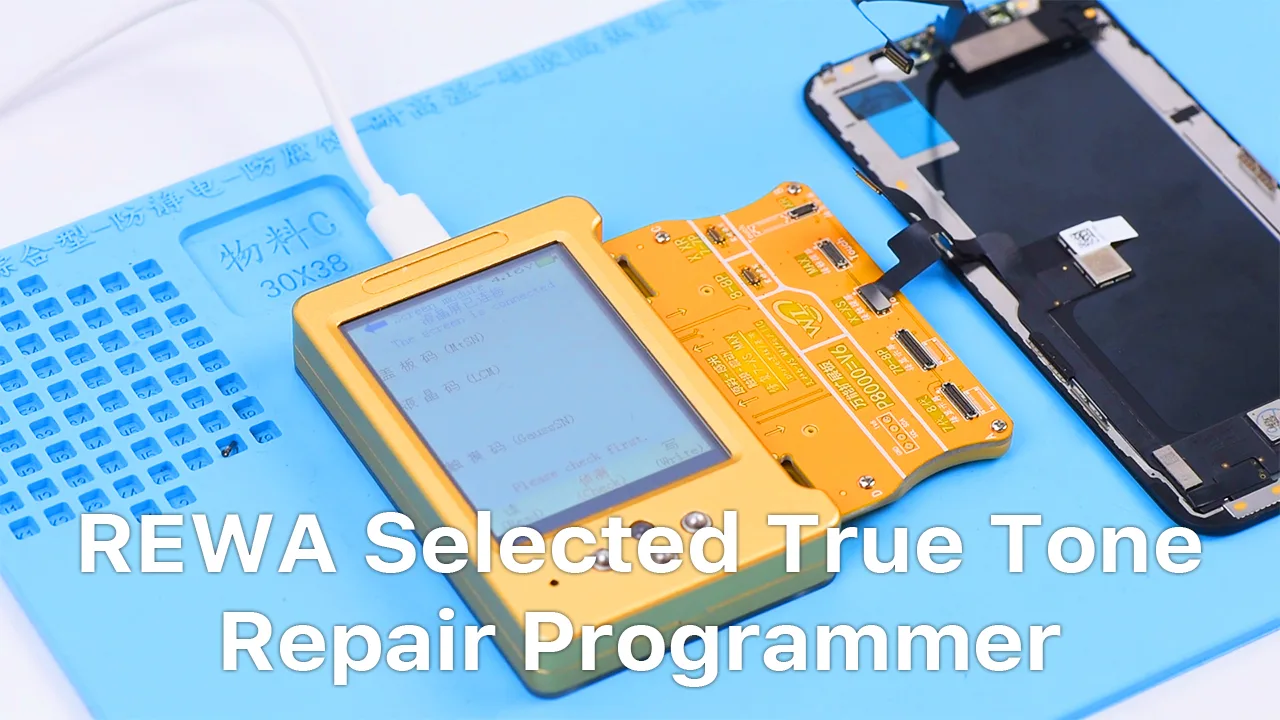
iOS 13 update has again brought the True Tone missing problem to some iPhone users. Well, REWA LAB has worked out a new solution to fix the problem. We will take iPhone XS as an example and show you how to restore the True Tone of aftermarket screens step by step.
Tips: True Tone supports iPhone devices from iPhone 8 to later models.
Products used in this True Tone Restoration video:
iPhone series from iPhone X to the newest iPhone 11 Pro Max comes with the double-stacked motherboard.
Therefore, it is important for repair shops to improve double-stacked motherboard repair techniques. REWA highly recommends the following 3 must-have tools for iPhone double-stacked motherboard repair.
Check it now! Double-stacked Motherboard Repair Steps There are 4 steps to repair the double-stacked motherboard as follows:
Step 1: Motherboard Separating
When repairing the logic board of the iPhone series before iPhone X, we can remove/solder components with the help of the Hot Air Gun.
However, with the motherboards of iPhone X and later models being double-stacked, the Hot Air Gun fails to heat the third space PCB evenly due to the large range.
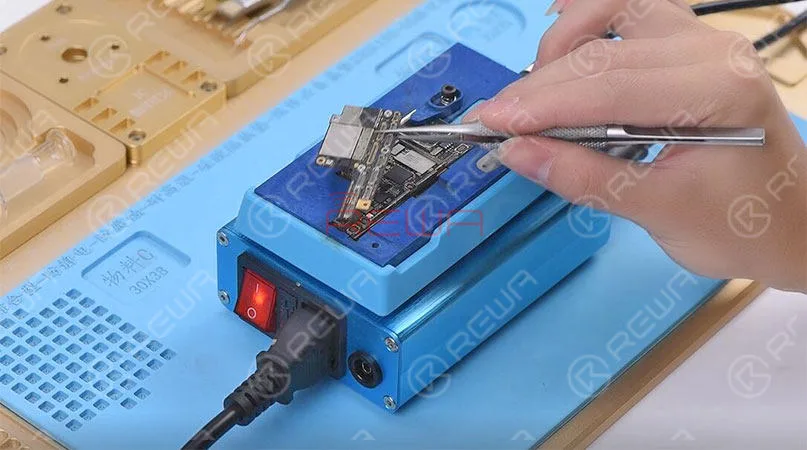
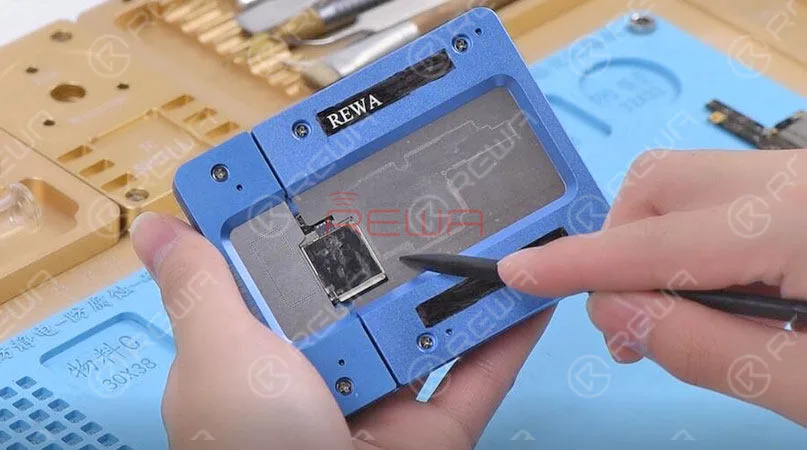
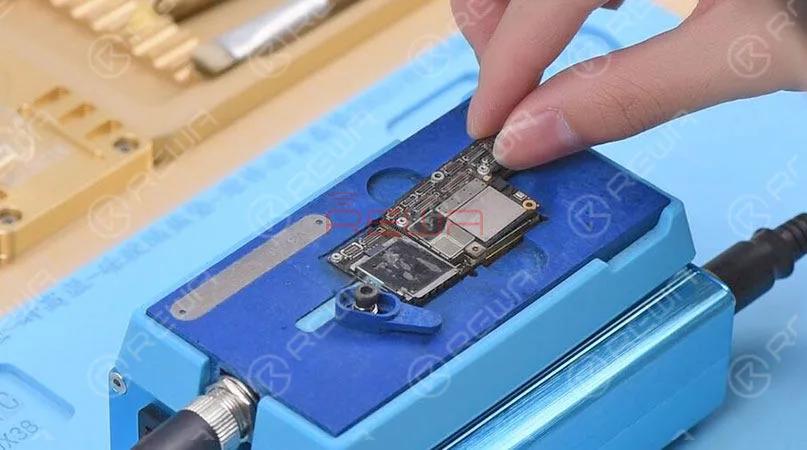
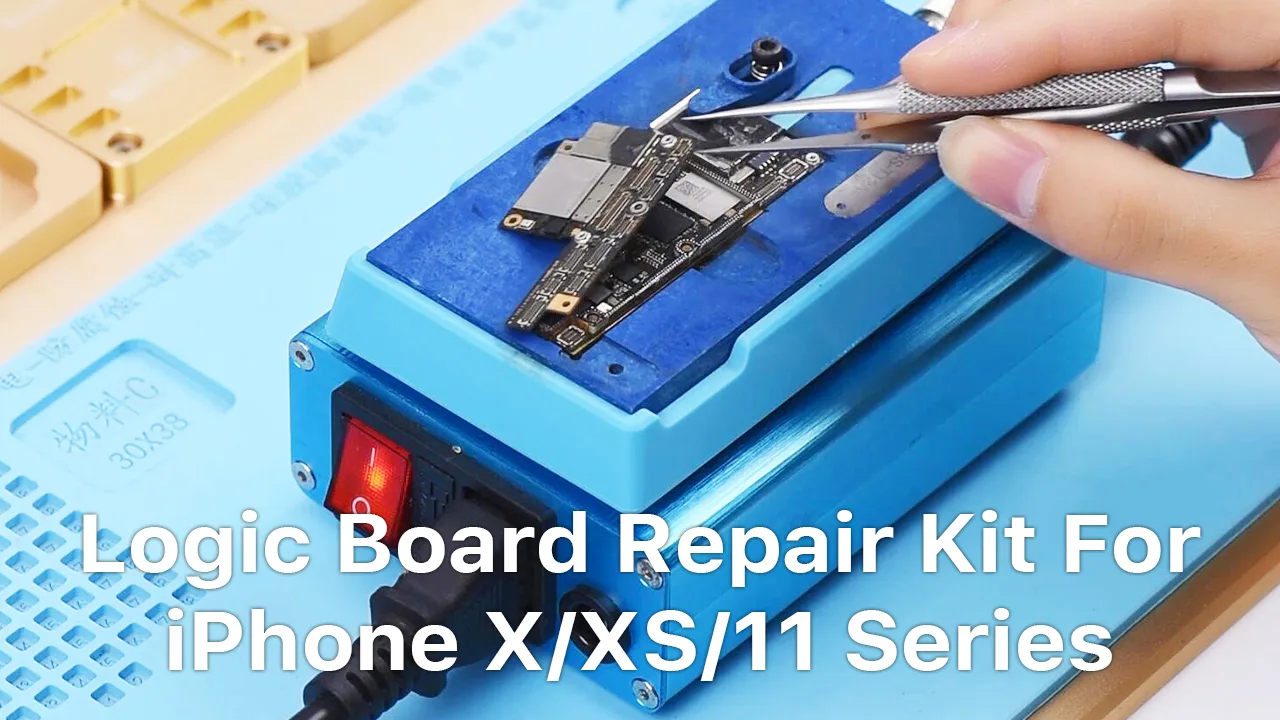
Hereby we recommend this Specialized Heating platform for your double-stacked motherboard repair.
You will need the Motherboard Disassemble Platform Main Unit For iPhone – SS-T12A and Motherboard Disassemble Platform Heating Groove For iPhone X/XS/XS Max – T12A – X3.
The 3 in 1 Heating Platform For iPhone X/XS/XS Max is suitable for iPhone X/XS/XS Max motherboard separating, CPU and other components removing. The temperature range is 100-280℃.
Tips: Traditional Hot Air Gun features high requirements for temperature control.
Therefore, any carelessness may result in solder joint falling-off or bridging that leads to not turning on of the motherboard or other issues.
Step 2: Diagnosing & Trouble Shooting
During the repairing of the double-stacked motherboard, there is always a time when we need to test the motherboard completely.
And to do that, we need to solder the two layers back together.
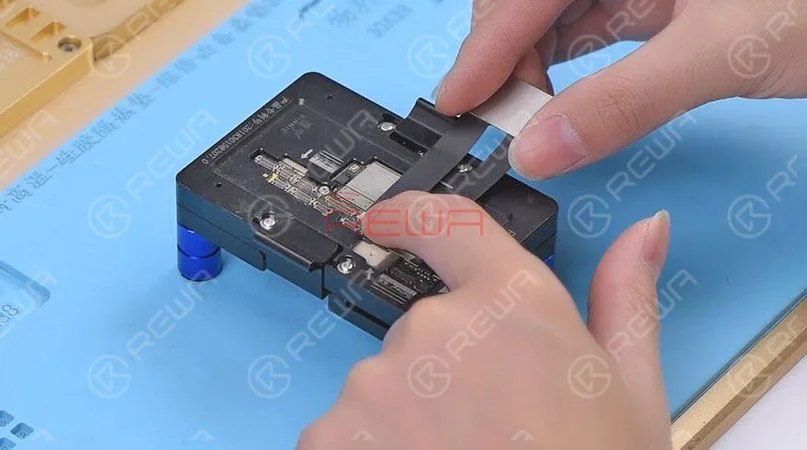
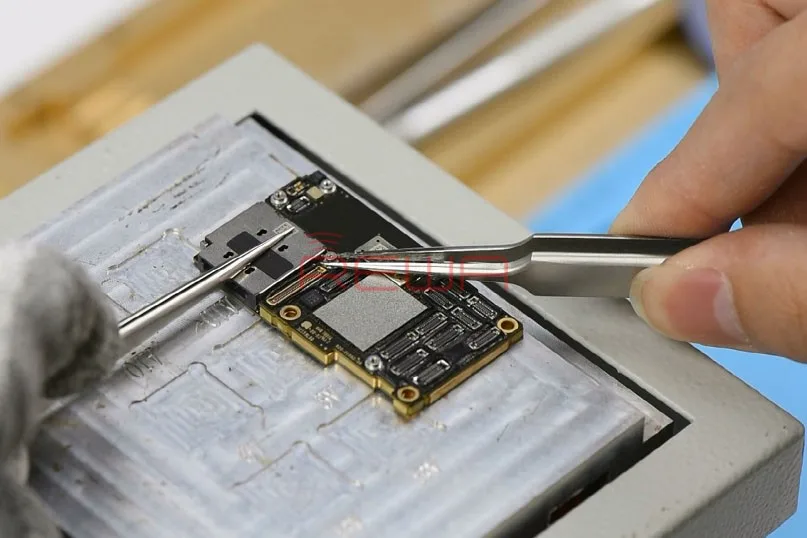
Now, with this third space PCB Test Fixture, we can test the motherboard completely without recombining the two layers.
A Must-have Tool For Diagnosing&Troubleshooting During Double-stacked Motherboard Repair – 2 in 1 Test Fixture For iPhone XS/XS Max and Test Fixture For iPhone X With the help of the test fixture, repair technicians can narrow down fault possibilities when troubleshooting the motherboard.
It can not only improve repair efficiency but also bring less damage to the motherboard.
Step 3: Lower Layer Reballing
We need to solder the two layers back together after troubleshooting.
We introduced the 3 must-have tool kit for iPhone double-stacked motherboard repair. Also, there is a New Arrival Recommendation – REWA Selected 3 in 1 iPhone X/XS/XS Max Heating Platform instead of the one we used in the video. With the help of these tools, you can not only improve repair efficiency and success rate but also power your repair business.
Tools & Parts used in double-stacked motherboard repair video:
As we all know, iPhone new series have undergone considerable changes on both inside and outside.
Especially on the motherboard.
How will these changes affect the repair industry?
Will it make third-party repair harder or easier?
Follow our iPhone 11 Pro motherboard separation & recombination blog today and find the answer by yourself.
iPhone 11 Pro Motherboard Separation
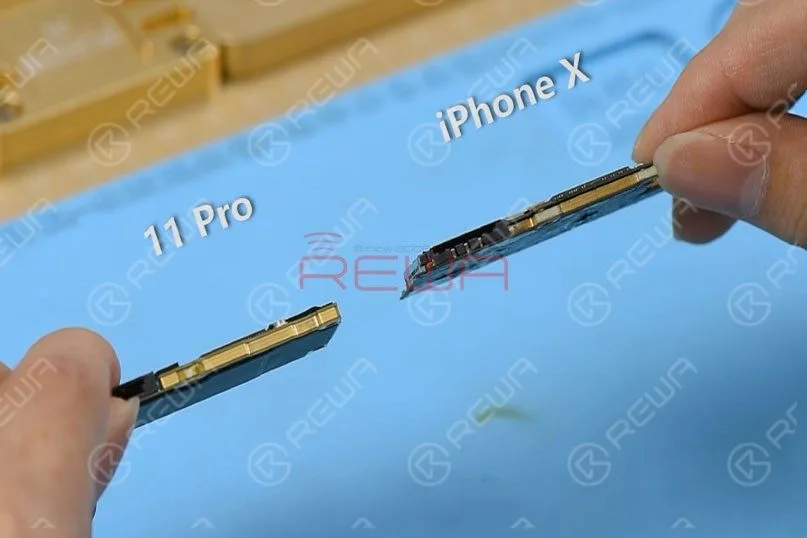
Compared with iPhone X series, iPhone 11 Pro’s motherboard is smaller with a much denser component array.
It is also thicker.
There are layers of graphite thermal transfer material on the backside.
It can dissipate heat generated from the motherboard efficiently.
Step 1
Remove the graphite thermal transfer material with tweezers first.
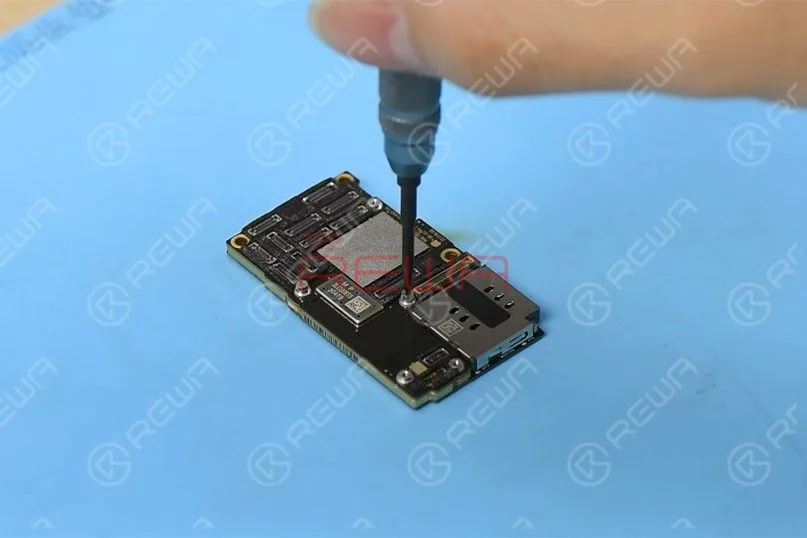
To recombine the two layers without reballing after separation, let’s fit two screws into the screw holes reserved on the motherboard.
Step 2
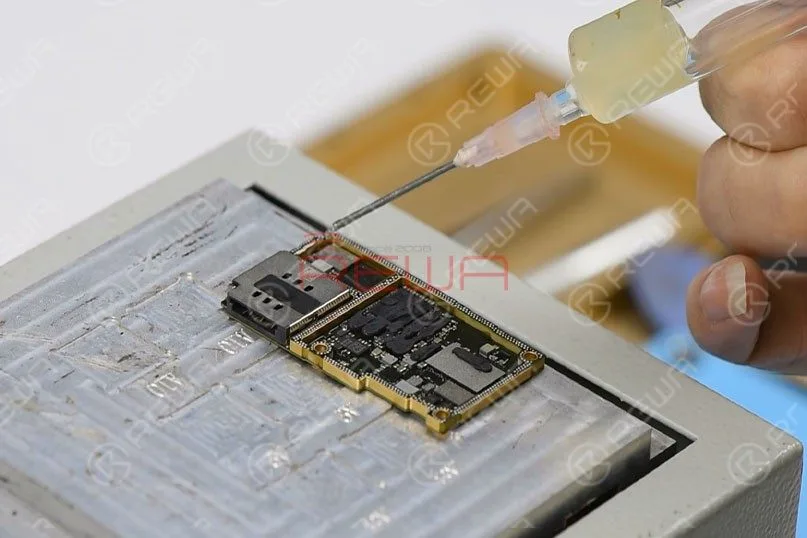
Set temperature of the heating platform at 170℃.
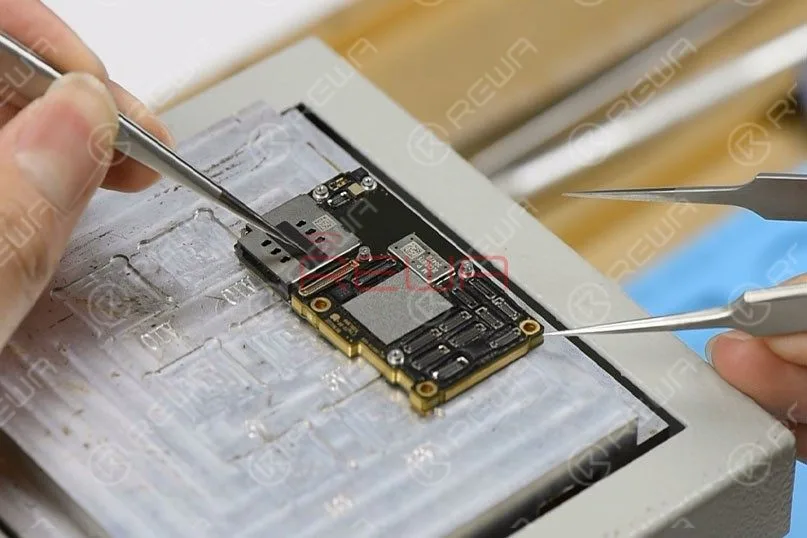
With temperature of the platform reaching 170℃, place the motherboard on the platform to heat for 3 minutes.
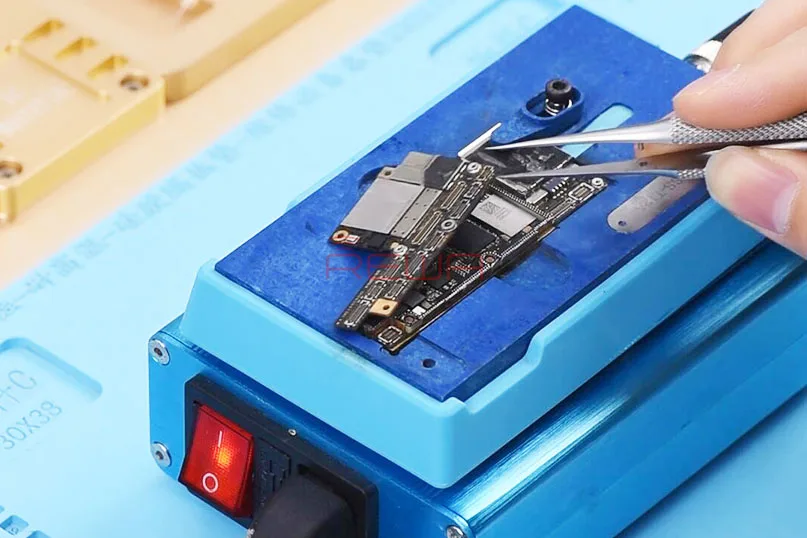
Press the SIM card reader with the tweezers and push the upper layer with another tweezers slightly.
Step 3
With solder balls on the third space PCB starting to melt, clamp the screws fitted into the screw holes with tweezers and pick up the upper layer with tweezers vertically.
Tips: do not shake the tweezers when picking up the upper layer.
The third space PCB might be stuck in bridging issues and the recombination work would also be affected.
Continue to pick up the lower layer.
iPhone 11 Pro Motherboard Structure
Now let’s start with the structure of the motherboard.
The Upper Layer
A.Thermal Compound
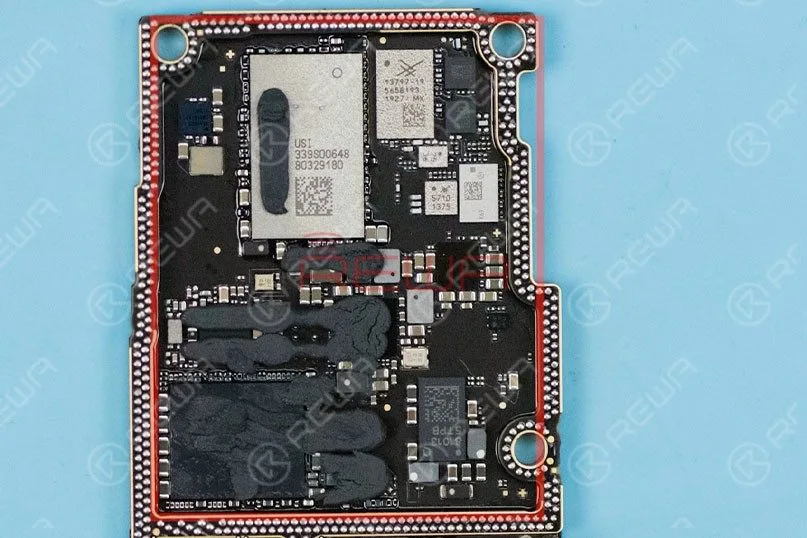
CPU and areas around CPU are covered with a large amount of thermal compound to dissipate heat generated from A13 CPU.
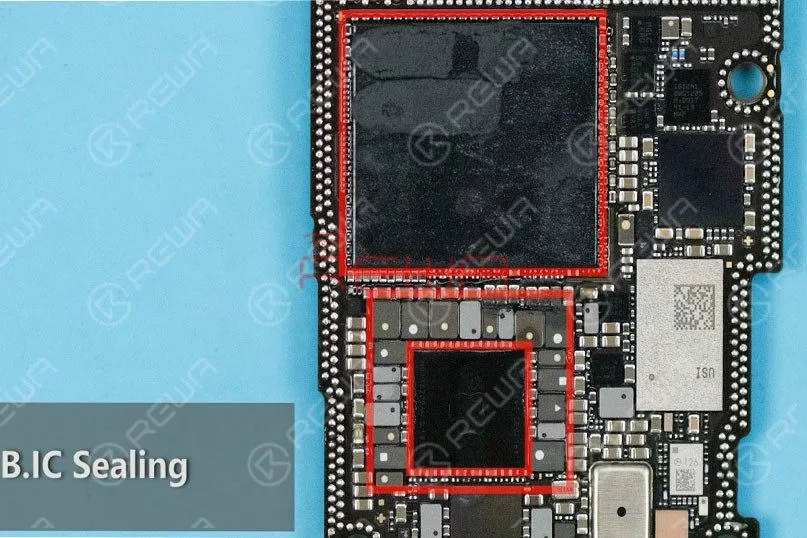
B.IC Sealing
CPU, PMU, and inductors around PMU are sealed with adhesive adding to the difficulty of repairs to some extent.
C.Dense Component Array Around PMU
Professional handwork is required when soldering/desoldering PMU.
D.USB IC
Unlike iPhone X series, the USB IC of iPhone 11 Pro hasn’t been sealed with adhesive, and it is far from CPU.
Therefore, the difficulty of USB IC relevant repairs is relatively reduced
Unlike iPhone X series, the A13 CPU of iPhone 11 Pro is not located right on the backside of the NAND flash chip.
This can reduce the bridging possibility of CPU when soldering/desoldering the NAND flash chip.
The Lower Layer
A. Different from iPhone X series, the lower layer of iPhone 11 Pro has a dispersive component array. Therefore, the difficulty of signal relevant repairs is also reduced.
B. Unlike iPhone X series, the SIM card reader of iPhone 11 Pro is independent from other components. We don’t have to remove the SIM card reader when working on signal relevant repairs.
iPhone 11 Pro Motherboard Recombination Without Reballing
Set temperature of the heating platform at 170℃.
With temperature of the platform reaching 170℃, place the lower layer on the platform to heat for 10 seconds.
Apply some Paste Flux to the third space PCB evenly.
Get the upper layer in position and heat for about 5 minutes.
Then, press the SIM card reader with the tweezers and push the upper layer with another tweezers slightly.
If the upper layer returns to the previous position automatically, then the soldering process is completed.
Test
Now we can assemble the phone and test.
Get the motherboard and display assembly installed and get the battery connected.
Press the power button to turn on the phone.
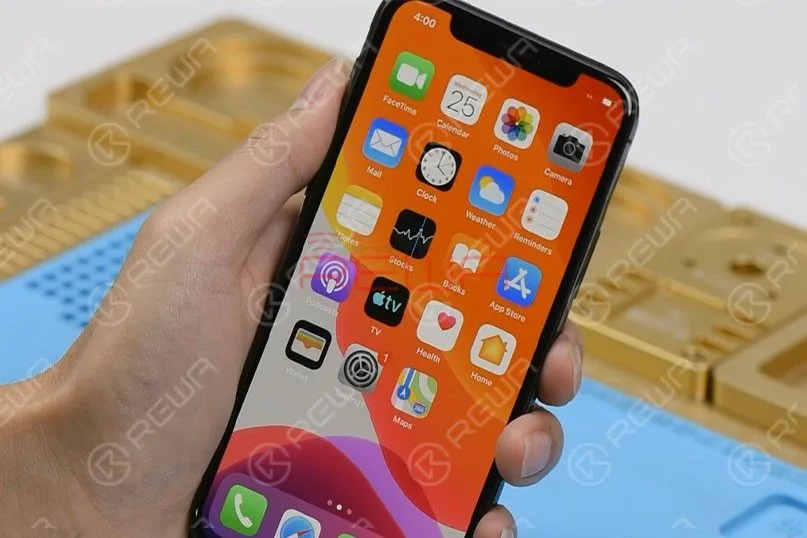
The phone turns on normally.
Run function test. All going well.
Summary
The separation&recombination of the motherboard of iPhone 11 Pro shows that the motherboard is smaller and more squared.
Compared with the iPhone X series, it will not be easily damaged by external forces.
The high integration of the motherboard also means that more professional handwork is required.
Overall, the difficulty of iPhone 11 Pro motherboard repairs is reduced.
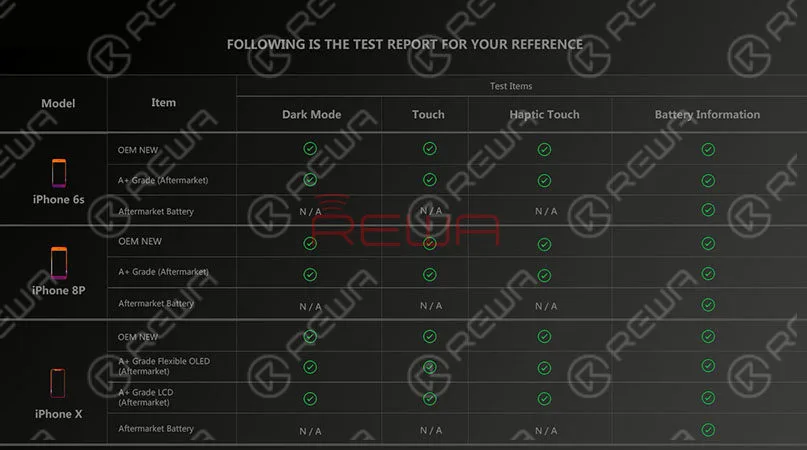
In order to provide our clients with featuring stable quality, REWA has conducted a series of compatibility tests for iPhone series from iPhone 6s to iPhone X with OEM NEW, A+Grade Aftermarket Screens and Aftermarket Batteries respectively.
Now, Let’s take iPhone 6s, iPhone 8P, and iPhone X as examples and show you how the test goes.
Tips: iOS 13 only supports the iPhone 6s and later models.
iPhone Aftermarket Screen Compatibility Test
iPhone 6s Screen Compatibility Test
iPhone 8P Screen Compatibility Test
iPhone X Screen Compatibility Test
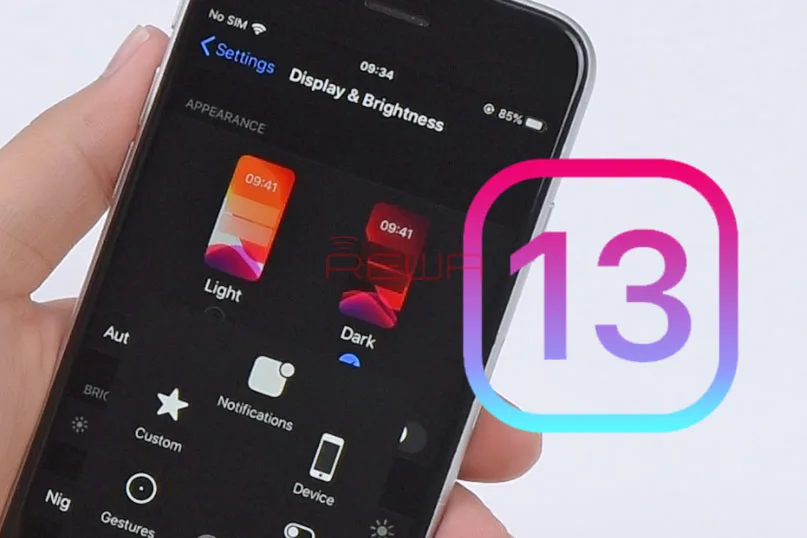
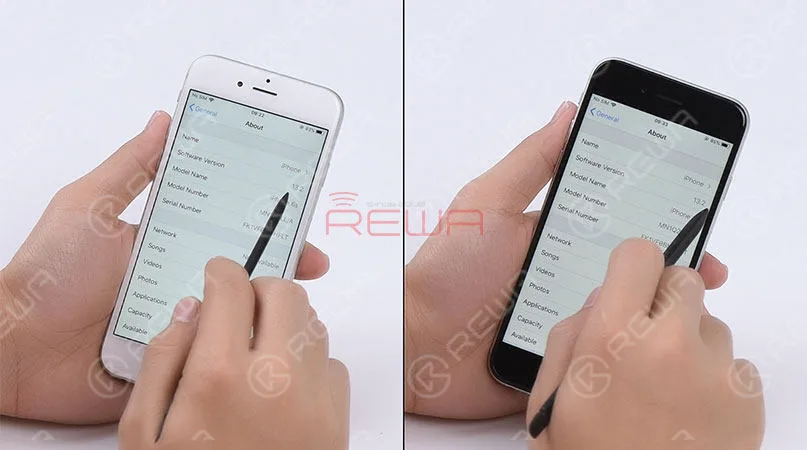
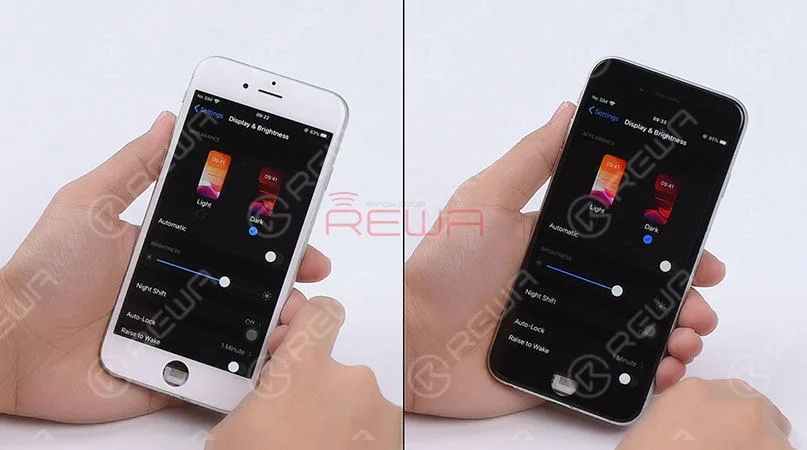
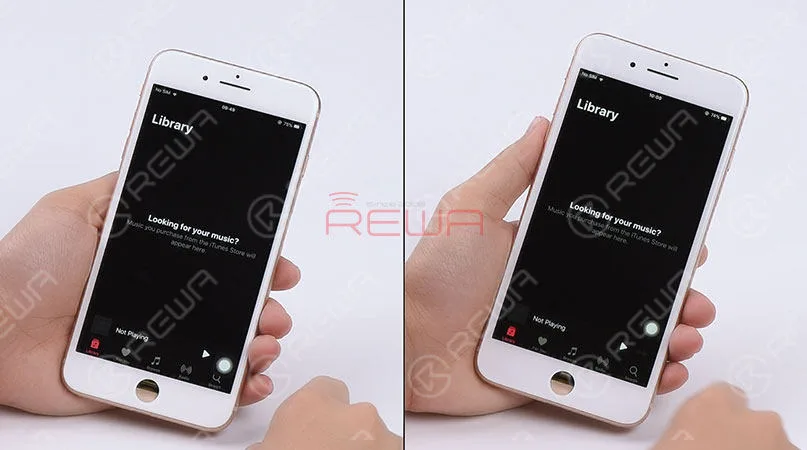
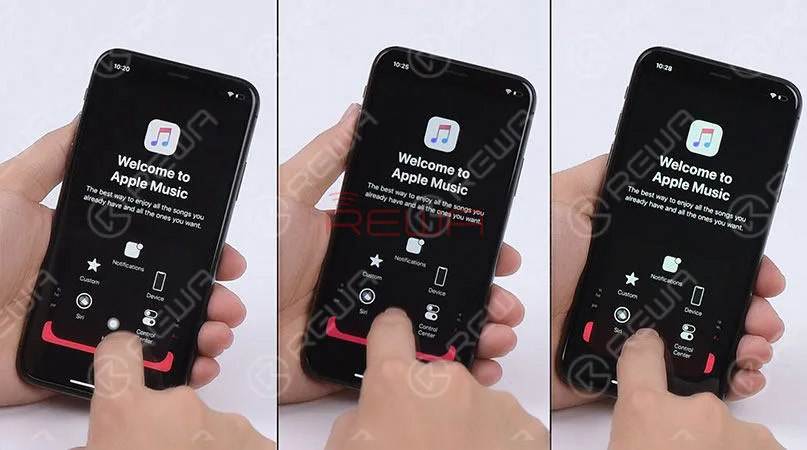
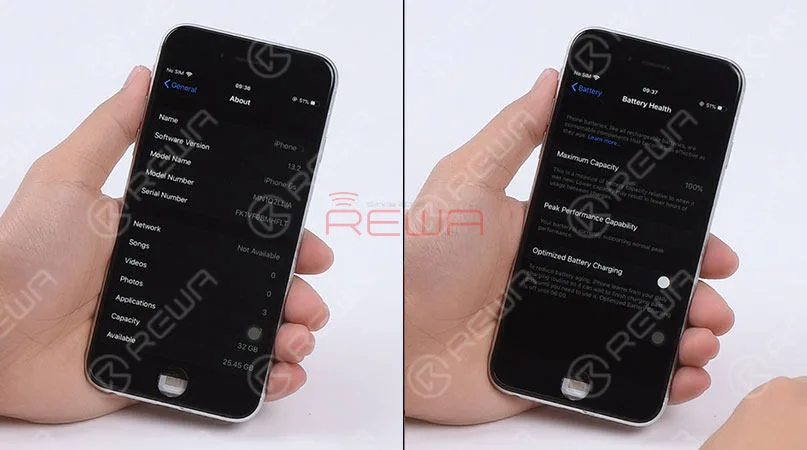
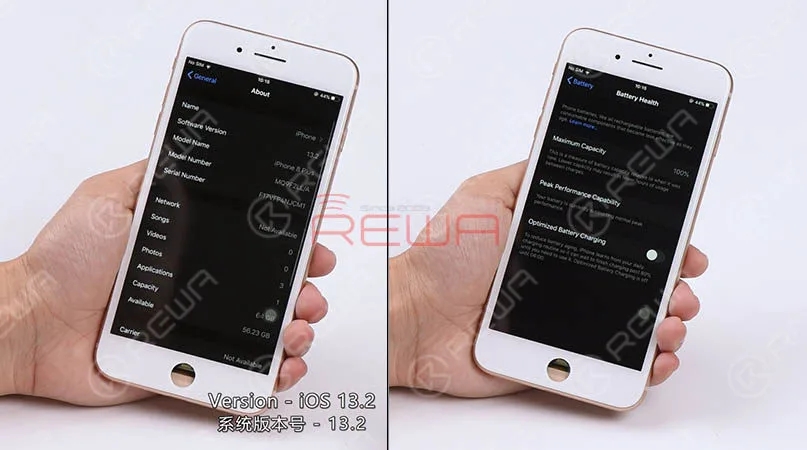
With the phone running on iOS 13.2, all built-in Apple apps of these tested screens (including aftermarket screens of iPhone 6s/8P/X) have been darkened in Dark Mode.
Haptic Touch and touch functionality are also normal.
That is to say, our A+ Grade Aftermarket Screens are compatible with iOS 13.
For more details please click to watch the video below
iPhone Aftermarket Battery Compatibility Test
iPhone 6s Aftermarket Battery Compatibility Test
iPhone 8P Aftermarket Battery Compatibility Test
iPhone X Aftermarket Battery Compatibility Test
With the phone running on iOS 13.2, it shows the maximum capacity of our aftermarket batteries normally.
That is to say, our Aftermarket batteries are compatible with iOS 13.
Conclusion
According to the test result, A+ Grade Aftermarket Screens and Aftermarket Batteries supplied by REWA are compatible with iOS 13.
For detailed information about our products, please check our Online Shop. Any questions and suggestions please feel free to contact sales@rewatechnology.com.
Since the release of iOS 13 on September 19, 2019, five iOS 13 updates have been pushed out within a month.
Well, despite the release of new updates to iOS 13, issues always crop up.
Our blog today will be a summary of common issues on iOS 13 since its release.
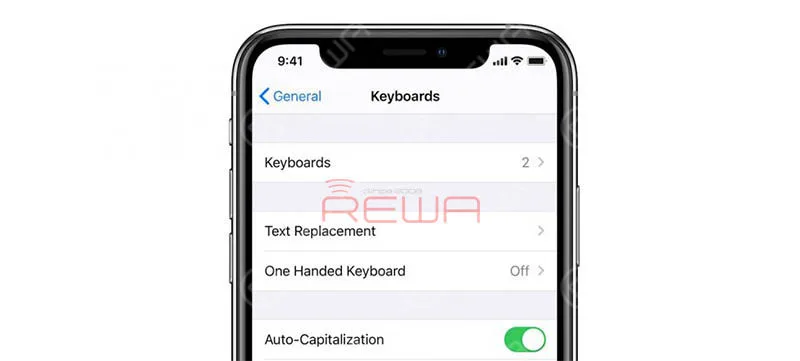
Third-party Keyboard Bug
A bug in iOS 13 might cause third-party keyboard apps to gain full access even without your approval.
Weak Signal
A lot of users are complaining about having poor WiFi reception or weak signal after installing iOS 13.
App Crash
It is a known bug that some apps crash after iOS 13 updates. For example, the Health app and the Apple Maps app quit randomly every once in a while.
Also, some iOS 13 users complained that the photo app just crashes and closes, showing the home screen when scrolling fast through photo library or pressing at the top of the screen, for instantly scrolling to the oldest photo.
Dropped Calls
There are widespread reports that iOS 13.1.2 is causing calls to drop within a minute of being placed.
Mail App Issues
Mail App not updating Mail App crashing, failing to sync on iPhone or iPad Mail
App not opening Mail App failing to send messages
Mail App opening draft messages upon launch
Mail App failing to load email and third party mail accounts
Mail App with mail notifications failure
Mail App failing to allow new accounts to be created
Mail App push not working
Mail App with a no sender issue
Battery Drain
Some iOS 13 users have noticed that the battery life of their phones has decreased since updating to Apple’s latest mobile operating system.
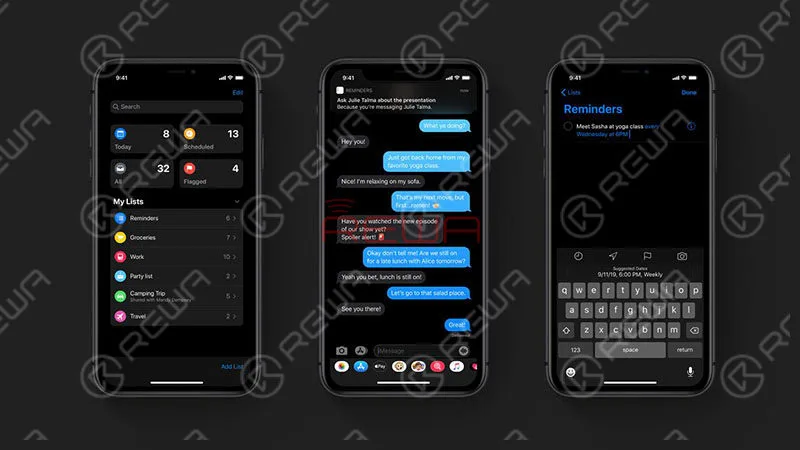
Reminders Not Syncing
Some iOS 13 users found that iCloud reminders created on a device that’s running earlier software are visible only on other devices running earlier software.
When you update that device to the latest software, those new reminders will be lost when you open the Reminders app.
Siri Makes Calls On Speakerphone By Default
When you ask Siri to make a phone call, the call is placed using speakerphone every time by default.
Contacts Lost
Some iPhone users found their contacts app malfunctioning on iOS 13.1.3. Some have contact names but no content in them, while others just show up as empty.
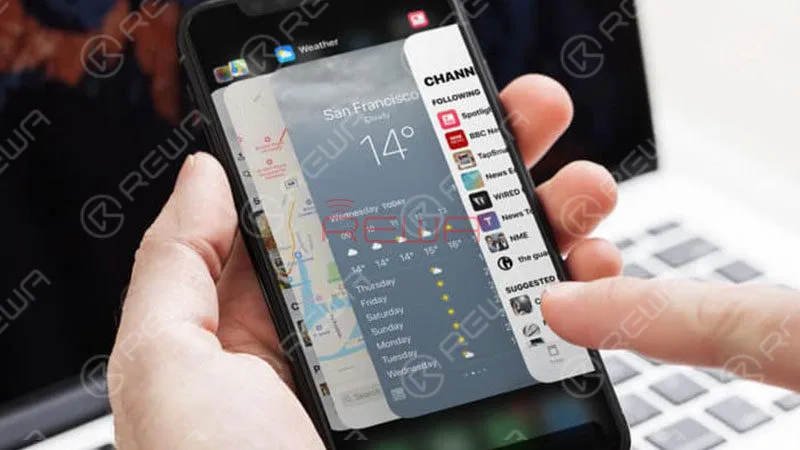
Background Apps Killing
Many iPhone users have been complaining about the background app killing issue after updating to iOS 13.2. The issue also comes along with the new iPhone 11 Pro.
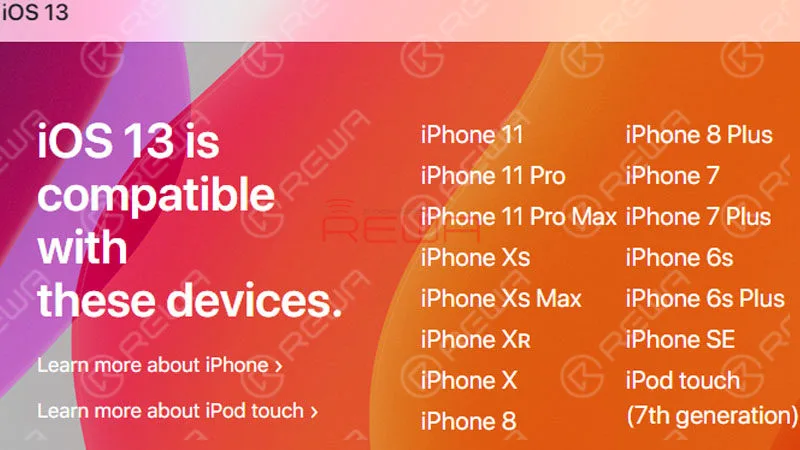
iOS 13 Compatible iPhone
iPhone 11 Pro Max iPhone 11 Pro iPhone 11 iPhone Xs Max iPhone Xs iPhone XR iPhone X iPhone 8 Plus iPhone 8 iPhone 7 Plus iPhone 7 iPhone 6s Plus iPhone 6s iPhone SE iOS 13 Compatible iPad
12.9” iPad Pro 11” iPad Pro 10.5” iPad Pro 9.7” iPad Pro iPad (6th generation) iPad (5th generation) iPad mini (5th generation) iPad mini 4 iPad Air (3rd generation) iPad Air 2 10.2 iPad (7th generation)
iOS 13 Compatible iPod
iPod Touch (7th Generation)
iOS 13 brings new and appealing features along with bugs and issues. If these bugs and issues can be fixed, it will definitely be a very good operating system. What do you think of the newest iOS 13? Do let us know in the comments below.
iOS 13 has been officially released for a month. In order to provide our clients with featuring stable quality, REWA LAB has conducted a series of compatibility tests for iPhone series from iPhone 6s to iPhone X with OEM NEW, A+Grade Aftermarket Screens, and Aftermarket Batteries respectively. Now, Let’s take iPhone 6s, iPhone 8P, and iPhone X as examples and show you how the test goes.
Tips: iOS 13 only supports the iPhone 6s and later models.
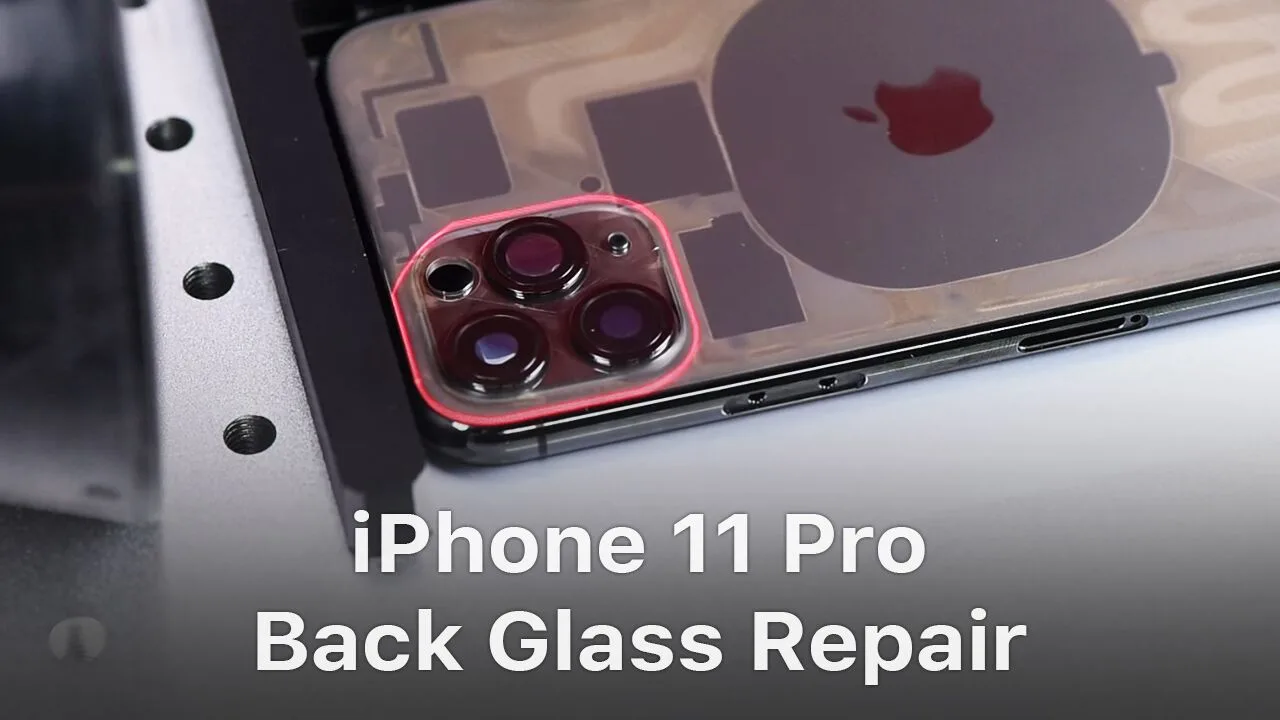
As the most powerful and most advanced iPhone that Apple has ever built, iPhone 11 Pro is made of a surgical grade stainless steel its back is a single piece of machine glass with an optical PVD coating, adding to the difficulty of repair.
What’s more, the arrangement of rear cameras of iPhone 11 Pro also greatly increases the difficulty of back glass repair.
REWA LAB tried different solutions (heating with the Hot Air Gun, separating with the dispergator/freeze assistance) and we were unable to remove the glass around the triple-lens camera safely and efficiently.
Check our detailed operation on iPhone 11 Pro back glass repair and hope we can enlighten you somehow.
Scan The 11 Pro Back Glass With Laser
First of all, place the iPhone 11 Pro back glass under the probe for focusing.
Then place the iPhone 11 Pro back glass on the operating panel.
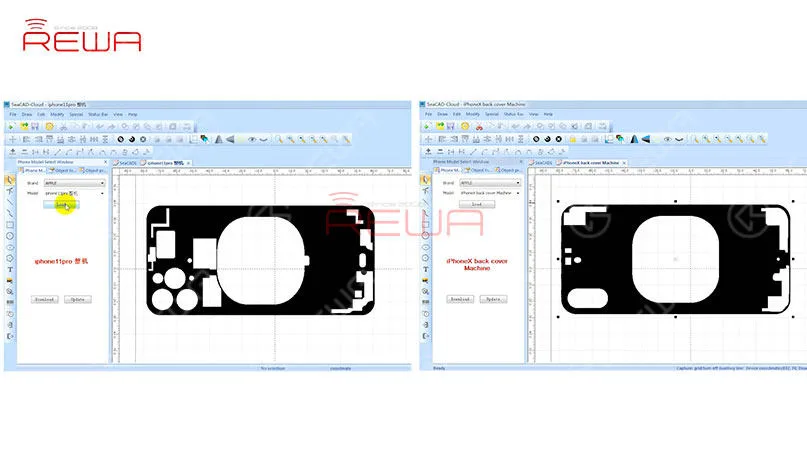
Choose ‘iPhone 11 Pro’ from the model list and click ‘Load’ to load the drawing.
The black area on the drawing is the area to be scanned, And the white area is the area to be retained.
Tips: Compare the two drawings and we can see that different from iPhone X, there are more areas the laser should keep away from when scanning iPhone 11 Pro.
After loading the drawing of iPhone 11 Pro, adjust the laser light scanning area on the back glass.
Once finished, get the parameter set and click ‘Mark’ to scan the back glass with the laser light.
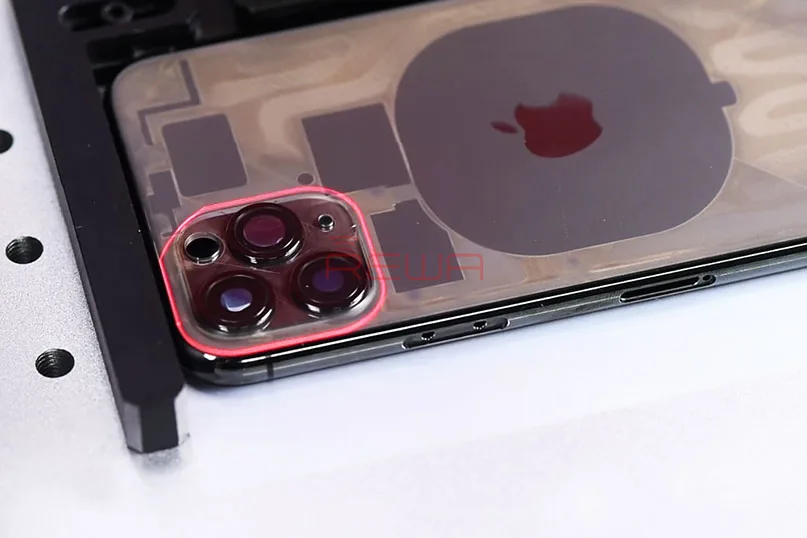
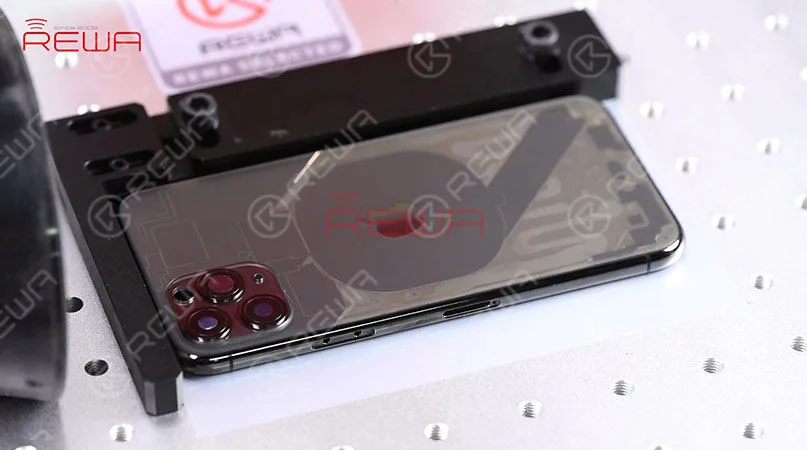
The back glass becomes transparent after laser scanning.
Scan The Glass Around The Triple-lens Camera With Laser
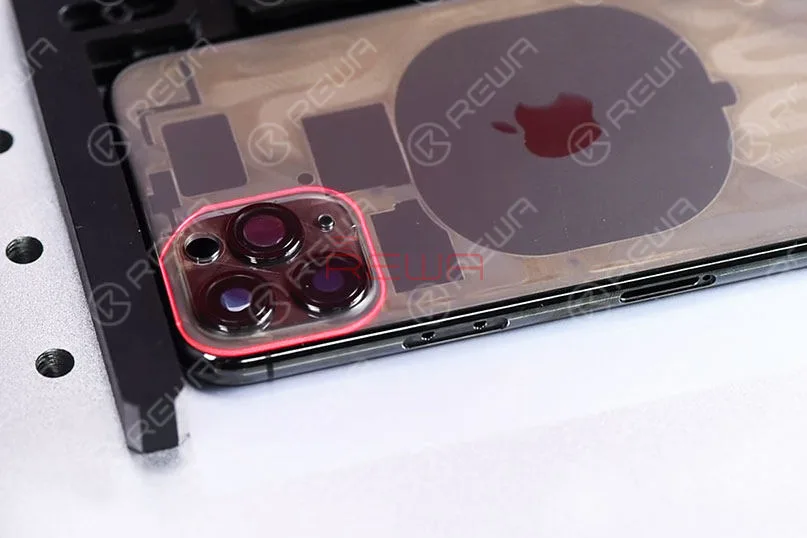
As you can see, the glass around the triple-lens camera is relatively thick.
The laser light scanning didn’t work well with the area here.
After several attempts and experiments, REWA LAB successfully completed a specialized drawing for the triple-lens camera area.
Scan the triple-lens camera area again with the laser with the help of the drawing.
The glass around the triple-lens camera also becomes transparent after the second laser scanning.
Separate The Back Glass From The Mid-frame
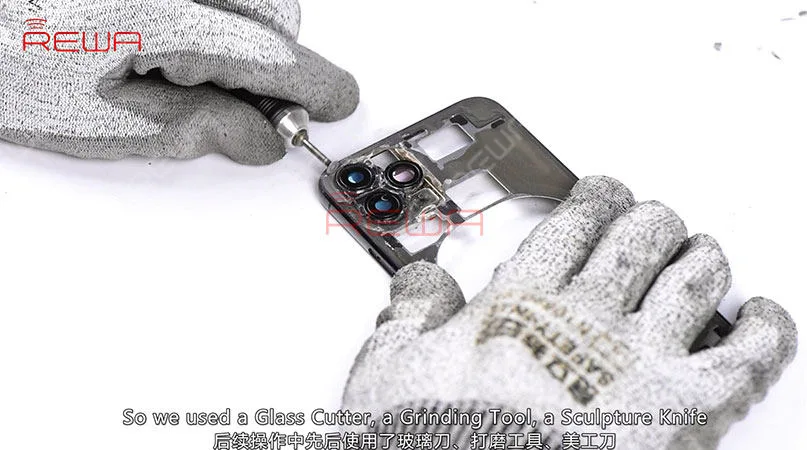
Now we need to separate the back glass from the mid-frame. The scanned back glass can be separated easily. However, the glass around the triple-lens camera needs further operation. Our commonly used tools failed to remove the glass here, so we used a glass cutter, a grinding tool, a Sculpture Knife and a Cutting Nipper to remove the glass around the triple-lens camera. At the last, once completed, remove residual black adhesive with the Laser Machine.
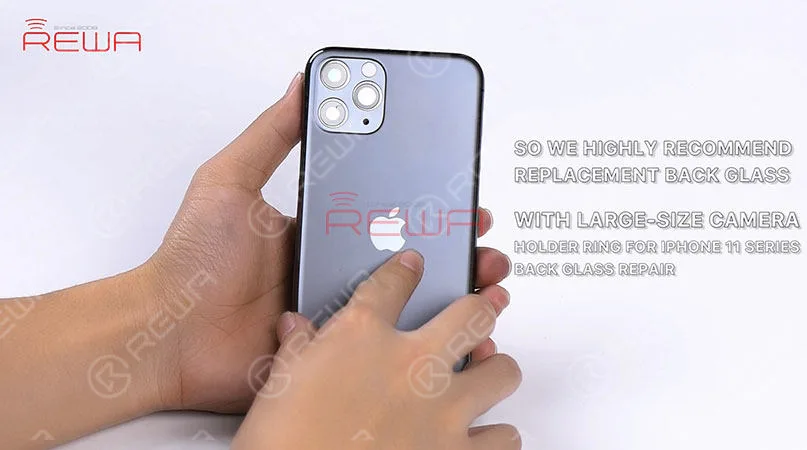
The camera holder ring of iPhone 11 series is harder and comes with thick inside walls, adding to the difficulty of polishing.
Meanwhile, the camera lens can also be easily damaged during polishing.
So we highly recommend replacement back glass with a big camera hole for iPhone 11 series back glass repair.
Due to the special arrangement of the three cameras of iPhone 11 Pro, the space between the three cameras is also narrow, adding to the difficulty of back glass separating.
Therefore, the Laser Machine may be the safest and most efficient solution for iPhone 11 Pro back glass repair.
For more details about the back glass repair of iPhone 11 Pro, please check the video below. You can also visit REWA YouTube Channel for more videos about iPhone 11 series.
REWA LAB will work hard to provide a better solution for iPhone 11 Pro back glass repair.
The replacement parts of iPhone 11 series are also coming soon, please stay tuned to REWA Online Shop.
Rear cameras of iPhone 11 series greatly increase the difficulty of back glass repair. REWA LAB tried different solutions (heating with the Hot Air Gun, separating with the dispergator/freeze assistance) and we were unable to remove the glass around the triple-lens camera safely and efficiently. Check our iPhone 11 Pro back glass repair video now and hope we can enlighten you somehow. Please let us know your thoughts on this topic in the comment below.
Tools & Parts used in this iPhone 11 Pro Back Glass Refurbishing video:
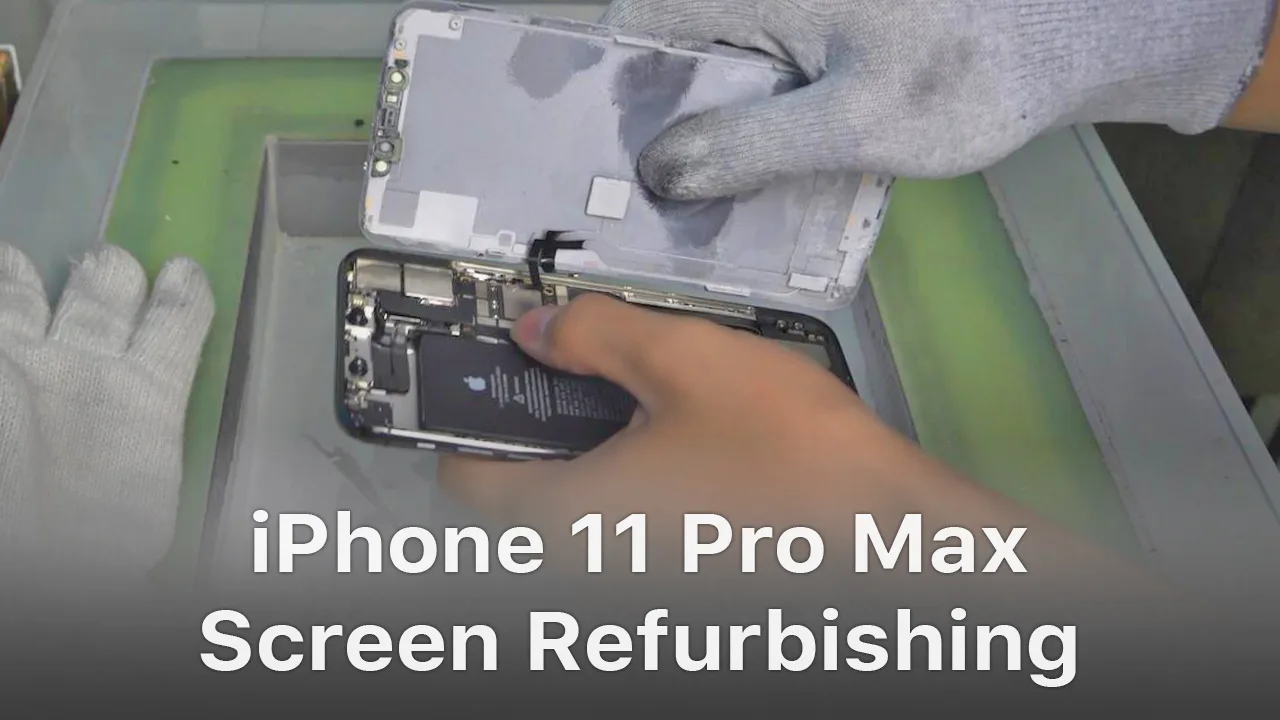
For iPhone X and later iPhone models, the bracket covering the bottom flex cable bonding area is adhered to by cold adhesive. The traditional method with heating assistance when removing bezel might damage the screen. After several attempts, REWA LAB found that the new method with cold assistance can improve the success rate and efficiency of screen refurbishing. For details, please check our video today – iPhone 11 Pro Max screen refurbishing.
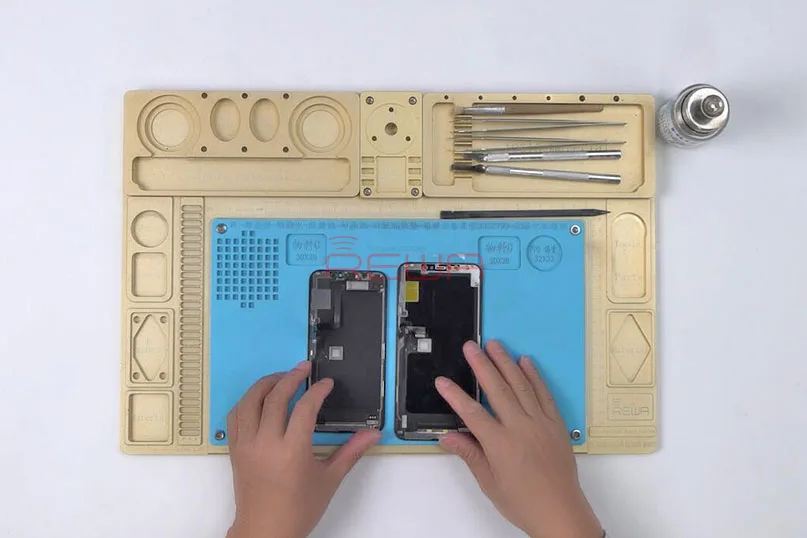
Tools & Parts used to refurbish iPhone 11 Pro Max:
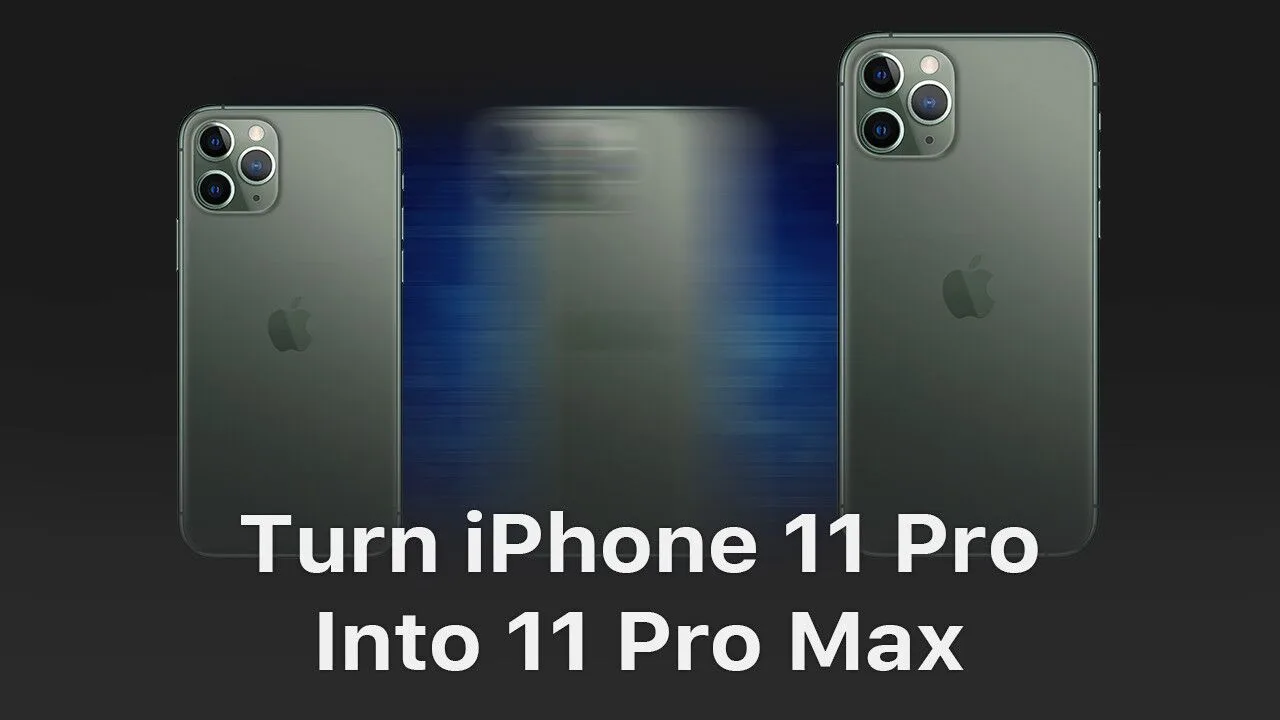
Can iPhone 11 Pro possibly be turned into iPhone 11 Pro Max?
It is actually theoretically possible.
With pins of the two phones’ display connector and touch connector functioning almost the dame, we can turn an iPhone 11 Pro into an iPhone 11 Pro Max by changing board ID resistors.
Today we will try to turn iPhone 11 Pro into iPhone 11 Pro Max.
iPhone 11 Pro VS iPhone 11 Pro Max
iPhone 11 Pro comes with a 5.80-inch touchscreen display.
iPhone 11 Pro Max comes with a 6.50-inch touchscreen display.
What will happen when we connect the iPhone 11 Pro Max screen with the housing of iPhone 11 Pro directly?
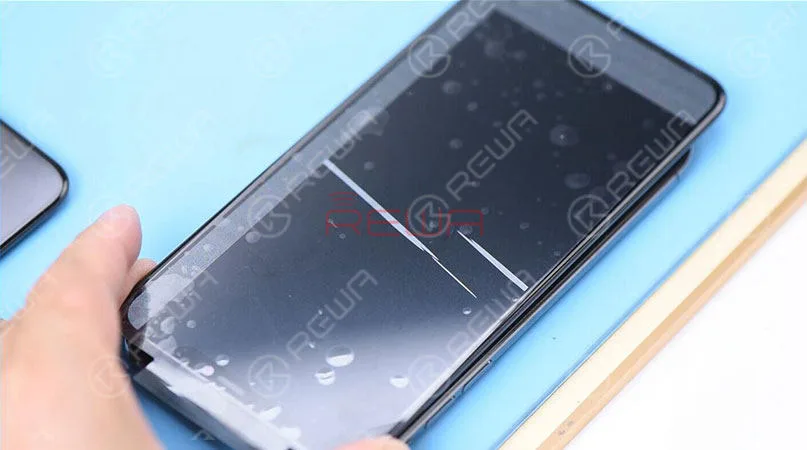
The backlight of the iPhone 11 Pro Max screen displays normally. However, the screen comes with horizontal lines.
Judging by this, although pins of the two phone’s display connector and touch connector function almost the same, the difference between driving programs of the two screens can still result in horizontal lines on the screen when iPhone 11 Pro Max’s screen is connected to iPhone 11 Pro’s housing.
What can we do to turn an iPhone 11 Pro into an iPhone 11 Pro Max?
Case: Turn iPhone 6s Plus into iPhone 6s
How to locate the board ID resistors?
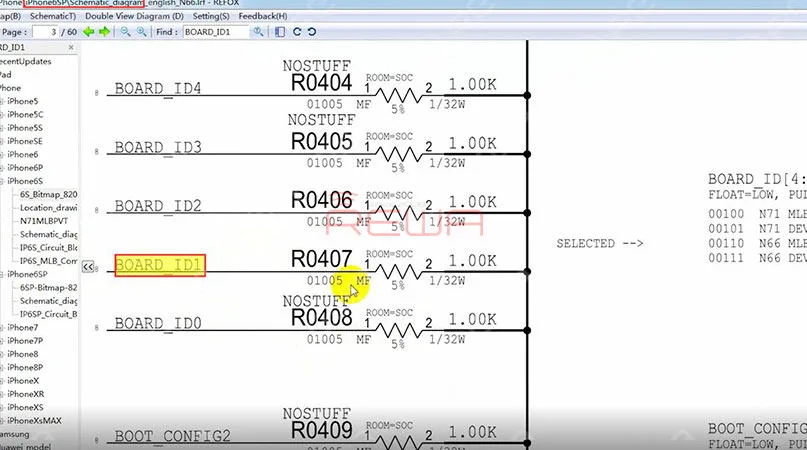
Open Refox and locate the Board ID resistor of iPhone 6s Plus.
We can see 5 Board ID resistors on the schematic. R0404, R0405, R0406, R0407 and R0408.
The board ID of iPhone 6s Plus is N66 MLB.
Board ID resistors of iPhone 6s Plus are arranged in an array of 00110.
Which means resistors on BOARD_ID1 and BOARD_ID2 should be kept.
The board ID of iPhone 6s is N71 MLB.
Board ID resistors of iPhone 6s are arranged in an array of 00100.
Which means the resistor on BOARD_ID2 should be kept.
To turn iPhone 6s Plus into iPhone 6s, all we need to do is to remove R0407 on BOARD_ID1.
For detailed operation of board ID resistors locating, please click to watch the video below.
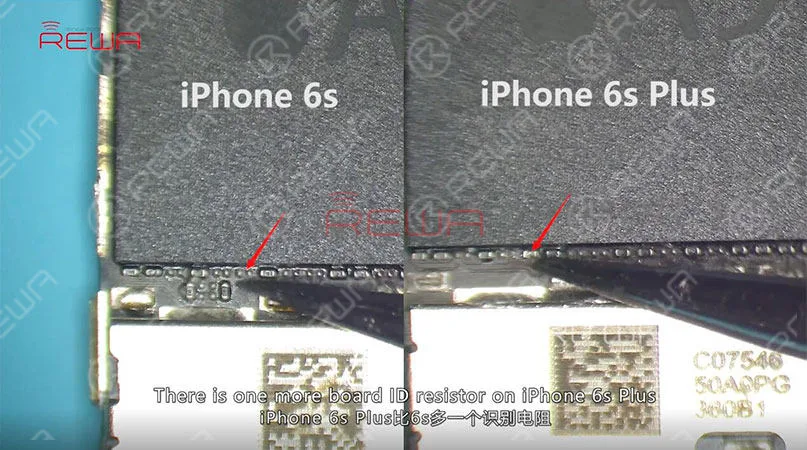
Compare the logic board of iPhone 6s and that of iPhone 6s Plus.
There is one more board ID resistor on iPhone 6s Plus.
This one is R0407 as mentioned above.
And we can just remove it with tweezers.
Then get the logic board of iPhone 6s Plus installed to the housing.
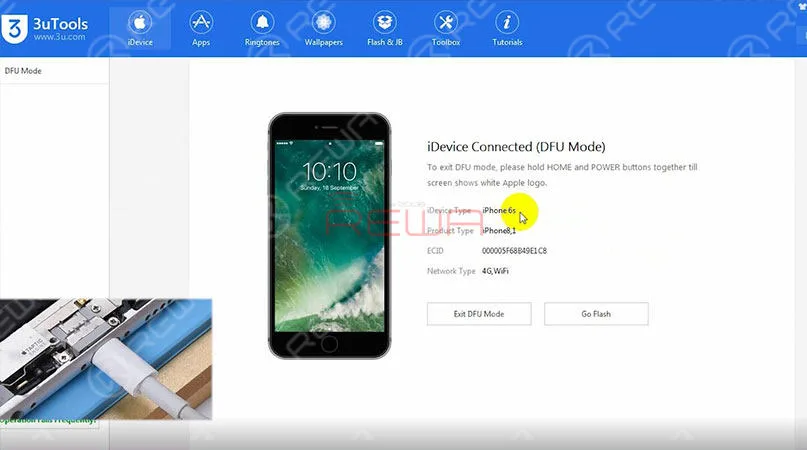
Connect the phone to the computer with the USB cable.
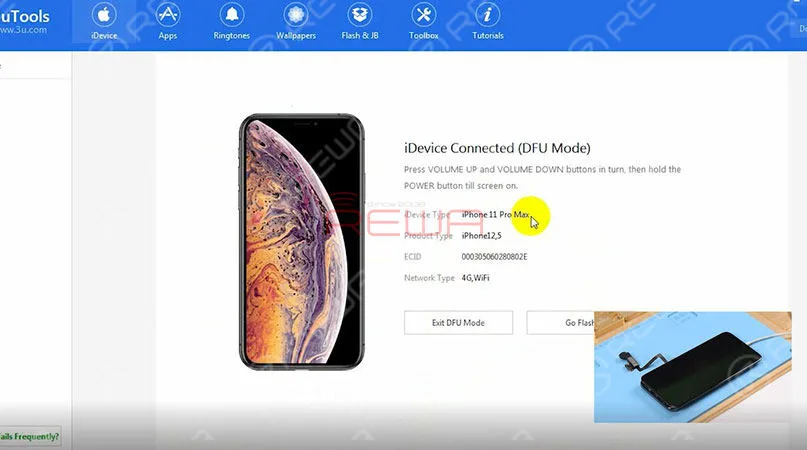
We can see on the interface of 3uTools that the phone has entered DFU mode.
And the phone has been turned into iPhone 6s.
We can write firmware of iPhone 6s to the phone.
However, sockets of iPhone 6s’s display connector and touch connector are different from those of iPhone 6s Plus, iPhone 6s screen cannot be connected to iPhone 6s Plus’s housing.
Can we turn iPhone 11 Pro into iPhone 11 Pro Max by changing the board ID resistor?
iPhone 11 Pro Motherboard Separating
Place the motherboard of iPhone 11 Pro on the heating platform to heat for 3 minutes.
Press the SIM card reader with the tweezers.
And push the upper layer with another tweezers slightly.
With solder balls on the third space PCB starting to melt, clamp the screws fitted into the screw holes with tweezers.
And pick up the upper layer with tweezers vertically.
Tips:
Do not shake the tweezers when picking up the upper layer.
The third space PCB might be stuck in bridging issues.
And the recombination work would also be affected.
Continue to pick up the lower layer.
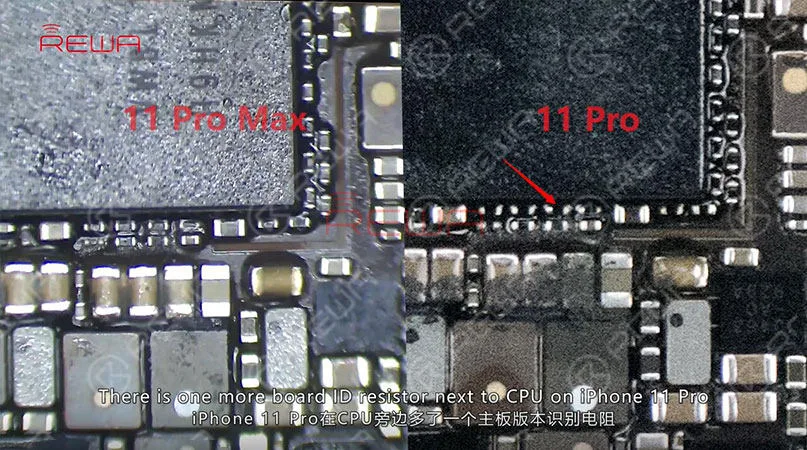
Compare the motherboard of iPhone 11 Pro and that of iPhone 11 Pro Max.
The component array of the two is almost the same.
There is one more board ID resistor next to CPU on iPhone 11 Pro.
Please remove the black adhesive before removing the board ID resistor.
Continue to heat with the Hot Air Gun to remove the resistor.
iPhone 11 Pro Motherboard Recombination
With temperature of the platform reaching 170℃, place the lower layer on the platform to heat for 10 seconds.
Apply some Paste Flux to the third space PCB evenly.
Get the upper layer in position. Heat for about 5 minutes.
Then, press the SIM card reader with the tweezers, and push the upper layer with another tweezers slightly.
If the upper layer returns to the previous position automatically, then the soldering process is completed.
For detailed operation of iPhone 11 Pro Motherboard Separating & Recombination, please check the video here.
Put the motherboard of iPhone 11 Pro into its housing.
Connect iPhone 11 Pro Max screen with iPhone 11 Pro’s s housing.
Connect the battery. Connect the phone to the computer with the USB cable.
We can see on the interface of 3uTools that the phone has entered DFU mode.
And the phone has been turned into iPhone 11 Pro Max.
We can write firmware of iPhone 11 Pro Max to the phone.
Continue to restore the phone in DFU mode.
Apple logo appears on the screen during restoring.
Once completed, the phone goes to the activation screen.
And then the home screen. The phone displays normally.
Can iPhone 11 Pro possibly be turned into iPhone 11 Pro Max? It is actually theoretically possible. With pins of the two phones’ display connector and touch connector functioning almost the same, we can turn an iPhone 11 Pro into an iPhone 11 Pro Max by changing board ID resistors. Check our video now and find out how we finally made it.
Warm Tips: This video is made for technique sharing only. For those who have no professional skills, please look before you leap.
 English
 Español
 Français
 Deutsch
 Italiano