
REWA Academy is a platform that provides repair technique learning, practical demonstration, and idea-sharing for practitioners in the electronic repair industry. Our teaching staff and R&D team have dedicated themselves to developing systematic repair training courses. 1. iPhone Logic Board Repair Foundation Course 2. iPhone Logic Board Repair Handwork Course 3. iPhone Logic Board Repair Work Flow & Troubleshooting Course 4. iPhone Logic Board Repair Cases Course 5. Cell Phone Broken Screen Refurbishment Course Grow the skills with REWA before growing your business.
Tag: iphone
-

How iPhone X Boot Circuit Works | REWA Academy Logic Board Repai
REWA will walk you through the work-flow of iPhone X Boot Circuit. The boot circuit can be regarded as logic board trigger circuit. To have the phone turned on, working conditions like power supply, clock signal and reset signal are indispensable. What’s more, CPU has to get key components into power-on self-test process and get the bootstrap imported. Since there are so many components involved in the process, reasons for won’t turn on of the phone can also be various.
-
How To Fix Black Camera By Jumping Wire ( iPhone 7 Plus Demo )
iPhone front camera not working? What should a repair technician start with? Follow our repair guide today and learn how to troubleshoot step by step. What’s more, REWA LAB will show you how to avoid further damaging the logic board by adopting a fresh new repair solution. Take iPhone 7 Plus as a demo. Check it out now!
Products Used:
-
iPhone Xs Max Flickering Screen Caused By Mistake
Develop a good habit and keep a well-organized workspace in daily repair work will help a lot for repair technicians. Today we share a special repair case – iPhone Xs Max flickering screen which caused by the technician’s mistake.
Products Used in this Video
- REWA Online Shop: https://shop.rewa.tech/
- REWA Repair Training Course Of Spring 2020: http://bit.ly/2SERDwT
- iPhone X/Xs/Xs Max Heating Platform: http://bit.ly/2ZlUOuI
- DC Power Supply: http://bit.ly/2skEC0G
- Power Supply Test Cable for iPhone 4 – Xs Max: http://bit.ly/2MvbQkV
- Integrated Mobile Phone Repair Platform: http://bit.ly/37jPtHd
- Motherboard Fixture: http://bit.ly/2MtjqMO
- Straight Tweezers: http://bit.ly/34VN2sv
- Curved Tweezers: http://bit.ly/2Mrj9dq
- Pry Bar: http://bit.ly/2PU9iPk
- Dust-free Cloth: http://bit.ly/2MuEB0T
- download refox: http://www.refoxteam.com/
-
iPhone 12 Battery Upgrade: What You Need to Know
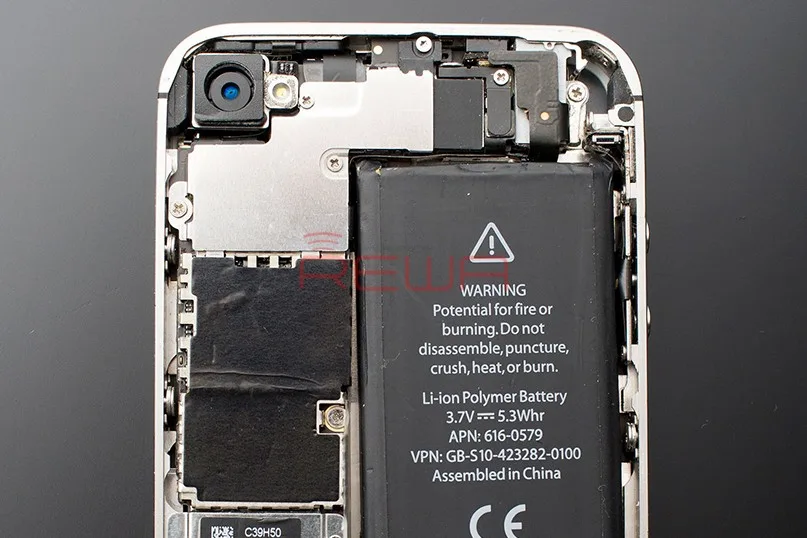
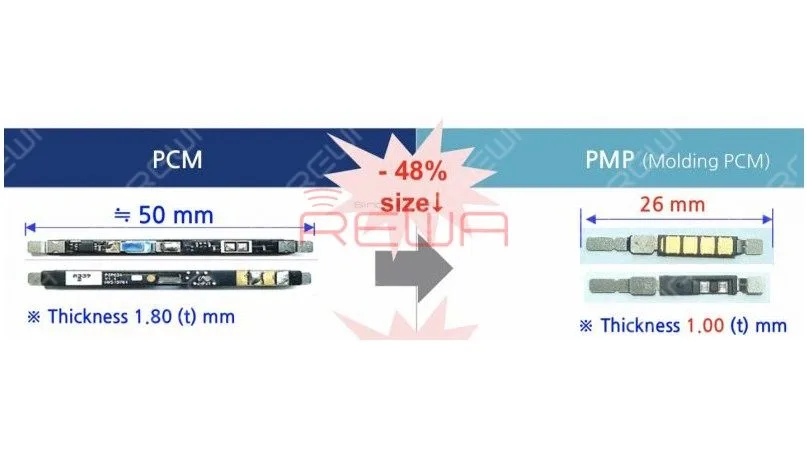
According to reports, Apple is planning to equip iPhone 12 with a custom battery protection module that is nearly 50 percent smaller and thinner than the battery protection circuit in previous iPhones.The smaller module could free up some internal space in iPhone 12 models, potentially paving the way for a slight increase in battery capacity. The smaller module would be supplied by South Korea’s ITM Semiconductor.
The battery capacity design of each generation of the iPhone is different. Although new models are gradually increasing the battery capacity year by year, the increasing rate is not high enough.
Android phones like Samsung’s galaxy series and Huawei’s mate series, by contrast, are equipped with larger and larger battery capacity.
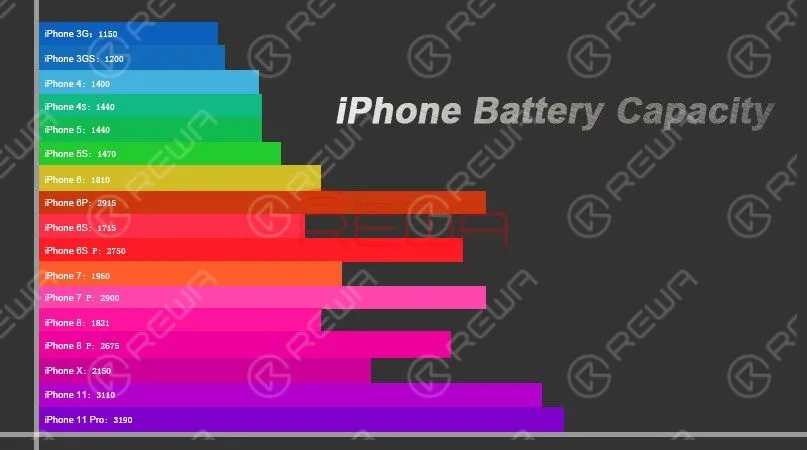
As far as we know, the battery life of a smart phone depends not only on the battery capacity, but also on the hardware configuration and system optimization of the phone.Unlike the Android system, the iOS system is very strict about APPs’ self-starting, linkage wake-up, etc.. All iOS apps are designed in compliance with Apple’s requirements. And that’s why iPhones can run smoothly with guaranteed battery life with relatively small battery capacity.
Why iPhone Battery Capacity Is So Small
As smart phones becoming more and more powerful with larger displays and more power-hungry camera modules, battery capacity design also becomes more and more important and demanding for manufactures.
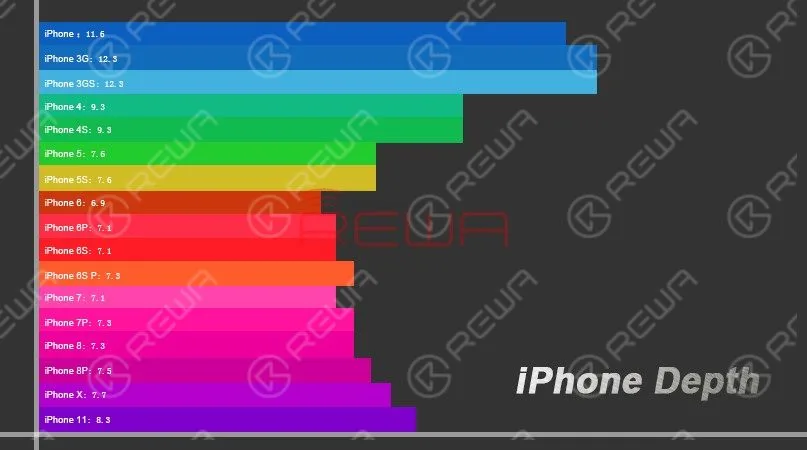
According to data in the above figure, Apple has been strictly controlling the thickness and size of the fuselage of iPhones. And the thickness of 8mm has not been launched until 2019. With the change of screen ratio and the increase of system functions, the battery life of newest iPhones is even worse.
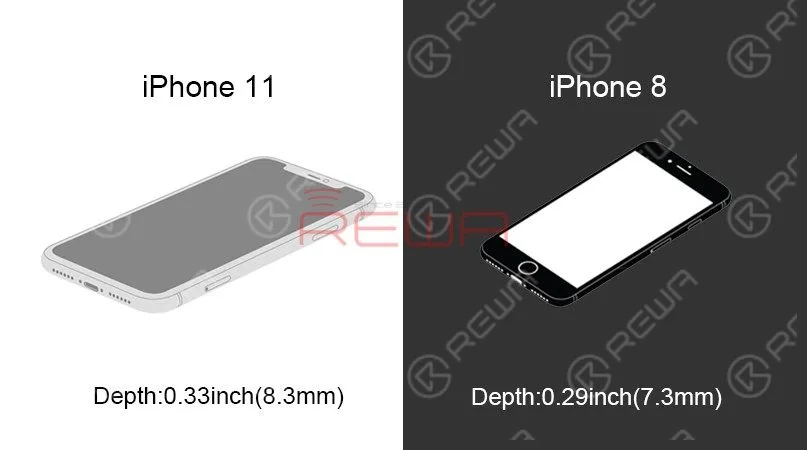
Apple has always been pursuing a better user experience. In order to add better vibration feedback-3D Touch function, a larger volume Taptic Engine linear actuation motor has been added. The cancellation of the 3.5mm headphone jack since iPhone 7 series is also aimed to allow more space for the new Taptic Engine.However, increasingly complex internal designs contribute to insufficient overall space and therefore result in a relatively small capacity battery.
iPhone Battery Common Issues & Causes
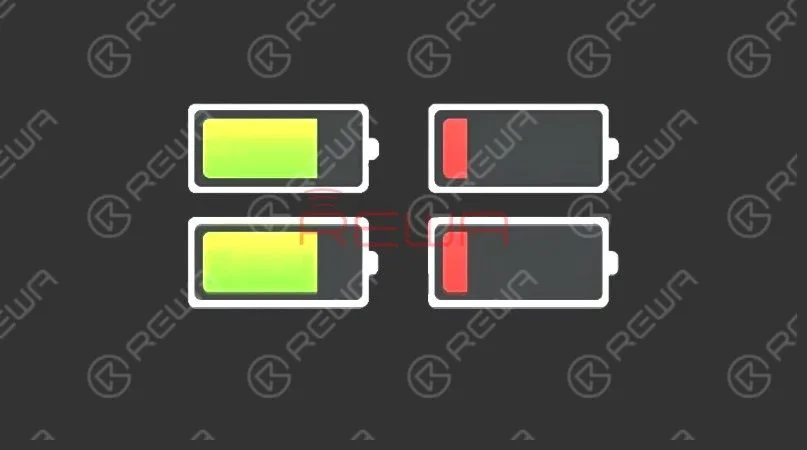
Common Battery Issues
Battery drops sharply.
Charge the phone and the battery percentage increases instantly. However, the battery percentage also drops sharply during usage.
The battery percentage is 0 and the phone turns off automatically. Restart the phone and we can see normal battery percentage. The phone also runs normally.
There is no significant battery drop. Yet the phone keeps heating and battery drops gradually.
Common Causes For Battery Issues
- Malfunction of PMU.
- Battery aging.
- Overcooling/overheating environment.
- Jailbreak leads to system instability.
- Power-consumption programs running; high-speed flowing of data; CPU continuously running under high load.
Differences Between Aftermarket Batteries And OEM Batteries
Aftermarket Batteries are different from OEM batteries in the three aspects: Price, Value, and Performance.
Price – Aftermarket batteries offer customers a lower price than that of OEMs. In fact, on average customers choosing aftermarket batteries end up saving up to 90% in the cost of batteries comparing to those choosing OEMs.
Value – OEM Batteries offer consumers a greater value in terms of compatibility. However the aftermarket batteries have great capacity and longevity. The higher the capacity rating, the longer your battery can last between charges. More capacity equals more runtime. More runtime equals better value!
Performance –Our phone does not care whether you have a big brand name on the battery or it is a generic aftermarket battery. What really matters is how long will the battery last and how well will it work.
Why You Should Choose REWA Batteries
REWA has its own battery production line. With different automation equipment applied during the whole core process, the battery assembling process is highly ensured. We utilize high-quality battery cells that will last a very long time – giving you day after day of great performance. Click here! take a closer look at the battery assembling process now!!
-
iPhone 7 Plus Touch ID Repair: Fix Broken Home Button Cable
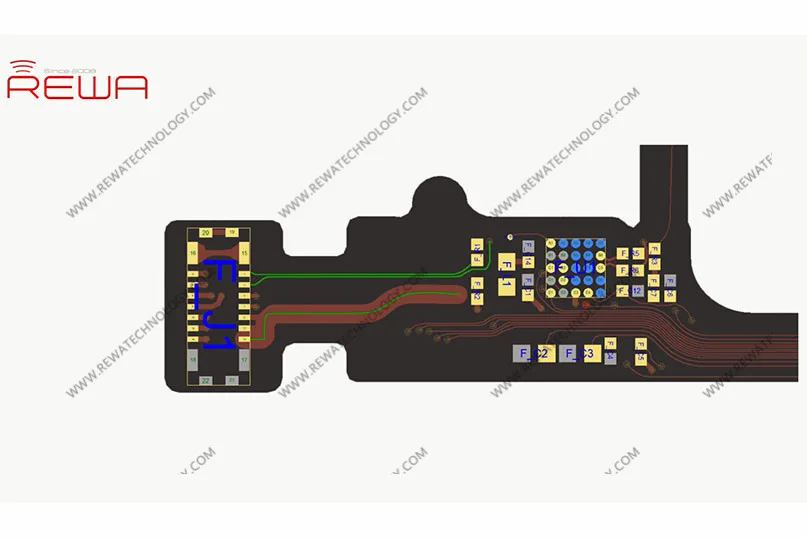
For iPhone 7-8P, 80% of Touch ID issues are caused by broken home button cable and we can fix the problem by jumping wires on the two layers of wires on the home button cable respectively. Which is very difficult especially when the bottom layer comes with many wires. And that’s when we bring you this new solution in our iPhone 7 Plus Touch ID repair blog today. With the help of the iPhone 7-8P Home Button Repair Socket Cable, we can fix the Touch ID problem in a safe and efficient way.
Tips: the home button cable is fragile and therefore professional operation is needed. For those who have no repair skills, please look before you leap.
Malfunction
Press the power button to turn on the phone. The phone turns on normally. However, there is an alert saying “Unable to activate Touch ID on this iPhone. Try to press the home button. The home button is also unresponsive.
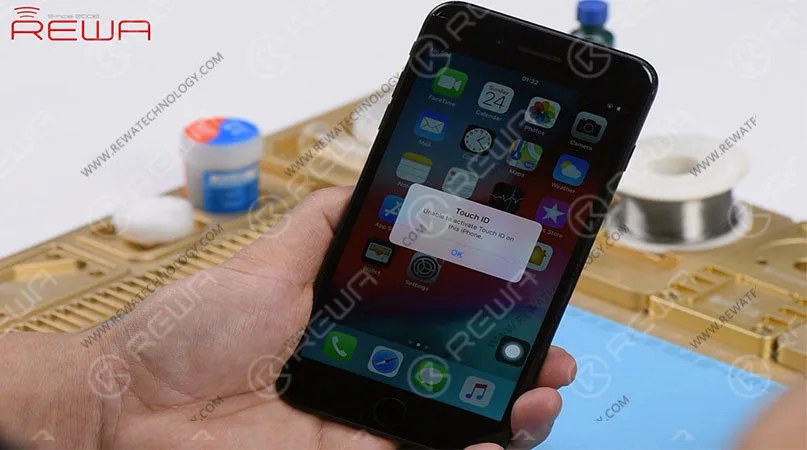
Go to Settings > Touch ID & Passcode. The option ‘Add a Fingerprint’ is grayed out. Judging by this, home button relevant circuit or home button cable has malfunctioned.
Diagnosing
Take apart the phone and remove the display assembly. Run diode mode measurement of the home button connector. The measured value is normal. Which indicates that home button relevant circuit is also normal. And the home button issue has nothing to do with the logic board.
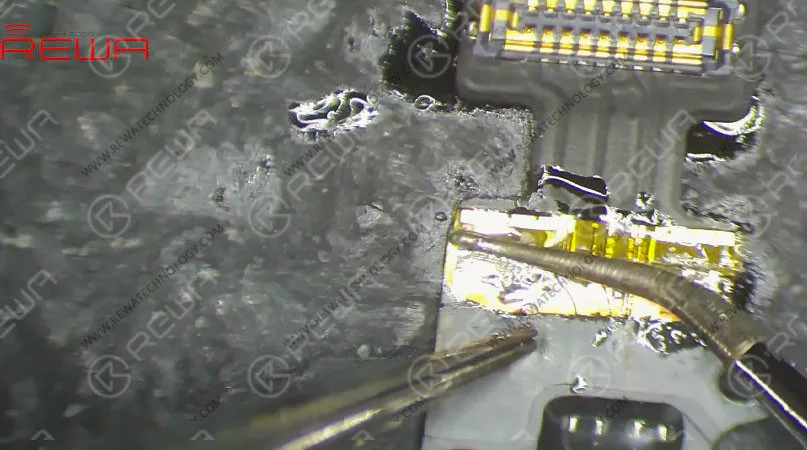
Next, we need to check the home button cable. Disconnect the home button cable. We can see that the home button cable nearby the socket is broken.
Troubleshooting
Judging by this, when installing/detaching the home button cable, rough operation of the technician led to the broken cable and resulted in the Touch ID not working problem. And for iPhone 7/7P/8/8P, 80% of Touch ID issues are caused by broken home button cable. We can fix the broken cable by jumping wires.
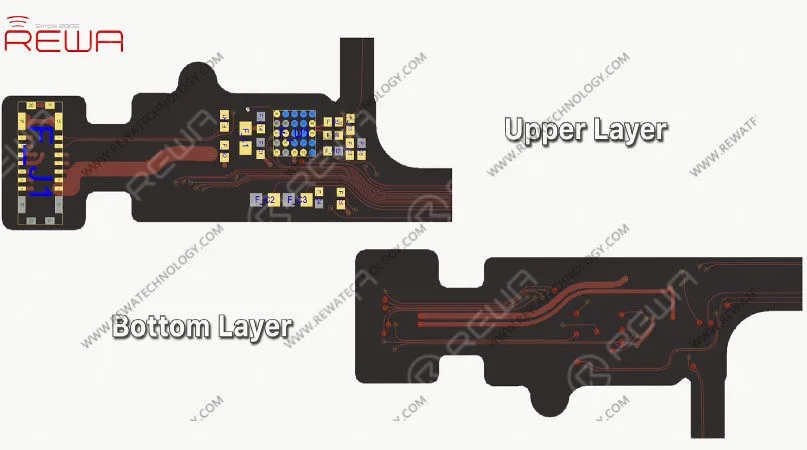
Also, there are two layers of wires on the home button cable. The bottom layer comes with more wires than the upper layer. When repairing the broken cable, the traditional way is to jump wires on the two layers respectively. Which is difficult and the home button cable might also be damaged. And that’s when we bring you this safe and efficient solution today. We can repair the broken cable by soldering the bottom layer of wires to the iPhone 7-8P Home Button Repair Socket Cable and joining up the upper layer of wires by jumping wires.
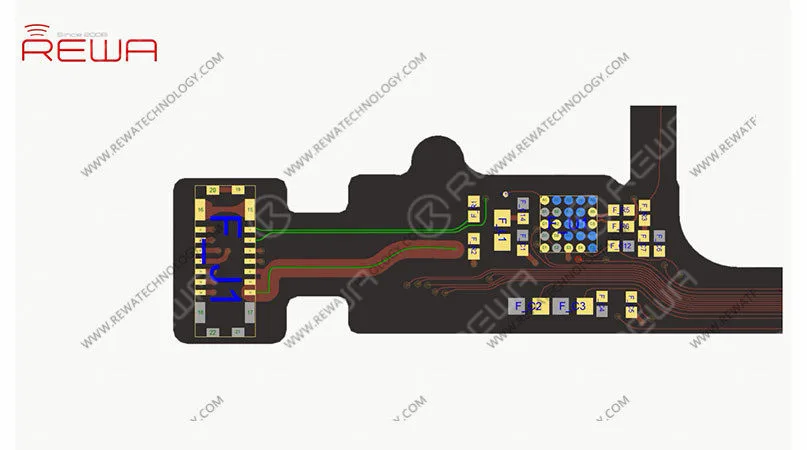
Please be noted that the home button cable can be easily damaged, here we also need a specialized Sculpture Knife to complete the work
Broken Home Button Cable Repair
Step 1
Secure the home button cable with the double-sided tape. Cut off the broken cable along with the socket. Then slice open the insulating coating on the cable.
Step 2
Heat with the Helical Wind Hot Air Gun for 5 seconds. Scrape off the insulating coating and then wires on the upper layer with Sculpture Knife. Clean with PCB Cleaner soaked cotton ball afterwards.
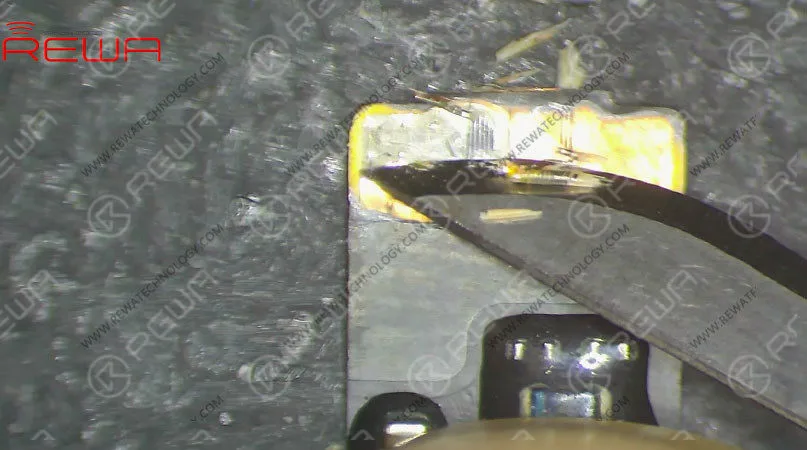
Step 3
Cut off the needless part of the Home Button Repair Socket Cable. Apply some solder paste and paste flux to the bottom layer. Apply the home button repair socket cable to the right position. Solder carefully with the Soldering Iron. Once done, clean with PCB Cleaner soaked cotton ball.
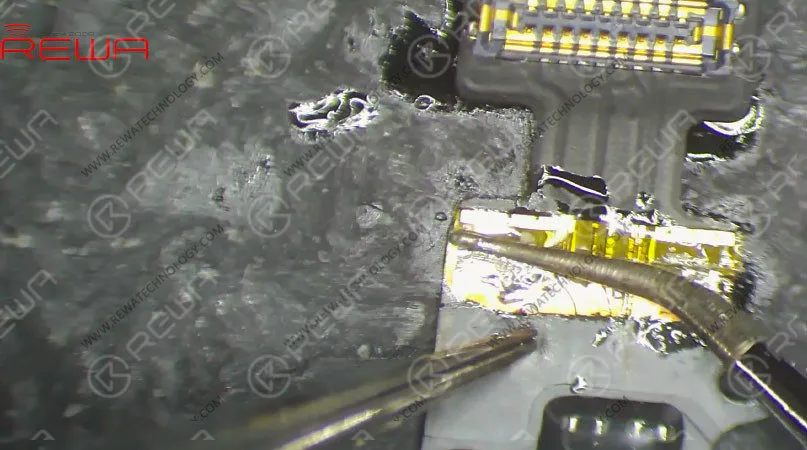
Step 4
Now we need to solidify the soldered area. Apply some UV Curable Solder Mask to the soldered area. Then solidify the cable under UV Dryer Lamp for 5 minutes.
Step 5
Next, let’s join up the upper layer of wires by jumping wires. Apply some paste flux and solder paste first. Here we need 0.02mm solder tinned enamelled wire. Solder the wire to the corresponding position on the upper layer one by one. Once done, apply some UV Curable Solder Mask. Then solidify the cable under UV Dryer Lamp for 5 minutes.
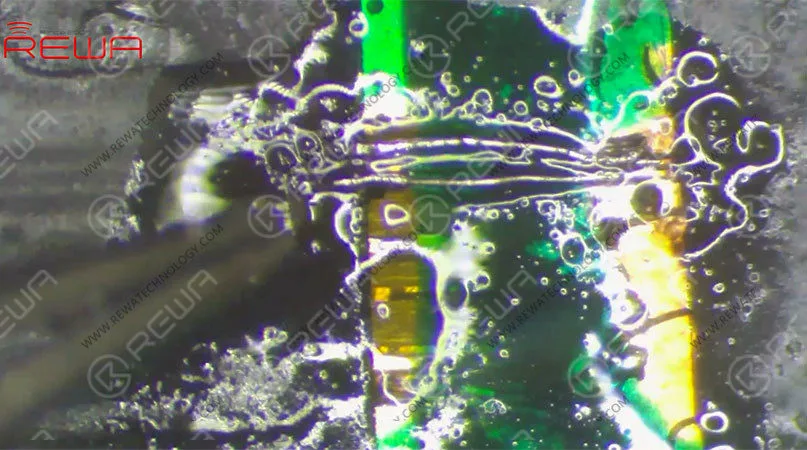
Test
Now we can assemble the phone and test. Get the home button cable installed. Get the display assembly installed and battery connected. Press the power button to turn on the phone. The phone turns on normally.
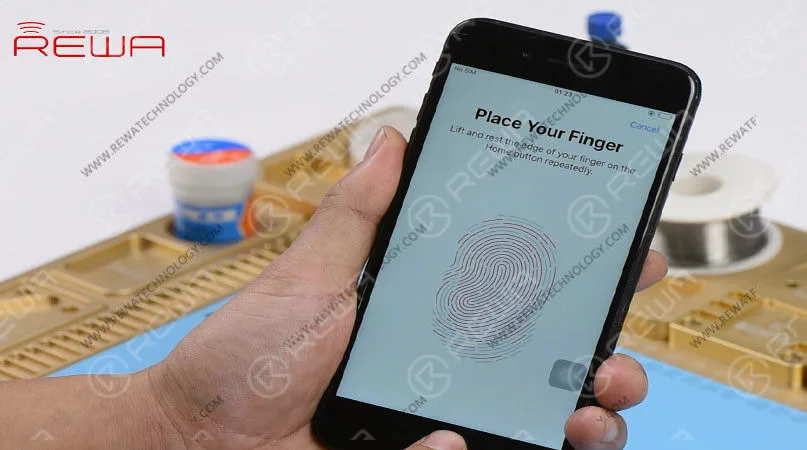
Go to Settings > Touch ID & Passcode. The option ‘Add a Fingerprint’ is back to normal. Try to set up Touch ID on the phone. With Touch ID set up successfully on the phone, Touch ID function is also normal. The home button is also back to normal Warm tips: get the phone full assembled after confirmation of fault clearance.
You can also visit REWA Youtube Channel to check our video of iPhone 7 Plus Touch ID Not Working – Broken Home Button Cable Repair.
-
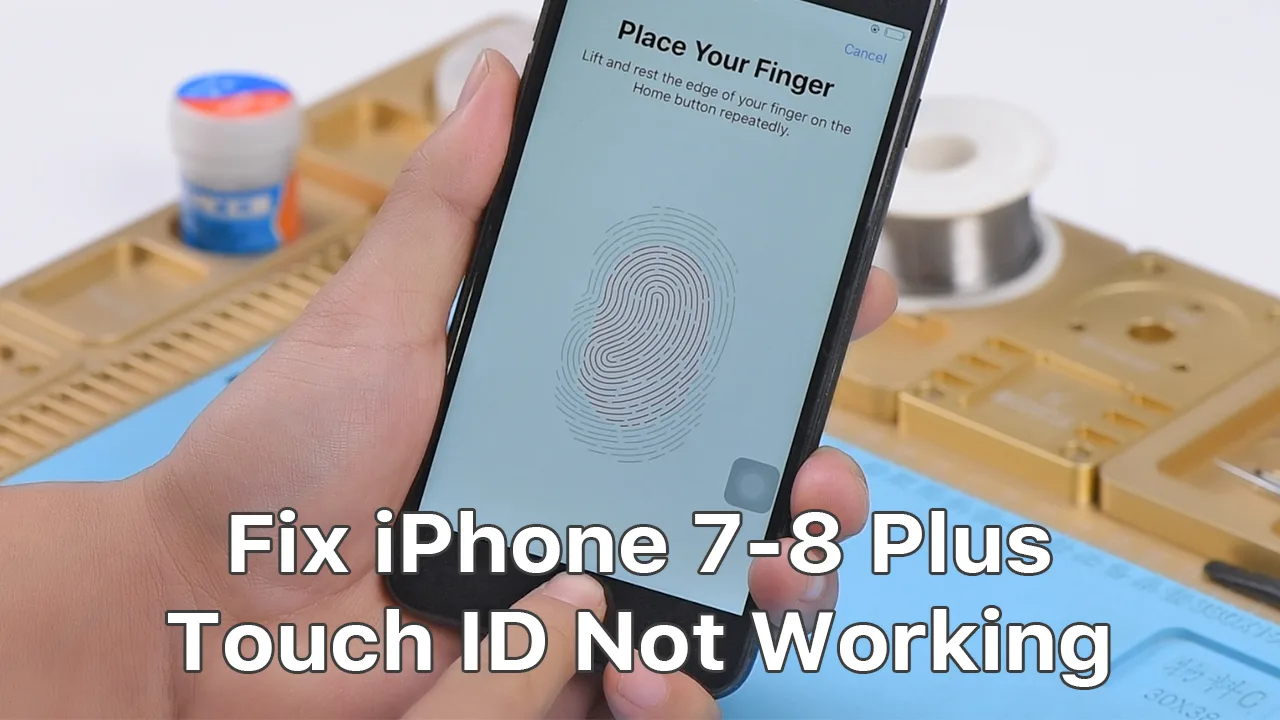
How To Fix iPhone 7-8 Plus Touch ID Not Working
For iPhone 7/7P/8/8P, 80% of Touch ID issues are caused by broken home button cable. We need to jump wires on both two layers of wires on the home button cable. Since the bottom layer comes with more wires than the upper layer, it is difficult and the home button cable might also be damaged.
However, with the iPhone 7-8P Home Button Repair Socket Cable, we don’t need to join up the bottom layer of wires by jumping wires.
Used Tools in this video
- iPhone 7-8P Home Button Repair Socket Cable: http://bit.ly/35q0vtV
- Lead-free Soldering Station: http://bit.ly/38GTuqv
- 861DW Hot Air Gun: http://bit.ly/2qUjzkL
- Repair Platform: http://bit.ly/2PqZxrJ
- Straight Tweezers: http://bit.ly/36Fx5Iq
- 0.02mm Varnished Wire: http://bit.ly/36IwWUD
- Screwdriver: http://bit.ly/38Irl2f
- UV Dryer Lamp: http://bit.ly/2LVWCF1
- UV Solder Mask: http://bit.ly/38HVMWw
- Solder Paste: http://bit.ly/2YOR2d2
- Flux: http://bit.ly/38MHNyL
- Pry Bar: http://bit.ly/2LZLzuA
- Soft Brush: http://bit.ly/38MHS5x
- Double-sided Tape: http://bit.ly/36BbTDl
-
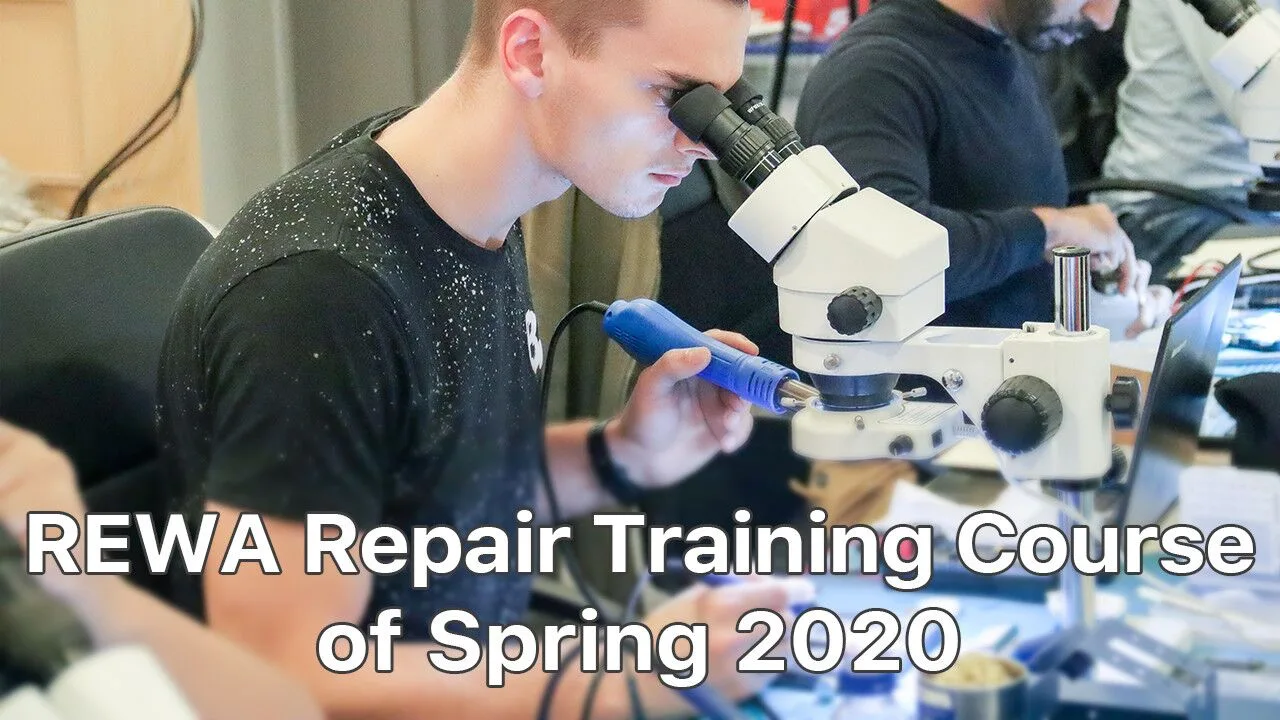
iPhone / MacBook Logic Board Repair Training Course 2020
In the past year, REWA systematic repair training course has helped more than 237 repair enthusiasts from 54 countries and regions around the world with professional instructors and teaching assistants guaranteeing practical teaching and heuristic learning.
-
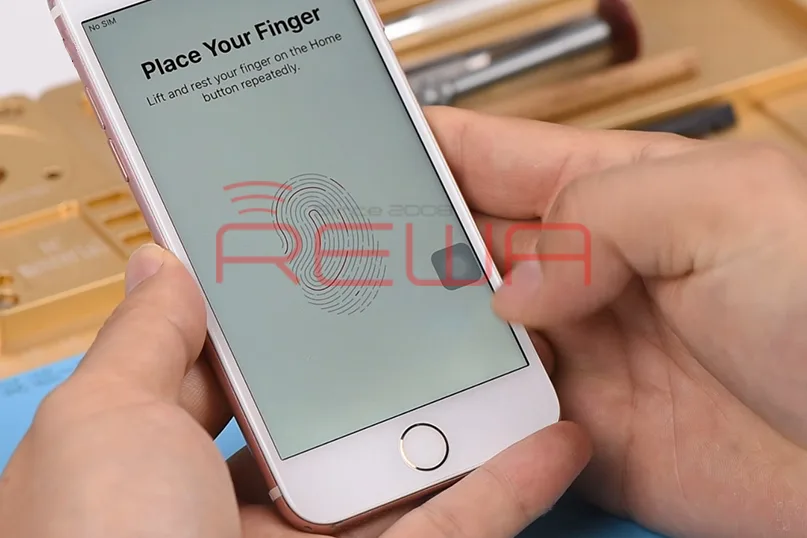
Troubleshooting Guide: Fix iPhone 7/7P Home Button Not Working
Return-to-home functionality failure is a common issue of iPhone 7/7P and the problem is usually related to the U10 chip on the home button cable.
And that’s what our iPhone 7 Home Button not working troubleshooting blog is about today.
Tip 1: The home button cable is fragile and therefore professional operation is needed. For those who have no repair skills, please look before you leap.
Step 1 TEST
1. Press the home button to unlock the phone.
2. Open an APP and press the home button. It fails to return back to the home screen.
3. Double-press the home button again, there is also no response.
4. Long-press the home button and Siri is also not launched.
5. Check out Touch ID Setting. It is working normally.
6. Judging by this, that means the return-to-home functionality fails. This is a common issue of the iPhone 7/7P about home button.
Step 2 Troubleshooting
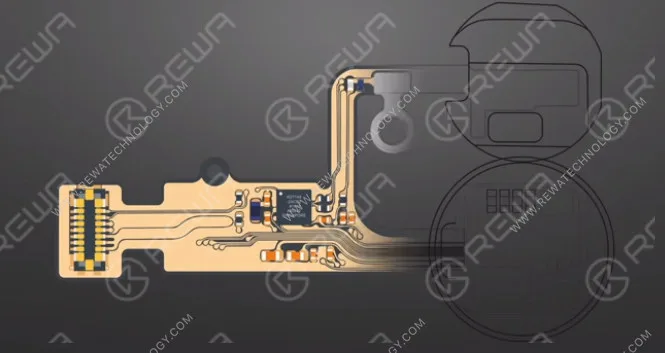
The return-to-home functionality of home buttons on iPhone 7/7P/8/8P is supported by the U10 chip on the home button cable.
Tips 2: The home button cable is secured by double-sided adhesive underneath.
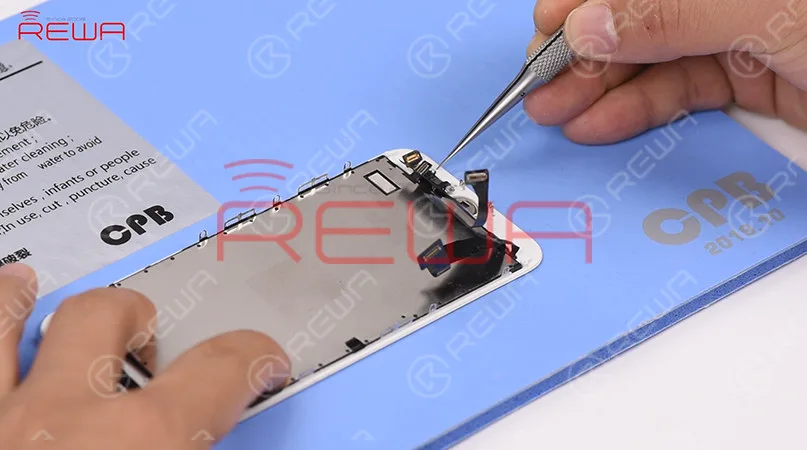
1. Heat up before removing the home button cable.
2. Attach the detached home button cable to the PCB Holder.
3. Secure the cable with High-temperature tape.
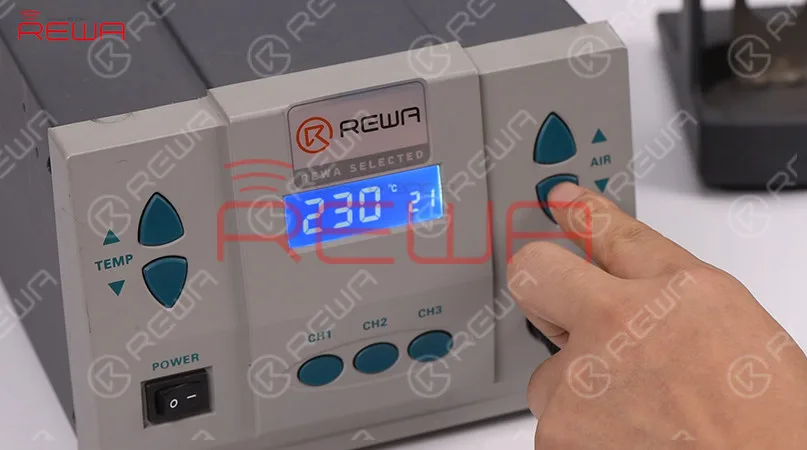
Tips 3: The home button cable is fragile. Please control the operating temperature of the Hot Air Gun and the Soldering Iron during the repair work. This is to protect the home button cable from high-temperature damage.
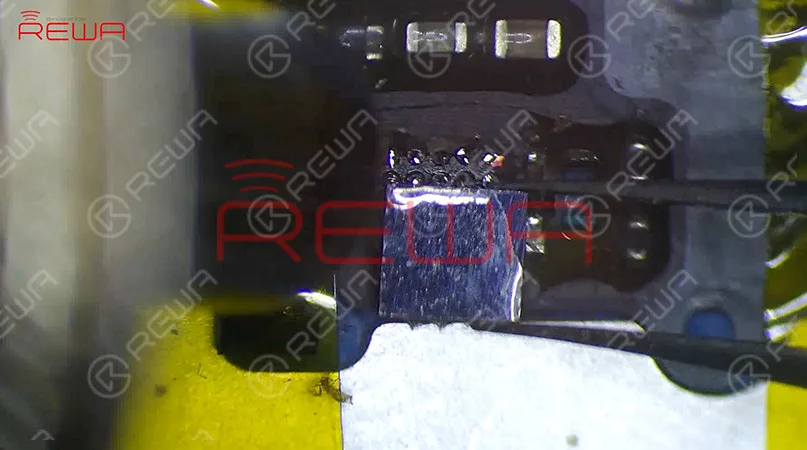
4. Heat with the Hot Air Gun to remove sealing adhesive around U10 chip.
5. Detach the U10 chip from the home button cable and clean its bonding pad with Soldering Iron afterwards.
6. Apply some UV Curable Solder Mask to the exposed area for insulation protection before soldering the chip. Then solidify the home button cable under UV Dryer Lamp for 15 minutes.
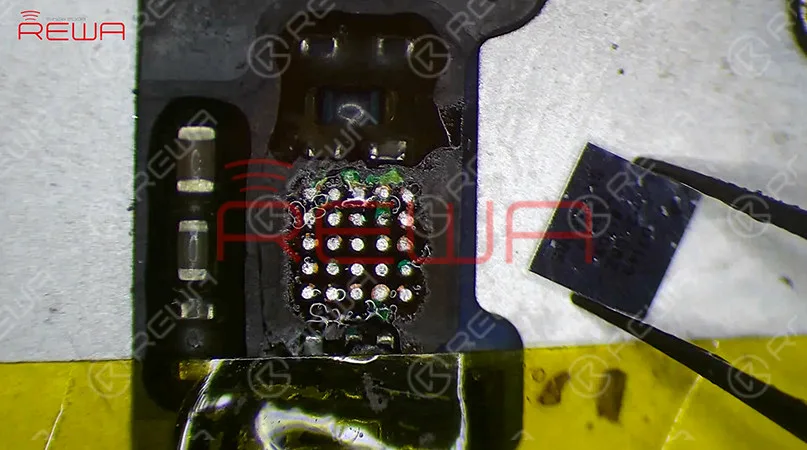
7. Solder a new U10 chip afterwards.
8. Get the home button cable installed.
9. Turn on the phone and test.
10. Touch ID works normally. The return-to-home functionality is also back to normal. For details of this case, please check out the YouTube Video below.
For tools and parts used in the video, please click the link below to get, visit REWA online shop for more.
-
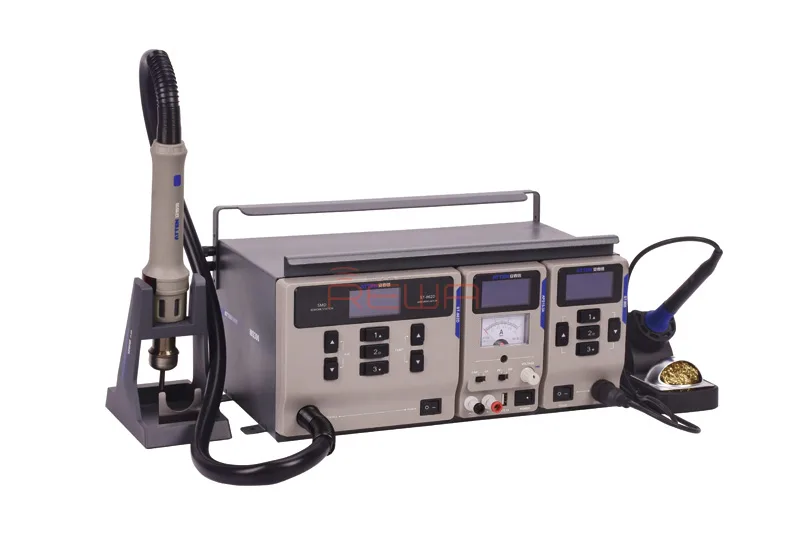
3 In 1 Rework Station For Mobile Phone Repair
Hot Air Guns, Soldering Irons and DC Power Supplies are essential tools for electronic maintenance engineers.
In today’s blog, we will introduce a 3 in 1 Rework Station for Mobile Phone Repair. It is not only space-saving but also cost-effective.
And therefore it is the best partner for repair beginners.
The 3 In 1 Rework Station for Mobile Phone Repair includes a ST-862D Hot Air Station, a ST-965 Soldering Station and an APS15-3A Power Supply.
Let’s check their features one by one.
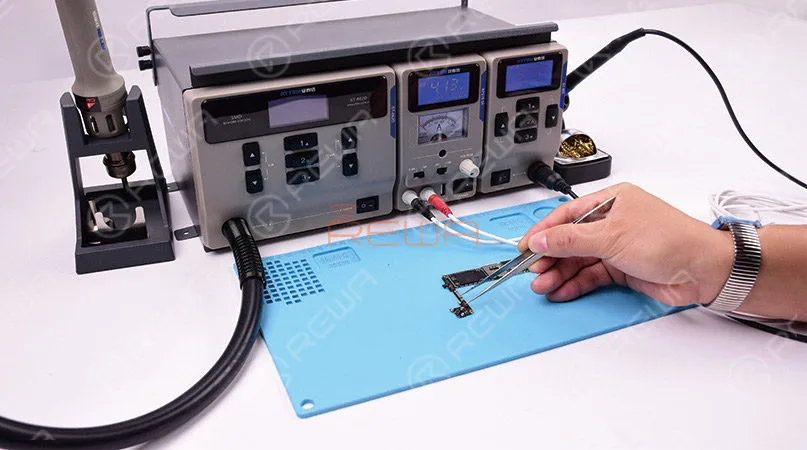
Power Supply APS15-3A
A DC power supply is used to provide DC power for logic board repairing and booting test.
With the built-in current/voltage reading display, it can also be used as a reference for fault-finding.
FEATURES
- Perfect short protection and over-current protection & Overheating Protection.
- Micro-controller Unit features low noise, high stability and low ripple.
- Built-in locking and alarm setting can effectively avoid mistaken operation.
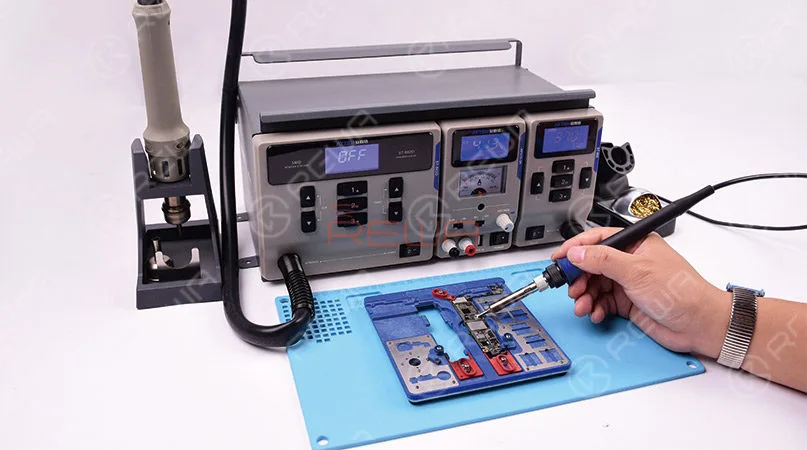
Soldering Iron ST-965
A soldering iron is used to solder the spare parts on the green-colored PCB (Printed Circuit Board) of mobile phones.
These soldered parts may get disconnected, lose contacts with the PCB or simply come out over time.
They may also come out due to shock or jerk due to falling down.
Therefore you need to solder the parts back again with a soldering iron.
FEATURES
- Temperature calibration & alarm setting.
- LED display for real-time temperature & working status monitoring.
- Auto sleep/switch-off function to highly extend Product life.
- CH 1/2/3 preset temperature for a fast switch.
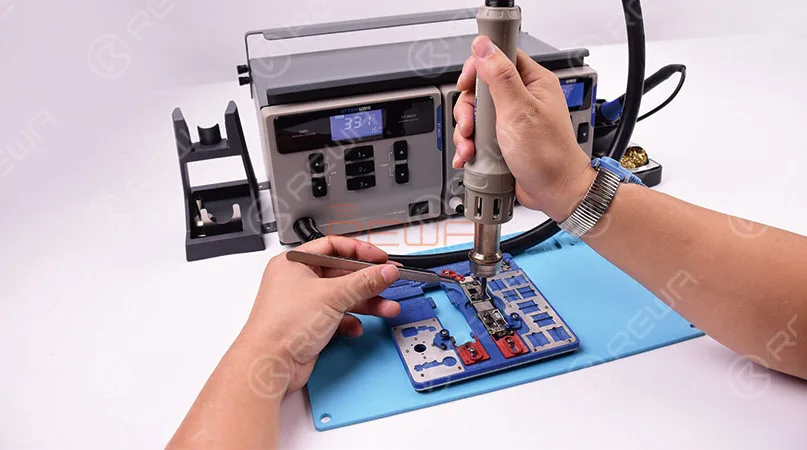
Hot Air Gun ST-862
It is one of the most frequently used tools in mobile phone repair.
From replacing charging ports to removing various capacitors and resistors, a hot air gun is a must.
FEATURES
- Conversion between vertical wind and helical wind.
- LED display for real-time temperature & working status monitoring.
- Auto sleep, safe and power saving.
- Precise temperature control, and constant set temperature.
The 3 In 1 Rework Station for Mobile Phone Repair is available now.
You can place an order for the whole set or buy a separate one on REWA ONLINE SHOP.
For bulk ordering, please contact REWA Account Manager to get an exclusive discount.
-
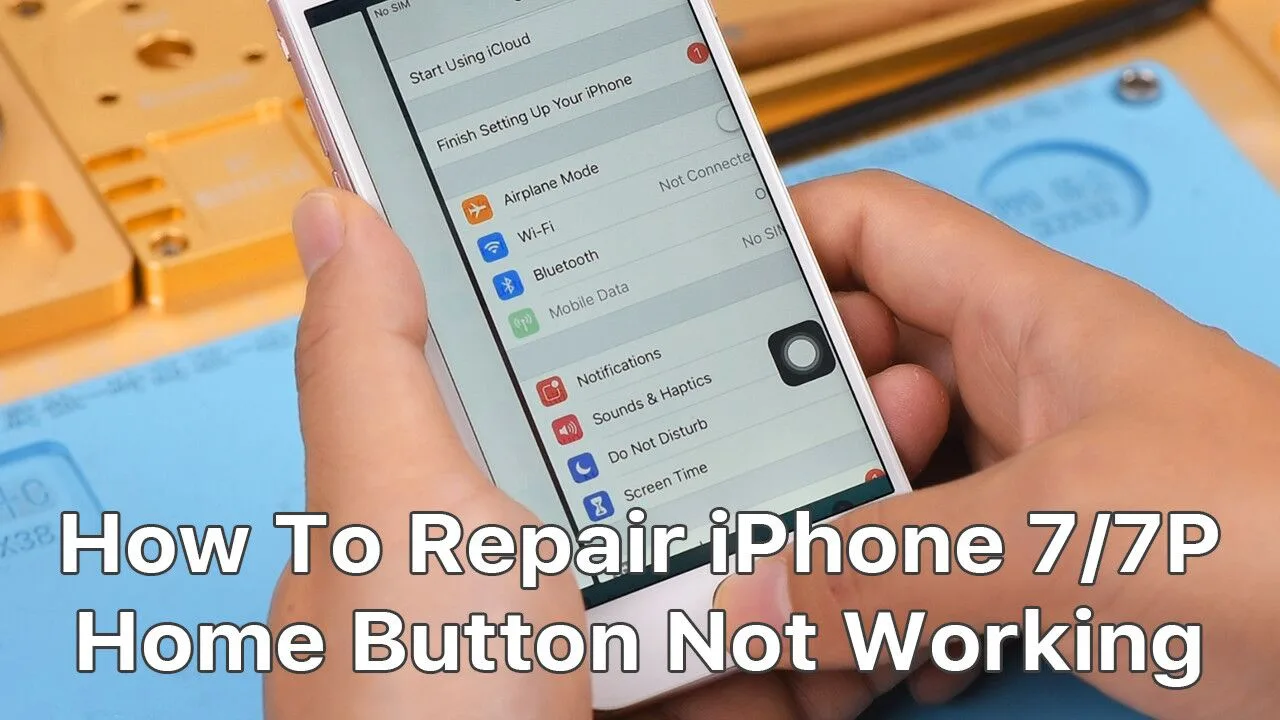
How To Repair iPhone 7/7P Home Button Not Working
iPhone 7/7P Home Button not working issue includes Touch ID not working and Return-to-home function not working. Both are common issues. Today we share with you a common issue of iPhone 7/7P – Touch ID works normally but Return-to-home function not working. Check it out now!
Tips: the home button cable is fragile and therefore professional operation is needed. For those who have no repair skills, please look before you leap.
Parts and Tools was Used
- DC Power Supply: http://bit.ly/2rKEWVM
- iPhone 4 – XS Max Power Supply Test Cable: http://bit.ly/2Y799uh
- Lead-free Soldering Station: http://bit.ly/34Ky0qi
- 861DW Hot Air Gun: http://bit.ly/2Y4StDE
- Repair Platform: http://bit.ly/37Y9Z0Z
- PCB Holder: http://bit.ly/2OII6Tb
- Straight Tweezers: http://bit.ly/2DxMXQy
- Screwdriver: http://bit.ly/2DA2TSn
- UV Dryer Lamp: http://bit.ly/2OGhWAr
- Scalpel Blade: http://bit.ly/2Y6WI1t
- UV Solder Mask: http://bit.ly/2OIJTaR
- Solder Paste: http://bit.ly/34FY7i3
- Rosin: http://bit.ly/2ODlkMc
- Flux: http://bit.ly/2YblY6P
- Pry Bar: http://bit.ly/2rOzMba
- Pry Piece: http://bit.ly/2YerLZy
- Soft Brush: http://bit.ly/2Y7CN2t
- Suction Cup: http://bit.ly/2rJPC75
-
iPhone X Face ID Not Working Repair
With the diffused application of Face ID on iPhone X – 11 series, Face ID failure also appears at a high frequency.
As our previous Face ID teardown video has introduced, Face ID can be easily damaged and hardly repaired. If the problem is related to the flex cable, then it’s simple.
However, based on statistics of REWA chip-level motherboard repair service, Face ID failure is caused by damage of the Flood illuminator/Dot Projector in most cases, which can not be repaired.
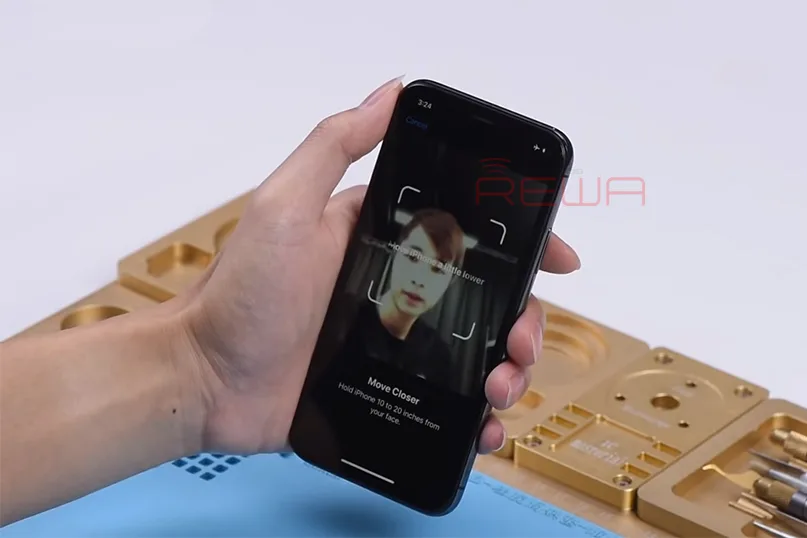
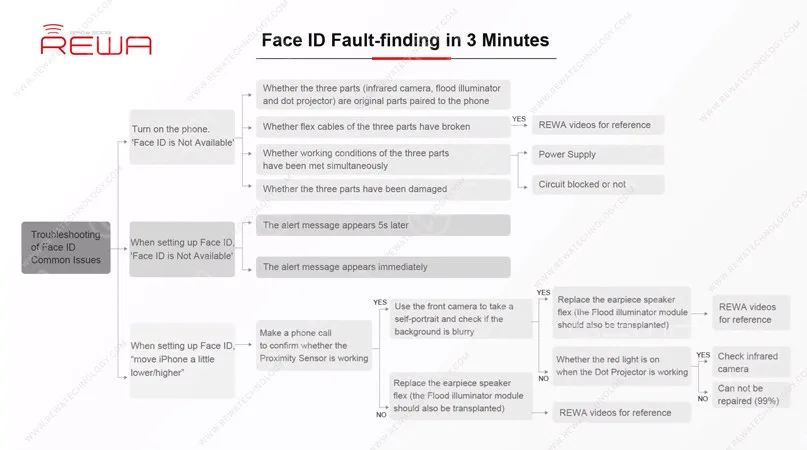
Today, we want to share a case about ‘move iPhone a little lower/higher when setting up Face ID’ and show you how our technicians find out the fault in 3 minutes with the help of REWA exclusive repair tricks on Face ID troubleshooting. Let’s get started!
Face ID Not Working Malfunction
The phone keeps sending messages: ‘move iPhone a little lower/higher’ during the setting up process of Face ID. It means that Face ID cannot be set up successfully on the phone.
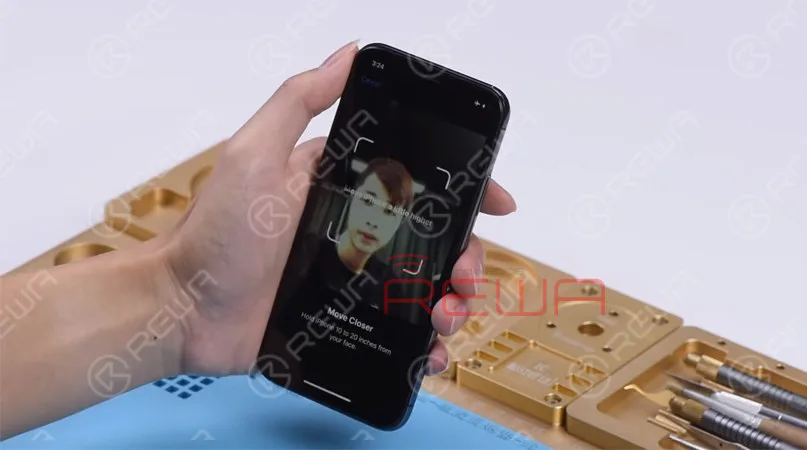
Face id not available troubleshooting
Now, let’s find out the fault step by step.
Step 1 Test The Flood Illuminator
Based on REWA exclusive repair tricks, let’s start with the Flood Illuminator. There are two important Face ID parts whose behavior relies on the support of the Flood Illuminator. In our daily repair work, we can test the Proximity Sensor and the Ambient Light Sensor to confirm whether the Flood Illunmunator is working normally.
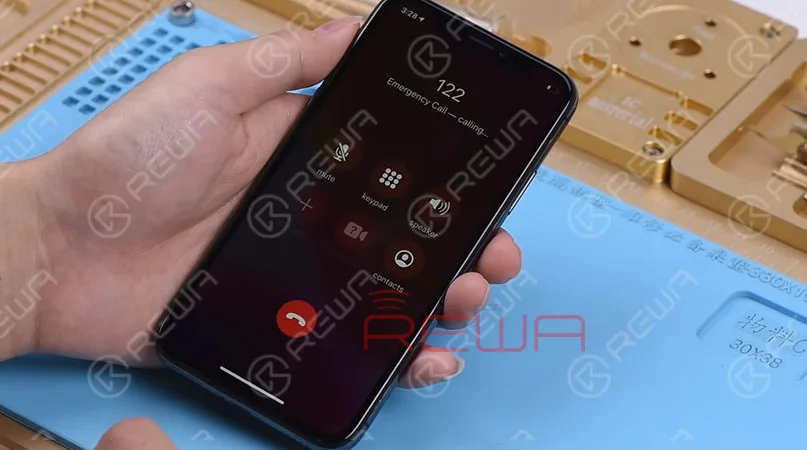
Let’s make a phone call to confirm whether the Proximity Sensor is working.
During the phone call, cover the top of the screen with one hand.
We can see that the screen turns black immediately.
Judging by this, the Proximity Sensor is working normally.
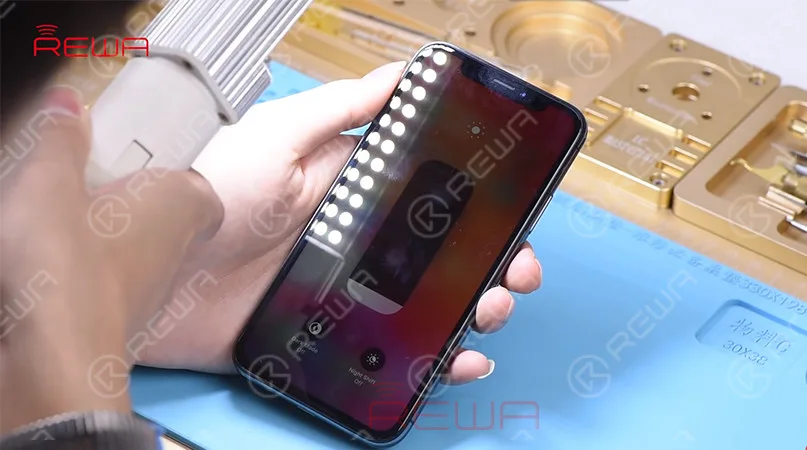
Next, test the Ambient Light Sensor. Set the screen brightness to the lowest and then hold the phone under a bright light.
With the screen getting brighter, we can confirm that the Ambient Light Sensor is also working normally. Judging by this, the Face ID failure is not caused by Flood Illuminator.
Step 2 Test The Front Camera Parts
Let’s move on to the next step of face id not working – test the front camera parts.
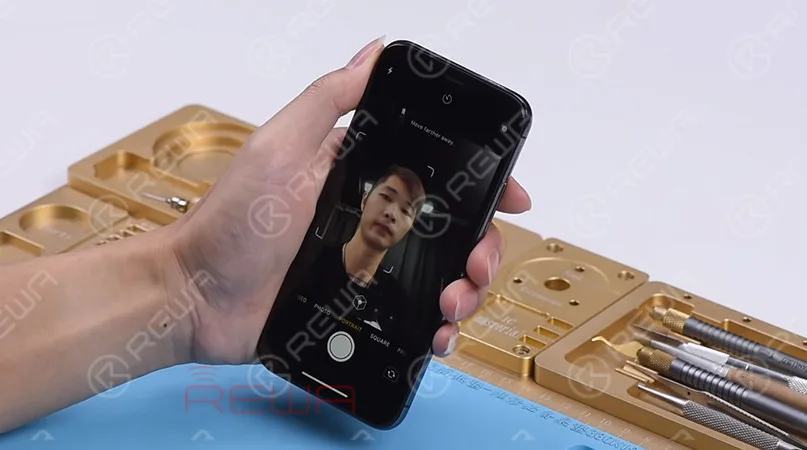
Open the camera app and swipe to Portrait Mode. The background is not blurred, which is abnormal.
Step 3 Observing The Dot Projector
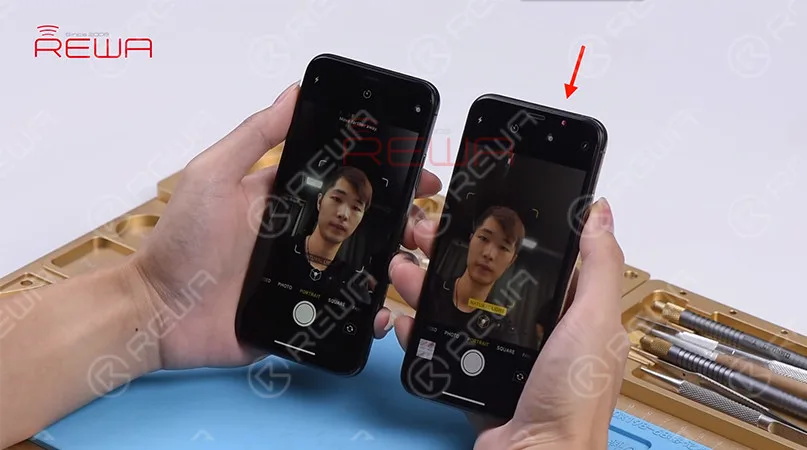
At the Portrait Mode, there is no flashing red light from the Dot Projector.
But the Dot Projector should emit flashing red light in normal status.
We can confirm now that the Dot Projector has malfunctioned.
This is the fault that causes the Face ID to set up failure. And the problem cannot be fixed.
Tips:
The three parts ( infrared camera, flood illuminator and dot projector) are paired to the phone. Damage of any one of them can cause Face ID failure and such an issue is irreparable.
Right now, Face ID failure has become a common problem in our daily repair work.
Whether the problem you are dealing with can be repaired or not is really an important thing for repair technicians.
Don’t worry! REWA exclusive repair tricks on face id not working can be a great reference for repair technicians to find out faulty positions and improve repair efficiency.
For details of this case, please check out the YouTube Video below.
Wanna learn basic knowledge about iPhone motherboard, master iPhone micro-soldering techniques, understand the work-flow of different iPhone circuits, master troubleshooting processes of different iPhone issues, and learn detailed screen/back glass refurbishing steps?
REWA Academy is a platform that provides repair technique learning, practical demonstration, and idea-sharing for practitioners in the electronic repair industry.
You can also click the course link below to know more!
- iPhone X Series Logic Board Repair Course
- iPhone Logic Board Repair Foundation Course
- iPhone Logic Board Repair Handwork Course
- iPhone Logic Board Repair Work Flow & Troubleshooting Course
- iPhone Logic Board Repair Cases Course
- Cell Phone Broken Screen Refurbishment Course
- iPhone Motherboard Repair Course Complete Package
 English
 Español
 Français
 Deutsch
 Italiano