There are various kinds of screen assembly products with uneven quality, which makes many customers confused when placing orders. Therefore, REWA has set a stringent standard for selecting products to ensure customers’ shopping experience, aiming to select the best quality screen assembly product with the highest cost performance on the market. REWA hopes to make customers shop without worries and rest assured to use assembly products selected by REWA.
Tag: iphone
-
How To Fixing iPhone X Unable to Activate By Jumping Wires
The iPhone X has been dropped and can’t work normally. After restoring, the phone can’t be activated. REWA Lab technicians suspect that the motherboard was damaged after the phone was dropped. This video will share how we locate and eliminate the fault. Let’s check it out!
Products recommended in this video
-
Fix iPhone X with Distorted Sound
Hello everyone! Today we will share how to fix an iPhone X with distorted sound.
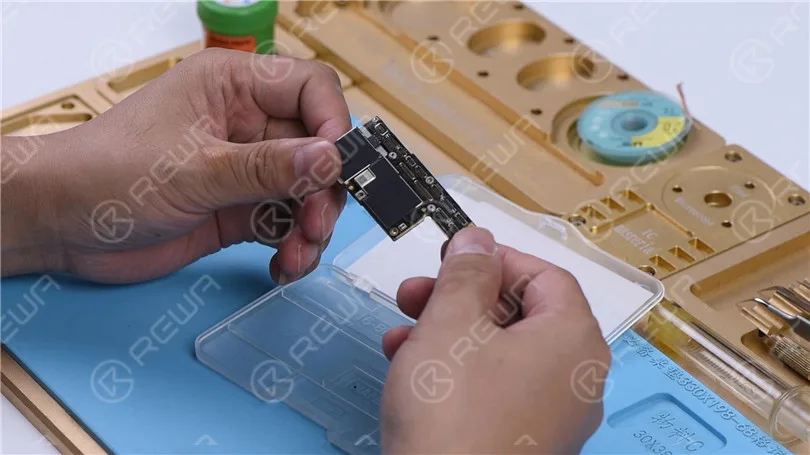
First of all, run a cosmetic inspection of the motherboard. The motherboard is not deformed or water damaged.
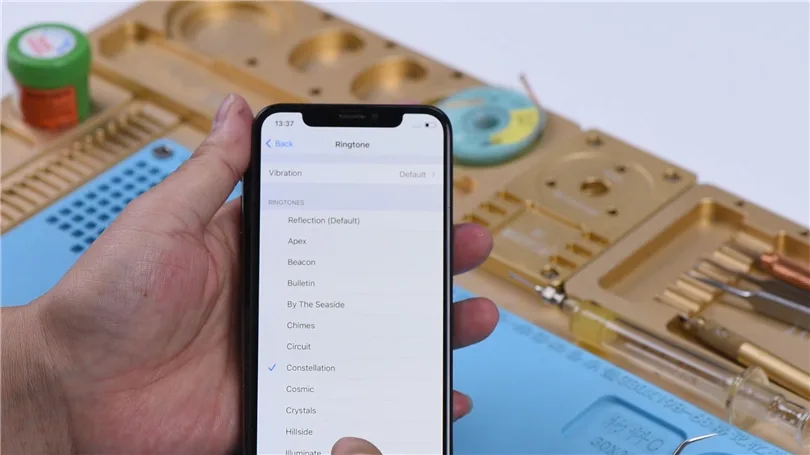
Then we install the motherboard on the phone to test. The phone turns on normally. Go to Settings > Sounds & Haptics. Turn the volume up. Play the ringtones. There is noise in the sound.
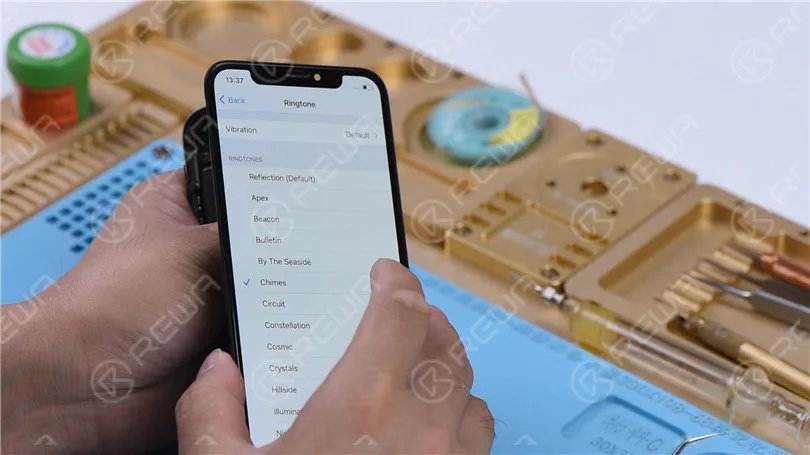
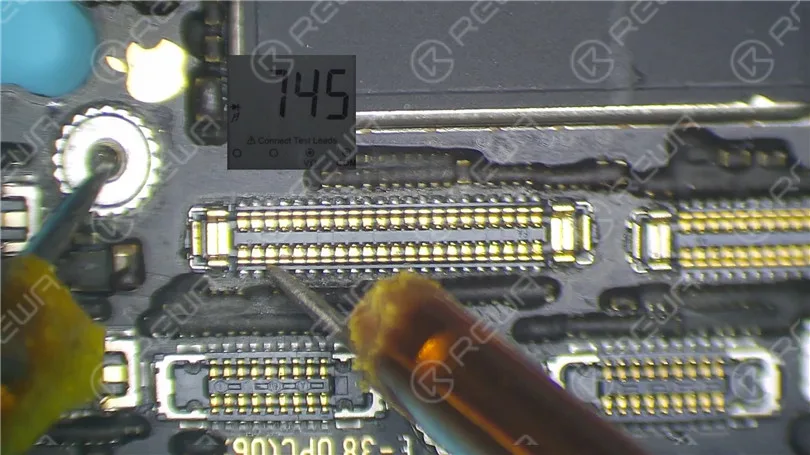
Next, measure circuits that are related to the speaker on the charging port connector.
Turn the phone off. Detach the motherboard. Run diode mode measurement of the pin 1, pin 3, pin 5, and pin 45 on the J6400. The diode values are normal.
Next, we need to separate the motherboard for further testing.
Cut through the shielding paper with a Sculpture Knife. Heat the motherboard on the Heating Platform at 165℃. When the temperature has risen to 165℃, remove the logic board and signal board.
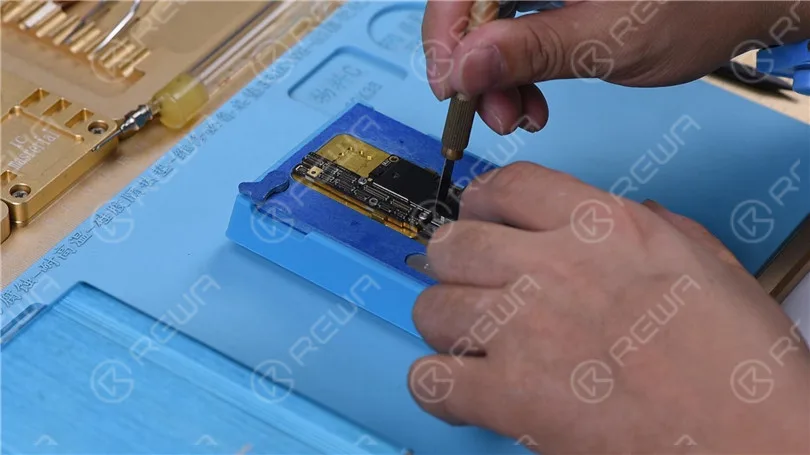
Attach the signal board to the holder. Smear rosin with Soldering Iron at 365℃ and solder wick to remove tin on the bonding pad. Remove tin on the bonding pad of the logic board with the same method.
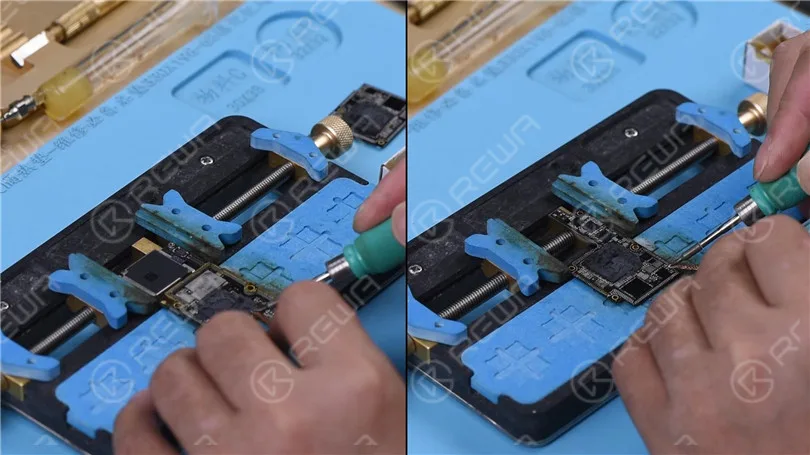
Remove thermal grease with a Sculpture Knife. Clean the motherboard with PCB Cleaner. Attach the signal board and logic board to the Testing Fixture.
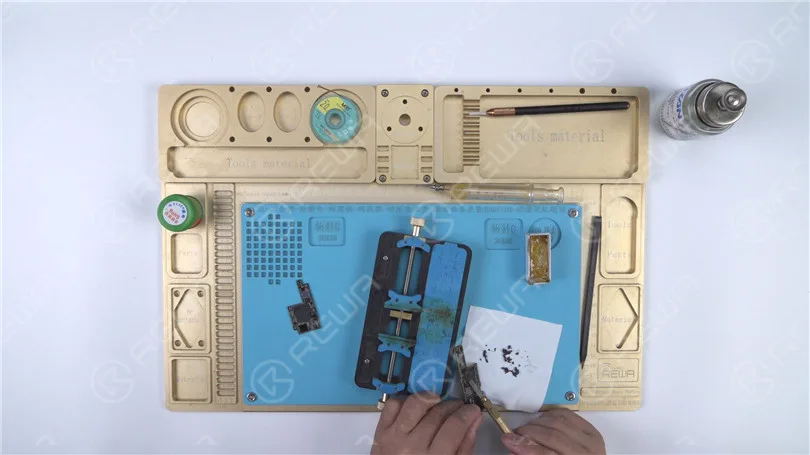
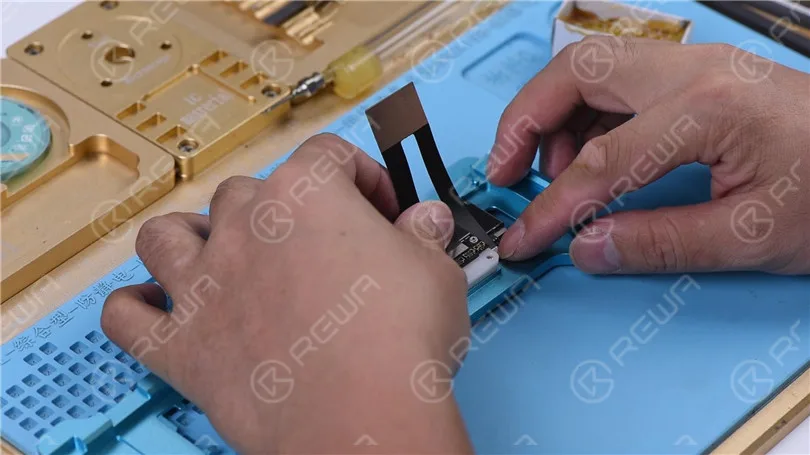
Connect the Test Extension Cable. Close the Testing Fixture. Connect the charging port flex cable. Then connect the battery and the display. Short to the ground of the J4300 pin 9 to trigger the boot-up. The phone turns on normally.
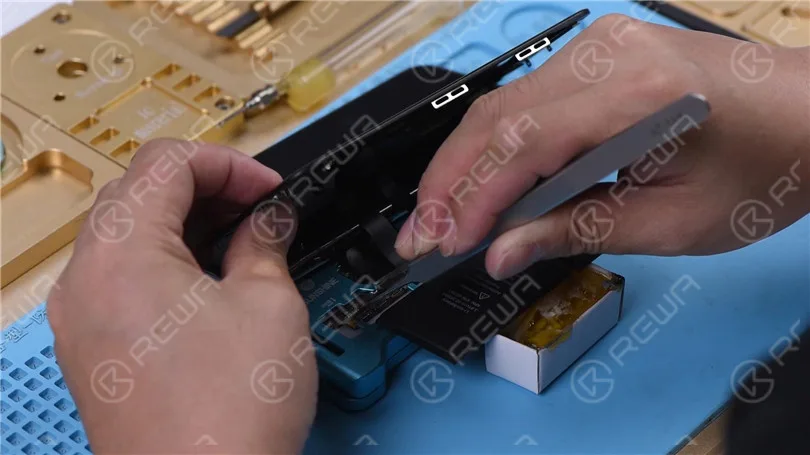
Go to Settings > Sounds & Haptics. The ringtones play normally. It can be judged that the noise is caused by pseudo soldering of the motherboard middle layer. All we need to do next is to recombine the logic board with the signal board. First of all, we need to reball the signal ball. Attach the signal board to the Reballing Platform. Put the Reballing Stencil in position. Apply a layer of low-temperature Solder Paste evenly. Remove the Reballing Stencil.
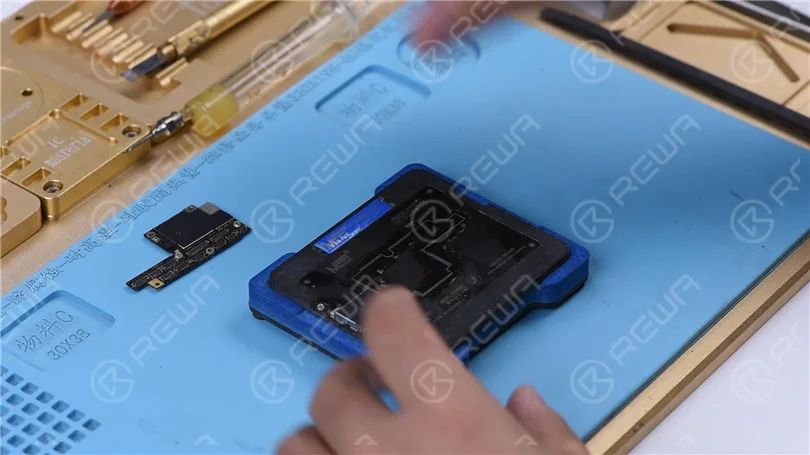
Put the signal board on the Heating Platform. Heat the signal board on the Heating Platform at 165℃. After the solder balls are formed, turn the power off and cool the motherboard for 5 minutes. Apply some Paste Flux. Align the logic board with the signal board. Keep heating the motherboard on the 165℃ Heating Platform. When the temperature reaches 165℃, keep heating for 1 minute. This step is to ensure that the logic board and the signal board fit closely. Turn the power off and cool the motherboard for 5 minutes. Then remove the motherboard.
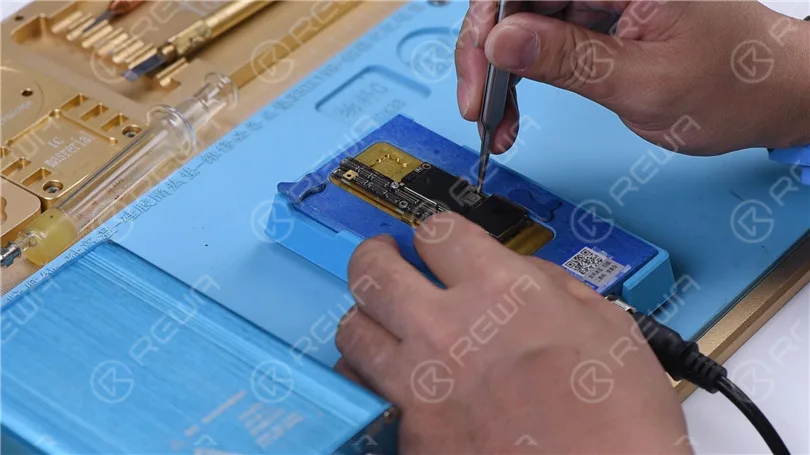
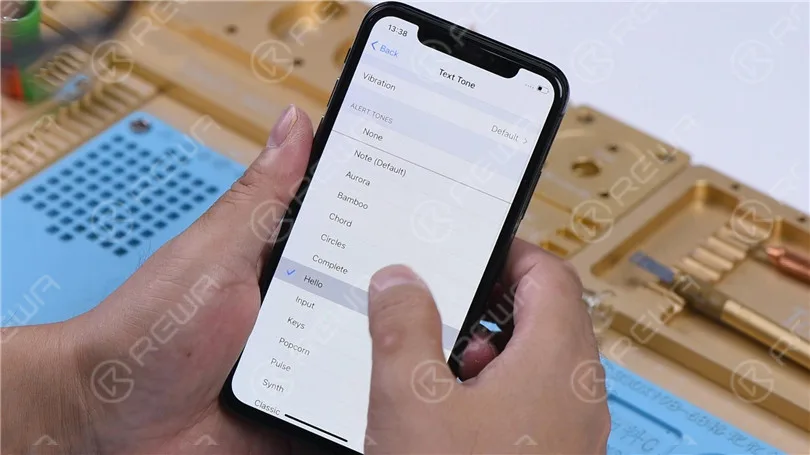
Put the motherboard on the phone. Connect the display and battery. The phone turns on normally. Test the sound. The sound gets back to normal and has no noise.
Conclusion
The sound of the iPhone X was distorted. When measuring circuits that were related to the speaker on the charging port connector by pressing the motherboard with multimeter probes, the diode values were normal and we couldn’t find the fault. But the sound remained normal after we separated the motherboard and tested the motherboard with the holding fixture. Therefore, we could conclude that the noise was caused by pseudo soldering of the motherboard middle layer. The fault was cleared after we recombined the logic board with the signal board.
-
How to clear iPhone 12 Pro Max cache
Some users find storage space more and more insufficient while using. Then how to clear iPhone 12 Pro max cache? Let’s check it out!
1. Clear “Recently Deleted”
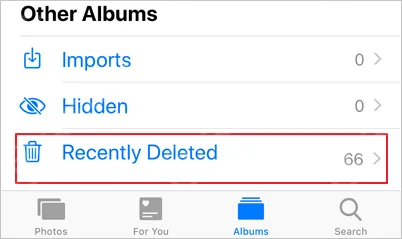
In the “Recently Deleted” album, photos that are deleted within recent 30 days will be stored. Photography hobbyists will stack this part with photos or videos. Regular clearance can be performed according to the actual situation.
2. Clear Safari cache
Go to “Settings” – “Safari” – “Clear History and Website Data” to clear the cache in the Safari browser.
3. Delete Apps that Are Not Used Frequently
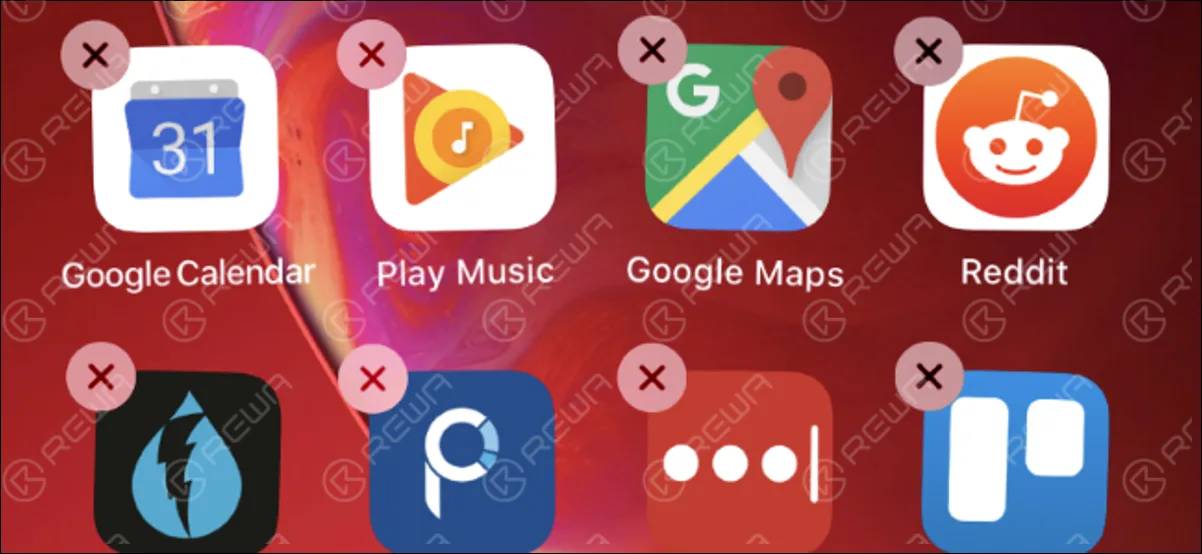
A lot of apps that take up storage space are not used frequently. Users can develop habits to remove this kind of App.
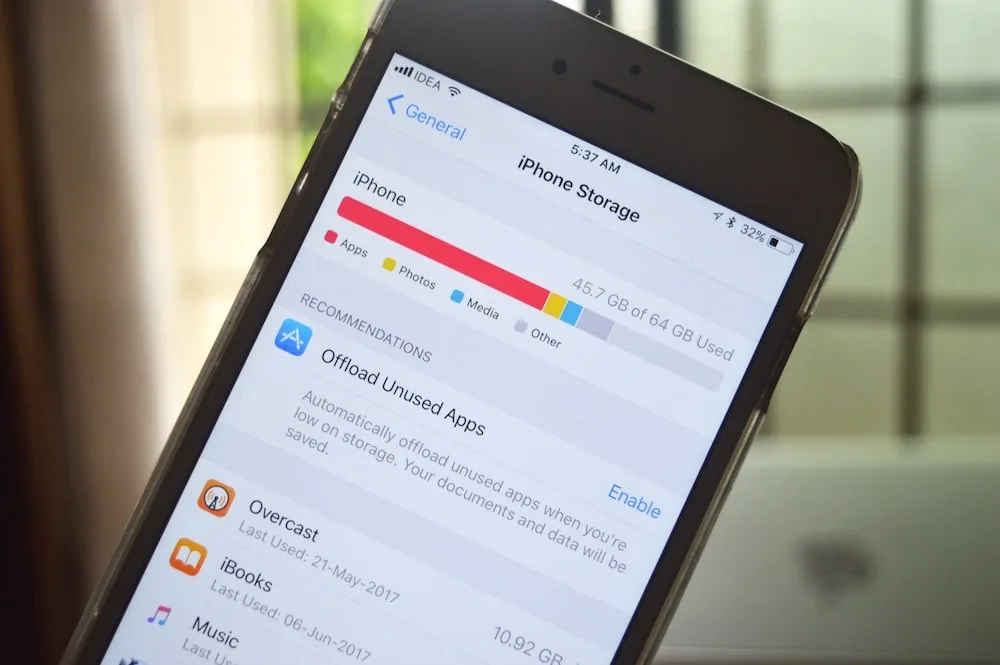
Go to “iPhone Storage”, you can view the storage size of each app. You can choose to delete according to your needs.
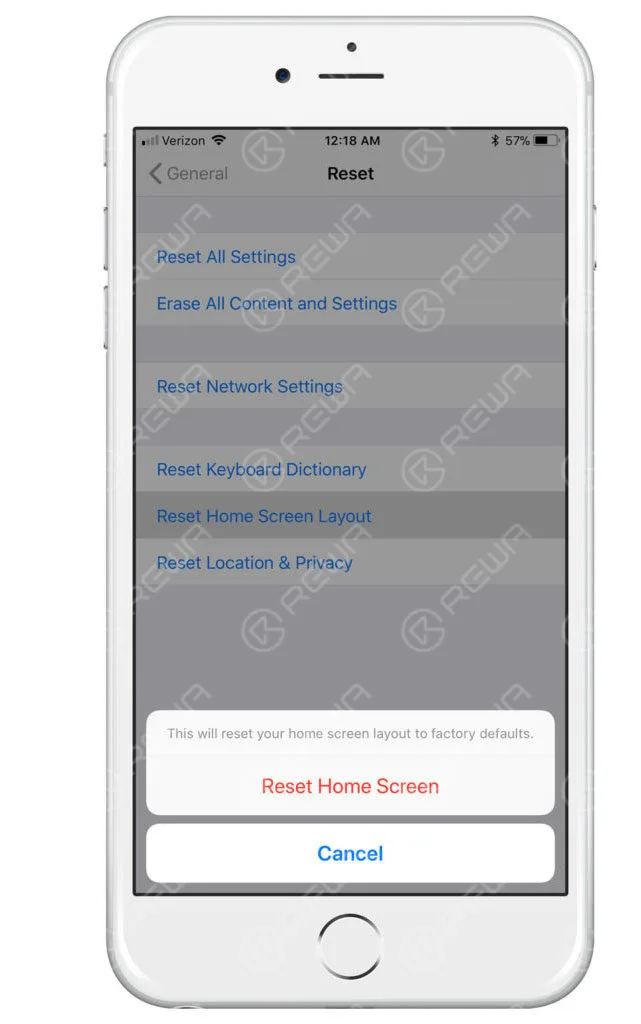
4. Reset the Phone Directly
After the mobile phone is completely reset, the data will be completely removed and the phone will be restored to factory settings.
Tips:
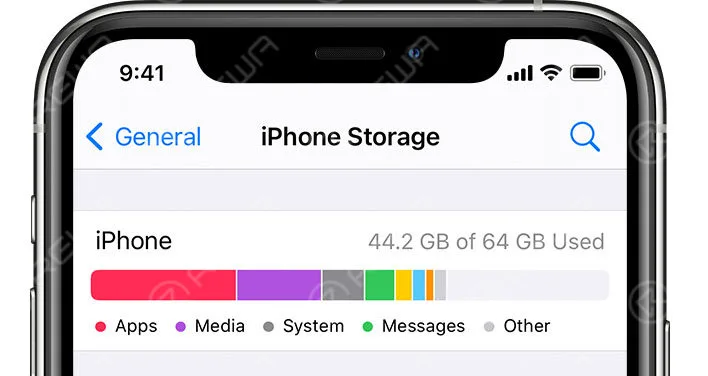
It is recommended to upgrade to the latest system and then clear the cache.
You can also use other applications for backup if there is no sufficient storage space for updates.
-
How to unlock iPhone with Apple Watch when wearing a mask
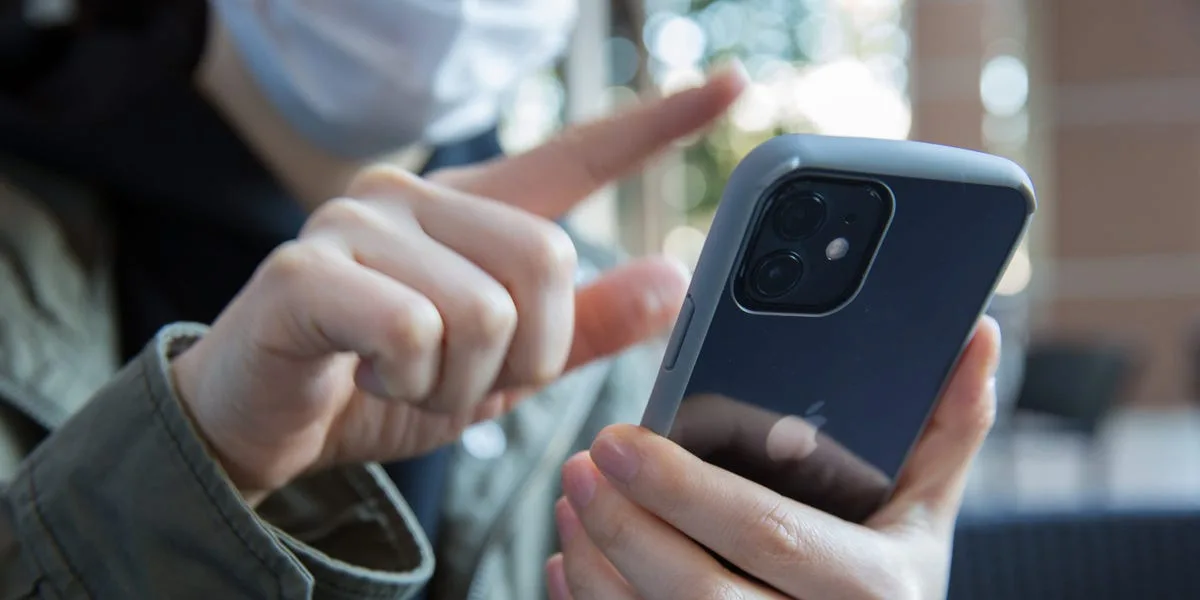
Because of the ongoing pandemic, face masks have created a challenge for iPhone users who rely on Face ID for unlocking their devices. Fortunately, Apple has introduced a convenient solution that allows you to unlock your iPhone using your Apple Watch, even while wearing a mask. In this guide, we will walk you through the steps required to set up this feature on your iPhone running iOS 14.5 and Apple Watch with WatchOS 7.4.
Our lives are now deeply intertwined with smartphones in the digital era. However, the use of face masks during the pandemic has posed a problem for iPhone users who depend on Face ID to unlock their devices. Thankfully, Apple has provided a practical solution that enables iPhone unlocking through an Apple Watch, even when wearing a mask. This guide outlines the necessary steps to configure this functionality on an iPhone running iOS 14.5 and an Apple Watch with WatchOS 7.4.
Describe how to unlock in the configuration app.
Set in “FACE ID and Pass Code” of the setting app
ne and installed WatchOS 7.4 to Apple Watch, if you have installed Apple Watch when wearing a mask, the unlocked function of the iPhone is not enabled.
You need the following settings to use this function.
Enable “Unlock Locking” with Apple Watch
Check the Apple Watch toggle switch to use to unlock the iPhone at “Locking with Apple Watch” in the Configuration App.
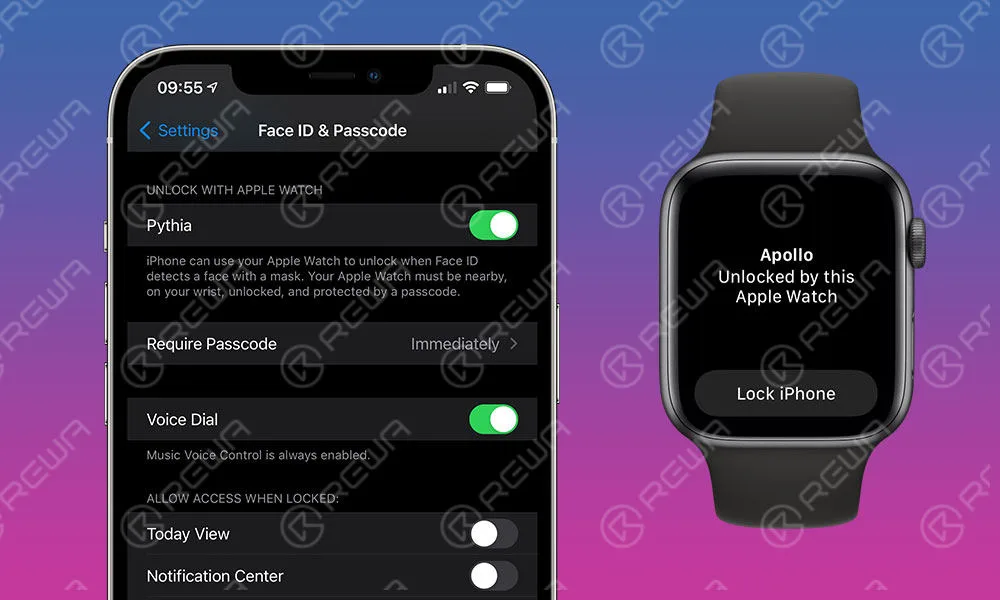
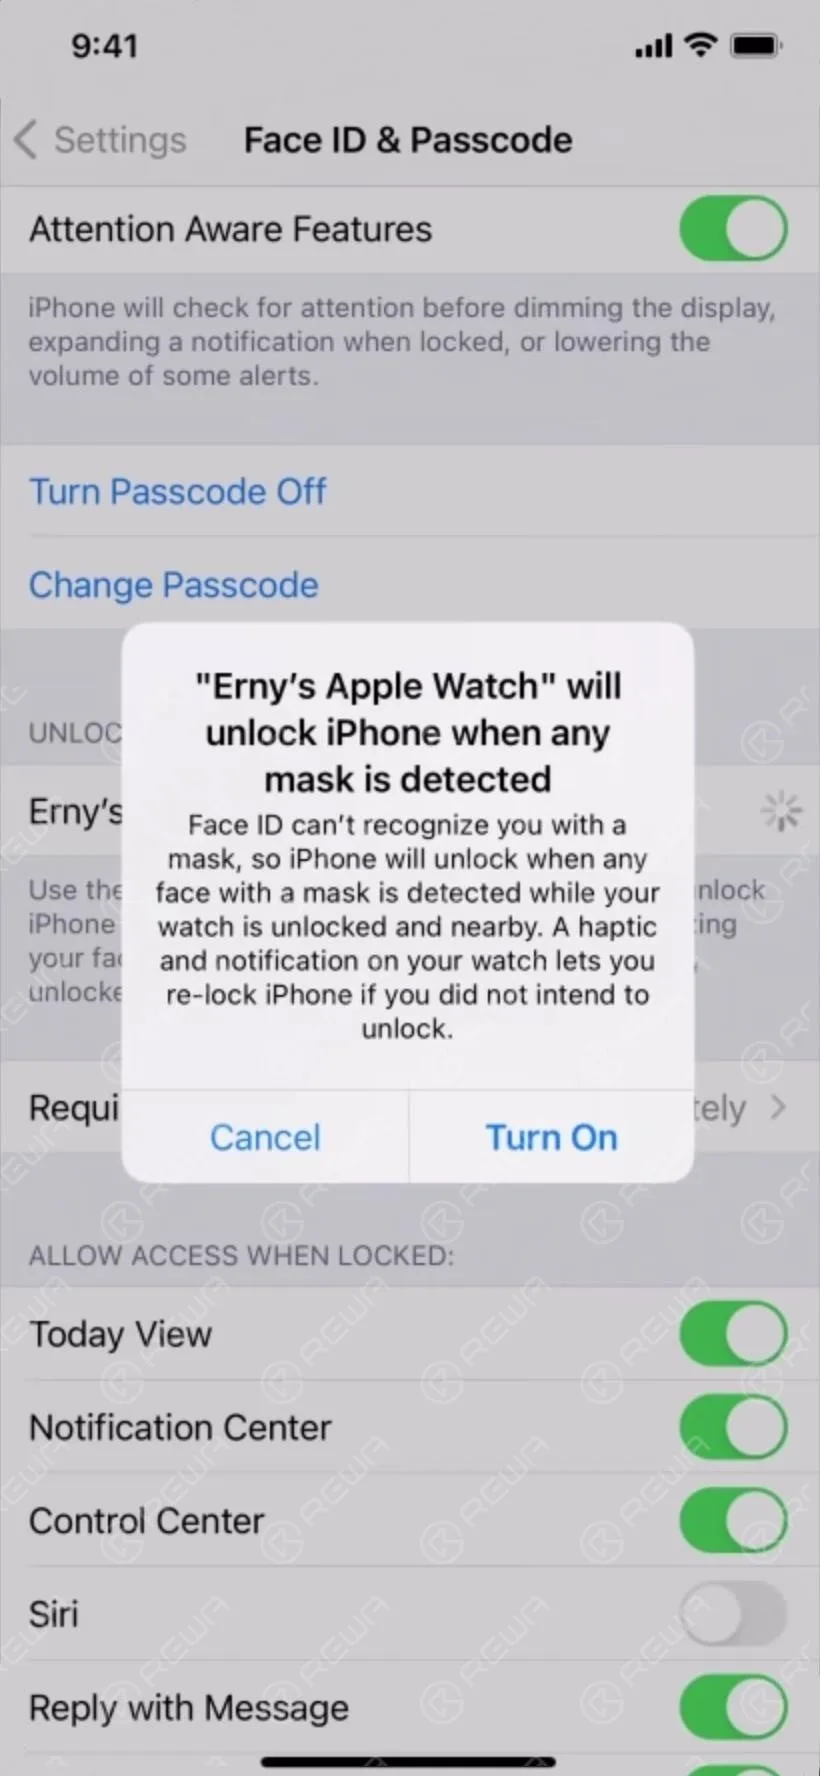
Display message display
You may also enable unlocking at Apple Watch or a confirmation message. If there is no problem, select Turn On.
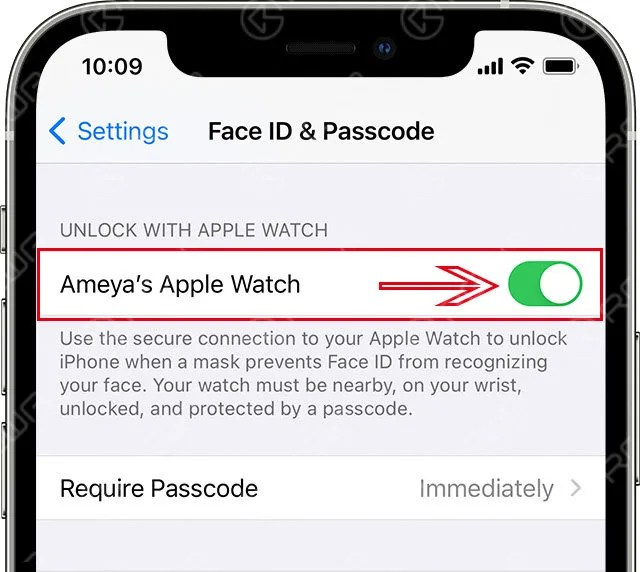
“Unlock unlocked with Apple Watch” is activated
The Apple Watch toggle switch used to unlock the iPhone is turned on.
In the corresponding Apple Watch, if WatchOS is an older version, “Software update is required”,
such as the lower level of Apple Watch below.
Unlock notification in Apple Watch
Wear a mask and wear Apple Watch and gaze the iPhone12 Pro screen.
The iPhone12 Pro has been unlocked with the light vibration of Apple Watch.
Light vibrations when canceled were the same as the vibrations when the MAC lock was unlocked at Apple Watch.
-
iPhone 13 vs. iPhone 12 Battery Life Comparison
Apple dispatched four iPhone 13, iPhone 13 MINI, iPhone 13 Pro, and iPhone 13 Pro Max in 2021, notwithstanding battery development.
It has likewise acquired a ton of enhancements alongside battery upgrades with a longer life battery. Let’s check out the difference compared with the iPhone 12.
Apple iPhone 13 model is indistinguishable from iPhone 12 appearance, the thing that matters is that the iPhone 13 has a thickness of 0.25 mm contrasted with iPhone 12, which is basically impacted by a higher capacity battery and another camera module.
iPhone 13 thickness: 7.65 mm
iPhone 12 thickness: 7.4 mm
iPhone 13 battery capacity is raised, 8% increment in iPhone 13, 9% of iPhone 13 and iPhone 13, where iPhone 13 Pro Max battery capacity is most reached by 18%, yet in addition the iPhone has above 4000mAh huge battery capacity for the first time.
iPhone 13 mini battery capacity is 2406mAh
iPhone 13 battery capacity is 3095mAh
iPhone 13 Pro battery capacity is 3095mAh
iPhone 13 Pro Max battery capacity is 4352mAh
iPhone 13 Comparison of Battery life with iPhone 12
As indicated by Apple’s fully-digital “California streaming” event on September 14, the iPhone 13 Series battery life on fortifying 1.5 hours to 2.5 hours expanded than the iPhone 12 Series, the information is as per the following:
iPhone 13 mini battery life increased 1.5 hours than iPhone 12 mini
iPhone 13 battery life is raised by 2.5 hours than iPhone 12
iPhone 13 Pro battery life to boost 1.5 hours than iPhone 12 Pro
iPhone 13 Pro Max battery life is more than 2.5 hours than iPhone 12 Pro Max
The iPhone 13 series fully enhances battery capacity, and is equipped with 5 nano-enhanced version A15 bionic chips to reduce power consumption, which will make iPhone 13 battery life strengthening.
thickness of 0.25 mm contrasted with iPhone 12, which is basically impacted by a higher capacity battery and another camera module.
iPhone 13 thickness: 7.65 mm
iPhone 12 thickness: 7.4 mm
iPhone 13 battery capacity is raised, 8% increment in iPhone 13, 9% of iPhone 13 and iPhone 13, where iPhone 13 Pro Max battery capacity is most altogether reached by 18%, yet in addition the iPhone has above 4000mAh huge battery capacity for the first time.
iPhone 13 mini battery capacity is 2406mAh
iPhone 13 battery capacity is 3095mAh
iPhone 13 pro battery capacity is 3095mAh
iPhone 13 Pro Max battery capacity is 4352mAh
iPhone 13 Comparison of Battery life with iPhone 12
As indicated by Apple’s fully-digital “California streaming” event on September 14, the iPhone 13 Series battery life on fortifying 1.5 hours to 2.5 hours expanded than the iPhone 12 Series, the information is as per the following:
iPhone 13 mini battery life to increase 1.5 hours than iPhone 12 mini
iPhone 13 battery life is raised by 2.5 hours than iPhone 12
iPhone 13 Pro battery life to boost 1.5 hours than iPhone 12 Pro
iPhone 13 Pro Max battery life is more than 2.5 hours than iPhone 12 Pro Max
The iPhone 13 series fully enhances battery capacity, and is equipped with 5 nano-enhanced version A15 bionic chips to reduce power consumption, which will make iPhone 13 battery life strengthening.
-
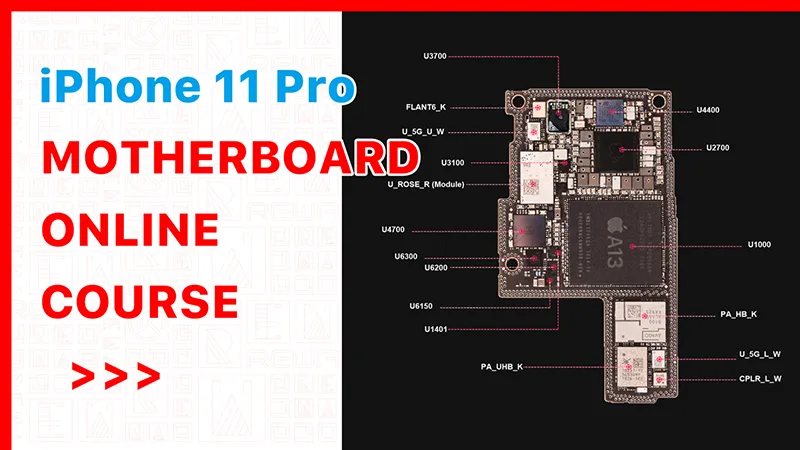
iPhone 11 Pro Motherboard Chips Distribution
After months of development, REWA Academy iPhone 11 Pro online repair course is coming soon, expecting to be launched on 14 May.
Before the course, we will walk you through iPhone 11 Pro motherboard chip distribution.
In the first place, let’s have a brief introduction to this course. In this course, we will learn the below circuit one by one. They’re totally around 14 circuits we should learn together. And for each circuit, there are two parts included. In the first part, we gonna learn the working process of the circuit. And the second part we will learn the troubleshooting process.
So there should be around a total of 30 lessons in this course. And to learn 30 lessons will not cost so much time. So during the learning process if you have any questions and when it’s necessary, you can just stop the video. And go to check the bitmap, and schematics or try to make the block diagram drawings by yourself so that you can know the working process and the troubleshooting process better. And this would be very helpful for your future repair business.
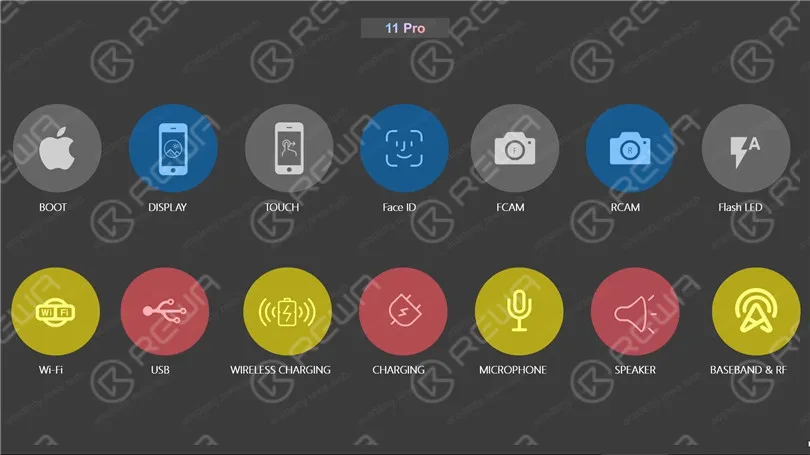
For the very first course, we will not introduce the details of the circuit. We will have an introduction about the motherboard first.
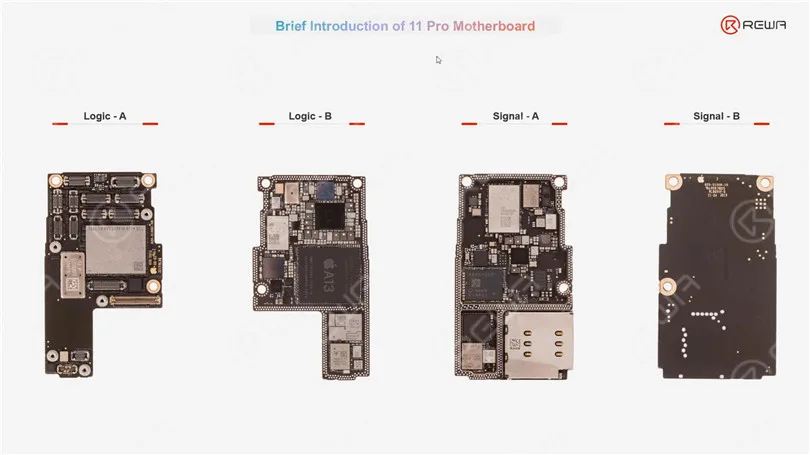
To know the motherboard is just like to know a friend. So let’s try our best to know the motherboard as well as possible. As we can see, the iPhone 11 pro motherboard, it’s just more or less like the iPhone X. It’s with two layers structure. And for the two layers, the upper layer we call it logic board. The lower layer we call it signal board.
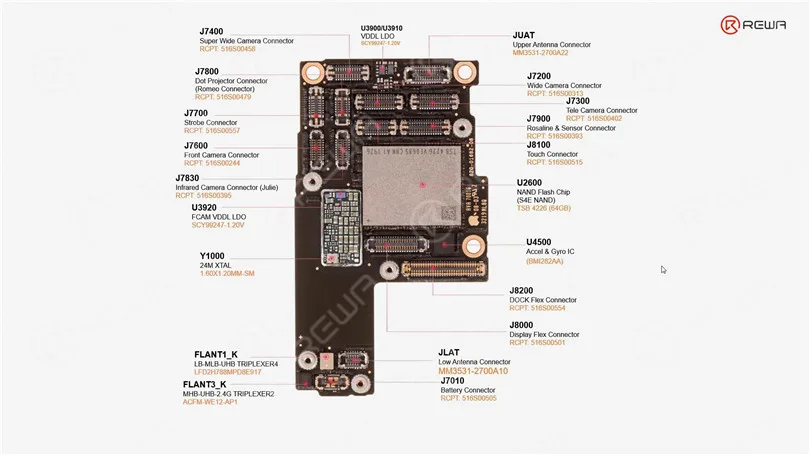
Let’s come to the first layer of the logic board first. There are so many connectors on the logic board. As we know, there are three rear cameras for the iPhone 11 Pro. So these three connectors are related to the rear cameras. The longest one is the dock flex cable connector. Because on the dock flex cable, there are so many functions integrated for example the charging, USB the main microphone, and also some antennae the vibrator, and the loudspeaker. So this connector is the longest.
The Face ID module is mainly related to the Infrared camera, dot projector, and flood illuminator. Rosaline controls not only the flood illuminator but also some sensors like the ambient light sensor and proximity sensor. The PMU is just like the heart of the mobile power supply system. The Face ID power IC, it’s mainly responsible for the power supply of the Face ID modules.
The tiny chip is Boost IC. It’s used for providing the PP_VDD_BOOST which is an essential power supply for many components. So if this one gets damaged, the phone cannot boot up. UWB is short for Ultra Wideband power supply. Audio CODEC IC is mainly responsible for the control of the audio-related circuit like the microphone circuit, speaker circuit, or vibrator circuit. USB IC is very important for charging data transforming or accessory identifications, etc. EEPROM’s very important for data recovery.
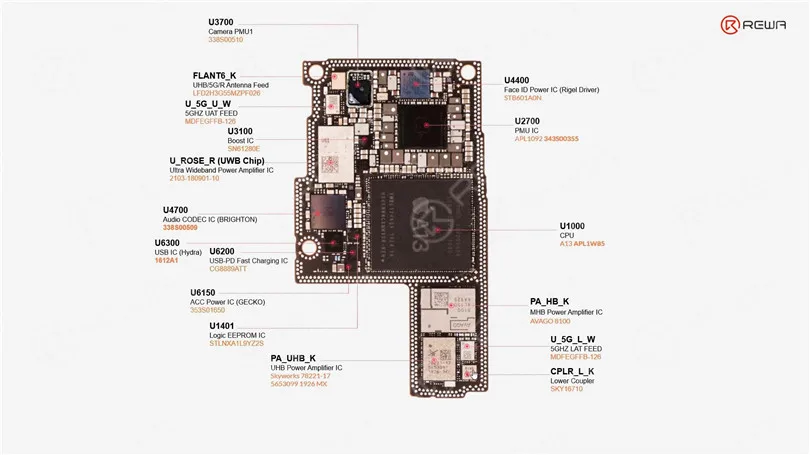
OK, so let’s continue. (On the signal board) The chips are many related to the Wi-Fi, the RF circuit, the Baseband, the NFC
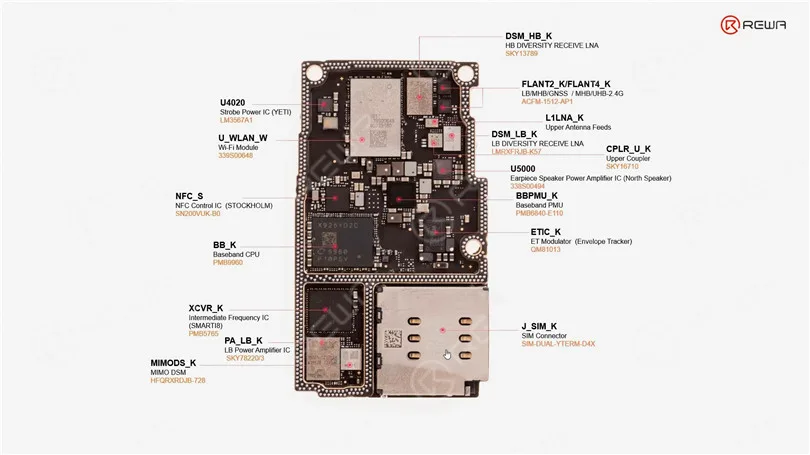
Sometimes we can know the function of the chip from the name, right? For example, CPLR means coupler. Strobe flash IC controls the power supply for the LEDs. Baseband PMU is responsible to supply power for the Baseband CPU. ET here is short for the envelope tracker. It’s also an important chip for the RF circuit which supplies power for the power amplifier ICs the DSM chips, etc. MIMO here means multiple inputs and multiple outputs, it’s also related to RF circuit. And on another side of the signal board. There are many test points
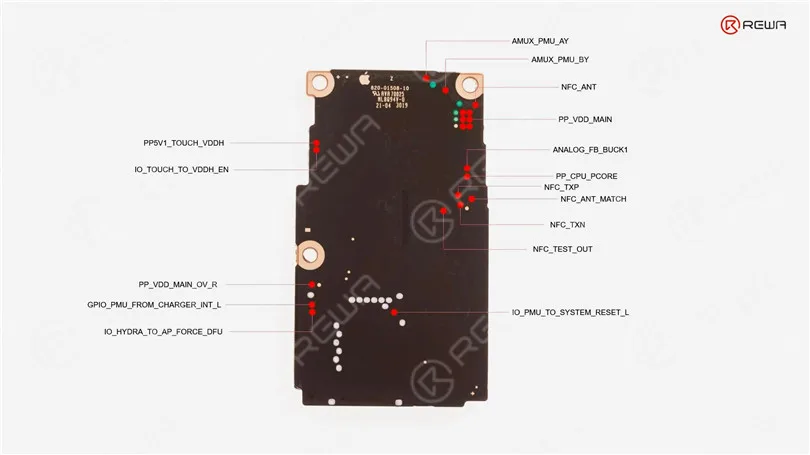
Watch the video to see iPhone 11 Pro chips distribution in detail.
Pre-order the iPhone 11Pro motherboard repair course now to get a 20% discount. (Limited offer: 28, Apr – 13, May)
-
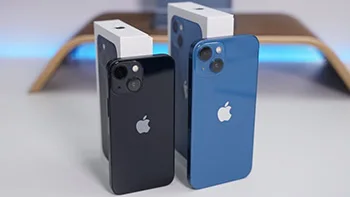
iPhone 13 Mini Battery Capacity Introduction
How much is the iPhone 13 mini battery capacity
battery capacity
iPhone13mini: 2406mAh battery + 25W fast charge, 90 minutes longer than iPhone 12mini
Magsafe wireless charging (up to 15 watts), QI wireless charging (up to 7.5 watts)
Configuration parameters
1.Screen
iPhone 13 Mini uses a 5.4-inch 2340 * 1080 goal outline xdr show, the notch is contracting 20%, upholds the true tone repair, DCI-P3, HDR display, AssistiveTouch, and so on, 476ppi, regular pinnacle splendor 800nit, HDR top brilliance 1200nit, no high brush.
2. Fire
Three surroundings 131.5 * width 64.2 * thickness 7.65mm, weight 140g, Ceramic Shield front, Glass back and aluminum design, support IP68 dustproof waterproof.
3. Color
Pink, blue, midnight color, starlight, red total 5 color matching
4. Camera
iPhone 13 MINI has a 12 megapixel TrueDepth Camera in front, the back twofold test 12 megapixel wide-point primary photograph + 12 million pixel very wide-point focal point, utilizing another 1.7μm sensor, the measure of information is 47%, while iPhone 12 Pro Max Sensor uprooting picture against shake work is decentralized, new video encoder, new “Photographic Styles” and new film impact design support portable help center transformation, 1080p30fps shallow profundity of field video shooting, and can shoot up to 4K60FPS Dolby Tuni-Turkey HDR video Wait.
5. Chip
A15 Bionic chip New 6‑core CPU with 2 performance and 4 efficiency cores New 4‑core GPU New 16‑core Neural Engine
The above is about how much the iPhone 13mini battery capacity is introduced.
-
What Should I do if iPhone is Running Slowly or Crashing?
If you find that your iPhone is running slowly or crashing, it may be caused by the following reasons, you can gradually check and try to solve the problem.
iPhone running slowly Check network conditions
Many apps on the iPhone need to connect to a fast network to function properly. If your connection is congested, the app may take some time to open or display the corresponding content. When you sit in a vehicle that is driving, the device will continue to reconnect the new signal tower, so it may look slowly.
This situation is better to determine, such as web refresh, slow or unable to display pictures, at which point you can wait patiently or try to replace a faster network.
If the app is not responding or crashing
If an App stops responding or crashes, you will need to force shutdown this app in the background and open it again.
After re-opening, the application still does not respond or crash. The applications are likely not compatible with the system. You can try to go to the App Store to update application, or consider deleting applications to re-download.
Make sure the iPhone has enough storage space
You can check the storage space of the device in “Settings” – “General” – “[Device] Storage Space”. To achieve optimal performance, try maintaining at least 1GB of available space. If the available storage space is less than 1GB, the speed of the device may slow down because iOS needs to make space to store other content.
If you need to release some space, follow these steps to open iOS built-in storage space Savings Suggestions:
1.Go to “Settings” – “General” – “[Device] Storage Space”, then read the iOS possible suggestions.
2. Tap “Enable” to open the suggestion, or tap the title to view the content you can delete.
If you have not seen any suggestions, or you need to release more space, you can view the app on the device. “[Equipment] Storage Space screen will list these apps directly, and it will also display the size of the space occupied.
Tap an app, you can choose from the following options:
1. Uninstall the app to release the storage space occupied by the app, but retain its documents and data.
2. Delete the APP that is no longer needed to remove the app and its related data.
Please note that if the storage space will be full:
When the iPhone storage space is full and runs very slowly, don’t try to restart your device immediately, it may cause the device to be stuck in Apple logo. Please do not use the device for the time being, waiting for its own available space, then back up your data immediately, and clean up the iPhone storage space to make more space.
Avoid overheating the equipment or too cold:
If the device becomes overheated due to the external conditions (for example, the device is left in a very high temperature, or if it is used for a long time in direct shooting), iOS will adjust the performance of the device. Move the device to a cool place so that it adjusts the temperature.
The very low temperature will also make the running speed of the device slow down. If the device is slow to run in a cold environment, move it to a relatively warm place.
Check battery health:
All rechargeable batteries are consumption components. With the growth of battery-level age, the performance of the battery will decrease. With the increase of the use time, the capacity and peak performance of the rechargeable battery in all iPhone models decline, and eventually needs to be replaced. iOS can display battery health and will prompt to replace the iPhone battery. Please go to “Settings” – “Battery” and tap “Battery Health”.
If “Battery Health” is as low as 80% or less, it is recommended to replace the battery to get a better experience.
Test if the touch screen is normal:
If the touch screen does not respond properly, it may make the device look slow. If you think the touch screen does not respond correctly, try restarting your iPhone. If this doesn’t work, and multiple Apps have this problem in the same area of the screen, then you can visit REWA Academy for help.
-
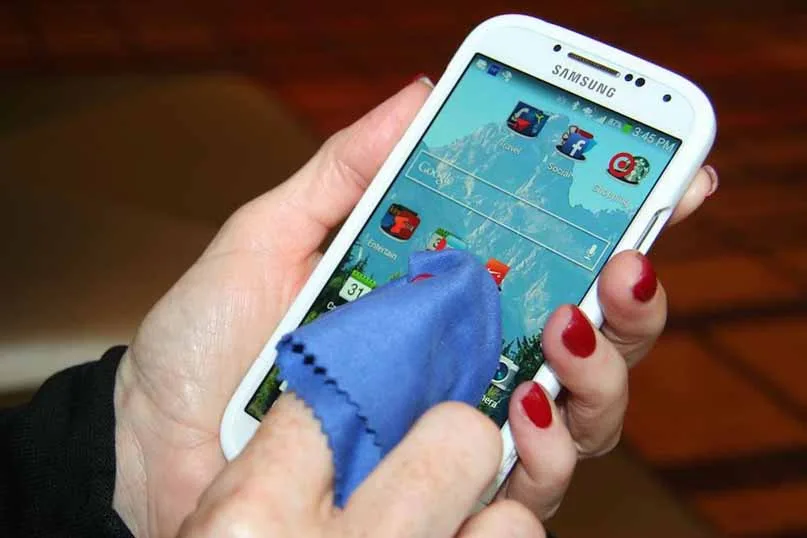
How to Safely Clean Your Smartphone or Tablet Touchscreen?
Cleaning the touchscreen of your smartphone is a simple task that doesn’t require a special cleaning kit or cleaning solution. You can use materials that you probably already have to safely clean your tablet or smartphone’s touchscreen. However, it’s important to know what to avoid as many common types of cloth and cleaning solutions can damage the touchscreen. In this guide, we will provide you with a step-by-step method to safely clean your smartphone touchscreen.
Cautions: What to Avoid
Before we dive into the cleaning process, it’s crucial to understand what you should never do when cleaning your smartphone or tablet touchscreen:
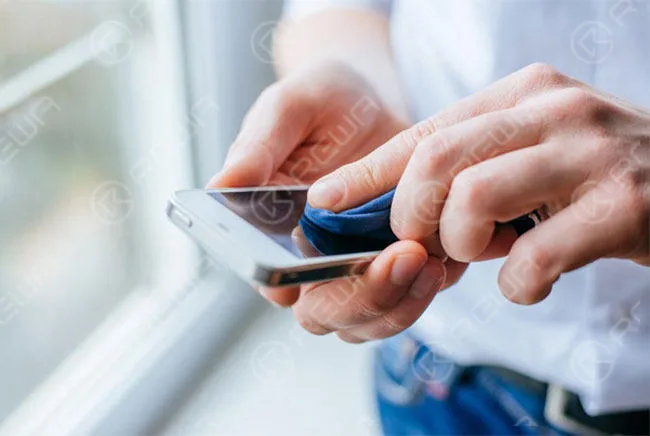
Avoid Harsh Chemicals
It is important to never use harsh chemicals like Windex, ammonia-based cleaners, or alcohol-based solutions when cleaning your screen. These chemicals can cause damage to the screen. If you need to use a liquid, only use a small amount of water on a cloth. You can also purchase special cleaning solutions, such as iKlenz, which is recommended by Apple.
Steer Clear of Abrasive Materials
To avoid scratching the touchscreen, it is important not to use abrasive cloths, paper towels, or tissue paper. Even small scratches can build up over time and ultimately damage and dull the screen. Instead, it is recommended to use microfiber cloths which are specially designed to clean sensitive surfaces.
Limit Water Usage
Avoid using excessive water on your device. If water is necessary, make your microfiber cloth slightly damp, but don’t apply water directly to the screen. It’s a good idea to power off your device before cleaning if water is involved.
Don’t Apply Excessive Pressure
When cleaning your device, remember to be gentle with your touchscreen to avoid damaging it.
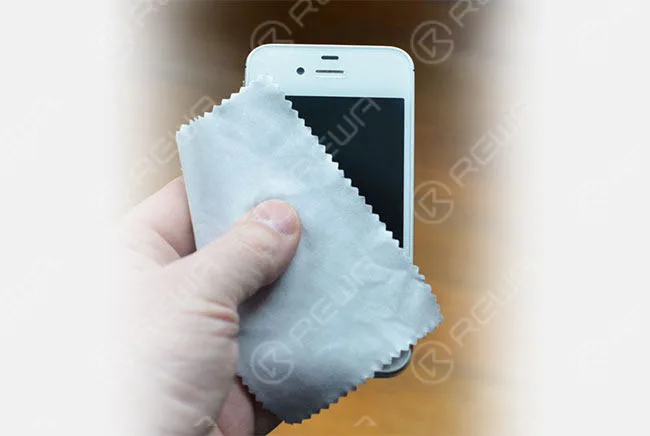
It’s important to note that the cleaning process will differ if you have a screen protector on your device. The method described below is specifically for cleaning glass screens. However, if your device has a plastic screen protector, you have more flexibility and can use different types of cleaning solutions.
Getting Started
To clean your touchscreen, you’ll need a few simple items:
Microfiber Cloth
One of the best tools to use for cleaning is a microfiber cloth. These cloths are designed to clean sensitive glass surfaces without scratching them. For cleaning a touchscreen, a microfiber cloth is all that is needed. Although the term “microfiber cloth” may sound fancy, they are actually very common and inexpensive. Most people have a pair of eyeglasses that come with a microfiber cloth for cleaning the glasses. This cloth can be used to safely clean sensitive glass surfaces without scratching them, such as those found on a touchscreen device.
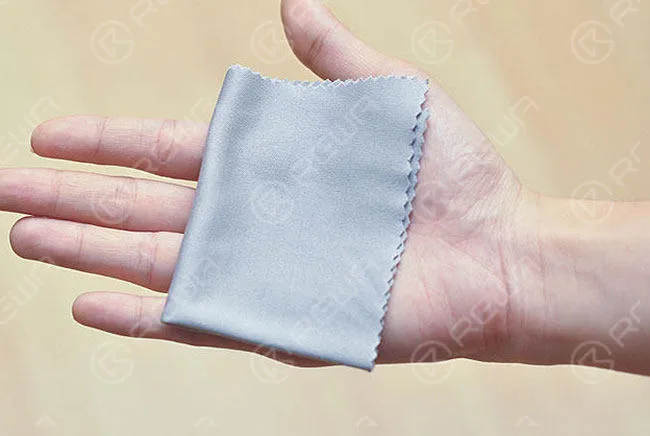
Microfiber cloths are designed with very small fibers that won’t scratch your touchscreen. They also attract dust and oils, pulling them off your device’s screen instead of rubbing them around the screen. You may also have received a microfiber cloth with another device. In case of an emergency, you can use kinds of cotton, such as cotton cloth or the corner of a cotton t-shirt, but this won’t work nearly as well. With just a few quick wipes using a microfiber cloth, your device’s screen will be clean and clear in no time.
Water
For dirty screens, you may need a small amount of plain water. Avoid using soap or other cleaning agents.
The Cleaning Process: Now that you have the right tools, let’s walk through the steps to safely clean your touchscreen:
How To Clean a Touch Screen
Now that you have the appropriate cloth to clean your screen, the process is very simple:
Turn off the device
This step is optional but recommended, especially if you plan to use water. It makes it easier to spot dirt and prevents potential issues.
Wipe Horizontally or Vertically
Using the microfiber cloth, wipe across the touchscreen in one repeating direction. For instance, start from the left side and wipe straight to the right. Then, move the cloth lower and repeat until the entire screen is clean. This motion prevents rubbing dirt onto the screen.
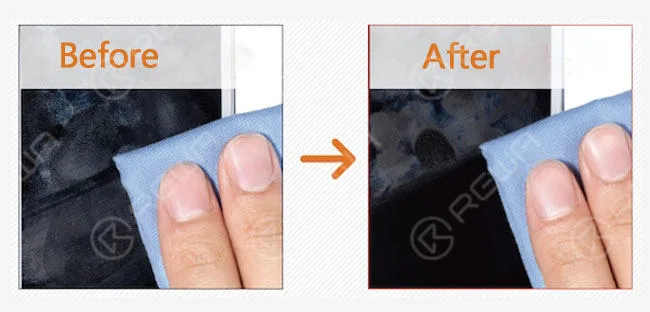
Use a Damp Cloth (if necessary)
If stubborn grime remains, dampen a corner of the cloth with a small amount of water (no soap). Clean the screen in the same way. In some cases, you may need to use a circular motion for challenging spots.
Dry the Screen
After cleaning, use the dry part of a microfiber cloth to dry the screen lightly. Allow the remaining water to air dry, avoiding aggressive drying with the cloth.
Clean the Microfiber Cloth
Periodically clean the microfiber cloth by soaking it in warm, soapy water, rinsing it thoroughly, and letting it air-dry. Avoid using harsh chemicals that can damage the cloth.
Additional Tips:
- While you can purchase specialized cleaning kits, a microfiber cloth and water are often sufficient.
- Regular handwashing can prevent excessive oil and smudges on your touchscreen.
Conclusion
Cleaning your smartphone or tablet touchscreen is a straightforward process when you know the dos and don’ts. For more tips on maintaining your tech devices, check out our guide to cleaning keyboards, mice, computer fans, and LCD monitors. How do you prefer to clean your touchscreen gadgets? Share your cleaning tips in the comments below!
-
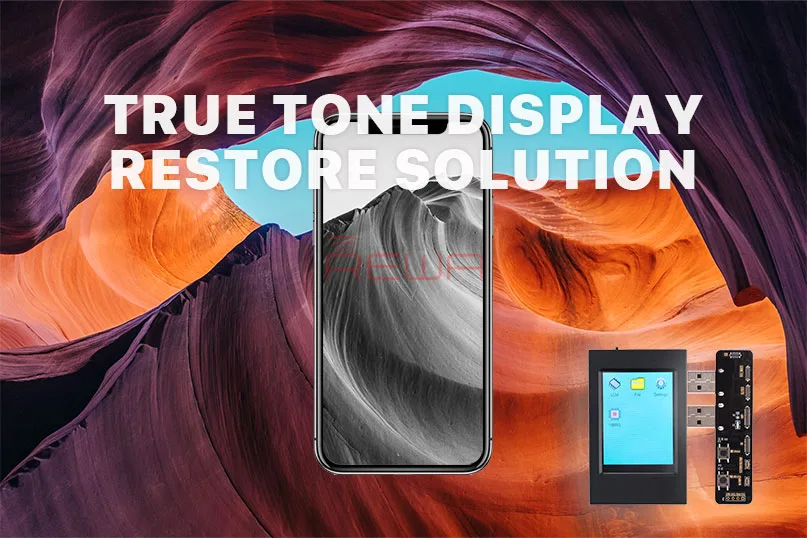
Introduction of True Tone EEPROM Programmer
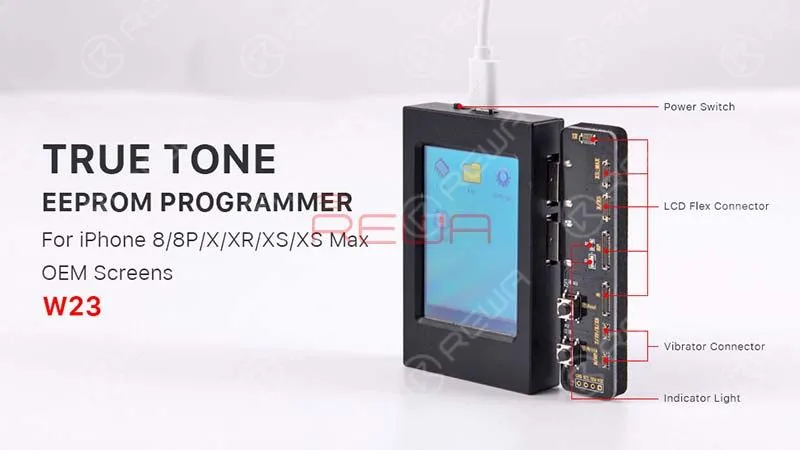
Today we are going to introduce a new repair tool for all repair technicians – True Tone EEPROM Programmer.
Market Demands
The True Tone option appears under Settings > Display and Brightness.
When enabled, it automatically adjusts the screen’s color and intensity to match the ambient light and reduce strain on the eyes.
The latest iOS 12 update did a terrific job in boosting the performance of iPhones and iPads.
For the aftermarket mobile phone repairer, the iOS 12 was not so perfect.
Because some users complain that the True Tone option disappeared after upgrading to iOS 12.
The affected models including iPhone 8, 8 Plus, X, XS and XS Max.
Many users suggest that the problem has something to do with whether the device has an OEM display, an aftermarket display, or the original display that has never been replaced.
According to this situation, REWA did a series of tests for certifying. And that’s why we are going to introduce this True Tone EEPROM Programmer today.
To begin with, we replaced the iPhone XS original screen with an OEM one.
And the True Tone option disappeared after screen replacement, while it was back there with the original screen installed.
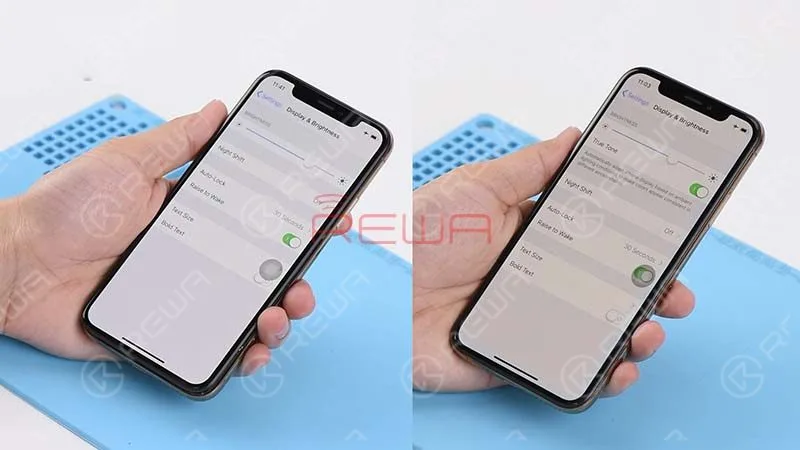
Then we programmed the OEM screen with this EEPROM tool.
And installed the screen again to test. The true tone option re-appeared on the screen.
This is really good news for all the repairing technicians.
Application
The practical purpose of this EEPROM programmer covers restoring of true tone, ambient light sensor, touch screen, vibrator and read/write of the data. What’s more, the programmer is appropriate for iPhone models from iPhone 8 to iPhone XS MAX.
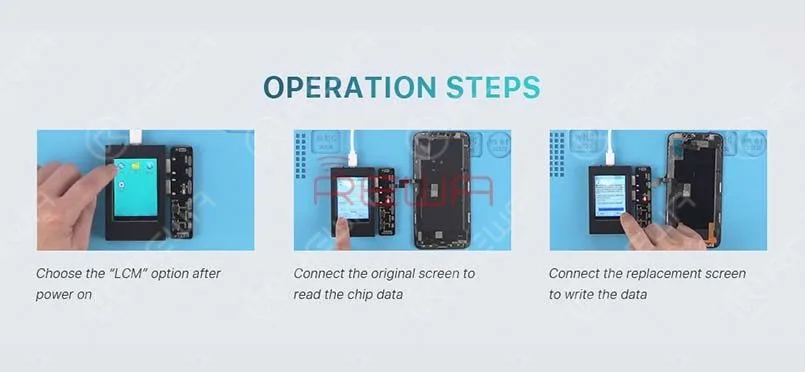
The operation is very easy. Only 3 steps to go.
- 1. Power on the device. And choose “LCM” option on the screen.
- 2. Connect the original screen with the corresponding connector, and click “read ” to read data from the original screen.
- 3. Connect the replacement screen to the corresponding connector, and click “write” to write the data into the replacement screen.
Get the true tone function back with this EEPROM programmer. And video tutorial guide is available.REWA new online store(shop.rewa.tech) is available now, you can see the price and detail of each product. Shipping fees as well. Welcome to check. Any suggestions and questions please feel free to contact sales@rewatechnology.com.
-

iPhone Bezel Glue Dispensing Machine

A brand new Bezel Glue Dispensing Machine designed for Professional Solution is available now!
This cell phone broken LCD refurbishing machine is based on Hot Melt Glue and high temperature. The easy operation Intelligent program allows it to achieve volume production. And it comes with iPhone 4, 4s, 5, 5c, 5s, 6, 6 Plus, 6s, 6s Plus Molds.
specification :
- Voltage: 220V
- Power: 800W
- N.W.: 40KG
- G.W.: 63KG
- Dimension: 65x53x71cm
- Working Environment: 20-30℃, Dust-free Room
operation steps :
- 1. Connect to the air compressor and put bezel glue into the Heating Drum
- 2. Plug in and turn on
- 3. Establish the right program to the right series bezel
- 4. Temperature set 220℃(no higher than 280℃), pressure set 0.5Mpa
- 5. Place the bezel on the mold, then start the machine, it will finish by itself. (Note: Add one pc bezel glue after finish 200 pcs bezel every time; test the machine by checking whether glue dispensing is fluent or not).
Tips:
- a. Test the machine by checking whether glue dispensing is fluent or not.
- b. Hot Melt Glue should be added the second time after you have done a certain number of bezel frames(100-200pcs), so as to avoid the blockage of the needle.
You can check our other posts:
 English
 Español
 Français
 Deutsch
 Italiano