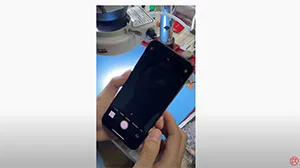
iPhone XS Max black screen when using a telephoto lens. We found it was caused by one of the wires which connect rear camera parts to CPU. After making jumper wires, the fault has been cleared.
Tag: iphone
-
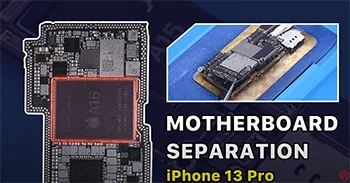
iPhone 13 Pro Motherboard Separation – The Hottest CPU?
In our last video, we did a teardown on iPhone 13 Pro. Today we will separate the motherboard of iPhone 13 Pro to share motherboard differences and repair difficulty. In the meantime, we will walk you through how to separate and recombine the motherboard.
-

One for All NAND Read & Write Programmer is Coming
One for ALL NAND Read & Write Programmer is Coming! Models support iPhone 6-11 Pro Max, iPad and iPhone SE 2020. One Click for Purple Mode and NAND Read & Write.
-
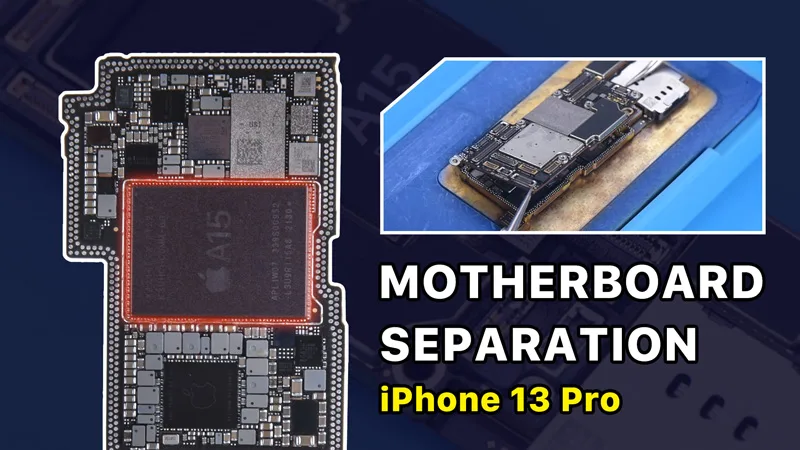
iPhone 13 Pro Motherboard Separation
In our last post, we did a teardown on iPhone 13 Pro. Today we will separate the motherboard of iPhone 13 Pro to share motherboard differences and repair difficulty.
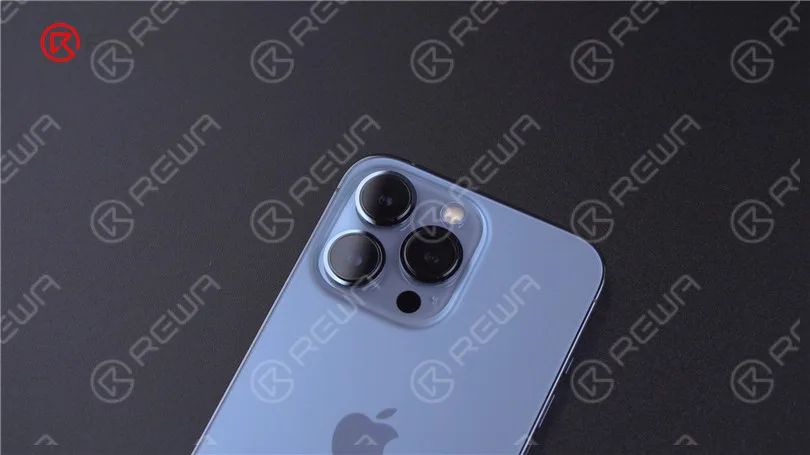
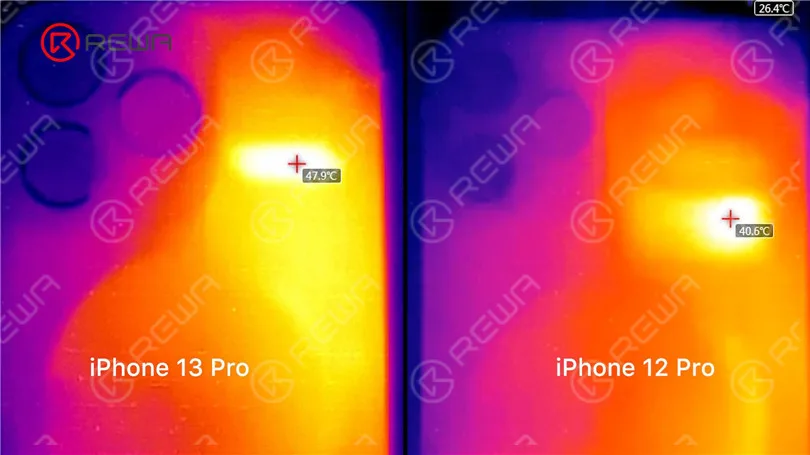
In the first place, we benchmark iPhone 13 Pro and iPhone 12 Pro at the same time. Through LINCSEEK Infrared Thermal Camera, it is found that iPhone 13 Pro gets hotter than iPhone 12 Pro.
iPhone 13 Pro can reach a maximum temperature of around 48 °C while the maximum temperature of iPhone 12 Pro is around 40 °C.
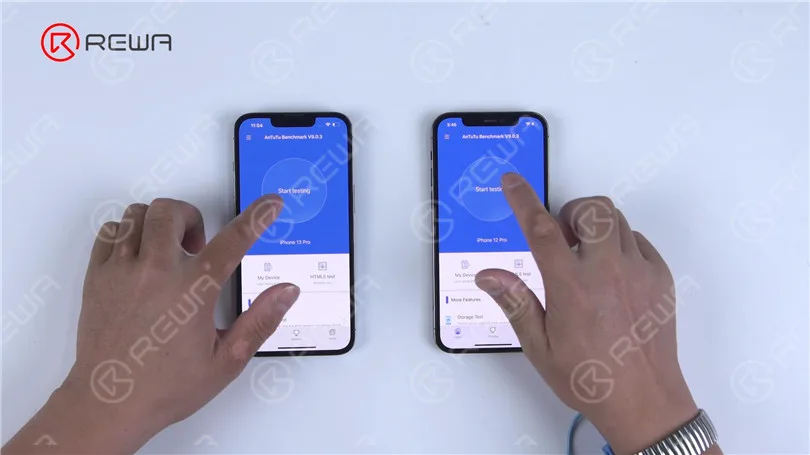
Then we separate the motherboard of iPhone 13 Pro to view its interior structure and find out what has caused the overheating. In the meantime, we will walk you through how to separate and recombine the motherboard.
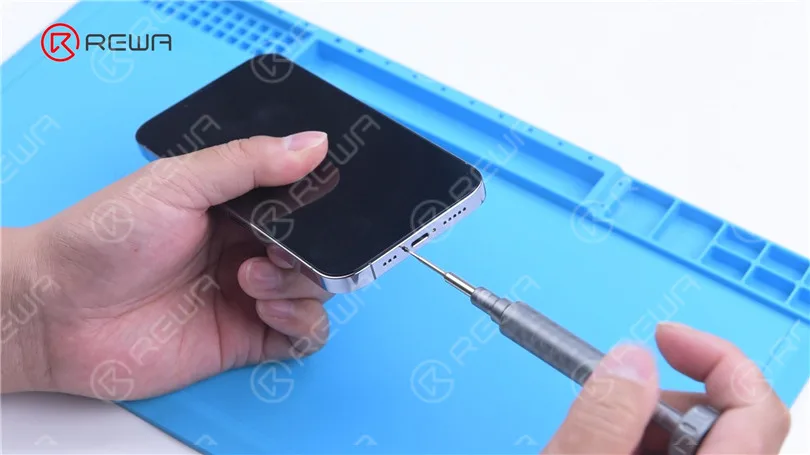
iPhone 13 Pro’s motherboard is designed to be more compact to leave more room for the battery. Furthermore, the motherboard no longer uses an L-shaped design.
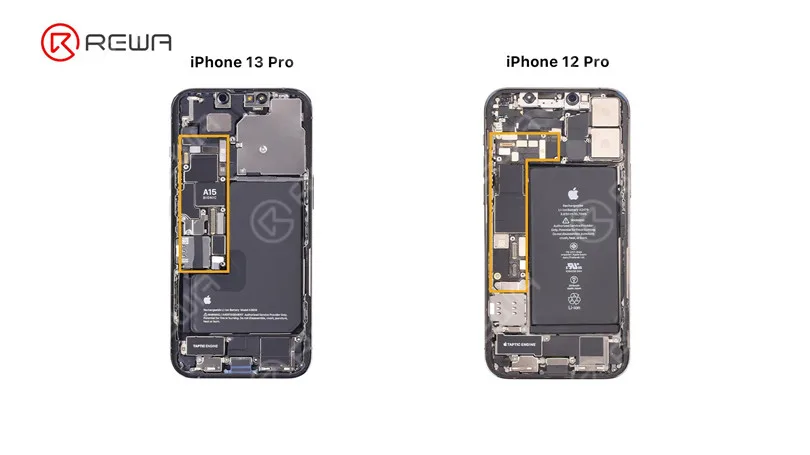
Remove the motherboard. The double-layered design is still used. SIM card reader is not stand-alone and is welded to the motherboard.
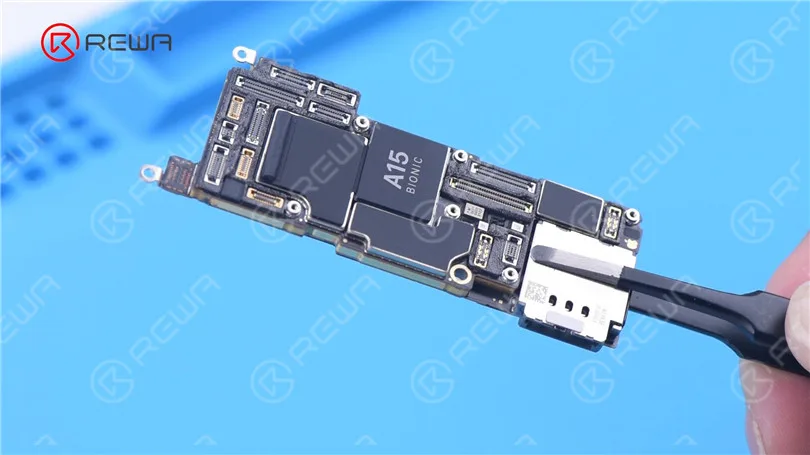
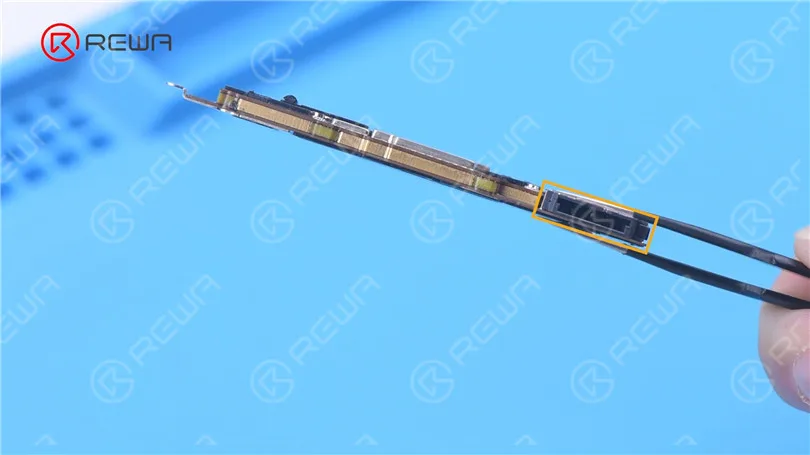
For better heat dissipation, both sides of the motherboard are covered with thick heat dissipation tapes.
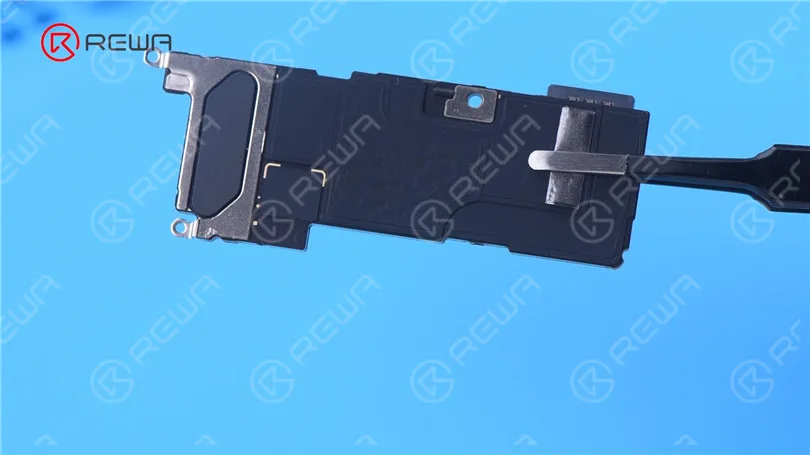
Then we remove foam on the motherboard. Remove tape on the motherboard with Hot Air Gun at 100 °C. It can be seen that NAND is under the A15 tape.
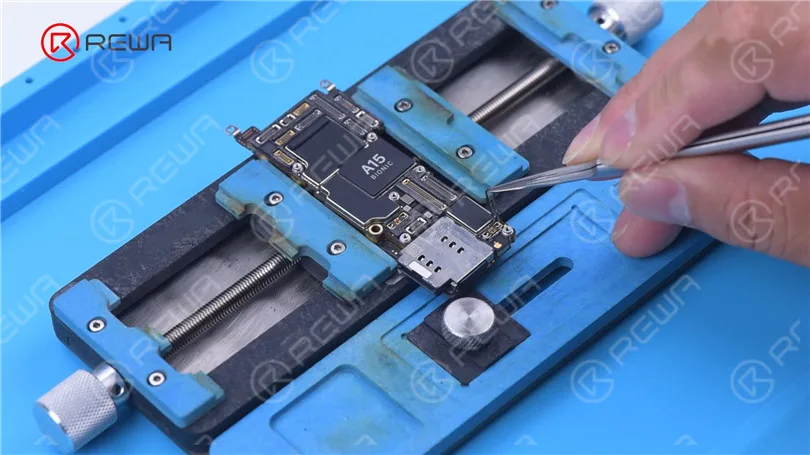
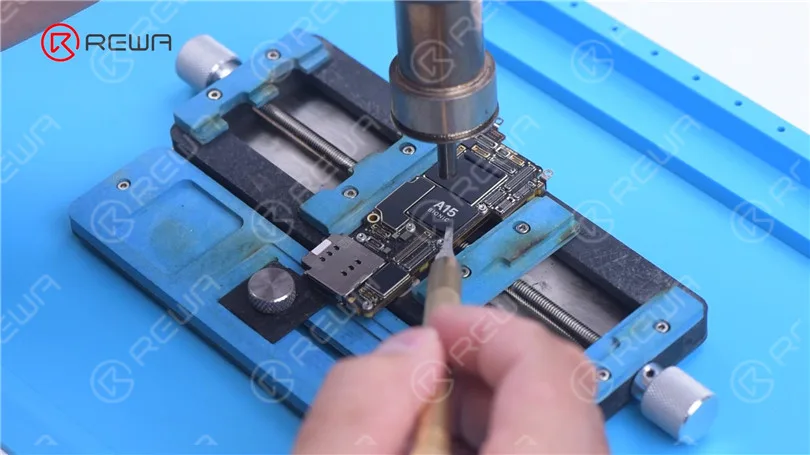
Continue to remove tapes on the back of the motherboard. Heat dissipation tapes on the motherboard are reusable. Please do not damage the tapes during repair to avoid influencing the heat dissipation effect after assembly.
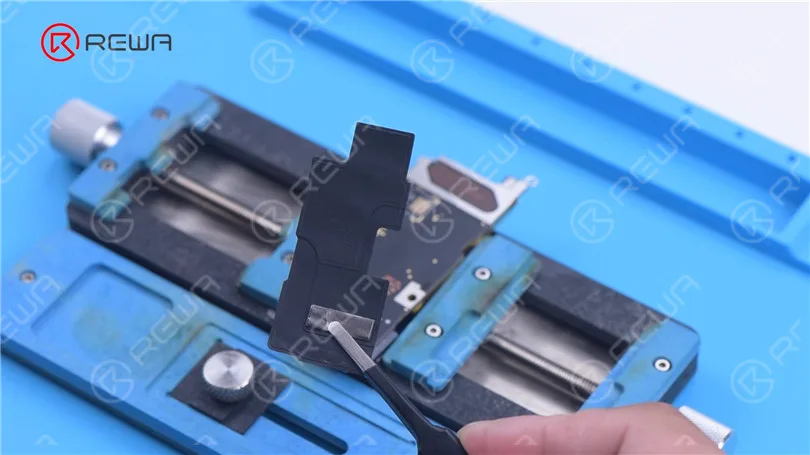
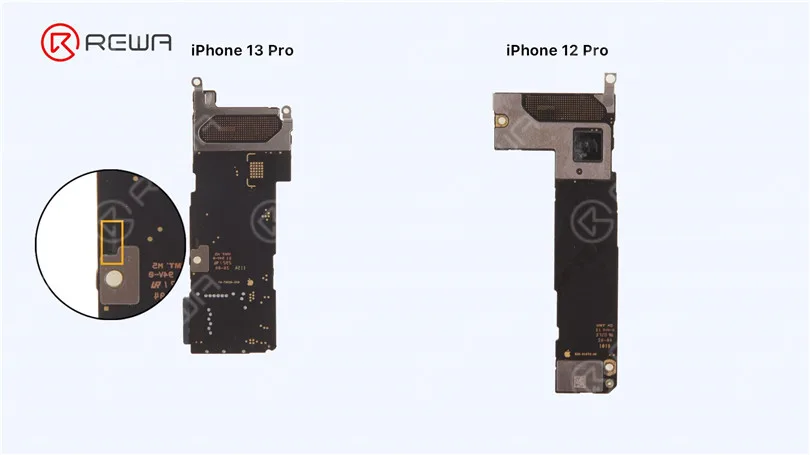
We found that the back of iPhone 13 Pro’s signal board has components. Please pay attention not to damage the components while separating.
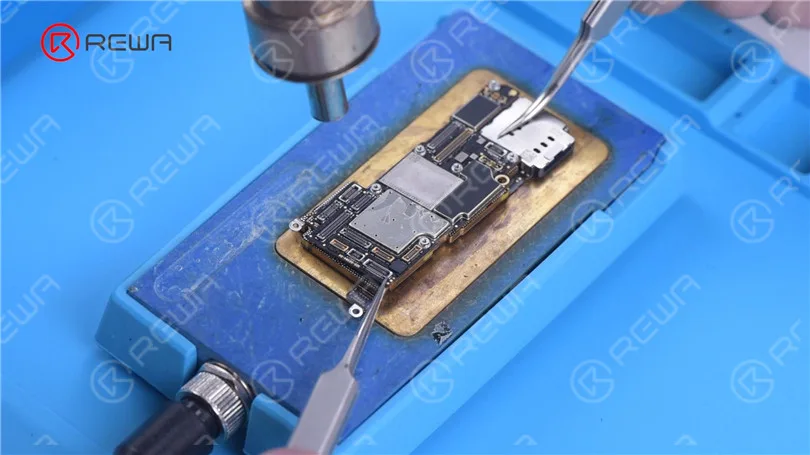
Since the heating platform for iPhone 13 Pro has not come out yet, we use a universal heating platform at 170 °C for separation.
Because the middle layer of iPhone 13 lineup’s motherboard still uses middle-temperature Solder Paste for soldering.
Add heat with Hot Air Gun at 330 °C around the motherboard, when the temperature of the Heating Platform reaches 150 °C. As the logic board becomes loose, remove the logic board with tweezers.
Please do not damage surrounding components while removing.
The CPU is stacked with the baseband which is bad for motherboard heat dissipation.
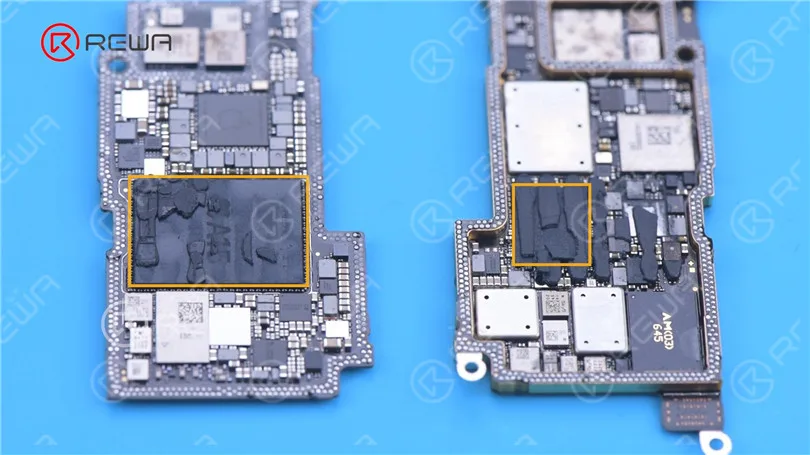
Then we remove thermal grease on the chips.
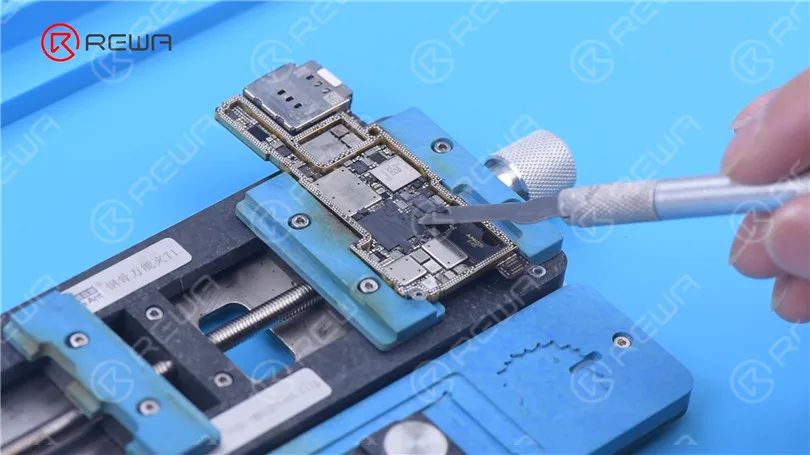
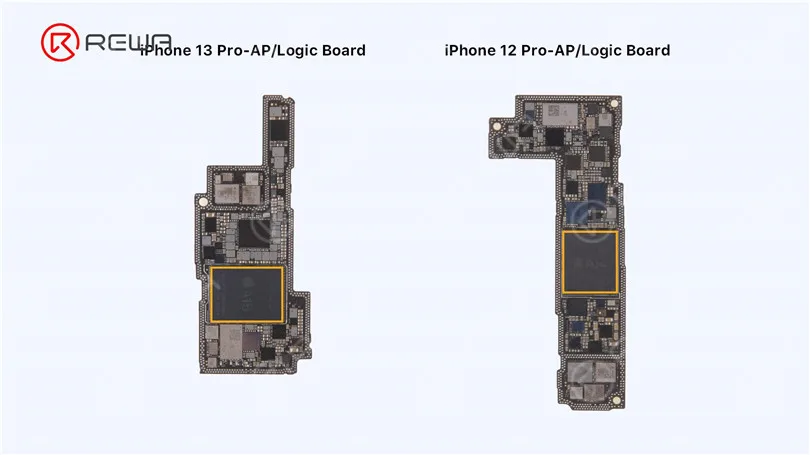
The size of A15 has increased a lot, which makes CPU desoldering more difficult.
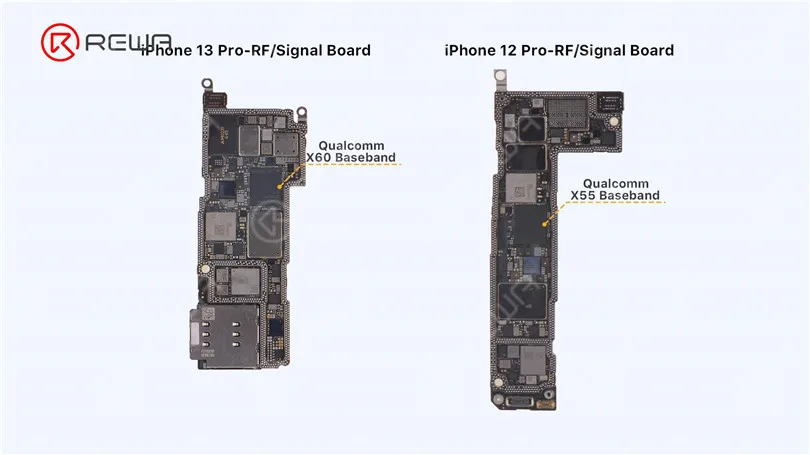
The iPhone 13 Pro’s baseband CPU has been upgraded to the Qualcomm X60. It is believed that the phone signal will be more stable than previous models.
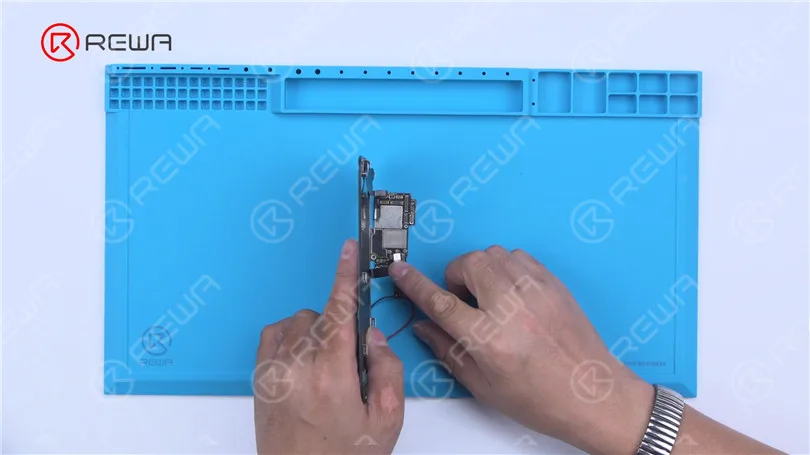
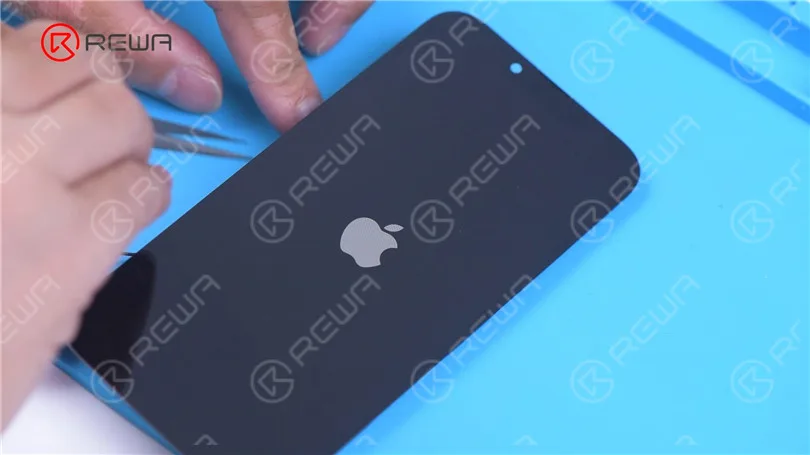
Then we see if a single logic board of iPhone 13 Pro can trigger the boot-up. Power the logic board with a Direct Current Supply.
Connect the display. Trigger the boot-up with tweezers.
We can see that iPhone 13 Pro took longer to trigger the boot-up than previous models.
It takes 8-10 seconds for the Apple logo to appear on the screen. This may be caused by the system.
Then we recombine the signal board with the logic board.
Apply some Paste Flux to the bonding pads of the signal board.
To better clean tin subsequently, apply some low-temperature Solder Paste to neutralize the temperature of the bonding pads.
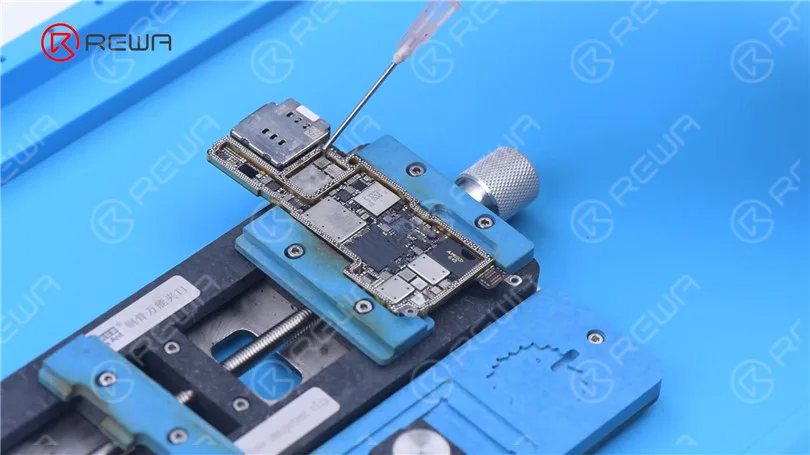
Clean the bonding pads with Soldering Iron at 380 °C and solder wick.
Apply solder paste to the bonding pads of the logic board.
Please do not affect surrounding components while applying solder paste.
This should also be noted while using Soldering Iron to remove tin.
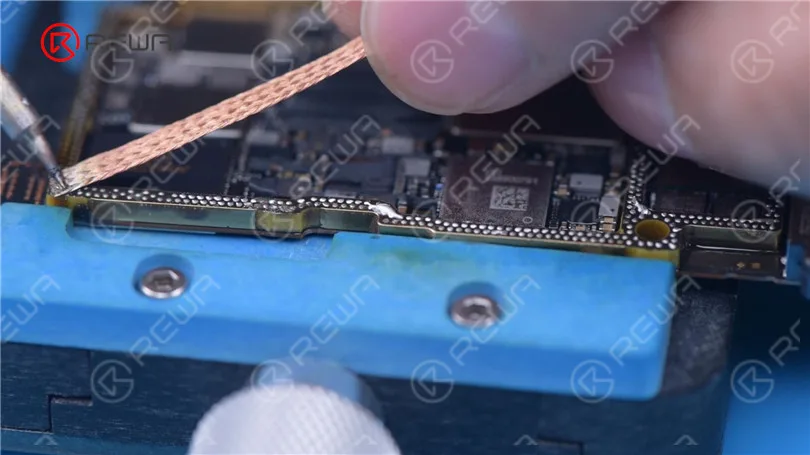
Clean the bonding pads with PCB Cleaner.
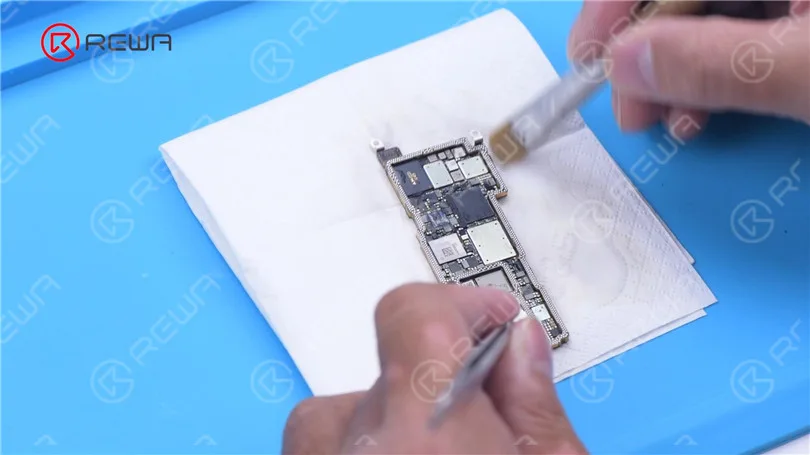
Then we reball the signal board. Attach the signal board to the Reballing Platform.
Put the reballing stencil in position. Apply middle-temperature Solder Paste evenly.
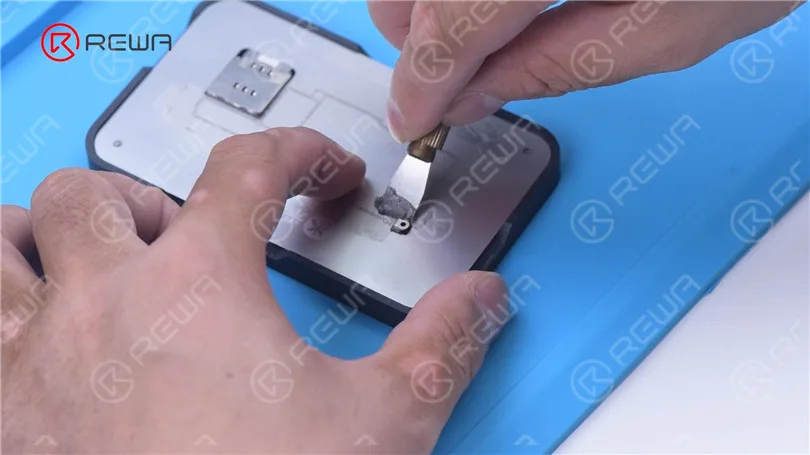
Remove the reballing stencil. Put the signal board on the Heating Platform to heat.
After the solder balls are formed, cool the signal board.
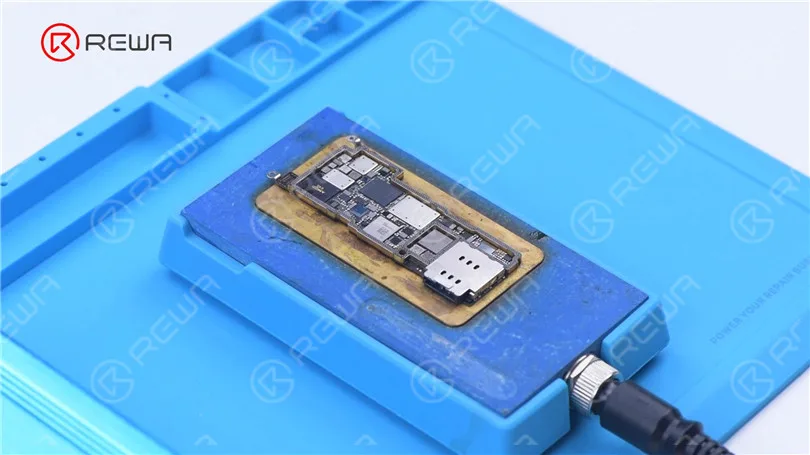
Apply some Paste Flux to the bonding pads.
Align the logic board with the signal board.
Keep heating with the Heating Platform at 170 °C.
Add heat around the motherboard with Hot Air Gun at 330 °C.
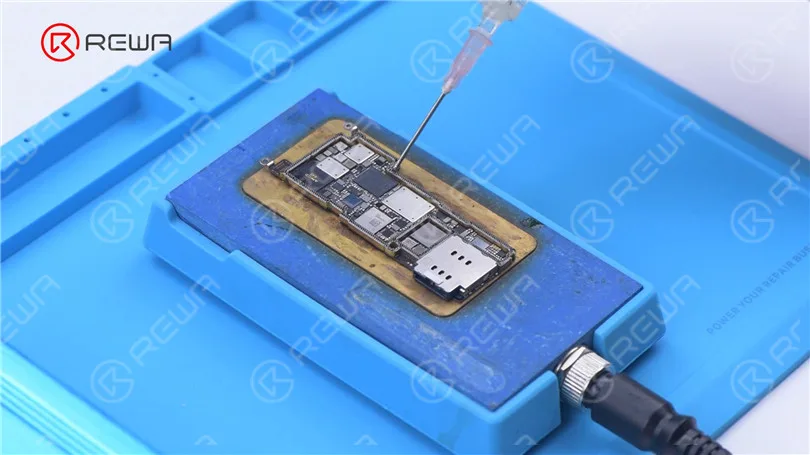
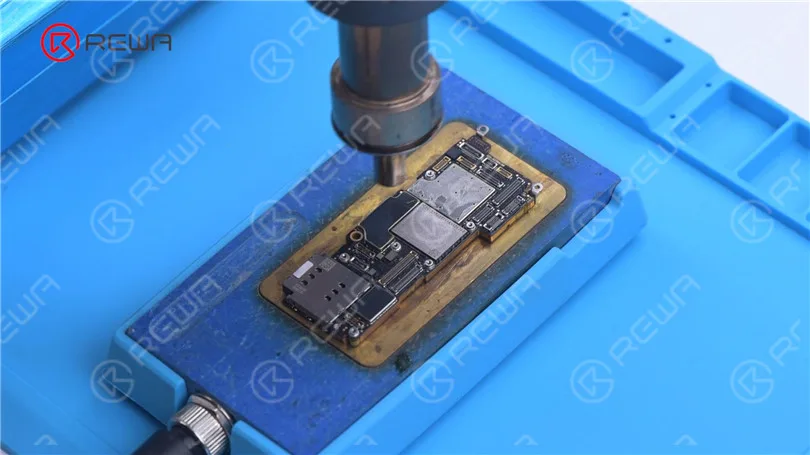
After the motherboard has cooled, detach the motherboard.
Reattach foam and heat dissipation tapes to the motherboard.
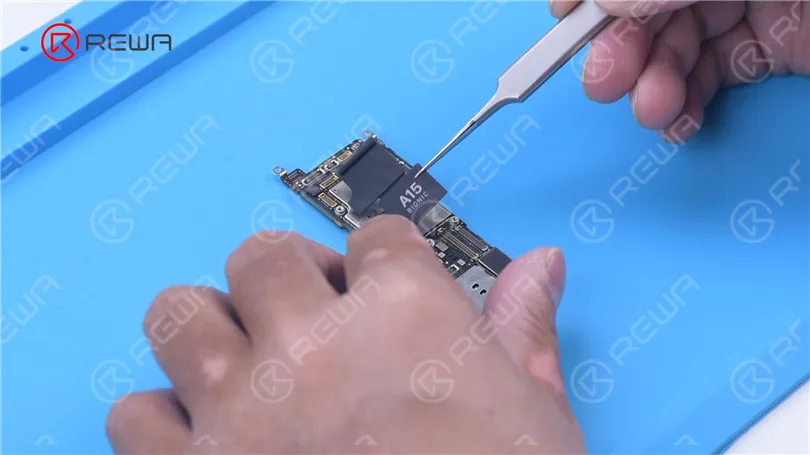
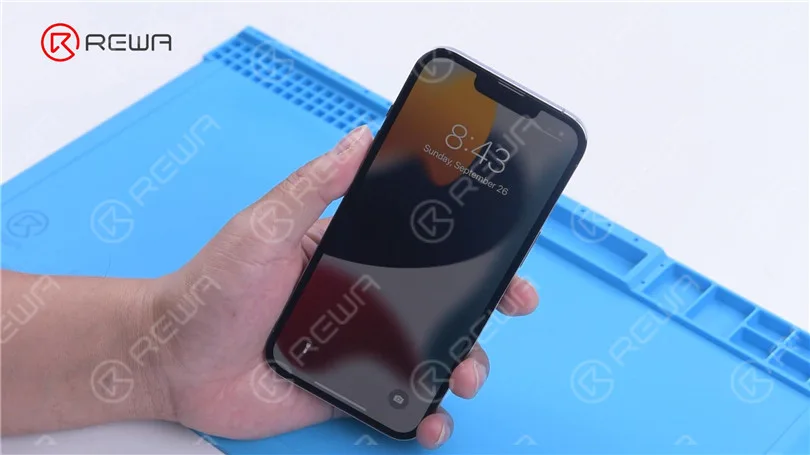
Install the motherboard for testing. The phone turns on normally.
In summary, through this separation, it is found that iPhone 13 Pro still has a double-layered motherboard.
The motherboard has some changes in appearance but there is little change in the main chip distribution.
Additionally, the CPU and baseband are stacked, which not only increases the difficulty of repair but also makes the motherboard heat up easily.
Under certain conditions, the motherboard is more likely to have problems.
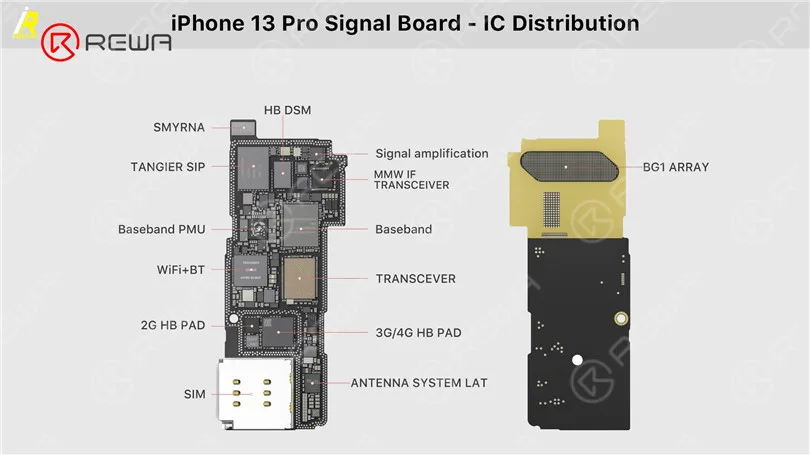
For your reference, this is the motherboard chip distribution diagram of iPhone 13 Pro from iRepair.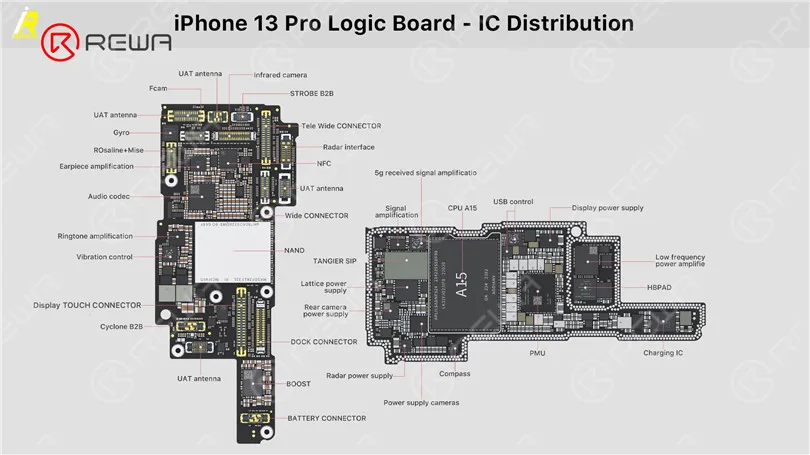
-
iPhone 13 Pro Reassembly
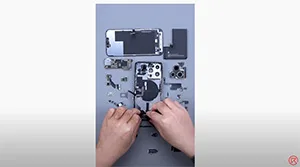
Get bored of teardown? Check out this video to see how we reassemble/put together an iPhone 13 Pro.
-
Aftermarket iPhone LCD Screen Visibility Under Sunglasses
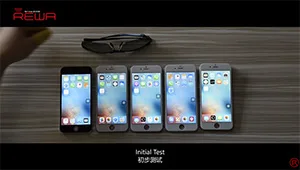
Black screen appeared when your aftermarket iPhone screens under polarized sunglasses? Is this the defect of China-made iPhone screens or some kind of physical issue? How can we deal with black iPhone LCD display under sunglasses? We had a series tests for aftermarket iPhone LCD screen visibility under sunglasses. Let’s check it out today!
-
Fix iPhone 6s Won’t Turn On – PMIC Grinding and Replacing
If your iPhone has a black screen and won’t turn on, what should you do? Go to the Apple store and repair it or fix it by yourself? But for whatever choice, you’d better read this article first, we’ll help you determine the reason why your iPhone won’t turn on and show you how to fix your iPhone won’t turn on.
REWA is a world-leading electronics(especially for iPhone) repair business solutions provider, we have the most professional and experienced technical engineers, and we provide the most sophisticated mobile cellphone repair tutorial and cell phone repairparts.
Why does my iPhone 6s won’t turn on?
There are two reasons cause your iPhone 6S won’t turn on, one is software, the other is hardware, so you should determine whether your iPhone won’t turn on due to a hardware or software problem?
So when your iPhone 6 won’t turn, you can do these five things first:
1. Recharge your iPhone
Most iPhone 6 won’t turn on because its battery is totally drained, so you can recharge your iPhone and then try to turn on your iPhone.
2. Restart your iPhone
To restart your iPhone press and keep holding down the Sleep/Wake button on the top of the handset until the red slider appears onscreen. Slide it across to turn it off then repeat to turn the phone back on. If the iPhone is frozen and can’t be restarted in the normal way do the following: Press and hold the Sleep/Wake button and the Home button simultaneously for at least 10 seconds. If the red slider appears or the screen dims, keep pressing the two buttons until the Apple logo appears.
3. Reset your iPhone
Click on Settings then General then Reset All Settings. This will perform a reset of all the settings to the factory defaults. The data or content on the iPhone is unaffected.
4. Restore
If all else fails, you will need to perform a full back up and Restore your iPhone. Click on the Summary tab and then click Restore. Click on Restore. Wait until your iPhone completes the restore process and resets to the Home screen.
5. Force devise into recovery mode
- Turn off your IOS device.
- Plug the USB cable into your computer – but not into the device
- Hold down the Home button then plug the USB cable into the device
- When you see the Connect to iTunes screen (below), release the Home button. If you don’t see this screen, repeat steps 1 to 3.
If all the steps fail, we can determine it is your iPhone 6s hardware problem, our video mainly solves this iPhone 6s won’t turn on – PMIC Grinding and Replacing.
Recently, some clients complained about the iPhone cannot turn on issue after holding the power key – no Apple logo, just black screen. Causes can be different and solutions flexible. Here in this video, REWA offers a logic board repair solution regarding this iPhone 6s won’t turn on the issue.With PMIC Grinded and replaced, you can fix your iPhone 6s won’t turn on problem easily by following our operations.
The iPhone won’t turn on normally after holding the power key. Run detection process and we find that the logic board comes with leak current as 900mA and the PMIC is over-heated. Whereas capacitance around the PMIC shows no short-circuit. Therefore we can draw the conclusion that the PMIC is damaged and need to be replaced with a new one.
-
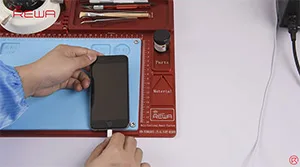
Master Job – iPhone 6 Error 9 Repair Without Removing CPU
iTunes Error 9 often appears when processing firmware update or system restores by iTunes. Several reasons are attributed towards the problem, and we have already posted a solution for iPhone error 9 fixes related to the NAND Flash error before. Here this video shows a different solution regarding iPhone 6 error 9 without removing CPU. With the help of our newly developed CNC chip grinding machine, this job can be done even safer and quicker without damaging the logic board and nearby chips.
-
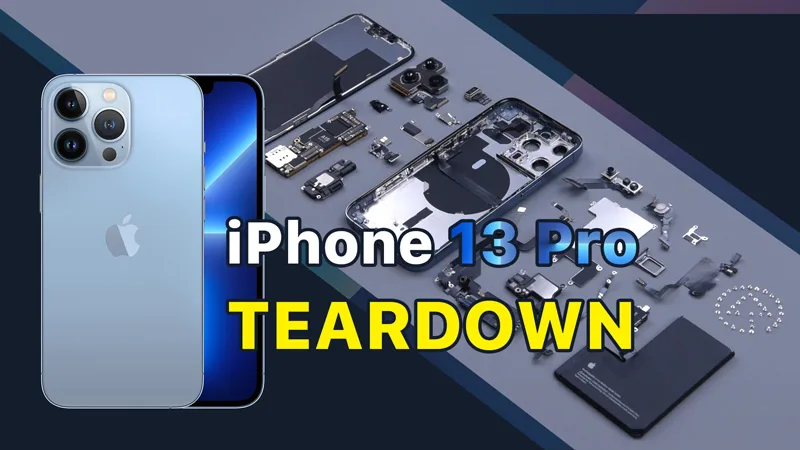
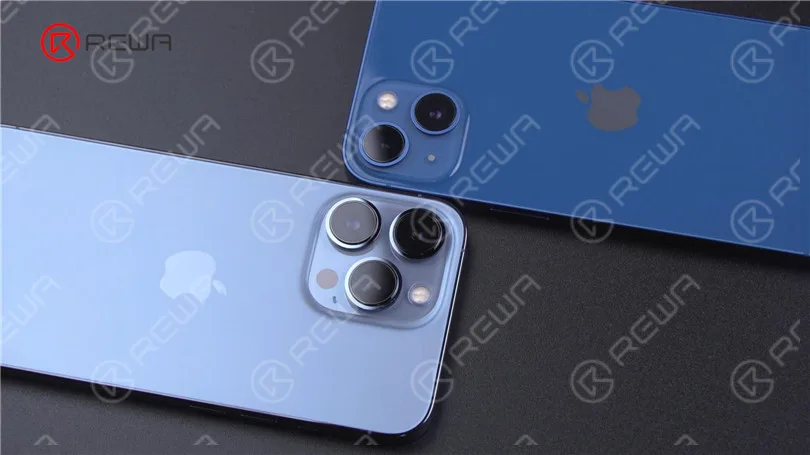
iPhone 13 Pro Teardown
Apple’s new iPhone 13 lineup made its debut at the 14th September Apple Event, with four new models shown off.
New models with technology upgrade always come with new repair challenges.
Today we will disassemble iPhone 13 Pro to see the interior structural changes and how those changes will affect repair.
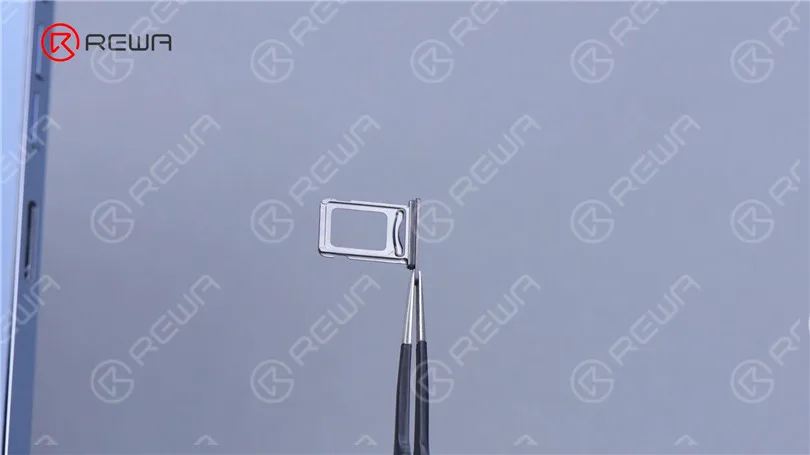
In the first place, remove the card tray. The card tray is made of metal and features Dual SIM with waterproof and dustproof rubber ring inside.
Besides the adhesive, iPhone also uses the bottom screws to reinforce the fastening. Remove two screws from the bottom.
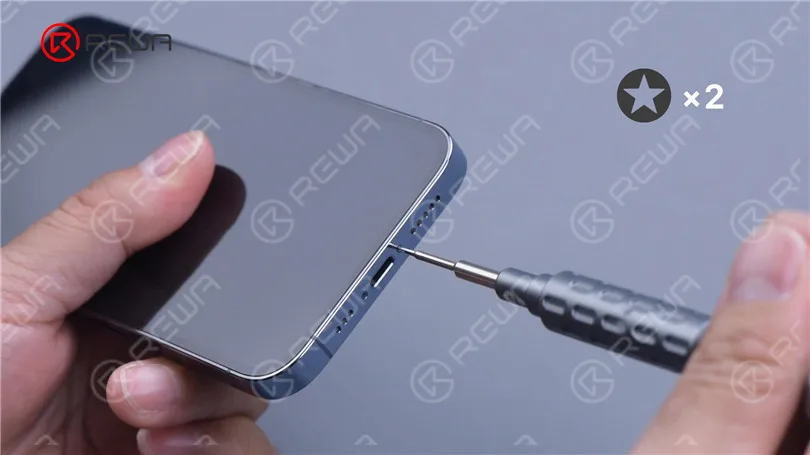
Heat the phone with Heating Pad for about 3 minutes. Lift the display with a Suction Cup.
Insert a Plastic Card when there is a gap.
Then slide along the gap. Like iPhone 12 Pro, the display flex cable of iPhone 13 Pro is on the left.
So the iPhone 13 Pro display also opens from the right edge.
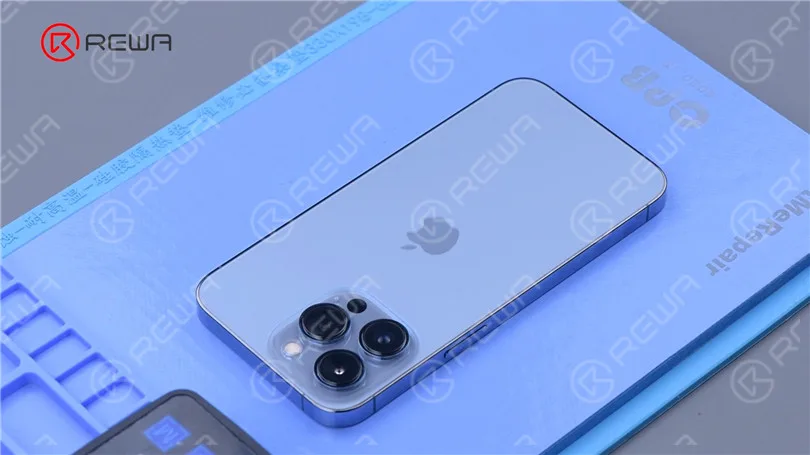
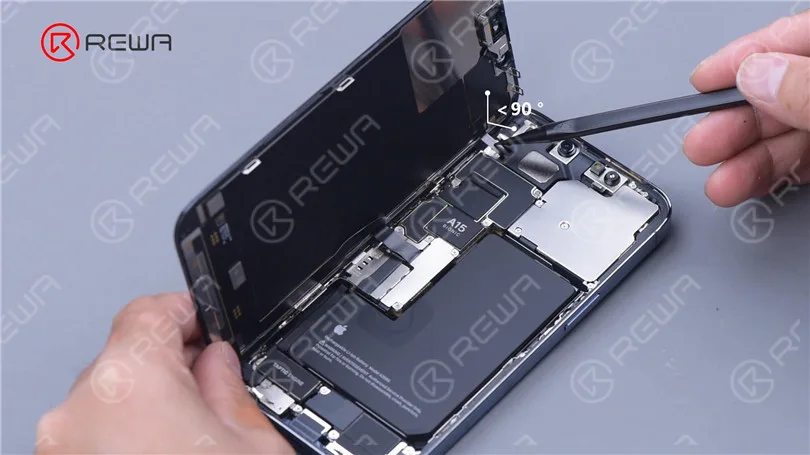
In addition, the flex cable of the sensor module is very short.
So when lifting the display, the angle should not be greater than 90 degrees to avoid breaking the flex cable.
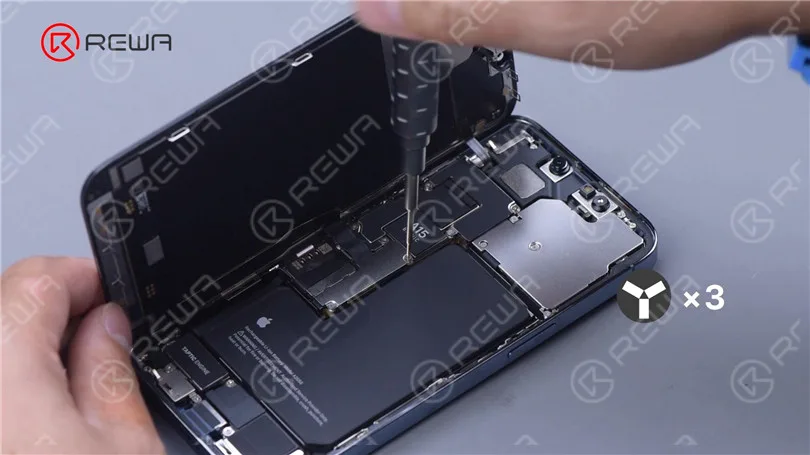
Remove the three screws that secure the battery shielding cover.
Detach the shielding cover. Disconnect the battery.
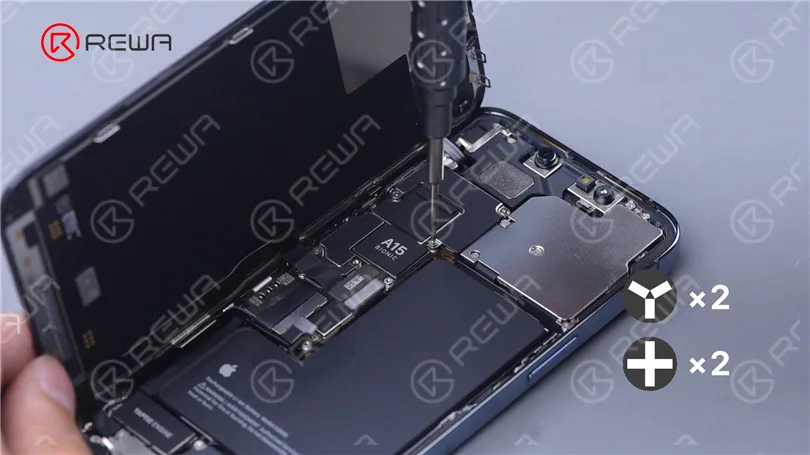
Continue to remove the four screws that hold the sensor module shielding cover.
Disconnect the flex cables of the sensor and screen to remove the screen.
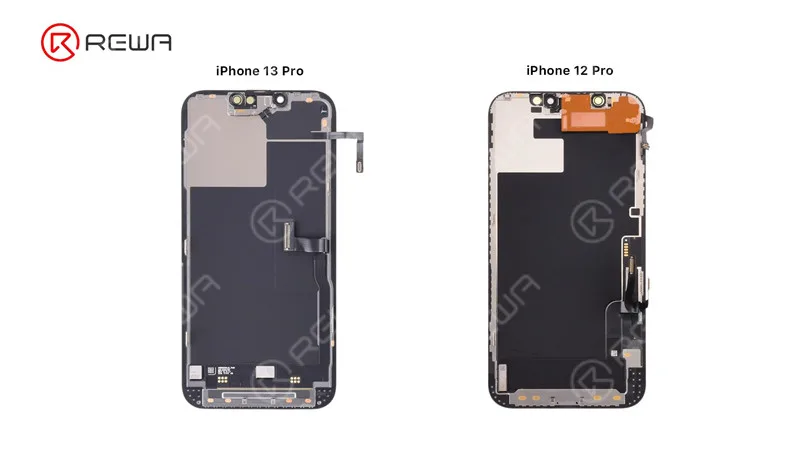
The earpiece of iPhone 13 Pro is moved to the housing while the earpiece of iPhone 12 Pro and previous models is on the screen.
The flex cables of display and touch are now integrated. The screen refurbishment difficulty of iPhone 13 Pro is expected to be higher.
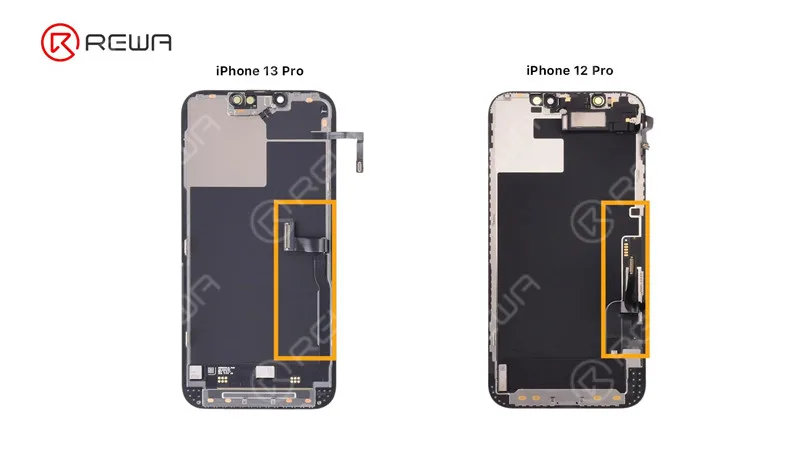
Remove the three screws that hold the sensor flex cable. Heat with Hot Air Gun to remove the flex cable.
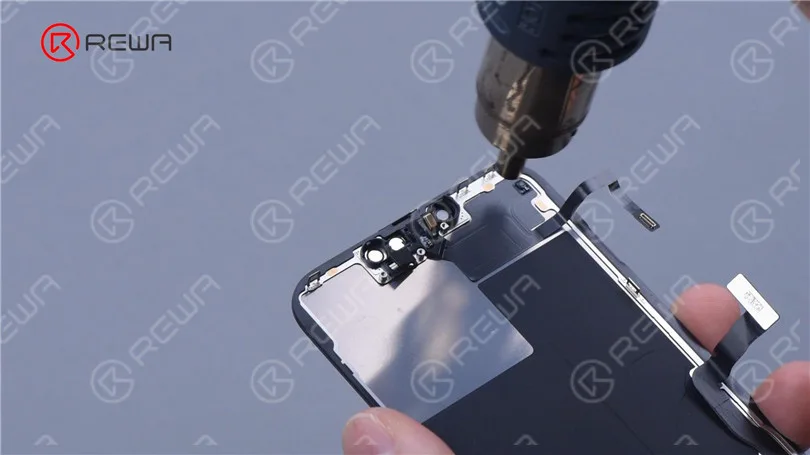
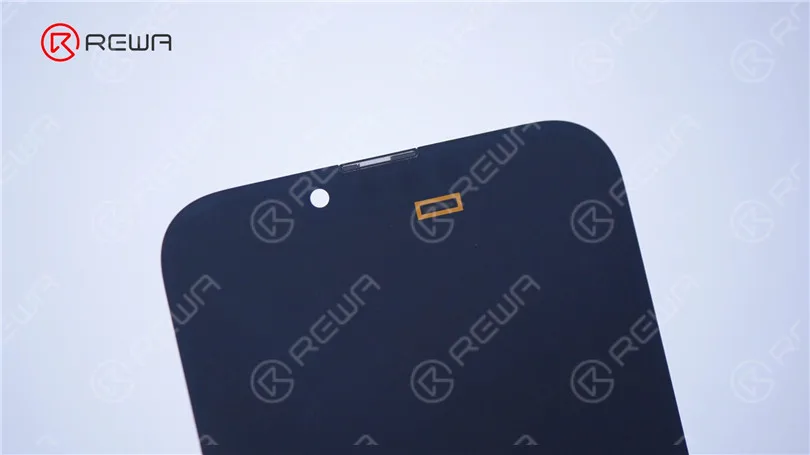
The aperture of the ambient light sensor is at the bottom right of the notch.
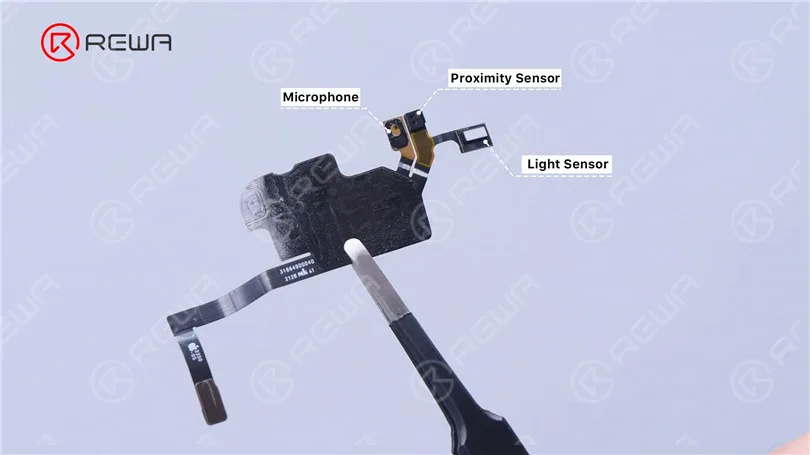
The flex cable integrates a front microphone, a distance sensor, and an ambient light sensor.
It is less of a floodlight illuminator than the iPhone 12 Pro.
The iPhone 13 Pro’s dot projector has moved to the middle.
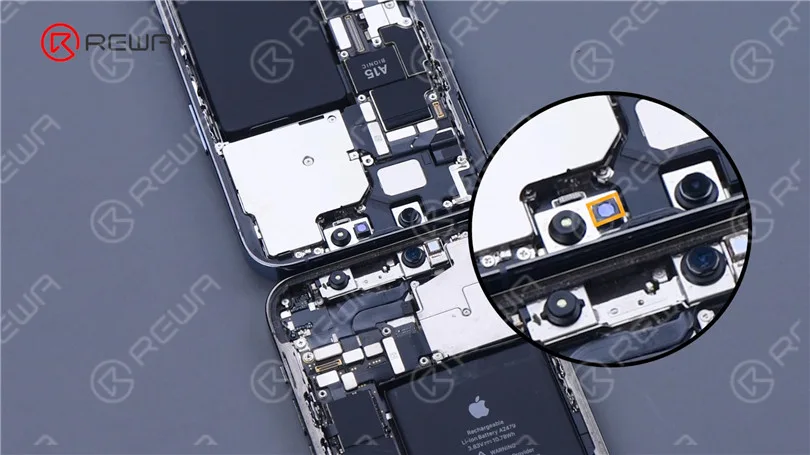
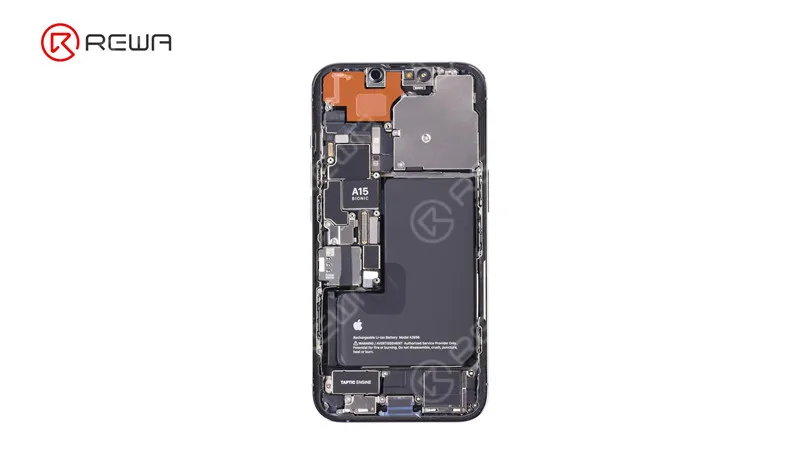
Next, let’s take a look at the overall interior structure. iPhone 13 Pro looks much cleaner than iPhone 12 Pro because there is less printing on the battery surface. And there’s A15 on the motherboard.
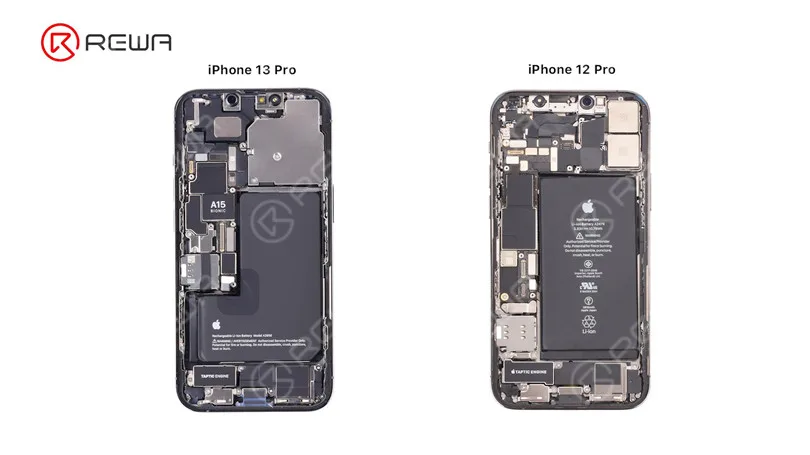
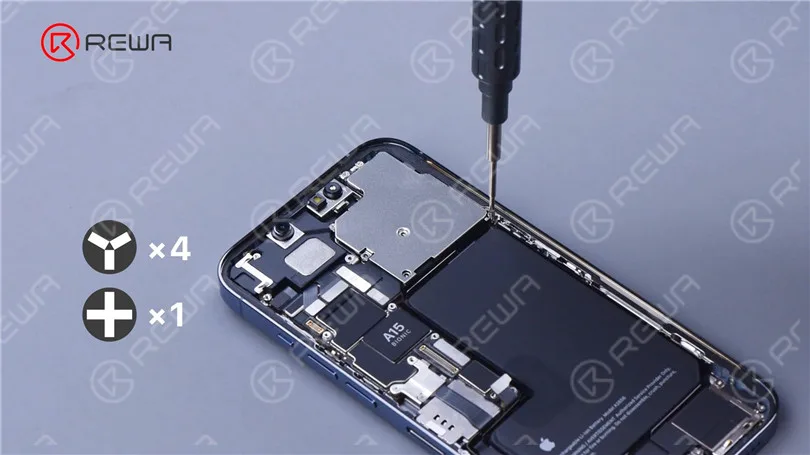
Remove the 5 screws that hold the rear camera shielding cover.
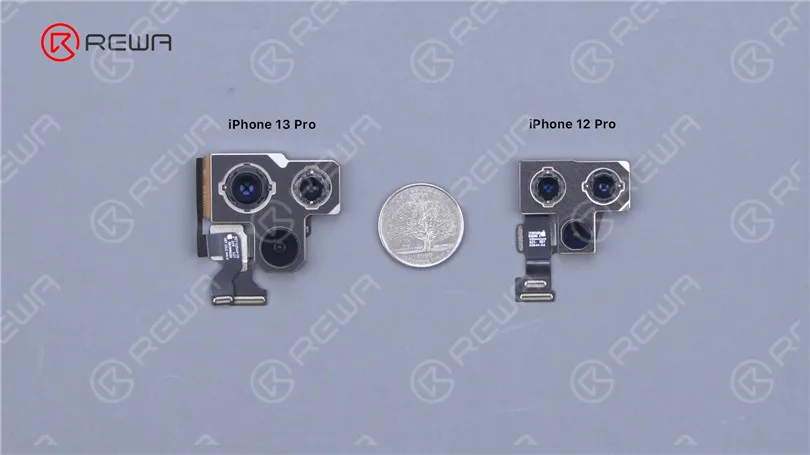
Disconnect the flex cable of the camera. Remove the camera. iPhone 13 Pro has a bigger camera than the iPhone 12 Pro.
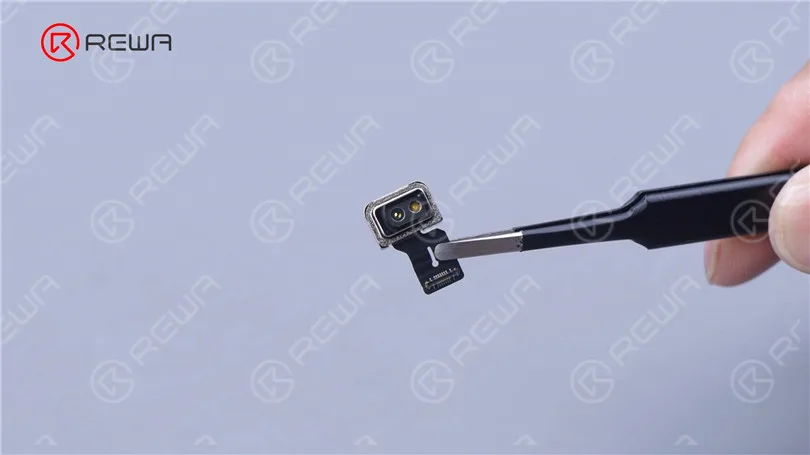
Detach the LiDAR. All sides of the LiDAR are protected by buffer foam.
Disconnect the lower antenna and charging port flex cables. Then disconnect the dot projector and Face ID module flex cables.
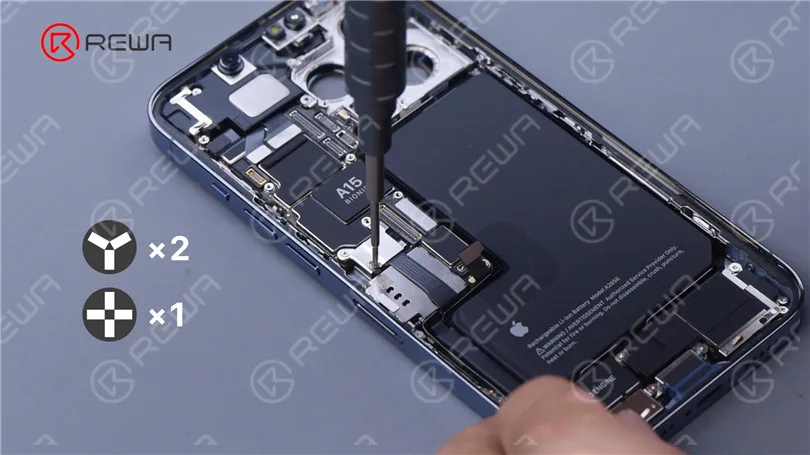
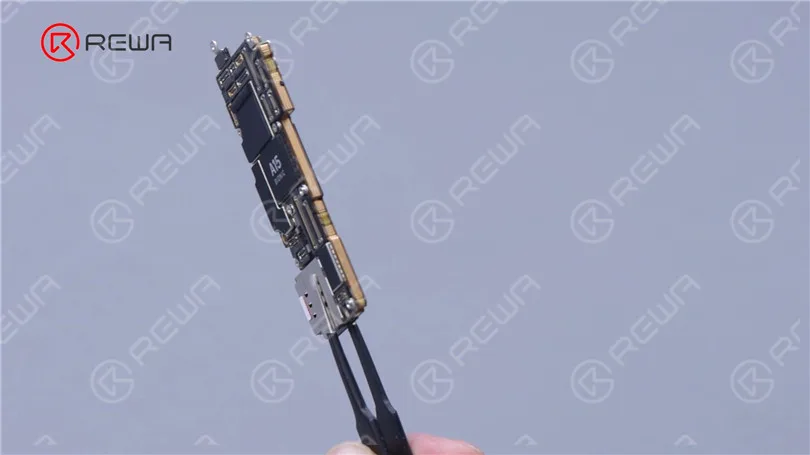
Remove the motherboard. The motherboard still adopts a double-layered design. SIM card reader is welded on the motherboard.
There are heat dissipation tapes on both sides of the motherboard.
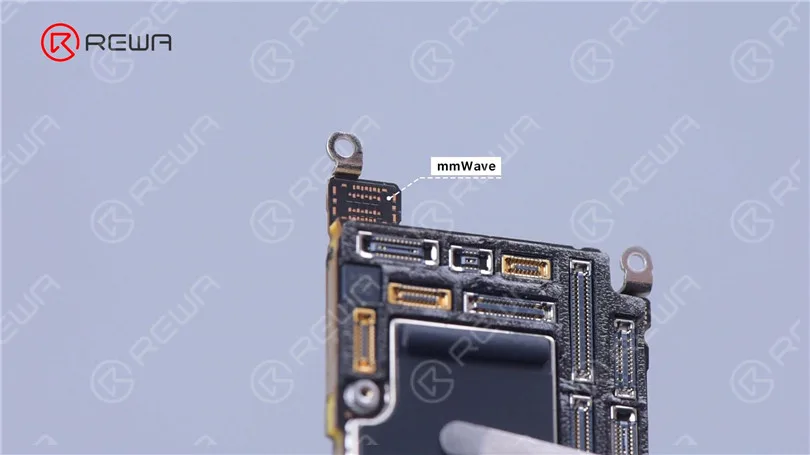
The seat of mmWave is empty on the motherboard.
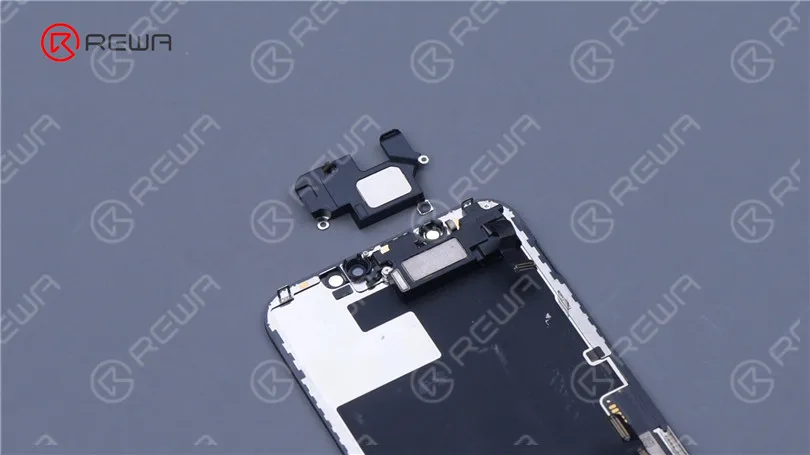
Remove the earpiece. The size has been increased compared with the previous model.
Remove the Face ID flex cable. The dot projector and infrared camera of iPhone 13 Pro are integrated into one flex cable.
This undoubtedly makes future Face ID repair more difficult.
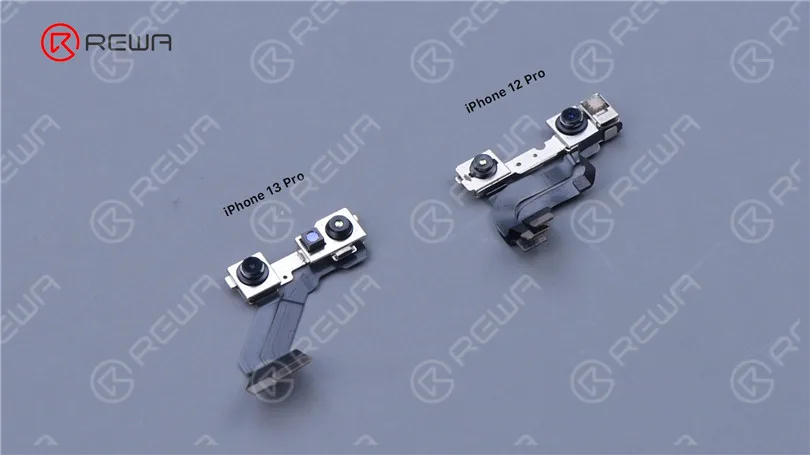
Remove the flash flex cable.
Unbolt the screws that secure the signal antenna and then the signal antenna. Remove the NFC antenna.
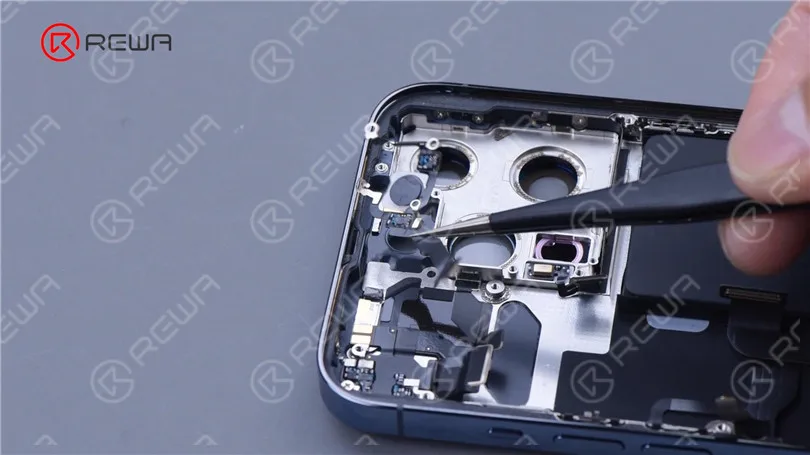
Remove the screws that hold the charging port flex cable.
Yank the speaker and Taptic Engine out. The Taptic Engine of iPhone 13 Pro is smaller.
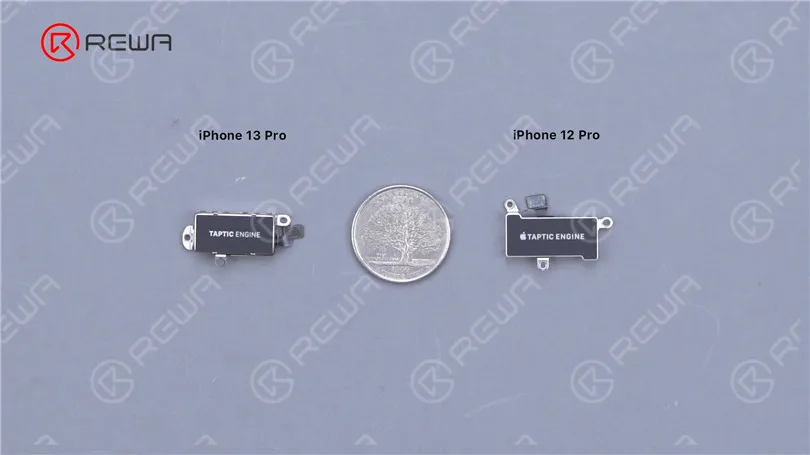
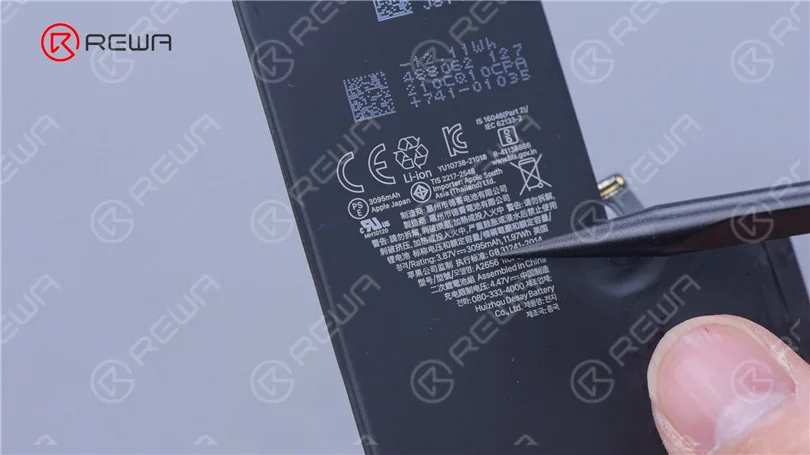
Then we remove the battery.
Use tweezers to slowly pull out the adhesive strips.
Battery capacity has increased from 2815 mAh to 3095 mAh.
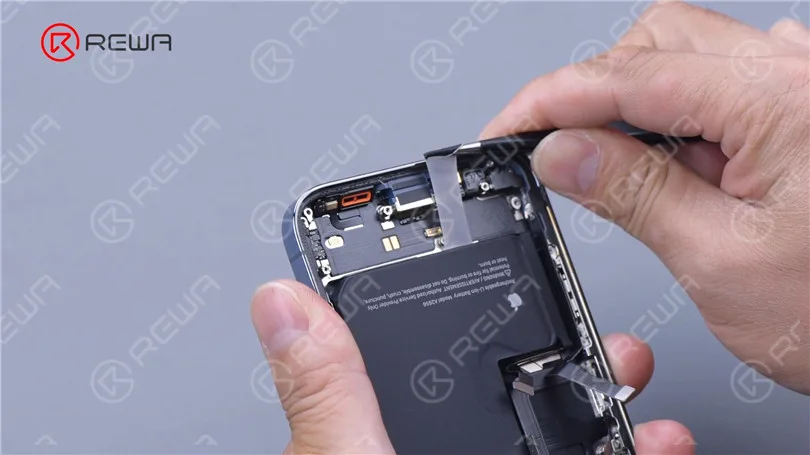
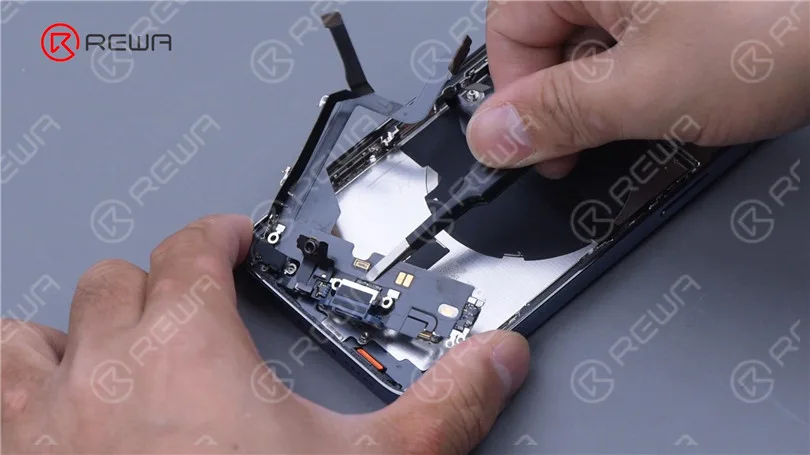
Finally, remove the plastic part and then the charging port flex cable.
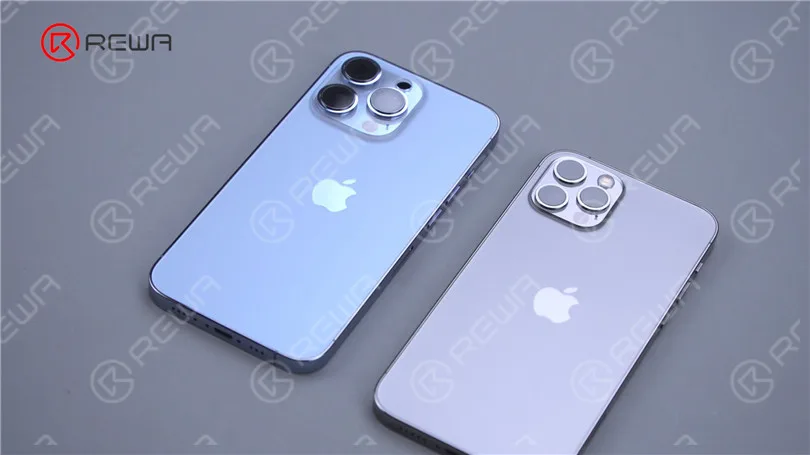
The back cover of the iPhone 13 Pro looks the same as the iPhone 12 Pro.
We assume that the refurbishment method is the same as the iPhone 12 Pro. In general, iPhone 13 Pro teardown is easier than its predecessor.
Screen refurbishment and Face ID repair will become more difficult. Later we will have videos on motherboard separation, screen and back cover refurbishment to discuss the repair difficulty of iPhone 13 Pro in detail. Please stay tuned.
-
iPhone 7 Black Screen/ No Display Backlight Repair
iPhone 7 starts up with black screen or no display on backlight but still working, and the boot current is normal. It still exists after replacing the screen. REWA LAB tested and found that this malfunction is caused by broken backlight circuit on logic board. Please check the video for the repair details of iPhone no display.
-
Find the Hidden Microphone of iPhone
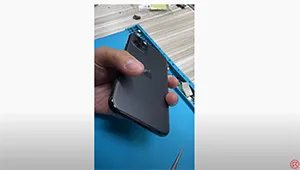
iPhone 11 Pro is said to have 3 mics but it has four mics actually. The hidden mic is in the speaker.
 English
 Español
 Français
 Deutsch
 Italiano