Tag: iphone

  • iPhone X Battery Replacement – Complete Guide

    iPhone X Battery Replacement – Complete Guide

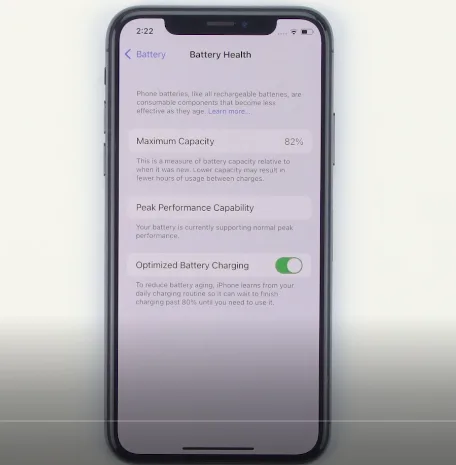
    If your phone battery is in a low health condition, like 80%, it’s time to replace a new one. We will bring you a full case of iPhone X battery replacement as a reference.

    All you need is a repair kit and a new battery. The repair kit should be included as below: tweezers, screwdrivers, pry piece, suction cup, heating pad, spudger, battery adhesive, and waterproof adhesive.

    iPhone low battery health

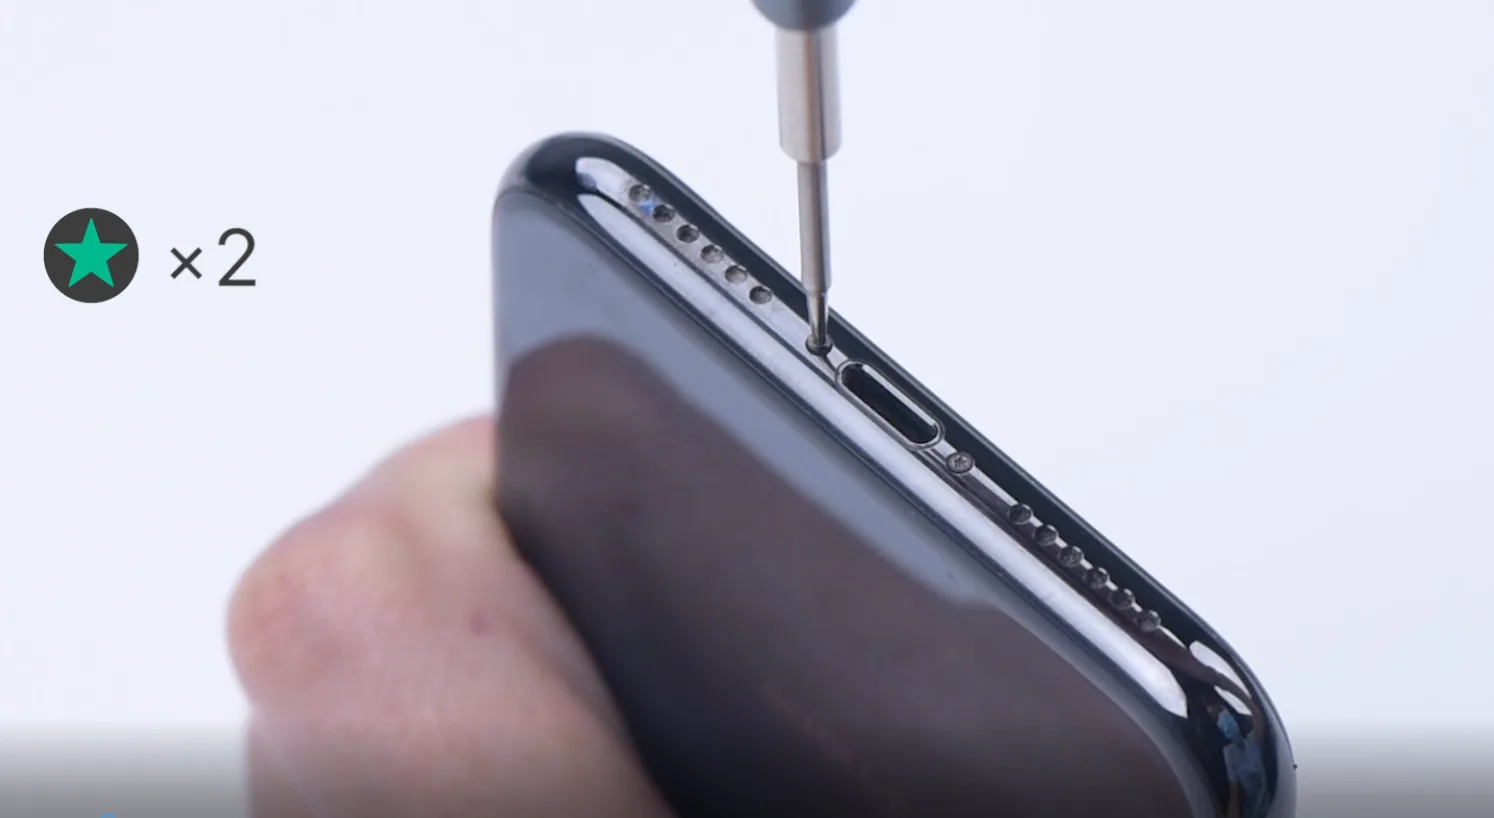
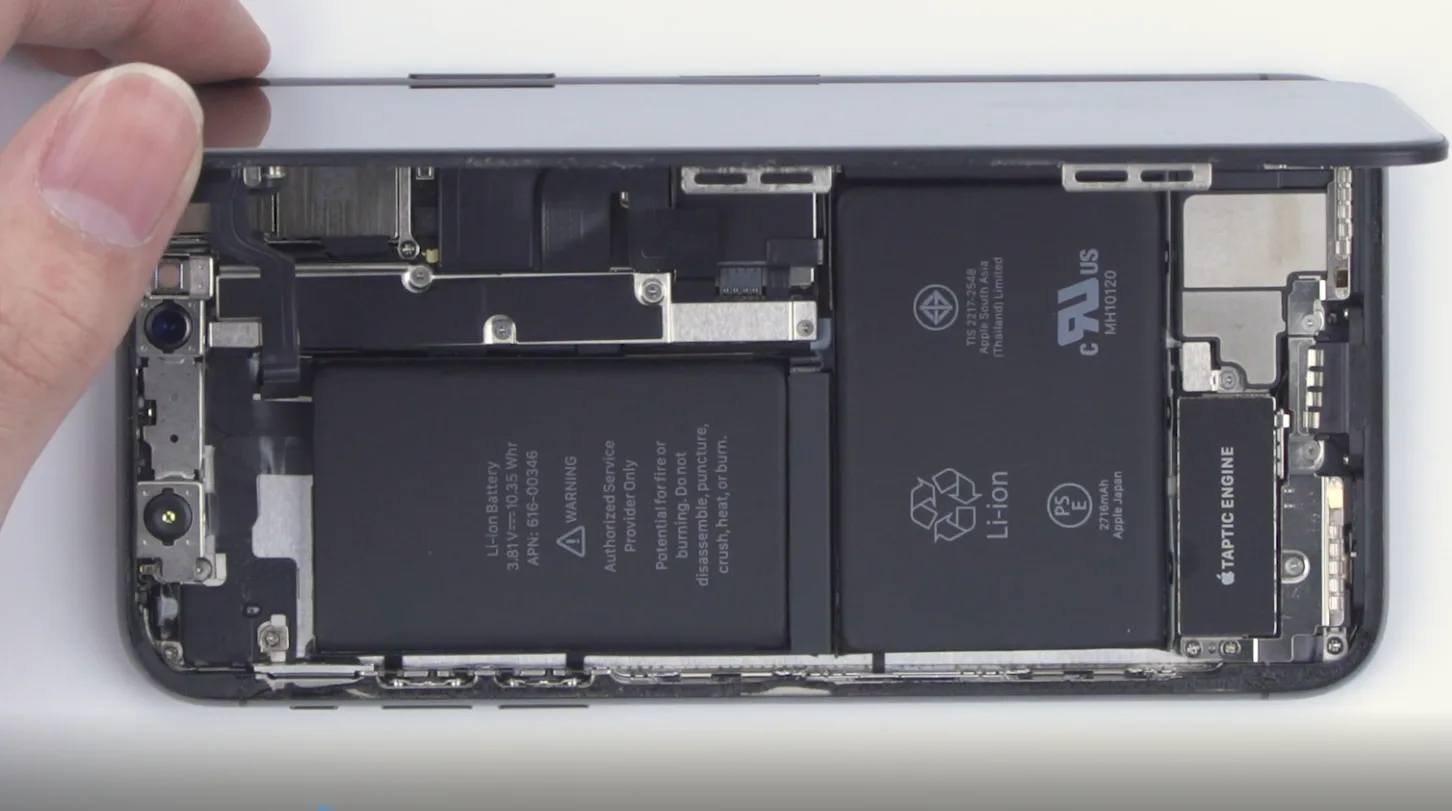
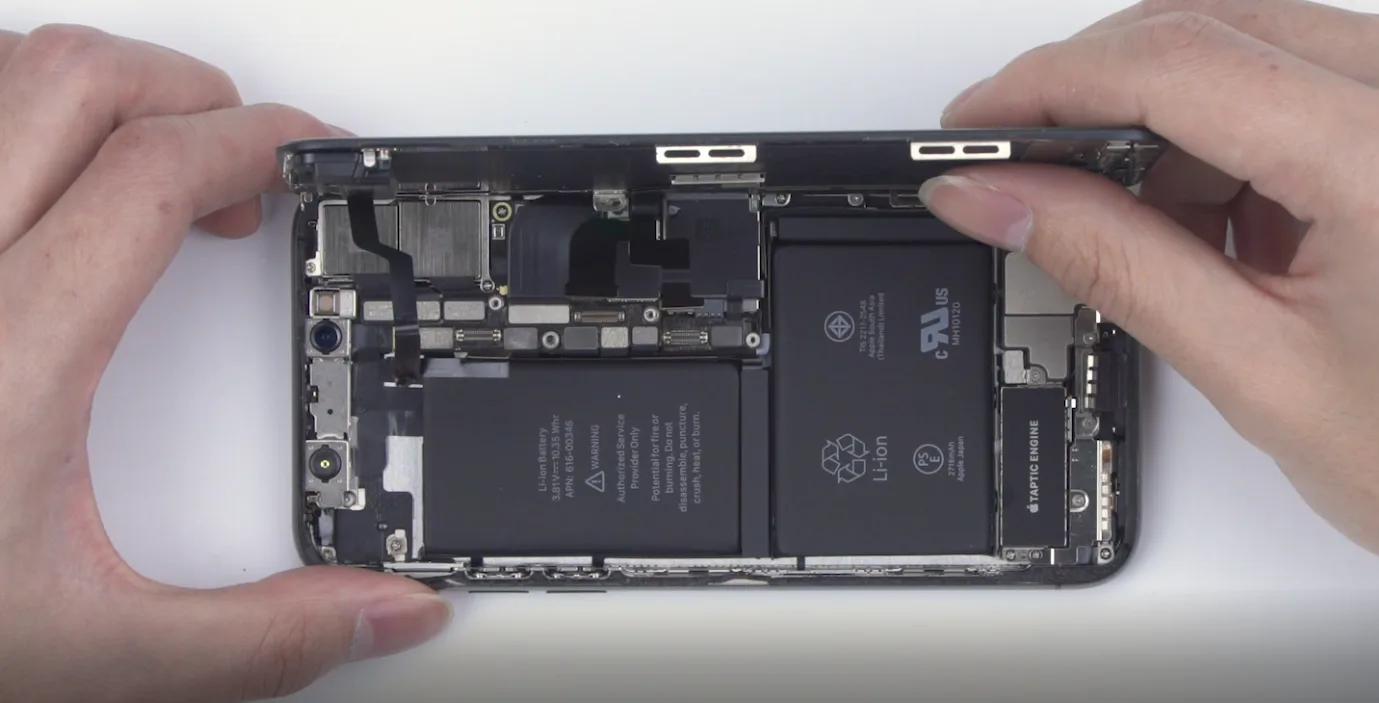
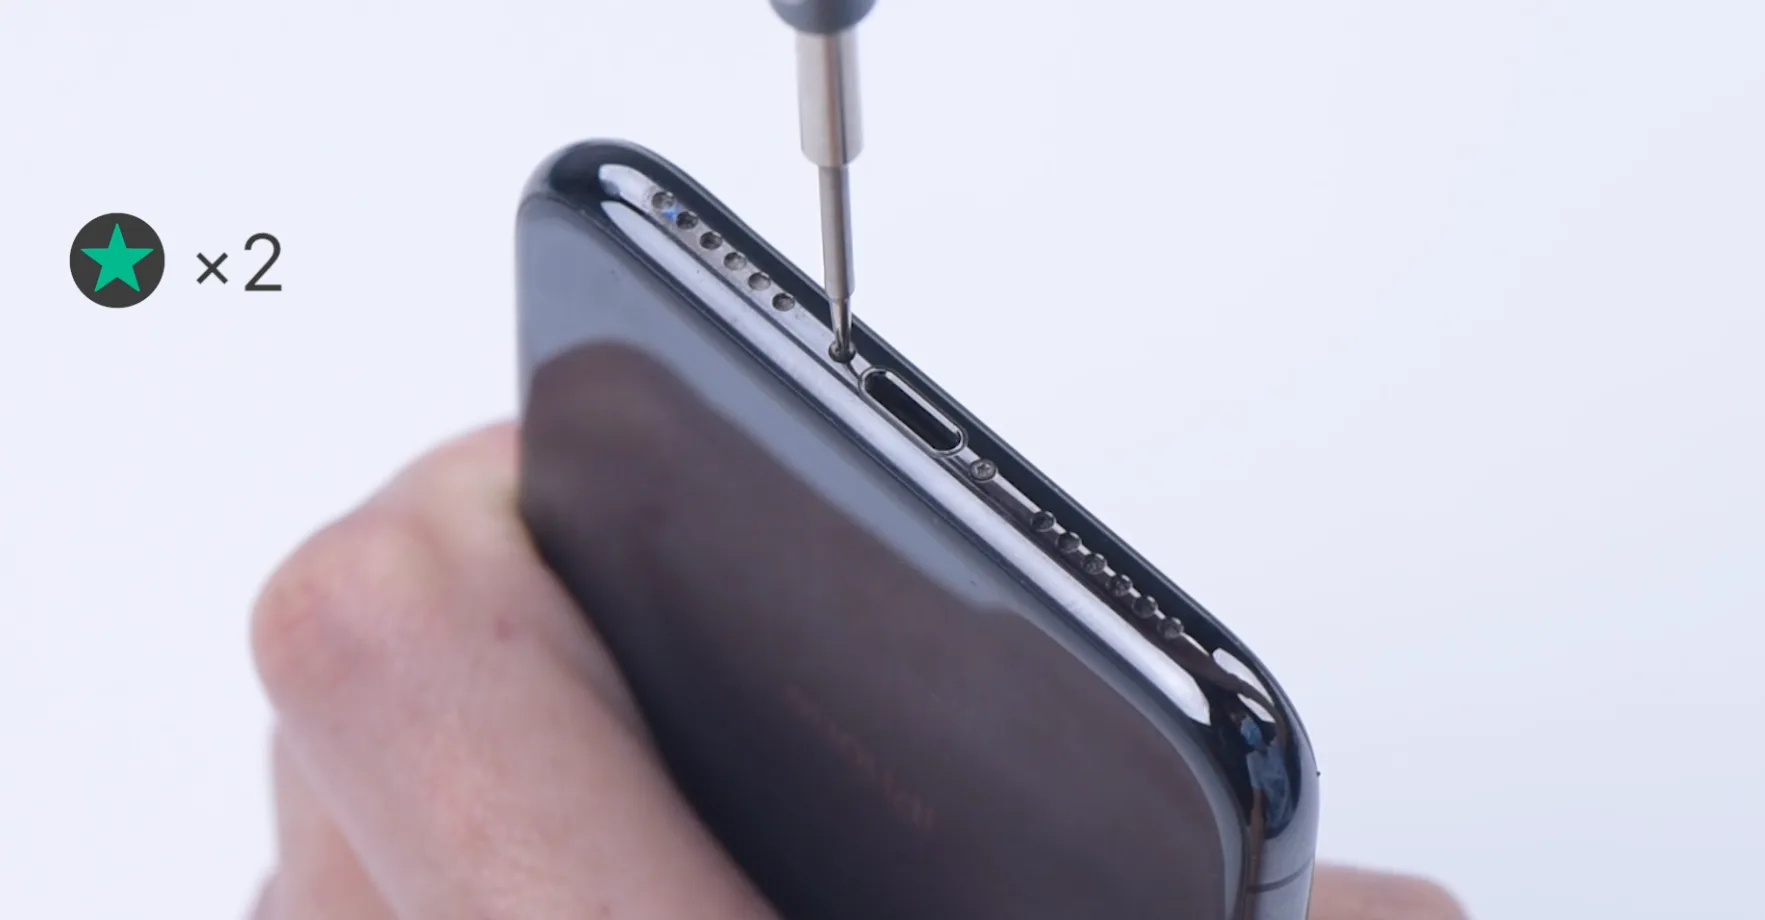
    Firstly, please long press the phone to turn it off. Then you can use a pentagon screwdriver to unscrew the screws at the bottom of the phone.

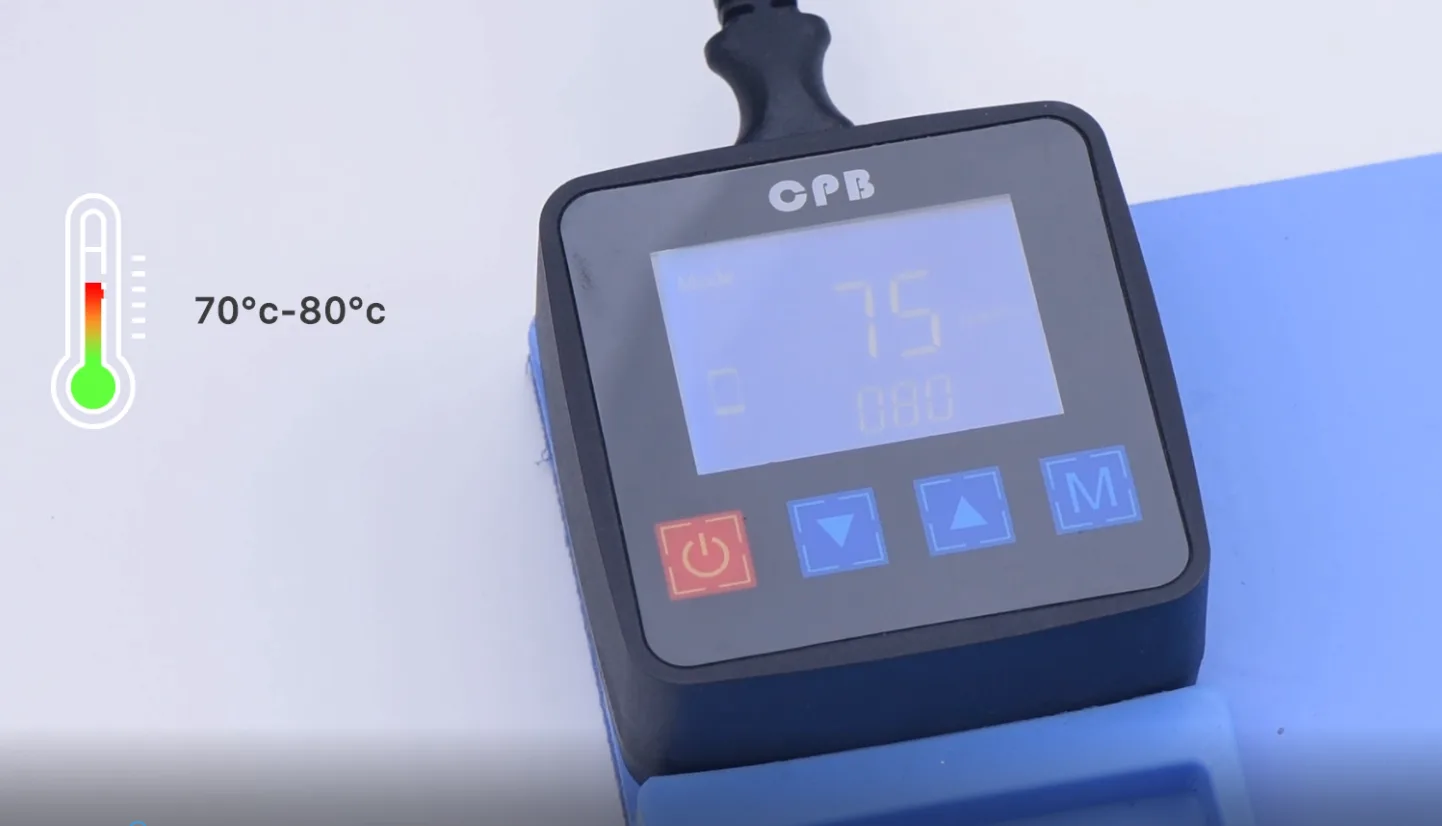
    Please pay attention to putting the screws aside well. You can place the screen face down on the pad for about 2-3 minutes after the heating pad is up to the temperature of 70—80°c.

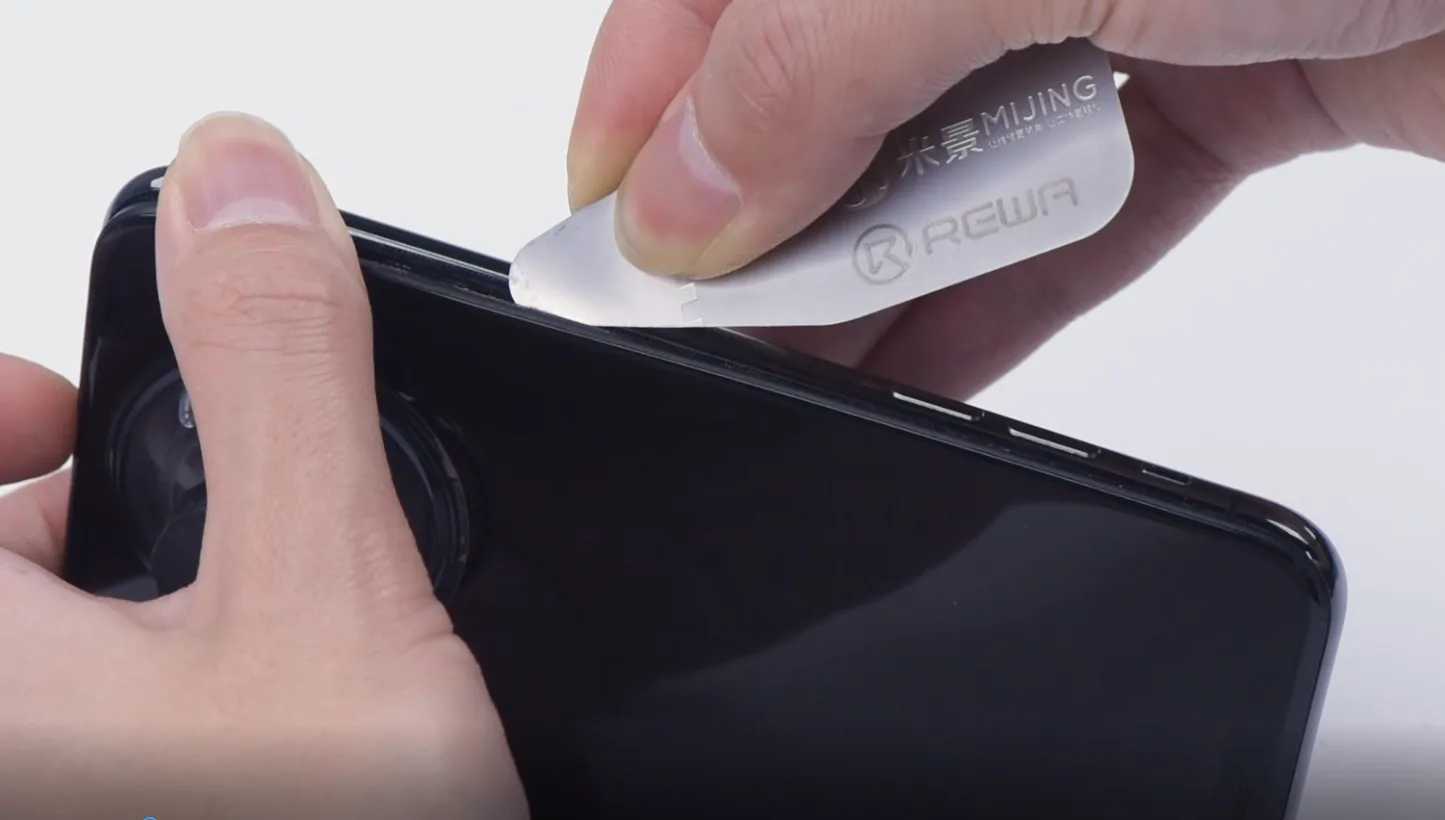
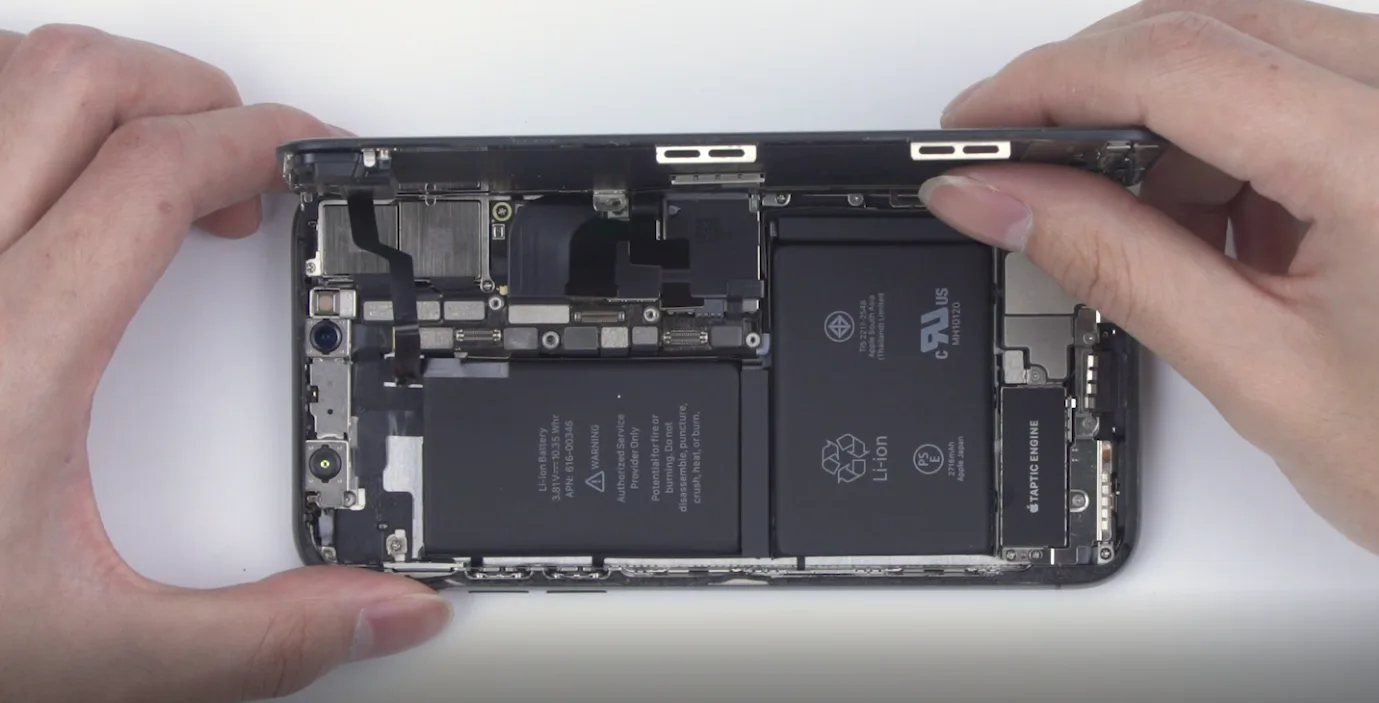
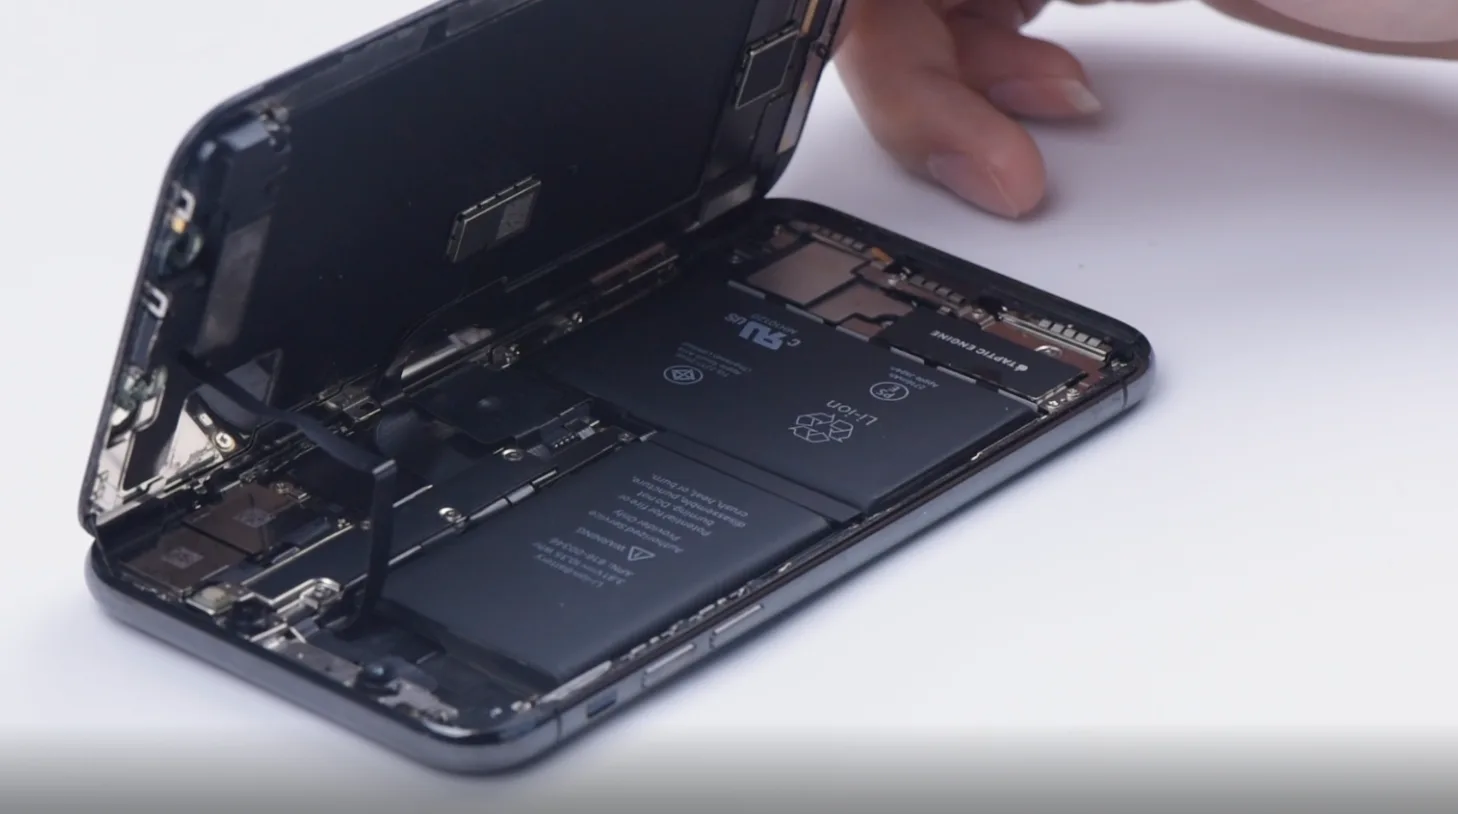
    And fix the suction cup at the bottom of the phone, lift the screen gently, and insert a pry piece underneath. Gradually move around the edge of the display, separating the screen along the gap.

    The display assembly is still connected to the iPhone by cables, so don’t try to remove it completely. Again, please pay attention to the position of the cable to avoid damage.

    The angle should not be greater than 90 degrees to prevent breaking the flex cable. The process of removing the cover is done.

    use a pentagon screwdriver to unscrew the screws
    the heating pad is up to the temperature of 70—80°c
    insert a pry piece underneath
    The angle should not be greater than 90 degrees

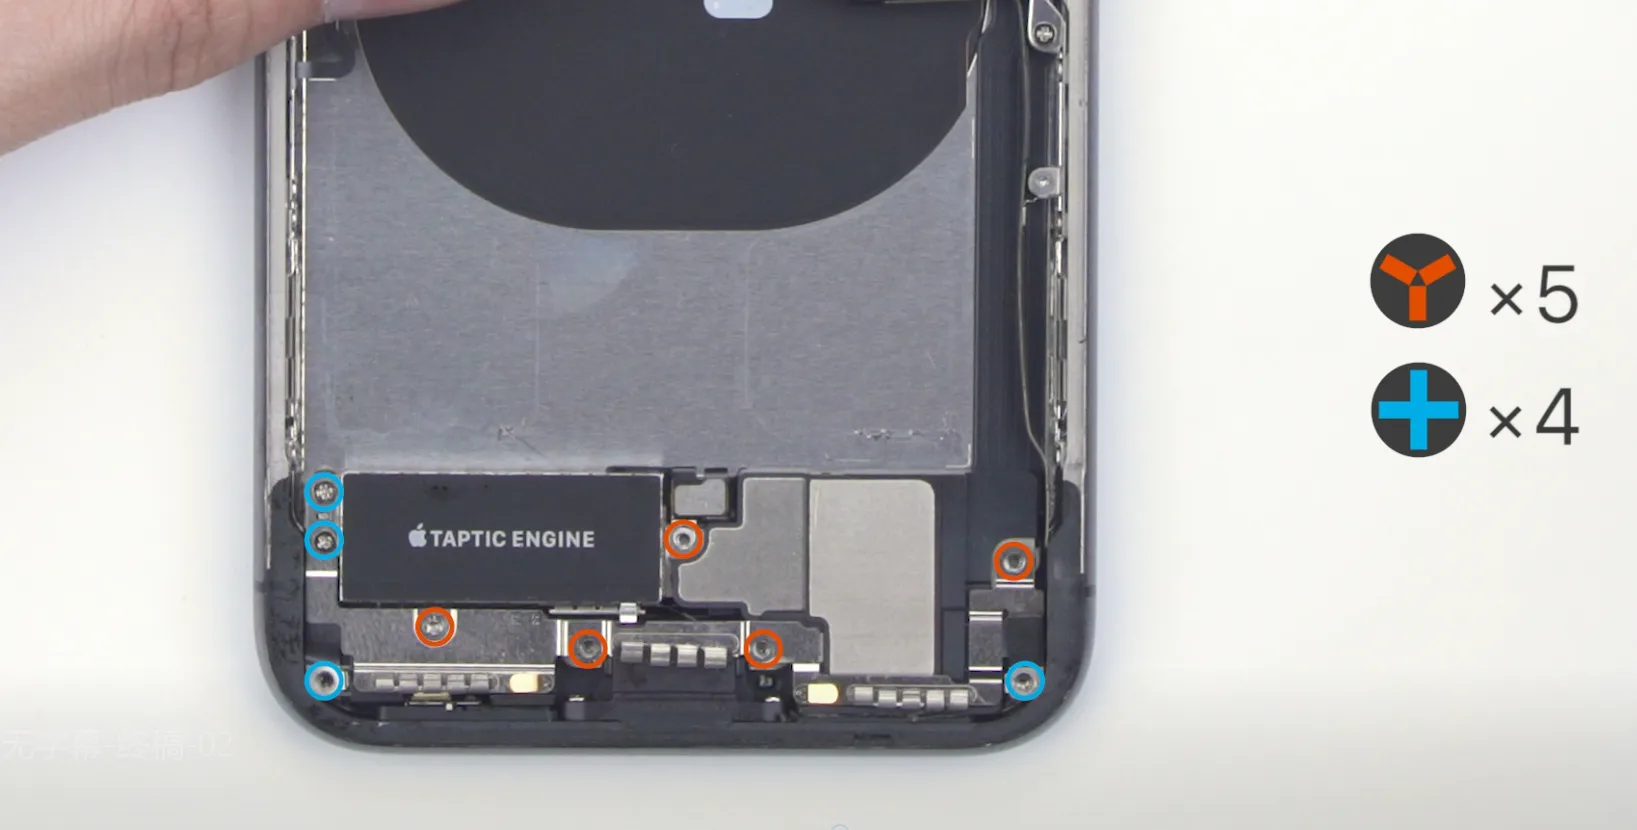
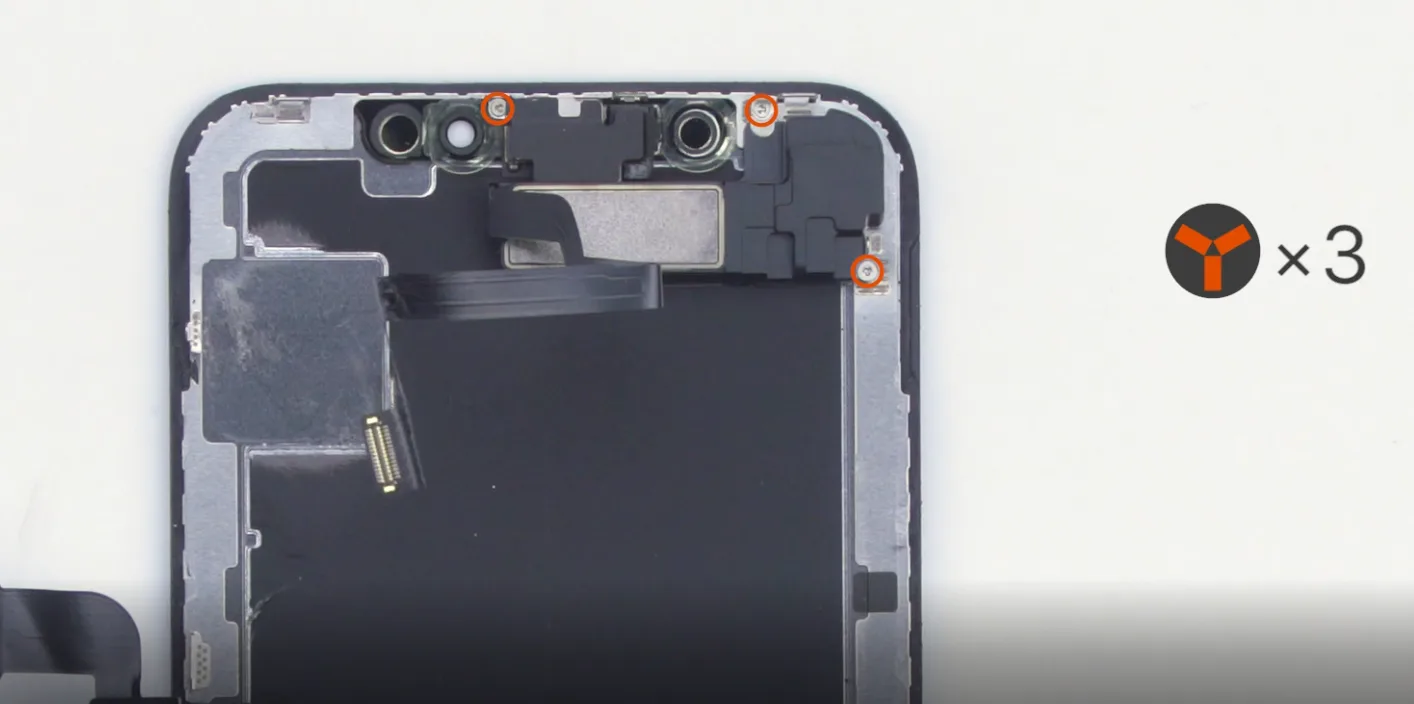
    Next, use a Tri-wing screwdriver to unscrew the screws on the shielding cover of the cable connector. You can use a spudger slightly to extricate the battery and the connector between the screen and the motherboard.

    Now, continue to follow instructions step by step. Detach the earpiece speaker flex cable, and remove the old display assembly.

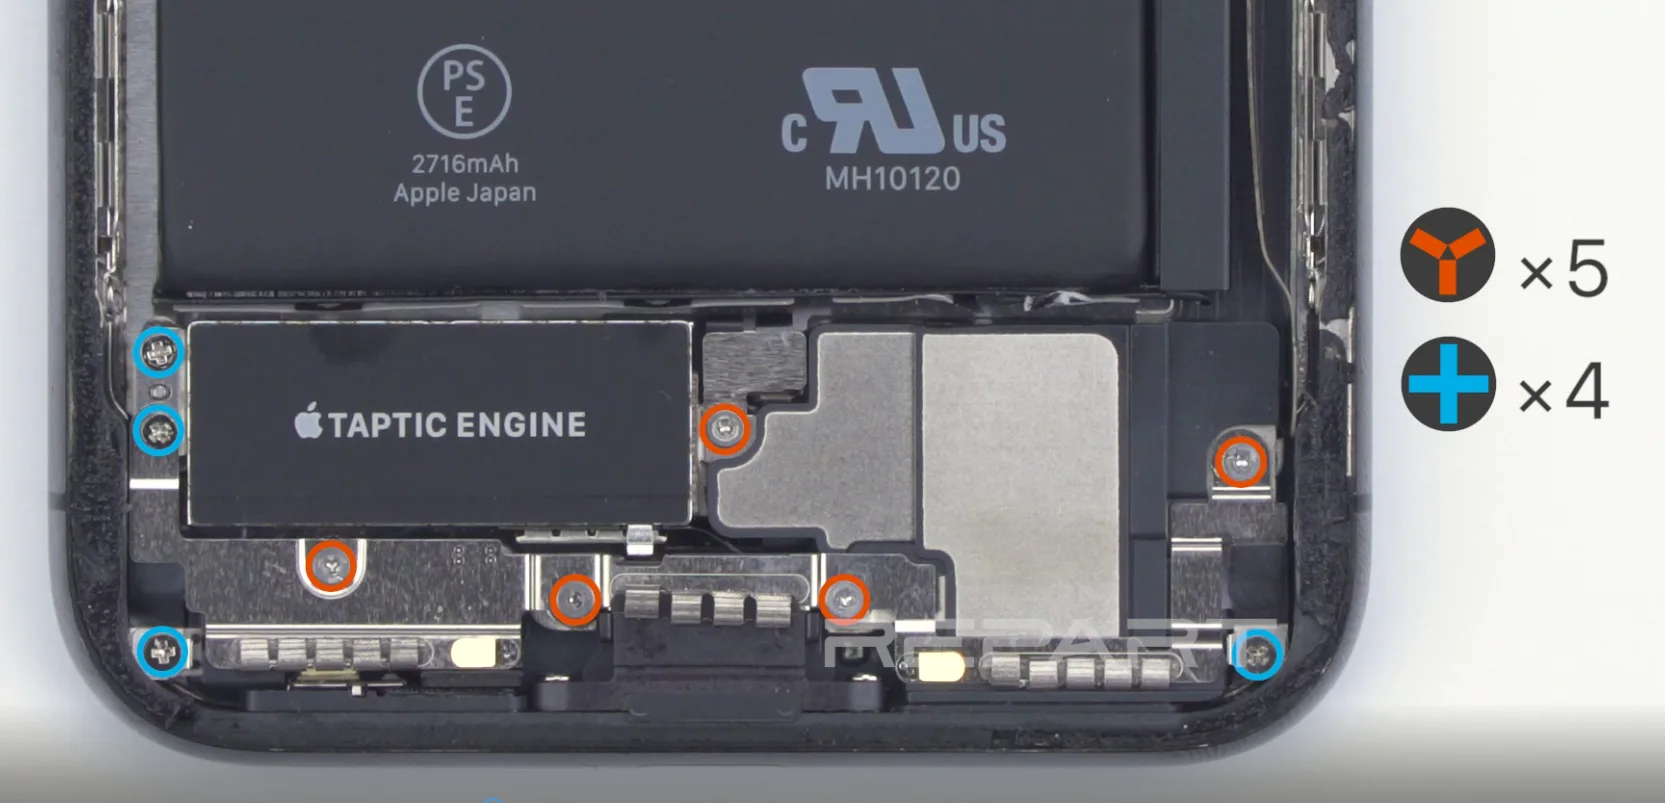
    unscrew the screws
    Detach the earpiece speaker flex cable
    unscrew the screws

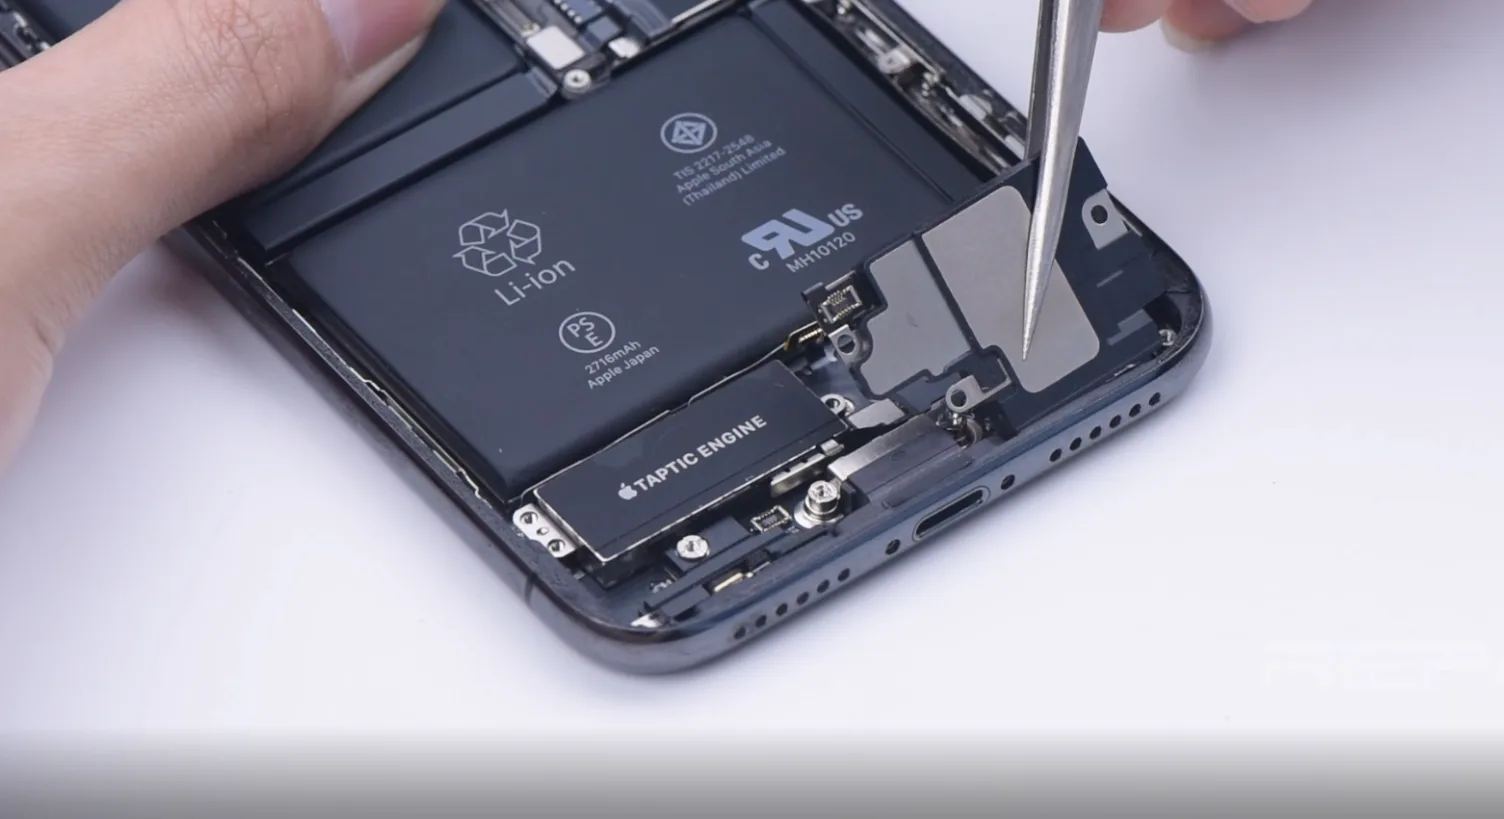
    Then, please use tweezers to clean up the battery adhesive. It’s suggested to detach the Taptic Engine and loudspeaker better to remove the adhesive at the bottom of the battery.

    Again, use a Tri-wing screwdriver to unscrew the screws on the speaker flex cable and detach the shielding cover.
     
    After taking out the loudspeaker and Taptic Engine, let’s continuously remove the battery adhesive. Because the adhesive at the bottom of the battery has been for a long time, it’s hard to remove it. We need to drop some alcohol to help clean up.

    Drop the alcohol around the edge of the battery, and leave it to penetrate and evaporate. Use tweezers to make it loose, take out the old battery, and continue to remove the rest adhesive.

    Please keep removing the waterproof adhesive around the frame. And replace the Taptic Engine and loudspeaker. Remember to tighten the screws and replace them with the new battery.

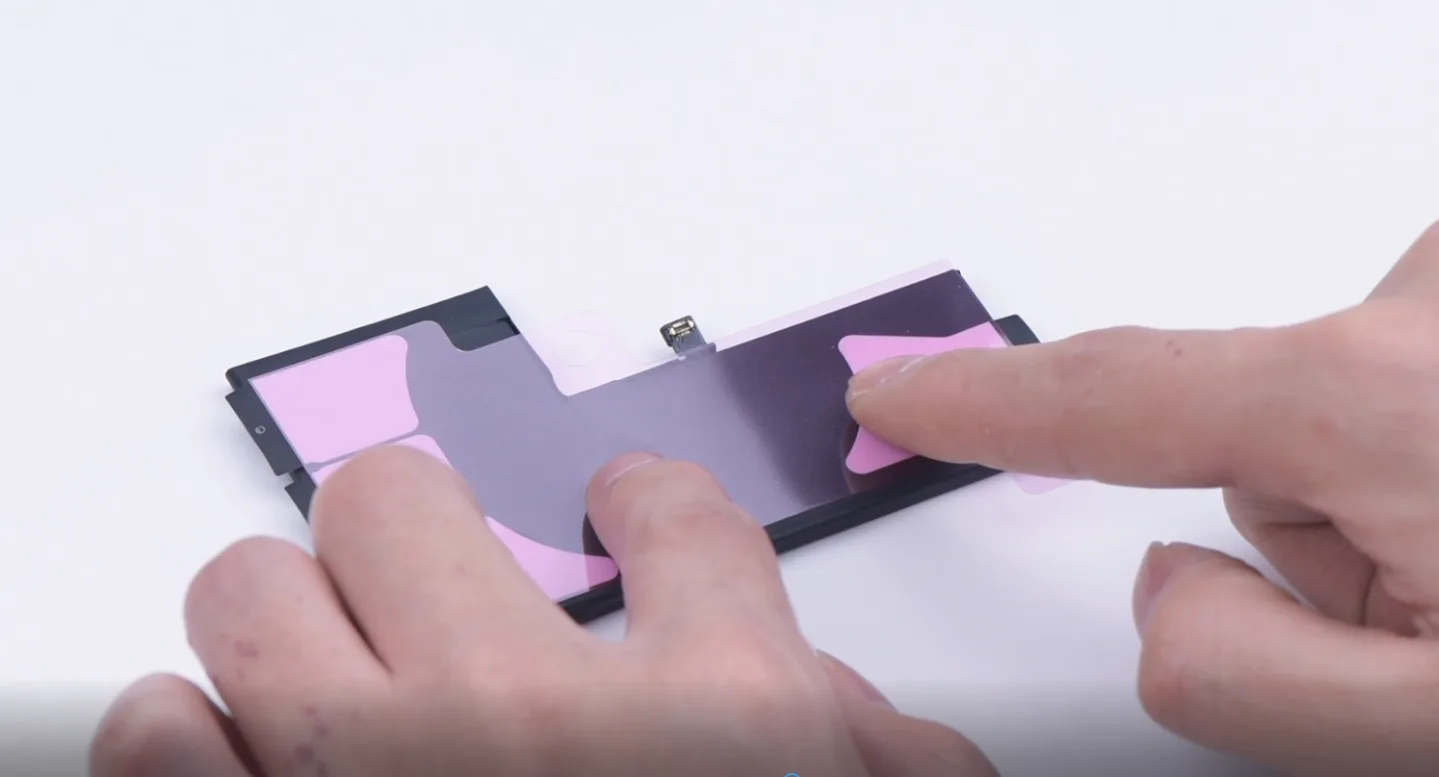
    battery adhesive
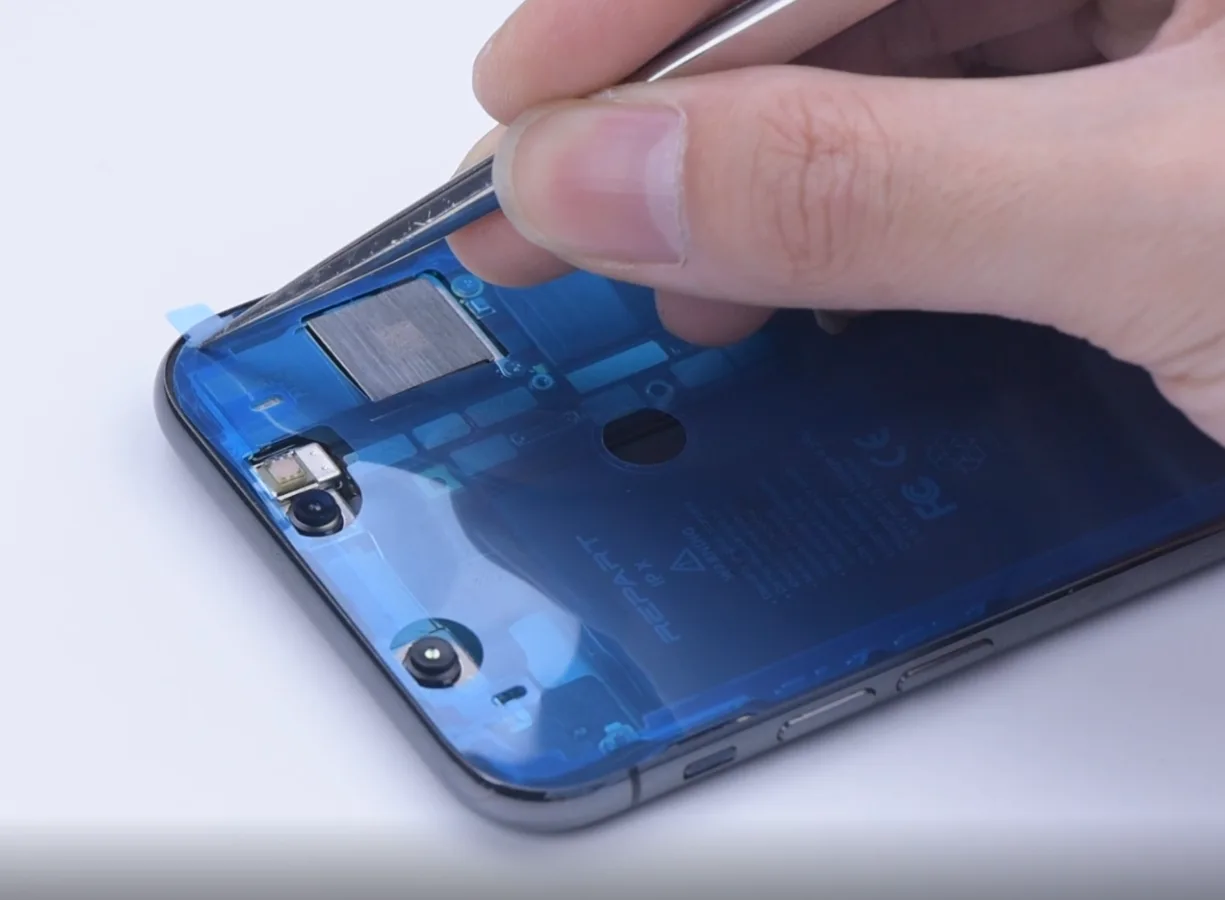
    Waterproof adhesive

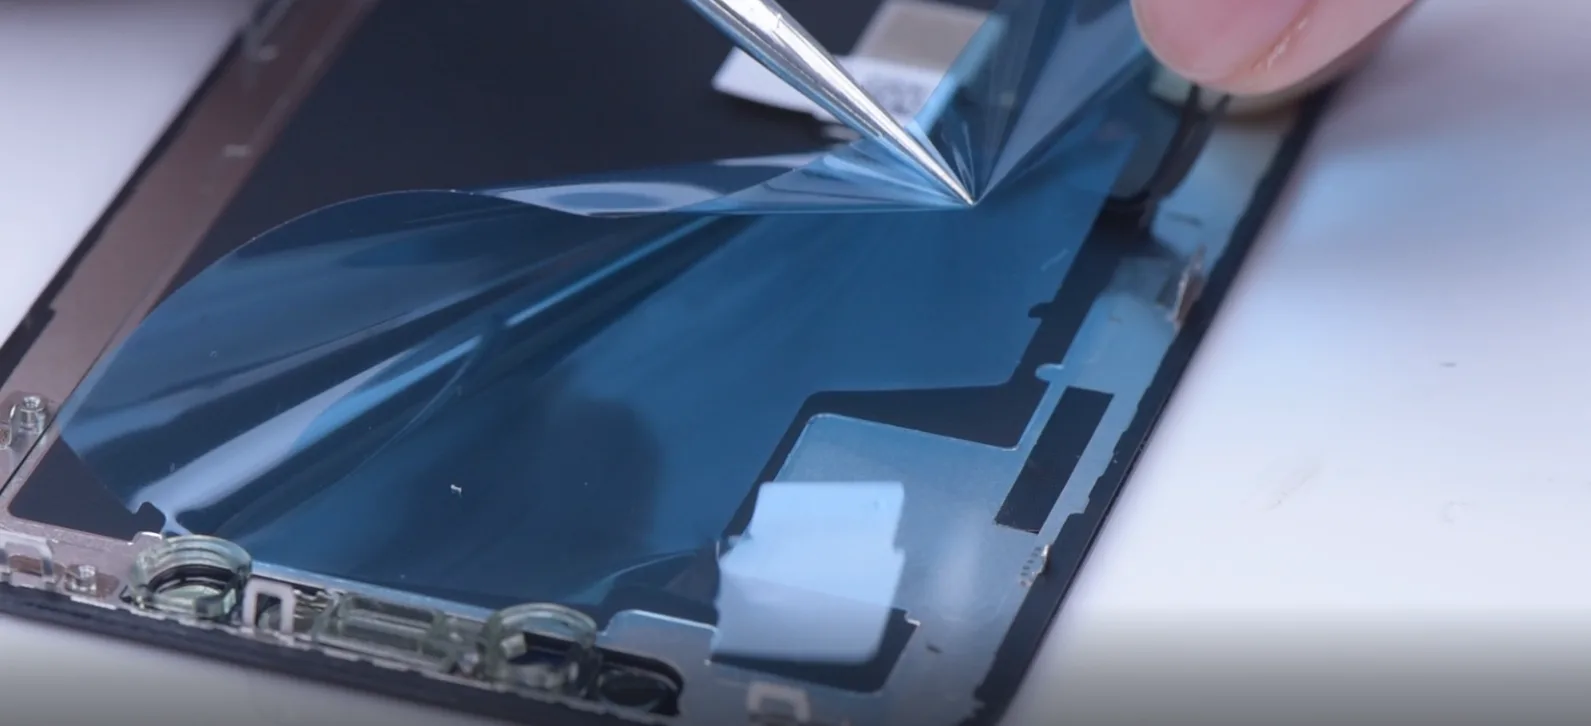
    Tear off the film of the battery adhesive, and make its glue adhere to the battery. Press it slightly, and tear off the film. Please put on the new battery, and press it slightly.

    Use a spudger to disengage the battery connector. Reassemble the display cable, touch the cable, and continuously.

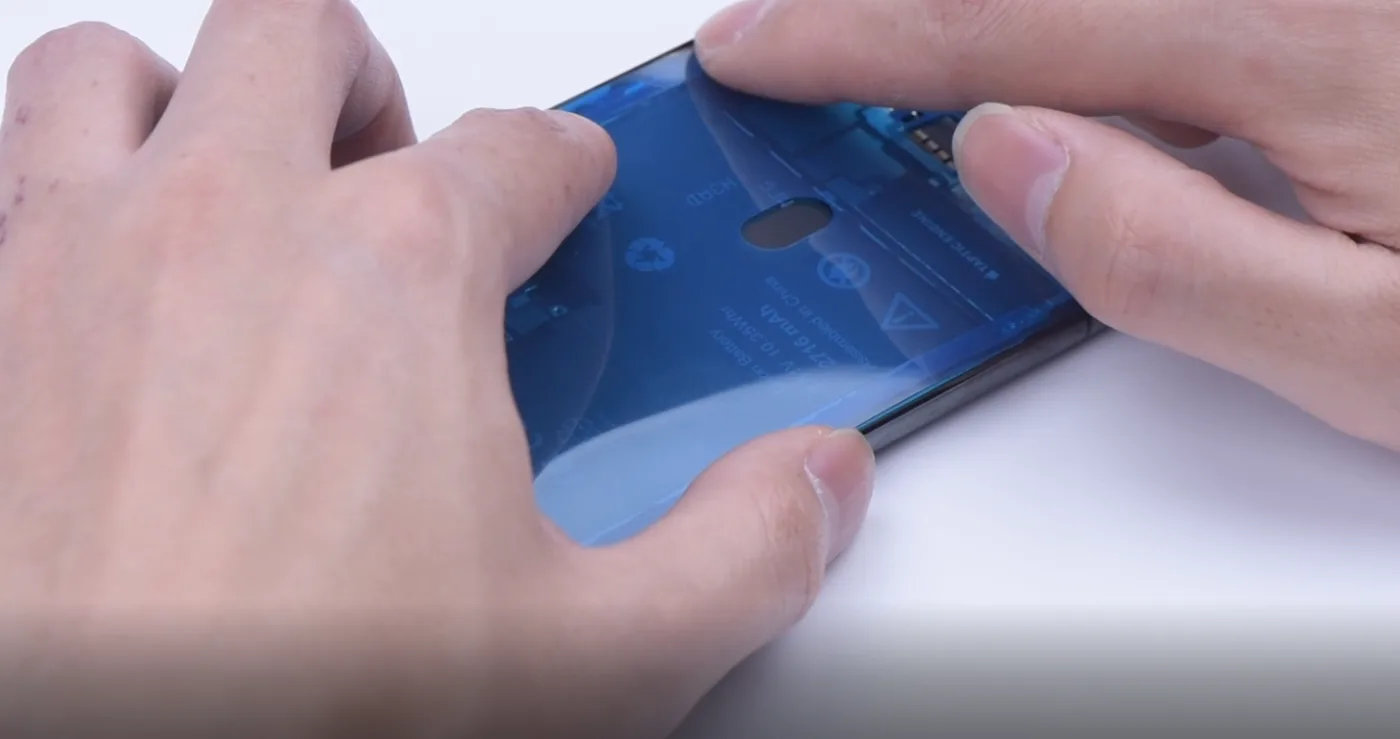
    Please turn it on. Check the health condition of the battery. It shows the maximum capacity of the battery now is 100%. Please turn it off. Tear off the waterproof adhesive. Make it adhere to the phone body. Press lightly with tweezers to make it adhesive.

    Tear off the film. Reassemble the display cable and touch the cable. Reassemble the earpiece speaker flex cable, and connect the battery. Install the shielding cover, and tighten the screws.

    Take off the waterproof adhesive around the frame. Buckle the phone screen.

    Please turn it on again. Let’s do some battery tests. First is the wired charging test. Next is the wireless charging test. It’s working. Both are working.

    The above guidance is about the battery replacement process. If you have any problems or advice, please leave us a comment below. 
     

  • iPhone Aftermarket Batteries: Massive Production and Pro Inspection

    iPhone Aftermarket Batteries: Massive Production and Pro Inspection

    In the previous blog: What Should A Qualified Battery Actually Be, REWA explained when should a battery be replaced and what standards we applied towards battery replacements.

    Now we will demonstrate the detailed production process and test procedures.

    Top quality batteries come from excellent materials, advanced automation equipment, and strict inspection&test standards. In the top-level factories, phone battery is usually carried out on highly automated equipment, with top quality materials applied.

    However there are still many smaller manufacturers who use manual assemble methods or poor materials, that is why the batteries in the market vary greatly.

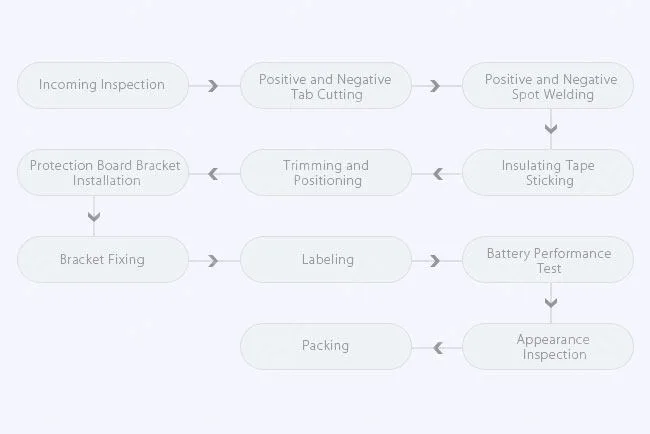
    What should a complete battery production process be?

    Production Process

    Production Process

    Battery appearance inspection is a common but easy way to inspect your phone batteries, but it does not always work, lacking precise values and results.

    Some battery failures are not so easy to spot with naked eyes. However, the strict test is necessary for the lithium batteries to ensure safety and quality.

    Here we will demonstrate the professional and complete test procedures.

    The test can be divided into three parts: Appearance Inspection, Basic Performance Test and Physical Performance Test.

    Appearance Inspection

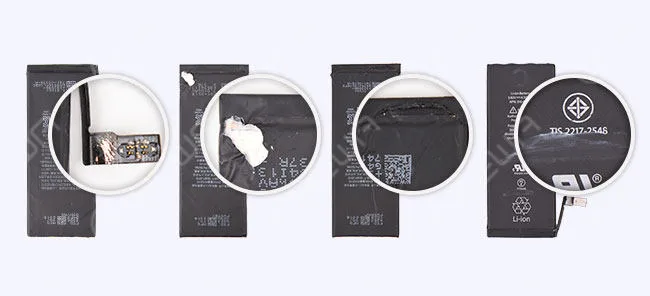
    Appearance Inspection: breakage, paint loss, crack, corrosion, labeled data

    Appearance Inspection: breakage, paint loss, crack, corrosion, labeled data

    Basic Test Methods and Procedures

    Basic Test Methods and Procedures

    Physical Performance Test Procedures 

    Further physical performance tests are conducted in the extreme situations, so as to verify if the battery will bend, deform, fire and explode in the different simulative environments.

    1. Low-Pressure High Altitude Simulation Test 

    This procedure is to test the air transportation safety performance of the battery at a pressure under 11.6kPa.

    Result: After 360 minutes, all the samples perform normally, no fire or explosion. /The samples do not explode or catch fire.

    2. Temp. & Humi. Test 

    This test is to verify the temperature adaptability of battery, processed at an extreme temperature of 72±2℃ and -40±2℃. 

    Batteries are stored for 6 hours at 72±2℃, then 6 hours at -40±2℃, for a total of 10 cycles.

    Result: After 10 cycles, all the samples perform normally. No bulge, fire or explosion./ The samples do not explode or catch fire

    3. Vibration Test 

    Vibration test is used to verify the battery anti-vibration performance during the transportation and usage. The test is a Sine Sweep: 7Hz – 200Hz, 15 min/sweep, 12 times, 3 hours in total

    Result: All the samples perform normally

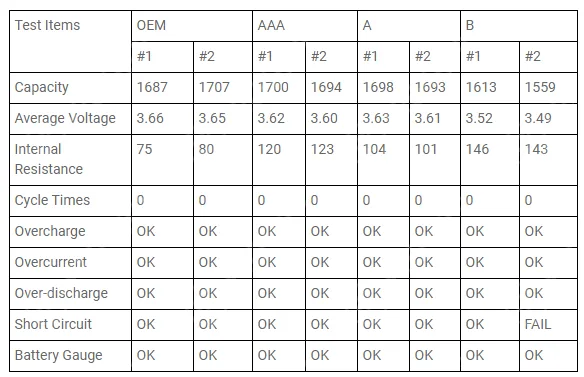
    4. Capacity Test 

    This is to test the actual capacity of the battery

    Result: OEM is the top performer. AAA Grade and A Grade come second, and the values are very close. B grade batteries are much worse than the above 3 kinds.

    5. Impact Test 

    Impact test simulates the impacting and hitting of the battery.

    Apply 561.5cm/s2 acceleration impact to the battery to test if it will be crushed or distorted when overload.

    Result: B grade batteries have problems of bend and deformation. Other samples perform normally.

    6. External Short Circuit Test 

    This test simulates an external short circuit to the terminals of the cell or battery. When the temperature goes up to 55℃, turn on the switch to make it short circuit, then check the battery to see if it will explode.

    Result: After 2 hours standing, all the samples perform normally. No fire or explosion. /The samples do not explode or catch fire.

    7. Drop Test 

    The drop test is operated at a height of 1.2 meters to test the battery hardness and anti-deformation capability.

    Result: B grade batteries have problems of bend and deformation. Other samples perform normally.

    8. Crush Test 

    Each battery is applied with a crushing force of 1.3kN for 0.1s. After 30 minutes, check the battery to see if it will fire, explode or deform.

    Result: All the samples perform normally.

    9. Thermal Abuse Test 

    The purpose of abuse testing is to verify that the battery is not a danger to the user either by accidental or deliberate thermal abuse under any conceivable conditions of use.

    After the temperature rise for 26 minutes, hold at 130℃ for 10 minutes, check the battery to see if it will fire or explode

    Result: All the batteries have the problem of bulging, no fire or explosion

    10. Burning Test 

    The purpose of this procedure is to test the safety performance of the battery. Put the battery into the machine, ignite it to test if the battery will explode and if the ashes are in clumps.

    Result: After 30 minutes, batteries burned completely, no explosion, with clumpy ashes left

    Every battery from REWA has to pass through rigorous basic performance and physical performance test, and only qualified products can be delivered to the warehouse. This is to ensure every battery you get is superior, safe and reliable.

    Certifications

    Our business has been founded on the belief “Quality Above ALL” for years. The batteries from REWA passed a series of international authoritative certifications, such as UL, CE, FCC etc..

    From all the above test results and analysis, we can draw a conclusion that OEM, AAA and A grade batteries are much better and safer than the B grade.

    Now that there is a shortage of OEM batteries, the cost-effective AAA and A grade batteries undoubtedly become your first choice.Every battery from REWA has been rigorously tested.

    Our QC and technical team can offer the right solutions for your needs and advise the best but economical battery replacements.

    If you have any questions and demands, please feel free to contact us.

  • Troubleshooting iPhone XS Max Face ID Not Working – Dot Projector Repair

    Troubleshooting iPhone XS Max Face ID Not Working – Dot Projector Repair

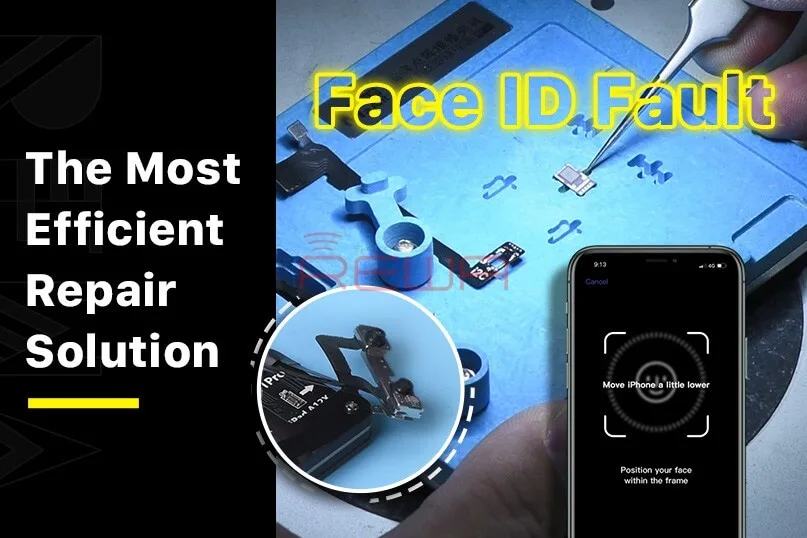
    Face ID Not Working ‘Move iPhone a Little Lower/Higher‘ is usually caused by damage to the dot projector and the problem is confirmed to be almost unrepairable. However, there is finally a solution to fix the problem. Today REWA LAB will show you the latest dot projector repair technique!

    Face ID Not Working 'Move iPhone a Little Lower/Higher' is usually caused by damage to the dot projector and the problem is confirmed to be almost unrepairable. However, there is finally a solution to fix the problem. Today REWA LAB will show you the latest dot projector repair technique!

    Problem

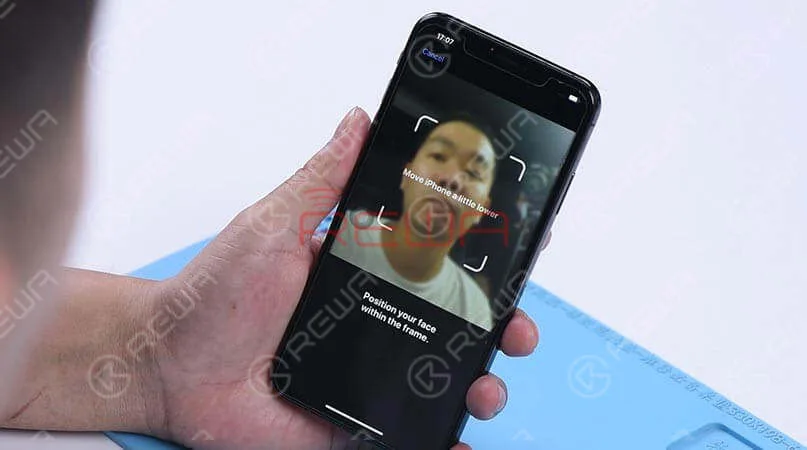
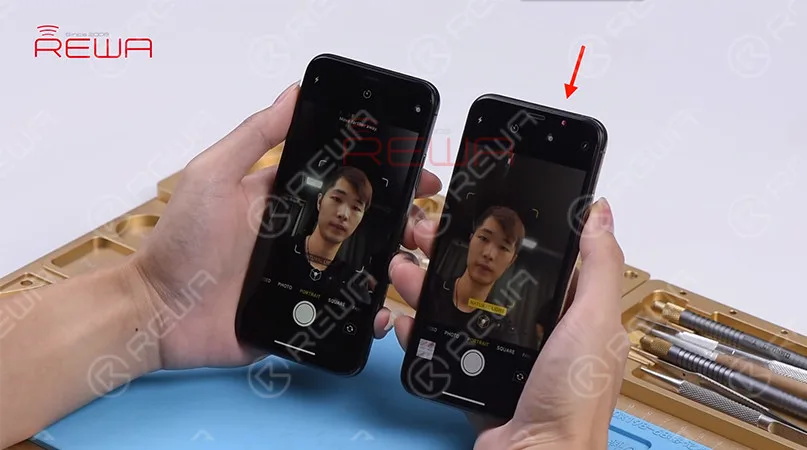
    When trying to set up Face ID on the iPhone, we get the message ‘move iPhone a little lower/higher’. Next, switch to the front camera, we found that the name of the lighting effect ‘Natural Light’ stays the same when the camera detects a person’s face. What’s more, the pop-up notification keeps saying ‘Move farther away’. Normally, when Portrait mode is ready, the name of the lighting effect ‘Natural Light’ should turn yellow. Judging by this, the dot projector or relevant circuits of the dot projector might have malfunctioned.

    When trying to set up Face ID on the iPhone, we get the message 'move iPhone a little lower/higher'. Next, switch to the front camera, we found that the name of the lighting effect ‘Natural Light’ stays the same when the camera detects a person's face. What's more, the pop-up notification keeps saying ‘Move farther away’. Normally, when Portrait mode is ready, the name of the lighting effect ‘Natural Light’ should turn yellow. Judging by this, the dot projector or relevant circuits of the dot projector might have malfunctioned.

    Diagnosis 

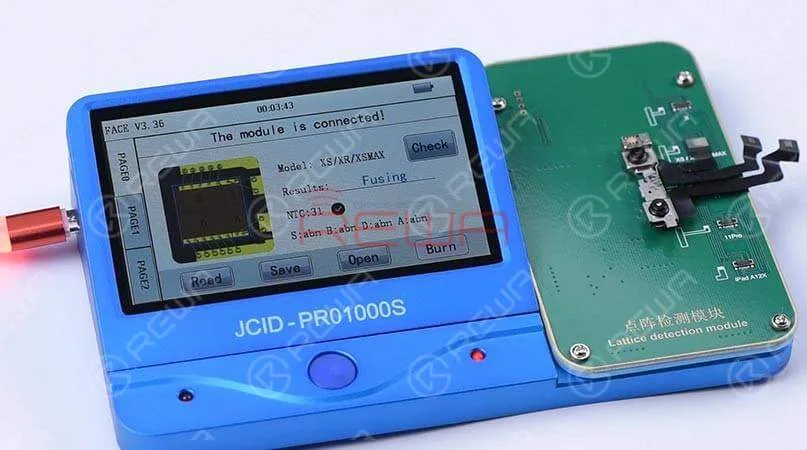
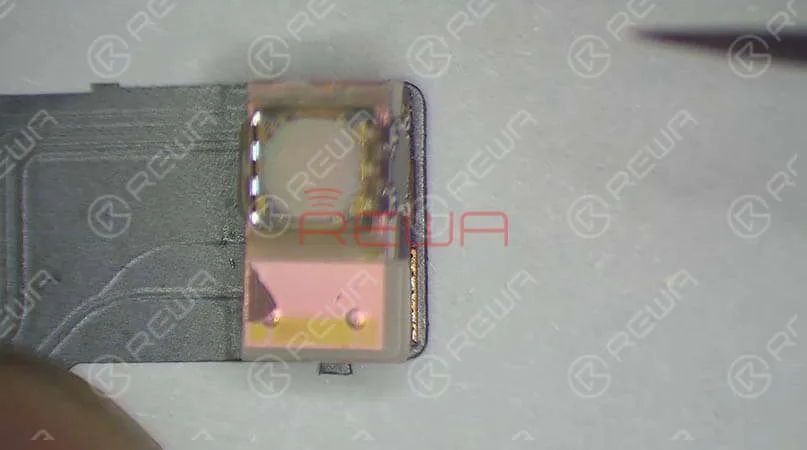
    Take apart the phone and remove the display assembly first. We can see that the dot projector has been water damaged and the crystal on the dot projector is broken. Take out the front camera assembly carefully. Here we recommend using a repair programmer to check the dot projector flex cable. Connecting the dot projector flex cable with the programmer, the results show ‘Fusing’ which means the dot projector flex cable has been damaged. We need to burn data of the original dot projector flex cable onto a new one and then replace the broken crystal.

    Connecting the dot projector flex cable with the programmer, the results show ‘Fusing’ which means the dot projector flex cable has been damaged. We need to burn data of the original dot projector flex cable onto a new one and then replace the broken crystal.
    Connecting the dot projector flex cable with the programmer, the results show ‘Fusing’ which means the dot projector flex cable has been damaged. We need to burn data of the original dot projector flex cable onto a new one and then replace the broken crystal.
    Connecting the dot projector flex cable with the programmer, the results show ‘Fusing’ which means the dot projector flex cable has been damaged. We need to burn data of the original dot projector flex cable onto a new one and then replace the broken crystal.
    Connecting the dot projector flex cable with the programmer, the results show ‘Fusing’ which means the dot projector flex cable has been damaged. We need to burn data of the original dot projector flex cable onto a new one and then replace the broken crystal.

    Troubleshooting   

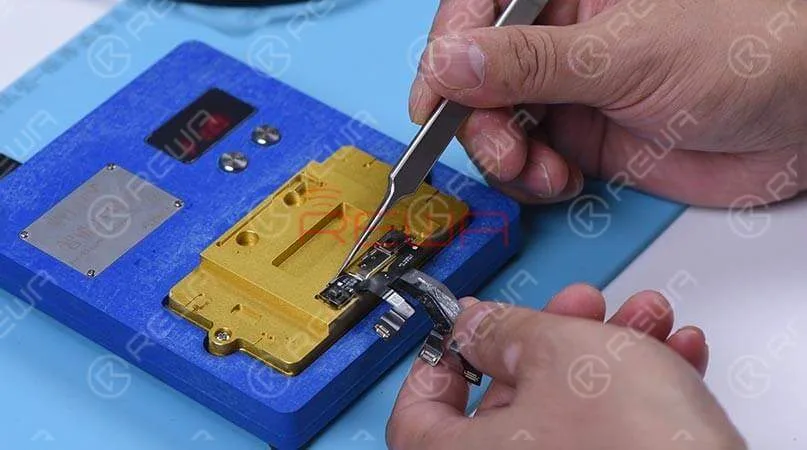
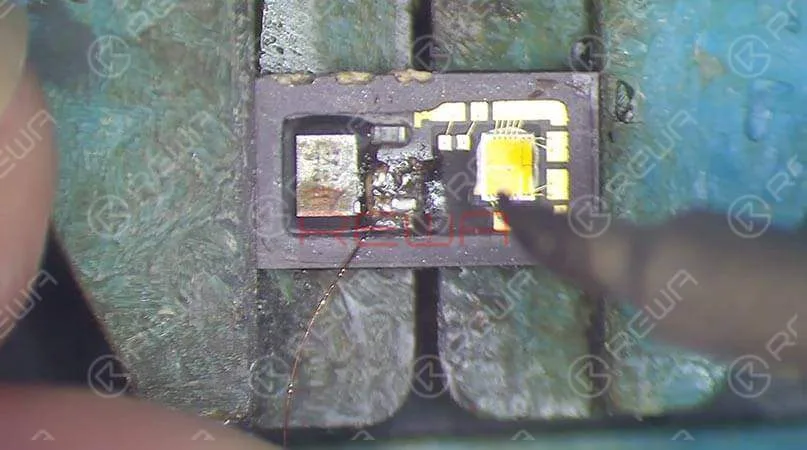
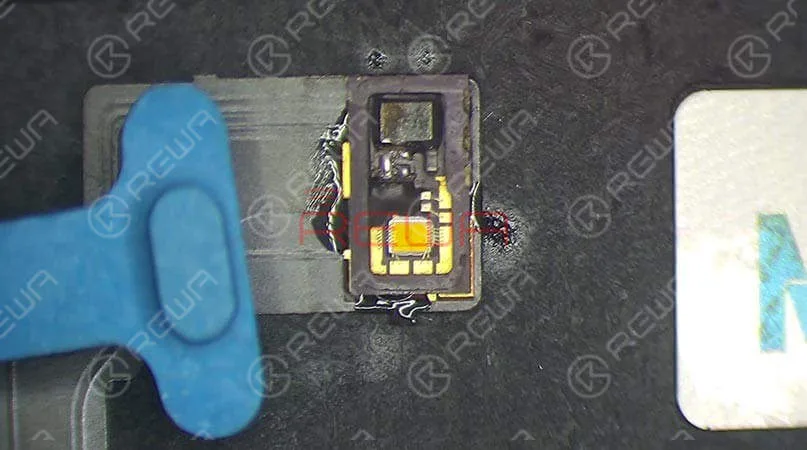
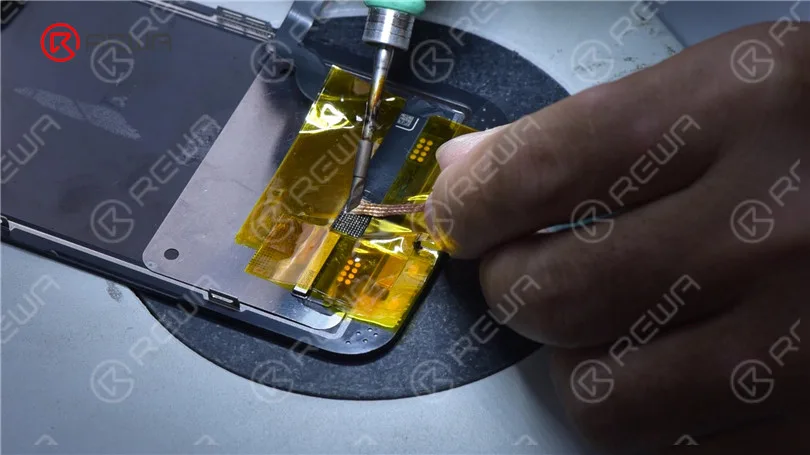
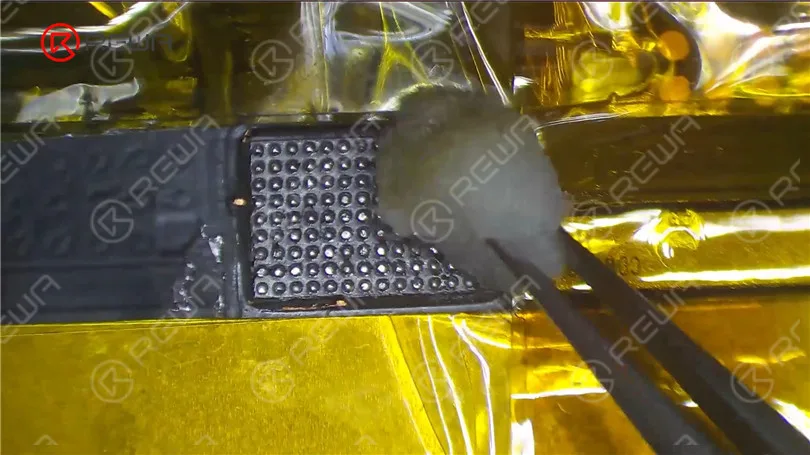
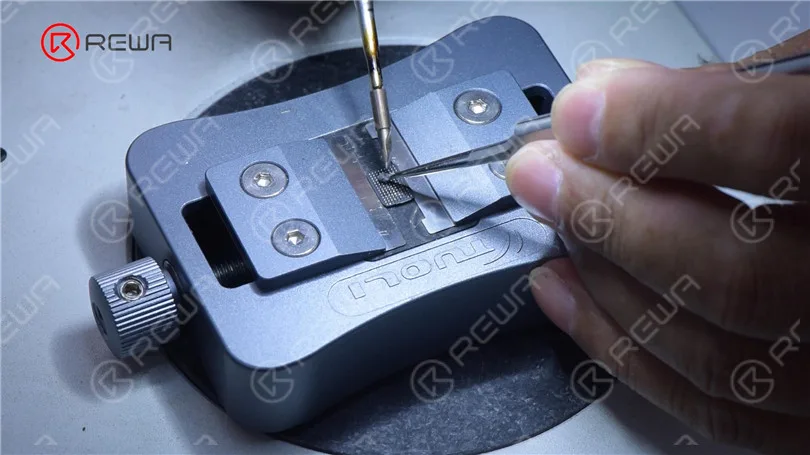
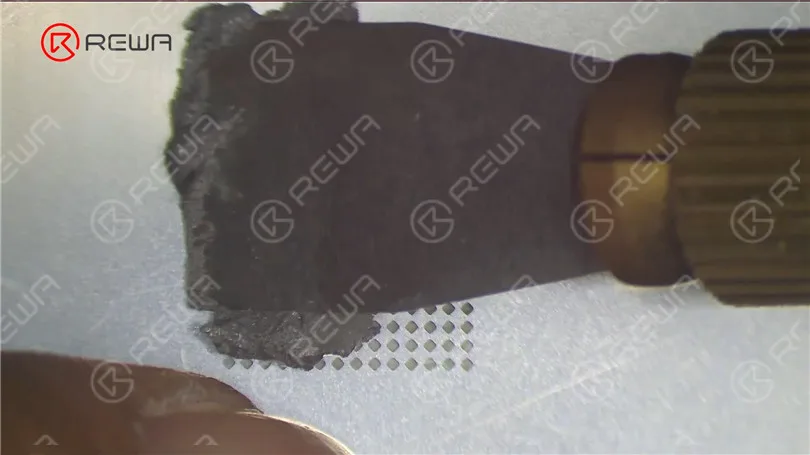
    In the first step, we should separate the crystal from the cable. Compared to traditional operations with a hot air gun, we prefer to use an intelligent preheating platform. Put the dot projector into the matching rubber mold and separate the crystal from the flex cable carefully with the blade.  Next, we use the repair programmer again to burn the origin data onto the new dot projector flex cable. After completing these two steps, we need to solder the dot projector module and glue a known-good crystal. For detailed instructions, click on the video at the bottom of the article

    troubleshooting iphone xs max face id not working dot projector repair 8

    Reassemble and Test 

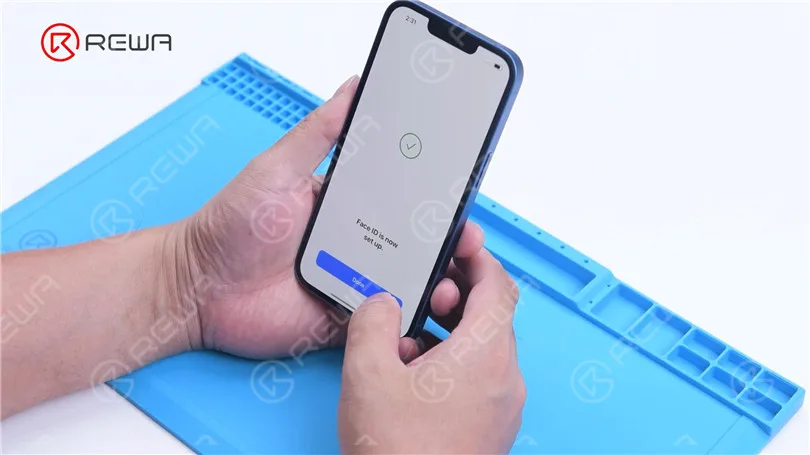
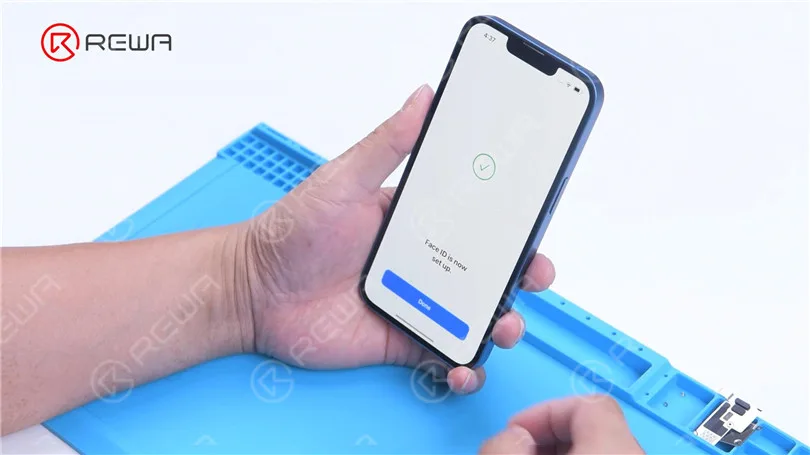
    Apply double-sided adhesive tape on the backside of the front camera, and adhere the dot projector flex cable to the right position. Get the front camera assembly installed and get the logic board assembled and buckle the display assembly. Face ID can be set up successfully, and the phone can be unlocked with Face ID this time.  Tips: The double-sided adhesive tape used here is for the test. We need to glue the dot projector module onto the flex cable after fault clearance.

    Tools Used

    Visit our online shop for more parts and tools.You can also visit REWA YouTube Channel to check our video.

  • Reasons for iPhone Face ID Not Available

    Reasons for iPhone Face ID Not Available

    Ahead of the launch of the iPhone 12, rumors claimed that the new model will both feature Touch ID and Face ID. Now that these myths have been dispelled, the iPhone 12 retained the Face ID function that proves to be a more secure and effective recognition technology.

    Though Face ID is handy, numerous users found that Face ID is not working sometimes, in which they have no choice but to enter the passcode to unlock.

    Face ID not working

    There are generally several reasons why Face ID is not available.

    Security Protection

    Like passcode unlock, Face ID also has a security protection system. Once the system is activated, you must enter the passcode to complete the extra security verification.

    1. The device just turns on or restarts.

    2. The device is locked for more than 48 hours.

    3. In the past six and half days, the device hasn’t been unlocked by a passcode and the device hasn’t been unlocked by Face ID in the past 4 hours.

    4. The iPhone receives remote lock instruction.

    5. Face ID unlocking has failed 5 times.

    6. Simultaneously press and hold the side button and either volume button until the “Slide to power off” and “Emergency SOS” sliders appear on the display.

    Other Conditions

    The Face ID may also fail in some conditions:

    1. Face Covered

    If you wear sunglasses or a hat, it will prevent your Face ID from working successfully.

    2. Camera Covered

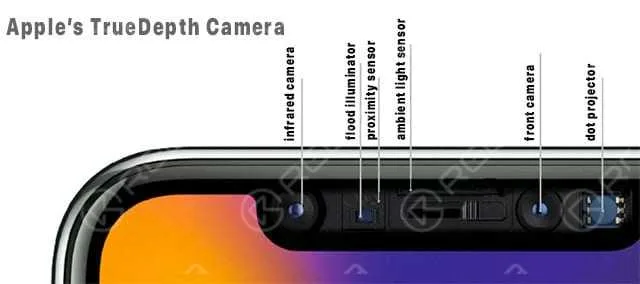
    If you apply a protective film on your phone, or there is dirt near the TrueDepth camera, the sensitivity of Face ID may be affected to some extent.

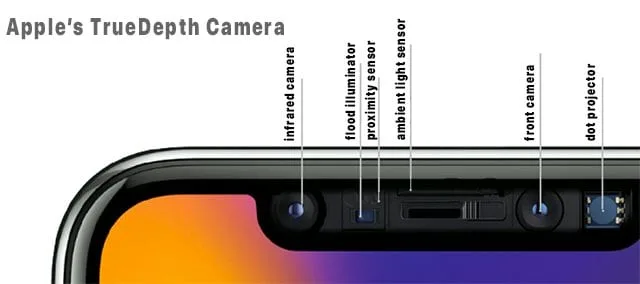
    Apple's TrueDepth camera

    3. Hardware Problem

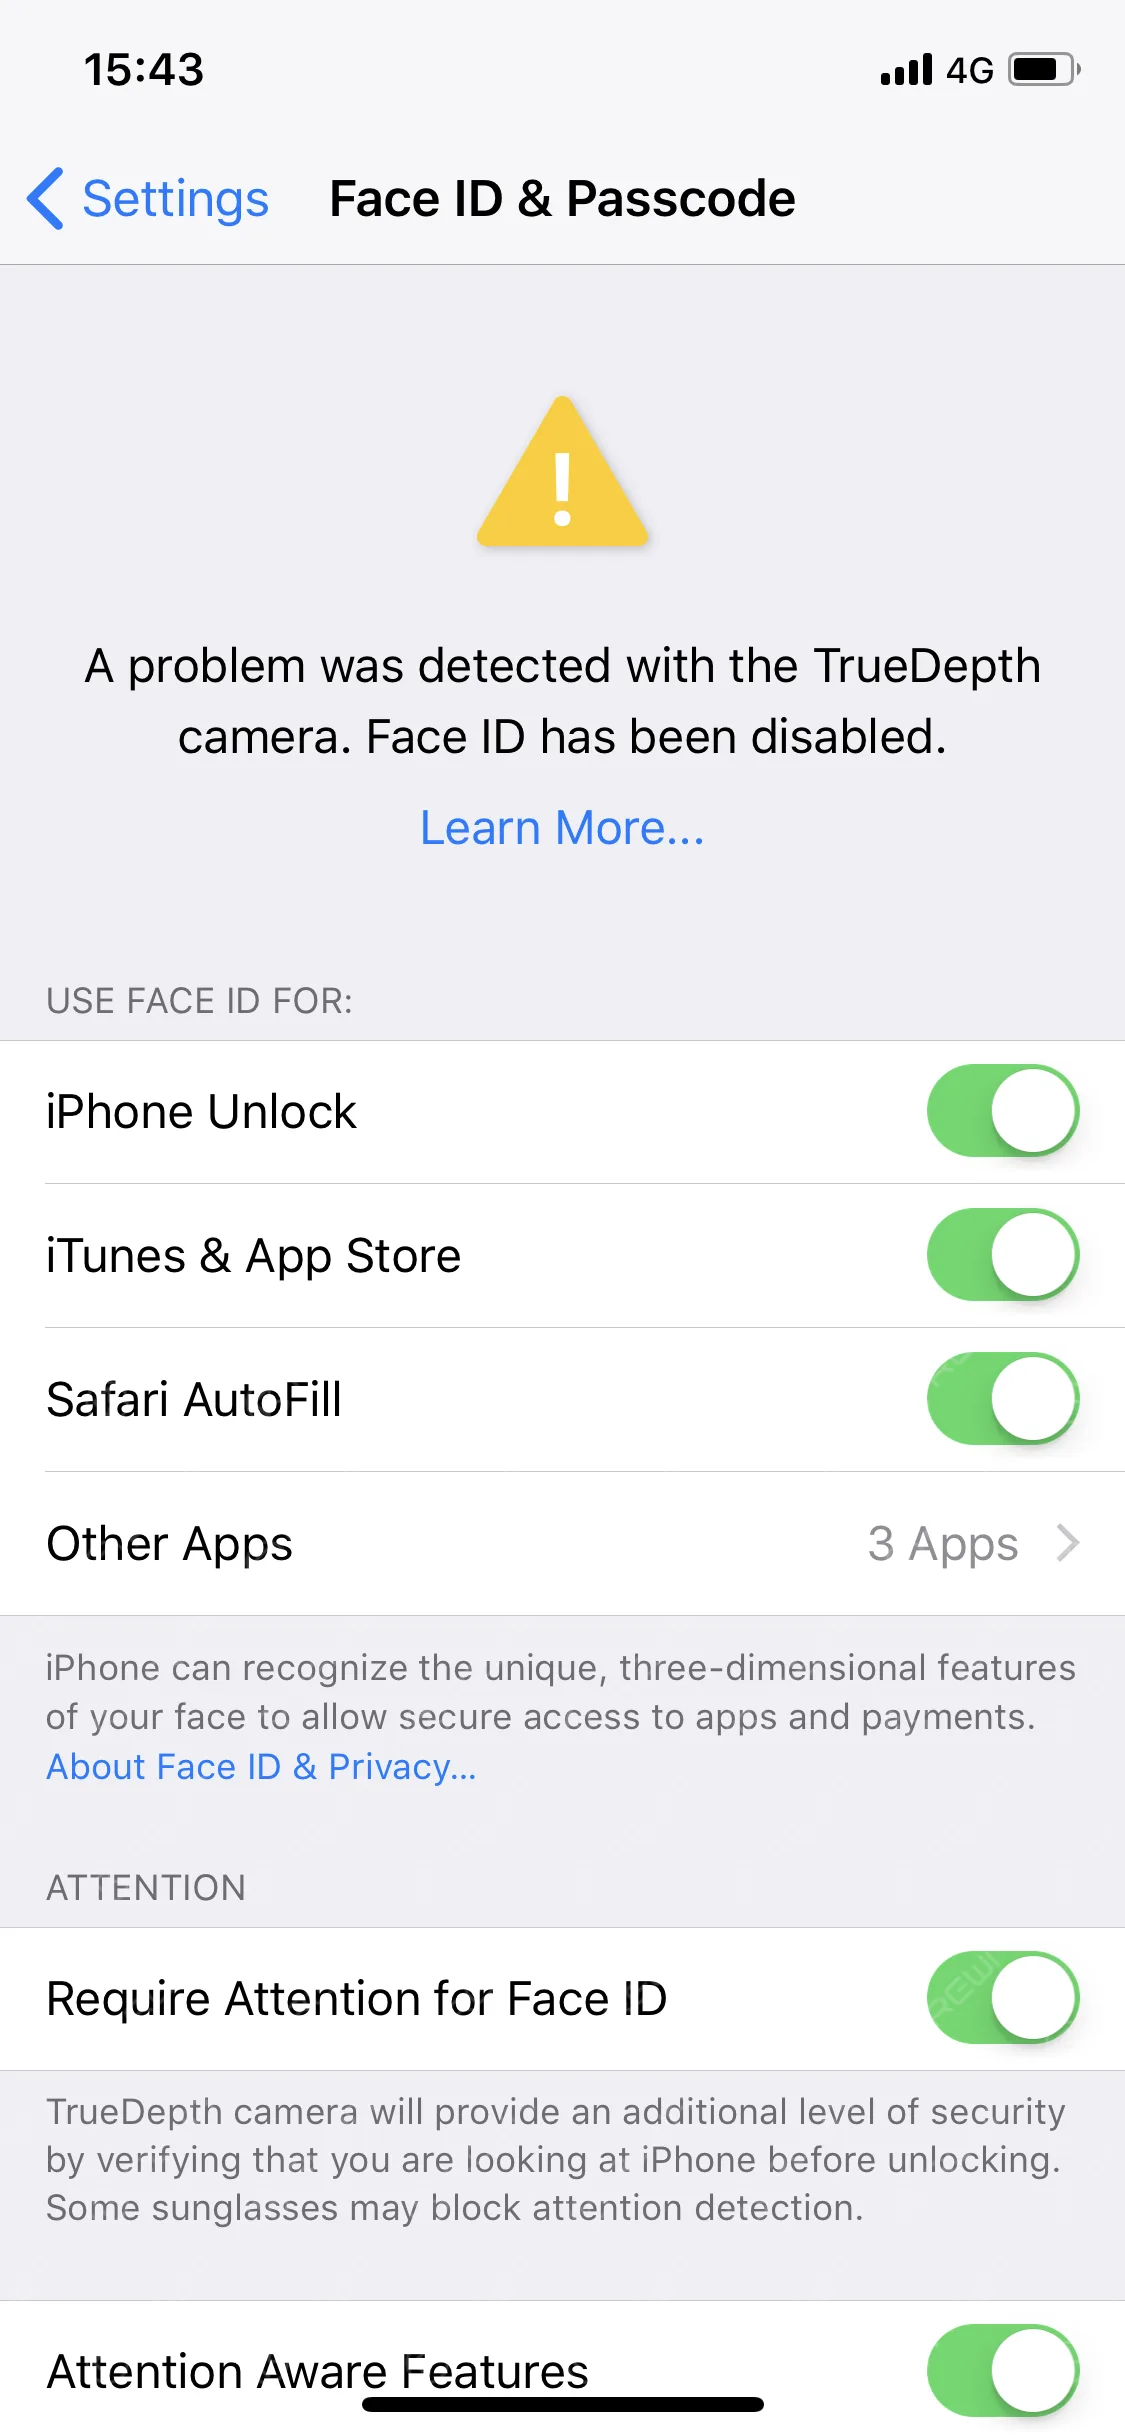
    If you see “A problem was detected with the TrueDepth camera. Face ID has been disabled”, it means that iOS has detected hardware damage of the device and it needs to be repaired.

    Although Face ID is convenient, the repair cost of hardware damage is also very high. If there is a problem with Face ID, you can first try to solve it by resetting and restoring the system.

    If it is determined to be a hardware problem, you’ll probably have to take your iPhone to your nearest Apple Store for repair.

    Feel free to leave any other questions you have about Face ID down below in the comment section.

  • iPhone X Face ID Not Working Repair

    iPhone X Face ID Not Working Repair

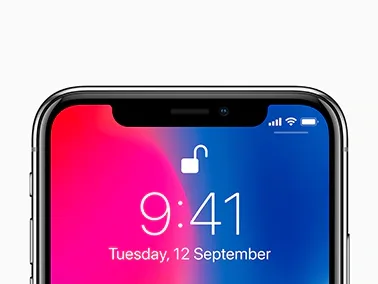
    With the diffused application of Face ID on iPhone X – 11 series, Face ID failure also appears at a high frequency. As our previous Face ID teardown video has introduced, Face ID can be easily damaged and hardly repaired.

    If the problem is related to the flex cable, then it’s simple.

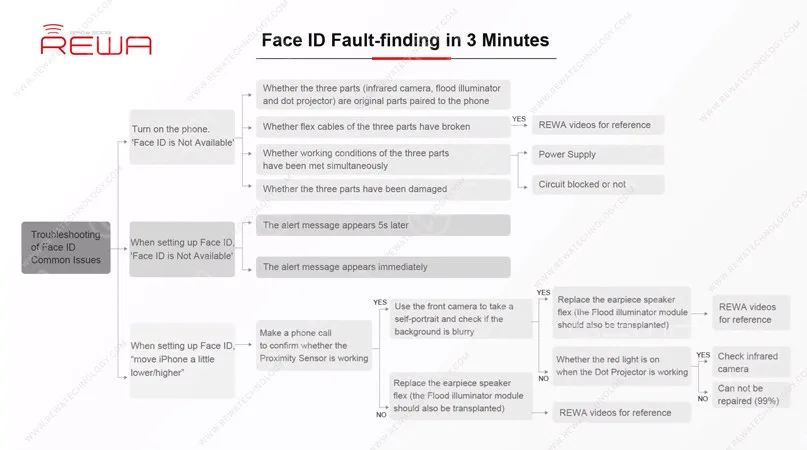
    However, based on statistics of REWA chip-level motherboard repair service , Face ID failure is caused by damage of the Flood illuminator/Dot Projector in most cases, which can not be repaired.

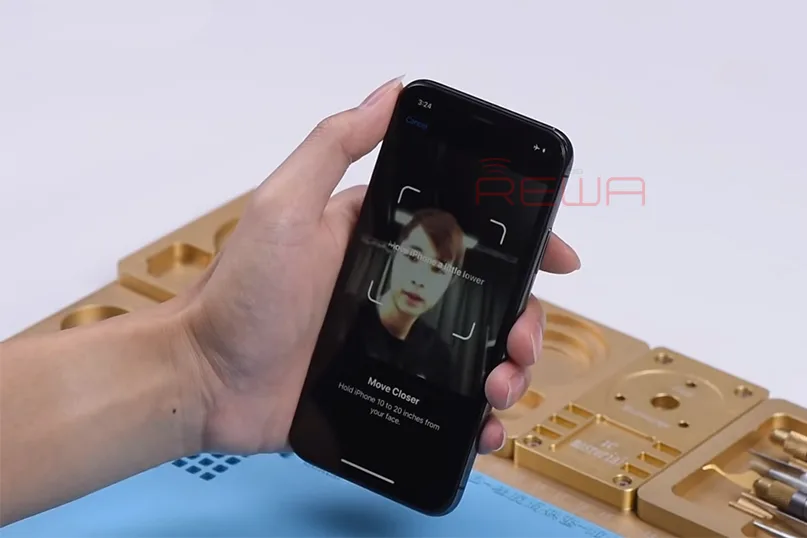
    face id setup not working

    Today, we want to share a case about ‘move iPhone a little lower/higher when setting up Face ID’ and show you how our technicians find out the fault in 3 minutes with the help of REWA exclusive repair tricks on Face ID troubleshooting. Let’s get started!

    Face ID Not Working Malfunction

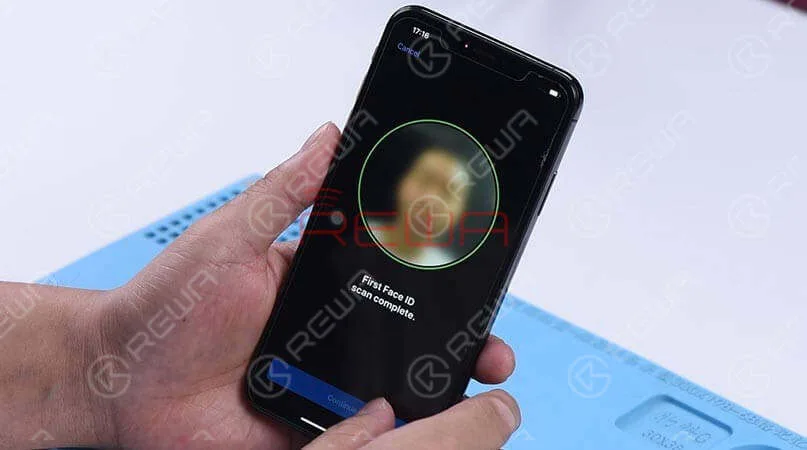
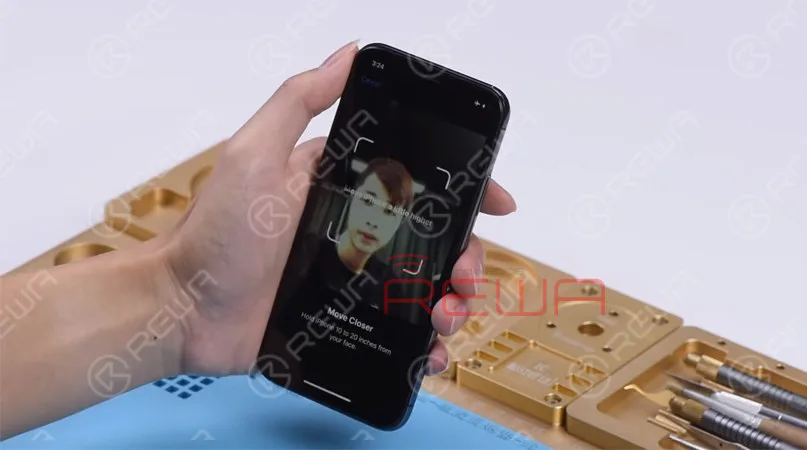
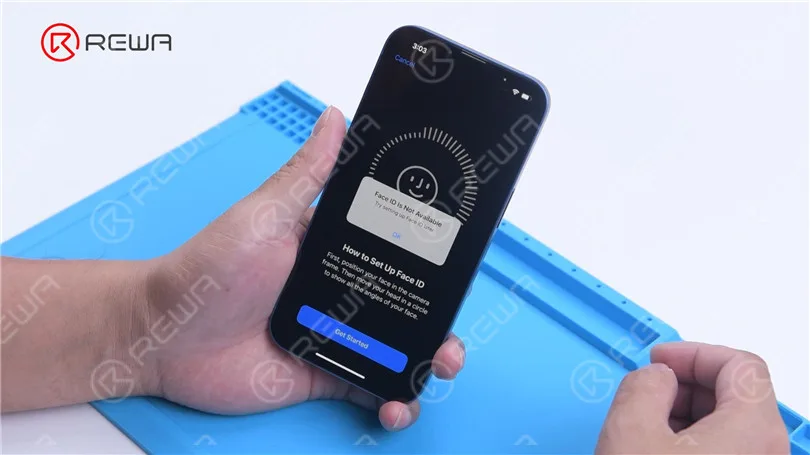
    The phone keeps sending messages: ‘move iPhone a little lower/higher’ during the setting up process of Face ID. It means that Face ID cannot be set up successfully on the phone.

    face id is not available

    Why is my face id not available troubleshooting

    Now, let’s find out the fault step by step.

    Step 1 Test The Flood Illuminator

    Based on REWA exclusive repair tricks, let’s start with the Flood Illuminator. There are two important Face ID parts whose behavior relies on the support of the Flood Illuminator.

    In our daily repair work, we can test the Proximity Sensor and the Ambient Light Sensor to confirm whether the Flood Illunmunator is working normally.

    why is my face id not working

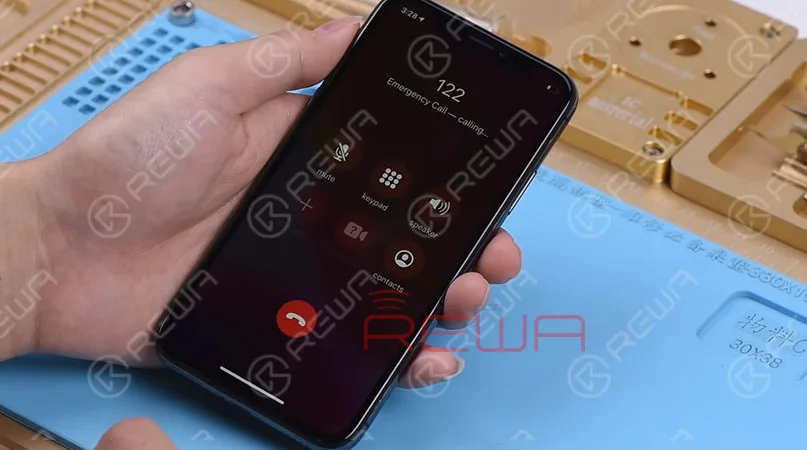
    Let’s make a phone call to confirm whether the Proximity Sensor is working. During the phone call, cover the top of the screen with one hand.

    We can see that the screen turns black immediately. Judging by this, the Proximity Sensor is working normally. 

    During the phone call, cover the top of the screen with one hand.

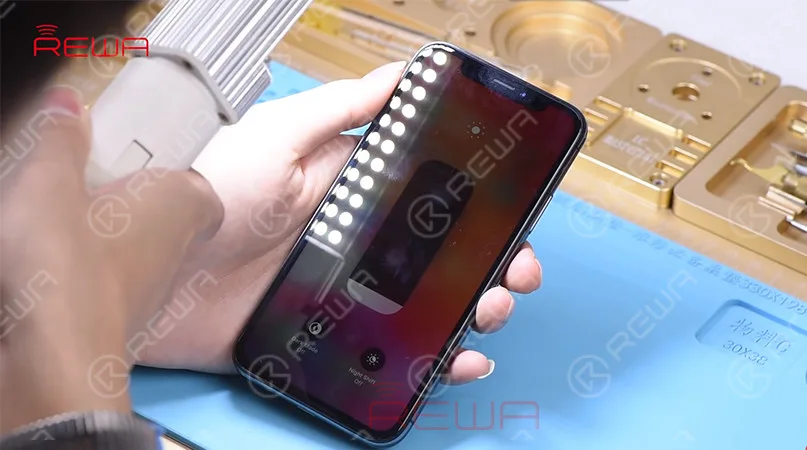
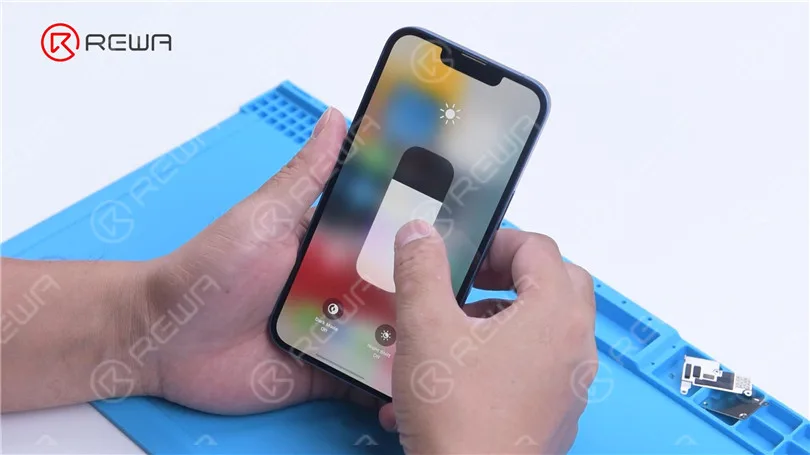
    Next, test the Ambient Light Sensor. Set the screen brightness to the lowest and then hold the phone under a bright light.

    With the screen getting brighter, we can confirm that the Ambient Light Sensor is also working normally. Judging by this, the Face ID failure is not caused by Flood Illuminator. 

    Ambient Light Sensor is also working normally

    Step 2 Test The Front Camera Parts

    Let’s move on to the next step of face id not working – test the front camera parts.

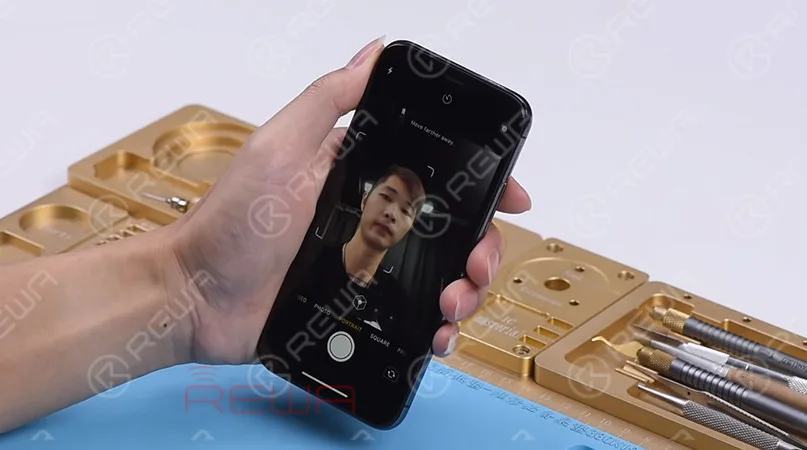
    Open the camera app and swipe to Portrait Mode. The background is not blurred, which is abnormal.

    The background is not blurred

    Step 3 Observing The Dot Projector

    At the Portrait Mode, there is no flashing red light from the Dot Projector. But the Dot Projector should emit flashing red light in normal status. We can confirm now that the Dot Projector has malfunctioned. This is the fault that causes the Face ID to set up failure. And the problem cannot be fixed.

    Dot Projector has malfunctioned

    Tips:

    The three parts ( infrared camera, flood illuminator and dot projector) are paired to the phone. Damage of any one of them can cause Face ID failure and such an issue is irreparable.

    Right now, Face ID failure has become a common problem in our daily repair work. Whether the problem you are dealing with can be repaired or not is really an important thing for repair technicians.

    Don’t worry! REWA exclusive repair tricks on face id not working can be a great reference for repair technicians to find out faulty positions and improve repair efficiency.

    For details of this case, please check out the YouTube Video below.

    Wanna learn basic knowledge about iPhone motherboard, master iPhone micro-soldering techniques, understand the work-flow of different iPhone circuits, master troubleshooting processes of different iPhone issues, and learn detailed screen/back glass refurbishing steps?

    REWA Academy is a platform that provides repair technique learning, practical demonstration, and idea-sharing for practitioners in the electronic repair industry. 

  • How to Fix iPhone Face ID – Move iPhone a Little Lower

    How to Fix iPhone Face ID – Move iPhone a Little Lower

    Many iPhone users may encounter a frustrating problem where Face ID continues to show”Move iPhone a Little Lower/Higher,” making it impossible to reset the feature. In this article, we will explore effective methods to resolve this issue and ensure the smooth functioning of Face ID on your iPhone.

    How to Fix face ID Move iPhone a Little Lower

    We have discovered several possible solutions fixing move the iPhone a little lower. These methods have proven effective and may work for your specific needs.

    1. Restart your Device

    To address software or temporary system failures, a simple restart can often resolve the problem. Follow these steps to restart your iPhone X or later models:

    • Press and hold the side button and any volume button simultaneously until the slider appears.
    • Slide the slider to power off the device.
    • Press and hold the side button until the Apple logo appears, indicating the device is restarting.

    2. Remove Film or Check For Dirt

    Inspect the area around the front camera for any stains or obstructions that may interfere with Face ID recognition. Clean the camera lens with a microfiber cloth or a gentle lift to ensure optimal performance.

    face id problems

    3. Check for water damage

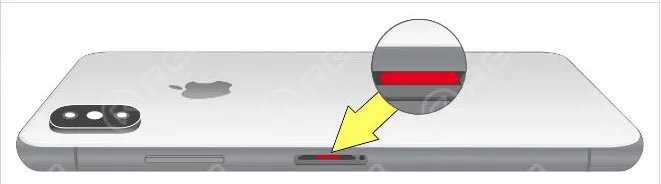
    If your iPhone has been exposed to water or liquid, it may result in Face ID malfunction. In such cases, it is recommended to seek assistance from Apple’s after-sales service. To determine if your device has suffered water damage, you can check the Liquid Contact Indicator (LCI):

    The majority of iPhone models are equipped with an LCI that can be viewed from the outside. The LCI is capable of detecting whether the device has been exposed to liquid or aqueous liquid. In general, the indicator should be white or silver in color. However, it will become red when it comes into contact with water or aqueous liquid.

    In order to determine if the LCI of your device is touching the liquid, you can refer to the following image to help you see the LCI.

    LCI

    It is recommended that you use a lamp or magnifying glass in order to see the LCI. Make sure you adjust the angle of the light or device until you can see it.

    4. Update the system

    If the device has not suffered from any water or drop damage, it is highly recommended to update the system to the latest version available. This is because Apple frequently releases new software versions that include essential bug fixes and exciting new features that are worth exploring.

    The majority of iPhone-related software issues can be resolved through the installation of the latest iOS update. Therefore, it is always advisable to keep your device up-to-date with the newest software releases to ensure optimal performance and a seamless user experience.

    Conclusion:

    By following these troubleshooting methods, you can overcome the “Move a Little Lower/Higher” prompt and restore the functionality of Face ID on your iPhone. Remember, if the problem persists, it is advisable to seek professional assistance from Apple’s support team. Enjoy the convenience and security of Face ID on your iPhone with these helpful tips.

  • How to Replace iPhone X Screen Display

    How to Replace iPhone X Screen Display

    If you’ve broken your phone screen, here are some tips for display replacement. We will bring you a case iPhone X as a reference. All you need is a repair kit and a new screen. The repair kit should be included as below: tweezers, screwdrivers, pry piece, suction cup, heating pad, programmer, spudger, battery adhesive, and waterproof adhesive.

    how replace iphone screen display

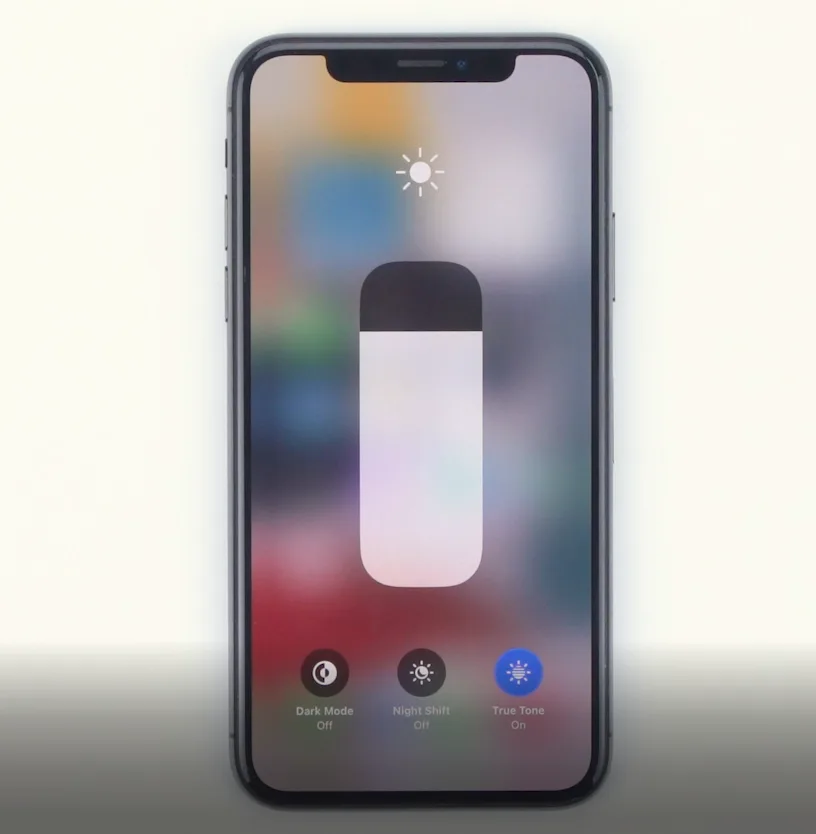
    Before the screen assembly replacement, we need to check out the True Tone display function and whether it still works as usual or not to make sure the new screen will be working.

    Firstly, please long press the phone to turn it off. Then you can use a pentagon screwdriver to unscrew the screws at the bottom of the phone. Please pay attention to putting the screws aside well. You can place the screen face down on the pad for about 2-3 minutes after the heating pad is up to the temperature of 70—80°c. And fix the suction cup at the bottom of the phone, lift the screen gently, and insert a pry piece underneath. Gradually move around the edge of the display, separating the screen along the gap. The display assembly is still connected to the iPhone by cables, so don’t try to remove it completely. Again, please pay attention to the position of the cable to avoid damage. The angle should not be greater than 90 degrees to prevent breaking the flex cable. The process of removing the cover is done.

    how replace iphone screen display 2
    how replace iphone screen display 3

    Next, use a Tri-wing screwdriver to unscrew the screws on the shielding cover of the cable connector. You can use a spudger slightly to extricate the battery and the connector between the screen and motherboard. Now, continue to follow instructions step by step. Detach the earpiece speaker flex cable, and remove the old display assembly.

    how replace iphone screen display 4

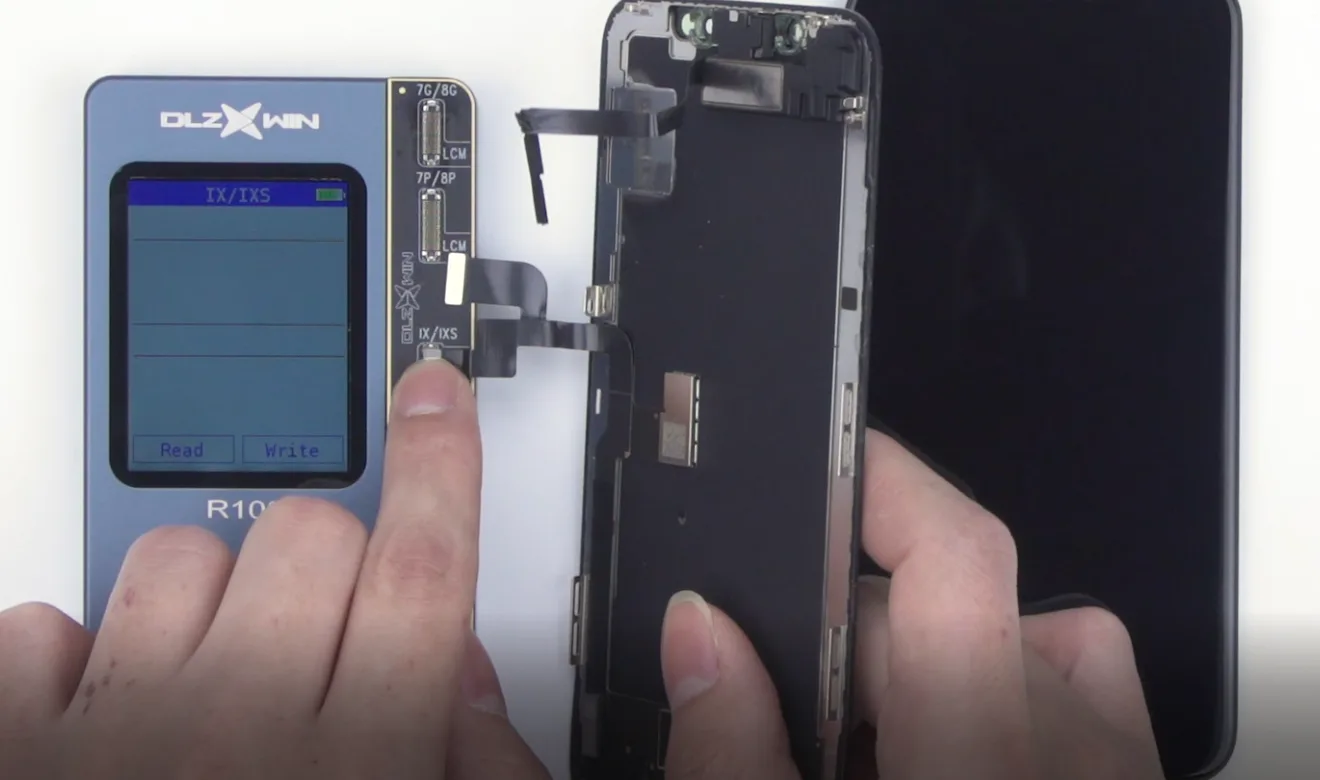
    In order to retain the True Tone function on the display as everything in the iPhone is paired to another screen, it’s suggested to make good use of a programmer. Fasten the old touch connector on the corresponding connector of the programmer, and start reading. After everything is done, take off the old screen assembly, connect the new one to the programmer, and start writing.

    how replace iphone screen display 5

    Please connect the new screen assembly to the programmer, start writing, then place the old screen assembly on the heating pad. You can use a Tri-wing screwdriver to unscrew the screws of the earpiece cable and take out the earpiece. Tear off the protector of the new screen assembly and reassemble the earpiece cable on the new screen assembly. Lastly, tighten the screws. Please pay attention to the position of the grounding chip. Finally, we come to the connection part. Please connect the display cable, touch cable, earpiece cable, and battery accordingly.

    If there is something wrong with the repair process or assembly issue, it’s better to do some tests after replacing a new screen.

    how replace iphone screen display 6
    how replace iphone screen display 7

    It is the same step as the beginning. Long press to turn it on to do some screen test first. We need to do several tests: 3D touch testing, True Tone testing, and light adjustment testing. If your phone shows, all is usually working. Then you can tear off the waterproof adhesive and make it adhere to the phone body. Press lightly with tweezers to make it adhesive, tear off the film, reassemble the display cable, and touch the cable. And the earpiece assembly, and connect the battery. Install the shielding cover, and tighten the screws. Take off the waterproof film around the frame. Buckle the phone screen, and tighten the screws at the bottom.

    how replace iphone screen display 8

    Those are all iPhone X screen replacement steps we share with you. If there is any confusion, please leave us your comment.

  • iPhone 11 Pro Max Face ID Not Working? Expert Repair Guide

    iPhone 11 Pro Max Face ID Not Working? Expert Repair Guide

    Dot projector parts are extremely fragile. A fall or water damage may harm dot projector parts, inducing Face ID not working.

    Since the dot projector IC is encrypted and replacement requires data encryption bonding for the new IC, repair technicians find it a challenge to repair the Face ID.

    The good news is that REWA LAB has developed a simple and efficient method to repair the Face ID. Let’s check it out!

    Go to Settings, Face ID & Passcode, and Set Up Face ID. When trying to set up Face ID, “Move iPhone a little lower/higher” pops up.

    Face ID cannot be normally set up. It can be judged that the dot projector of the Face ID has malfunctioned.

    Remove the display and then detach the Face ID module.

    We can see a red mark, which indicates that the phone has water damage.

    Connect the dot projector flex cable with the I2C Repair Programmer. The test shows that the dot projector flex cable has malfunctioned.

    Press “Read” and read the data from the dot projector flex cable.

    Connect a new I2C iPhone 11 Pro Max flex cable to the programmer. Press “Write” and write the data that has been read on the new flex cable.

    Dip a small amount of UV Adhesive on the crystal of the dot projector flex cable and solidify it with UV Lamp. This step is aimed to fix the crystal.

    Remove the foam on the back of the dot projector.

    To make positioning easier while assembly, mark the module with Sculpture Knife.

    Since the dot projector flex cable is under the metal plate, lift the metal plate to remove the flex cable.

    Get the Holding Fixture. We use Wextom Face ID Module and Dot Projector Board Holding Fixture for the repair.

    Attach the Face ID module to the Holding Fixture and grind the welding position of the metal plate.

    Insert the pry knife into the gap between the dot projector module and the crystal.

    Heat with Hot Air Gun at 150℃ and remove the dot projector flex cable.

    Heat with Hot Air Gun at 320℃ and detach the dot projector module.

    Attach the dot projector module to the Holding Fixture.

    Heat with Hot Air Gun at 320℃ and take out the MOSFET.

    Apply a small amount of Solder Paste to the bonding pad with Soldering Iron at 365℃.

    Jump wire between pin 2 and pin 3 of the MOSFET with 0.02mm copper wire.

    Attach the dot projector module to the holder.

    To clean the tin on the dot projector module, smear rosin with Soldering Iron at 365℃ and solder-wick.

    Clean the module with PCB Cleaner afterward.

    Heat with Hot Air Gun at 240℃ and remove residual adhesive with tweezers.

    Get the new flex cable.

    Put the Reballing Stencil in the right position and apply some medium-temperature Solder Paste evenly.

    Heat with Hot Air Gun at 320℃ and remove the Reballing Stencil after the flex cable has cooled.

    Heat with Hot Air Gun at 320℃ again and apply a small amount of Paste Flux to the flex cable.

    Fix the flex cable to the holder and align the dot projector module.

    Solder with Hot Air Gun at 320℃. Connect the flex cable that has been soldered to the I2C programmer.

    Press “Test” and the screen shows “Pass” which indicates that the flex cable is normal.

    Attach the flex cable to the Holding Fixture and put the dot projector flex cable in position.

    Apply a small amount of 460 Adhesive between the dot projector module and the crystal.

    Once the adhesive has set, arrange the flex cable.

    Install the flex cable on the phone.

    Boot up the phone, and go to Face ID settings.

    Face ID is set up normally and unlocks normally. The fault is cleared.      

    Please feel free to visit our online shop for repair parts and tools.

    For more Face ID content, please read the articles below.

    Watch the video below to get a more detailed iPhone 11 Pro Max Face ID repair.

  • Troubleshooting iPhone 13 Face ID & Display Message Issues after Screen Replacement

    Troubleshooting iPhone 13 Face ID & Display Message Issues after Screen Replacement

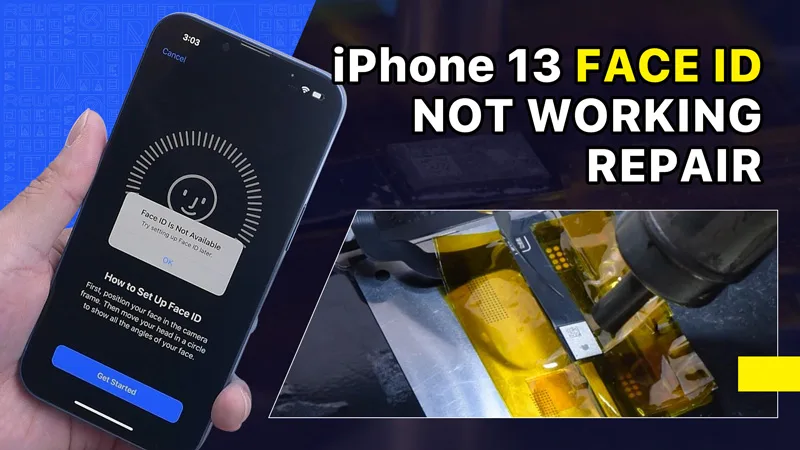
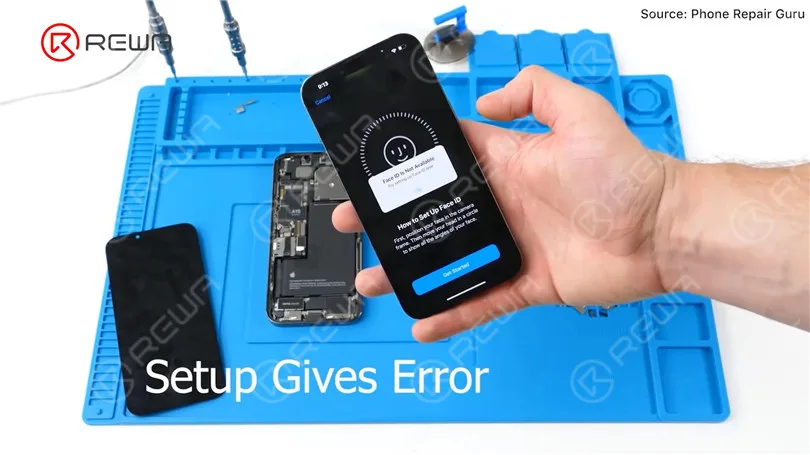
    Recently, Phone Repair Guru posted a video about iPhone 13 screen replacement. After replacement, “Important Display Message” pops up. What’s worse, Face ID is not available.

    Fix iPhone 13 Face ID Not Working & Important Display Message after Screen Replacement

    Since the iPhone 13 screen includes no flood illuminator module and all the parts for the TrueDepth system are housed in the iPhone itself,

    Fix iPhone 13 Face ID Not Working & Important Display Message after Screen Replacement
    Fix iPhone 13 Face ID Not Working & Important Display Message after Screen Replacement

    REWA LAB speculates that the chip on the original screen has saved Face ID data. Transferring the chip to the new screen might solve the problem. Today, let’s verify this speculation.

    Fix iPhone 13 Face ID Not Working & Important Display Message after Screen Replacement

    In the first place, we test the Face ID function of iPhone 13. True Tone function is normal. Face ID can be set up and is working fine.

    Fix iPhone 13 Face ID Not Working & Important Display Message after Screen Replacement
    Fix iPhone 13 Face ID Not Working & Important Display Message after Screen Replacement

    Then we disassemble the phone and try to replace the screen with an original and genuine one. Remove the original screen. Detach the sensor flex cable with Hot Air Gun at 100 °C. Please be careful not to damage the flex cable when you remove it. 

    Fix iPhone 13 Face ID Not Working & Important Display Message after Screen Replacement
    Fix iPhone 13 Face ID Not Working & Important Display Message after Screen Replacement

    Attach the removed sensor flex cable to the new screen. Install the screws. Connect the new screen. Turn on the phone.“Important Display Message”  appears. Face ID can’t be set up. True Tone disappears.

    Fix iPhone 13 Face ID Not Working & Important Display Message after Screen Replacement
    Fix iPhone 13 Face ID Not Working & Important Display Message after Screen Replacement
    Fix iPhone 13 Face ID Not Working & Important Display Message after Screen Replacement

    Next, we try to transfer the IC on the original screen to the new screen.

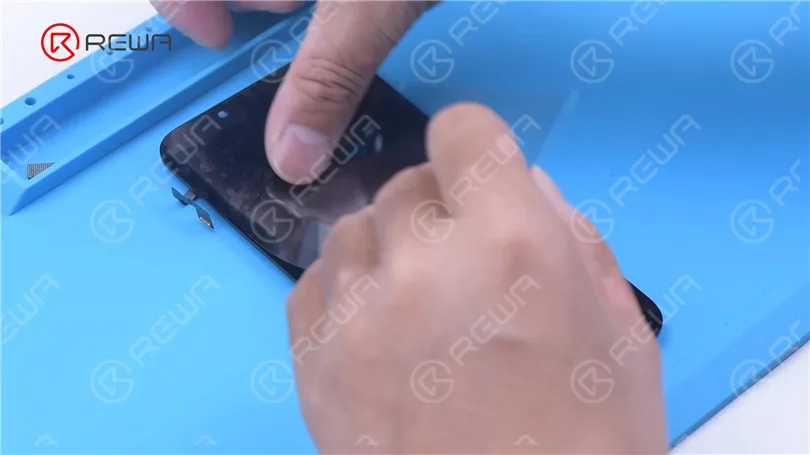
    Remove the new screen. To prevent scratches on the screen during operations,

    apply a protective film to the screen. 

    Fix iPhone 13 Face ID Not Working & Important Display Message after Screen Replacement

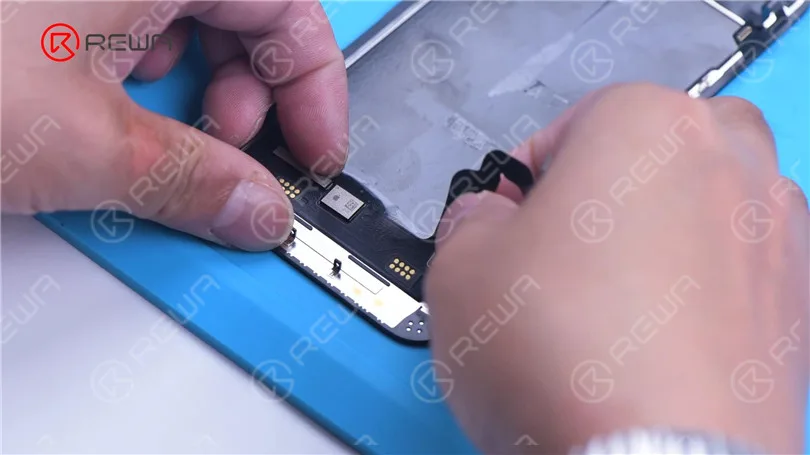
    Heat the screen flex cable with Hot Air Gun at 100 °C. Gently pull up the flex cable.

    To protect the screen, insert the reballing stencil under the flex cable for insulation. Apply high-temperature tape.

    Fix iPhone 13 Face ID Not Working & Important Display Message after Screen Replacement
    Fix iPhone 13 Face ID Not Working & Important Display Message after Screen Replacement
    Fix iPhone 13 Face ID Not Working & Important Display Message after Screen Replacement

    Remove black adhesive around the chip with Hot Air Gun at 240 °C.

    To remove the chip, set the temperature to 300 °C and airflow to 6.

    Fix iPhone 13 Face ID Not Working & Important Display Message after Screen Replacement
    Fix iPhone 13 Face ID Not Working & Important Display Message after Screen Replacement

    Apply some middle-temperature Solder Paste.

    Clean the bonding pads with Soldering Iron at 360 °C and solder wick.

    Keep cleaning the bonding pads with PCB Cleaner.

    Fix iPhone 13 Face ID Not Working & Important Display Message after Screen Replacement
    Fix iPhone 13 Face ID Not Working & Important Display Message after Screen Replacement

    Next, remove the chip on the original screen with the same method.

    Clean tin on the chip of the original screen.

    Apply some middle-temperature Solder Paste to the bonding pads.

    Clean tin and black adhesive on the bonding pads of the chip with Solder Wick.

    Keep cleaning the bonding pads with PCB Cleaner.

    Fix iPhone 13 Face ID Not Working & Important Display Message after Screen Replacement

    Next, reball the chip. Put the reballing stencil in position.

    Apply a layer of middle-temperature Solder Paste evenly.

    Heat with Hot Air Gun at 300 °C to form the solder balls.

    After the solder balls are formed, clean with PCB cleaner.

    Fix iPhone 13 Face ID Not Working & Important Display Message after Screen Replacement
    Fix iPhone 13 Face ID Not Working & Important Display Message after Screen Replacement

    Apply Paste Flux to the bonding pads of the new screen.

    Align the chip of the original screen.

    Solder the chip with Hot Air Gun at 300 °C.

    Fix iPhone 13 Face ID Not Working & Important Display Message after Screen Replacement
    Fix iPhone 13 Face ID Not Working & Important Display Message after Screen Replacement
    Fix iPhone 13 Face ID Not Working & Important Display Message after Screen Replacement

    Remove high-temperature tape after the flex cable has cooled.

    Connect the screen. Turn on the phone.

    There is no “Important Display Message”. Face ID can be set up and is working fine.

    But True Tone hasn’t been restored.

    Fix iPhone 13 Face ID Not Working & Important Display Message after Screen Replacement

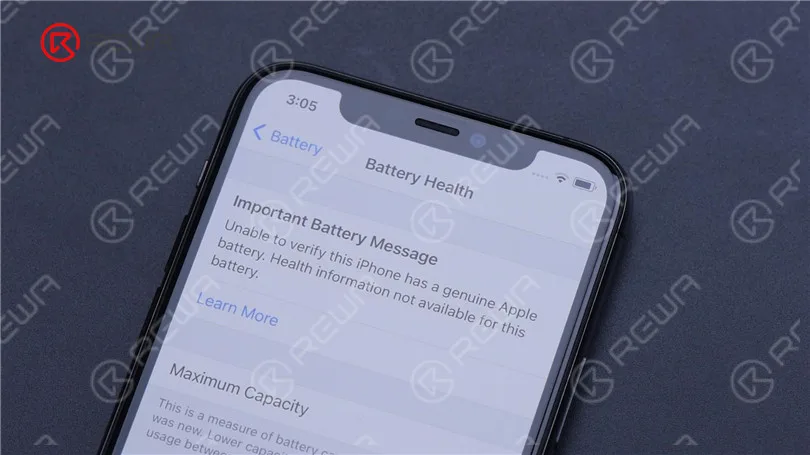
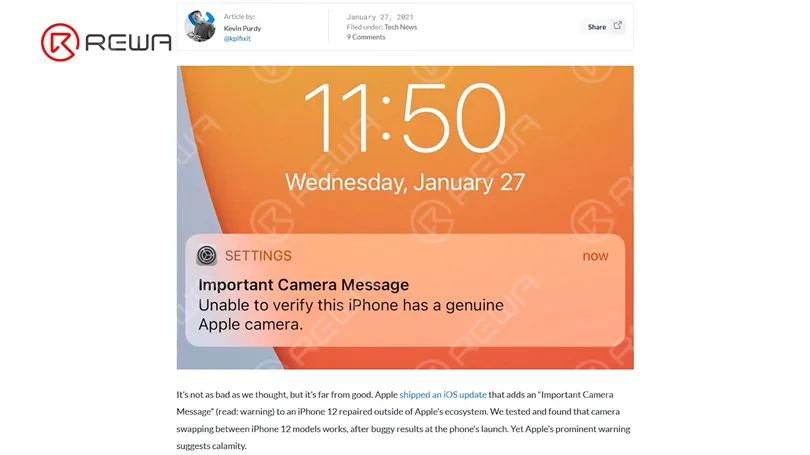
    Apple has long faced criticism for displaying prompts like “Important Battery Message” and “Important Camera Message”, which makes it difficult for third-party repair stores to fix their products.

    Fix iPhone 13 Face ID Not Working & Important Display Message after Screen Replacement
    Fix iPhone 13 Face ID Not Working & Important Display Message after Screen Replacement

    With the ‌iPhone 13‌ this year, Apple further makes it more difficult for customers to get repairs from third-party stores.

    However, it is risky to replace the chip to solve Face ID not working after iPhone 13 screen replacement. REWA LAB does not recommend that non-professionals try this method.

    Apple could patch this via an iOS update in the future.

    Let’s wait and see. Please feel free to leave your thoughts on the problem.

  • Debunking Myths about Aftermarket iPhone Batteries & Battery Alerts

    Debunking Myths about Aftermarket iPhone Batteries & Battery Alerts

    Despite the continuous advancements in battery technology, rumors and myths still circulate and confuse users. However, we are here today to debunk the misconceptions regarding aftermarket iPhone batteries and battery alerts. By being equipped with knowledge, you will be able to make informed decisions about your iPhone’s battery health and comprehend the reality behind aftermarket alternatives.

    Aftermarket High-Capacity Batteries:

    Myth: Aftermarket high-capacity batteries are bigger in size.

    Reality: Thanks to advancements in battery technology, modern aftermarket high-capacity batteries have been designed to increase battery density while maintaining the original size. Therefore, the size of aftermarket high-capacity batteries is no longer inherently bigger than their genuine counterparts. Manufacturers employ the latest techniques to enhance the capacity-to-size ratio, ensuring compatibility with older iPhone models.

    The durability of Genuine vs. Aftermarket Batteries:

    Myth: Genuine batteries are more durable than aftermarket batteries.

    Reality: Both genuine and aftermarket batteries can offer comparable durability levels. Reputable aftermarket battery manufacturers utilize quality cells and proven technology for battery production. These batteries undergo rigorous testing, with over 80% of them exceeding 600 cycles and over 60% surpassing 800 cycles. Therefore, the durability of genuine and aftermarket batteries is largely on par, provided you choose a reliable aftermarket battery supplier.

    Impact on Phone Performance:

    Myth: Aftermarket batteries slow down the phone.

    Reality: The notion that aftermarket batteries inherently slow down iPhones is a misconception. Slowness can occur if inferior quality batteries with low output voltage are used. However, high-quality aftermarket batteries manufactured by reputable suppliers ensure compatibility and optimal performance. As long as you select a reliable aftermarket battery that meets the necessary voltage specifications, you should not experience any adverse effects on your phone’s speed or overall performance.

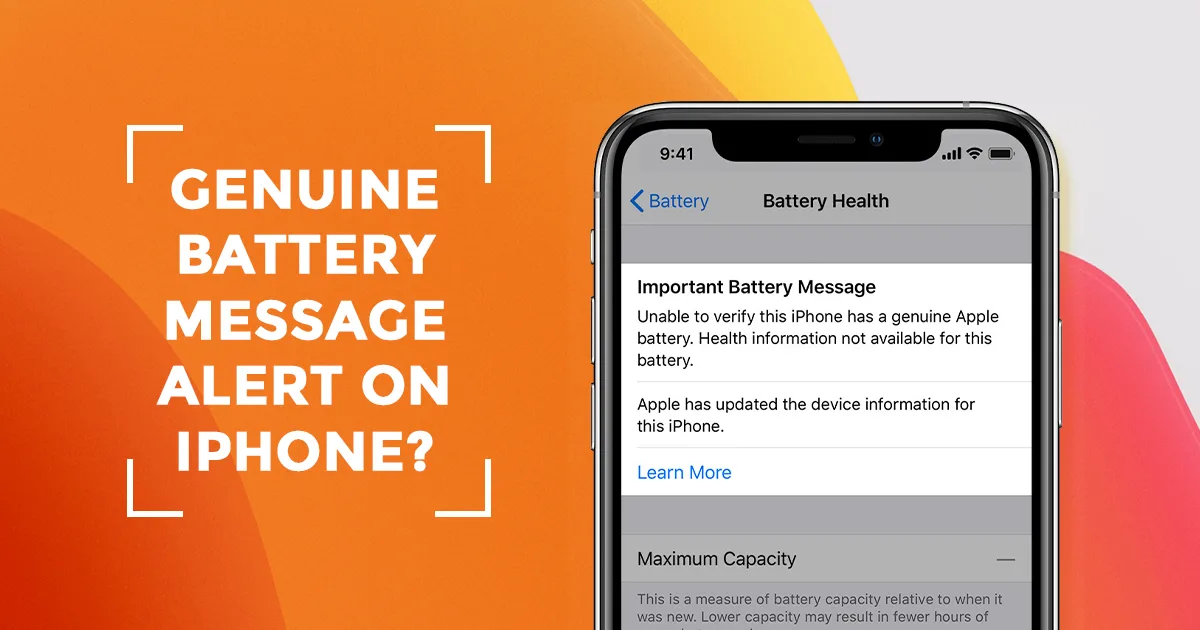
    Genuine Battery Message Alert:

    Myth: Changing the battery triggers an “Important battery message” on models released in 2018 and later.

    Reality: When it comes to models released in 2018 and later (such as the XS-13 Pro Max), changing the battery with original data remaining unchanged will not trigger an “Important battery message.” To address the message after replacing the battery, different approaches apply based on the specific model: XS to XR models do not require a flex, while models from 11 to 13 Pro Max will need a tag-on flex. If you lack the skills for cell replacement, opting for professional battery replacement services or purchasing batteries from trusted sources is recommended.

    What iPhones display the Important Battery Alert?

    iPhone ModelBattery ReplacementBattery Replacement
    Data Unchanged
    Cell Replacement
    Data Changed
    iPhone XNo//
    iPhone XSYesNo (Original data)No
    iPhone XSYesNo (Original data)No
    iPhone XRYesNo (Original data)No
    iPhone 11YesNo (Original data)No (Tag-on Flex)
    iPhone 11 ProYesNo (Original data)No (Tag-on Flex)
    iPhone 11 Pro MaxYesNo (Original data)No (Tag-on Flex)
    iPhone 12 YesNo (Original data)No (Tag-on Flex)
    iPhone 12 ProYesNo (Original data)No (Tag-on Flex)
    iPhone 12 Pro MaxYesNo (Original data)No (Tag-on Flex)
    iPhone 13YesNo (Original data)No (Tag-on Flex)
    iPhone 13 PlusYesNo (Original data)No (Tag-on Flex)
    iPhone 13 ProYesNo (Original data)No (Tag-on Flex)
    iPhone 13 Pro MaxYesNo (Original data)No (Tag-on Flex)
    iPhone 14 YesNo (Original data)No (Tag-on Flex)
    iPhone 14 PlusYesNo (Original data)No (Tag-on Flex)
    iPhone 14 ProYesNo (Original data)No (Tag-on Flex)
    iPhone 14 Pro MaxYesNo (Original data)No (Tag-on Flex)
    iPhone 15YesNo (Original data)No (Tag-on Flex)
    iPhone 15 PlusYesNo (Original data)No (Tag-on Flex)
    iPhone 15 ProYesNo (Original data)No (Tag-on Flex)
    iPhone 15 Pro MaxYesNo (Original data)No (Tag-on Flex)

    Conclusion:

    By debunking common myths surrounding iPhone batteries and genuine battery alerts, we have clarified the reality behind these misconceptions. Aftermarket high-capacity batteries boast similar sizes to their genuine counterparts, and their durability matches that of genuine batteries. Choosing a reliable aftermarket battery supplier ensures compatibility and optimal performance without any adverse impact on your phone’s speed.

  • Troubleshooting iPhone Restarting Issue

    Troubleshooting iPhone Restarting Issue

    For what reason does my iPhone continue to restart, and what do I do about it? We trust our iPhones and they need to work constantly.

    It would be great if there was a solitary reason behind why iPhones restart again and again, yet there is certifiably not a magic slug for this issue.

    In this article, I’ll disclose what makes iPhones keep restarting and I’ll tell you the best way to fix the issue.

    For what reason Does My iPhone Keep Restarting?

    iPhones that continue to restart for the most part fall into two categories:

    1. iPhones that restart discontinuously: You can use your iPhone for some time with no issue by any means, and afterward your iPhone unexpectedly restarts.

    2. iPhone restart circle: Your iPhone consistently restarts and it’s unusable. The Apple logo shows up and vanishes on the screen, again and again.

    Assuming your iPhone falls into the subsequent category, skirt ahead to step 5. It’s difficult to do the initial few steps if you can’t utilize the software on your iPhone.

    1. Back Up Your iPhone

    Before we do any troubleshooting whatsoever, ensure your iPhone is backed up.

    If your iPhone has a hardware issue, this could be your last opportunity to back up your information.

    If we want to, we’ll restore your iPhone in a later step, and you need a backup before you restore.

    Once you’re backed up, you’ll be prepared to begin fixing the issue.

    2. Update Your iPhone’s Software (iOS)

    Like Windows on a PC or macOS on a Mac, iOS is your iPhone’s working framework. iOS updates consistently contain heaps of fixes for programming bugs and different issues.

    Once in a while, a software update fixes the issue that is making your iPhone continue to restart or enter a restart loop.

    To check if any software updates are available, go to Settings – > General – > Software Update. If an update is available, install it.

    You can also connect your iPhone to your PC and use iTunes (PCs and Macs running macOS 10.14 or older) or Finder (Macs running macOS 10.15 or newer) to update your iPhone’s software.

    If your iPhone is consistently restarting, iTunes or Finder may be your smartest option.

    3. Decide whether An App Is Causing Your iPhone To Restart

    It’s extremely intriguing for an application to make an iPhone restart or turn on and off more than once. Generally, the software on your iPhone is protected from issue applications.

    That being said, there are over 1.5 million applications in the App Store and they’re not all perfect.

    If you installed an application not long before your iPhone entered a restart loop, uninstall that application and check whether the issue settles itself.

    Settings – > Privacy – > Analytics & Improvements – > Analytics Data is somewhere else to check for issue applications. It’s typical to see a few sections in this rundown.

    Quickly scroll through the list and search for any applications that are recorded again and again. If you see one, uninstalling that application might fix your iPhone.

    4. Reset All Settings

    Reset All Settings is certifiably not an enchanted shot, yet it can resolve specific software issues. Go to Settings – > General – > Transfer Or Reset iPhone – > Reset – > Reset All Settings to restore your iPhone’s settings to factory defaults.

    You will not lose any of your applications or information, yet you will have to enter your Wi-Fi password once more.

    5. Remove Your SIM Card

    iPhone restart loops can be caused by issues with your iPhone’s connection to your wireless carrier.

    Your SIM card connects your iPhone to your wireless carrier, so removing it is the most ideal way to troubleshoot issues where your iPhone continues to restart.

    Sit back and relax: Nothing can turn out badly when you remove your SIM card. Your iPhone will immediately reconnect to your carrier when you set it back in.

    If removing your SIM card fixes the issue, put the SIM card back in your iPhone.

    If the issue returns after you put your SIM card back in, you’ll have to restore your iPhone (step 7) or replace the SIM card with your carrier.

    On the off chance that removing the SIM card doesn’t fix the issue, don’t put your SIM card back in until you’ve finished the subsequent step.

    6. Hard Reset

    You shouldn’t do a hard reset on your iPhone except if it’s totally necessary.

    It’s similar to switching off a workstation by unplugging it from the wall. That being said, an iPhone restart loop is one of those times when a hard reset is justified.

    To play out a hard reset, hold the power button and Home button simultaneously until your iPhone screen goes blank and the Apple logo reappears.

    On an iPhone 7 or 7 Plus, the buttons you need to press to execute a hard reset are somewhat unique. At the same time press and hold the power button and the volume down button.

    Assuming you have an iPhone 8 or newer, the process of hard resetting is also different.

    Press and release the volume up button, then, at that point, the volume down button, press and hold the side button.

    Notwithstanding what model iPhone you have, ensure you hold the two buttons down together for no less than 20 seconds.

    If you removed the SIM card from your iPhone in the previous step, this moment’s a decent opportunity set it back in your iPhone.

    We’ve eliminated the possibility that your SIM card is making your iPhone restart.

    Ideally, the hard reset will fix the issue where your iPhone continued to restart, yet on the off chance that it proceeds, you’ll need to reset your gadget by adhering to the guidelines underneath.

    7. Restore Your iPhone

    Restoring your iPhone eradicates and reloads the iPhone’s software (iOS), and it can dispose of a huge number of programming issues simultaneously.

    At the point when we restore your iPhone, we’ll eliminate the possibility that a software issue might be making your iPhone restart – that is the reason Apple specialists get it done so regularly.

    Your iPhone should be connected to a PC to restore.

    I suggest doing an exceptional sort of restore that Apple specialists do call a DFU Restore, which goes further than a normal restore and can tackle more issues.

    After the restore gets done, you’ll have the option to reload all your data from your iPhone backup in iTunes, Finder, or iCloud. If you still have an issue, return here and continue to peruse.

    8. Check For A Hardware Problem

    Hardware issues are a typical reason why iPhones stall out in a restart loop. If you’re utilizing a case on your iPhone, remove it before you proceed.

    Intently check out the charging port on the lower part of your iPhone. Verify whether any trash is stuck inside and for indications of corrosion.

    If something doesn’t look right, snatch a toothbrush you’ve never utilized and delicately brush out the charging port.

    A short circuit or other issues inside the charging port can cause a wide range of issues with your iPhone.

    9. You May Need To Repair Your iPhone

    We’ve eliminated the possibility a software issue is making your iPhone continue to restart and we’ve checked for hardware issues outside of your iPhone.

    Assuming your iPhone is in a restart circle, your iPhone likely should be fixed.

    If you decide to find support at your neighborhood Apple Store, ensure you have an appointment with the Genius Bar so you don’t need to stick around.

    Summary

    By this point, I wish we’d fixed the issue that made your iPhone keep restarting.

    I would like to hear your experience and questions in the comments section below.
  • Aftermarket iPhone Battery – Everything You Need to Know!

    Aftermarket iPhone Battery – Everything You Need to Know!

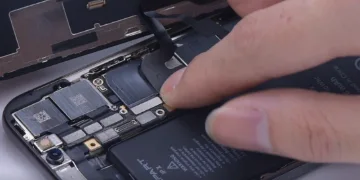
    A battery replacement is one of the most common repairs for an iPhone. There are numerous kinds of iPhone batteries with uneven qualities on the market. If you buy inferior iPhone batteries, there is every likelihood that you will face draining fast, spicy pillow, overheating, etc.