Tag: iphone

  • Apple iPhone Review – From 2007 to 2017

    Apple iPhone Review – From 2007 to 2017

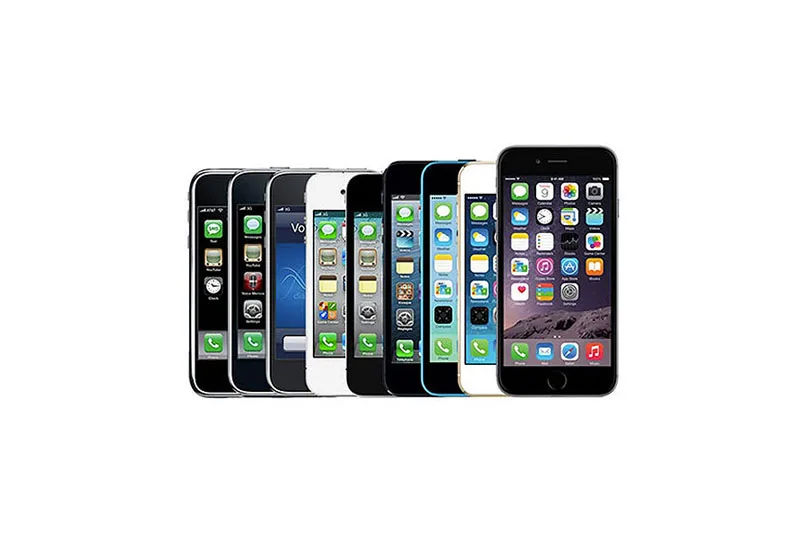
    As we all know, Apple iPhone has influenced the rest of the mobile industry and society as a whole since its announcement in 2007. 2017 can be a special year as Apple iPhone officially turns ten years old and plans to release new series months after. When it comes to iPhone review, what have you got? In this blog, we look back at all series of Apple iPhone so far has been released and give a brief iPhone review by different specs. See if you can recapture the excitement and enthusiasm accompanied with each iPhone review.

    Apple iPhone Review

    iPhone
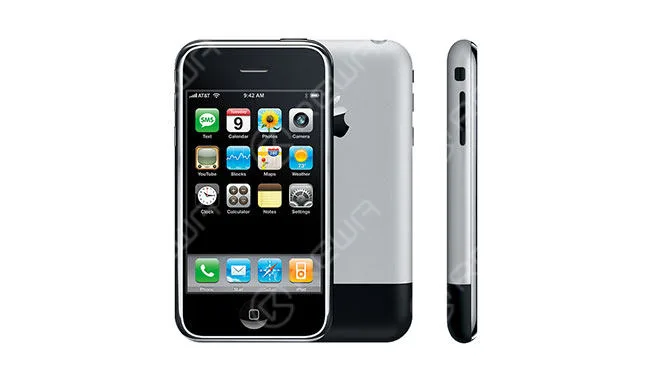
    apple iphone review 2007 2017 original colors

    Year introduced: 2007

    Capacity: 4, 8, 16 GB

    Model number on the back case: A1203

    Display: 3.5 inches

    Key Features: a 2-megapixel camera, classic grid-of-icons layout, the single home button, multi-touch display

    iPhone 3G 
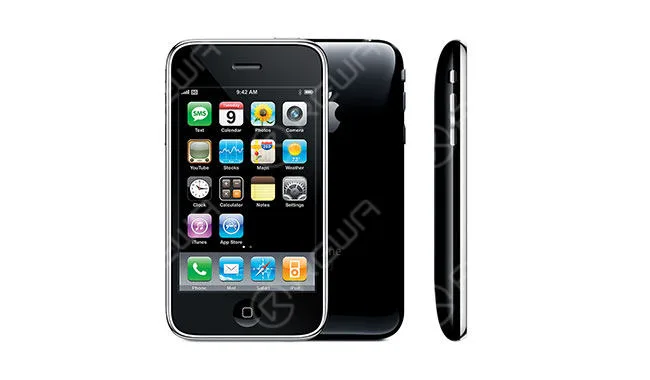
    apple iphone review 2007 2017 iphone3g colors

    Year introduced: 2008, 2009 (China)

    Capacity: 8, 16 GB

    Model number on the back cover: A1324, A1241

    Display: 3.5 inches

    Key Features: able to connect to faster 3G-based networks, built-in GPS, more storage, location services

    iPhone 3GS
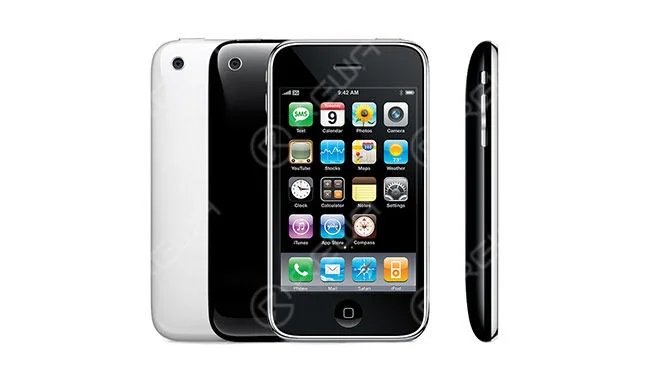
    apple iphone review 2007 2017 iphone3gs colors

    Year introduced: 2009

    Capacity: 8, 16, 32 GB

    Colors: Black and white

    Model number on the back cover: A1325, A1303

    Display: 3.5 inches

    Key Features: the form factor was unchanged from the previous version, yet twice as fast as its predecessor Check the iPhone 3G Parts on REWA;

    iPhone 4
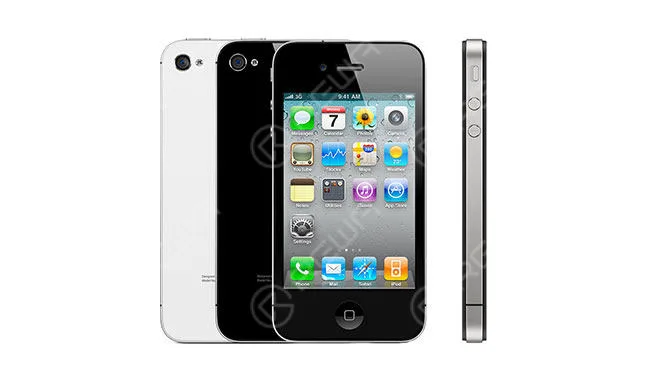
    apple iphone review 2007 2017 iphone4 colors

    Year introduced: 2010 (GSM), 2011 (CDMA)

    Capacity: 8, 16, 32 GBColors: Black and white

    Model number on the back cover: A1349, A1332

    Display: 3.5 inches

    Key Features: FaceTime video chat, high-resolution ‘Retina’ screen

    iPhone 4s 
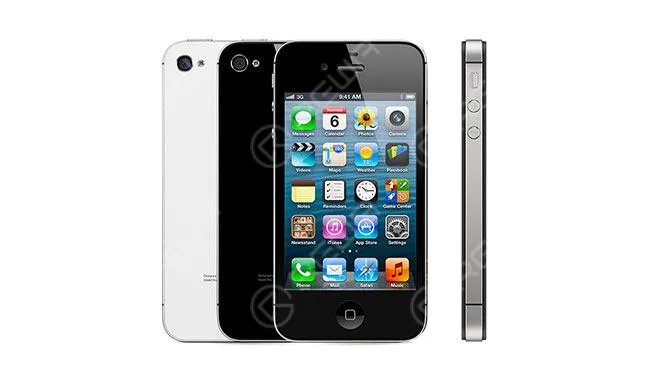
    apple iphone review 2007 2017 iphone4s colors

    Year introduced: 2011

    Capacity: 8, 16, 32, 64 GB

    Colors: Black and white

    Model number on the back cover: A1431, A1387

    Display: 3.5 inches

    Key Features: new dual-core processor (the same used in the iPad 2)

    iPhone 5
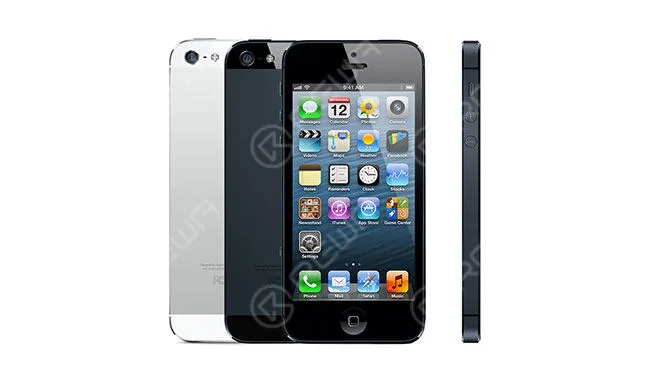
    apple iphone review 2007 2017 iphone5 colors

    Year introduced: 2012

    Capacity: 16, 32, 64 GB

    Colors: Black and white

    Model number on the back cover: A1428, A1429, A1442

    Display: 4 inches

    Key Features: the first version to have a 4-in. Screen, faster and slimmer

    iPhone 5c 
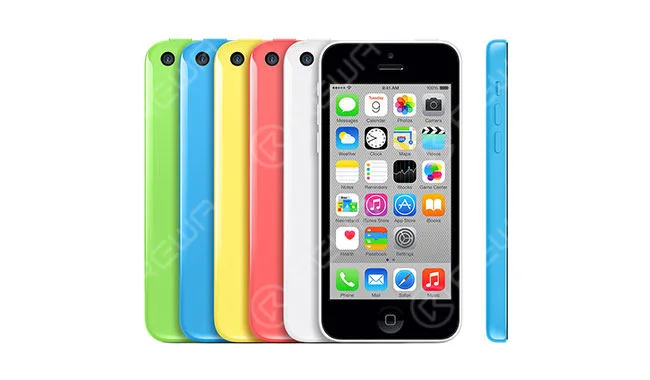
    apple iphone review 2007 2017 iphone5c colors

    Year introduced: 2013

    Capacity: 8, 16, 32 GB

    Colors: White, blue, pink, green, yellow

    Model number on the back cover: A1456, A1507, A1516, A1529, A1532

    Display: 4 inches

    Key Features: iPhone 5C was basically a reskinned iPhone 5 but came with a polycarbonate shell Check the iPhone 5C Parts;

    iPhone 5s
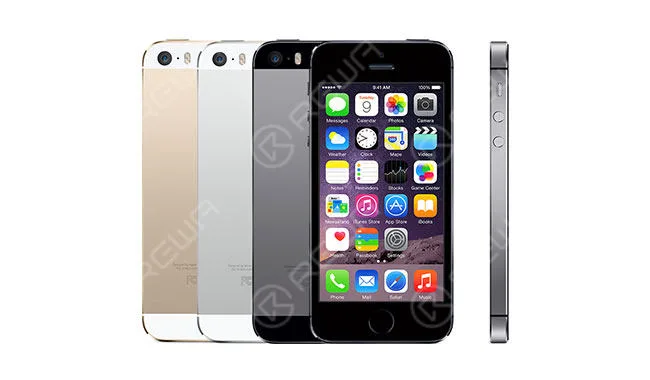
    apple iphone review 2007 2017 iphone5s colors

    Year introduced: 2013

    Capacity: 16, 32, 64 GB

    Colors: Space gray, silver, gold

    Model number on the back cover: A1453, A1457, A1518, A1528, A1530, A1533

    Display: 4 inches

    Key Features: a faster, 64-bit A7 SoC (system on a chip), Touch ID, and a new motion data processor touted as the foundation for a new wave of health and fitness apps.

    iPhone 6
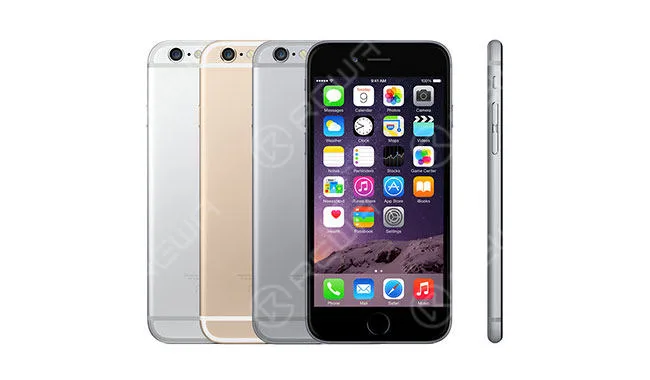
    apple iphone review 2007 2017 iphone6 colors

    Year introduced: 2014

    Capacity: 16, 32, 64, 128 GB

    Colors: Space gray, silver, gold

    Model number on the back cover: A1549, A1586, A1589

    Display: 4.7 inches

    Key Features: a new, curved design, as well as NFC support for mobile payments, a faster processor, and improved cameras

    iPhone 6 Plus
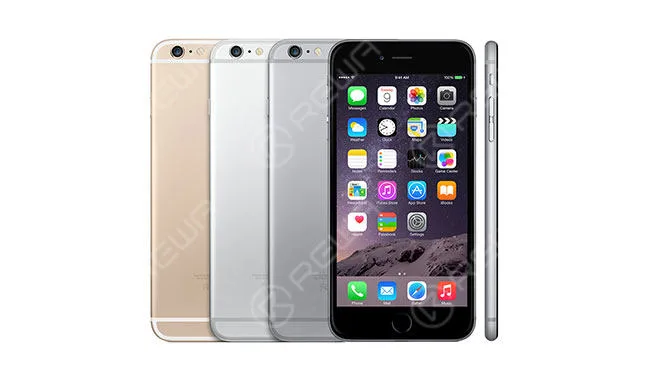
    apple iphone review 2007 2017 iphone6plus colors

    Year introduced: 2014

    Capacity: 16, 64, 128 GB

    Colors: Space gray, silver, gold

    Model number on the back cover: A1522, A1524, A1593

    Display: 5.5 inches

    Key Features: a new, curved design, as well as NFC support for mobile payments, a faster processor, and improved cameras

    iPhone 6s
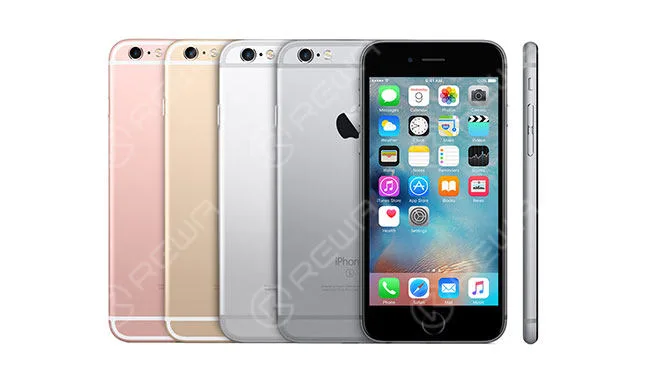
    apple iphone review 2007 2017 6s colors

    Year introduced: 2015

    Capacity: 16, 32, 64, 128 GB

    Colors: Space gray, silver, gold, rose gold

    Model number on the back cover: A1633, A1688, A1700

    Display: 4.7 inches

    Key Features: A9 chip, advanced touch id security, faster LTE/WIFI, 12-megapixel iSight camera, a pressure-sensitive display (3D Touch) and short videos captured with every picture (Live Photos), 5-megapixel FaceTime camera

    iPhone 6s Plus
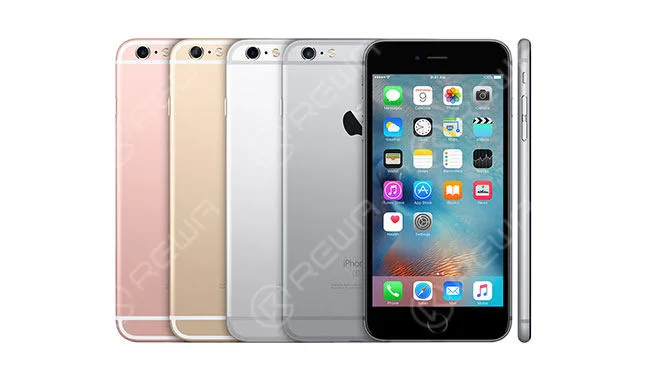
    apple iphone review 2007 2017 6splus colors

    Year introduced: 2015

    Capacity: 16, 32, 64, 128 GB

    Colors: Space gray, silver, gold, rose gold

    Model number on the back cover: A1634, A1687, A1699

    Display: 5.5 inches

    Key Features: A9 chip, advanced touch id security, faster LTE/WIFI, 12-megapixel iSight camera, a pressure-sensitive display (3D Touch) and short videos captured with every picture (Live Photos), 5-megapixel FaceTime camera.

    iPhone SE
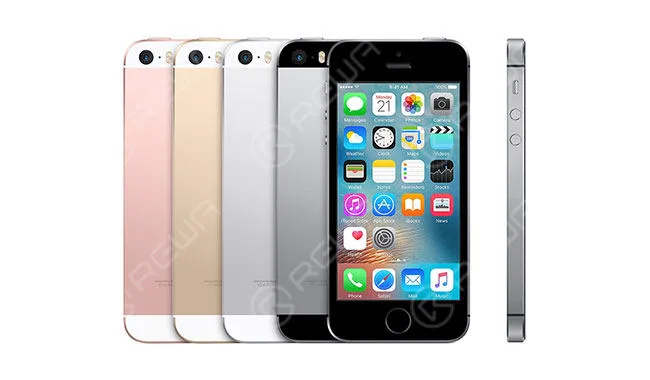

    apple iphone review 2007 2017 se colors

    Year introduced: 2016

    Capacity: 16, 32, 64, 128 GB

    Colors: Space gray, silver, gold, rose gold

    Model number on the back cover: A1723, A1662, A1724

    Display: 4 inches

    Key Features: looked exactly like an iPhone 5S, but with speedy new hardware inside and a Touch ID-enabled home button, A9 chip, 12-megapixel camera

    iPhone 7
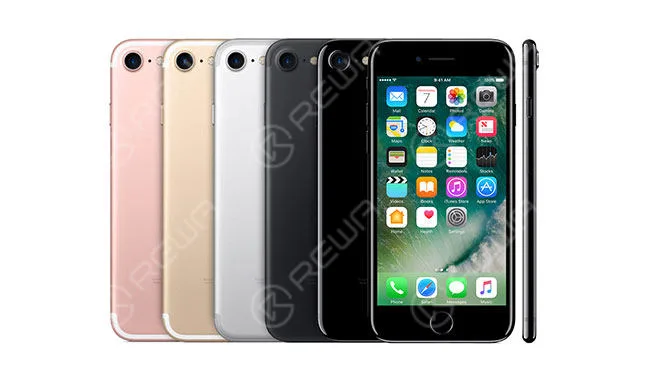
    apple iphone review 2007 2017 iphone7 colors

    Year introduced: 2016

    Capacity: 32, 128, 256 GB

    Colors: Black, jet black, gold, rose gold, silver, (PRODUCT)RED

    Model number on the back cover: A1660, A1778, A1779 (Japan*)

    Display: 4.7 inches

    Key Features: improved cameras, water-resistant, dropping the mechanical home button in favor of a fully digital lookalike, removing the headphone jack, a quad-core A10 Fusion chip

    iPhone 7 Plus
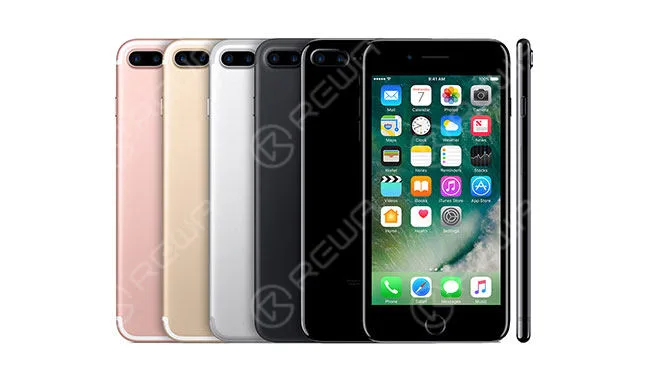
    apple iphone review 2007 2017 iphone7plus colors

    Year introduced: 2016

    Capacity: 32, 128, 256 GB

    Colors: Black, jet black, gold, rose gold, silver, (PRODUCT)RED

    Model number on the back cover: A1661, A1784, A1785 (Japan*)

    Display: 5.5 inches

    Key Features: a new dual-camera system, water-resistant, dropping the mechanical home button in favor of a fully digital lookalike, removing the headphone jack, a quad-core A10 Fusion chip.


  • Fix iPhone 6s Won’t Turn On  – PMIC Grinding and Replacing

    Fix iPhone 6s Won’t Turn On – PMIC Grinding and Replacing

    If your iPhone has a black screen and won’t turn on, what should you do? Go to the Apple store and repair it or fix it by yourself? But for whatever choice, you’d better read this article first, we’ll help you determine the reason why your iPhone won’t turn on and show you how to fix your iPhone won’t turn on.

    REWA is a world-leading electronics(especially for iPhone) repair business solutions provider, we have the most professional and experienced technical engineers, and we provide the most sophisticated mobile cellphone repair tutorial and cell phone repair parts.

     Why does my iPhone 6s won’t turn on?

    There are two reasons cause your iPhone 6S won’t turn on, one is software, the other is hardware, so you should determine whether your iPhone won’t turn on due to a hardware or software problem?

     So when your iPhone 6 won’t turn, you can do these five things first:

    1. Recharge your iPhone

    Most iPhone 6 won’t turn on because its battery is totally drained, so you can recharge your iPhone and then try to turn on your iPhone.

    2. Restart your iPhone

    To restart your iPhone press and keep holding down the Sleep/Wake button on the top of the handset until the red slider appears onscreen. Slide it across to turn it off then repeat to turn the phone back on. If the iPhone is frozen and can’t be restarted in the normal way do the following: Press and hold the Sleep/Wake button and the Home button simultaneously for at least 10 seconds. If the red slider appears or the screen dims, keep pressing the two buttons until the Apple logo appears.

    3. Reset your iPhone

    Click on Settings then General then Reset All Settings. This will perform a reset of all the settings to the factory defaults. The data or content on the iPhone is unaffected.

    4. Restore

    If all else fails, you will need to perform a full back up and Restore your iPhone. Click on the Summary tab and then click Restore. Click on Restore. Wait until your iPhone completes the restore process and resets to the Home screen.

    5. Force devise into recovery mode

    • Turn off your IOS device.
    • Plug the USB cable into your computer – but not into the device
    • Hold down the Home button then plug the USB cable into the device
    • When you see the Connect to iTunes screen (below), release the Home button. If you don’t see this screen, repeat steps 1 to 3.

    If all the steps fail, we can determine it is your iPhone 6s hardware problem, our video mainly solves this iPhone 6s won’t turn on – PMIC Grinding and Replacing. 

    Recently, some clients complained about the iPhone cannot turn on issue after holding the power key – no Apple logo, just black screen. Causes can be different and solutions flexible. Here in this video, REWA offers a logic board repair solution regarding this iPhone 6s won’t turn on the issue.With PMIC Grinded and replaced, you can fix your iPhone 6s won’t turn on problem easily by following our operations.

    The iPhone won’t turn on normally after holding the power key. Run detection process and we find that the logic board comes with leak current as 900mA and the PMIC is over-heated. Whereas capacitance around the PMIC shows no short-circuit. Therefore we can draw the conclusion that the PMIC is damaged and need to be replaced with a new one.


  • Production of Aftermarket China-made iPhone LCD Screen

    Production of Aftermarket China-made iPhone LCD Screen

    This video exclusively unveils the secrets of the production process of China-made iPhone LCD screen Assembly replacements. Taking Tianma LCD screen as an example, REWA here presents how China factories deal with the laminating and assembling procedure of TM LCD screen assembly just after the LCM status.

  • 6 Essential Tips for Enhancing iPhone Security

    6 Essential Tips for Enhancing iPhone Security

    essential tips enhancing iphone security to increase your

    It is not a surprising thing that ordinary people, like most of us, prefer convenience over security. Especially when it comes to our daily used iPhones.

    Sure, we are not celebrities who have lots of things to hide from the public.

    But still, there is a risk that someday someone might want access to other people’s digital life.

    Thieves, for example, can be an animated example to violate the privacy and security of ordinary people by breaking in their iPhone.

    So, what can we do to avoid the violation of iPhone security?

    Here are some REWA tips to help to increase the iPhone security!

    Passcode & Touch ID

    The first but also most important security setting to enable is the passcode.

    If you already have one, then try to improve it with a 6-digit or alphanumeric code.

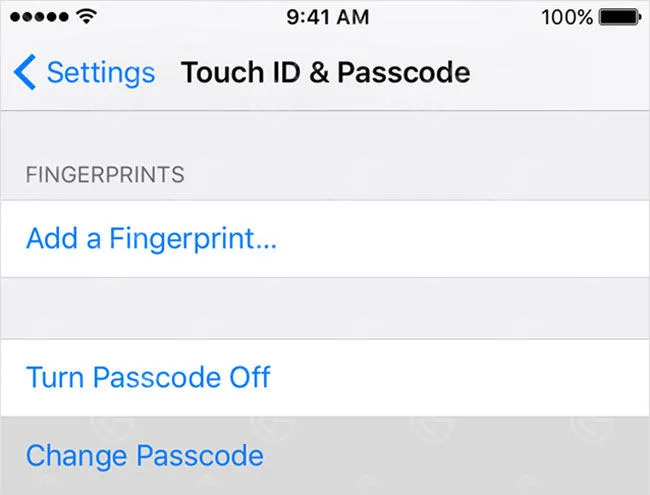
    Go to Settings>Touch ID & Passcode, choose Change Passcode. (First, you’ll have to enter in your current one.)

    Then tap Passcode Options and choose Custom Alphanumeric Code to set your new, more complex passcode.

    essential tips enhancing iphone security

    As for touch ID, some users might set up Touch ID so that they can unlock the iPhone quickly and easily using their fingerprint.

    Yet the touch ID also adds a layer of iPhone security by allowing users to use a fingerprint scan in lieu of typing in their passcode.

    Simply go to Settings and tap on Touch ID & Passcode to set it up.

    Home Screen Features

    essential tips enhancing iphone security 2

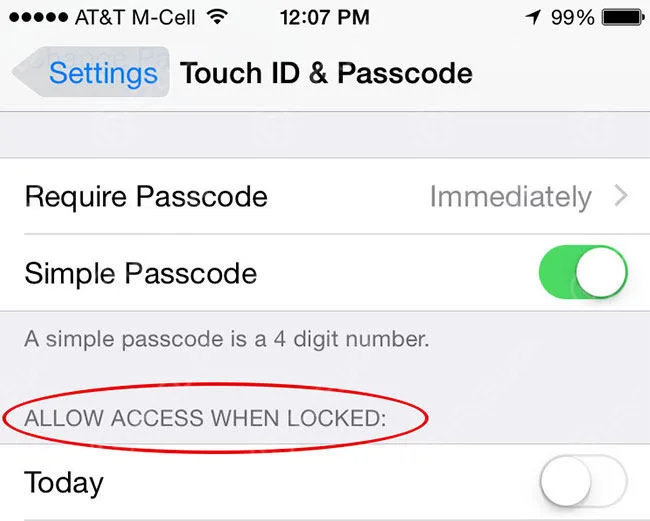
    One more assignment with Touch ID & Passcode. Go to Settings > Touch ID & Passcode, and scroll down to see your lock screen access.

    Items here can truly reveal a lot of things and the fewer that are on, the better.

    Turn off as many features as you’d like under the Allow Access When Locked section.

    Once turned off, you won’t be able to access these features until you unlock your iPhone.Location Protection

    essential tips enhancing iphone security 3

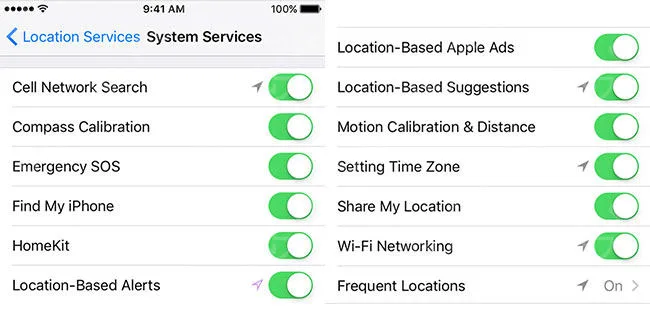
    Your iPhone can track you wherever you go – Go to Settings>Privacy>Location Services>System Services and figure out which of Apple’s system services are tracking your location.

    Disable the ones you don’t use. And for senior privacy purpose, you can also turn the feature off in Settings>Privacy>Location Services>System Services>Frequent Locations.Control Center

    Control Center can be really convenient for your operation with unlocking.

    But it also lets a thief turn on Airplane Mode, disable the GPS as well as cellular and WiFi.

    In this way, the iPhone they have just stole cannot be tracked.

    Go to Settings and select Control Center. From there, disable Access on Lock Screen.

    Erase data

    With the Touch ID & Passcode category, there is a built-in security setting many people don’t know.

    At the bottom of the Settings>Touch ID & Passcode screen, you’ll find the Erase Data toggle. Enable it and all data on your iPhone will be erased after 10 failed passcode attempts.

    Well, don’t be anxious, back up through iCloud and you should be able to retrieve most of it later on.

    Two-Factor Authentication

    For iPhone security layer, you have a passcode, and you have touch id.

    The sad thing is that Apple doesn’t allow you to use both passcode and Touch ID for added iPhone security. That’s when we put up with two-factor authentication.

    Which means that when you enter your Apple ID and password for the first time on a new device, there are two steps waiting for you.

    Enter your regular password at the beginning.

    Then you will have to verify your identity with a six-digit verification code using one of your other devices. You can manage this on your Apple ID account page.

    Of course, there are other iPhone security settings waiting for us to dig out.

    Do you have any iPhone security suggestions to share? Please leave comments below.

  • Improve iPhone Standby Time: Ultimate Tips for Professionals

    Improve iPhone Standby Time: Ultimate Tips for Professionals

    improve iphone standby time ultimate tips professionals

    iPhone Standby Time refers to the accumulation of all powered on time since its last full charge.

    Whether iPhone is actively being used, running with the screen off or sleeping, this time counts towards the standby category.

    Generally speaking, the iPhone standby time is calculated based on the capacity of the battery versus the draw of the system since its lasts full charge.

    Which also means that within the same battery capacity, the lower the power consumption is, the longer the standby time will be. And vice versa.

    Here are some REWA tips to improve the iPhone standby time.

    Tip 1 Stop Shutting Apps Down

    Apple Store Genius Scotty Loveless explains that when you close an App, you take it out of RAM. You think you did the right thing, but it’s not.

    The next time you open the same App again, the iPhone has to load it back into memory. “All of that loading and unloading puts more stress on your device than just leaving it alone,” he writes.

    The fact is that Apps “running” in the background usually aren’t really running—they’re frozen, waiting for you to fire them up again.

    Still, there are also exceptions.

    Once you have enabled Background App Refresh, some Apps that are designed to do things in the background, like navigation Apps or email Apps, are also running in the background.

    To get Apps’ problem done effectively, you can turn off notifications, location service and background refreshing to prevent applications from burning battery in the background.

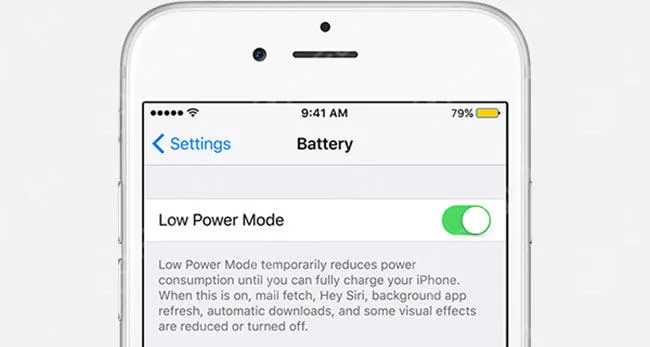
    Tip 2 Turn On Low Power Mode

    Low Power Mode is to reduce overall power requirements and makes the battery last longer.

    Apple even claims that the low power mode will allow you to gain three extra hours of battery life from your iPhone.

    improve iphone standby time ultimate tips professionals

    Below is what ”Apple’s documentation on Low Power Mode” writes about.

    Low Power Mode reduces or affects these features: Email fetch “Hey Siri” Background app refresh Automatic downloads Some visual effects Auto-Lock (defaults to 30 seconds)

    Tip 3 Check The Battery Status

    If the iPhone battery is in normal status and the iPhone power is simply not enough, then the problem can be fixed with an external battery pack or battery protection cover.

    Or the problem may be that the iPhone’s battery is coming to the end of its life.

    A quick way to check whether there really is a problem with the battery in your iPhone is to head over to Settings > General > Battery and wait for your Battery Usage report to load up.

    The usage time and standby time can indicate whether there is a battery drain problem. If something goes wrong, well, just repair or replace the battery with a new one.

    Tip 4 Turn On Airplane Mode When Needed

    One of the biggest drains of battery life is the antenna. Since it’s constantly checking for nearby cellular and Wi-Fi networks.

    If there is no need to access data, make or receive calls, open GPS, then just put the phone into flight mode and stop all use of the iPhone’s antenna.

    What’s more, Wi-Fi connection can also work with Airplane Mode.

    Tip 5 Some Other Settings

    Here are some other iPhone settings to save the iPhone standby time.

    • 1. Reduce screen brightness
    • 2. Turn off automatic downloads, iCloud and auto time zone
    • 3. Disable Bluetooth & Wi-Fi
    • 4. Turn off AirDrop, Fitness Tracking, Hey Siri and Spotlight
    • 5. Set the Auto Lock
    • 6. Disable 3G, 4G
    • 7. Turn down volume
    • 8. Stop vibrating
    • 9. Tone down visual effects
    • 10. Stop push email and remove multiple email accounts.
  • Essential Tools for Professional iPhone Repair Shops

    Essential Tools for Professional iPhone Repair Shops

    So you want to start an iPhone repair business?

    Whether you repair phones locally, online, for friends, family, or for profit, there are some essential tools you need for the job.

    Here are some essential tools that REWA highly recommends.

    Disassembling Tools

    essential tools professional iphone repair shops

    Screwdriver Set: Screwdrivers are of many types.

    Mainly used for iPhone repairs are listed as 0.8mm pentagon, 1.5mm Phillips screwdriver, 2.5mm cross-shaped medium plate screwdriver, 2.5mm medium plate socket screwdriver, and 0.6mm Y tri-point screwdriver.

    Tweezers: Tools for holding and manipulating small and delicate components.

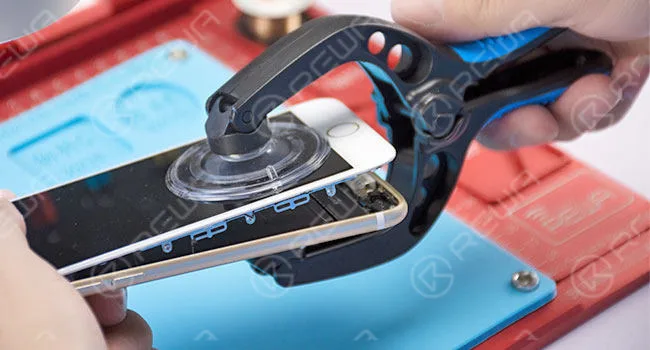
    LCD Opening Pliers: This ingenious tool makes quick work for phone dismantling.

    Suction Cup: To assure the safety of the touch screen when dismantling the phone, a professional vacuum suction cup with extra strength is needed.

    Plastic Pry Bar: Mainly used to pry up flex cables when dismantling the phone.

    Screwdriver Magnetizer/Demagnetizer: Easily magnetize or demagnetize screwdrivers.

    Screw Memory Board: Organizes and magnetically secures all your screws while you work on the device.

    Sculpture Knife: Used to pry up chips and scrape off glue residue.

    Brush: Used to remove and clean any dirt or dust inside the phone or on the PCB.

    Repairing Materials

    essential tools professional iphone repair shops 2

    Rosin: High-purity rosin soldering flux for soldering work.

    Solder Wick: a braided copper wire helps to remove solder from circuit boards and other electrical components.

    UV-Curable Solder Mask: Used in electronic components insulation and welding protection.

    Solder Wire: A solder wire is used for soldering components.

    Solder Paste: Used for the soldering process.

    Jumper Wire: It is a copper wire that is used for making jumpers from one point to another if a track is open (broken).

    Aluminum Foil Paster: Used for heat protection when removing chips.

    PCB Cleaner: Used for PCB cleaning.

    BGA Paste Flux: It is used for heating and removal of ICs. It is applied on the edges of the IC when heating and removing them.

    Miscellaneous Tools

    essential tools professional iphone repair shops 3

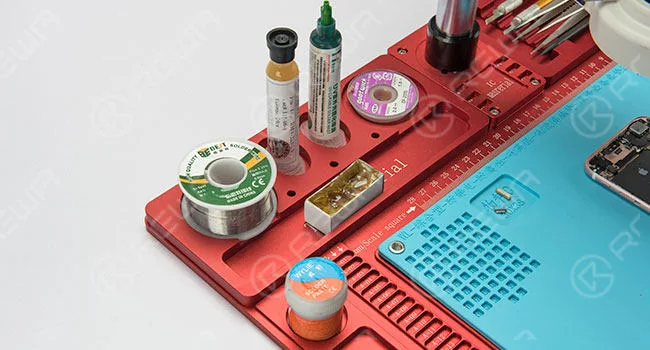
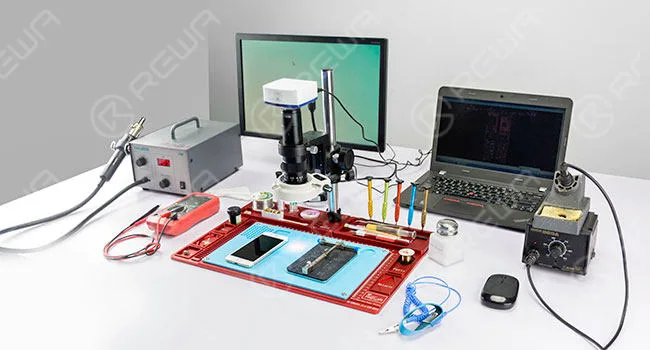
    Maintenance Platform: One integrated aluminum alloy pad maintenance platform with suppliers and tools placing slots for mobile phone repair. Combined with microscope fixed base.

    Hot Air Gun: Used for heating and replacing ICs (Chips) on the logic board. It is also used for removing or mounting soldered parts and components on the PCB.

    Soldering Iron: A soldering iron is used for soldering and de-soldering the parts and components that are soldered on the PCB. It is also used for making jumpers i.e. bridging broken tracks.

    PCB Holder: While working on a PCB for soldering, you will need a PCB holder so that the PCB does not move.

    Handheld Magnifier: It is necessary to see all the minute components and to view the PCB.

    DC Power Supply For Mobile Phone Repair Test: It is used to supply power for logic board repairing and booting tests.

    Digital Multimeter: A multimeter is used for checking and testing various spare parts and components. It is also used to check broken tracks on the PCB.

    BGA Reballing Kit: Used for chip reballing process.

    Cutting Nipper: Used for shield plate removal.

    UV Dryer Lamp: Used to solidify UV curable solder mask.

    Professional Equipment

    essential tools professional iphone repair shops 4

    64 Bit Nand Flash Memory Chip Programmer

    Used for iPhone & iPad chip reprogramming and storage upgrading. Fix iTunes errors 9, 14, 4005 (for iPhone 5s/6/6 Plus/iPad 5/ipad 6/mini2/mini 3/mini4).

    PCIE Nand Flash Memory Chip Programmer

    Used for iPhone & iPad chip reprogramming and storage upgrading. Fix iTunes errors 9, 14, and 4005 (for iPhone 6s/6s Plus/SE/ iPad Pro/7/7+).

    CNC Chip Grinding Machine

    With the CNC chip grinding machine, iPhone & iPad chip removal can be safe and quick without damaging the logic board and nearby chips.

    And more…

    Stay tuned for more publications to help you along your journey.

  • Tips for Prolong Your Limited iPhone Lifespan

    Tips for Prolong Your Limited iPhone Lifespan

    tips prolong your limited iphone lifespan android vs


    Choosing Between iPhone and Android: A User Dilemma

    Staying updated with electronic product designs and tech news is crucial for the repair industry.

    The world is evolving rapidly, especially the electronic landscape, with Apple’s iPhone series dominating a significant market share.

    However, the rivalry between iPhone and Android has been the talk of the tech town for the past decade.

    So, which side are consumers on? Android users enjoy a diverse range of devices at various price points, offering full features at affordable prices.

    On the other hand, iPhone users are drawn to Apple’s quality experience, guaranteed software updates, security, and user-friendly environment.

    But what about the lifespan of a smoothly-functioning iPhone? According to Apple, iPhones last for about three years with their first owner.

    Despite Apple’s yearly updates, older devices may struggle to support the added weight of new features. How can users extend their iPhone lifespan beyond this three-year mark?

    REWA Tips for Prolonging iPhone Lifespan:

    1. Manage Data Storage:

      • Store large files on a removable memory card or back up older files externally.
      • Regularly clear excess cached files.
      • Keep only frequently used apps on the phone to manage data storage efficiently.
    2. Battery Care:

      • iPhones lose about 20% of battery capacity after 500 charge cycles.
      • Stay informed about signs indicating the need for a new battery.
      • For cost-effective aftermarket iPhone batteries, contact REWA for assistance.

    In a world of constant updates, these simple tips can help users make the most out of their iPhones, ensuring they run smoothly and last beyond the typical three-year lifespan.

  • iPhone 6 Error 9 CPU Repair Without BGA Reballing

    iPhone 6 Error 9 CPU Repair Without BGA Reballing

    Have you ever come across with iPhone 6 error 9 issue? Error 9 often appears when processing firmware update or system restores by iTunes. Several reasons are attributed towards the problem, and we have alredy posted a solution for iPhone error 9 fix related to the NAND Flash error before. This time REWA comes with a totally different solution regarding to iPhone 6 error 9 caused by insufficient soldering within CPU BGA. With the help of our newly developed CNC chip grinding machine, chip removing can be safe and quick without damaging the logic board and nearby chips.

    Four steps to help you to solve the iPhone 6 error 9 issue. 

    1. Phone Disassembling

    The phone is stuck in Recovery Mode when trying to start up. Connect it with computer and start system restore via iTunes.

    Error 9 appears. Disassemble the phone and take out the logic board. Remove a part of the shield plate with cutting nipper.

    2. Malfunction Diagnosing

    Test grounding resistance value of resistor R0317 and R0316 with diode mode-Abnormal value (480 under normal circumstances). R0317 and R0316 are connected with CPU pin AP31-SDA and pin AR31-SCL directly.

    3. Malfunction Repairing

    Take down the shield plate of CPU with hot air gun. Then put the logic board on the corresponding position of the CNC mold and fix it tightly. Load iPhone 6 corresponding logic board chip grinding program and start grinding.

    Once finished, take out the logic board and use a sculpture knife to scrape carefully until the CPU sublayer circuit comes out. After that, clean with PCB cleaner.

    Apply some UV curable solder mask to the exposed area, apart from the two bonding pads (SDA,SCL). Once it has been done, put the logic board under the UV dryer lamp for 10 minutes and then take out the logic board.

    Solder tins on the two bonding pads with soldering iron. Then solder the 0.02mm copper wire to the two bonding pads respectively. The two soldered wires connect R0317-corresponding pad SDA and R0317-corresponding pad SCL respectively.

    Test grounding resistance value of R0317,R0316 with diode mode again-Normal value this time.

    4. Phone Testing

    Assemble the phone and restore via iTunes. Then activate the phone and test, malfunction fixed.

    Once test finished, take out the logic board. Then apply some UV curable solder mask to the soldered place again. Put the logic board under the UV dryer lamp for 10 minutes.

    Assemble the phone and test again, all work normally.

    Tools Used:

    • CNC Chip Grinding Machine
    • Screw Drivers
    • Tweezers (ESD–10 / ESD–15)
    • LCD Opening Pliers (M)
    • Cutting Nipper
    • Maintenance Platform
    • Electron Microscope
    • Digital Multimeter
    • Soldering Iron
    • Hot Air Gun
    • Sculpture Knife
    • Solder Wire
    • UV Dryer Lamp
    • Anti-static Wrist Strap
  • How To Repair iPhone 7 Touch Screen Not Working

    How To Repair iPhone 7 Touch Screen Not Working

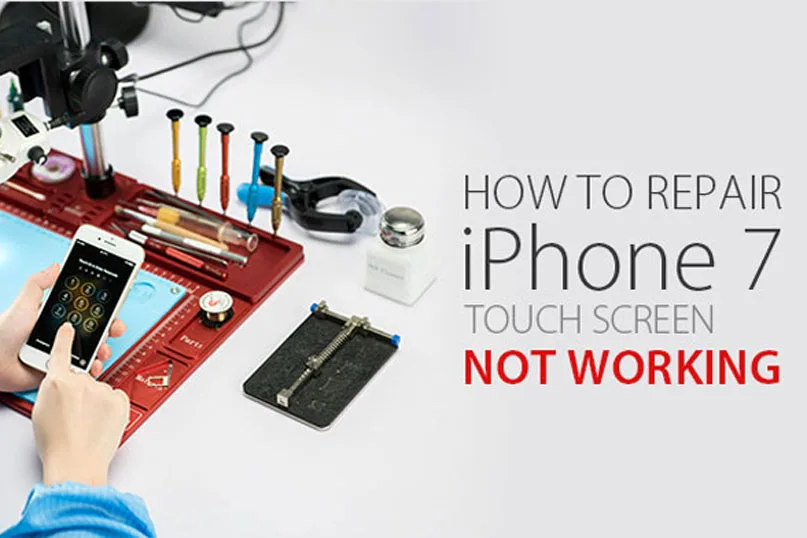
    It’s natural to feel frustrated when your iPhone 7 touch screen is not working. You can’t use your iPhone for many things such as making calls, through pictures, read news or chat by social networks…iPhone (especially iPhone 6/6S/7/7 Plus) touch screen not working is a common repair issue for Apple users,and there are many reasons for the iPhone screen unresponsive to touch and iPhone screen not responding. REWA here presents a chip level repair solution video steps to fix your iPhone screen not responding, that can be fixed at home, and recommend some great repair options, if it comes to that.

    Why is my iPhone Touch screen not responding?

    There are a lot of reasons why your iPhone touch screen unresponsive to touch. Thankfully, there are also a lot of ways to fix those problems. The first thing we need to do is figure out why your iPhone touch screen. Usually, the problem is caused when the physical part of your iPhone’s display that processes touch stops working correctly or when your iPhone’s software stops “talking” to the hardware the way it should. In other words, it could be a hardware or a software problem. Troubleshooting iPhone software problems typically doesn’t cost anything. It’s also easier than prying off your screen with suction cups (please don’t do this). But Rewa is focused on hardware fixes.

    There are steps to teach you How to repair iPhone 7 touch screen not working:

    1. Phone Disassembling

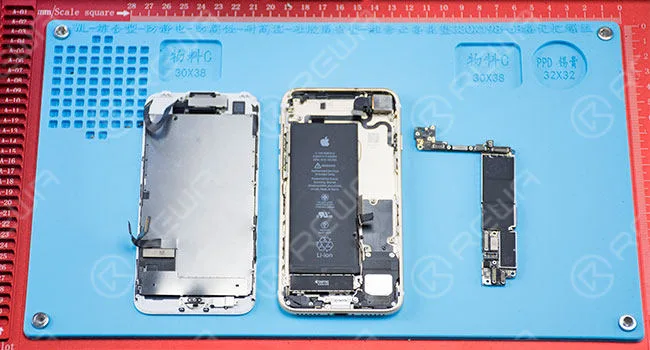
    Turn on the phone, the touch function is incapacitated. Remove charging port screws and detach the display assembly. Disconnect flex cables and remove logic board screws. Then take out the logic board.

    2. Malfunction Diagnosing

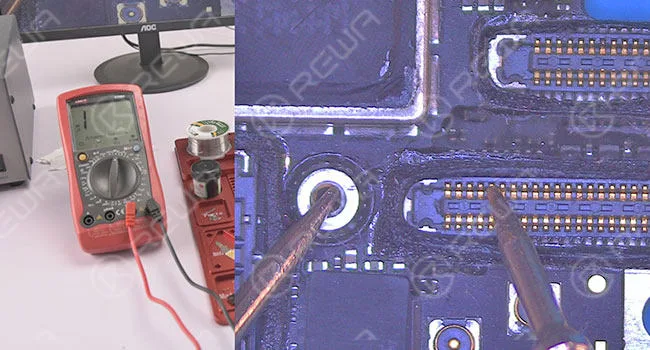
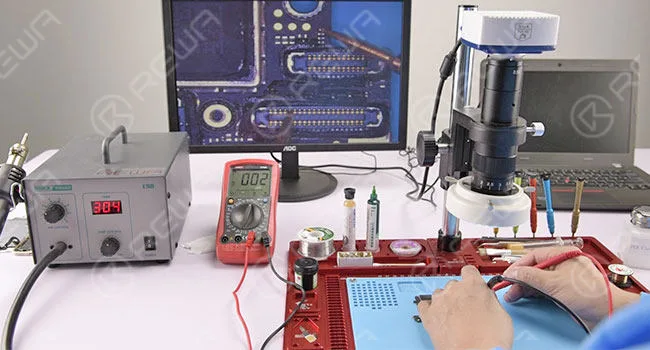
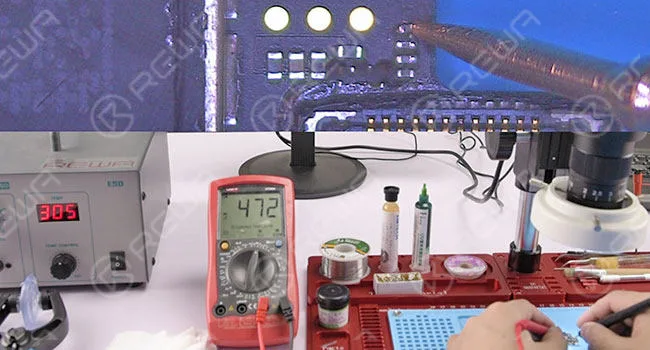
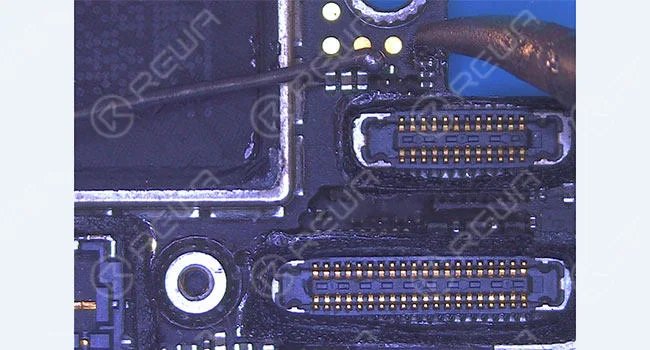
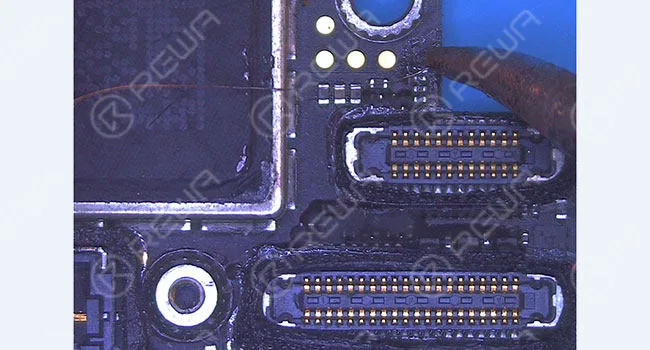
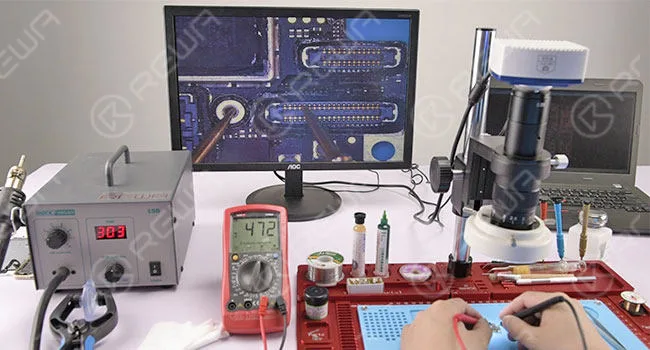
    Test resistance of the display assembly connector with digital multimeter. Resistance of pin 10 displays abnormal value (470 under normal circumstances).

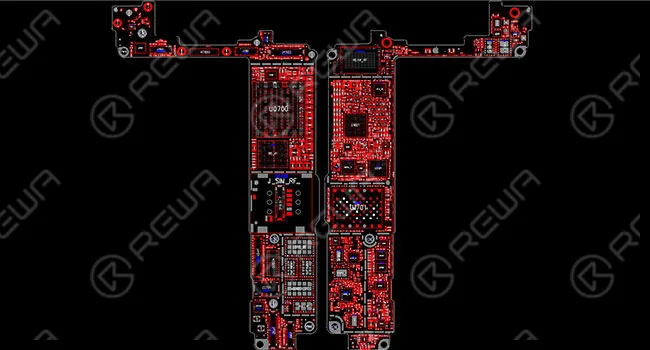
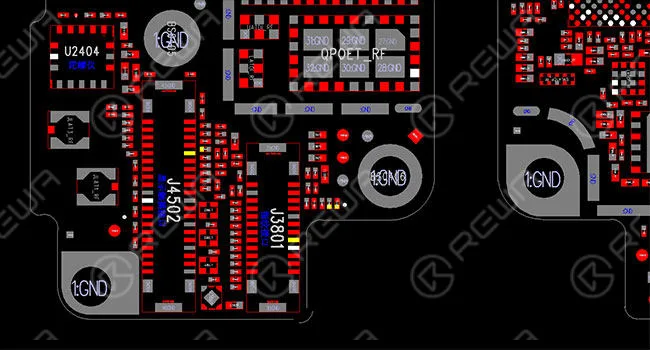
    Roll out the maintenance drawing for reference.

    Pin 10 worked as AP_TO _TOUCH _MAMBA _CONN _L signal. The signal was connected with CPU AT2 pin via inductor FL3904.

    Circuit between pin 10 and inductor FL3904 displays normally.

    Test resistance from inductor FL3904 to CPU, the device displays normal value. Then we can draw the conclusion that inductor FL3904 was damaged.

    3. Malfunction Repairing

    Take down the inductor with soldering iron.

    Solder tins on the copper wire. After that, connect the two bonding pads of the inductor with the copper wire. Then cut off the rest of it with a sculpture knife.

    Test pin 10 resistance with digital multimeter again, this time we get a normal value, which means the problem has been fixed.

    4. Function Testing

    Clean the bonding pad with PCB cleaner.

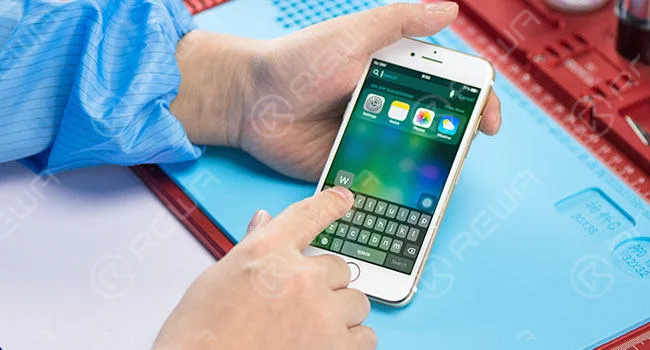
    Assemble the phone and test. Touch function is back to normal.

    For more details on iPhone 7 touch screen not working repair guide, please go to REWA YouTube channel. 

    Tools Used:

    • Maintenance Platform
    • Tweezers (ESD–10 / ESD–15)
    • LCD Opening Pliers (M)
    • Digital Multimeter
    • Electron Microscope
    • Soldering Iron
    • Sculpture Knife
    • Anti-static Wrist Strap
  • How To Repair iPhone 7 Touch Screen Not Working

    How To Repair iPhone 7 Touch Screen Not Working

    iPhone users may have experienced such a frustrated moment – the screen of the iPhone suddenly freezes, no matter how hard they poke or how many times they restart, it just gives no response.

    And we all know a phone with a frozen screen equals nothing more than a brick – you can do nothing with it.

    So, what repair shops usually do with iPhone 7 touch screen not working issue?

    First of all, clean the screen. In the second place, try a force reboot of the iPhone 7.

    If the issue continues, try to restore the iPhone from a Backup.

    Still not working? The next step is to erase it and set it up as new, which means resetting it to a factory state (remember to make a backup before doing that).

    If none of these steps work, then the issue may be related to physical screen display defects, since everyone may have accidentally damaged their phone without knowing themselves.

    In such an event, broken screen repair or iPad & iPhone LCD repair could be a perfect solution.

    iPhone 7 Touch Screen Not Working

    If you’ve forcibly rebooted the iPhone 7, you’ve restored the iPhone 7 from a backup, you’ve set up the iPhone 7 as new, and you have repaired the broken screen and LCD, and the touchscreen is still unresponsive, it’s time to change your thinking and look for a totally different solution.

    REWA here presents you a refreshing logic board solution regarding to the unresponsive touchscreen issue of iPhone 7.

    If you have any questions or different opinions, please feel free to contact us!

    iPhone 7 Touch Screen Not Working Repair

    1. Phone Disassembling

    Turn on the phone, the touch function is incapacitated.

    Remove charging port screws and detach the display assembly.

    Disconnect flex cables and remove logic board screws.

    Then take out the logic board.

    Phone Disassembling

    2. Malfunction Diagnosing

    Test resistance of the display assembly connector with a digital multimeter.

    The resistance of pin 10 displays abnormal value (470 under normal circumstances).

    Malfunction Diagnosing

    Roll out the maintenance drawing for reference.

    Roll out the maintenance

    Pin 10 worked as AP_TO _TOUCH _MAMBA _CONN _L signal. The signal was connected with CPU AT2 pin via inductor FL3904.

    CPU AT2 pin via inductor FL3904

    The circuit between pin 10 and inductor FL3904 displays normally.

    inductor FL3904 displays normally

    Test resistance from inductor FL3904 to CPU, the device displays normal value.

    Then we can draw the conclusion that inductor FL3904 was damaged.

    Test resistance from inductor FL3904

    3. Malfunction Repairing Take down the inductor with soldering iron.

    Malfunction Repairing

    Solder tins on the copper wire.

    After that, connect the two bonding pads of the inductor with the copper wire.

    Then cut off the rest of it with a sculpture knife.

    Solder tins on the copper wire

    Test pin 10 resistance with digital multimeter again, this time we get a normal value, which means the problem has been fixed.

    Test pin 10 resistance

    4. Function Testing Clean the bonding pad with PCB cleaner.

    Function Testing

    Assemble the phone and test.  Touch function is back to normal.

    Assemble the phone and test

    For more details on iPhone 7 touch screen not working repair guide, please go to REWA YouTube channel.

  • The Current And Future States Of Cell Phone Repair Industry 2017

    The Current And Future States Of Cell Phone Repair Industry 2017

    In 2016, the global cell phone market witnessed the shipment of a staggering 1.97 billion units, according to IDC.

    Furthermore, IBIS’s report highlighted that the revenue of the cell phone repair industry reached an estimated $4 billion, with an average annual growth rate of 3% or higher.

    The Rise of Smartphones and Repair Demand

    The dynamic growth of the cell phone repair industry over the past decade can be attributed to the widespread adoption of smartphones.

    Their delicate components, such as fragile LCD assemblies and short battery life, contribute to an increased demand for repairs.

    Navigating the Future: Sustaining Growth in the Cell Phone Repair Industry

    As this industry matures, fueled by rising device shipments and the inherently repair-prone design of smartphones, a critical question arises: Can this growth be sustained in the coming years?

    Navigating Uncertainties: Predicting the Next Chapter

    Predicting the future of the cell phone repair industry presents challenges. IBIS forecasts a lower annual growth rate in the next 2-3 years after a decade of continuous expansion.

    Smartphone shipments are expected to plateau, and feature phones are on a steady decline.

    Consumers, driven by rapidly advancing technology and falling phone prices, lean towards replacements rather than repairs.

    Beneath the Surface: The Ongoing Demand for Repairs

    While these predictions are logical, it’s crucial not to overlook the industry’s inherent potential.

    Even if the growth rate slows, the mobile phone repair sector still boasts a substantial market capacity for several reasons.

    Smartphone Saturation vs. Repair Demands

    Despite a decline in feature phone shipments, the growth of smartphones is anticipated to offset this decrease.

    Saturation of smartphones doesn’t necessarily translate to reduced repair demands.

    Daily incidents of phones shattering, as reported by SquareTrade, emphasize the ongoing significance of the repair market – “a cellphone in the U.S. breaks every two seconds.”

    Economics of Repair: A Cost-Effective Choice

    Although smartphone technology has evolved rapidly, the durability of devices hasn’t necessarily followed suit.

    Official after-sales support, often complex and expensive, may not be the preferred option for consumers, especially when phones are out of warranty or lack insurance.

    Repairing an original device at a lower cost remains a more appealing option than purchasing a new, comparatively expensive phone.

    Diverse Operation Modes: The Entrepreneurial Landscape

    The industry’s vast development prospects have attracted numerous entrepreneurs, leading to a highly fragmented market.

    Three typical operation modes have emerged: in-store, mail-in, and door-to-door, with various patterns derived from years of experience.

    Innovation in Operation: Pioneering Companies and Real-time Dispatch

    Pioneering companies, such as iCracked, have introduced innovative operation modes like real-time dispatch services.

    Meanwhile, the industry’s top three necessities – parts, tools, and experience – are predominantly sourced from Shenzhen, China, a global electronic distribution hub.

    Meeting Evolving Needs: Up-to-Date Repair Technologies

    In the face of intensified competition and a slowing growth rate, basic repair services may no longer suffice.

    Repair technicians need up-to-date skills, prompting companies like REWA Technology to provide one-stop electronics aftermarket services, including spare parts and tools sourcing, repair tutorials, and recycling services.

    The Road Ahead: Current Status and Future Trends

    As the cell phone repair industry evolves, the future holds questions about its trajectory.

    With increasing demands, a lower annual growth rate, new operating modes, and diversified upstream supply, the current status and future trends of cell phone repair are becoming clearer.

    Empowering Aspiring Entrepreneurs: A Call to Acquire Knowledge

    To stay relevant in this evolving landscape, individuals aspiring to join the cell phone repair industry are encouraged to acquire comprehensive knowledge.

    REWA LAB offers a variety of cell phone repair training tutorials and videos, covering topics such as fixing water-damaged iPhones, resolving iPhone startup issues, MacBook Air RAM upgrades, iPhone storage upgrades, and Samsung Galaxy S7 Edge glass replacement.

  • How To Fix No Service On iPhone 6

    How To Fix No Service On iPhone 6

    Have you came through “no service” on your iPhone 5/5S, iPhone 6/6Plus, iPhone 6S/6S Plus, iPhone 7/7 Plus? What does it mean when your iphone says no service? it means you can’t use it for the basic things, such as texting, calling, and using mobile data. You won’t be able to use the mobile internet until you get rid of the error. The same thing goes for messages and calls. The issue will appear in the areas with no network coverage, or in the areas where network coverage is poor when you can also see a message “searching for service”.

    There are external and internal causes for ‘no service’ problem, which means no one-size-fits-all solution. REWA here presents you a professional iPhone 6 no service solution video and steps with pictures that deals with hardware failure with the help of our newly developed maintenance drawing. 

    How to fix no service on iPhone 6:

    1. Turn on the phone, searching for the signal – no service. Spread out the dialer board, enter ‘*#06#’ for IMEI code – no results. We can draw the preliminary cause as signal failure.

    2. Go to Settings – General – About, IMEI code displays right, SIM card readable, and Modem Firmware functions normally.

    3. Disassemble the phone, detach phone battery, take down the LCD screen assembly, then take out the motherboard.

    4. Remove the shield plate on motherboard with cutting nipper(Hot air gun is not recommended here because the shield plate is hard to remove and high temperature might cause damage to components nearby). Attach motherboard to PCB holder.

    5. Apply some BGA paste flux to the baseband CPU, blow it with hot air gun at 300 degrees centigrade. After a while, take down the baseband CPU.

    6. Clean the tins on the bonding pad with soldering iron, then dip some rosin with Goot wick for secondary cleaning. After that, clean it again with PCB cleaner.

    7. Roll out the maintenance drawing for reference. Point out the U1 Y1 pin as data signal failure. Test the U1 Y1 pin of the baseband CPU with digital multimeter, no resistance. We can conclude that the pin has been disconnected.

    8. Scrape the insulation varnish off the U1 Y1 pin circuit, solder the tins on the circuit with soldering iron for cable welding afterwards. Then align a solder added copper wire with a diameter of 0.02 millimeter to the exposed circuit with soldering iron. Clean it with PCB cleaner.

    9. Apply some UV curable solder mask to the aligned copper wire, then put it under the UV dryer lamp for 10 minutes.

    10. Apply some rosin with soldering iron for cleaning, PCB cleaner afterwards. Once finished,reball the baseband CPU with BGA reballing stencil.

    11. Apply some soldering paste with BGA scraper and smear evenly on the right place. Blow it with hot air gun for formation, take it down and blow it with hot air gun again.

    12. Apply some BGA paste flux to the bonding pad, align the CPU to the right place, blow it with hot air gun at 280 degrees centigrade.

    13. Once the motherboard is cooling enough, clean it with PCB cleaner. Afterwards, install the motherboard to the phone and test – IMEI code functions well.