Tag: iphone

  • iPhone 6s WiFi Module Repair Tutorial

    iPhone 6s WiFi Module Repair Tutorial

    Many people have experience of an unstable Wi-Fi connection or not able to connect to WiFi network at all, iPhone 6S WiFi failed to be turned on, the reboot did not work either. Don’t worry. Here we have the solutions for the WIFI module repair which can repair WIFI connection failure problem in 8 minutes by replacing the WIFI module.

    To fix the iPhone 6S WiFi failure, we need to bond a new WiFi module and refresh the flash drive data. Here are all the detail steps of how to repair iPhone 6S WiFi Module.

    The Tools and materials we need to use:

    • PCI-E Hard Disk Repair Tool
    • Hot Air Gun with Electric Soldering Station
    • PCB Holder – Type 2100g Solder Wire – Type 1 
    • Insulation mat for the Maintenance Platform 
    • Soldering Paste 50g – Type 1
    • Apple iPhone 6s IC Solder Repair Plate BGA Tencil
    • 1.5*25mm Philips Screwdriver

    The detailed steps:

    1. Open iPhone 6S screen and detach the flex cables and take out the logic board

    2. Fix logic board with PCB holder, Stick heat resistant tape on 2 sides of WiFi module to prevent damage; and adjust the hot gun at 240℃ and scrape off the black adhesive

    3. (Set hot air gun to 320℃ ), blow WiFi module for 1 minute for 1 minute and pry it with sculpture knife, apply some Paste Flux, remove tin with Soldering Iron, apply some rosin on solder wick, slick the Bonding Pad

    4. Clean the Bonding Pad with PCB cleaner, stick heat resistant tape on 2 sides of the flash drive,  blow flash drive for 1 minute and pry it, clean the Bonding Pad

    5. Connect System Repair Tool to the computer with data cable and Press the power on-off button, open the software and refresh port, install the flash drive in the right direction, press the reset button

    6. Access to the highest authority of flash drive and wait for all data query, you will see the WiFi and Bluetooth address(About the detail of this step, you can watch the tutorial video )

    7. Take out the flash drive, apply some Paste Flux, align new WiFi module with Bonding Pad and blow the flash drive for 1 minute at 280℃, add a fresh coat of solder paste on the flash drive with BGA Stencil, heat the paste at 280℃ until soldering ball forming 

    8. Align flash drive in right direction and heat for 1 minute at 280℃, after cool down, remove the residue from WiFi module and flash drive

    9. The last, install the logic board, LCD screen, and then you can test your WiFi.
     

  • Cell Phone Battery Test: Comprehensive Guide

    Cell Phone Battery Test: Comprehensive Guide

    cell phone battery test comprehensive guide how we batteries

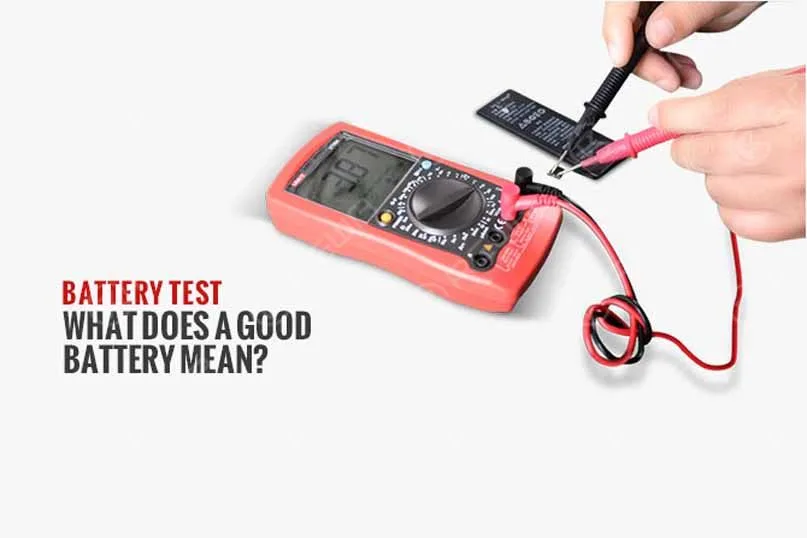
    With the rapid development of smartphone industry, more and more people possess one or more cell phones and thus many battery issues occur in the course of improper use of mobile phones, such as deformation, run out of capacity, overheating etc. Usually a replacement battery can settle this matter in a very common way. Here arises another problem, what does a good cell phone battery mean? As one of the most professional cell phone parts sourcing and recycling solution provider, what follows is right the way we test cell phone batteries.
    Appearance Inspect

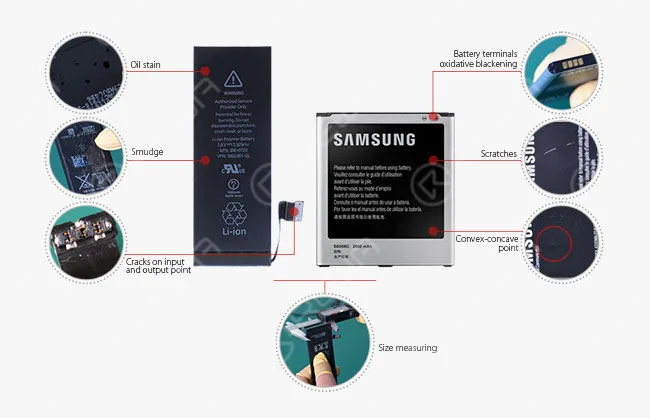
    First of all, let’s have a look at its cosmetic appearance. A fine cellular phone battery characters with no oil stains, smudges, scratches, convex-concave points on the surface and no cracks on input and output point. Besides, another important region which is often neglected is the battery contacts, assure that the battery terminals are not oxidative blackening. And of course, the qualified replacement battery needs to pass the dimension test compared with OEM ones.
    cell phone battery test comprehensive guide 2

    Functionality Test

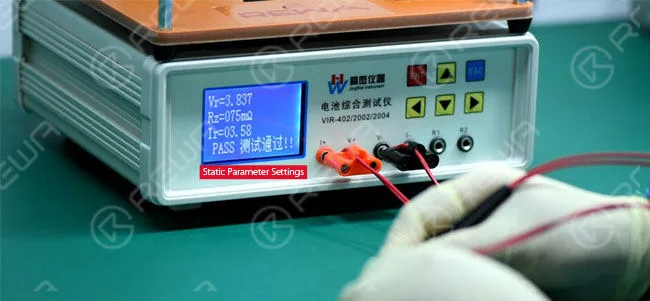
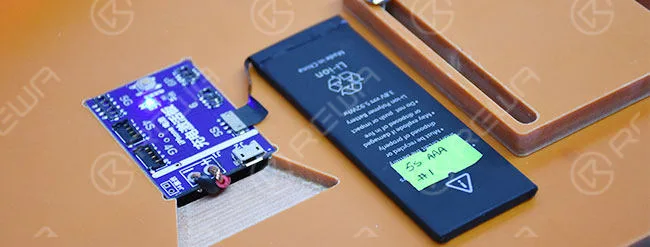
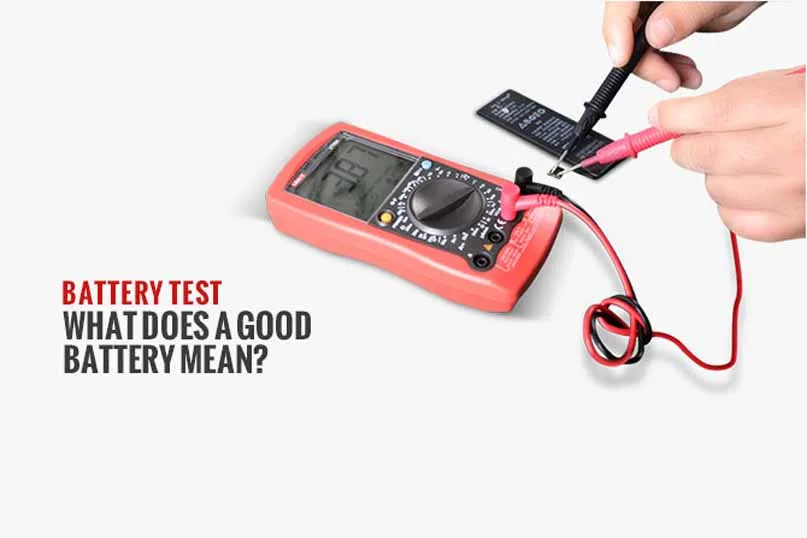
    And then come to the function test phase. During this stage, a phone battery tester and converted universal meter (for better demonstration) are involved. These specifications such as battery resistance, voltage, charging and capacity of the cell are required to confirm standards. Nonetheless, sampling test and complete test are applied based on the actual situations. 1) Resistance & Voltage Test Switch the Phone Tester to Static Parameter Settings mode, then check through the displayed values. Here is REWA standard towards “VIR”: Resistance value should be less than 150mΩ Voltage value should be greater than 3.7V

    cell phone battery test comprehensive guide 3

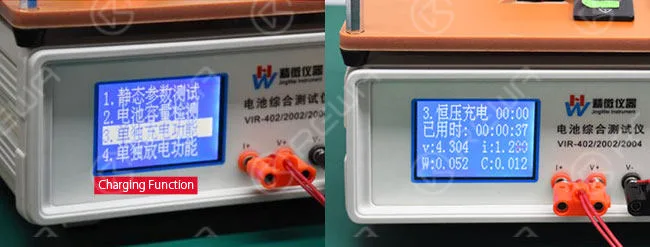
    2) Charging Test Choose the Charging Function and set the right parameter. And then start charging to see if it could work properly.

    cell phone battery test comprehensive guide 4

    3) Capacity Test In the first place, the battery’s current capacity and energy capacity need to be examined on the label.

    cell phone battery test comprehensive guide 5

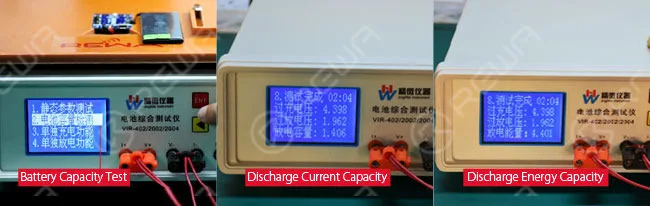
    Then switch to Battery Capacity Test and set the right parameters. Next fully discharge the battery, and then recharge it, fully discharge again and moving back and forth like this.

    cell phone battery test comprehensive guide 6

    After several charging and discharging circulations, the discharge current capacity and discharge energy capacity gradually tend to be balanced. Work out the average Discharge Current Capacity and Discharge Energy Capacity values according to the recorded data in the course of operation. Here is REWA standard towards phone battery capacity: Deviation: ±10%

    4) Drop Test

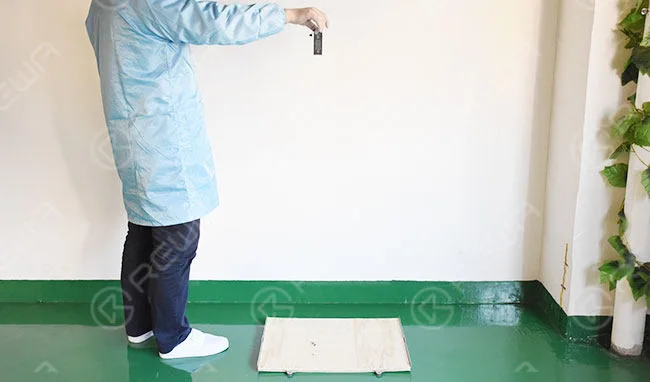
    This is also one of the acceptable reliability level tests as to mobile phone batteries. Firstly get the battery fully charged and after 30 minutes let it fall in a natural way to an 18mm to 22mm plank at the height of 1 meter. Check if the battery malfunctioning or has any damage cosmetically.

    cell phone battery test comprehensive guide 7

    5) Full Charged Cycles

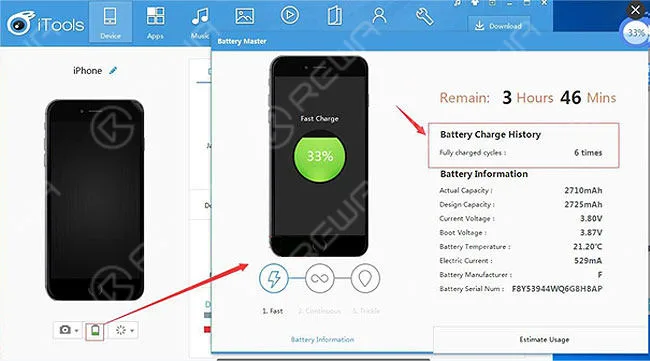
    Last but not least, some PC software could play a part in helping us check the battery full charge cycles such as iTools(with respect to iPhone non-removable battery). Connect with iTools and enter the Battery Master then check the fully charged cycles.

    cell phone battery test comprehensive guide 8

    In the end, several Battery Activation Tips are represented as follows:

    Some customers report that the batteries have no response when getting charged. For some new lithium batteries, they just need to be activated before function with optimum performance. Here are 5 tips for your reference:

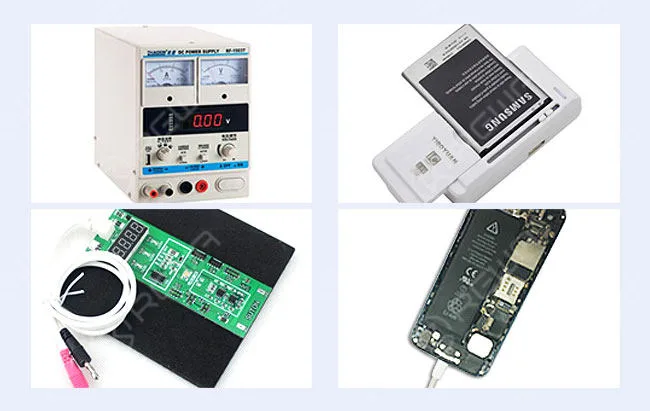
    • 1. Charge with the matched charger for a period of time.
    • 2. Remember to plug the data cable first, then install the battery.
    • 3. Use Battery Activation Plate.
    • 4. Use Universal Charger.
    • 5. Use DC Power Supplier.
    cell phone battery test comprehensive guide 9

    Strictly speaking, batteries pass the above-mentioned testing procedures are eligible replacement cells for smartphones and function properly afterward. Want to order our products? Please contact us:

    PRE-SALES Skype: rewatech

    Email: service@rewa.tech

  • How To Repair iPhone 7 Glass Cracked Screen

    How To Repair iPhone 7 Glass Cracked Screen

    This iPhone 7 Plus refurbishing process will involve some of the recommended refurbishing machines for stable performance and easy-to-use merits as well as repair materials and tools.

    iPhone 7 Plus Broken Screen Testing

    Firstly, you need an iPhone 7 Plus LCD with broken glass lens but properly working touch screen and LCD display. Install LCD to motherboard plate, then test if the display, touch and 3D touch functionality is OK.

    Bezel Disassembling

    Take off the LCD screen from the phone, cut the 4 corners of the front bezel with Heating Soldering Iron. Stick adhesive tape on the whole glass lens to prevent the problems that may arise in subsequent operations. Lay the LCD on Manual LCD Separator (80-90℃) and heat for about 15s. Press the Start button and remove the bezel frame. Remove the bezel adhesive glue with razor blade afterward.

    Glass Separating

    Embed the gold cutting wire into the bottom of LCD screen, pull it right and left till the glass separated.

    POL Film Removing

    Turn on LCD Glue Removing Machine and preheat for 5 minutes(170-180℃), then remove the POL film.

    Glue Removing

    Brush some LCM Cleaner on LCD and remove the residue adhesive. Eliminate the residue completely with N-hexane.

    POL Film Laminating

    Put the LCD on POL Film / OCA Laminating Machine and align it with a new piece of POL Film. Press Pump Down button, absorb it on the panel. Clean the LCD again and tear off the protective film with Easy Tear Sticker. Press Membrana Tectoria(Laminating) button to start POL Film Laminating.

    OCA Glue Laminating

    Tear off the first protective film and align OCA glue with LCD. Press the Pump Down button to absorb OCA glue. Tear off the protective film with Easy Tear Sticker and then go into the OCA Glue Laminating.

    Glass Laminating

    Put the LCD into aligning mold and tear off the OCA protective film. Align the LCD with Integrated Glass Lens and Bezel Frame. Tear off the glass lens protective film. Lay LCD into the laminating mold, then put it into 4 in 1 Vacuum Glass Laminating and Bubble Removing Machine. Press Start button and start glass laminating. Take it out after glass laminating is done(about the 30s at 42℃).

    Bubble Removing

    Lay LCD onto the Iron Shelf, close the cabin door and press Start Button. After bubble removing finishes(about 10 minutes at 35℃), press the button again and wait till the gauge indicates 0. At this moment open the door and take out the LCD screen.

    Back Light Unit Replacing

    Remove the soldering spot adhesive with tweezers. Detach the soldering joint with Soldering Iron. Put the LCD on Heating Platform for 20-30s, then tear off the backlight unit layer by layer. Remove the adhesive glue. Clean the LCD with N-hexane, tear off the protective film on Back Light Unit. Align it with LCD screen, then weld the soldering joint with solder wire(ensure that the tin spot is of satiation). Stick a new soldering spot adhesive on the joint.

    Retesting

    Connect the LCD to the motherboard, and then test the display, 3D touch, and touch functionality again.

    Note:

    1 Back Light Unit needs replacing only when it has problems of water damage, dust spot, the light spot, and 3D touch fails etc.

    2. The use of Integrated Glass Lens with Bezel Frame results in the unnecessity of Bezel Assembling step in this refurbishing process.

    This is when we should call it a day. Because at this point a cracked iPhone 7 Plus is successfully refurbished.

  • iPhone 7 Plus VS iPhone 6s Plus Teardown

    iPhone 7 Plus VS iPhone 6s Plus Teardown

    iPhone 7 and 7 Plus has been attaching a lot of attention in the run up to their launch, some of which keep doubting, others of which are crazy for the new features.

    What is the difference between iPhone 7 Plus and iPhone 6s Plus? Are their spare parts compatible?

  • How To Repair Samsung S7 Edge Broken Screen Glass

    How To Repair Samsung S7 Edge Broken Screen Glass

    As we know, our phone’s screen is the most easily damaged parts, no matter how careful you are, your phone is bumped and squished and dropped. If you break your Samsung Galaxy S7 screen you’ll want to get it fixed. Here’s what you need to know about repairing or replacing the screen. Among popular smartphone screens, OLED is different from LCD, the well-known represent-ative OLED is Samsung SUPER AMOLED. It is with brilliant sharp colors, but it seems so fragile as you accidentally drop your phone on the ground,you will probably get a shattered screen.

    To fix this headache, it is very difficult even for repair stores. Refer to iFixit guide, Samsung Galaxy S7 edge Repairability Score is 3 out of 10 (10 is easiest to repair). Because the S7 edge phone and screen use tons of adhesive to attach the screen, glass lens and the frame, meaning when anyone breaks one of them all three need to be replaced. Replacing the glass only is a big challenge even for professionals.

    There are plenty of in-depth tutorials about changing your Galaxy S7 screen on YouTube. You should start with REWA’s video where they provide repairs the screen guide and Samsung phone repair parts . Today, REWA Lab is bringing the success to the curved OLED Glass only repair, aiming to make the repairing of cracked screen clear and easier for professional repairman. Below are the detailed instructions for Samsung Galaxy S7 edge screen repair. Replacing the S7 edge glass without destroying the display is impossible? In this video we give you the solution about how to refurbish & repair your cracked screen glass. Please contact us if you need refurbishing machines & materials or S7 edge screen third-party refurbishing service.

    Cracked Screen Testing

    Make sure the display and touch functions both work well on the glass-cracked screen.

    Frame Separating

    Firstly, we need to remove the screen from middle frame of the phone. Use Pry Piece, 530 cleaner and Heat Platform to separate the LCD and frame preliminarily, then separate it completely with Frame Separator.

    OLED Separating

    Samsung SuperAMOLED screen separating is different from iPhone screen repair, here we use Frozen Separator to disable the glue and a plastic Pry Piece to help.

    Put screen into Frozen Separator, freezing 30s, then separate the OLED from glass.

    Glue Removing

    With the help of 8333 remover and N-hexane, clean the glue residue on the OLED.

    OCA Laminating

    Use a Manual OCA Film Laminating Roller to laminate OCA sheet onto OLED.

    Bubble Removing

    Put it into Bubble Removing Machine for 15 minutes. Make sure the OCA is bubble free on OLED.

    Glass Laminating

    Align the front glass with OLED, then laminate the glass and OLED with help of Vacuum Glass Laminating Machine.

    Bubble Removing

    Put it into Bubble Removing Machine again for 15 minutes. Make it bubble free after glass laminated.

    Repaired Screen Testing

    Make a complete test on the repaired screen display performance, touch functions, all testings are good.

  • How To Fix The iPhone Touch Unresponsive Problem

    How To Fix The iPhone Touch Unresponsive Problem

    Did you get your iPhone 6 / 6 plus touch screen unresponsive? Many people feel so annoyed when their iPhone touch screen can not work , especially in the moment of fierce urgency. In this video we give you the solution to fix the iPhone touch unresponsive problem that only by replacing the touch IC.

    Touch screen unresponsive fault analysis

    A design defect has resulted in tons of iPhone 6/6 Plus touch doesn’t work. There are 4 chips on iPhone 6 Plus logic board that handle touch functionality, they are U2402, U2401, U1202, U1501. U2402 synchronizing signal connect with display connector and U2403 touch IC, this signal is the root cause of touch not responding and screen flickering. 

    Repair

    Step 1: Separate the display assembly from the rear case with suction cup, remove screws on the metal cover, disconnect the display assembly flex cable, disconnect battery connection under the metal cover and take out the logic board. 

    Step 2: Fix the motherboard on PCB holder, tear off the shieding cover, add some paste flux and blow it at the temperature of 300.C. 

    Step 3: Two minutes later, pry out the IC, scrao off the tin on the bonding pad with soldering station. 

    Step 4: Clean off the residual tin with solder wick and rosin solfer flux. 

    Step 5: Clean the bonding pad with PCB cleaner. 

    Step 6: Test the circuit between U2402 and M1 before welding a new touch IC. 

    Step 7: Coat the PCB bonding pad with paste flux. 

    Step 8: Put the touch IC into bonding pad(take care of the direction), Blow it for two minutes with hot air gun at the temperature of 300.C. 

    Step 9: Clean the touch IC after it cooled down. Install logical board and assemble the display assembly. 

    Power on and test the iPhone 6 Plus, the problem goes away and touch screen functions well.

  • How To Repair iPhone 6 Not Charging

    How To Repair iPhone 6 Not Charging

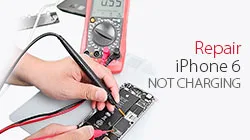
    Have you met after charged one hour, but the battery power becomes less? Do you know how to fix your iPhone not charging problem?First, we need to know what reason result in your phone not charging, that is charging fault ananlysis. Second charing fault detection, and then repair. Let’s follow REWA step by step video recording to fix iPhone 6 not charging.

    Charging fault analysis

    Plug dongle to computer, open PCB diagram software, iPhone 6 PCB diagram, Charing voltage input PP5V0_USB, battery voitage PP_BATT_VCC, Battery electric quantity dectection BATTERY_SWI_CONN, Connect U1401,Tigris charger, USB control IC, overvoltage protection signal, U1700 damage can result in not charging, reboot and connect computer failure ect.

    Charging fault detection

    Open iPhone 6 screen, take down the screen, pull up the battery connector from logic board. The coltage is about 2.0V after measurement through stitch battery is ok. Plug to charger, the voltage is 0.5V(normal 1.8V – 4.2V) after measurement through FPC connector, logic board can’t charge

    Repair:

    Take out the logic board, fix the logic board with PCB holder. Blow the shield cover with 320℃ air hot gun and take off it. After blowing for 1 minute at 240℃, scrape off the black ashesive. Blow the Bonding Pad for 1 minute at 300℃ until the tin melts, pry the chip with sculpture knife, apply some Paste Flux, remove the tin on bonding pad, apply some rosin on the Solder Wick and slick Bonding Pad, clearn the Bonding Pad with PCB Cleaner, align the new chip in right direction through stitch. Blow the chip with hot gun for 1 minute at 280℃. Install the logic board after cool down

    Detection and Troubleshoot

    Plug the charge, the voltage ranges between 1.8V and 4.2V indicating charging IC works properly, install the LCD and charge, after 1 hour the battery can charge properly

  • Boost Sales & Protect Shipments with REWA Packaging

    Boost Sales & Protect Shipments with REWA Packaging

    Great packaging cannot only avoid rough handling and harsh environment during the transportation before delivered to the hands of customers, but also make a difference to growing startups for the reason that it does have a direct impact on sales volume and a company’s overall appeal.

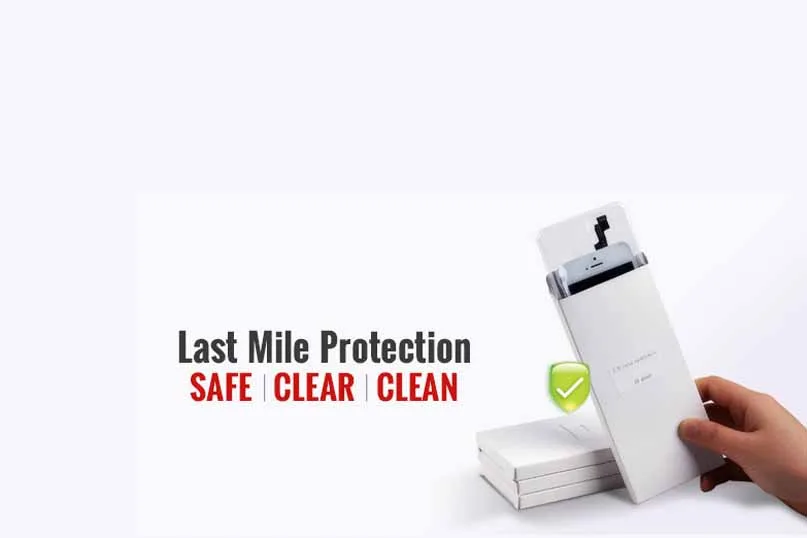
    REWA packaging is the last mile protection for the products – safe, clear and clean. And also the packages are Eco-friendly to a degree because some of them are recyclable or reusable.

    Below is the detailed packing procedure and different packages specially designed for different mobile phone spare parts

    such as mobile phone LCD touch screen assembly, replacement battery, iPhone LCD front bezel frame, Tablet PC touch screen digitizer, cell phone outer glass lens, small components (dock connector charging port flex cable, rear/front facing camera, vibrating motor etc.) as well as phone replacement battery cover.

    Stamping

    After the products have been tested, they will be stamped with QC number seal & REWA stamp (seal). Generally, Different products come with different packages.

    boost sales protect shipments rewa packaging

    Packaging

    iPhone 5/5c/5s/6/6s LCD Display Screen

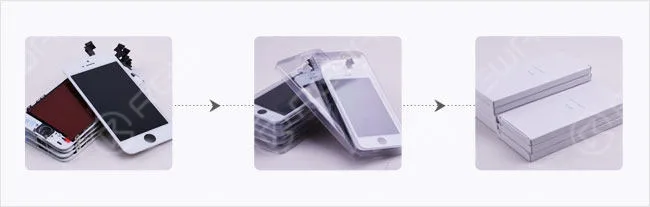
    Customized transparent plastic boxes are applied to those new iPhone screens.

    boost sales protect shipments rewa packaging 2

    Other LCD Screens

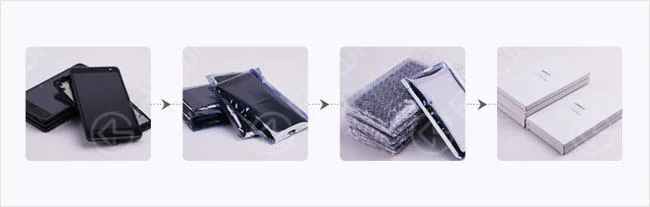
    Mobile phone LCD displays will be packaged in the anti-static bags, then wrapped with bubble bags and then packed into paper boxes.

    boost sales protect shipments rewa packaging 3
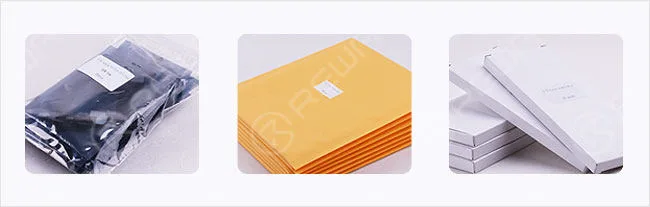
    • 1) Anti-static Bag Packing Avoid static damage for electronic components such as flex cable and IC.
    • 2) Anti-shock Bubble Bag Packing To provide shock-proof protection.
    • 3) Clean Carton Box (paper box) Packing To provide the individual and clean package to the hands of end-users.
    • 4) Foam and Hard Carton Packing To avoid rough handling and harsh environment during the transportation.

    Phone Battery

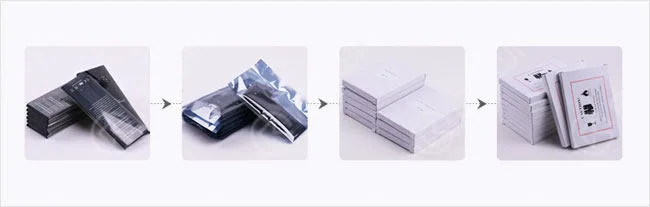
    Batteries will be packaged in the anti-static bags, then packed with paper boxes and put into battery specialized paper boxes.

    boost sales protect shipments rewa packaging 4

    iPhone Front Bezel Frame

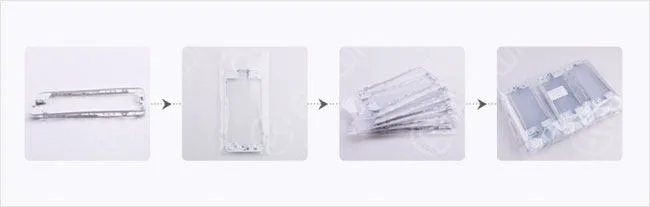
    Make the two front bezels face to face (save room and safe). Put into a plastic bag in a group of 10 and lock by the stapler, then package 6 groups in a big plastic lock plastic bag.

    boost sales protect shipments rewa packaging 5

    Tablet PC Digitizer Touch Screen

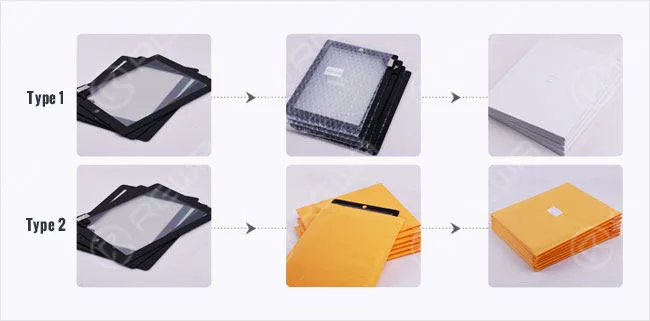
    Firstly, protect the fragile touch screen flex cable with foam and adhere it on the screen, and then:

    Type 1: Put it into a bubble bag and pack with a paper box;

    Type 2: Put in into a customized sealed bubble bag.

    boost sales protect shipments rewa packaging 6

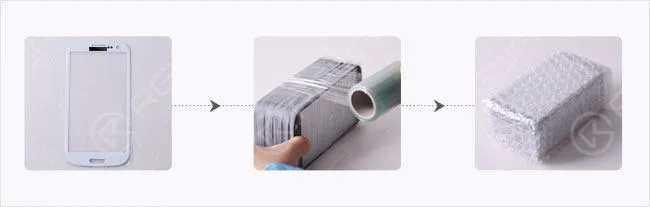
    Mobile Phone Outer Glass Lens

    Glass lens will be fixed with fresh-keeping film and wrapped with layers of bubble bags.

    boost sales protect shipments rewa packaging 7

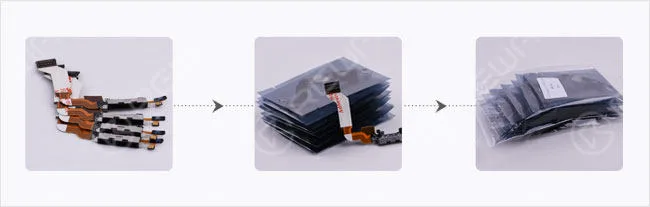
    Small Components

    Flex cables, frames, and battery covers will be packaged in a plastic lock bag wrapped with bubble bags and then packed into a big plastic bags.

    boost sales protect shipments rewa packaging 8

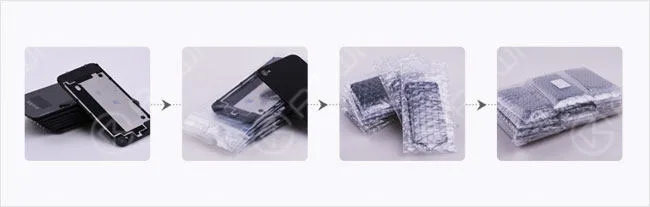
    Phone Back Battery Cover

    Put it in a small plastic lock bag with a bubble bag wrapped outside, then package it into a big plastic bag. Warm Prompt:* For cell phone battery covers, screens, glass lens and other products with big logo, the logo will be covered with black tape to reduce customs clearance risks.

    boost sales protect shipments rewa packaging 9

    Labeling

    Each product will come with a label includes major info. of the products. Before labeling, we will check the info on the label to see if it is consistent and complete.

    boost sales protect shipments rewa packaging 10

    Packing

    Foam Box

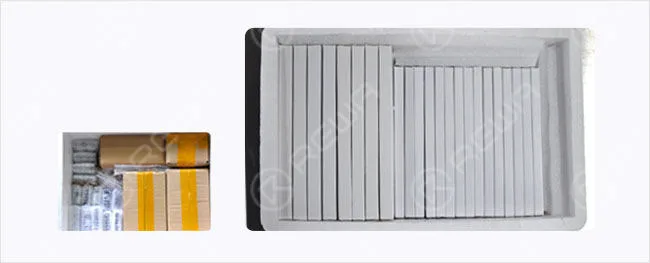
    After making sure all products are well packaged, we will put them into a foam box and fix it to prevent them from any possible damage in the course of transportation.

    boost sales protect shipments rewa packaging 11

    Master Carton

    After all parts are packaged in the foam box, then we will have a master carton pack outside. The shipping mark, box number and tracking number will be stuck on the surface of the carton.

    boost sales protect shipments rewa packaging 12

    Above is the whole process that how our phone spare parts are packaged before being delivered to your hand. So far in our experience, REWA does not hear from any customers that complained about the cell phone parts damages.

    So you do not have to concern yourself with the handling of the phone packaging. Want to order our products? Please go to our online store shop.rewa.tech to get or contact us:

    PRE-SALES Skype: rewatech Email: service@rewa.tech

    AFTER-SALES Skype: support-rewatech Email: support@rewatechnology.com

  • How To Unlock iPad Air

    How To Unlock iPad Air

    The video is made for technical sharing, if you have a locked iCloud, please contact Apple official service. With a 64-bit system repair tool, you can remove activation lock of iPhone 5s/6/6 plus/iPad Air/Air 2/mini/mini 2/mini 3/mini 4 by changing the serial number.

    Many iPad users are easy to forget their iPad password/pin. We often heard many similar questions from different channels: what to do if I forgot iPad password? How to unlock my iPad? how to unlock iPad activation lock? Therefore, this video is made to help those in need to unlock iPad without the password or reset disabled iPad. The method can be used to get into locked iPad Pro, iPad 2/3/4, iPad Air 1/2, iPad Mini 1/2/3 without the password.

    There are some different ways to solve how to unlock an iPad, software and hardware; but our video is mainly talking about how to bypass iPad Air activation lock in hardware.

    The device can’t be activated without the right ID and password, so we can use hardware unlock iCloud of iPad Air. Here are the detail steps to teach you how to unlock an iPad Air – Hardware unlock iCloud of iPad Air with 64 bit system repair tool

    And if you don’t want to use the hardware unlock iCloud of iPad, you can try this software to solve your problem. You need to use a software which named iOS Lock Screen Removal, this is a professional software for unlocking a phone without the password. It supports both iOS and Android. As for iOS, this iPhone unlocker works greatly with the latest iOS 11 and iPhone X/iPhone 8. 

    One Click to Bypass the Lock Screen Password on iPad Pro

    Step 1. Connect your iPad Pro to PC

    First, please install the iOS Lock Screen Removal and run it on your computer. Then click the “Unlock” among all the choices.

    Next, you can concatenate your iPad Pro to the computer using a lightning cable and click “Start” on the program.

    Step 2. Boot iPad Pro in DFU mode

    In order to prior to bypass iPad Pro lock screen, we need to boot it in DFU mode. If you have no idea how to boot it, you can follow the orders on dr.fone to complete it.

    1. Power off your iPad Pro.

    2. Press and hold the Volume Down button and the Power button together for 10 seconds.

    3. Free the Power button and keep holding the Volume Down button until your iPad Pro is in DFU mode.

    Step 3. Identify iOS device information

    After the device is in DFU mode, dr.fone will scan your phone and display the device information, such as iPad generation, iOS version, etc. If the information is wrong, you can also select the correct information from the dropdown lists. Then click “Download” the download the firmware for your iPad Pro.

    Step 4. Unlock iPad Pro screen lock

    After managing to download the firmware, click “Unlock Now” to initiate unlocking your iPad Pro. Can you believe that just in a few seconds, your iPad Pro will be unlocked successfully? Believe it or not, the dr.fone is so efficient.

    Attentionally, it’s unavoidable that the unlocking course will also wipe the data on your iPad Pro. To be honest, there is no solution to bypass iPhone/iPad lock screen without data loss at present in the market.

    Notice:

    The software solution is from some iPad user recommended, we didn’t verify it, if you have a lock iCloud iPad need to repair, we recommend the hardware solution.

  • Causes & Solutions for Static Electricity on LCD Screen

    Causes & Solutions for Static Electricity on LCD Screen

    Static Electricity on LCD Screen

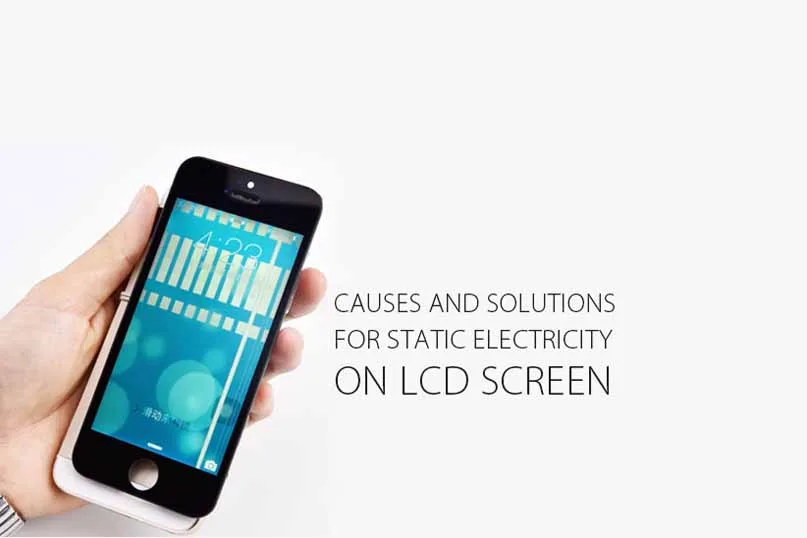
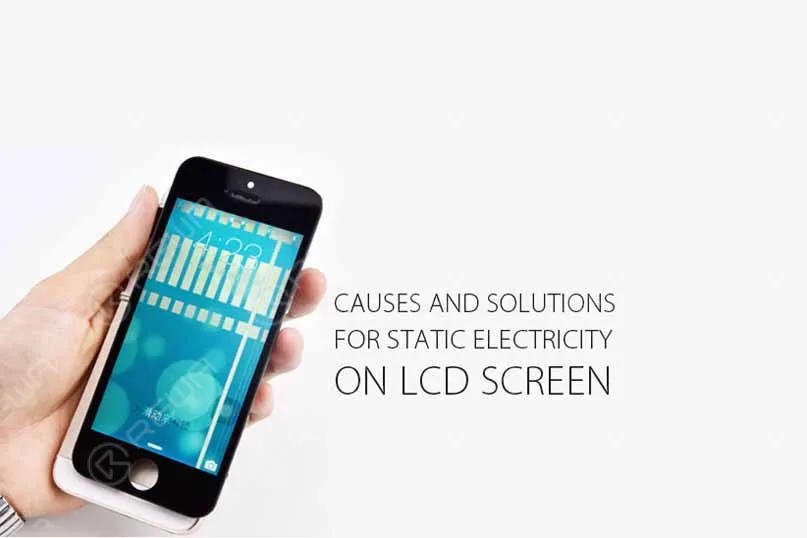
    In regard to some iPhone 5 screen units, a few fuzzy vertical or grid lines appearing on the LCD screen, which usually thought to be caused by static electricity.

    In some special cases, static electricity may even cause following problems: gray screen when tearing protective film, unresponsive screen , unstable touch functionality etc.

    Generally, only iPhone 5 series LCD Assembly has the static electricity problem, while iPhone 6 series LCDs are free from this trouble due to their improved material and technology.

    Causes of screen static electricity

    1. Silver Conductive Paste

    2. Aside from the silver conductive paste problem, quality and material of POL film is also a big cause.

    A. Screen without silver conductive paste

    Silver Conductive Paste

    B. Misoperation in injecting silver conductive paste

    injecting silver conductive paste

    3. Cracking Corner

    Cracking Corner

    4. High temperature. New produced iPhone 5 series screens perform poor in electron conductivity due to the high temperature, which causes static screen. Solutions

    1. If you make sure it is caused by quality and material of POL film, we suggest you replace it with a better POL film.

    2. For those screens without silver conductive paste or the mishandled, it needs to be injected or re-injected qualified silver conductive paste.

    re-injected qualified silver conductive paste

    3. There are two solutions for the screen with cracking corners: a. Inject the silver conductive paste to the gap junction between POL film and touch screen digitizer flex cable;

    screen with cracking corners

    b. Connect the bottom of touch screen flex and POL film with conductive tape. Solution A is recommended because it is easier to handle.

    4. As regards static electricity caused by tearing film or high temperature, please confirm whether it has been injected with silver conductive paste first, If yes, charge it or just leave it to place for a certain period of time.

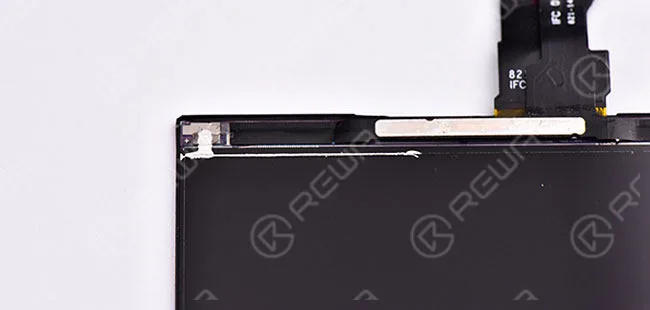
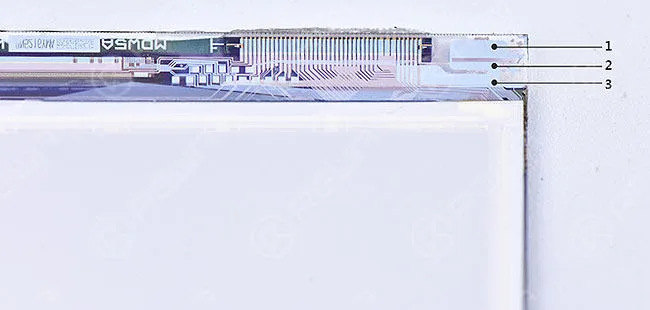
    Tips: A. More attention should be paid at iPhone 5 series Toshiba LCD, the unique structure makes it easier to be mishandled. Avoid applying any silver conductive paste on the gap between the three lines.

    iPhone 5 series Toshiba LCD

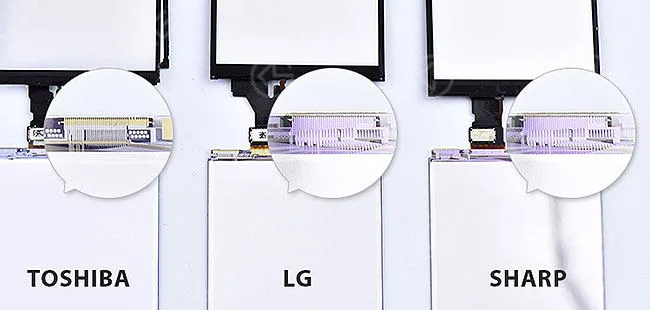
    B. How to distinguish LCD manufacturer? The texture of control circuit on the upside of the glass is different.

    distinguish LCD manufacturer

    Want to order our products? Please go to our online store shop.rewa.tech to get or contact us:

    PRE-SALES Skype: rewatech

    Email: service@rewa.tech

    AFTER-SALES Skype: support-rewatech

    Email: support@rewatechnology.com

  • Reduce Customs Clearance Risks with Battery Sticker Label

    Reduce Customs Clearance Risks with Battery Sticker Label

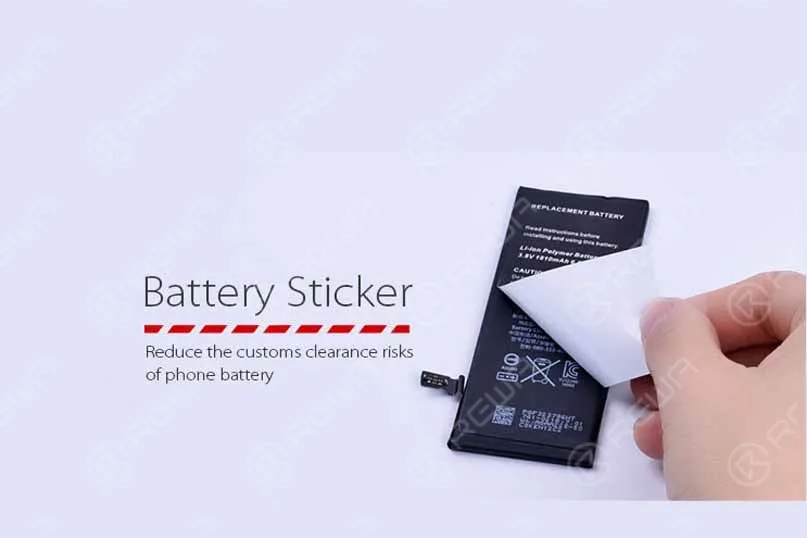
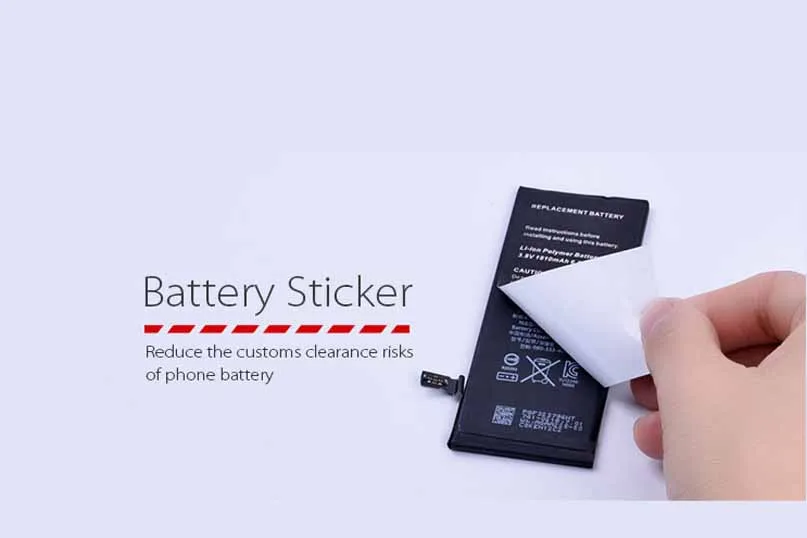
    reduce customs clearance risks battery sticker label the of phone REWA launched a new package sticker for iPhone 4s, 5, 5c, 5s, 6, 6 plus batteries to reduce the risks during customs clearance.
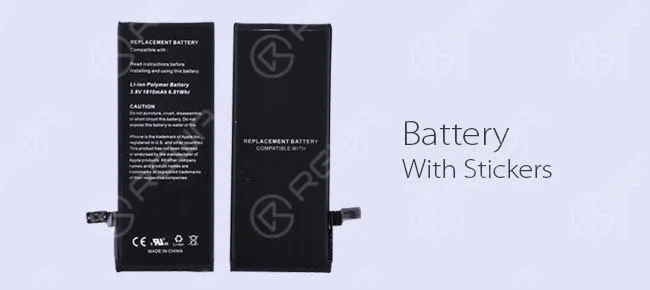
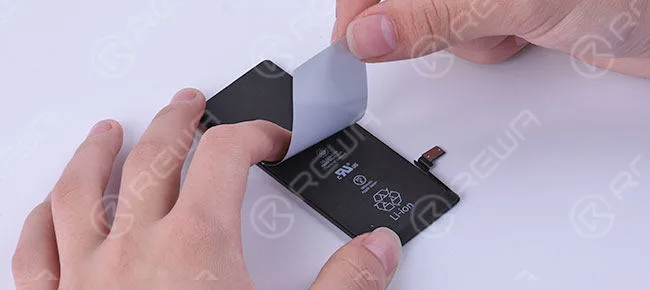
    This new battery label looks very similar to the original battery in appearance with sensitive information removed which reads on the front:

    REPLACEMENT BATTERY

    Compatible with: iPhone 6

    Read instructions for installing and using this battery.

    Li-ion Polymer Battery 3.8V 1810mAh 6.91Whr

    CAUTION

    Do not puncture, crush, disassemble, or short circuit this battery.

    Do not expose this battery to water or fire. iPhone is the trademark of Apple Inc., registered in the U.S. and other countries.

    This product has not been licensed or endorsed by the manufacturer of Apple products.

    All other company names and product names and product names are trademarks or registered trademarks of their respective companies.

    On the back writes:

    REPLACEMENT BATTERY

    COMPATIBLE WITH

    iPhone 6

    This measure tends to help people who have businesses in mobile phone parts distribution, cell phone spare parts wholesale or cellular phone repair.

    In the way that without sensitive information visible on the battery surface will efficiently reduce the possibilities to a greater degree of customs clearance issues such as being confiscated, destroyed or repatriated.

    If your customers are not willing to accept the stickers, you can also take the labels off easily.

    reduce customs clearance risks battery sticker label

    What follows is the whole process of battery packaging in REWA.

    reduce customs clearance risks battery sticker label 2

    Attach the battery sticker & label to the front and back of the cell phone battery.

    reduce customs clearance risks battery sticker label 3

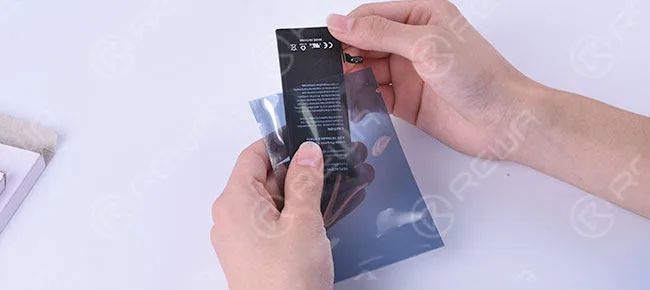
    Anti-static Bag Packing to avoid static damage for electronic components.

    reduce customs clearance risks battery sticker label 4

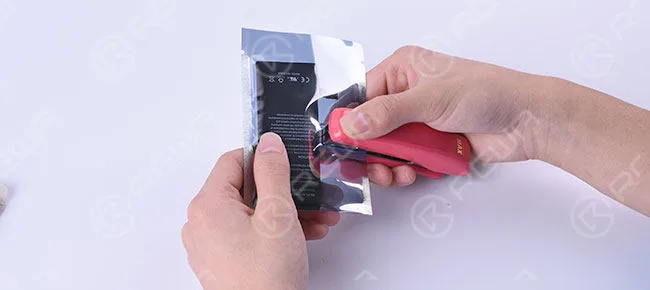
    Fix the battery in the anti-static bag by putting the staples into the bag.

    reduce customs clearance risks battery sticker label 5

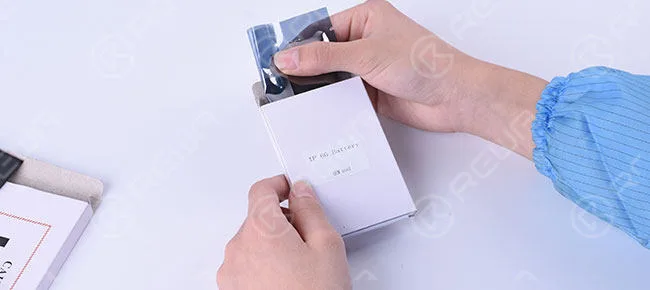
    Clean Carton Box Packing to provide the individual and clean package to the hands of end-users.

    reduce customs clearance risks battery sticker label 6

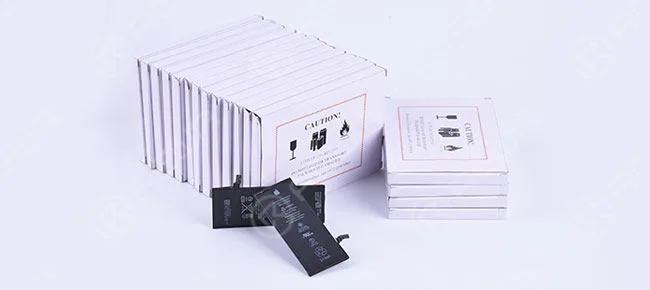
    Bigger box with Caution Marks / Lithium Battery Handling Labels to avoid rough handling and harsh environment during transportation.

    Safely transport these lithium battery packages by air with Caution Labels which are designed in accordance with international air regulations.

    When it comes to regulatory compliance, we think through all of the details so you don’t have to worry.

    REWA launched this brand new package sticker/label for mobile phone batteries which is a foolproof shipping label solution, helping you get your packages delivered on time.

    Want to order our products? Please go to our online store shop.rewa.tech to get or contact us:

    PRE-SALES Skype: rewatech

    Email: service@rewa.tech

    AFTER-SALES Skype: support-rewatech

    Email: support@rewatechnology.com

  • How To Fix iPhone 6s 3D Touch Backlight

    How To Fix iPhone 6s 3D Touch Backlight

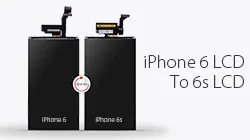
    This is a cheaper solution to fix iPhone 6s 3D Touch Backlight. It is similar to an iPhone 6 backlight, only with a different flex connector: If your 3d touch is still working, you’ll only need to change this backlight part. Much cheaper than a complete backlight. Here are the steps, to change the backlight part on an iPhone 6s. You can now transfer iPhone 6 backlight to 6S backlight, which saves you a lot each piece, check it out today.

    Step 1: When we get the iPhone 6S, we should test the iPhone 6s screen first, and we found the backlight can not display properly, but the 3D touch functions well.

    Step 2: Now we should tear down the defective iPhone 6S backlight, melt the spot on the LCD backlight flex cable, heat the screen for 10s, take down the backlight and then take off the 3D touch module and LGP, keep them; After take off the 3D Touch module, you should clean the glue residue, then you should take off the LED light

    Step 3: Install iPhone 6S LED light to the metal plate, spread B7000 glue including the two corners

    Stick the LED light into it and then clean the LCD backlight module

    Step 4: Transfer iPhone 6 backlight to 6s, tear off the last layer of iPhone 6 backlight; align the rest with the 6s backlight module and stick into it; tear off the iPhone 6 LED light, Test the backlight with ampere meter and work properly and then clean the iPhone 6s LCD screen, Tear off the protective on the backlight, align the backlight LCD and into it. Joint the welding spot with soldering station neatly, Paste the welding spot with anti-static tape, connect the LCD to iPhone 6s logic board, Screen testing on pure black white and gray color.

    At last: Touch and 3D touch function is good condition.