Tag: iphone

  • How to Optimize iPhone XS Battery Life

    How to Optimize iPhone XS Battery Life

    Tips 1: Disable Background App Refresh

    You can start with disabling Background App Refresh. Go to Settings > General > Usage, recording the remaining standby and use time.

    Then turn off Background App Refresh and lock the phone to wait 10 minutes. Then return to Settings > General > Usage.

    You will see that the battery life will increase by at least 10 minutes. If there is no change, you also need to turn off all current background running applications one by one.

    Go to Settings > General > Close the Background Application to see the APP list. Turn them all off.

    Tips 2: Disable Email Notification

    Spam is like virus nowadays, and many users can’t tolerate them every day. You can try to disable email notifications. Go to Settings > Mail, Contacts, Calendar > Get New Data.

    You can turn off these features. Or set every 15 minutes, 30 minutes or an hour to let iPhone XS check a new email. You will not miss important emails. The longer the interval, the more battery life you will save.

    Tips 3: Disable application notification

    Some apps will send you notifications. You can go to Settings > Notifications to check in detail. Click any of the applications in the list to turn it off so that the notifications will not be received.

    Tips 4: Disable automatic download

    If you set the music, applications, and system of iPhone XS to automatic update, you will also consume a lot of battery life.

    Therefore, a part of the battery life can be saved in this feature. Go to Settings > iTunes Store and App Store to disable the Cellular Data option. Then the iPhone XS will be updated with Wi-Fi.

    Tips 5: Shorten automatic lock screen time

    When you are not using it, your iPhone XS screen takes a while to go dark. And you can go to Settings > General > Auto-Lock.

    Set it to the minimum values that you can accept, which can also help you save a lot of battery life under the premise of using it.

    Tips 6: Turn off AirDrop-save the iphone xs battery life

    No one needs the AirDrop to be on all the time. So when you need it, you can slide up from the bottom of the screen and open it in the control center.

    Tips 7: Use black static wallpapers and themes

    You can disable Auto-Brightness in the wallpaper and brightness, so that the screen is always in a darker state, saving a lot of battery life.

    After all, we need more brightness in the case of direct sunlight. And this situation will not always appear.

    Tips 8: Disable animation effect

    If you don’t like dynamic background, visual difference, and 3D effect, then you can also turn it off.

    A still picture can be set as wallpapers in the Wallpaper and Brightness, and the animation effect can be turned off in General > Auxiliary.

    Tips 9: Disable GPS

    Unless the map must be used, the GPS is not helpful at all, which is also very power-consuming.

    You can go to Settings > Privacy to disable the GPS, or keep the applications that must be positioned, and turn off the others.

    Tips 10: Turn off Siri

    If you don’t use Siri, you can turn it off directly.

    Tips 11: Turn off the vibration

    In Settings > Sound, you can choose to turn off vibration, and disable the vibration of the new email notification in the Mail, which will save you much battery life.

     Tips 12: Disable iCloud

    Go to iCloud, you will see cloud synchronization will consume a lot of data and power.

    Of course, you can re-open iCloud synchronous backup with the phone connected to power, so that you can save important data.

    If you have followed the above suggestions, the iphone xs battery life is still draining fast.

    It is possible that the battery may be a problem. You can test the battery life in the nearest repair store.
  • Expert Tips for Desoldering & Soldering iPhone X Charging IC

    Expert Tips for Desoldering & Soldering iPhone X Charging IC

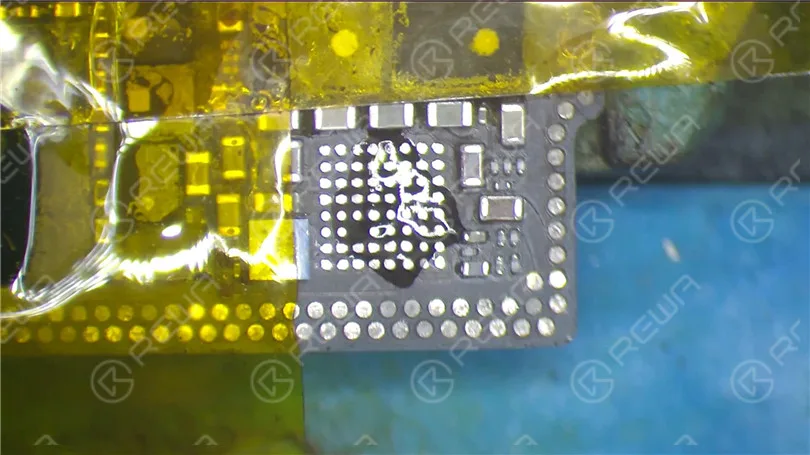
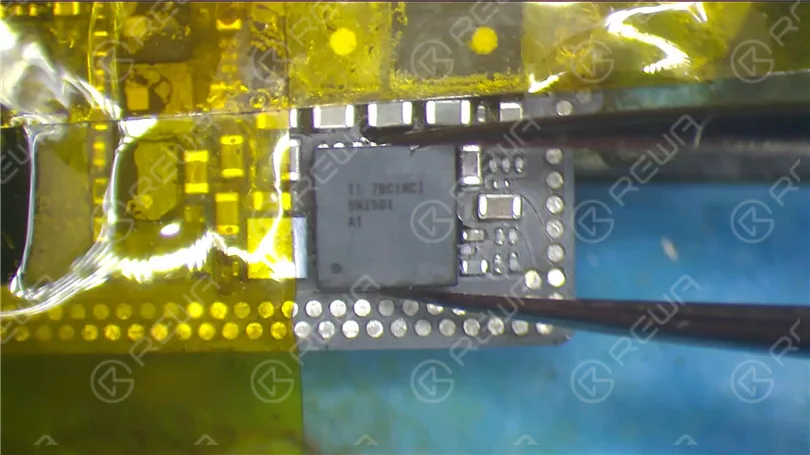
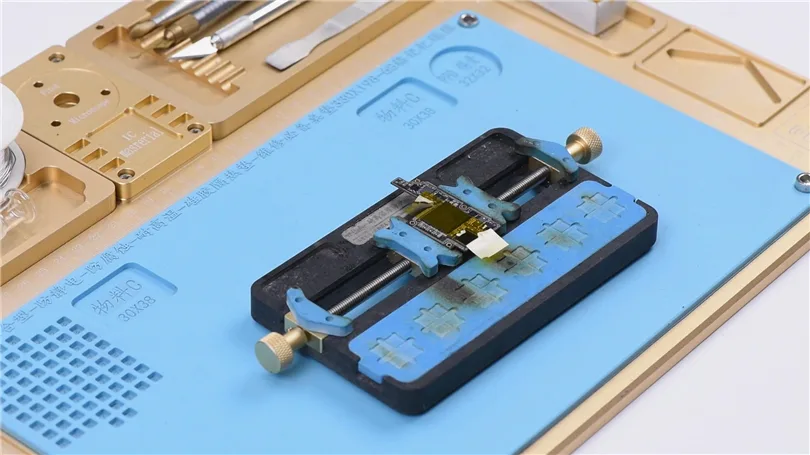
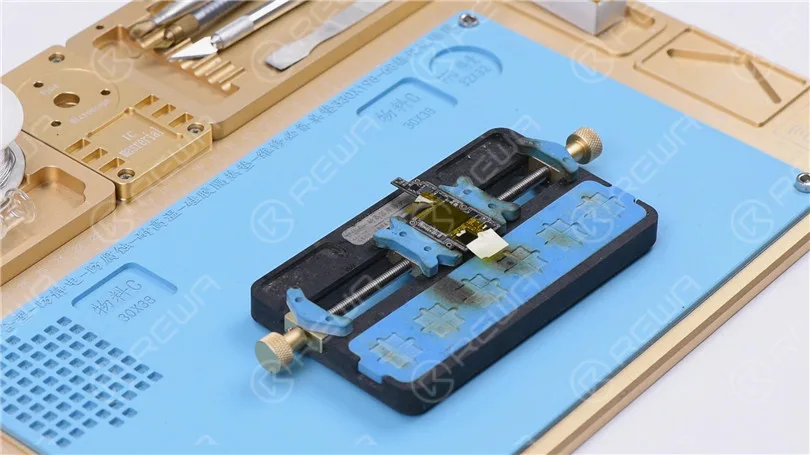
    Hello guys, today we will walk you through repair tricks for desoldering&soldering of iPhone X charging IC.

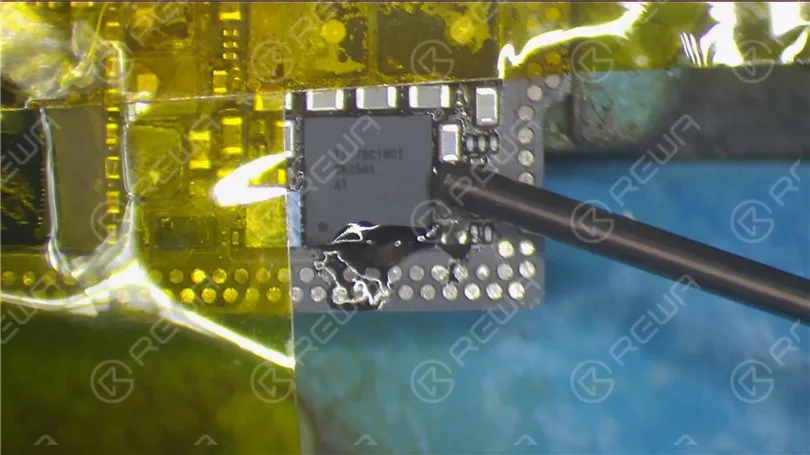
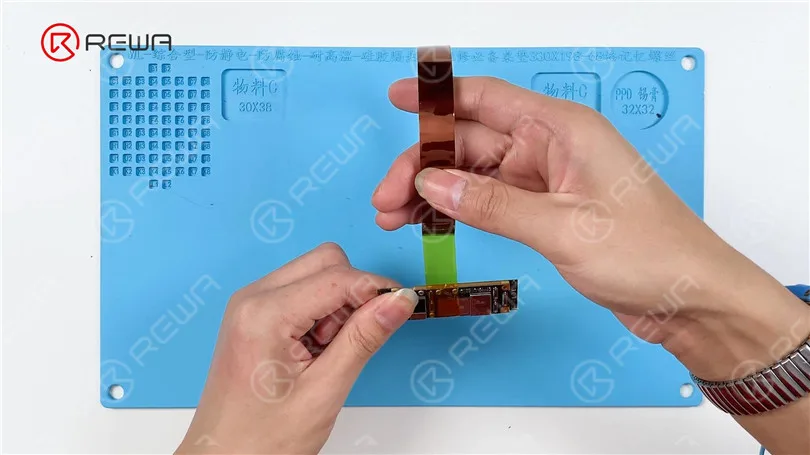
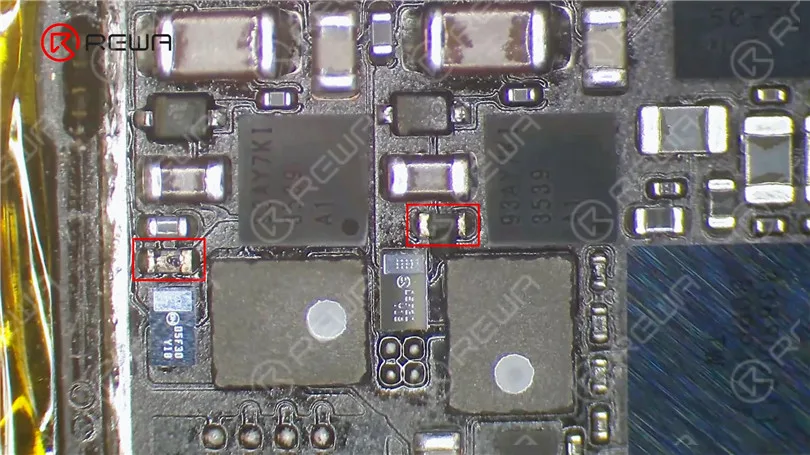
    First, stick high-temperature tape on components around the charging IC to protect them from pseudo soldering/bridging during the operation.

    Repair tricks for desoldering&soldering of iPhone X charging IC

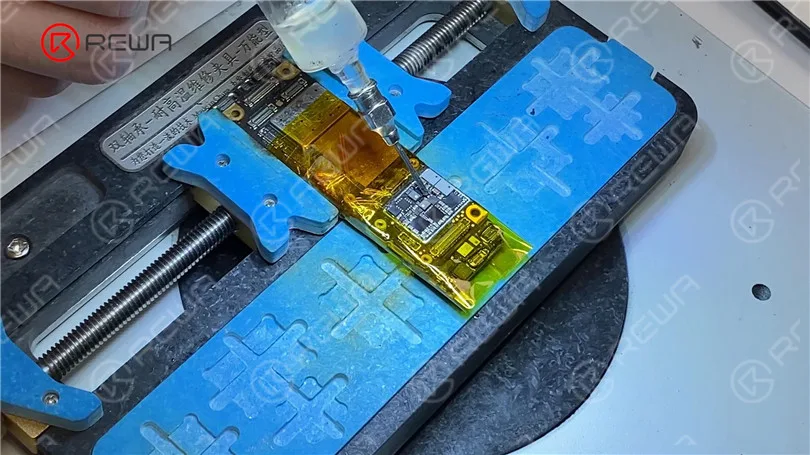
    Then apply some paste flux around the charging IC.

    Repair tricks for desoldering&soldering of iPhone X charging IC

    Set temperature of the QUICK 990 AD Vertical Wind Hot Air Gun at 330℃, air flow 3. Keep the hot air gun at 5mm-10mm height from the charging IC.

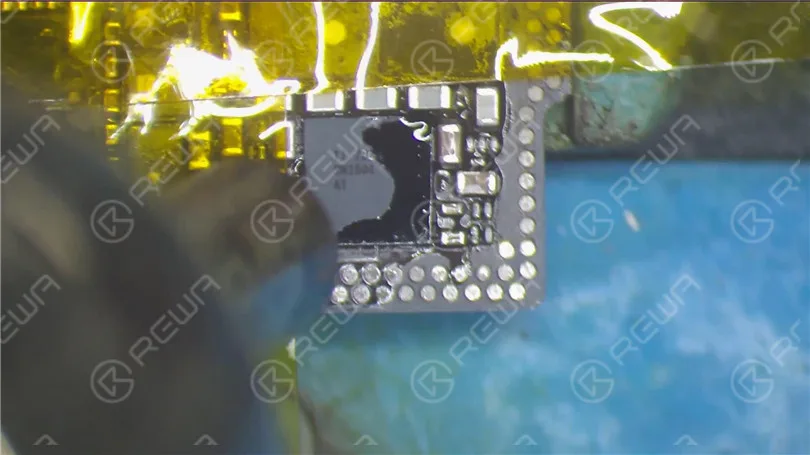
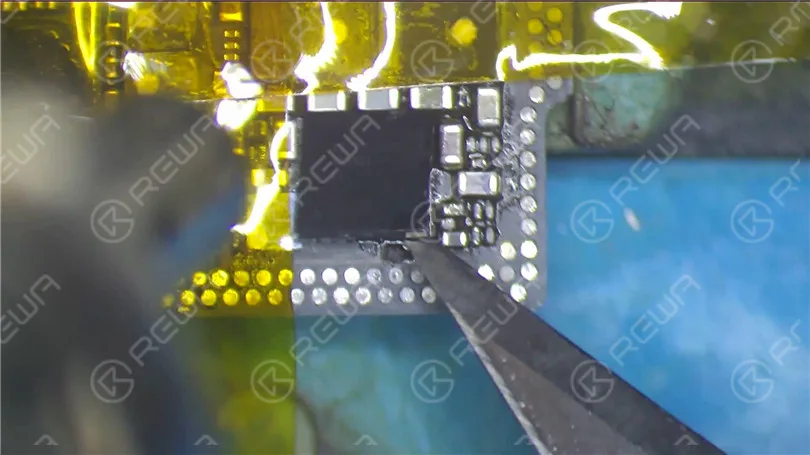
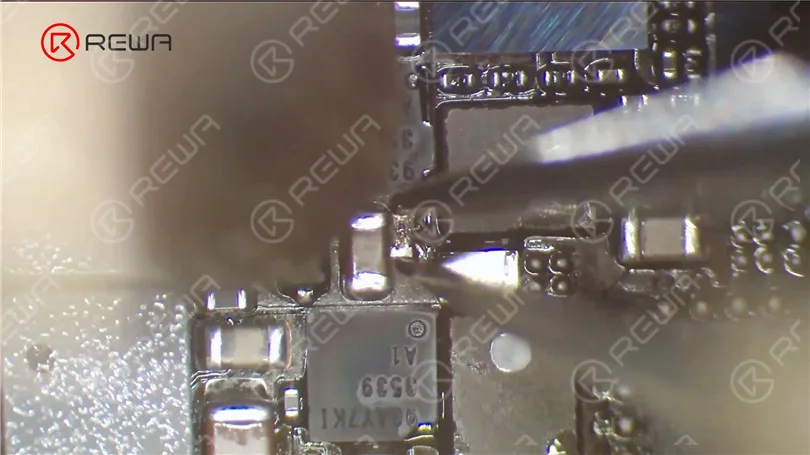
    Heat for around 15s-20s, then pry up the charging IC. Tips: control the force applied when prying up the IC. Rough operations might damage the chip or the bonding pad.

    Repair tricks for desoldering&soldering of iPhone X charging IC
    Repair tricks for desoldering&soldering of iPhone X charging IC

    Continue to apply some medium-temp solder paste to the bonding pad. Heat with the QUICK 990 AD Vertical Wind Hot Air Gun at 280℃, air flow 3.

    Repair tricks for desoldering&soldering of iPhone X charging IC

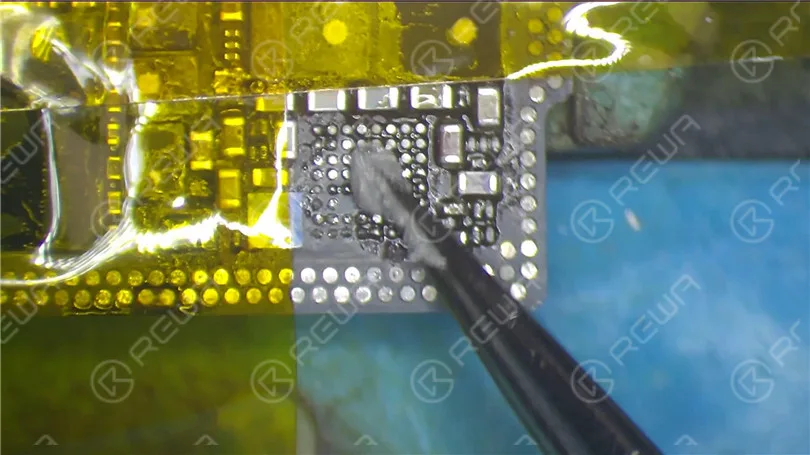
    Meantime, clean solder joints on the bonding pad with Soldering Iron at 360℃. Once done, clean the pad thoroughly with rosin soaked solder wick.

    Also, be careful with your operation here. Rough operations might result in pseudo soldering/bridging of components around

    Repair tricks for desoldering&soldering of iPhone X charging IC

    Clean with PCB Cleaner afterward.

    Repair tricks for desoldering&soldering of iPhone X charging IC

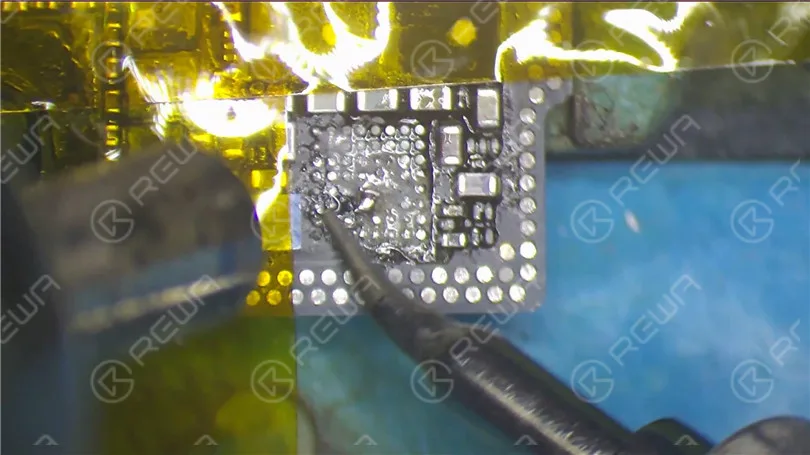
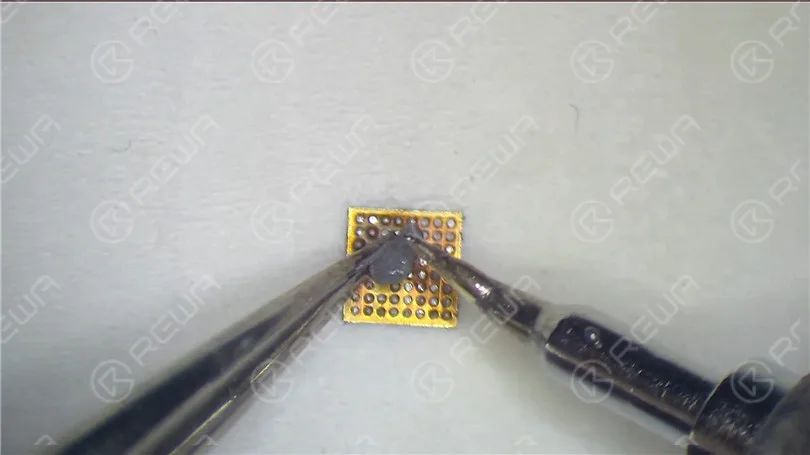
    Now we need to clean solder joints on the backside of the charging IC.

    Apply some medium-temp solder paste to the bonding pad on the backside. Clean the pad with Soldering Iron at 360℃.

    Repair tricks for desoldering&soldering of iPhone X charging IC

    Also, you can apply some paste flux for better cleaning.

    Once done, clean with PCB Cleaner. Tips: don’t be too strict with solder joints on the pad. You can keep several solder joints for the sake of perfect reballing afterwards.

    Repair tricks for desoldering&soldering of iPhone X charging IC

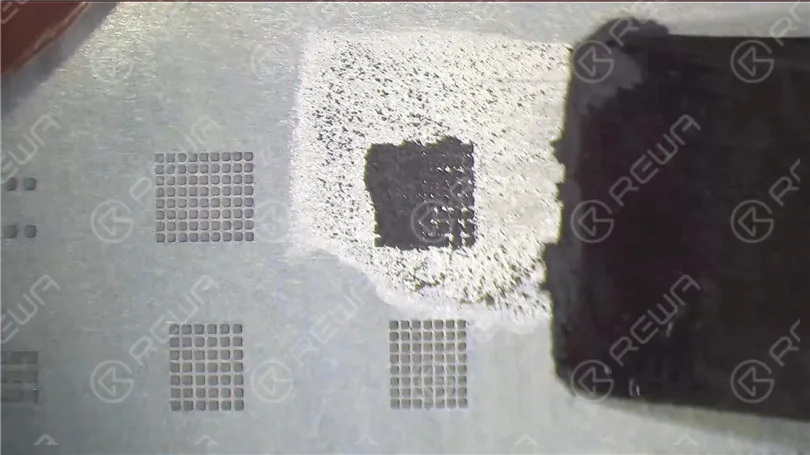
    Let’s move on to the reballing process. Get the BGA Reballing Stencil in position. Apply some medium-temp solder paste with BGA Scraper.

    Repair tricks for desoldering&soldering of iPhone X charging IC

    Then apply the solder paste to a facial tissue. This is to dry the solder paste by wrapping in the facial tissue.

    Repair tricks for desoldering&soldering of iPhone X charging IC

    So that the solder paste can be well prepared for reballing. Wettish solder paste might result in bridging during reballing. Continue to smear medium-temp solder paste evenly on the stencil. Wipe out needless solder paste with lint-free wiping cloth.

    Apply pressure to the BGA Reballing Stencil with tweezers. Heat with the QUICK 990 AD Vertical Wind Hot Air Gun at 300℃, air flow 3. So that all solder balls can solidify completely.

    Tips: when heating, the hot air gun should approach from far to near from edges to the center.

    Repair tricks for desoldering&soldering of iPhone X charging IC

    Concentrated heating might get the stencil deformed. The shaping-up process of solder balls might also be affected.

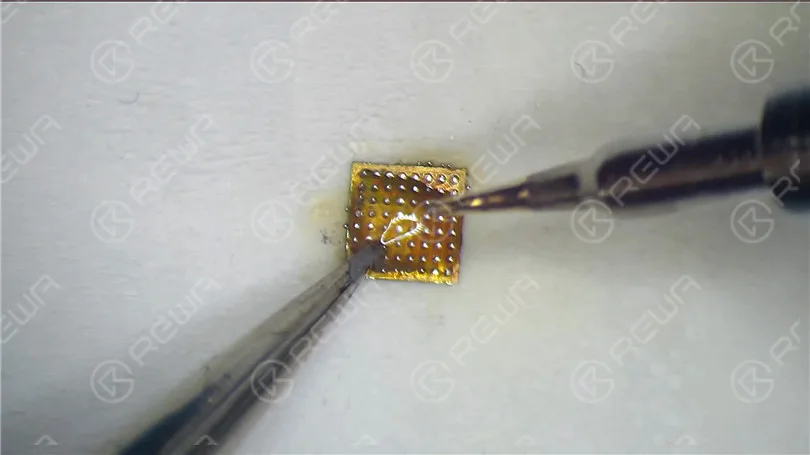
    Once done, cool for 1 minute. Clean with PCB Cleaner afterwards. Separate the chip from the stencil with tweezers gently. Then clamp the chip with tweezers.

    Heat again with the QUICK 990 AD Vertical Wind Hot Air Gun at 300℃, air flow 3. This is to ensure the perfect formation of solder balls.

    Repair tricks for desoldering&soldering of iPhone X charging IC

    Now we can solder the charging IC. Apply some paste flux to the bonding pad.

    Repair tricks for desoldering&soldering of iPhone X charging IC

    Get the charging IC in the right position.

    Do not place it in the wrong direction. Solder with the QUICK 990 AD Vertical Wind Hot Air Gun at 330℃, air flow 2. 15s-20s later, with the IC sinking and paste flux overflowing.

    Repair tricks for desoldering&soldering of iPhone X charging IC

    Continue heating for like 5 seconds. Once done, clean with PCB Cleaner.

    Feel free to visit REWA Academy to study more phone repair techniques and skills.

  • How to Quickly Fix iPhone 11 Crashing Issues: A Comprehensive Guide

    How to Quickly Fix iPhone 11 Crashing Issues: A Comprehensive Guide

    Dealing with constant crashes on your iPhone 11 can be frustrating and disruptive. In this article, we will explore the reasons behind iPhone 11 crashes and provide effective solutions to resolve them. Whether it’s a software-related issue or a hardware malfunction, we have you covered with step-by-step instructions to get your iPhone 11 back to its optimal performance.

    Reasons for iPhone 11 Crashing:

    1. Software Plug-In Interference:
      Sometimes, incompatible or faulty plug-ins can disrupt the normal operation of your iPhone 11, leading to app crashes.
    2. Incompatible Software:
      If you have recently downloaded software that does not match your iPhone 11’s system version, it may cause instability and crashes. Ensure that all your apps are compatible with your iOS version.
    3. Flashing Apps:
      Apps that continuously flash or freeze may indicate the need for an update. Keeping your apps up to date is crucial to maintain stability and prevent crashes.
    4. Internal Hardware Issues:
      Hardware malfunctions can also contribute to iPhone 11 crashes. If your device is experiencing abnormal operation, it may be necessary to address the hardware problem.
    5. iOS Bugs:
      Apple’s iOS system is not immune to bugs, which can lead to crashes. Regular software updates aim to fix these issues, so keeping your iOS version up to date is important.

    Effective Solutions to Fix iPhone 11 Crashing:

    Solution 1: Restart Your iPhone

    Often, a simple restart can resolve software-related crashes. Restart your iPhone 11 to refresh the system and potentially eliminate any temporary glitches causing crashes.

    Solution 2: Troubleshooting Steps

    1. Backup your Data: Before proceeding with troubleshooting steps, ensure you have a backup of your important data to prevent any potential loss.
    2. Close Crashing Apps: Open the background management window and exit the crashing app. Then, reopen the app to see if the issue is resolved.
    3. Close Background Programs: If closing the crashing app does not solve the problem, reopen the background management window and close all other background programs.
    4. Perform a Restart: If the crashing issue persists, try restarting your iPhone 11.
    5. Reset All Settings: If restarting fails to resolve the crashing problem, consider resetting all settings on your phone. This restores your phone’s settings to their original state without deleting existing data and media. Note: Avoid using this feature if your iPhone 11 has been jailbroken.

    Solution 3: Restore All Settings

    Additionally, the iPhone offers a function to restore all settings, which can effectively address crashing problems.

    Steps: Go to Settings > General > Reset > Reset All Settings

    If you have followed the above methods and your iPhone 11 continues to crash, you may need to uninstall and reinstall the problematic app.

    Conclusion:

    Dealing with iPhone 11 crashes can be frustrating, but with the right solutions, you can quickly get your device back on track. By understanding the various reasons behind crashes and following the step-by-step instructions provided, you can effectively troubleshoot and resolve the issue. Remember to regularly update your iOS and apps to prevent future crashes. Enjoy a seamless iPhone 11 experience without the hassle of unexpected crashes.

  • Is It Time to Update Your iPhone 7 to iOS 15? Fixing the Crashing Issue

    Is It Time to Update Your iPhone 7 to iOS 15? Fixing the Crashing Issue

    In the world of smartphones, Apple has always been at the forefront of innovation, consistently releasing new iOS updates to improve the user experience. With the recent release of iOS 15, iPhone 7 users are now contemplating whether this update is worth the install. In this article, we’ll delve into the details to help you decide whether it’s time to update your trusty iPhone 7 to the latest iOS 15 or stick with your current system.

    A Noteworthy Continuation

    When we compare iOS 14 to iOS 15, it’s true that the changes might not seem revolutionary. The transition from iOS 14 to iOS 15 appears more as an evolutionary step, building upon the foundation of the previous version. However, don’t let this similarity deter you from considering the update.

    Device Compatibility

    iOS 15 continues to support the same range of devices as iOS 14, including the iPhone 6S, a testament to Apple’s commitment to long-term support. The iPhone 6S, with its 2GB of RAM, has seen a remarkable seven major updates, making it one of the most updated smartphones globally. If you’re still using an iPhone 6S, you can opt for the iOS 15 update without hesitation.

    The iPhone 7 Conundrum

    Despite the impressive track record of updates, some iPhone 7 users have been facing persistent crashing issues. The big question on their minds is whether iOS 15 can help alleviate these problems.

    Updating for Stability

    If your iPhone 7 is currently running an older iOS version, you may want to hold off on the update. Newer iOS versions like iOS 14 and iOS 15 introduce more features and designs, which can strain older hardware. This may result in a less than optimal user experience due to higher resource consumption. If your device is already experiencing performance issues, an update may exacerbate the problem.

    Resolving Crashes

    On the other hand, if your iPhone 7 is crashing frequently with iOS 14, you may want to consider updating to iOS 15. While the differences between the two versions are not groundbreaking, iOS 15 includes several optimizations and bug fixes aimed at resolving issues from previous versions. However, it’s worth noting that as of the time of writing, iOS 15 is still in beta, so some instability may persist. It’s essential to keep an eye on updates and bug fixes as they roll out to address these issues.

    Conclusion

    In conclusion, the decision to update your iPhone 7 to iOS 15 depends on your current circumstances. If your device is running smoothly with an older iOS version, you might want to stick with it, as updating could lead to performance issues. On the other hand, if you’re experiencing crashes with iOS 14, consider the update to iOS 15, with the hope that it brings stability improvements. Keep in mind that iOS 15 is still in the beta phase, so some instability is expected.

    By assessing your device’s current state and needs, you can make an informed decision about whether or not to update to iOS 15. The key is to prioritize a seamless and enjoyable user experience while keeping up with the latest enhancements Apple has to offer.

  • iPhone 11 Black Screen/ No Display Backlight Repair: A Comprehensive Guide

    iPhone 11 Black Screen/ No Display Backlight Repair: A Comprehensive Guide

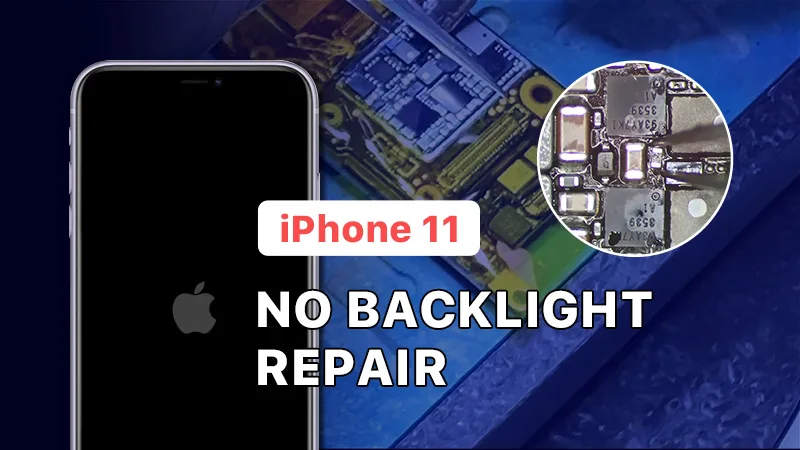
    Are you experiencing the frustrating issue of a black screen with no backlight on your iPhone 11? Don’t worry, we are here to help. In this detailed guide, we will provide step-by-step instructions to diagnose and repair this common iPhone problem. With our expert tips and insights, you’ll be able to get your iPhone 11’s backlight up and running in no time.

    Diagnosing the Problem

    iPhone 11 Black Screen/ No Display Backlight Repair

    First things first, if your iPhone 11 powers on but the display is dim or black, you may be dealing with a backlight issue. Here’s how you can diagnose the problem:

    iPhone 11 Black Screen/ No Display Backlight Repair

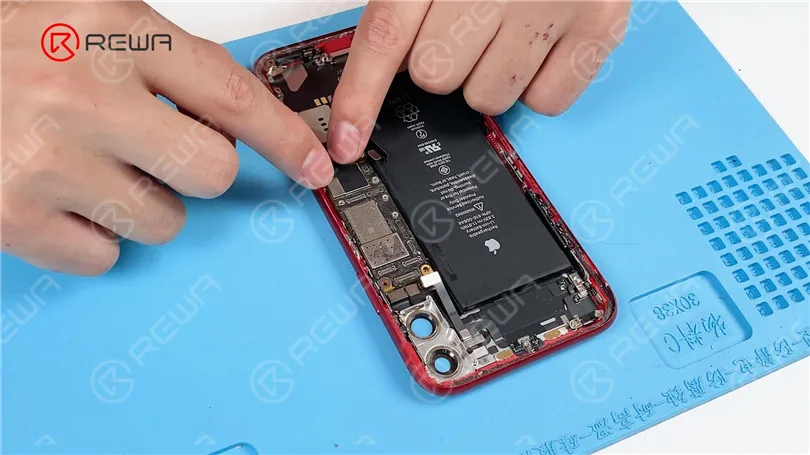
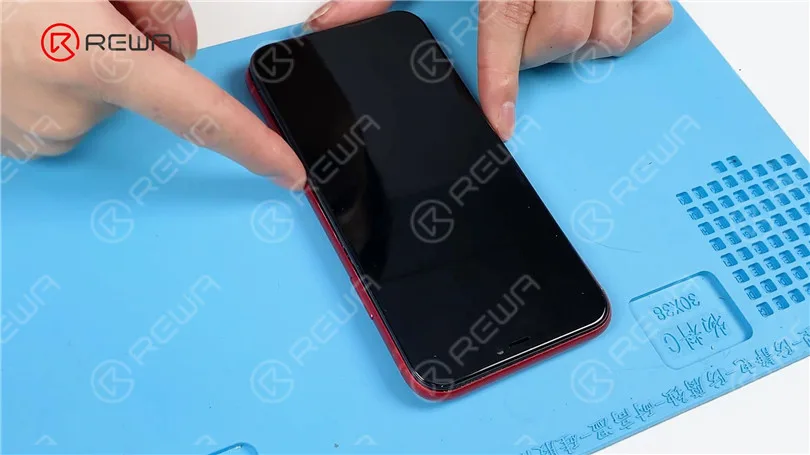
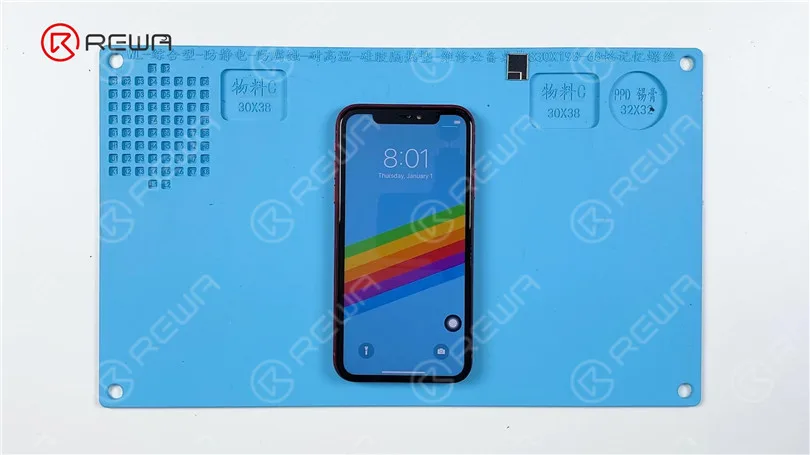
    Connecting the Essentials: Begin by installing the motherboard and connecting the screen and battery. Press the power button to turn on the phone. If you can see the Apple logo faintly, it’s a clear indication that your phone is functional, but the backlight is not working.

    iPhone 11 Black Screen/ No Display Backlight Repair

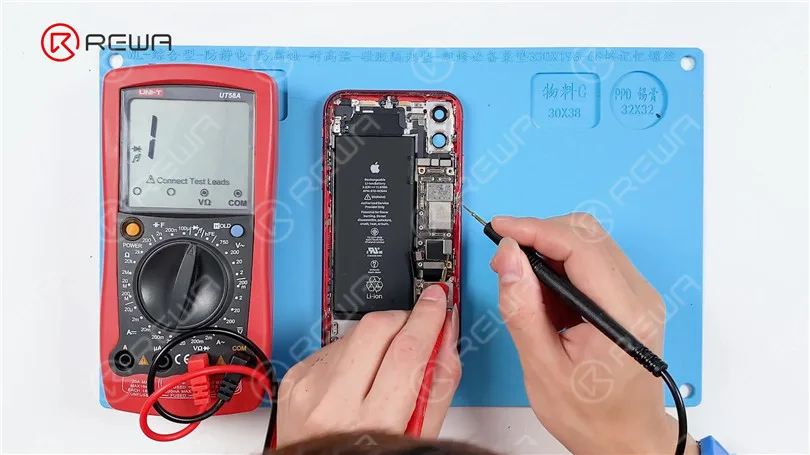
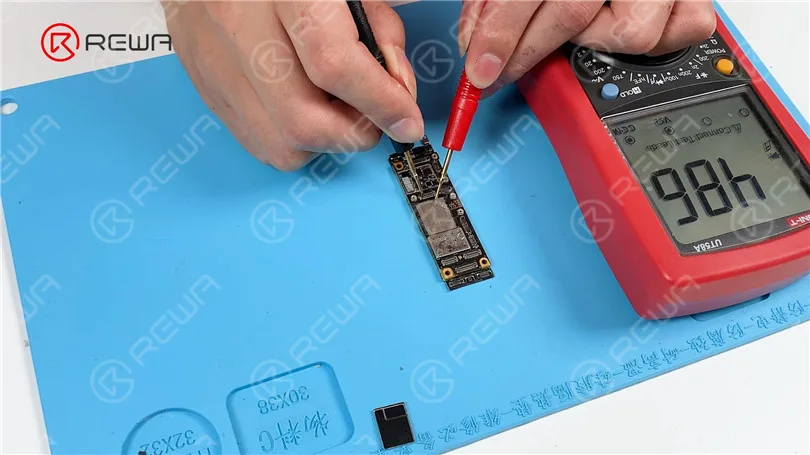
    Measuring Diode Values: To identify the root cause, remove the screen and disconnect the battery. Using a multimeter in diode mode, measure the values of pins 26, 24, 22, 20, 18, and 16 on J8000. Pay special attention to pins 24 and 18; if they show no diode values or values significantly different from the normal range of around 400-500, it suggests an open circuit in these circuits.

    The Repair Process

    Since the malfunctioning components are hidden beneath a shielding cover, the following steps are necessary:

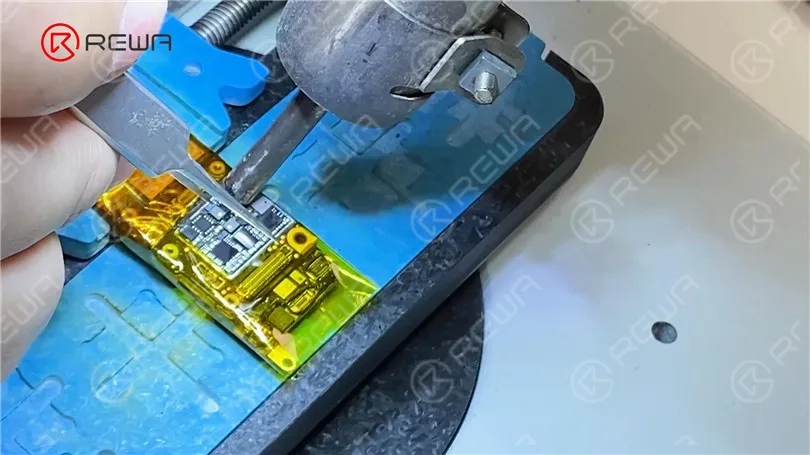
    iPhone 11 Black Screen/ No Display Backlight Repair

    Shielding Cover Removal: Safeguard the connectors with high-temperature tape. Gently heat the shielding cover with a Hot Air Gun at 380°C and airflow 60. Carefully pry up the shielding cover using a Sculpture Knife.

    iPhone 11 Black Screen/ No Display Backlight Repair

    Component Inspection: Under a microscope, you will likely observe damaged resistors R5651 and R5661. These need to be replaced.

    iPhone 11 Black Screen/ No Display Backlight Repair

    Resistor Replacement: Apply a small amount of Paste Flux, then use a Hot Air Gun set at 360°C and airflow 40 to remove the damaged resistors. Since finding identical-sized resistors can be challenging, you can use iPhone 7 backlight protection inductors as suitable alternatives. Heat the inductors with the Hot Air Gun to solder them in place.

    iphone 11 black screen no display backlight repair comprehensive guide 7
    iphone 11 black screen no display backlight repair comprehensive guide 8
    iPhone 11 Black Screen/ No Display Backlight Repair

    Testing and Confirmation: Once the motherboard cools down, remove the high-temperature tape and measure the diode values of pin 24 and 18. You should now see that they have returned to normal.

    iPhone 11 Black Screen/ No Display Backlight Repair

    Reassembly: With the resistors replaced and the backlight circuit restored, it’s time to reassemble your iPhone. Install the motherboard, connect the screen and battery, and power on your device. If all goes well, your iPhone 11 should display correctly, and the backlight issue should be resolved.

    iPhone 11 Black Screen/ No Display Backlight Repair

    Video Guide to fix iPhone 11 Black Screen with no backlight.

    Conclusion

    In this comprehensive guide, we’ve demonstrated the step-by-step process to diagnose and repair an iPhone 11 with no backlight. By carefully following these instructions, you can successfully bring your iPhone back to life.

    Remember to exercise caution and precision when working with delicate components, and if you’re not confident in your repair skills, consider seeking professional assistance. With a little patience and know-how, you can save your iPhone 11 from the annoyance of a black screen and enjoy your device’s display once more.

    By following these guidelines, you’ll have your iPhone 11’s backlight issue resolved in no time. Don’t let a dim display keep you in the dark; bring your device back to life and enjoy its vibrant screen once more.
  • iPhone 11 Black Screen/No Display Backlight Repair

    iPhone 11 Black Screen/No Display Backlight Repair

    Today we will share how to fix an iPhone 11 with no backlight. The phone can be turned on but the backlight is not working. Check out this video and see how we fix the problem!

    Products recommended in this video:

    • MaAnt T1 Universal PCB Holder
    • Chips & Components
    • iPhone Motherboard Repair Training Book (REWA Exclusive
  • How To Repair iPhone 7/7P Home Button Not Working | Repair Shop Tips

    How To Repair iPhone 7/7P Home Button Not Working | Repair Shop Tips

    iPhone 7/7P Home Button not working issue includes Touch ID not working and Return-to-home function not working. Both are common issues. Today we share with you a common issue of iPhone 7/7P – Touch ID works normally but Return-to-home function not working. Check it out now!

    Tips: the home button cable is fragile and therefore professional operation is needed. For those who have no repair skills, please look before you leap.

  • Troubleshooting Face ID Issues on iPhone: Solutions and Tips

    Troubleshooting Face ID Issues on iPhone: Solutions and Tips

    Using Face ID on your iPhone can be a convenient and secure way to unlock your device and authenticate various actions. However, like any technology, it may encounter issues that hinder its functionality. In this article, we will explore common problems with Face ID and provide effective solutions to resolve them. Whether you are experiencing the “Move a Little Lower/Higher” prompt or other Face ID-related difficulties, we’ve got you covered.

    Please check if there

    Section 1: Restart Your Device

    One of the simplest yet effective solutions to fix Face ID problems is to restart your iPhone. To do this, press and hold the side button and any volume button until the slider appears. Slide the slider to power off your device. Once it is off, press and hold the side button until the Apple logo appears, indicating that your device is restarting. Rebooting your iPhone can often resolve software or temporary system failures that may be affecting Face ID.

    Section 2: Check for Obstructions

    Ensure that there is nothing covering the front-facing TrueDepth camera on your iPhone. Sometimes, a film or dirt can obstruct the camera, causing Face ID to malfunction. Carefully inspect the area around the camera and clean it with a gentle cloth or lift if necessary. Removing any obstructions can significantly improve the performance of Face ID.

    Section 3: Assess Water Damage

    If your iPhone has been exposed to water or liquid, it may lead to Face ID not working properly. In such cases, it is recommended to visit an authorized Apple service center. To check for water damage, look for the Liquid Contact Indicator (LCI) on your device. The LCI is usually located externally and changes color (from white or silver to red) when it comes into contact with liquid. Use a lamp magnifying glass to locate and inspect the LCI for any signs of water damage.

    LCI

    Section 4: Update Your System

    Keeping your iPhone’s operating system up to date is crucial for maintaining optimal performance. If Face ID issues persist even after trying the previous solutions, it is advisable to update your device to the latest iOS version. Apple regularly releases software updates that address bugs and improve system stability. Navigate to Settings > General > Software Update and follow the prompts to install any available updates.

    Conclusion:

    Face ID is a remarkable feature that enhances the security and convenience of using your iPhone. However, occasional issues may arise that require troubleshooting. By following the steps outlined in this article, you can effectively resolve Face ID problems such as the “Move a Little Lower/Higher” prompt or other related difficulties. Remember to restart your device, check for obstructions, assess water damage, and update your system regularly. These measures will help ensure a seamless Face ID experience on your iPhone.

  • iPhone Xs Max Flickering Screen Caused By Mistake | iPhone Repair Tips

    iPhone Xs Max Flickering Screen Caused By Mistake | iPhone Repair Tips

    Develop a good habit and keep a well-organized workspace in daily repair work will help a lot for repair technicians. Today we share a special repair case – iPhone Xs Max flickering screen which caused by the technician’s mistake.

  • How To Fix iPhone 7-8 Plus Touch ID Not Working By Jumping Wires | Repair Shop Tips

    How To Fix iPhone 7-8 Plus Touch ID Not Working By Jumping Wires | Repair Shop Tips

    For iPhone 7/7P/8/8P, 80% of Touch ID issues are caused by broken home button cable. We need to jump wires on both two layers of wires on the home button cable. Since the bottom layer comes with more wires than the upper layer, it is difficult and the home button cable might also be damaged.

    However, with the iPhone 7-8P Home Button Repair Socket Cable, we don’t need to join up the bottom layer of wires by jumping wires. Check our video

  • iPhone / MacBook Logic Board Repair Training Course 2020 | REWA Academy

    iPhone / MacBook Logic Board Repair Training Course 2020 | REWA Academy

    REWA Repair Training program has developed rapidly in 2019.In the past year, REWA systematic repair training course has helped more than 237 repair enthusiasts from 54 countries and regions around the world with professional instructors and teaching assistants guaranteeing practical teaching and heuristic learning.

  • How To Fix iPhone X Won’t Turn On By Board Swap | iPhone Repair Tips

    How To Fix iPhone X Won’t Turn On By Board Swap | iPhone Repair Tips

    This is a real-life repair case from REWA chip-level motherboard repair service. The iPhone X motherboard was severely damaged with a hole in the upper layer during the reassembling process, resulted in an iPhone X won’t turn on issue. Follow our guidance in the video today and learn how to diagnose and troubleshoot the double-stacked motherboard step by step.