With the development of the mobile phone industry, the number of mobile phone users is forecast to reach 4.68 billion in 2019. It’s not surprising, therefore, that mobile phone repair possesses a large market capacity.
With years of professional experience in mobile phone repair, REWA has trained hundreds of repair technicians to power their repair businesses. There is no doubt that these technicians have craftsman level skills, but REWA can provide them with catalysts to help them become successful technicians. Shakespeare claims that “Eyes are the windows to your soul”. While REWA believes that “Microscope is the window to technicians”.
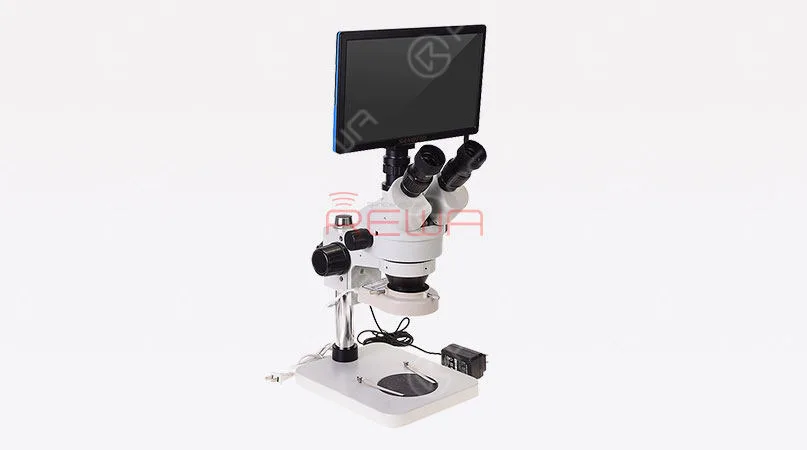
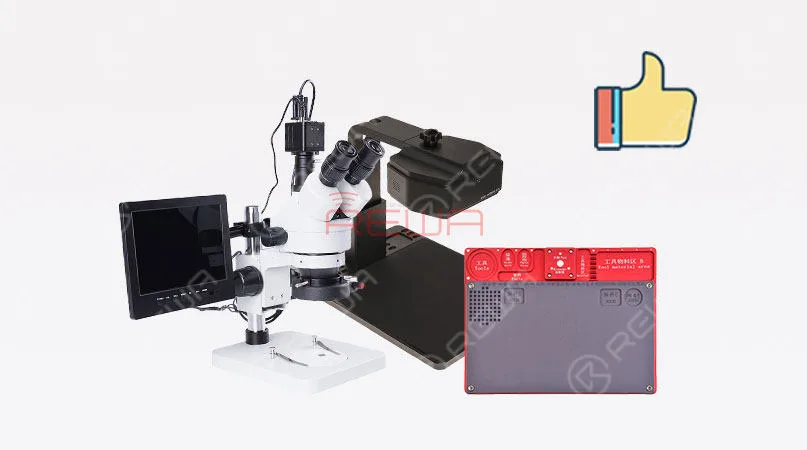
Take a look at our premium 1080P Electron HDMI Stereo Trinocular Microscope. It can be used not only for industrial inspection but also for PCB/ metal inspection. Compared with standard microscopes, the high-resolution graphics output of our Microscope can increase the accuracy of your repair work.
Rosin and freeze spray are two common ways used for fault-finding.
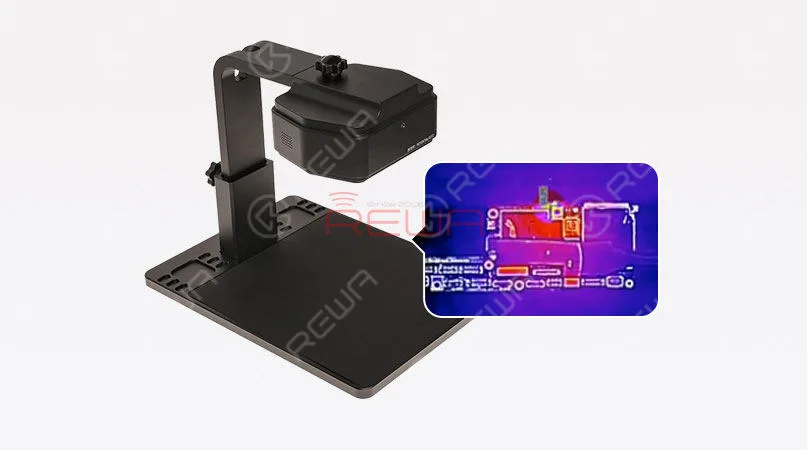
Although these two ways are cost-effective, it is difficult for us to instantly locate the faulty component with the help of the two. It’s time to change. The infrared thermal camera can directly increase efficiency of repair work. Thanks to the intelligent analysis software, it can effectively monitor temperature of each chip. What’s more, the advanced imaging tech that combines visible light with infrared thermal imaging can also achieve different visual effects.
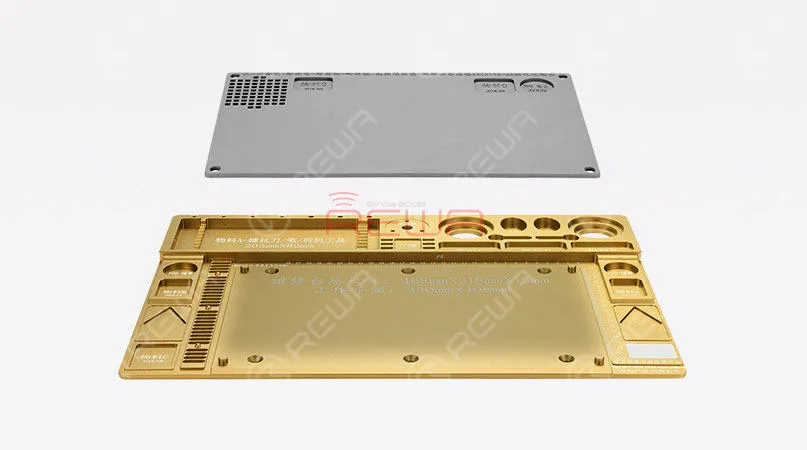
You might feel angry or even mad when you spend endless time organizing different screws, repair materials, etc. Why not try the integrated mobile phone repair platform? The giant platform comes with an Aluminum base and a heat-resistant silicone pad. The point of this platform is that it can not only gather up different repair tools (including the microscope) & components but also features anti-static functionality.
After our brief introduction of these effective “catalysts”, you may still have no idea what repair tools you should choose. Don’t worry. Here we present you two repair kits, the “Ultimate Kit” and the “Standard Kit”.
Ultimate Kit
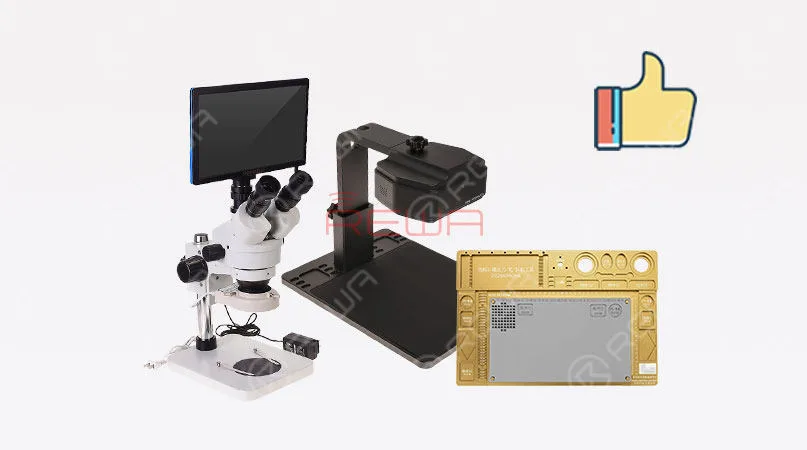
The Ultimate kit includes a 1080P Electron HDMI Stereo Trinocular Microscope, an Infrared Thermal Camera for Mobile Phone PCB Troubleshooting and a Giant Integrated Mobile Phone Repair Platform. The kit comes with the best output graphic quality and it is expensive than the standard kit.
Ultimate Kit
Let’s Move to the standard kit. It includes a standard Trinocular Microscope, an Infrared Thermal Camera for Mobile Phone PCB Troubleshooting and a Basic Integrated Mobile Phone Repair Platform. Compared with the ultimate kit, the graphic quality of the standard Trinocular Microscope is relatively general. However, it can also ensure the correct operation of your repair work. The basic platform is also smaller than the platform in the ultimate kit. All in all, the standard kit is more cost-effective than the ultimate kit. For detailed product list of the two kits, please kindly check below.
Can iPhone 11 Pro possibly be turned into iPhone 11 Pro Max?
It is actually theoretically possible.
With pins of the two phones’ display connector and touch connector functioning almost the dame, we can turn an iPhone 11 Pro into an iPhone 11 Pro Max by changing board ID resistors.
Today we will try to turn iPhone 11 Pro into iPhone 11 Pro Max.
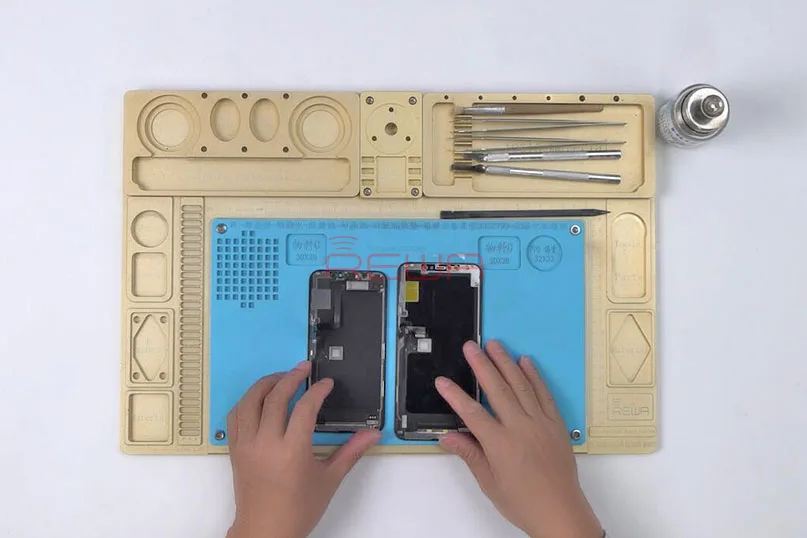
iPhone 11 Pro VS iPhone 11 Pro Max
iPhone 11 Pro comes with a 5.80-inch touchscreen display.
iPhone 11 Pro Max comes with a 6.50-inch touchscreen display.
What will happen when we connect the iPhone 11 Pro Max screen with the housing of iPhone 11 Pro directly?
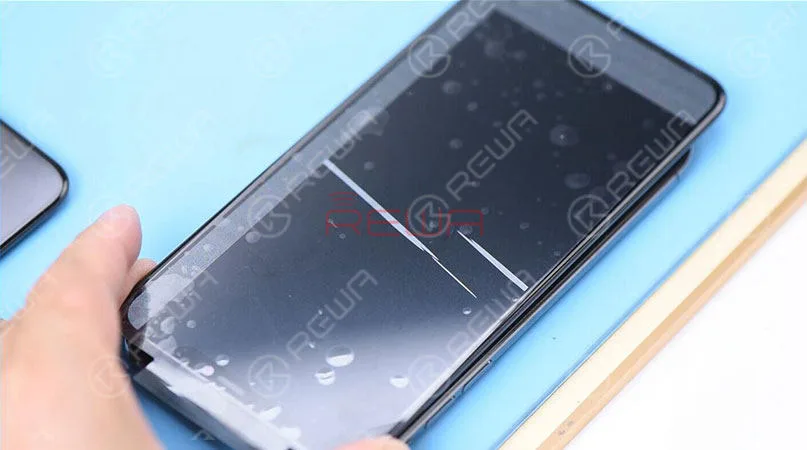
The backlight of the iPhone 11 Pro Max screen displays normally. However, the screen comes with horizontal lines.
Judging by this, although pins of the two phone’s display connector and touch connector function almost the same, the difference between driving programs of the two screens can still result in horizontal lines on the screen when iPhone 11 Pro Max’s screen is connected to iPhone 11 Pro’s housing.
What can we do to turn an iPhone 11 Pro into an iPhone 11 Pro Max?
Case: Turn iPhone 6s Plus into iPhone 6s
How to locate the board ID resistors?
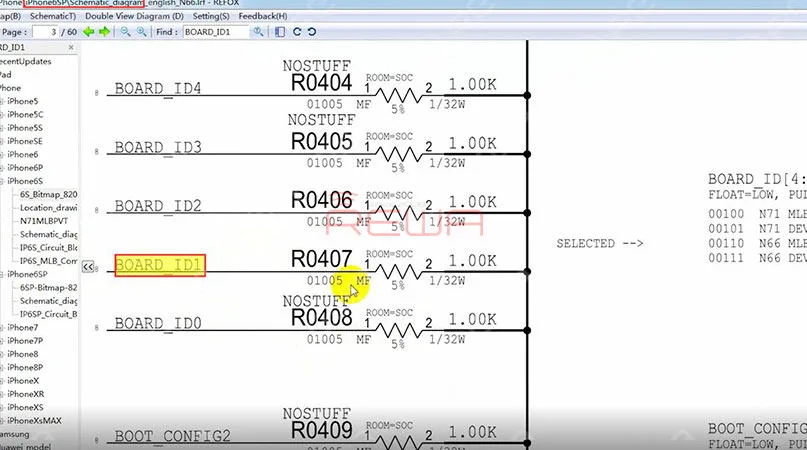
Open Refox and locate the Board ID resistor of iPhone 6s Plus.
We can see 5 Board ID resistors on the schematic. R0404, R0405, R0406, R0407 and R0408.
The board ID of iPhone 6s Plus is N66 MLB.
Board ID resistors of iPhone 6s Plus are arranged in an array of 00110.
Which means resistors on BOARD_ID1 and BOARD_ID2 should be kept.
The board ID of iPhone 6s is N71 MLB.
Board ID resistors of iPhone 6s are arranged in an array of 00100.
Which means the resistor on BOARD_ID2 should be kept.
To turn iPhone 6s Plus into iPhone 6s, all we need to do is to remove R0407 on BOARD_ID1.
For detailed operation of board ID resistors locating, please click to watch the video below.
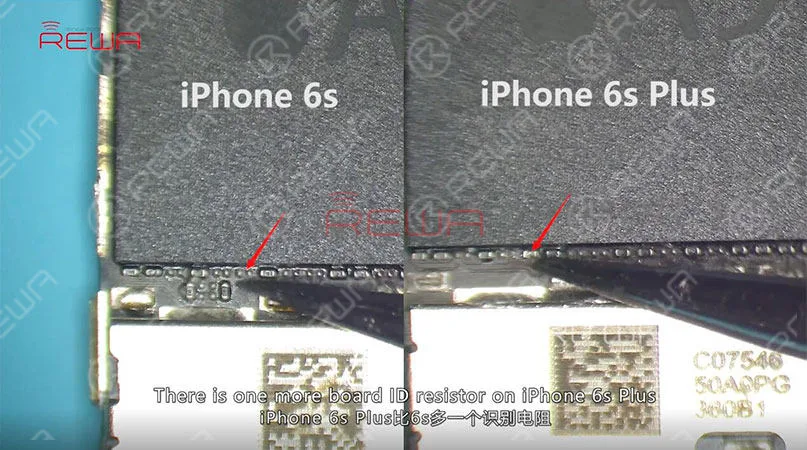
Compare the logic board of iPhone 6s and that of iPhone 6s Plus.
There is one more board ID resistor on iPhone 6s Plus.
This one is R0407 as mentioned above.
And we can just remove it with tweezers.
Then get the logic board of iPhone 6s Plus installed to the housing.
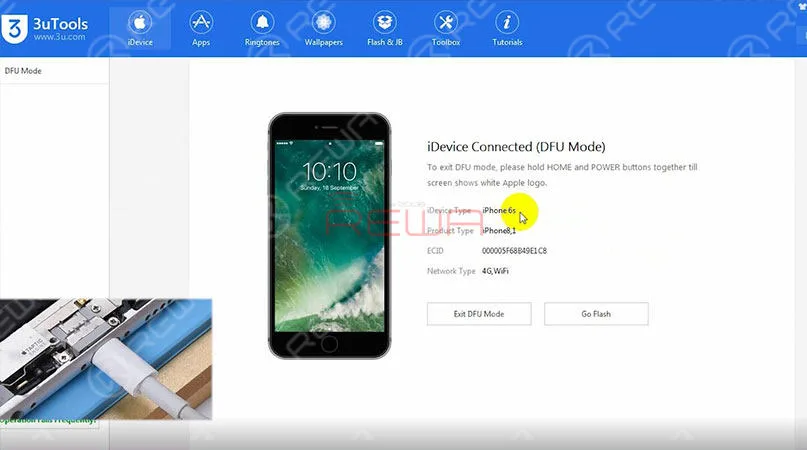
Connect the phone to the computer with the USB cable.
We can see on the interface of 3uTools that the phone has entered DFU mode.
And the phone has been turned into iPhone 6s.
We can write firmware of iPhone 6s to the phone.
However, sockets of iPhone 6s’s display connector and touch connector are different from those of iPhone 6s Plus, iPhone 6s screen cannot be connected to iPhone 6s Plus’s housing.
Can we turn iPhone 11 Pro into iPhone 11 Pro Max by changing the board ID resistor?
iPhone 11 Pro Motherboard Separating
Place the motherboard of iPhone 11 Pro on the heating platform to heat for 3 minutes.
Press the SIM card reader with the tweezers.
And push the upper layer with another tweezers slightly.
With solder balls on the third space PCB starting to melt, clamp the screws fitted into the screw holes with tweezers.
And pick up the upper layer with tweezers vertically.
Tips:
Do not shake the tweezers when picking up the upper layer.
The third space PCB might be stuck in bridging issues.
And the recombination work would also be affected.
Continue to pick up the lower layer.
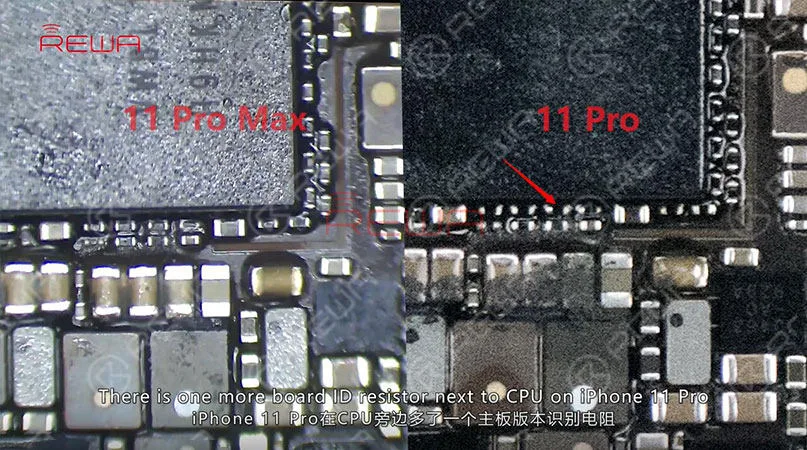
Compare the motherboard of iPhone 11 Pro and that of iPhone 11 Pro Max.
The component array of the two is almost the same.
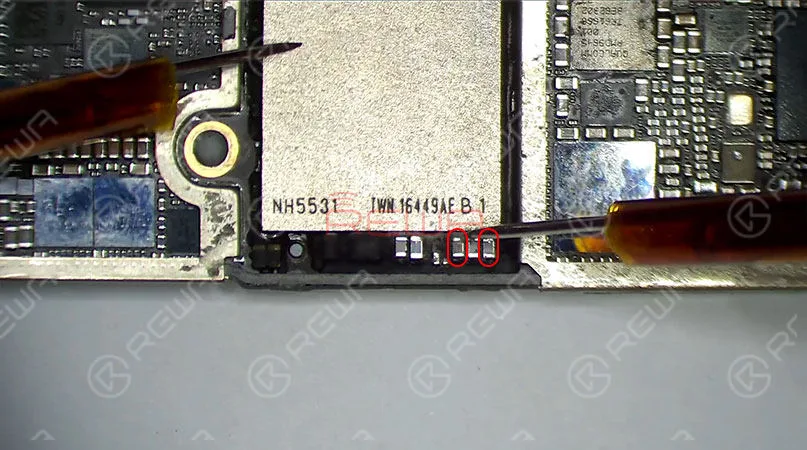
There is one more board ID resistor next to CPU on iPhone 11 Pro.
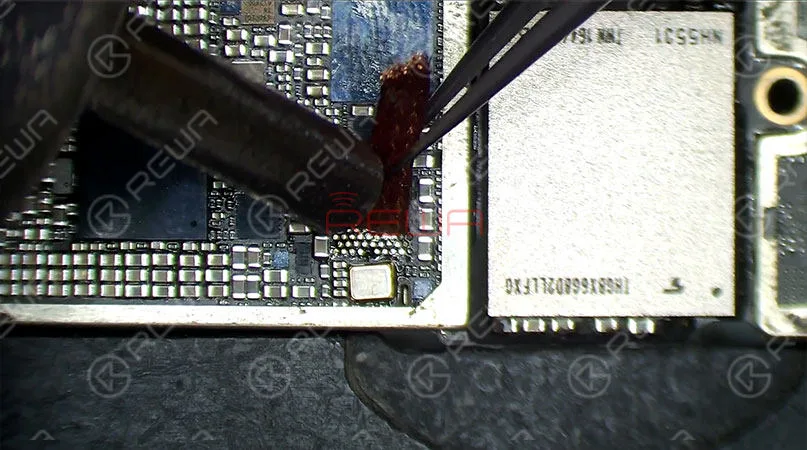
Please remove the black adhesive before removing the board ID resistor.
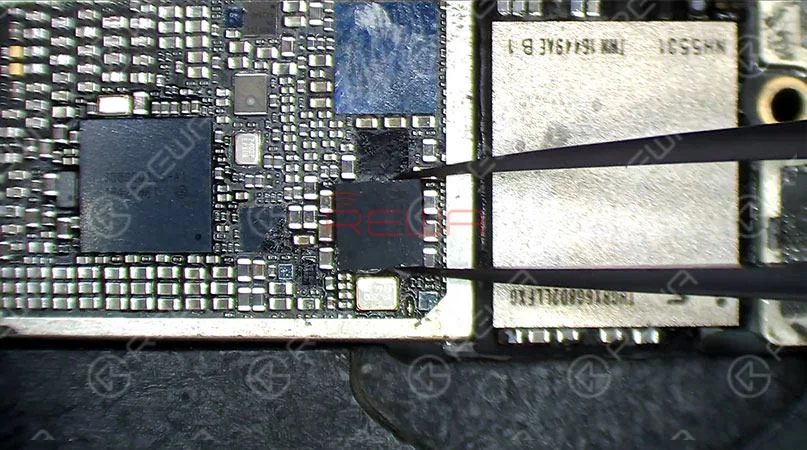
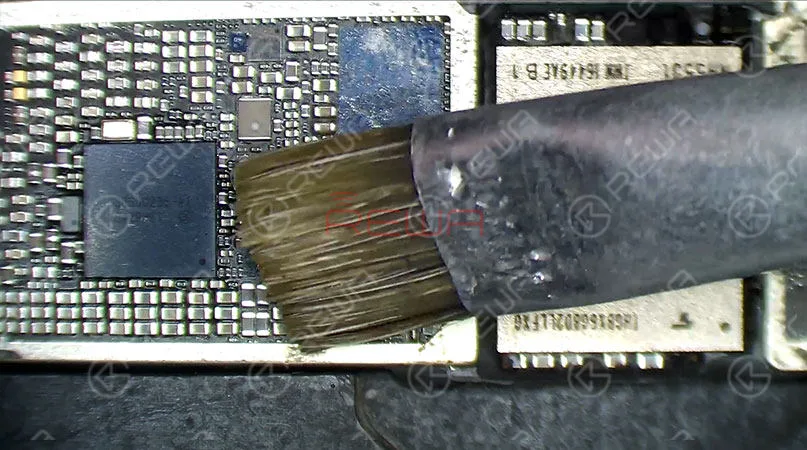
Continue to heat with the Hot Air Gun to remove the resistor.
iPhone 11 Pro Motherboard Recombination
With temperature of the platform reaching 170℃, place the lower layer on the platform to heat for 10 seconds.
Apply some Paste Flux to the third space PCB evenly.
Get the upper layer in position. Heat for about 5 minutes.
Then, press the SIM card reader with the tweezers, and push the upper layer with another tweezers slightly.
If the upper layer returns to the previous position automatically, then the soldering process is completed.
For detailed operation of iPhone 11 Pro Motherboard Separating & Recombination, please check the video here.
Put the motherboard of iPhone 11 Pro into its housing.
Connect iPhone 11 Pro Max screen with iPhone 11 Pro’s s housing.
Connect the battery. Connect the phone to the computer with the USB cable.
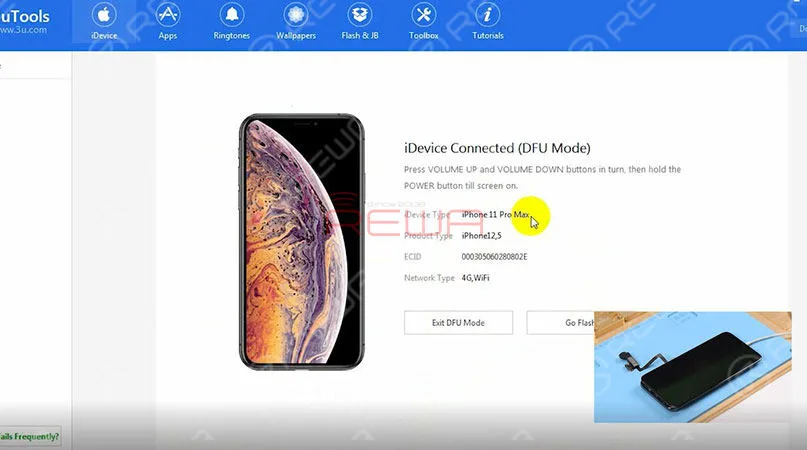
We can see on the interface of 3uTools that the phone has entered DFU mode.
And the phone has been turned into iPhone 11 Pro Max.
We can write firmware of iPhone 11 Pro Max to the phone.
Continue to restore the phone in DFU mode.
Apple logo appears on the screen during restoring.
Once completed, the phone goes to the activation screen.
And then the home screen. The phone displays normally.
No matter you are a repair shop owner or a customer of a mobile phone, there’s more than one reason you might need to replace the iPhone screen or the battery.
Screen/battery replacement is an essential business for repair shops. Professional replacing techniques can not only reduce the failure rate of screen/battery replacement and save time, but also highlight the professional image of the repair shop and gain favorable feedback from customers.
In this article, we take iPhone X as an example to show you tips and tricks for screen/battery replacement of iPhone X/XS/XS Max.
Follow our steps and power your repair shop now.
Finding the Right Tools, Screen, Battery, and Instructions
Once you’re ready to replace the screen or the battery, research the recommended tools and battery options for each phone individually, as they’re all slightly unique.
REWA is dedicated to providing products and services for business clients(repair shops, refurbishing factories, etc.) and data recovery services for individual clients.
As for other repair demands of individual clients, repair shops nearby would be a good choice for you.
What Will You Need to Replace The Screen/Battery of Your iPhone X
1.Pentalobe Screws Removing and Hot Air Gun Heating
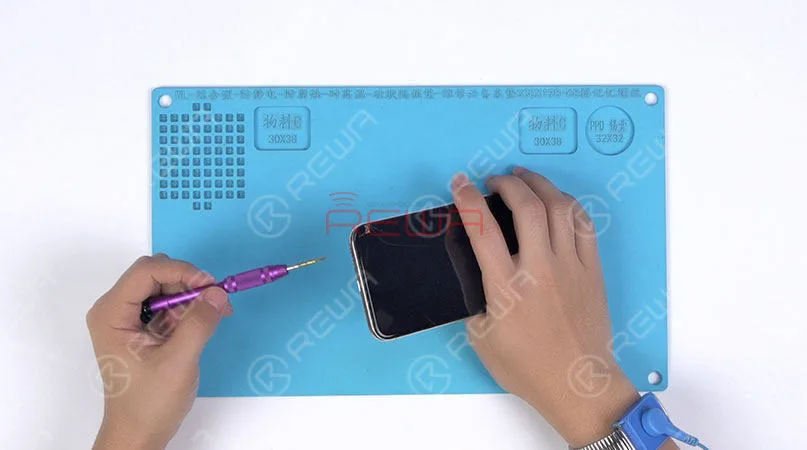
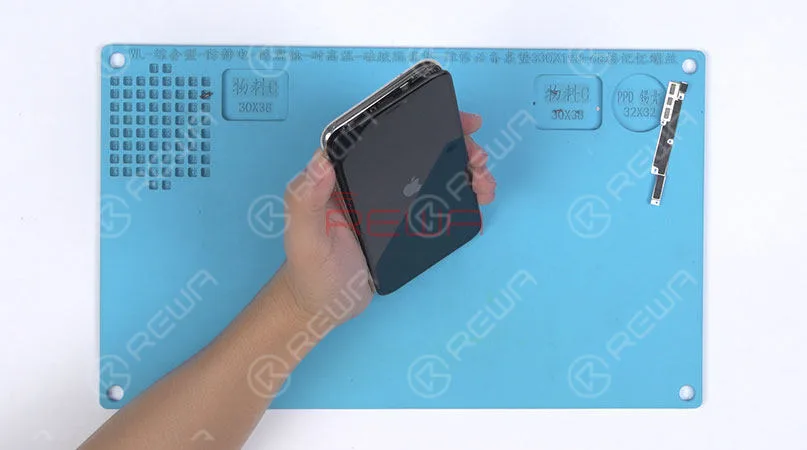
Remove the two pentalobe screws with the pentagon screwdriver at the bottom edge of the phone.
Since there are waterproof seals between the screen and the back glass assembly, you need to heat and soften up the waterproof seals with the hot air gun at 120℃-150℃ for 1 minute.
2. Open The Screen
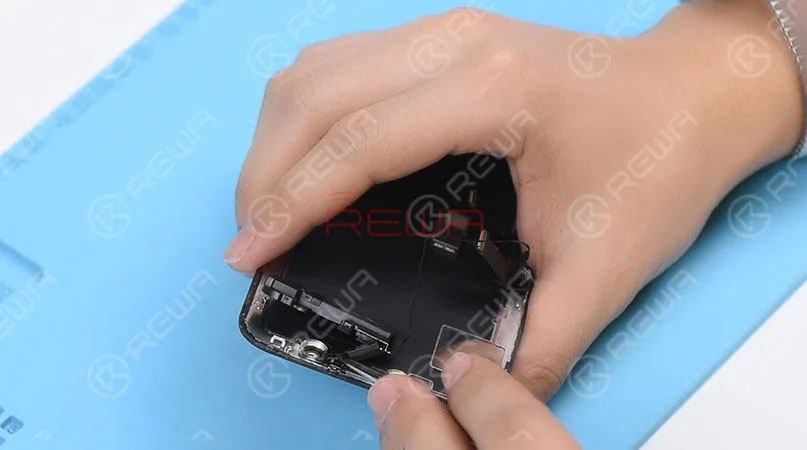
Press the suction cup firmly onto the screen, and insert the pry piece to slice through the adhesive holding the screen.
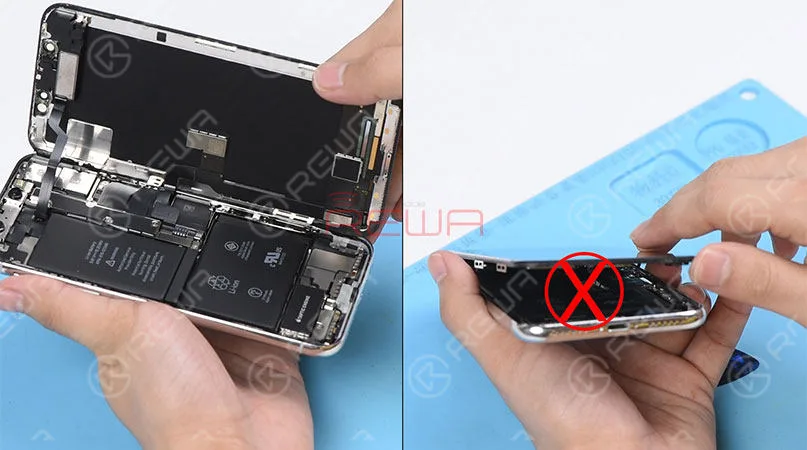
Note: Do not swing the screen up from the bottom side.
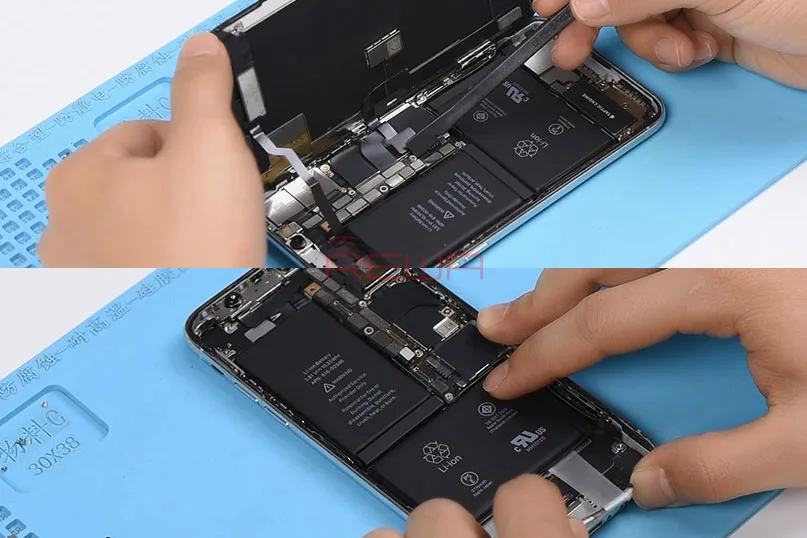
As the flex cables of iPhone x are mainly arranged on the right side, to avoid tearing off these cables, we need to open the phone by swinging the screen up from the left side.
♥Tips: Please be careful with the force applied when replacing the screen.
Otherwise, the phone might be stuck in touch/display issues. Because the bottom area of the screen(with ICs bonded here) and the Face ID area are fragile.
3. Connector Bracket And Screen Removing
(Watch the video to get details – at the ending of the article)
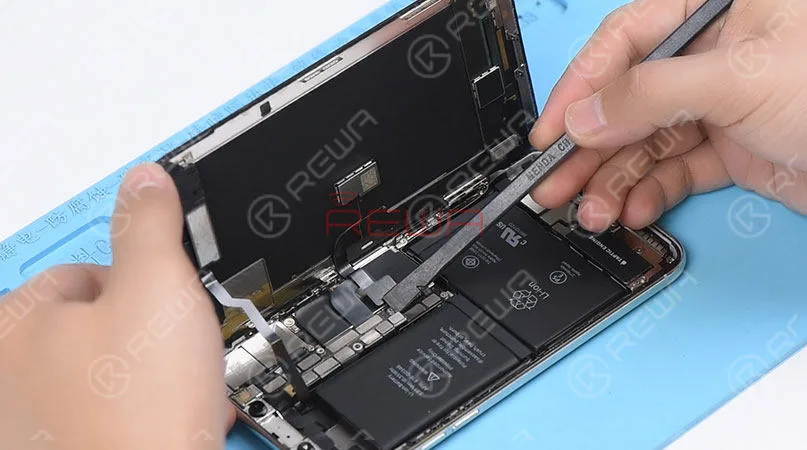
Remove screws securing the connector bracket with the tri-point screwdriver
Pry the battery connector up from its socket
Disconnect the OLED panel cable connector
Pry the digitizer cable connector up from its socket And then disconnect the front panel sensor assembly flex cable
♥Tips: The front panel sensor assembly flex cable is secured by the double-sided tape. Please lift the cable carefully when removing the screen.
4. Earpiece Speaker And Sensor Assembly Removing & Installation
Remove screws securing the front panel sensor assembly flex cable with the tri-point screwdriver. Heat with the Hot Air Gun at 120℃-150℃ first to soften the adhesive, then remove the front panel sensor assembly flex cable with tweezers.
♥Tips: there is double-sided tape securing the Flood Illuminator Module area.
Get the earpiece speaker and sensor assembly installed onto the new screen
Get the front panel sensor assembly flex cable, the digitizer cable connector the OLED panel cable connector and the battery connector connected
5.Phone Assembling
Please test the screen before the reassembly process.
♥Tips: the waterproof seals might get damaged when replacing the screen. If so, clean the residual waterproof seals at first, then stick new waterproof seals.
The true tone-capable display of iPhone 7 – XS Max is missing after screen replacement. So we highly suggest that repair shops restore the true tone with the True Tone Programmer after screen replacement.
iPhone X/XS/XS Max Screen Replacement Tips & Tricks
1. Wear Anti-static Wrist Strap
2. Power off the phone before the disassembly
3. Pre-heat with hot air gun
4. Open the phone by swinging the screen up from the left side
5. Pay attention to the bottom area of the screen (ICs Bonding Area)
6. Pay attention to the top area of the screen(Face ID area)
7. Disconnect the battery flex cable first
8. Pre-heat before removing earpiece speaker and sensor assembly
9. Test the screen before the reassembly process
iPhone Battery Replacement Steps Overview
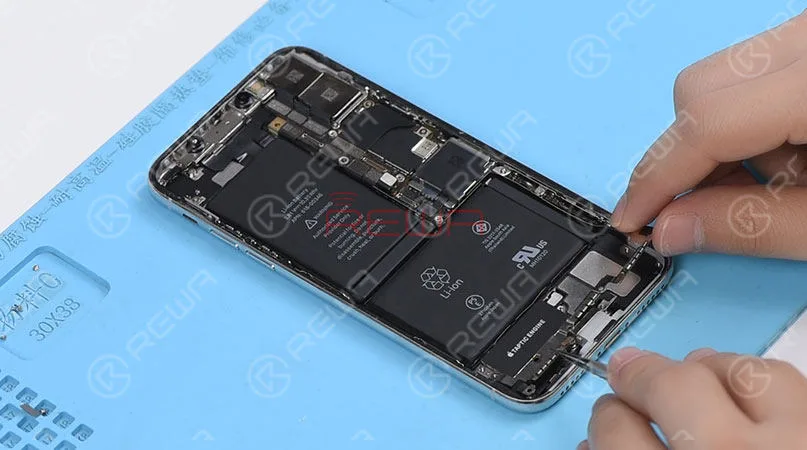
♥Tips: To remove the battery adhesive strips easily, please remove the Taptic Engine and speaker at first.
1.Taptic Engine And Speaker Removing
Please be noted that there are many screws detached in this step, we highly suggest that you place these screws in order.
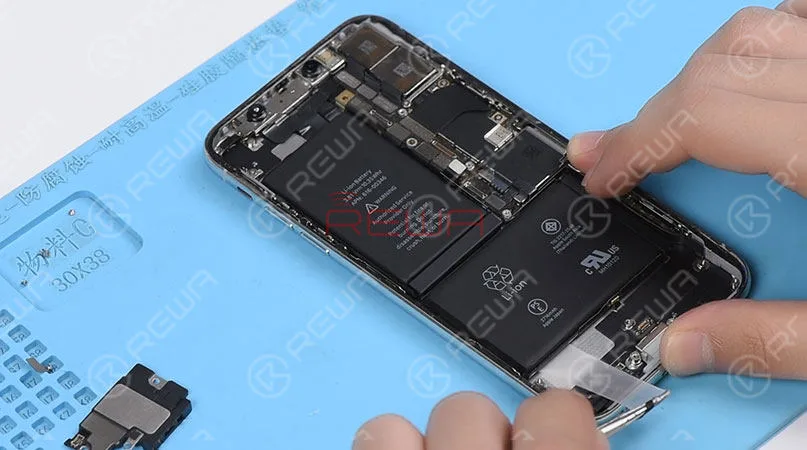
2.Battery Adhesive Strips Removing
Wrap the battery adhesive strips with tweezers and pull the strips out slowly and parallelly.
3.Battery Adhesive Strips & Battery Adhering
Adhere new battery adhesive strips to the battery.
4.Taptic Engine And Speaker Installation
iPhone X/XS/XS Max Battery Replacement Tips & Tricks
1. Taptic Engine and speaker removing first
2. Place screws in order
3. Pull the strips out slowly and parallelly.
Conclusion
In addition to professional techniques, high-quality and reliable third-party suppliers are also extremely important for repair shops. Choose REWA, choose the quality you want.
For individual clients and repair enthusiasts, REWA online shop with iPhone screens of different quality grade and replacement batteries are here for your choice.
Why hesitating? Place your order now! For certified iPhone Screens, replacement batteries and repair tools, please place an order on REWA ONLINE SHOP.
In the modern tech-driven world, everything seems to revolve around speed and about being quick, quicker as compared to competitors, quick enough to get everything done, and quick enough to get some free time despite hectic schedules. Until some time back mobile applications were reserved for large businesses and corporations. Currently, smaller businesses and organizations are becoming smarter and well-equipped serving customers better and obtaining greater ROIs because of mobile apps. Human beings have an inherent urge to be social. No one wishes to be alone and secluded from the rest of the world. You simply cannot deny that mobile is social. We know that today, businesses could be boosting sales via mobile devices. Setting up a functional Twitter or Facebook account could be a wonderful idea but that simply is not good enough.
Businesses have today concluded that they need apps. The fear associated with high-priced mobile app developers is no longer a deterrent; hence, there is no reason to do without a mobile app. Businesses could make the most of their apps thanks to perfect planning and a clear idea of what exactly you are thinking of getting from your mobile app. You simply need to describe your goals and then just prioritize them right from the start. You could use one or all of the following paths leading to obtaining a highly functional and customized mobile app. The four paths are service & support, customer engagement, online sales, and customer engagement. Once you know precisely what you are looking for, you would soon realize why you needed to have a mobile app for your business. Let us explore some of the advantages of having a mobile app for businesses.
For Establishing Direct Communication & Effective Geo-Targeting Marketing
As per www.carmatec.com, Mobile apps are known to be effective and quick in grasping customer attention and engaging customer interest. They are great for direct and prompt communication about product launches, promotional offers, new services, discounted rates, and improved features. All this direct communication could help you to obtain important information like geographical locations, demographics, and shopping behavior in terms of your products, as well as, services, thus assisting you to assess the overall market demand and enhance your marketing and sales strategies.
Boost Visibility to Customers at All Times
In the United States, the average individual spends more than two hours on his phone every day. There are over 1 billion smartphones worldwide. Hence, from the perspective of businesses, it is great to know that people are spending more and more time on their mobile phones as compared to PCs. Businesses simply need to modify their marketing strategy to complement or match this slight shift.
Your business would get a wider exposure if you are successful in building a reasonable mobile presence. Your company’s name, image, and logo must be visible when people are scrolling, unlocking, or doing whatever on the go. We use mobiles while traveling to work and coming back from there or even while watching television every evening. These are supposed to be great times for sending notifications to your potential customers. If you are offering Internet-based products or services, you must consider using a mobile app for making sales. You must focus on offering valuable solutions to your clients remotely. You could use mobile apps to connect with reputed lending services such as libertylending.com for fast and perfect solutions.
Build Solid Brand Recognition
Whether you are having a brand new business or you are simply re-branding, you could consider boosting its recognition and image using a competent mobile app. You simply need to develop an app having likable features for fascinating your target audiences. You could consider building a functional app instead of using a costly billboard. It is a fact that many people do not pay attention to the messages showcased on billboards.
Encourage your customers to interact actively with your app. The more frequently they would be interacting with it, the more they would develop a liking for your new products and brands sold by you. According to the experts if the customers frequently see your brand, for instance, 20 times or more, then it is properly noticed.
Today, mobile apps have sharing options and they could easily share a brand’s communication with their close friends and family. It is just like a friend informing you about an amazing product or service he had come across. We know that studies reveal that third-party sales and referrals seem to be a truly effective and valuable marketing stratagem.
Boost Customer Engagement
All customers require reaching the company that sells something they are looking for. If a business seems unreachable, you would be encountering the risk of losing your prospective customers. We understand that a mobile app could be of great use in enabling this reach. You could consider having a Help Desk on precisely the mobile platform for customers to post their queries, comments, orders, complaints, etc. If you are in a position to respond to your customers individually and on your own, then your customer engagement would be exceptional. Make the ordering or even the booking procedure pretty simple but secure. People do not like the idea of lengthy procedures. They are more likely to click the button marked Back Button as compared to clicking the Next Button.
Stand Tall Among the Rest
A mobile app could help you in standing tall among the rest. You must make the most of this effective marketing tool. By the time your competitors start recognizing its importance, you would have captured the majority of the market share. You could then stay well ahead of the competition. You would be winning a lot of respect among your peers.
Boost Customer Loyalty
Customer loyalty could be achieved when they are constantly reminded about your products and services. We know that there are already too many advertising efforts out there. Instances are roadside banners, billboards, emails, flyers, flashing signs, coupons, and social media marketing, etc. Do you think it is wise to include more communication in this already crowded place? Your message could get lost or even forgotten in this overcrowded place. In this context, it is essential to realize that a mobile app would truly help in developing a sincere and robust bond between your clients and your business.
Conclusion
Mobile apps create huge possibilities for businesses today. Persuade your customers to download your business’s app on their mobile devices and smartphones. You must use the app for generating profitable opportunities.
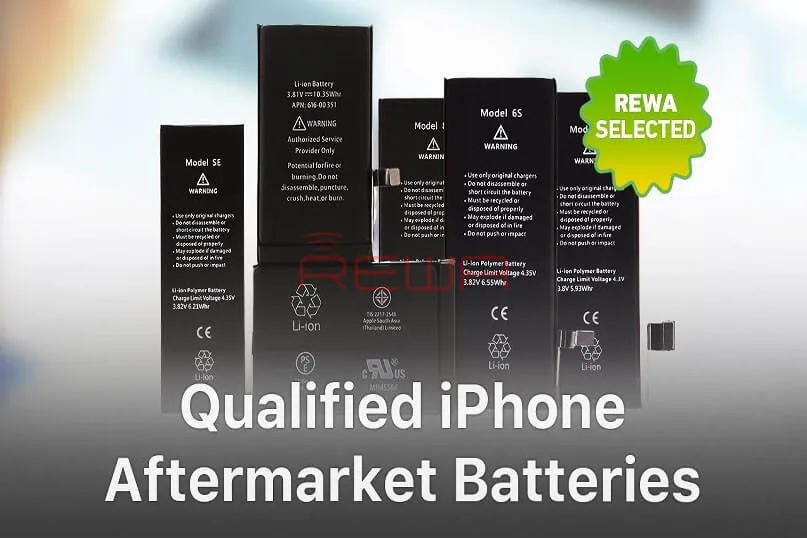
Batteries are consumables of cell phone repair industries.
However, there are few Apple OEM New batteries on the market.
Don’t worry, with aftermarket battery technology becoming mature day by day, aftermarket batteries are made to have almost the same quality as Apple OEM batteries.
Safety is a principal requirement of a qualified battery.
And this is decided by the battery cell and the protection board.
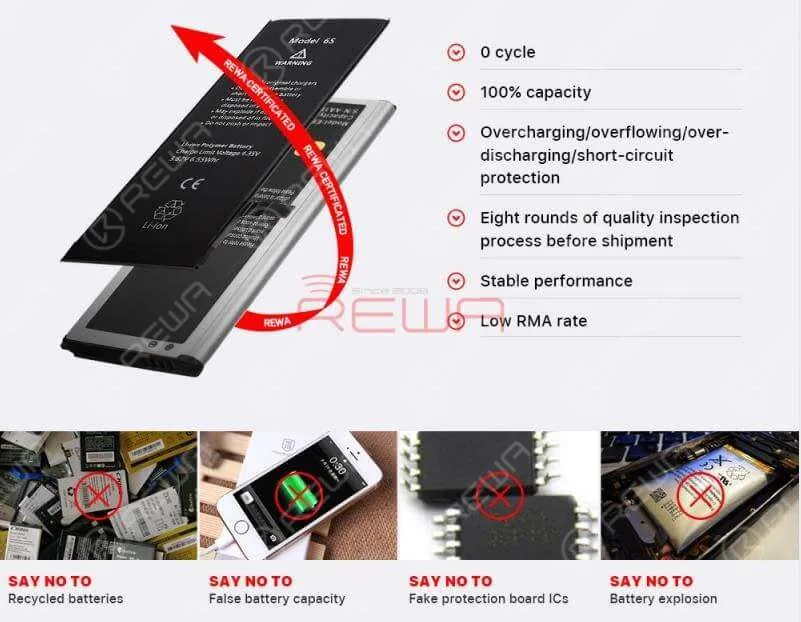
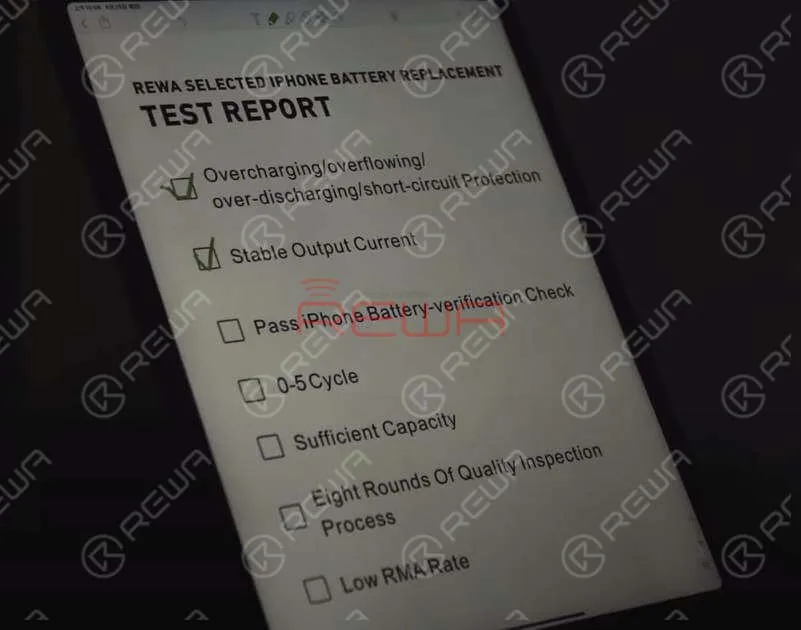
With overcharging/overflowing/over-discharging/short-circuit protection, REWA Selected batteries are safety guaranteed.
There is also a strict protection board performance test for REWA Selected batteries.
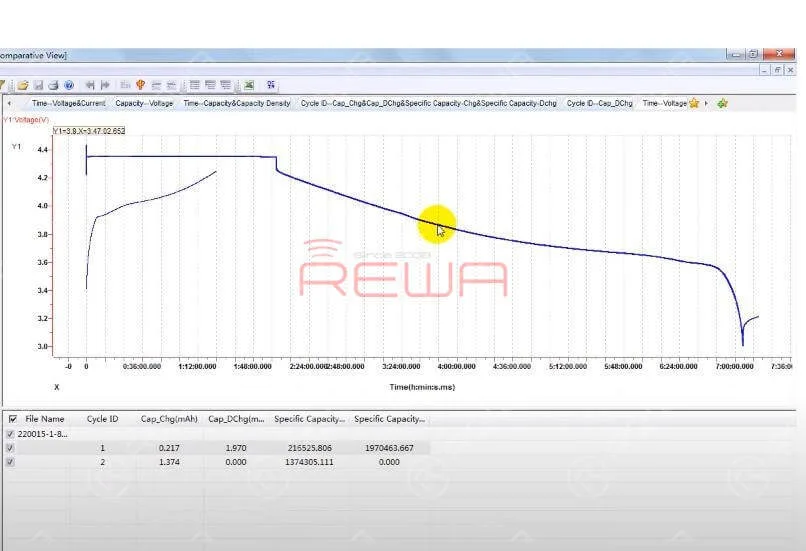
The more gently the battery discharge curve is, the more durable and stable the battery is.
REWA Selected Battery Standard
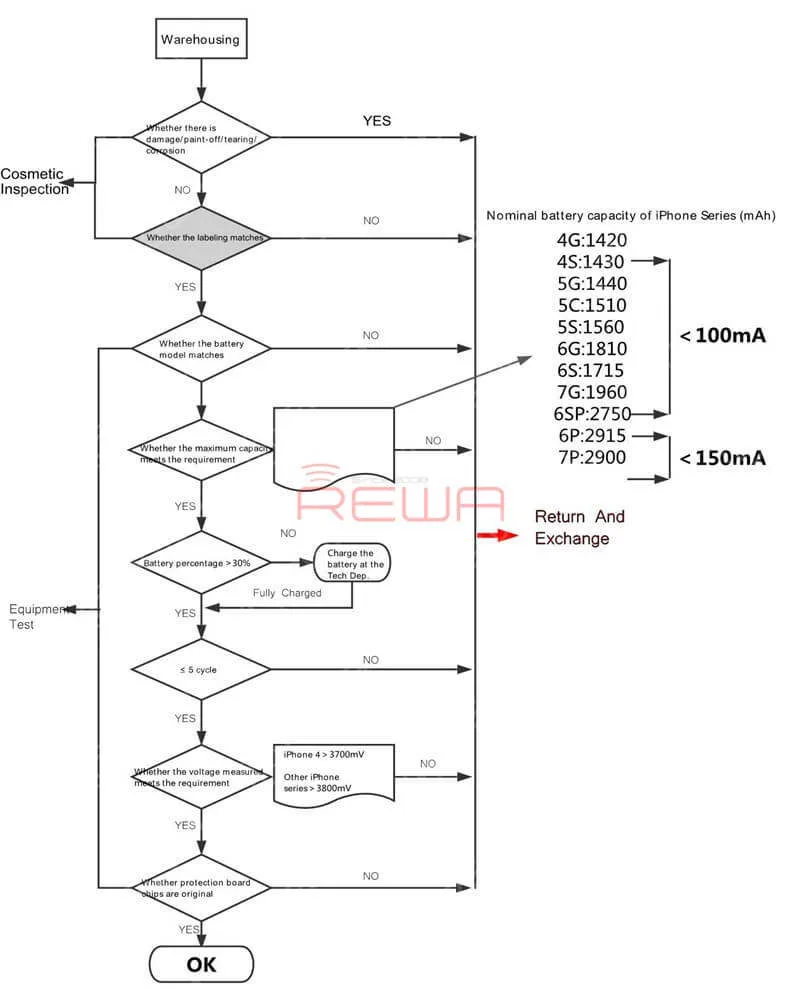
The battery should retain up to 80% of its original capacity at 400 complete charge cycles.
Pass iPhone Battery-verification Check
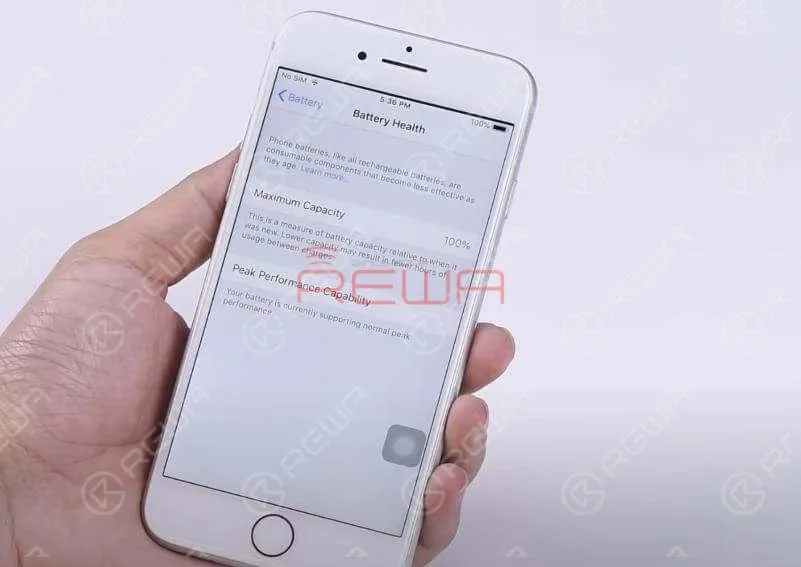
REWA Selected batteries can pass iPhone battery-verification check.
Get the REWA Selected battery installed onto your phone and you will still be able to use your iPhone’s Battery Health report.
Battery Charge&discharge Cycle Test
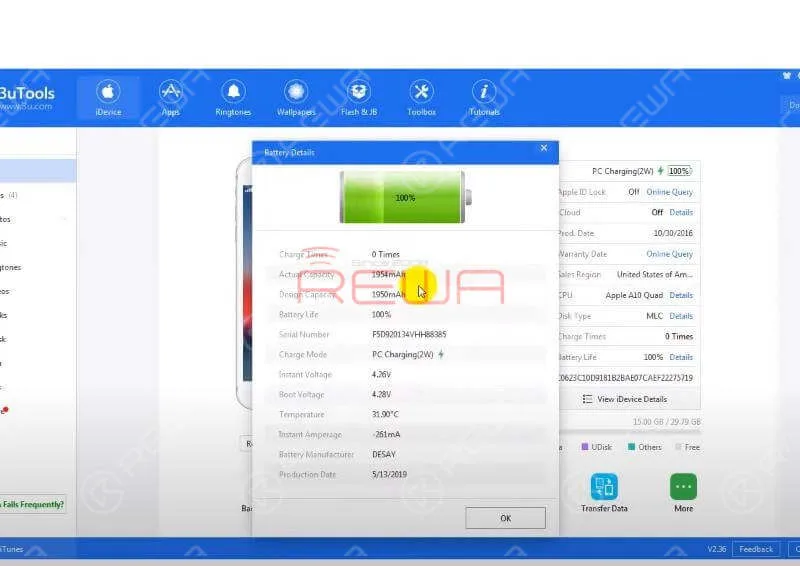
Before shipment, REWA LAB will carry out random battery charge&discharge cycle test.
This is to ensure that the battery cycle-index is within a proper range (0-5). Also, the actual battery capacity should be within a proper range.
Eight Rounds Of Quality Inspection Process Ensures Low RMA Rate
The strict quality control process of REWA LAB is the reason why REWA Selected Batteries enjoy a low RMA rate all the time.
Tips:There are a wide variety of Apple batteries with varying quality on the market.
However, the OEM battery cell is only available in Apple-designated factories.
Therefore, the authenticity and quality stability of some aftermarket batteries that claim to have the original battery cell are still to be discussed.
Please think carefully before you place an order.
You can also check out our YouTube channel for more information.
“a cellphone in the U.S. breaks every two seconds”, reported by SquareTrade, a company that insures smartphones. Thirty percent of cellphone owners will damage their phones in the next 12 months, and one in 10 are currently using a phone with a cracked screen. That is to say, even cell phone shipments are approaching saturation, the market capacity of the repair industry remains large.
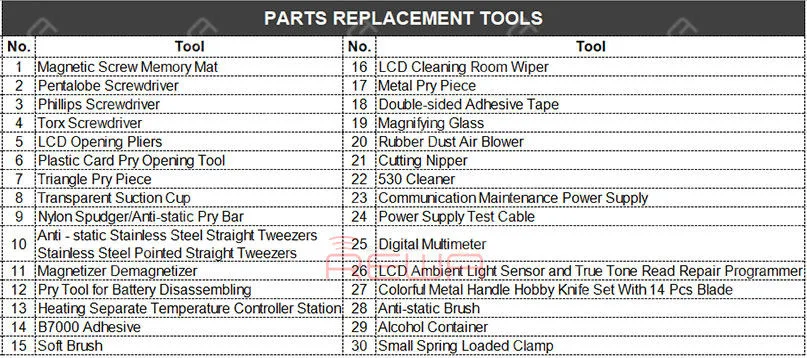
How many repair tools do I need to have? You may think about the problem when you prepare to open a repair shop. REWA repair technicians with 10+ years of experience have classified repair tools needed into three main categories as following:
Parts Replacement Tools
Logic Board Soldering Tools
Logic Board Advanced Repair Tools
Communication Maintenance Power Supply
The communication maintenance power supply is used for logic board repairing and booting test. The communication maintenance power supply is matched with Apple iPhone 4 – XS Max power supply test cable.
Hot Air Gun Rework station
The Hot Air Gun Rework station is suitable for a variety of components. such as SOIC, CHIP, QFP, PLCC, BGA (especially suitable for soldering of circuits and flex cable). The three tools are used to solve the problem that the repair shop faced every day.
What repairs you can do with the Parts Replacement Tools?
Replace the screen/battery/back battery cover/flex cable/ear speaker and diagnosis whether can power on, etc..
What repairs you can do with the Logic Board Soldering Tools?
Replace the IC/connector Not turning on diagnosing Replace the screen/battery/back battery cover/flex cable/ear speaker, etc..
What repairs you can do with the Logic Board Advanced Repair Tools?
Repair Case Example: “I have lost all the files on my iPhone. The pictures, messages, contacts, and files are very important to me, can you recover the data?” How to recover the data? Let’s take iPhone X data recovery from dead motherboard an example.
Data recovery with iCloud
For phones with iCloud backup, you can recover the data from the iCloud.
Data recovery with software
For carelessly deleted data of phones in good conditions, you can recover the data with the help of some software.
Data recovery with hardware
However, if the two methods don’t work. How to recover data from a dead logic board?
Step 1. Use screwdrivers nd straight tweezers to detach the dead logic board from the iPhone. And then attach the dead logic board to the PCB holder.
Step 2. Detach the A8 CPU, EEPROM, and NAND Flash from the dead logic board. Please deal with these chips carefully. Because the three well-performed chips are a must of successful data recovery.
Step 3. Use the Soldering iron and the razor blade to clean the three detached chips. Rosin, BGA paste flux and PCB cleaner are also needed during the process. Step 4. Complete BGA reballing with the help of the hot air gun rework station, BGA reballing stencil, and straight tweezers.
Step 5. Detach the A8 CPU, NAND Flash, EEPROM from the new logic board.
Step 6. Transplant chips detached from the dead logic board to the new logic board.
Step 7. Get the logic board installed and test whether the data has been recovered successfully.
Notice:
1. There are possible risks for the logic board data recovery process.
2. Skilled repair techs are required for the operation.
3. The fallen pads are empty pads which do not affect the function.
4. Apple’s official after-sales support does not accept the phone repaired by third-parties.
5. The data can not be recovered if one of these three chips (CPU, NAND Flash, EEPROM) is broken.
6. This cellphone is still calling failed until this step because the whole process is for data recovery only. The phone may be faced up with some other problems. Here is a video guide for your reference:
It has always been our aim to power your repair business. For quick ordering, please visit our online shop – shop.rewa.tech. Any questions and suggestions please feel free to contact sales@rewa.tech.
For each generation of iPhone, they updated great features to its new devices. However, each new handset is encountered with specific problems from its release day.
Since the launching of iPhone XS/iPhone XS Max, users have experienced several problems and faults. Let’s see what are the problems are and how to fix them.
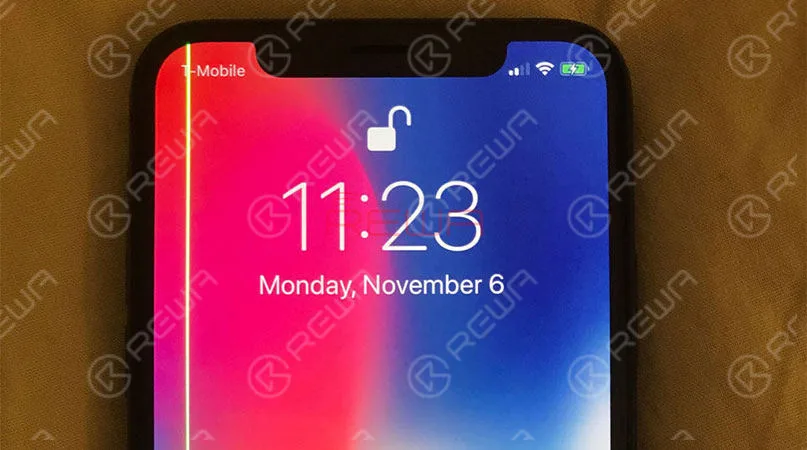
Annoying green line on the display
Apple shifted to OLED display since iPhone X in 2018.
However, a user in Australia reported that a bright green line running vertically across the screen of his iPhone XS Max after a period of use.
A number of customers encounter this issue after this.
Solution
For this problem, Apple will replace the device in warranty.
If you are experiencing this vertical green line of pixels on the side of your iPhone, it’s time to make an appointment with the Apple Store.
Poor Cellular Connection and slow WIFI speed
According to users of iPhone XS/iPhone XS Max, their devices featured fewer bars and poorer signal compared to its last generations.
Sometimes even shows “no service”, especially in the area of the weak signals. While these claims are rapidly growing in number, In addition to LTE problem, other users claimed that their devices appear to be slower WIFI speed.
The majority of people experiencing slower speeds found that their iPhone XS models were connected to the 2.4GHz network rather than the 5GHz network.
Solution
Some speculated that Apple switch from Qualcomm to Intel for the iPhone’s modem may be to blame.
Others pointed out that this is unlikely to be the root of the problem. Anyway, Apple has pushed out IOS 12.0.1, which fixes the LTE and WIFI issues.
Charging gate
Some users have trouble charging the devices over a wired connection.
They find their iPhone XS can’t charge with their charging ports plugged in.
Unless unplug the charger, wake up the screen, and then plug it in all over again, it begins to charge. But not all iPhone XS models are experiencing the problem.
What’s more, some people with older handsets are reporting with similar behavior. That suggests the issue might actually be with the latest software update iOS 12.
Solution
That means it could be fixed with a software update.
Beauty gate
Users taking to the forums are saying Apple’s new iPhone selfie camera automatically smoothens the skin in photos shooting from the front camera, which makes them look too good. And there is no way to disable it. This is the most unacceptable
Solution
According to Apple, the selfie camera system on the iPhone X uses faster sensor improved chips, and “advanced algorithms” to make your photos look better with a feature called “Smart HDR.” users can go Setting > camera > Smart HDR to disable the beauty mode.
Audio connectivity issue caused by Bluetooth
A small number of iPhone XS and iPhone XS Max owners are enduring Bluetooth connectivity issues where their iPhones fail to communicate with their car’s entertainment system properly.
Solution
This problem does not yet have an Apple-supplied solution.
Dust inside the camera lens
This is a minor issue actually. Some users claimed that dust getting inside the camera lens continuously. Which make the camera not perform well.
Actually, just because they’re sealed up tight doesn’t make the iPhone immune to dust and dirt. The environment gets involved too.
Solution
To get rid of this problem, take it to the Apple Store to get it cleaned out.
If you have an iPhone XS and XS Max that are facing any of the above issues, do let us know in the comments section.
Are you ever trapped into the situation that iTunes Error 4013 on iPhone 7/7 Plus?
Actually, it is one of the most common problems for iPhone users.
Also, we have sort out and released all the iTunes error codes of iPhone 6/ 6 Plus, as well as all the meaning of iPhone error codes.
iTunes Error 4013 of iPhone 7/7 Plus is usually caused by pseudo soldering or damage of CPU.
The problem might also be related to power supply of baseband PMU or NAND flash.
Since CPU repair is quite difficult, to start with we can check the power supply of baseband PMU and NAND flash. Let’s check the details.
Malfunction Display
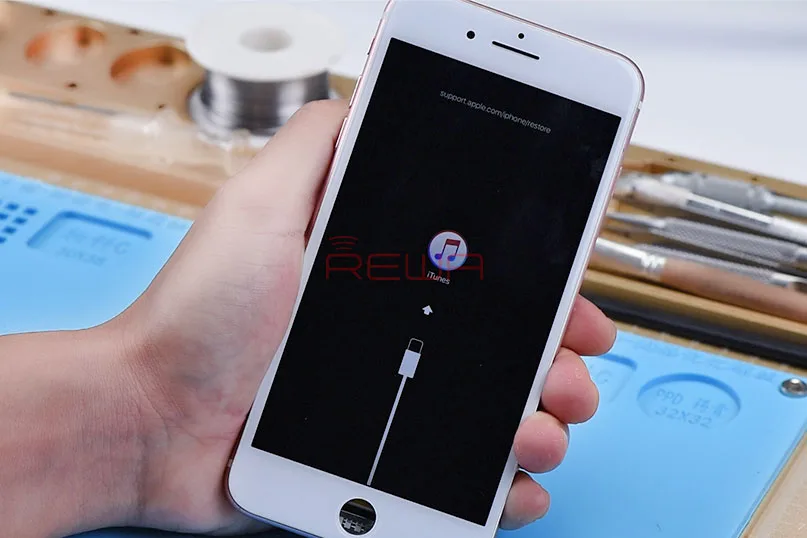
First, press power button to power on, the phone gets stuck with iTunes Recovery Mode and has no access to the system.
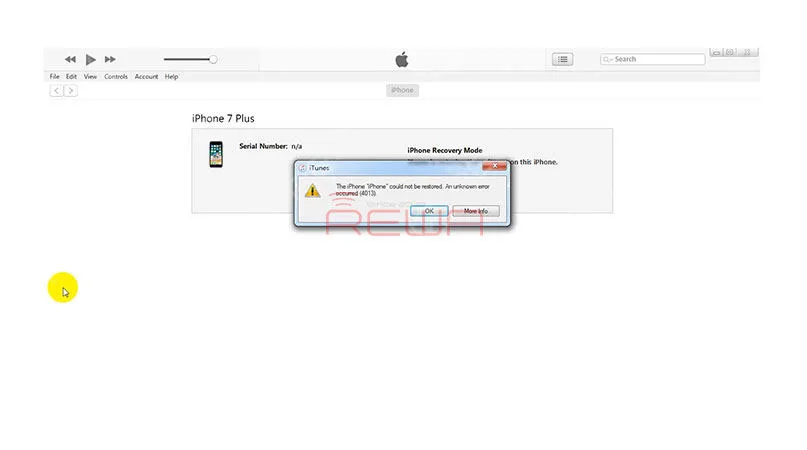
Next, connect it with computer and restore via iTunes, error 4013 appears during the restoring process. The phone restarts afterward.
Malfunction Analysis
iTunes Error 4013 of iPhone 7/7 Plus is usually caused by pseudo soldering or damage of CPU.
The problem might also be related to power supply of baseband PMU or NAND flash.
Since CPU repair is quite difficult, to start with we can check power supply of baseband PMU and NAND flash.
Connect battery connector with Power Supplier, and press power button on the Power Supplier. The system will then detect power button press.
The run voltage measurement of baseband PMU test points C5623 and C5631, the measured value of C5623 and C5631 are normal. Judging by this, power supply of baseband PMU is normal.
Malfunction Repair
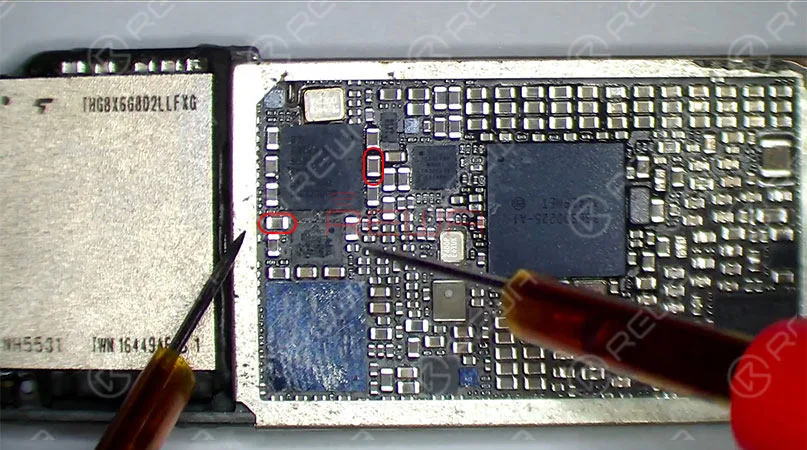
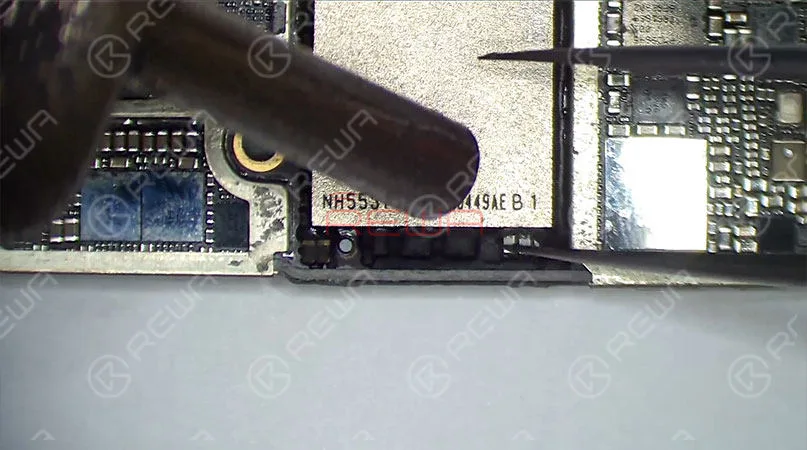
Let’s move to the power supply of NAND Flash, let’s remove black adhesive around NAND Flash with Hot Air Gun.
Then continue to measure voltage of NAND Flash test points C1701, C1721 and C1704. Judging by the measured value, power supply of NAND Flash is also normal.
Let’s try to replace the baseband PMU and see how it works.
Detach baseband PMU from the board with Hot Air Gun, then clean the bonding pad with resin-soaked Solder Wick.
Tips: some chips are sealed to the bonding pad with black adhesive, be careful with your operation to avoid knocking pads off the board.
Clean with PCB Cleaner afterward.
Apply some Paste Flux to the bonding pad, get a new baseband PMU in position(be careful with the direction). then solder with Hot Air Gun.
Once done, wait for the logic board to cool for 5 minutes and clean thoroughly with PCB Cleaner afterward.
Assemble and Test
Till now, the whole repair process is fully finished, let’s get the logic board and display assembly installed.
Connect the battery and press power button to power on, the phone gets stuck with iTunes Recovery Mode.
We need to connect it with computer and restore via iTunes.
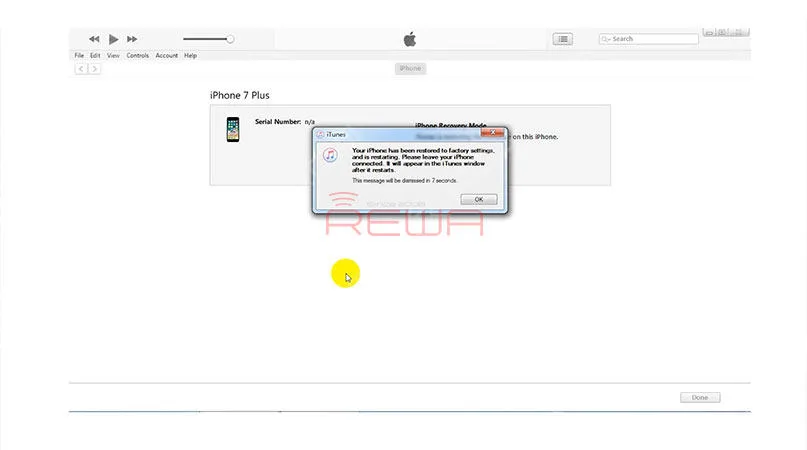
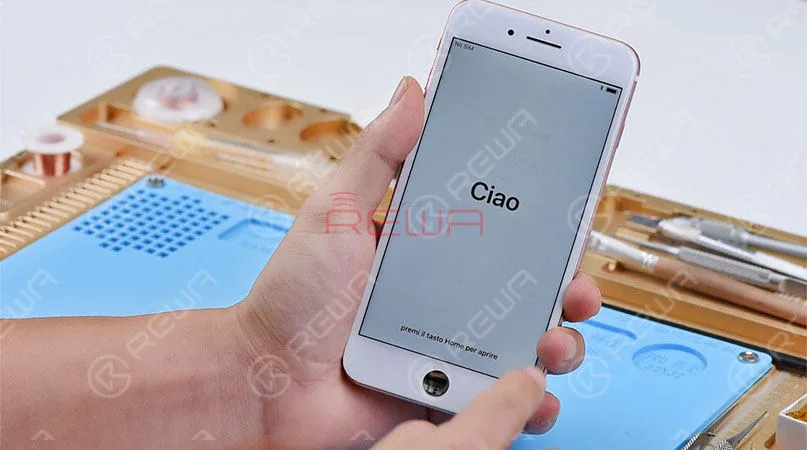
The phone can be restored normally.
Once completed, the phone restarts automatically, fault cleared. (Warm tips: get the phone full assembled after confirmation of fault clearance.)
iPhone 7 Plus Error 4013 fixed perfectly.
For more details about fix iPhone 7 Plus Error 4013 please check our video.
Any suggestions or questions please comment below or go to ASK Forum to post an ask, we will try our best to help you and answer you in time.
Because it’s a signal of a device’s hardware trouble, including battery.
However, we can not simply make a hasty generalization with the instances that a cellphone cannot charge.
We need to troubleshooting, meanwhile, and have an idea about what the trouble really is with the cell phone.
In this post, We will teach you how to troubleshoot not charging Samsung Galaxy S8+.
As an owner, you need to take some time to troubleshoot your Galaxy S8+ to check if the problem is only a minor glitch in the gadget?
or hardware issue that needs to replace ICs?
So, here’s what you need to do…
You may also read: How to fix Samsung Galaxy S8 speaker sound not working
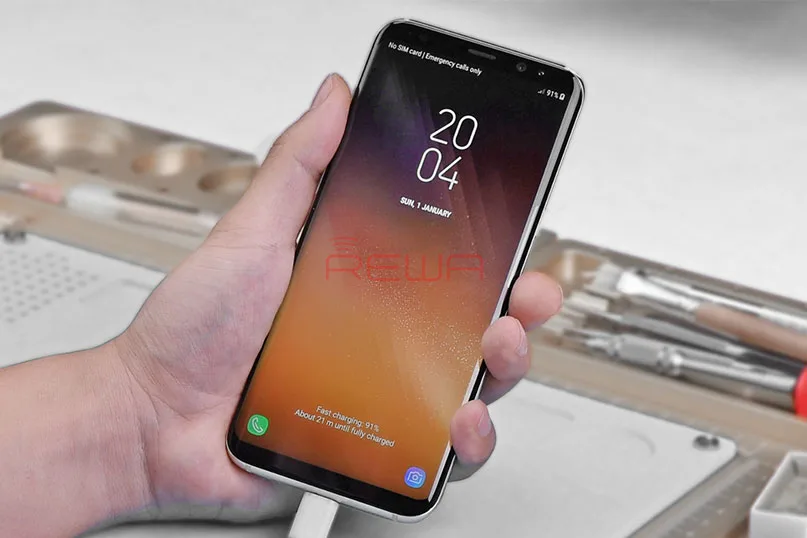
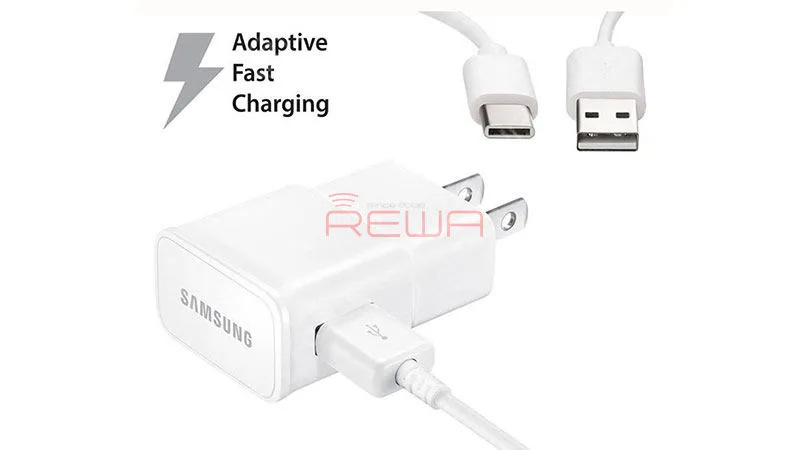
1: Make sure you’re using is the unique original charger and USB cable.
It is imperative to charge your phone with its original charger and data cable.
Try to look at the port of the charger.
There may be a few forms of debris, lint or maybe corrosion that hinders the right contact to the connectors. If there’s none, we should do physically check both ends of the cable.
If you can’t find any, and the Galaxy S8+ still has full battery left, try to connect the phone to a laptop, and check if the laptop detects it.
Because if it does, the cable works fine.
And if the Samsung Galaxy S8+ is charging, then it’s a charger problem.
In this case, the only thing that the charger needs to replace and no longer the cellphone.
If the phone cannot be detected or won’t charging whilst connected to the computer, then move directly to the next step.
2. Boot in safe mode and attempt charging
You only need to do this if the phone is still powered on and can be rebooted in safe mode.
3.Troubleshooting possibility of a malfunction or gadget crash
This step could be very critical, especially if the Samsung galaxy s8+ has a black screen and won’t respond while the power secretly hit.
When the gadget crashes, the Samsung galaxy s8+ will become unresponsive.
And no matter what you do, it received no reply even to the charger.
The above is the solution for fix Samsung Galaxy S8 Plus not charging, you can try them out.
But it is nothing for your phone, then you need to follow the step to repair – hardware repair.
First, you can click our video to see the whole repair progress.
For this case, Samsung Galaxy S8 Plus won’t charge issue is caused by PMIC, so we need to replace with a new charging PMIC.
Now, We will step-by-step teach you to repair your Samsung Galaxy S8+ not charging with charging PMIC issue.
Step 1. Disconnect the charging cable, and separate the I/O daughterboard and battery from the motherboard. Then remove the rear camera.
Step 2. Attach the motherboard to PCB Holder, stick High-Temperature Adhesive Tape on CPU and connector next to charging PMIC so as to protect them from high-temperature damage.
Step 3. Apply some BGA Paste Flux to charging PMIC, heat with Hot Air Gun at 350℃
Step 4. Detach the charging PMIC from the board, remove tins on the bonding pad with Soldering Iron at 360℃.
Then heat with Hot Air Gun at 360℃ and remove tins thoroughly with resin-soaked Solder Wick.
Once done, clean with PCB Cleaner
Step 5. Apply some BGA Paste Flux to the bonding pad, align the new charging PMIC to the right place(Tips: put it in the right direction).
Solder with Hot Air Gun at 350℃, air gear
2. Once done, clean with PCB Cleaner.
Wait for the logic board to cool for 5 minutes, get the motherboard and I/O daughterboard mounted
Step 6. Plug in the charging cable.
Run voltage measurement of the battery connector.
The measured value is normal.
Now we can assemble the phone and test, press power button to power on.
And then plug in the charging cable.
The phone can be charged normally. Fault cleared.
Warm tips: get the phone full assembled after confirmation of fault clearance
Good luck with your new Samsung Galaxy S8+ device. If you want to get more info on tools used in the video, please check the following.
We are always open to your problems, questions and suggestions, so feel free to contact us by comment below or directly email to service@rewa.tech.
This is a free service we offer and we won’t charge you a penny for it.
But please note that we receive hundreds of emails every day and it’s impossible for us to respond to every single one of them.
But rest assured we read every message we receive.
For those we’ve helped, please spread the word by sharing our posts with your friends or simply liking our Facebook and Google+ page or following us on Twitter.
After we post Samsung Galaxy S7 edge Glass Screen Replacement Guide, I often heard many people said their Samsung Galaxy S8 no speaker sound. So we released this guide to solve this problem.
When your Samsung Galaxy S8 or Galaxy S8 Plus no speaker sound or audio, it will be a frustrating issue, your smartphone will become an electronic reader.
So what should you do? First, you need to know what happened on your phone, there are also three common problems such as your Samsung Galaxy rings but speaker won’t work for other applications; you might not hear any sound with music, apps as well as calls or the Samsung Galaxy S8 gets stuck in the headphone mode.
So how to fix No Sound Or Speaker on Samsung Galaxy S8?
Follow the steps below one at a time and you should be able to fix the issue with your phone.
1. Your Samsung Galaxy S8 might have the Silent/Vibrate mode enabled.
This is a funny thing when you are anxious about your S8 no speak sound.
When you found your Samsung Galaxy S8 audio not working, the first step you need check your volume case.
You can check this by using the drop-down menu using your fingers to slide down the screen from the top.
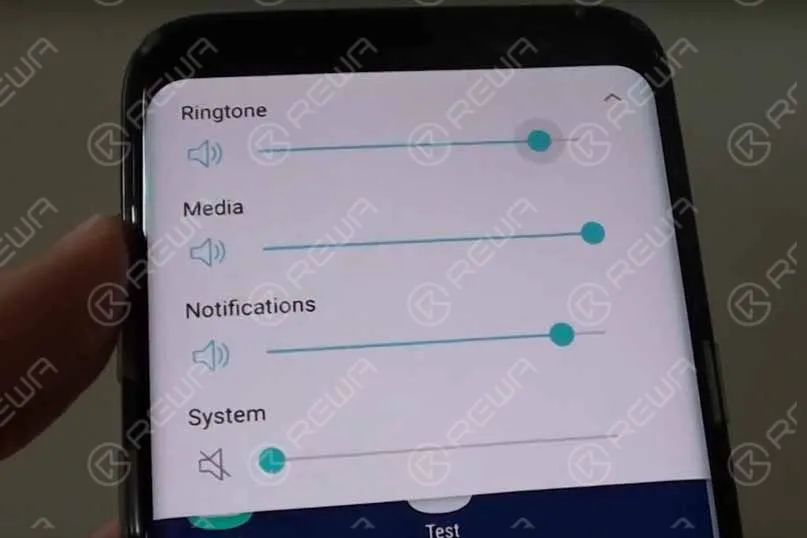
Press the volume key and when the volume slider appears on-screen, tap on the small down arrow at the end of the slider to see all the volume controls for Media, Ringtone, Notifications and System.
Go ahead and turn all the sound settings up, turn it to Loud Mode.
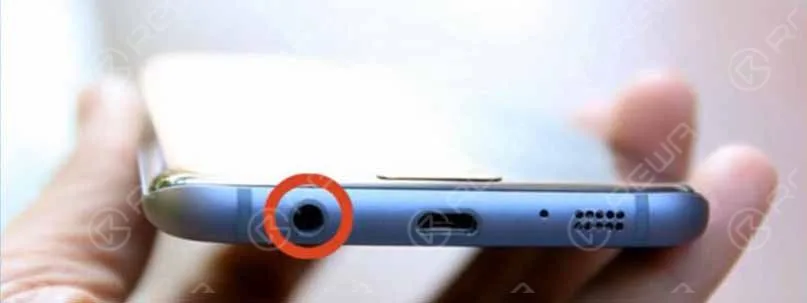
2. The headphone jack may be blocked
If the step 1 can’t solve this question, the headphone jack may be blocked, you can clean your headphone jack and speaker grill to make sure there is no lint, dust and dirt which can prevent you from getting any sound.
Any dust, dirt or grime blocking the charging port can result in a poor connection which might eventually lead to sound and charging issues.
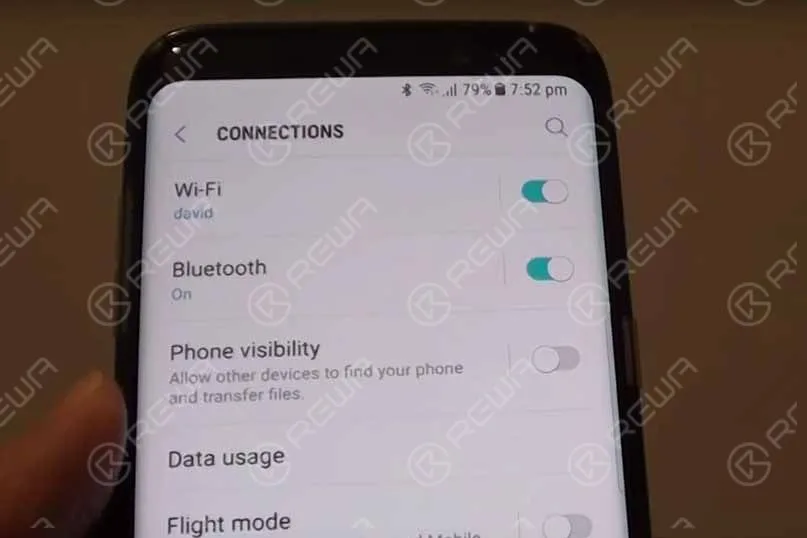
3. Close the Bluetooth
If your Galaxy S8 smartphone to other devices via Bluetooth.
Ghost connections still remain even after aborting a Bluetooth connection.
These ghost connection sound issues when you try to play back a sound file.
You can fix this issue by simply turning off the Bluetooth toggle from the Bluetooth settings.
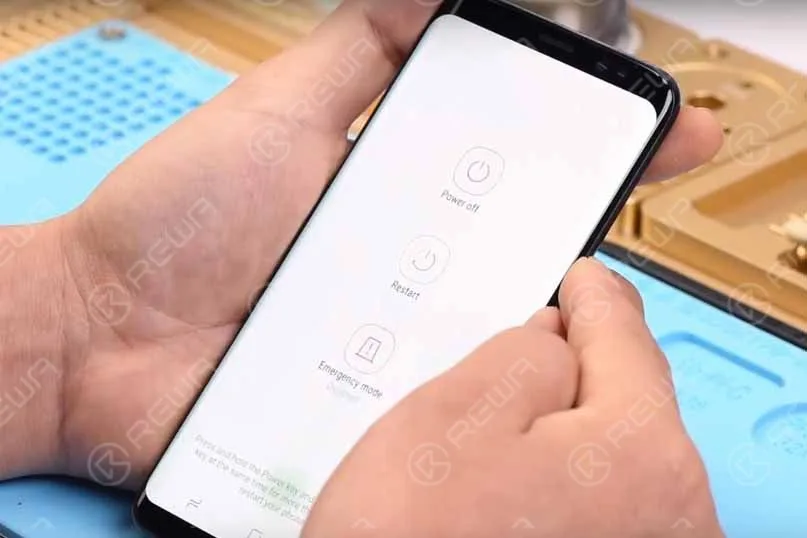
4. Restart your phone
Use the power button options to restart your Samsung Galaxy S8 or Galaxy S8 Plus.
Select the option to restart the device which should hopefully get rid of any glitches that are resulting in the sound issues.
5. Software update
Check to ensure that you have the latest software update on your Galaxy smartphone.
You can do this by following the directions below;
Settings > About device > Software update > Check for updates.
If there is a new update, download it.
Different carriers release updates at different times.
6. Factory reset
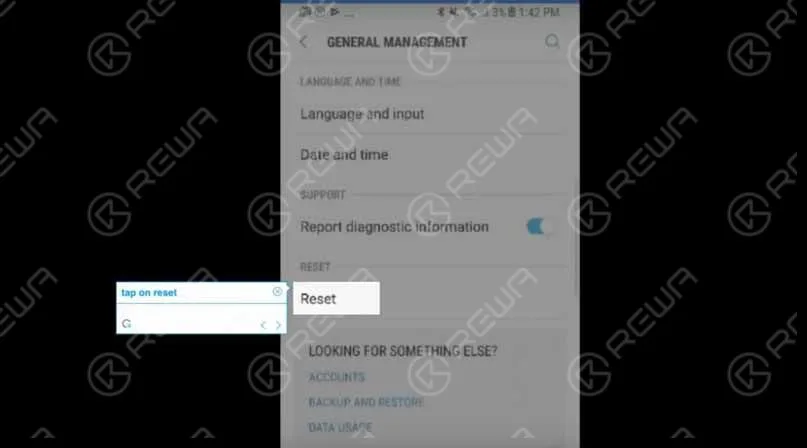
If all else fails backup your phone and do a reset.
Go to settings, General management, Reset and then factory data reset.
Factory reset is the last option that can resolve all kind of issue including the S8 sound problems.
So head towards Settings > Backup & reset> Factory data reset > Erase all data.
Wait for few seconds as this will take a few minutes to erase everything from the device after which you are required to set up your Galaxy S8 from scratch.
7. Turn on ‘Prevent USB audio routing’
Enable the developer option in your Galaxy S8 by going to Settings> About device and tap the build number seven times.
When the developer option is enabled, head to Developer option and scroll down to get the Media option.
There you will notice an option ‘Prevent USB audio routing’.
Turn this option on by toggling the switch.
This method has worked for many.
So, you too can try this out if it becomes helpful for you to solve the audio issue.
8. Boot in safe mode
Turn off the device first
Next, press Power button for few seconds till you notice Samsung logo on the screen.
Release the power key then and hold down the Volume down button till the phone completes restarting and safe mode appears at the bottom left corner of the screen.
If the audio issue is not noticed in safe mode then a third party app is the main culprit.
Uninstall third-party apps on by one until the problem is solved.
Our suggestion is to start with the apps you installed recently, right before the issue occurred.
So, these are the methods to resolve the Samsung Galaxy S8 audio issues.
You can try them out, but if nothing works, the possible situation is that your speaker is broken in which case you will need to have it changed or replaced.
You need to read the next solution:
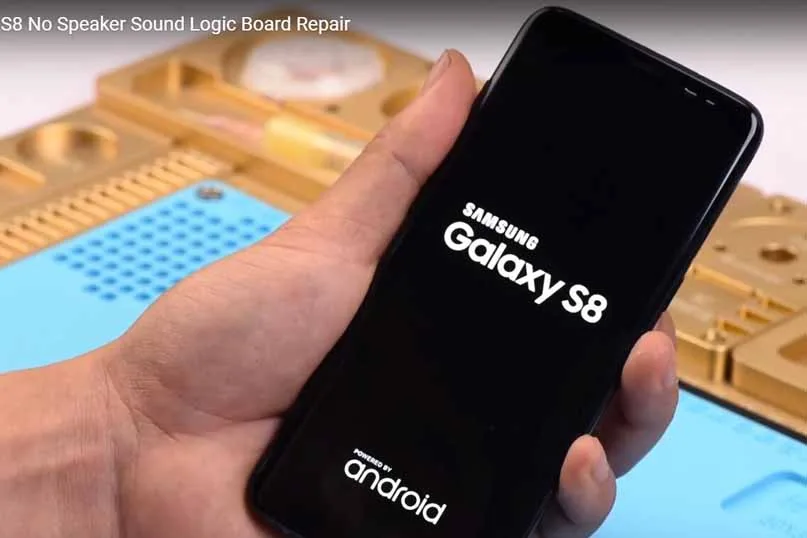
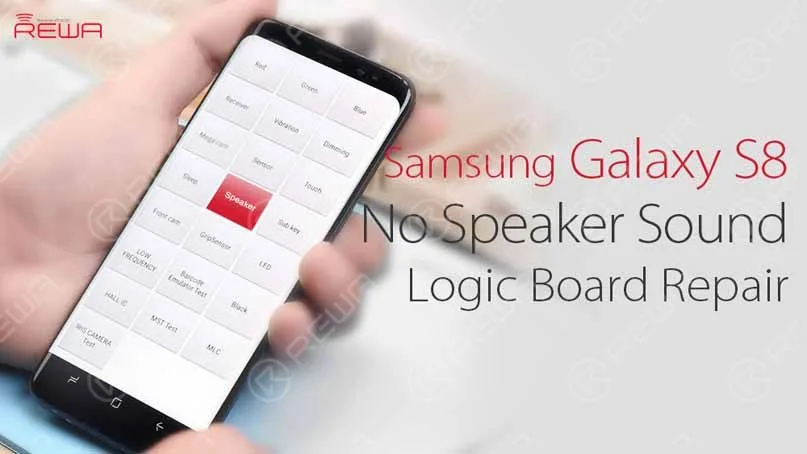
Samsung Galaxy S8 No Speaker Sound Logic Board Repair
Usually, Damage of the speaker or malfunction of the speaker circuit can result in this issue.
We need to confirm whether the speaker is in a normal status or not first.
If yes, then continue to run diode mode measurement of the speaker contacts.
And we can relate the fault to audio amplifier IC with the measured value of one contact being abnormal, At last, we complete the repairing work by replacing a new audio amplifier IC.
Next watch our video guide:
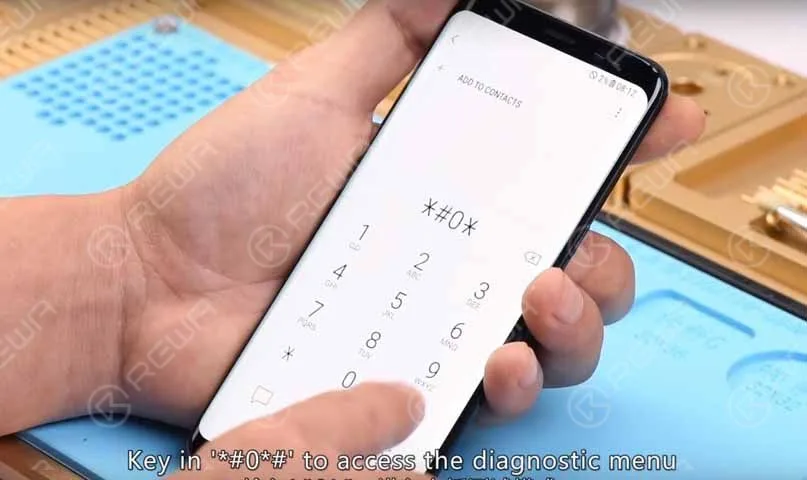
When we get a No Speaker Sound Samsung Galaxy S8, we need to check it first. Turn on the phone and open the Dialer app, key in ‘*#0*#’ to access the diagnostic menu, and tap on the ‘Speaker’ button, we found there is no audio output of the phone. Now we are sure the Samsung Galaxy S8 no speak sound, so we need do the next steps.
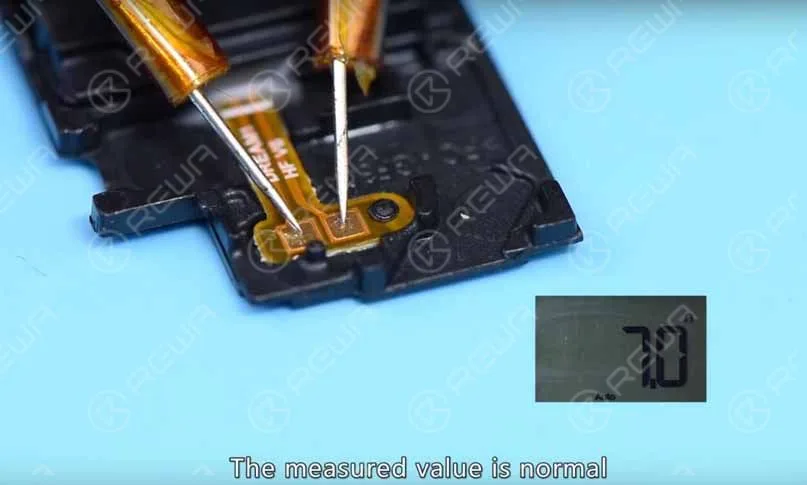
Step 1: Check if the speaker is in a normal status; disassemble the phone and take out the speaker, measure resistance of the speaker, we found the measured value is normal, So the fault might be related to the relevant circuit of the speaker;
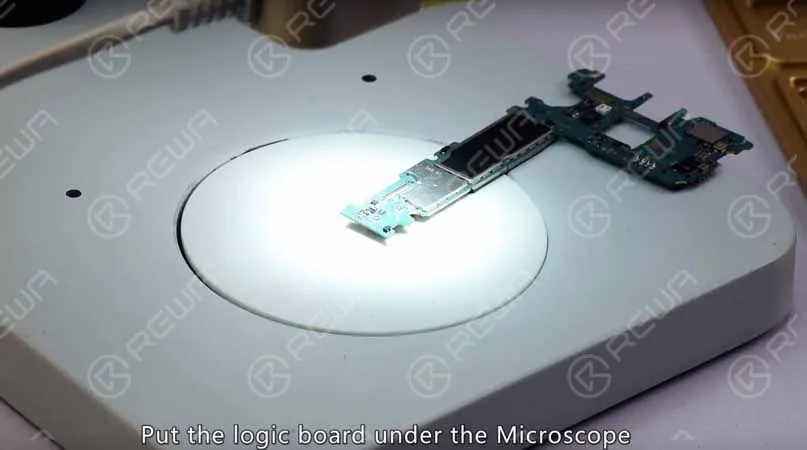
Step 2: Take out the logic board, put the logic board under the Microscope, check if speaker contacts and components around have been damaged or loosed. The result shows all going well;
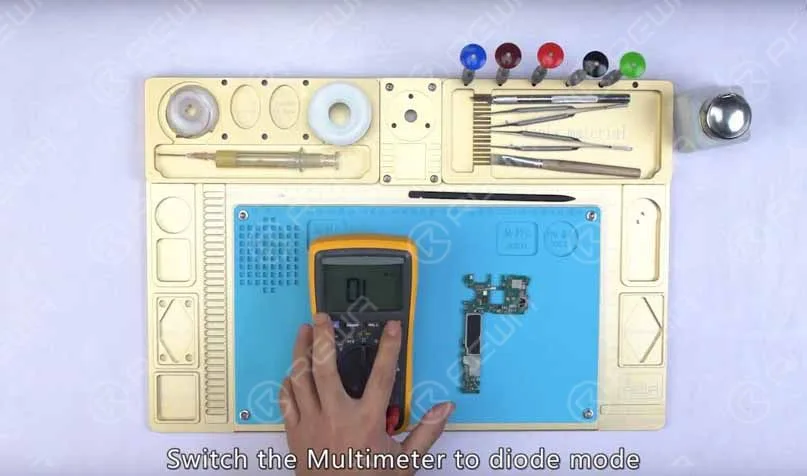
Step 3: Switch the Multimeter to diode mode, measure two contacts of the speaker,
The measured value of one contact is 502, which is abnormal The other contact 802, which is normal Since the two contacts are connected with audio amplifier IC via inductor
Step 4:
Our next move is to check the audio amplifier IC
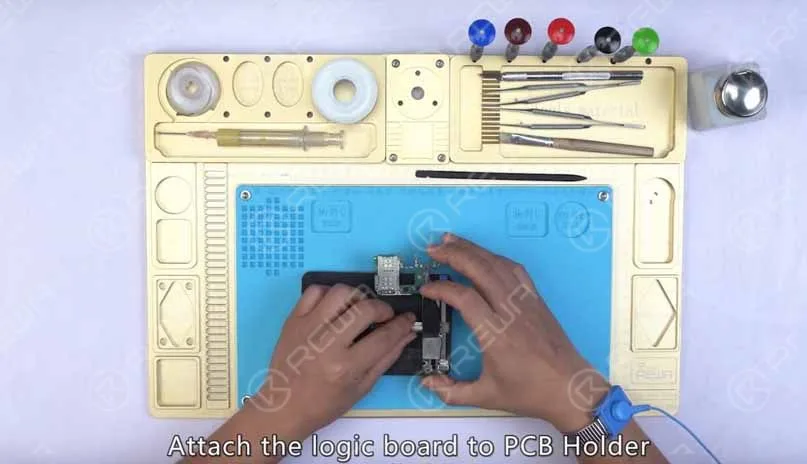
Attach the logic board to PCB Holder, apply some BGA Paste Flux to the audio amplifier IC, heat with Hot Air Gun at 330℃, air gear2;
and detach the audio amplifier IC from the logic board, then clean bonding pad with rosin wrapped Solder Wick.
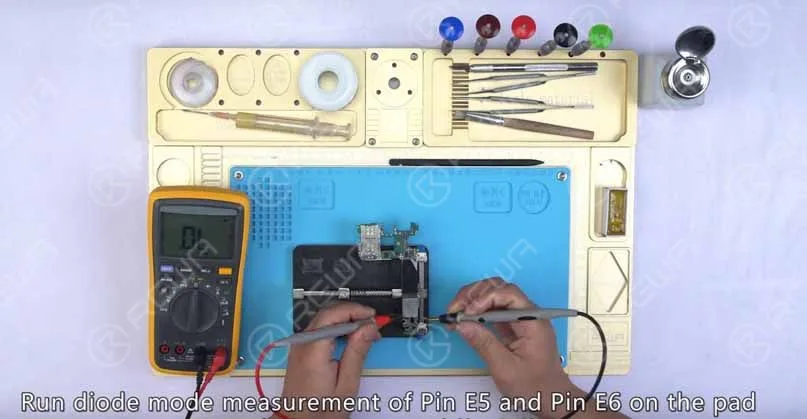
Once done, clean with PCB Cleaner, run diode mode measurement of Pin E5 and Pin E6 on the pad, check whether the internal circuit has been short-circuited.
Result: No short-circuited condition
We can confirm now that the fault is related to audio amplifier IC, and we need to replace with a new IC.
Step 5: Replace with a new IC.( watch the video to get detail )
Apply some BGA Paste Flux to the bonding pad
Align the new IC to the right place
Solder with Hot Air Gun at 330℃
Once done, clean with PCB Cleaner
Step 6:
Run diode mode measurement of the two speaker contacts, the measured value is normal, assemble the phone.
Test:
Turn on the phone and open the Dialer app, key in ‘*#0*#’ to access the diagnostic menu, tap on the ‘Speaker’ button, and we can find the audio output of the phone is back to normal.
For Samsung spare parts, you can visit REWA online shop.
For cell phone repair videos, please visit REWA YouTube Channel.
And for those who wanna learn more about cell phone repair, visit REWA Academy.
REWA has dedicated itself to the cell phone repair industry for over a decade.
The extensive experience and acute market insight allow us to deal with problems related to our customers’ repair business effectively.
We've detected you might be speaking a different language. Do you want to change to:






 English
 Español
 Français
 Deutsch
 Italiano