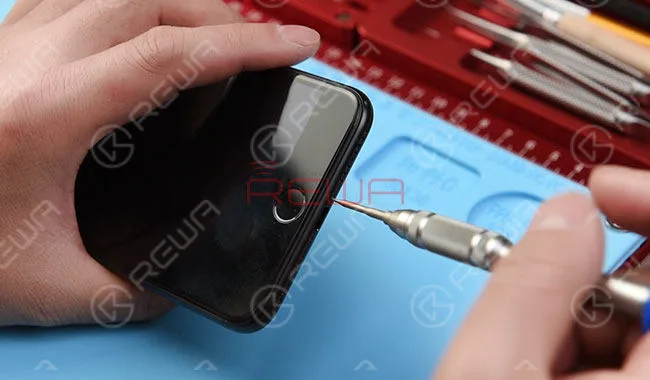
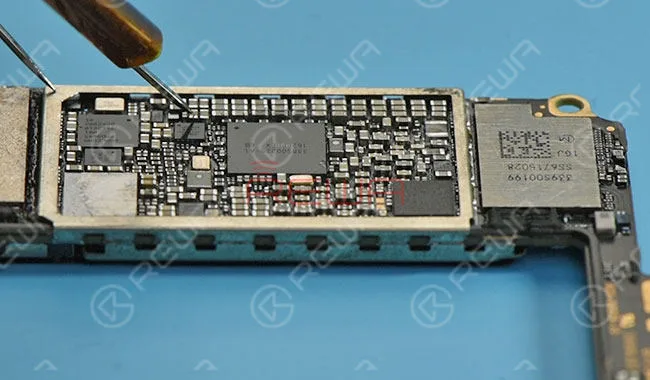
Water damage is a common issue for iPhone in daily use. In this video, the home button of iPhone 7 is not working after water damaged, because lines on logic board get corroded and damaged. Since there is a high failure risk in repairing, REWA LAB presents you a method to fix heavily corroded and damaged logic board step by step by Ultrasonic Cleaner and making jumper wire. To fix your iPhone 7 home button issue caused by water damage, please follow the repair operations of our tutorial video.
Cuando tu iPhone no se enciende, ¿qué puedes hacer?
El primer paso es encontrar la razón de iPhone no se enciende, podría haber cualquier problema de hardware o software relacionados con el dispositivo.
Como físicamente dañado o caído en el agua o alguna otra razón, y hay muchas soluciones de Internet, tales como cargar el iPhone, reiniciar, reiniciar duro, el uso de software para arreglar ... para estas soluciones, usted puede tener una oportunidad, pero aquí vamos a proporcionar un alto nivel y solución profesional para arreglar iPhone no se enciende.
El iPhone X, con su pantalla supergrande, la última tecnología biométrica -Face ID-, el cristal más resistente, la carga inalámbrica, etcétera, llega al corazón de la mayoría desde su lanzamiento en octubre de 2017.
Por perfecta que sea, muestra fallos de funcionamiento con el paso del tiempo.
Al principio, tiene problemas de falta de respuesta táctil, pantalla atascada y otros problemas de visualización. Últimamente, algunos mal funcionamiento de la placa lógica aparecen. Por ejemplo, el iPhone X no se enciende, etc.
Si llegas a conocer la estructura de la placa lógica del iPhone X, debes saber que la placa lógica del iPhone X se dobló por la mitad y luego se soldaron las dos capas: la capa superior es la placa principal y la capa inferior es la placa de señales.
Lo que dificultó mucho nuestra reparación.
Hoy compartimos un caso de reparación de iPhone X no enciende reparación de placa lógica. Vamos a ver cuál es la parte más difícil.
Desmontar
Desmontar el no se enciende iPhone X. Sacar la placa base de doble capa.
Aquí viene la primera dificultad - separar la placa base plegada. lo que requiere un control severo de la temperatura.
Una temperatura excesivamente alta dañaría los componentes de alrededor, pero una temperatura demasiado baja no puede separarlos. Con paciencia y tiempo, separamos la placa lógica con éxito.
Diagnóstico
Después de separar la placa lógica, conecte la capa superior con la fuente de alimentación de CC.
La corriente de lectura es anormal. Así que localizamos el fallo en la capa superior.
Para continuar nuestro diagnóstico, medimos la tensión de alimentación de la capa superior con un multímetro.
Y descubre que no hay valor de voltaje en C2771 y C2770.
Medir con Multímetro y podemos confirmar que el inductor L2770 está dañado.
Mantenimiento y pruebas
Así que tenemos que desmontar el inductor L2770 y sustituirlo por uno nuevo.
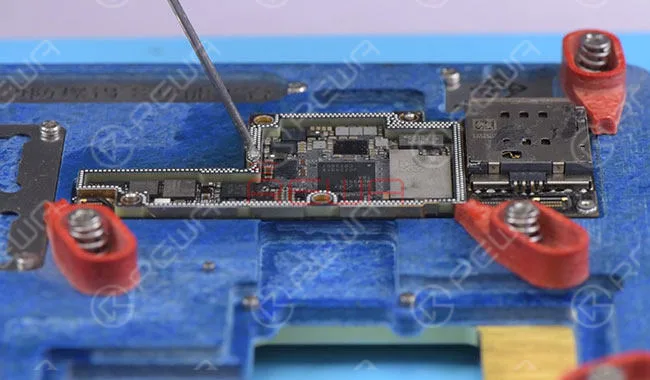
En primer lugar, fije la capa superior al soporte de la placa de circuito impreso.
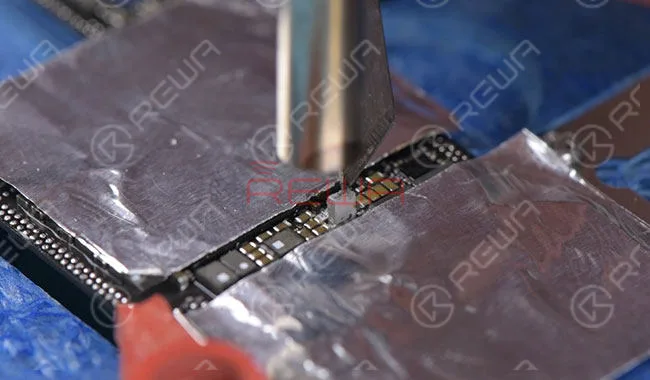
Y pegue cinta adhesiva de alta temperatura en los componentes alrededor del L2770 para protegerlos.
A continuación, vuelva a soldar con un nuevo inductor.
Después de enfriarse, vuelva a medir el valor de la corriente conectándolo a la fuente de alimentación de CC.
El valor de corriente medido en el amperímetro es normal esta vez. Fallo eliminado.
Vuelva a montar
¿Adivina qué? Aquí viene la parte más difícil de la reparación - para eliminar las latas de las dos capas por separado.
Transferimos la dirección durante 5 veces y, finalmente, terminamos el proceso de desestañado.
A continuación, otra parte difícil - para reball la capa inferior.
En realidad sólo lo conseguimos en nuestro segundo intento.
Finalmente, conseguimos volver a soldar las dos placas y volver a montar el teléfono, el iPhone X no se enciende el problema fue finalmente resuelto.
iPhone won’t turn on and the screen is black or frozen? After software issue being excluded, the problem may be caused by a faulty logic board. Since logic board of iPhone X is a single one that’s basically been folded over and soldered together, the unique design and structure have made any repairs to the logic board far more difficult than previous series. With our iPhone X won’t power on repair case today, the fault has been confirmed as inductor damage by voltage measurement. And we can fix the iPhone X won’t turn on issue by inductor replacing and board re-soldering.
Just 4 steps to fix your iPhone x won’t turn on.
1. Disassemble
Disassemble the won’t turn on iPhone X. Take out the double layer motherboard. Here comes the first difficulty – separate the folded motherboard. which requires severely temperature controlling. Excessively high temperature would damage the components around, but too low temperature cannot separate them. With patience and time, we separate the logic board successfully.
2. Diagnosis
After the logic board was separated, connect the upper layer with DC Power Supply. The reading current is abnormal. So we locate the fault to the upper layer. To continue our diagnosis, we measure power supply voltage of the upper layer with Multimeter. And find out there is no voltage value on C2771 and C2770. Measure with Multimeter and we can confirm that the inductor L2770 is damaged.
3. Maintenance & Test
So we need to take down inductor L2770, and replace with a new inductor. Firstly, attach the upper layer to the PCB Holder. And stick High-Temperature Adhesive Tape on components around L2770 for protection. Then re-solder with a new inductor. After cooling down, measure the current value again via connect it with DC Power Supply. The measured current value on the ammeter is normal this time. Fault cleared.
4. Reassemble
Guess what? Here comes the most difficult part of the repair – to remove tins from the two layers separately. We transfer the direction for 5 times and finally finish the tin removing process. Then another difficult part – to reball the lower layer. We actually made it only at our second attempt. Eventually, we got re-solder the two boards and reassemble the phone, the iPhone X won’t turn on issue was finally solved.
Recently, REWA has received feedback from several third-party repair shops regarding issues with the ambient light sensor not working on some iPhone 8 series and iPhone X devices after repair. After conducting tests and analysis, REWA LAB has discovered that Apple may have implemented technical barriers to prevent customers from seeking third-party repairs. Watch the video to see the testing procedures and results.
¿Qué debes hacer si tu iPhone 7 no se enciende después de haberse caído?
El problema puede ser causado por un fallo de software o un problema de hardware complicado.
Hemos publicado un vídeo de guía sobre qué hacer cuando un iPhone 6 no enciende y cuando un iPhone X no enciende, y esta vez, hemos recibido un iPhone 7 Plus que se ha caído y no enciende.
El problema finalmente se detectó como un cortocircuito en la CPU. Aquí tenemos procedimientos detallados de solución de problemas.
Diagnóstico del iPhone 7 que no enciende
Desmonta el teléfono y desconecta la batería, luego conecta el teléfono con el Fuente de alimentación CC y presione el botón de encendido para encender.
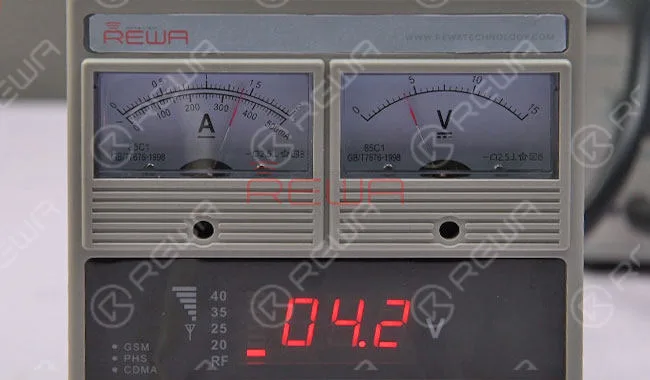
La lectura actual del amperímetro salta a 350 mA y luego se queda fija, lo cual es anormal e indica que la placa lógica está en cortocircuito.
desarma el teléfono y separa la batería
Desconecte la fuente de alimentación y saque la tarjeta lógica.
Realice mediciones de diodos en los condensadores alrededor del CI de alimentación uno por uno.
Todos los valores son normales excepto C1823: muestra 0, lo que indica que C1823 está en cortocircuito.
Desde el esquemas, podemos ver que C1823 es el condensador de filtro de PP1V8-SDRAM, y está conectado directamente a la SDRAM de la CPU.
mediciones de diodos en condensadores alrededor del circuito integrado de potencia
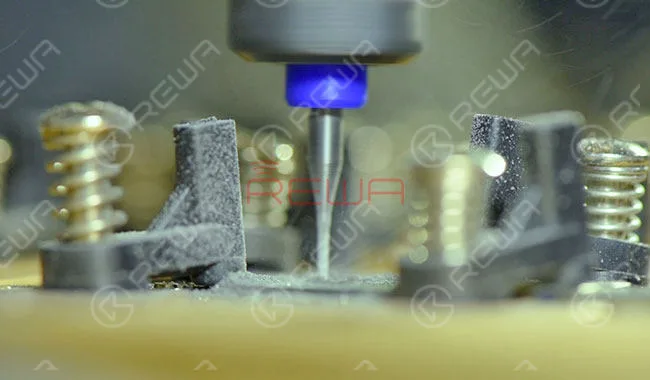
Conecte la placa lógica al Soporte para PCB, y retire la cubierta de blindaje calentando con pistola de aire caliente, luego retire la CPU SDRAM con Rectificadora de virutas CNC.
Después de lijar el chip, fije la lógica a la placa de circuito impreso (PCB) y límpiela con limpiador de PCB, luego retire el adhesivo negro alrededor con un cuchillo para escultura.
Después de eso, aplique un poco de fundente en pasta BGA a la almohadilla de unión.
Alinea la nueva SDRAM en el lugar correcto (no inviertas la dirección) y luego solda con la pistola de aire caliente. Después de enfriar durante 5 minutos, limpia bien con limpiador de PCB.
Prueba de esmerilado de chips de CPU SDRAM
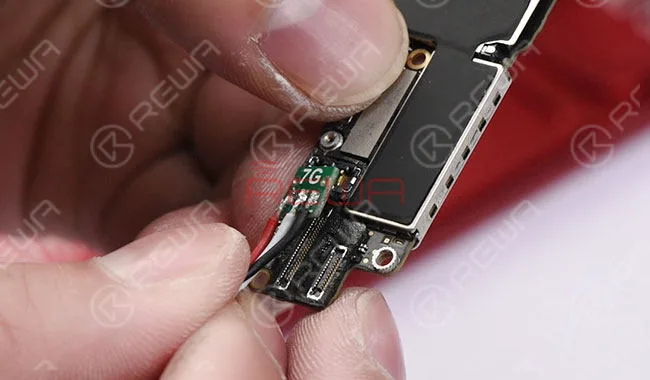
Conecte el teléfono a la fuente de alimentación de CC, luego haga un puente entre el Pin 13 de J4504 y la tierra con las pinzas para activar el encendido del sistema.
Esta vez, la lectura actual en el amperímetro es normal.
conecta el teléfono a la fuente de alimentación de CC
Ensambla la tarjeta lógica y abrocha el conjunto de la pantalla.
Conecta el teléfono a la computadora, luego mantén presionados el botón de bajar volumen y el botón de encendido para entrar en el modo DFU. Restaura el teléfono a través de iTunes.
Una vez hecho, inserte la tarjeta SIM y active el teléfono.
Después de las pruebas, todas las funciones funcionan normalmente.
lectura actual del amperímetro
Para más detalles sobre la reparación de un iPhone 7 que no enciende y Videos de reparación de iPhone, por favor revisa nuestro video de YouTube.
¿Necesitas repuestos o herramientas para la reparación de teléfonos celulares?
REWA ofrece piezas y herramientas de reparación de teléfonos móviles al por mayor y al por menor a precios accesibles durante 10 años. Bienvenidos a visitar nuestra tienda en línea. tienda.rewa.tech.
iPhone 7/7 Plus won’t turn on after it is dropped? Due to the imperfect technology of CPU supplier, the SDRAM of iPhone 7/7 Plus series can be easily damaged. Once dropped, the SDRAM might be short-circuited and the phone won’t turn on afterward. Let’s click the video to know how we fix iPhone 7 plus won’t power on the issue in a more efficient way.
Diagnóstico
Take apart the phone and disconnect the battery, then connect the phone with the DC Power Supply and press power button to power on. The current reading of the ammeter jumps to 350mA and then stays still, which is abnormal and indicates that the logic board is short circuited.
Disconnect the power supply and take out the logic board. Run diode measurements on capacitors around power IC one by one. All the values are normal except C1823 – It displays 0, which indicates that C1823 is short-circuited. From the schematics, we can see that C1823 is the filter capacitor of PP1V8-SDRAM, and it is directly connected to CPU SDRAM.
Attach the logic board to the PCB Holder, and take down the shielding cover by heating with Hot Air Gun, then remove CPU SDRAM with CNC Chip Grinding Machine. After chip grinding, attach the logic board to the PCB Holder and clean it with PCB Cleaner, then remove the black adhesive around with Sculpture Knife. After that, apply some BGA Paste Flux to the bonding pad. Align the new SDRAM to the right place(Don’t reverse the direction), and then solder with Hot Air Gun. After cooling for 5 minutes, clean thoroughly with PCB Cleaner.
Pruebas
Connect the phone with the DC Power Supply, then short Pin 13 of J4504 to the ground with tweezer to trigger the power on system. This time, the current reading on the ammeter is normal.
Get the logic board assembled and buckle the display assembly. Connect the phone to the computer, then press and hold volume down and power button to get into DFU mode. Restore the phone via iTunes. Once done, insert the SIM card and activate the phone. After testing, All the functions work normally.
iPhone 6s overheating and getting hot? Usually the problem is caused by excessive running apps, but in this tutorial video, we demonstrated a logic board repair method. After current detecting and rosin detecting, we can confirm that the problem was caused by damaged capacitors inside the WiFi module. With our repairing experience, we adopt a exclusive repair solution to fix the iPhone 6s high temperature warning screen issue.
Herramientas utilizadas:
Plataforma integrada de reparación de teléfonos móviles
Estación digital de retrabajo por aire caliente - 861DW
Have you ever encountered with a problem of iPhone 6 no speaker sound while receiving dialing or playing music via louder speaker, and if you plug EarPods in, the sound come out again? This iPhone speaker no sound problem may be caused by some components pseudo soldering while the iPhone leaving factory. As time goes by, operating environment and personal habits of users may acceleratethe oxidation or shedding of pseudo soldered components. Let us check the video and find out how to fix iPhone speaker not working problem.
Herramientas utilizadas:
Comunicación Mantenimiento Fuente de alimentación
Estación de soldadura digital - 203H
Estación digital de retrabajo por aire caliente - 861DW
Plataforma integrada de reparación de teléfonos móviles
Ha comprobado nuestro recién publicado sobre agrietado iPhone 7 tutorial de reparación de pantalla?
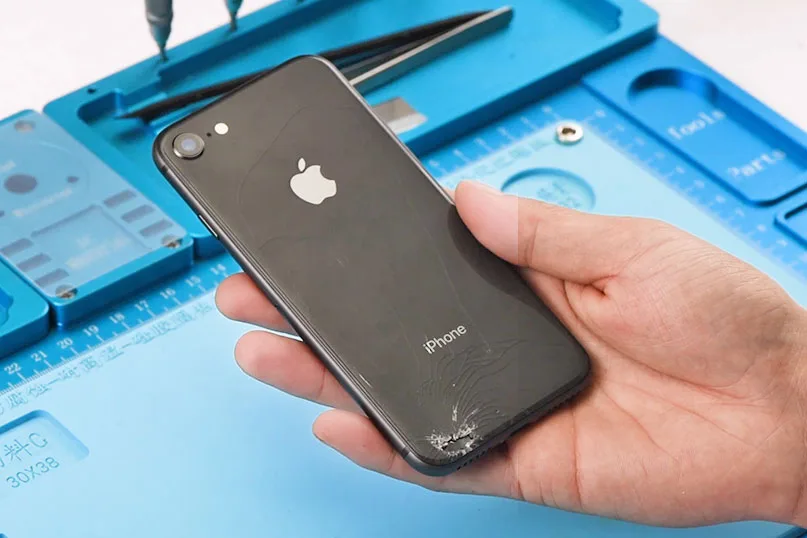
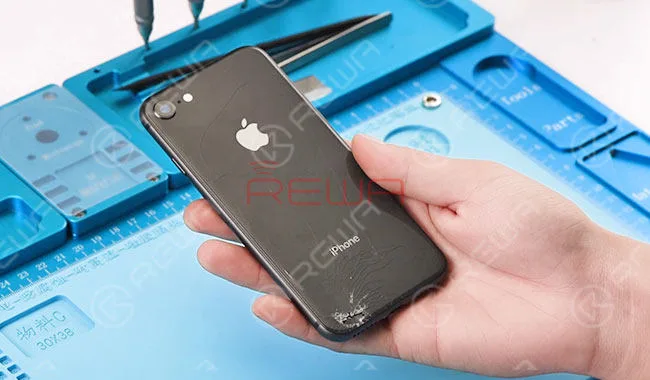
Merece la pena echar un vistazo. En comparación con el iPhone 7, el iPhone 8 y el iPhone X se ven preciosos, pero también los hacen vulnerables, especialmente el cristal trasero.
El frágil cristal trasero lleva tiempo reportándose extremadamente difícil de reparar y puede costarte más de lo esperado debido al nuevo diseño con carga inalámbrica, cámara incrustada y pegamento tenaz.
¿No sabe cómo empezar la reparación?
No te frustres. Después de la guía de reparación de la pantalla OLED del iPhone X sólo vidrio ,REWA aquí despliega una nueva y. solución rápida para la reparación del cristal trasero del iPhone 8 y iPhone X .
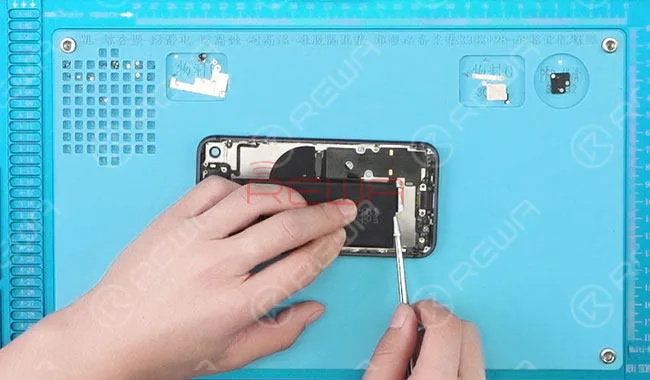
Retira los tornillos, la cámara trasera, la placa lógica, el altavoz y el motor taptic, después saca la batería y desconecta el cable flex del puerto de carga.
Retire la bobina de carga inalámbrica calentándola con Pistola de aire caliente , y desconecte el cable flexible de volumen del interruptor de alimentación.
Desmontar el iPhone 8
Reparación de lunas traseras
Vierta el dispersador adecuado en el recipiente del Limpiador Ultrasónico, luego sumerja el vidrio posterior en el recipiente y coloque la tapa. Ajuste el tiempo del Limpiador Ultrasónico a 30m , y la temperatura a 60℃ .
Transcurridos 30 minutos, saca la parte trasera de cristal.
En caso de que los vasos rotos le hagan daño en las manos, limpie la mesa y tenga cuidado durante el proceso de separación.
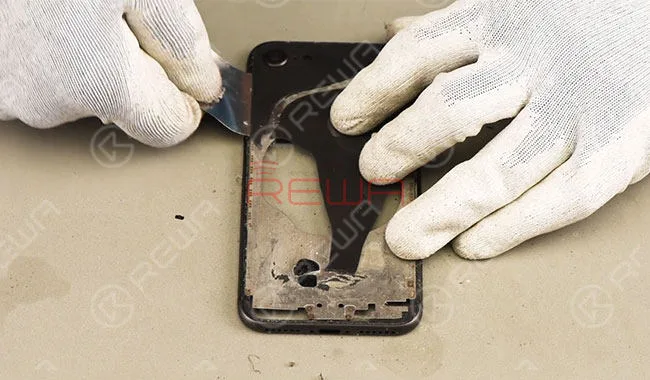
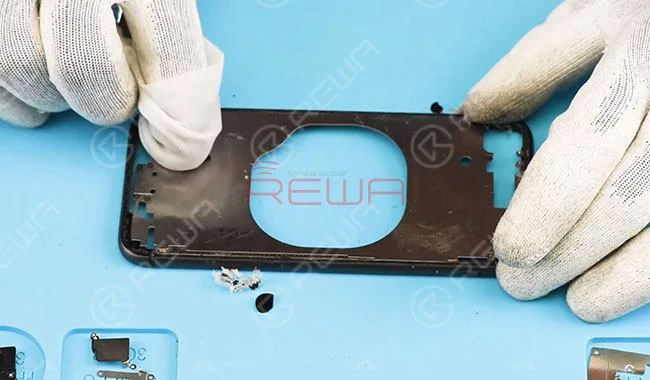
Elimine los restos de pegamento del marco central con una cuchilla de afeitar y límpielo con N-hexano.
Hasta ahora la separación del cristal trasero se ha completado sin lesiones en los laterales.
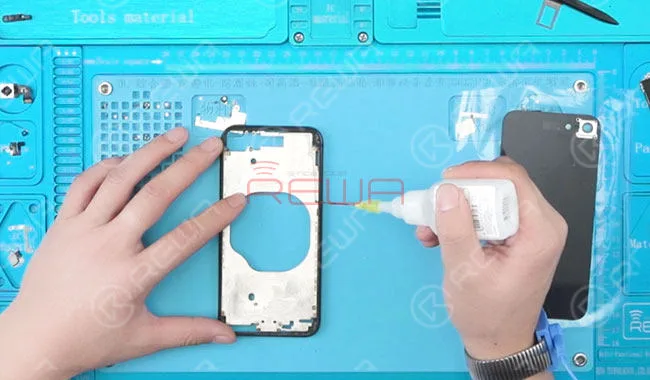
Aplica un poco de pegamento en el marco central y espárcelo uniformemente.
Después de eso, alinee la cámara trasera en la posición correcta, a continuación, aplique presión y fije el cristal trasero al marco central firmemente.
Una vez hecho esto, limpia los restos de pegamento.
Aplique cola en el marco central
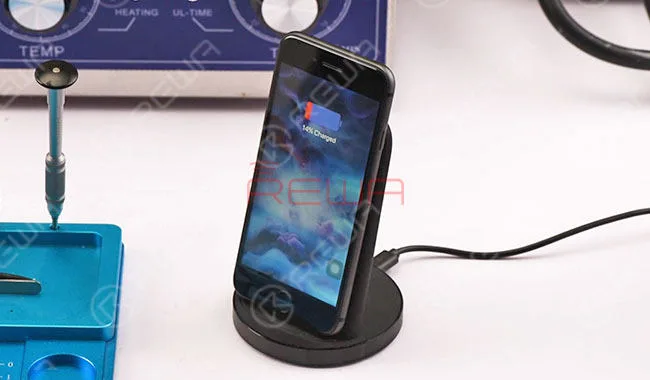
samblar el teléfono y probar, y el teléfono funciona normalmente con carga inalámbrica.
Para más información sobre Reparación del cristal trasero del iPhone 8/X, consulte nuestra guía en vídeo.
Ahora puede pedir las herramientas y piezas utilizadas en este vídeo en nuestra tienda en línea.
Si tiene alguna pregunta sobre estas piezas de repuesto/herramientas o necesita ayuda para realizar su pedido, póngase en contacto con nosotros en sales@rewatechnology.com y le ayudaremos lo antes posible.
iPhone 6 keeps searching for signal? There are many possibilities for the causes of iPhone showing “searching” issue. As soon as they see “Searching”, a lot of people assume the built-in antenna on their iPhone is broken and head straight for the Apple Store. While it’s true that a defective internal antenna can cause the iPhone searching problem, it is by no means the only cause. You may try to figure it out by replacing a new SIM card, restarting the phone or resetting the network.
What if these do not work? This video introduced a logic board solution to fix iPhone 6 constantly searching for network. Let’s check the video for the detailed tutorial.
How To Fix An iPhone That Says Searching
We’ll walk you through the process of troubleshooting an iPhone that says iPhone searching for network, and help you fix the problem, if it can be fixed.
We structure our articles with the simple fixes first, and then we move on to the more complicated fixes if and when they become necessary. If we discover there really is a hardware problem with your iPhone, you can watch our video and we will steps to teach you how to repair your iPhone keeps searching for service.
1.Turn your iPhone off turn on again
This is a simple and necessary steps, when you turn on your iPhone again and then you need to check if your iPhone can search the signal?
2. Update your carrier settings
Sometimes wireless carriers release software updates that change the way your iPhone interacts with the cellular network. Sometimes, these updates fix problems that can cause your iPhone to say “Searching…” all the time.
3. Reset Network Settings
Reset Network Settings restores your iPhone’s cellular data configuration back to factory defaults. It’s an easy way to eliminate the possibility that an accidental change in the Settings app is preventing your iPhone from connecting to the network.
4.Fix Problems With Your SIM Card
All iPhones have a tiny SIM card that wireless carriers use to identify specific iPhones on their network. Your SIM card gives your iPhone your phone number – it’s what tells your carrier you’re you. SIM card problems are a common reason why iPhones say “Searching for service”.
If these steps are not solve your iPhone keeps searching for service, so it means your hardware is broken, you can watch our video to help you solve this question.
With up to 15 steps within the laminating process, iPhone X glass only screen repair is much more complicated than LCD screen of previous iPhone models. In consideration of the $279 official maintenance cost of broken screen and tough supply of China-made screen replacements in the short term, REWA LAB is honored to present you our hard-earned success with iPhone X OLED screen refurbishing.
Plus: For those in need, REWA also provides refurbishing service for models from iPhone 5 to iPhone X. Please feel free to contact us.
iPhone 8 stuck on Apple logo with an unresponsive home button? Why and how? Different from previous versions, there is a built-in hardware detection during booting process for iPhone 8. Once touch ID gets malfunctioned, the phone will hang on Apple logo during startup and won’t turn on. If you are troubled with the same problem that iPhone 8 can not be activated, check this video for the solution!


 English
 Español
 Français
 Deutsch
 Italiano