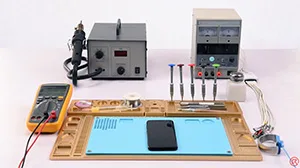
Samsung Galaxy S8 no speaker sound? Usually, Damage of the speaker or malfunction of the speaker circuit can result in this issue. We need to confirm whether the speaker is in a normal status or not first. If yes, then continue to run diode mode measurement of the speaker contacts. And we can relate the fault to audio amplifier IC with the measured value of one contact being abnormal, At last, we complete the repairing work by replacing a new audio amplifier IC.
Tag: samsung
-
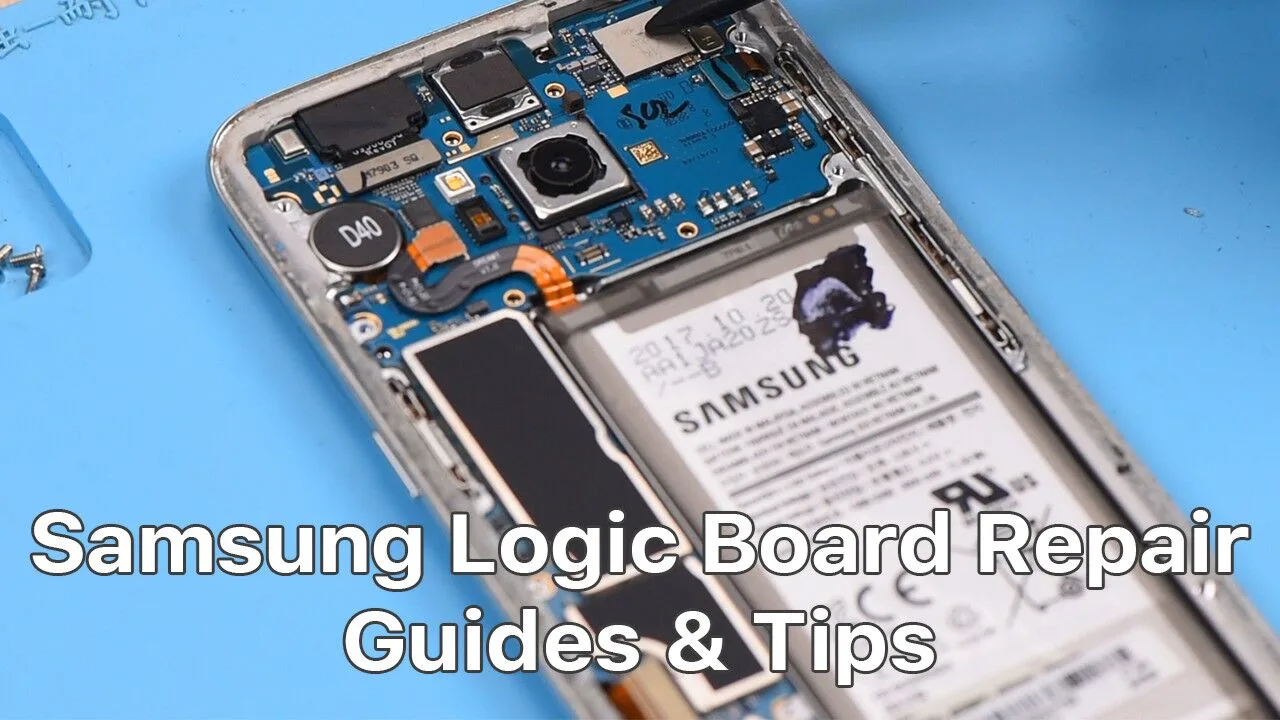
Samsung Logic Board Repair Guides & Tips ( Galaxy S8 Demo )
Today REWA LAB will share tips and tricks for Samsung phone repair by demonstrating basic steps for Samsung Galaxy S8 repair.
When repairing Samsung series, we need to pay special attention to similarities in different Samsung series and choose the right tools to improve repair efficiency.
Get the product in the video:
- 00:49 Integrated Repair Platform: http://bit.ly/3aaZto6
- 03:27 Heating Pad: http://bit.ly/2tXPQbS
- 03:39 Suction Cup: http://bit.ly/2NpeDww
- 03:54 Plastic Card: http://bit.ly/2tVOWwx
- 04:31 Spudger: http://bit.ly/30o4s0w
- 04:54 Phillips Screwdriver: http://bit.ly/2tmqZi3
- 04:57 Steel Straight Tweezer: http://bit.ly/30mgoQ2
-
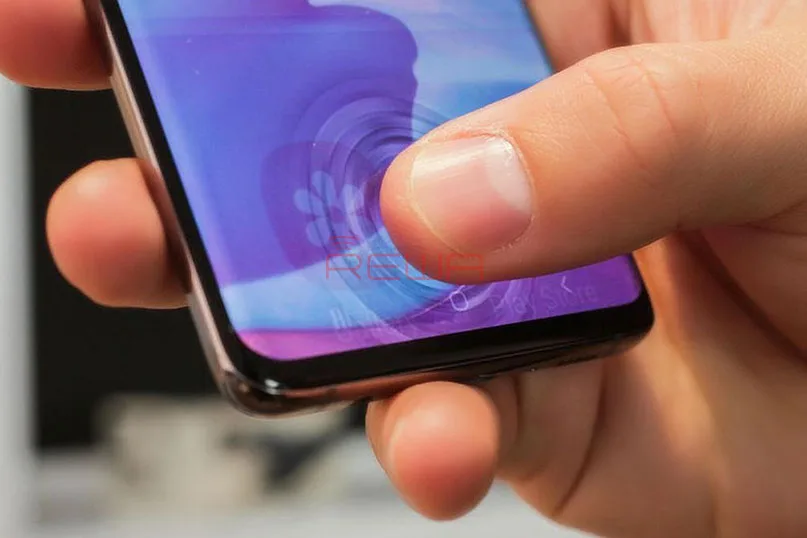
Samsung Intelligent Fingerprint Scan Being Fool Again
Earlier this month, according to The Sun reported that the Samsung Galaxy S10’s in-display fingerprint sensor has a security flaw. Some silicone screen protectors may confuse the ultrasonic fingerprint sensor. If you currently use this kind of covers, please refrain from using it until your device has been updated with a new software patch, according to Samsung’s official statement.
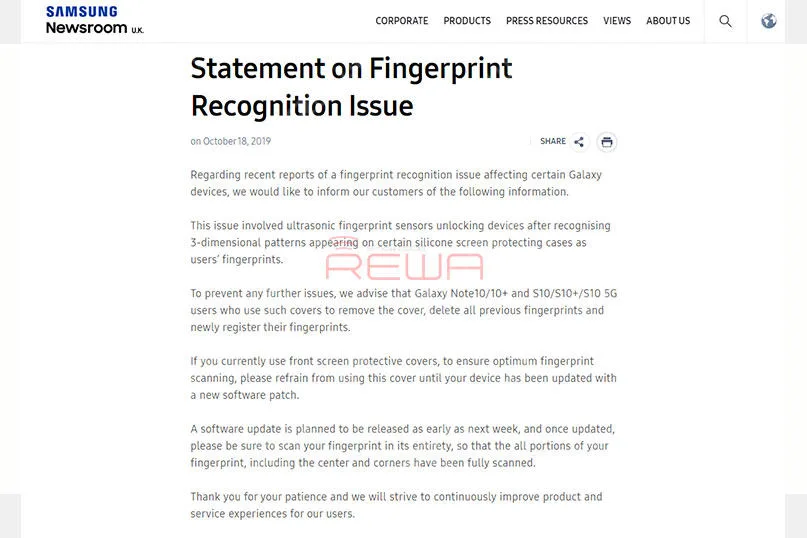
Statement from Samsung
What happened?
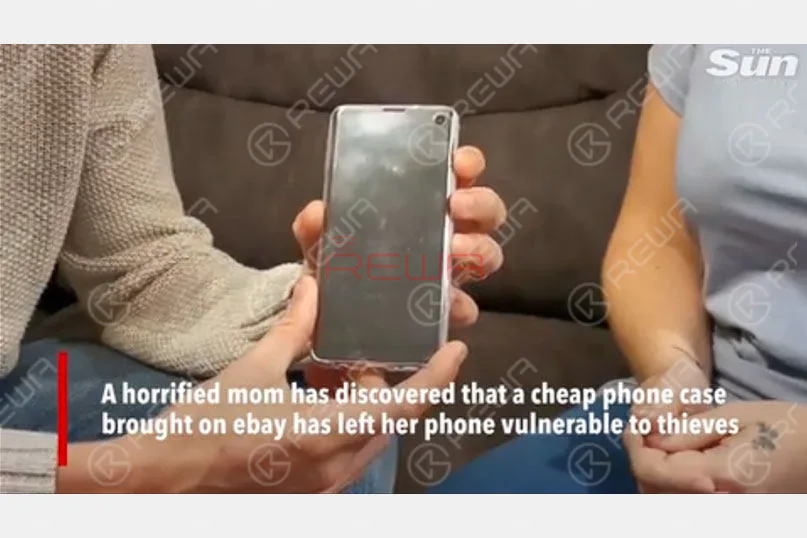
Photo by The Sun
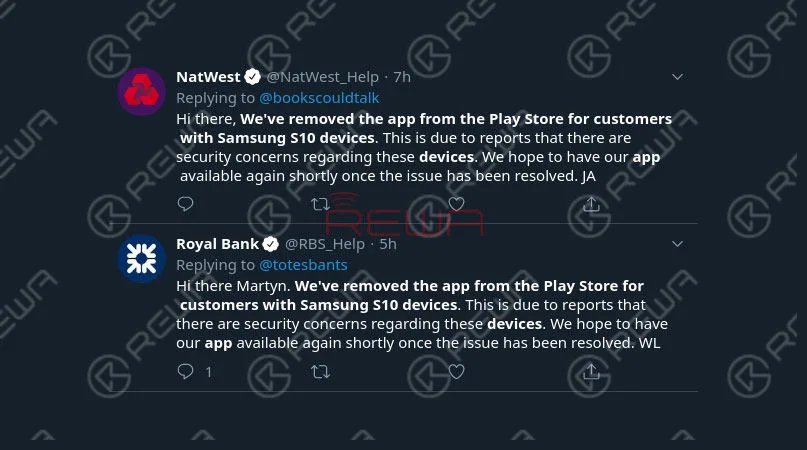
Screenshot from twitter
A British user complained that her Galaxy S10’s fingerprint recognition system got confused after a silicone screen protector was applied. Those fingerprints that have not been recorded can also unlock the phone. What’s worse, they could also log into some private Bank APPs and perform operations. At least three banks operating in the UK have decided to temporarily suspend their mobile banking services for Samsung Galaxy S10 users. These are not the only financial institutions that took steps to protect their customers.
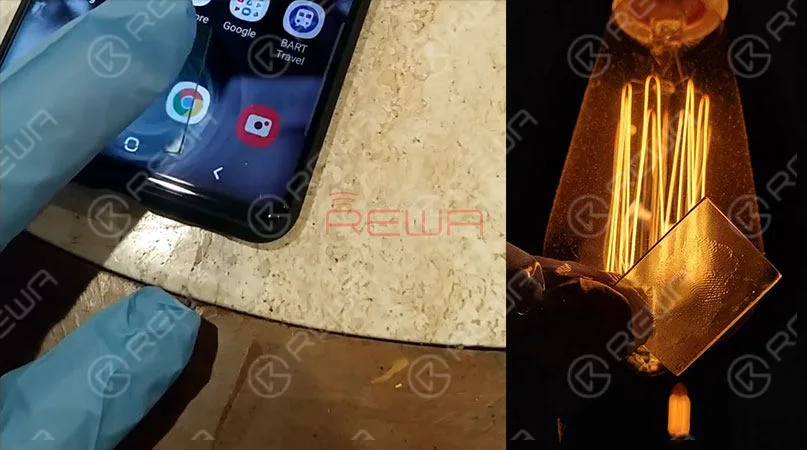
Photo by darkshark
However, this is not the first time that the S10 has had problems with fingerprints. Earlier this year, The Imgur blogger darkshark had successfully fooled the ultrasonic fingerprint sensor with the 3D print of his finger. He took photos of his fingerprints left on the surface of a wine glass and then used Photoshop to clean it up. He finally created a 3D model of his fingerprint patterns using 3DS Max.
The Fingerprint Recognition System Of Samsung
Now, let’s look inside the fingerprint recognition system of Samsung and find out the possible cause of the fingerprint issue mentioned above.
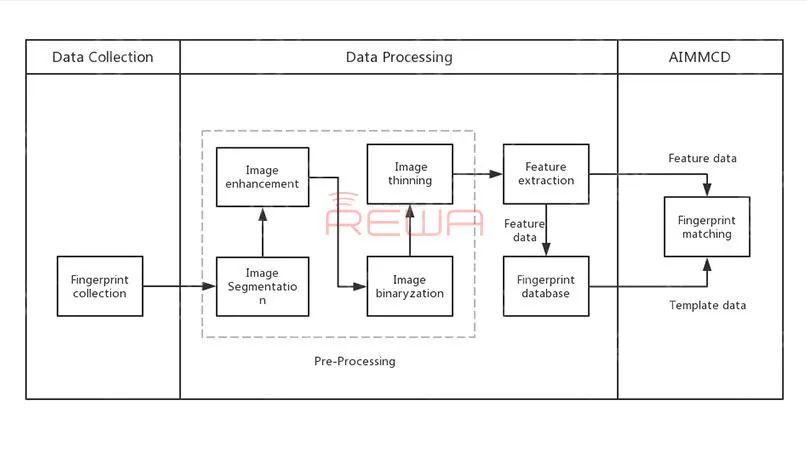
Basic logic of fingerprint sensor
Software protection: feature point extraction algorithm
Currently, most fingerprint identification algorithm is realized by extracting and comparing key feature points, such as the overall structure of fingerprint, local bifurcation points, endpoints, breakpoints and so on. In this case, the ultrasonic fingerprint sensor of Samsung Galaxy S10 may come with a detection bug.
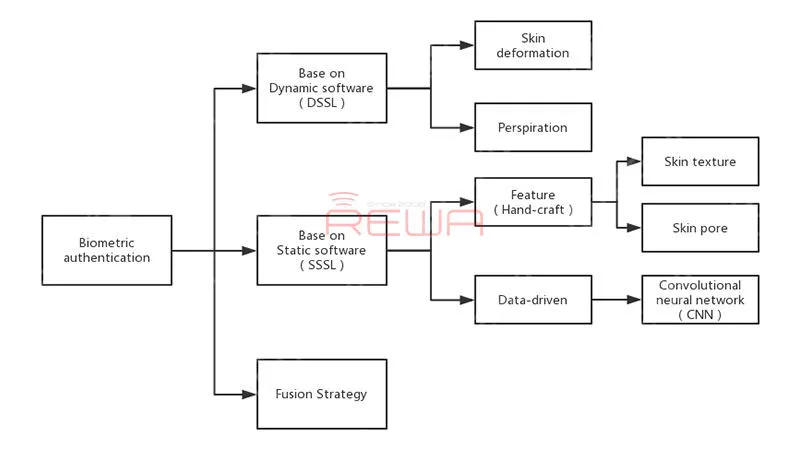
Detection method of biometric authentication
We suspect that the problem is probably related to the “threshold and learning mode setting” of the fingerprint learning algorithm. For the first case mentioned above, the system recorded the texture of silicone screen protector and the textured surface fooled the phone’s biometric authentication system. Nowadays, the fingerprint identification module needs to satisfy more users and it is hard for module to balance the recognition rate and the pass rate. Samsung should make their best effort to strengthen security through continuous improvement and updates to enhance biometric authentication functions.
Hardware protection: trusted computing environment and resource isolation
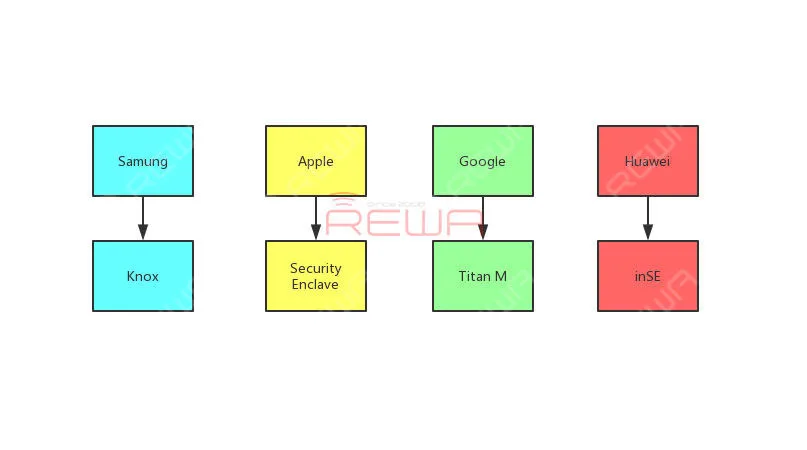
The best way to protect your private information on your phone is to build a trusted computing environment inside it. Each manufacturer has a different strategy for TEE isolation.
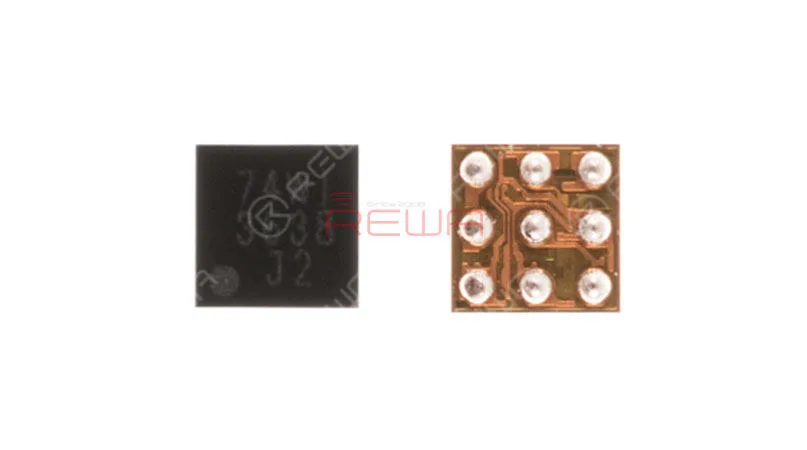
iPhone 8/8 Plus Fingerprint Boost IC Replacement
Since Apple A7, Apple has adopted a self-developed isolation system called Security Enclave. As a separate processor handling biometric information, the Enclave stores encryption keys used to lock down the biometric data. Thus makes it difficult for hackers to decrypt sensitive information without physical access to the device. Compared to Apple, Samsung adopted a completely different design in TEE isolation. The built-in mobile security platform Knox is applied to isolate sensitive data. Between the sensitive data storage and the main system, Samsung designed a fuse. The E-fuse will be set if the phone is booted or a swipe is detected. As thus, Samsung created a trusted computing environment physically.
What about other cell phone manufacturers?
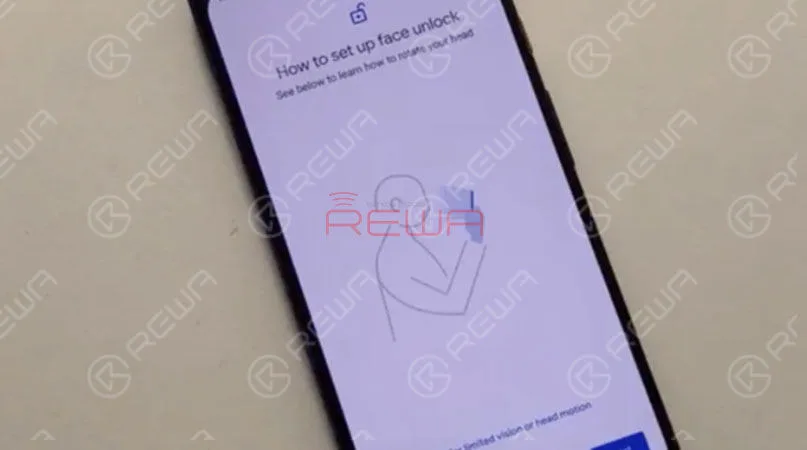
Photo by the INQUIRER
Also in October Google came under fire for its Pixel 4 facial recognition unlock feature, which would unlock your phone, even if your eyes were closed. Google issued a media statement quickly that the glitch will be fixed in a software update that will be delivered in the “coming months.”
-
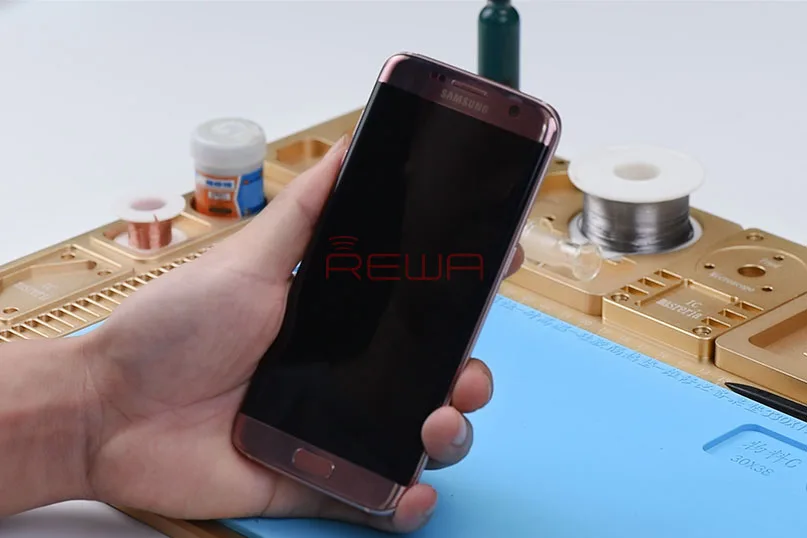
How to Fix Samsung S7 edge Won’t Turn on – Logic Board Solution
“Oh, my Samsung Galaxy S7 Edge won’t turn on!” Yes, we know and understand how annoying it can be when your phone remains frozen at the black screen almost like a dead wood. It is not easy to deal with an unresponsive phone, especially when it does not even turn on no matter how many times you try. However, you are not the only one whose Galaxy S7 edge won’t power on. There are many like you facing a similar fault. Since it is a common problem. You can find and try some basic ways from Google, such as check the power button whether it damage, perform factory reset and etc. Such basic methods we have mentioned in How to Fix Samsung Galaxy S8 Plus Not Charging and How to fix Samsung Galaxy S8 speaker sound not working.
You can take a look. However, there can be various other reasons due to that Samsung Galaxy S7 edge won’t turn on. As for won’t power on accompanied with 50mA-80mA boot current, the first thing we do is to check power supply voltage. If nothing goes wrong, the fault is most likely to be related to CPU. If there is abnormal voltage measured, then check corresponding faulty position on the board. The fault component is finally confirmed as PMIC U7003, our focus today would be to fix this issue. We can fix the issue by replacing with a new PMIC(You can read our another about PMIC Replace Case- iPhone 6 Won’t Turn On Repair – PMIC Grinding and Replacing). Now, follow the instructions given below:
Before Repair Test
Press the Galaxy S7 Edge power button, the phone won’t turn on. Then take out the SIM card tray and logic board.
Fault Analysis
First, we need to confirm whether the boot current is normal, for better measurement, apply tins to the battery connector and solder a length of red supply wire.
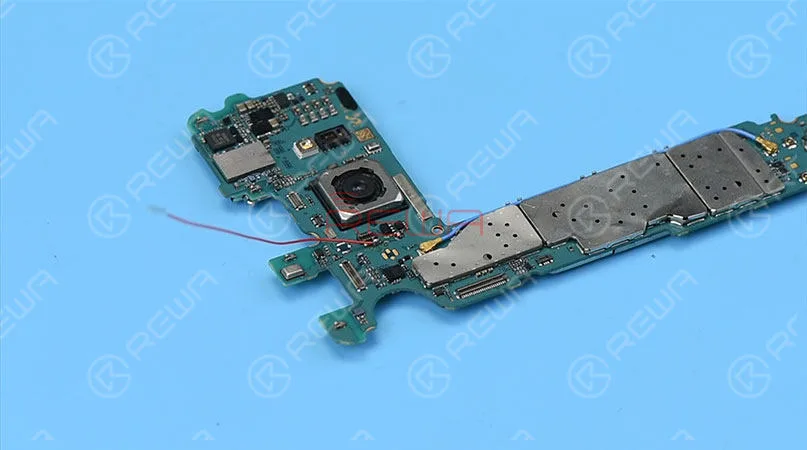
Trigger with tweezers to power on the phone, current reading on the ammeter is 50mA(For 50mA boot current of the phone). The fault is usually related to CPU and main power supply voltage.
Next, let’s measure the voltage outputted from PMIC, measure PP_0V8, PP_0V85, PP_1V8, PP_2V95, PP_1V25, PP_1V15 and PP_0V8
Fault Detection
Disconnect the power supply, remove the shield plate. And then trigger with tweezers to power on the phone, measure L7012, L7011, C7067, C7044, C6040, L7015 and L7004 one by one.
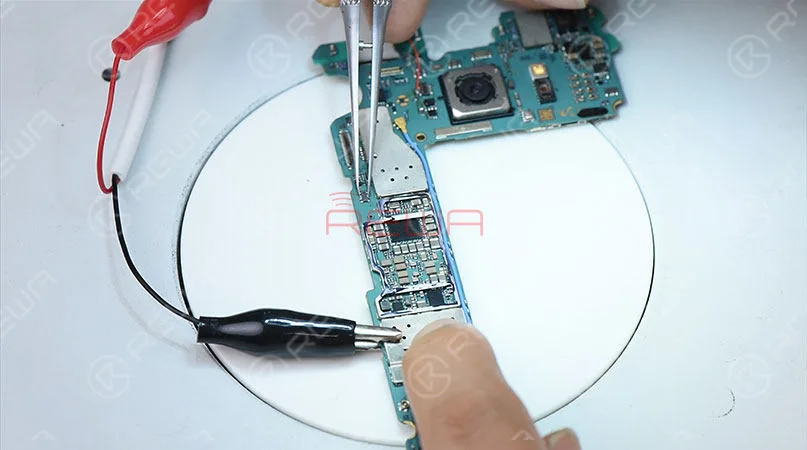
The measured voltage of C7067 is lower than the normal value (Normal value should be about 1.8V).
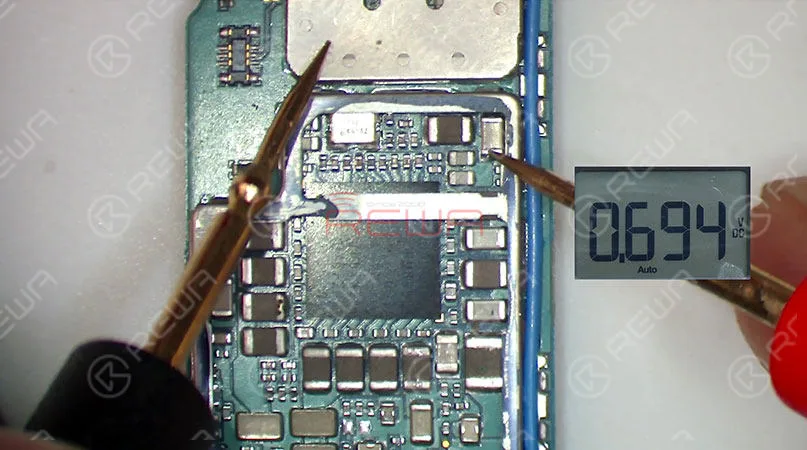
Now, we can confirm now that the fault component is PMIC U7003.
Repair
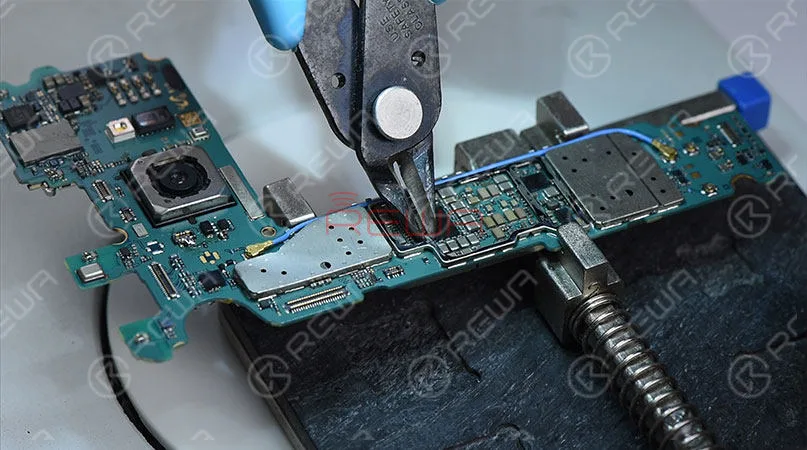
We need to replace a new PMIC. First, remove shield plate on PMIC with Cutting Nipper, then heat up with Hot Air Gun.
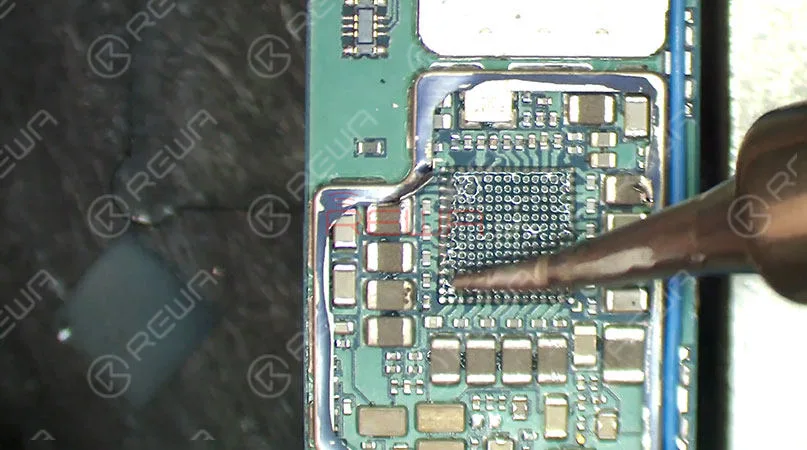
Detach PMIC from the board, apply some Paste Flux to the bonding pad. Remove tins on the pad with Soldering Iron.
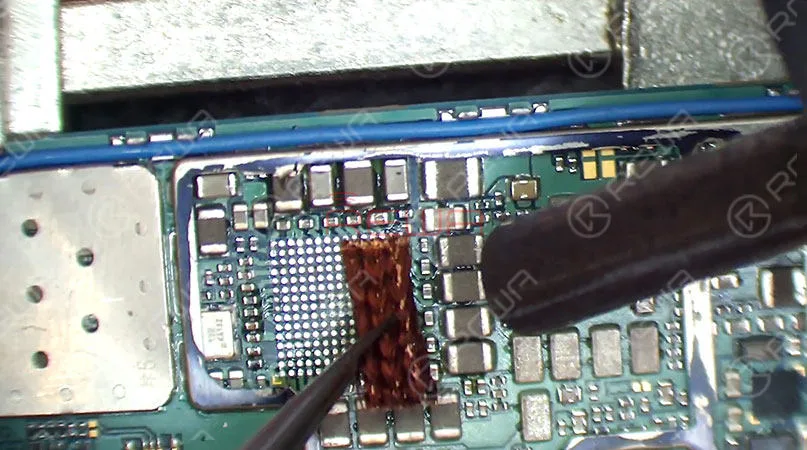
Remove tins thoroughly with rosin soaked Solder Wick, once done, clean with PCB Cleaner.
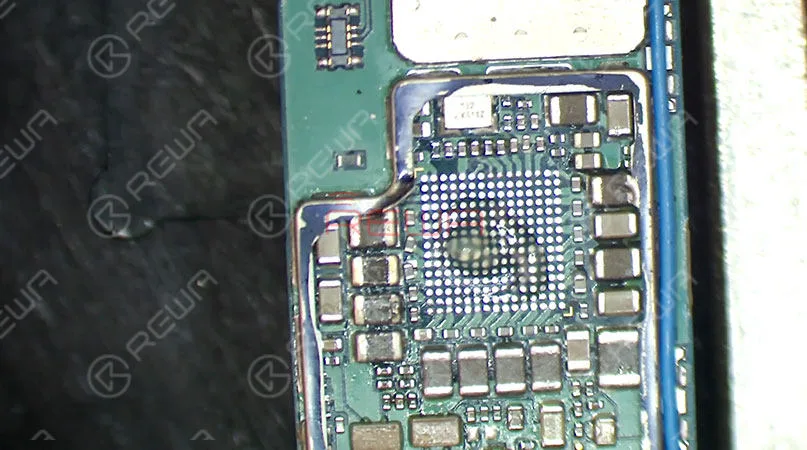
Apply some Paste Flux to the bonding pad, get a new PMIC in position and solder with Hot Air Gun. Once done, wait for the logic board to cool for 5 minutes, at last, clean with PCB Cleaner afterwards.
After Repaired Test
Now we can assemble the phone and test. Get the logic board installed, connect the battery, get the loudspeaker and wireless charging coil installed. Press the power button to power on, the phone turns on normally.
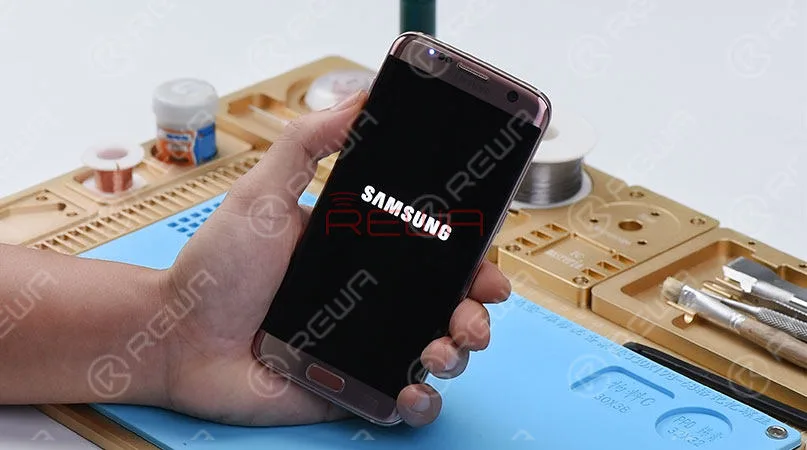
Samsung Galaxy S7 edge won’t turn on issue fixed perfectly. For more details about fix Galaxy S7 edge won’t power on please check our video. Any suggestions or questions please comment below, we will try our best to help you and answer you in time.
Attaching the tools list used in the video, if you are interested in those items please feel free to contact sales@rewatechnology.com for details.
Tools Used
- Pentalobe Screwdriver
- 2.5mm Philip Screwdriver
- 1.5mm Philip Screwdriver Tri-wing Screwdriver
- 4 in 1 Integrated Rework Station
- PCB Holder
- Straight Tweezer
- Paste Flux
- Rosin
- Solder Wick
- Digital Multimeter
- Cutting Nipper
- Anti-static Plastic Pry Bar
- Soft Brush
-
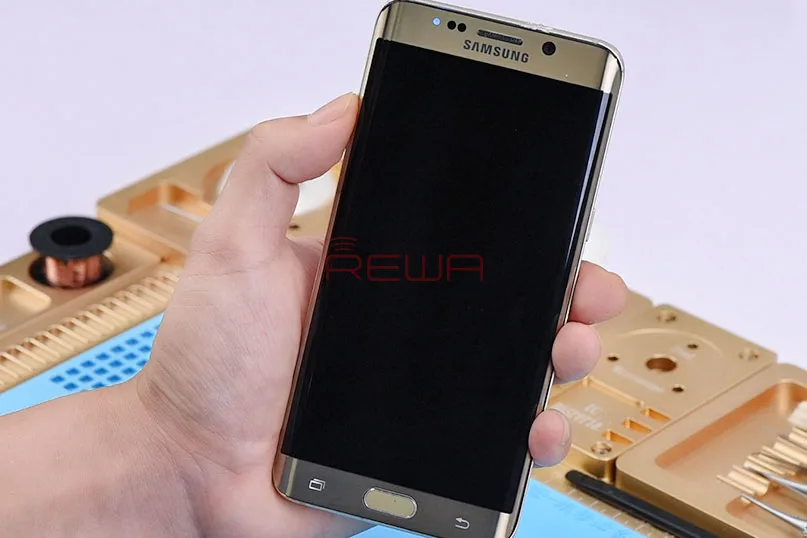
How to Fix Samsung Galaxy S6 Turns On With Black Screen
Did you ever encounter with a black screen after turning on your Samsung Galaxy S6 edge+? After we post iPhone 7 Black Screen Repair Tutorial, there are many readers ask how to fix Samsung Galaxy S6 Edge turns on with black screen. In fact, it’s a common issue on Samsung Series. When you press power button, the phone stuck with black screen. Yet the buttons were lightened up and the LED indicator was pulsing. So we know its just the screen that fails to wake up.
There will several common ways we will try to solve this problem.
- Hold the power button and connect the charging cable
- Boot to recovery mode and wipe cache partition
- Factory Reset your Samsung Galaxy S6 edge+
However, if the screen still stays black, it may relate to the hardware issue. That’s what we are going to share with you.
Disassemble the phone first, and check the logic board. All going well. For Samsung devices, Black screen and other graphics issues are common problems, which are mostly resulted from the damage of OLED relevant inductors. Therefore, our initial judgment – the fault may be related to OLED circuit.
Measure the voltage value of OLED supply with Multimeter. Normal voltage value on C9028 and C9026 means a normal voltage and normal status on OLED supply. Next, measure the diode value on each pin on OLED connector one by one. With no value measured on Pin 25 and Pin 27, we judge there might be an open circuit on relevant circuit related to the two pins. Since PLCD_MIPI_D0_N and PLCD_MIPI_D0_P of CPU are connected with Pin 25 and Pin 27 on OLED connector via Pin 3 and Pin 4 on F9013, our next step is to check whether PLCD_MIPI_D0_N and PLCD_MIPI_D0_P are in normal status. Let’s do it.
1. Removing the shielding cover on F9013.
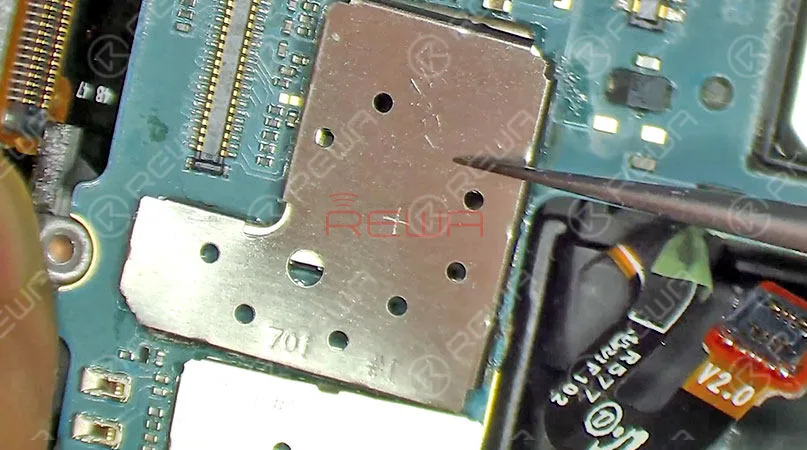
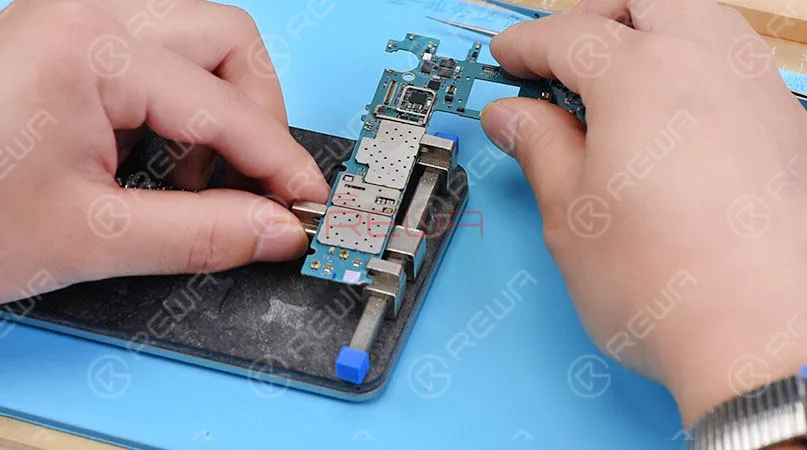
2. Take out the logic board and attach it to PCB Holder for the detachment of F9013.
3. Measure the diode value on Pin 3 and Pin 4 of F9013, which is normal.
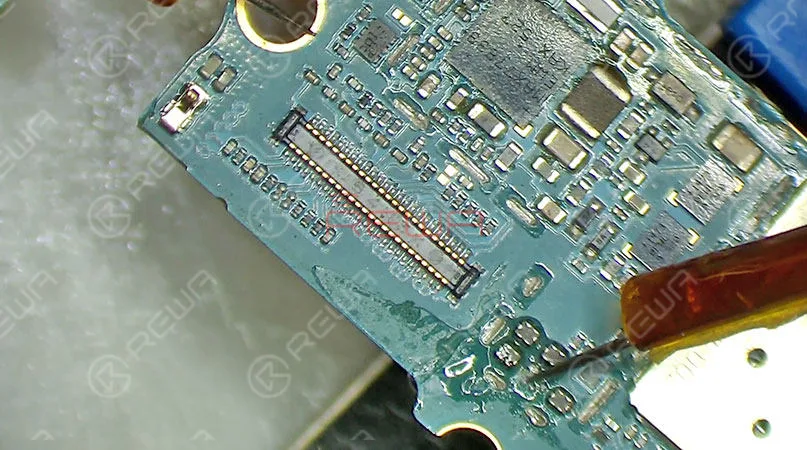
4. Continue to measure the diode value on Pin 25 and Pin 27. Judging by the measured value, circuit from OLED connector to F9013 is in normal status.
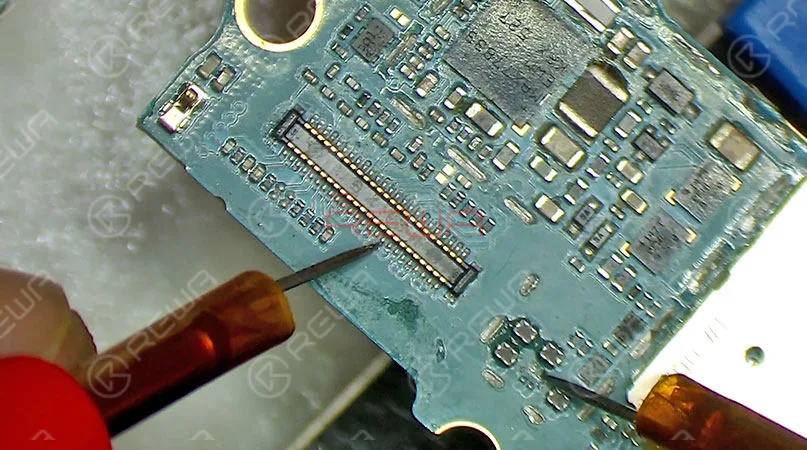
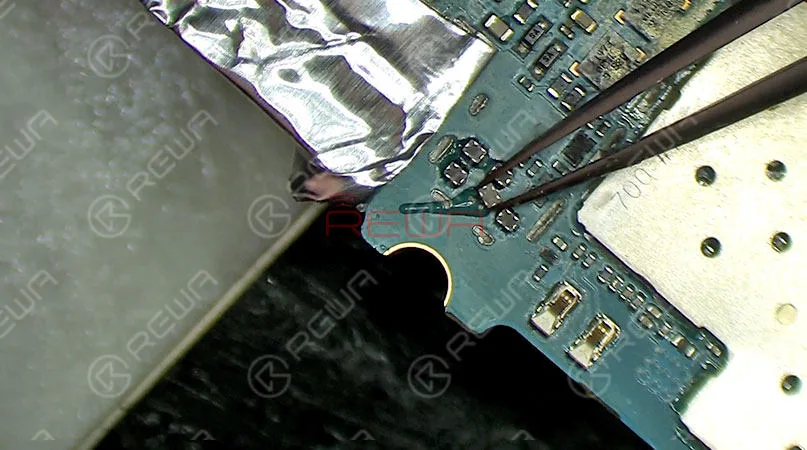
5. So the fault may be related to F9013. and we need to replace with a new F9013. 6. Align to the right place and solder with a new F9013.
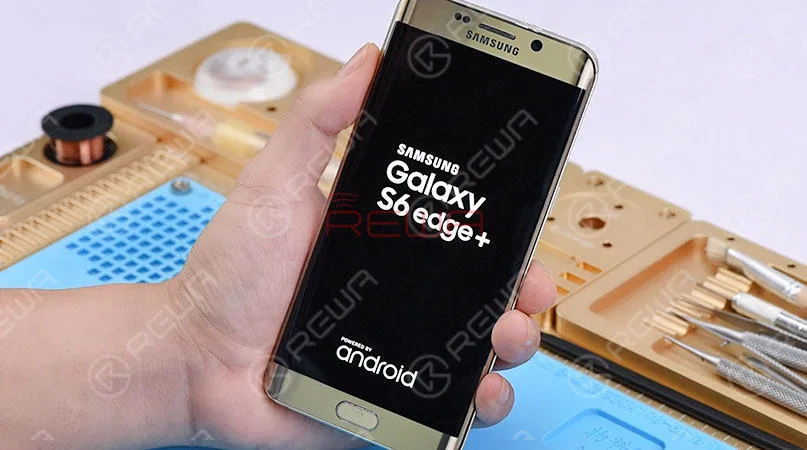
Assemble the phone and test. Press power button to power on. The phone turns on with normal display and normal touch function. Fault cleared.
Hope you can solve your problem with our repairing guide. Any problems or suggestions please leave us a message. We will try to reply you in time.
Click to watch the guide video of Galaxy S6 edge Plus no display issue
If you want to order the tools used in the video please come with following
-
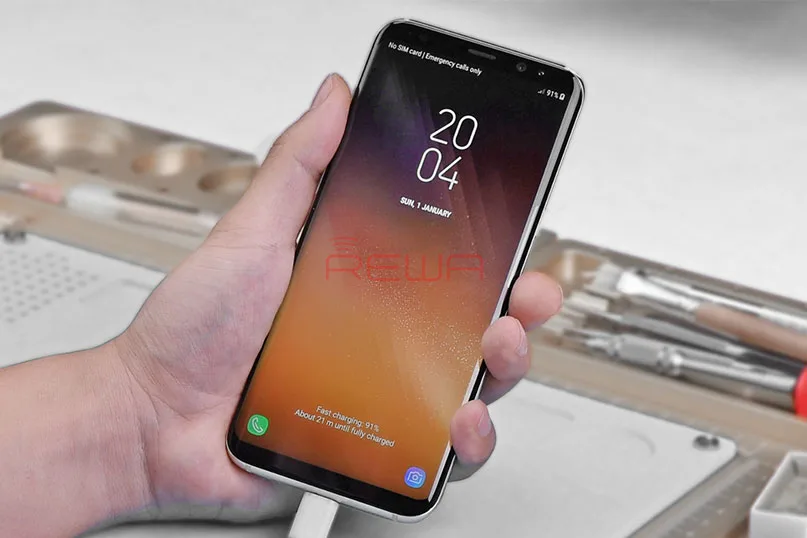
How to Fix Samsung Galaxy S8 Plus Not Charging?
It’s alarming if your phone is not charging.
Because it’s a signal of a device’s hardware trouble, including battery.
However, we can not simply make a hasty generalization with the instances that a cellphone cannot charge.
We need to troubleshooting, meanwhile, and have an idea about what the trouble really is with the cell phone.
In this post, We will teach you how to troubleshoot not charging Samsung Galaxy S8+.
As an owner, you need to take some time to troubleshoot your Galaxy S8+ to check if the problem is only a minor glitch in the gadget?
or hardware issue that needs to replace ICs?
So, here’s what you need to do…
You may also read: How to fix Samsung Galaxy S8 speaker sound not working
1: Make sure you’re using is the unique original charger and USB cable.
It is imperative to charge your phone with its original charger and data cable.
Try to look at the port of the charger.
There may be a few forms of debris, lint or maybe corrosion that hinders the right contact to the connectors. If there’s none, we should do physically check both ends of the cable.
If you can’t find any, and the Galaxy S8+ still has full battery left, try to connect the phone to a laptop, and check if the laptop detects it.
Because if it does, the cable works fine.
And if the Samsung Galaxy S8+ is charging, then it’s a charger problem.
In this case, the only thing that the charger needs to replace and no longer the cellphone.
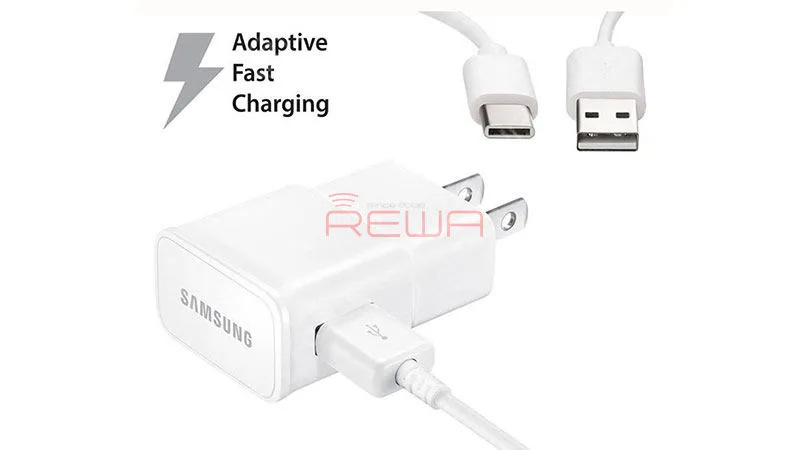
If the phone cannot be detected or won’t charging whilst connected to the computer, then move directly to the next step.
2. Boot in safe mode and attempt charging
You only need to do this if the phone is still powered on and can be rebooted in safe mode.
3. Troubleshooting possibility of a malfunction or gadget crash
This step could be very critical, especially if the Samsung galaxy s8+ has a black screen and won’t respond while the power secretly hit.
When the gadget crashes, the Samsung galaxy s8+ will become unresponsive.
And no matter what you do, it received no reply even to the charger.
The above is the solution for fix Samsung Galaxy S8 Plus not charging, you can try them out.
But it is nothing for your phone, then you need to follow the step to repair – hardware repair.
First, you can click our video to see the whole repair progress.
For this case, Samsung Galaxy S8 Plus won’t charge issue is caused by PMIC, so we need to replace with a new charging PMIC.
Now, We will step-by-step teach you to repair your Samsung Galaxy S8+ not charging with charging PMIC issue.
Step 1. Disconnect the charging cable, and separate the I/O daughterboard and battery from the motherboard. Then remove the rear camera.
Step 2. Attach the motherboard to PCB Holder, stick High-Temperature Adhesive Tape on CPU and connector next to charging PMIC so as to protect them from high-temperature damage.
Step 3. Apply some BGA Paste Flux to charging PMIC, heat with Hot Air Gun at 350℃
Step 4. Detach the charging PMIC from the board, remove tins on the bonding pad with Soldering Iron at 360℃.
Then heat with Hot Air Gun at 360℃ and remove tins thoroughly with resin-soaked Solder Wick.
Once done, clean with PCB Cleaner
Step 5. Apply some BGA Paste Flux to the bonding pad, align the new charging PMIC to the right place(Tips: put it in the right direction).
Solder with Hot Air Gun at 350℃, air gear
2. Once done, clean with PCB Cleaner.
Wait for the logic board to cool for 5 minutes, get the motherboard and I/O daughterboard mounted
Step 6. Plug in the charging cable.
Run voltage measurement of the battery connector.
The measured value is normal.
Now we can assemble the phone and test, press power button to power on.
And then plug in the charging cable.
The phone can be charged normally. Fault cleared.
Warm tips: get the phone full assembled after confirmation of fault clearance
Good luck with your new Samsung Galaxy S8+ device. If you want to get more info on tools used in the video, please check the following.
- Hot Air Gun Rework Station
- Soldering Iron Rework Station
- Integrated Mobile Phone Repair Platform
- Digital Multimeter
- Optical Microscope
- Solder Wick
- Solder Wire
- Rosin Soldering Flux
- Screwdriver
- Straight Tweezer
- Curved Hook Tweezer
- Cutting Nipper
- PCB Holder
We are always open to your problems, questions and suggestions, so feel free to contact us by comment below or directly email to service@rewa.tech.
This is a free service we offer and we won’t charge you a penny for it.
But please note that we receive hundreds of emails every day and it’s impossible for us to respond to every single one of them.
But rest assured we read every message we receive.
For those we’ve helped, please spread the word by sharing our posts with your friends or simply liking our Facebook and Google+ page or following us on Twitter.
-
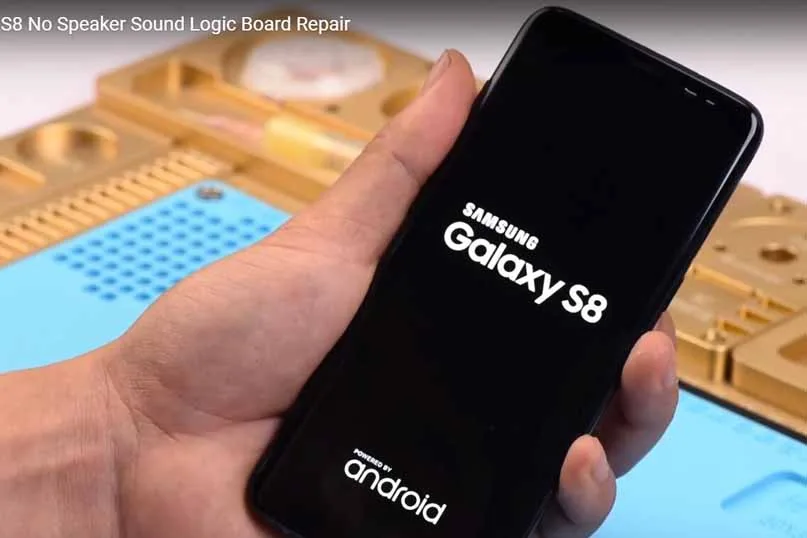
Troubleshooting Samsung Galaxy S8 Speaker Sound
After we post Samsung Galaxy S7 edge Glass Screen Replacement Guide, I often heard many people said their Samsung Galaxy S8 no speaker sound. So we released this guide to solve this problem.
When your Samsung Galaxy S8 or Galaxy S8 Plus no speaker sound or audio, it will be a frustrating issue, your smartphone will become an electronic reader.
So what should you do? First, you need to know what happened on your phone, there are also three common problems such as your Samsung Galaxy rings but speaker won’t work for other applications; you might not hear any sound with music, apps as well as calls or the Samsung Galaxy S8 gets stuck in the headphone mode.
So how to fix No Sound Or Speaker on Samsung Galaxy S8?
Follow the steps below one at a time and you should be able to fix the issue with your phone.
1. Your Samsung Galaxy S8 might have the Silent/Vibrate mode enabled.
This is a funny thing when you are anxious about your S8 no speak sound.
When you found your Samsung Galaxy S8 audio not working, the first step you need check your volume case.
You can check this by using the drop-down menu using your fingers to slide down the screen from the top.
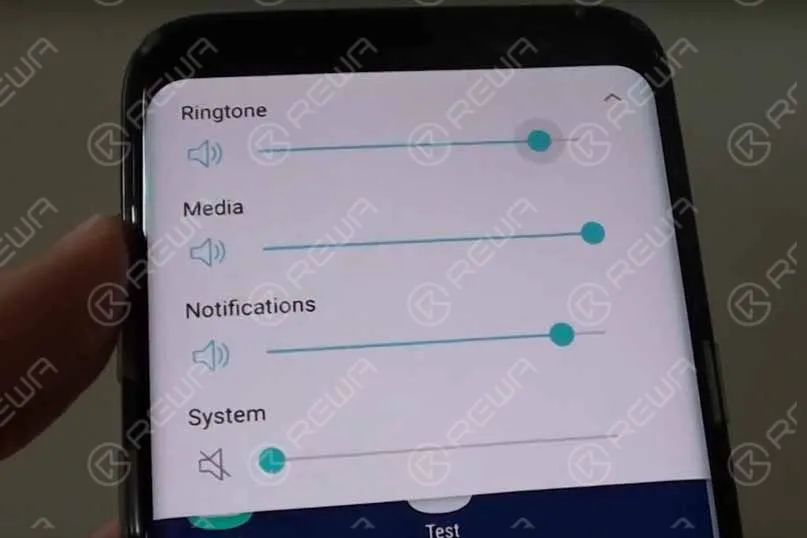
Press the volume key and when the volume slider appears on-screen, tap on the small down arrow at the end of the slider to see all the volume controls for Media, Ringtone, Notifications and System.
Go ahead and turn all the sound settings up, turn it to Loud Mode.
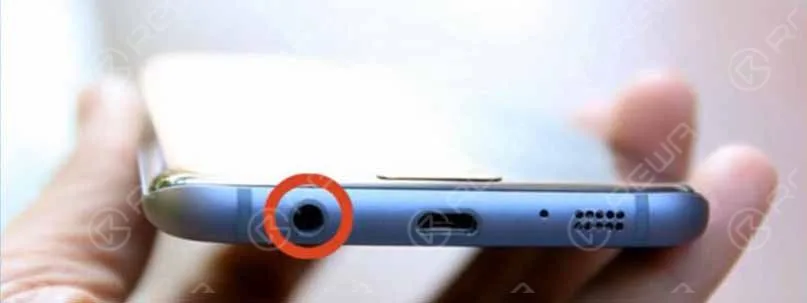
2. The headphone jack may be blocked
If the step 1 can’t solve this question, the headphone jack may be blocked, you can clean your headphone jack and speaker grill to make sure there is no lint, dust and dirt which can prevent you from getting any sound.
Any dust, dirt or grime blocking the charging port can result in a poor connection which might eventually lead to sound and charging issues.
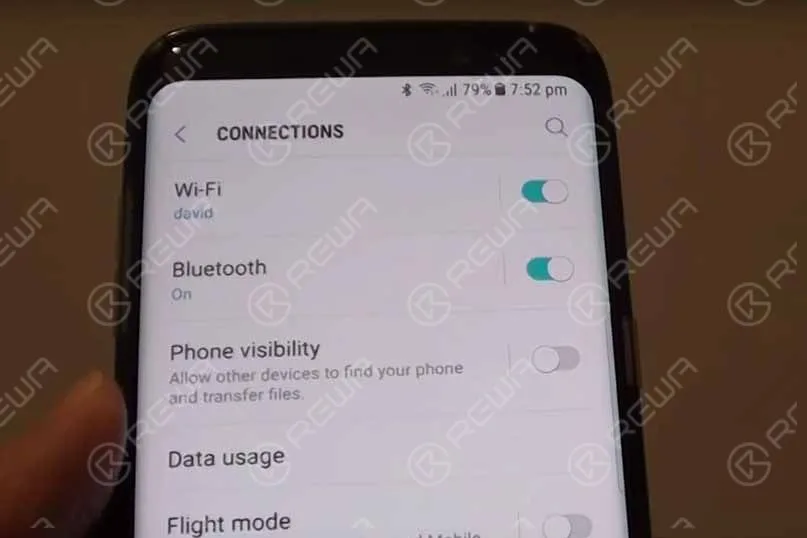
3. Close the Bluetooth
If your Galaxy S8 smartphone to other devices via Bluetooth.
Ghost connections still remain even after aborting a Bluetooth connection.
These ghost connection sound issues when you try to play back a sound file.
You can fix this issue by simply turning off the Bluetooth toggle from the Bluetooth settings.
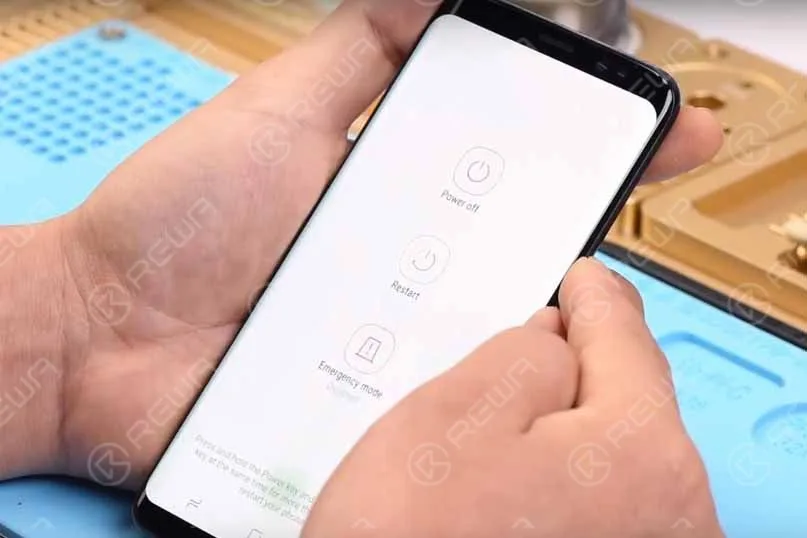
4. Restart your phone
Use the power button options to restart your Samsung Galaxy S8 or Galaxy S8 Plus.
Select the option to restart the device which should hopefully get rid of any glitches that are resulting in the sound issues.
5. Software update
Check to ensure that you have the latest software update on your Galaxy smartphone.
You can do this by following the directions below;
Settings > About device > Software update > Check for updates.
If there is a new update, download it.
Different carriers release updates at different times.
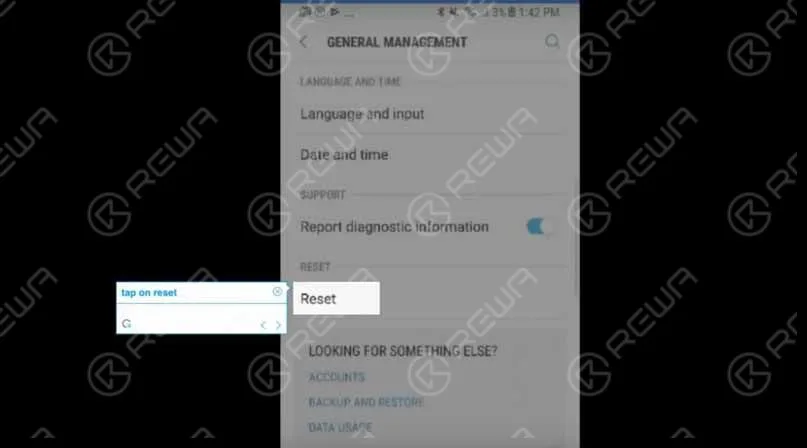
6. Factory reset
If all else fails backup your phone and do a reset.
Go to settings, General management, Reset and then factory data reset.
Factory reset is the last option that can resolve all kind of issue including the S8 sound problems.
So head towards Settings > Backup & reset> Factory data reset > Erase all data.
Wait for few seconds as this will take a few minutes to erase everything from the device after which you are required to set up your Galaxy S8 from scratch.
7. Turn on ‘Prevent USB audio routing’
Enable the developer option in your Galaxy S8 by going to Settings> About device and tap the build number seven times.
When the developer option is enabled, head to Developer option and scroll down to get the Media option.
There you will notice an option ‘Prevent USB audio routing’.
Turn this option on by toggling the switch.
This method has worked for many.
So, you too can try this out if it becomes helpful for you to solve the audio issue.
8. Boot in safe mode
Turn off the device first
Next, press Power button for few seconds till you notice Samsung logo on the screen.
Release the power key then and hold down the Volume down button till the phone completes restarting and safe mode appears at the bottom left corner of the screen.
If the audio issue is not noticed in safe mode then a third party app is the main culprit.
Uninstall third-party apps on by one until the problem is solved.
Our suggestion is to start with the apps you installed recently, right before the issue occurred.
So, these are the methods to resolve the Samsung Galaxy S8 audio issues.
You can try them out, but if nothing works, the possible situation is that your speaker is broken in which case you will need to have it changed or replaced.
You need to read the next solution:
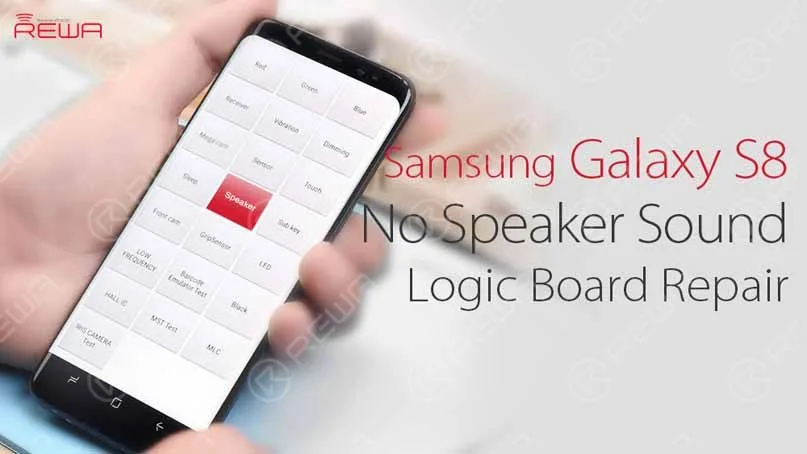
Samsung Galaxy S8 No Speaker Sound Logic Board Repair
Usually, Damage of the speaker or malfunction of the speaker circuit can result in this issue.
We need to confirm whether the speaker is in a normal status or not first.
If yes, then continue to run diode mode measurement of the speaker contacts.
And we can relate the fault to audio amplifier IC with the measured value of one contact being abnormal, At last, we complete the repairing work by replacing a new audio amplifier IC.
Next watch our video guide:
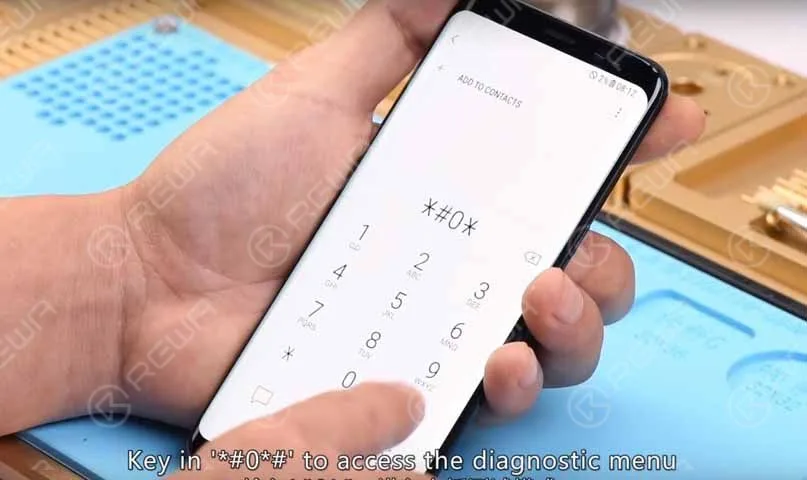
When we get a No Speaker Sound Samsung Galaxy S8, we need to check it first. Turn on the phone and open the Dialer app, key in ‘*#0*#’ to access the diagnostic menu, and tap on the ‘Speaker’ button, we found there is no audio output of the phone. Now we are sure the Samsung Galaxy S8 no speak sound, so we need do the next steps.
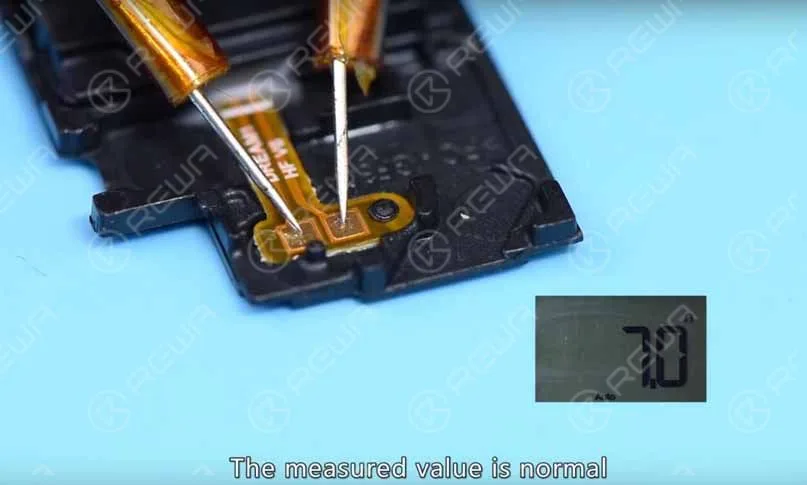
Step 1: Check if the speaker is in a normal status; disassemble the phone and take out the speaker, measure resistance of the speaker, we found the measured value is normal, So the fault might be related to the relevant circuit of the speaker;
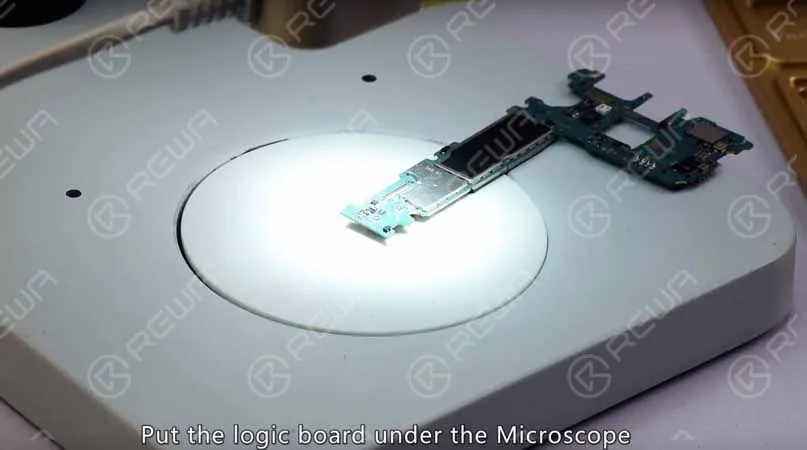
Step 2: Take out the logic board, put the logic board under the Microscope, check if speaker contacts and components around have been damaged or loosed. The result shows all going well;
Step 3: Switch the Multimeter to diode mode, measure two contacts of the speaker,
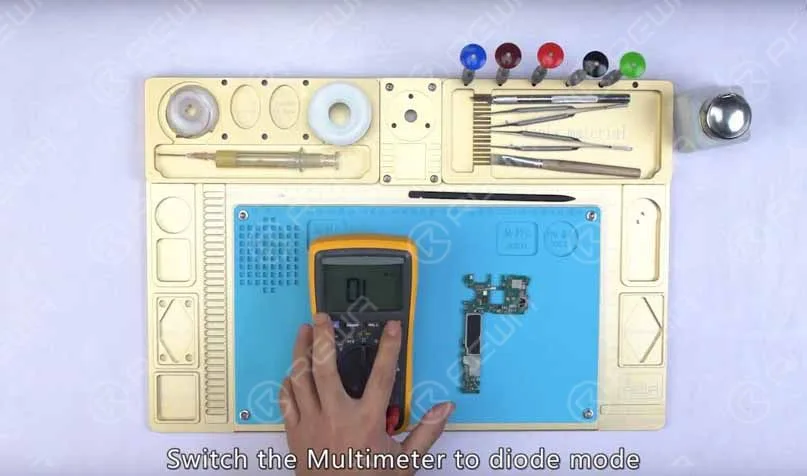
The measured value of one contact is 502, which is abnormal The other contact 802, which is normal Since the two contacts are connected with audio amplifier IC via inductor
Step 4:
Our next move is to check the audio amplifier IC
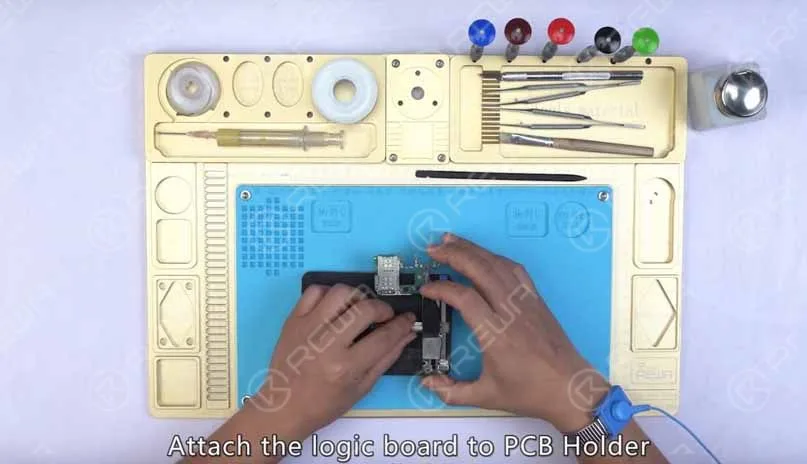
Attach the logic board to PCB Holder, apply some BGA Paste Flux to the audio amplifier IC, heat with Hot Air Gun at 330℃, air gear2;
and detach the audio amplifier IC from the logic board, then clean bonding pad with rosin wrapped Solder Wick.
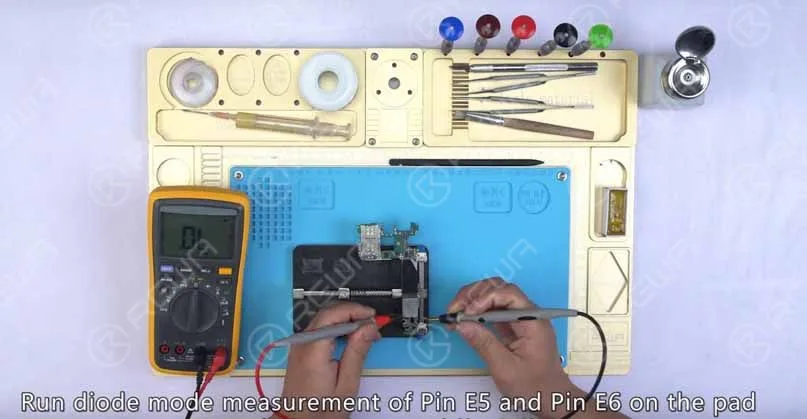
Once done, clean with PCB Cleaner, run diode mode measurement of Pin E5 and Pin E6 on the pad, check whether the internal circuit has been short-circuited.
Result: No short-circuited condition
We can confirm now that the fault is related to audio amplifier IC, and we need to replace with a new IC.
Step 5: Replace with a new IC.( watch the video to get detail )
Apply some BGA Paste Flux to the bonding pad
Align the new IC to the right place
Solder with Hot Air Gun at 330℃
Once done, clean with PCB Cleaner
Step 6:
Run diode mode measurement of the two speaker contacts, the measured value is normal, assemble the phone.
Test:
Turn on the phone and open the Dialer app, key in ‘*#0*#’ to access the diagnostic menu, tap on the ‘Speaker’ button, and we can find the audio output of the phone is back to normal.
For Samsung spare parts, you can visit REWA online shop.
For cell phone repair videos, please visit REWA YouTube Channel.
And for those who wanna learn more about cell phone repair, visit REWA Academy.
REWA has dedicated itself to the cell phone repair industry for over a decade.
The extensive experience and acute market insight allow us to deal with problems related to our customers’ repair business effectively.
-
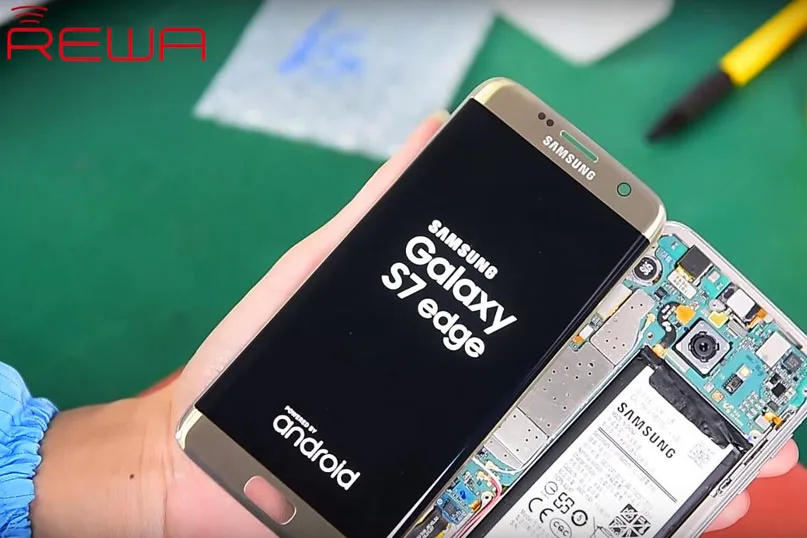
Samsung Galaxy S7 edge Glass Screen Replacement Guide
Among popular smartphone screens, OLED is different from LCD, the well-known representative OLED is Samsung SUPER AMOLED. It is with brilliant sharp colors, but it seems so fragile as you accidentally drop your phone on the ground, you will probably get a shattered screen.
To fix this headache Samsung Galaxy glass replacement, it is very difficult even for repair stores. Refer to iFixit guide, Samsung Galaxy S7 edge Repairability Score is 3 out of 10 (10 is easiest to repair). Because the S7 edge phone and screen use tons of adhesive to attach the screen, glass lens and the frame, meaning when anyone breaks one of them all three need to be replaced. Replacing the glass only is a big challenge even for professionals.
Today, REWA Lab is bringing the success to the curved OLED Glass only repair, aiming to make the repairing of the cracked screen clear and easier for the professional repairman. Below are the detailed instructions for Samsung Galaxy S7 edge screen repair.
Cracked Screen Testing
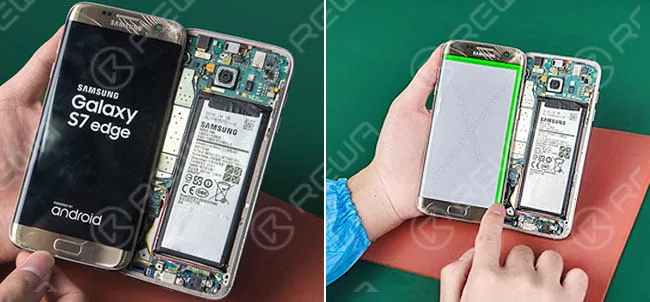
Make sure the display and touch functions both work well on the Samsung Galaxy S7 edge glass-cracked screen.
Frame Separating
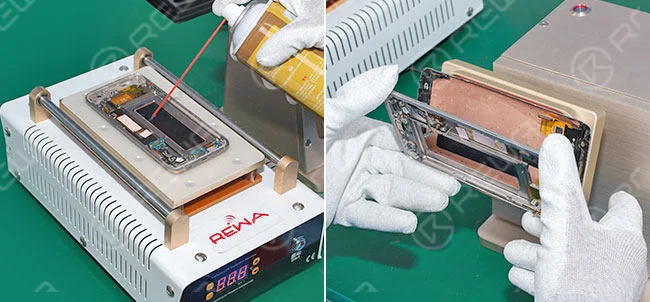
Firstly, we need to remove the Samsung Galaxy S7 edge screen and the case from the middle frame of the phone. Use Pry Piece, 530 cleaner, and Heat Platform to separate the LCD and frame preliminarily, then separate it completely with Frame Separator.
OLED Separating
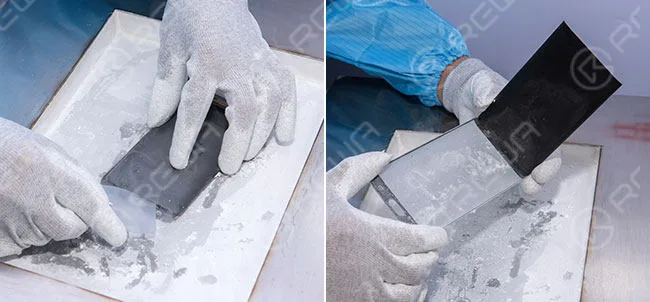
Samsung Super AMOLED screen separating is different from iPhone screen repair, here we use Frozen Separator to disable the glue and a plastic Pry Piece to help. Put screen into Frozen Separator, freezing 30s, then separate the OLED from the glass.
Glue Removing
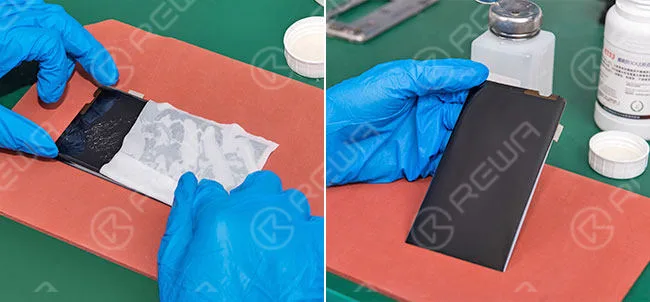
With the help of 8333 removers and N-hexane, clean the glue residue on the OLED.
OCA Laminating
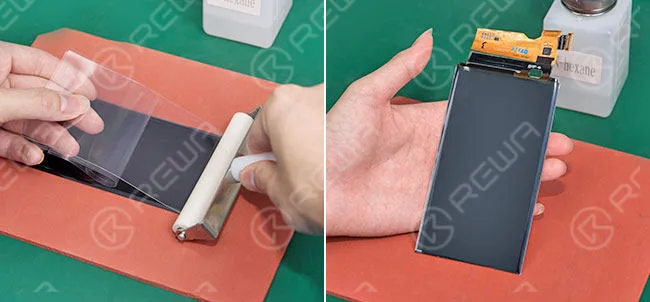
Use a Manual OCA Film Laminating Roller to laminate OCA sheet onto OLED.
Bubble Removing
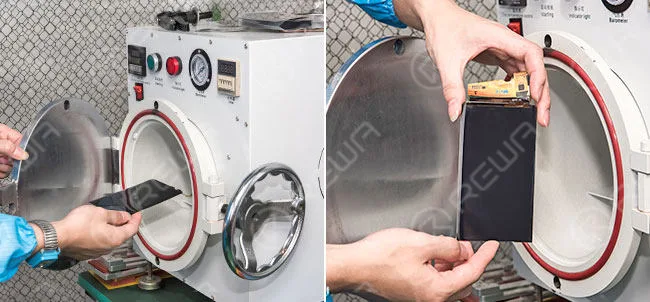
Put it into Bubble Removing Machine for 15 minutes. Make sure the OCA is bubble free on OLED.
Glass Laminating
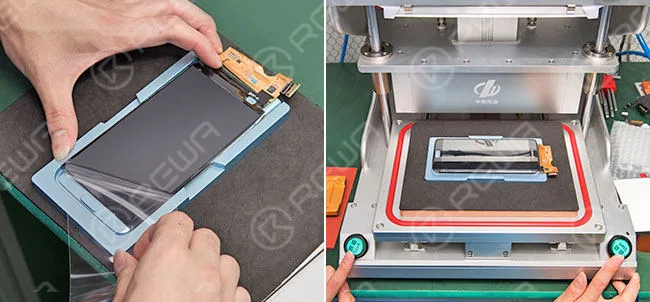
Align the front glass with OLED, then laminate the glass and OLED with help of Vacuum Glass Laminating Machine.
Bubble Removing
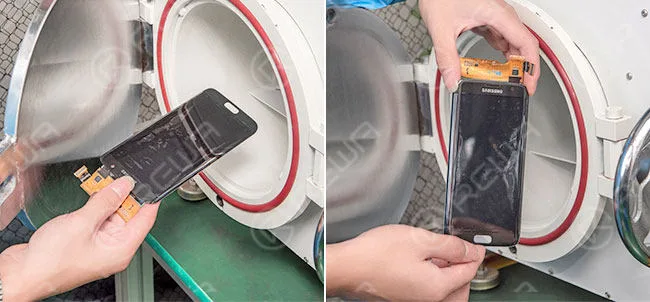
Put it into Bubble Removing Machine again for 15 minutes. Make it bubble free after glass laminated.
Repaired Screen Testing
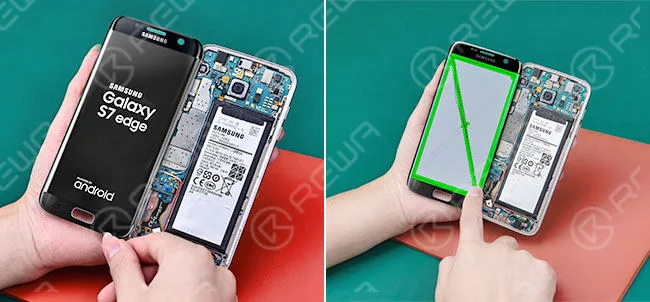
Make a complete test of the repaired screen display performance, touch functions, all testings are good.
Conclusion
This post aims to provide very detailed instructions Glass screen only replacement of Samsung Galaxy S7 edge. Hopefully, it could be useful to repair shop professionals who occupy professional tools and skills. Meanwhile, REWA Lab provides the screen repair services as well as the repair training for your business and interests. By the way, we have released Samsung Galaxy S8 speaker sound not working repair guide, if you have similar trouble, you can have a check.
Watch the detailed guide video here
Necessary Parts and Tools
- Electronic Heating Platform
- Bezel Disassemble Machin
- Back Cover Separator
- Vacuum Glass Laminating Machine
- Bubble Removing Autoclave
- Anti-static Pry Bar
- 8333 OCA Adhesive Remover
- Anti-static Glass Wiper
- S7 edge OCA Glue
- Manual OCA Film Laminating Roller
- S7 edge Glass Lens
- S7 edge LCD Screen Laminating and Positioning Alignment Mold
- Rubber Mat for Laminator Machine
-
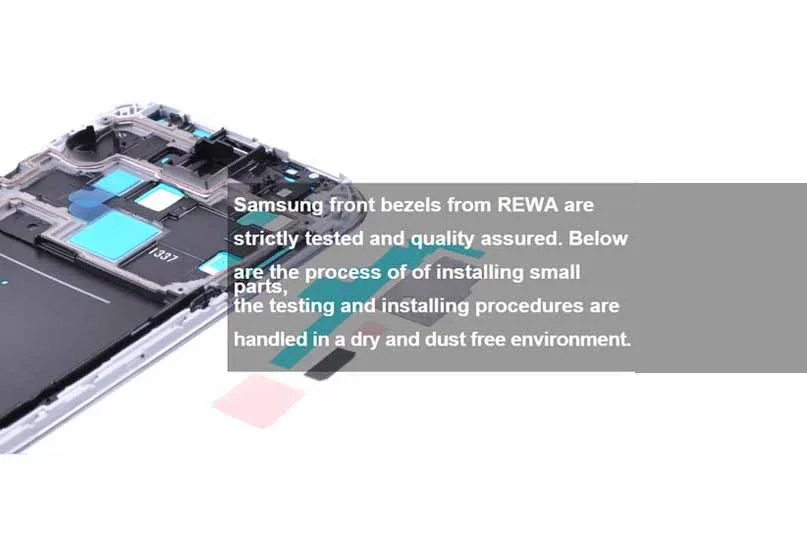
Step-by-Step Guide to Small Parts Installation on Samsung Front Bezel
For many DIY enthusiasts, the thrill of disassembling and repairing cell phones goes beyond just replacing screens or malfunctioning components like ear speakers and cameras. But one often-overlooked aspect of these repairs is restoring the small parts to their original condition. Ensuring that these components are reinstalled correctly is crucial for maintaining the device’s functionality and longevity. In this guide, we’ll walk you through the professional process of installing small parts onto a Samsung front cover housing. Remember, all testing and installation should be performed in a dry, dust-free environment to avoid contamination.
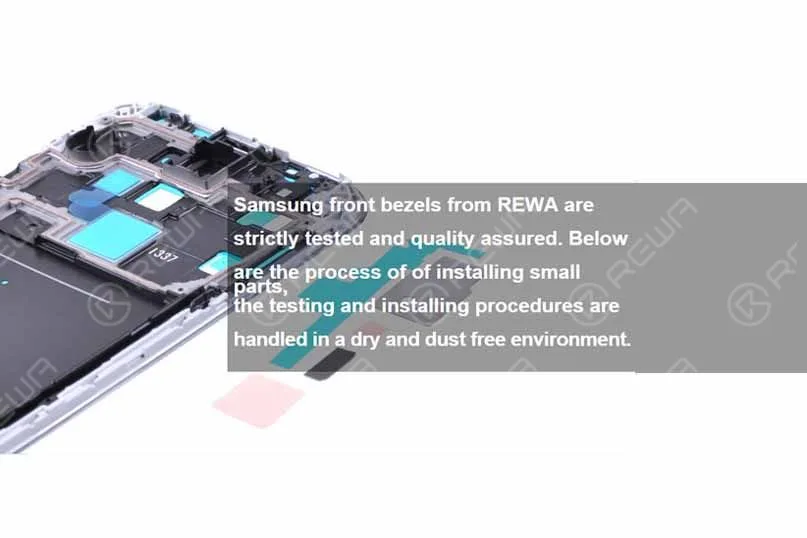
Tools Needed
- Anti-static Rubber Finger Cots
- Anti-static Plastic Tip Tweezers (PS)-ESD259A
Small Parts Included
- Signal Light Plug
- Small Sponge
- Small Heat Sink
- Big Heat Sink
- Heat Sink Film
- Charging Port Adhesive
- Camera Plate
- Thermal Emission Paster
- Ear Speaker Mesh
- Front Bezel Adhesive
All these and more repair parts are available on our website REWA Shop
Operation Procedures
1: Install the Signal Light Plug
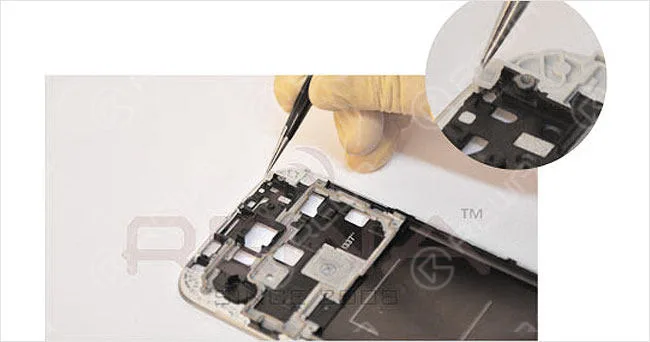
Place the Signal Light Plug on the top right corner of the cell phone’s front frame, on the rear side of the LCD screen.
2: Add the Small Sponge
Fill the top right corner of the front plate with the Small Sponge, ensuring it fits snugly.
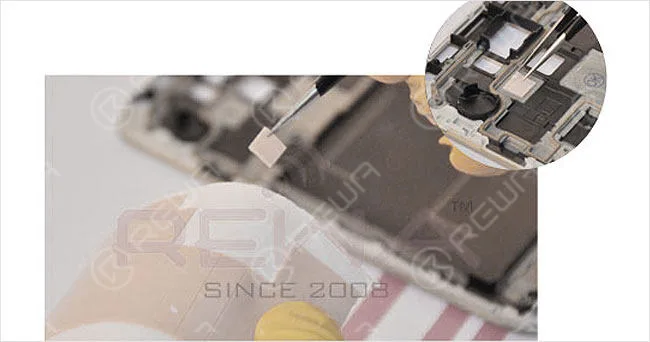
3: Install the Small Heat Sink
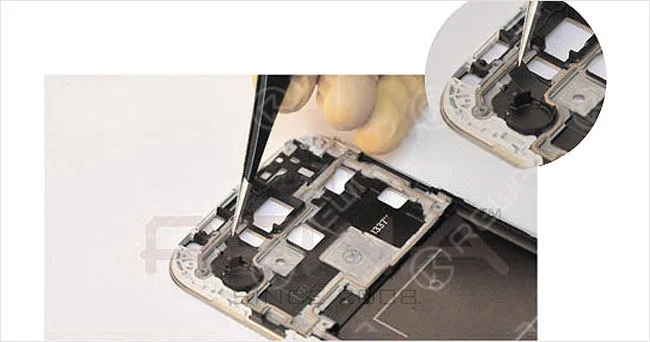
Position the Small Heat Sink at its designated location. The heat sink is essential for conducting and radiating heat from electrical components.
4: Install the Big Heat Sink
Similarly, install the Big Heat Sink in the corresponding location, ensuring it aligns perfectly.
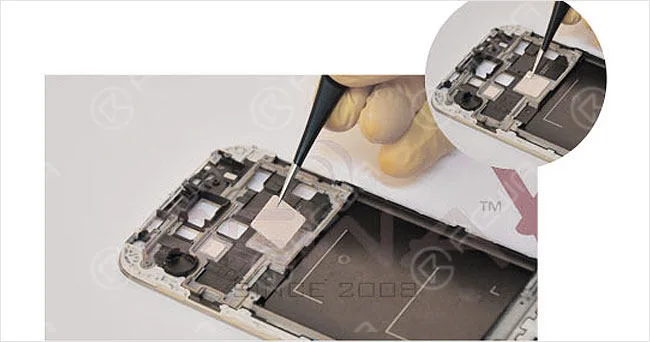
5: Laminate the Heat Sink Film
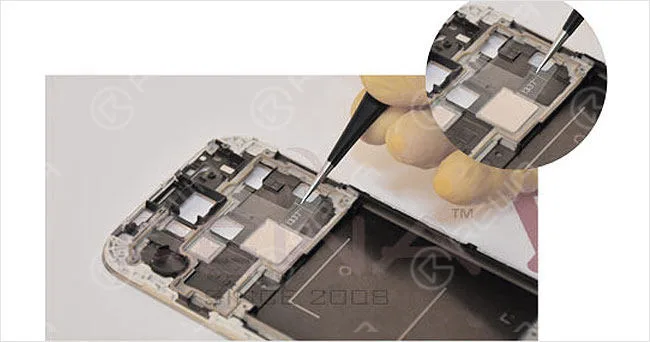
Place the Heat Sink Film directly above the big heat sink, ensuring it covers the entire area.
6: Apply the Charging Port Adhesive
Before applying the adhesive, clean the surface thoroughly to remove any dust, dirt, or grease. Use a lint-free cloth with alcohol or a silicone-free cleanser. Then, remove the protective foil and apply the Charging Port Adhesive Tape over the corresponding position on the front cover. Press firmly for at least 5 seconds to ensure a secure bond.
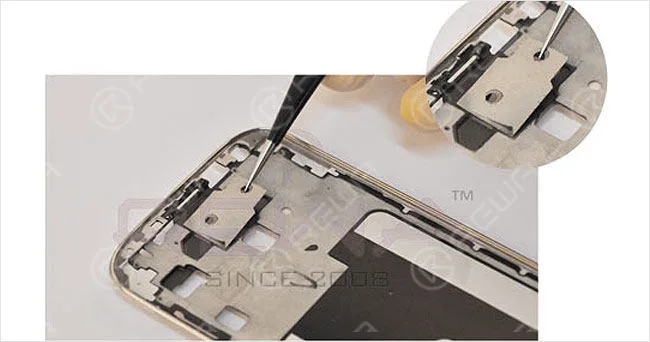
Note: During steps 1-6, the side where the small parts are fitted should be opposite the screen assembly side.
7: Install the Camera Plate
Using anti-static plastic tip tweezers, position the Camera Plate in the correct location.
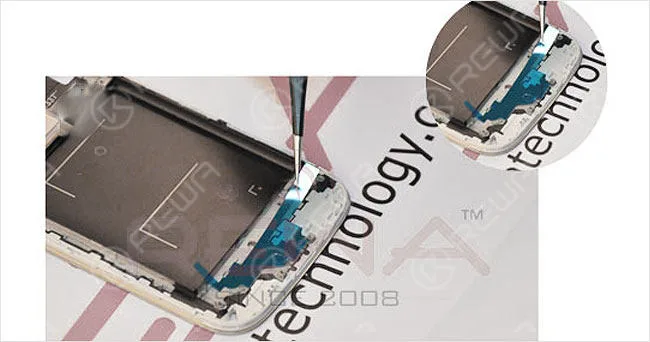
8: Apply the Thermal Emission Paster:
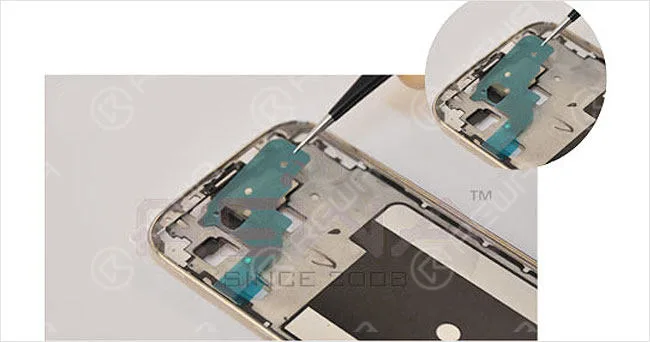
Just like the previous steps, install the Thermal Emission Paster on the front housing to manage heat distribution effectively.
9: Install the Ear Speaker Mesh
Carefully tuck the Ear Speaker Mesh into the tiny space using plastic tip tweezers to ensure it stays in place.
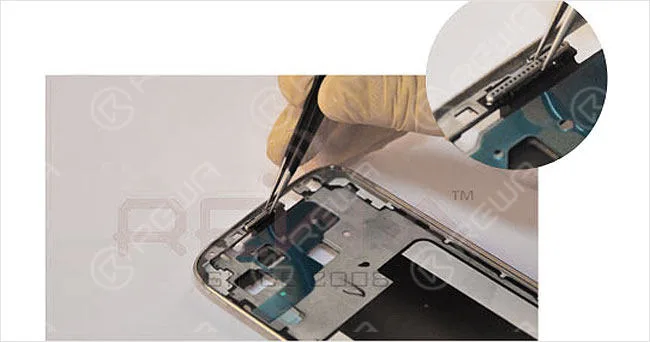
10: Apply the Front Bezel Adhesive Sticker Tape
For better adhesion between the LCD and digitizer touch screen assembly, apply the Front Bezel Adhesive Sticker Tape to the LCD supporting frame.
Reminder: The small parts in steps 7-10 are installed on the frontal side, where the screen is assembled.
Final Result
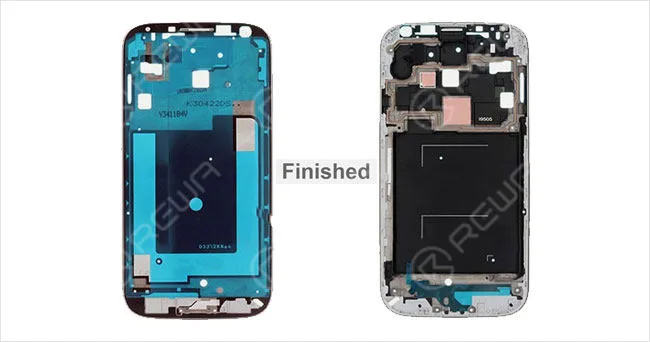
The finished Samsung front bezel with all small parts installed will function like new, with all components securely in place.
Conclusion
Successfully installing small parts onto a Samsung front cover housing requires precision and attention to detail. By following these steps, you can ensure that all components are correctly placed, leading to a professional-quality repair that restores your device to its original condition. Whether you’re a seasoned technician or an eager DIYer, mastering these techniques will help you achieve the best results in your phone repairs.
 English
 Español
 Français
 Deutsch
 Italiano