Tag: samsung

  • The Evolution of Samsung Aftermarket Screens: From Incell LCD to Advanced 1:1 OLED

    The Evolution of Samsung Aftermarket Screens: From Incell LCD to Advanced 1:1 OLED

    For years, Samsung aftermarket screens were often associated with poor display quality, missing functions, and unreliable performance. Many repair shops treated them as low-cost emergency solutions rather than serious alternatives to OEM displays.

    Driven by advances in OLED manufacturing, panel engineering, and aftermarket supply chains, nowadays Samsung aftermarket screens have evolved into highly capable repair solutions for different business scenarios. For repair shops, distributors, refurbishing facilities and buyback businesses, understanding the differences between screen grades is critical.

    In this article, we break down the evolution of Samsung third-party screens — from basic Incell LCDs to advanced 1:1 OLED displays — and explain which option best fits different repair needs and budgets.
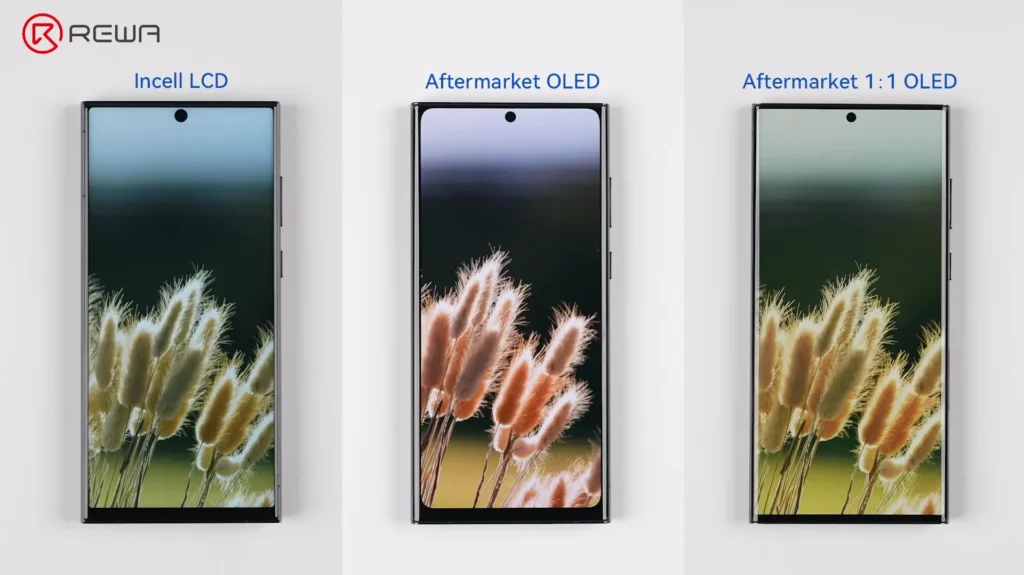
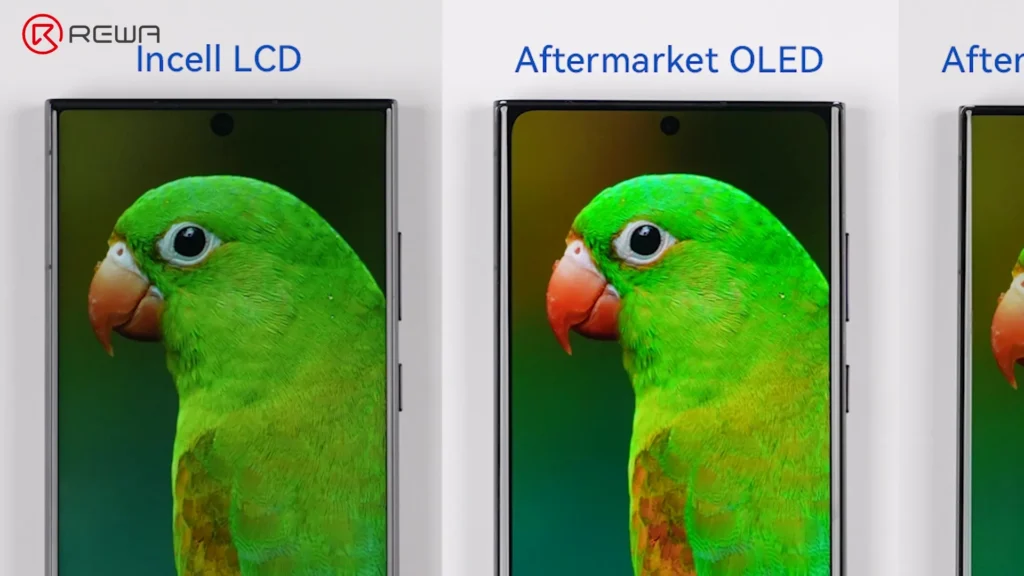
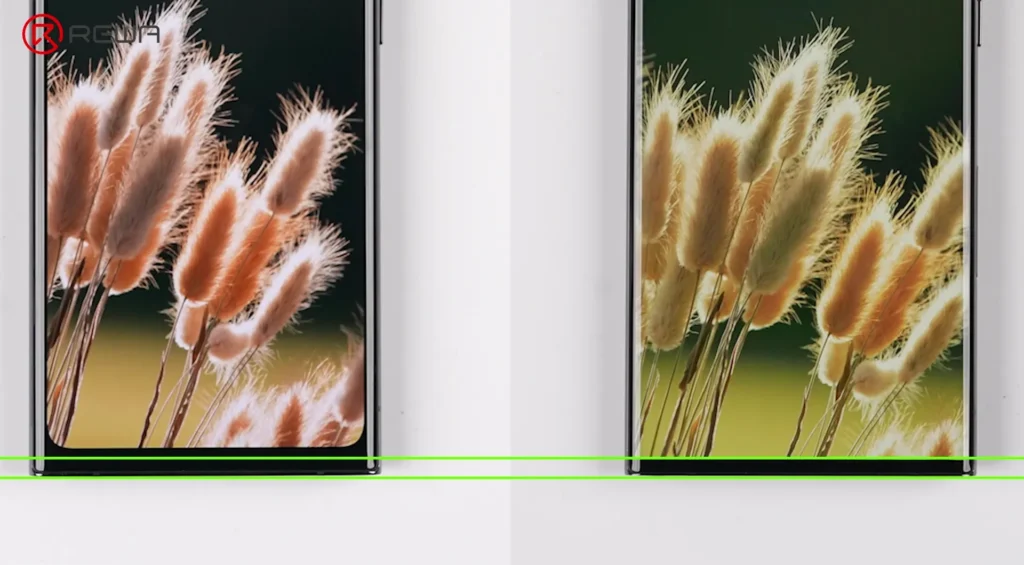
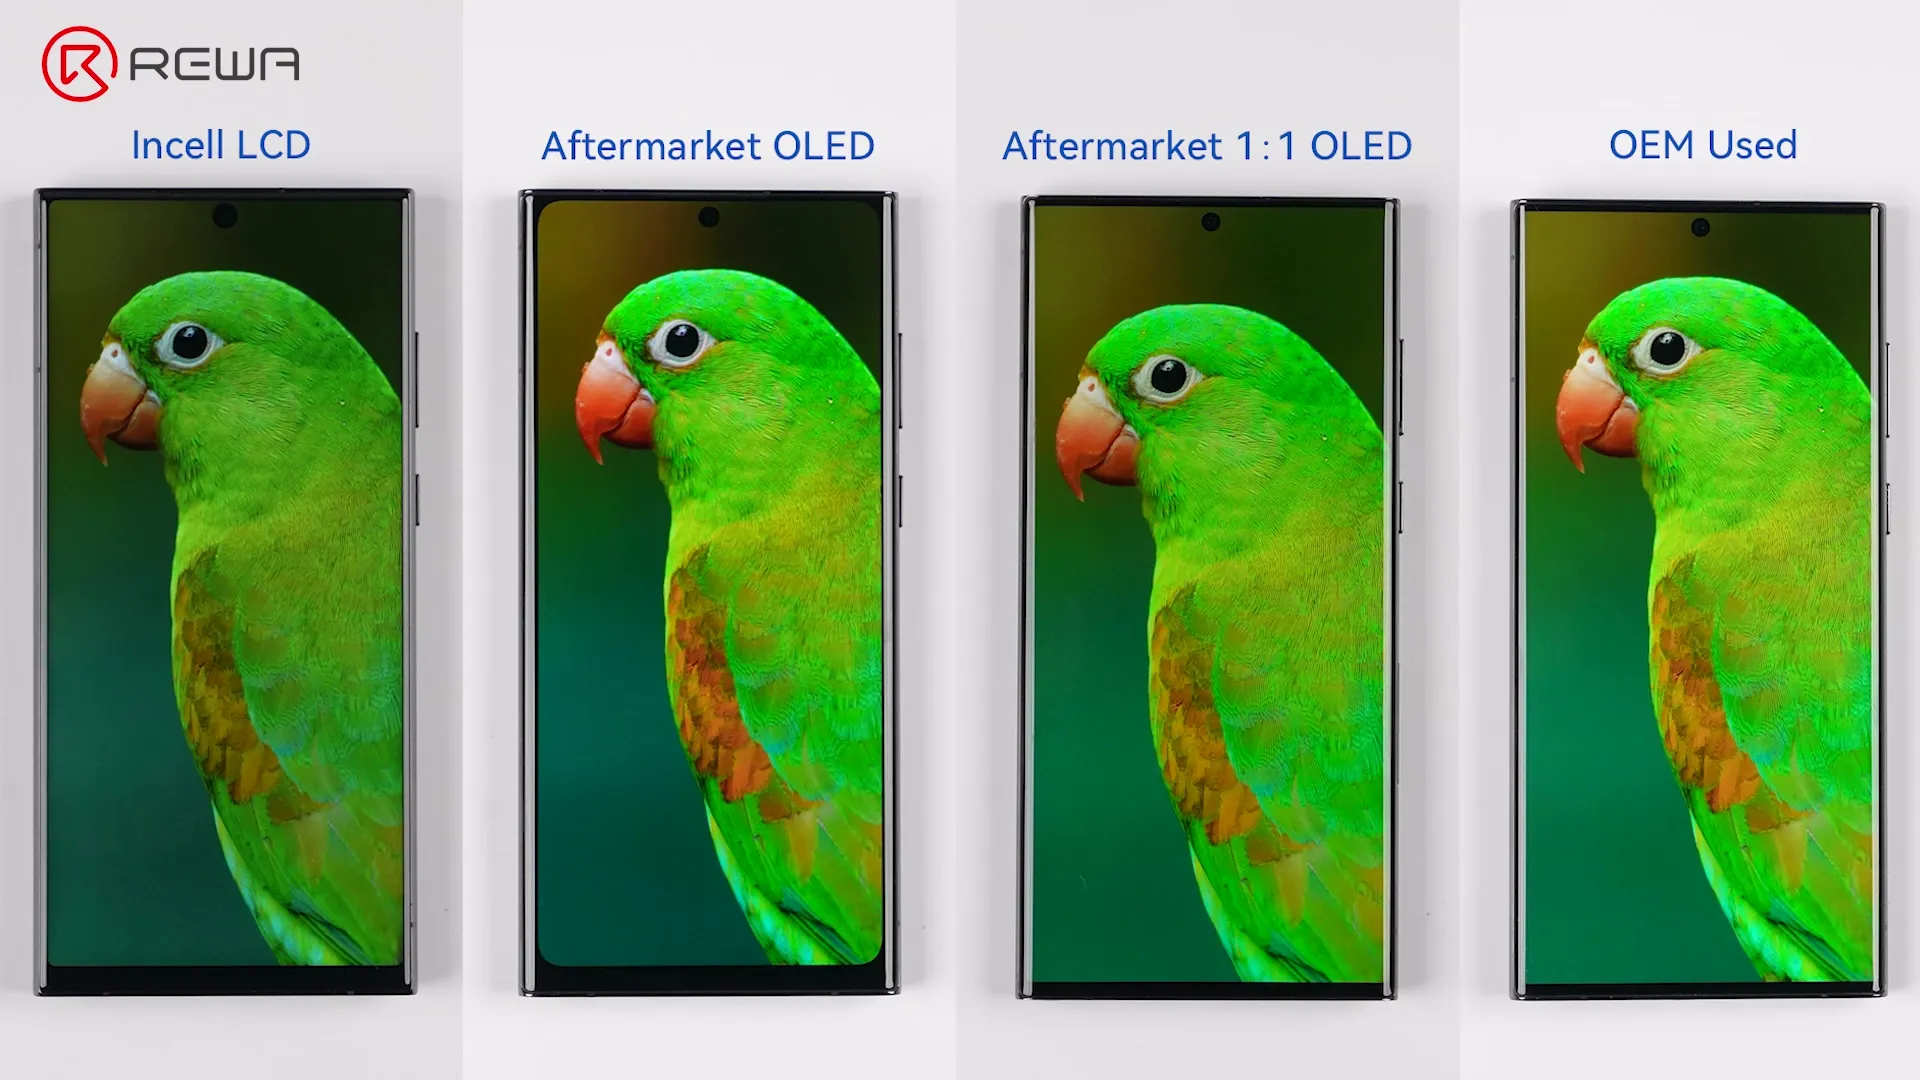
    Side-by-side comparison of Incell LCD, Aftermarket OLED, and 1:1 OLED screens showing differences in bezel thickness

    Budget Repair Option: Incell LCD Screens

    The earliest mainstream Samsung third-party screens focused primarily on affordability and functionality recovery. For many repair scenarios, Incell LCD screens still serve an important purpose today.

    Widely used for:

    • Budget repairs
    • Data recovery
    • Temporary replacement
    • Low-cost resale preparation

    However, their limitations are clear due to the fundamental LCD structure. Unlike OLED panels, Incell LCD displays cannot support self-emitting pixels. As a result:

    • True blacks appear grayish
    • Power efficiency is lower
    • Contrast performance is weaker
    • AOD functionality becomes limited or unavailable
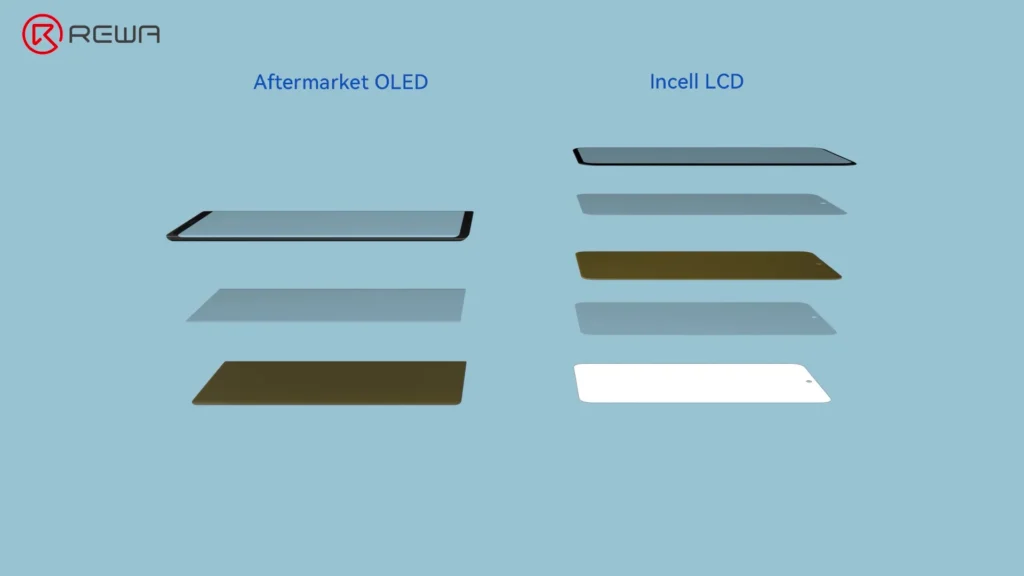
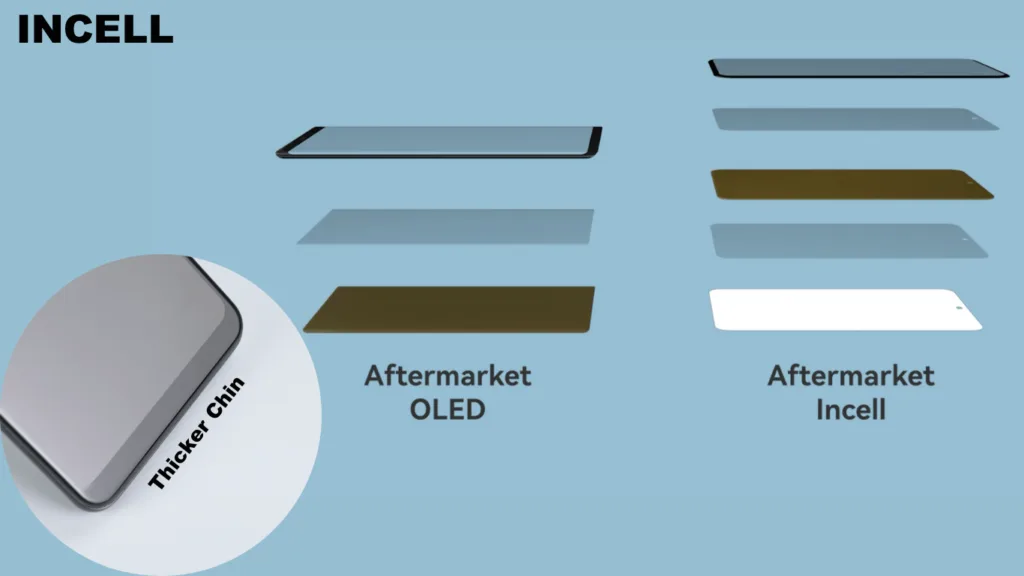
    Comparison of screen structures showing Aftermarket OLED with three layers and Incell LCD with five layers

    More importantly, Incell structures cannot properly support Samsung’s under-display fingerprint sensor technology. This is one of the biggest compromises for users accustomed to flagship Samsung devices.

    Physical construction is another challenge. Due to IC packaging and panel design limitations, Incell LCD screens often feature:

    • Wider bezels
    • Thicker chins
    • Smaller viewing areas
    • Less precise frame fitting

    Mainstream Repair Option: Aftermarket OLED Screens

    As market demands increased, the aftermarket industry reached a major turning point: the rise of aftermarket OLED screens. This generation significantly improved both visual quality and feature compatibility.

    Because OLED technology closely mirrors OEM display architecture, these screens deliver major improvements in:

    • Black depth
    • Brightness & contrast ratio
    • Color saturation & color gamut
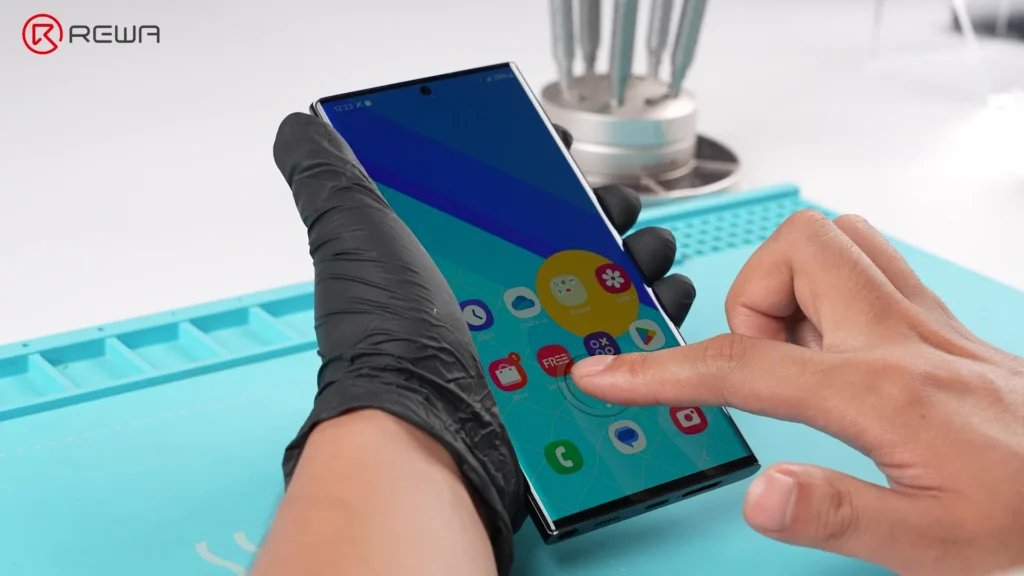
    • Under-display fingerprint sensor
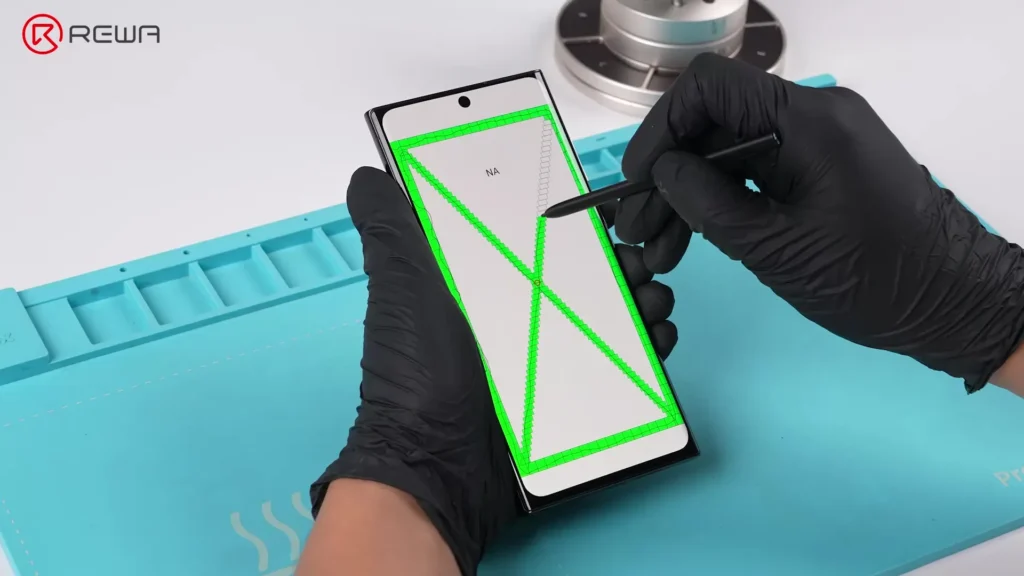
    • S Pen responsiveness
    • Ambient light sensor function

    For repair customers, the experience immediately feels more “premium,” meanwhile the OLED screens became the sweet spot between performance and cost.

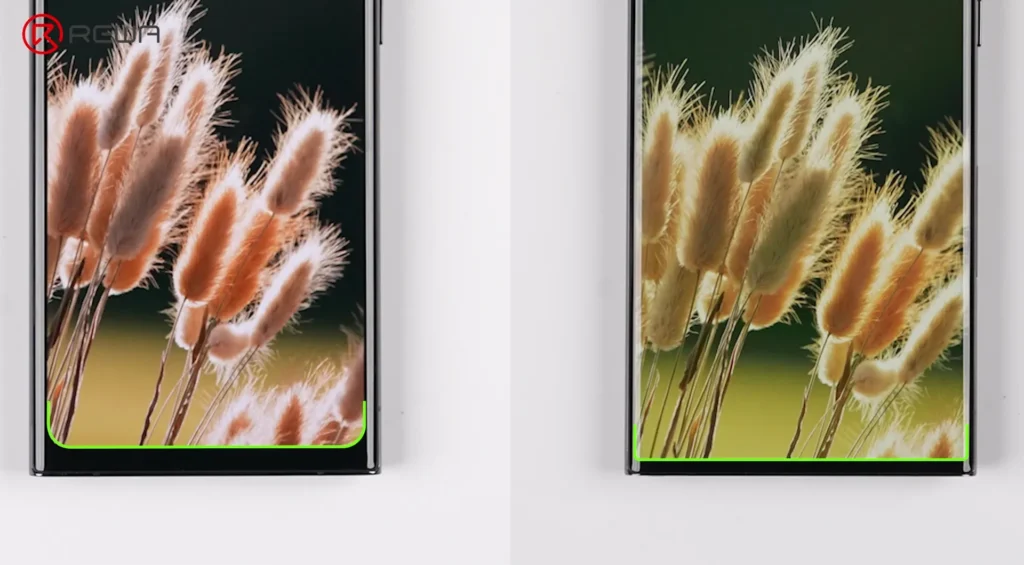
    However, early aftermarket OLED generations still had one noticeable compromise: the viewing area. Compared to original Samsung displays, this slightly reduced the active viewing area and created subtle visual differences around the corners and borders.
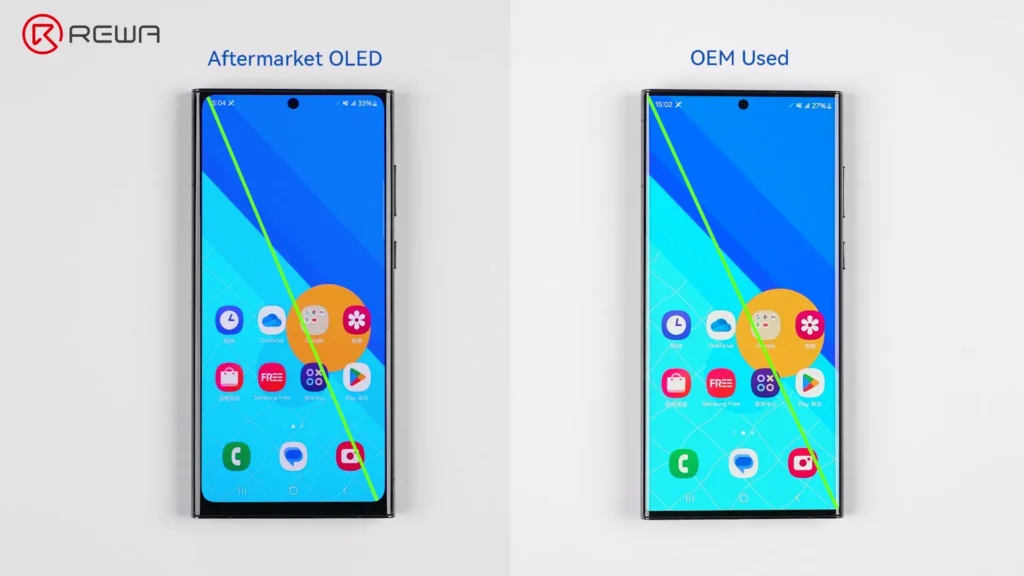
    Comparison showing an Aftermarket OLED screen has slightly thicker bezels and a smaller viewing area than an OEM Used screen

    Best For:

    • Mainstream repair businesses
    • Mid-to-high-end device repairs
    • Customers wanting original-like functionality
    • Shops prioritizing value and reliability

    Premium Repair Option: Aftermarket 1:1 OLED Screens

    As aftermarket technology matured, manufacturers pushed toward a new goal: achieving a true OEM-like visual experience, which led to the development of the latest innovation: aftermarket 1:1 OLED screens.
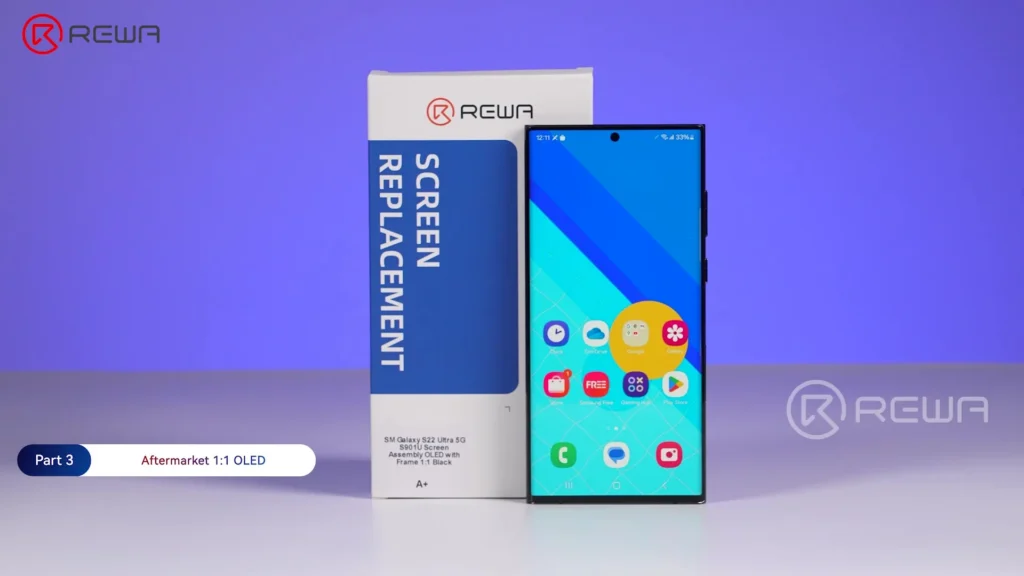
    REWA aftermarket 1:1 OLED screen replacement for Samsung Galaxy S22 Ultra next to its packaging

    Unlike earlier OLED generations, these panels feature:

    • Narrower chins
    • True 1:1 viewing areas
    • True right-angled corner structures
    • OEM-like border proportions

    According to REWA Lab testing, the latest third-party 1:1 OLED screens demonstrate virtually no noticeable difference from OEM screens in areas such as:

    • Under-display fingerprint sensor
    • S Pen pressure sensitivity
    • Display performance
    • Ambient light sensor

    For repair professionals, this represents a major evolution in aftermarket display technology. Of course, newer technologies come with higher initial manufacturing costs. This generation of OLED displays cost highest than previous ones.

    Best For:

    • High-end Samsung users
    • Customers sensitive to display quality
    • Professional refurbishing businesses
    • Repair shops pursuing OEM-like results

    How to Choose the Right Samsung Aftermarket Screen

    Different repair scenarios require different solutions. There is no universal “best” option.

    Here’s a simplified comparison:

    Comparison of Samsung Aftermarket Screens for S & Note Series

    CollectionOEM UsedREWA Selected 1:1 Soft OLEDREWA Selected Aftermarket OLEDOthers in the market
    Display SizeOriginalOriginalNear OEMSmall Size
    Display PanelSoft OLEDSoft OLEDSoft OLEDIncell LCD
    Display PerformanceHigh Brightness,
    Wide Gamut, No Color Shift
    High Brightness, Wider Gamut,
    Rich Saturation
    High Brightness, Wider Gamut,
    Rich Saturation
    Lower Brightness,
    Cool Color Tone
    Battery ImpactLowMediumMediumHigh
    Fit & Finish1:1 Fit Near;
    OEM bezel
    Excellent Fit;
    Near OEM bezel
    Great Fit;
    Narrow bezel
    Light leakage may exist;
    Thick bezel
    ResolutionFHDFHDFHDHD
    Refresh Rate120Hz90Hz90Hz60Hz
    Touch ResponseHigh-speed response;
    Supports S pen
    Near OEM response;
    Supports S pen
    Near OEM response;
    Supports S pen
    Occasionally delayed response;
    Unsmooth S Pen
    Compatible ModelsLimitedLimitedMainstreamSelective
    Supply StabilityConstrainedSteadySteadyVariable
    Price LevelHigh & UnstableSlightly HighMedium & StableLow, but high customer complaints
    Target Use CaseOEM experience, premium resale
    & high-quality repair
    1:1 OEM display size, reliable soft OLED alternativeOEM display performance,
    cost-effective & stable OLED replacement
    No OEM display
    & touch needs
    Overall Rating☆☆☆☆☆☆☆☆☆☆☆☆☆☆

    Frequently Asked Question

    What is the difference between Incell LCD and OLED screens?

    Incell LCD screens use LCD technology with backlighting, while OLED screens use self-emitting pixels. OLED offers better blacks, higher contrast, and improved compatibility with Samsung flagship features.

    Why does under-display fingerprint recognition not work on some aftermarket screens?

    Most Incell LCD structures cannot support Samsung’s optical under-display fingerprint technology due to structural limitations.

    What does “1:1 view area” mean?

    It means a display structure designed to match the OEM screen’s active display size and border proportions.

    Are aftermarket OLED screens good enough for daily use?

    Yes. Modern aftermarket OLED screens now provide excellent display quality and support many original Samsung features, making them suitable for everyday users.

    Why are 1:1 OLED screens more expensive?

    They require higher-precision glass processing, improved panel engineering, and more advanced manufacturing standards.

    Which aftermarket screen is best for repair shops?

    It depends on the customer’s budget and expectations. Most repair shops benefit from offering multiple grades, including budget Incell LCD, mainstream OLED, and premium 1:1 OLED options.

    Conclusion

    From basic Incell LCDs to advanced 1:1 OLED panels, the aftermarket industry is rapidly narrowing the gap with OEM standards through continuous material innovation and engineering improvements.

    REWA selected every tier of screen discussed above on the REWA Online Shop. And it has also obtained the CE certificate. As a global repair supply chain partner, every single display undergoes rigorous inbound and outbound inspection procedures by REWA to ensure it meets REWA strict QC standards.
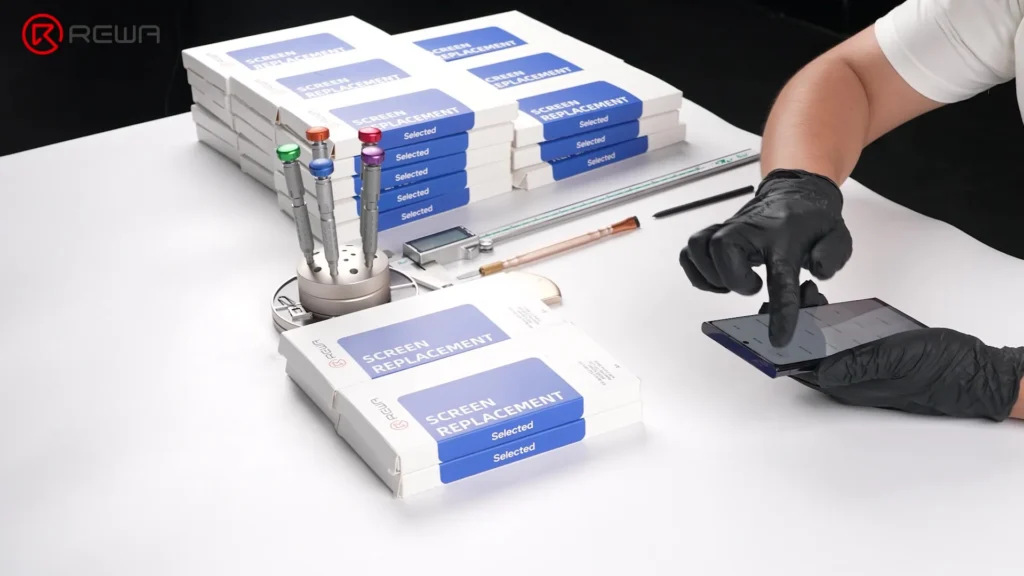
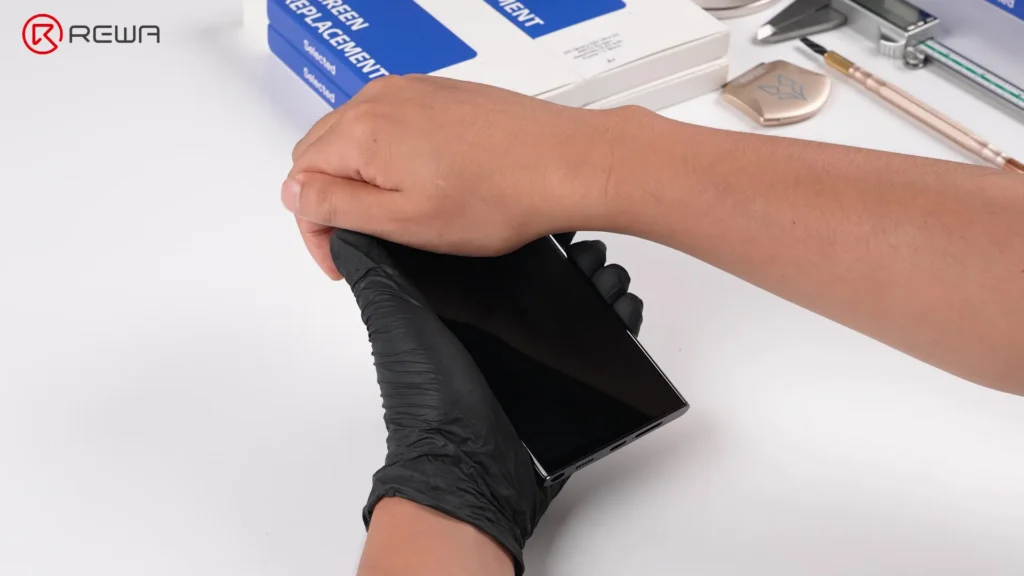
    Technician testing a smartphone screen next to stacks of REWA screen replacement boxes and repair tools

    Over the 18 years, we are committed to powering your repair business with reliable and premium products and tailored customer solutions. If you have any questions, feel free to contact us.
  • How Samsung Aftermarket OLED Screens are Made?

    How Samsung Aftermarket OLED Screens are Made?

    When you’re planning a Samsung screen replacement, aftermarket OLED screens often stand out as the most cost-effective solution. But critical questions remain: how are these screens actually manufactured—and can their quality be trusted?

    In this guide, REWA Tech takes you inside a professional production workflow to break down the full process of a Samsung aftermarket OLED screen step by step. This article will help you understand how high-quality aftermarket OLED screens are built—and what separates reliable products from low-grade ones.

    What Is an OLED Screen?

    Before diving into manufacturing, it’s essential to understand what an OLED screen consists of and how each component contributes to performance.

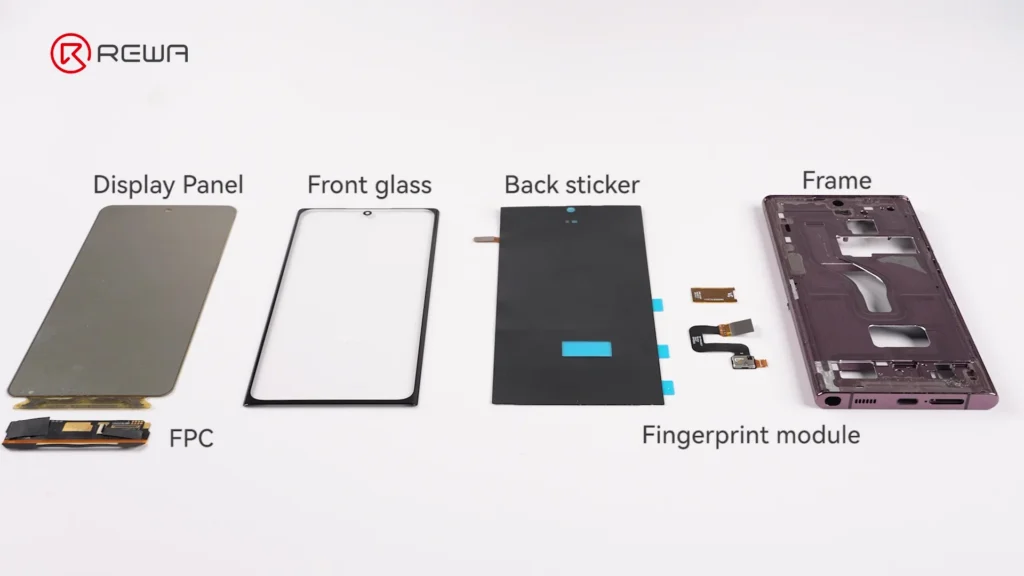
    An OLED (Organic Light-Emitting Diode) screen is a complex module made up of multiple layers and precision components working together. Key parts include:

    • Display Panel: The core light-emitting layer that produces light and images
    • FPC (Flexible Printed Circuit): Connects the screen to the motherboard
    • Driver IC: Controls display signals and image rendering
    • Front Glass: The top protective layer protects the display and enables touch
    • OCA (Optically Clear Adhesive): Bonds glass to the panel without affecting clarity
    • Back Sticker: Secures the screen into the phone frame
    • Fingerprint Module: Enables under-display fingerprint recognition
    • Frame: Provides structural support and ensures proper installation
    structure of aftermarket samsung screens

    Simply put:

    • Driver IC = “the brain” of the screen
    • FPC = “the signal cable”
    • OCA = “invisible glue for display clarity”

    1. Driver IC Bonding and FPC Bonding: The Core Electrical Assembly

    This stage is the foundation of screen functionality. Any error here directly affects display performance and touch response.

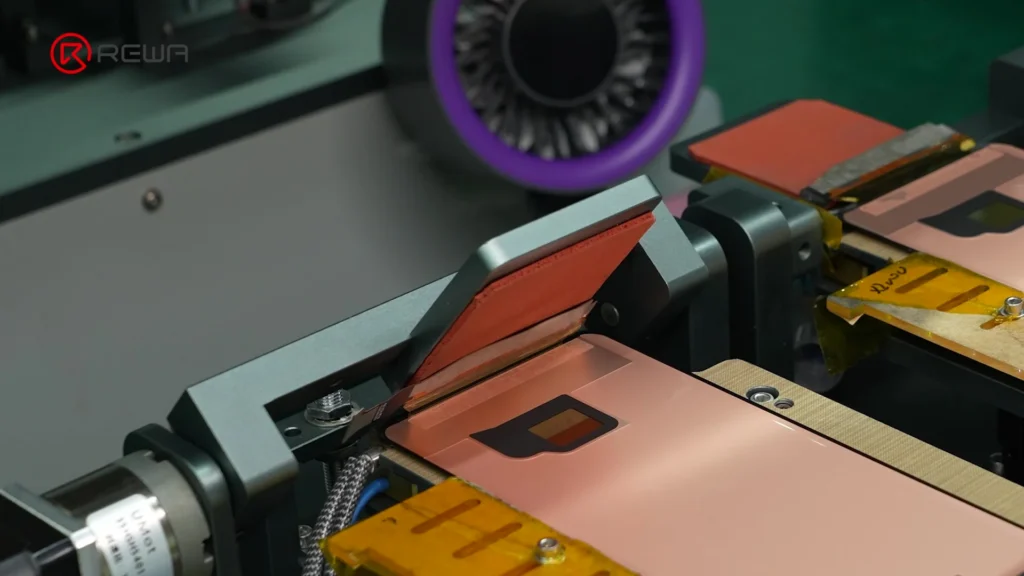
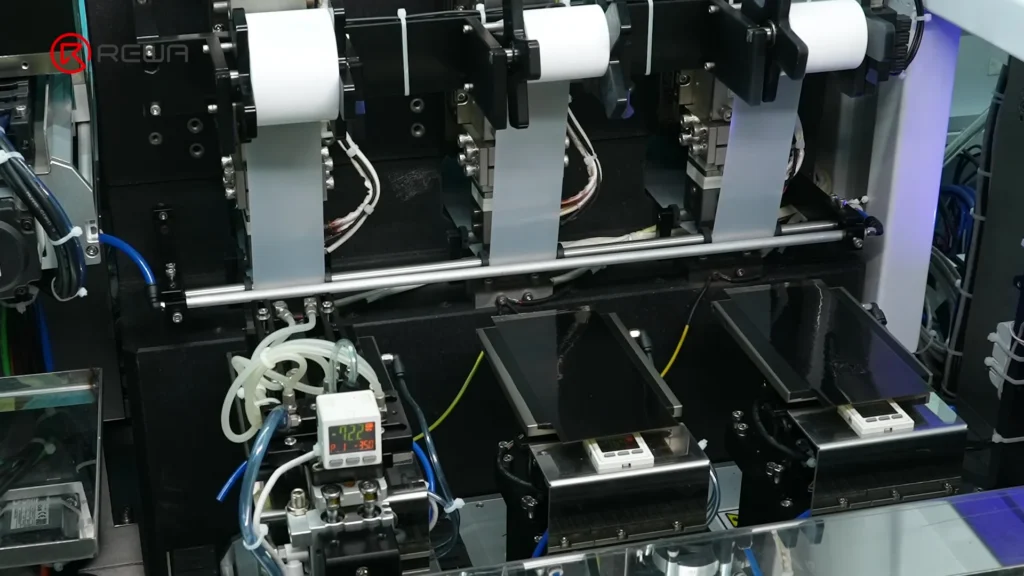
    The process begins with polarizer lamination, where a polarizing layer is applied to the glass with precision tolerance controlled within 0.1mm. Then comes Driver IC bonding, a critical step where the chip is attached to the display panel using ACF (Anisotropic Conductive Film).

    To ensure reliability:

    • Plasma cleaning removes contaminants from bonding surfaces
    • Automated dispensers apply ACF with high precision
    • HD vision systems align components accurately
    • Controlled heat and pressure secure the bond
    screen driver ic bonding

    Next is FPC bonding, which connects the display to the device motherboard. Similar cleaning, alignment, and bonding processes are applied to ensure a stable electrical connection.

    After bonding:

    • Anti-oxidation adhesive protects connection points
    • Manual inspection ensures no defects
    • Power-on testing verifies touch responsiveness

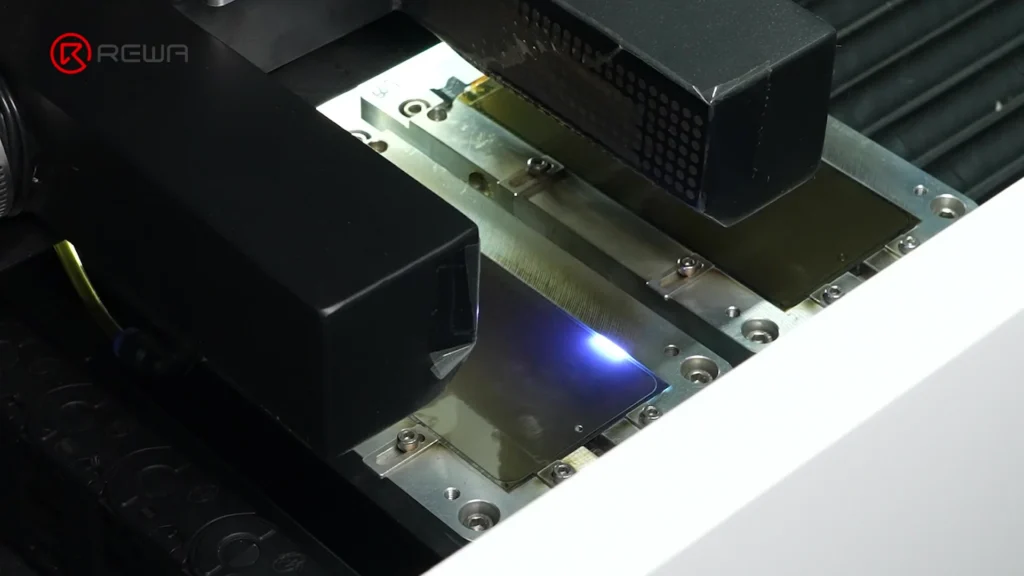
    Finally, laser cutting shapes the display with 1:1 accuracy, ensuring:

    • Perfect camera hole alignment
    • Correct corner curvature
    • Seamless fit into the phone frame
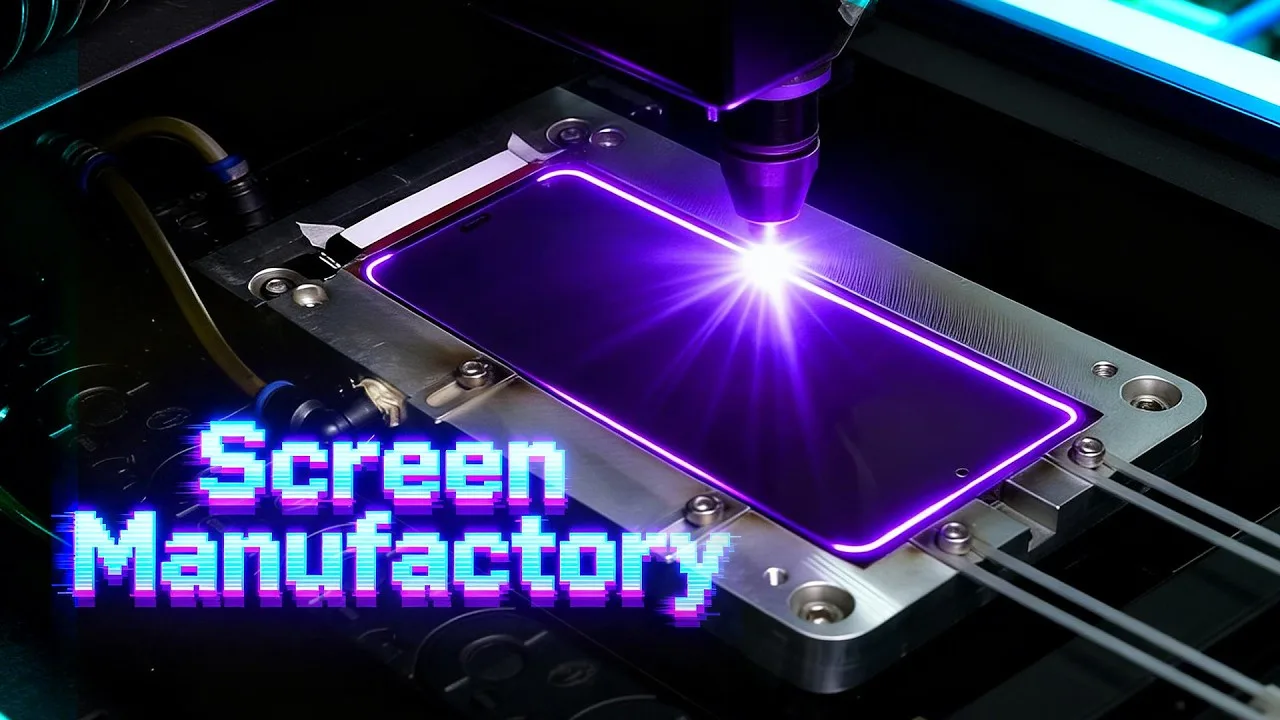
    screen laser cutting

    2. Glass–OCA–Display Lamination: Achieving Visual Clarity

    This lamination part determines the visual quality of the screen—clarity, brightness, and absence of defects.

    The process takes place in a dust-free cleanroom, because even microscopic particles can cause display issues.

    Steps include:

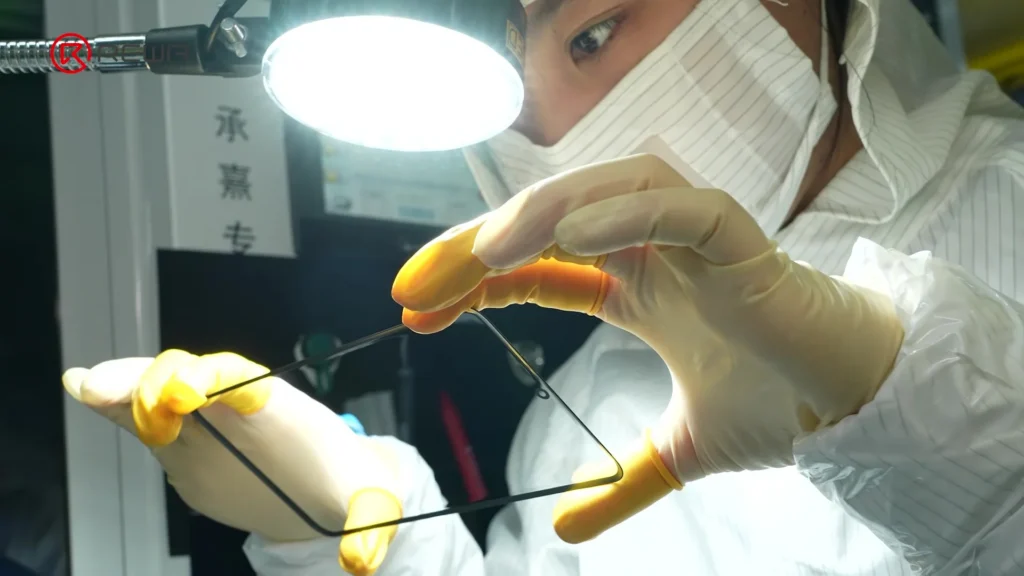
    1. Glass inspection under high-intensity light to detect scratches or contamination
    2. OCA application to ensure optical transparency
    3. Vacuum lamination, aligning glass and panel precisely
    wearing mask a worker is inspecting samsung aftermarket screen

    After lamination:

    • Screens undergo autoclaving (high pressure + heat) to eliminate micro-bubbles
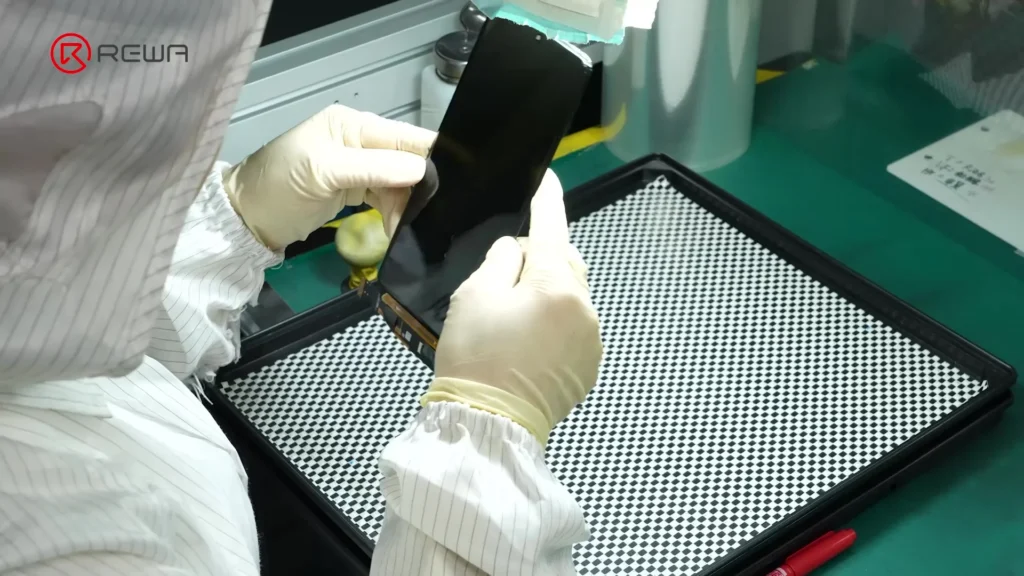
    • Manual inspection ensures zero bubbles and perfect adhesion
    a worker is inspecting samsung aftermarket screen

    Important note:
    “Bubbles” are not just cosmetic—they can affect touch sensitivity and display uniformity.

    Next steps:

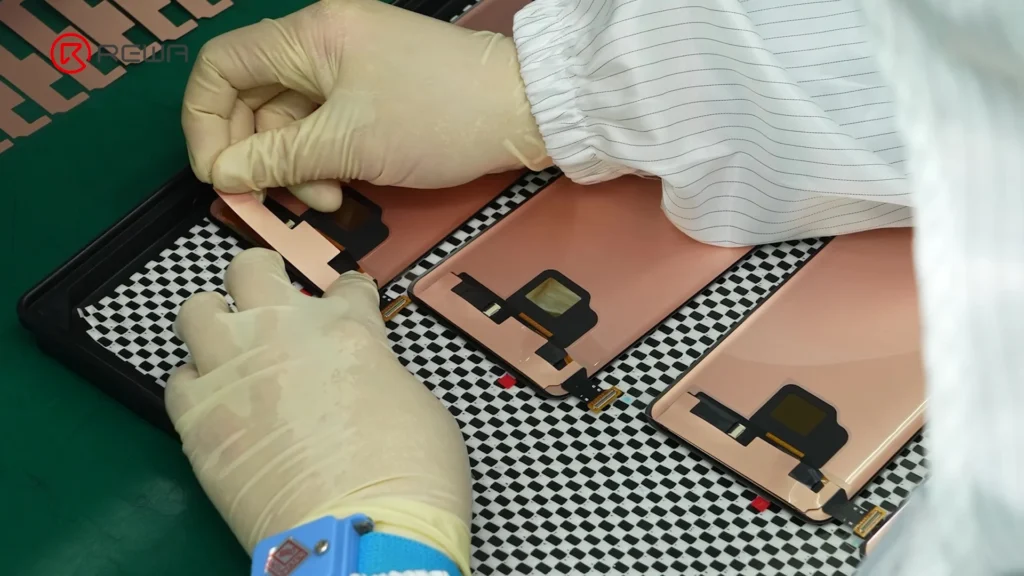
    • Back sticker is applied using robotic arms
    • FPC is secured and routed to avoid stress damage
    • Protective films are added

    A full touch-function test ensures: No dead zones + No “ghost touches”, setting the baseline for REWA’s high-quality screens. At this stage, only fully functional, bubble-free displays move forward.

    3. Module & Frame Assembly: Completing the Screen Structure

    This stage focuses on integrating functional modules and finalizing the physical structure.

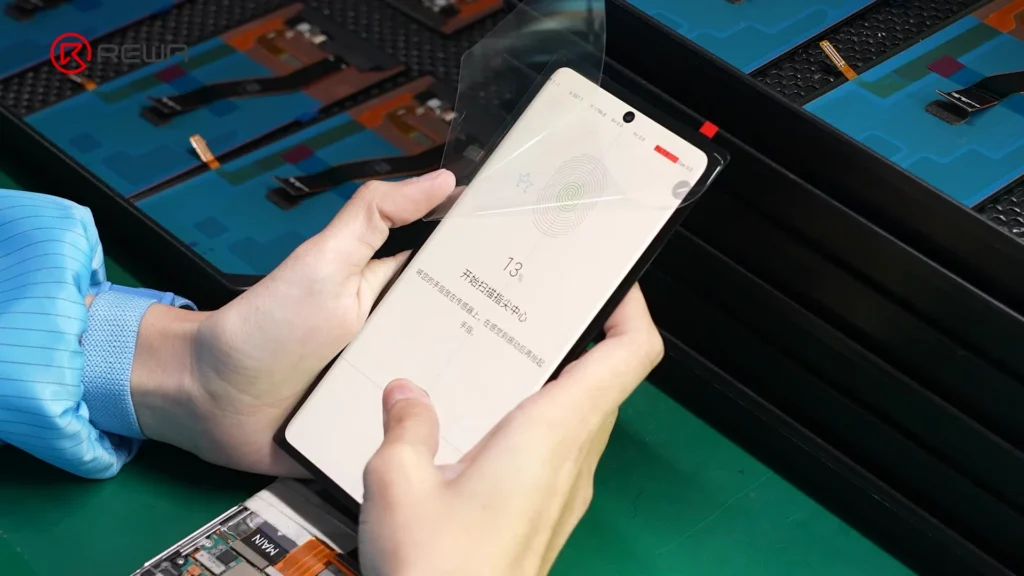
    Samsung Galaxy S Series & Samsung Note Series and selected models of A Series feature intelligent under-display fingerprint sensor, thus biometric security is paramount. The fingerprint module is installed:

    • Optical adhesive ensures proper signal transmission
    • Precise OLED alignment guarantees accurate recognition

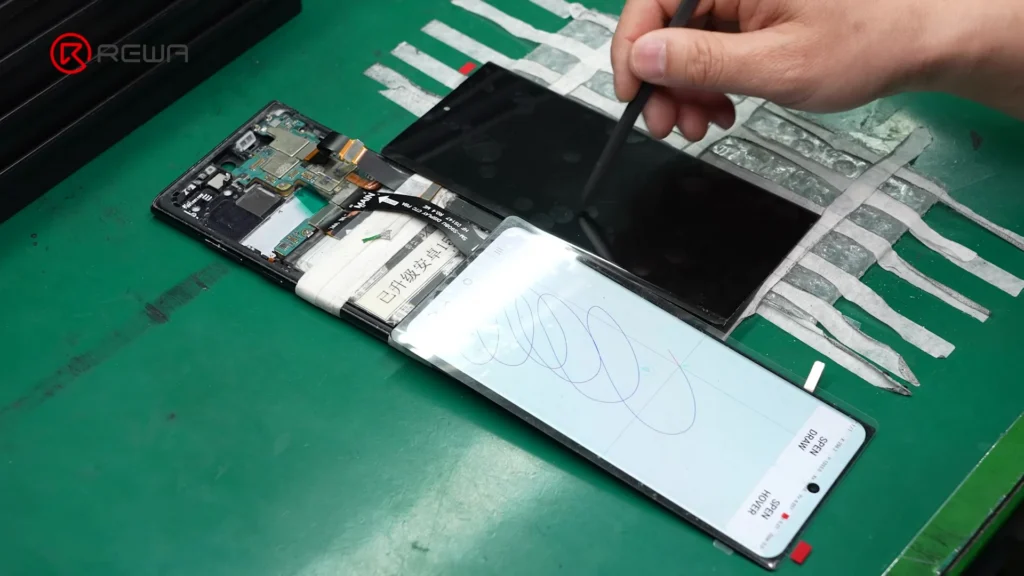
    Next comes fingerprint recognition and S Pen response test.

    Next is frame assembly:

    • Automated dispensing applies adhesive along original design paths
    • Ensures proper sealing and structural integrity
    • Guarantees a flush fit with the phone body

    The final protective film is applied to complete assembly, creating a fully finished, durable screen.

    4. Independent Quality Verification: What Makes REWA Selected Screens Different

    Production alone does not guarantee quality. This is where independent verification in REWA laboratory becomes critical.

    Each batch undergoes:

    • Secondary full-scale testing
    • Functional validation (display + touch + biometrics)
    • Strict defect screening

    Only screens that pass this rigorous verification can earn the REWA seal of approval.

    Key insight:
    The difference between “average” and “premium” third-party screens often lies in post-production quality control, not just manufacturing.

    Samsung Aftermarket OLED Screen

    Frequently Asked Questions

    Are aftermarket OLED screens as good as original ones?

    High-quality aftermarket OLED screens can achieve performance close to original displays, especially when manufactured with precise bonding and strict quality control.

    What is ACF and why is it important?

    ACF (Anisotropic Conductive Film) is a special adhesive that allows electrical connections only in specific directions, ensuring stable signal transmission between components.

    Why is dust control important during lamination?

    Even tiny dust particles can cause bubbles, display defects, or touch issues. Cleanroom environments ensure high visual quality.

    What causes “ghost touch” problems?

    Ghost touch is usually caused by poor bonding, defective FPC connections, or low-quality materials affecting signal transmission.

    How can I identify a high-quality Samsung aftermarket screen?

    Look for:
    Stable touch performance
    No bubbles or display defects
    Accurate fit (1:1 with original)
    Under-display fingerprint recognition
    Verified testing or certification

    Why is the Driver IC bonding process critical?

    It directly controls how the screen displays images. Poor bonding can lead to flickering, lines, or complete display failure.

    Do Samsung third-party screens support fingerprint functionality?

    Yes, but only if the fingerprint module is properly installed and calibrated during assembly.

    Conclusion

    Understanding how Samsung aftermarket OLED screens are made reveals an important truth: quality depends on process precision and testing standards—not just cost.

    From IC bonding and cleanroom lamination to final assembly and independent verification, every step plays a role in determining performance and reliability.

    At REWA, there is a strict Quality Control Line to block products that do not meet 4S standards. Over the 18 years, we are committed to powering your repair business with reliable and premium products and tailored customer solutions. If you have any questions, feel free to contact us.
  • How to Refurbish Samsung Galaxy Z Flip4: Complete Screen & Mid-Frame Restoration Guide

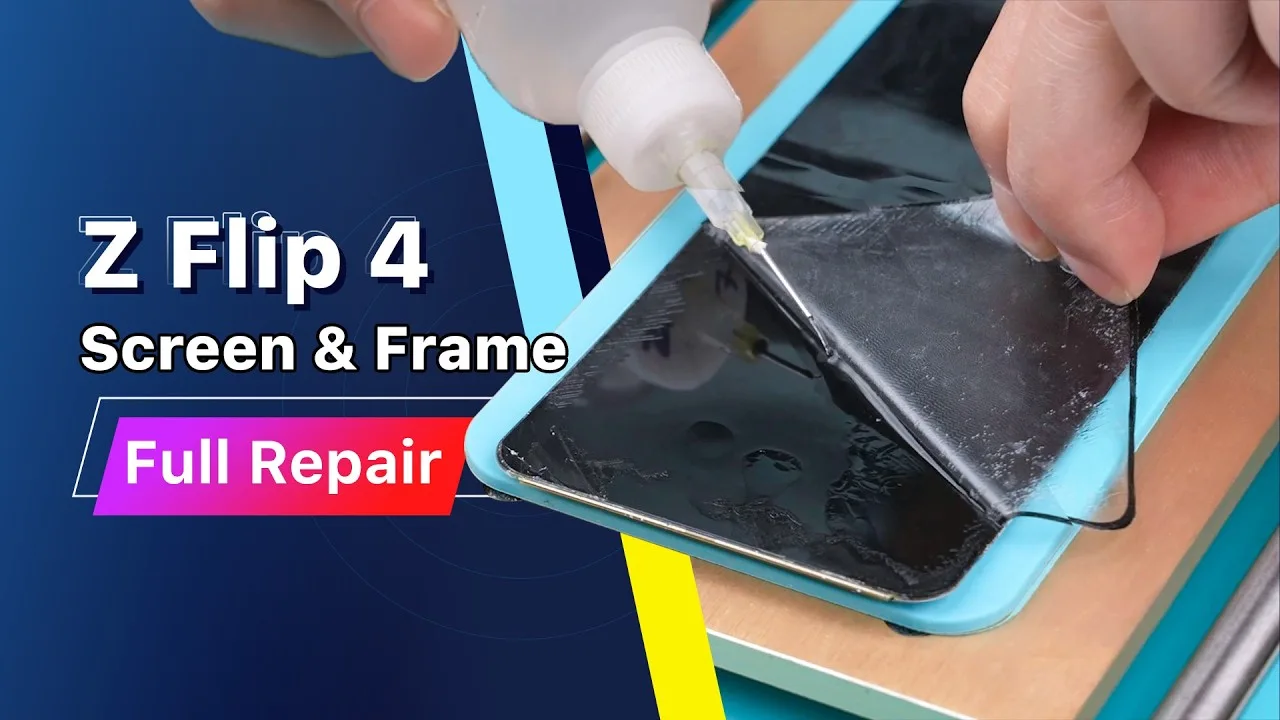
    How to Refurbish Samsung Galaxy Z Flip4: Complete Screen & Mid-Frame Restoration Guide

    Foldable smartphones like the Samsung Galaxy Z Flip4 are revolutionary — but also delicate. A cracked back cover, hinge damage, or screen issues like yellow tinting can ruin both functionality and appearance. Fortunately, these issues don’t mean you need a new device.

    In this comprehensive refurbishment guide, we’ll walk you through the step-by-step process to restore a damaged Samsung Z Flip4, addressing a yellow-tinted screen, replacing the back cover, and repairing the mid-frame. Whether you’re a repair technician, DIY enthusiast, or running a repair shop, this tutorial will help you transform a broken foldable into a like-new device.

    Step-by-Step Samsung Z Flip4 Refurbishment Process

    1. Initial Screen Testing

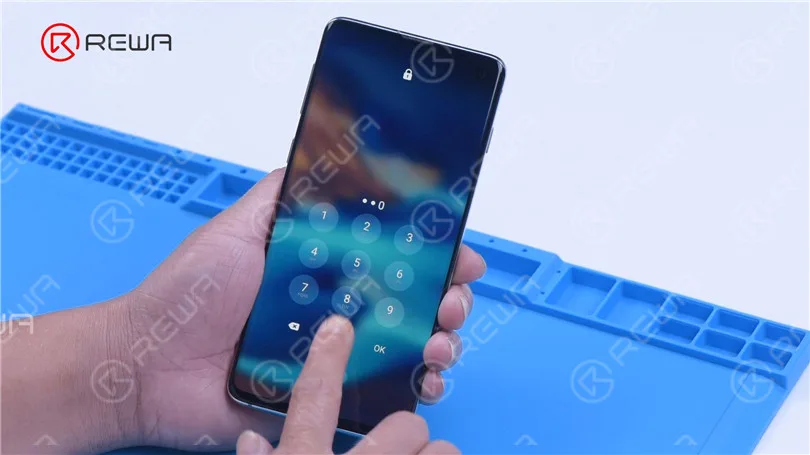
    • Turn on the device. Dial *#0*#
    • Check touch response and display functionality.
    • If both work normally despite screen tint, proceed with refurbishment.

    2. Remove the Back Cover

    1. Power off the phone.
    2. Place the phone on a heating pad set to 90°C (194°F) for 5 minutes.
    3. Insert an entry pick along the back cover gap and apply isopropyl alcohol.
    4. Slide toward the center hinge area using an opening card.
    5. Repeat the process for the upper back cover.

    3. Internal Disassembly

    • Apply a camera lens protective sticker.
    • Unscrew all metal plates.
    • Disconnect:
      • Battery flex cable
      • Hinge flex cable
      • Wireless charging coil
      • Bridge flex cable
    • Remove:
      • Front camera
      • SIM card tray
      • Motherboard
      • Charging port
      • Speaker assembly

    4. Screen Disassembly

    • Reheat the screen area.
    • Use IPA and spudger to lift the support frame and remove clips.
    • Insert an opening card — avoid cutting the display flex cable at the bottom.
    • Peel off adhesive and proceed carefully.

    5. Clean Screen Components

    • Place the screen on a separator and use electronic glue remover.
    • Clean with isopropyl alcohol, sponge, and lint-free cloth.

    6. Replace the Damaged Polarizer

    1. Insert 0.028mm cutting wire to remove the outer CPI film.
    2. Clean again.
    3. Use cutting wire to remove the polarizer — keep tension even and parallel.
    4. Clean surface with specialty solution and cloth.

    7. Apply New Polarizer & Laminate

    • Place screen in alignment mold.
    • Apply new inner film with polarizer layer.
    • Laminate and perform bubble removal.

    8. Reassemble the Device

    Mid-Frame Restoration

    • Pry up both batteries using IPA and blade (carefully).
    • Remove power button, speaker, hinge, waterproof strip, and hinge flex cable.
    • Clean hinge and install components onto the new mid-frame.
    • Test foldability before final connections.

    Final Assembly

    • Reinstall:
      • Motherboard
      • Front camera
      • Wireless charging coil
      • Charging port module
    • Apply screen adhesive, bond screen to mid-frame gently.
    • Use frame adhesive for support frame and clips.
    • Secure with tape until bonded.
    • Apply sealing tape on back cover, remove lens film, and reattach back cover.

    9. Final Testing

    Power on the phone and verify:

    • Screen works correctly
    • Touch is responsive
    • Folding mechanism functions smoothly

    The Samsung Galaxy Z Flip4 has been successfully refurbished!

    Tools & Parts List

    Tools Used:

    • Heating pad (90°C)
    • Entry pick & opening card
    • Isopropyl alcohol (IPA)
    • Spudger, tweezers, screwdrivers
    • Lint-free cloth, sponge
    • Electronic glue remover
    • Separation machine, cutting wire
    • Alignment mold, laminator, bubble remover
    • Protective stickers, adhesive tapes

    Replacement Parts:

    • New mid-frame
    • Inner film with polarizer
    • Back cover
    • Hinge flex cable
    • Waterproof strip

    Glossary of Terms

    • Polarizer: Controls light direction in the display. Damaged polarizers cause discoloration like yellow tinting.
    • CPI Film: A transparent layer protecting the flexible screen surface.
    • Lamination: Bonding display layers using pressure and heat.
    • Hinge Flex Cable: Sends signals across the folding hinge. A common failure point in foldable phones.

    Repair Key Points:

    • When separating the bottom screen, do not slide the opening card all the way down. A display flex cable lies at the bottom. Stop at the position shown on the screen.
    • When separating the inner film (polarizer with UTG) from the display layer, it is recommended to use a 0.028mm cutting wire, pulling gently to avoid damaging the display layer.
    • The hinge flex cable is fragile; handle it carefully during removal and installation to prevent irreversible damage.

    Conclusion

    Refurbish Samsung Galaxy Z Flip4 isn’t just possible — it’s practical and rewarding. By carefully replacing the polarizer and back cover, restoring the hinge, and reassembling the phone step-by-step, you can turn a damaged device into a like-new foldable phone.

    Whether you’re a repair shop technician or advanced DIYer, this guide will save costs, reduce e-waste, and improve repair confidence. Be sure to test all functions post-assembly for the best result.

    Tips & Resources

    • 🔗 Check our YouTube channel for the hinge flex cable repair video.
    • 📸 Add repair images or video snippets for better clarity.
    • 🕒 Estimated repair time: 2–3 hours | Difficulty: 🔧🔧🔧🔧 (Advanced)
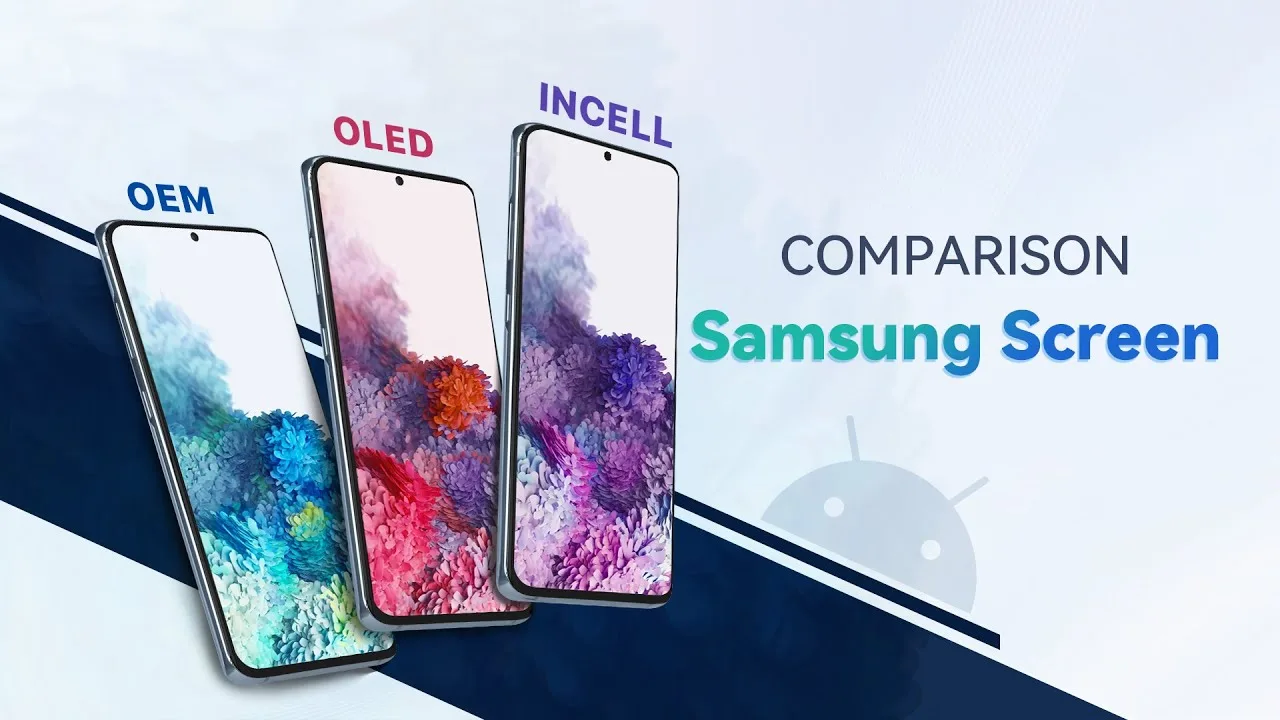
  • Samsung Screen Comparison: OEM, OLED, and INCELL

    Samsung Screen Comparison: OEM, OLED, and INCELL

    Since 2023, aftermarket demand for Android screens has skyrocketed, especially for Samsung’s premium N and S series devices. To address this rising demand, REWA has introduced a comprehensive range of Samsung screens including the A, J, M, N, and S series. We aim to help customers find the most suitable replacement screen tailored to their needs.

    There are three main types of replacement screens on the market: OEM Refurbished Screens, Aftermarket OLED Screens, and Aftermarket Incell Screens. Each of these options varies in performance across key aspects such as color, resolution, and touch response. In this blog, we’ll test Samsung S20 screens and explore these differences through four core tests, providing a detailed analysis to guide your decision-making process.

    Note: Before reading this blog, you can also watch this video with the same topic.

    Overview of the Three Screen Types: Pros and Cons

    OEM Refurbished Screens

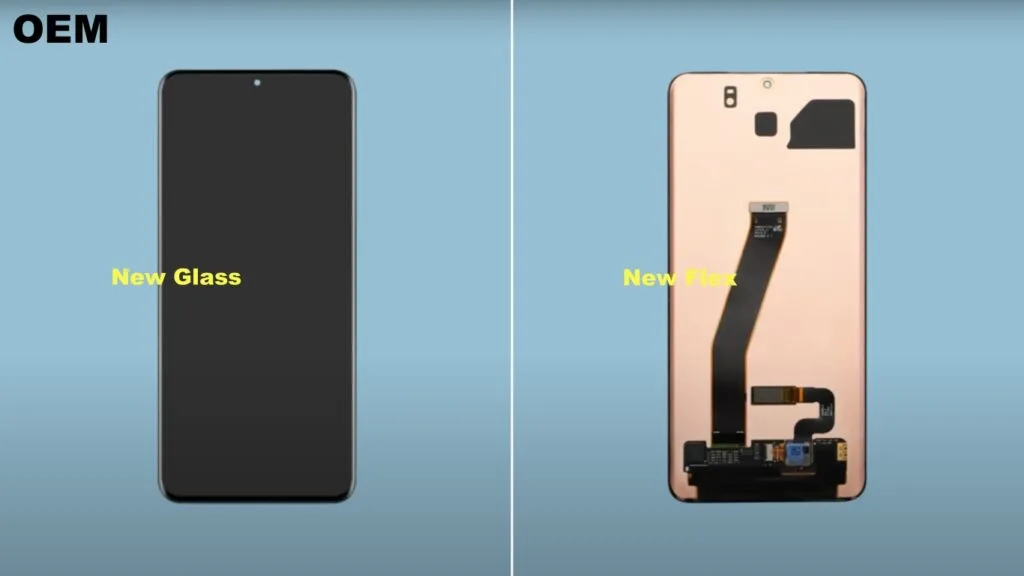
    These screens are removed from original devices and retain most of their original components, with only the front glass or flex cable replaced when necessary. While minor signs of aging may be present, REWA meticulously inspects and eliminates such imperfections, making these screens an excellent choice for users seeking high quality.

    OEM Screen
    Figure 1. OEM Screen

    Aftermarket OLED Screens

    Manufactured by third-party factories, these screens adopt OLED technology, delivering impressive brightness and contrast. However, some models may require a dedicated frame due to design incompatibility with the original frame.

    Figure 2. OLED Screen
    Figure 2. OLED Screen

    Aftermarket Incell Screens

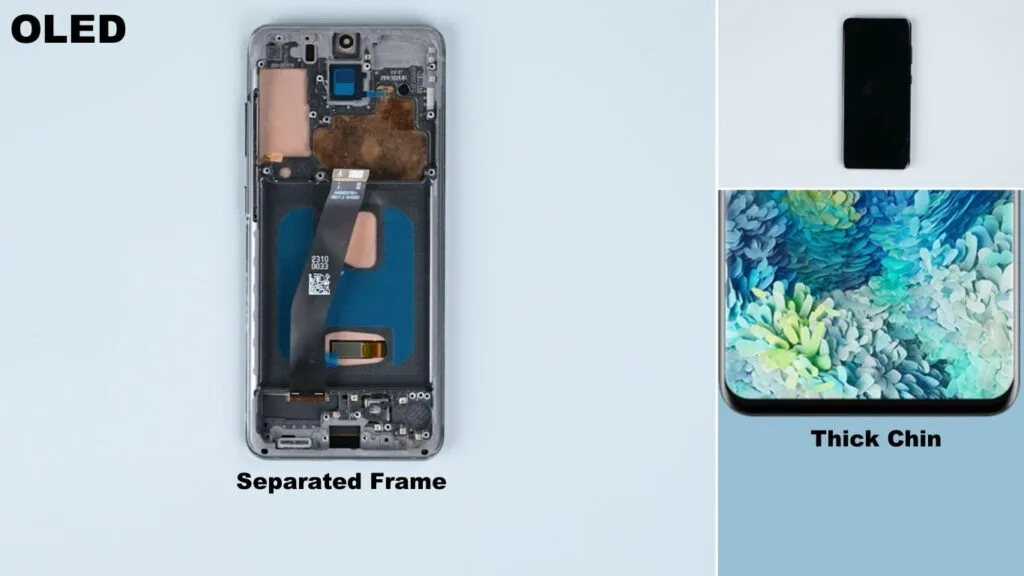
    Incell screens are flat-panel designs with slightly wider bottom bezels, reducing the viewing area and lacking features like fingerprint-on-display (FoD). While the overall performance is modest, these screens offer a cost-effective solution for budget-conscious users.

    samsung screen comparison oem oled incell figure 1024x576 2
    Figure 3. INCELL Screen

    Four Core Tests: Analyzing Performance in Depth

    To provide a comprehensive comparison, we evaluated the three screen types based on color reproduction, brightness, color gamut, resolution, and touch performance. Here’s what we found:

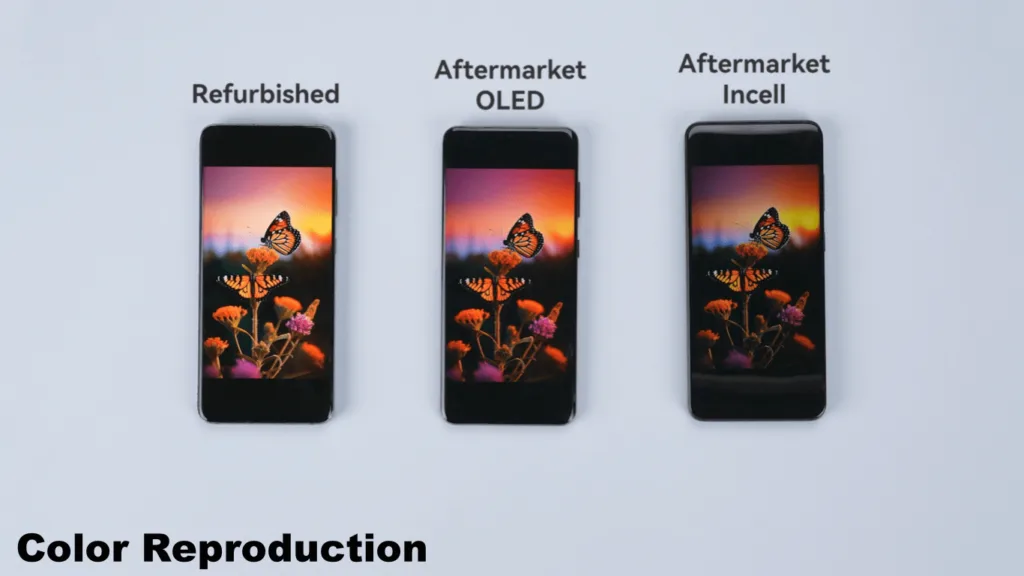
    1. Color Reproduction: Natural vs. Vibrant

    Color reproduction significantly impacts user experience and screen quality perception.

    The OEM Refurbished Screen delivers natural and realistic colors, closely resembling what the human eye perceives, making them ideal for users who value high accuracy.

    The Aftermarket OLED Screen exhibits cooler tones with more vibrant and saturated colors. These screens appeal to users who prefer vivid visuals, though prolonged use may cause eye strain.

    The Aftermarket Incell Screen has dimmer tones and lower contrast, leading to a noticeable loss of detail, especially in darker regions. This makes them less suitable for scenarios requiring high-quality displays.

    Color Reproduction
    Figure 4. Color Reproduction

    2. Brightness and Color Gamut: How Bright and Colorful?

    Brightness and color gamut determine how well a screen performs in various lighting conditions and its ability to display a broad color range.

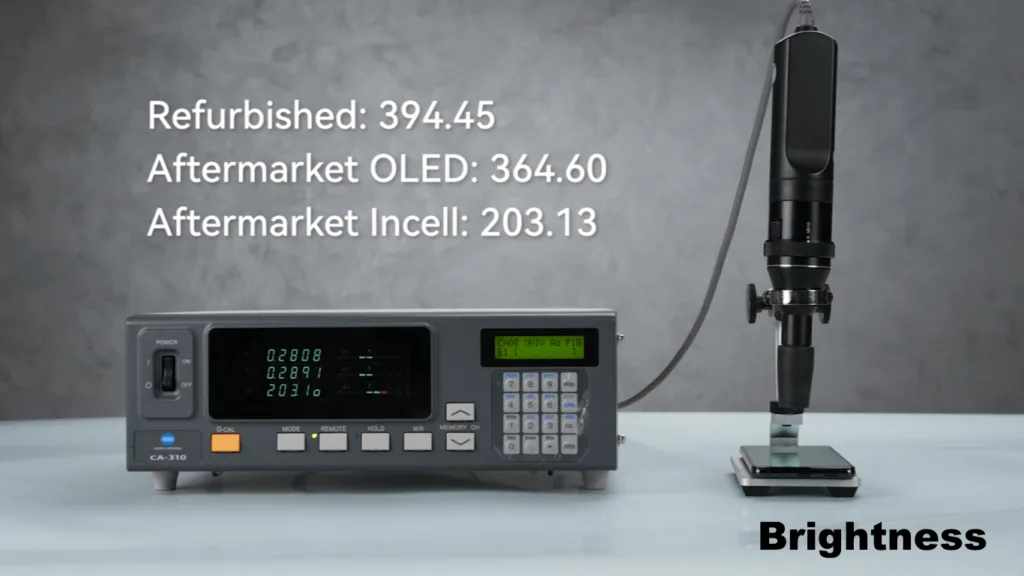
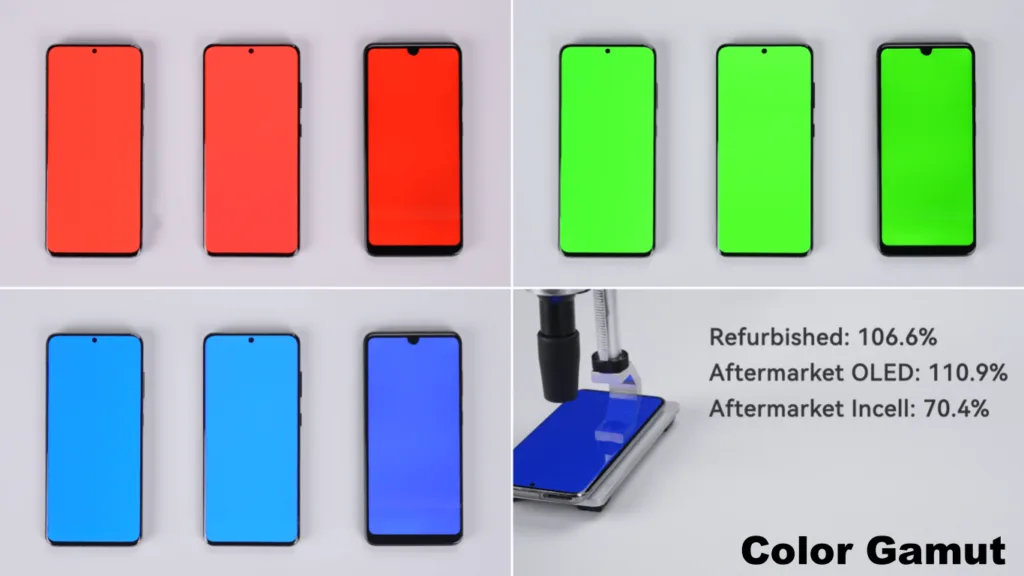
    The OEM Refurbished Screen achieves a brightness of 394.45 nits and a color gamut coverage of 106.6%, balancing both brightness and vividness for versatile use.

    The Aftermarket OLED Screen offers 364.60 nits of brightness and a slightly higher color gamut coverage of 110.9%, displaying a richer range of colors.

    The Aftermarket Incell Screen falls behind with only 203.13 nits of brightness and 70.4% color gamut coverage, making it less suitable for environments with high ambient light.

    Brightness
    Figure 5. Brightness
    Color Gamut
    Figure 6. Color Gamut

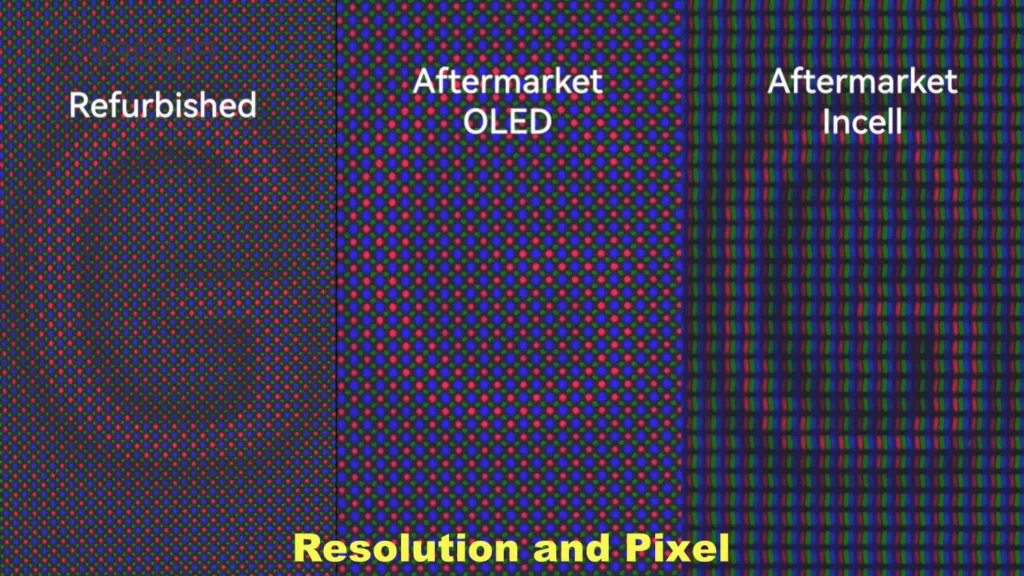
    3. Resolution and Pixel Arrangement: A Test of Clarity

    Using a microscope, we examined the pixel arrangements to evaluate clarity:

    The OEM Refurbished Screen features Samsung’s diamond pixel arrangement, providing superior pixel density and clarity.

    The Aftermarket OLED Screen utilizes TCL CSOT’s proprietary pixel arrangement, delivering decent clarity but slightly trailing the OEM screen.

    The Aftermarket Incell Screen has a standard RGB arrangement, offering moderate clarity that is sufficient for basic needs.

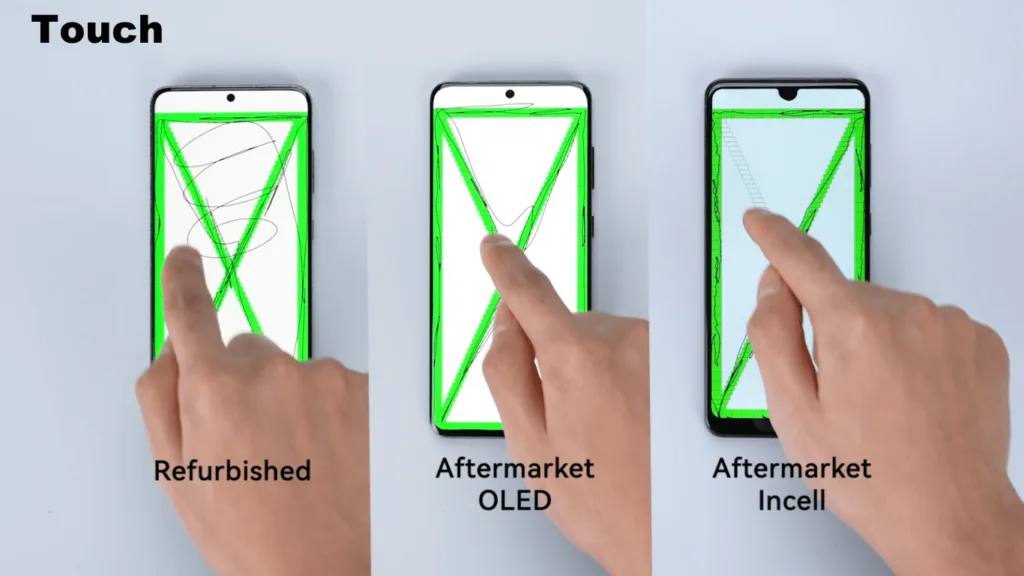
    4. Touch Performance: Precision and Responsiveness

    Touch performance is critical for interaction and determines the screen’s usability.

    Resolution and Pixel
    Figure 7. Resolution and Pixel

    The OEM Refurbished Screen delivers precise and responsive touch functionality with consistent performance across the entire screen, making it perfect for users with high interaction demands.

    The Aftermarket OLED Screen is slightly slower in response but maintains good touch accuracy, meeting most daily requirements.

    The Aftermarket Incell Screen shows minor lag and less precise touch input. While this may not be noticeable without a direct comparison, it could impact tasks requiring high precision.

    Figure 8. Touch
    Figure 8. Touch

    Which Screen Is Right for You?

    Summary of the differences:

    Screen TypeOEM Refurbished OLEDAftermarket OLEDAftermarket Incell
    Display★★★★★★★★★★★★
    View WindowOriginalSimilar to originalThick chin
    Installment ThicknessOriginalSimilar to originalThick
    PriceHighMediumLow

    Based on the tests, it’s clear that each screen type has its strengths and suits different needs:

    For display and view windows, OEM Refurbished Screens are the top choice, excelling in all key areas.

    For value-conscious users, Aftermarket OLED Screens provide excellent view windows and installment thickness at a competitive price.

    For budget-focused users, Aftermarket Incell Screens offers basic functionality at an affordable cost, making them a practical option for limited budgets.

    Conclusion: Make an Informed Decision

    Choosing the right screen whether it’s a Samsung screen, iphone screen or other is about balancing performance, budget, and end-customers’ preferences. By understanding the differences between OEM Refurbished Screens, Aftermarket OLED Screens, and Aftermarket Incell Screens, you can confidently select the one that best suits your business.

    At REWA, we’re here to provide expert advice and high-quality products to ensure you make the best choice. If you have any questions, feel free to contact us.
  • REWA New Website Released: Power Your Repair Business

    REWA New Website Released: Power Your Repair Business

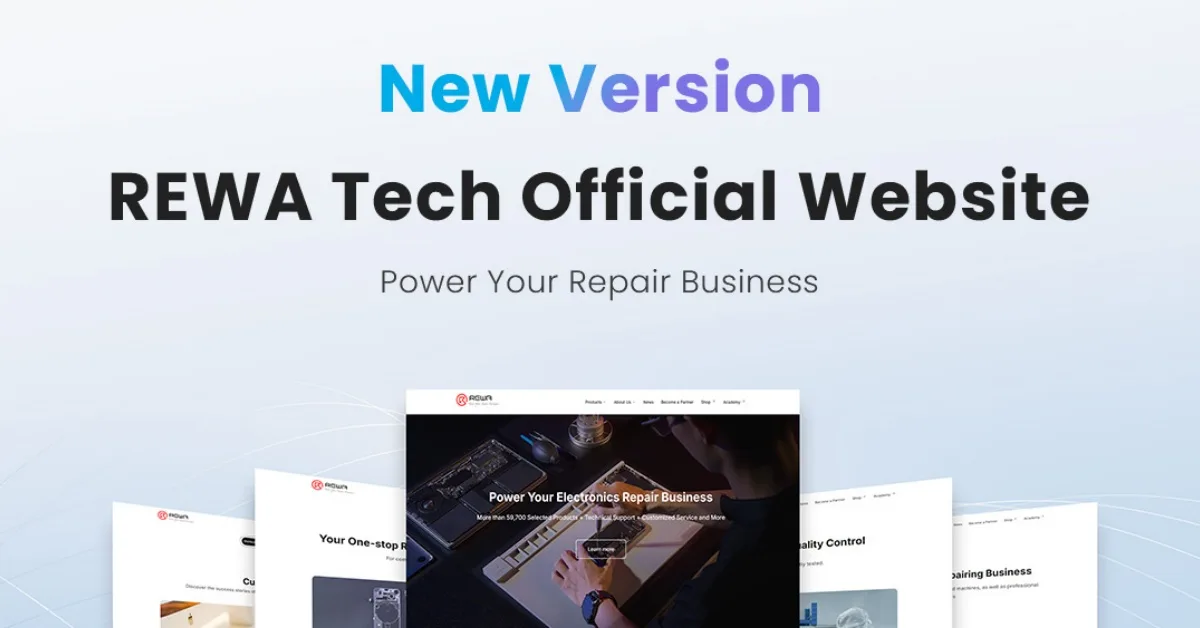
    We are pleased to announce that REWA Tech official website has been upgraded! This update is tailored for B2B phone repair enterprise users. Not only has it been upgraded in visual design, but it also offers more product and service information. This will help you stand out from the repair industry competition.

    rewa new website released power your repair business tech

    Rich product and service information

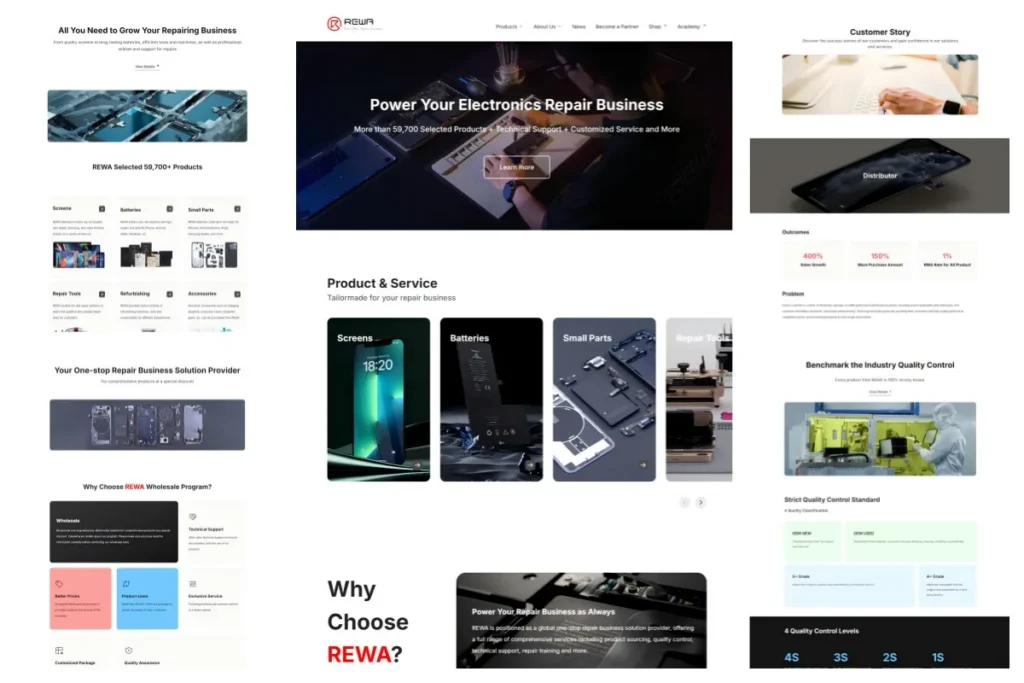
    As a phone parts wholesale supplier, we have updated the display page of products and services to provide a more detailed overview of solutions, allowing you to find the solution that best meets your business needs.
    Check details: https://rewawp.iamtareq.com/product/

    rewa new website released power your repair business product

    New UI design

    By adopting a modern design style, it offers a more professional and concise browsing experience. Enjoy smooth navigation and visual enjoyment whether you are searching for information or exploring solutions.

    Improve user experience

    By optimizing the content layout and website architecture, the browsing experience on mobile devices is also greatly enhanced. This helps you access the website more efficiently anytime, anywhere and make business decisions.

    Why choose REWA?

    As a leader in one-stop repair business solutions, REWA Tech has always been committed to providing customers with the most complete solutions through screen assemblies, batteries, small parts, repair and refurbishment products and technical support. This includes training services, pre-sales and after-sales services. Additionally, we have updated our website to reflect our brand upgrade and our latest understanding of customer needs.

    rewa new website released power your repair business why

    Explore Now

    Visit REWA Tech Official Website now to explore new repair business solutions!
    We sincerely invite you to visit the new official website to experience the new design and functions. If you have questions or feedback, please feel free to contact us. We look forward to working with you to jointly drive your business to success.
  • Samsung vs Apple: A Closer Look at the 2020 Flagship Mobile Phones

    Samsung vs Apple: A Closer Look at the 2020 Flagship Mobile Phones

    The release of the Samsung Galaxy Note 10 and iPhone 11 Pro has brought an end to the battle of the 2019 flagship mobile phones.
    If 2017-2018 is the time of full-screen display, then 2019 – 2020 is the time of 5G.

    The leaked info of next year’s iPhone and Samsung has seen a huge change on the two flagship mobile phones, including design, hardware, etc.

    Let’s take a look at it now.

    Qualcomm has already released the snapdragon 865 5G processor and brought us numerous features.

    One of the major changes is Dolby Vision which can dynamically adjust an image’s color settings to prevent the image from looking too dim or bright.

    In the meantime, the processor also supports 200-megapixel cameras for better digital zoom, 960 FPS super-slow-motion video recording, and even 8K video as well.

    Thus the early leakage predicted that Samsung S11 will have unbelievable improvement on its camera parts while the develop code is Picasso.

    Previously, Samsung officially unveiled the 108MP ISCOCELL Bright HMX camera sensor in August.

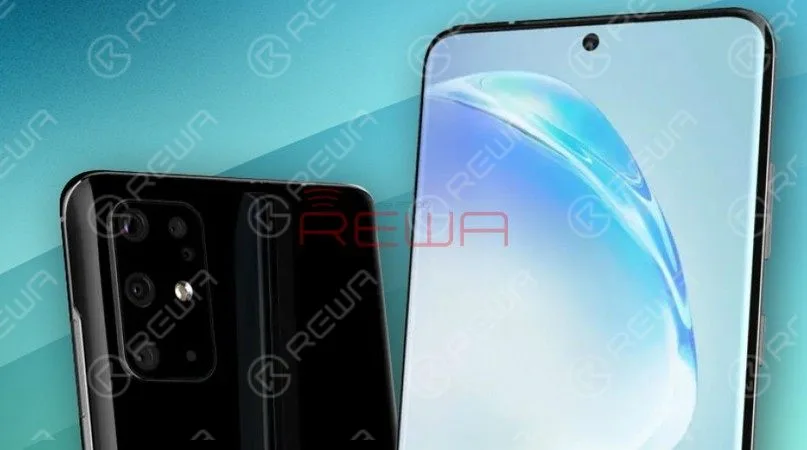
    In October, the leakage design also unveiled the secret of Samsung S11’s back camera and it seems that the phone will have around five “eyes” with a strange design.

    Everything looks just fine except for the camera.

    samsung vs apple closer look 2020 flagship mobile phones s11
    Samsung S11 Concep

    Thus the early leakage predicted that Samsung S11 will have unbelievable improvement on its camera parts while the develop code is Picasso.

    Previously, Samsung officially unveiled the 108MP ISCOCELL Bright HMX camera sensor in August.

    In October, the leakage design also unveiled the secret of Samsung S11’s back camera and it seems that the phone will have around five “eyes” with a strange design.

    Everything looks just fine except for the camera.

    I thought Samsung was just joking whereas they were serious about it.

    Samsung S11 comes with a large camera that integrates five individual camera sensors.

    It is bound to be a powerful photography device.

    In the meantime, the new system leakage screenshot proves that the new S11 will have a 120hz fresh rate setting option.

    Together with the advanced 2K dynamic display with a crazy fresh rate, the Samsung S11 is supposed to be a phone with the best visual effect in 2020.

    Thanks for watching…oh, there is one more thing.

    What about the iPhone 12?

    After Apple compromised the lawsuit with Qualcomm, Apple finally got the chance to produce a 5G phone in 2020.

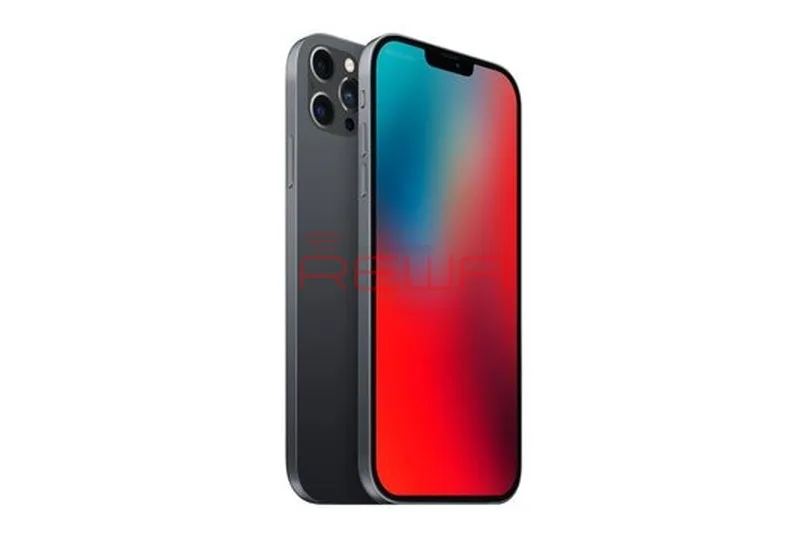
    It seems Apple will release six iPhones in 2020 including iPhone SE2, iPhone 12 4G, iPhone 12 4G Plus, iPhone 12 4G Pro Plus, iPhone 12 5G Pro Plus, and iPhone Pro Max 5G.

    Right now have two common rumors about the design.

    One predicted that the notch will be a bit narrower than before and Apple will fix it to reach a real full display in 2021.

    Another opinion is that the new iPhone will use iPad Pro’s Face ID solution to fix the notch issue.

    Both opinions believe the iPhone 12 will reuse the metal bezel.

    Over The Horizon or "One More Thing"? The Choice of Samsung or Apple In 2020

    Now, let’s move to hardware, it seems all the iPhone 12 series will come with an OLED screen and triple camera & TOF camera as well.

    All phones will come with the A14 Bionic processor while the iPhone 12 Pro series will come with Super Retina XDR display.

    iPhone 12’s main direction is to make a huge improvement in 5G, camera parts, and the stability of iOS.

    There are a variety of bugs in iOS 13 and Apple has released so many patch versions to fix different issues.

    Apple has already claimed that they will take the stability of the system as the main direction of iOS 14.

    No matter how Samsung and Apple gonna change, 2020 definitely will be the new time for mobile phones.

    Which one will you choose next year? Samsung or iPhone?

    Leave your opinion in the comment below.

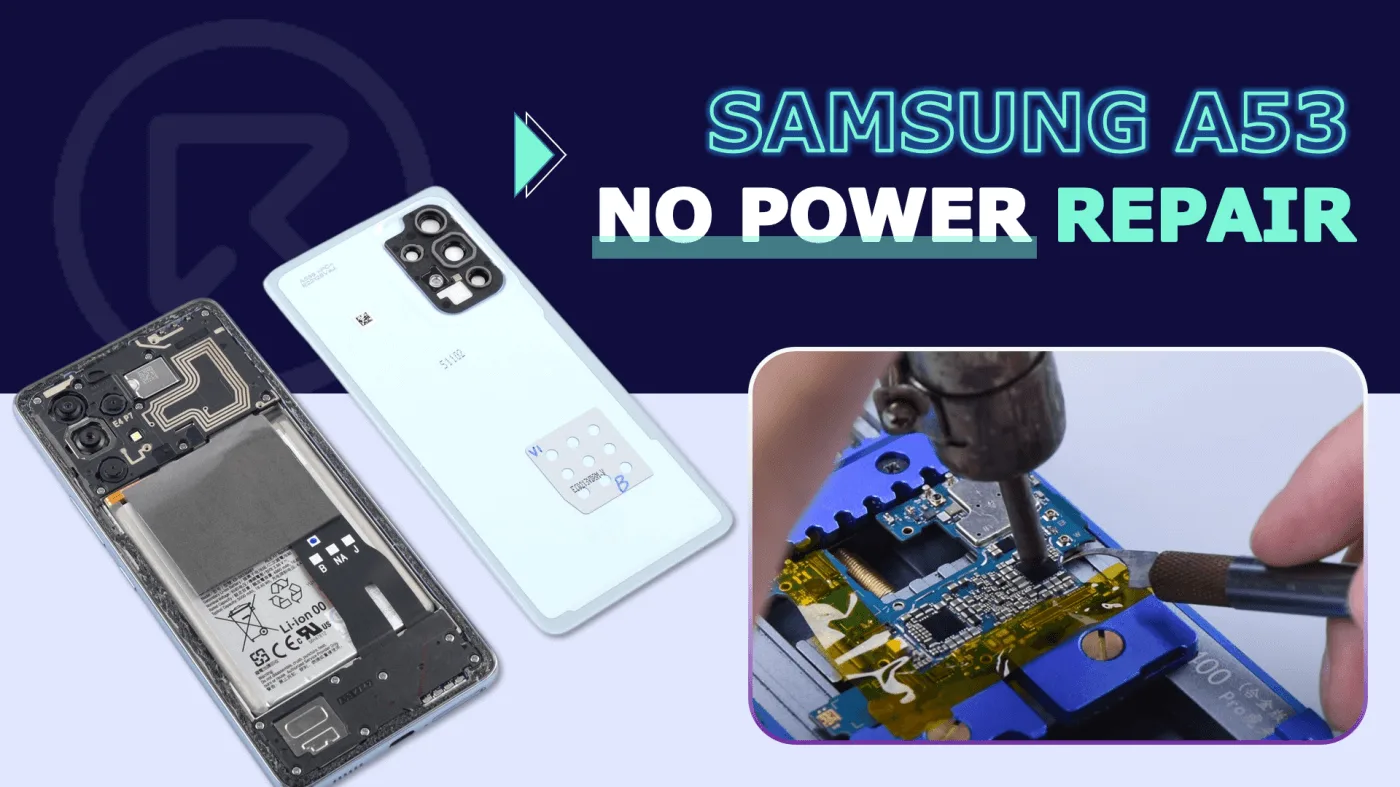
  • Samsung A53 Won’t Turn On Repair

    Samsung A53 Won’t Turn On Repair

    The Samsung A53 model is widely recognized as one of the most desirable smartphones currently available. However, like all electronic devices, it is susceptible to occasional operational issues that may prove difficult and frustrating for users. One of the most common problems experienced by users pertains to the device’s failure to turn on, leading to numerous inquiries directed at REWA Tech via email.

    While there could be several reasons why a Samsung A53 may not turn on, REWA Tech is committed to providing comprehensive solutions to such problems. Our technical team has developed a step-by-step guide to aid users in troubleshooting and resolving this issue.

    Initial Troubleshooting Steps

    Check the Battery

    Ensure that your phone’s battery is charged. If your phone shows no signs of charging when connected to a charger, try using a different cable and charger to rule out a faulty charging setup.

    Soft Reset

    Sometimes, a soft reset can resolve the issue. Press and hold the power button along with the volume down button for about 10 seconds. This can sometimes force the phone to restart if the issue is software-related.

    Advanced Troubleshooting:

    samsung a53 won turn repair power by pressing button and flex cable but

    Primary Testing

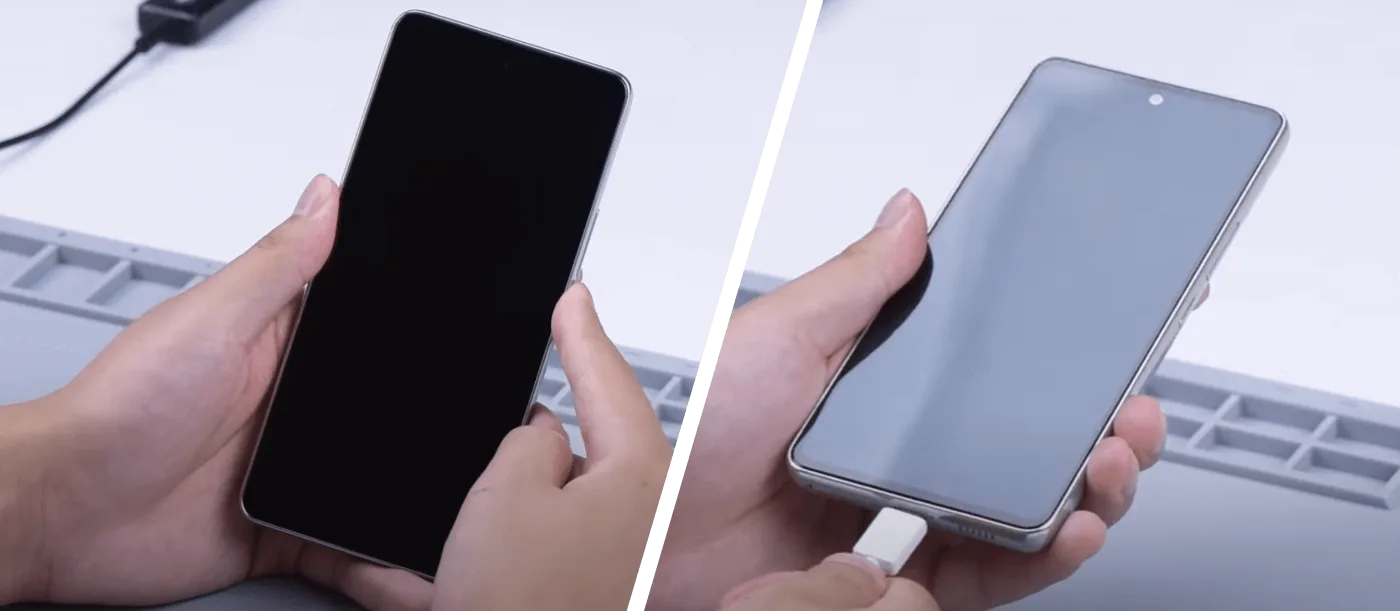
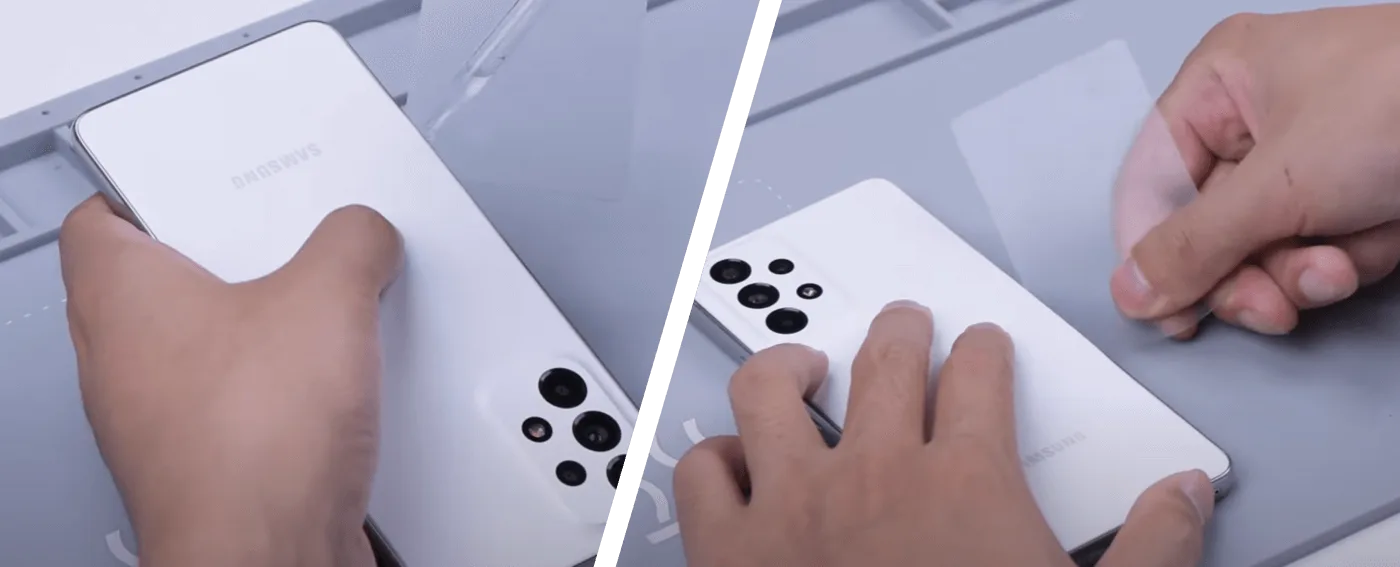
    To begin, test the device by pressing the power button. If the device does not turn on, plug in the charging cable to charge the phone. If the phone remains unresponsive, the device will need to be disassembled for further testing.

    Next, we need to get the phone disassembled for further test

    Place the phone back down on the heating pad at 100℃ for about 2 minutes, then get a gap with an opening card. Add some alcohol to facilitate separation.

    samsung a53 won turn repair heat the phone on heating pad at degreen
    samsung a53 won turn repair disassemble the rear cover with alcohol and

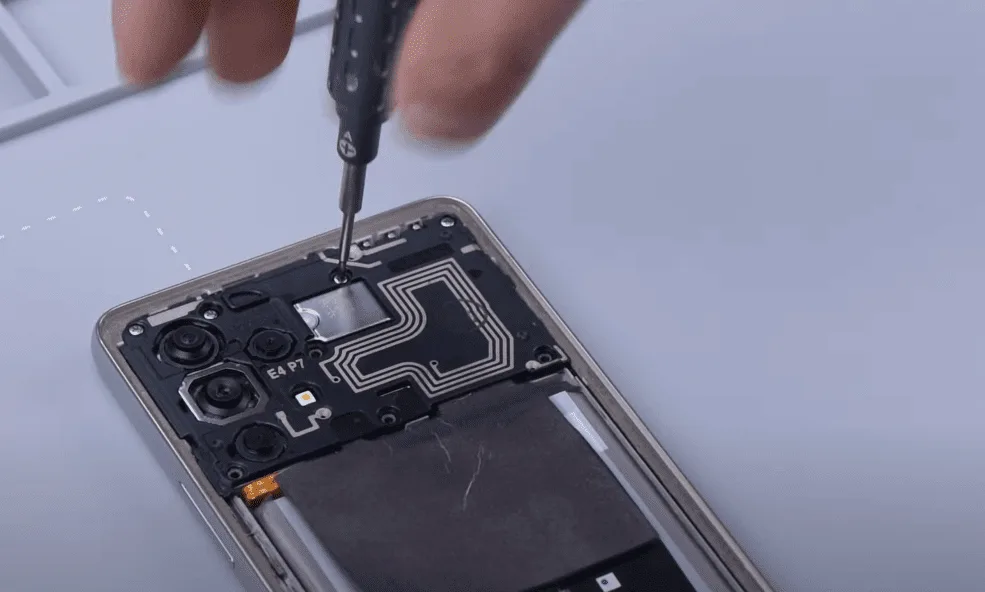
    Detach the back cover, and remove the screws that secure the motherboard shielding cover.

    samsung a53 won turn repair remove the screws that secure motherboard

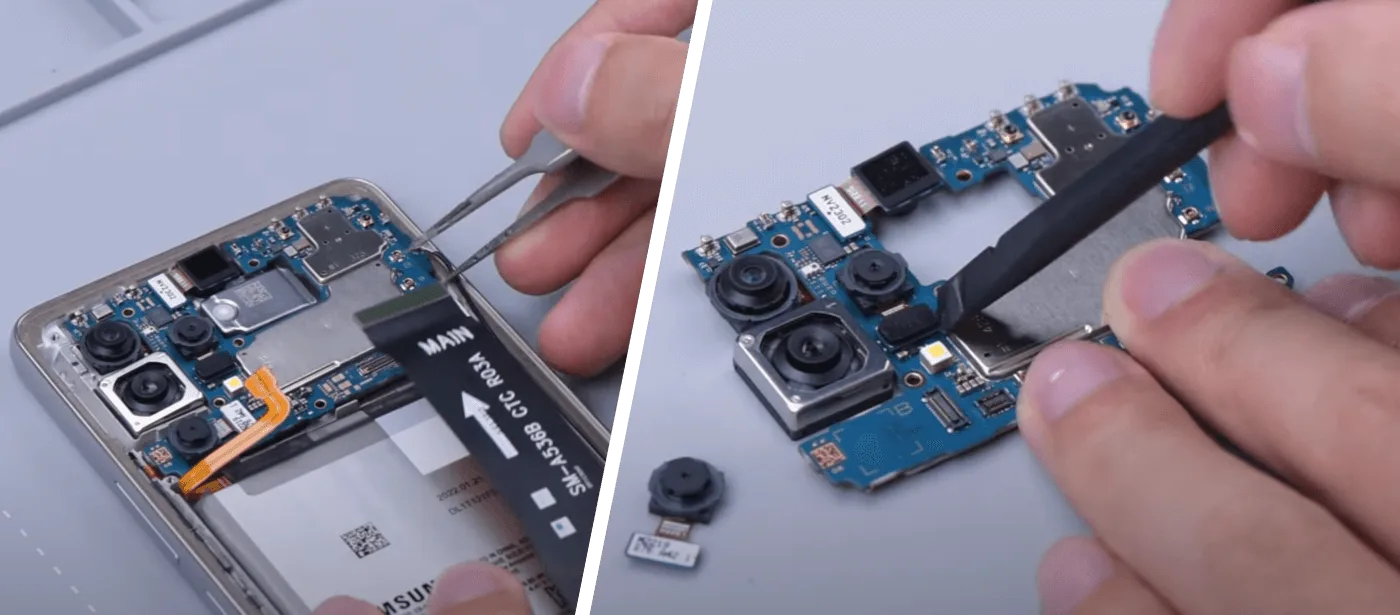
    Disconnect the flex cables, take the motherboard out and remove the cameras with the ESD spudger. 

    samsung a53 won turn repair detach the flex cables and remove cameras

    Check the motherboard

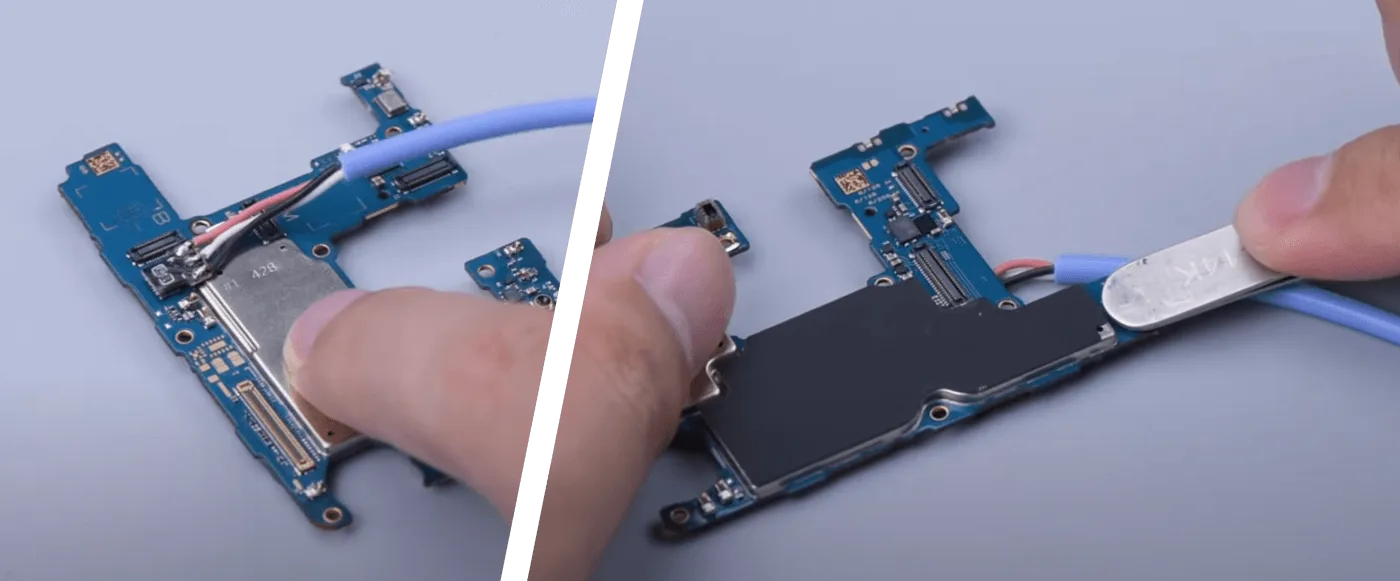
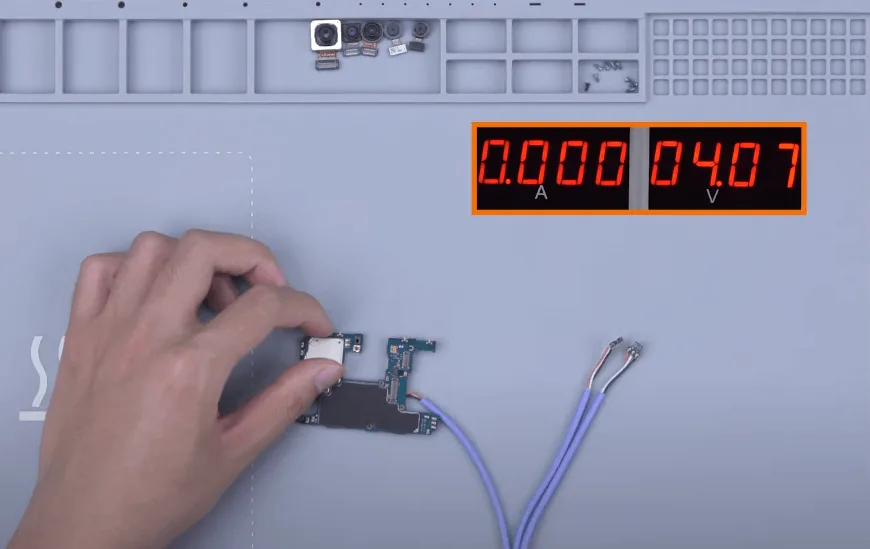
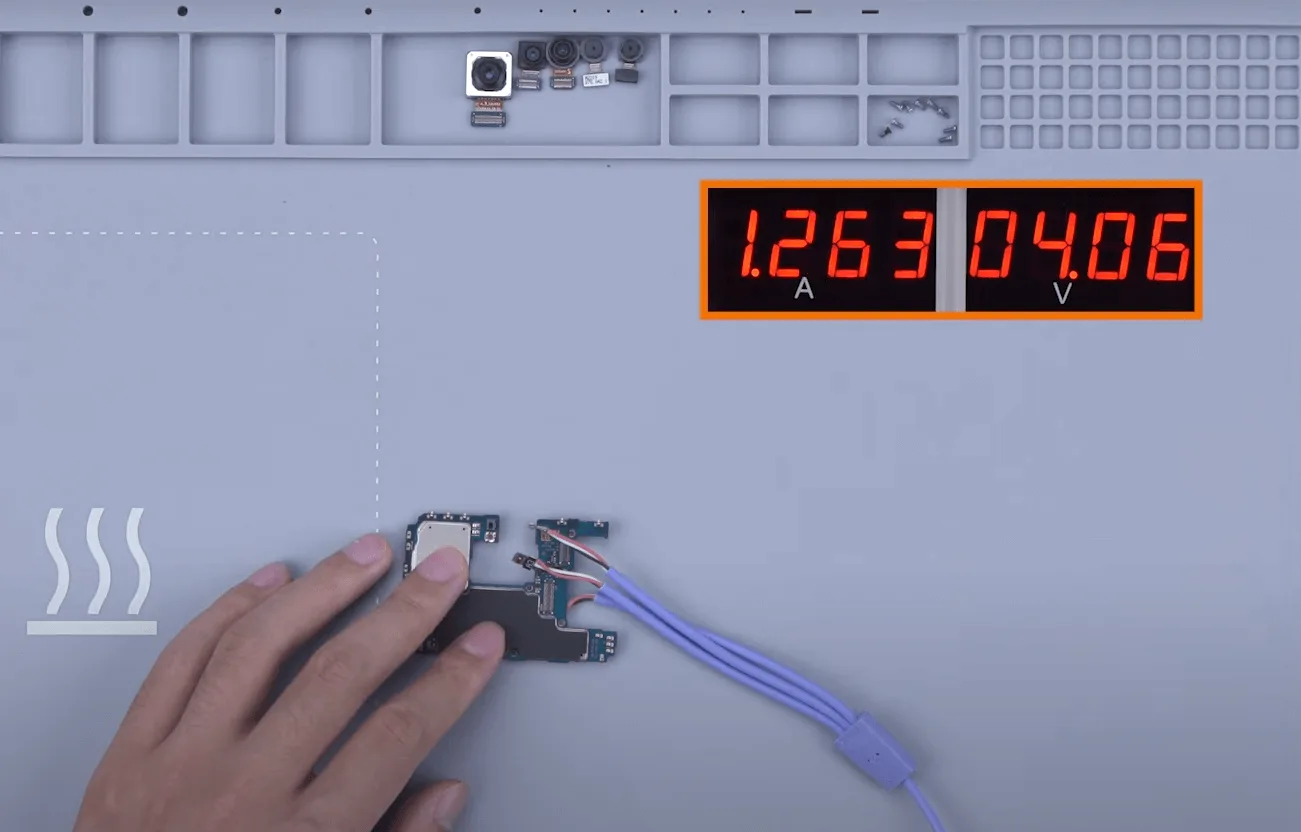
    Power the motherboard with a direct current supply and trigger the boot process with tweezers, the boot current is 0.

    samsung a53 won turn repair power the cable and boot up with tweezers

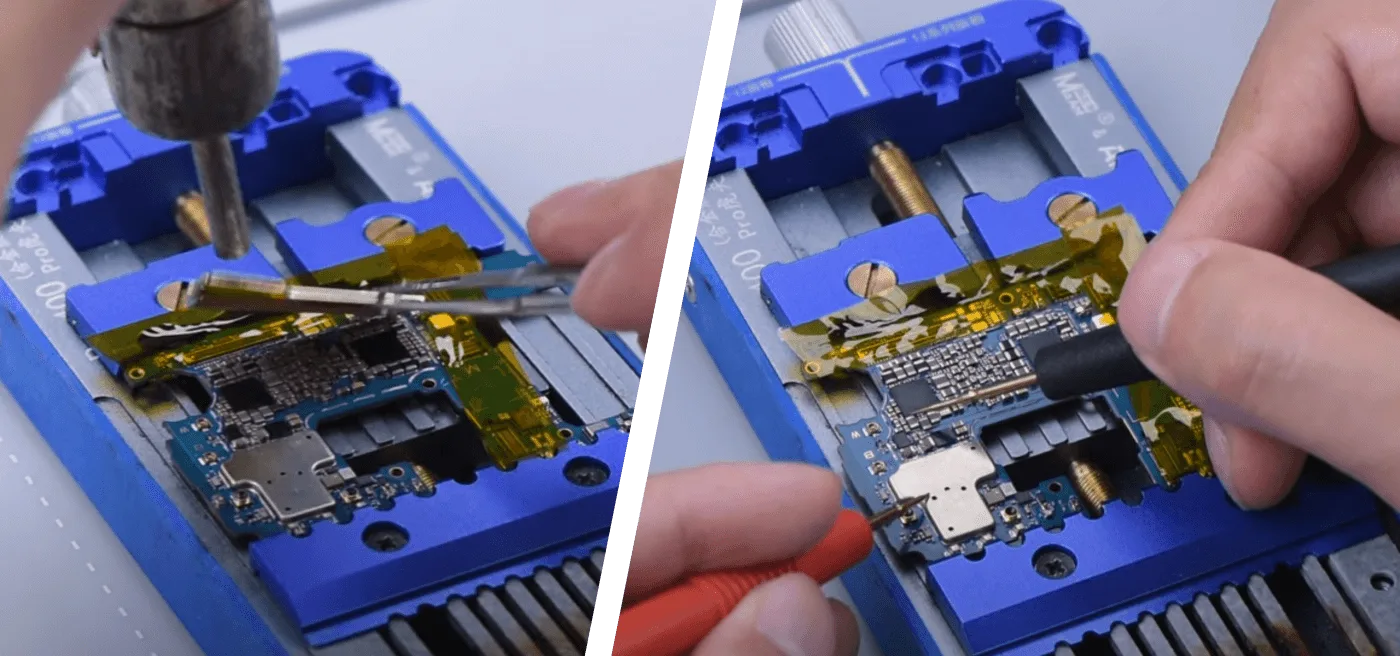
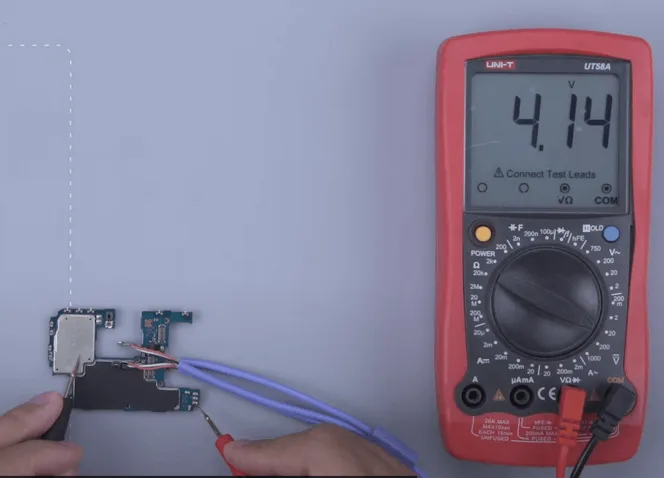
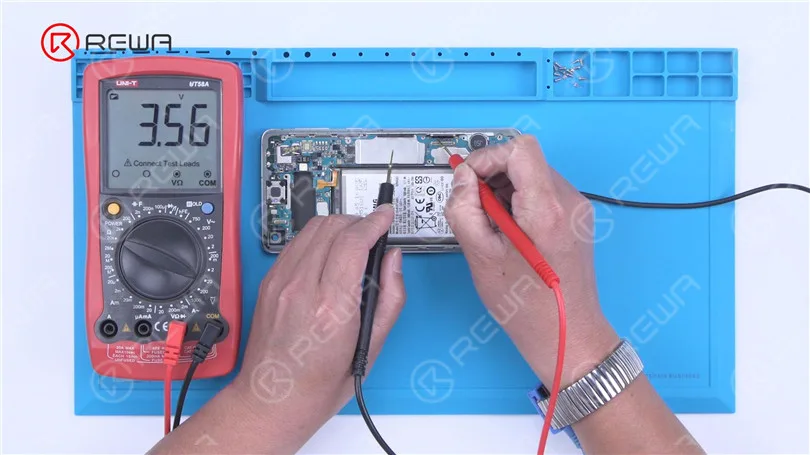
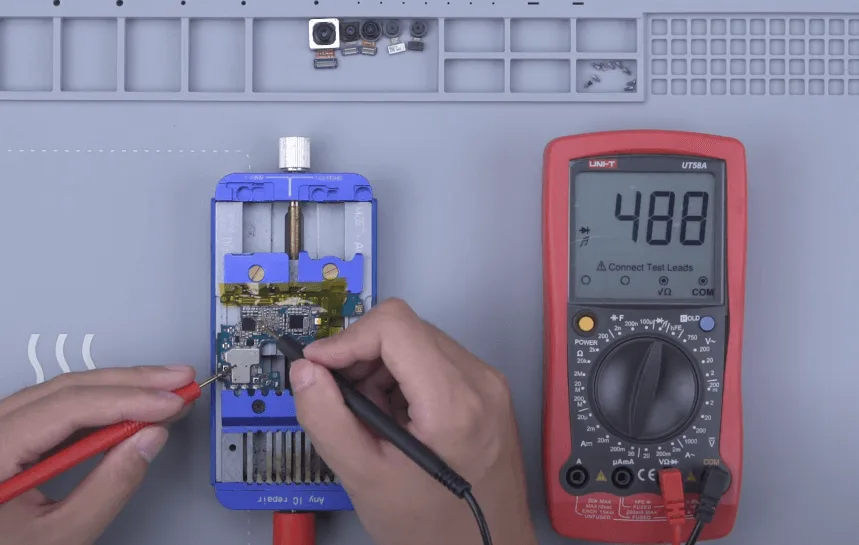
    Then continue to measure with a multimeter, connect the black probe to the ground and use the red probe for measurement, the voltage is 0. 

    samsung a53 won turn repair boot voltage is

    Next, protect the motherboard with high-temperature tape, and remove the shielding cover with a hot air gun at 380℃. Measure the diode values of the components around the power IC, the diode values are OK.

    samsung a53 won turn repair remove the shielding conver and measure
    samsung a53 won turn repair all the diode values are ok

    It can be judged that the power IC is faulty. Then let’s try to replace the power IC.

    Power IC replacement process

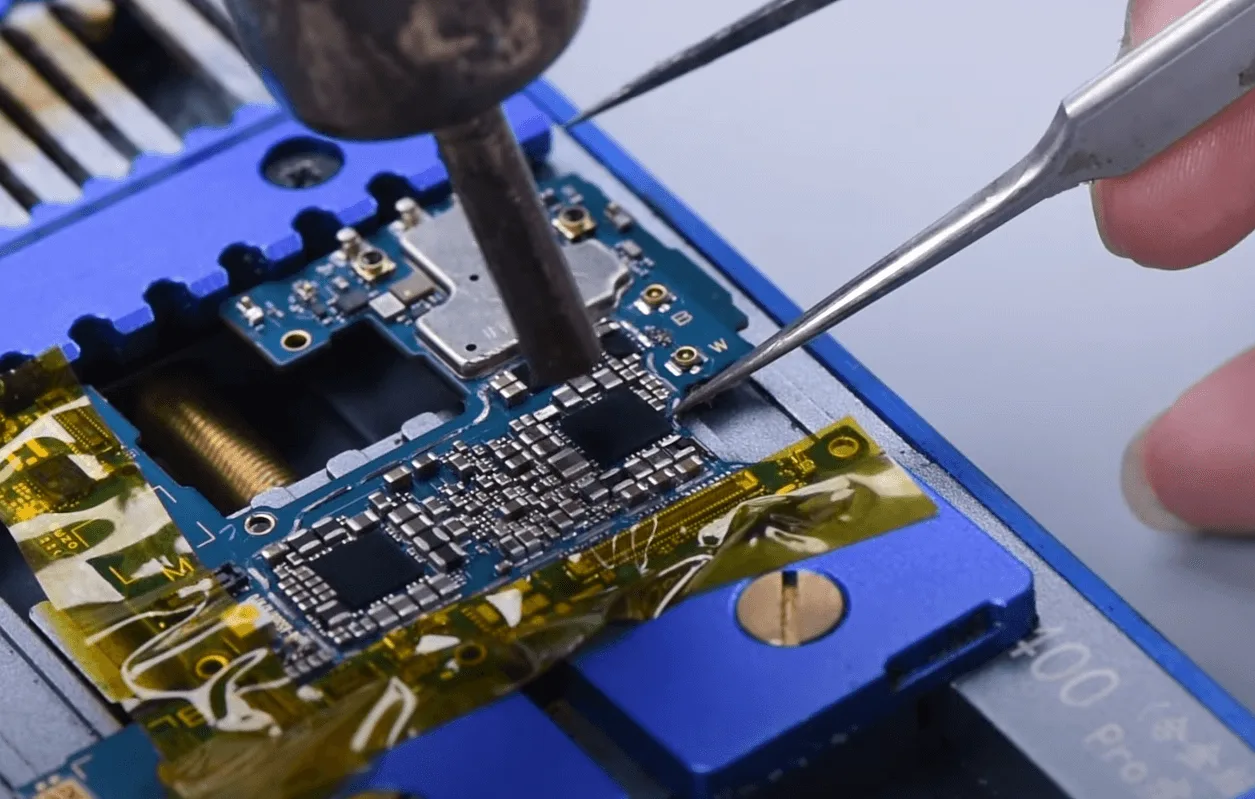
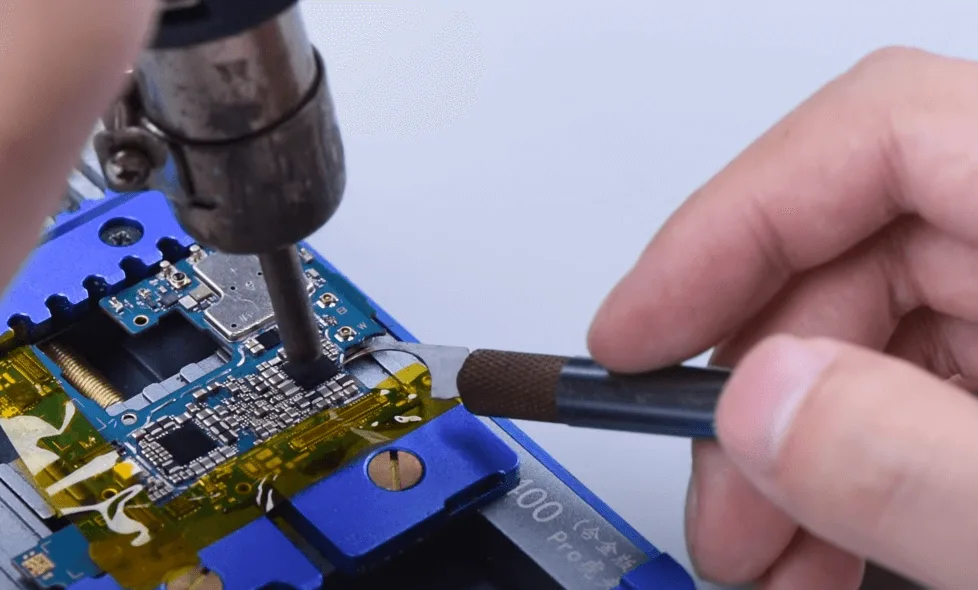
    Protect the components and chips around the power IC with high-temperature tape, and apply a little bit of solder paste flux. Then heat the IC with a hot air gun at 380℃ and airflow 3. 

    samsung a53 won turn repair remove the power ic

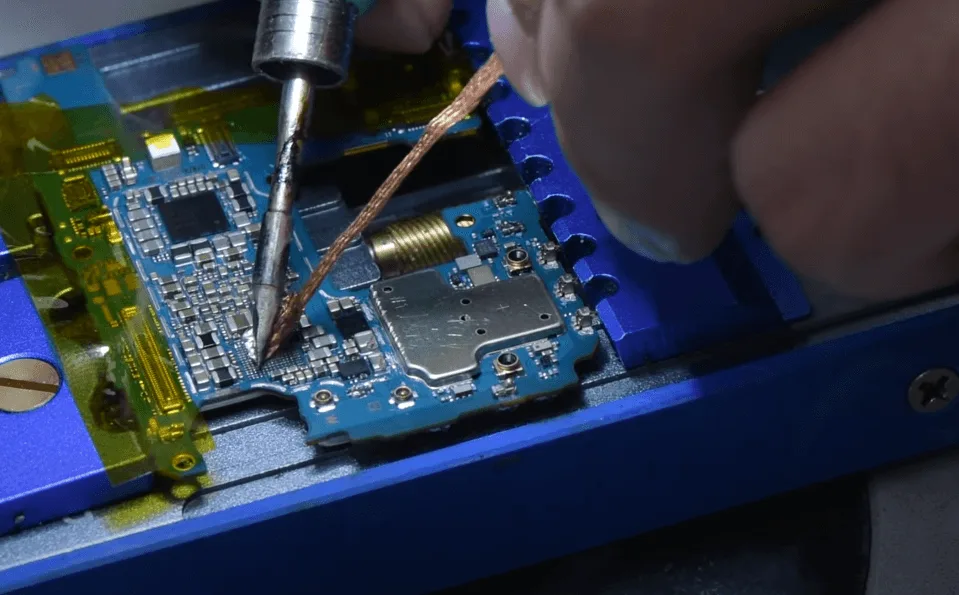
    After removing the IC apply some paste flux to the bonding pads, use a soldering iron at 380℃ and solder wick to remove the tin. Clean the bonding pads with PCB cleaner when the tin is removed.

    samsung a53 won turn repair remove the tin with solder wick

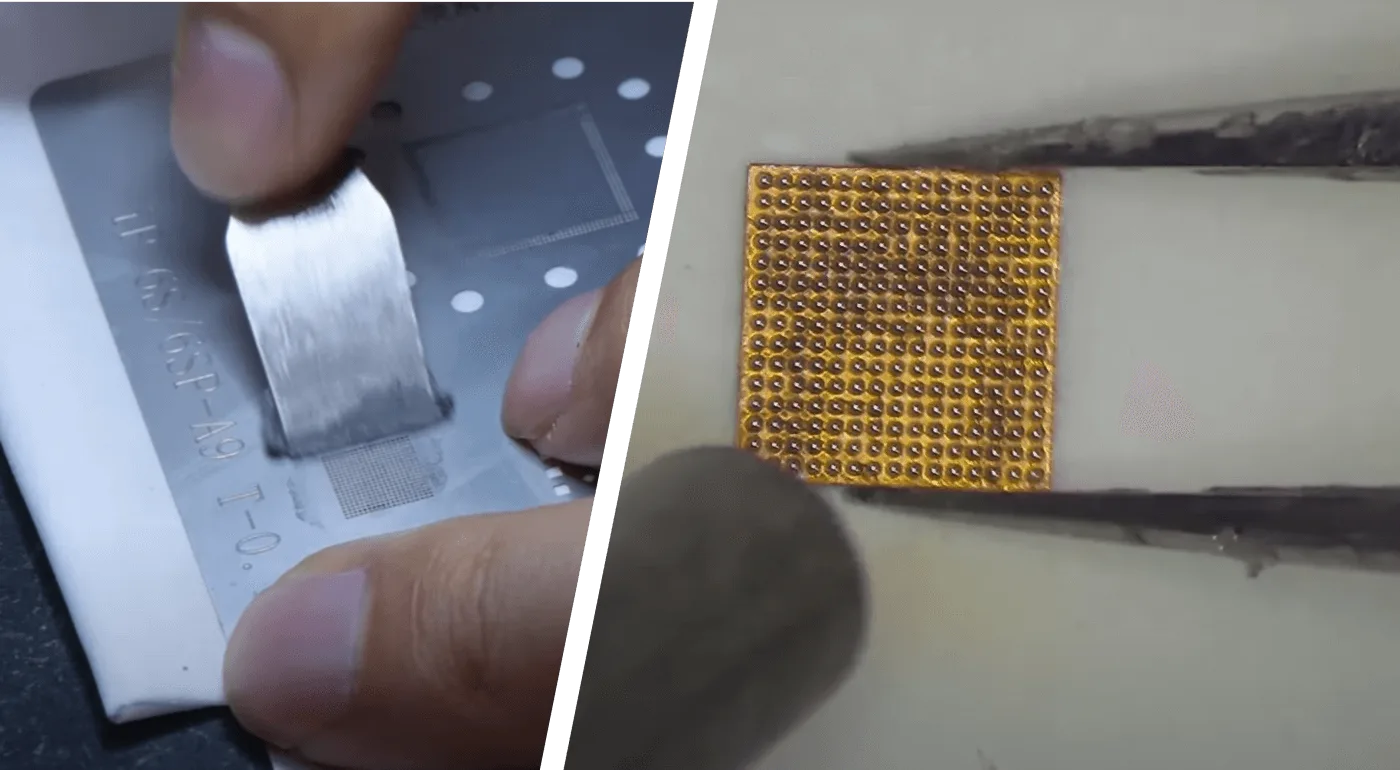
    The next step, let’s reball the bonding pads of the power IC. Apply the tin paste on the bonding pads with stencil evenly then heat with a hot air gun to form the solder balls at 320℃. 

    samsung a53 won turn repair resolder the pmic

    Apply solder paste on the PCB and align the IC at the proper place, then solder the IC with a hot air gun at 320℃ and airflow 3.

    samsung a53 won turn repair solder it with hot air gun

    Clean the motherboard with PCB cleaner and cool it down, then measure with a multimeter, the voltage return to normal, trigger the boot-up with tweezers, and the boot current is also normal. 

    samsung a53 won turn repair the boot current is also normal
    samsung a53 won turn repair the voltage value is normal

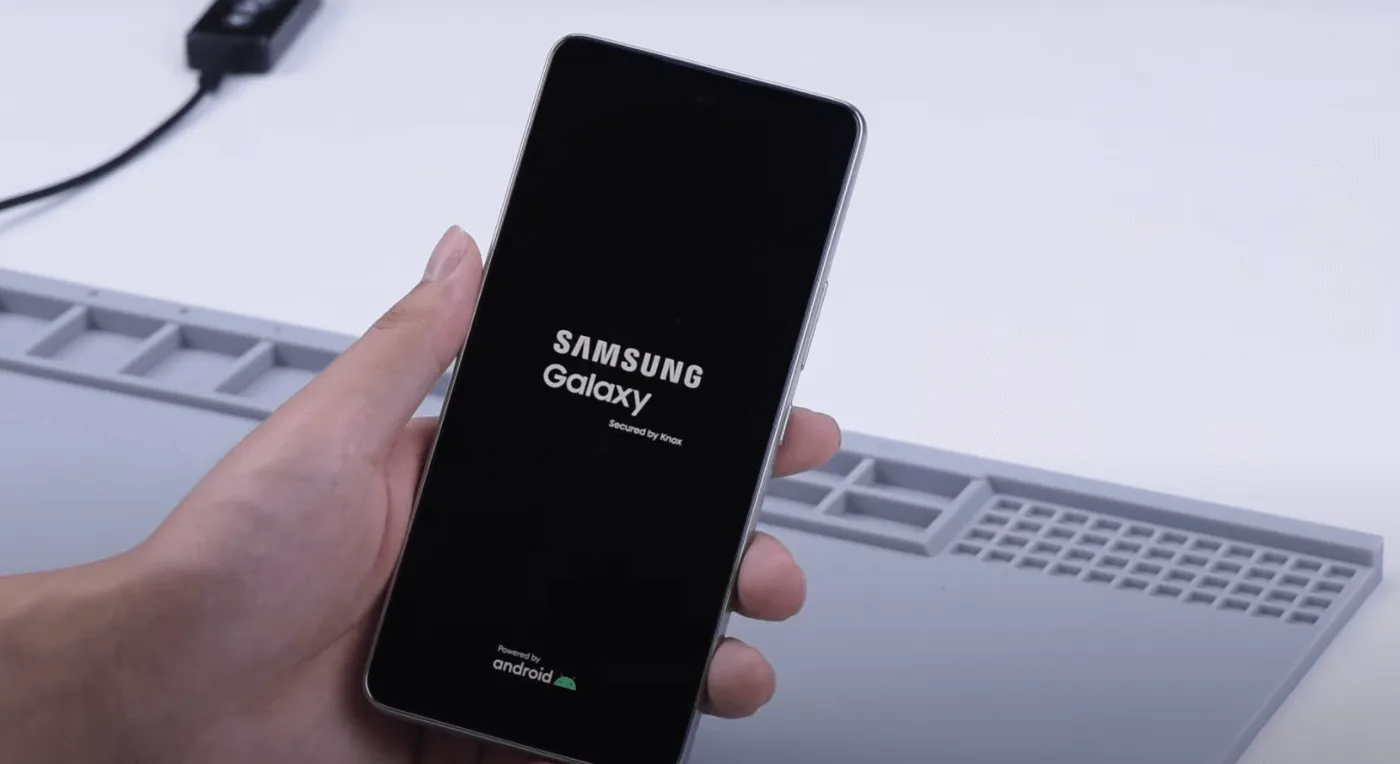
    Then we put back the shielding cover and the cameras and install the motherboard. Press the power button and the phone turns on normally.

    SAMSUNG A53 Won't Turn On

    Assemble the phone and test the functions again

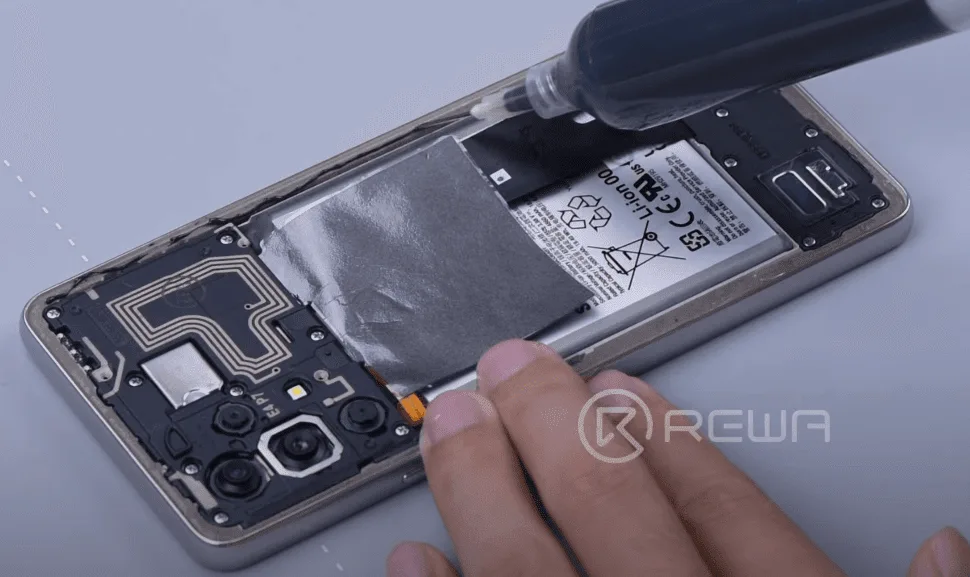
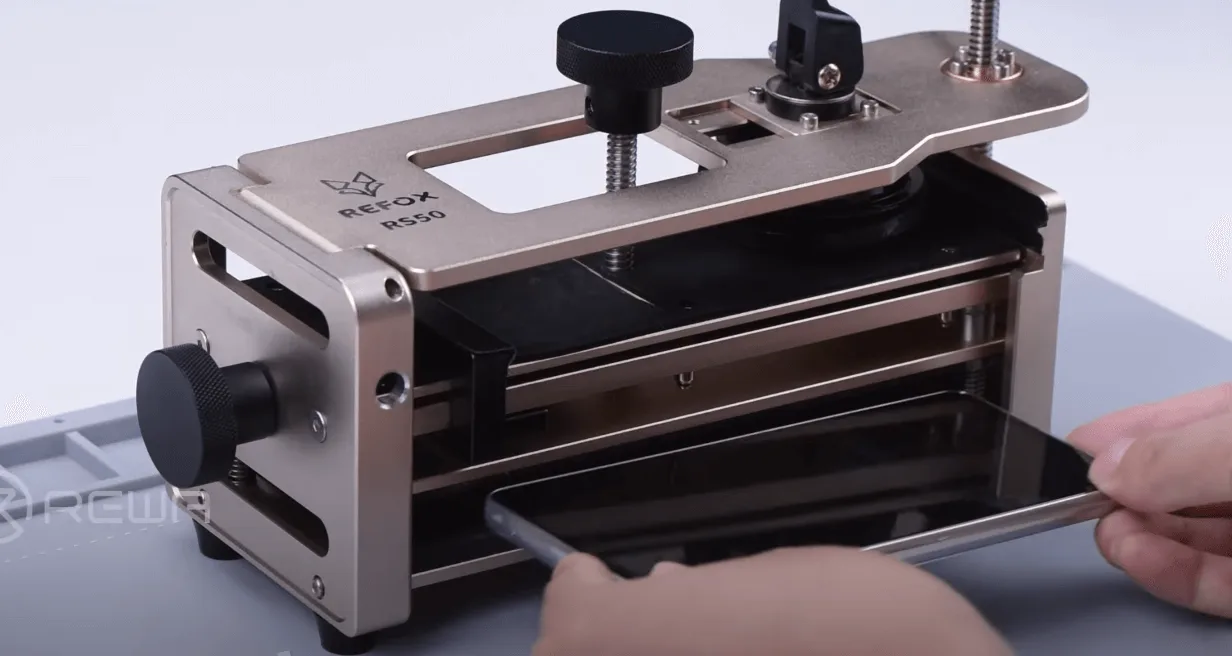
    Apply bezel glue and assemble the phone screen with a clamp fixture. Then test all the functions again, and the phone works normally. The issue gets resolved by power IC replacement.

    samsung a53 won turn repair apply the bezel glue
    samsung a53 won turn repair the fixture is ok


    Visit REWA Youtube Channel to watch the detailed operation process

    Frequently Asked Questions

    How to Fix a Samsung Phone that won’t Turn on?

    An issue with the motherboard chip level causes the issue, which requires excellent repair skills and knowledge, as well as professional tools and equipment. It is recommended that you send it back to the official repair center for repair. If your device is out of warranty already and you don’t want to spend a lot on repairing it, ask a local repair shop for assistance.

    How can I Become a Cell Phone Technician?

    In order to become a cell phone repair technician, you’ll have to learn the device structure, and how to use repair tools, and the key skill is excellent handwork, replacing parts without damaging the motherboard.

    A cell phone repair course at REWA Academy is the best way to acquire cell phone repair expertise and skills. We have everything you need to be a cell phone repair technician who can earn a decent living. 

    There are three types of training we offer on-site, off-site, and live training. A professional team of trainers and technicians with more than ten years of experience will help you to become a service expert in no time.

    Conclusion

    Repairing a smartphone requires a methodical approach to identifying and solving the underlying issue. Whether it’s a simple fix like charging your phone with a different charger or a complex repair like replacing the power IC, understanding the problem is the first step toward resolution.

  • How to Fix Samsung S10 Touch Screen Not Working

    How to Fix Samsung S10 Touch Screen Not Working

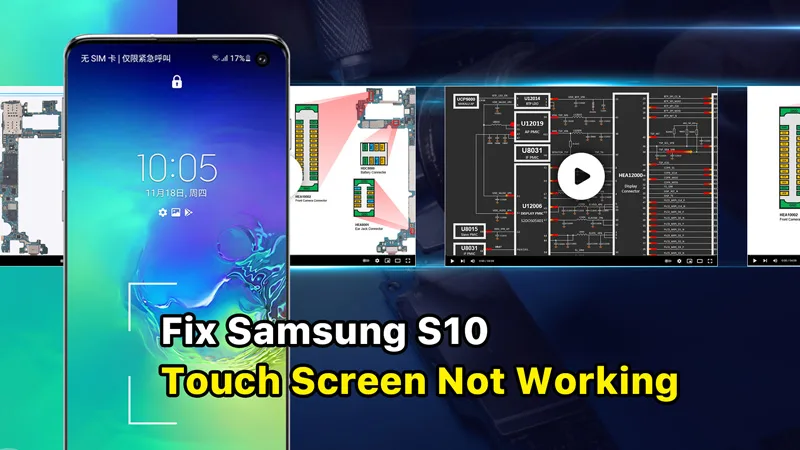
    REWA Academy recently launched online Android Phone Motherboard Repair Courses. For $129 a year, you can learn the workflow and troubleshooting process for different Android phone motherboards like Samsung, Huawei, Xiaomi, etc. The workflow and troubleshooting process learned can be effectively applied to solve problems in real repair circumstances. Today we will make use of Android course content from REWA Academy to deal with a real repair case of Samsung S10 touch screen not working.

  • REWA Testing Center – Samsung Galaxy S5 Glass Lens Testing, What’s A Good Glass Lens Mean ?

    REWA Testing Center – Samsung Galaxy S5 Glass Lens Testing, What’s A Good Glass Lens Mean ?

    This video will guide you to REWA Testing Center, where professional engaged in mobile phone parts testing. This video will tell you the testing course for Samsung Galaxy S5 glass lens,

    more testing videos will continue to be launched. Please keep sustained attention on our website https://shop.rewa.tech/ to get the latest news.

  • Troubleshooting Samsung S10 Touch Issues: A Step-by-Step Guide

    Troubleshooting Samsung S10 Touch Issues: A Step-by-Step Guide

    Are you having trouble with your Samsung S10’s touchscreen? You’re not the only one. Although it’s one of the most sought-after smartphones on the market, some users have reported issues with the touchscreen. But fret not, we have you covered. This guide includes detailed step-by-step instructions on how to troubleshoot the issue.

    The new online courses offered by REWA Academy focus on repairing Android phone motherboards. These courses cover various brands such as Samsung, Huawei, Xiaomi, and more. Students will learn the step-by-step workflow and troubleshooting techniques that can be directly applied to real repair scenarios. In this instance, we will utilize the Android course content from REWA Academy to address a specific repair case involving the Samsung S10 model.

    Diagnosing the Problem

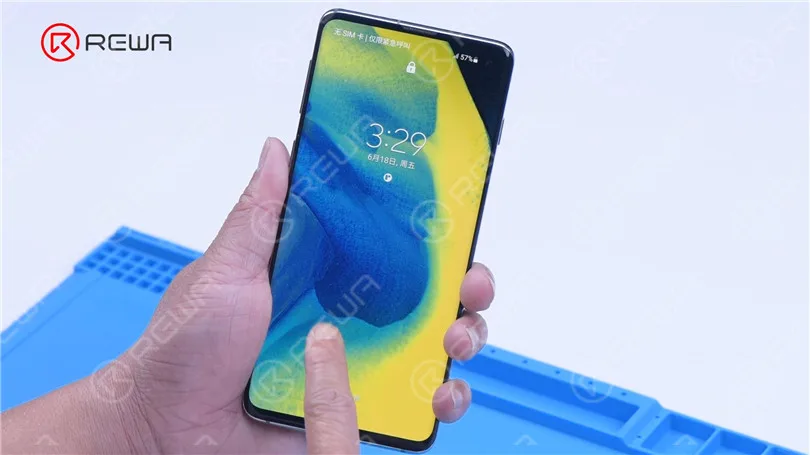
    Samsung S10 Touch Screen Not Working

    Upon turning on the Samsung S10, it becomes evident that the touch screen isn’t functioning. Even after replacing the screen, the issue persists, pointing to a possible motherboard fault as the culprit.

    Samsung S10 Touch Screen

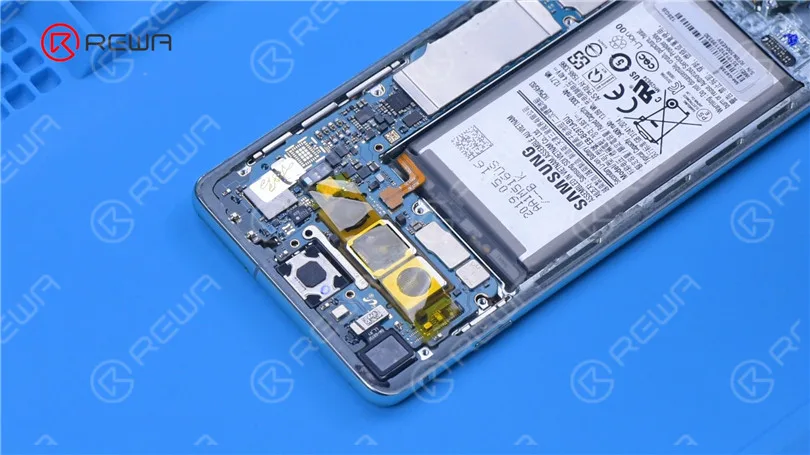
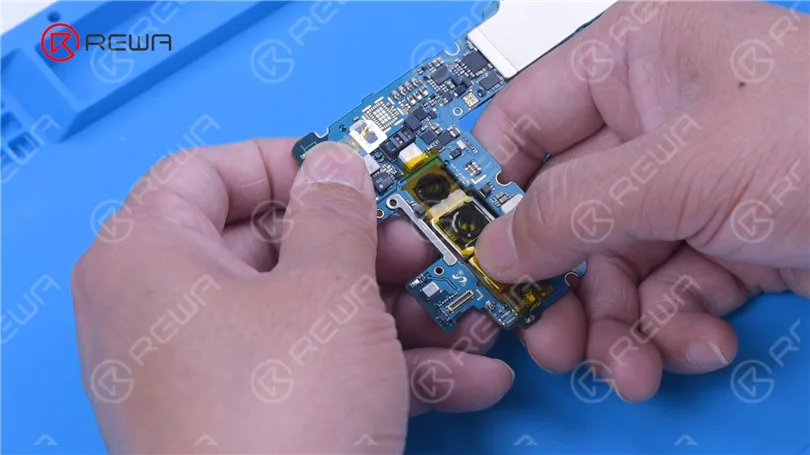
    To get to the root of the problem, we need to remove the motherboard for further testing. Here’s a breakdown of the steps.

    1. Detach the Back Cover: Start by gently removing the back cover of the phone.

    3. Protect the Camera: To safeguard the camera during the repair, apply high-temperature tape over it.

    motherboard out for further testing

    2. Remove Screws and Cover: Carefully take out the screws securing the motherboard and the cover that holds it in place.

    4. Disconnect Components: Begin by disconnecting the battery flex cable and removing the front camera.

    5. Disconnect the Display: Next, disconnect the display flex cable.

    6. Remove the Motherboard: Carefully extract the motherboard from the phone.

    7. Yank the Rear Camera Module: Lastly, remove the rear camera module to avoid any damage during the repair process.

    Disconnect the battery flex cable

    Understanding the Components

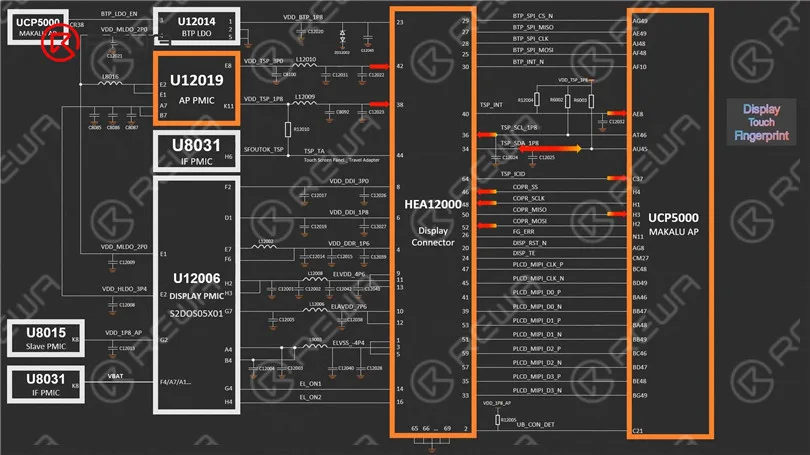
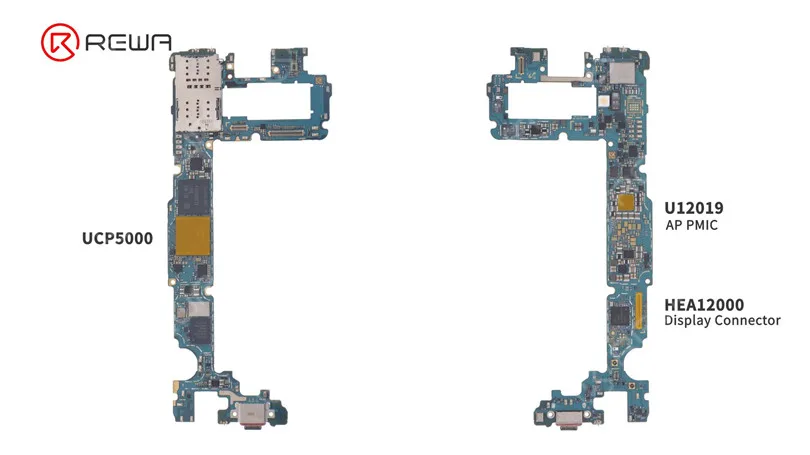
    Before diving into the repair, it’s essential to understand the key components related to the touch functionality of the Samsung S10. As per the REWA Academy course, these components include:

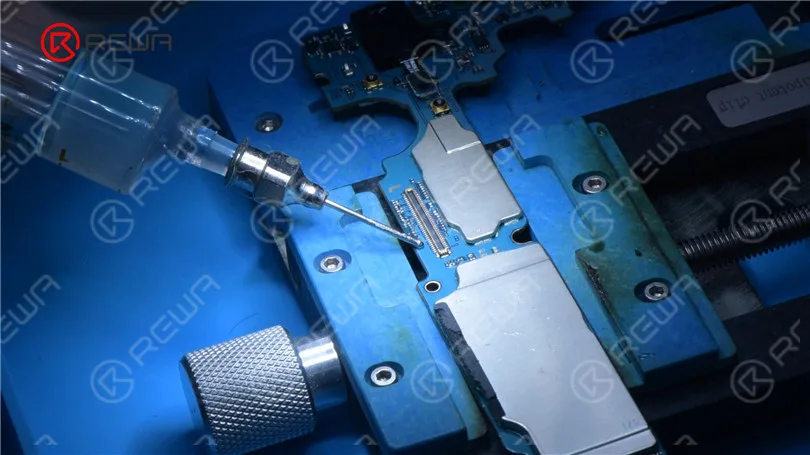
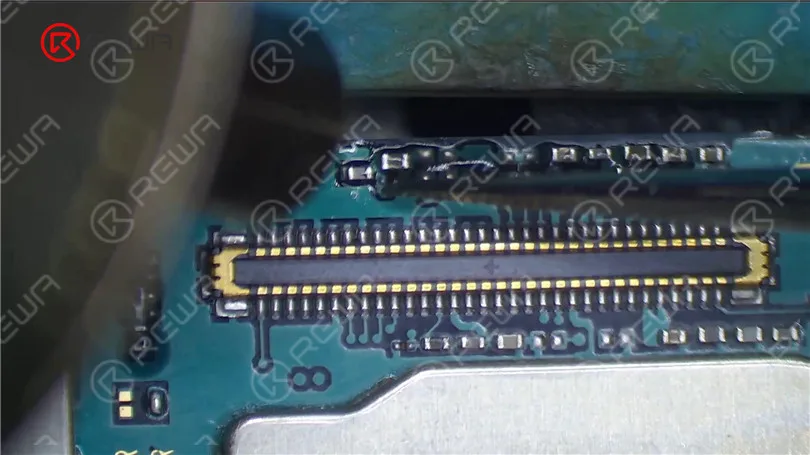
    – HEA12000: The display and touch connector that links the screen to the motherboard.

    – U12019: Supplies touch with 3.3 V and 1.8 V voltages.

    – UCP5000: Responsible for communication between the screen and touch.

    communication between the screen and touch
    S10 include HEA12000

    Troubleshooting the Faulty Component

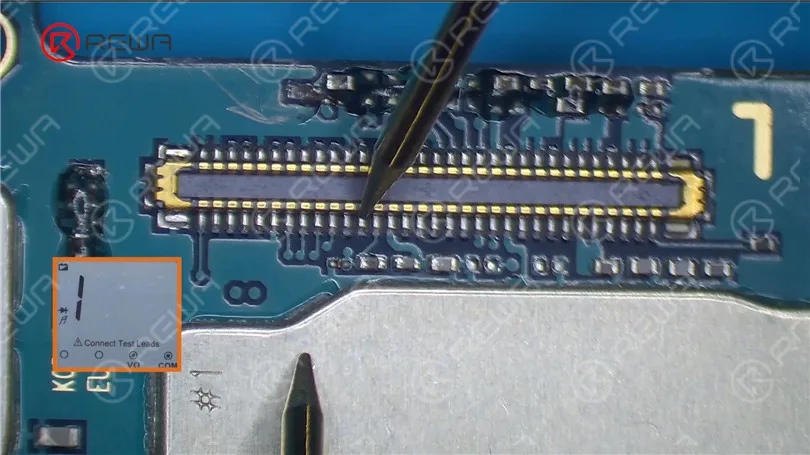
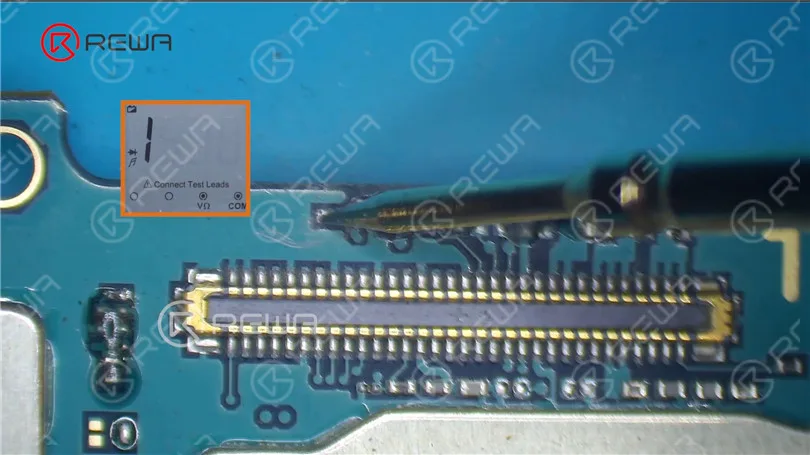
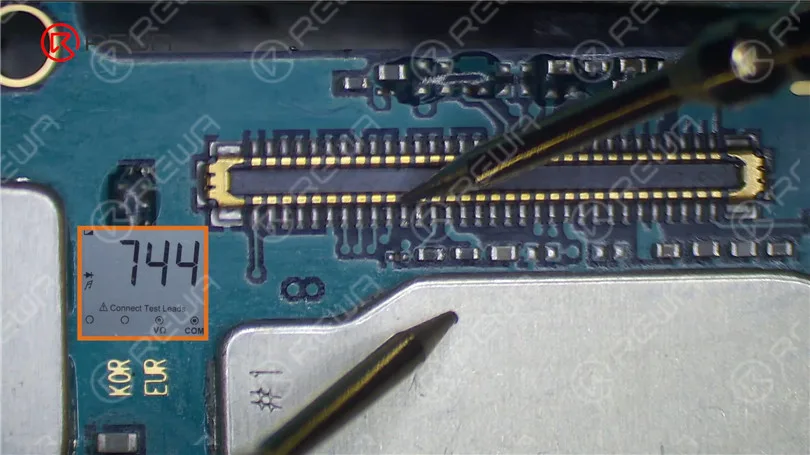
    To isolate the issue, we first measured the diode value of HEA12000. Normally, it should read around 600, but in this case, it shows 1 (infinite).

    measure the diode value of HEA12000

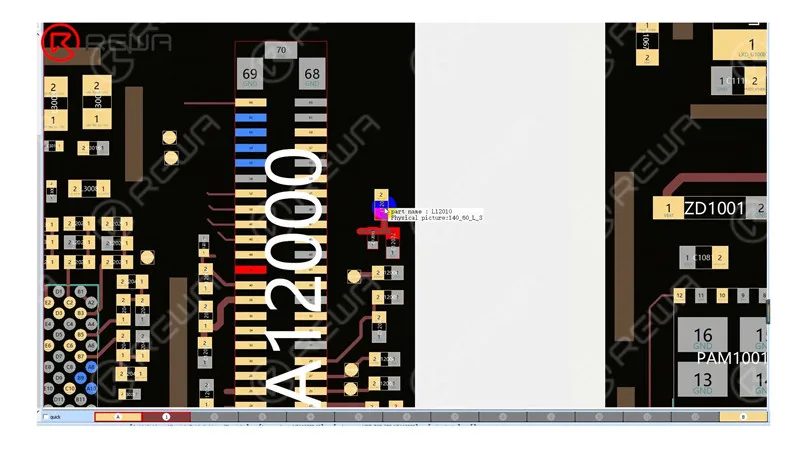
    Upon inspection, we find that pin 42 of HEA12000 connects to C12022 and L12010, eventually leading to U12019.

    connected to C12022 and L12010
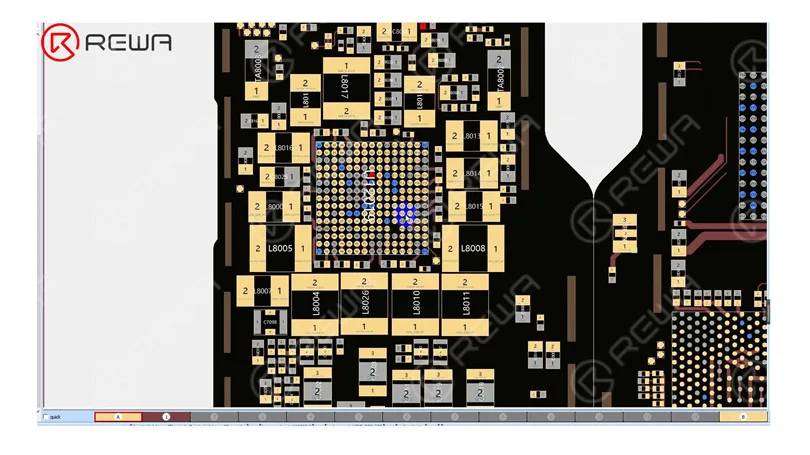
    connected to U12019

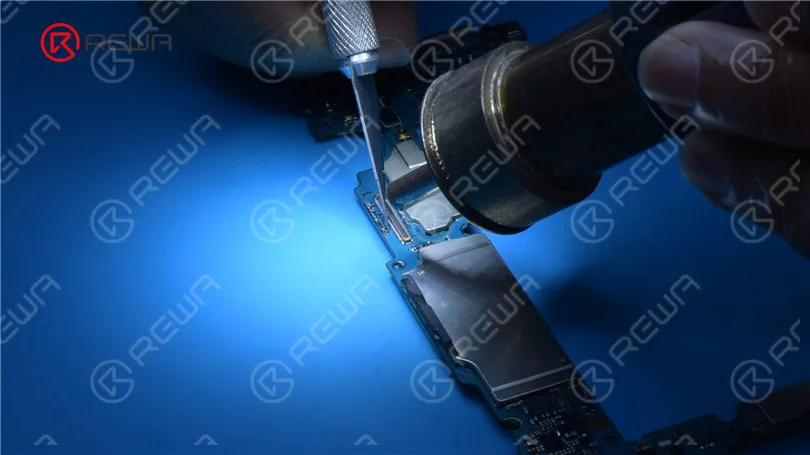
    After measurement by the multimeter, The diode value of L12010 is also 1 (infinite), indicating a problem with the inductor or related circuits. Then we remove corner adhesive with Hot Air Gun at 250 °C and airflow 3. We can see that the inductor is completely damaged.

    measurement by the multimeter

    Confirmation of the Issue

    diode value of the inductor

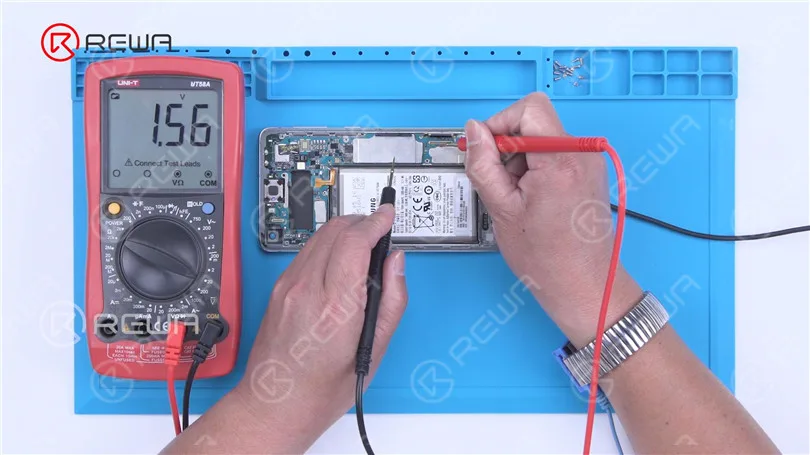
    To verify that the power IC’s output voltage is normal, we connect the battery and turn on the phone. We measure one end of the inductor and find a voltage of about 3.3 V instantly. We also check the 1.8 V power supply of pin 38, which jumps to 1.5 V instantaneously. This confirms that both output voltages of U12019 are functioning correctly, affirming that the open-circuited inductor is the cause of the touch issue.

    output voltage of the power IC

    Then measure the 1.8 V power supply of pin 38 to see if it is normal. The startup voltage jumps to 1.5 V instantaneously. It indicates the two output voltages of U12019 are working fine. We can confirm now that the open-circuited inductor has resulted in the touch not working.

    1.8 V power supply

    Repair and Testing

    After identifying the problem, we replaced the defective inductor with a fresh one. Add Paste Flux to the bonding pads, then use a Soldering Iron at 380 °C to clean them. Continuously clean the bonding pads with PCB Cleaner.

    Fix Samsung Screen Not Working

    Use a Hot Air Gun to solder a new inductor at 330 °C with airflow 3. After soldering, clean the bonding pads with PCB Cleaner. Proceed to measure the diode values of both the inductor and capacitor, which are found to be normal. Finally, measure the diode value of the connector, which is also normal.

    Solder a new inductor with Hot Air Gun
    Samsung Touch Screen Not Working

    After reassembling the phone, touch functionality is restored, bringing the Samsung S10 back to life.

    touch function returns to normal

    Conclusion

    Keeping up with the latest advancements and information in the ever-evolving sphere of smartphone repair is vital. At REWA Academy, we offer advanced courses for various Android phone models, providing you with the essential abilities and proficiency to tackle any repair job. Furthermore, when you subscribe to REWA Academy, you will receive complimentary access to newly added tutorials for the duration of your subscription.

  • Dual SIM & SD Card Work Simultaneously on Samsung Galaxy S7 Edge

    Dual SIM & SD Card Work Simultaneously on Samsung Galaxy S7 Edge

    Warm Prompt:

    1.Attention that you may break your SIM card, Micro SD card and/or Galaxy S7 Edge by these instructions.

    2.Skilled technician is required for the operations.

    3. This video is only for technique sharing.

    4. The device in the video is dual-SIM card version Samsung S7 edge

    Those who need the dual SIM cards on their device might have been disappointed with the Samsung Galaxy S7 Edge. Because you can either choose Extra Space; or Dual Sim with internal space.

  • Replace the Charging Port of Samsung S10

    Replace the Charging Port of Samsung S10

    The Type-C port of the Samsung S10 is damaged. Check out this video to see how we replaced the charging port of the Samsung S10.