Tag: iphone repair

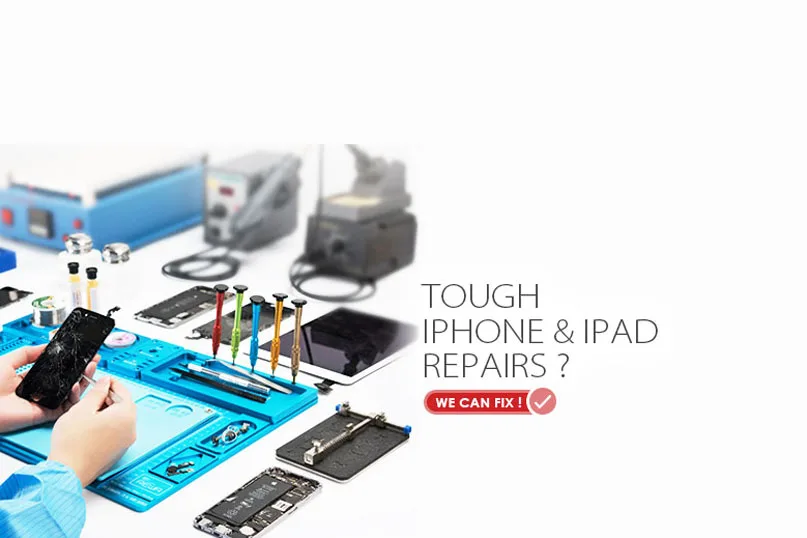
  • Tough iPhone & iPad Repairs? We Can Fix!

    Tough iPhone & iPad Repairs? We Can Fix!

    When it comes to electronic products like phones, tablets and computers, iPhone & iPad repairs can often be cost-effective alternatives to buying new. However, it’s easy for us to spell the word ‘repair’ while practical repair work can be a real meticulous process. Repair shops spring up with the development of electronics all around the world, in the meantime, malfunction grew to be more and more precise. Repair experts can be professional at some point but they cannot be almighty for all fault caused by the daily updated electronic products. So what to do? It’s never too late for you to ask for support and REWA always got a repair solution for you. Our network of repair services are positioned to offer efficient logic board repair and cracked screen repair services for all in need. We want you to boost your business and stand out from others, and we are honored to be there to help.

    Advantages of iPhone & iPad Repairs With REWA

    Tough iPhone & iPad Repairs

    One-stop Meets All

    REWA is capable of supplying all of our customer’s needs within our services. Whatever your problem, no matter how big or small, our dedicated sales and customer service team will provide a competitive and reliable solution.

    Prompt And Efficient

    Don’t get into a spin with your unsolved problem, REWA offers prompt and efficient service for your emergency. Contact us now to solve your problem quickly and cheaply.

    Leading Technology

    Faced with a problem your experts may have a question with? Turn to REWA for support. Our experts and engineers are highly skilled and equipped to deal with a broad range of products like iPhone, Samsung, Huawei etc.

    Transparent Service

    Transparency creates trust! REWA believes that the best approach is to step outside of the business realm and into the human realm. Our customers are kept informed of all information they need from repair process to price details and so on.

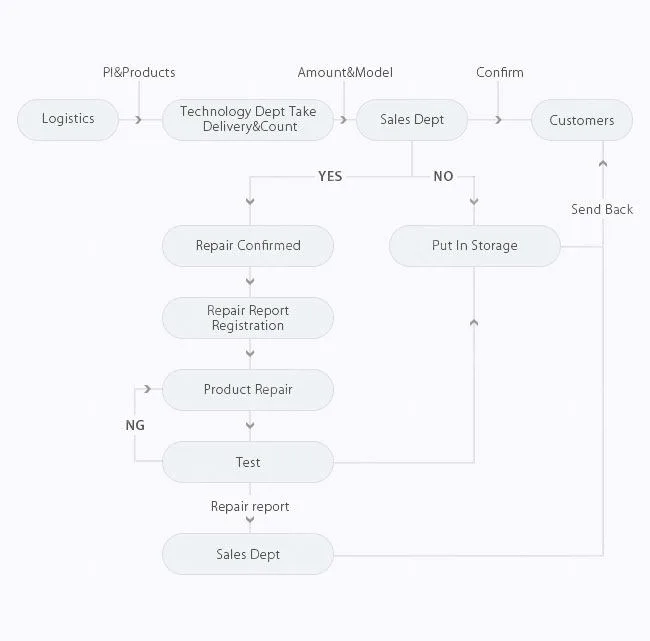
    How REWA Repair Service Works
    Tough iPhone & iPad Repairs

    Logic Board Repair Service Includes1.

    Camera chip repair: iPhone 6 Camera not working;

    2. Touch screen chip repair: iPhone 7 touch screen not working or unresponsive touch;

    3. Display chip repair: LCD doesn’t display images properly, or it doesn’t display at all;

    4. Charging chip repair: The device not charging, or you have trouble connecting the device to computer or charger;

    5. WiFi chip repair: How to fix wifi on iPhone 6, WiFi can’t open, or WiFi cannot be connected, or WiFi has no signals;

    6. Speaker chip repair: Can’t hear your audio or use your loudspeaker, sound of ear speaker fades in and out, or iPhone 6 no sound at all;

    7. Signal chip repair: iPhone 6 No Service Hardware Fix Solution, Can’t connect to a cellular network, can’t make or receive calls

    8. Logic board connector repair: Connectors on logic board damaged

    9. Touch ID chip repair: iPhone 7 home button not working, the touch ID flex cable cracked, but the home button is OK

    10. Upgrade storage: upgrade your iPhone & iPad storage to 64GB/128GB/256GB, such as How to upgrade iPhone storage;

    11. No turning on: iPhone won’t turn on, no function; fixed display; restarting; white screen; red screen; blue screen; no display at all;

    12. Unlock iPad iCloud: How to unlock iPad air;

    13. Fix compass problems

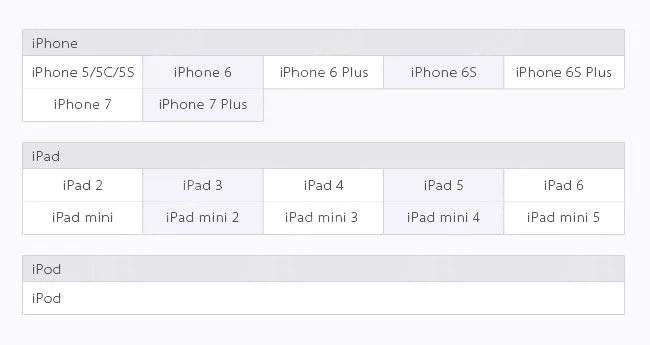
    Logic Board Repair Service – Models
    Tough iPhone & iPad Repairs

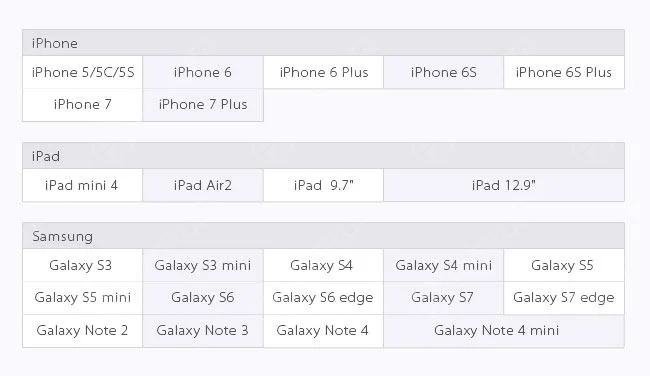
    Cracked Screen Repair Service – Models
    Tough iPhone & iPad Repairs

    Customer Notification

    Here are some details we would like you to know before sending out

    1. MOQ: 10PCS

    2. The repair process(not including delivery time) typically takes about 7 days.

    3. Delivery charges are the responsibility of customers.

    4. Mark the malfunctions of each device and record their IMEI before delivery.

    5. If locked, please provide the password to your phone so that we can test functionality.

    6. If possible, please provide iCloud account and password; Or please delete your iCloud account from your device(We do not repair a device that has no iCloud password). 7. If you require a touch ID repair service, please send the home button assembly together with the logic board.

    8. For iPhone storage upgrade, please update your device to the latest IOS operating system.

    9. We are unable to repair a device that rust and corrosion on too many components.

    10. If you don’t accept our test report and decide to give up the repair service. You should bear the return shipping.

    11. The repair charge depends on the exact damage and amount of damage to your device. We can only offer you an estimated repair price before repair completed.
  • How to Restore Touch ID of iPhone Due to Home Button Flex Broken

    How to Restore Touch ID of iPhone Due to Home Button Flex Broken

    iPhone users might be in despair when their iPhone home button touch ID gets into trouble or even doesn’t work after replaced home button. Why? For iPhone 6 and later versions, touch ID is bonded with CPU, and the user who has replaced his home button will then lose its touch ID fingerprint function. For a long time, it is a sticky business for repair technicians to repair the iPhone touch ID issue, but actually, about 80% of the touch ID failures are resulted by damaged home button touch ID flex. REWA therefore released a video about how to restore iPhone 6/6 plus/6s/6s plus home button touch id issue by making a jumper on flex.

    Restore iPhone Touch ID With Home Button Flex Reparing

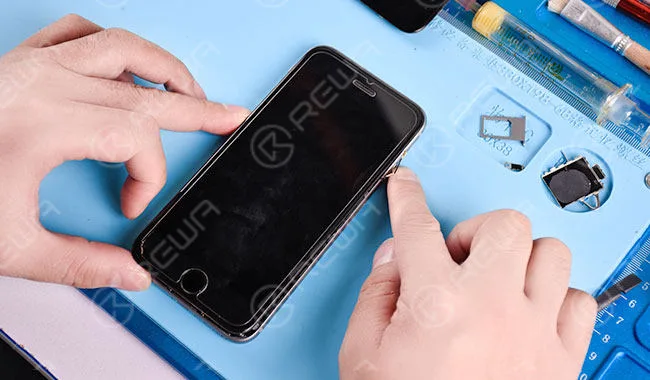
    Power on and test. “Unable to activate Touch ID on this iPhone”. Press Home Button, the returning function is normal.

    Disassemble the phone and remove the display assembly. First of all, check the logic board connector J2118 for mouldy condition and dry Joint. Everything is fine.

    Then, measure the resistance between J2118 and grounding. The value is also normal.

    Take down the Home Touch Sensor Assembly and check the home button flex cable. There are obvious broken traces on the flex cable.

    Preliminary judgment – Touch ID malfunction is caused by fractured flex cable circuit. We can fix the problem by replacing the fractured section with a new length of flex cable.

    Pry up the back plate with Tweezer and Soldering Iron. Cut the fractured part from the flex cable with Sculpture Knife.

    Scrape out the flex cable circuit. Be careful not to cut the circuit off.

    Apply some BGA paste flux to the flex cable and then solder tins with Soldering Iron. Clean with PCB Cleaner after cooling.

    Prepare a new Home Touch Sensor Assembly.

    Pry up the back plate of the new Home Touch Sensor Assembly. Cut a length of flex cable from the new Home Touch Sensor Assembly (allow for some adjustment in length of the cut cable).

    Fix the newly cut cable with double-sided adhesive. Then, scrape out the newly cut flex cable circuit. Be careful not to cut the circuit off.

    Apply some BGA paste flux to the newly cut flex cable. Then solder tins with Soldering Iron. Clean with PCB Cleaner after cooling.

    Cut out the excess parts of the newly cut flex cable. After that, apply 460 Glue to the bonding part and adhere the two cables carefully. Pay attention to the aligning position.

    Once cables are fixed, apply some BGA paste flux and solder flex cables with Soldering Iron. Be careful with bridging and disturbed solder condition.

    Clean with PCB Cleaner after cooling. Remember to check the circuit for bridging and disturbed solder.

    Get the Home Touch Sensor Assembly mounted on the screen. Then buckle the display assembly to the logic board.

    Power on and run Touch ID function test. Touch ID back to normal.

    Take down the display assembly after test and take out the Home Touch Sensor Assembly. Prepare another length of cable. And then adhere the cable to the previous bonding part.

    To further secure flex cables, solder with Soldering Iron. And then secure the back plate with Glue carefully.

    Get the Home Touch Sensor Assembly mounted on the screen. Buckle the display assembly to the logic board. After that, power on and test. The phone works with normal Touch ID function.

  • iPhone Water Damage Repair With Ultrasonic

    iPhone Water Damage Repair With Ultrasonic

    Nearly 80% of the repair shops still use the brush to clean the water damaged iPhone motherboard. It processes very slow and sometimes ineffective. This time REWA LAB presents a new water damaged iPhone repair with ultrasonic cleaner. 

  • Water Damage iPhone Repair – Ultrasonic Applied

    Water Damage iPhone Repair – Ultrasonic Applied

    So we all know that iPhones aren’t officially waterproof, which means iPhone water damage issue can be a real common problem for repair shops. Once got iPhone water damage, the problem may be that the iPhone won’t turn on, or begins to behave in an unusual way or lost the data. Luckily, REWA has solved the iPhone won’t power on or lost data due to water damaged and offer special cases for that issue. You can check Fix iPhone 7 Won’t Turn On With CPU Repair and How Can I Recover Data From Dead iPhone 6S. For our today course, we focus to solve  How to fix iPhone water damaged issue and get the iPhone working properly again. Following to check the details steps.

    This time REWA presents a new repair with ultrasonic cleaner that 80% of repair shops have never used in their work. Take a look by yourself and you shall be amazingly surprised! iPhone Water Damage Repair With Ultrasonic Cleaner

    Step 1:

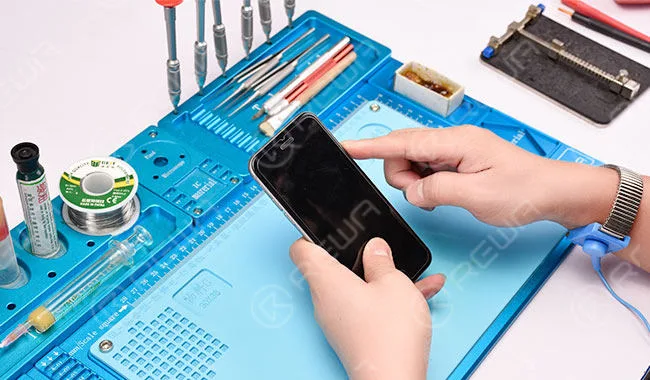
    iPhone 6s got water damaged. Try to start it up, the phone can not boot normally.

    iPhone 6s got water damaged. Try to start it up, the phone can not boot normally.

    Step 2:

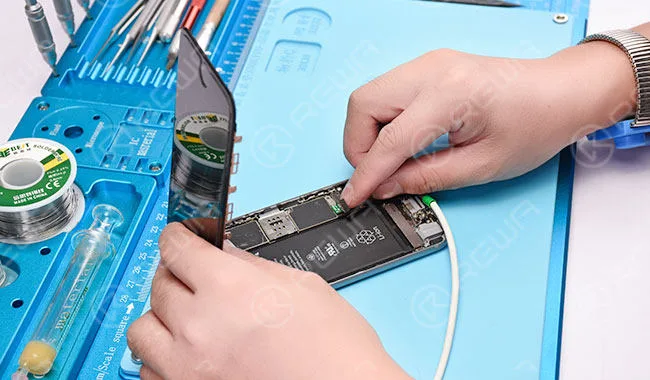
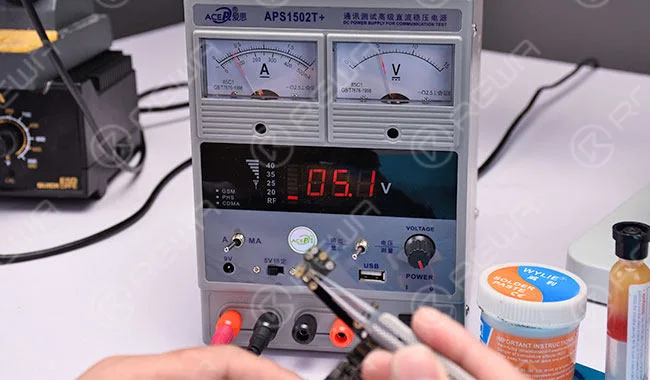
    Take apart the phone and connect the phone with DC power supply, we can see that the logic board comes with heavy current.

    Take apart the phone and connect the phone with DC power supply, we can see that the logic board comes with heavy current.

    Step 3:

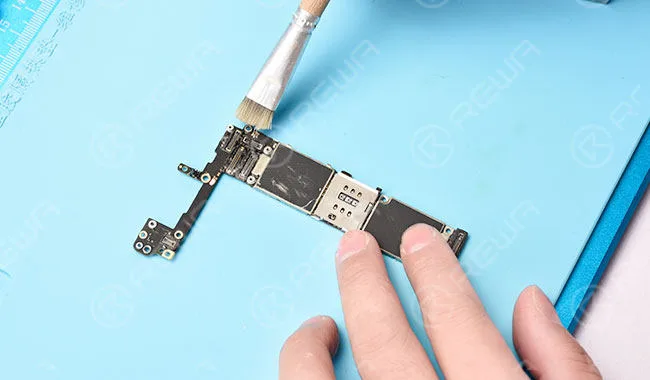
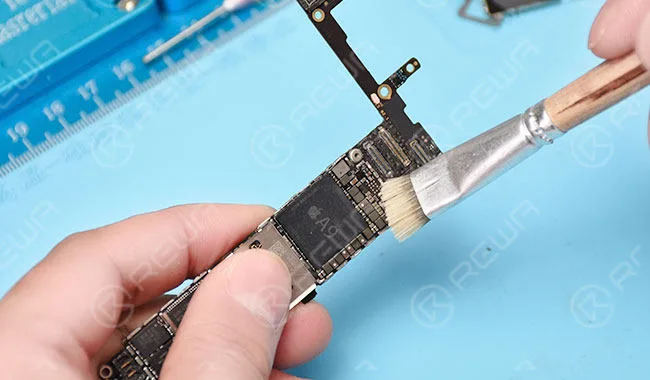
    Take out the logic board. We can see with naked eyes that the logic board is mouldy. Let’s run cleaning with PCB cleaner at the beginning.

    Take out the logic board. We can see with naked eyes that the logic board is mouldy. Let’s run cleaning with PCB cleaner at the beginning.

    Step 4:

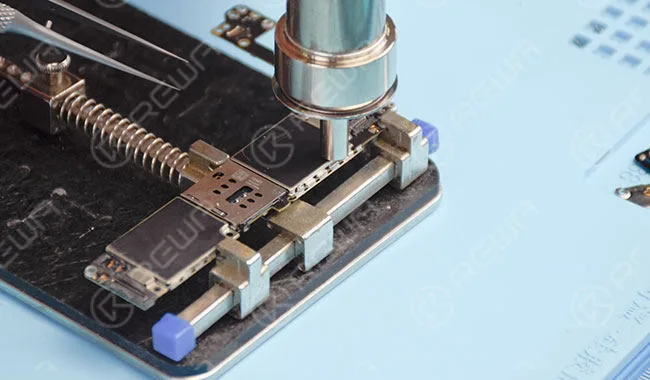
    Tear off the shield sticker and remove the CPU shield plate with hot air gun.

    Tear off the shield sticker and remove the CPU shield plate with hot air gun.

    Step 5:

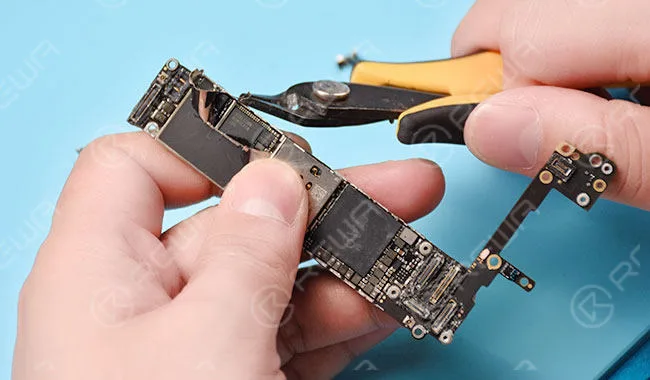
    Since welded junctions of baseband shield plate come with high melting point that can not be removed by hot air gun easily. Remove the baseband shield plate with cutting nipper.

    Since welded junctions of baseband shield plate come with high melting point that can not be removed by hot air gun easily. Remove the baseband shield plate with cutting nipper.

    Step 6:

    We can see it clearly that areas under the shield plate are also water damaged. In this case, brushes are helpless for thoroughly cleaning. So continue the cleaning process with ultrasonic cleaner.

    We can see it clearly that areas under the shield plate are also water damaged. In this case, brushes are helpless for thoroughly cleaning. So continue the cleaning process with ultrasonic cleaner.

    Step 7:

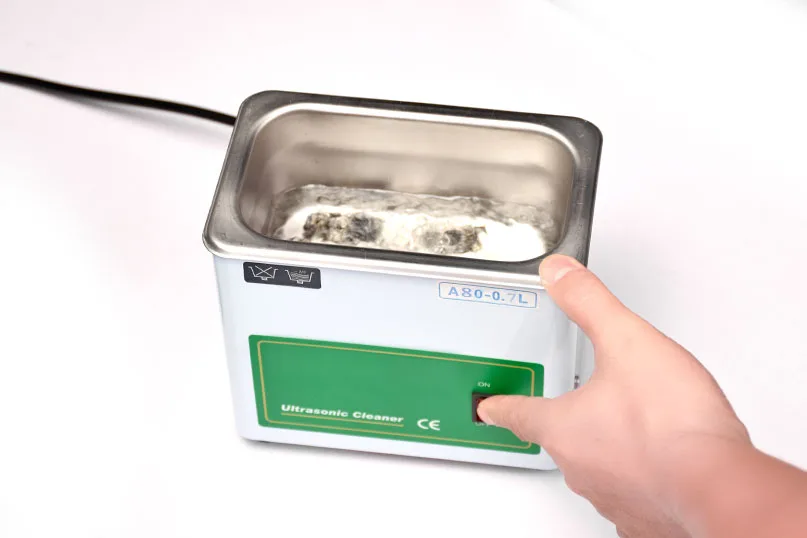
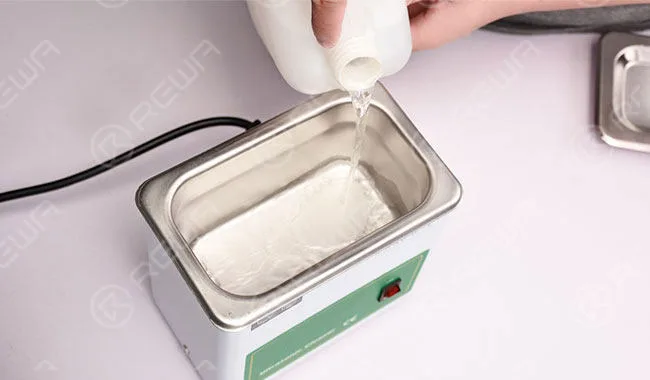
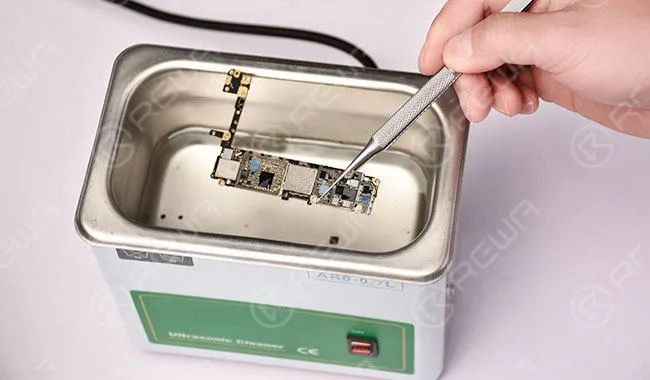
    Pour adequate PCB cleaner into the ultrasonic cleaner and put the logic board in. Power on and get the lid on.

    Pour adequate PCB cleaner into the ultrasonic cleaner and put the logic board in. Power on and get the lid on.

    Step 8:

    Five minutes later, switch off the power supply and take out the logic board. After that, Leave to rest for 5 minutes.

    Five minutes later, switch off the power supply and take out the logic board. After that, Leave to rest for 5 minutes.

    Step 9:

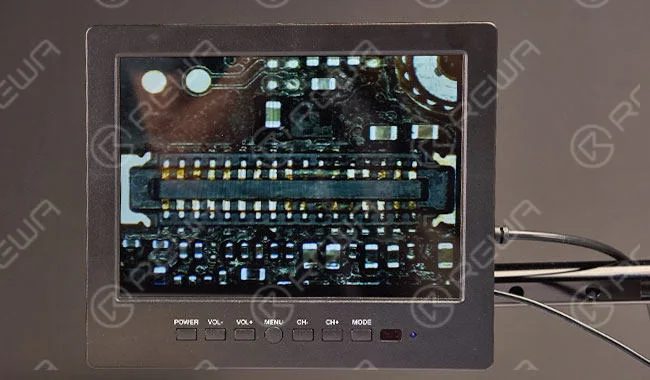
    Check cleaning effect with naked eyes. Then check with microscope again. The logic board looks great after the ultrasonic cleaner process.

    Check cleaning effect with naked eyes. Then check with microscope again. The logic board looks great after the ultrasonic cleaner process.

    Step 10:

    Water damage also caused corrosion of rear camera connector. So we have to replace it with a new one.

    Water damage also caused corrosion of rear camera connector. So we have to replace it with a new one.

    Step 11:

    Apply some BGA paste flux and take down the damaged connector with hot air gun. After that, clean with PCB cleaner and apply some BGA paste flux again. Then solder the tins with soldering iron. Once finished, clean with PCB cleaner. Again we apply some BGA paste flux, align and install a new connector and then clean with PCB cleaner for the best effect.

    Apply some BGA paste flux and take down the damaged connector with hot air gun. After that, clean with PCB cleaner and apply some BGA paste flux again. Then solder the tins with soldering iron. Once finished, clean with PCB cleaner. Again we apply some BGA paste flux, align and install a new connector and then clean with PCB cleaner for the best effect.

    Step 12:

    Once rear camera connector replacing finished, connect the phone with DC power supply and boot with startup signal triggered by tweezer. Booting current displays normally.

    Once rear camera connector replacing finished, connect the phone with DC power supply and boot with startup signal triggered by tweezer. Booting current displays normally.

    Step 13:

    Assemble the phone. Connect with the original screen and power on, the phone go with no display.

    Assemble the phone. Connect with the original screen and power on, the phone go with no display.

    Replace with a new screen and power up again. iPhone boots and works normally.

    Replace with a new screen and power up again. iPhone boots and works normally.

    For more details on iPhone Water Damage Repair With Ultrasonic Cleaner guide, please go to REWA YouTube channel. You can also contact us for support: PRE-SALES Skype : rewatech Email : sales@rewatechnology.com AFTER-SALES Skype : support-rewatech Email : support@rewatechnology.com

    Necessary Parts and Tools

  • How To Fix The iPhone Touch Unresponsive Problem

    How To Fix The iPhone Touch Unresponsive Problem

    Did you get your iPhone 6 / 6 plus touch screen unresponsive? Many people feel so annoyed when their iPhone touch screen can not work , especially in the moment of fierce urgency. In this video we give you the solution to fix the iPhone touch unresponsive problem that only by replacing the touch IC.

    Touch screen unresponsive fault analysis

    A design defect has resulted in tons of iPhone 6/6 Plus touch doesn’t work. There are 4 chips on iPhone 6 Plus logic board that handle touch functionality, they are U2402, U2401, U1202, U1501. U2402 synchronizing signal connect with display connector and U2403 touch IC, this signal is the root cause of touch not responding and screen flickering. 

    Repair

    Step 1: Separate the display assembly from the rear case with suction cup, remove screws on the metal cover, disconnect the display assembly flex cable, disconnect battery connection under the metal cover and take out the logic board. 

    Step 2: Fix the motherboard on PCB holder, tear off the shieding cover, add some paste flux and blow it at the temperature of 300.C. 

    Step 3: Two minutes later, pry out the IC, scrao off the tin on the bonding pad with soldering station. 

    Step 4: Clean off the residual tin with solder wick and rosin solfer flux. 

    Step 5: Clean the bonding pad with PCB cleaner. 

    Step 6: Test the circuit between U2402 and M1 before welding a new touch IC. 

    Step 7: Coat the PCB bonding pad with paste flux. 

    Step 8: Put the touch IC into bonding pad(take care of the direction), Blow it for two minutes with hot air gun at the temperature of 300.C. 

    Step 9: Clean the touch IC after it cooled down. Install logical board and assemble the display assembly. 

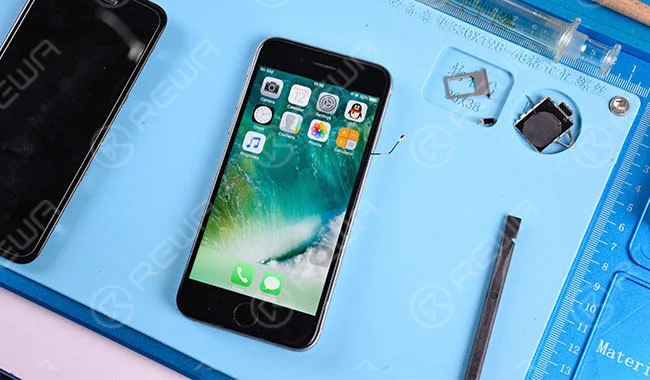
    Power on and test the iPhone 6 Plus, the problem goes away and touch screen functions well.