Tag: iphone 12

  • How to Fix iPhone 12 Touch Screen Not Working After Overnight Charging

    How to Fix iPhone 12 Touch Screen Not Working After Overnight Charging

    If an iPhone 12 touch screen not working can be frustrating, especially if it fails after a simple overnight charge. This guide will walk you through troubleshooting and fixing an iPhone 12 touch screen that isn’t responding. We’ll cover each step, from checking for physical damage to identifying and replacing faulty components on the motherboard. Whether you’re a seasoned technician or a DIY repair enthusiast, this guide provides everything you need to restore full touch functionality.
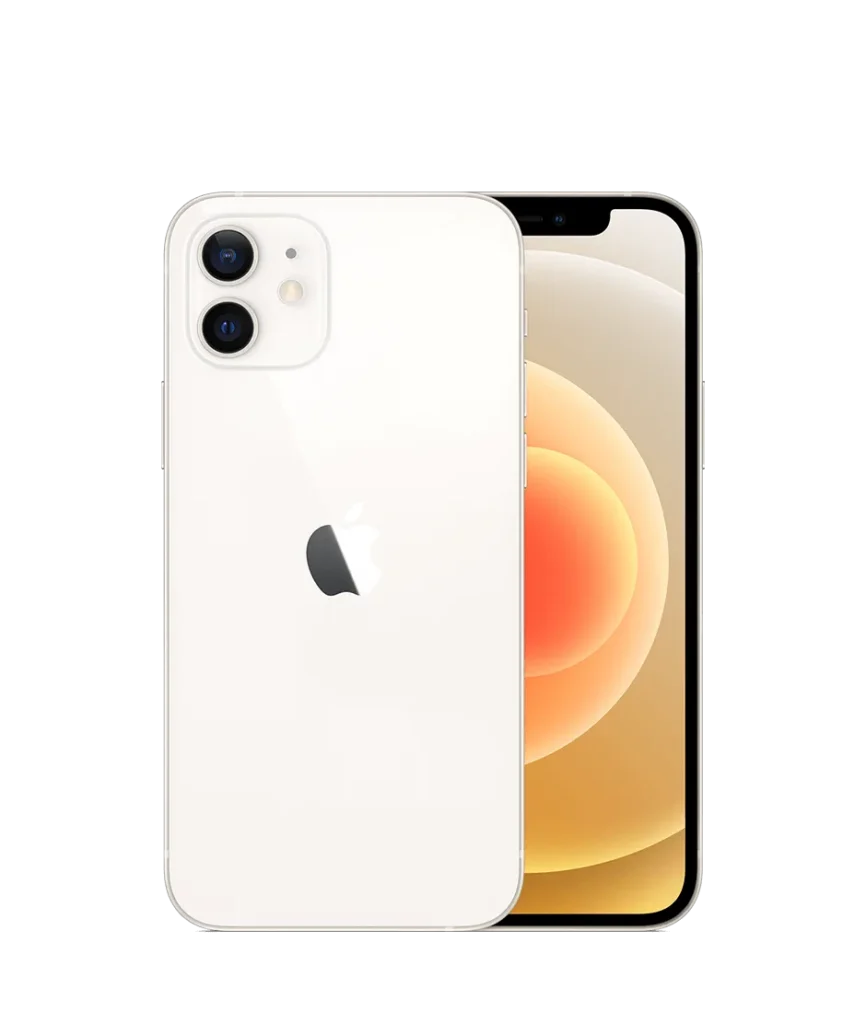
    iphone 12

    Device Details

    Model: iPhone 12

    Announced: 2020, October 13

    Defect Phenomenon

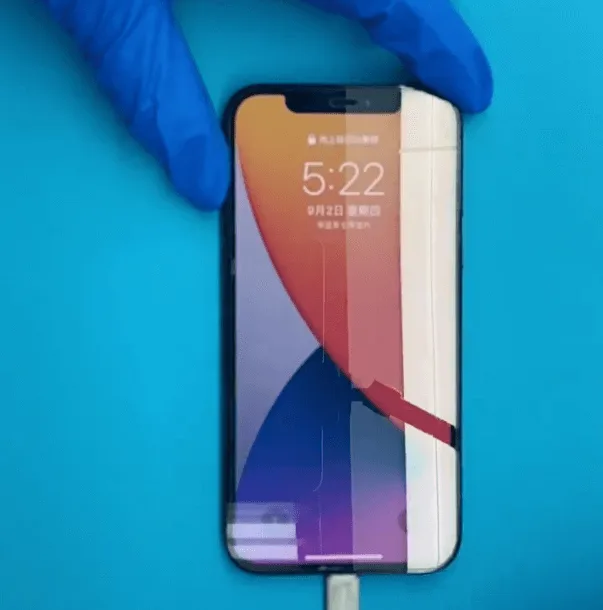
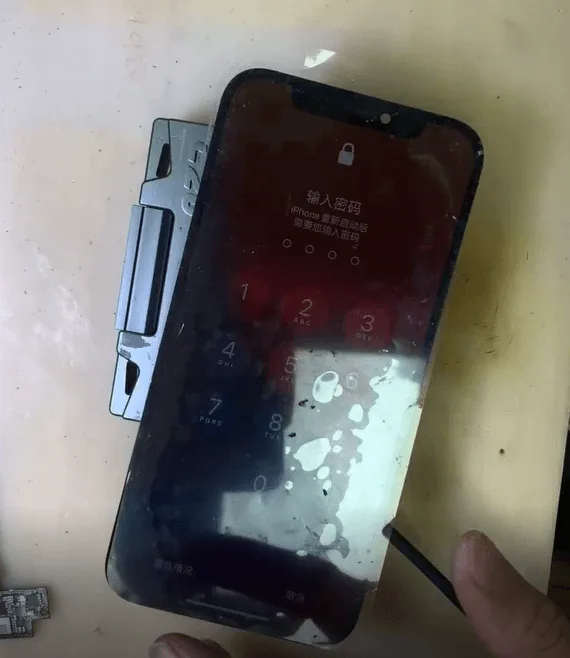
    The iPhone 12 worked fine, but after charging overnight, the touch screen became unresponsive the next morning.

    Troubleshooting

    Physical Inspection

    Examine the exterior of the phone. It looks new and shows no signs of impact, the issue is likely internal.

    Disassembly and Interior Check
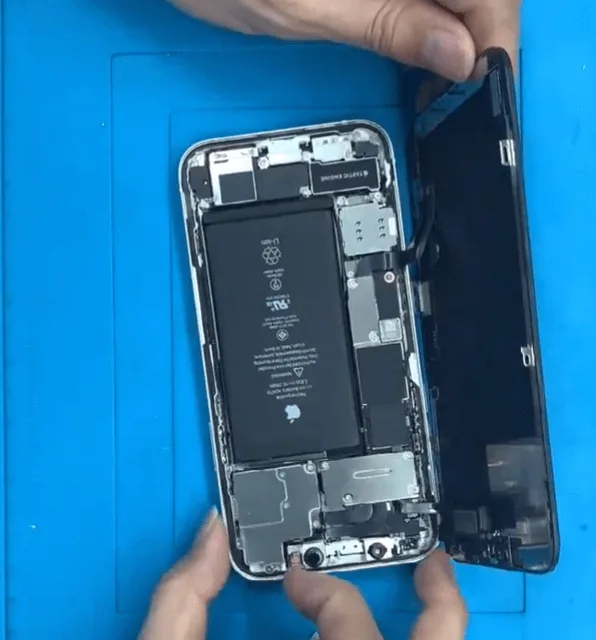
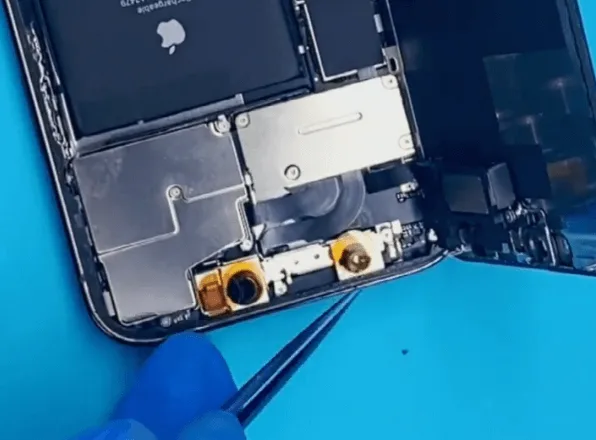
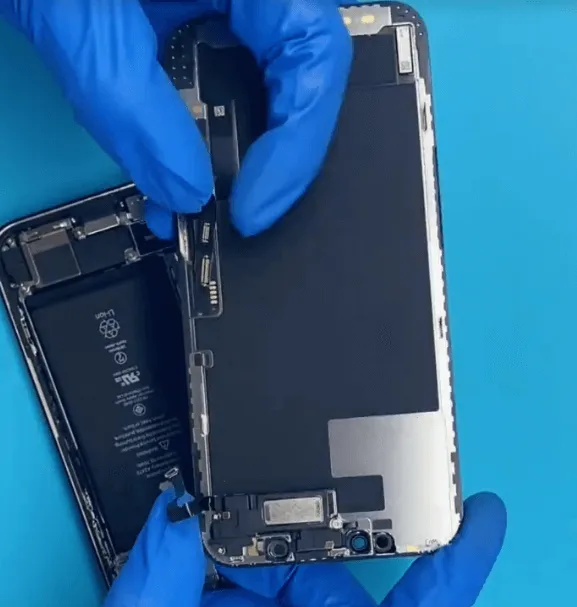
    how fix iphone 12 touch screen not working overnight charging the inner

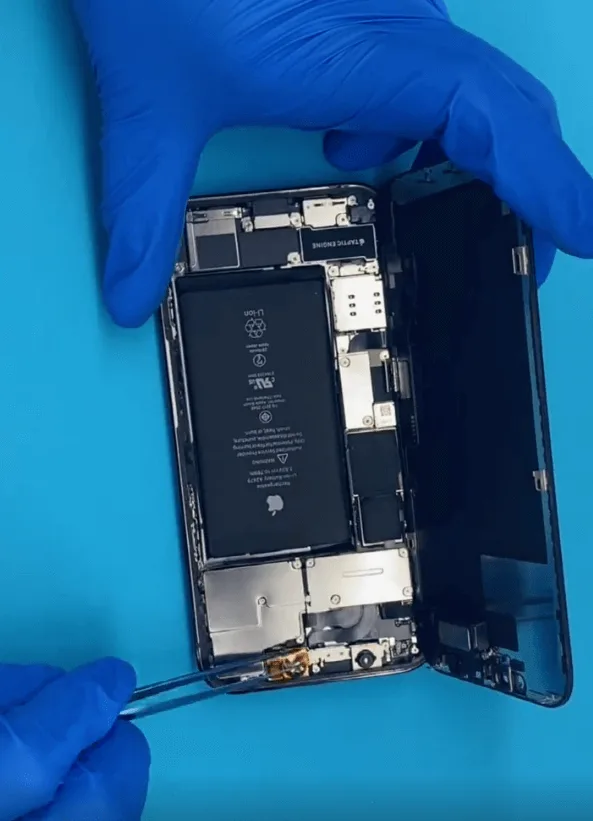
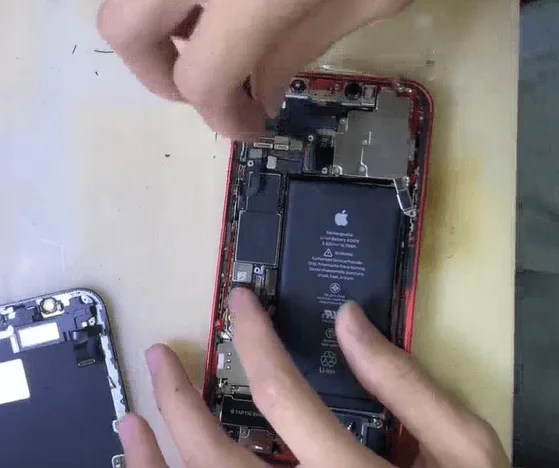
    Disassemble the phone to inspect the internal components. Everything appears clean with no visible water or physical damage, it’s time to check for possible component malfunctions.

    Screen Replacement Test

    Replace the screen to rule out a faulty display. If the touch function remains unresponsive, the issue likely stems from the motherboard.

    Diode Value Check on Touch Connector
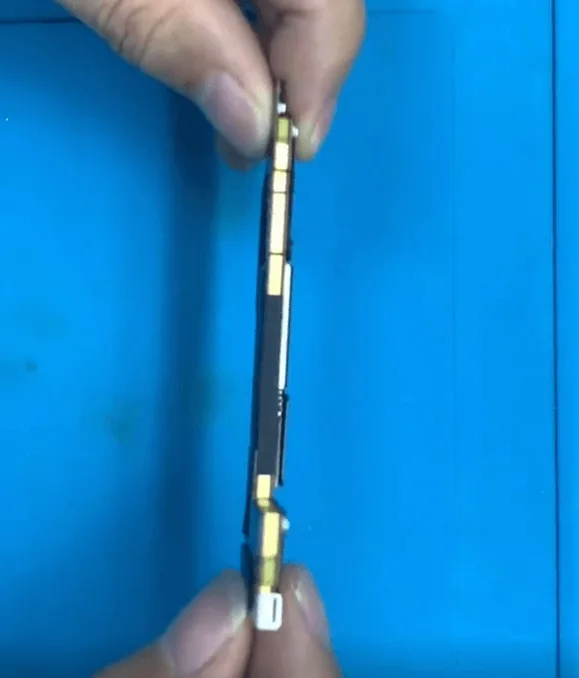
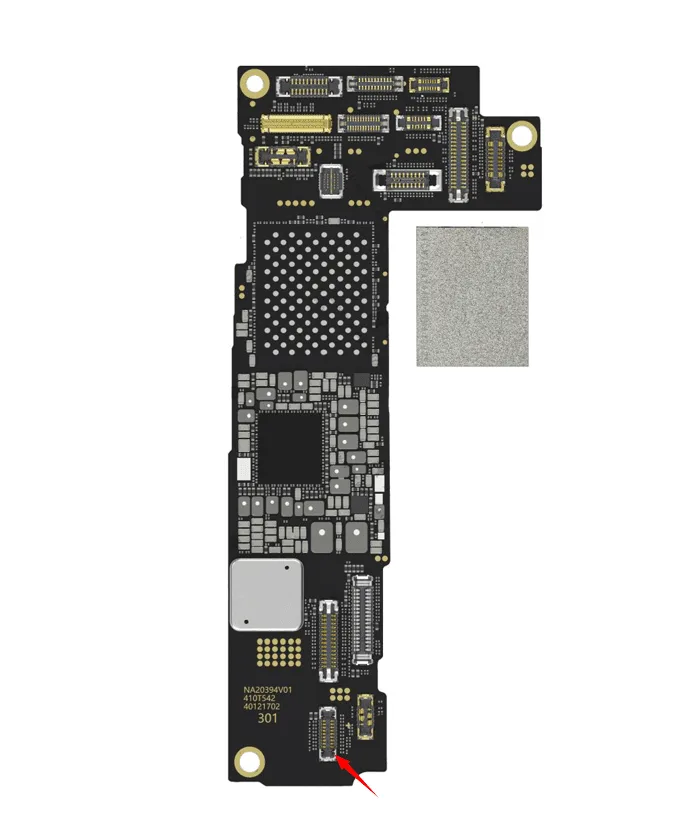
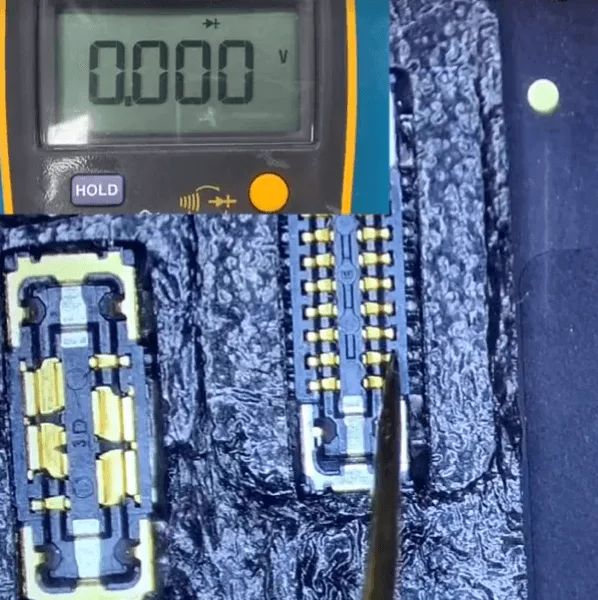
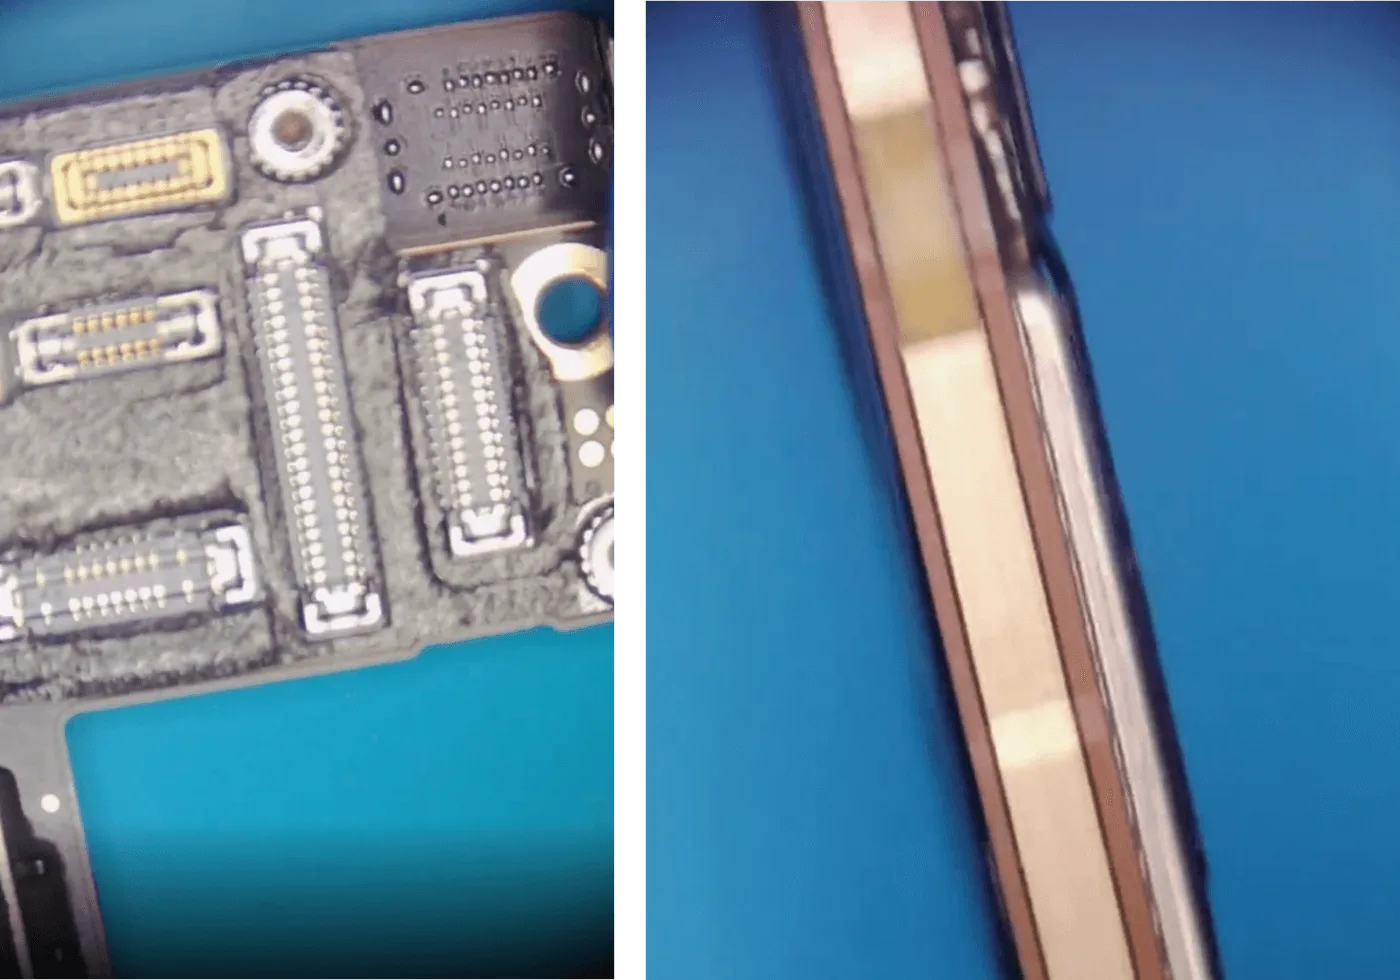
    Remove the motherboard and place it under a microscope. Measure the diode values at each pin on the touch connector. If you find an abnormal reading (like 0 instead of the expected 300-400), there’s likely a grounded connection causing the issue.

    Repair Process:

    Focus on Pin 3 (PP5V1_TOUCH_VDDH)

    Pin Information:

    • Pin Number: 3
    • Signal Name: PP5V1_TOUCH_VDDH (Power supply for touch)
    • Relevant Components: C8901, C8903, C8902, C11693, XR1696, U8910

    Note: The focus will be on the highlighted components around this pin.
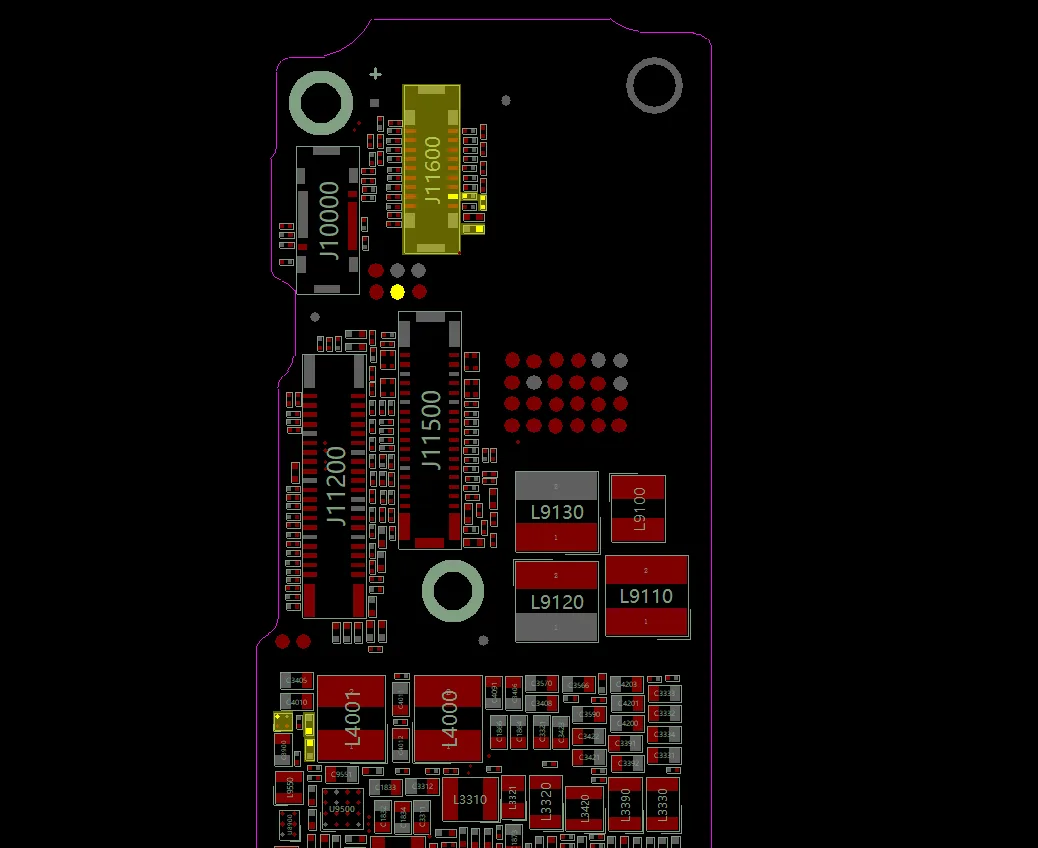
    how fix iphone 12 touch screen not working overnight charging relative

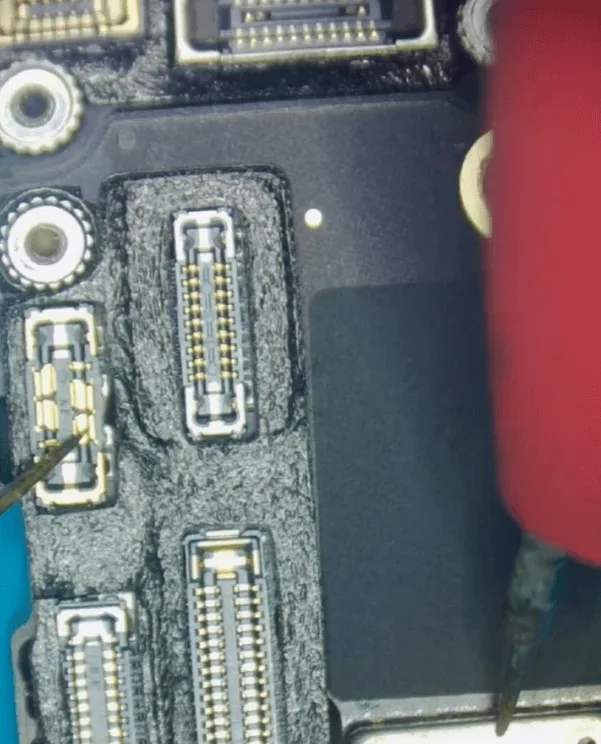
    Remove Sealed Glue and Foam

    how fix iphone 12 touch screen not working overnight charging remove the

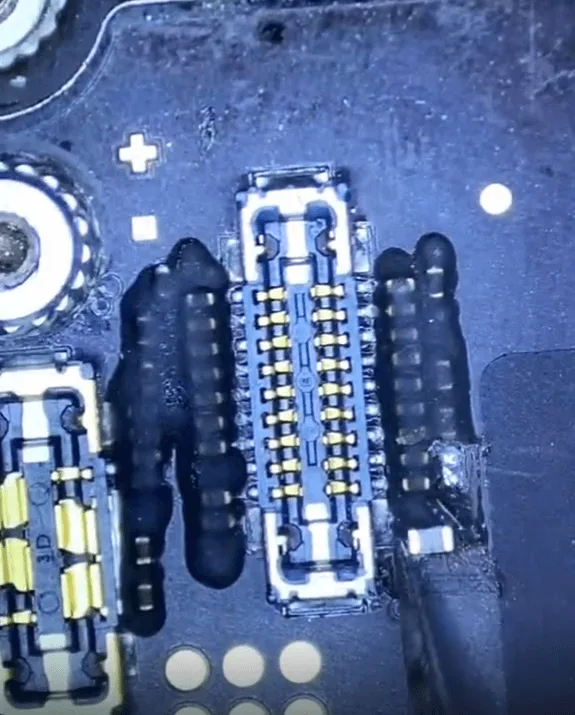
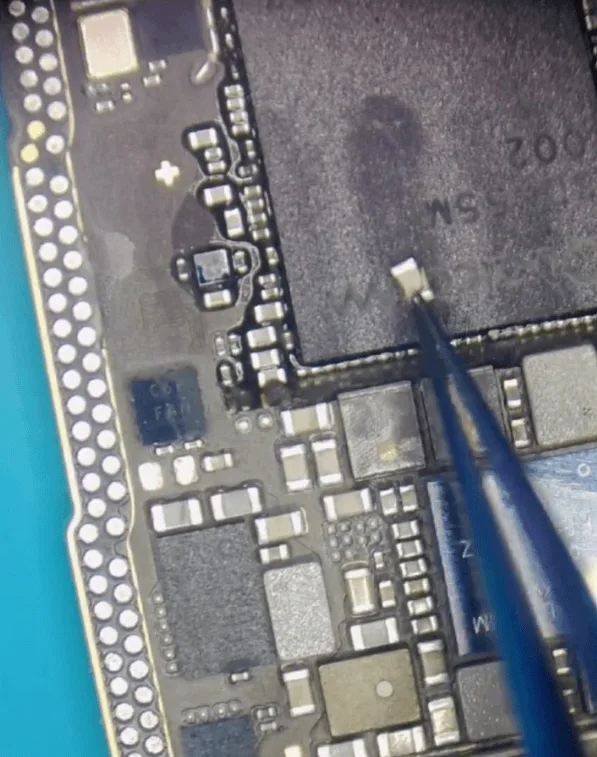
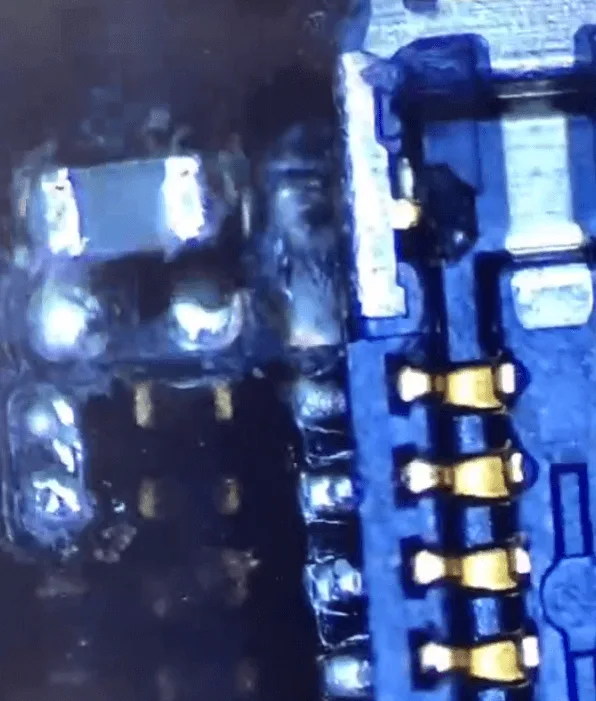
    Carefully remove the waterproof foam from the touch connector area. Scratch off the black sealed glue around the small components near Pin 3.

    Check for Loose Components
    how fix iphone 12 touch screen not working overnight charging after that

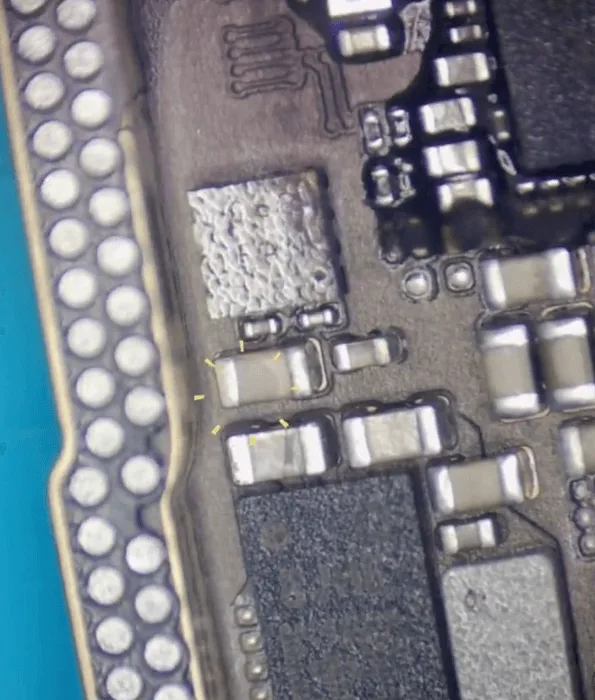
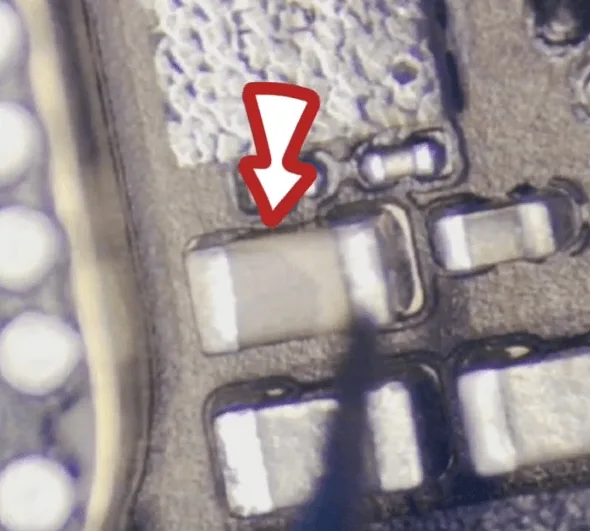
    You may notice a loose filter-type capacitor, which could cause grounding issues. Remove the capacitor and re-measure the diode value. If it’s still grounded, proceed with further inspection.

    Inspect Components Under Shielding
    how fix iphone 12 touch screen not working overnight charging remove the 2

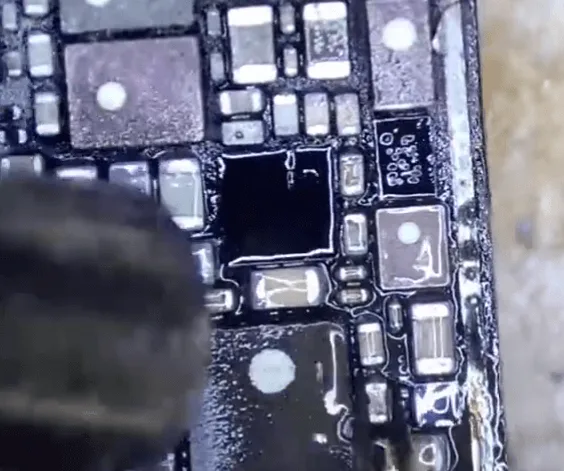
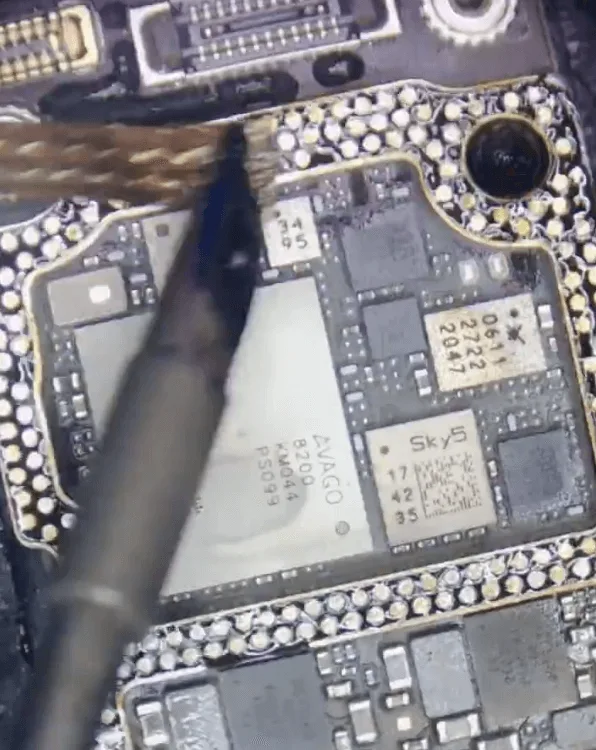
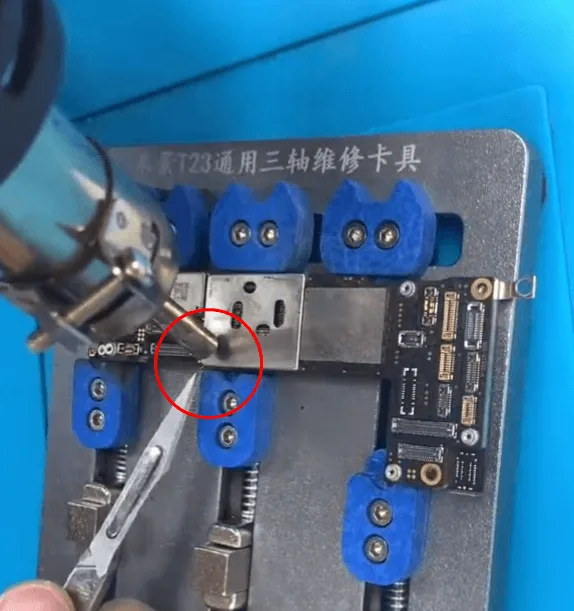
    Use a hot air gun to remove the shielding cover on the motherboard. This will allow you to inspect the hidden components.

    Rosin Inspection Technique
    how fix iphone 12 touch screen not working overnight charging rorin

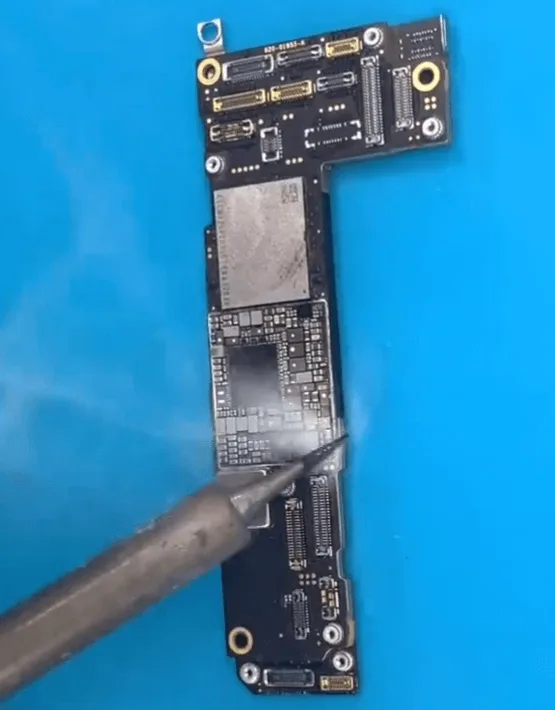
    Apply rosin smoke over the small components and apply 1.8V from the DC power supply to the relevant rail. Watch for any changes in the rosin to help identify the shorted component.

    Identify and Remove the Faulty Capacitor
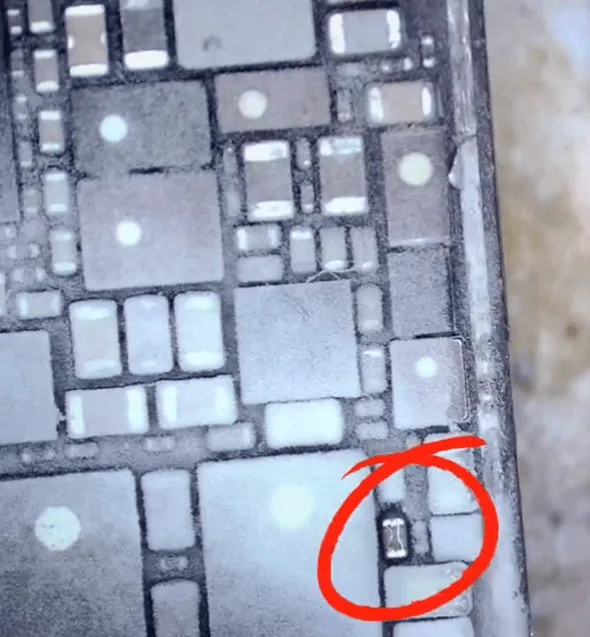
    Once identified, use a hot air gun to remove the shorted capacitor. Allow the board to cool and clean the area with PCB cleaner.

    Testing and Assembly

    Verify Diode Value
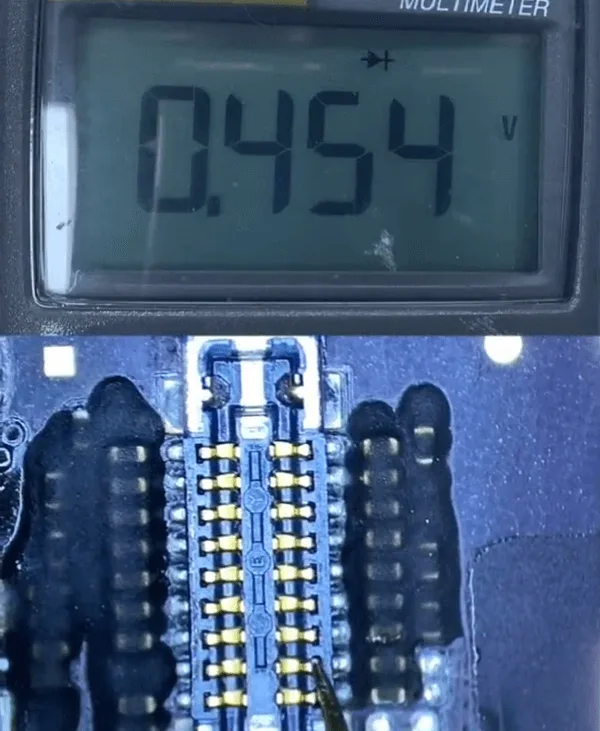
    iPhone 12 Touch Does Not Work

    Measure the diode value on the touch connector. If it now reads in the expected range, the repair is likely successful.

    Reassemble and Test the Device
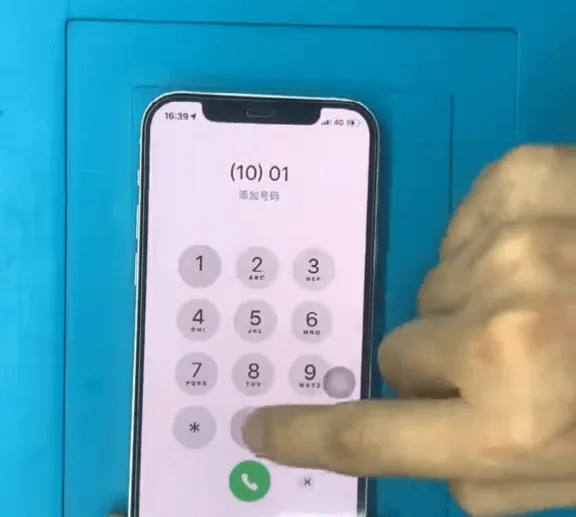
    how fix iphone 12 touch screen not working overnight charging test ok la

    Reassemble the phone and perform a final test. Ensure the touch function works and that other functionalities are unaffected.

    Conclusion

    By following this guide, you’ve resolved an iPhone 12 touch screen not working issue caused by a shorted capacitor. This step-by-step repair ensures the device functions smoothly, and you’ve extended its usability. With a little patience and precision, you can tackle even intricate motherboard repairs effectively.

    Tools & Parts List

  • How to Repair iPhone 12 Pro Water Damage: Step-by-Step Motherboard Fix

    How to Repair iPhone 12 Pro Water Damage: Step-by-Step Motherboard Fix

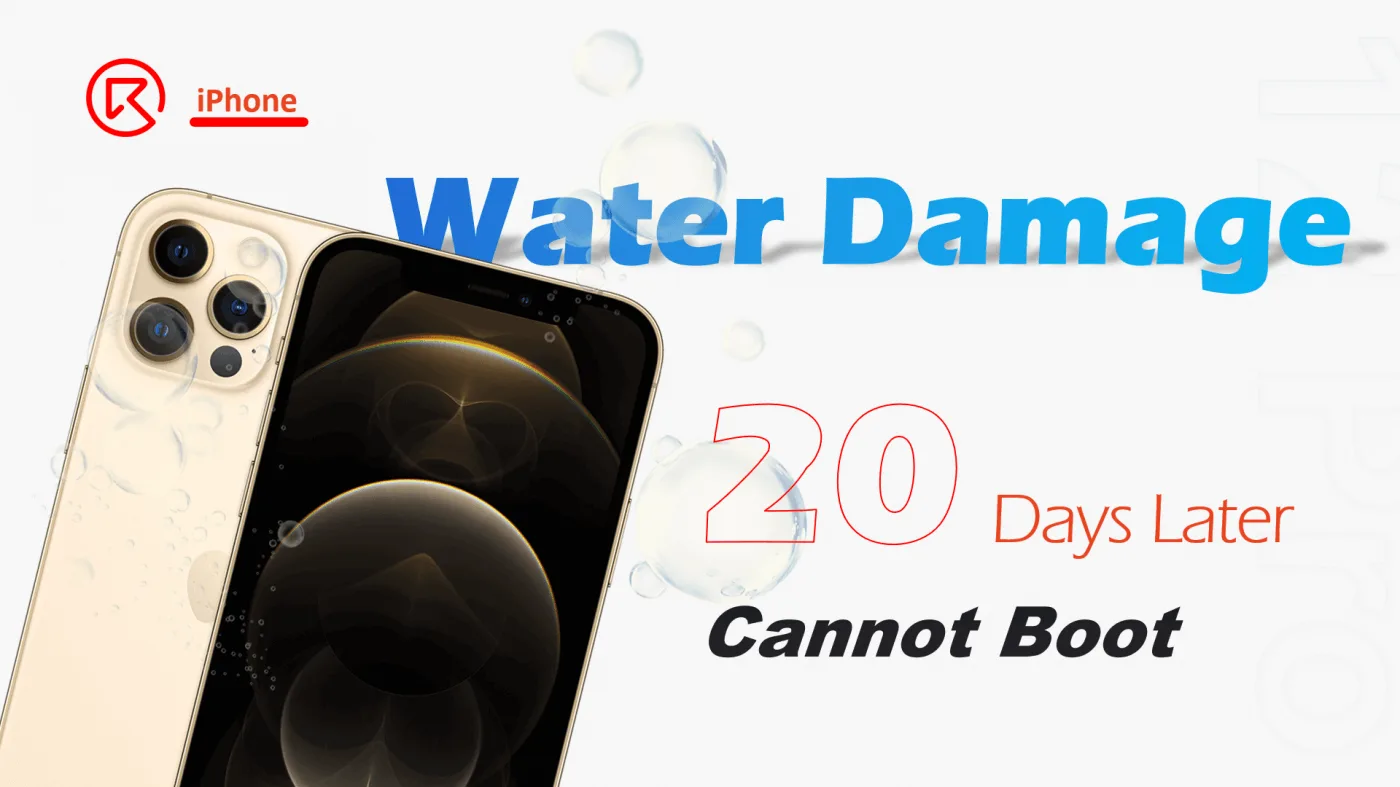
    Water damage is one of the most common and frustrating issues faced by iPhone users—especially when the phone won’t power on. In this detailed repair guide, we’ll show you how to diagnose and fix an iPhone 12 Pro water damage and remains unresponsive, even after 20 days. You’ll learn how to disassemble the device, locate the short-circuited component, and restore full functionality by removing a damaged capacitor on the motherboard.

    Whether you’re a repair technician, shop owner, or an experienced DIYer, this article offers expert-level insights and real repair case experience to help you successfully revive a water-damaged iPhone 12 Pro.


    Step-by-Step Repair Guide: iPhone 12 Pro Water Damage Repair

    1. Initial Inspection & Disassembly

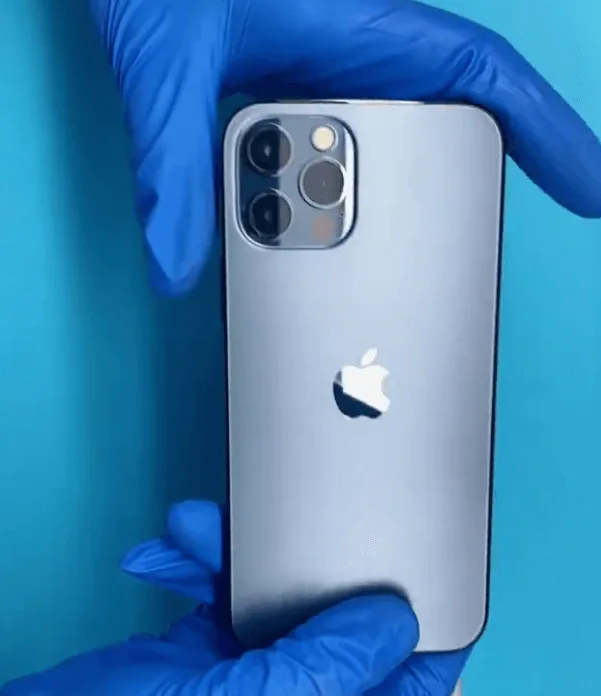
    Client complaint: The iPhone 12 Pro cannot boot after water damage and has been sitting for around 20 days.

    iphone 12 pro water damage

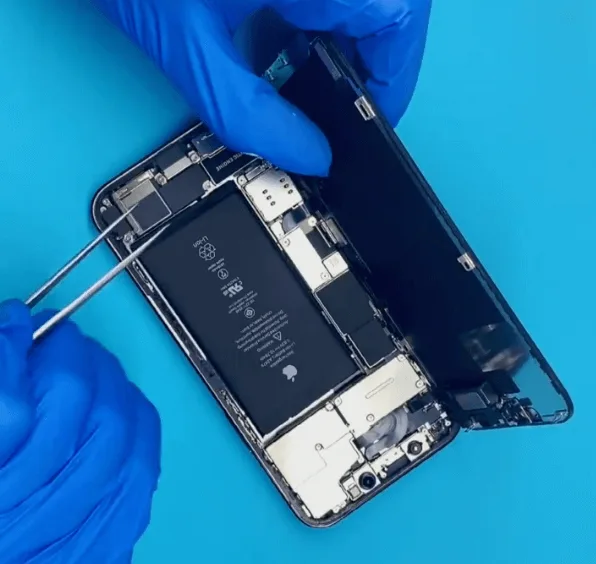
    Disassembly steps:

    • Remove the two screws at the bottom of the device.
    • Place the phone on a heating platform at ~70°C to soften the adhesive between the screen and the frame.
    • Use a plastic pry card to gently separate the screen.
    how repair iphone 12 pro water damage step motherboard fix the phone get

    2. Water Damage Indicators

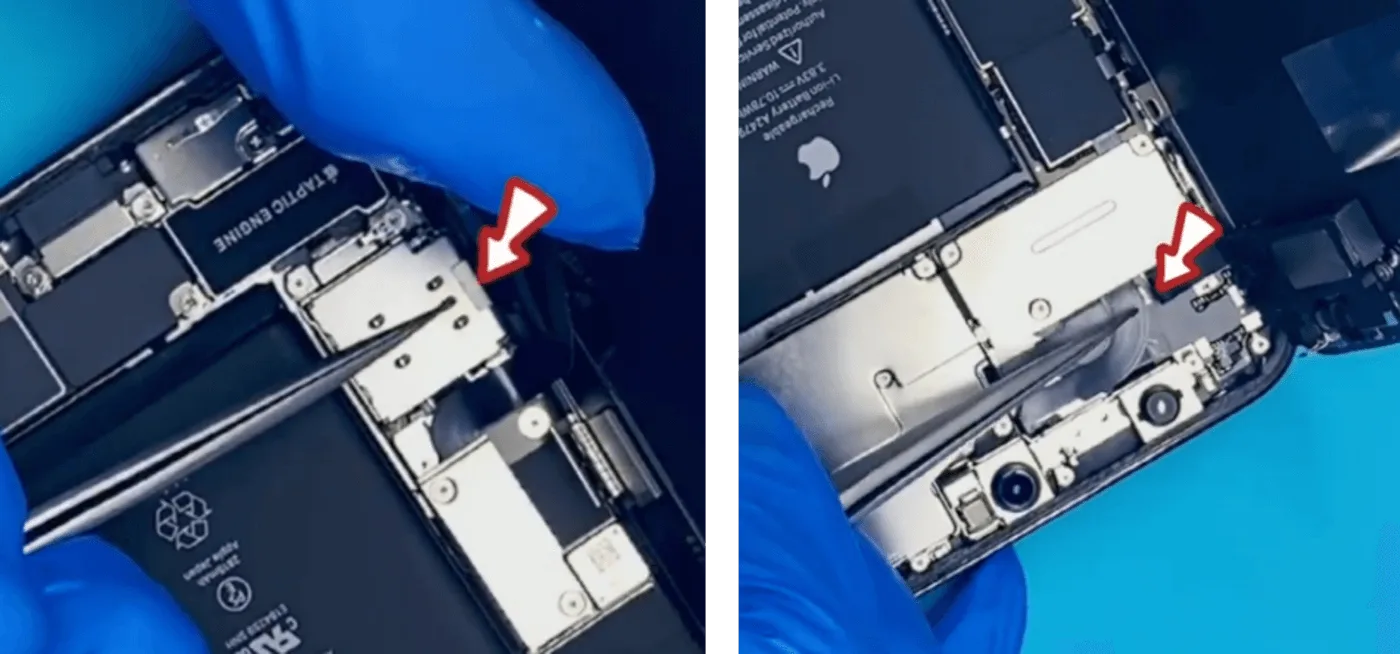
    • iPhones have Liquid Contact Indicators (LCIs) that turn red when exposed to water.
      • ✅ Indicator near the SIM card slot: Normal (white).
      • ❌ Indicator near the earpiece speaker: Turned red.
    • Conclusion: Water likely entered the motherboard through the earpiece speaker mesh.
    how repair iphone 12 pro water damage step motherboard fix indicator

    3. Screen & Motherboard Check

    • Protect sensitive modules like the front camera, infrared camera, and dot projector.
    • Remove the screen — no visible damage observed.
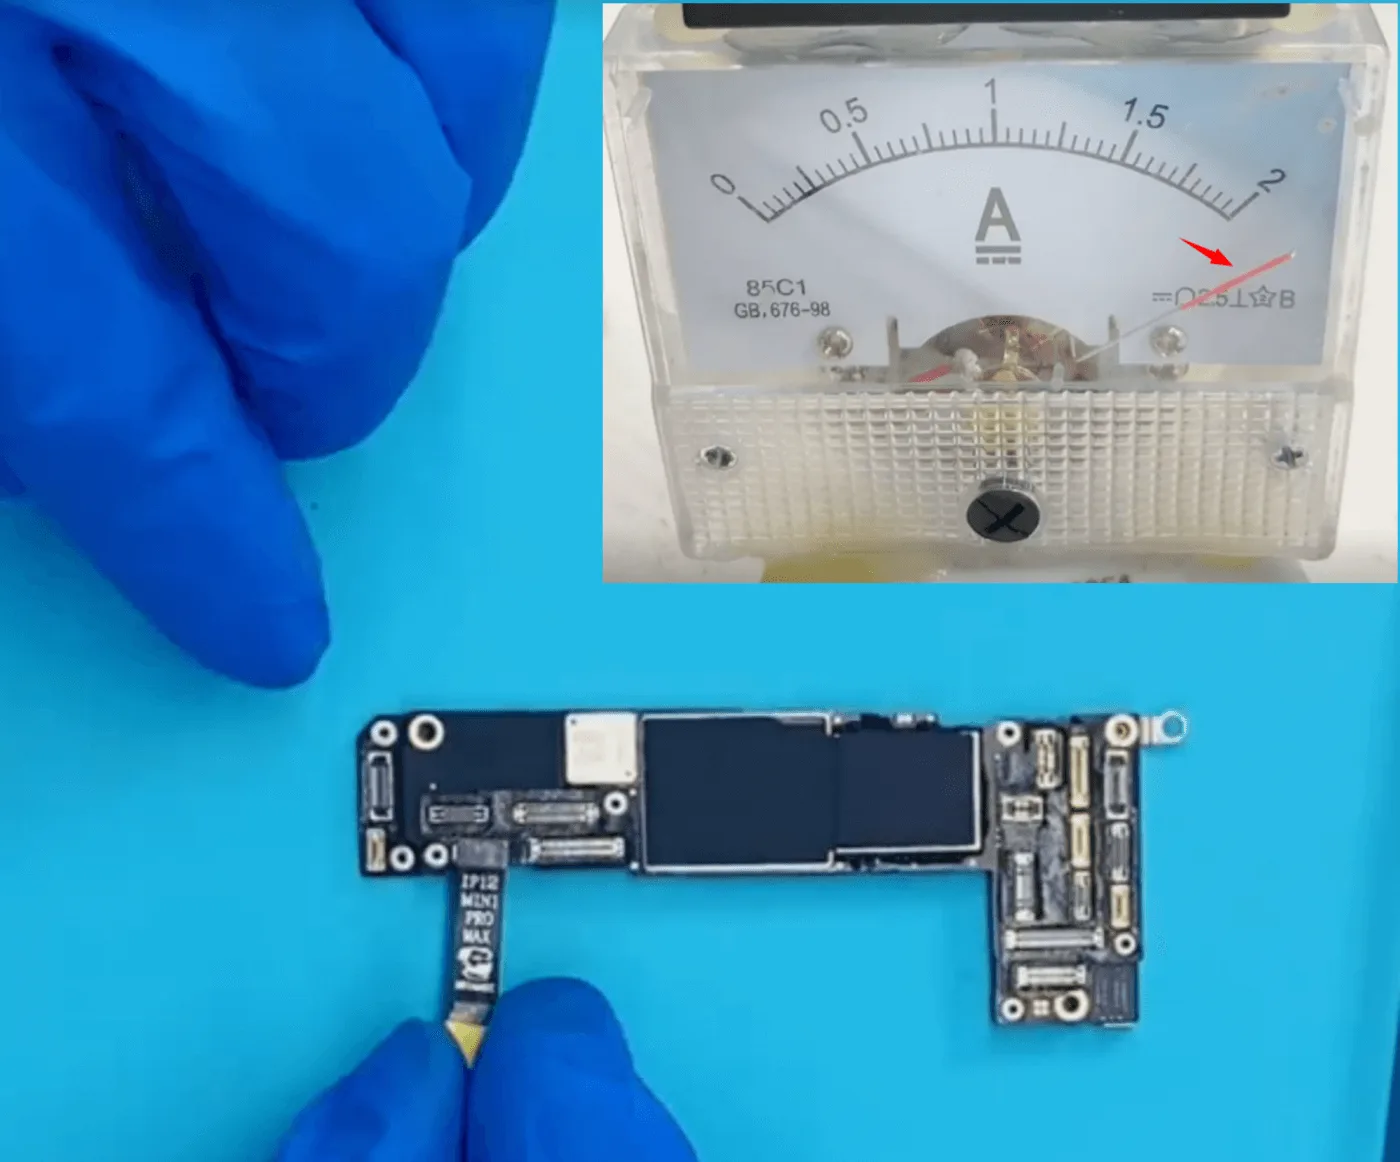
    • Take out the motherboard and connect it to a DC power supply for testing.
      • Result: High current draw immediately after connection, indicating a short circuit.

    4. Identifying the Faulty Component

    • Visual inspection under a microscope: No physical damage or corrosion detected.
    • Diode mode test reveals:
      • PP_VDD_MAIN line is shorted to ground.
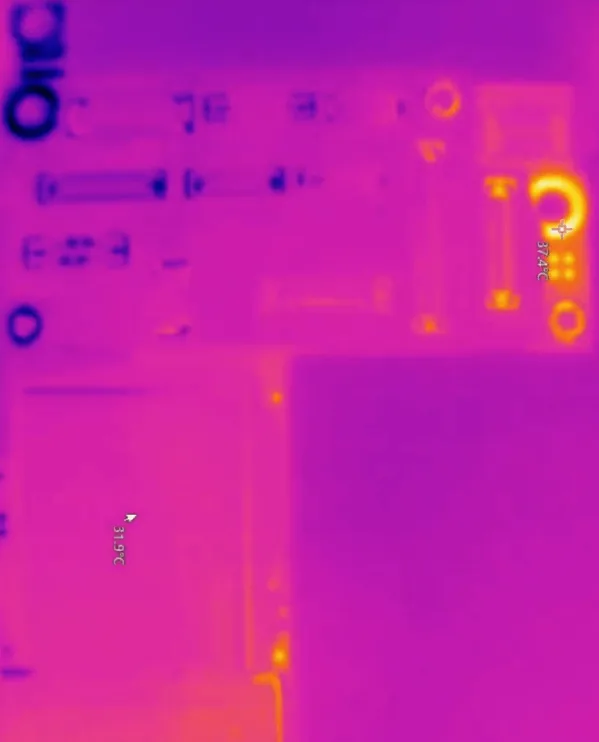
    • Use a thermal imaging camera while connected to DC power:
      • No heating component detected — the short must be internal.

    5. Motherboard Separation & Deep Inspection

    • Use a heating platform and hot air gun to separate the sandwiched motherboard layers.
    • Upon inspection, a capacitor labeled C413_E appears discolored — likely damaged.
      • Based on repair experience, this indicates internal capacitor failure.

    6. Remove the Faulty Capacitor

    • Desolder and remove C413_E without replacing it:
      • Reason:
        • It’s located near the middle layer — re-soldering could damage nearby connections.
        • The Baseband CPU is adjacent — excessive heat could cause baseband failure.
        • PP_VDD_MAIN has multiple filter capacitors — removing one won’t affect performance.
    • Re-check the PP_VDD_MAIN line:
      • ✅ Short circuit resolved.

    7. Reassemble and Test

    • Recombine the motherboard layers.
    • Reassemble the iPhone and power it on.
    • ✅ All functions are working properly.
    12 Pro Cannot Be Booted

    Tools & Parts List

    🛠️ Tools Used:

    • Heating platform (70°C)
    • Hot air gun
    • Microscope
    • DC power supply machine
    • Thermal imaging camera
    • Plastic pry card
    • Screwdriver set
    • Multimeter (with diode mode)

    🔩 Parts/Components Involved:

    • iPhone 12 Pro motherboard
    • Capacitor C413_E (removed, not replaced)

    Technical Terms Explained

    • PP_VDD_MAIN: The main power rail distributing voltage to critical components on the motherboard.
    • DC Power Supply Machine: A diagnostic tool that simulates the iPhone battery, helping identify short circuits based on current flow.
    • Thermal Imaging Camera: Detects abnormal heat to help find shorted components.
    • C413_E: A small filter capacitor used to smooth voltage spikes — one of many on the PP_VDD_MAIN line.
    • Diode Mode Testing: A multimeter function that checks for short circuits or open circuits by measuring voltage drop across components.

    Conclusion

    Water damage doesn’t always mean your iPhone is beyond saving. With the right tools and expertise, even a non-booting iPhone 12 Pro can be revived. In this case, the culprit was a shorted capacitor (C413_E) on the PP_VDD_MAIN line, which was successfully removed to restore full functionality.

    If you’re a technician or DIYer, always proceed carefully when dealing with internal motherboard repairs. And for those looking to enhance their skills, REWA Academy’s iPhone 12 Pro Online Course is a great place to deepen your understanding.

  • iPhone 12 Won’t Boot After Drop? How to Fix Logic Board Damage Step by Step

    iPhone 12 Won’t Boot After Drop? How to Fix Logic Board Damage Step by Step

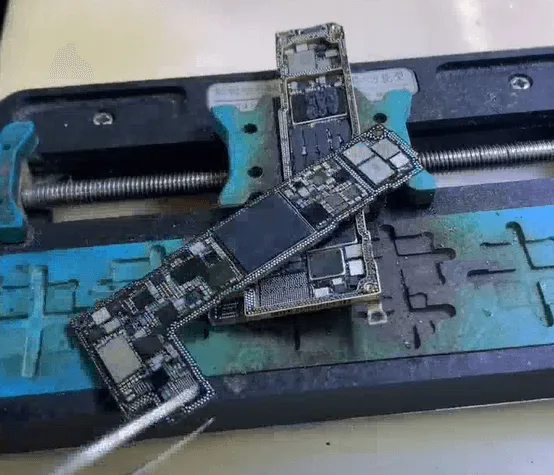
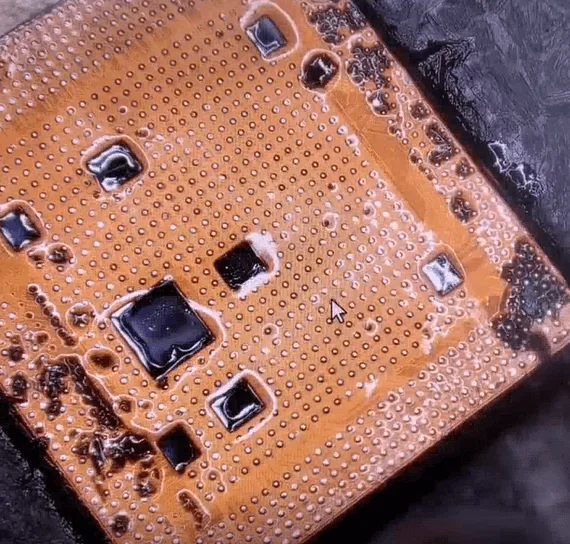
    When an iPhone 12 experiences a severe drop, it’s not just the screen or back glass that suffers—internal logic board components can also sustain serious damage. If your iPhone 12 won’t boot and only shows a fixed current of around 70mA on a DC power supply, this guide details a real-world board-level repair case. We’ll cover how to identify NAND or CPU damage, perform encrypted chip swaps, and restore the phone to working condition—perfect for advanced repair technicians, refurbishers, and repair shop owners.

    Initial Diagnosis: Phone Doesn’t Boot

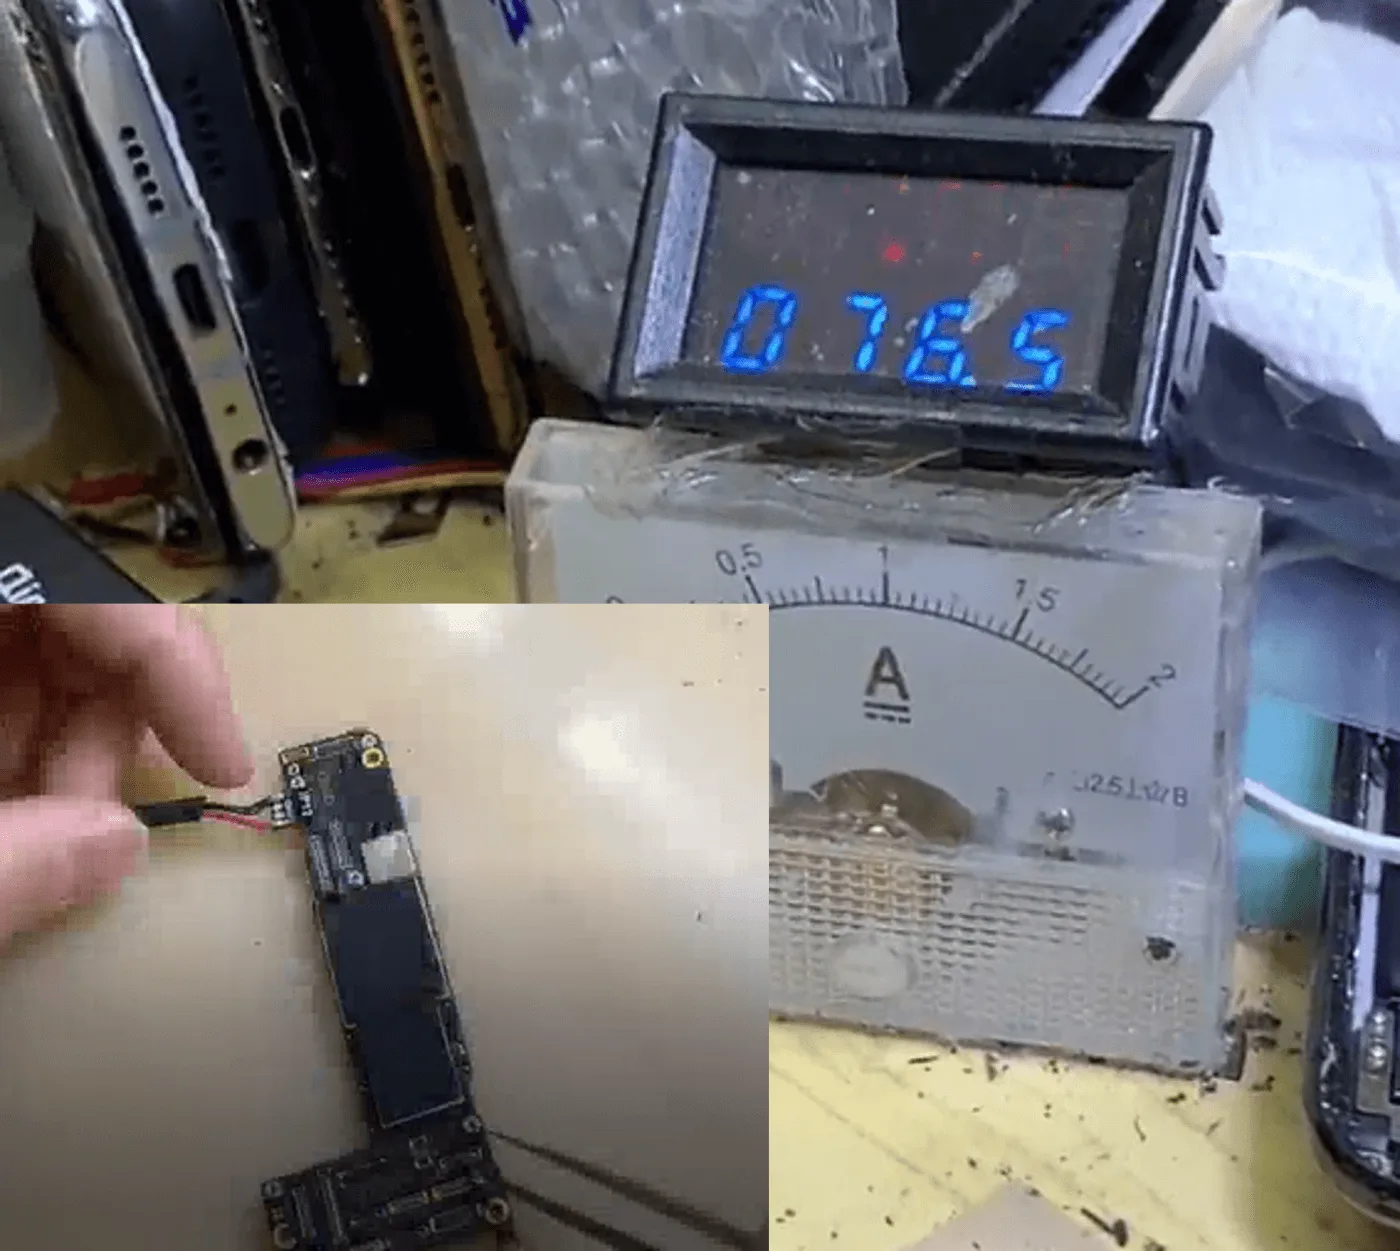
    After disassembling the iPhone 12, the motherboard was tested using a DC power supply. The boot current remained fixed at ~70mA, a common indicator of NAND or CPU failure.

    Internal Board Inspection

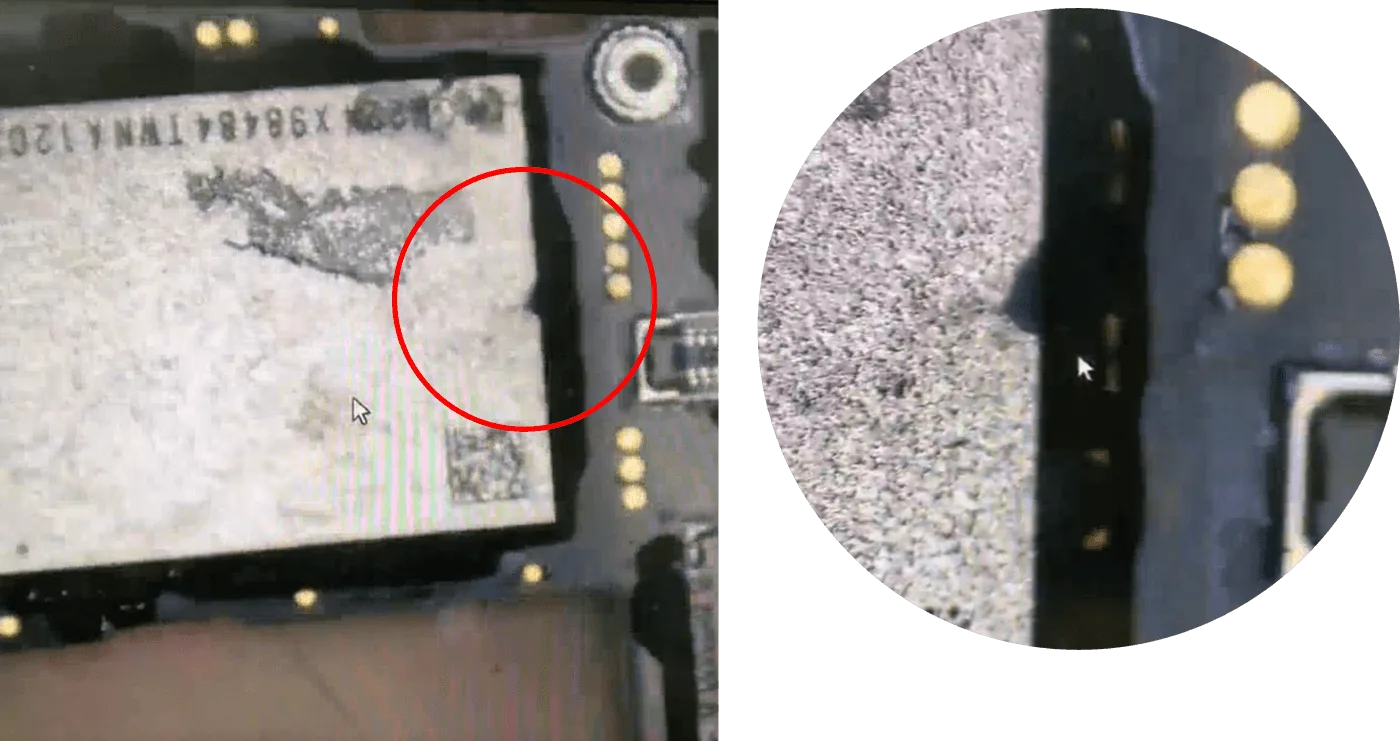
    The motherboard was separated into upper and lower layers using a heating platform. Upon inspection:

    • Some pads were missing.
    • The NAND chip had a minor crack on the edge.
    • The rest of the board looked intact.

    Under normal circumstances, removing the NAND still allows the phone to connect to iTunes or 3uTools, but this one didn’t. This raised suspicion of CPU damage.

    NAND & CPU Removal

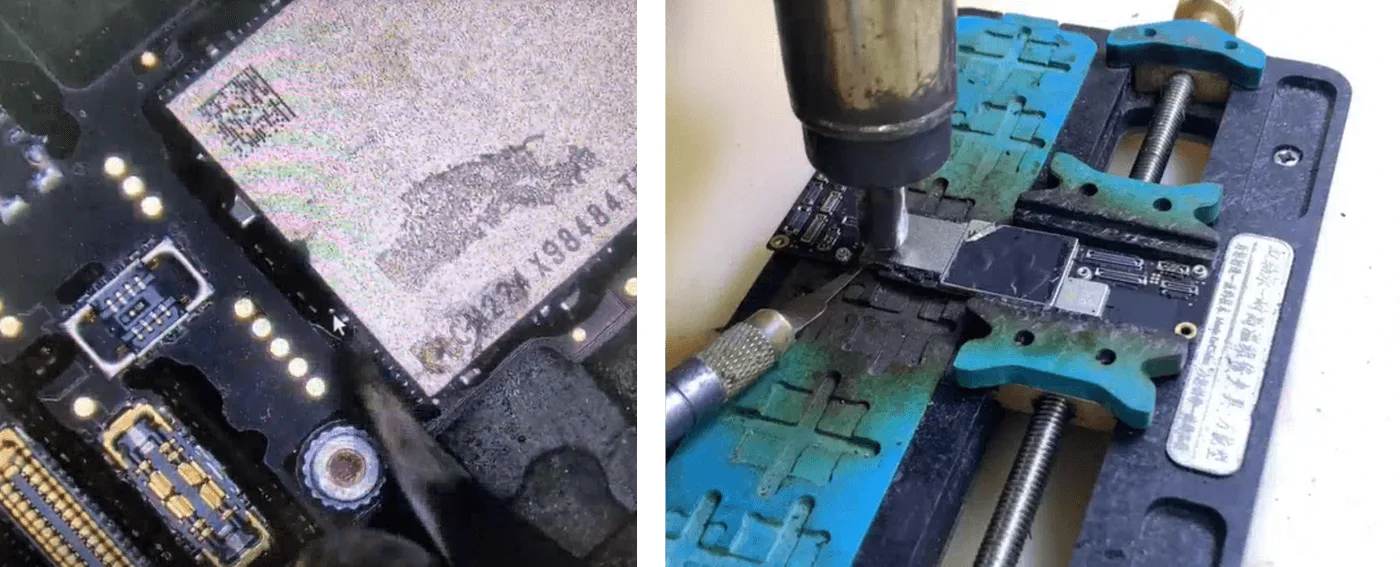
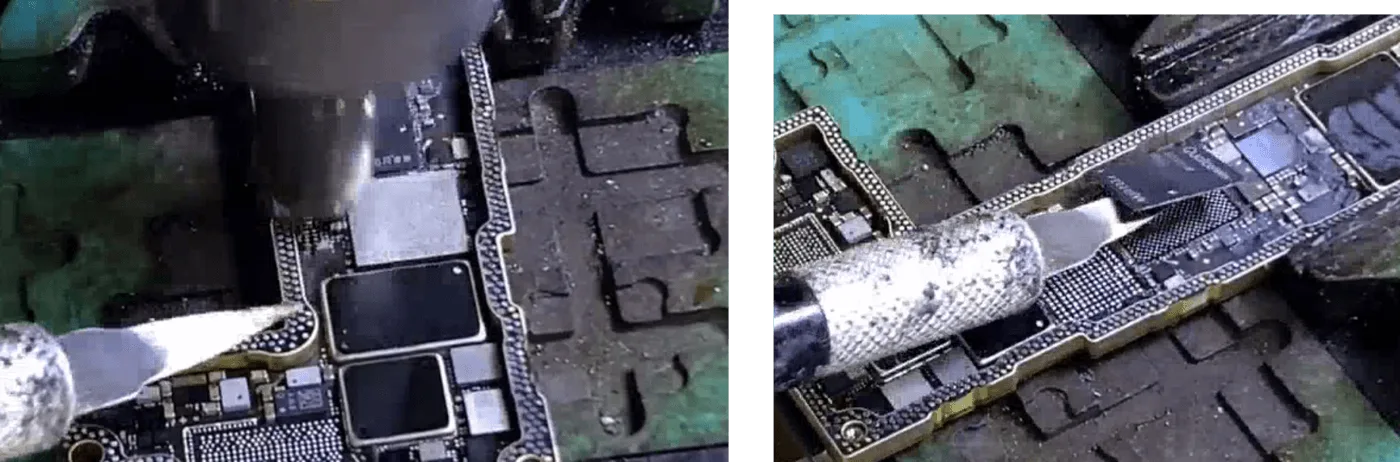
    1. Carefully removed black glue around NAND with a sculpting knife and heat gun.
    2. Heated the chip until solder melted and pried it off.
    3. Board under NAND was heavily deformed (seesaw-like).
    4. CPU was then removed and inspected — no visible cracks or missing pads.
    iphone 12 repair

    Chip Swapping Repair Process

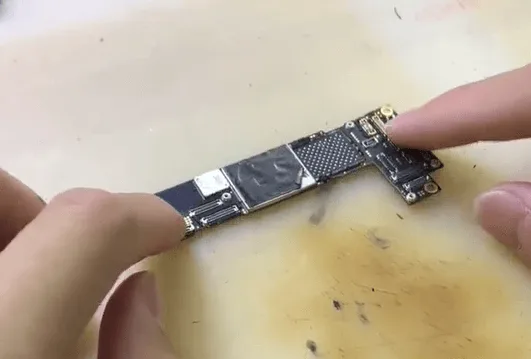
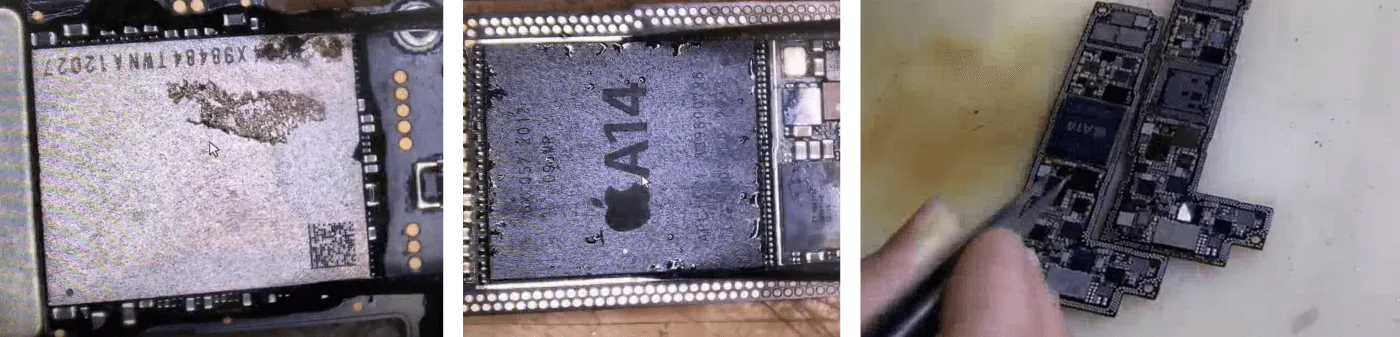
    Given the physical deformation, the likely fix involved transplanting key encrypted chips to a new board.

    1. Swapped the following from the damaged board to donor board:
      • NAND chip
      • CPU
      • Logic EEPROM
    2. Connected upper logic board to DC power — the phone booted successfully!
    iphone 12 a14 chip

    Signal Board Chip Swap

    To restore network and connectivity functions:

    Baseband CPU and Wi-Fi chip were also transferred to the donor signal board.

    With both board layers temporarily connected for testing, the phone booted properly again.

    iphone 12 repair

    Final Assembly

    • Upper and lower layers were permanently rebonded.
    • Phone was fully reassembled.
    • All functions passed — iPhone 12 fully restored!
    iPhone 12 won't boot

    Tools & Parts List

    Tools:

    • DC power supply
    • Heating platform
    • Microscope
    • Hot air gun
    • Sculpture knife
    • Blade knife
    • Motherboard layered test fixture

    Parts:

    • Donor iPhone 12 logic board
    • Replacement signal board
    • Logic EEPROM
    • NAND chip
    • CPU
    • Wi-Fi chip
    • Baseband CPU

    Conclusion

    Severe drop damage doesn’t always mean your iPhone 12 is unsalvageable. If it won’t boot and shows a 70mA current, a deformed board or NAND/CPU failure is likely. With careful inspection, encrypted chip transplants, and the use of donor boards, a skilled technician can revive a seemingly dead phone.

    Got questions? Leave a comment or share your toughest iPhone 12 repair story below!

  • Repair iPhone 12 Broken Solder Pads by Soldering Lugs

    Repair iPhone 12 Broken Solder Pads by Soldering Lugs

    The REFOX Soldering Lug can be placed directly on the missing pads, which is efficient and convenient with stable soldering.

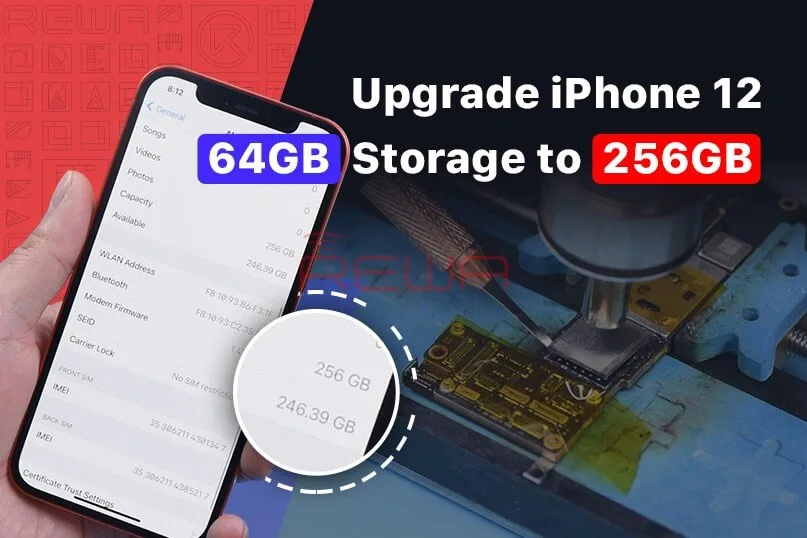
  • Upgrade iPhone 12 64GB Storage to 256GB

    Upgrade iPhone 12 64GB Storage to 256GB

    From the first iPhone to iPhone 11, Apple has stored serial number, WiFi address, and Bluetooth address on NAND. However, the NAND on iPhone 12 does not store serial number, WiFi address, and Bluetooth address, which means that the NAND of iPhone 12 can directly be replaced by an iPhone 12 NAND and activated.

  • How to Recover a Water-Damaged iPhone 12: Expert Tips

    How to Recover a Water-Damaged iPhone 12: Expert Tips

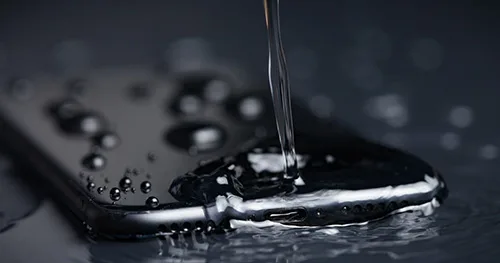
    iPhone 12 series has four models and has a water-resistance rating of IP68 level under IEC 60529 (6 meters of water for up to 30 minutes).

    However, it should be noted that splash, water, dust, dust-proof performance is not permanent.

    The protective performance may decrease due to normal wear, and damage caused by the immersion is not within the warranty.

    If the iPhone accidentally falls in water:

    Wipe the iPhone with a soft cloth. To make the iPhone dry, please take the charging port down, gently patting your iPhone with your hand to discharge excess liquid.

    Or place the iPhone in a ventilated dry area.

    You can also put the iPhone in front of the fan, letting the cold wind blow directly to the charging port, which may speed up the drying process.

    Be careful not to use an external heat source to dry the iPhone or plug foreign objects in the charging port such as cotton swab or tissue.

    Waiting for the iPhone to completely dry after opening the SIM card tray.

    If you need to charge the iPhone, please wait for 5 hours at least to make sure the iPhone is dry and then you can charge the iPhone.

    If the sound of the speaker is distorted after falling in the water

    Check if there is water in the microphone or speaker.

    Let the speaker face down, put the iPhone on a lifted cloth, and see if there is no water drop. Water in the port may reduce the performance of the speaker or microphone.

    The function will not return to normal until the moisture is completely evaporated.

    What should be noted in daily use

    • Don’t take the iPhone with you when taking a bath or go swimming.
    • For example, do not use iPhone in the sauna;
    • Do not deliberately immerse your iPhone in the water;
    • Do not place your iPhone in high pressure or high-flow rate water like shower, skiing, surfing, etc.
  • How to Fix iPhone 12 Siri is Not Responding?

    How to Fix iPhone 12 Siri is Not Responding?

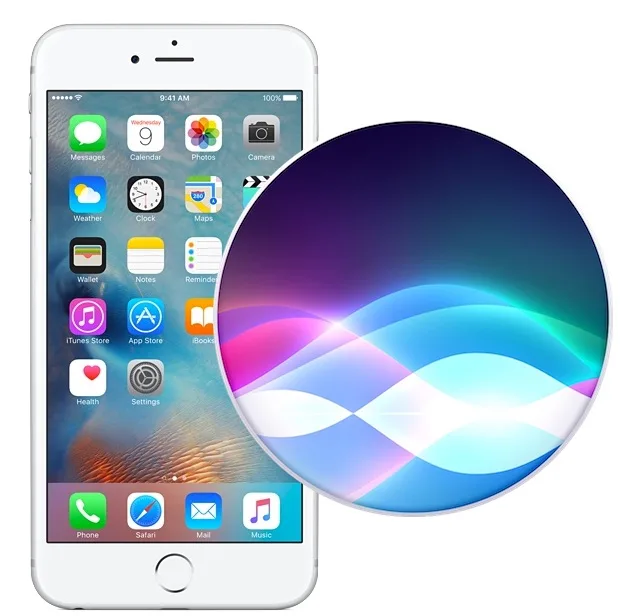
    Siri, Apple’s voice assistant, has become an essential component for numerous iPhone users. Nonetheless, a number of iPhone 12 users have encountered problems with Siri’s unresponsiveness. This article will explore the causes of this issue and offer detailed instructions to guarantee flawless functionality of Siri on your iPhone 12.

    Why is Siri on iPhone 12 not working as expected?

    Users who heavily rely on Siri may have noticed that the voice assistant fails to respond when the iPhone screen is facing downward or if the camera is obstructed. It’s important to note that this behavior is entirely normal and not indicative of any hardware or software issues with your phone. In the past, Siri could only be used when the iPhone screen was facing up. However, Apple has enhanced this feature in newer system versions for added convenience.

    To ensure Siri responds at all times, you should enable the “Hey Siri” feature in your iPhone settings.

    How to Fix Siri Not Responding on iPhone 12

    If you cannot find the “Hey Siri” option in your settings, consider updating your device to the latest system version. If the issue persists, follow the instructions below to rectify the problem:

    1. Check if “Hey Siri” is Enabled:

    • Navigate to your device’s settings and tap on “Siri & Search.”
    • Ensure the following settings are turned on:
      • Listen for “Hey Siri”
      • Suggestions on Lock Screen
    • To improve Siri’s voice recognition:
      1. Go to settings and tap on “Siri and Search.”
      2. Turn off “Listen for Hey Siri” and then turn it on again.
      3. Follow the on-screen instructions to train Siri to recognize your voice by saying the provided commands and tapping “Finish.”

    2. Verify Siri is Not Disabled:

    • Head to “Settings” > “Screen Time” > “Content & Privacy Restrictions.”
    • Ensure that “Siri & Dictation” is not turned off under “Allowed Apps.”

    3. Check Your Microphone:

    • To ensure that Siri can hear you, connect a headset with a microphone and ask Siri a question.
    • If you don’t hear Siri’s response, check whether your device is muted or if voice feedback is disabled.
    • You can adjust voice feedback settings by going to Siri & Search.

    Conclusion

    Don’t let Siri issues hinder your iPhone 12 experience. By ensuring that your “Hey Siri” settings are correctly configured, that Siri is enabled, and that your microphone is functioning properly, you can enjoy the full benefits of this convenient voice assistant. Stay connected and informed with your iPhone 12, and explore more of our blog for valuable insights and tips.

    For more in-depth articles on iOS-related topics and device troubleshooting, keep exploring our blog. We are committed to providing you with the most up-to-date information and solutions to enhance your Apple device experience.

  • How to Fix iPhone 12 Screen Flickering Issue – What is the Solution?

    How to Fix iPhone 12 Screen Flickering Issue – What is the Solution?

    The screens of iPhone 12 are fully upgraded and the original LCD screen is changed to the OLED screen. The flickering issue of the OLED screen is well known. Then how to solve this problem? REWA brings you the latest mobile phone information. Let’s check it out!

    iPhone 12 screen flickering

    How to fix iPhone 12 screen flickering issue?

    At present, after using the iPhone 12 for a long time, the eyes will be dry, because the OLED will flicker under PWM dimming. Imagine that the screen always flickers under low brightness (only the flicker is invisible to the naked eye, but the visual nerve can sense it), which leads to eye problems.

    iPhone 12 does not support DC dimming.

    However, we can reduce the screen flickering by adjusting the brightness spot, do not triggering PWM dimming. Then keep the screen in a suitable low brightness value by “lowering the white point value”. The specific method is not particularly difficult.

    Use tutorial

    1. Go to “Settings”

    2. Open “Accessibility”

    3. Choose “Display & Text Size”

    4. Find “Reduce White Point”

    We can use this way to indirectly reduce the iPhone 12 screen flickering, by which you can relieve your eyes dryness and protect your eyes. It is pretty amazing.

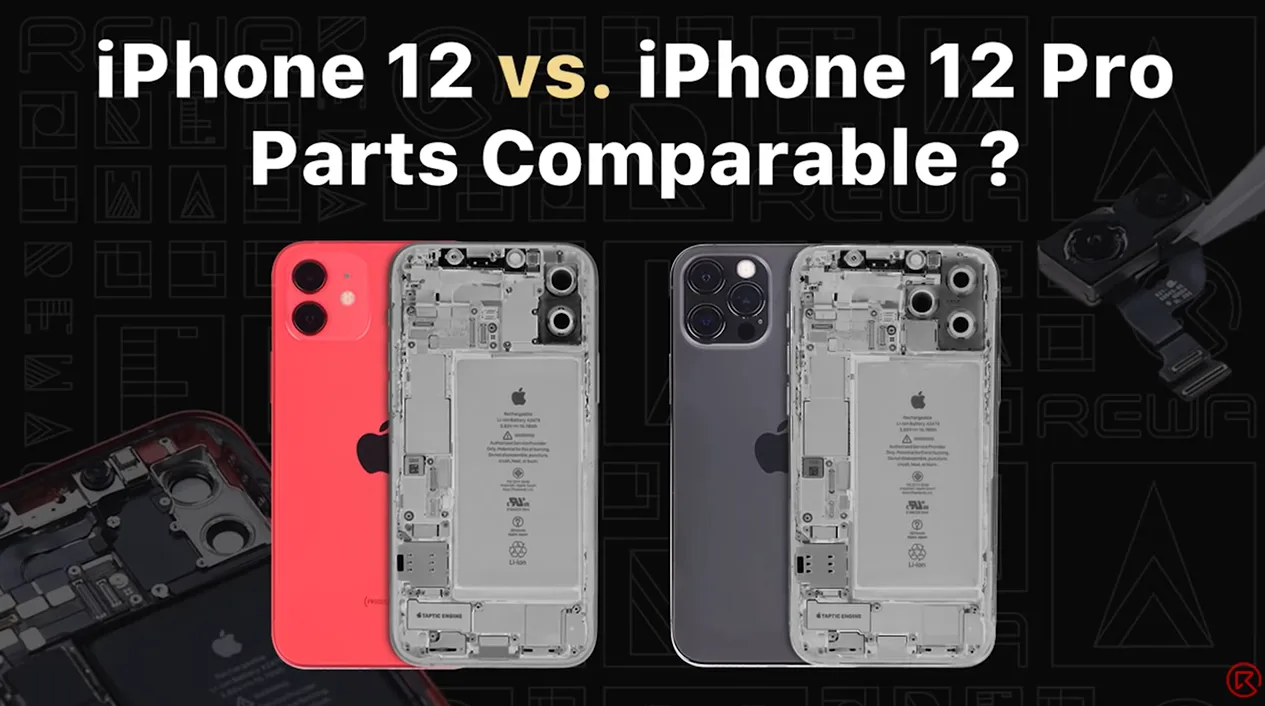
  • iPhone 12 vs. iPhone 12 Pro: Parts Swapping Test by REWA LAB

    iPhone 12 vs. iPhone 12 Pro: Parts Swapping Test by REWA LAB

    Recently, REWA LAB found that interior structure and appearance of iPhone 12 and iPhone 12 Pro look very similar after teardown. Therefore, REWA technicians tried to swap some parts of the two models to test if they can be functionally interchangeable. Want to find out the test result? Watch this video and you will know!

  • iPhone 13 vs. iPhone 12 Battery Life Comparison

    iPhone 13 vs. iPhone 12 Battery Life Comparison

    Apple dispatched four iPhone 13, iPhone 13 MINI, iPhone 13 Pro, and iPhone 13 Pro Max in 2021, notwithstanding battery development.

    It has likewise acquired a ton of enhancements alongside battery upgrades with a longer life battery. Let’s check out the difference compared with the iPhone 12.

    Apple iPhone 13 model is indistinguishable from iPhone 12 appearance, the thing that matters is that the iPhone 13 has a thickness of 0.25 mm contrasted with iPhone 12, which is basically impacted by a higher capacity battery and another camera module.

    iPhone 13 thickness: 7.65 mm 

    iPhone 12 thickness: 7.4 mm 

    iPhone 13 battery capacity is raised, 8% increment in iPhone 13, 9% of iPhone 13 and iPhone 13, where iPhone 13 Pro Max battery capacity is most reached by 18%, yet in addition the iPhone has above 4000mAh huge battery capacity for the first time.

    iPhone 13 mini battery capacity is 2406mAh 

    iPhone 13 battery capacity is 3095mAh 

    iPhone 13 Pro battery capacity is 3095mAh 

    iPhone 13 Pro Max battery capacity is 4352mAh 

    iPhone 13 Comparison of Battery life with iPhone 12

    As indicated by Apple’s fully-digital “California streaming” event on September 14, the iPhone 13 Series battery life on fortifying 1.5 hours to 2.5 hours expanded than the iPhone 12 Series, the information is as per the following:

    iPhone 13 mini battery life increased 1.5 hours than iPhone 12 mini 

    iPhone 13 battery life is raised by 2.5 hours than iPhone 12 

    iPhone 13 Pro battery life to boost 1.5 hours than iPhone 12 Pro 

    iPhone 13 Pro Max battery life is more than 2.5 hours than iPhone 12 Pro Max 

    The iPhone 13 series fully enhances battery capacity, and is equipped with 5 nano-enhanced version A15 bionic chips to reduce power consumption, which will make iPhone 13 battery life strengthening.

    thickness of 0.25 mm contrasted with iPhone 12, which is basically impacted by a higher capacity battery and another camera module.

    iPhone 13 thickness: 7.65 mm 

    iPhone 12 thickness: 7.4 mm 

    iPhone 13 battery capacity is raised, 8% increment in iPhone 13, 9% of iPhone 13 and iPhone 13, where iPhone 13 Pro Max battery capacity is most altogether reached by 18%, yet in addition the iPhone has above 4000mAh huge battery capacity for the first time.

    iPhone 13 mini battery capacity is 2406mAh 

    iPhone 13 battery capacity is 3095mAh 

    iPhone 13 pro battery capacity is 3095mAh 

    iPhone 13 Pro Max battery capacity is 4352mAh 

    iPhone 13 Comparison of Battery life with iPhone 12

    As indicated by Apple’s fully-digital “California streaming” event on September 14, the iPhone 13 Series battery life on fortifying 1.5 hours to 2.5 hours expanded than the iPhone 12 Series, the information is as per the following:

    iPhone 13 mini battery life to increase 1.5 hours than iPhone 12 mini 

    iPhone 13 battery life is raised by 2.5 hours than iPhone 12 

    iPhone 13 Pro battery life to boost 1.5 hours than iPhone 12 Pro 

    iPhone 13 Pro Max battery life is more than 2.5 hours than iPhone 12 Pro Max 

    The iPhone 13 series fully enhances battery capacity, and is equipped with 5 nano-enhanced version A15 bionic chips to reduce power consumption, which will make iPhone 13 battery life strengthening.

  • Remove Scratches from iPhone 12 & Apple Watch 3 with REFOX Grinding & Polishing Machine

    Remove Scratches from iPhone 12 & Apple Watch 3 with REFOX Grinding & Polishing Machine

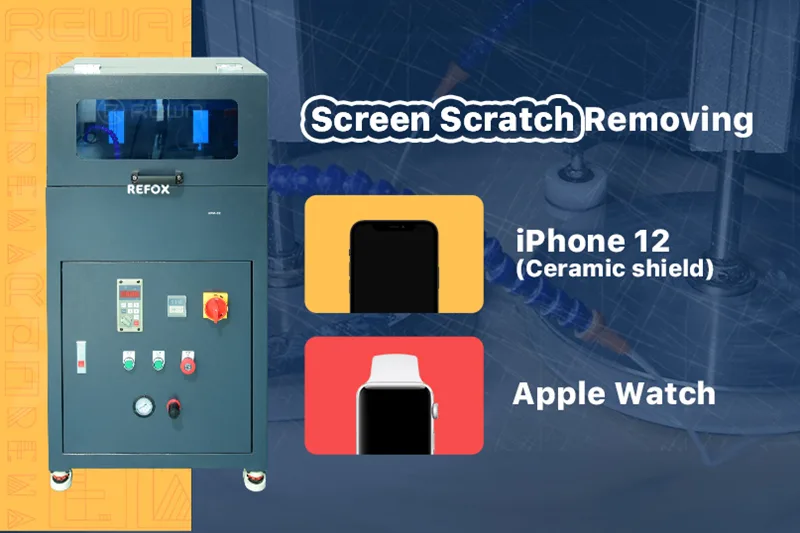
    The REFOX Grinding and Polishing Machine, newly selected by REWA, has quickly become a favorite among phone refurbishers and repair technicians worldwide. Its powerful grinding capabilities and impressive efficiency make it the go-to tool for refurbishing devices like the iPhone 12 and Apple Watch. In this guide, we’ll walk you through how to use the REFOX machine to remove scratches and restore your devices to like-new condition.

    Testing the Devices

    Before starting the refurbishment process, it’s important to test the display and touch functionality of both the iPhone 12 and the Apple Watch.

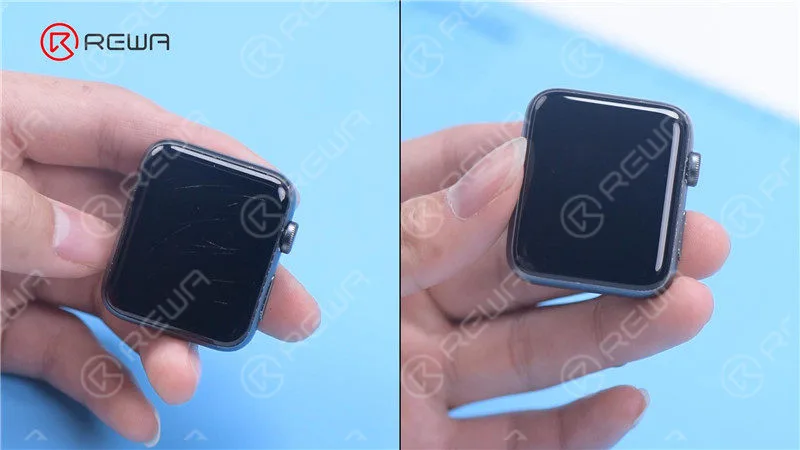
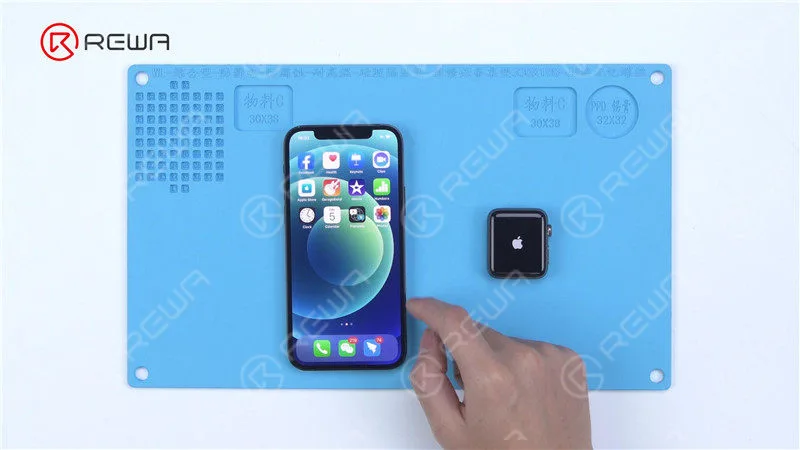
    Test the display and touch of the phone. All going well. Test the display and touch of the Apple Watch. The watch functions normally.
    There are obvious scratches on the phone and Apple Watch.

    In our case, both devices were functioning properly, despite having obvious surface scratches.

    Waterproofing

    The first step in refurbishing these devices is waterproofing. This is crucial to avoid water damage during the grinding and polishing process.

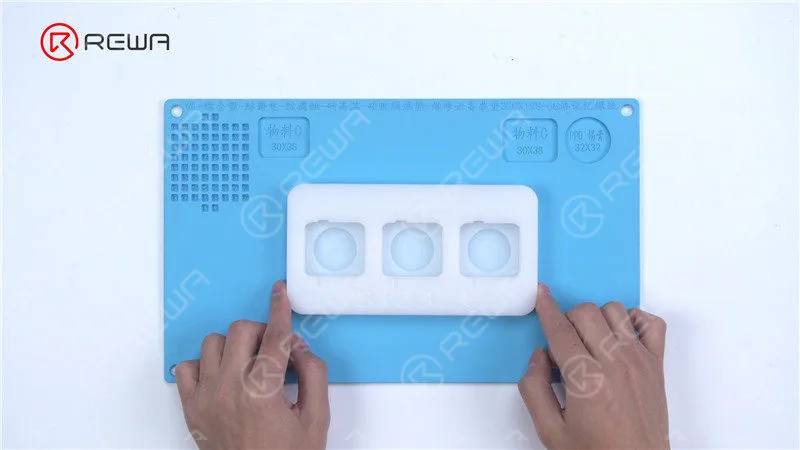
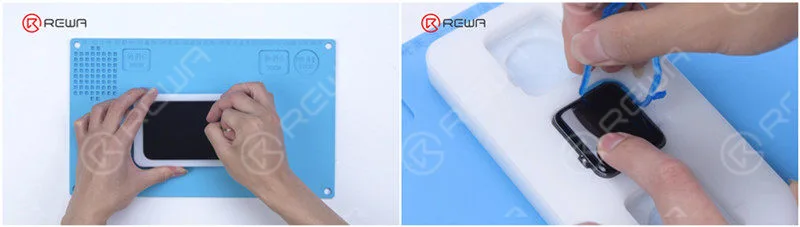
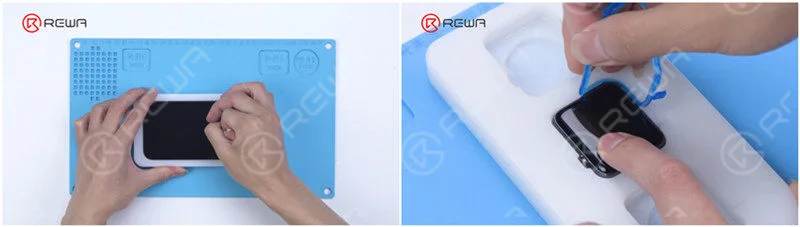
    Get the special mold for Apple Watch. The mold can grind and polish three watches at the same time.

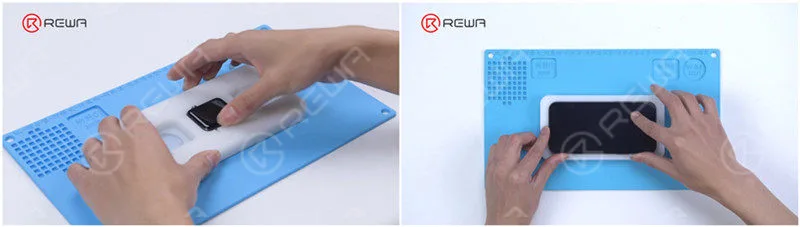
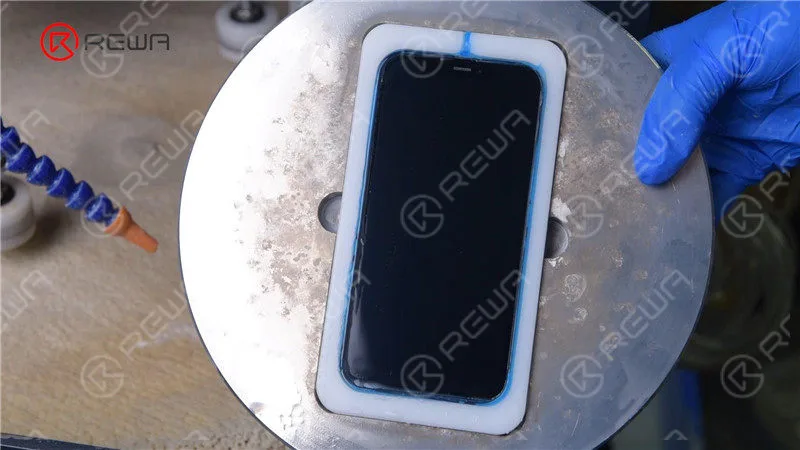
    Apple Watch Mold: Use the special mold that can hold three Apple Watches at a time. The phone and watch should be securely placed in their respective molds.

    Put the phone and watch into the mold respectively and prepare for waterproofing.

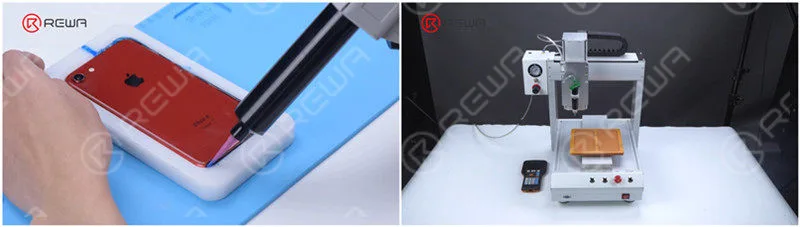
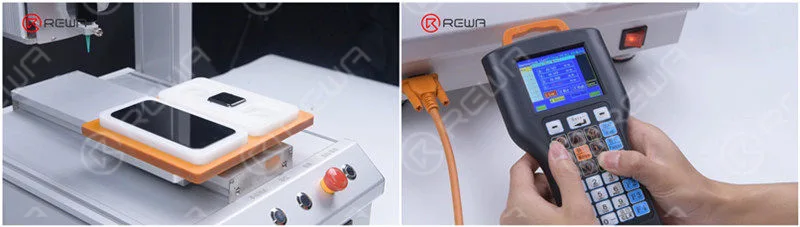
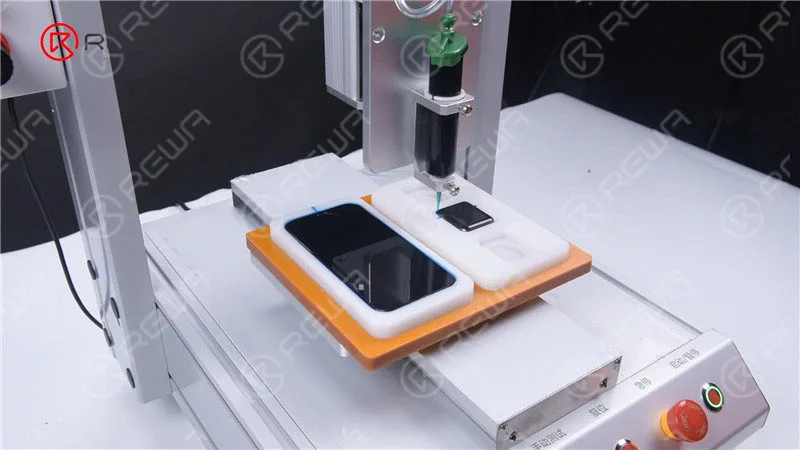
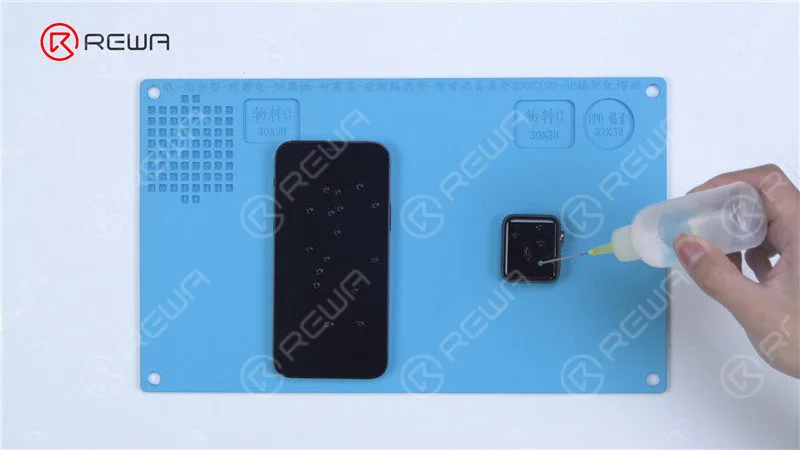
    Automatic Adhesive Dispenser: Waterproofing is the most important step for refurbishing electronic devices with the grinding and polishing machine. If waterproofing is not done well, it may lead to water damage to the device. In the last article, our technicians were applying waterproof adhesive manually. To improve refurbishment efficiency and reduce operation difficulty, REWA recommends a fully automatic adhesive dispenser for you.

    automatic adhesive dispenser

    Attach the molds to the platform. The first time you use the dispenser, you need to draw the drawing of the corresponding mobile phone models.

    automatic adhesive dispenser

    It is convenient that the drawing can be saved for direct usage. Click reset after the drawing has completed. The dispenser returns to the starting point. Then we press the start button and begin dispensing adhesive.

    automatic adhesive dispenser

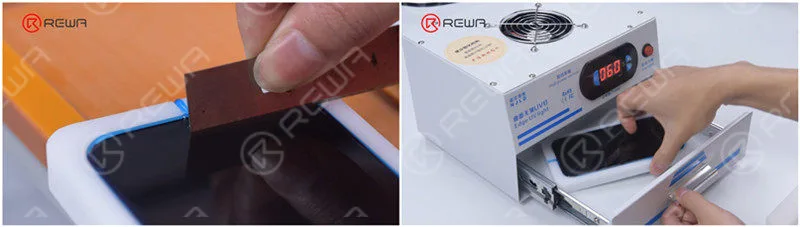
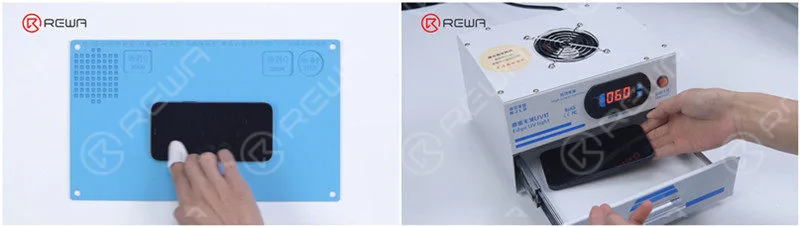
    Please scrape the adhesive on the receiver with a blade. After the adhesive has been cured by a UV Lamp, we can put the mold plates into the grinding and polishing machine.

    Please scrape the adhesive on the receiver with a blade. After the adhesive has been cured by a UV Lamp, we can put the mold plates into the grinding and polishing machine.

    Grinding and Polishing

    Now that the devices are waterproofed, it’s time to start the grinding and polishing process:

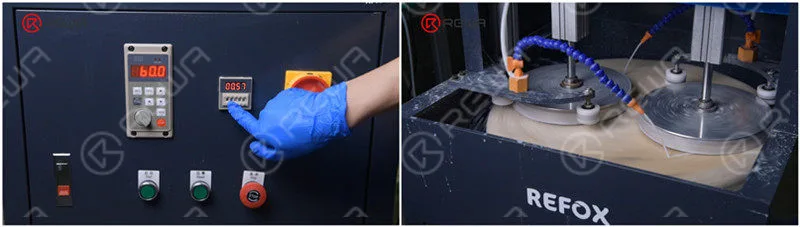
    Since the scratches on the watch and phone are deep, we set the grinding and polishing time for 12 minutes. Press the start and reset button. The machine begins to work

    iPhone 12 (Ceramic Shield) and Apple Watch 3 Scratches Removing By Grinding & Polishing

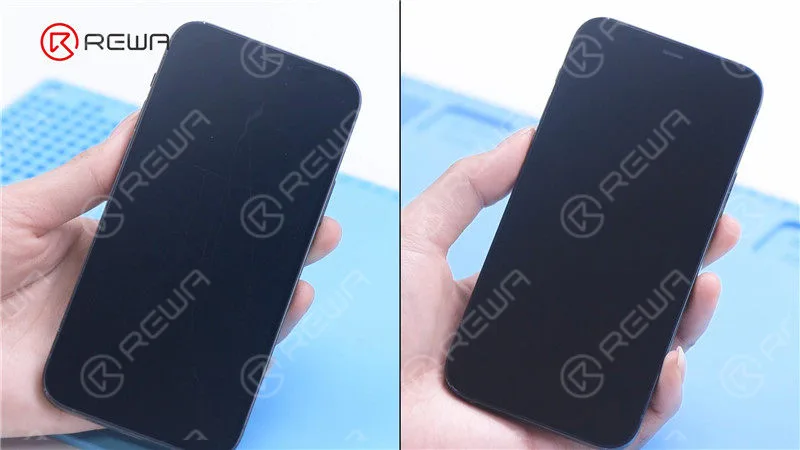
    After the first grinding and polishing, the Apple Watch with deep scratches has been refurbished successfully but there are still some small scratches on the iPhone 12.

    The scratches are completely gone after the second grinding and polishing. It can be seen that iPhone 12 takes longer to remove the same scratches than other iPhone series.

    After the first grinding and polishing, the Apple Watch with deep scratches has been refurbished successfully but there are still some small scratches on the iPhone 12.  The scratches are completely gone after the second grinding and polishing. It can be seen that iPhone 12 takes longer to remove the same scratches than other iPhone series.

    Then we peel off the waterproof adhesive of the phone. Since there are less adhesive on the receiver, we need to apply adhesive again and solidify it to make it fall.

    Then we peel off the waterproof adhesive of the phone. Since there are less adhesive on the receiver, we need to apply adhesive again and solidify it to make it fall.

    Take out the phone with a suction cup.Remove the waterproof adhesive of the Apple Watch. The scratches are gone.

    Take out the phone with a suction cup.Remove the waterproof adhesive of the Apple Watch. The scratches are gone.
    Take out the phone with a suction cup.Remove the waterproof adhesive of the Apple Watch. The scratches are gone.
    Take out the phone with a suction cup.Remove the waterproof adhesive of the Apple Watch. The scratches are gone.

    Testing

    Turn on the phone and watch to test. The watch and the phone work fine.

    Turn on the phone and watch to test. The watch and the phone work fine.

    Hydrophobic Effect

    Then we add hydrophobic effect to the screen. Coat the screen with Oleophobic Coating and apply evenly. Solidify with a UV Lamp.

    Then we add hydrophobic effect to the screen. Coat the screen with Oleophobic Coating and apply evenly. Solidify with a UV Lamp.

    The screen of the watch and phone has now regained the hydrophobic effect.

    The screen of the watch and phone has now regained the hydrophobic effect.

    The iPhone 12 and Apple Watch have been refurbished successfully.

    Summary

    The scratches on iPhone 12 have become more difficult to remove than previous models because of the ceramic shield. Nonetheless, the grinding and polishing machine managed to remove the scratches with high efficiency. Furthermore, the machine gave full of its talent by successfully removing scratches on an Apple Watch. Without a doubt, the grinding and polishing machine will be your first choice if you want to carve a place in the refurbishment industry.

    To put in more specifically, the old way to refurbish the screen is to replace the front glass, which is not only difficult but also costly. Therefore, the emergence of the polishing and grinding machine can greatly improve the efficiency of refurbishment and reduce the refurbishment cost effectively. Moreover, the operation is relatively simple.

    The efficiency of the grinding and polishing machine is of paramount concern. There are currently three kinds of hot-selling grinding and polishing machine. One is the machine from the video that can grind and polish four phones simultaneously. The other two can grind and polish two and eight phones at the same time. You can choose the right model according to your workload. REWA offers a complete screen and back glass refurbishment solution, which includes all tools and supplies. If you need the grinding and polishing machine, you can contact us to learn more about the details.

    Watch the full video below to see how we remove iPhone 12 and Apple Watch scratches by grinding and polishing.

  • Upgrade iPhone 12 64GB Storage to 256GB – The Easiest Ever?

    Upgrade iPhone 12 64GB Storage to 256GB – The Easiest Ever?

    From the first iPhone to iPhone 11, Apple has stored serial number, WiFi address, and Bluetooth address on NAND. However, REWA technicians recently discovered that the NAND on iPhone 12 does not store serial number, WiFi address, and Bluetooth address, which means that the NAND of iPhone 12 can directly be replaced by an iPhone 12 NAND and activated. Therefore, REWA technicians speculate that the storage upgrade of the iPhone 12 will be easier than previous models. Read this article to verify our speculation! The iPhone 12 serial number, WiFi address, and Bluetooth address are said to no longer be stored on the NAND. So the replacement of NAND no longer needs the NAND programmer.

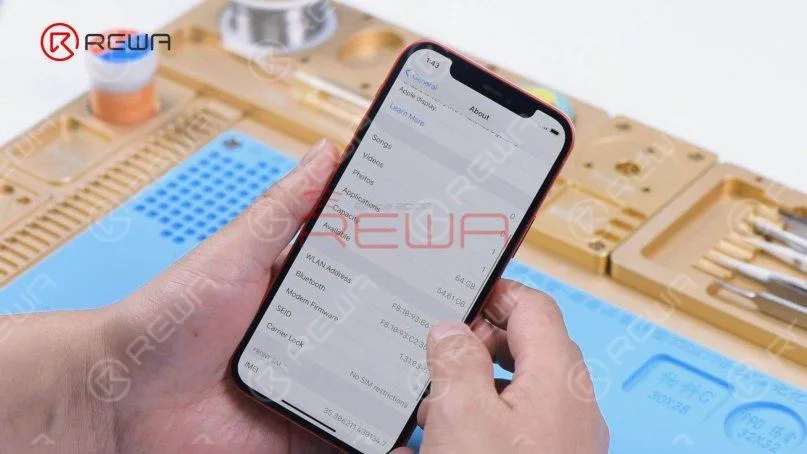
    The capacity of the iPhone is 64G.

    iPhone 12 storage

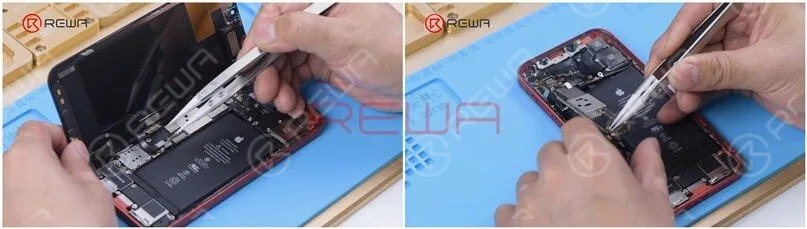
    Disconnect the battery. Remove the display and the motherboard.

    iPhone 12 teardownAttach the motherboard to the holder and then attach the high-temperature tape.
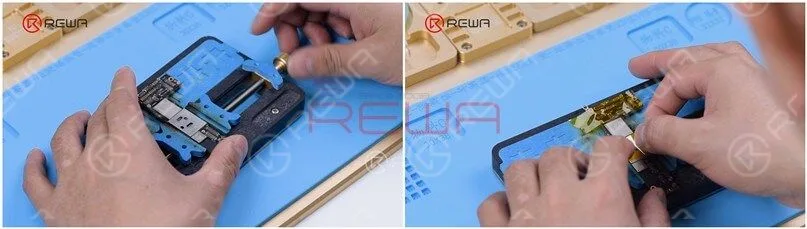
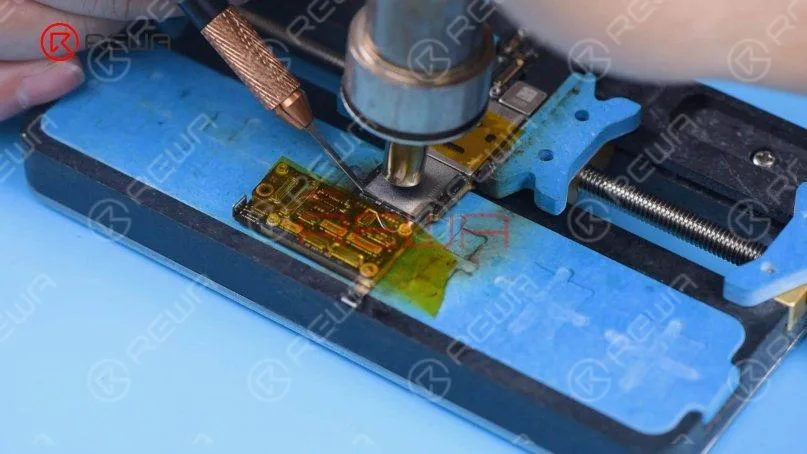
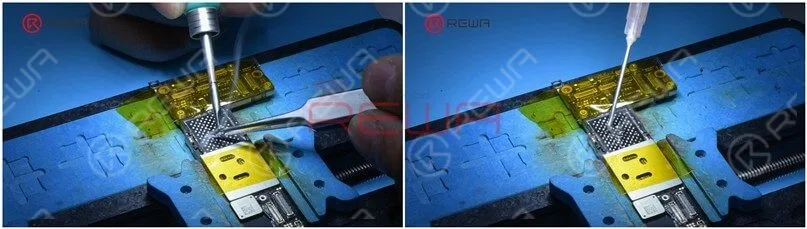
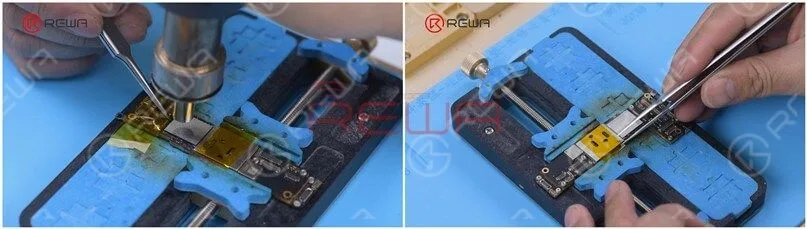
    Upgrade iPhone 12 64GB Storage to 256GBHeat the side of the NAND with Hot Air Gun at 280℃ and airflow 45. Remove black adhesive on the side of the NAND with a Side Glue Cleaner Blade.
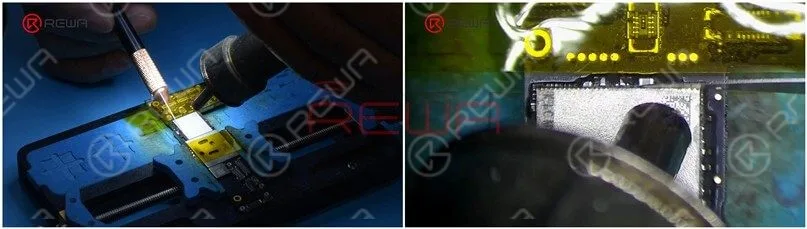
    iPhone 12 NAND Heat the NAND with Hot Air Gun at 385℃ and airflow 45. Pry up the NAND with a Pry KnifeiPhone 12 NAND replacementApply medium temperature solder paste to the bonding pad with Soldering Iron at 365℃ and then apply a small amount of Paste Flux.
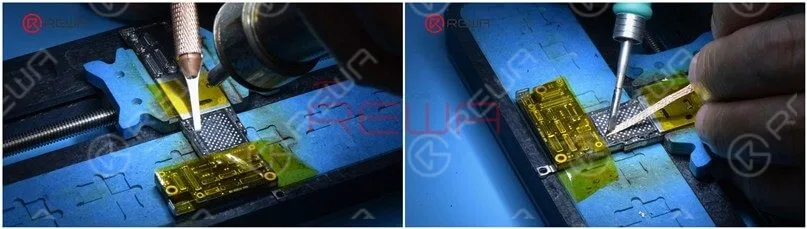
    Upgrade iPhone 12 64GB Storage to 256GBRemove tin on the bonding pad with Soldering Iron and Solder Wick. Clean the bonding pad with PCB Cleaner.
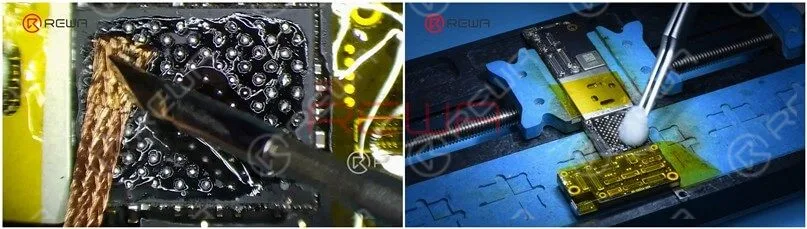
    Upgrade iPhone 12 64GB Storage to 256GBHeat the bonding pad with Hot Air Gun at 280℃ to remove the black adhesive. Dip rosin with Soldering Iron and Solder Wick to remove tin on the bonding pad. Clean the bonding pad with PCB Cleaner afterward.Upgrade iPhone 12 64GB Storage to 256GBApply some Paste Flux to the bonding pad and put an iPhone 12 256G NAND in position.
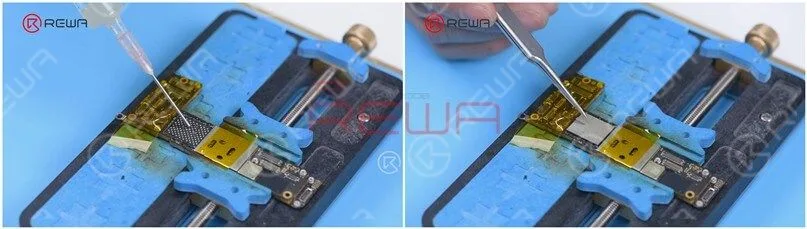
    Upgrade iPhone 12 64GB Storage to 256GBSolder the NAND with Hot Air Gun at 365℃ and airflow 45. After the motherboard has cooled, peel off the tape.
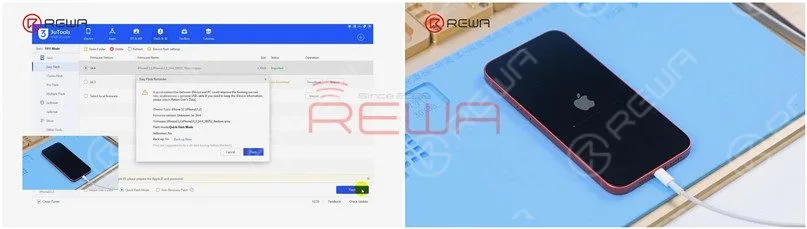
    Upgrade iPhone 12 64GB Storage to 256GBInstall the motherboard and display. Plug in the data cable and connect the iPhone to the computer. Open 3uTools to flash the iPhone. The phone does not display a progress bar during the flash process and won’t display a progress bar until the flash has finished.
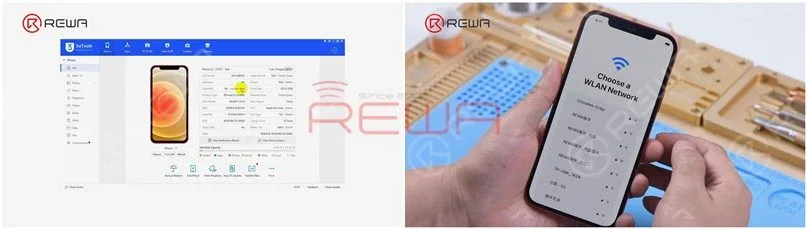
    3uTools to flash iPhone 12Activate the phone on 3uTools. Set up the phone and WiFi can be searched normally.
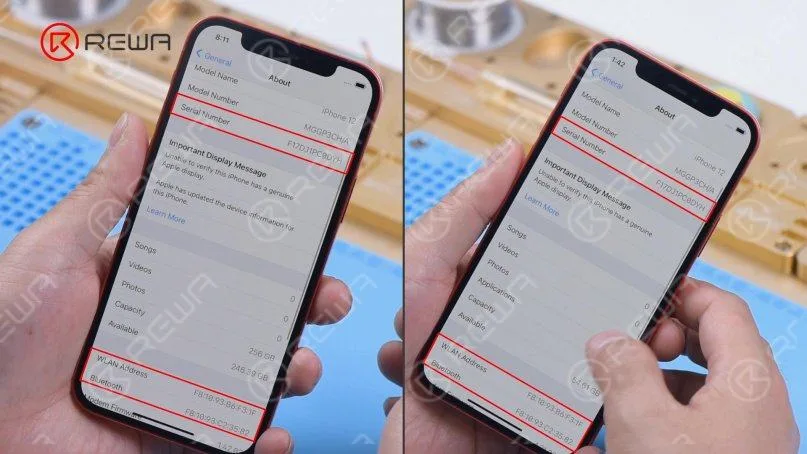
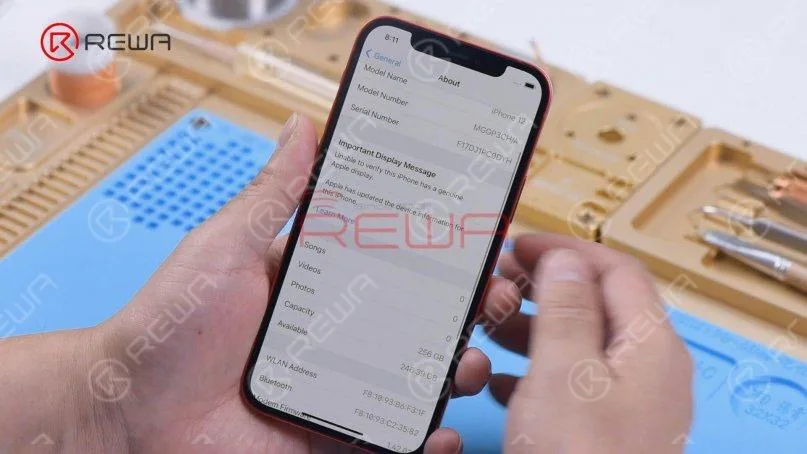
    Upgrade iPhone 12 64GB Storage to 256GBGo to Settings > About. The phone has a 256G capacity. The serial number, WiFi address, and Bluetooth address remain unchanged.
    Upgrade iPhone 12 64GB Storage to 256GB
    Upgrade iPhone 12 64GB Storage to 256GB

    It can be confirmed that the serial number, WiFi address, and Bluetooth address are no longer stored on the NAND. Replacing the NAND of iPhone 12 with a disassembled iPhone 12 NAND no longer needs a programmer to write the serial number, WiFi address, and Bluetooth address. Unlike previous models, the NAND of iPhone 12 can be directly replaced. REWA technicians speculate that the serial number, WiFi address, and Bluetooth address are likely stored on EPROM or CPU. The technological change that Apple has made does make storage upgrade easier. But REWA doesn’t recommend that users upgrade storage on their own. The first reason is that Apple does not provide a warranty for the phone that has been disassembled before. The second reason is that inappropriate operation may lead to some malfunctions. The water resistance function will be much worse. But for a phone with a bad NAND, it will be much easier to repair.

    Watch the video below to see how we upgrade the storage of the iPhone 12.