Tag: ipad

  • Tough iPhone & iPad Repairs? We Can Fix!

    Tough iPhone & iPad Repairs? We Can Fix!

    When it comes to electronic products like phones, tablets and computers, iPhone & iPad repairs can often be cost-effective alternatives to buying new. However, it’s easy for us to spell the word ‘repair’ while practical repair work can be a real meticulous process. Repair shops spring up with the development of electronics all around the world, in the meantime, malfunction grew to be more and more precise. Repair experts can be professional at some point but they cannot be almighty for all fault caused by the daily updated electronic products. So what to do? It’s never too late for you to ask for support and REWA always got a repair solution for you. Our network of repair services are positioned to offer efficient logic board repair and cracked screen repair services for all in need. We want you to boost your business and stand out from others, and we are honored to be there to help.

    Advantages of iPhone & iPad Repairs With REWA

    Tough iPhone & iPad Repairs

    One-stop Meets All

    REWA is capable of supplying all of our customer’s needs within our services. Whatever your problem, no matter how big or small, our dedicated sales and customer service team will provide a competitive and reliable solution.

    Prompt And Efficient

    Don’t get into a spin with your unsolved problem, REWA offers prompt and efficient service for your emergency. Contact us now to solve your problem quickly and cheaply.

    Leading Technology

    Faced with a problem your experts may have a question with? Turn to REWA for support. Our experts and engineers are highly skilled and equipped to deal with a broad range of products like iPhone, Samsung, Huawei etc.

    Transparent Service

    Transparency creates trust! REWA believes that the best approach is to step outside of the business realm and into the human realm. Our customers are kept informed of all information they need from repair process to price details and so on.

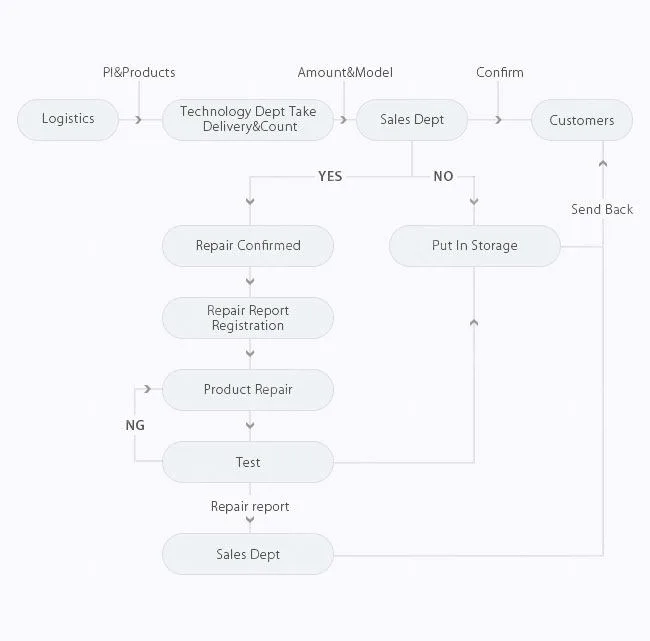
    How REWA Repair Service Works
    Tough iPhone & iPad Repairs

    Logic Board Repair Service Includes1.

    Camera chip repair: iPhone 6 Camera not working;

    2. Touch screen chip repair: iPhone 7 touch screen not working or unresponsive touch;

    3. Display chip repair: LCD doesn’t display images properly, or it doesn’t display at all;

    4. Charging chip repair: The device not charging, or you have trouble connecting the device to computer or charger;

    5. WiFi chip repair: How to fix wifi on iPhone 6, WiFi can’t open, or WiFi cannot be connected, or WiFi has no signals;

    6. Speaker chip repair: Can’t hear your audio or use your loudspeaker, sound of ear speaker fades in and out, or iPhone 6 no sound at all;

    7. Signal chip repair: iPhone 6 No Service Hardware Fix Solution, Can’t connect to a cellular network, can’t make or receive calls

    8. Logic board connector repair: Connectors on logic board damaged

    9. Touch ID chip repair: iPhone 7 home button not working, the touch ID flex cable cracked, but the home button is OK

    10. Upgrade storage: upgrade your iPhone & iPad storage to 64GB/128GB/256GB, such as How to upgrade iPhone storage;

    11. No turning on: iPhone won’t turn on, no function; fixed display; restarting; white screen; red screen; blue screen; no display at all;

    12. Unlock iPad iCloud: How to unlock iPad air;

    13. Fix compass problems

    Logic Board Repair Service – Models
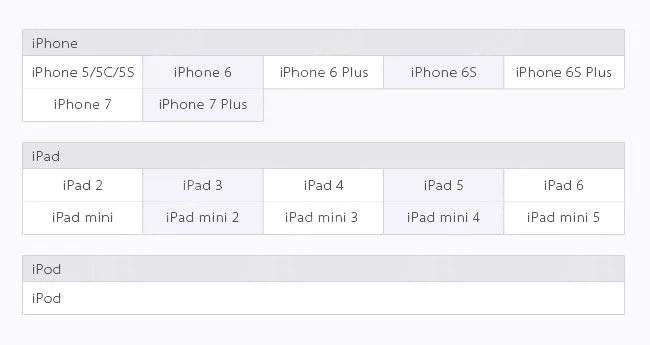
    Tough iPhone & iPad Repairs

    Cracked Screen Repair Service – Models
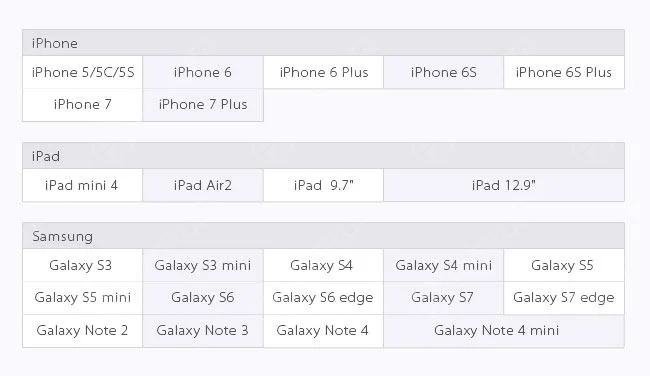
    Tough iPhone & iPad Repairs

    Customer Notification

    Here are some details we would like you to know before sending out

    1. MOQ: 10PCS

    2. The repair process(not including delivery time) typically takes about 7 days.

    3. Delivery charges are the responsibility of customers.

    4. Mark the malfunctions of each device and record their IMEI before delivery.

    5. If locked, please provide the password to your phone so that we can test functionality.

    6. If possible, please provide iCloud account and password; Or please delete your iCloud account from your device(We do not repair a device that has no iCloud password). 7. If you require a touch ID repair service, please send the home button assembly together with the logic board.

    8. For iPhone storage upgrade, please update your device to the latest IOS operating system.

    9. We are unable to repair a device that rust and corrosion on too many components.

    10. If you don’t accept our test report and decide to give up the repair service. You should bear the return shipping.

    11. The repair charge depends on the exact damage and amount of damage to your device. We can only offer you an estimated repair price before repair completed.
  • iPad Air Touch Screen Partially Unresponsive Repair

    iPad Air Touch Screen Partially Unresponsive Repair

    iPad Air touch screen partially unresponsive? Replace with a new touch screen and the problem remains unsolved? It’s time for you to check our repair guide and get refreshed with a totally new logic board solution regarding the unresponsive touch issue. We have rich experience in screen replacement, such as our screen repair guide:

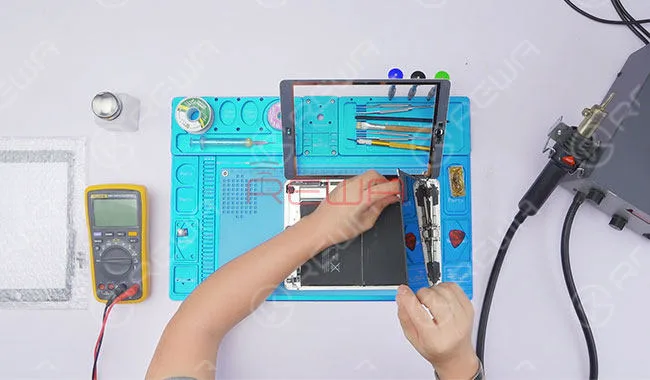
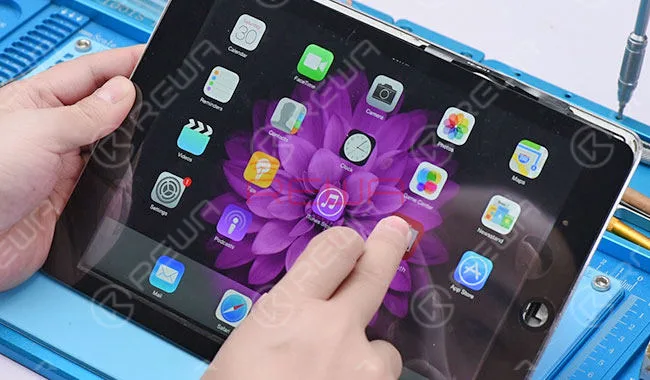
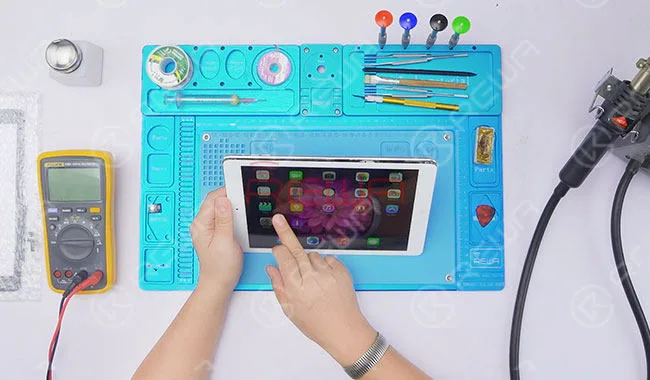
    The iPad turns on normally. Run touch function test – touch failure appears.

    iPad Air Touch Screen Partially Unresponsive Repair

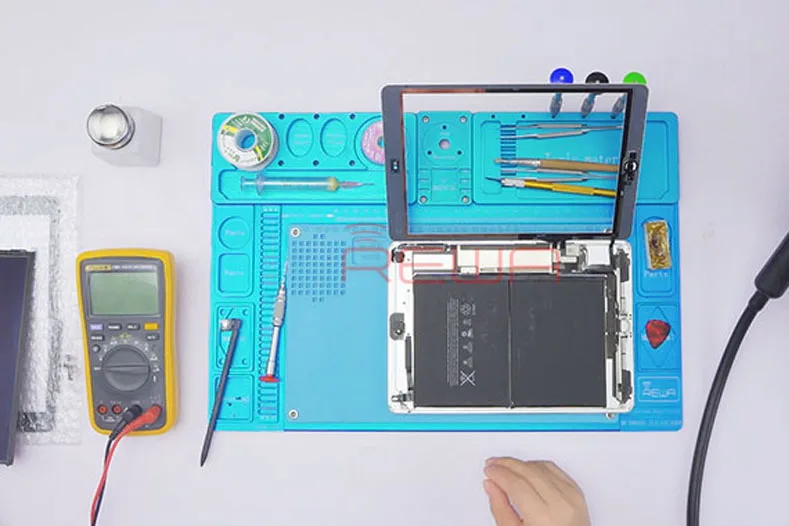
    Disassemble the iPad and remove LCD and Touch Screen Digitizer. Replace with a new Touch Screen Digitizer.

    iPad Air Touch Screen Partially Unresponsive Repair

    Then power on and test. Touch failure still exists. We can see that touch failure appears mainly in one specific area.

    iPad Air Touch Screen Partially Unresponsive Repair

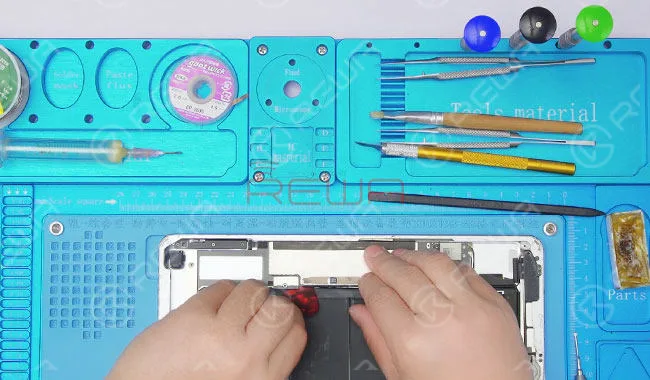
    Take down LCD and Touch Screen Digitizer. Remove screws and detach battery.

    iPad Air Touch Screen Partially Unresponsive Repair

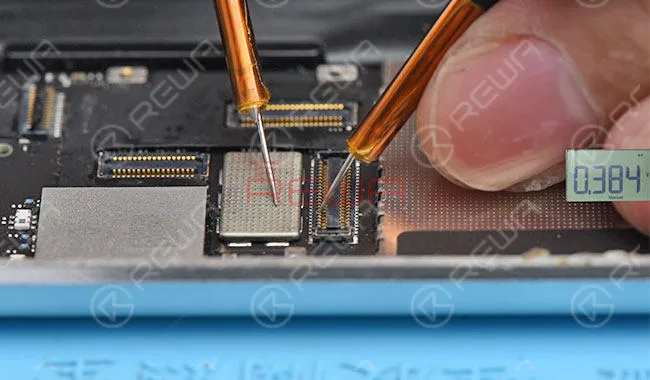
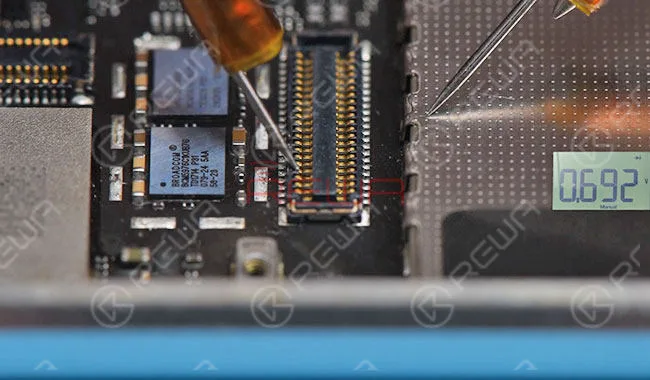
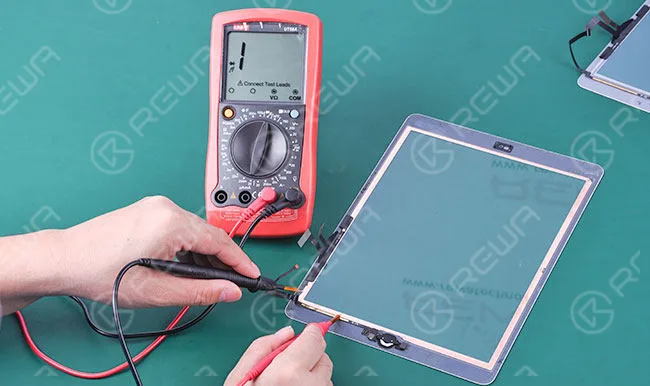
    Switch to diode mode and measure the resistance between J6640 and grounding, J6620 and grounding. The resistance value between J6640 and grounding is normal. The measured resistance value between 35# of J6620 and grounding is 293. The measured resistance value between 33# of J6620 and grounding is 384. Abnormal value for the two Pins. The normal value should be 690. Since 33# and 35# of J6620 connect with U6650 directly, we can conclude that U6650 broke down.

    iPad Air Touch Screen Partially Unresponsive Repair

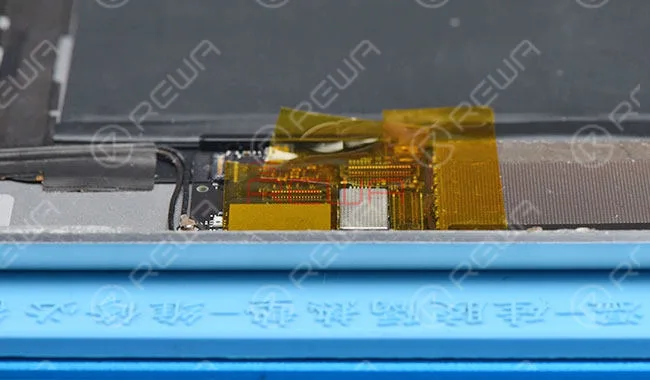
    Stick connectors next to U6650 with high-temperature adhesive tape to protect them from high-temperature damage.

    iPad Air Touch Screen Partially Unresponsive Repair

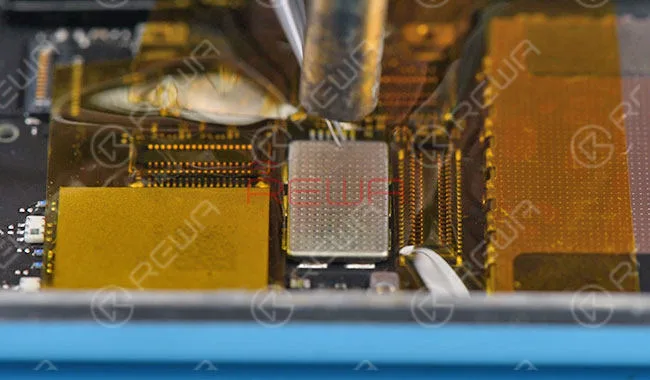
    Take down the shield plate with Hot Air Gun at 340℃. Apply some BGA paste flux around U6650 and take down U6650 with Hot Air Gun at 340℃.

    iPad Air Touch Screen Partially Unresponsive Repair

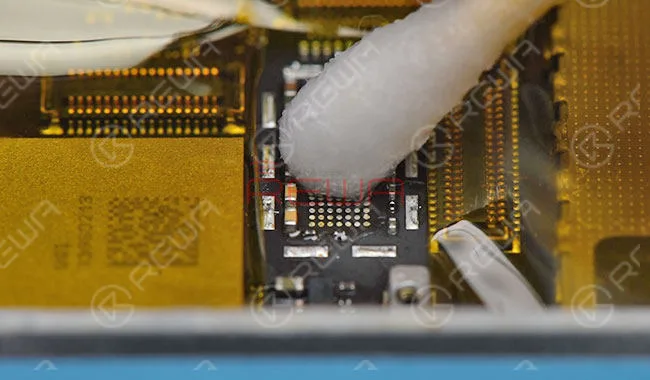
    Clean tins on the bonding pad with Soldering Iron and then clean the bonding pad with PCB Cleaner.

    iPad Air Touch Screen Partially Unresponsive Repair

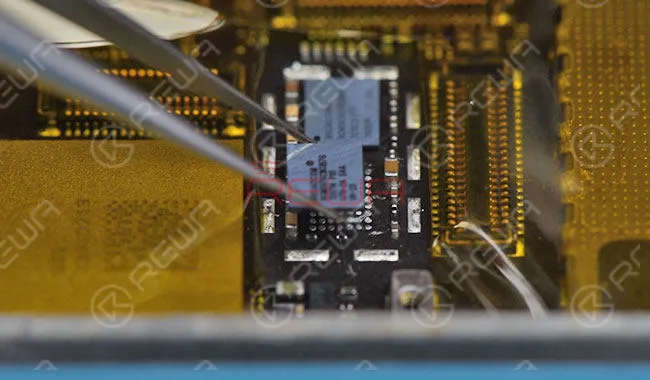
    Apply some BGA paste flux to the bonding pad. Align the new U6650 to the right place and solder with Hot Air Gun at 340℃.

    iPad Air Touch Screen Partially Unresponsive Repair

    Wait for the logic board to cool for 5 minutes. Then clean with PCB Cleaner. Measure the resistance between 33# and grounding, 35# and grounding. Normal resistance value this time.

    iPad Air Touch Screen Partially Unresponsive Repair

    Assemble the iPad and test. Touch function back to normal. Fault cleared.

    For more details on iPad Air Touch Screen Partially Unresponsive Repair, please go to REWA YouTube channel.

    Tools & Parts

  • iPad Touch Screen Home Button Assembling Tutorial

    iPad Touch Screen Home Button Assembling Tutorial

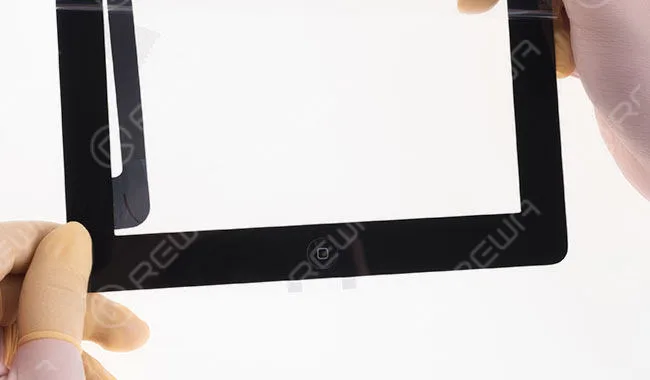
    So you need iPad touch screen digitizer assembly replacements for your repair work. You search on the internet and find that some of them are not well assembled with home buttons. Yet the home button on the iPad controls the tablet and all of its functionality, missing of which can render your iPad almost useless. Well, how to piece those home button assembly parts together and make it work perfectly with the iPad touch screen digitizer assembly?REWA offers detailed step-by-step guides to assist you with the home button assembling process and get it working as you need. (such as iPhone won’t turn on after screen replacement, iPhone 7 touch screen not working,  iPhone 7 home button not working)

    Note: four iPad series are applied to this home button assembling guide – iPad 2, iPad 3, iPad 4, iPad 5 and iPad mini.

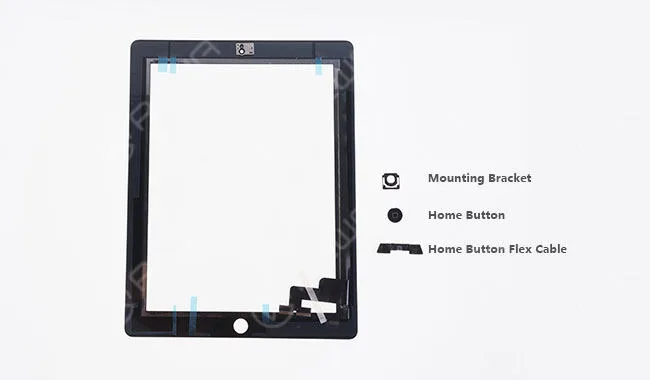
    iPad 2

    ipad touch screen home button assembling tutorial 2

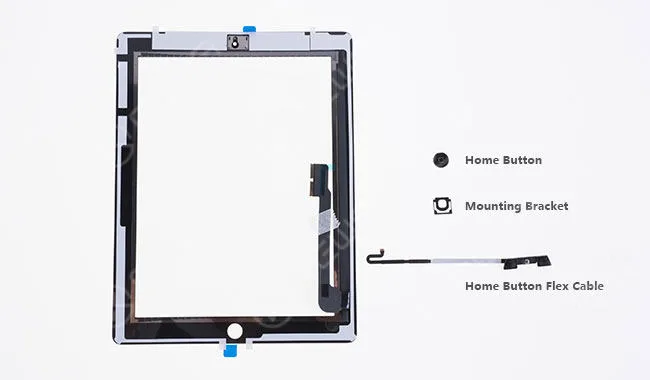
    Parts contained: Home Button; Mounting Bracket; Home Button Flex Cable

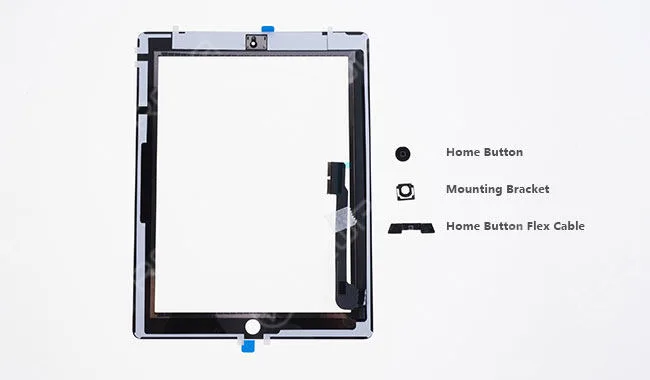
    iPad 3

    ipad touch screen home button assembling tutorial 3

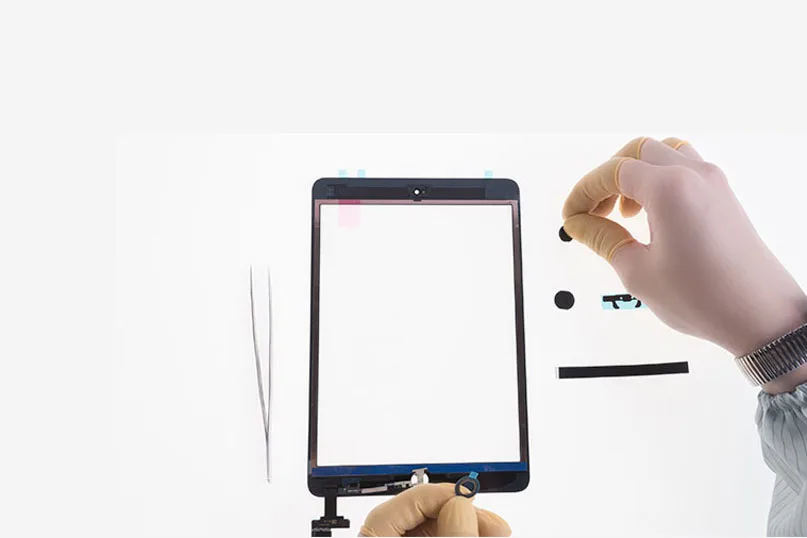
    Parts contained: Home Button; Mounting Bracket; Home Button Flex Cable

    iPad 4

    ipad touch screen home button assembling tutorial 4

    Parts contained: Home Button; Mounting Bracket; Home Button Flex Cable

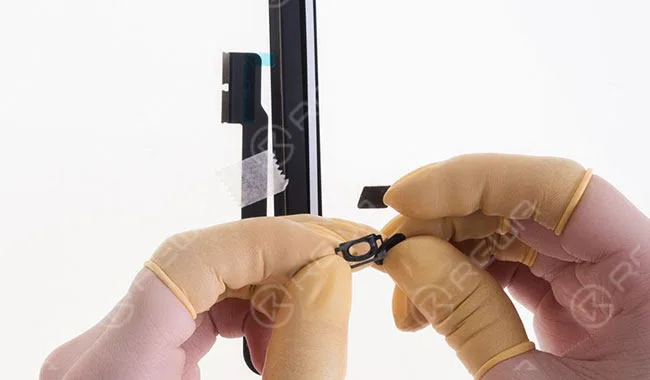
    The three of them have the same steps as below (take iPad 3 as an example).

    Step 1 Seat the home button with the mounting bracket.

    ipad touch screen home button assembling tutorial dsc4700

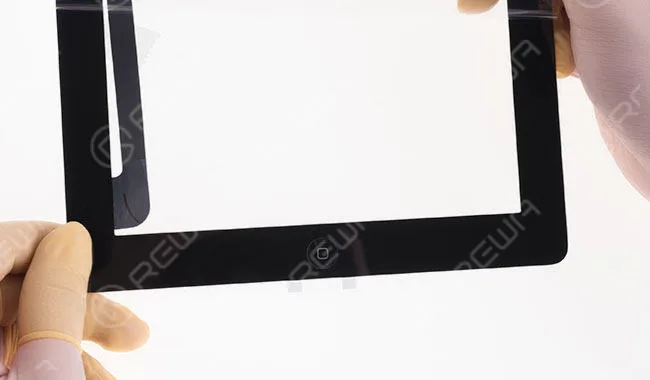
    Step 2 Align them to the home button hole of the iPad touch screen digitizer assembly.

    ipad touch screen home button assembling tutorial dsc4715

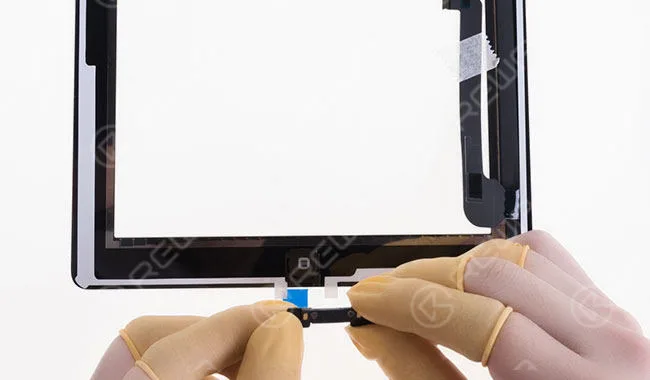
    Step 3 Align the home button flex cable.

    ipad touch screen home button assembling tutorial dsc4707

    Step 4 Once finished, check the assembling effect.

    ipad touch screen home button assembling tutorial dsc4715 2

    iPad 5

    ipad touch screen home button assembling tutorial 5

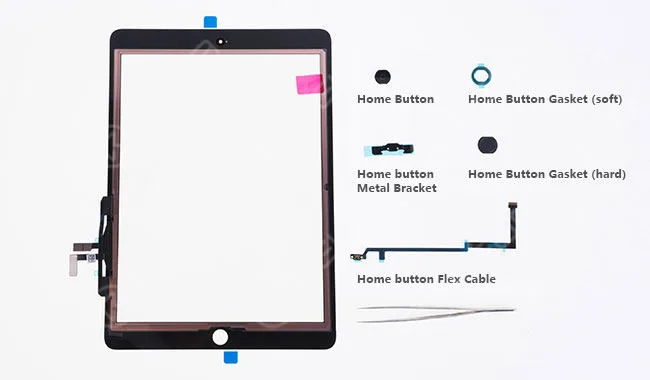
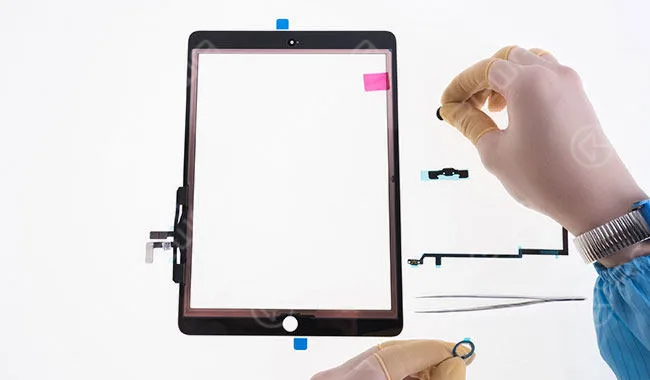
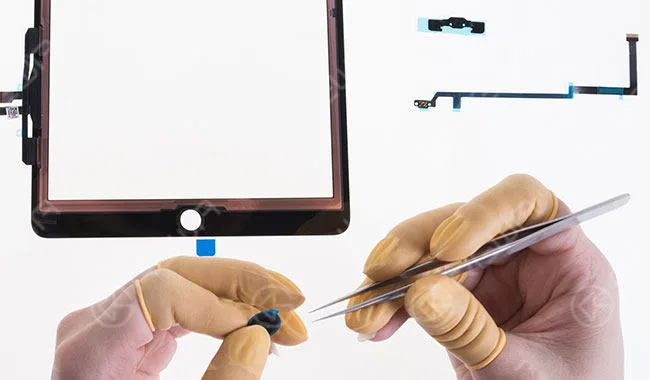
    Parts contained: Home Button; Home Button Gasket (soft); Home button Metal Bracket; Home Button Gasket (hard); Home Button Flex Cable Step 1 Tear off the front self-adhesive sticker of the soft home button gasket, paste the home button to it and then tear off the rear self-adhesive sticker. Then align them to the home button hole of the iPad touch screen digitizer assembly.

    ipad touch screen home button assembling tutorial dsc4742

    Step 2 Tear off the self-adhesive sticker of the hard home button gasket and paste it to the home button hole of the iPad touch screen digitizer assembly.

    ipad touch screen home button assembling tutorial dsc4752

    Step 3 Tear off the self-adhesive sticker of the home button metal bracket and align it to the home button flex cable. Then adhere the two to the right place of the iPad touch screen digitizer assembly.

    ipad touch screen home button assembling tutorial dsc4766

    Step 4 Once finished, check the assembling effect.

    ipad touch screen home button assembling tutorial dsc4780

    iPad mini

    ipad touch screen home button assembling tutorial mini

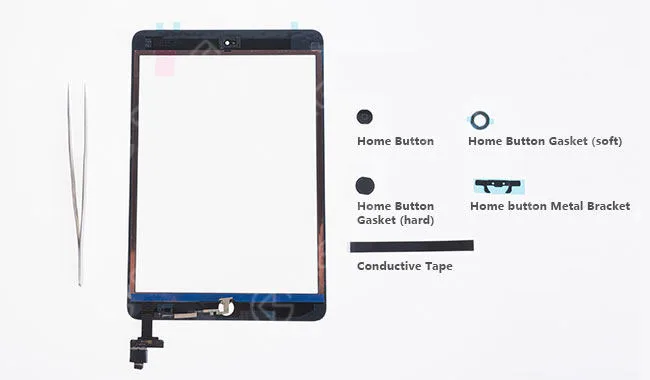
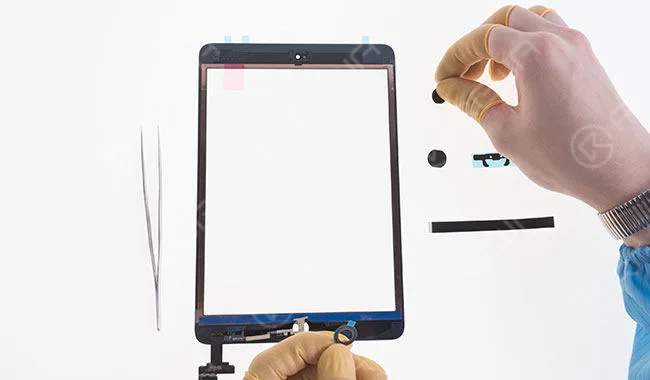
    Parts contained: Home Button; Home Button Gasket (soft); Home Button Gasket (hard); Home button Metal Bracket; Conductive Tape.

    Step 1 Tear off the front self-adhesive sticker of the soft home button gasket, paste the home button to it and then tear off the rear self-adhesive sticker. Then align them to the home button hole of the iPad touch screen digitizer assembly.

    ipad touch screen home button assembling tutorial dsc4790

    Step 2 Tear off the self-adhesive sticker of the hard home button gasket and paste it to the home button hole of the iPad touch screen digitizer assembly.

    ipad touch screen home button assembling tutorial dsc4802

    Step 3 Tear off the self-adhesive sticker of the home button metal bracket and align it to the right place. Then seal with the conductive tape.

    ipad touch screen home button assembling tutorial dsc4818

    Step 4 Once finished, check the assembling effect.

    ipad touch screen home button assembling tutorial dsc4830

  • Replacements For iPad Touch Screen Quality Control & Packing Process

    Replacements For iPad Touch Screen Quality Control & Packing Process

    replacements ipad touch screen quality control packing process for

    Our previous blog Samsung Galaxy S7 edge glass replacement or  iPad Touch Screen Assembly you must know   has introduced what test REWA glass lens have to go through before assembling and how the test-passed products being processed to be integrated replacements for iPad touch screen assembly. Let’s make it clear now. The situation is that so far we have got you the semi-finished replacements for iPad touch screen assembly now. Why called them semi-finished products? To ensure the quality of REWA replacements for iPad touch screen assembly, all these processed products have a long inspection way to go before the standard packing and safe delivering. Below is a detailed description of how we dealt with them. Hope it will help you build confidence in our products.

    REWA Replacements for iPad Touch Screen Assembly

    Quality Control 1. Cosmetic Inspection

    Each touch screen assembly should go through cosmetic inspection before shipment to ensure there are no flaws in scratch, bubble or dust etc.

    replacements ipad touch screen quality control packing process

    The toughness of the touch screen assembly also needs to be fully confirmed.

    replacements ipad touch screen quality control packing process 2

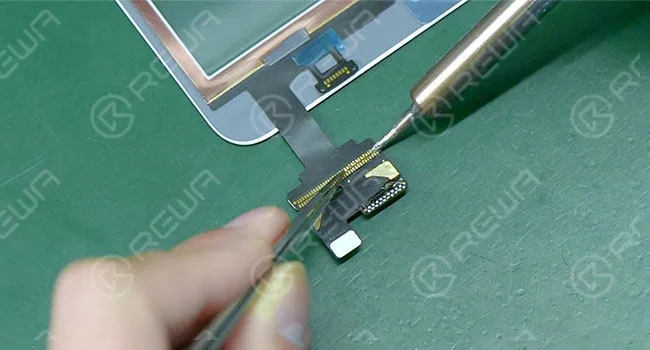
    2. IC Assembly Solder touch IC flex cable and home button flex cable to those that have passed cosmetic inspection.

    replacements ipad touch screen quality control packing process 3

    3. Function Test

    Run touch function test and home button function test.

    replacements ipad touch screen quality control packing process 4

    4. Sampling Inspection

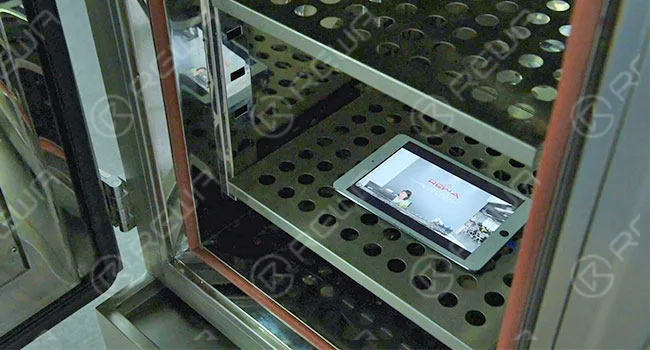
    For those that have passed function test, REWA LAB will start a random drawing for a 2-hour aging test with a high temperature of 45 centigrade.

    replacements ipad touch screen quality control packing process 5

    5. Components Assembly

    Install camera bracket, double-sided adhesive and home button to the touch screen assembly.

    That’s the whole quality control process of iPad touch screen assembly.

    Packing Process1. Protective Film Attaching

    Attach exclusive protective film to touch screen assembly for quality guarantee.

    2. QC Stamping

    Each iPad touch screen assembly that has passed all quality test is testified with our QC PASS stamp.

    3. Inside Packing

    Use a bubble envelope for inside packing.

    4. Outside Packing

    Bubble chamber and carton packaging for outside packing to protect our products from damage during transportation.

    For more details on replacements for iPad touch screen quality control & packing process, please go to REWA YouTube channel .

  • iPad Touch Screen Assembly – Something You Must Know

    iPad Touch Screen Assembly – Something You Must Know

    Are you bothered by the insufficient supply of OEM New iPad Touch Screen Assembly?

    REWA here offers you high-quality AAA grade replacement.

    Integrated supply chain, fully tested iPhone 6S glass lens and strict procedures for producing process, all contribute to the outstanding quality and stable supply of our products.

    Glass Sampling

    All REWA glass lens has to go through tough tests like bending test, drop test, hydrophobic effect test, etc. to ensure the outstanding quality.

    iPad Touch Screen Assembly Sample Groups

    During glass sampling process, there are three sample groups for comparison.

    Group (A)——REWA AAA Grade

    Group (B)——OEM New

    Group (C)——Prevail on the Market

    1. Bending Test

    Run bending test on iPad Touch Screen Assembly groups (A), (B) and (C) respectively.

    Max Bending Force Value:

    Group (A)——72.86kgf

    Group (B)——78.16kgf

    Group (C)——30.76kgf

    Bending Test Result:

    Group (A)——Good

    Group (B)——Excellent

    Group (C)——Poor

    2. Drop Test

    Run drop test on iPad Touch Screen Assembly groups (A), (B) and (C) respectively. Each sample goes through three times continuously.

    Max Drop Strength Value:

    Group (A)——90cm/90g

    Group (B)——90cm/90g

    Group (C)——80cm/65g

    Drop Test Result:

    Group (A)——Excellent

    Group (B)——Excellent

    Group (C)——Poor

    3. Dimension Measurement

    Thickness parameters of iPad Touch Screen Assembly groups (A), (B) and (C) are as following:

    Group (A)——0.57mm

    Group (B)——0.56mm

    Group (C)——0.58mm

    4. Hydrophobic Effect Comparison

    Sample Water Alcohol N-hexane (A) good ordinary ordinary (B) excellent excellent excellent (C) ordinary poor poor

    5. Light Transmittance Test

    Before the test, tear off the protective film and run cosmetic inspection of iPad Touch Screen Assembly groups (A), (B) and (C).

    After that, run Light Transmittance Test under dimly lit environment.

    Visible light transmittance value of Camera hole (550nm):

    Group (A)——95%

    Group (B)——95%

    Group (C)——92%

    Visible light transmittance value of the touch panel Functional area (550nm):

    Group (A)——92%

    Group (B)——93%

    Group (C)——92%

    6. Home Button Alignment

    Install home button for a look——all glass lens fit perfectly well.

    Conclusion

    Group (A) runs with a good performance during all those tests.

    REWA AAA Grade proves to be qualified for the following assembly producing process.

    Digitizer Assembling

    1. Touch Panel

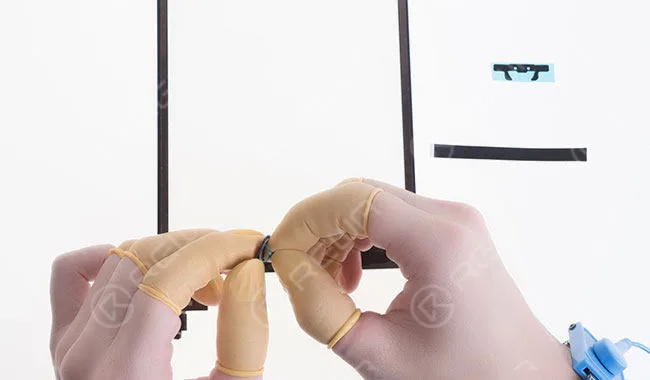
    Adhere the ACF adhesive to the corresponding position of the touch panel.

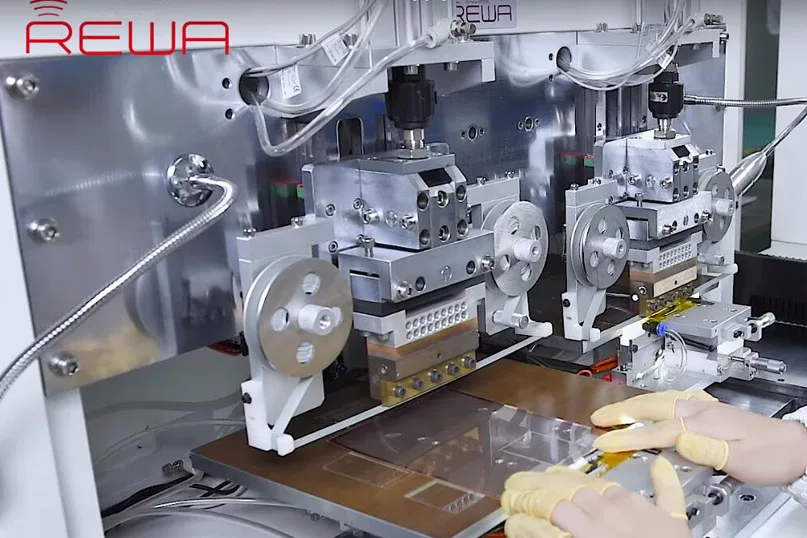
    Then complete bonding the FPC to the corresponding positions of the touch panel respectively.

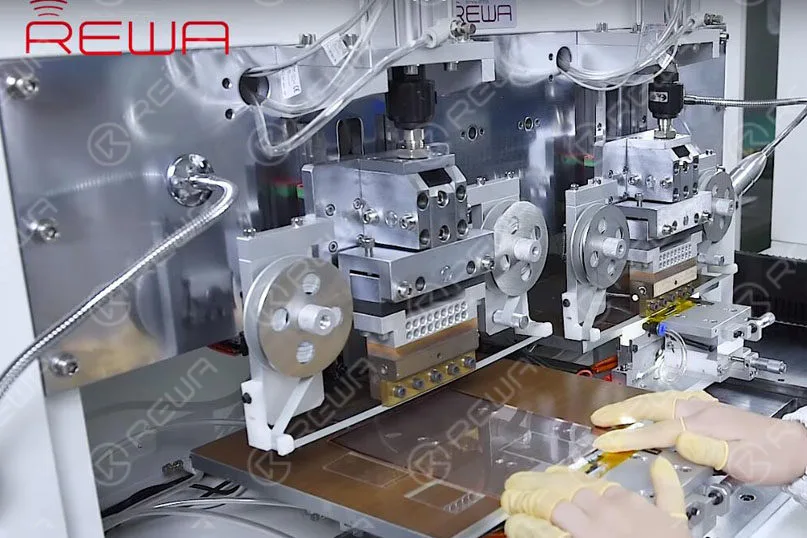
    After bonding, connect the touch panel to the touch system for function test and run sampling inspection of both defective and non-defective samples of the touch panel with the electron microscope to analyze the bonding effect.

    Once finished, deliver the completed touch panel to the next process via the transfer window.

    2. Roller Dedusting

    Use the roller to finish preliminary cleaning of the touch panel.

    3. Glass Cleaning

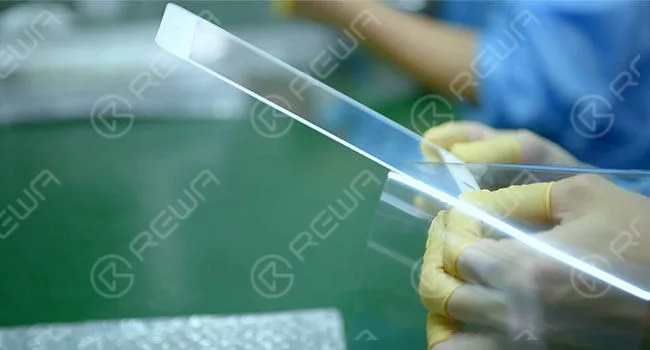
    In the high grade purifying environment, clean each glass lens with the cleaner.

    4. Glass Laminating

    In the high grade purifying environment, run re-clean and re-inspection process of the glass lens.

    After that, laminate the touch panel with the glass lens with the help of the semi-automatic laminating machine.

    5. Bubble Removing

    Put the touch screen assembly on the tray and place it into the bubble removing machine for 45 minutes. Set the pressure value as 0.6MPa and activate the bubble removing process.

    Once finished, take out the touch screen assembly.

    6. Protective Film Attaching

    Attach exclusive protective film to the front and back of the touch screen assembly for quality guarantee.

    7. Semi-finished product warehouse in

    Once finished, deliver the semi-finished products to the warehouse.

    For more details on iPad touch screen assembly producing process,

    please go to REWA YouTube channel.

  • iPad Air Ghost Touch? Learn Why and How to Solve It

    iPad Air Ghost Touch? Learn Why and How to Solve It

    You may have observed that your iPad has been acting strangely, especially if you have replaced the iPad screen recently.

    Similarly, this is also a headache for many repair shops.

    For S+ grade iPad Air touch screen digitizer, iPad ghost touch is a problem occurs quite often as follow, touch function works well before assembling, but some malfunctions spring up after assembled, like screen flicking and unstable touch.

    How to solve this problem?

    Here we have the reason and solution.

    Reason

    What causes the ghost touch on your iPad devices?

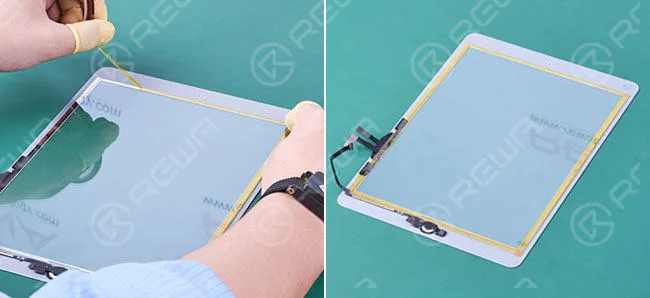
    There is a layer of electronic circuit exposed on the surface of S+ grade iPad Air touch screen digitizer, and also a layer of conductive adhesive tape stuck along the four sides of LCD display.

    When installing the touch screen digitizer to the LCD, it will cause short-circuit, which acted as screen flicking and unstable touch.

    ipad air ghost touch learn why how solve it

    For the OEM touch screen digitizer, however, there is a piece of film covered on the surface, thus it will avoid the occurring of the above problems.

    ipad air ghost touch learn why how solve it 2

    Solutions

    The solutions to this problem are quite easy.

    1. Paste tape on the four sides of the iPad digitizer to protect the exposed electronic circuit from touching the conductive adhesive directly.

    Please take care of the flex cable when pasting.

    ipad air ghost touch learn why how solve it 3

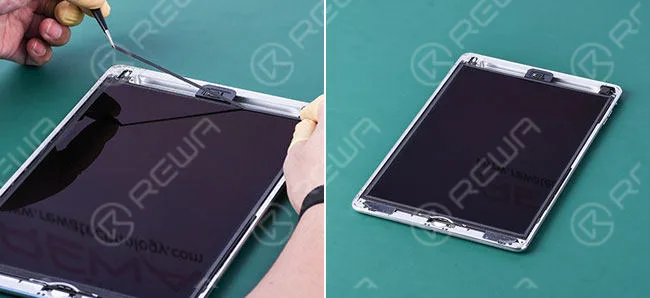
    2. Paste a layer of foam on the four sides of the LCD display to avoid direct contact between the LCD display and digitizer touch screen.

    ipad air ghost touch learn why how solve it 4

    If you experience ghost touching on your iPad Air, it would be better to take it to a repair shop.

  • iPad Air 2 Glass Replacement Guide | Save Money on Repairs

    iPad Air 2 Glass Replacement Guide | Save Money on Repairs

    iPad Air 2 was first debuted in Oct. 2014 and it has been more than 2 years so far. If you happen to get one Apple’s iPad Air 2 and it recently became the victim of an unfortunate accident, how will you deal with it?

    I’m afraid you’ll need to cough up some serious money to get it fixed or replace it.

    If you’re handy, however, and you can manage to source iPad spare parts at a decent price.

    As a repair shop, you can earn more profits by fixing iPad for your customers by following along our latest LCD refurbishing instructions.

    As a matter of fact, we have already published a few articles with regard to LCD refurbishing guidance for some flagship models of Apple and Samsung phone.

    But as for iPad or tablet PC, it’s the first time that we get involved in the iPad broken screen refurbishment.

    As such, iPad repair knowledge isn’t readily available to the public and falls into the category of “catch as catch can”.

    Now let’s get through and take first look at the latest broken LCD refurbishing techniques and equipment.

    This refurbishing process will include some of the recommended refurbishing machines of high performance and easy-to-use virtues as well as materials and tools .

    Broken Screen Testing

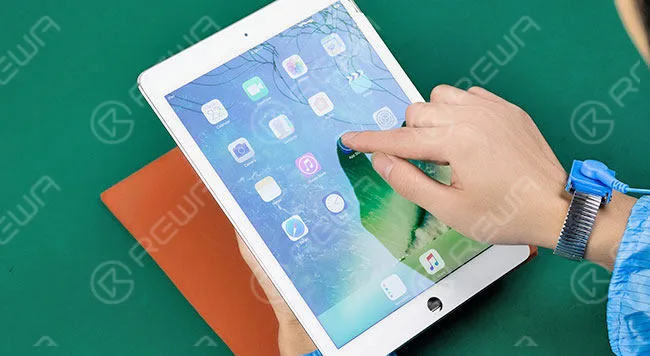
    Firstly, you need an iPad Air 2 screen with broken glass lens but properly working touch digitizer and LCD display.

    Install LCD to motherboard plate, then test if the display, touch functionality is OK.

    ipad air glass replacement guide save money repairs

    LCD Separating

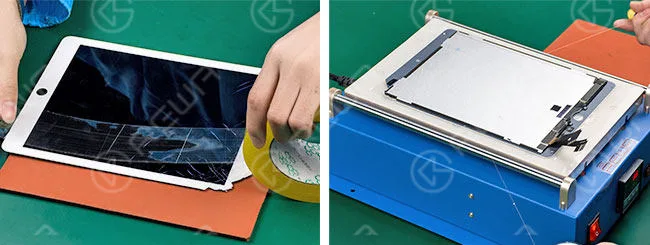
    In the first place, we need to stick a layer of adhesive tape on the full surface of the LCD screen.

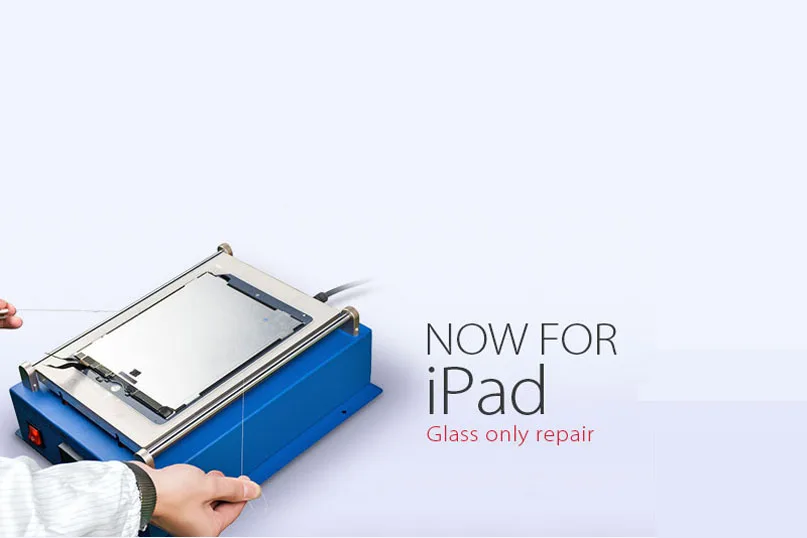
    Get it heated on 13” LCD Separating Machine.

    Press the vacuum button, then embed the gold cutting wire into the bottom of LCD screen, pull it right and left till the glass separated.
    ipad air glass replacement guide save money repairs 2

    Glue Removing

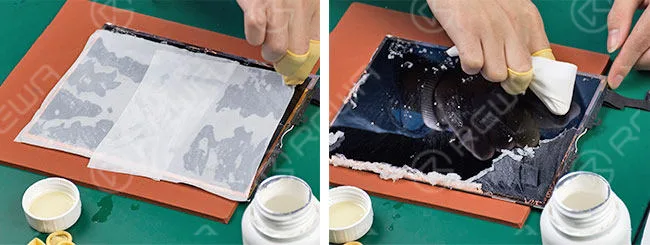
    Dip some 8333 OCA Cleaner with Anti-static Glass Wiper, spread it on LCD for 1 minute.

    And remove the residue adhesive.

    ipad air glass replacement guide save money repairs 3

    OCA Laminating and Bubble Removing

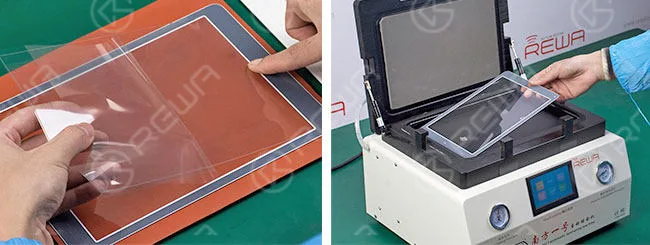
    Respectively tear off the protective films on new glass lens and OCA, align them then laminate.

    After that, place glass lens into Glass Laminating Machine for bubble removing for 3 minutes to make sure air bubbles between OCA and glass lens completely removed.

    ipad air glass replacement guide save money repairs 4

    Glass Laminating and Bubble Removing

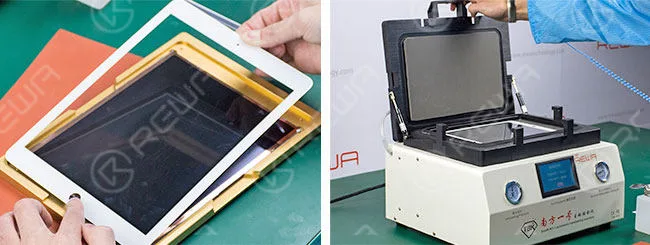
    Put the LCD into Alignment LCD Mold and clean it.

    Tear off another protective film on OCA glue. Then align glass lens with LCD and put it into a mold for preliminary lamination.

    Take out the LCD and put it into Glass Laminating Machine with a laminate cushion placed under it. You should be more careful of the placement of LCD flex cables at this moment.

    Place another clean glass lens onto the LCD Assembly and align them to make complete lamination. Take it out after glass laminating is done.

    ipad air glass replacement guide save money repairs 5

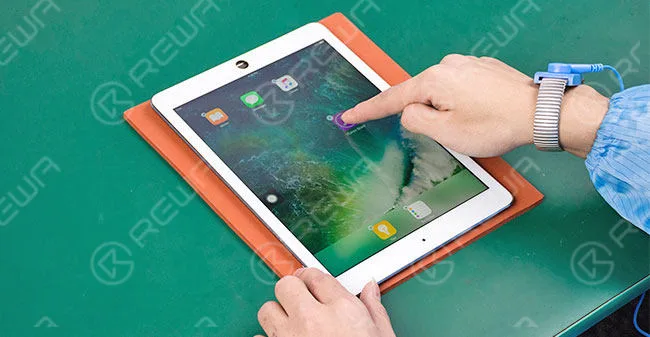
    Retesting

    Connect the LCD to the motherboard, and then test the display and touch functionality again, both are OK.

    ipad air glass replacement guide save money repairs 6

    Warm Prompt: This broken screen refurbishing service for iPad series currently cover iPad mini 4, iPad Air 2 and iPad Pro.

    Now is when we should call it a day.

    Because at this point a cracked iPad Air 2 screen is successfully refurbished.

    If you still have any other questions or are looking for LCD refurbish machines, materials, demo videos and technical support or on-site training, please feel free to contact us via service@rewa.tech or visit the website at shop.rewa.tech .
    Video Tutorial

  • iPad Touch Screen Digitizer Testing Procedures

    iPad Touch Screen Digitizer Testing Procedures

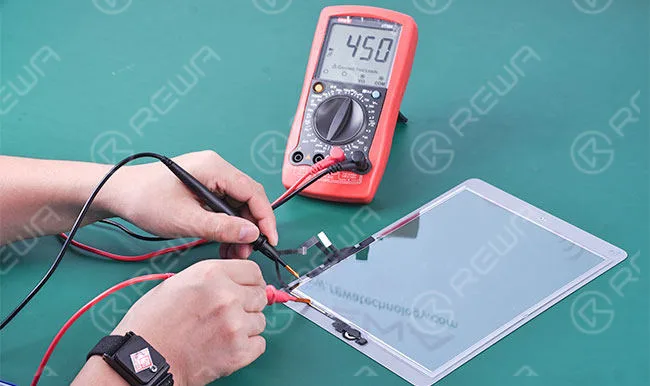
    ipad touch screen digitizer testing procedures 2

    Do you know what kind of replacement touch screen digitizer for iPad is qualified one and what are you supposed to do to test it then?

    Here is the procedure our quality control engineers process with the parts quality inspection of which standard is in line with the industry standard.

    Appearance Testing

    ipad touch screen digitizer testing procedures 3

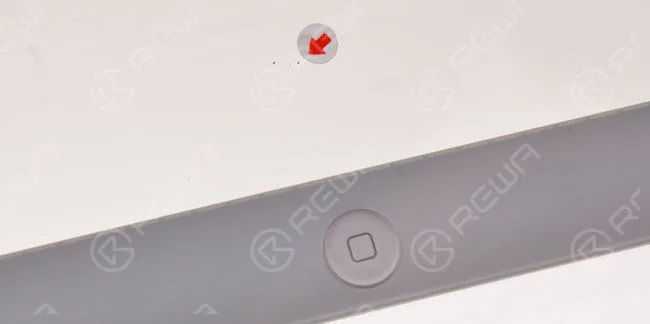
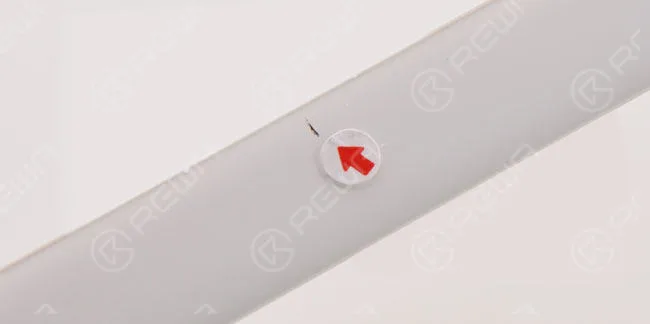
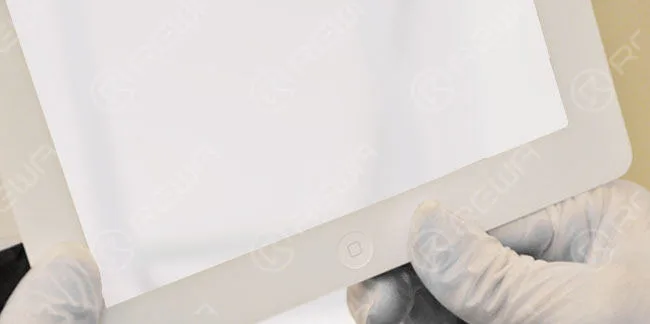
    No scratches on the touch panel

    ipad touch screen digitizer testing procedures 4

    No dust spots or dots on the touchscreen

    ipad touch screen digitizer testing procedures 5

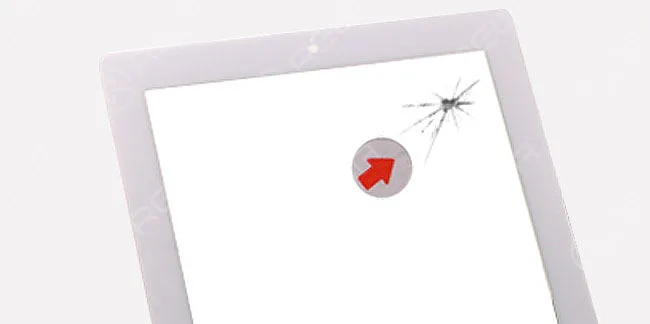
    No breakage on the digitizer

    ipad touch screen digitizer testing procedures 6

    No paint loss on the touchscreen

    ipad touch screen digitizer testing procedures 7

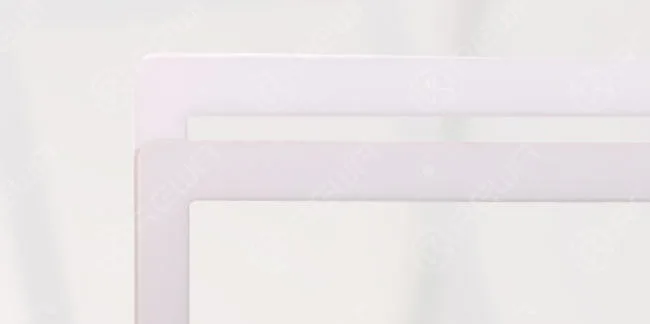
    No chromatic aberration compared with OEM one

    ipad touch screen digitizer testing procedures 8

    Grid lines inspection in the normal range

    ipad touch screen digitizer testing procedures 9

    Home button hole alignment – in a proper position

    ipad touch screen digitizer testing procedures 10

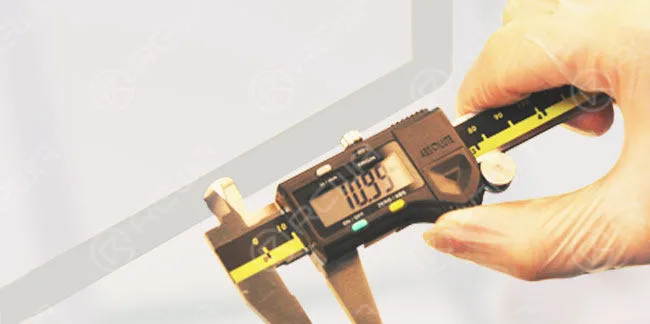
    Home button hole measuring – diameter around 10mm

    Three Proofings Testing

    ipad touch screen digitizer testing procedures 11

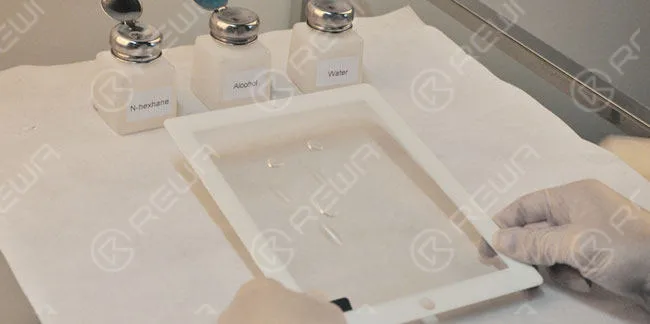
    The touch screen digitizer should possess the properties of three proofings – waterproof, alcohol proof, n-hexane proof.

    Light Transmittance Testing

    ipad touch screen digitizer testing procedures 12

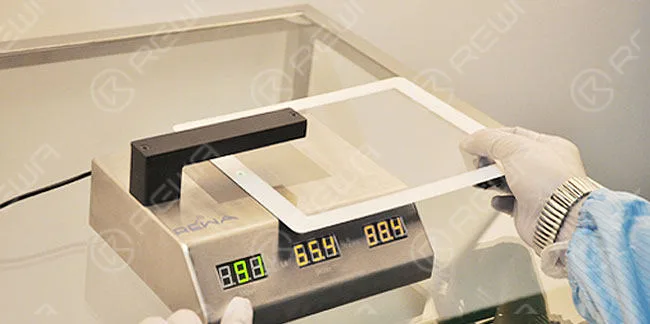
    We usually do isible light (of which electromagnetic wave wavelength around 550nm) transmittance test to the camera hole and functional area of a touch panel.

    The normal range for Camera Hole Testing Value should be greater than 90; While Functional Area should be greater than 88.

    Bending Strength Testing

    ipad touch screen digitizer testing procedures 13

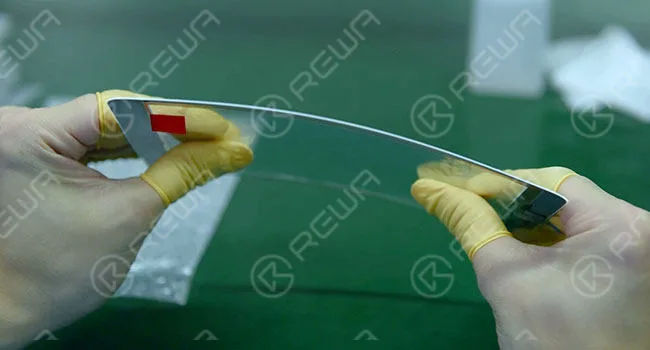
    Bend the whole screen and four corners slightly to the extent that is within the proper range, while OEM one is more flexible.

    Touch Function Testing

    ipad touch screen digitizer testing procedures 14

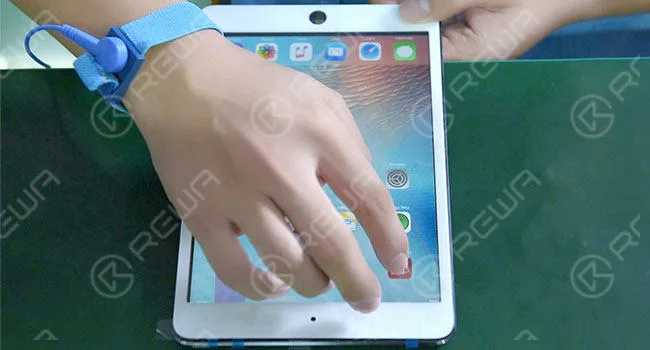
    y moving the app icon in all directions including swiping from the edge of the screen to test if touch functionality works well.

    In REWA, everything comes after quality!

    Want to order our products?

    Please contact us:

    • PRE-SALES Skype: rewatech
    • Email: service@rewa.tech
    • AFTER-SALES Skype: support-rewatech
    • Email: support@rewatechnology.com