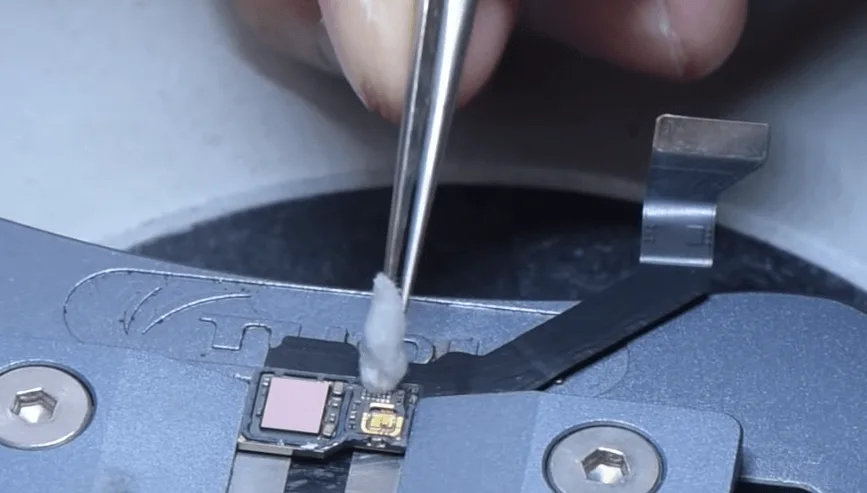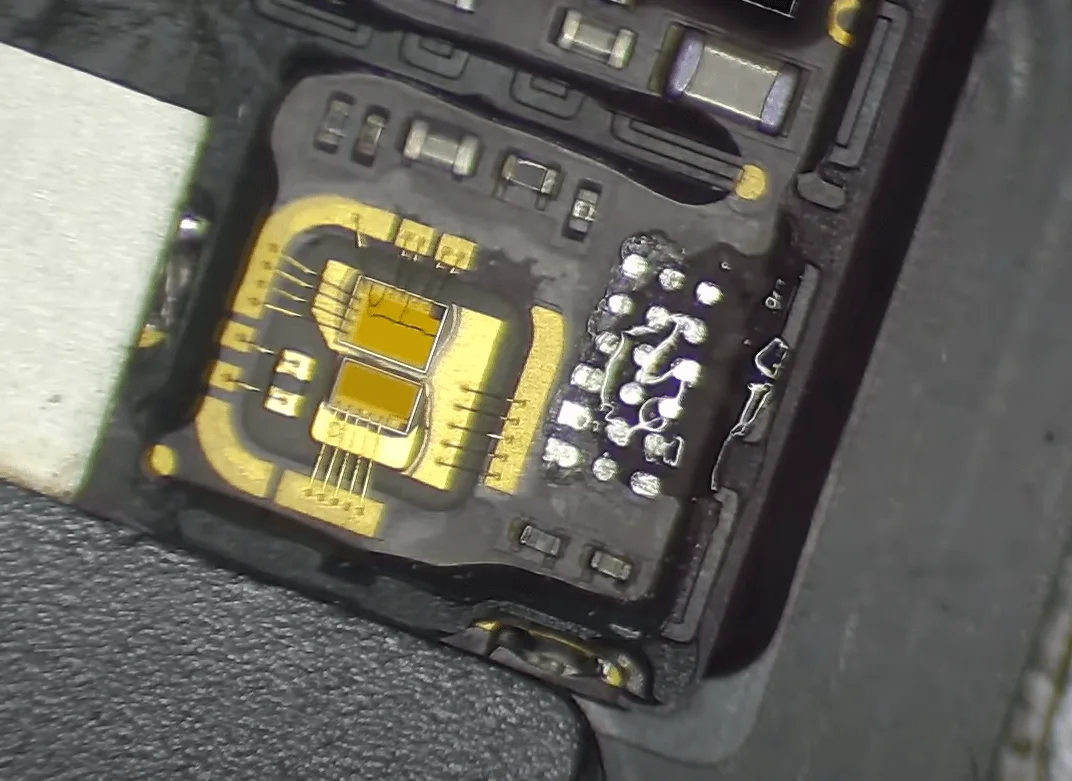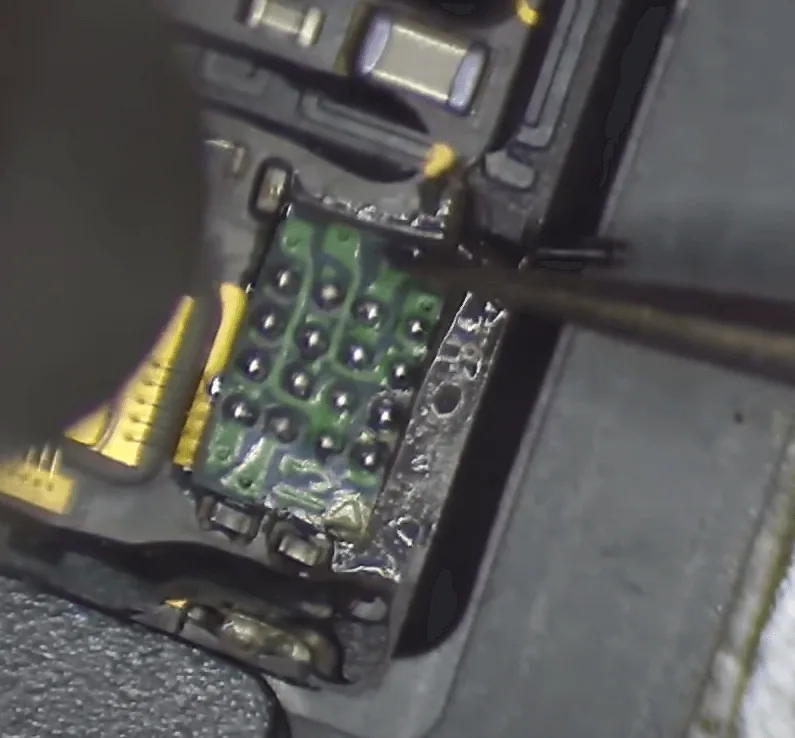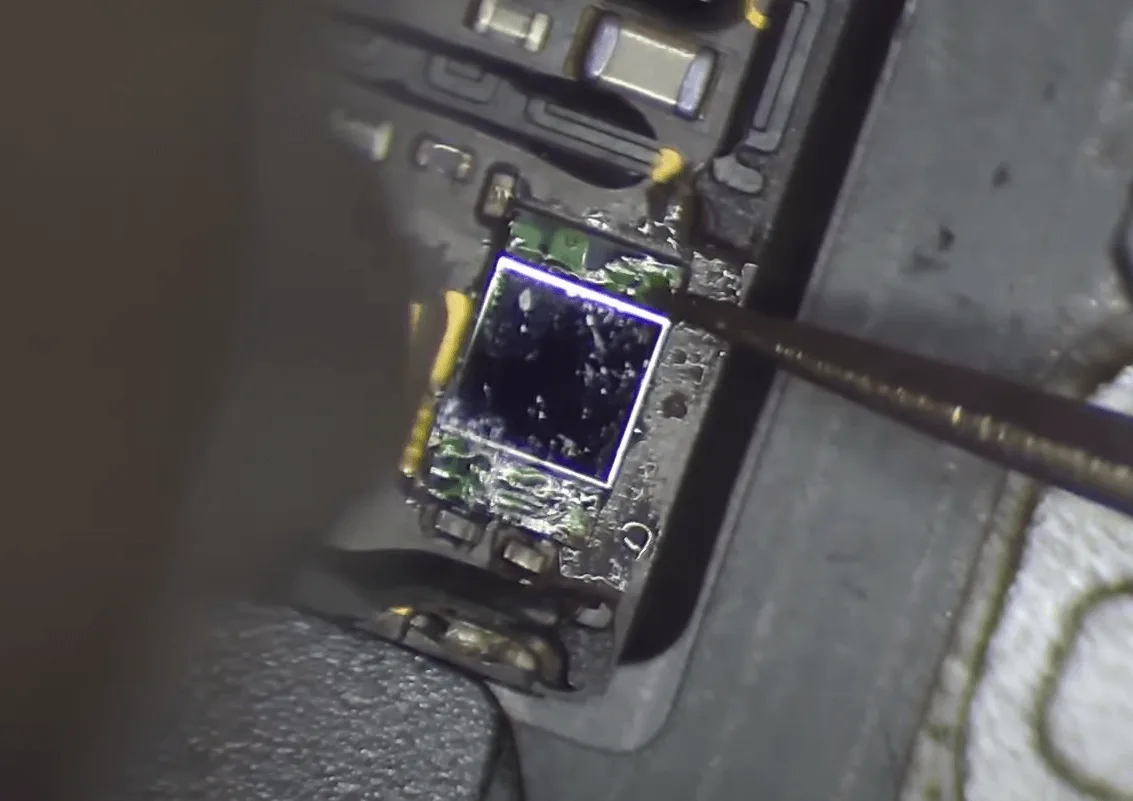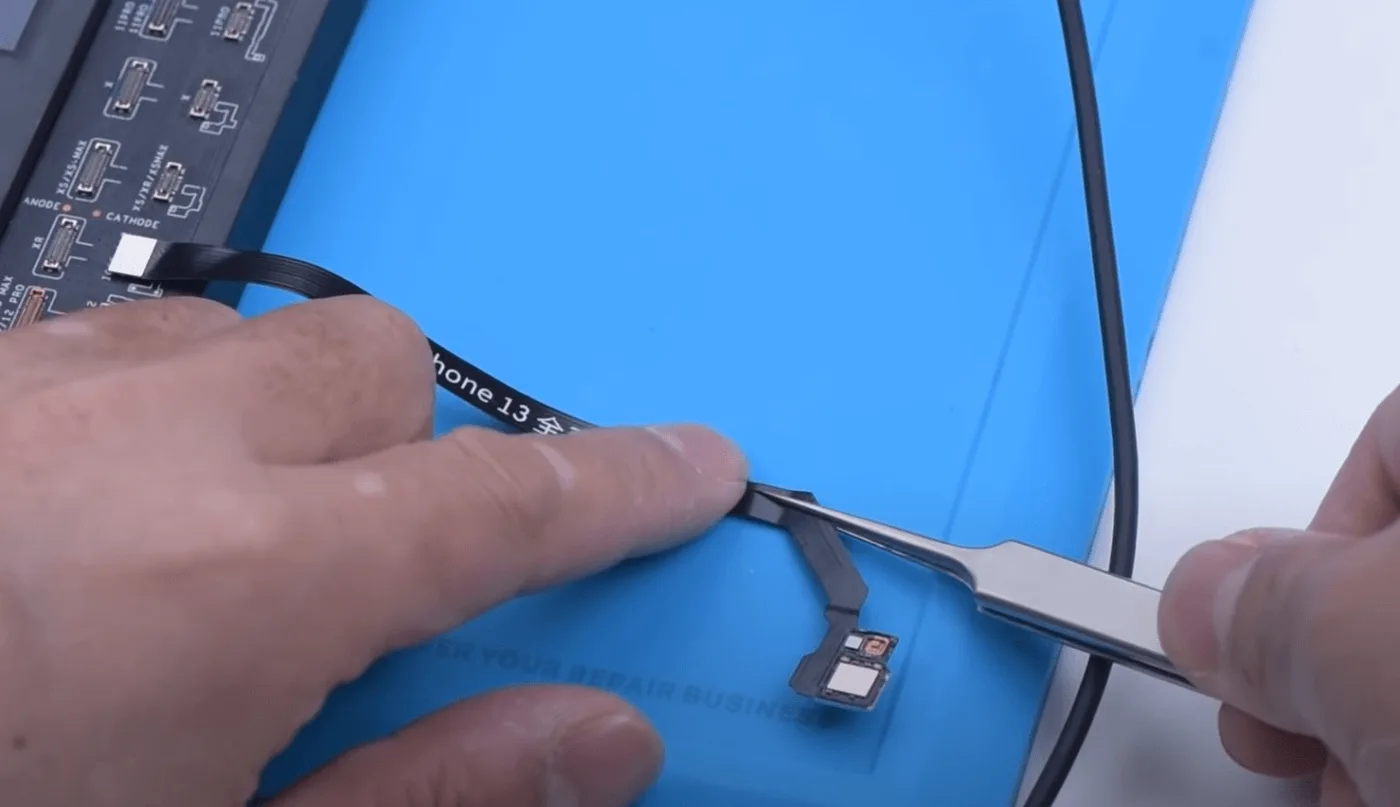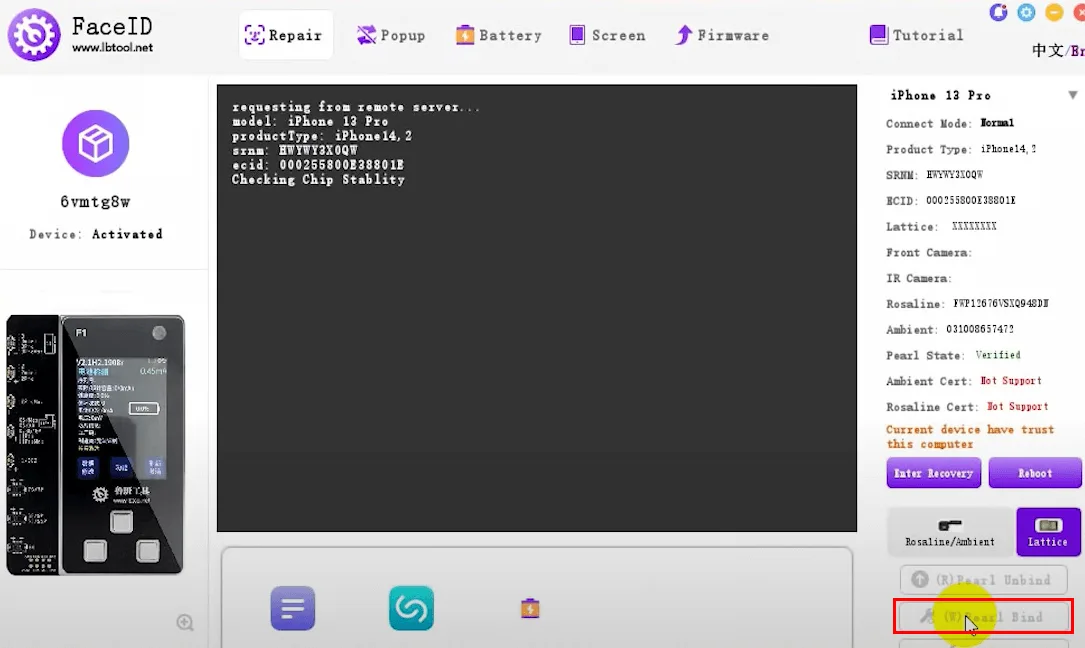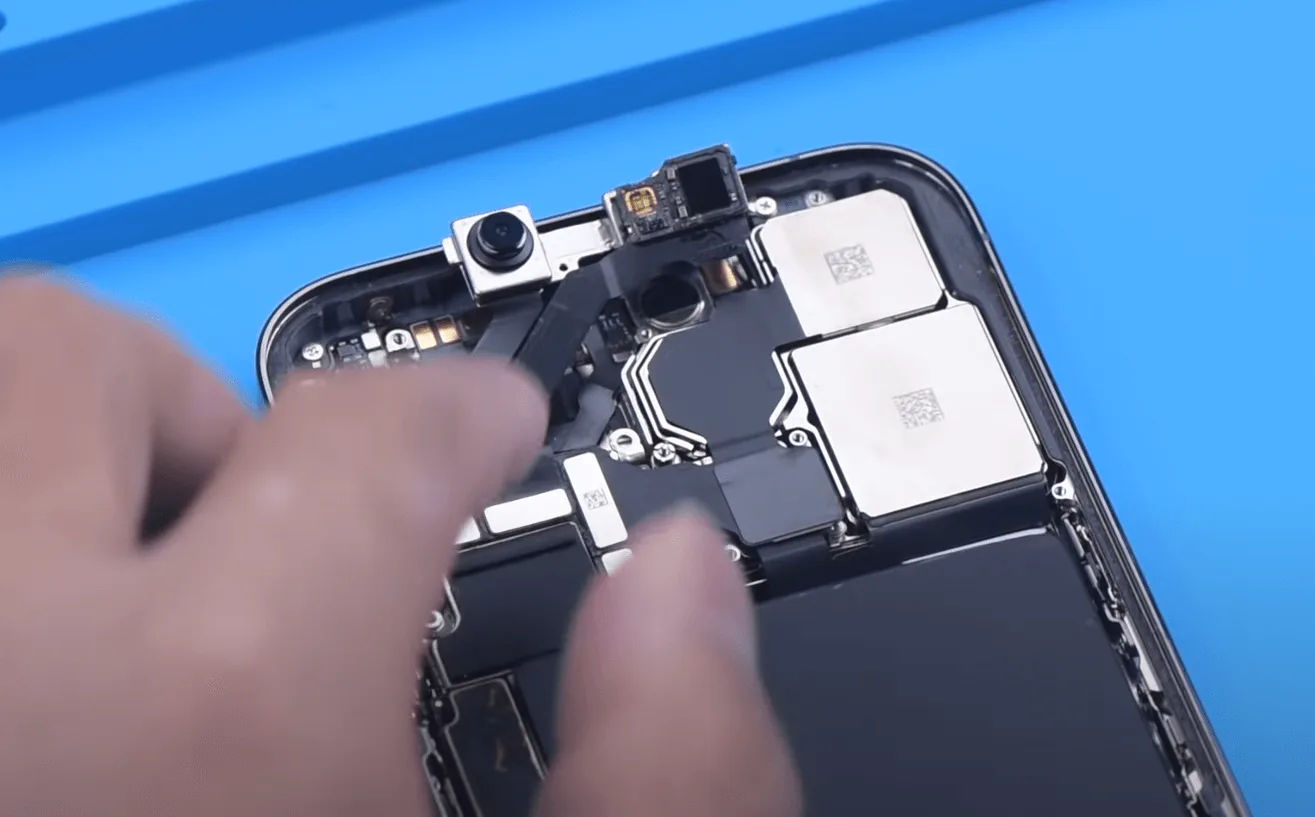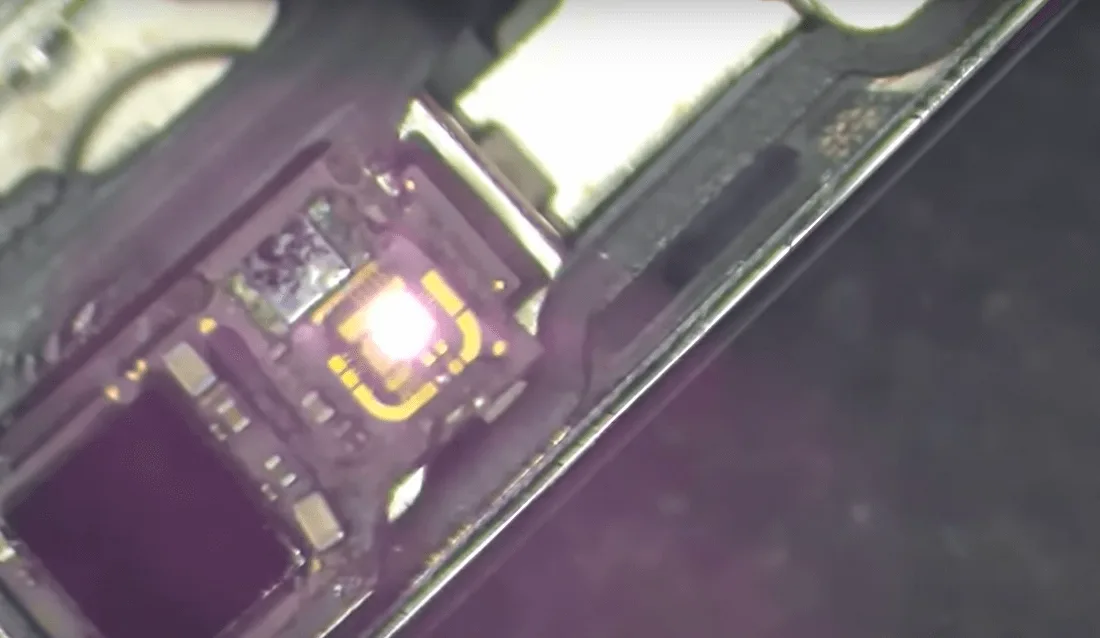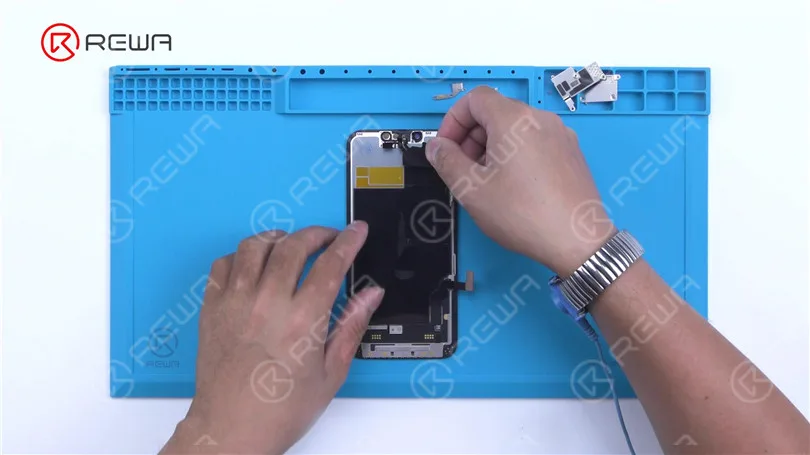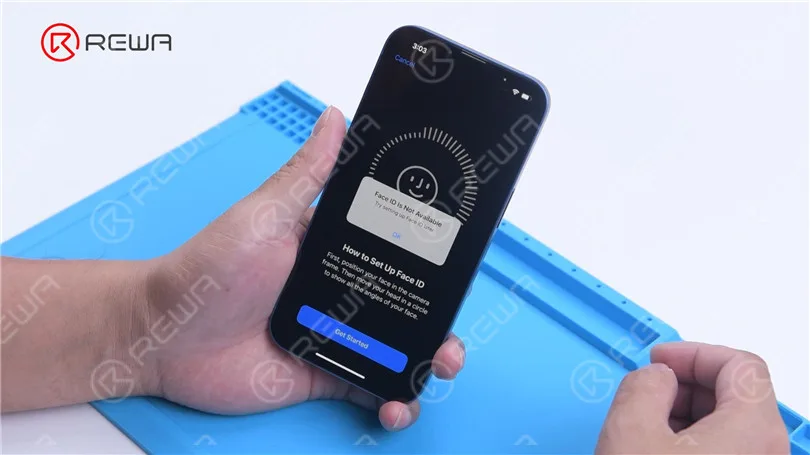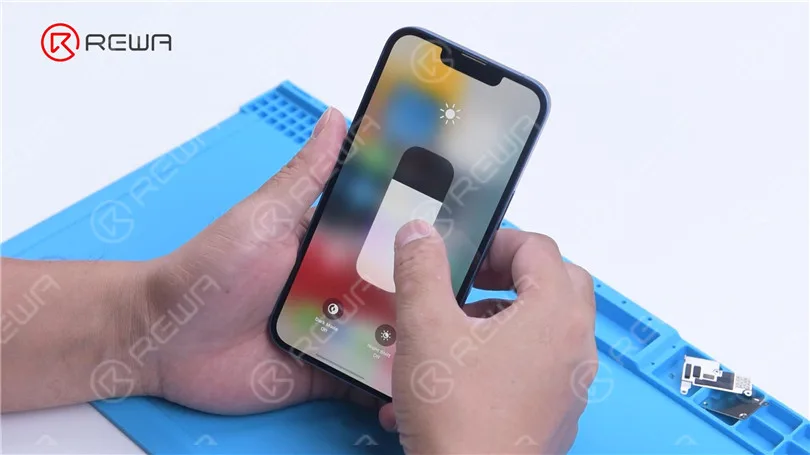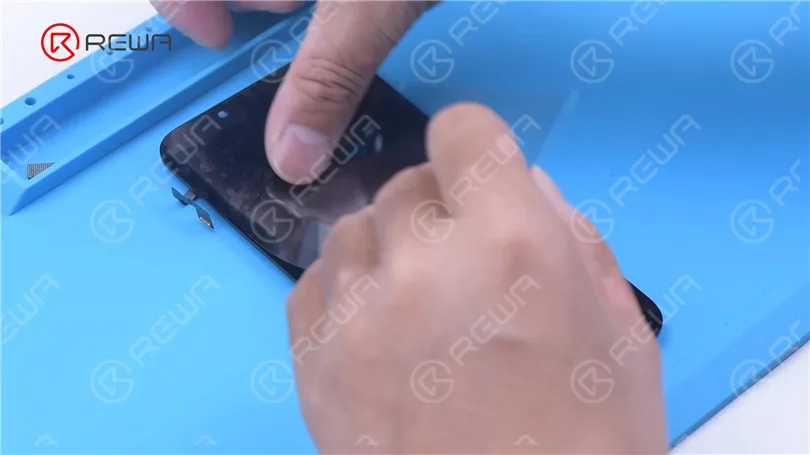
Tag: face id

  • iPhone 18 Pro Teardown: What Changed Inside and How Does It Affect Repairability

    iPhone 18 Pro Teardown: What Changed Inside and How Does It Affect Repairability

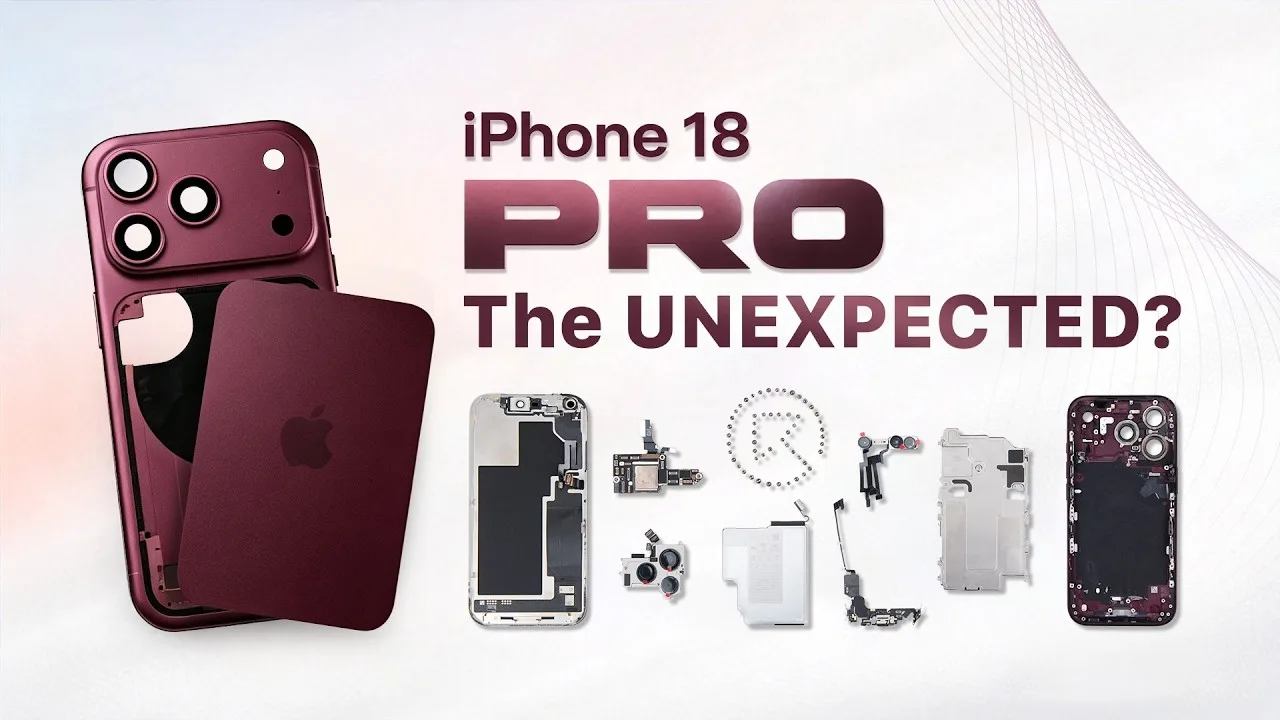
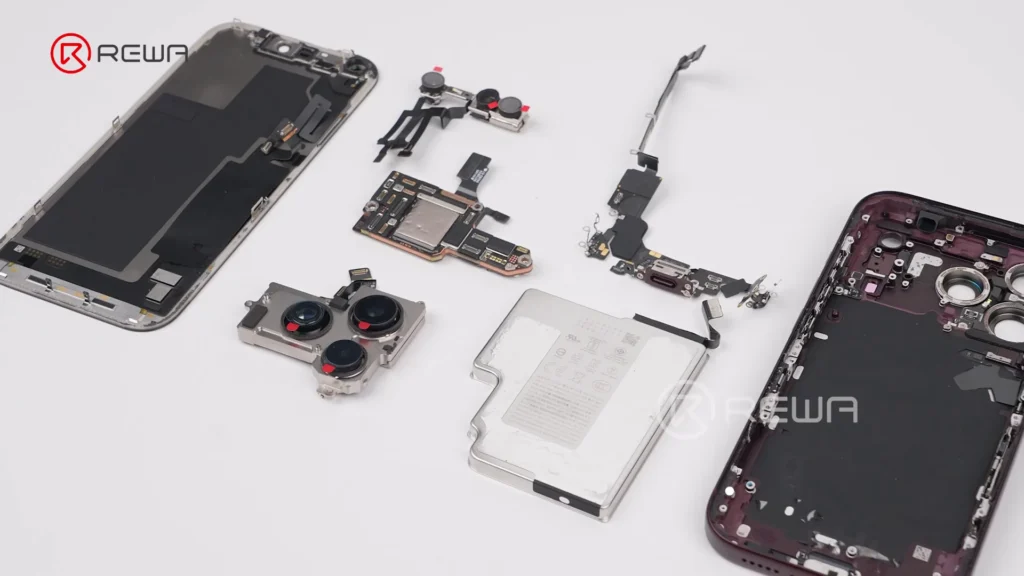
    The iPhone 18 Pro brings several significant changes beneath its familiar exterior. From a smaller Dynamic Island and a new under-display infrared camera to a dramatically larger vapor chamber and a redesigned motherboard layout, Apple has changed more than just the phone’s appearance.

    In this full teardown by REWA Lab, we dive deep into the internal structural changes and analyze what these updates mean for third-party repair shops and aftermarket component manufacturers.

    Step-by-Step Disassembly Process

    Opening the iPhone 18 Pro requires specialized repair tools and a cautious approach to avoid damaging internal flexes and sensors. Standard safety and prep steps are as follows:

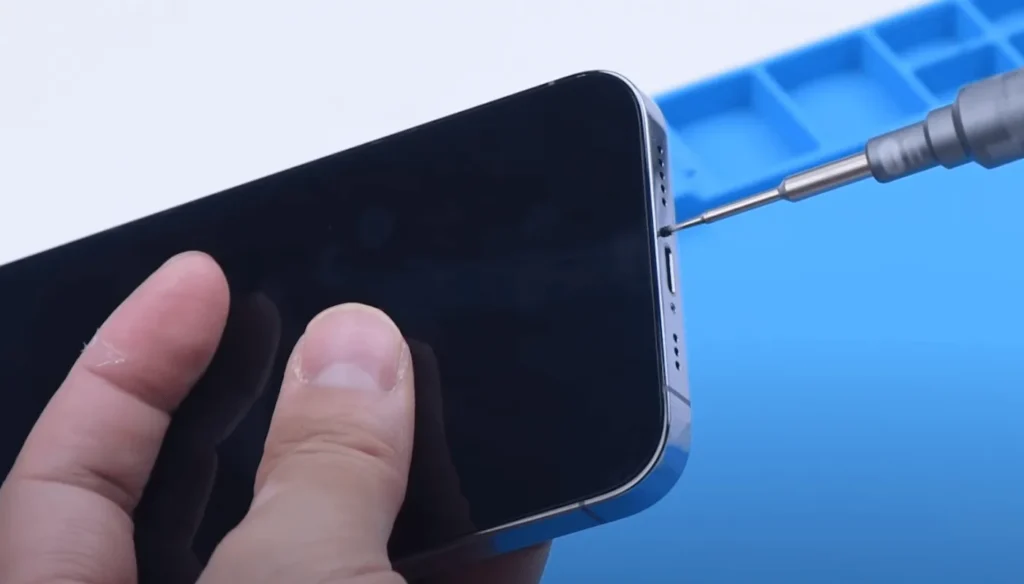
    Preparation Before Teardown: Power off the device and remove the bottom screws with the Pentalobe screwdriver.
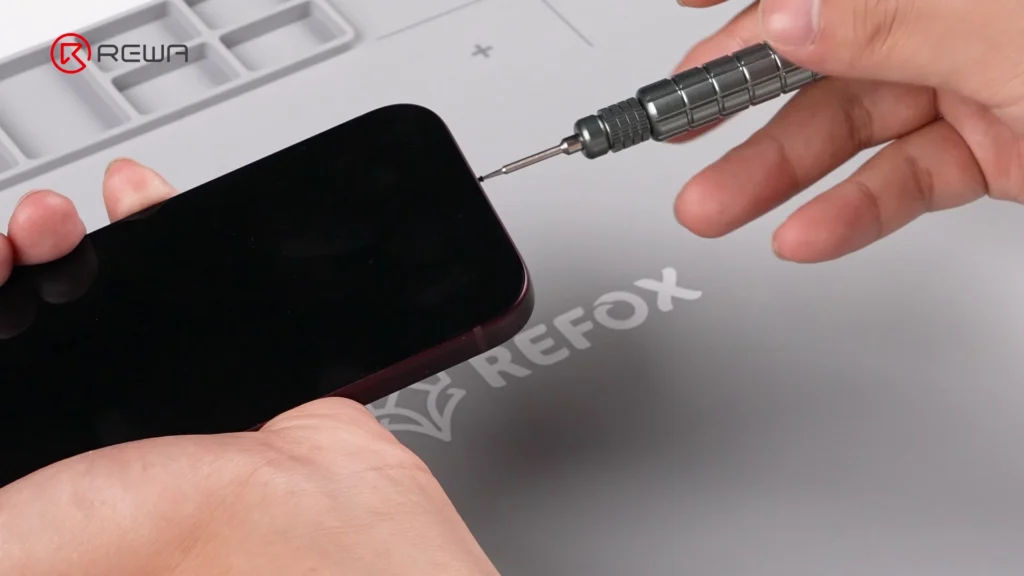
    Removing the bottom screw of an iPhone using a precision Pentalobe screwdriver

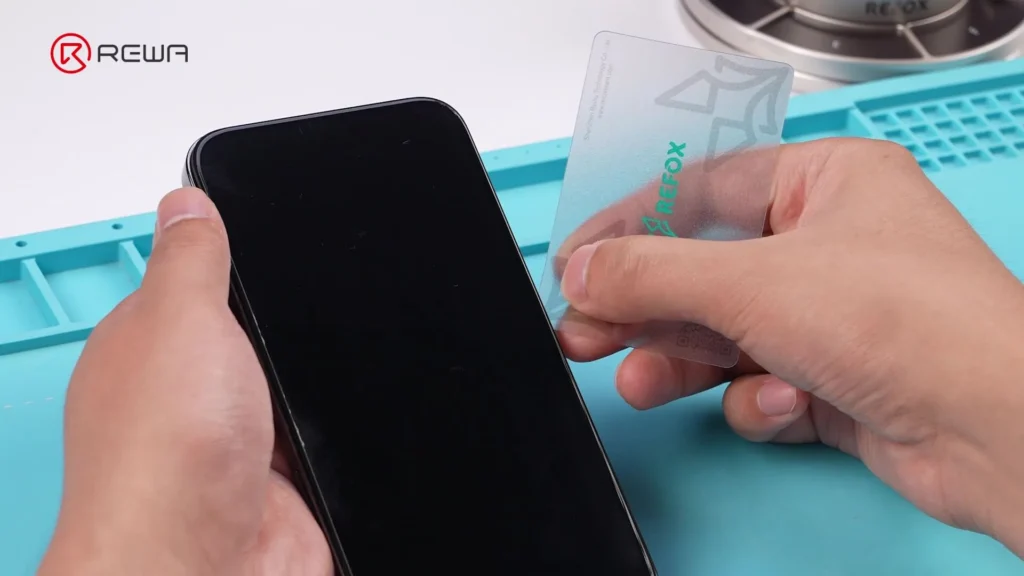
    Screen Removal: Heat the screen to soften the perimeter waterproof adhesive. Use an opening tool with suction cup and isopropyl alcohol to gently slice through the seal with an opening pick.

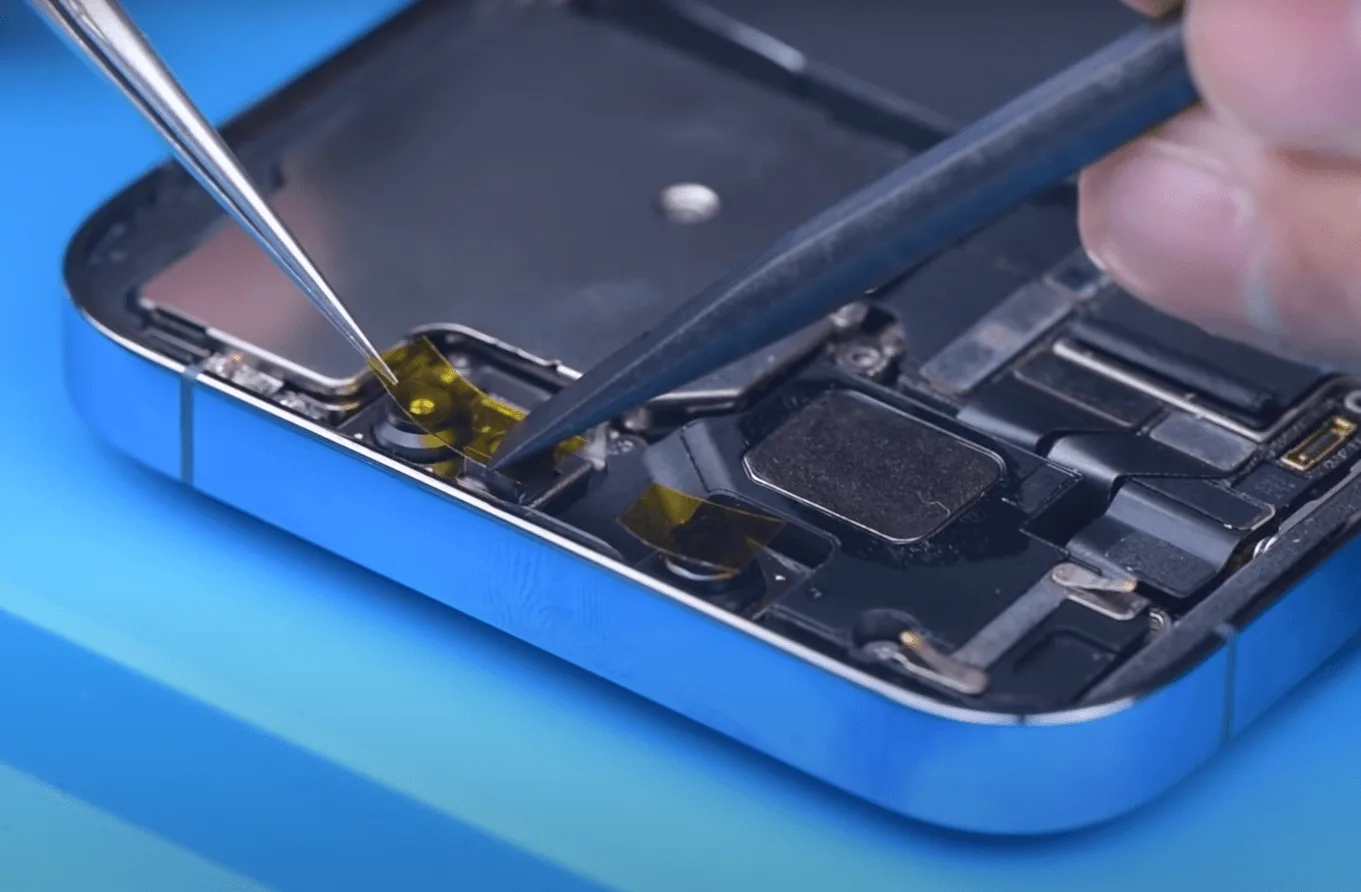
    Camera Protection: Cover the front camera module with protective sponge stickers to prevent dust or scratches.

    Bracket & Flex Cable Disconnection: Unscrew and remove the battery and display connector bracket. Disconnect the battery flex cable, display cable, and front sensor cable to free the screen.

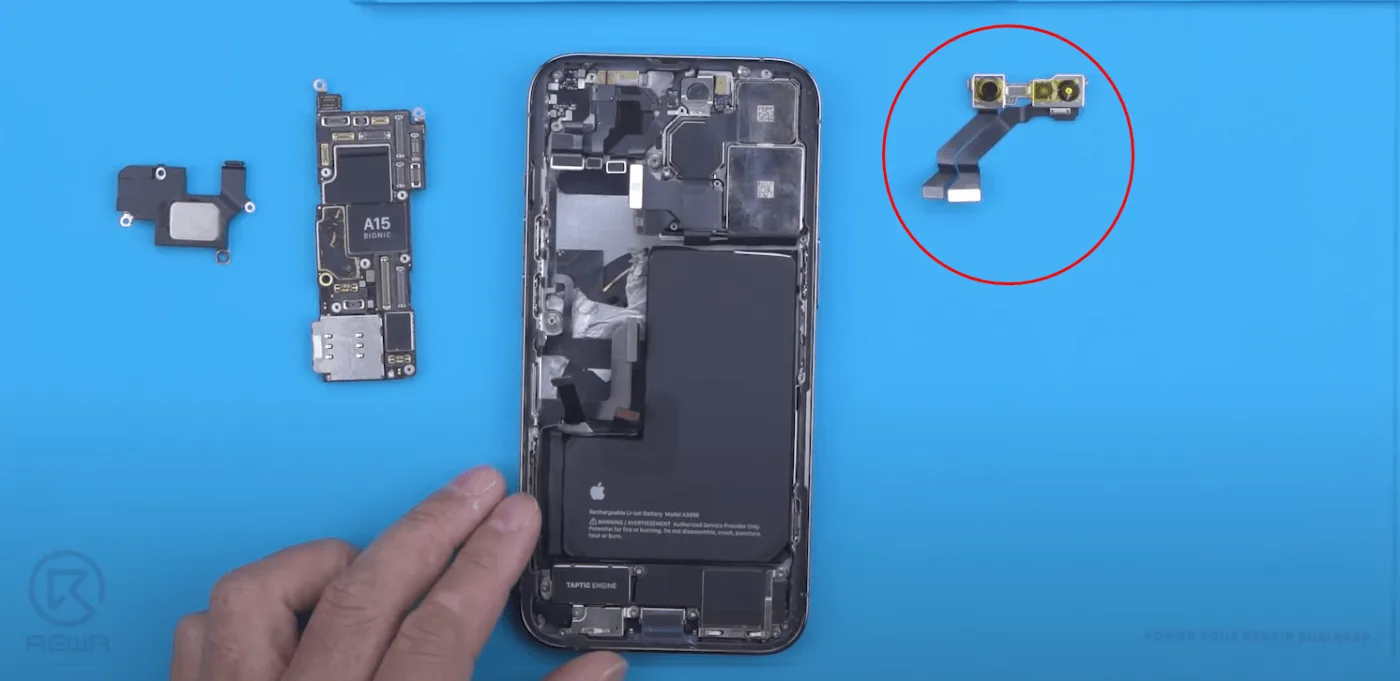
    Vapor Chamber & Cameras: Unscrew the vapor chamber using a 4IP screwdriver. Disconnect and remove the front / rear camera modules.
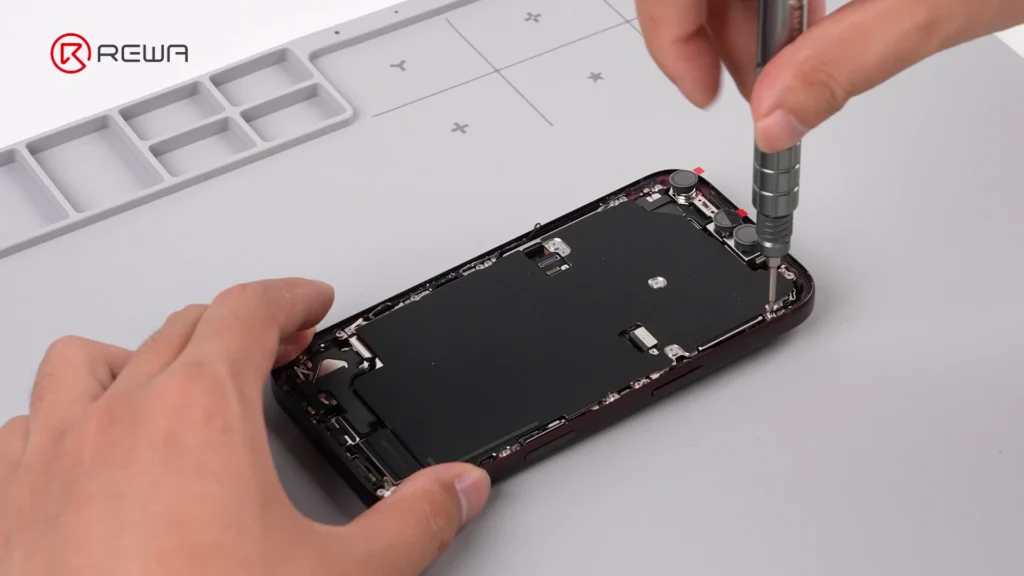
    using a screwdriver to open iPhone 18 Pro for teardown

    Motherboard & Peripheral Removal: Unscrew and flip over the motherboard to disconnect the wireless charging coil. Remove flashlight, LiDAR, SIM tray, SIM card reader, bottom speaker, charging port, Taptic Engine, and microphone in sequence.
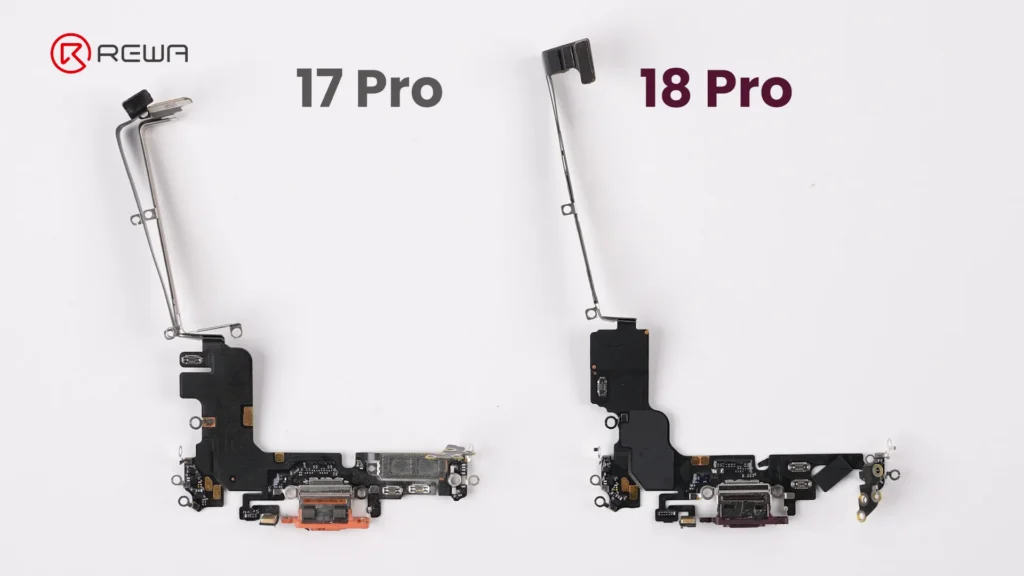
    iphone 18 pro teardown what changed inside how does it affect 3

    Battery Debonding: Apply a 9V DC voltage between the silver battery tab (positive probe) and the vapor chamber (negative probe) to electronically deactivate the adhesive, allowing easy battery removal.
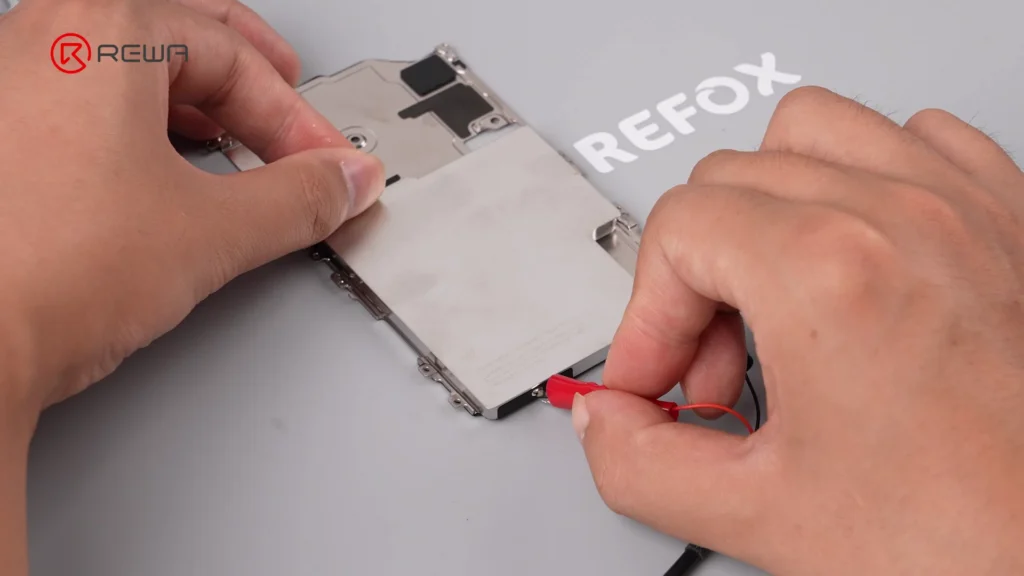
    iphone 18 pro teardown what changed inside how does it affect 4

    Display & Dynamic Island: Under-Display Infrared Tech

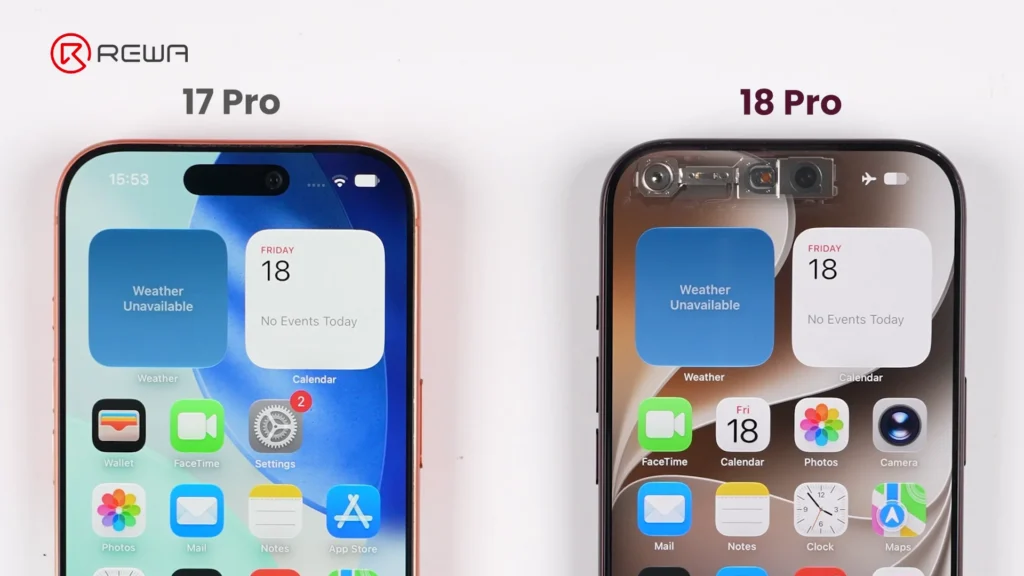
    Apple’s smaller Dynamic Island introduces a more complex under-display optical structure, creating new challenges for display refurbishment. This shrink is achieved by relocating the infrared camera under the display assembly and positioning it near the screen corner.
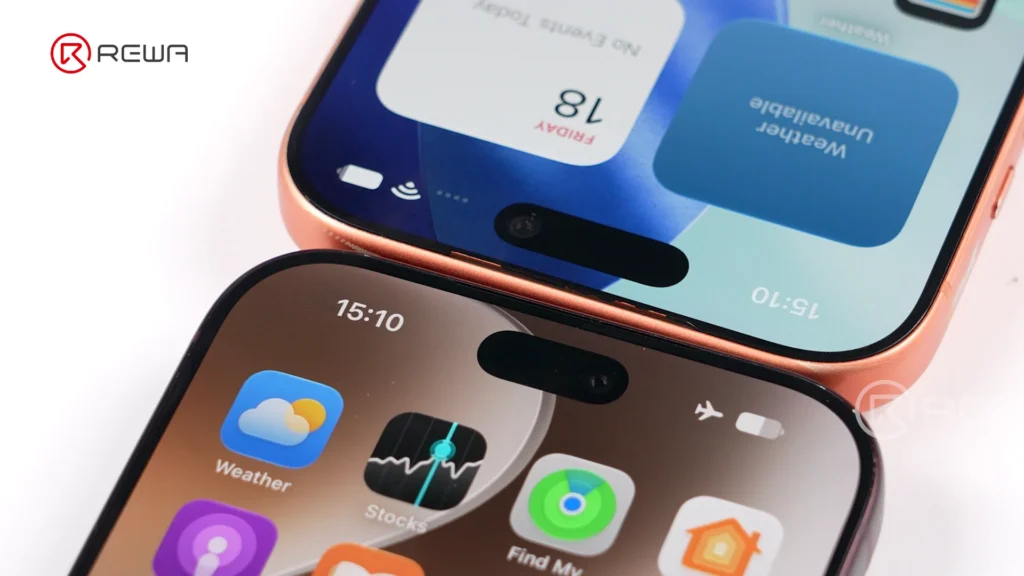
    iphone 18 pro teardown what changed inside how does it affect 5
    iphone 18 pro teardown what changed inside how does it affect 6

    Key display architecture updates include:

    Adjusted Pixel Matrix: The display above the infrared camera features a modified pixel density and arrangement to allow infrared light transmission for Face ID functionality.

    iphone 18 pro teardown what changed inside how does it affect 7

    Unfixed Flex Cable: The display flex cable is no longer secured with heavy adhesive, making screen separation cleaner during repair and refurbishment.

    Aftermarket Challenge: Third-party display manufacturers will face higher precision requirements to replicate the light-transmitting pixel window for Face ID functionality.

    Motherboard Architecture: Higher Difficulty for Micro-Soldering

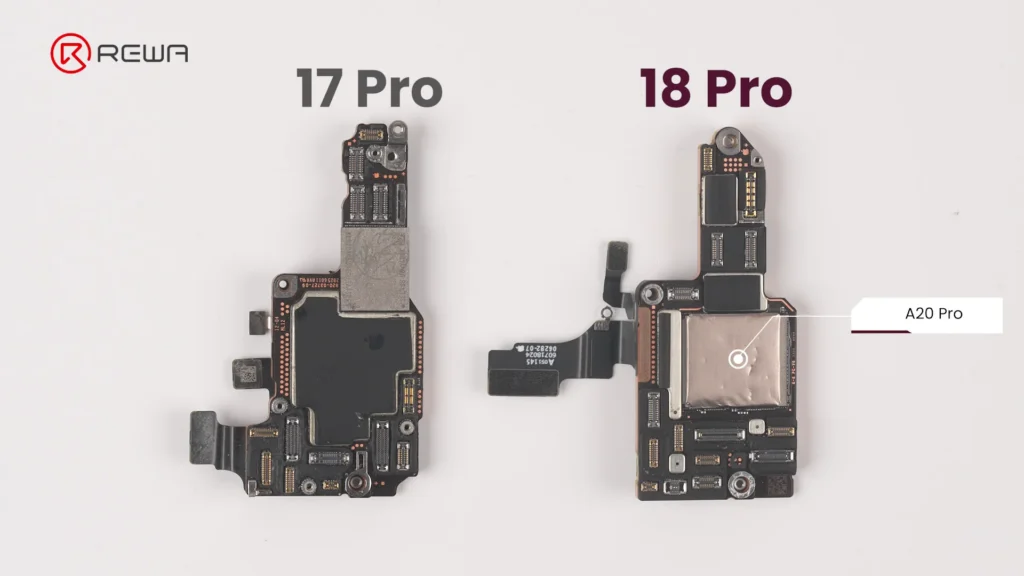
    The updated motherboard layout places crucial chips in vulnerable locations while sandwiching NAND and power IC between layers. For micro-soldering technicians, the iPhone 18 Pro motherboard presents an elevated level of complexity.
    iphone 18 pro teardown what changed inside how does it affect 8

    Apple has reorganized chip placement and shielding:

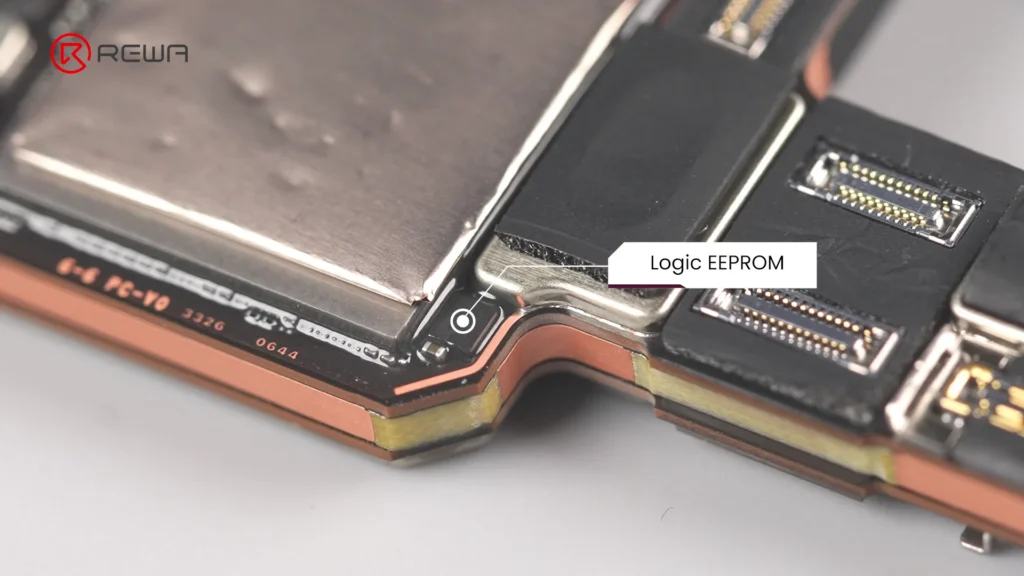
    Exposed Logic EEPROM: The Logic EEPROM chip on the board surface lacks a protective metal shield, leaving it significantly more susceptible to physical damage and technician error.
    iphone 18 pro teardown what changed inside how does it affect 9

    Layered Sandwich Design: The NAND storage chip and Power IC are sandwiched inside the multi-layer PCB structure. Replacing or repairing these components requires demanding motherboard desoldering and reballing.

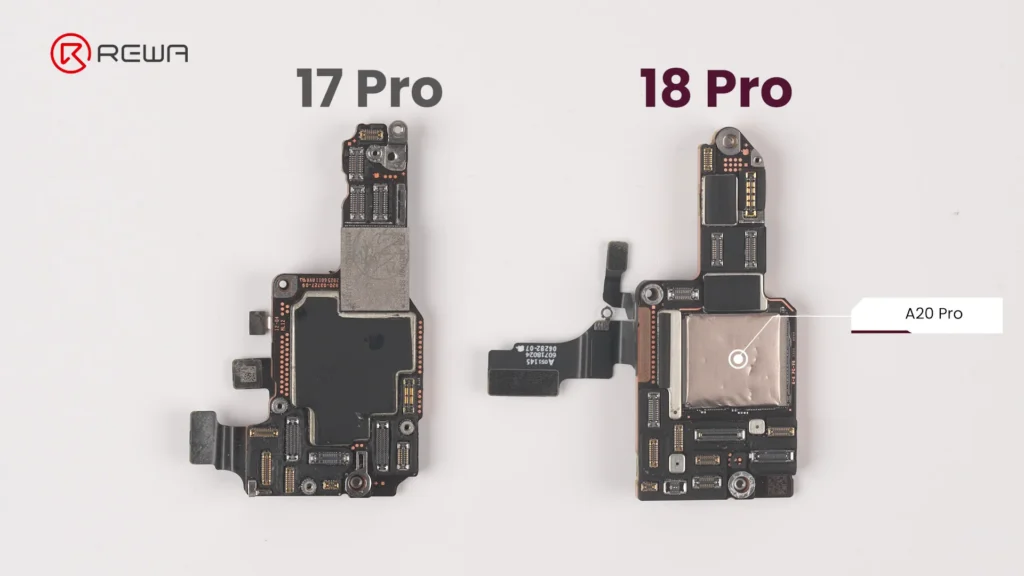
    Relocated A20 Pro Chip: The main processor sits directly on the motherboard surface, and in direct contact with the vapor chamber for substantial improvement in thermal performance.
    iphone 18 pro teardown what changed inside how does it affect 10

    Upgraded Camera Modules

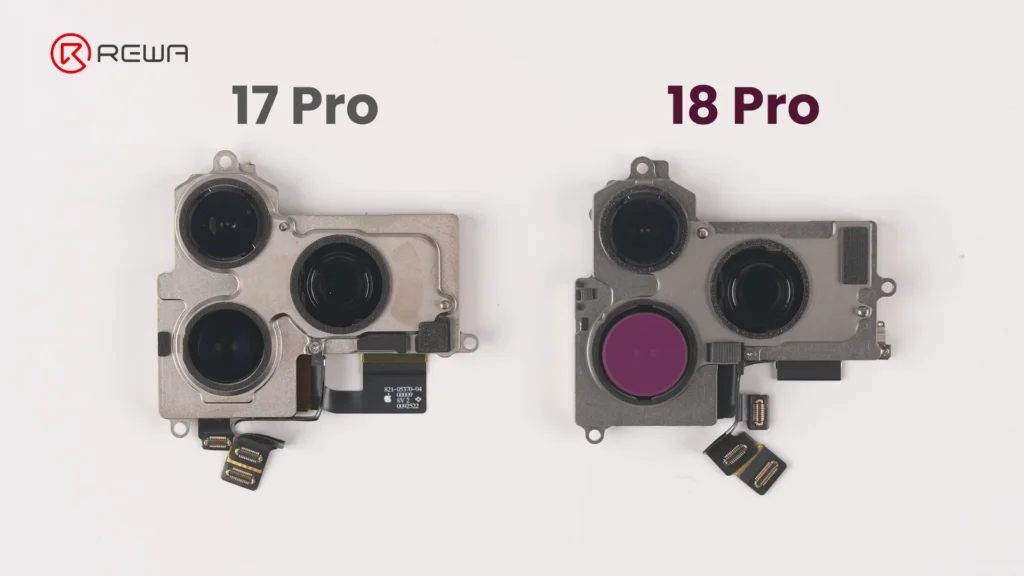
    The iPhone 18 Pro’s camera modules feature noticeable changes in mechanical design, module size, and cable layout.

    Fusion Main Camera: The rear camera module features a variable aperture for greater control over depth of field.
    iphone 18 pro teardown what changed inside how does it affect 11

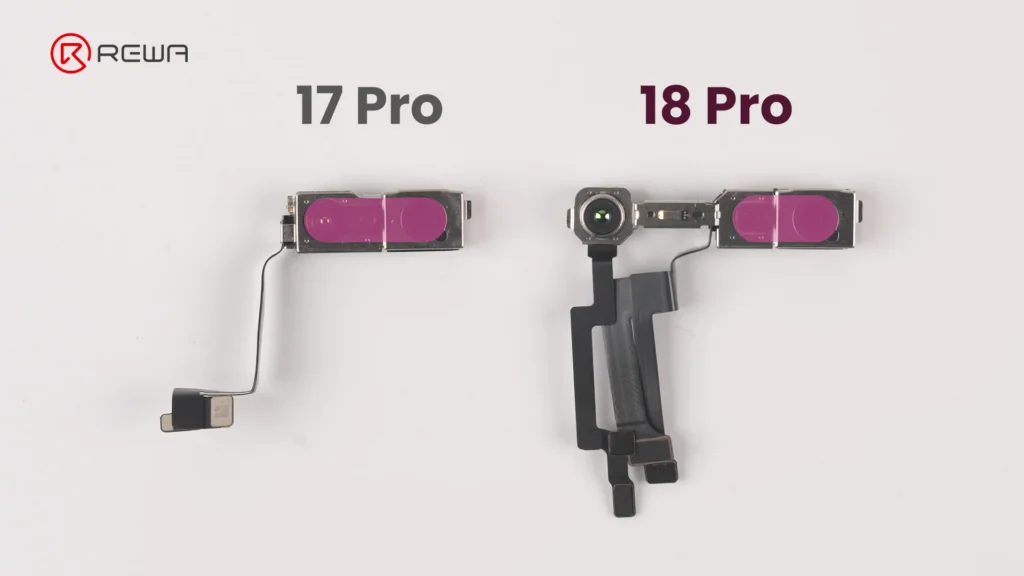
    Separated Infrared Sensor: The front camera and under-display infrared camera are connected via three separate flex cables, bridged across a wider distance to facilitate the shrunken Dynamic Island.
    iphone 18 pro teardown what changed inside how does it affect 12

    Thermal Management & Battery Changes

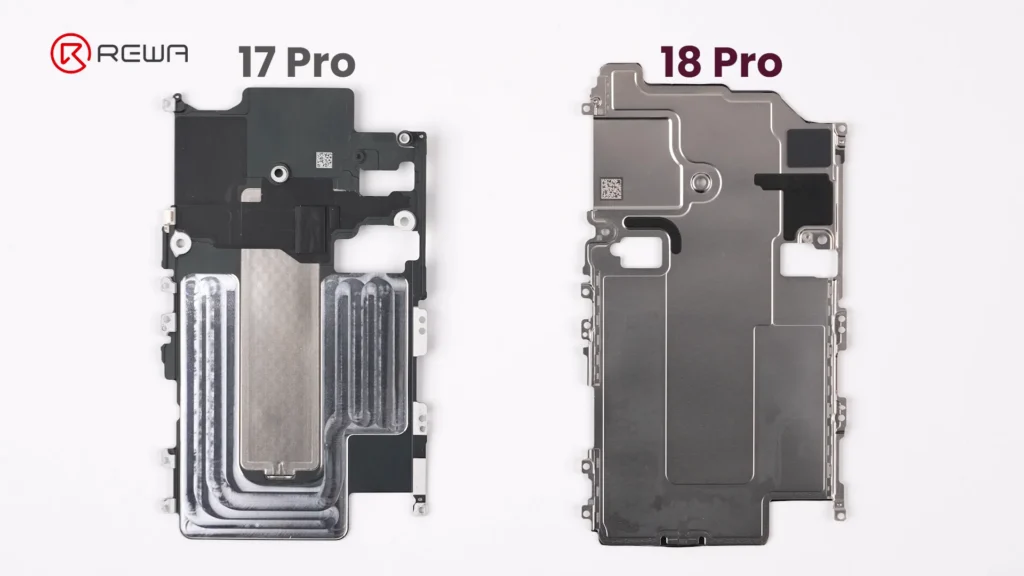
    Vapor chamber on the iPhone 18 Pro receives its largest redesign in years. Apple has integrated a significantly larger vapor chamber, with three times the surface area of the one used in the iPhone 17 Pro.
    iphone 18 pro teardown what changed inside how does it affect 13

    Simply Put:

    A vapor chamber is a flat, sealed metal enclosure containing a small amount of liquid. When the chips heat up, the liquid absorbs heat and evaporates. The vapor then spreads through the chamber, transferring heat to cooler areas where it condenses back into liquid. This helps the phone maintain stable performance under sustained workloads.

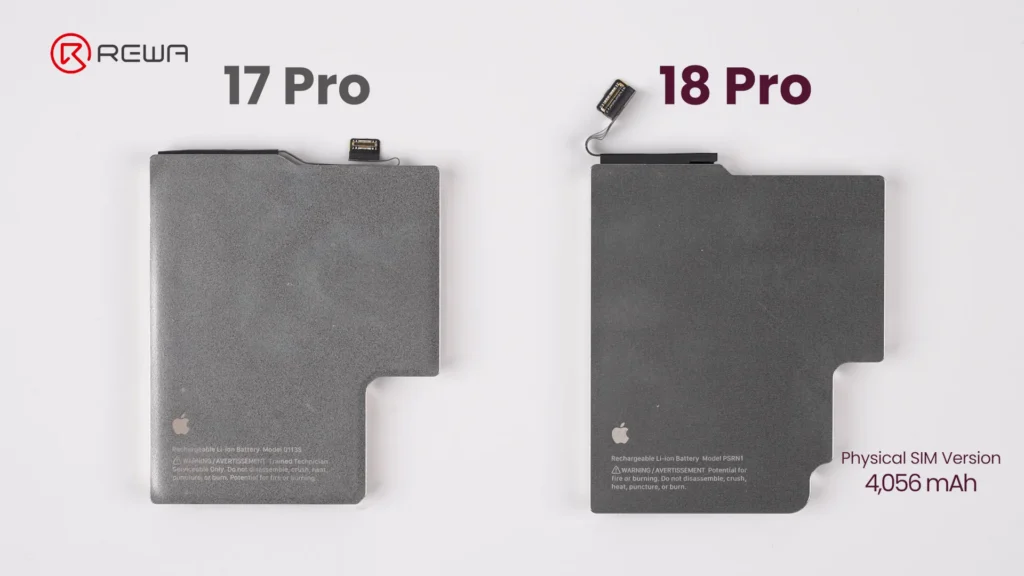
    The battery capacity of iPhone 18 Pro is slightly bigger than that on iPhone 17 Pro. In physical SIM version, it packs 4,056mAh, achieving about 1.7% increase over previous generation. Apple officially confirms that the redesigned battery architecture and charging system enable faster charging, reaching 50% in approximately 15 minutes.
    iphone 18 pro teardown what changed inside how does it affect 14

    Repair Difficulty Assessment: Pros & Cons

    A concise summary of what makes repairing the iPhone 18 Pro easier or harder for repair professionals.

    Component Changes Made Repair Difficulty
    Screen
    • Smaller Dynamic Island
    • Under-display infrared camera
    • Display flex cable not fixed with adhesive
    Easy
    Battery
    • Larger capacity: 4,056mAh (SIM tray version)
    • Larger connector
    • Multi-layer cable
    Easy
    Front Camera Module
    • Infrared camera moved to the corner
    • Three separate cables
    Very Easy
    Rear Camera Module
    • Larger Fusion Main Camera
    • Cable layout changed
    Hard
    Motherboard
    • A20 Pro chip on the surface
    • Logic EEPROM chip without a shield
    • NAND and Power IC sandwiched inside
    Very Hard

    Frequently Asked Questions (FAQs)

    Why is iPhone 18 Pro motherboard repair more difficult?

    The main reason is the new layered motherboard architecture. NAND storage and the power IC are positioned between PCB layers, meaning technicians need to separate the board layers to access them. This increases the complexity, heat exposure, labor, and risk involved in component-level repair.

    Why is the Dynamic Island smaller on the iPhone 18 Pro?

    The infrared camera used for Face ID has been moved under the display and toward the corner. The display uses a modified pixel arrangement in this area to allow infrared light to pass through. This allows Apple to reduce the size of the visible Dynamic Island.

    How big is the iPhone 18 Pro battery?

    The iPhone 18 Pro shown in the REWA Lab teardown is the physical-SIM version and has a 4,056mAh battery, approximately 1.7% higher than the iPhone 17 Pro. Battery capacity varies by regional configuration; in eSIM-only version, the iPhone 18 Pro has a 4,288mAh battery.

    How much larger is the iPhone 18 Pro vapor chamber?

    iPhone 18 Pro vapor chamber has three times the surface area of the vapor chamber in the iPhone 17 Pro. Apple says the redesigned thermal system enables up to 40% better sustained performance compared with the previous generation.

    What is the biggest repair challenge revealed by REWA Lab’s iPhone 18 Pro teardown?

    For board-level technicians, the layered motherboard architecture is one of the most significant challenges because it complicates access to NAND and power-management components. For aftermarket parts manufacturers, the new under-display infrared camera arrangement creates another major challenge because display structure, optical transmission, and Face ID compatibility must all work together.

    Did Apple make major changes to the iPhone 18 Pro’s frame and back cover?

    No. The iPhone 18 Pro retains a largely similar frame and back cover structure to the iPhone 17 Pro. The back cover uses a more color-matched aluminum and glass design in iPhone 18 Pro.

    Conclusion

    The iPhone 18 Pro showcases impressive internal engineering, highlighted by under-display Face ID technology, triple-sized vapor chamber, and larger variable-aperture main camera.
    iphone 18 pro teardown what changed inside how does it affect 15

    However, for the independent repair industry, these advancements come with obvious challenges: motherboard layering makes micro-soldering more demanding, and screen replacement requires precise technical alignment and careful handling to ensure proper Face ID functionality.

    As phone architectures become more complex, having high-grade repair tools, reliable replacement parts, and advanced technical training is essential, please contact us for OEM/aftermarket replacement parts, professional repair tools, and step-by-step technical guides.
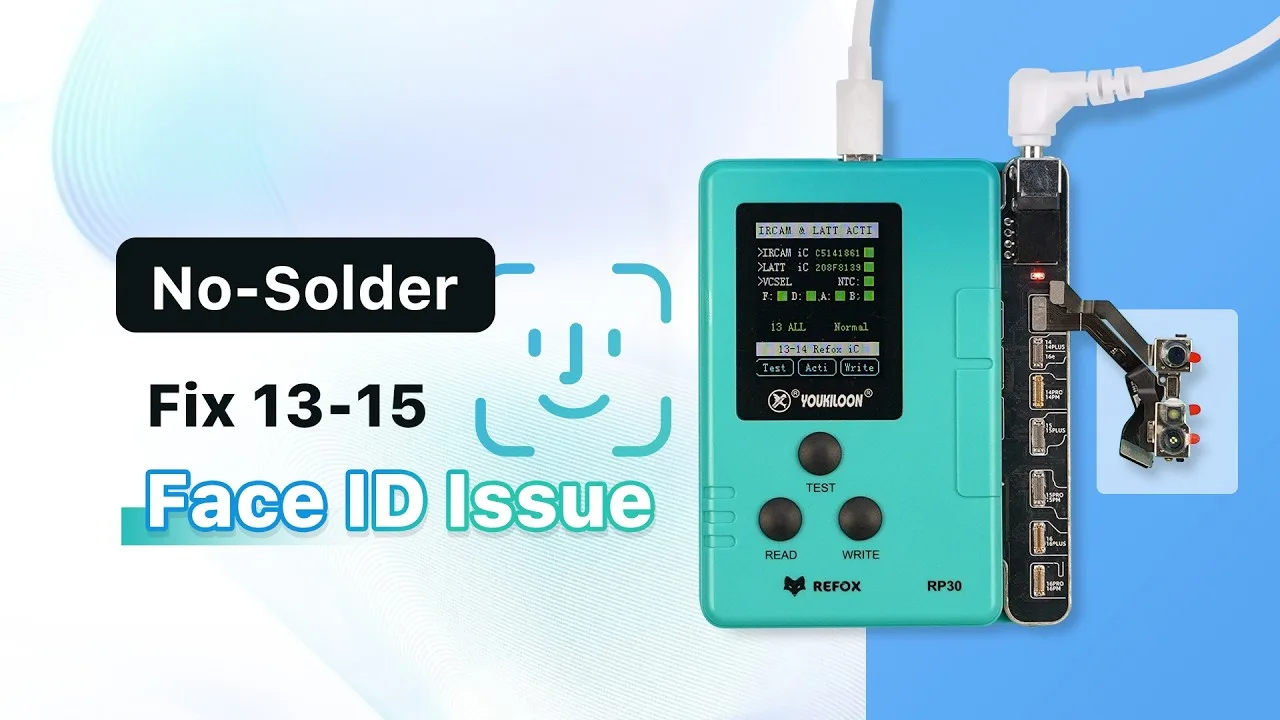
  • No-Solder Fix for Face ID Not Working on iPhone 13–15 Series (New Repair Method)

    No-Solder Fix for Face ID Not Working on iPhone 13–15 Series (New Repair Method)

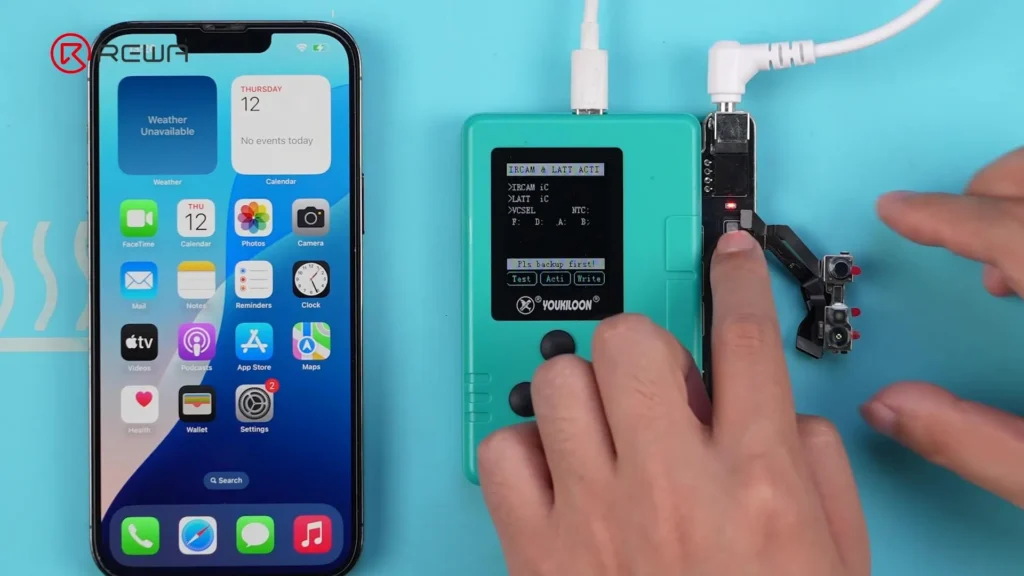
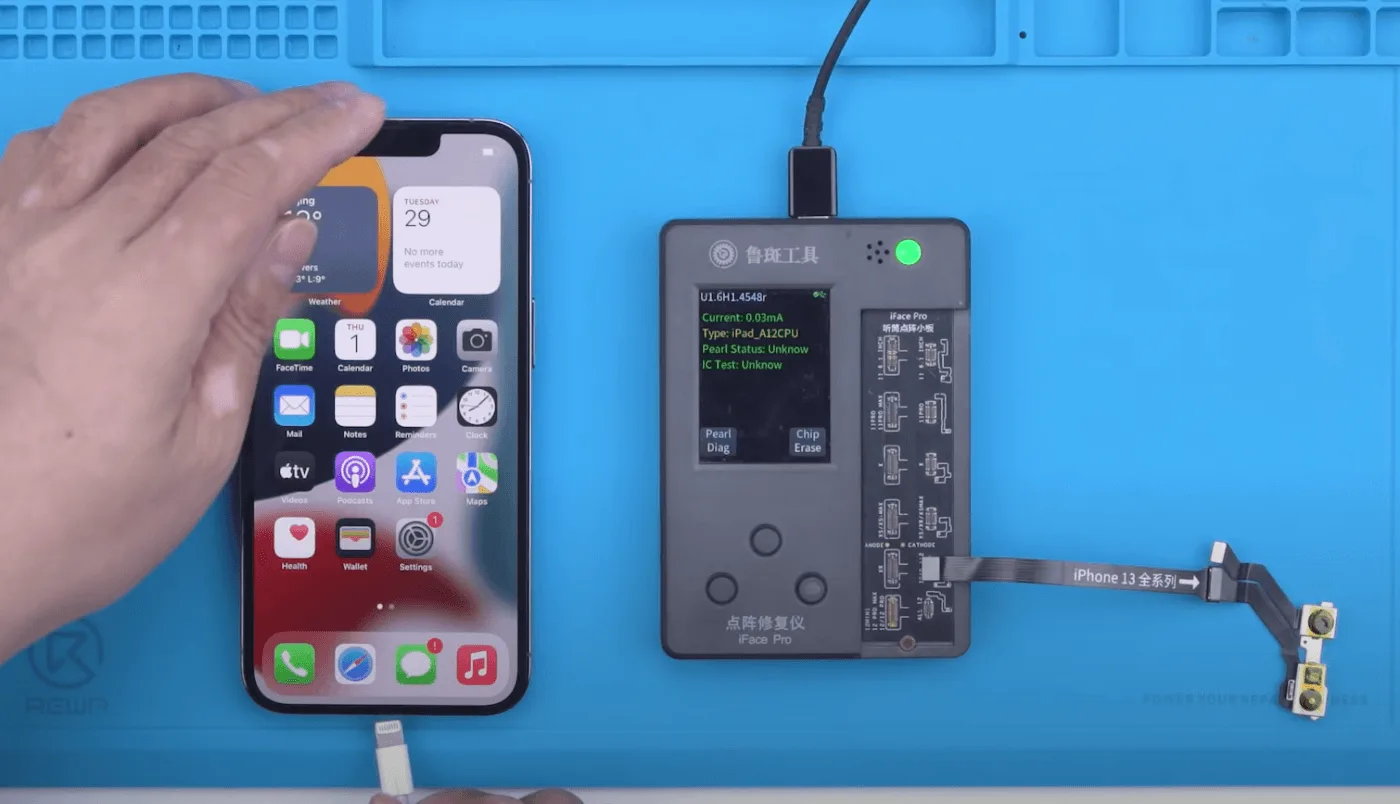
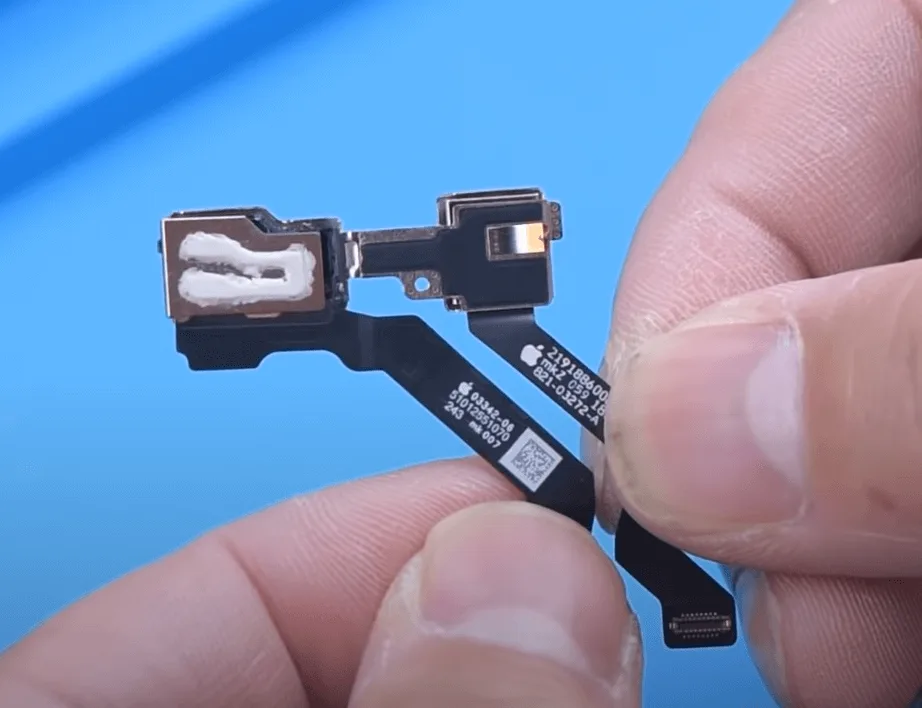
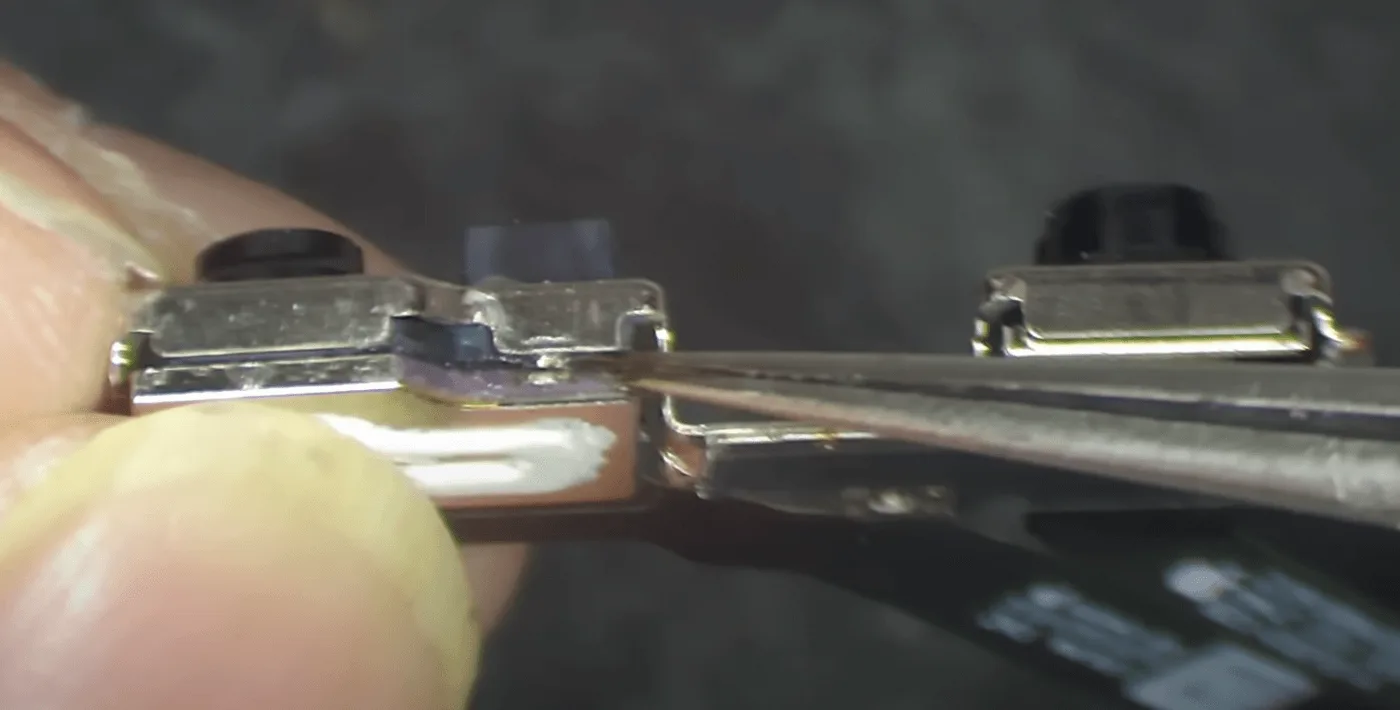
    When Face ID malfunctions on iPhones with a Dot Projector IC issue, traditional repairs typically require risky soldering or board-level replacements. However, a new no-solder solution now out for fixing Face ID on iPhone 13 through iPhone 15 series devices. By using the REFOX Face ID programmer, you can restore full Face ID functionality safely, reliably, and without disassembling the module. In this repair case, we demonstrate how we successfully repaired a Face ID not working on an iPhone 13 Pro Max using this innovative method.

    Step-by-Step: Fixing Face ID Not Working on iPhone 13-15

    Step 1: Confirm the Issue

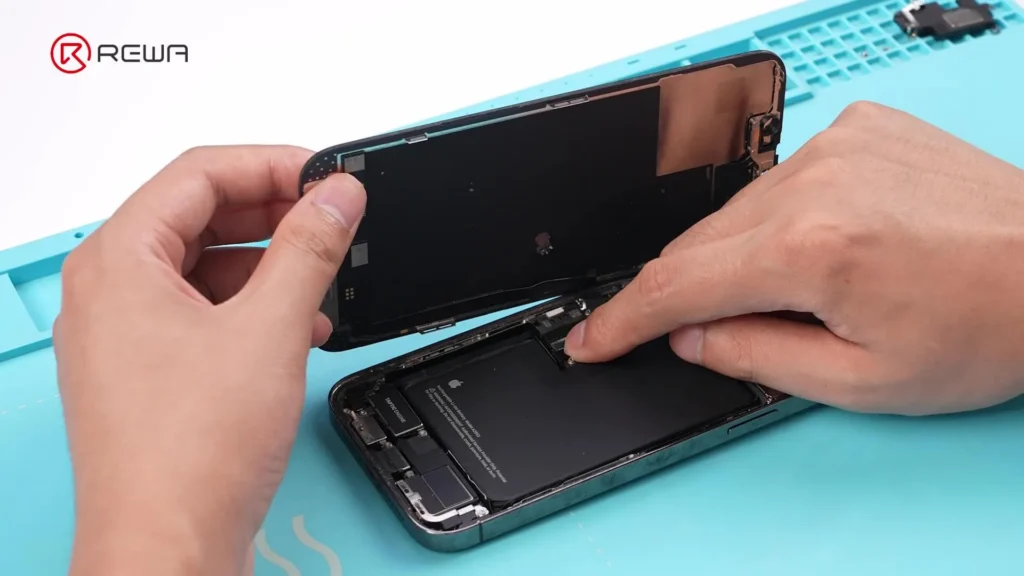
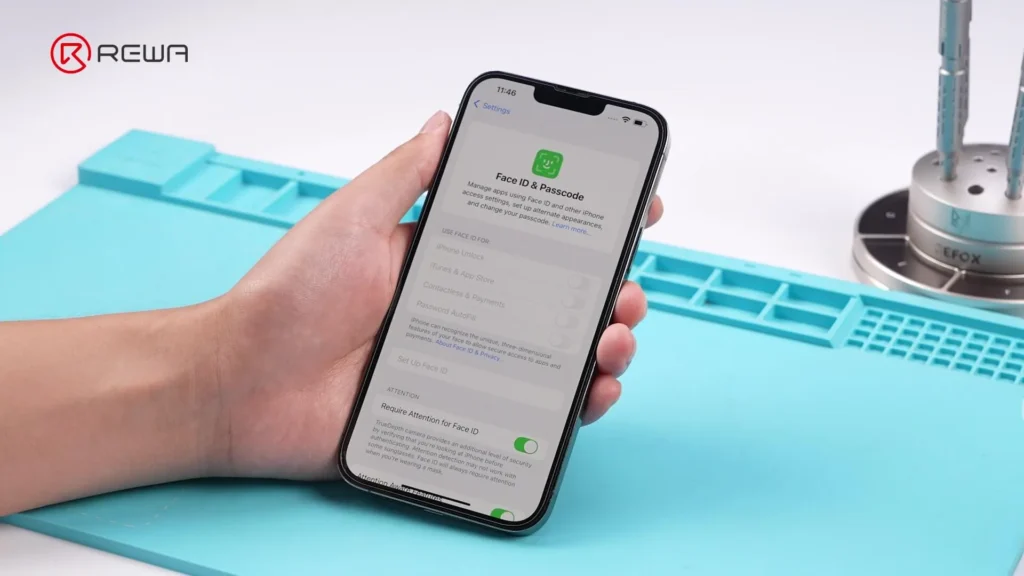
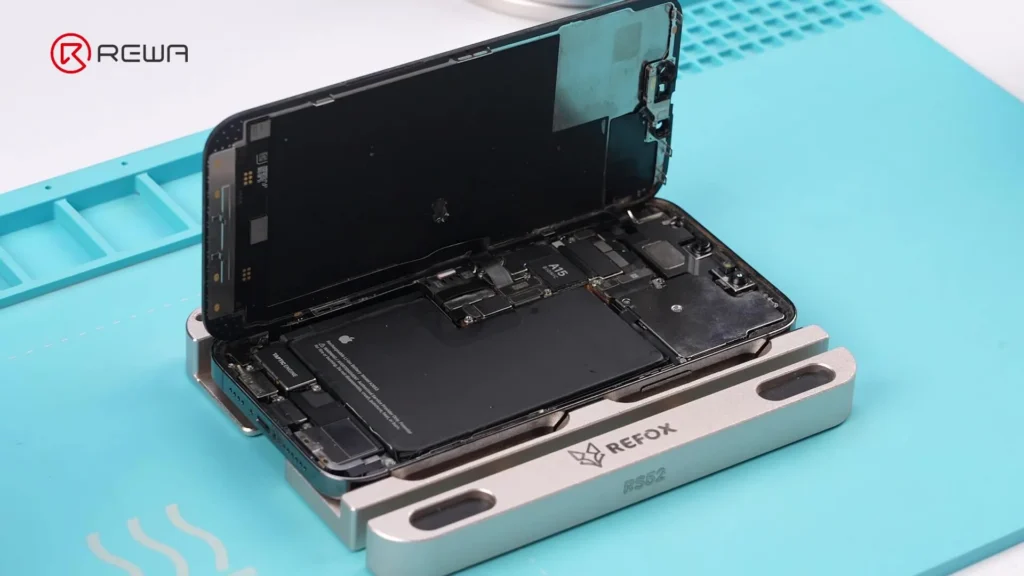
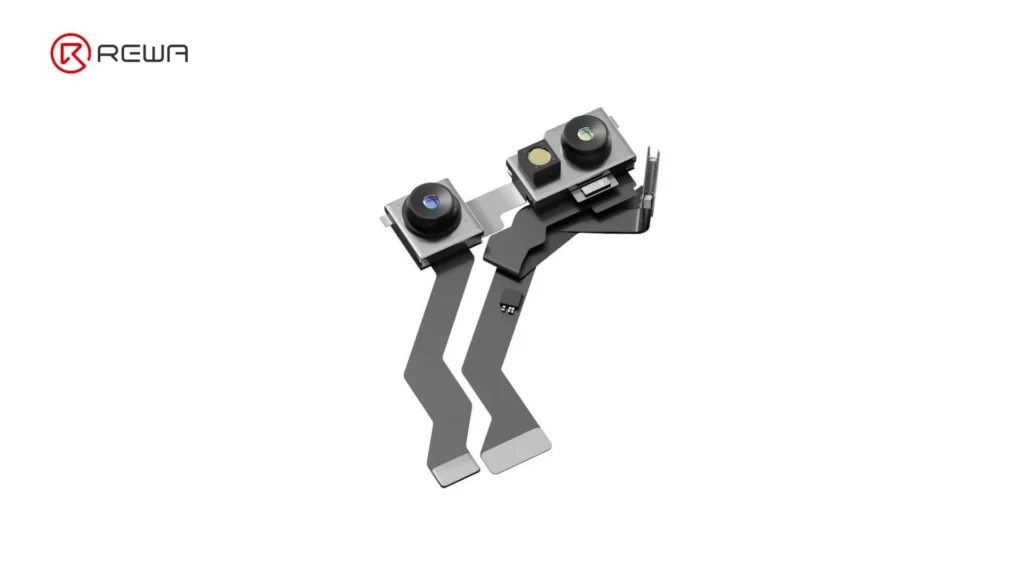
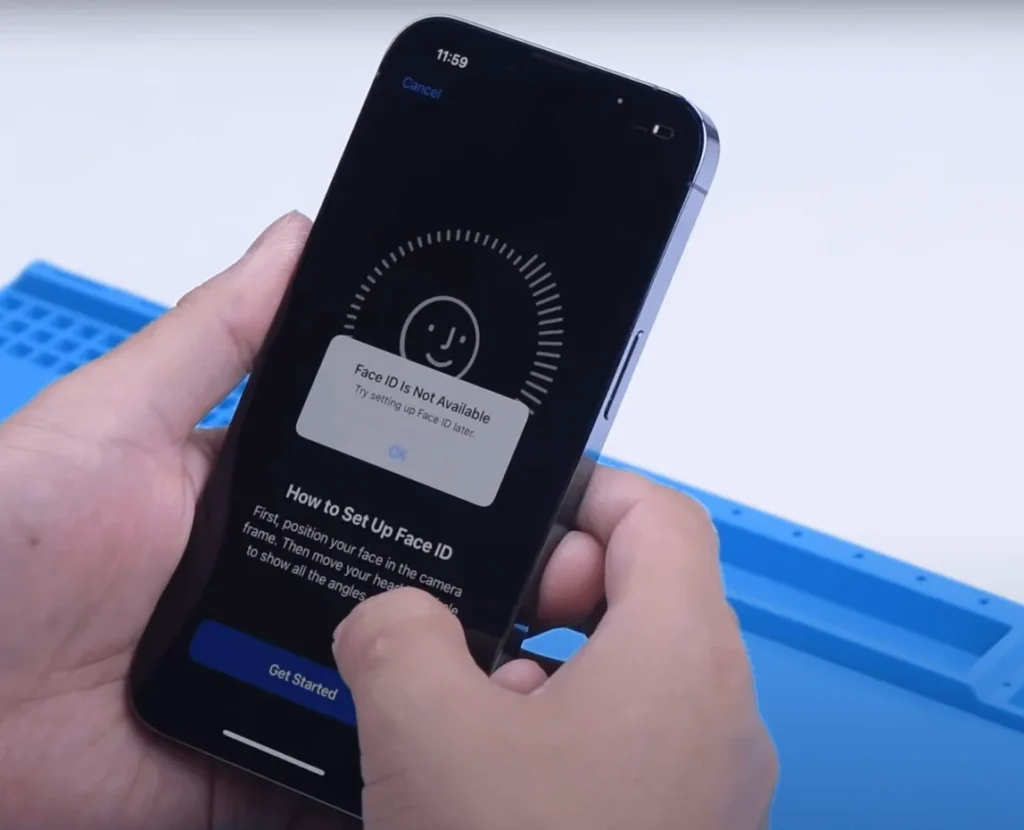
    The iPhone 13 Pro Max displays the message: “Face ID is not available.” Power off the device and disassemble it. Remove the front camera module, then reinstall the motherboard, as this repair requires the phone to remain powered on.

    Step 2: Prepare the Tools

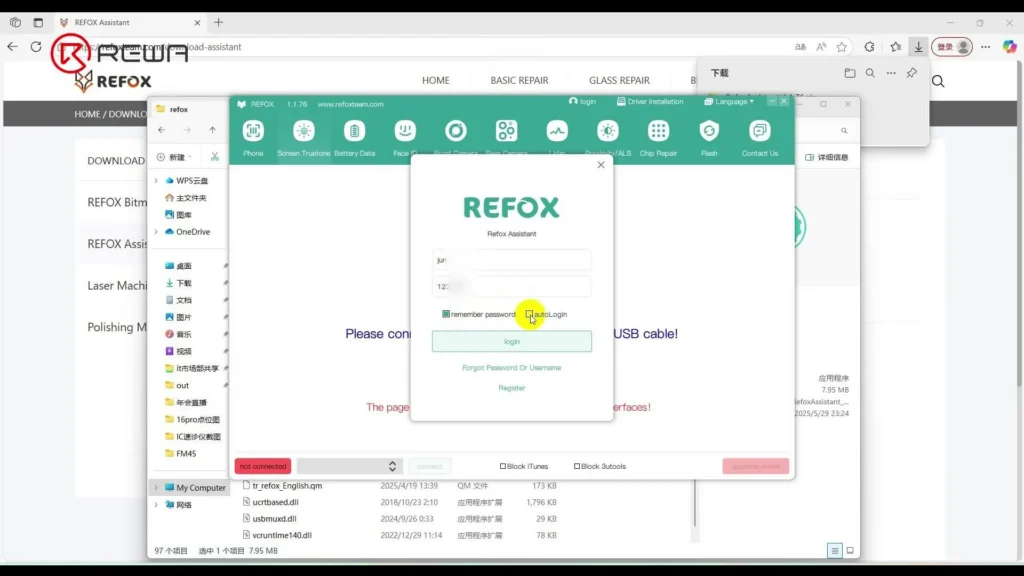
    Make sure your REFOX software is updated, as this is essential for accessing the latest features.

    You will need:

    • REFOX Assistant (latest version)
    • Dot Projector Repair Module
    • REFOX Programmer
    • Type-C Cable
    • DC Adapter
    • Tag-on Flex for iPhone 13 Pro Max

    Step 3: Begin Face ID Diagnosis

    1. Log in to REFOX Assistant on your PC.
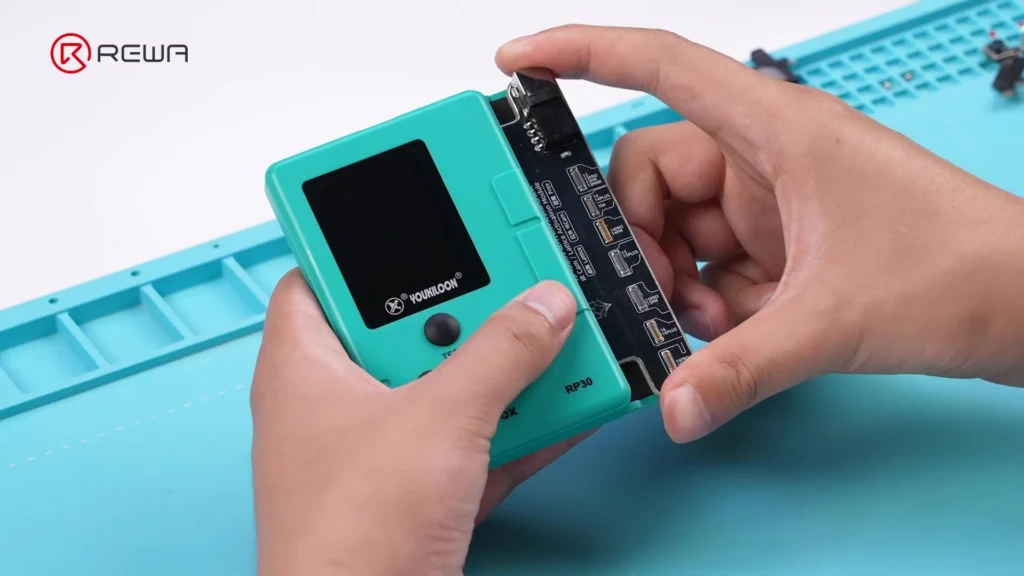
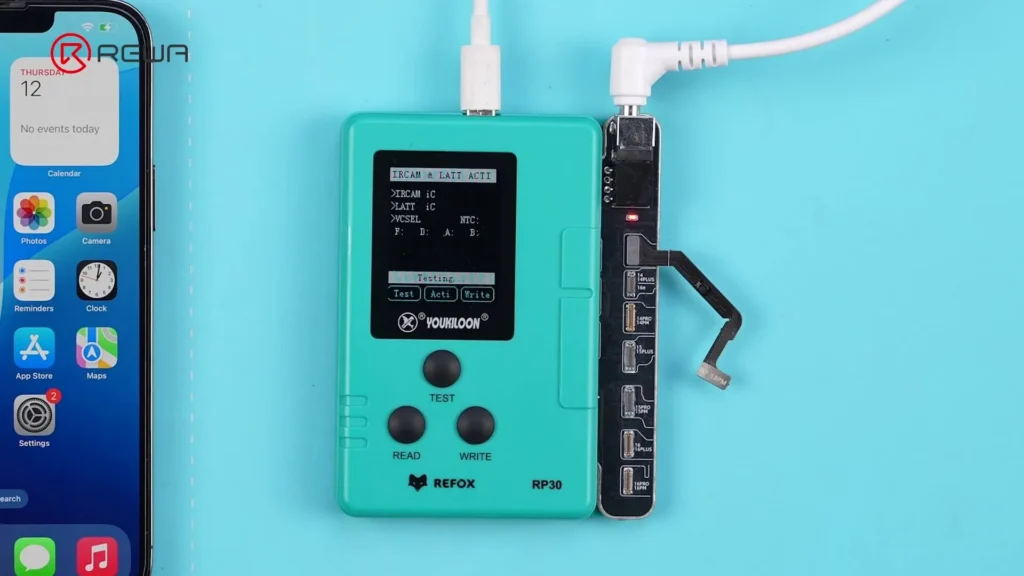
    2. Connect the Dot Projector repair module to the programmer.
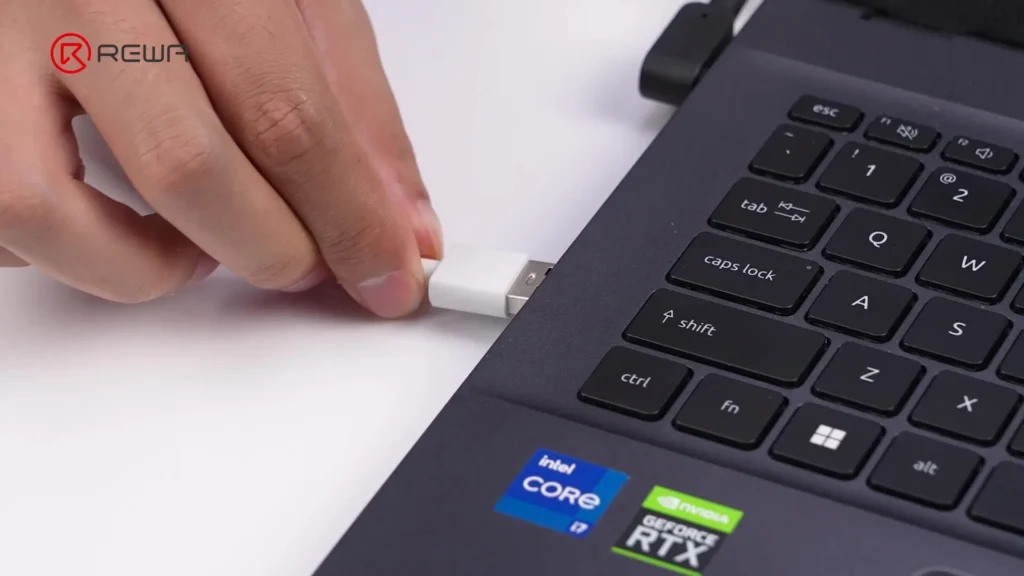
    3. Use a Type-C cable to connect the programmer to the PC.
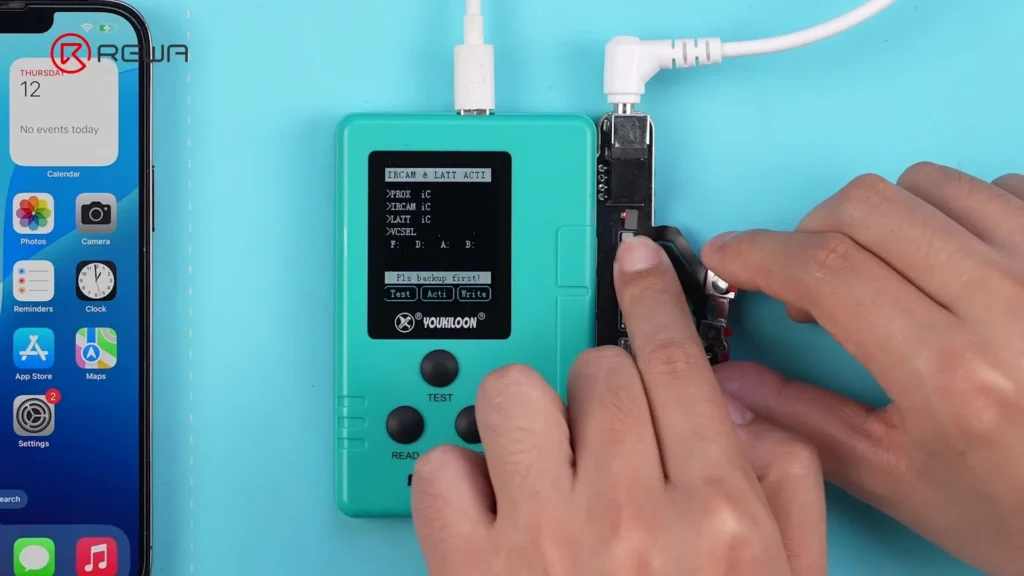
    4. Plug in the correct DC adapter — make sure the light is on.
    5. Connect the iPhone to the PC.
    6. Connect the Dot Projector to the Face ID repair module.
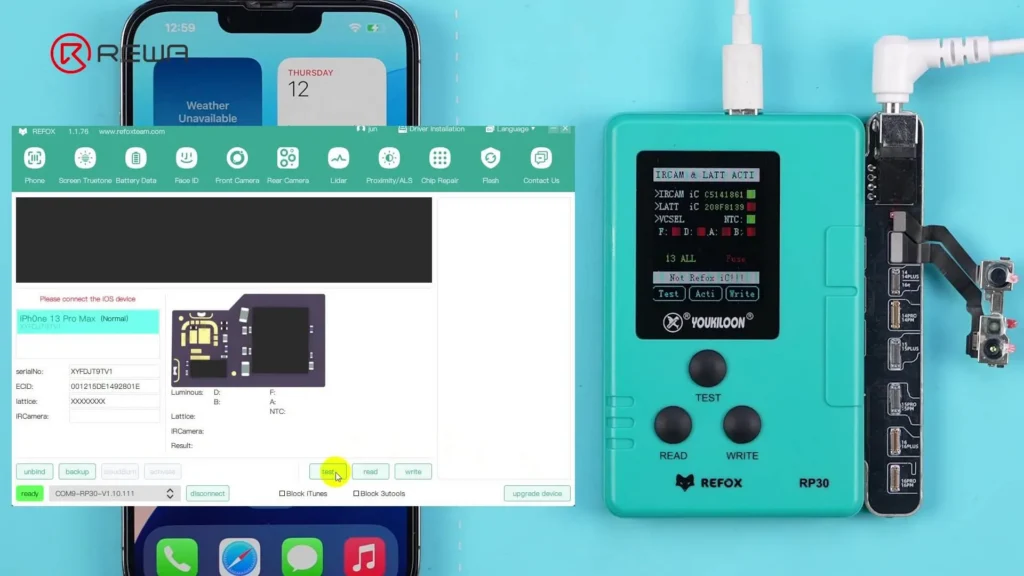
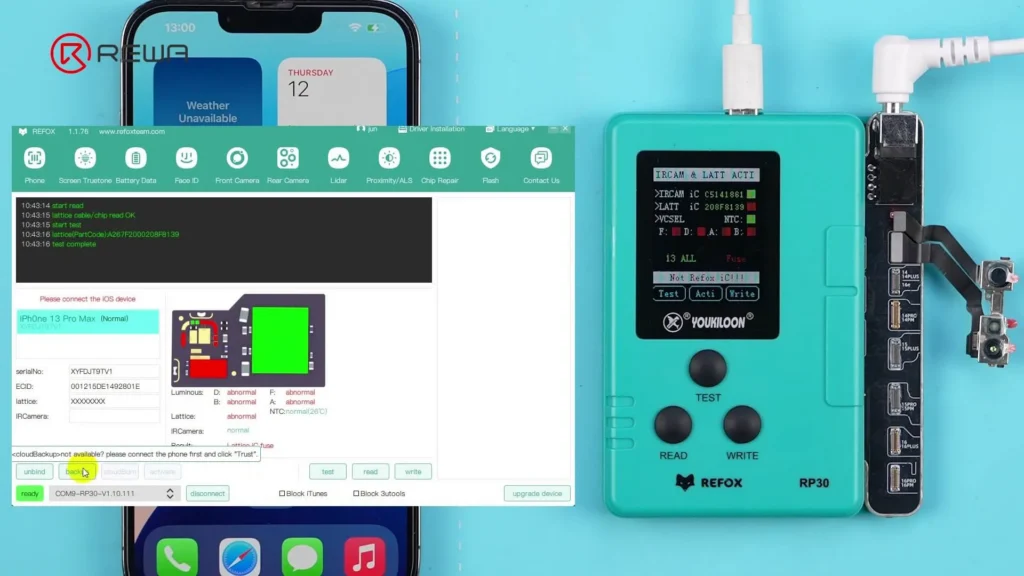
    7. Click “Test” in the software.

    Diagnosis Result: The diagnosis reveals a lattice IC fuse failure, which is a common issue with the Dot Projector.

    Step 4: Cloud Backup and Activation

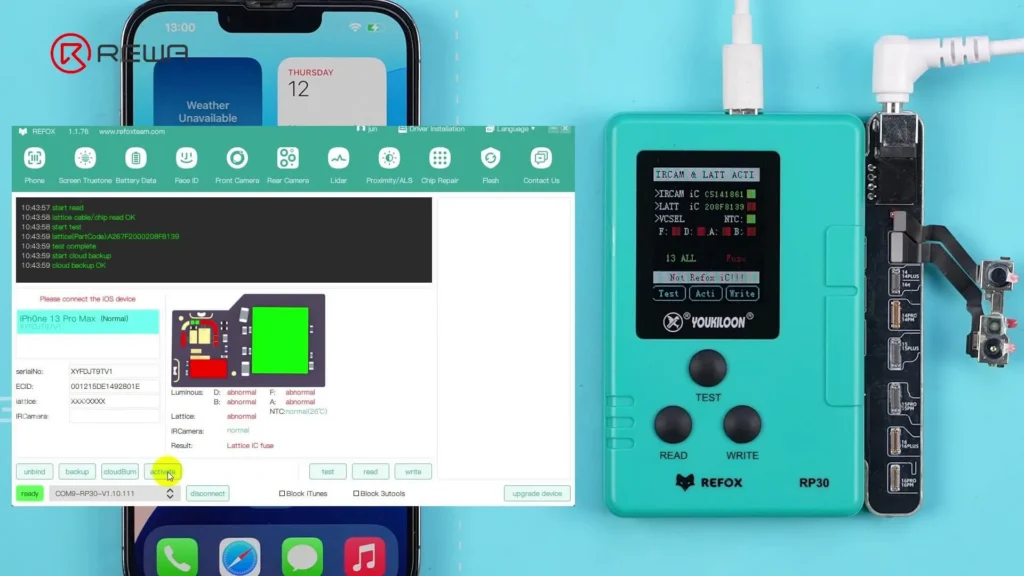
    1. Click “Backup” to upload the Dot Projector data to the cloud.
    2. Click on “Activate” — Note: each Dot Projector can only be activated once.
    3. Remove the Dot Projector from the programmer.

    Step 5: Program the Tag-On Flex

    1. Insert the tag-on flex for iPhone 13 Pro Max into the programmer.
    2. Click “CloudBurn”, select the backed-up data, and then click OK.
    3. Remove the tag-on flex after a successful burn.
    4. Follow the on-screen animation to install and fold the tag-on flex correctly.

    Step 6: Final Assembly and Verification

    1. Connect the Dot Projector to the programmer via the tag-on flex.
    2. The software verifies the status as “Normal”.
    3. Alternatively, click “Test” to verify manually.
    fix face id using refox programmer

    Step 7: Reassemble the Front Camera Module

    1. Carefully position the front camera module back into the phone.
    2. Ensure the tag-on flex doesn’t block the earpiece screw hole to avoid damage.
    3. Install the earpiece and adjust the front camera with a tweezer as needed.
    4. Tighten all the screws.
    5. Reconnect the screen and battery cables, then power on the iPhone.

    Step 8: Test Face ID

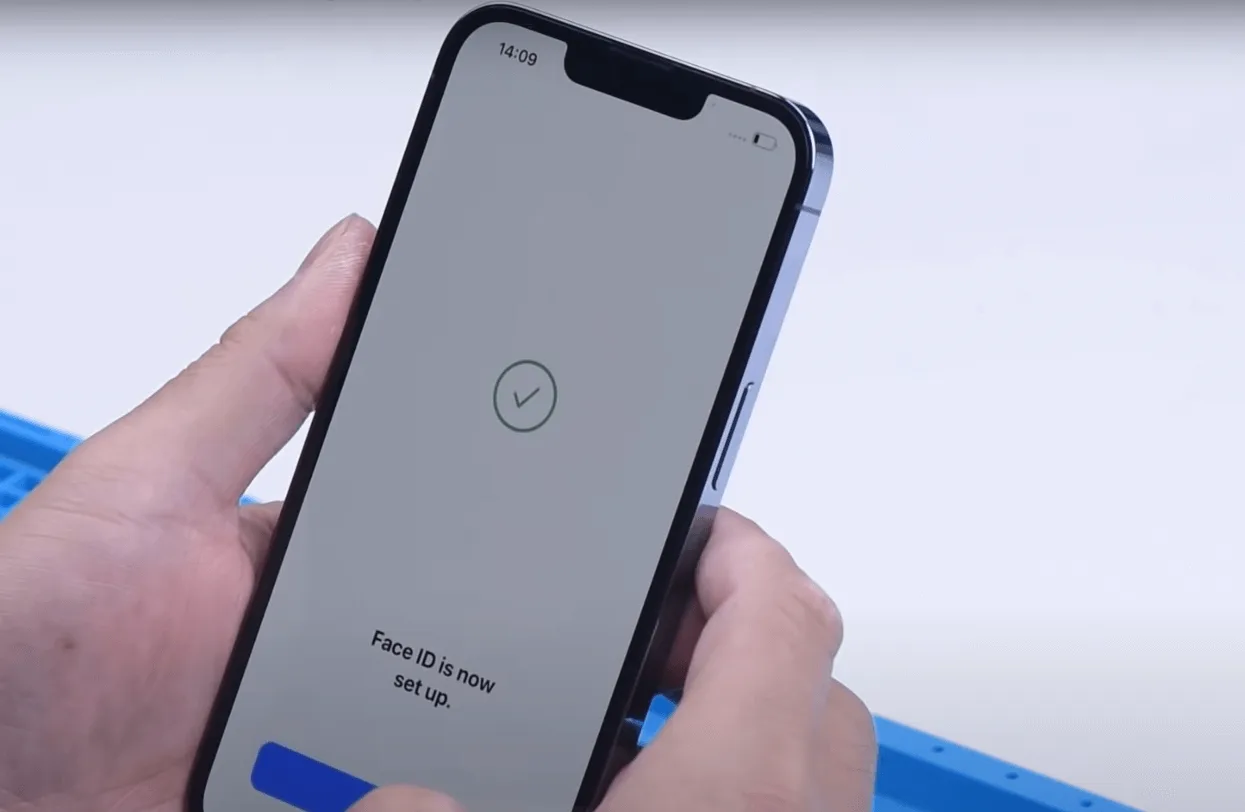
    ✅ Face ID enrollment is successful
    ✅ Unlocking with Face ID works perfectly
    ✅ Even after upgrading to iOS 26 Beta, Face ID remains fully functional.

    Key Points:

    • It is important to use the right power adapter to activate the Dot Projector, or it will fail to activate.
    • Fold the tag-on-flex properly, or the front camera module will not fit.
    • Ensure the front camera module is aligned properly – misalignment can prevent Face ID from working.

    Tools & Materials Used

    • REFOX Face ID Repair Programmer
    • REFOX Dot Projector Repair Module
    • REFOX Assistant (v1.1.76 or newer)
    • Type C cable
    • DC power adapter
    • Tag-on flex for iPhone 13 Pro Max
    • Tweezers, screwdriver set
    • iPhone 13–15 series device with Face ID failure

    Conclusion

    This no-solder Face ID repair method for iPhone 13 to 15 series devices is fast, safe, and future-proof, even after iOS upgrades. Using the REFOX system, technicians can restore Face ID functionality without risking damage to internal components. If you’ve encountered similar Face ID issues, consider this method for a secure, professional-level repair.
    Got Questions?

    Have you tried this method or encountered other Face ID repair challenges? Share your thoughts in the comments below.

  • iOS 18.1 Compatibility: Face ID Testing and Repairs

    iOS 18.1 Compatibility: Face ID Testing and Repairs

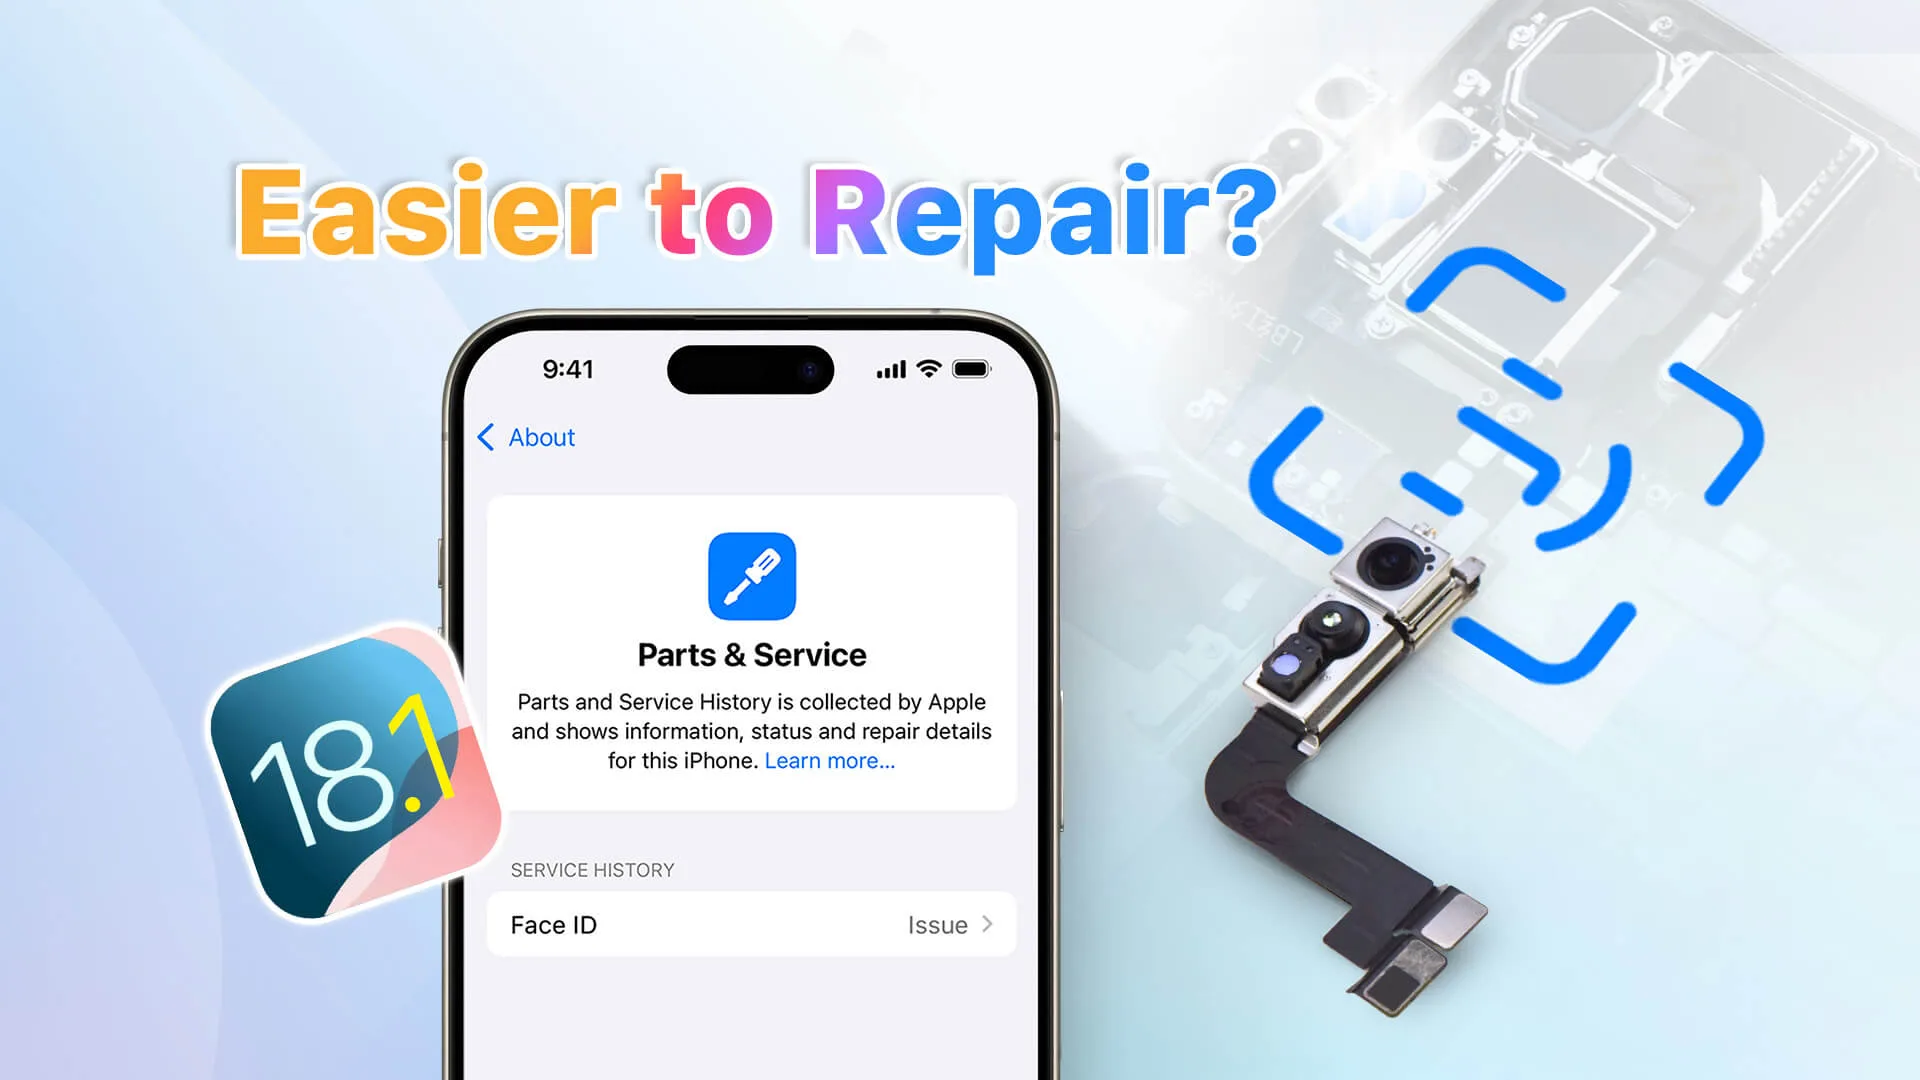
    In this video, REWA Lab dives into the compatibility and repair challenges of Face ID parts on iOS 18.1. We’ll assess whether traditional repair methods remain effective with the latest system update. The testing process includes a detailed Face ID parts swap and pairing steps, comprehensive functionality checks, and innovative Face ID solution testing. If you’re a repair professional or enthusiast, this video is a must-watch to stay updated on iOS 18.1’s impact on Face ID repairs. Gain insights, troubleshoot issues, and ensure seamless repairs with the latest techniques.
    Tools in this video can be found on REWA shop: https://shop.rewa.tech/

    For more technical solutions, welcome to contact us: https://rewawp.iamtareq.com/wholesale

  • iPhone 16 Pro Swap Parts: Face ID Remains Functional

    iPhone 16 Pro Swap Parts: Face ID Remains Functional

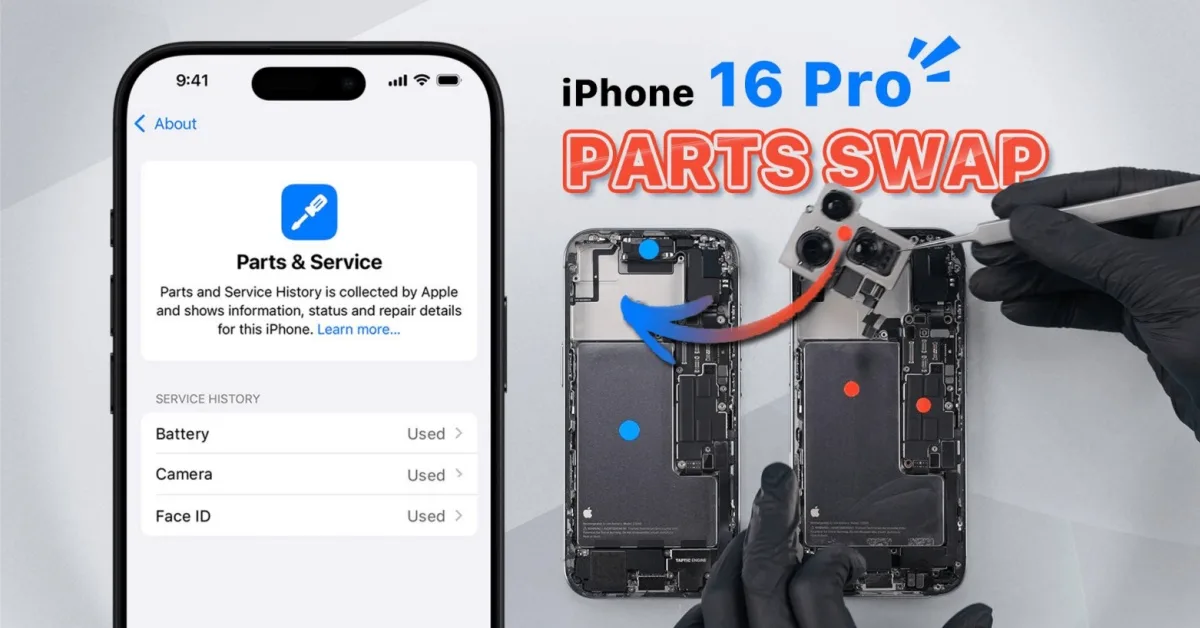
    With the introduction of iPhone 16 and iOS 18, Apple has refined how parts swaps are handled with the new ‘Parts & Service’ and ‘Repair Assistant’ features. In this article, REWA Lab tests these updates by swapping parts between two iPhone 16 Pro devices. We discovered not only that Face ID remains fully functional after being replaced and reconfigured, but also that the phone’s enclosure now generates a repair history and requires reconfiguration after a swap.
    We recommend to watch video first:

    Back Glass Swap: New Part Pairing

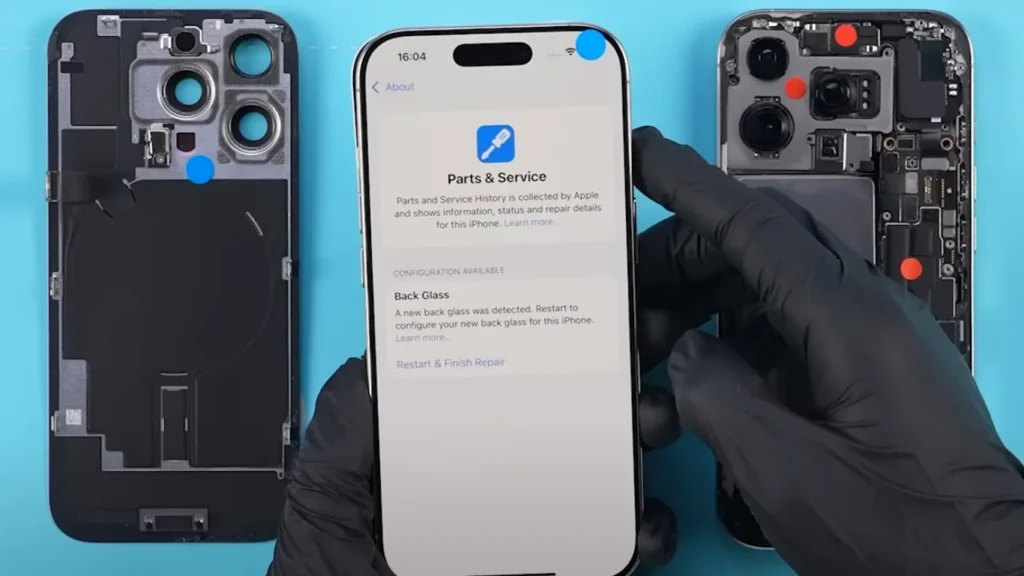
    In previous iPhones, the back glass wasn’t tied to the phone’s system. However, when we swapped the back glass on the iPhone 16 Pro, a ‘Parts & Service History’ notice appeared, indicating the detection of a new back glass. After configuration, the message disappeared.

    iphone 16 pro swap parts face id remains functional figure
    Figure 1. A new back glass was detected

    Rear Camera Swap: Calibration Needed

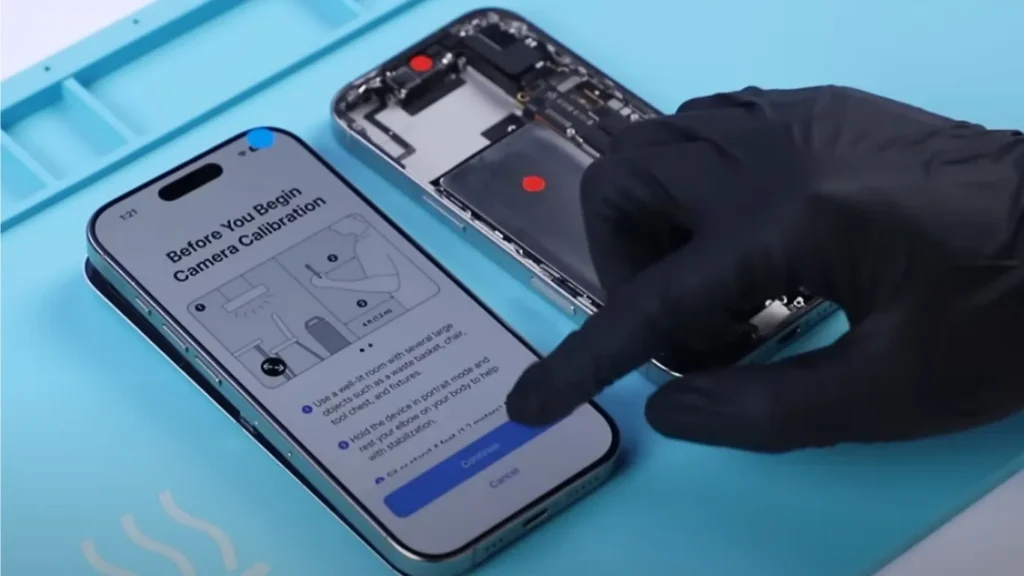
    Swapping the rear cameras between two phones triggered the ‘Parts & Service History’ message. Unlike other parts, the rear camera required calibration via the Repair Assistant, which involved moving the phone as prompted. It is important to note that calibrating the camera is just one step in running the Repair Assistant. In fact, after replacing the camera, the phone can still take photos or record videos normally, even without running the Repair Assistant calibration. Furthermore, after completing the process, the system marked the camera as ‘Used’ in the parts history. 

    iphone 16 pro swap parts face id remains functional figure 2
    Figure 2. Replaced rear camera need to calibrate

    Face ID Assembly Swap: A Significant Improvement

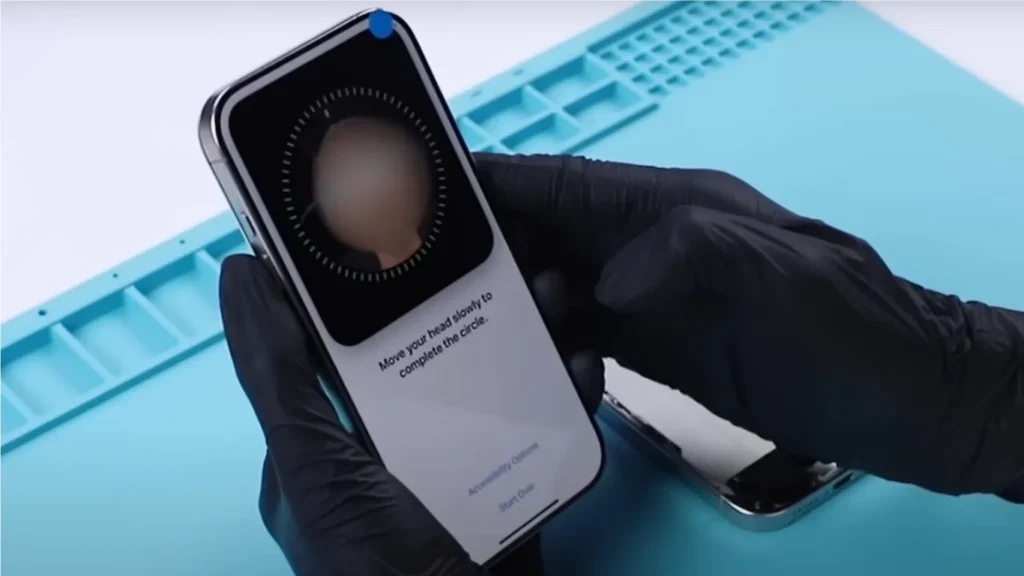
    A significant change on the iPhone 16 Pro is the ability to swap the Face ID assembly and retain functionality. After swapping the Face ID and running the Repair Assistant, the system fully restored Face ID functionality. Although it was recorded as a ‘Used’ part in the system, this is a major improvement, as Face ID was previously tied to the motherboard and would not work after replacement in older iPhone models.

    iphone 16 pro swap parts face id remains functional figure 3
    Figure 3. Face ID is functional after configuration

    Battery Swap: Effects on Health Data

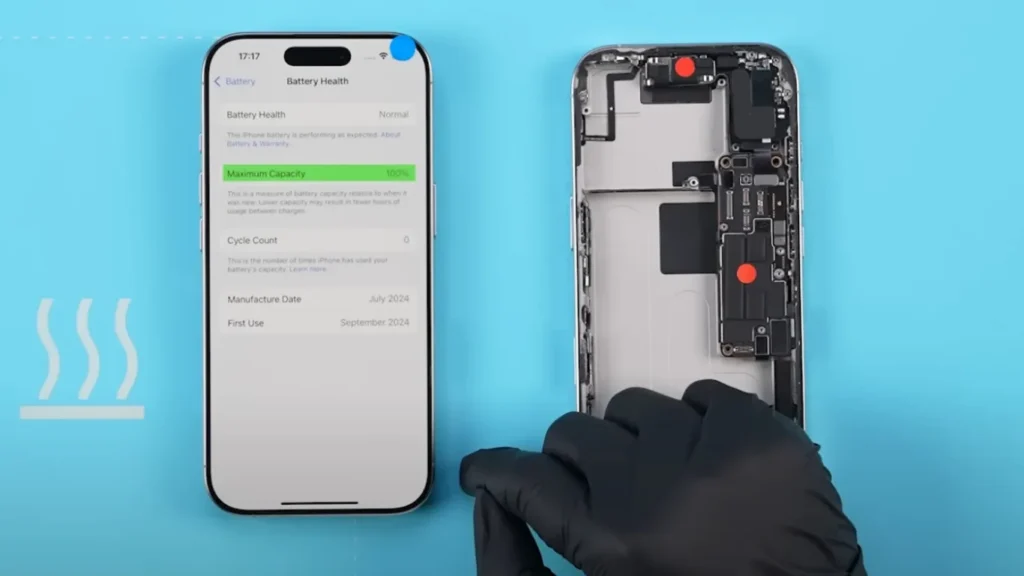
    After swapping the battery, the system labeled it as an ‘Unknown Part,’ and battery health data was disabled. Additionally, the ‘Parts & Service History’ indicated the battery required configuration. Once configured, the ‘Unknown Part’ message disappeared, and battery health data returned, with the system marking the battery as a ‘Used’ component.

    iphone 16 pro swap parts face id remains functional figure 4
    Figure 4. Battery health data can be fixed

    Screen Swap: True Tone Can Be Restored

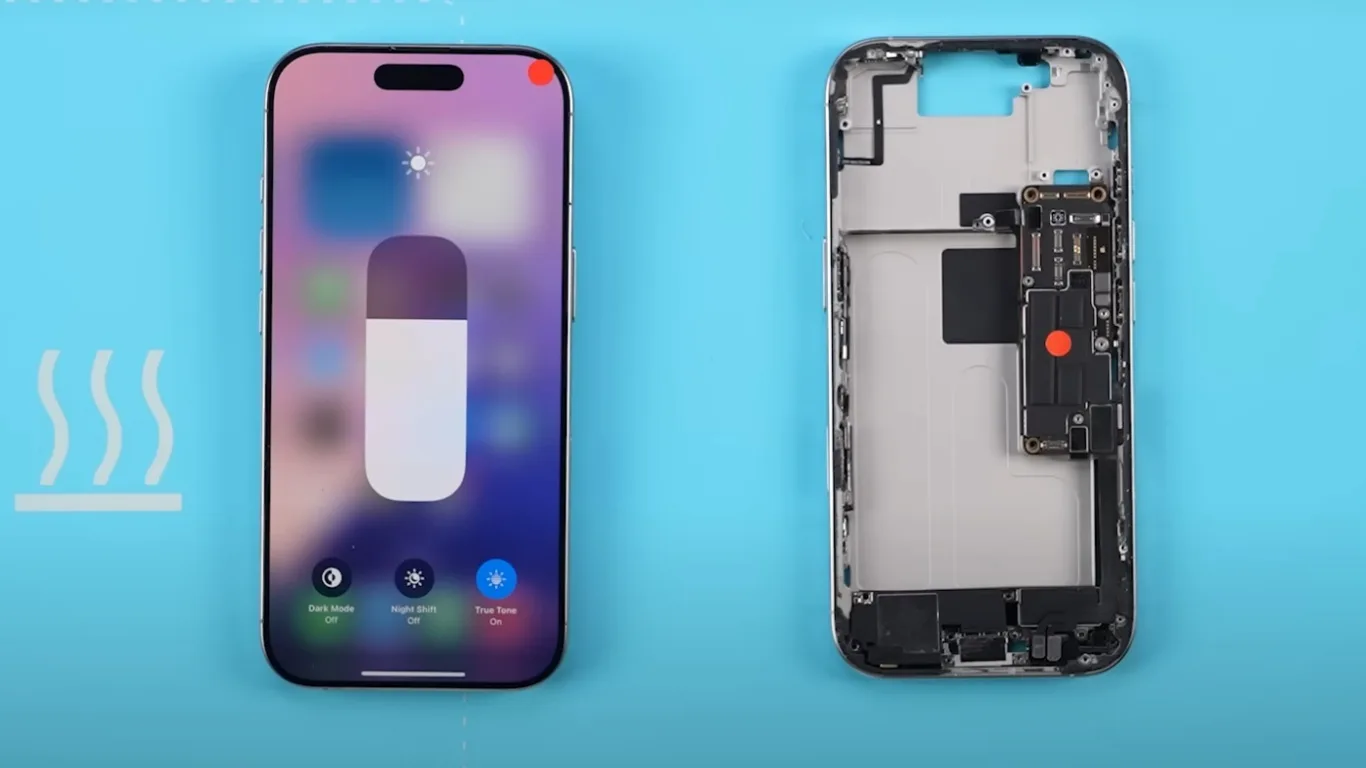
    Swapping the screens caused the True Tone feature to disappear initially. After configuring the system, True Tone was restored, and the screen was labeled as ‘Used’ in the parts history. This emphasizes the importance of system configuration after screen replacements to maintain features like True Tone.

    iphone 16 pro swap parts face id remains functional figure 5
    Figure 5. True Tone can be fixed

    Motherboard Swap: Enclosure Needs Configuration

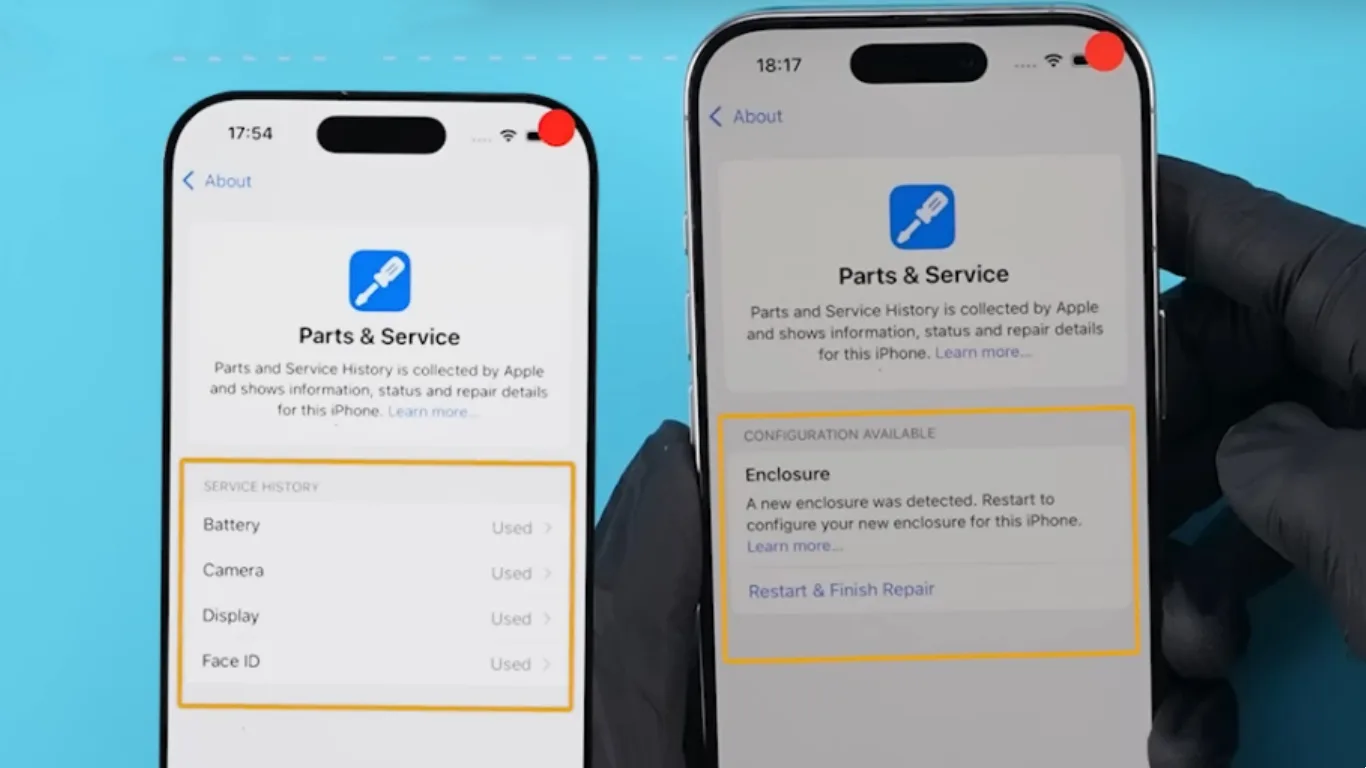
    To further test the system, we swapped the motherboards of the two phones. Interestingly, the major parts functioned normally, and there were no repair notices for these parts in the ‘Parts & Service History.’ However, a new notification prompted us to configure the enclosure, and the system required rear camera recalibration again.

    iphone 16 pro swap parts face id remains functional figure 6
    Figure 6. A new enclosure was detected

    Parts History: An Ongoing Investigation

    Even after swapping back the native parts, the system continued to display their repair history, though it verified them as genuine. This suggests that once parts are replaced, the system may permanently record their history. However, further verification is needed, and REWA Lab will continue to explore this behavior in future tests.
    Conclusion: Face ID and Other Swap Parts in iPhone 16 Pro

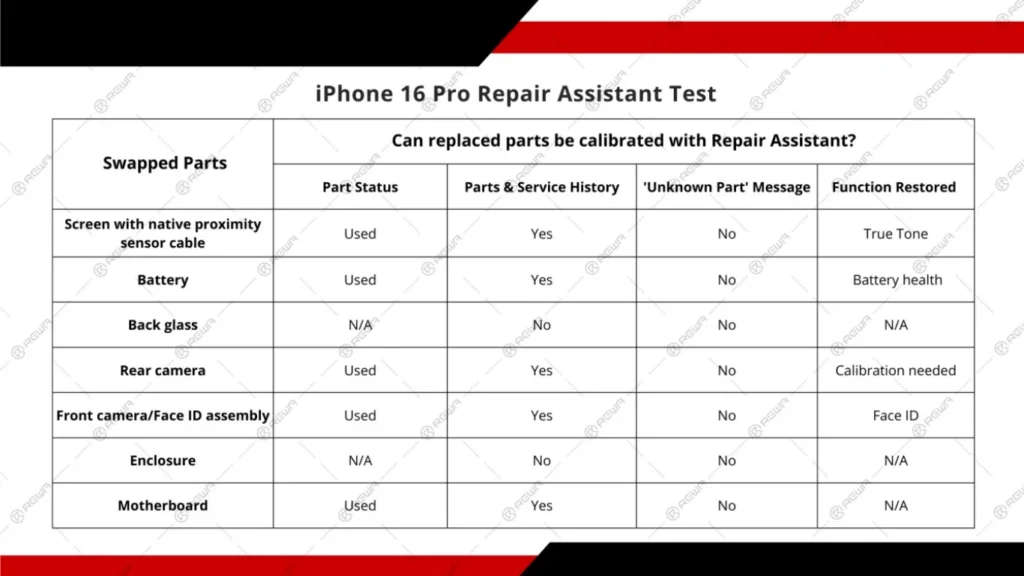
    Our tests reveal that iPhone 16 Pro, with iOS 18’s Repair Assistant, allows for greater flexibility when swapping parts, particularly with Face ID, which can now be replaced without losing functionality. The ‘Parts & Service’ feature ensures accurate tracking of swapped components, and we will continue to explore how third-party parts interact with this system in future tests.

    iphone 16 pro swap parts face id remains functional figure 7
    Figure 7. REWA Lab test results

    Want to buy iPhone 16 parts products?

    Welcome to check product list: iPhone 16 Pro Parts

    Or submit your demand here: https://rewawp.iamtareq.com/wholesale/

  • iPhone 13 Pro Face ID Not Available Repair

    iPhone 13 Pro Face ID Not Available Repair

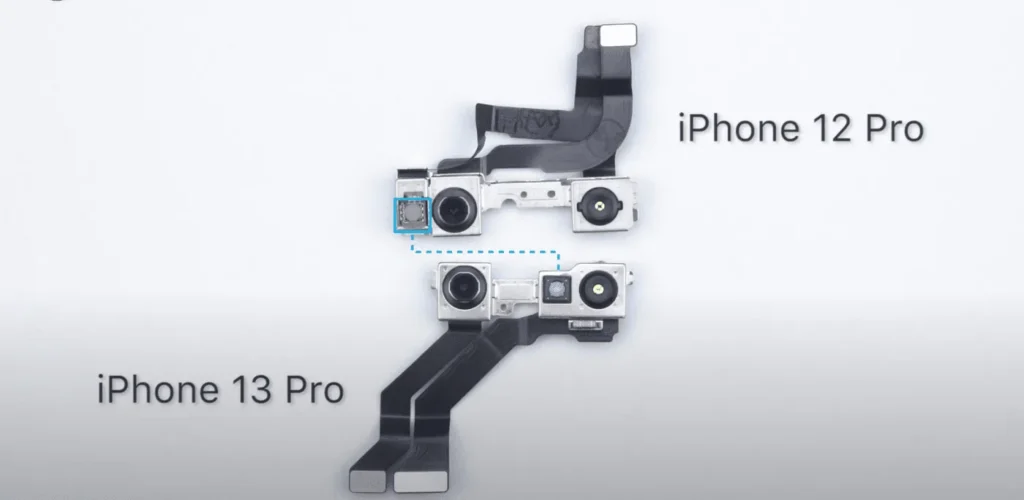
    The iPhone 13 Pro introduces several hardware changes, particularly in its Face ID module, which sets it apart from its predecessor, the iPhone 12 Pro. One significant difference is the integration of the flood illuminator with the dot projector, resulting in a smaller TrueDepth camera module and a different component layout. This design change, while improving the device’s aesthetics and functionality, presents new challenges for repair technicians. In this guide, we’ll walk through the process of repairing the Face ID module on the iPhone 13 Pro when it becomes unavailable, highlighting the tools and techniques needed for this intricate repair.

    Introduction of the iPhone 13 Pro Face ID Module

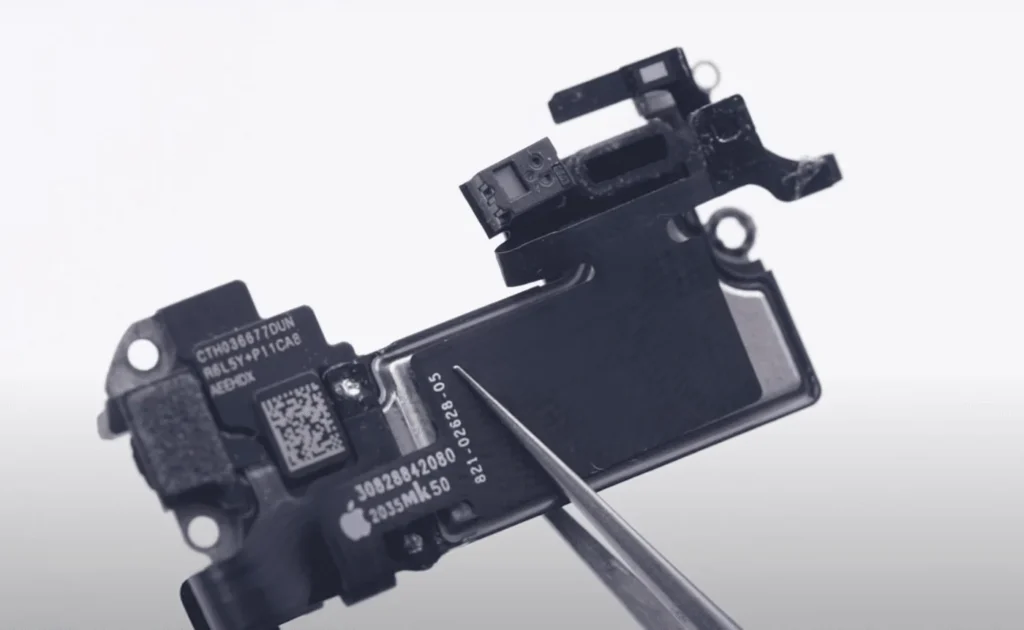
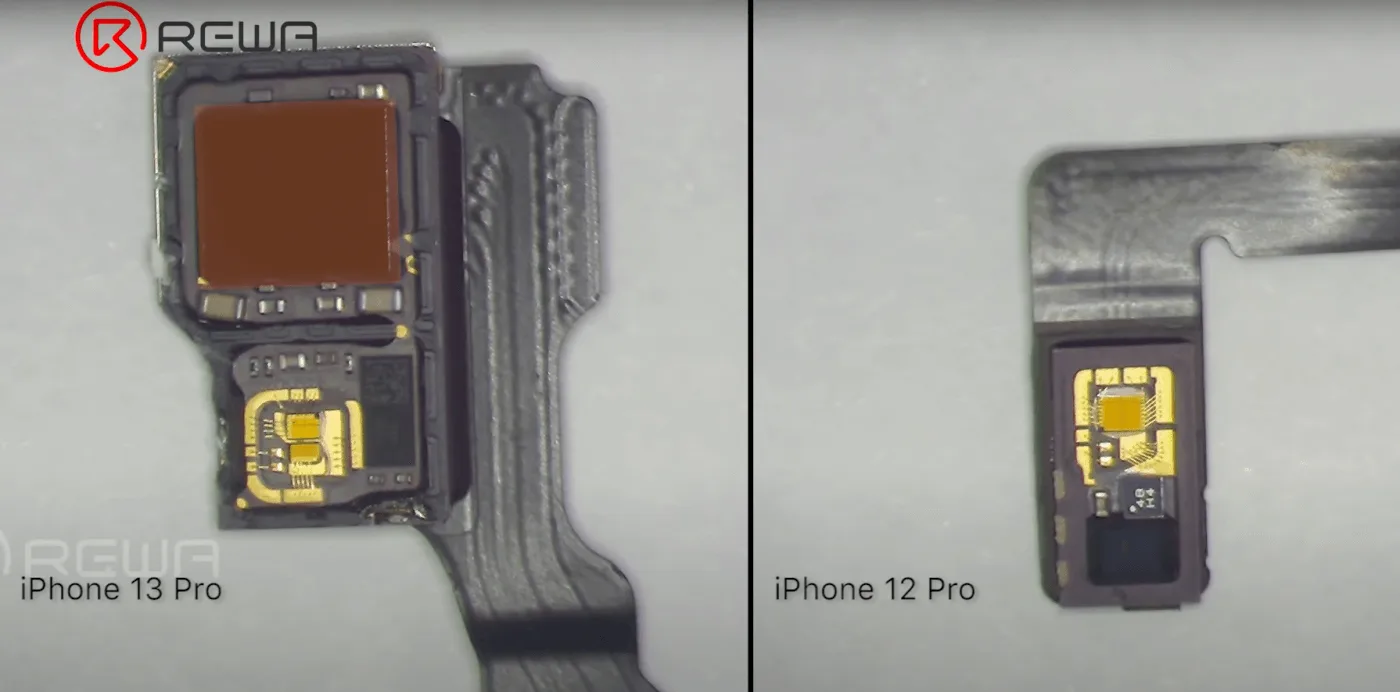
    The iPhone 13 Pro differs from the iPhone 12 Pro in several key ways, particularly in the Face ID system. Notably, the iPhone 13 Pro no longer has a separate flood illuminator on the earpiece module; it has been integrated with the dot projector. This integration allows for a smaller TrueDepth camera module, with the dot projector now centrally located. These changes make the Face ID system more compact but also more challenging to repair.

    Repair Tools Required for the Face ID Issue

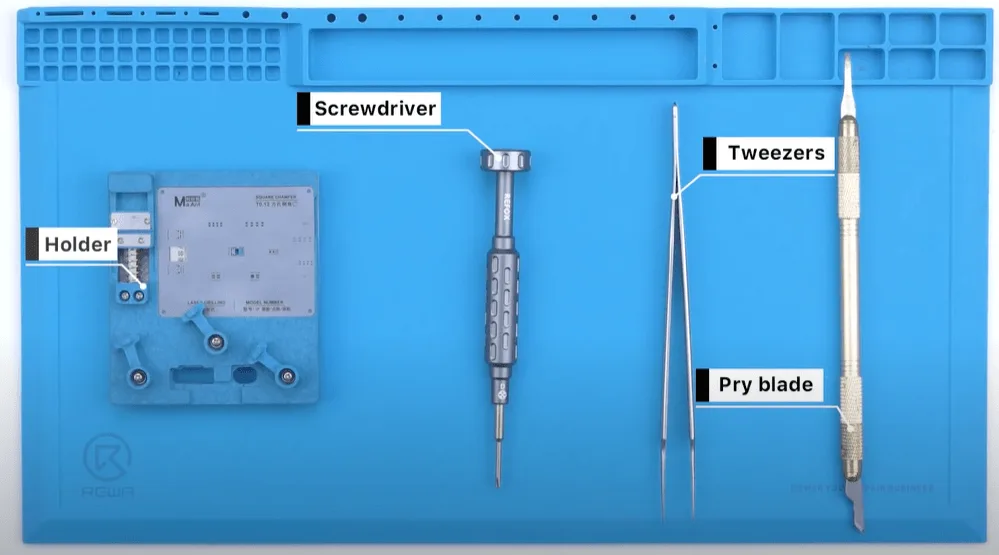
    1. Face ID Lattice Repair Hold Fixture
    2. Screwdriver, tweezers, pry blade
    3. Face ID programmer and computer

    Face ID Issue Repair Process

    Initial Diagnosis:

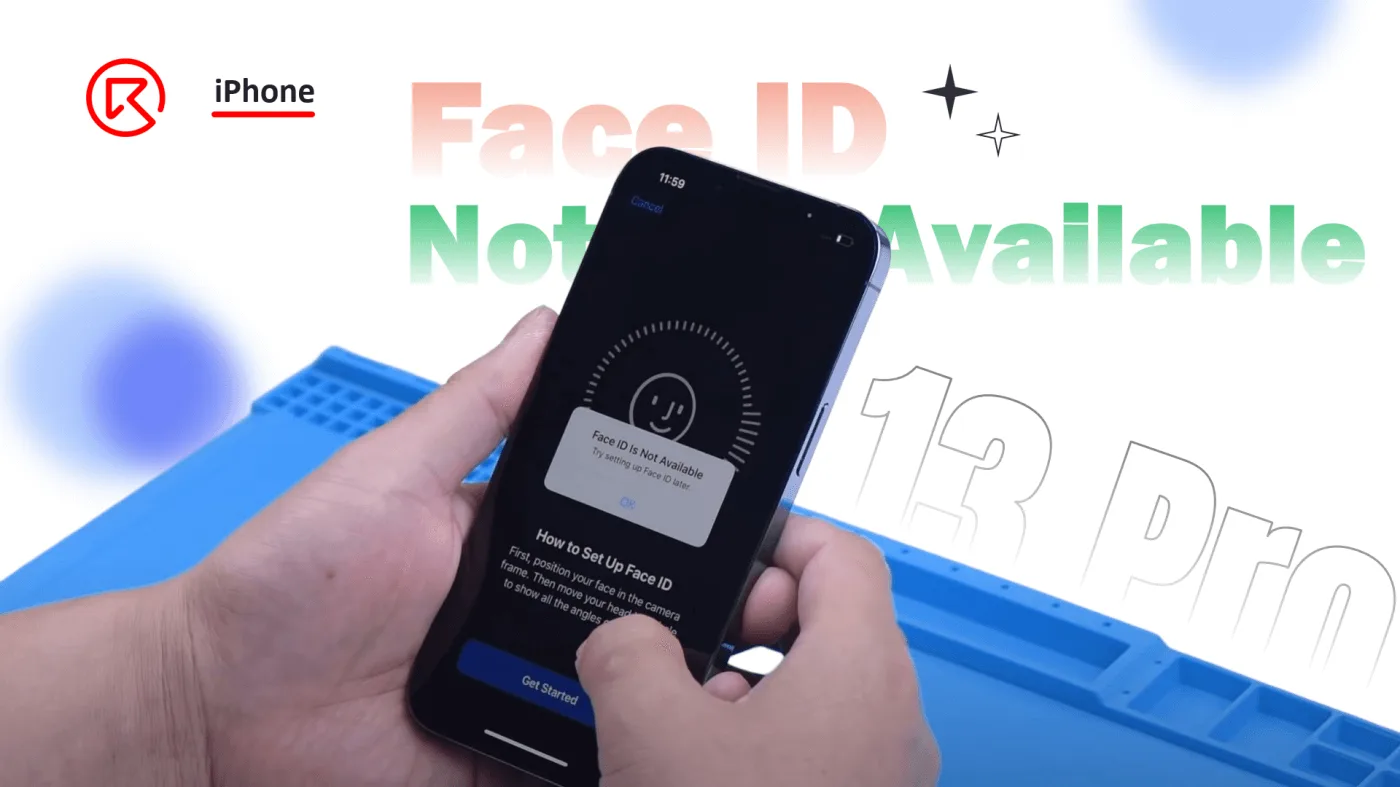
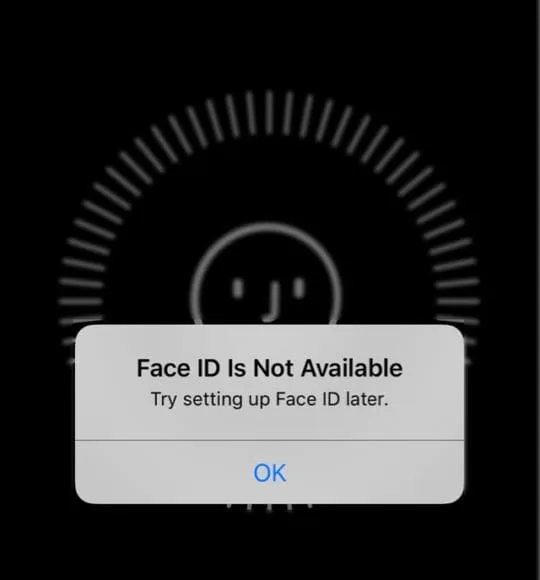
    • When your iPhone 13 Pro displays the message “Face ID is not available, try setting up Face ID later,” it’s a sign that the Face ID module might be malfunctioning.
    • Begin by shutting down the phone and removing the bottom screws to carefully take apart the phone.

    Disassemble the Phone:

    • Disconnect the screen flex cable to remove the display.
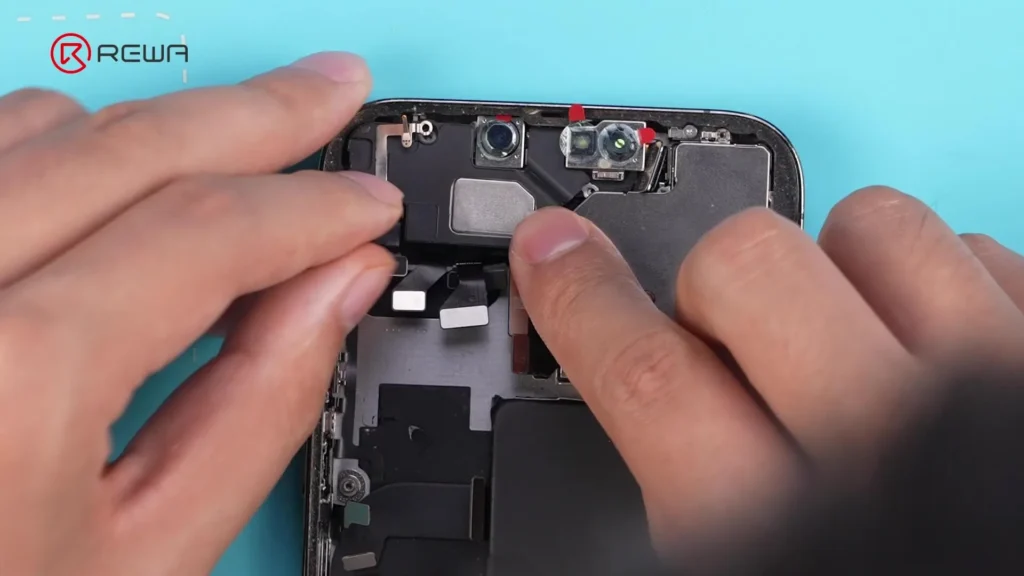
    • To prevent damage, apply protective stickers on the front camera module before proceeding with the repair.
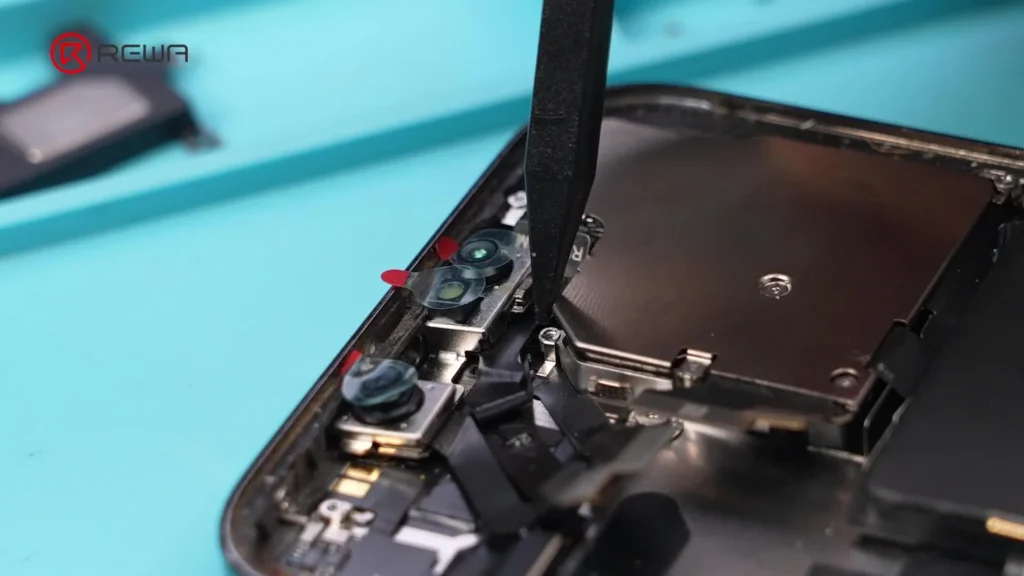
    • Next, remove the front camera, infrared camera, and dot projector module.

    Data Backup:

    • Connect the Face ID module to the programmer and the camera to the computer.
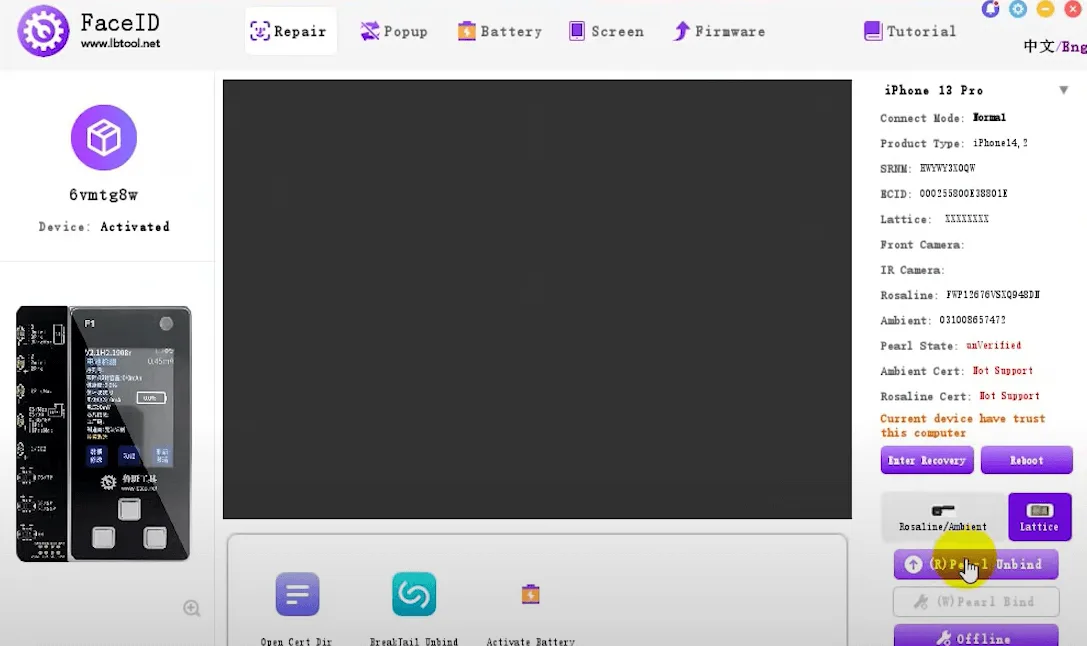
    • Open the specified Face ID software and click the “Pearl Unbind” button to back up the necessary data.

    Then disconnect the screen flex cable to remove the display.

    To avoid the potential damage, we should also apply some stickers on the front camera module before repairing.

    Next, take out the front camera, infrared camera and dot projector module out.

    In the first place, let’s connect the Face ID module with the programmer, and the camera to connect with the computer.

    Then open the specified Face ID software and click the “Pearl Unbind” button to back up the data.

    iphone 13 pro face id not available repair backup the data

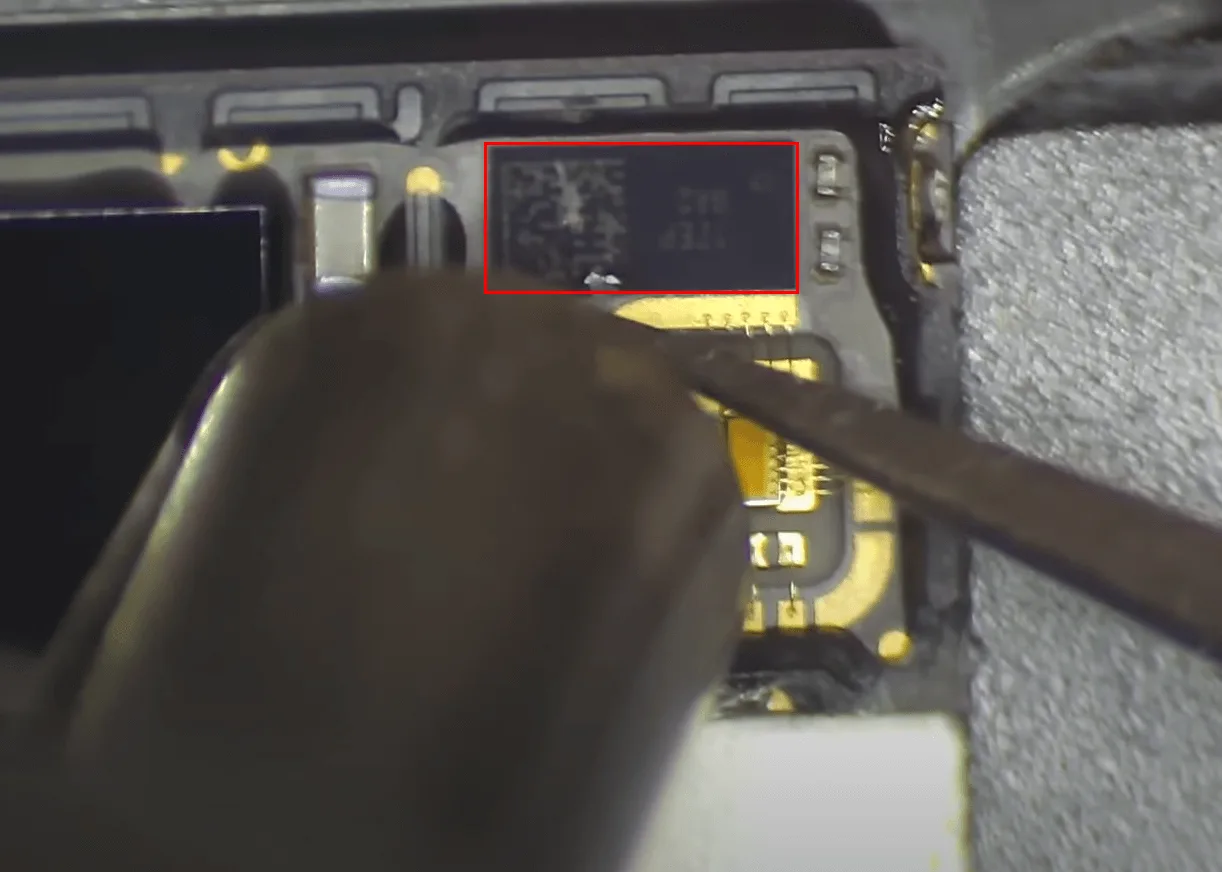
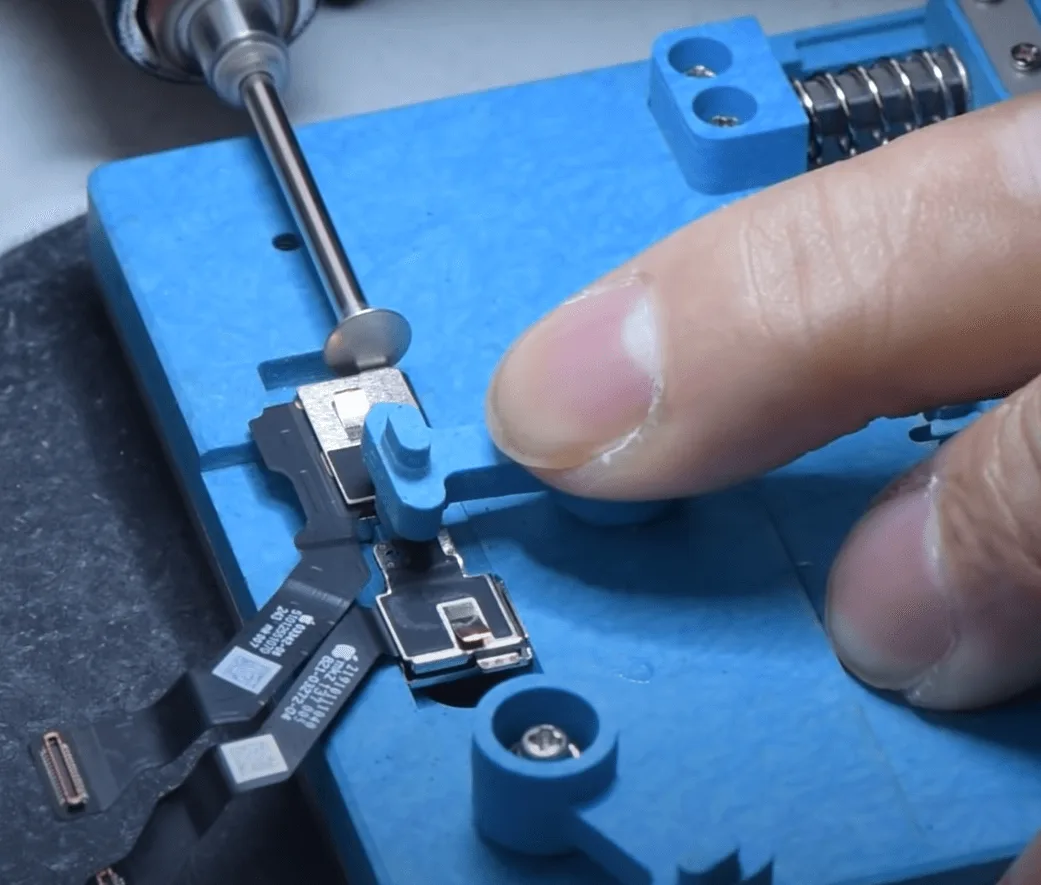
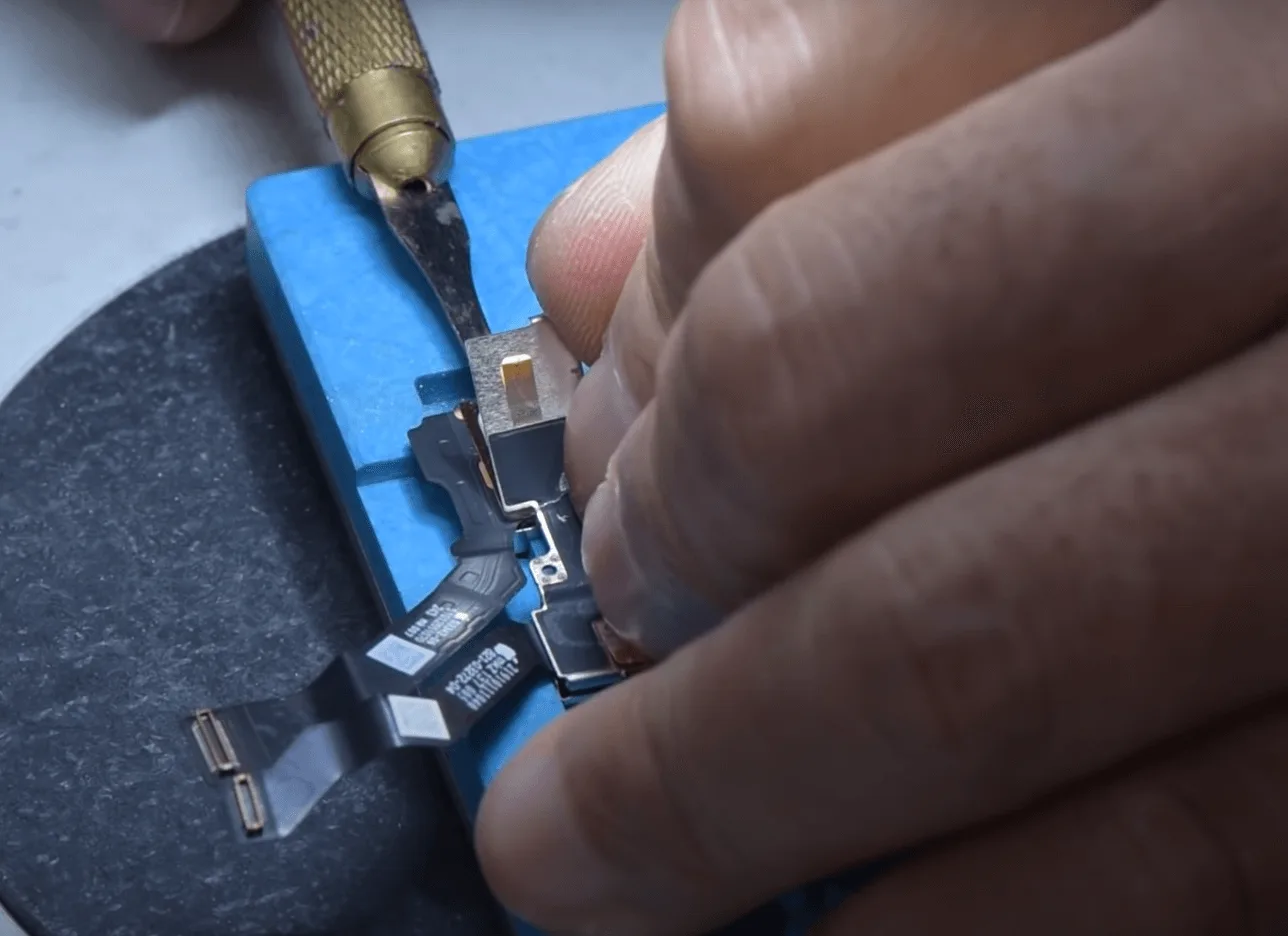
    After unbinding, attach the Face ID module to the holder and carefully remove the metal plate with the grinding pen.

    Pry up the shielding cover with a sculpture knife

    Then remove the dot projector with the hot air gun at 120℃, during heating pry with a blade to separate. Below is how the dot projector inner board looks like

    iphone 13 pro face id not available repair compare with obviously the

    Compare with iPhone 12 Pro, obviously, the dot projector of the iPhone 13 Pro with flood illuminator integrated.

    Then let’s remove the chip with the hot air gun at 330℃ carefully

    iphone 13 pro face id not available repair the chip that need to be

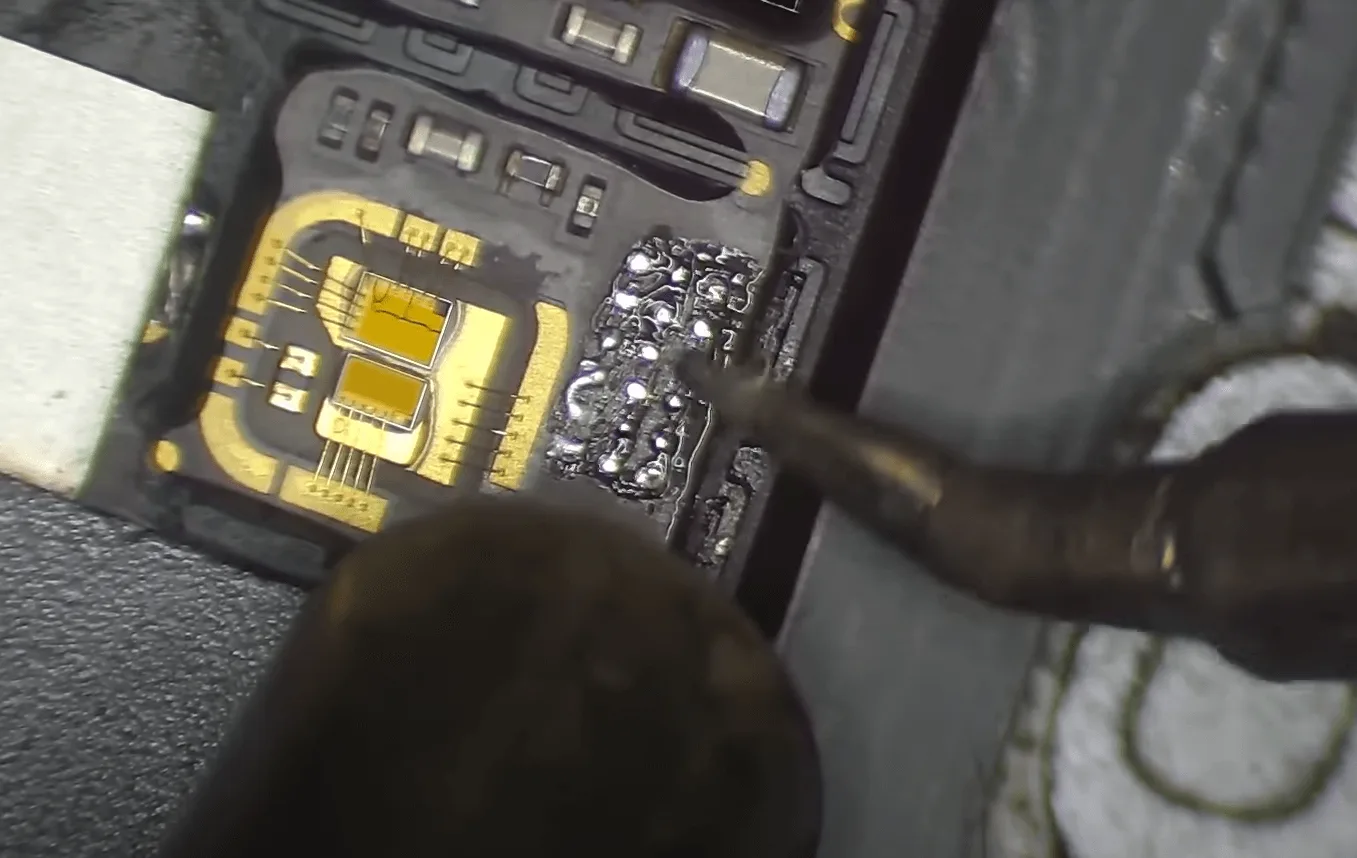
    Then clean the bonding pads on the tiny PCB board with the hot air gun + soldering iron at 360℃.

    iphone 13 pro face id not available repair clean the pads on pcb with

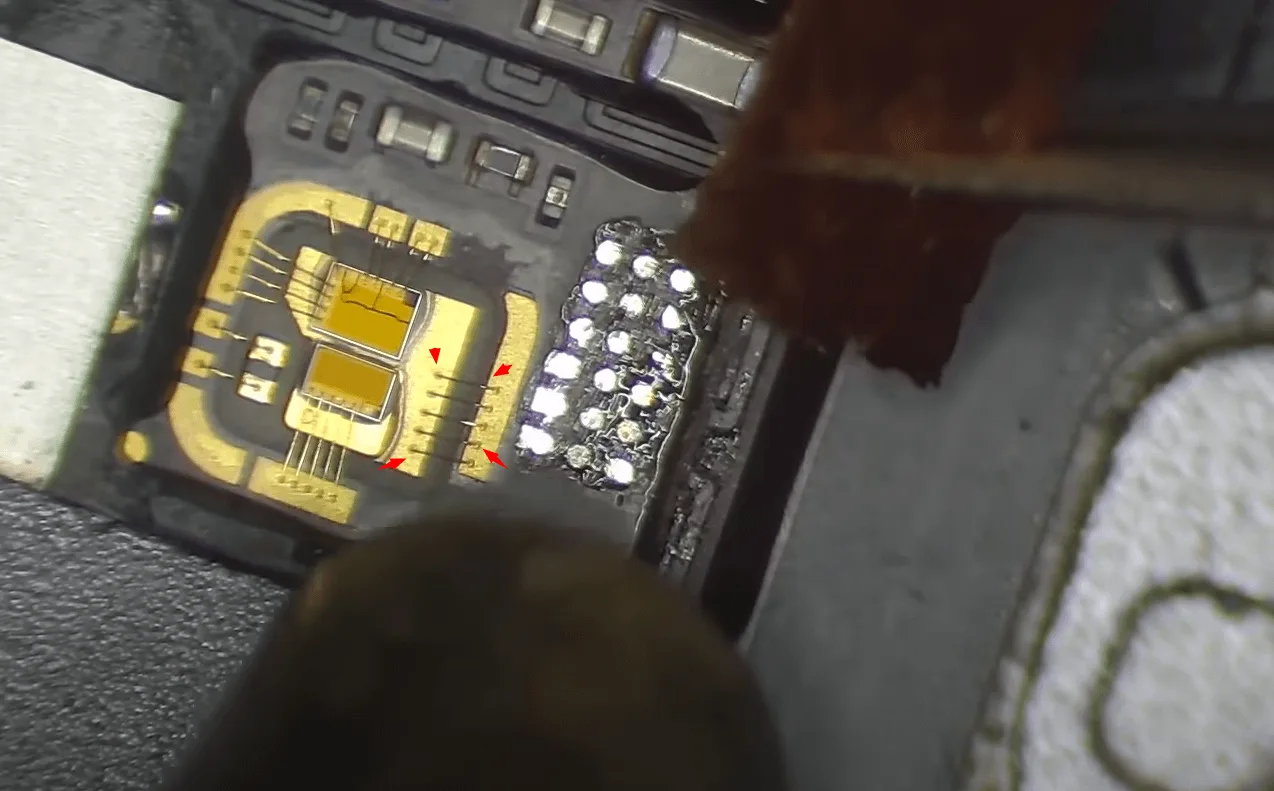
    Keep cleaning the bonding pads with solder wick till the pads are clean and flat

    Pay attention to not damaging the golden wire during operation

    iphone 13 pro face id not available repair pay attention to damage the

    Clean the pads again with the PCB cleaner

    iphone 13 pro face id not available repair clean the pads with pcb

    Apply some solder paste to the bonding pads

    iphone 13 pro face id not available repair apply paste to the bonding

    Align and solder a tiny transfer PCB board with the hot air gun at 330℃. (the new chip pads quantity is smaller, so we need to solder a PCB transfer board first)

    iphone 13 pro face id not available repair transfer pcb board

    Then flatten the bonding pads on the little board with solder wick first, then align and put the new IC in position.

    Heat with the hot air gun to solder it on the surface of the little PCB, the heating temperature is also around 330℃.

    iphone 13 pro face id not available repair heat with the hot air gun to

    After that, connect the cable with the pearl programmer to write the data by pressing the “Pearl bind” button on the software.

    iphone 13 pro face id not available repair connect with programmer
    iphone 13 pro face id not available repair pearl bind

    Next, we install the flex cable on the phone for testing

    iphone 13 pro face id not available repair connect the flex cable on

    The flood illuminator working fine

    iphone 13 pro face id not available repair the flood illuminator working

    Ok, the test is OK. Then let’s assemble the front camera module

    iphone 13 pro face id not available repair assemble the camera module

    After alignment apply some specialized adhesive glue

    iphone 13 pro face id not available repair after alignment apply some

    Once the adhesive is set, install the front camera module, and connect the screen and battery to test.

    Final Test:

    Turn on the iPhone, and set up Face ID. If the setup is successful, the Face ID repair is complete, and the feature should work perfectly.

    iPhone 13 Pro Face ID Is Not Available Repair

    Tips

    The integration of the flood illuminator with the dot projector in the iPhone 13 Pro not only reduces the notch size but also complicates Face ID repairs. Compared to previous methods involving flex cable replacement and module transfer, this new approach requires more precision and skill. The repair process is more demanding, emphasizing the importance of excellent handwork and attention to detail.

  • Troubleshooting iPhone XS Max Face ID Not Working – Dot Projector Repair

    Troubleshooting iPhone XS Max Face ID Not Working – Dot Projector Repair

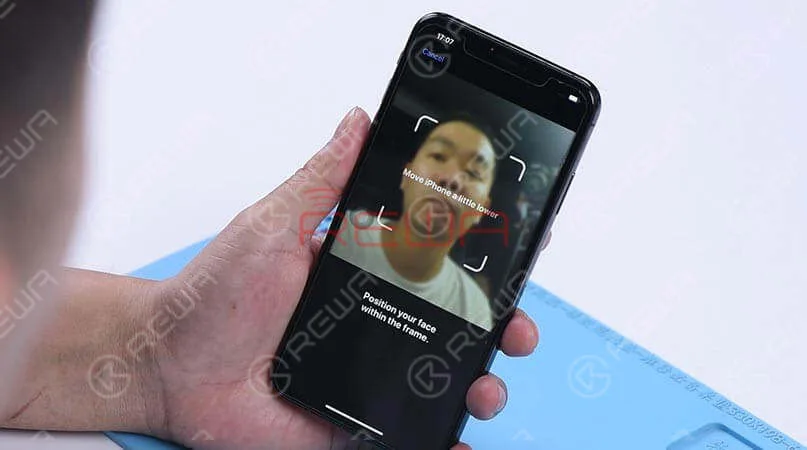
    Face ID Not Working ‘Move iPhone a Little Lower/Higher‘ is usually caused by damage to the dot projector and the problem is confirmed to be almost unrepairable. However, there is finally a solution to fix the problem. Today REWA LAB will show you the latest dot projector repair technique!

    Face ID Not Working 'Move iPhone a Little Lower/Higher' is usually caused by damage to the dot projector and the problem is confirmed to be almost unrepairable. However, there is finally a solution to fix the problem. Today REWA LAB will show you the latest dot projector repair technique!

    Problem

    When trying to set up Face ID on the iPhone, we get the message ‘move iPhone a little lower/higher’. Next, switch to the front camera, we found that the name of the lighting effect ‘Natural Light’ stays the same when the camera detects a person’s face. What’s more, the pop-up notification keeps saying ‘Move farther away’. Normally, when Portrait mode is ready, the name of the lighting effect ‘Natural Light’ should turn yellow. Judging by this, the dot projector or relevant circuits of the dot projector might have malfunctioned.

    When trying to set up Face ID on the iPhone, we get the message 'move iPhone a little lower/higher'. Next, switch to the front camera, we found that the name of the lighting effect ‘Natural Light’ stays the same when the camera detects a person's face. What's more, the pop-up notification keeps saying ‘Move farther away’. Normally, when Portrait mode is ready, the name of the lighting effect ‘Natural Light’ should turn yellow. Judging by this, the dot projector or relevant circuits of the dot projector might have malfunctioned.

    Diagnosis 

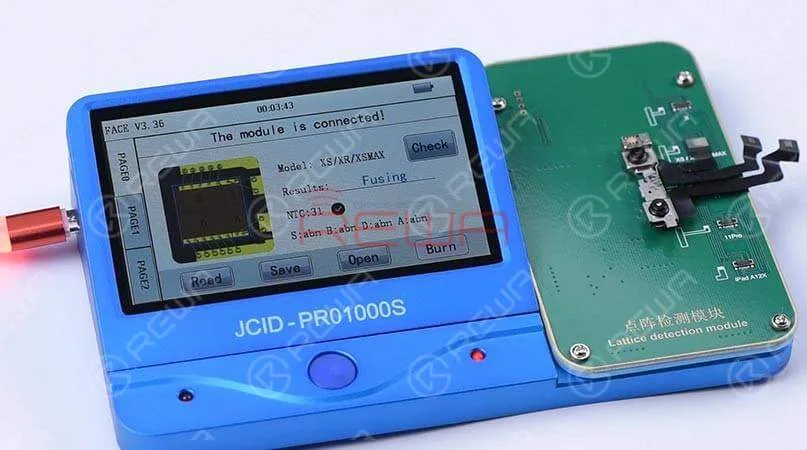
    Take apart the phone and remove the display assembly first. We can see that the dot projector has been water damaged and the crystal on the dot projector is broken. Take out the front camera assembly carefully. Here we recommend using a repair programmer to check the dot projector flex cable. Connecting the dot projector flex cable with the programmer, the results show ‘Fusing’ which means the dot projector flex cable has been damaged. We need to burn data of the original dot projector flex cable onto a new one and then replace the broken crystal.

    Connecting the dot projector flex cable with the programmer, the results show ‘Fusing’ which means the dot projector flex cable has been damaged. We need to burn data of the original dot projector flex cable onto a new one and then replace the broken crystal.
    Connecting the dot projector flex cable with the programmer, the results show ‘Fusing’ which means the dot projector flex cable has been damaged. We need to burn data of the original dot projector flex cable onto a new one and then replace the broken crystal.
    Connecting the dot projector flex cable with the programmer, the results show ‘Fusing’ which means the dot projector flex cable has been damaged. We need to burn data of the original dot projector flex cable onto a new one and then replace the broken crystal.
    Connecting the dot projector flex cable with the programmer, the results show ‘Fusing’ which means the dot projector flex cable has been damaged. We need to burn data of the original dot projector flex cable onto a new one and then replace the broken crystal.

    Troubleshooting   

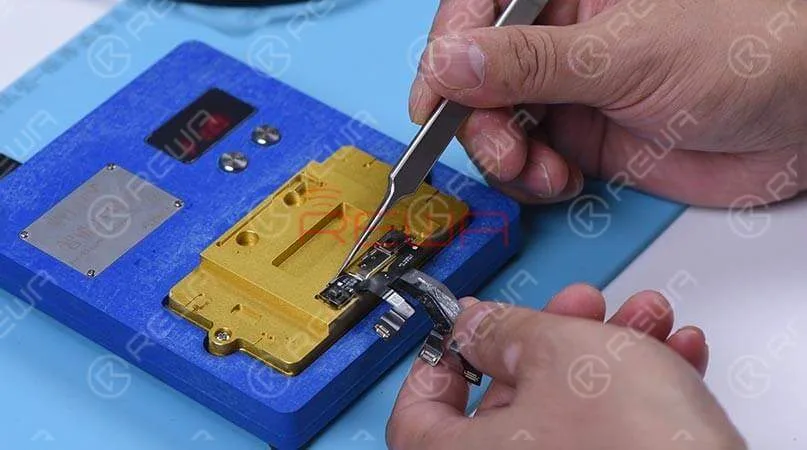
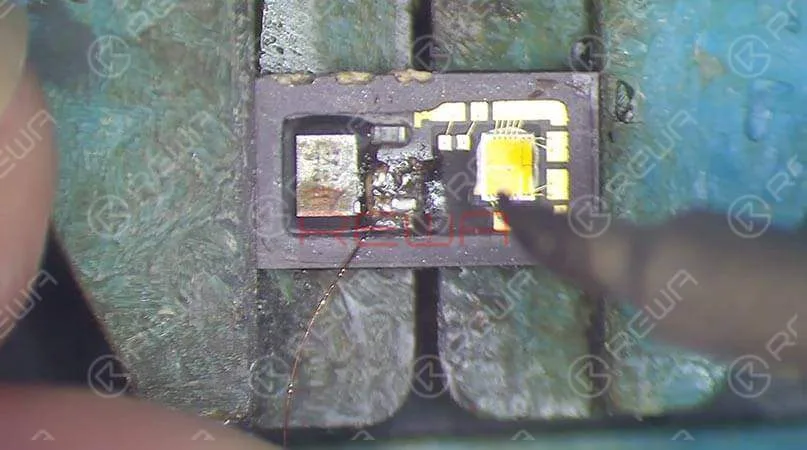
    In the first step, we should separate the crystal from the cable. Compared to traditional operations with a hot air gun, we prefer to use an intelligent preheating platform. Put the dot projector into the matching rubber mold and separate the crystal from the flex cable carefully with the blade.  Next, we use the repair programmer again to burn the origin data onto the new dot projector flex cable. After completing these two steps, we need to solder the dot projector module and glue a known-good crystal. For detailed instructions, click on the video at the bottom of the article

    troubleshooting iphone xs max face id not working dot projector repair 8

    Reassemble and Test 

    Apply double-sided adhesive tape on the backside of the front camera, and adhere the dot projector flex cable to the right position. Get the front camera assembly installed and get the logic board assembled and buckle the display assembly. Face ID can be set up successfully, and the phone can be unlocked with Face ID this time.  Tips: The double-sided adhesive tape used here is for the test. We need to glue the dot projector module onto the flex cable after fault clearance.

    Tools Used

    Visit our online shop for more parts and tools.You can also visit REWA YouTube Channel to check our video.

  • Reasons for iPhone Face ID Not Available

    Reasons for iPhone Face ID Not Available

    Ahead of the launch of the iPhone 12, rumors claimed that the new model will both feature Touch ID and Face ID. Now that these myths have been dispelled, the iPhone 12 retained the Face ID function that proves to be a more secure and effective recognition technology.

    Though Face ID is handy, numerous users found that Face ID is not working sometimes, in which they have no choice but to enter the passcode to unlock.

    Face ID not working

    There are generally several reasons why Face ID is not available.

    Security Protection

    Like passcode unlock, Face ID also has a security protection system. Once the system is activated, you must enter the passcode to complete the extra security verification.

    1. The device just turns on or restarts.

    2. The device is locked for more than 48 hours.

    3. In the past six and half days, the device hasn’t been unlocked by a passcode and the device hasn’t been unlocked by Face ID in the past 4 hours.

    4. The iPhone receives remote lock instruction.

    5. Face ID unlocking has failed 5 times.

    6. Simultaneously press and hold the side button and either volume button until the “Slide to power off” and “Emergency SOS” sliders appear on the display.

    Other Conditions

    The Face ID may also fail in some conditions:

    1. Face Covered

    If you wear sunglasses or a hat, it will prevent your Face ID from working successfully.

    2. Camera Covered

    If you apply a protective film on your phone, or there is dirt near the TrueDepth camera, the sensitivity of Face ID may be affected to some extent.

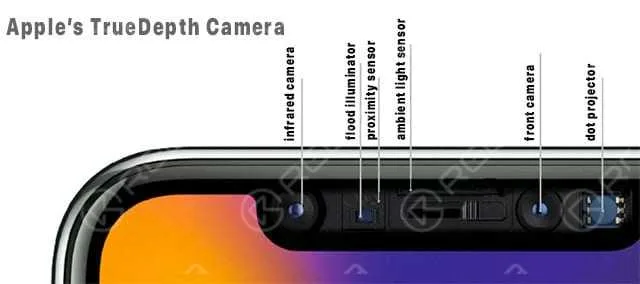
    Apple's TrueDepth camera

    3. Hardware Problem

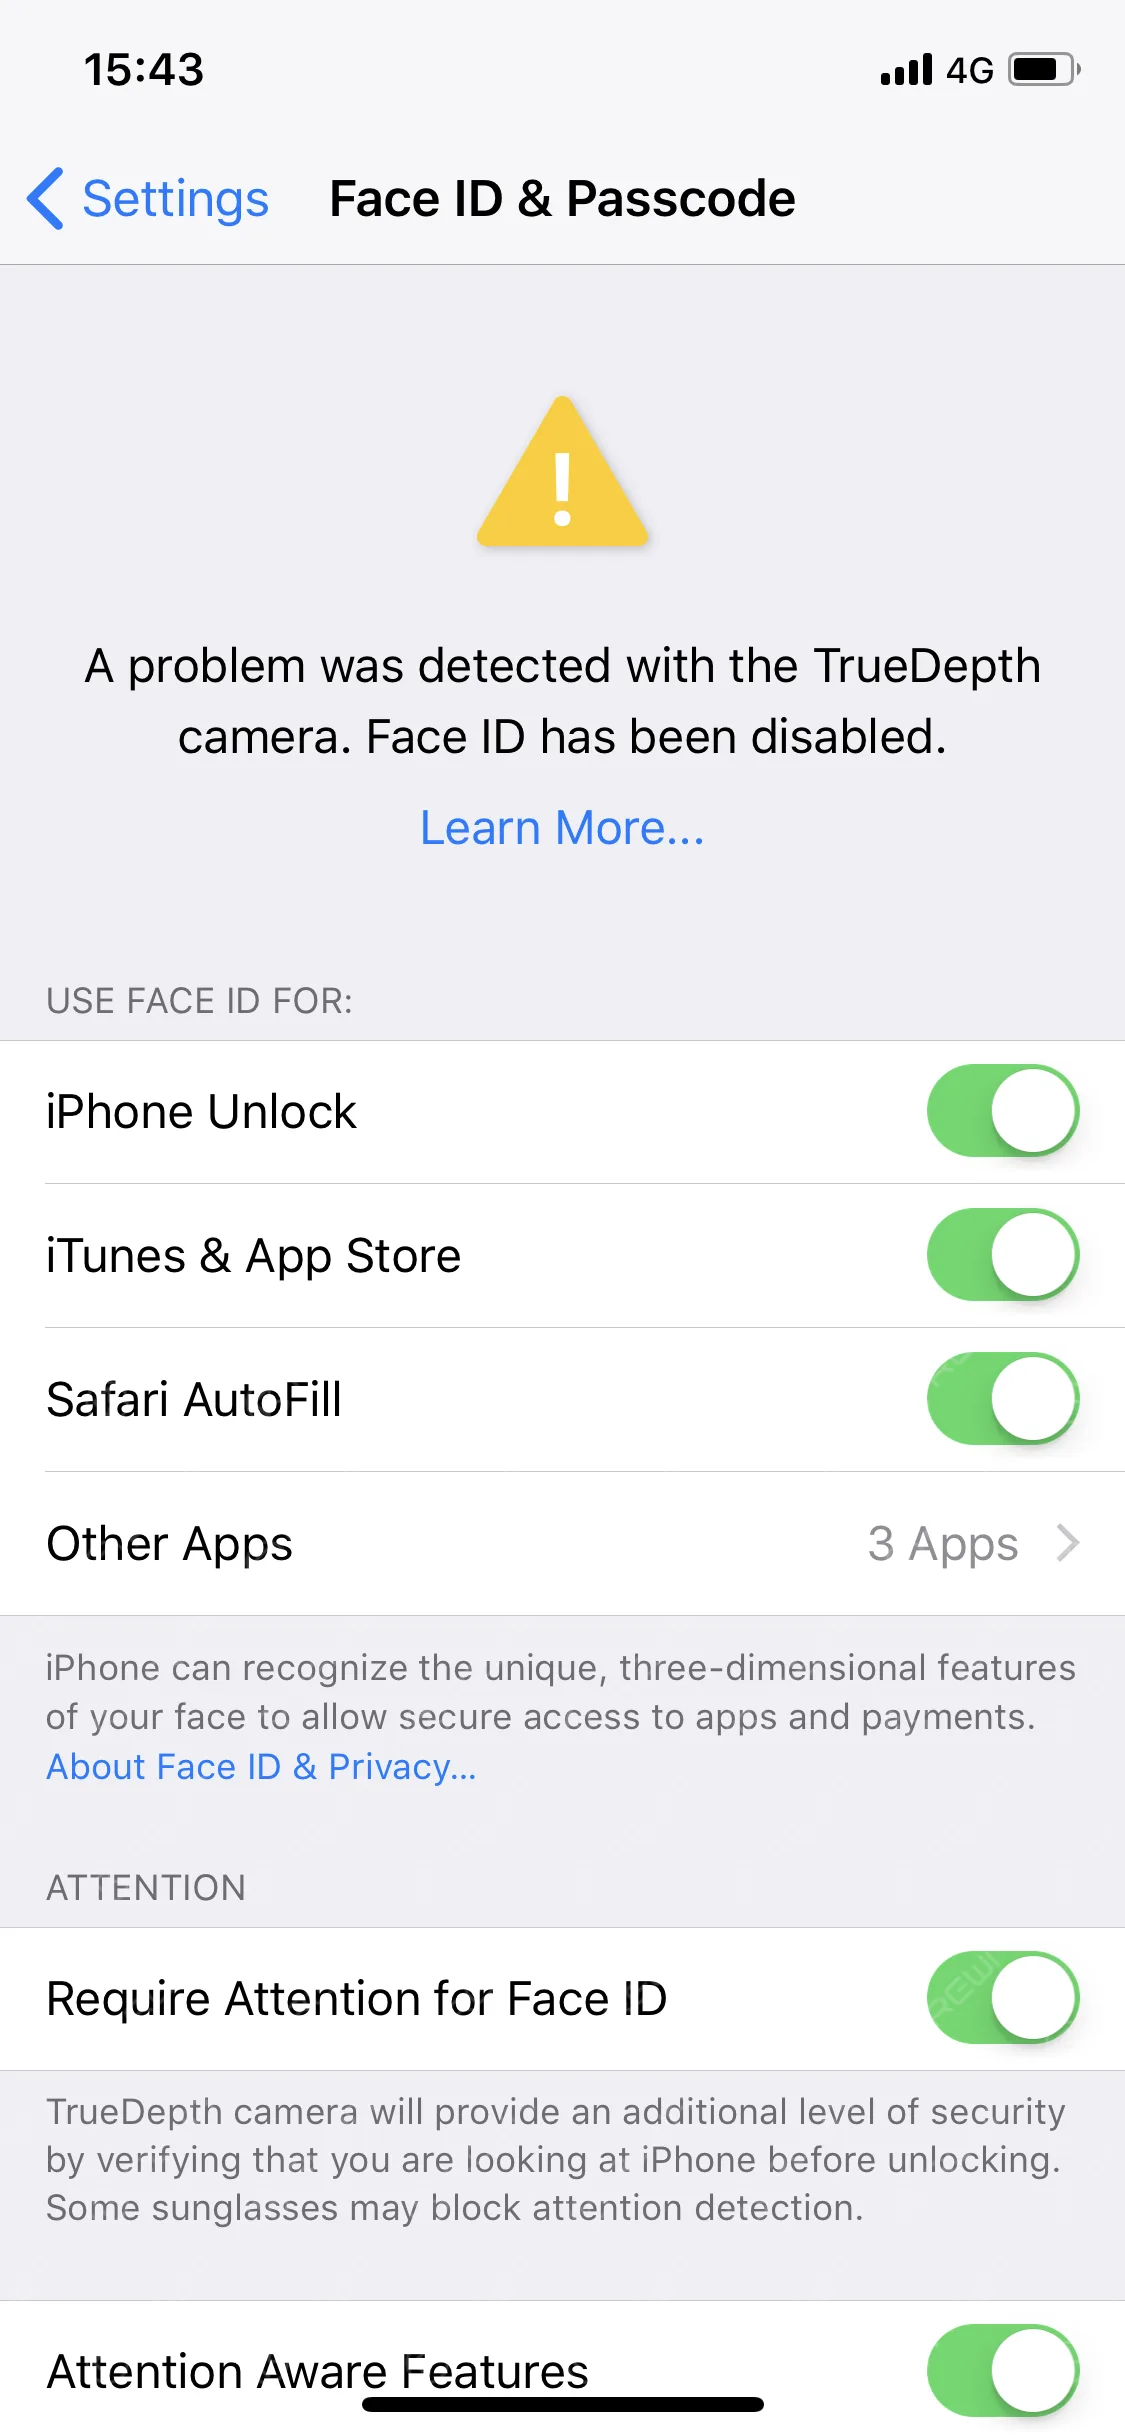
    If you see “A problem was detected with the TrueDepth camera. Face ID has been disabled”, it means that iOS has detected hardware damage of the device and it needs to be repaired.

    Although Face ID is convenient, the repair cost of hardware damage is also very high. If there is a problem with Face ID, you can first try to solve it by resetting and restoring the system.

    If it is determined to be a hardware problem, you’ll probably have to take your iPhone to your nearest Apple Store for repair.

    Feel free to leave any other questions you have about Face ID down below in the comment section.

  • iPhone 11 Pro Max Face ID Not Working? Expert Repair Guide

    iPhone 11 Pro Max Face ID Not Working? Expert Repair Guide

    Dot projector parts are extremely fragile. A fall or water damage may harm dot projector parts, inducing Face ID not working.

    Since the dot projector IC is encrypted and replacement requires data encryption bonding for the new IC, repair technicians find it a challenge to repair the Face ID.

    The good news is that REWA LAB has developed a simple and efficient method to repair the Face ID. Let’s check it out!

    Go to Settings, Face ID & Passcode, and Set Up Face ID. When trying to set up Face ID, “Move iPhone a little lower/higher” pops up.

    Face ID cannot be normally set up. It can be judged that the dot projector of the Face ID has malfunctioned.

    Remove the display and then detach the Face ID module.

    We can see a red mark, which indicates that the phone has water damage.

    Connect the dot projector flex cable with the I2C Repair Programmer. The test shows that the dot projector flex cable has malfunctioned.

    Press “Read” and read the data from the dot projector flex cable.

    Connect a new I2C iPhone 11 Pro Max flex cable to the programmer. Press “Write” and write the data that has been read on the new flex cable.

    Dip a small amount of UV Adhesive on the crystal of the dot projector flex cable and solidify it with UV Lamp. This step is aimed to fix the crystal.

    Remove the foam on the back of the dot projector.

    To make positioning easier while assembly, mark the module with Sculpture Knife.

    Since the dot projector flex cable is under the metal plate, lift the metal plate to remove the flex cable.

    Get the Holding Fixture. We use Wextom Face ID Module and Dot Projector Board Holding Fixture for the repair.

    Attach the Face ID module to the Holding Fixture and grind the welding position of the metal plate.

    Insert the pry knife into the gap between the dot projector module and the crystal.

    Heat with Hot Air Gun at 150℃ and remove the dot projector flex cable.

    Heat with Hot Air Gun at 320℃ and detach the dot projector module.

    Attach the dot projector module to the Holding Fixture.

    Heat with Hot Air Gun at 320℃ and take out the MOSFET.

    Apply a small amount of Solder Paste to the bonding pad with Soldering Iron at 365℃.

    Jump wire between pin 2 and pin 3 of the MOSFET with 0.02mm copper wire.

    Attach the dot projector module to the holder.

    To clean the tin on the dot projector module, smear rosin with Soldering Iron at 365℃ and solder-wick.

    Clean the module with PCB Cleaner afterward.

    Heat with Hot Air Gun at 240℃ and remove residual adhesive with tweezers.

    Get the new flex cable.

    Put the Reballing Stencil in the right position and apply some medium-temperature Solder Paste evenly.

    Heat with Hot Air Gun at 320℃ and remove the Reballing Stencil after the flex cable has cooled.

    Heat with Hot Air Gun at 320℃ again and apply a small amount of Paste Flux to the flex cable.

    Fix the flex cable to the holder and align the dot projector module.

    Solder with Hot Air Gun at 320℃. Connect the flex cable that has been soldered to the I2C programmer.

    Press “Test” and the screen shows “Pass” which indicates that the flex cable is normal.

    Attach the flex cable to the Holding Fixture and put the dot projector flex cable in position.

    Apply a small amount of 460 Adhesive between the dot projector module and the crystal.

    Once the adhesive has set, arrange the flex cable.

    Install the flex cable on the phone.

    Boot up the phone, and go to Face ID settings.

    Face ID is set up normally and unlocks normally. The fault is cleared.      

    Please feel free to visit our online shop for repair parts and tools.

    For more Face ID content, please read the articles below.

    Watch the video below to get a more detailed iPhone 11 Pro Max Face ID repair.

  • Troubleshooting iPhone 13 Face ID & Display Message Issues after Screen Replacement

    Troubleshooting iPhone 13 Face ID & Display Message Issues after Screen Replacement

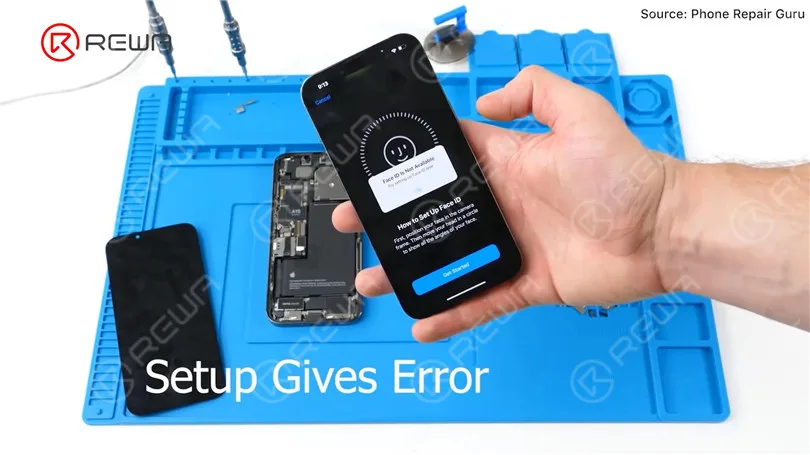
    Recently, Phone Repair Guru posted a video about iPhone 13 screen replacement. After replacement, “Important Display Message” pops up. What’s worse, Face ID is not available.

    Fix iPhone 13 Face ID Not Working & Important Display Message after Screen Replacement

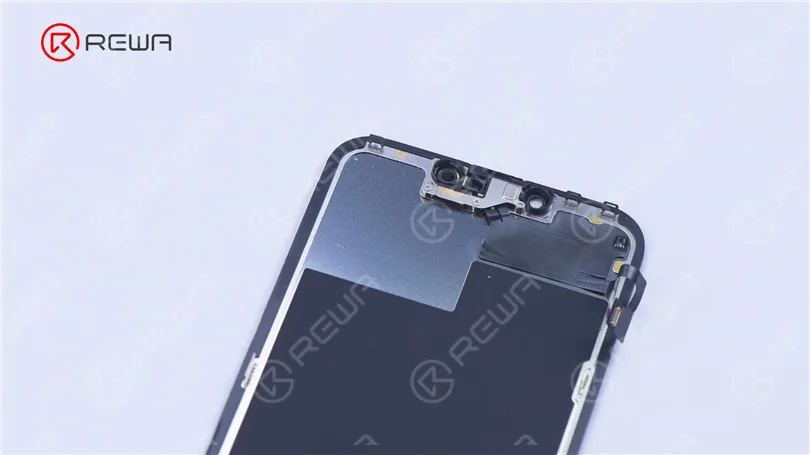
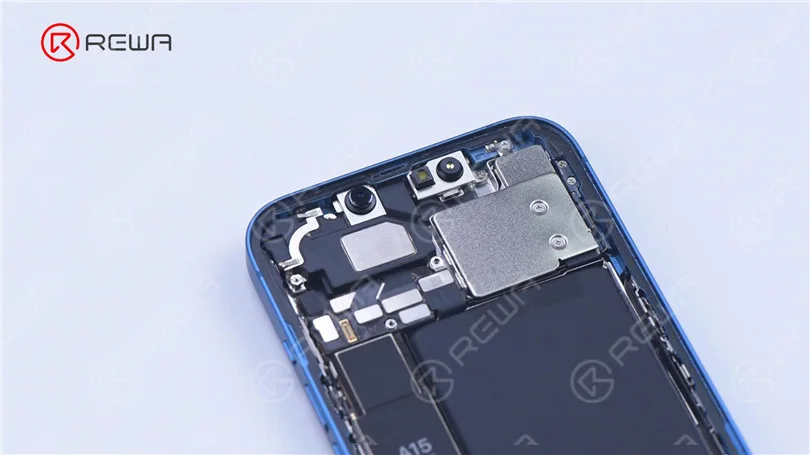
    Since the iPhone 13 screen includes no flood illuminator module and all the parts for the TrueDepth system are housed in the iPhone itself,

    Fix iPhone 13 Face ID Not Working & Important Display Message after Screen Replacement
    Fix iPhone 13 Face ID Not Working & Important Display Message after Screen Replacement

    REWA LAB speculates that the chip on the original screen has saved Face ID data. Transferring the chip to the new screen might solve the problem. Today, let’s verify this speculation.

    Fix iPhone 13 Face ID Not Working & Important Display Message after Screen Replacement

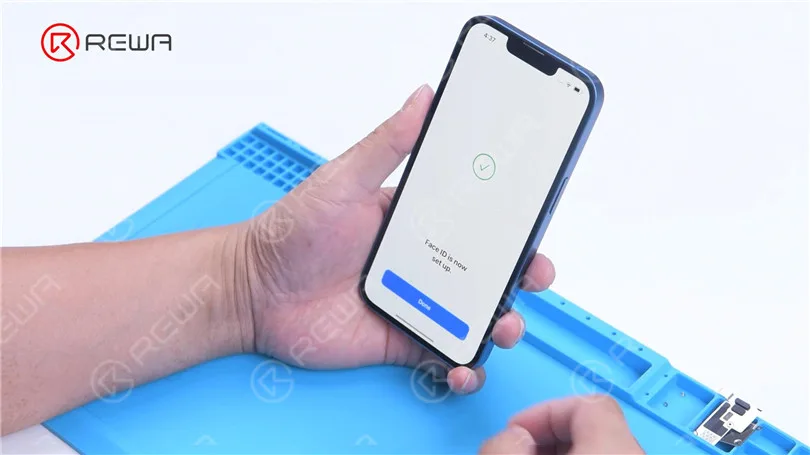
    In the first place, we test the Face ID function of iPhone 13. True Tone function is normal. Face ID can be set up and is working fine.

    Fix iPhone 13 Face ID Not Working & Important Display Message after Screen Replacement
    Fix iPhone 13 Face ID Not Working & Important Display Message after Screen Replacement

    Then we disassemble the phone and try to replace the screen with an original and genuine one. Remove the original screen. Detach the sensor flex cable with Hot Air Gun at 100 °C. Please be careful not to damage the flex cable when you remove it. 

    Fix iPhone 13 Face ID Not Working & Important Display Message after Screen Replacement
    Fix iPhone 13 Face ID Not Working & Important Display Message after Screen Replacement

    Attach the removed sensor flex cable to the new screen. Install the screws. Connect the new screen. Turn on the phone.“Important Display Message”  appears. Face ID can’t be set up. True Tone disappears.

    Fix iPhone 13 Face ID Not Working & Important Display Message after Screen Replacement
    Fix iPhone 13 Face ID Not Working & Important Display Message after Screen Replacement
    Fix iPhone 13 Face ID Not Working & Important Display Message after Screen Replacement

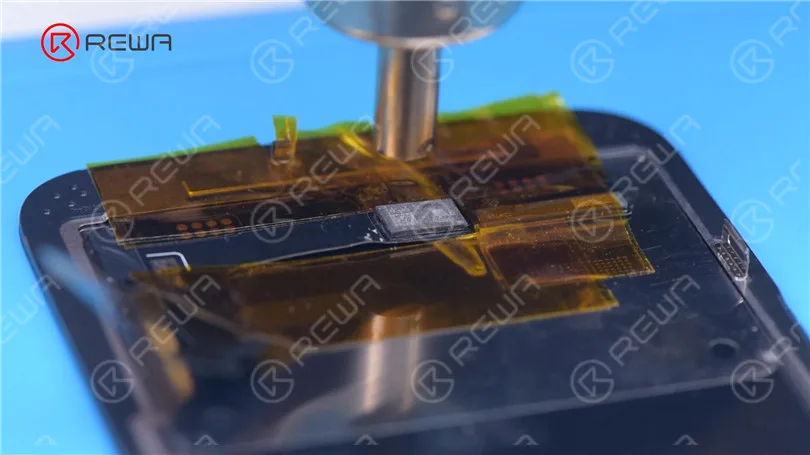
    Next, we try to transfer the IC on the original screen to the new screen.

    Remove the new screen. To prevent scratches on the screen during operations,

    apply a protective film to the screen. 

    Fix iPhone 13 Face ID Not Working & Important Display Message after Screen Replacement

    Heat the screen flex cable with Hot Air Gun at 100 °C. Gently pull up the flex cable.

    To protect the screen, insert the reballing stencil under the flex cable for insulation. Apply high-temperature tape.

    Fix iPhone 13 Face ID Not Working & Important Display Message after Screen Replacement
    Fix iPhone 13 Face ID Not Working & Important Display Message after Screen Replacement
    Fix iPhone 13 Face ID Not Working & Important Display Message after Screen Replacement

    Remove black adhesive around the chip with Hot Air Gun at 240 °C.

    To remove the chip, set the temperature to 300 °C and airflow to 6.

    Fix iPhone 13 Face ID Not Working & Important Display Message after Screen Replacement
    Fix iPhone 13 Face ID Not Working & Important Display Message after Screen Replacement

    Apply some middle-temperature Solder Paste.

    Clean the bonding pads with Soldering Iron at 360 °C and solder wick.

    Keep cleaning the bonding pads with PCB Cleaner.

    Fix iPhone 13 Face ID Not Working & Important Display Message after Screen Replacement
    Fix iPhone 13 Face ID Not Working & Important Display Message after Screen Replacement

    Next, remove the chip on the original screen with the same method.

    Clean tin on the chip of the original screen.

    Apply some middle-temperature Solder Paste to the bonding pads.

    Clean tin and black adhesive on the bonding pads of the chip with Solder Wick.

    Keep cleaning the bonding pads with PCB Cleaner.

    Fix iPhone 13 Face ID Not Working & Important Display Message after Screen Replacement

    Next, reball the chip. Put the reballing stencil in position.

    Apply a layer of middle-temperature Solder Paste evenly.

    Heat with Hot Air Gun at 300 °C to form the solder balls.

    After the solder balls are formed, clean with PCB cleaner.

    Fix iPhone 13 Face ID Not Working & Important Display Message after Screen Replacement
    Fix iPhone 13 Face ID Not Working & Important Display Message after Screen Replacement

    Apply Paste Flux to the bonding pads of the new screen.

    Align the chip of the original screen.

    Solder the chip with Hot Air Gun at 300 °C.

    Fix iPhone 13 Face ID Not Working & Important Display Message after Screen Replacement
    Fix iPhone 13 Face ID Not Working & Important Display Message after Screen Replacement
    Fix iPhone 13 Face ID Not Working & Important Display Message after Screen Replacement

    Remove high-temperature tape after the flex cable has cooled.

    Connect the screen. Turn on the phone.

    There is no “Important Display Message”. Face ID can be set up and is working fine.

    But True Tone hasn’t been restored.

    Fix iPhone 13 Face ID Not Working & Important Display Message after Screen Replacement

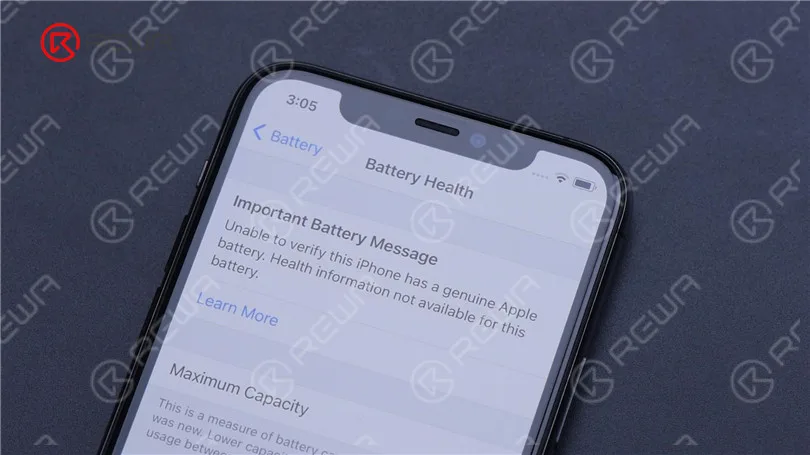
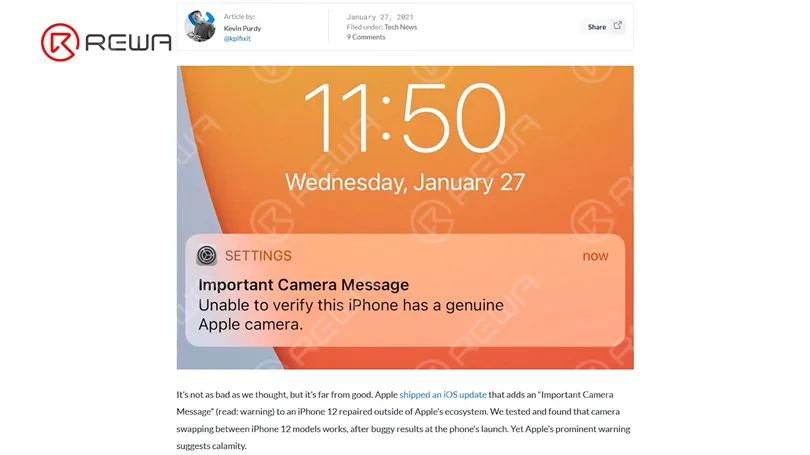
    Apple has long faced criticism for displaying prompts like “Important Battery Message” and “Important Camera Message”, which makes it difficult for third-party repair stores to fix their products.

    Fix iPhone 13 Face ID Not Working & Important Display Message after Screen Replacement
    Fix iPhone 13 Face ID Not Working & Important Display Message after Screen Replacement

    With the ‌iPhone 13‌ this year, Apple further makes it more difficult for customers to get repairs from third-party stores.

    However, it is risky to replace the chip to solve Face ID not working after iPhone 13 screen replacement. REWA LAB does not recommend that non-professionals try this method.

    Apple could patch this via an iOS update in the future.

    Let’s wait and see. Please feel free to leave your thoughts on the problem.

  • iPhone 13 Face ID Not Working After Screen Replacement

    iPhone 13 Face ID Not Working After Screen Replacement

    Phone Repair Guru recently uploaded a video demonstrating the replacement of an iPhone 13 screen. A message appears after replacement stating that Face ID is not available. This is referred to as an Important Display Message. In this blog article, we will demonstrate how to troubleshoot this problem.

    Fix iPhone 13 Face ID Not Working & Important Display Message after Screen Replacement

    The iPhone 13 screen lacks a flood illuminator module, as all the components for the TrueDepth system are contained within the iPhone itself.

    Fix iPhone 13 Face ID Not Working & Important Display Message after Screen Replacement
    Fix iPhone 13 Face ID Not Working & Important Display Message after Screen Replacement

    REWA LAB speculates that the chip on the original screen has saved Face ID data. Transferring the chip to the new screen might solve the problem. Today, let’s verify this speculation.

    Fix iPhone 13 Face ID Not Working & Important Display Message after Screen Replacement

    In the first place, we tested the Face ID function on the iPhone 13 and found that the True Tone function is working normally. Additionally, we were able to successfully set up Face ID and it is working properly.

    Fix iPhone 13 Face ID Not Working & Important Display Message after Screen Replacement
    Fix iPhone 13 Face ID Not Working & Important Display Message after Screen Replacement

    Then we disassemble the phone and try to replace the screen with an original and genuine one. Remove the original screen. Detach the sensor flex cable with Hot Air Gun at 100 °C. Please be careful not to damage the flex cable when you remove it. 

    Fix iPhone 13 Face ID Not Working & Important Display Message after Screen Replacement
    Fix iPhone 13 Face ID Not Working & Important Display Message after Screen Replacement

    Attach the removed sensor flex cable to the new screen. Install the screws. Connect the new screen. Turn on the phone.“Important Display Message”  appears. Face ID can’t be set up. True Tone disappears.

    Fix iPhone 13 Face ID Not Working & Important Display Message after Screen Replacement
    Fix iPhone 13 Face ID Not Working & Important Display Message after Screen Replacement
    Fix iPhone 13 Face ID Not Working & Important Display Message after Screen Replacement

    Next, we try to transfer the IC on the original screen to the new screen. Remove the new screen. To prevent scratches on the screen during operations, apply a protective film to the screen. 

    Fix iPhone 13 Face ID Not Working & Important Display Message after Screen Replacement

    Heat the screen flex cable with Hot Air Gun at 100 °C. Gently pull up the flex cable. To protect the screen, insert the reballing stencil under the flex cable for insulation. Apply high-temperature tape.

    Fix iPhone 13 Face ID Not Working & Important Display Message after Screen Replacement
    Fix iPhone 13 Face ID Not Working & Important Display Message after Screen Replacement
    Fix iPhone 13 Face ID Not Working & Important Display Message after Screen Replacement

    Remove black adhesive around the chip with Hot Air Gun at 240 °C. To remove the chip, set the temperature to 300 °C and airflow to 6.

    Fix iPhone 13 Face ID Not Working & Important Display Message after Screen Replacement
    Fix iPhone 13 Face ID Not Working & Important Display Message after Screen Replacement

    Apply some middle-temperature Solder Paste. Clean the bonding pads with Soldering Iron at 360 °C and solder wick. Keep cleaning the bonding pads with PCB Cleaner.

    Fix iPhone 13 Face ID Not Working & Important Display Message after Screen Replacement
    Fix iPhone 13 Face ID Not Working & Important Display Message after Screen Replacement

    Next, remove the chip on the original screen with the same method.

    Clean tin on the chip of the original screen. Apply some middle-temperature Solder Paste to the bonding pads. Clean tin and black adhesive on the bonding pads of the chip with Solder Wick. Keep cleaning the bonding pads with PCB Cleaner.

    Fix iPhone 13 Face ID Not Working & Important Display Message after Screen Replacement

    Next, reball the chip. Put the reballing stencil in position. Apply a layer of middle-temperature Solder Paste evenly. Heat with Hot Air Gun at 300 °C to form the solder balls. After the solder balls are formed, clean with PCB cleaner.

    Fix iPhone 13 Face ID Not Working & Important Display Message after Screen Replacement
    Fix iPhone 13 Face ID Not Working & Important Display Message after Screen Replacement

    Apply Paste Flux to the bonding pads of the new screen. Align the chip of the original screen. Solder the chip with Hot Air Gun at 300 °C.

    Fix iPhone 13 Face ID Not Working & Important Display Message after Screen Replacement
    Fix iPhone 13 Face ID Not Working & Important Display Message after Screen Replacement
    Fix iPhone 13 Face ID Not Working & Important Display Message after Screen Replacement

    Remove high-temperature tape after the flex cable has cooled. Connect the screen. Turn on the phone. There is no “Important Display Message”. Face ID can be set up and is working fine. But True Tone hasn’t been restored.

    Fix iPhone 13 Face ID Not Working & Important Display Message after Screen Replacement

    Third-party repair stores find it challenging to fix Apple products due to the presence of prompts such as “Important Battery Message” and “Important Camera Message,” resulting in ongoing criticism for Apple.

    Fix iPhone 13 Face ID Not Working & Important Display Message after Screen Replacement
    Fix iPhone 13 Face ID Not Working & Important Display Message after Screen Replacement

    Apple has made it even harder for customers to seek repairs from third-party stores with the release of the ‌iPhone 13‌. Attempting to address the Face ID issue after replacing the iPhone 13 screen by replacing the chip is risky and not advisable for non-professionals, according to REWA LAB. It is possible that Apple will address this problem through an iOS update in the future. We will have to wait and see. Please feel free to share your thoughts on this matter.

  • Exploring Face ID on iPhone: A Secure Facial Recognition System

    Exploring Face ID on iPhone: A Secure Facial Recognition System

    Face ID is a facial recognition system that replaces Apple’s Touch ID fingerprint scanner on certain devices. It uses sensors located near the iPhone’s front-facing camera to scan your face and, if the scan matches the stored data, perform actions such as unlocking the phone or authorizing an Apple Pay transaction.

    How Does Face ID Work?

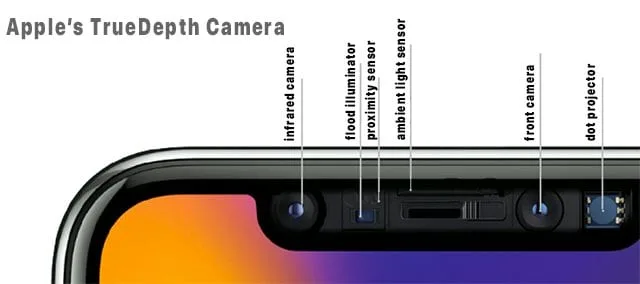
    Face ID relies on sensors located in the notch at the top of compatible iPhone screens. These sensors include:

    1. Dot Projector: This projects over 30,000 invisible dots onto your face, creating a 3D facial map.
    2. Infrared Camera: It reads the dots from the Dot Projector and captures an image.
    3. Flood Illuminator: This additional infrared light ensures that Face ID works even in low-light conditions.

    The facial map created by the infrared camera is then compared to the data stored on your iPhone to unlock the device or authorize an Apple Pay transaction. It’s also used for features like creating animated emojis based on your facial expressions.

    Apple claims that Face ID is intelligent and sensitive enough to recognize you even if you change your hairstyle, wear glasses, grow or shave facial hair, or age. However, there have been some instances where Face ID has misidentified individuals, including twins and children who closely resemble their parents.

    What Is Face ID Used for on an iPhone?

    Face ID is used for various purposes, similar to Touch ID, including:

    • Authorizing Apple Pay transactions.
    • Unlocking the iPhone without using a passcode.
    • Providing access to your Apple ID and passwords

    What Devices Support Face ID?

    Face ID is supported on the iPhone X and newer models. It’s possible that, like Touch ID, Face ID may eventually be added to other Apple devices like the iPad.

    Is My Face Scan Stored in the Cloud?

    No, Face ID data is not stored in the cloud. All face scans are kept directly on your iPhone, specifically in the “Secure Enclave,” a chip dedicated to securing sensitive data. This is also where fingerprint data from Touch ID is stored.

    How Secure Is My Face Scan?

    Face ID is highly secure due to the way the Secure Enclave functions. Your actual facial scan isn’t stored on your iPhone. Instead, it’s transformed into a numerical representation that is stored on your device. Even if someone were to somehow access the Secure Enclave data (which is extremely unlikely), they would only find a numerical code, not an actual scan of your face. This makes it nearly impossible to misuse the data in other facial recognition systems.

    How to Set up and Use Face ID

    Setting up Face ID is straightforward, and you likely did it during the initial iPhone setup. You position your face within the onscreen frame and rotate your head until the circle is filled in. Repeat this process as instructed by the phone. If you skipped this step during setup, you can later add Face ID by going to Settings > Face ID and Passcode and following the onscreen instructions. You can also add alternative appearances to Face ID, such as someone you trust or different photos of yourself with varying facial features.

    How to Disable Face ID

    To quickly disable Face ID, press the side button and volume down buttons simultaneously. To re-enable Face ID, you’ll need to enter your passcode.

    How Does Face ID Compare to Other Smartphone Facial Recognition Systems?

    Face ID has been widely praised for its accuracy, speed, and ease of use. The transition from Touch ID to Face ID was smoother than anticipated. In contrast, some other facial recognition systems, such as those used by Samsung, have been shown to be less secure and easier to trick, even with a simple photo. Samsung does not allow its facial scans to authorize financial transactions, as Touch ID can on an iPhone.

    Using Face ID When Wearing a Face Mask

    With the iOS 14.5 update, users can unlock their iPhone X and later use Face ID while wearing a face mask. This feature requires an unlocked Apple Watch Series 3 or later to be nearby. Simply glance at your iPhone, and your Apple Watch will provide haptic feedback to confirm that the iPhone is unlocked.

    Frequently Asked Questions

    How does Apple Face ID work with a scarf?

    Face ID is designed to work with head coverings like scarves and eyewear. It should be able to recognize your face even if you are wearing a hat, scarf, glasses, contact lenses, or many types of sunglasses.

    Does Apple Face ID work when eyes are closed?

    No, it doesn’t. Face ID is attention-aware and can detect if your eyes are open and your attention is directed toward the device. This feature helps prevent someone from unlocking your device without your knowledge.

  • Face ID Not Working? 8 Simple Fixes to Save Your iPhone

    Face ID Not Working? 8 Simple Fixes to Save Your iPhone

    Apple’s Face ID is commended for its speed and precision. It is the most helpful approach to open your iPhone after Apple decided to dispose of the Home Button for their iPhone X and latter models.

    It’s likewise secure to the point that Apple says the likelihood of an arbitrary individual could unlock your iPhone (or iPad) utilizing Face ID is around 1 out of 1,000,000, that is with a solitary enrolled appearance.

    iPhone and iPad Face ID solely permits up to five unsuccessful attempts before the password is needed.

    Face ID is also used to validate buys and sign in to applications. Be that as it may, what occurs if your Face ID quits working?

    Follow the below steps to fix your Face ID

    1. Check Your Face ID Settings

    Apple educates you to go to Settings > Face ID and Passcode.

    See that your Face ID is set ready for action, with the vital features flipped on.

    In case there are a few features off, feel free to flip the settings you need to utilize Face ID for while you’re there: Apple Pay, opening your iPhone, Password AutoFill, and the iTunes and App Store,

    In case it’s not set up, tap “Set Up Face ID.” Your cell phone will walk you through the means which includes shifting and pivoting your head for the face examines.

    If you can’t move your head, Apple’s Accessibility Options button is additionally there for you to tap.

    A password will be needed on the off chance that you’ve had five unsuccessful Face ID attempts and need to get to your phone.

    2. Ensure Nothing is Covering Your Face

    The TrueDepth camera needs to see your eyes, nose, and mouth completely noticeable for the Face ID to work.

    That implies you can’t utilize it while wearing a face veil.

    Face ID can work with numerous shades, however.

    In any case, Apple cautions that a few sunglasses that are intended to hinder particular kinds of light can impede the infrared light utilized by the TrueDepth camera and thus Face ID can’t remember you.

    If that is the case, take your shades off when expecting to utilize Face ID.

    3. Reset Face ID

    If none of the past ways work, reset Face ID. Just head to Settings > Face ID and Passcode and tap “Reset Face ID”. It’s underneath “Set Up and Alternate Appearance.”

    Whenever that is done, go ahead and set up Face ID once more.

    4. Restart Your iPhone (or iPad)

    This might sound senseless but now and then software can glitch and a straightforward restart can assist with getting things back altogether.

    Go ahead to restart your cell phone by either going to Settings > General > Shut Down or squeezing your Side Button and either one of the Volume Buttons together.

    5. Set up an Alternate Appearance

    In the event that you have an appearance that can appear to be endlessly unique from the first enrolled appearance, you can set up a substitute appearance so Face ID can in any case remember you and let you access your iPhone.

    Note that this doesn’t work in case you’re wearing a face veil, Apple says.

    To add an alternate appearance, go to Settings > Face ID and Passcode. You may be needed to enter your password. Tap “Set Up an Alternate Appearance” and begin.

    It’s fundamentally the same way you set up your first enrolled appearance. Once more, if you are unable to move your head, the Accessibility Option button can help you with that.

    6. Make Sure that the TrueDepth Camera is Free of Barrier

    Apple advised ensuring nothing is covering the TrueDepth camera, which includes your phone case or the protector. Make sure no dirt or buildup is covering the TrueDepth camera.

    7. Ensure You’re Facing the Camera The Right Way

    For iPhone users, hold your iPhone in a portrait direction when utilizing Face ID. Those who use iPad can utilize it in any direction.

    Additionally, ensure you are confronting the camera straightforwardly.

    Apple says the TrueDepth camera has a comparable scope of view as when you take a selfie or make a video call. So ensure that your phone is at a safe distance or 10-20 inches away from your face.

    8. Contact Apple Support

    In the event that all these steps have been conducted, Face ID is as yet not working and you accept that this is a result of a new iOS update.

    Feel free to contact Apple Support and report the issue.

    In case there are different reasons you suspect like you can’t enroll your appearance or different issues, Apple Support ought to have the option to help you with that.