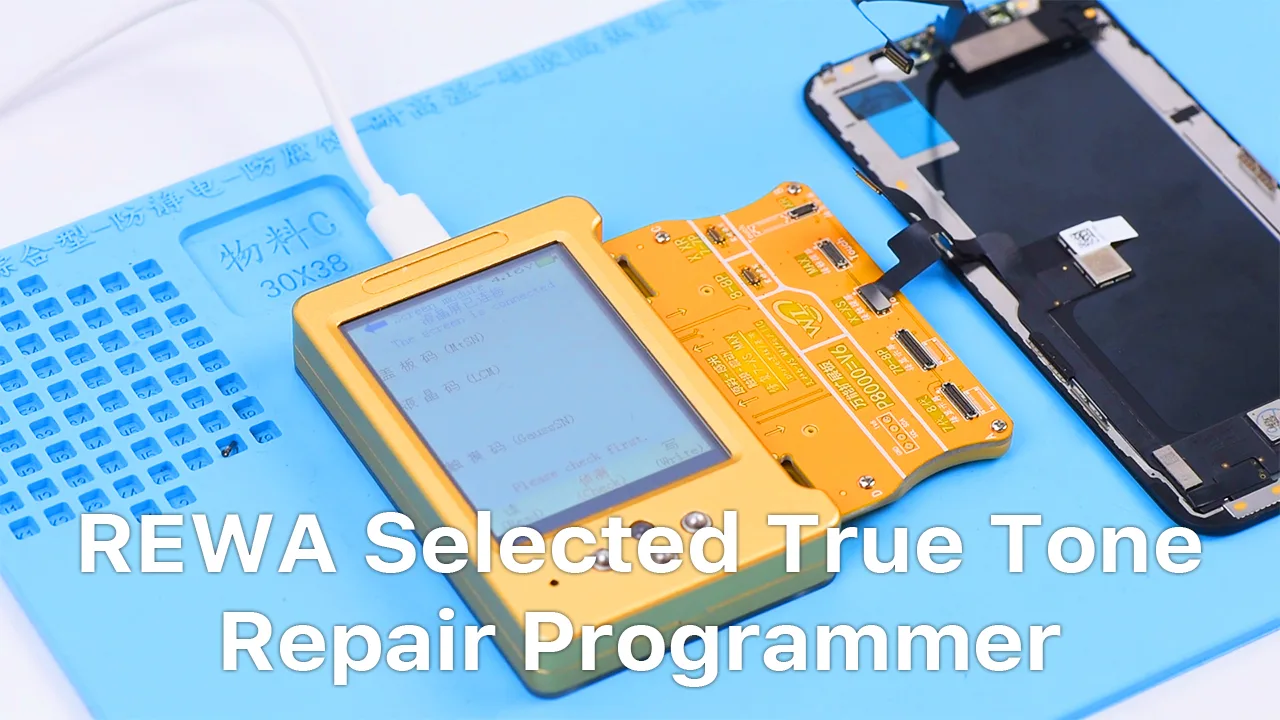
iOS 13 update has again brought the True Tone missing problem to some iPhone users. Well, REWA LAB has worked out a new solution to fix the problem. We will take iPhone XS as an example and show you how to restore the True Tone of aftermarket screens step by step.
Suggerimenti: True Tone supports iPhone devices from iPhone 8 to later models.
Products used in this True Tone Restoration video:
Serie iPhone da iPhone X Il nuovo iPhone 11 Pro Max è dotato di una scheda madre a doppio strato.
Pertanto, è importante che i centri di riparazione migliorino le tecniche di riparazione della scheda madre double-stacked. REWA raccomanda vivamente i seguenti 3 strumenti indispensabili per la riparazione della scheda madre a doppio stack dell'iPhone.
Controlla ora! Fasi di riparazione della scheda madre double-stacked Le fasi di riparazione della scheda madre double-stacked sono 4, come segue:
Passo 1: Separazione della scheda madre
Quando si ripara la scheda logica della serie di iPhone precedenti all'iPhone X, è possibile rimuovere/saldare i componenti con l'aiuto della Pistola ad aria calda.
Tuttavia, poiché le schede madri dell'iPhone X e dei modelli successivi sono a doppio strato, la pistola ad aria calda non riesce a riscaldare uniformemente il PCB del terzo spazio a causa dell'ampio raggio d'azione.
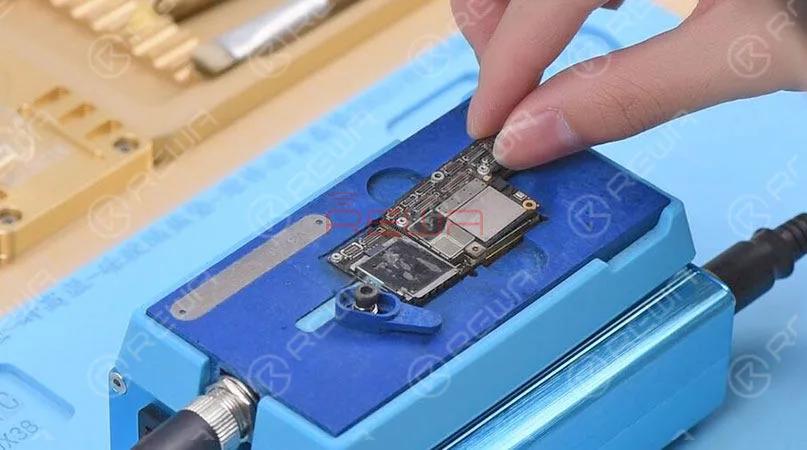
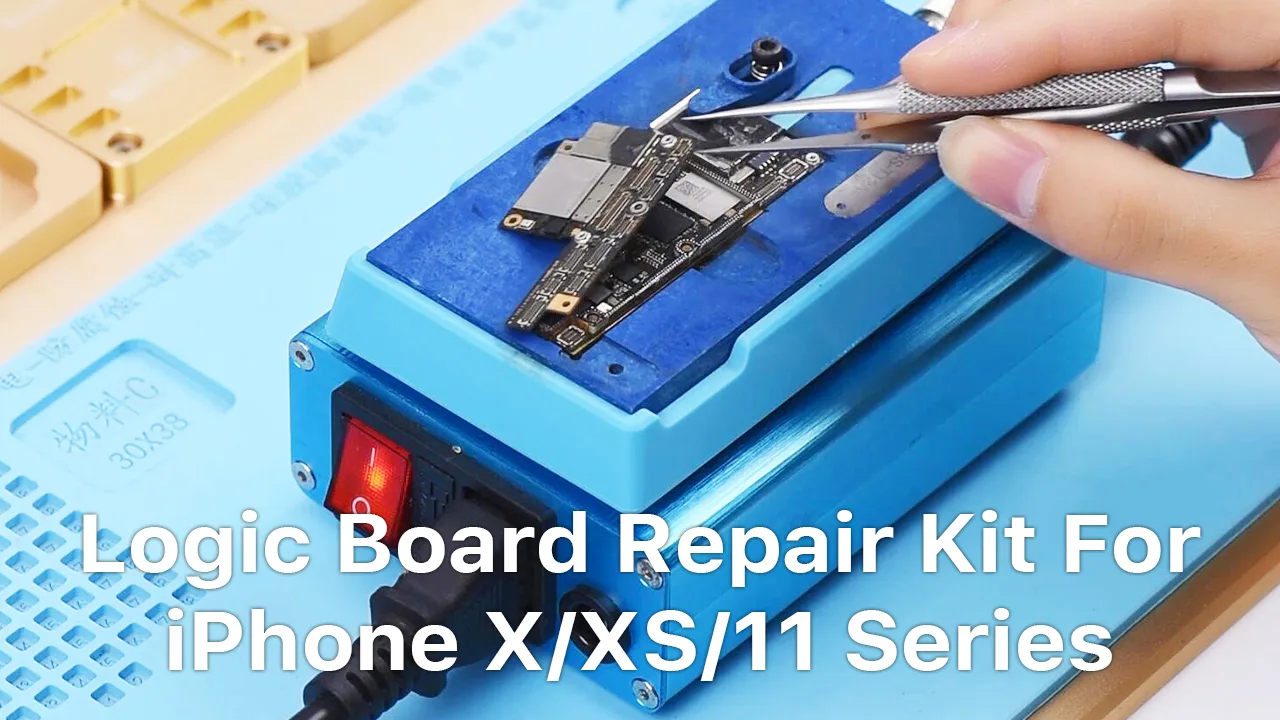
Raccomandiamo quindi questa piattaforma di riscaldamento specializzata per la riparazione della scheda madre a doppio strato.
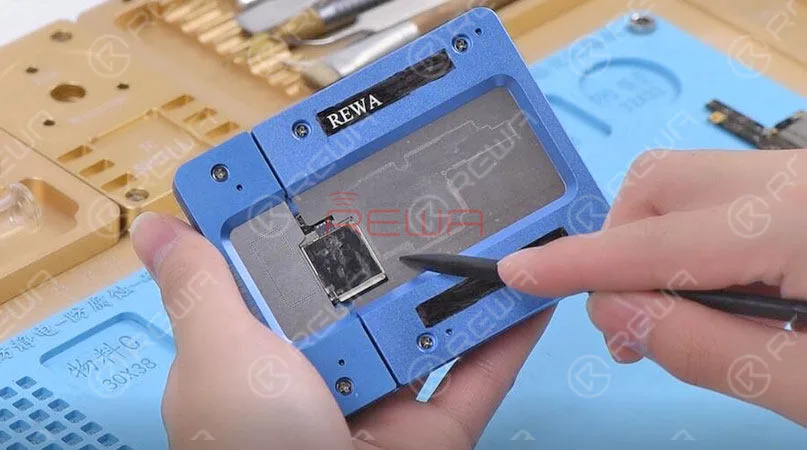
Sono necessari la piattaforma di smontaggio della scheda madre per l'unità principale dell'iPhone - SS-T12A e la scanalatura di riscaldamento della piattaforma di smontaggio della scheda madre per iPhone X/XS/XS Max - T12A - X3.
La piattaforma di riscaldamento 3 in 1 per iPhone X/XS/XS Max è adatta alla separazione della scheda madre di iPhone X/XS/XS Max, alla rimozione della CPU e di altri componenti. L'intervallo di temperatura è di 100-280℃.
Suggerimenti: La pistola ad aria calda tradizionale presenta requisiti elevati per il controllo della temperatura.
Pertanto, qualsiasi disattenzione può causare il distacco o la formazione di ponti tra le saldature, con conseguente mancata accensione della scheda madre o altri problemi.
Fase 2: Diagnosi e risoluzione dei problemi
Durante la riparazione della scheda madre a doppio stack, c'è sempre un momento in cui è necessario testare completamente la scheda madre.
Per farlo, dobbiamo saldare insieme i due strati.
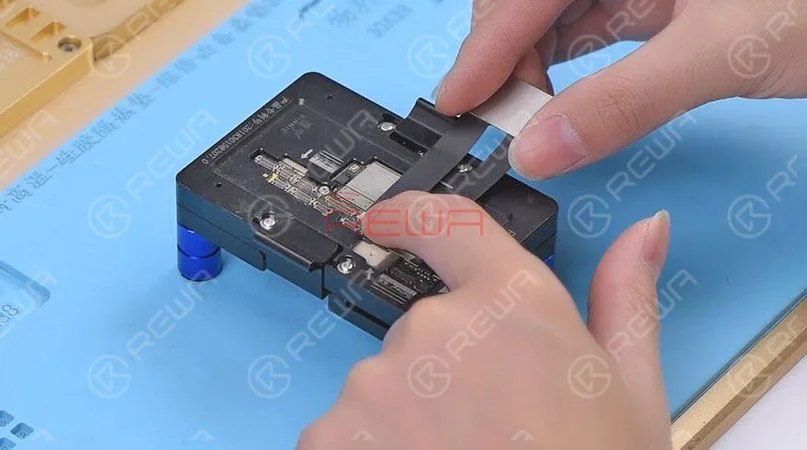
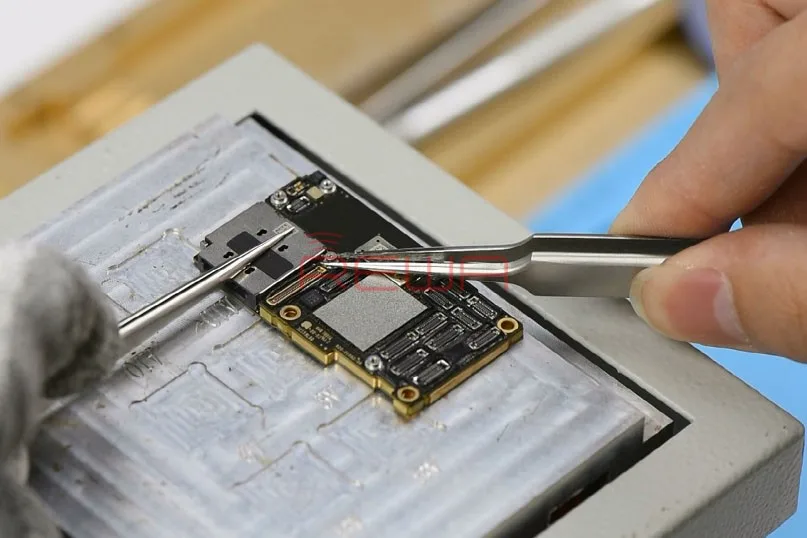
Ora, con questo terzo spazio PCB Test Fixture, possiamo testare completamente la scheda madre senza ricombinare i due strati.
Uno strumento indispensabile per la diagnosi e la risoluzione dei problemi durante la riparazione di schede madri a doppio strato. Dispositivo di prova 2 in 1 per iPhone XS/XS Max e Dispositivo di prova per iPhone X Con l'aiuto del dispositivo di prova, i tecnici di riparazione possono restringere le possibilità di errore durante la risoluzione dei problemi della scheda madre.
Non solo può migliorare l'efficienza della riparazione, ma anche ridurre i danni alla scheda madre.
Fase 3: Ribaltamento dello strato inferiore
Dopo la risoluzione dei problemi, è necessario saldare insieme i due strati.
We introduced the 3 must-have tool kit for iPhone double-stacked motherboard repair. Also, there is a New Arrival Recommendation – REWA Selected 3 in 1 iPhone X/XS/XS Max Heating Platform instead of the one we used in the video. With the help of these tools, you can not only improve repair efficiency and success rate but also power your repair business.
Tools & Parts used in double-stacked motherboard repair video:
As we all know, iPhone new series have undergone considerable changes on both inside and outside.
Especially on the motherboard.
How will these changes affect the repair industry?
Will it make third-party repair harder or easier?
Follow our iPhone 11 Pro motherboard separation & recombination blog today and find the answer by yourself.
iPhone 11 Pro Motherboard Separation
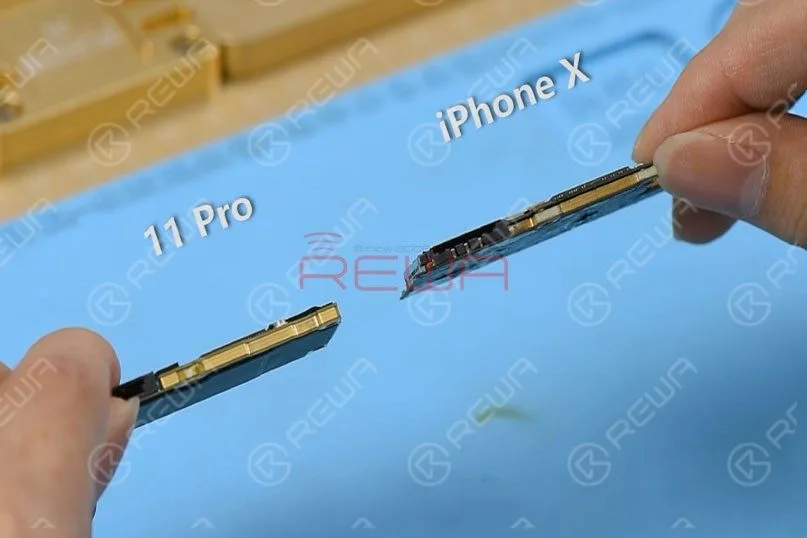
Compared with iPhone X series, iPhone 11 Pro’s motherboard is smaller with a much denser component array.
It is also thicker.
There are layers of graphite thermal transfer material on the backside.
It can dissipate heat generated from the motherboard efficiently.
Passo 1
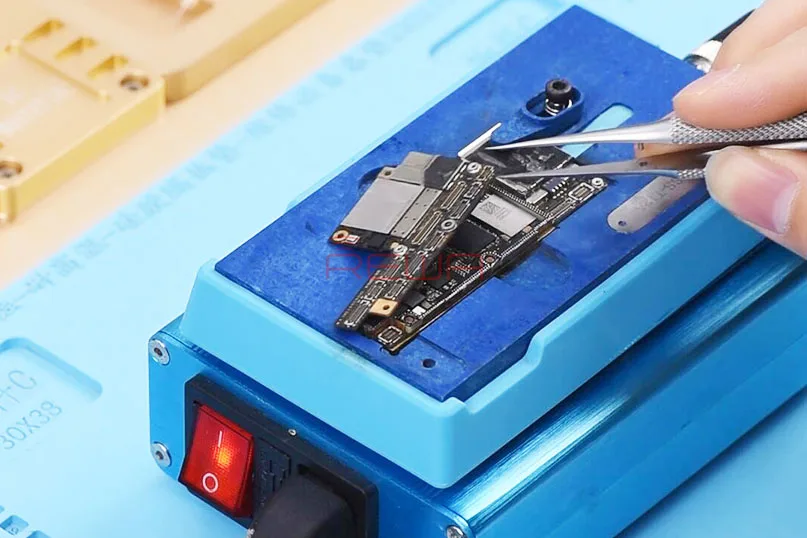
Remove the graphite thermal transfer material with tweezers first.
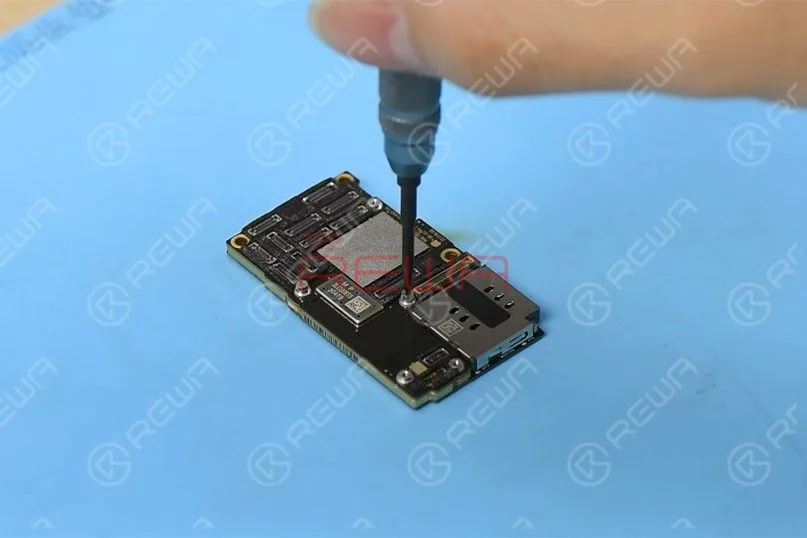
To recombine the two layers without reballing after separation, let’s fit two screws into the screw holes reserved on the motherboard.
Passo 2
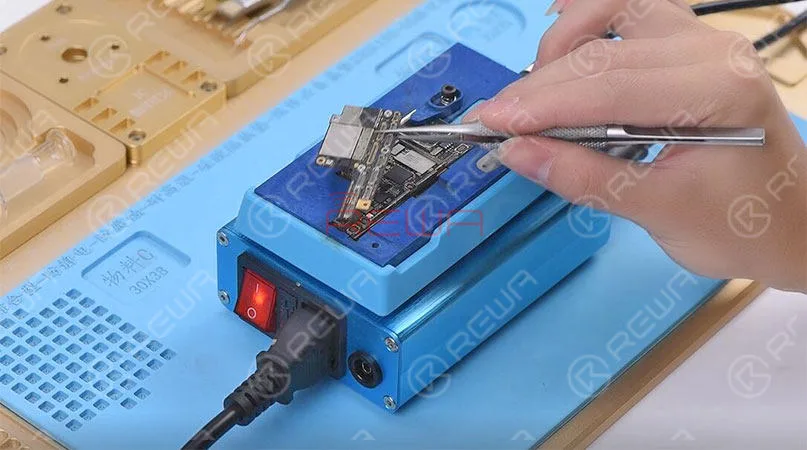
Set temperature of the heating platform at 170℃.
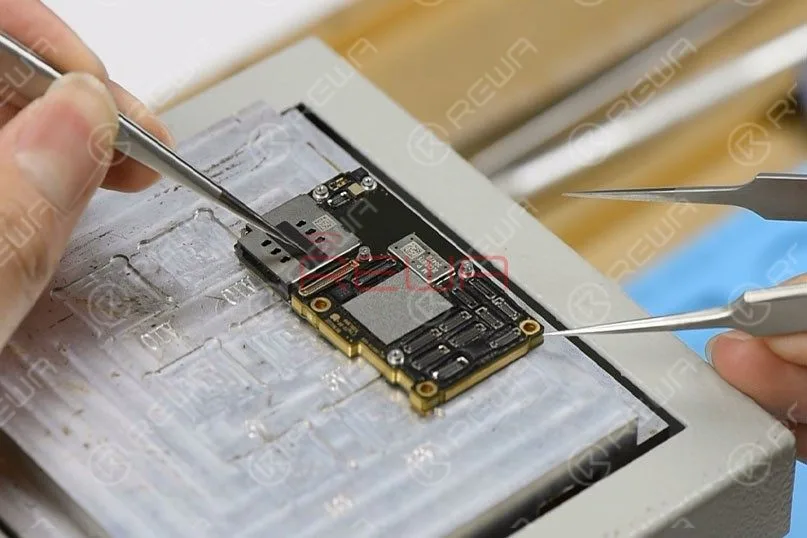
With temperature of the platform reaching 170℃, place the motherboard on the platform to heat for 3 minutes.
Press the SIM card reader with the tweezers and push the upper layer with another tweezers slightly.
Passo 3
With solder balls on the third space PCB starting to melt, clamp the screws fitted into the screw holes with tweezers and pick up the upper layer with tweezers vertically.
Tips: do not shake the tweezers when picking up the upper layer.
The third space PCB might be stuck in bridging issues and the recombination work would also be affected.
Continue to pick up the lower layer.
iPhone 11 Pro Motherboard Structure
Now let’s start with the structure of the motherboard.
The Upper Layer
A.Thermal Compound
CPU and areas around CPU are covered with a large amount of thermal compound to dissipate heat generated from A13 CPU.
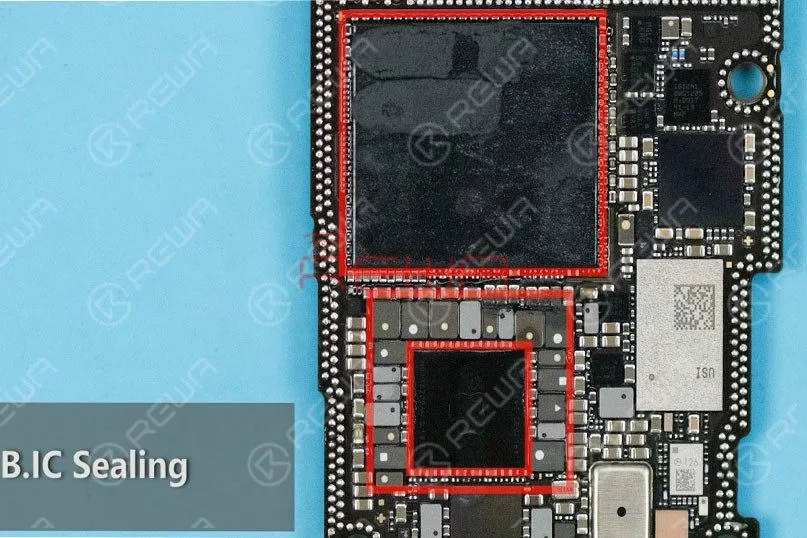
B.IC Sealing
CPU, PMU, and inductors around PMU are sealed with adhesive adding to the difficulty of repairs to some extent.
C.Dense Component Array Around PMU
Professional handwork is required when soldering/desoldering PMU.
D.IC USB
Unlike iPhone X series, the USB IC of iPhone 11 Pro hasn’t been sealed with adhesive, and it is far from CPU.
Therefore, the difficulty of USB IC relevant repairs is relatively reduced
Unlike iPhone X series, the A13 CPU of iPhone 11 Pro is not located right on the backside of the NAND flash chip.
This can reduce the bridging possibility of CPU when soldering/desoldering the NAND flash chip.
The Lower Layer
A. Different from iPhone X series, the lower layer of iPhone 11 Pro has a dispersive component array. Therefore, the difficulty of signal relevant repairs is also reduced.
B. Unlike iPhone X series, the SIM card reader of iPhone 11 Pro is independent from other components. We don’t have to remove the SIM card reader when working on signal relevant repairs.
iPhone 11 Pro Motherboard Recombination Without Reballing
Set temperature of the heating platform at 170℃.
With temperature of the platform reaching 170℃, place the lower layer on the platform to heat for 10 seconds.
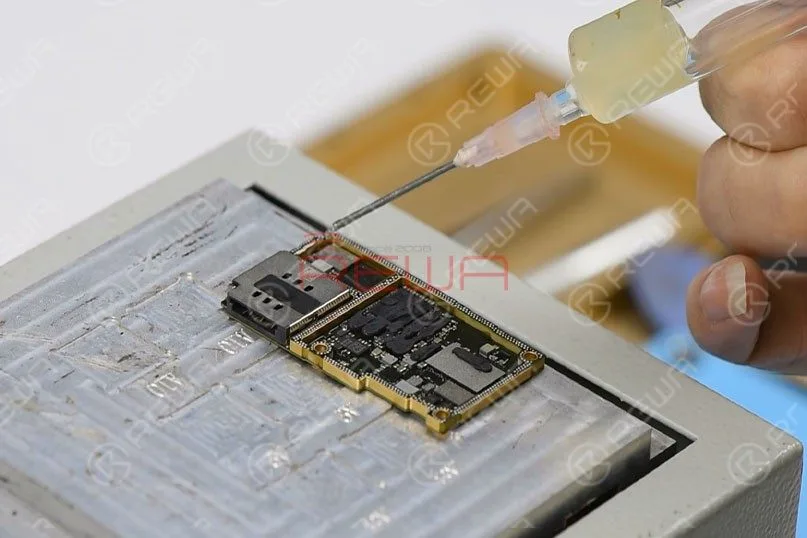
Apply some Paste Flux to the third space PCB evenly.
Get the upper layer in position and heat for about 5 minutes.
Then, press the SIM card reader with the tweezers and push the upper layer with another tweezers slightly.
If the upper layer returns to the previous position automatically, then the soldering process is completed.
Test
Ora possiamo assemblare il telefono e testare.
Get the motherboard and display assembly installed and get the battery connected.
Premi il pulsante di accensione per accendere il telefono.
Il telefono si accende normalmente.
Run function test. All going well.
Sintesi
The separation&recombination of the motherboard of iPhone 11 Pro shows that the motherboard is smaller and more squared.
Compared with the iPhone X series, it will not be easily damaged by external forces.
The high integration of the motherboard also means that more professional handwork is required.
Overall, the difficulty of iPhone 11 Pro motherboard repairs is reduced.
Strumenti e parti di ricambio
Stazione di rilavorazione con pistola ad aria calda
iOS 13 è stato rilasciato ufficialmente da un mese.
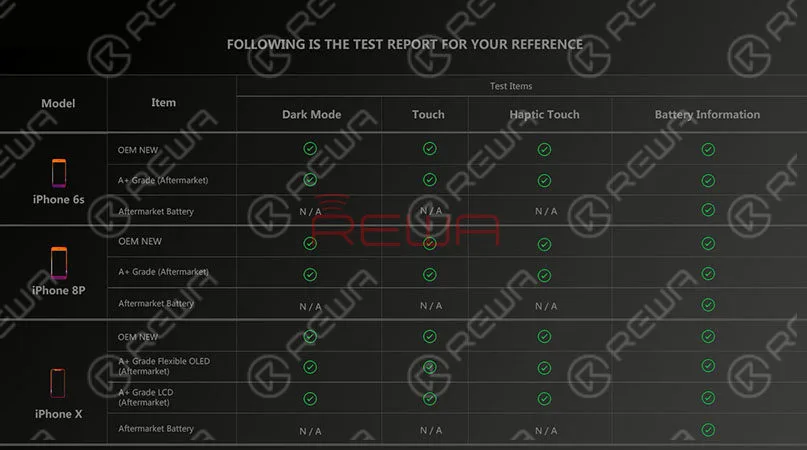
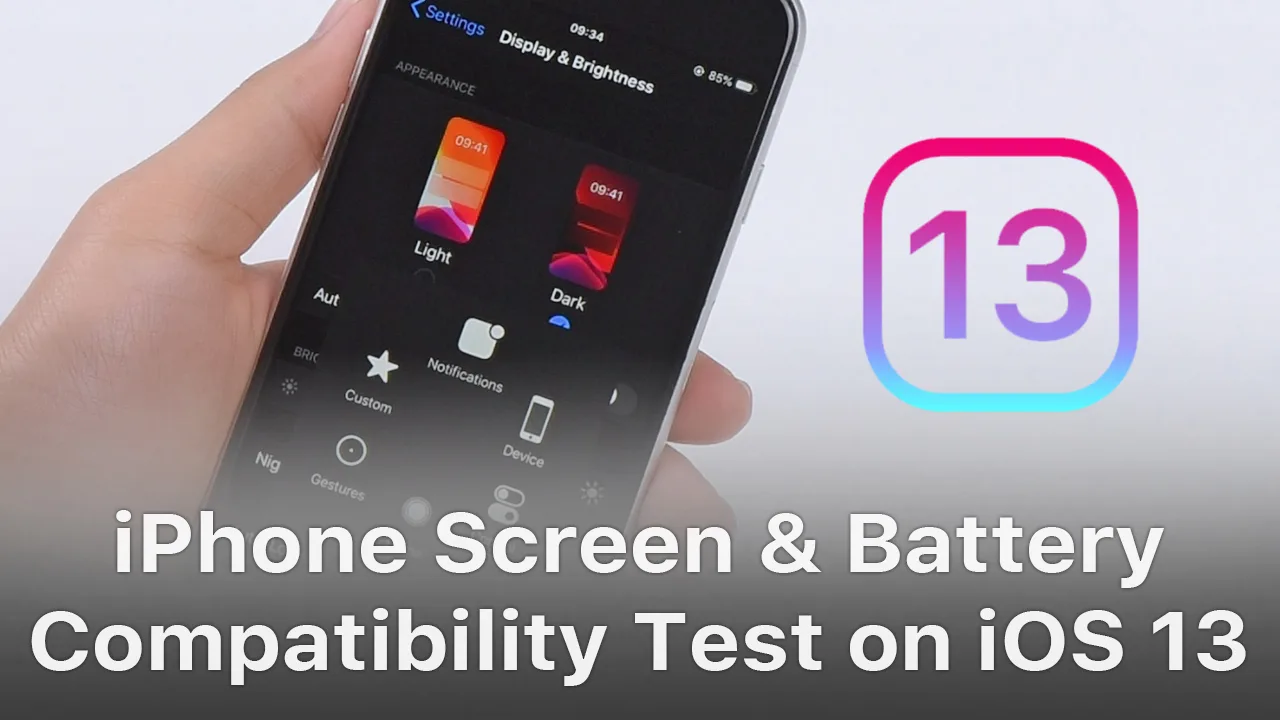
Al fine di fornire ai nostri clienti una qualità stabile, REWA ha condotto una serie di test di compatibilità per le serie di iPhone dall'iPhone 6s all'iPhone X con l'OEM NEW, Schermi aftermarket di qualità A+ e batterie aftermarket, rispettivamente.
Prendiamo come esempio l'iPhone 6s, l'iPhone 8P e l'iPhone X e mostriamo come si svolge il test.
Suggerimenti: iOS 13 supporta solo l'iPhone 6s e modelli successivi.
Test di compatibilità dello schermo dell'iPhone aftermarket
Test di compatibilità dello schermo dell'iPhone 6s
Test di compatibilità dello schermo dell'iPhone 8P
Test di compatibilità dello schermo dell'iPhone X
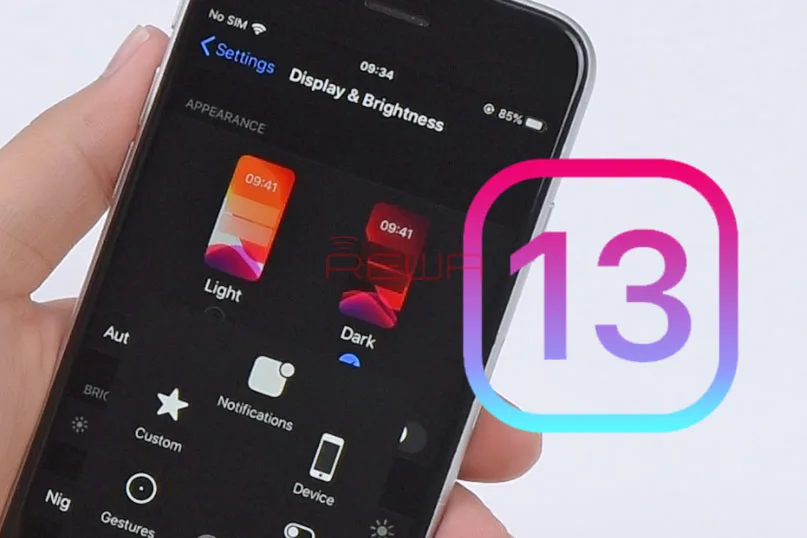
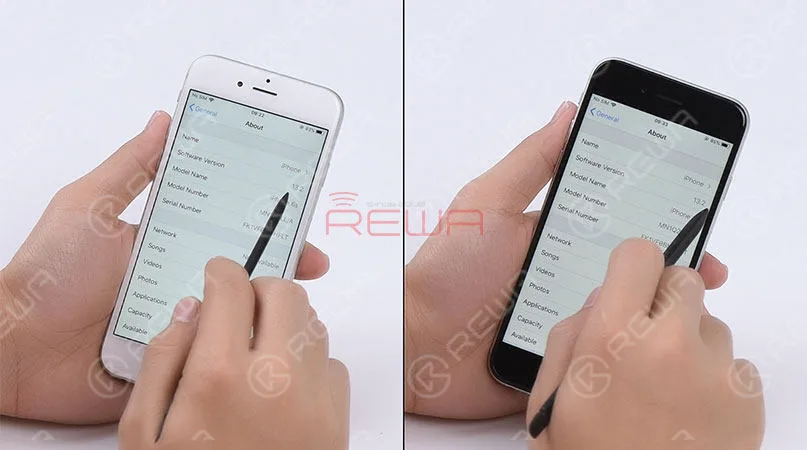
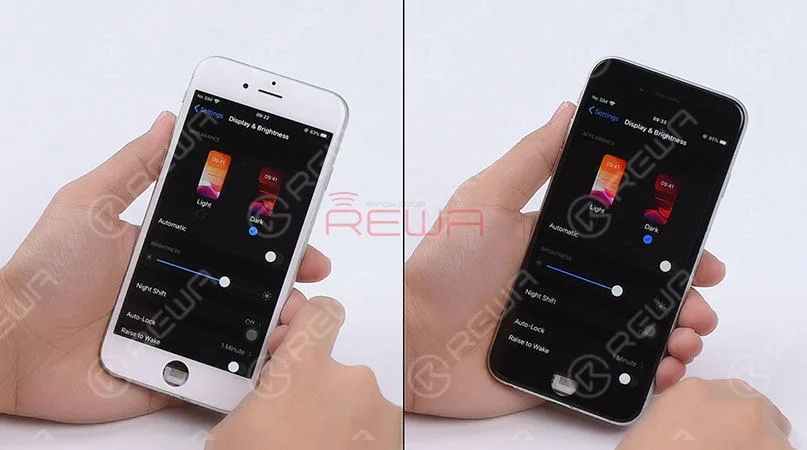
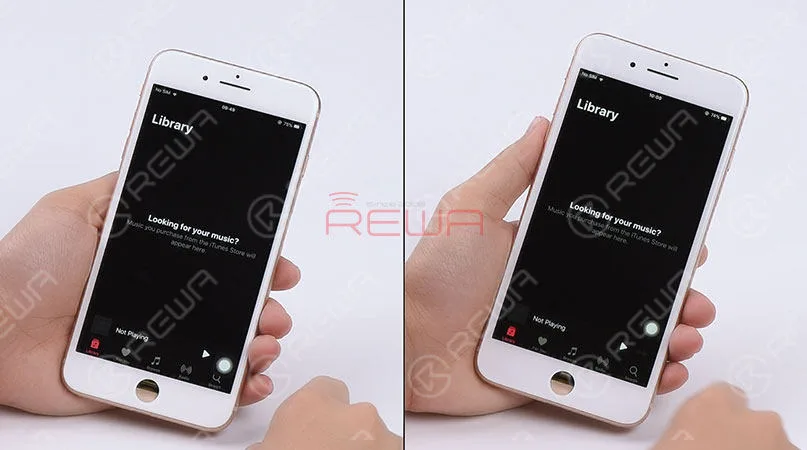
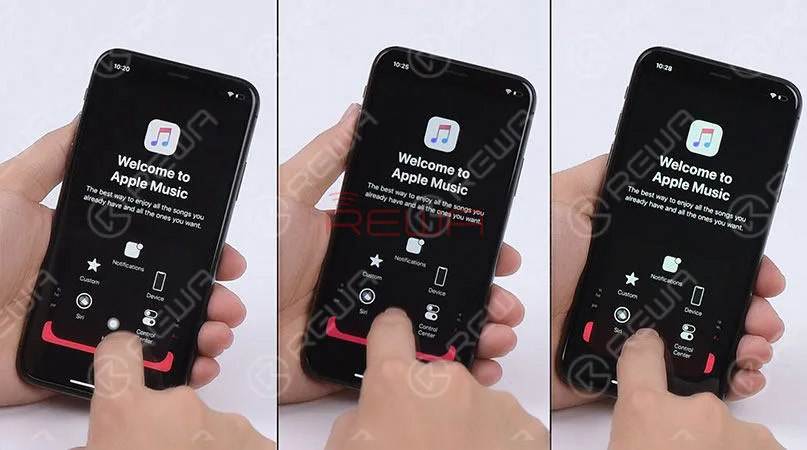
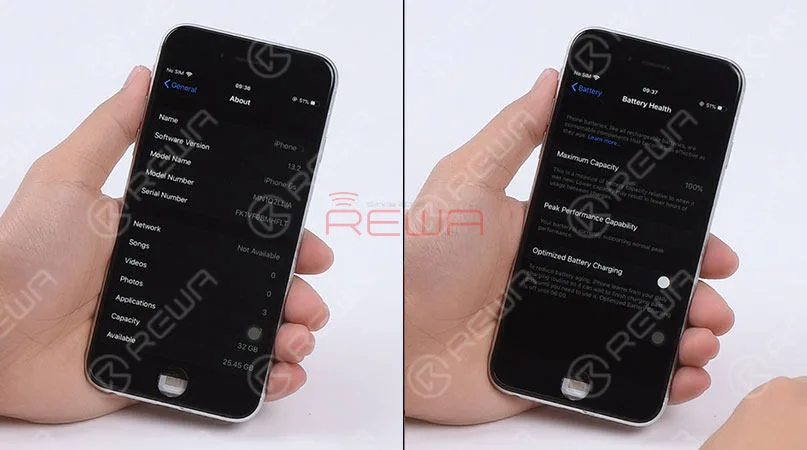
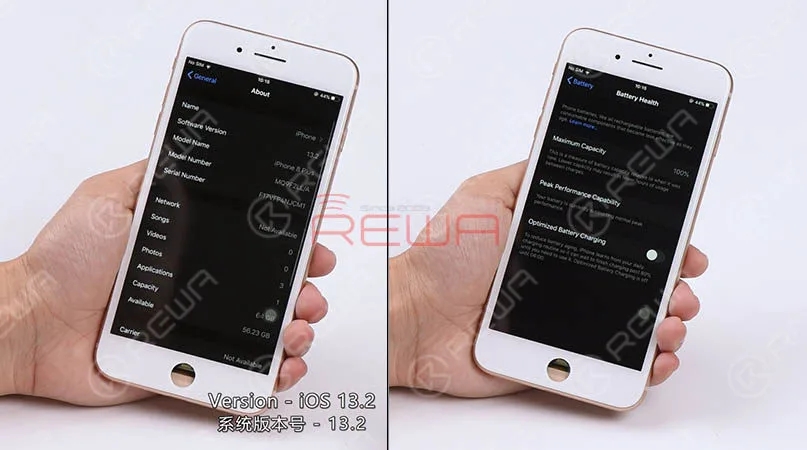
Con il telefono in esecuzione su iOS 13.2, tutte le app Apple integrate negli schermi testati (compresi gli schermi aftermarket di iPhone 6s/8P/X) sono state oscurate in modalità scura.
Anche l'Haptic Touch e la funzionalità touch sono normali.
Vale a dire, il nostro Schermi aftermarket di qualità A+ sono compatibili con iOS 13.
Per maggiori dettagli, fare clic per guardare il video qui sotto
Test di compatibilità della batteria aftermarket dell'iPhone
Test di compatibilità della batteria aftermarket dell'iPhone 6s
Test di compatibilità della batteria aftermarket dell'iPhone 8P
Test di compatibilità della batteria aftermarket di iPhone X
Con il telefono in esecuzione su iOS 13.2, mostra normalmente la capacità massima delle nostre batterie aftermarket.
Vale a dire, il nostro Le batterie aftermarket sono compatibili con iOS 13.
Conclusione:
Secondo i risultati del test, gli schermi e le batterie aftermarket di grado A+ fornite da REWA sono compatibili con iOS 13.
Per informazioni dettagliate sui nostri prodotti, consultare il nostro sito web Negozio online. Per qualsiasi domanda o suggerimento non esitate a contattare sales@rewatechnology.com.
Dal rilascio di iOS 13 il 19 settembre 2019, sono stati rilasciati cinque aggiornamenti di iOS 13 in un mese.
Nonostante il rilascio di nuovi aggiornamenti per iOS 13, i problemi si presentano sempre.
Il nostro blog di oggi sarà un riepilogo dei problemi comuni su iOS 13 dal suo rilascio.
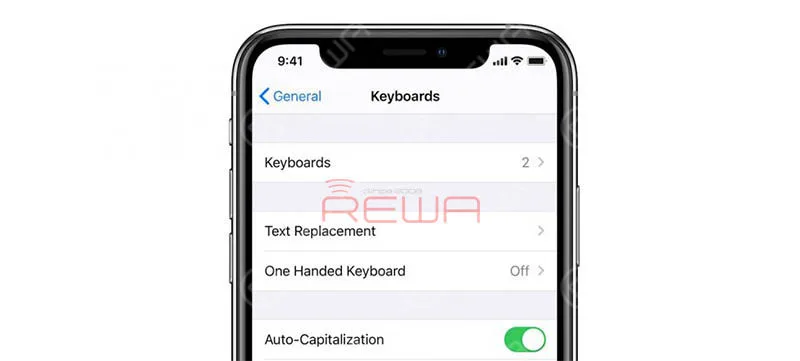
Bug della tastiera di terze parti
Un bug in iOS 13 potrebbe far sì che le app di tastiera di terze parti ottengano l'accesso completo anche senza l'approvazione dell'utente.
Segnale debole
Molti utenti lamentano una scarsa ricezione WiFi o un segnale debole dopo l'installazione di iOS 13.
Arresto anomalo dell'app
È un bug noto che alcune app si bloccano dopo gli aggiornamenti di iOS 13. Ad esempio, l'app Salute e l'app Mappe di Apple si chiudono a caso di tanto in tanto.
Inoltre, alcuni utenti di iOS 13 si sono lamentati del fatto che l'app foto si blocca e si chiude, mostrando la schermata iniziale quando si scorre velocemente la libreria fotografica o si preme nella parte superiore dello schermo, per scorrere istantaneamente alla foto più vecchia.
Chiamate interrotte
Secondo alcune segnalazioni diffuse, iOS 13.1.2 causa la caduta delle chiamate entro un minuto dall'invio.
Problemi dell'applicazione Mail
L'applicazione Mail non si aggiorna L'applicazione Mail si blocca e non riesce a sincronizzarsi su iPhone o iPad Mail
L'app non si apre L'app di posta non riesce a inviare messaggi
L'app Mail apre le bozze dei messaggi all'avvio
L'app Mail non riesce a caricare le e-mail e gli account di posta di terze parti
App di posta elettronica con errore nelle notifiche di posta
L'applicazione Mail non consente la creazione di nuovi account
L'applicazione Mail push non funziona
App di posta elettronica con un problema di assenza di mittente
Scarico della batteria
Alcuni utenti di iOS 13 hanno notato che la durata della batteria dei loro telefoni è diminuita dopo l'aggiornamento all'ultimo sistema operativo mobile di Apple.
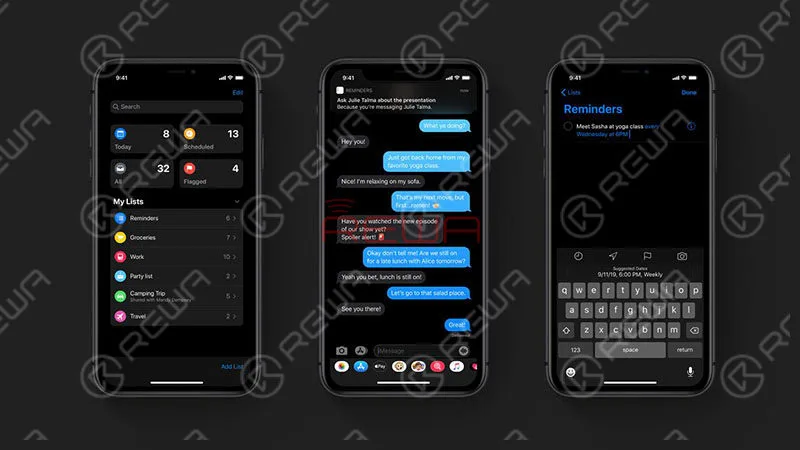
Promemoria non sincronizzati
Alcuni utenti di iOS 13 hanno riscontrato che i promemoria di iCloud creati su un dispositivo con software precedente sono visibili solo su altri dispositivi con software precedente.
Quando si aggiorna il dispositivo all'ultima versione del software, i nuovi promemoria andranno persi quando si apre l'app Promemoria.
Siri effettua chiamate in vivavoce per impostazione predefinita
Quando si chiede a Siri di effettuare una telefonata, per impostazione predefinita questa viene effettuata in vivavoce.
Contatti persi
Alcuni utenti di iPhone hanno riscontrato il malfunzionamento dell'app Contatti su iOS 13.1.3. Alcuni hanno nomi di contatti ma non contenuti, mentre altri appaiono semplicemente vuoti.
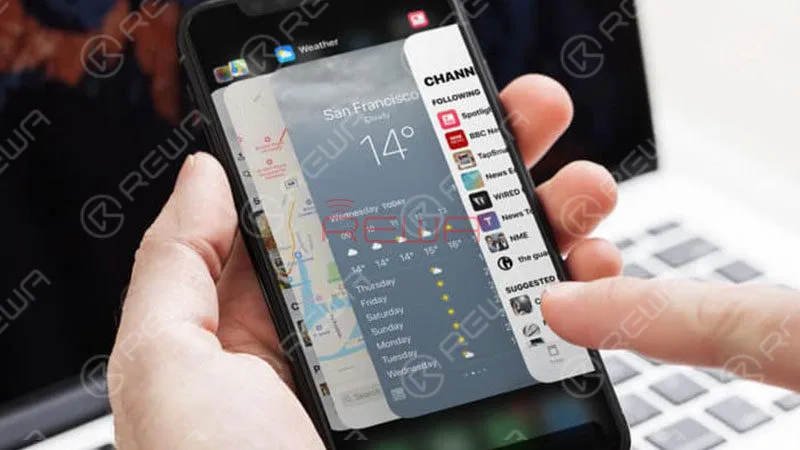
Applicazioni di sfondo che uccidono
Molti utenti di iPhone si sono lamentati del problema dell'uccisione delle app in background dopo l'aggiornamento a iOS 13.2. Il problema si presenta anche con il nuovo iPhone 11 Pro. Il problema si presenta anche con il nuovo iPhone 11 Pro.
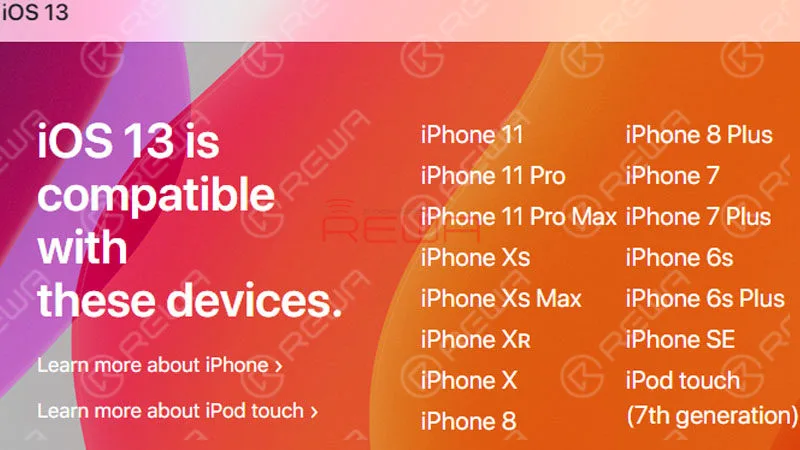
iPhone compatibile con iOS 13
iPhone 11 Pro Max iPhone 11 Pro iPhone 11 iPhone Xs Max iPhone Xs iPhone XR iPhone X iPhone 8 Plus iPhone 8 iPhone 7 Plus iPhone 7 iPhone 6s Plus iPhone 6s iPhone SE iPad compatibile con iOS 13
iPad Pro 12,9" iPad Pro 11" iPad Pro 10,5" iPad Pro 9,7" iPad Pro iPad (6a generazione) iPad (5a generazione) iPad mini (5a generazione) iPad mini 4 iPad Air (3a generazione) iPad Air 2 10,2 iPad (7a generazione)
iPod compatibile con iOS 13
iPod Touch (7a generazione)
iOS 13 porta con sé nuove e interessanti funzionalità, ma anche bug e problemi. Se questi bug e problemi potranno essere risolti, sarà sicuramente un ottimo sistema operativo. Cosa ne pensate del nuovo iOS 13? Fatecelo sapere nei commenti qui sotto.
iOS 13 has been officially released for a month. In order to provide our clients with featuring stable quality, REWA LAB has conducted a series of compatibility tests for iPhone series from iPhone 6s to iPhone X with OEM NEW, A+Grade Aftermarket Screens, and Aftermarket Batteries respectively. Now, Let’s take iPhone 6s, iPhone 8P, and iPhone X as examples and show you how the test goes.
Suggerimenti: iOS 13 supporta solo l'iPhone 6s e modelli successivi.
È l'iPhone più potente e più avanzato che Apple abbia mai costruito, iPhone 11 Pro è realizzato in acciaio inossidabile di grado chirurgico e il retro è un unico pezzo di vetro macchina con rivestimento ottico PVD, che aumenta la difficoltà di riparazione.
Inoltre, la disposizione delle fotocamere posteriori dell'iPhone 11 Pro aumenta notevolmente la difficoltà di riparazione del vetro posteriore.
REWA LAB ha provato diverse soluzioni (riscaldamento con la pistola ad aria calda, separazione con il disperdente/assistenza al congelamento), ma non siamo riusciti a rimuovere il vetro intorno alla telecamera a tre lenti in modo sicuro ed efficiente.
Controllate la nostra operazione dettagliata sulla riparazione del vetro posteriore dell'iPhone 11 Pro e speriamo di potervi illuminare in qualche modo.
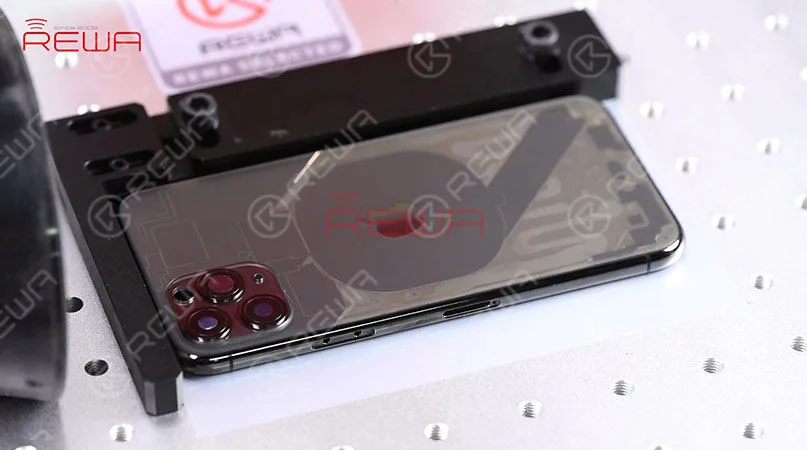
Scansione del vetro posteriore di 11 Pro con il laser
Prima di tutto, posizionare il vetro posteriore dell'iPhone 11 Pro sotto la sonda per la messa a fuoco.
Quindi posizionare il vetro posteriore dell'iPhone 11 Pro sul pannello operativo.
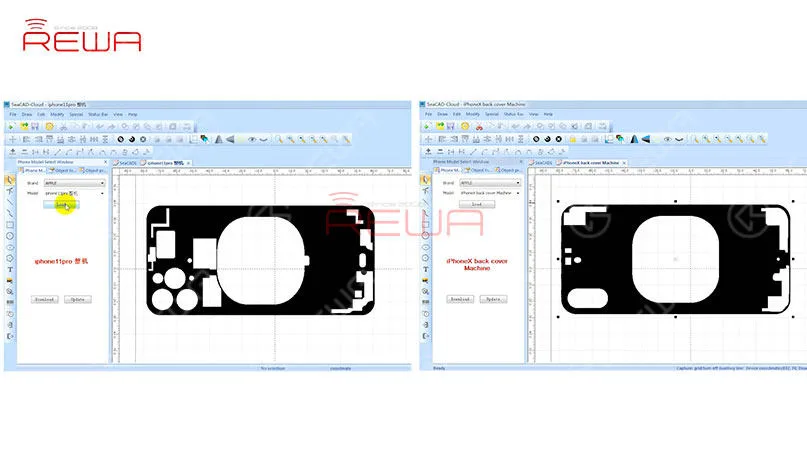
Scegliere "iPhone 11 Pro" dall'elenco dei modelli e fare clic su "Carica" per caricare il disegno.
L'area nera del disegno è l'area da scansionare, mentre l'area bianca è l'area da conservare.
Suggerimenti: Confrontando i due disegni si può notare che, a differenza dell'iPhone X, ci sono più aree da cui il laser deve tenersi lontano durante la scansione dell'iPhone 11 Pro.
Dopo aver caricato il disegno dell'iPhone 11 Pro, regolare l'area di scansione della luce laser sul vetro posteriore.
Una volta terminato, impostare i parametri e fare clic su 'Mark' per scansionare il vetro posteriore con la luce laser.
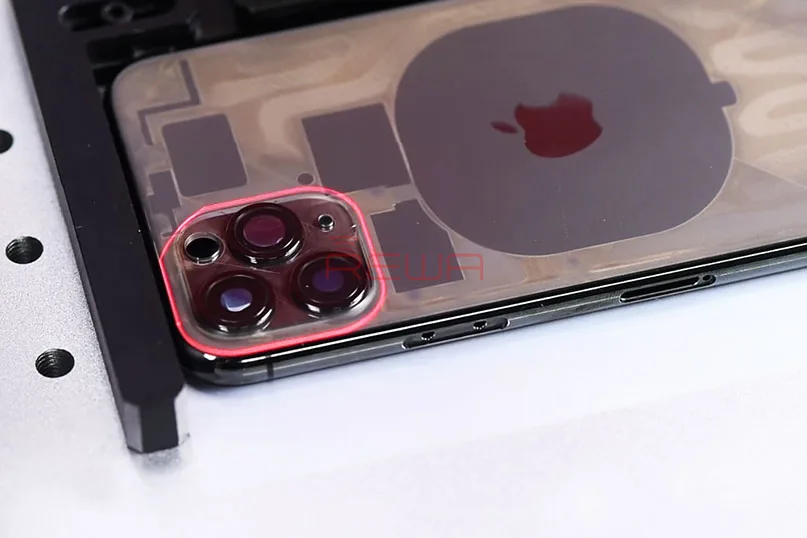
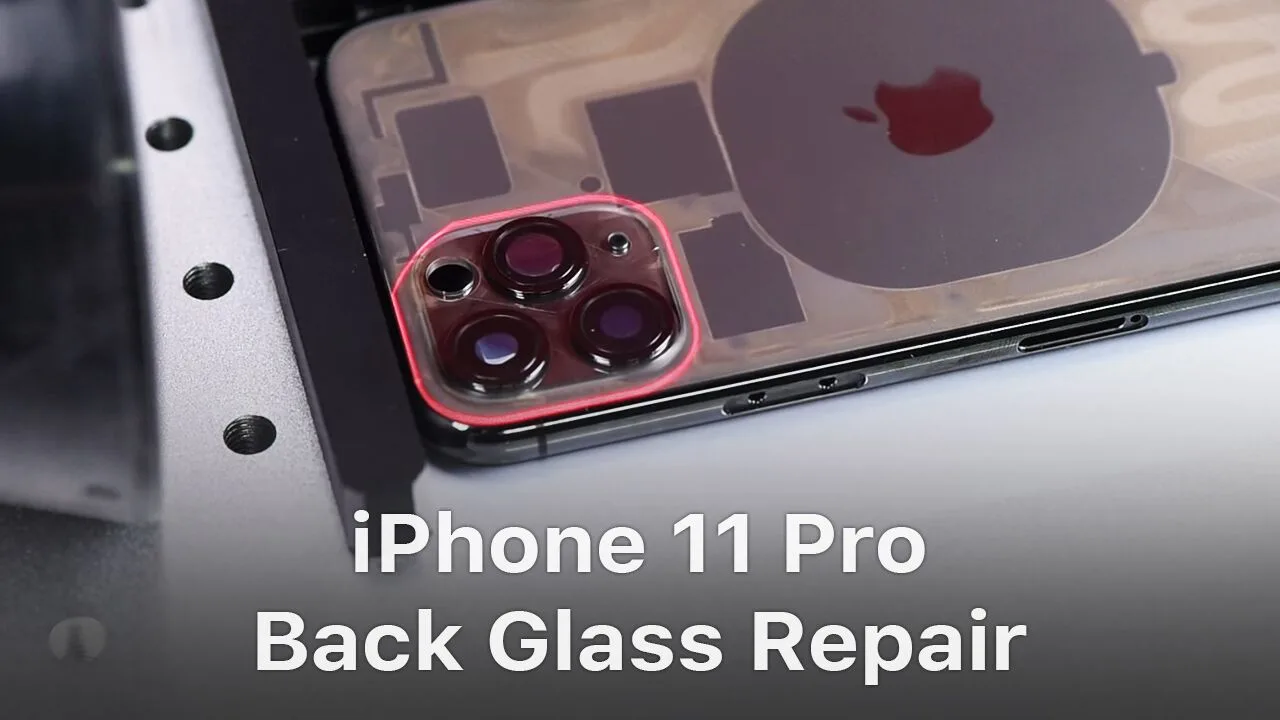
Il vetro posteriore diventa trasparente dopo la scansione laser.
Scansione del vetro intorno alla fotocamera a tre lenti con il laser
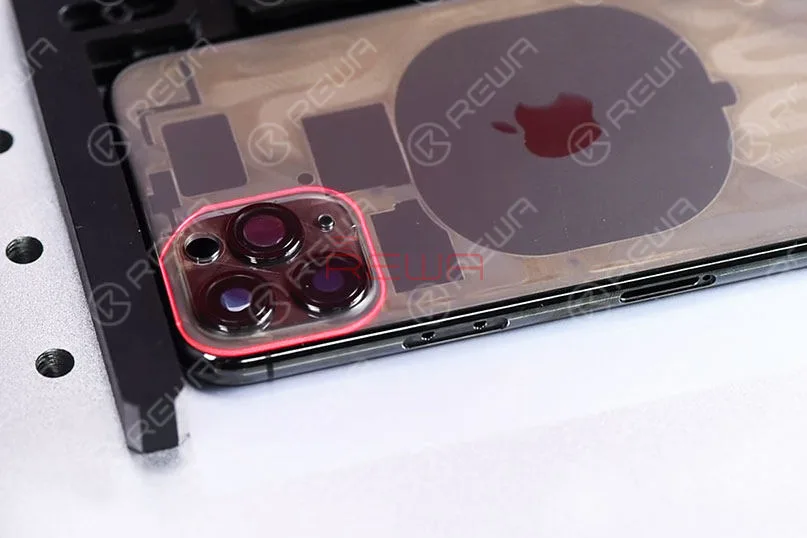
Come si può notare, il vetro intorno alla fotocamera a tre lenti è relativamente spesso.
La scansione a luce laser non ha funzionato bene con l'area in questione.
Dopo diversi tentativi ed esperimenti, REWA LAB ha completato con successo un disegno specializzato per l'area della fotocamera a tre lenti.
Scansionare nuovamente l'area della telecamera a tre lenti con il laser con l'aiuto del disegno.
Anche il vetro intorno alla telecamera a tre lenti diventa trasparente dopo la seconda scansione laser.
Separare il vetro posteriore dal telaio centrale
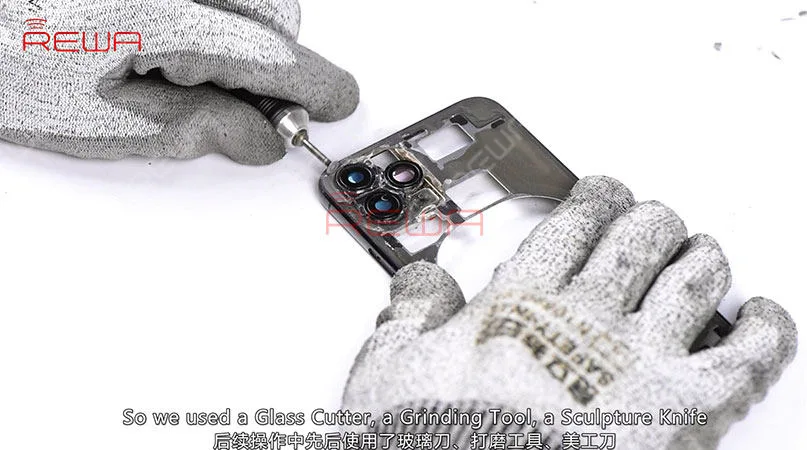
Ora è necessario separare il vetro posteriore dal fotogramma centrale. Il vetro posteriore scansionato può essere separato facilmente. Tuttavia, il vetro intorno alla fotocamera a tre lenti richiede un'ulteriore operazione. Gli strumenti comunemente utilizzati non sono riusciti a rimuovere il vetro, quindi abbiamo utilizzato un tagliavetro, un utensile per smerigliare, un coltello per sculture e un tronchesino per rimuovere il vetro intorno alla fotocamera a tre lenti. Infine, una volta completato, rimuovere l'adesivo nero residuo con la macchina laser.
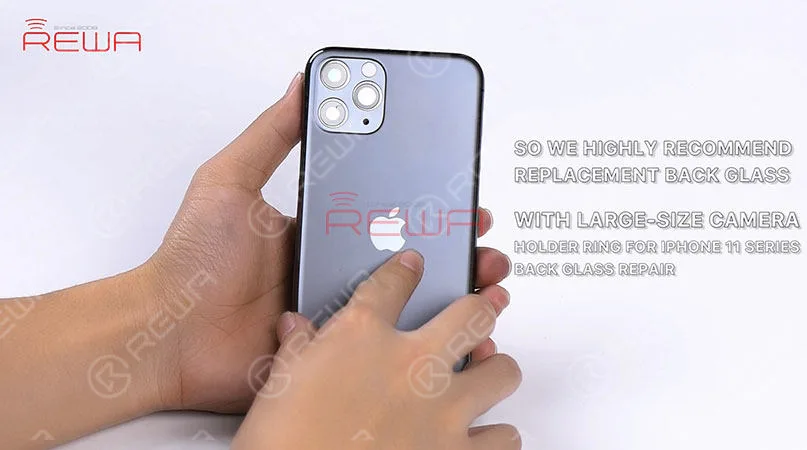
L'anello del supporto della fotocamera dell'iPhone 11 è più duro e presenta pareti interne spesse, il che aumenta la difficoltà di lucidatura.
Nel frattempo, anche l'obiettivo della fotocamera può essere facilmente danneggiato durante la lucidatura.
Per questo motivo consigliamo vivamente di sostituire il vetro posteriore con un grande foro per la fotocamera per la riparazione del vetro posteriore dell'iPhone 11 Series.
A causa della particolare disposizione delle tre fotocamere dell'iPhone 11 Pro, anche lo spazio tra le tre fotocamere è stretto e ciò aumenta la difficoltà di separazione del vetro posteriore.
Pertanto, la macchina laser può essere la soluzione più sicura ed efficiente per la riparazione del vetro posteriore dell'iPhone 11 Pro.
Per maggiori dettagli sulla riparazione del vetro posteriore dell'iPhone 11 Pro, guardate il video qui sotto. Potete anche visitare Canale YouTube REWA per altri video sulla serie iPhone 11.
REWA LAB lavorerà duramente per fornire una soluzione migliore per la riparazione del vetro posteriore di iPhone 11 Pro.
Anche le parti di ricambio della serie iPhone 11 sono in arrivo, rimanete sintonizzati su Negozio online REWA.
Rear cameras of iPhone 11 series greatly increase the difficulty of back glass repair. REWA LAB tried different solutions (heating with the Hot Air Gun, separating with the dispergator/freeze assistance) and we were unable to remove the glass around the triple-lens camera safely and efficiently. Check our iPhone 11 Pro back glass repair video now and hope we can enlighten you somehow. Please let us know your thoughts on this topic in the comment below.
Tools & Parts used in this iPhone 11 Pro Back Glass Refurbishing video:
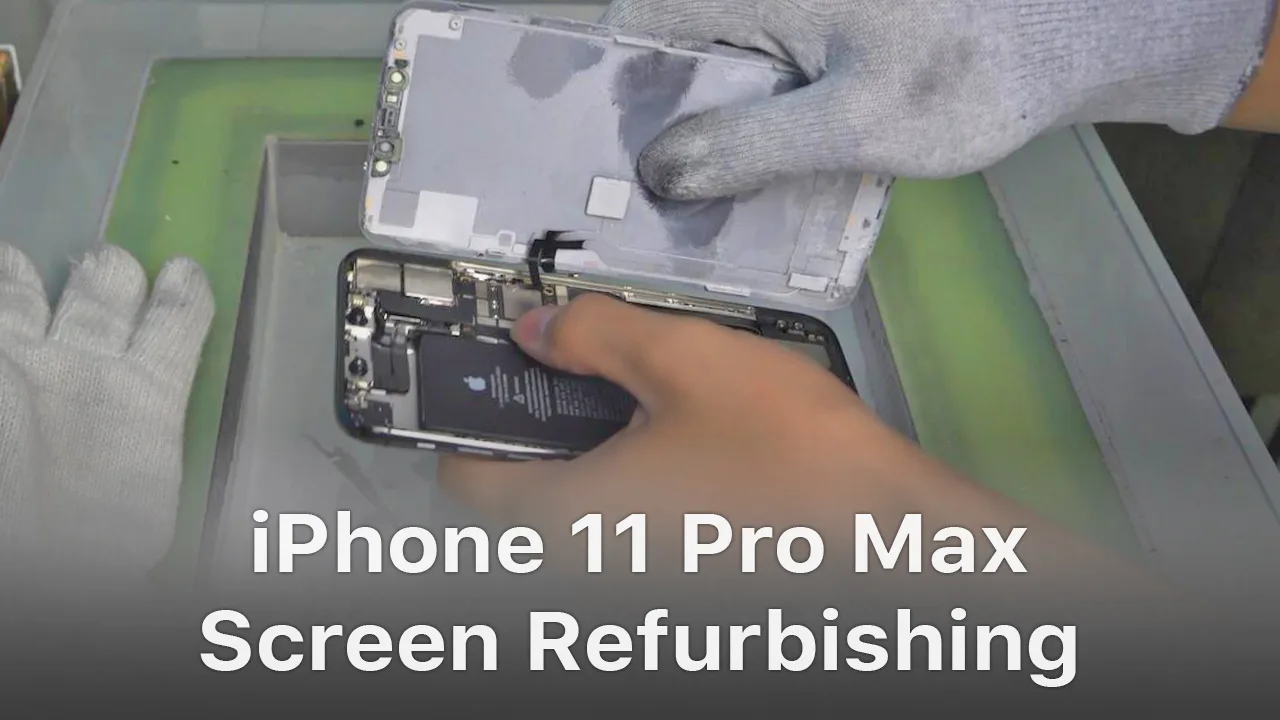
Per iPhone X e i modelli successivi, la staffa che copre l'area di collegamento del cavo flessibile inferiore è fissata tramite adesivo a freddo. Il metodo tradizionale con assistenza termica durante la rimozione della cornice potrebbe danneggiare lo schermo. Dopo diversi tentativi, REWA LAB ha scoperto che il nuovo metodo con assistenza a freddo può migliorare la percentuale di successo e l'efficienza della rigenerazione dello schermo. Per i dettagli, guarda il nostro video di oggi: rigenerazione dello schermo di iPhone 11 Pro Max.
Strumenti e parti utilizzate per rigenerare iPhone 11 Pro Max:
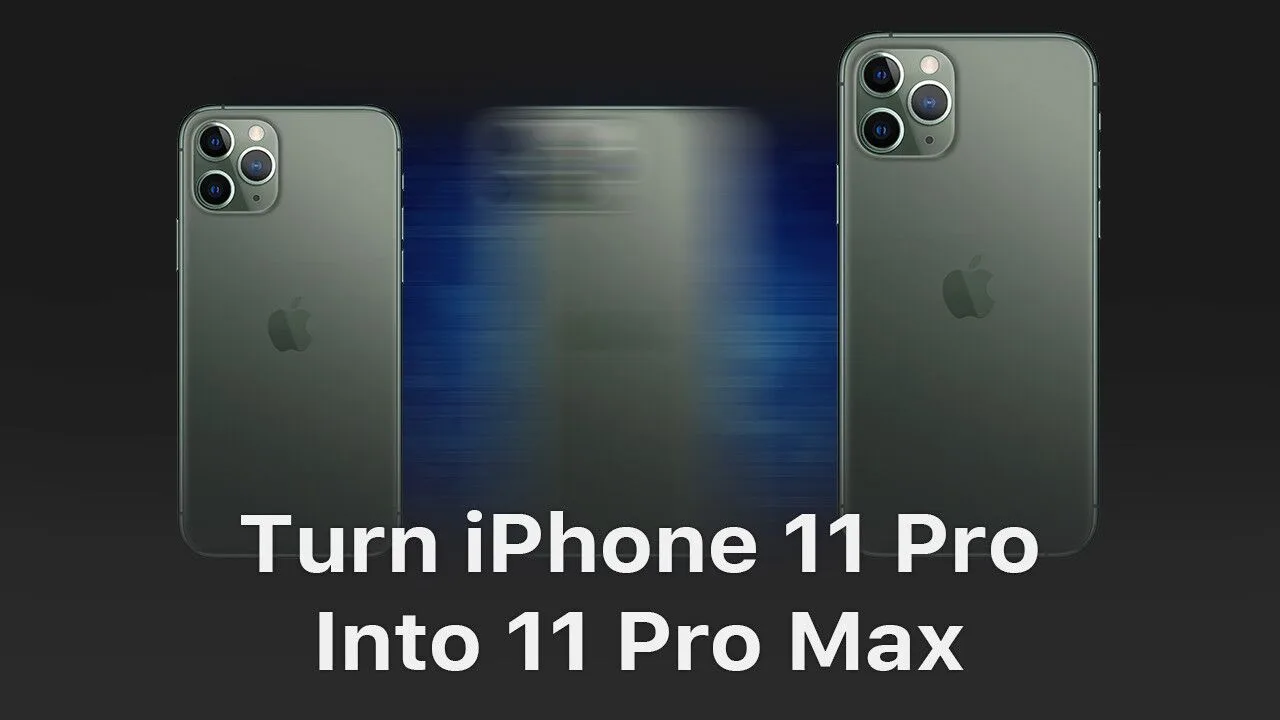
Can iPhone 11 Pro possibly be turned into iPhone 11 Pro Max?
It is actually theoretically possible.
With pins of the two phones’ display connector and touch connector functioning almost the dame, we can turn an iPhone 11 Pro into an iPhone 11 Pro Max by changing board ID resistors.
Today we will try to turn iPhone 11 Pro into iPhone 11 Pro Max.
iPhone 11 Pro VS iPhone 11 Pro Max
iPhone 11 Pro comes with a 5.80-inch touchscreen display.
iPhone 11 Pro Max comes with a 6.50-inch touchscreen display.
What will happen when we connect the iPhone 11 Pro Max screen with the housing of iPhone 11 Pro directly?
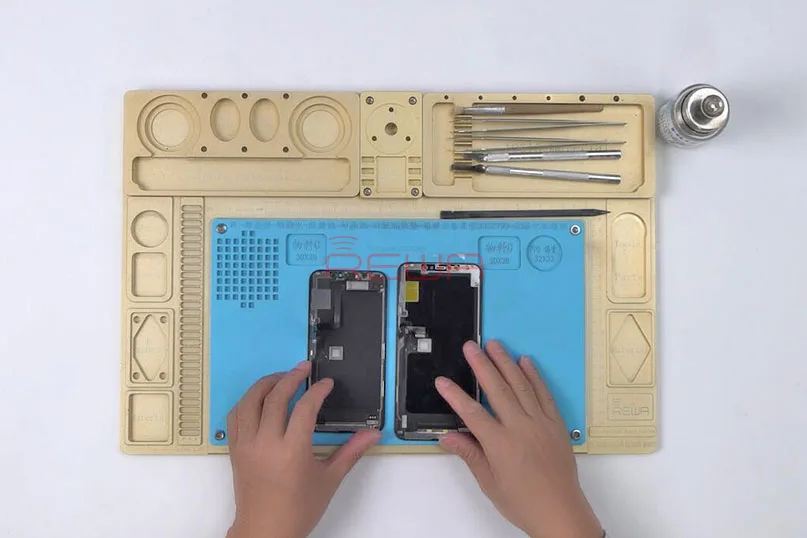
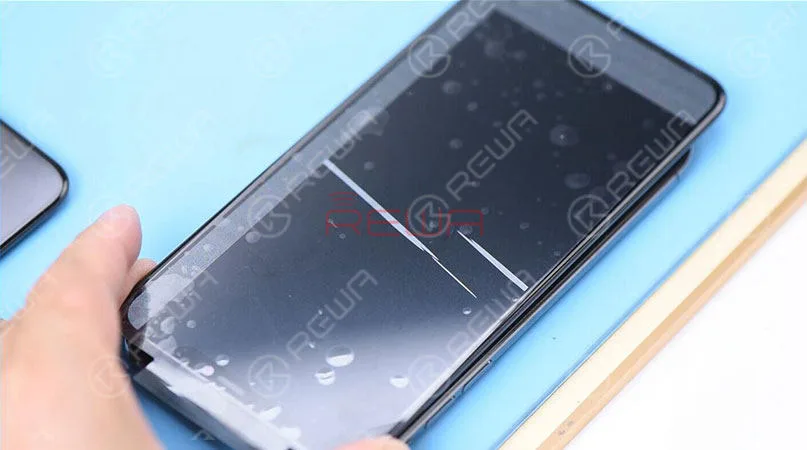
The backlight of the iPhone 11 Pro Max screen displays normally. However, the screen comes with horizontal lines.
Judging by this, although pins of the two phone’s display connector and touch connector function almost the same, the difference between driving programs of the two screens can still result in horizontal lines on the screen when iPhone 11 Pro Max’s screen is connected to iPhone 11 Pro’s housing.
What can we do to turn an iPhone 11 Pro into an iPhone 11 Pro Max?
Case: Turn iPhone 6s Plus into iPhone 6s
How to locate the board ID resistors?
Aperto Refox and locate the Board ID resistor of iPhone 6s Plus.
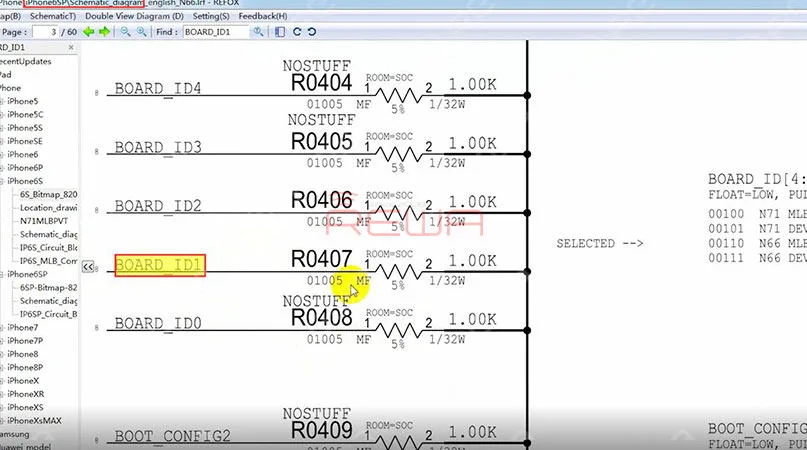
We can see 5 Board ID resistors on the schematic. R0404, R0405, R0406, R0407 and R0408.
The board ID of iPhone 6s Plus is N66 MLB.
Board ID resistors of iPhone 6s Plus are arranged in an array of 00110.
Which means resistors on BOARD_ID1 and BOARD_ID2 should be kept.
The board ID of iPhone 6s is N71 MLB.
Board ID resistors of iPhone 6s are arranged in an array of 00100.
Which means the resistor on BOARD_ID2 should be kept.
To turn iPhone 6s Plus into iPhone 6s, all we need to do is to remove R0407 on BOARD_ID1.
For detailed operation of board ID resistors locating, please click to watch the video below.
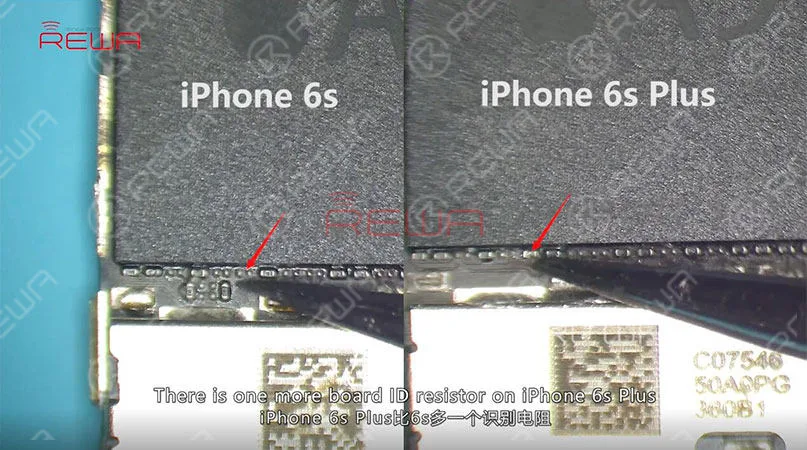
Compare the logic board of iPhone 6s and that of iPhone 6s Plus.
There is one more board ID resistor on iPhone 6s Plus.
This one is R0407 as mentioned above.
And we can just remove it with tweezers.
Then get the logic board of iPhone 6s Plus installed to the housing.
Connect the phone to the computer with the USB cable.
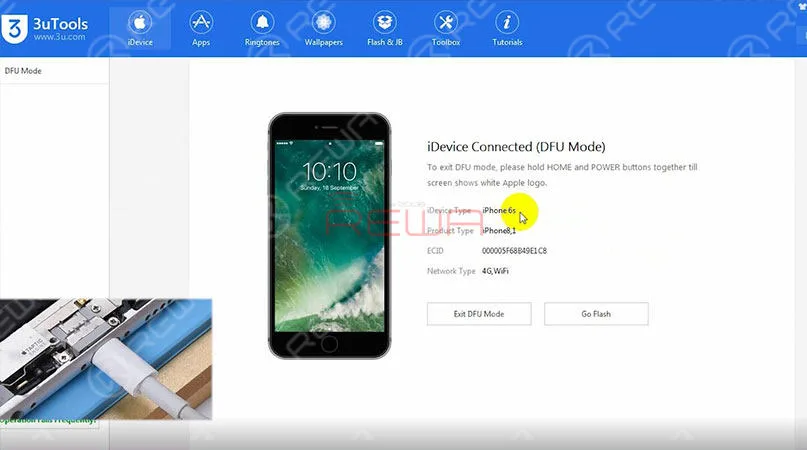
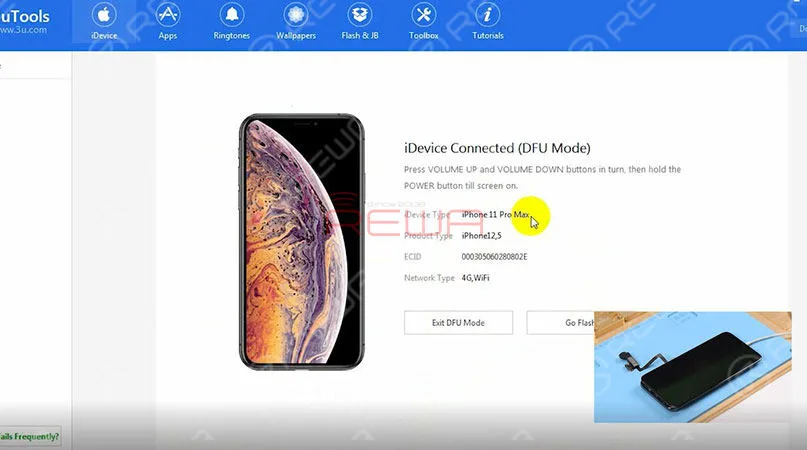
We can see on the interface of 3uTools that the phone has entered DFU mode.
And the phone has been turned into iPhone 6s.
We can write firmware of iPhone 6s to the phone.
However, sockets of iPhone 6s’s display connector and touch connector are different from those of iPhone 6s Plus, iPhone 6s screen cannot be connected to iPhone 6s Plus’s housing.
Can we turn iPhone 11 Pro into iPhone 11 Pro Max by changing the board ID resistor?
iPhone 11 Pro Motherboard Separating
Place the motherboard of iPhone 11 Pro on the heating platform to heat for 3 minutes.
Press the SIM card reader with the tweezers.
And push the upper layer with another tweezers slightly.
With solder balls on the third space PCB starting to melt, clamp the screws fitted into the screw holes with pinzette.
And pick up the upper layer with tweezers vertically.
Suggerimenti:
Do not shake the tweezers when picking up the upper layer.
The third space PCB might be stuck in bridging issues.
And the recombination work would also be affected.
Continue to pick up the lower layer.
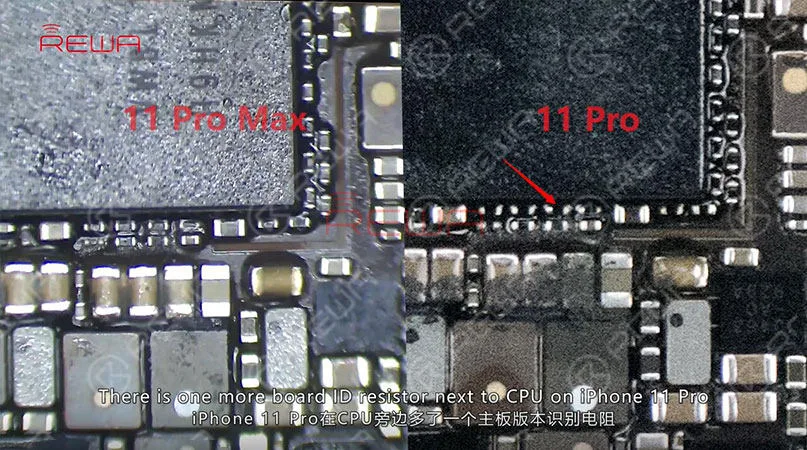
Compare the motherboard of iPhone 11 Pro and that of iPhone 11 Pro Max.
The component array of the two is almost the same.
There is one more board ID resistor next to CPU on iPhone 11 Pro.
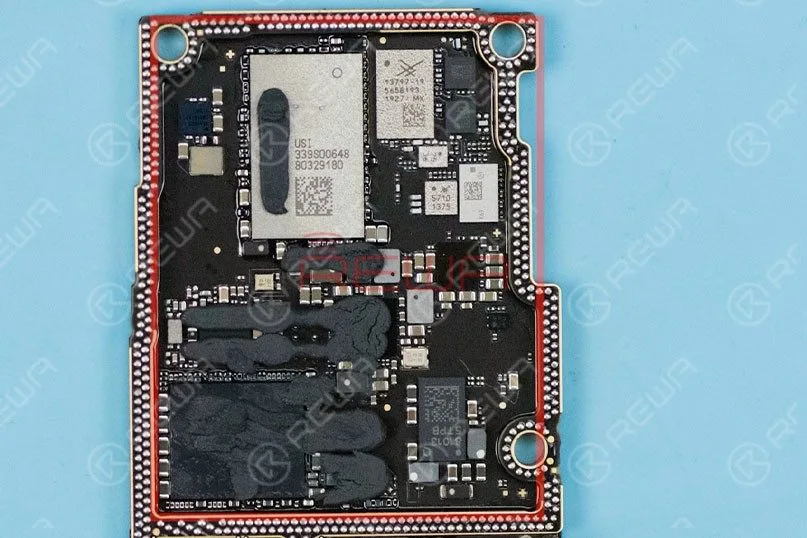
Please remove the black adhesive before removing the board ID resistor.
Continue to heat with the Hot Air Gun to remove the resistor.
iPhone 11 Pro Motherboard Recombination
With temperature of the platform reaching 170℃, place the lower layer on the platform to heat for 10 seconds.
Apply some Paste Flux to the third space PCB evenly.
Get the upper layer in position. Heat for about 5 minutes.
Then, press the SIM card reader with the tweezers, and push the upper layer with another tweezers slightly.
If the upper layer returns to the previous position automatically, then the soldering process is completed.
For detailed operation of iPhone 11 Pro Motherboard Separating & Recombination, please check the video qui.
Put the motherboard of iPhone 11 Pro into its housing.
Connect iPhone 11 Pro Max screen with iPhone 11 Pro’s s housing.
Connect the battery. Connect the phone to the computer with the USB cable.
We can see on the interface of 3uTools that the phone has entered DFU mode.
And the phone has been turned into iPhone 11 Pro Max.
We can write firmware of iPhone 11 Pro Max to the phone.
Continue to restore the phone in DFU mode.
Apple logo appears on the screen during restoring.
Once completed, the phone goes to the activation screen.
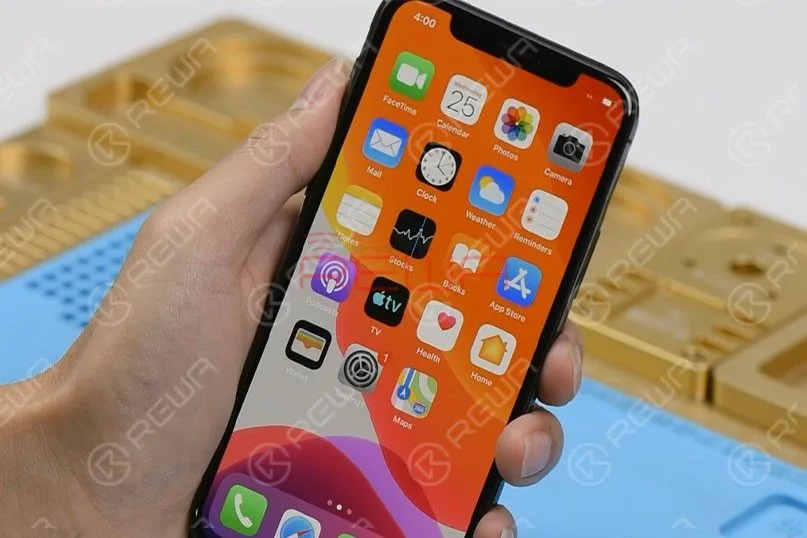
And then the home screen. The phone displays normally.
Can iPhone 11 Pro possibly be turned into iPhone 11 Pro Max? It is actually theoretically possible. With pins of the two phones’ display connector and touch connector functioning almost the same, we can turn an iPhone 11 Pro into an iPhone 11 Pro Max by changing board ID resistors. Check our video now and find out how we finally made it.
Warm Tips: This video is made for technique sharing only. For those who have no professional skills, please look before you leap.
 English
 Español
 Français
 Deutsch
 Italiano