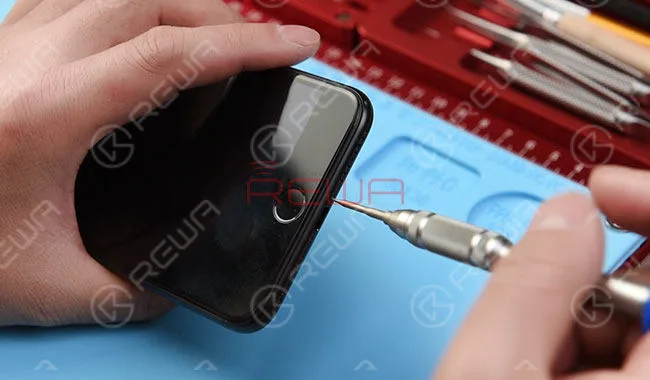
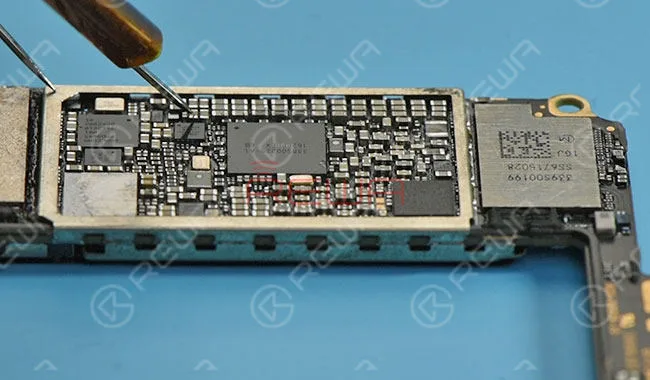
Water damage is a common issue for iPhone in daily use. In this video, the home button of iPhone 7 is not working after water damaged, because lines on logic board get corroded and damaged. Since there is a high failure risk in repairing, REWA LAB presents you a method to fix heavily corroded and damaged logic board step by step by Ultrasonic Cleaner and making jumper wire. To fix your iPhone 7 home button issue caused by water damage, please follow the repair operations of our tutorial video.
Quando il vostro iPhone non si accende, cosa potete fare?
Il primo passo è quello di trovare il motivo per cui l'iPhone non si accende: potrebbe esserci un problema hardware o software relativo al dispositivo.
Ad esempio, se l'iPhone è stato danneggiato fisicamente o è caduto in acqua o per altri motivi, ci sono molte soluzioni su Internet, come la ricarica dell'iPhone, il riavvio, il riavvio duro, l'utilizzo di software per risolvere il problema... Per queste soluzioni, potete provare, ma qui vi forniremo una soluzione di alto livello e professionale per risolvere il problema dell'iPhone che non si accende.
L'iPhone X, con il suo display di dimensioni super, la più recente tecnologia biometrica - Face ID, il vetro più resistente, la ricarica wireless e così via, ha colpito il cuore della maggioranza al momento della sua uscita nell'ottobre 2017.
Per quanto sia perfetto, con il passare del tempo mostra dei malfunzionamenti.
All'inizio si sono verificati malfunzionamenti dovuti alla mancata risposta al tocco, allo schermo bloccato e ad altri problemi di visualizzazione. Ultimamente, sono comparsi alcuni malfunzionamenti della scheda logica. Ad esempio, l'iPhone X non si accende, ecc.
Se si conosce la struttura della scheda logica dell'iPhone X, si deve sapere che la scheda logica dell'iPhone X è stata piegata a metà e i due strati sono stati saldati insieme: lo strato superiore è la scheda principale e lo strato inferiore è la scheda dei segnali.
Il che ha reso molto difficile la nostra riparazione.
Oggi condividiamo un caso di riparazione della scheda logica dell'iPhone X che non si accende. Vediamo qual è la parte più difficile.
Smontaggio
Smontare l'iPhone X che non si accende. Estrarre la scheda madre a doppio strato.
Ecco la prima difficoltà: separare la scheda madre piegata, che richiede un controllo rigoroso della temperatura.
Una temperatura troppo elevata danneggerebbe i componenti circostanti, ma una temperatura troppo bassa non può separarli. Con pazienza e tempo, riusciamo a separare la scheda logica con successo.
Diagnosi
Dopo aver separato la scheda logica, collegare lo strato superiore con l'alimentazione CC.
La corrente di lettura è anormale. Pertanto, il guasto viene localizzato nello strato superiore.
Per continuare la diagnosi, misuriamo la tensione di alimentazione dello strato superiore con un multimetro.
E scoprire che non c'è alcun valore di tensione su C2771 e C2770.
Misurando con il multimetro si può confermare che l'induttore L2770 è danneggiato.
Manutenzione e test
È quindi necessario smontare l'induttore L2770 e sostituirlo con uno nuovo.
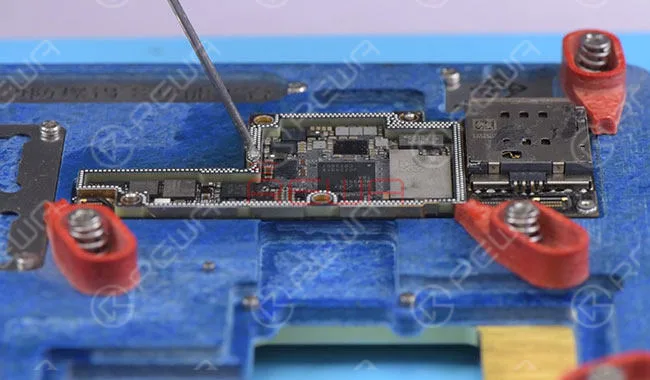
In primo luogo, fissare lo strato superiore al supporto del PCB.
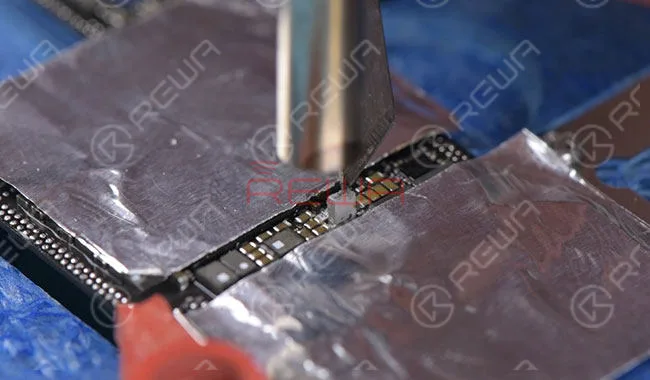
Per proteggere i componenti intorno a L2770, applicare il nastro adesivo per alte temperature.
Quindi risaldare con un nuovo induttore.
Dopo il raffreddamento, misurare nuovamente il valore di corrente collegandolo all'alimentazione CC.
Questa volta il valore di corrente misurato sull'amperometro è normale. Guasto eliminato.
Riassemblare
Indovinate un po'? Arriva la parte più difficile della riparazione: rimuovere le lattine dai due strati separatamente.
Trasferiamo la direzione per 5 volte e infine terminiamo il processo di rimozione dello stagno.
Poi un'altra parte difficile: il reballaggio dello strato inferiore.
In realtà ce l'abbiamo fatta solo al secondo tentativo.
Alla fine, dopo aver risaldato le due schede e riassemblato il telefono, il problema dell'iPhone X che non si accende è stato risolto.
L'iPhone non si accende e lo schermo è nero o bloccato? Esclusi i problemi software, il problema potrebbe essere causato da una scheda madre difettosa. Poiché la scheda madre di iPhone X è un pezzo unico fondamentalmente ripiegato su se stesso e saldato, il design e la struttura unici hanno reso qualsiasi riparazione della scheda madre molto più difficile rispetto alle serie precedenti. Con il nostro caso di riparazione di oggi per un iPhone X che non si accende, il guasto è stato confermato come un danno all'induttore tramite la misurazione della tensione. E possiamo risolvere il problema dell'iPhone X che non si accende sostituendo l'induttore e risaldando la scheda.
Solo 4 passaggi per riparare il tuo L'iPhone X non si accende.
Smontare
Smonta l'iPhone X che non si accende. Estrai la scheda madre a doppio strato. Ecco che arriva la prima difficoltà: separare la scheda madre piegata, il che richiede un rigoroso controllo della temperatura. Una temperatura eccessivamente alta danneggerebbe i componenti circostanti, ma una temperatura troppo bassa non permette di separarli. Con pazienza e tempo, separiamo con successo la scheda logica.
2. Diagnosi
Dopo che la scheda logica è stata separata, collegare lo strato superiore all'alimentatore in corrente continua. La corrente di lettura è anormale. Quindi individuiamo il guasto nello strato superiore. Per continuare la nostra diagnosi, misuriamo la tensione di alimentazione dello strato superiore con il multimetro. E scopriamo che non c'è alcun valore di tensione su C2771 e C2770. Misurando con il multimetro possiamo confermare che l'induttore L2770 è danneggiato.
3. Manutenzione e Test
Quindi dobbiamo rimuovere l'induttore L2770 e sostituirlo con un nuovo induttore. Per prima cosa, fissare lo strato superiore al supporto per PCB. E applicare del nastro adesivo resistente alle alte temperature sui componenti intorno a L2770 per protezione. Quindi saldare nuovamente con un nuovo induttore. Dopo il raffreddamento, misurare nuovamente il valore della corrente collegandolo a un alimentatore CC. Il valore della corrente misurato sull'amperaggio è normale questa volta. Guasto risolto.
4. Rimonta
Indovina un po'? Ecco che arriva la parte più difficile della riparazione: dissaldare gli schermi metallici dai due strati separatamente. Abbiamo invertito la direzione per 5 volte e finalmente completato il processo di rimozione. Poi un'altra parte difficile: rifare le sfere di stagno (reballing) sullo strato inferiore. In realtà ci siamo riusciti solo al nostro secondo tentativo. Alla fine, siamo riusciti a risaldare le due schede e a rimontare il telefono, e il problema dell'iPhone X che non si accende è stato finalmente risolto.
Recently, REWA has received feedback from several third-party repair shops regarding issues with the ambient light sensor not working on some iPhone 8 series and iPhone X devices after repair. After conducting tests and analysis, REWA LAB has discovered that Apple may have implemented technical barriers to prevent customers from seeking third-party repairs. Watch the video to see the testing procedures and results.
What should you do if your iPhone 7 won’t turn on after being dropped?
The problem may be caused by a software crash or a complicated hardware issue.
We have published an iPhone 6 won’t turn on and iPhone X won’t turn on guide video, and this time, we received an dropped iPhone 7 Plus which cannot turn on.
The problem was finally detected as CPU being short-circuited. Here we have detailed troubleshooting procedures.
iPhone 7 won’t turn on Diagnosis
Take apart the phone and disconnect the battery, then connect the phone with the Alimentazione CC and press the power button to power on.
The current reading of the ammeter jumps to 350mA and then stays still, which is abnormal and indicates that the logic board is short-circuited.
disassemble the phone and detach the battery
Disconnect the power supply and take out the logic board.
Run diode measurements on capacitors around power IC one by one.
All the values are normal except C1823 – It displays 0, which indicates that C1823 is short-circuited.
From the schematics, we can see that C1823 is the filter capacitor of PP1V8-SDRAM, and it is directly connected to CPU SDRAM.
diode measurements on capacitors around power IC Repair
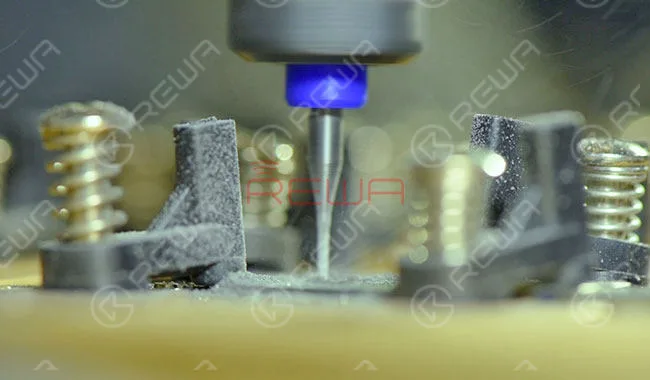
Collegare la scheda logica al Supporto per PCB, and take down the shielding cover by heating with Hot Air Gun, then remove CPU SDRAM with CNC Chip Grinding Machine.
After chip grinding, attach the logic board to the PCB Holder and clean it with PCB Cleaner, then remove the black adhesive around with Sculpture Knife.
After that, apply some BGA Paste Flux to the bonding pad.
Align the new SDRAM to the right place(Don’t reverse the direction), and then solder with Hot Air Gun. After cooling for 5 minutes, clean thoroughly with PCB Cleaner.
CPU SDRAM chip grinding Testing
Connect the phone with the DC Power Supply, then short Pin 13 of J4504 to the ground with the tweezer to trigger the power on the system.
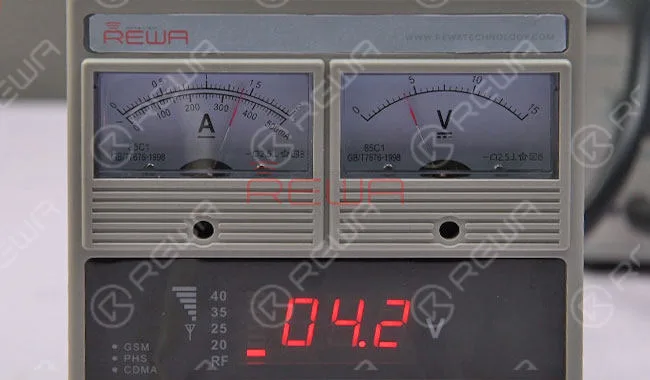
This time, the current reading on the ammeter is normal.
connect the phone with the DC Power Supply
Get the logic board assembled and buckle the display assembly.
Connect the phone to the computer, then press and hold volume down and power button to get into DFU mode. Restore the phone via iTunes.
Once done, insert the SIM card and activate the phone.
After testing, All the functions work normally.
current reading on the ammeter
For more details about iPhone 7 won’t turn on repair and iPhone repair videos, please check our YouTube video.
Need cell phone repair replacement parts or tools?
REWA offers wholesale and retail mobile phone repair parts/tools with affordable prices for 10 years. Welcome to check our online store shop.rewa.tech.
iPhone 7/7 Plus won’t turn on after it is dropped? Due to the imperfect technology of CPU supplier, the SDRAM of iPhone 7/7 Plus series can be easily damaged. Once dropped, the SDRAM might be short-circuited and the phone won’t turn on afterward. Let’s click the video to know how we fix iPhone 7 plus won’t power on the issue in a more efficient way.
Diagnosi
Take apart the phone and disconnect the battery, then connect the phone with the DC Power Supply and press power button to power on. The current reading of the ammeter jumps to 350mA and then stays still, which is abnormal and indicates that the logic board is short circuited.
Disconnect the power supply and take out the logic board. Run diode measurements on capacitors around power IC one by one. All the values are normal except C1823 – It displays 0, which indicates that C1823 is short-circuited. From the schematics, we can see that C1823 is the filter capacitor of PP1V8-SDRAM, and it is directly connected to CPU SDRAM.
Attach the logic board to the PCB Holder, and take down the shielding cover by heating with Hot Air Gun, then remove CPU SDRAM with CNC Chip Grinding Machine. After chip grinding, attach the logic board to the PCB Holder and clean it with PCB Cleaner, then remove the black adhesive around with Sculpture Knife. After that, apply some BGA Paste Flux to the bonding pad. Align the new SDRAM to the right place(Don’t reverse the direction), and then solder with Hot Air Gun. After cooling for 5 minutes, clean thoroughly with PCB Cleaner.
Test
Connect the phone with the DC Power Supply, then short Pin 13 of J4504 to the ground with tweezer to trigger the power on system. This time, the current reading on the ammeter is normal.
Get the logic board assembled and buckle the display assembly. Connect the phone to the computer, then press and hold volume down and power button to get into DFU mode. Restore the phone via iTunes. Once done, insert the SIM card and activate the phone. After testing, All the functions work normally.
iPhone 6s overheating and getting hot? Usually the problem is caused by excessive running apps, but in this tutorial video, we demonstrated a logic board repair method. After current detecting and rosin detecting, we can confirm that the problem was caused by damaged capacitors inside the WiFi module. With our repairing experience, we adopt a exclusive repair solution to fix the iPhone 6s high temperature warning screen issue.
Strumenti utilizzati:
Piattaforma integrata per la riparazione dei telefoni cellulari
Stazione di rilavorazione digitale ad aria calda - 861DW
Stazione di rilavorazione digitale con saldatore - 203H
Pinzetta dritta - Tipo 3
PCB Cleaner
Adesivo termoresistente
Soft Brush – Type 1
Coltello da scultura
Supporto per PCB - Tipo 1
Comunicazione Manutenzione Alimentazione
Flusso di saldatura alla colofonia di elevata purezza
Avete mai riscontrato il problema dell'assenza di suono dell'altoparlante dell'iPhone 6 durante la composizione di numeri o la riproduzione di musica tramite l'altoparlante più alto e, se inserite gli auricolari, il suono viene emesso di nuovo? Questo problema di assenza di suono dell'altoparlante dell'iPhone può essere causato da una pseudo-saldatura di alcuni componenti quando l'iPhone lascia la fabbrica. Con il passare del tempo, l'ambiente operativo e le abitudini personali degli utenti possono accelerare l'ossidazione o il distacco dei componenti pseudo-saldati. Vediamo il video e scopriamo come risolvere il problema dell'altoparlante dell'iPhone che non funziona.
Strumenti utilizzati:
Comunicazione Manutenzione Alimentazione
Stazione di rilavorazione digitale con saldatore - 203H
Stazione di rilavorazione digitale ad aria calda - 861DW
Piattaforma integrata per la riparazione dei telefoni cellulari
Multimetro digitale - F17B+ - Tipo 3
Supporto per PCB - Tipo 1
Adesivo termoresistente
Coltello da scultura
Detergente per PCB - 250 ml
Pinzetta dritta
Pinzetta a gancio curvo
Filo di saldatura
IC e componenti Apple
Pasta saldante fluida per strisce BGA
Flusso di saldatura alla colofonia di elevata purezza
Have you checked our newly released about cracked iPhone 7 screen repair tutorial?
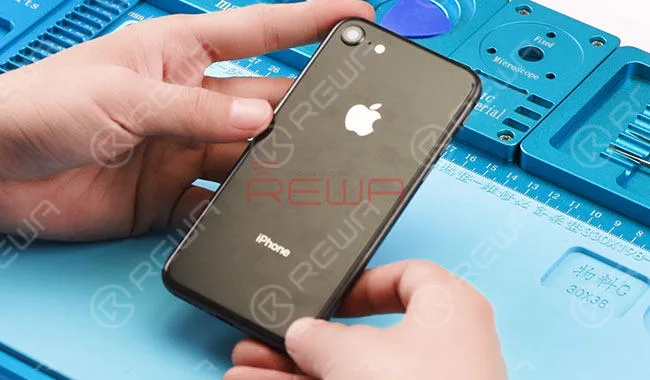
It is worth to take a look. Compare to iPhone 7, iPhone 8 and iPhone X look gorgeous, but also make them vulnerable, especially the back glass.
The fragile back glass is long reported extremely difficult to repair and may cost you more than expected due to the new design with wireless charging, embed camera and stubborn glue.
Have no idea about how to start your repair?
Don’t be frustrated. After the iPhone X OLED screen glass-only repair guide ,REWA here rolls out a new and quick solution for iPhone 8 and iPhone X back glass repair .
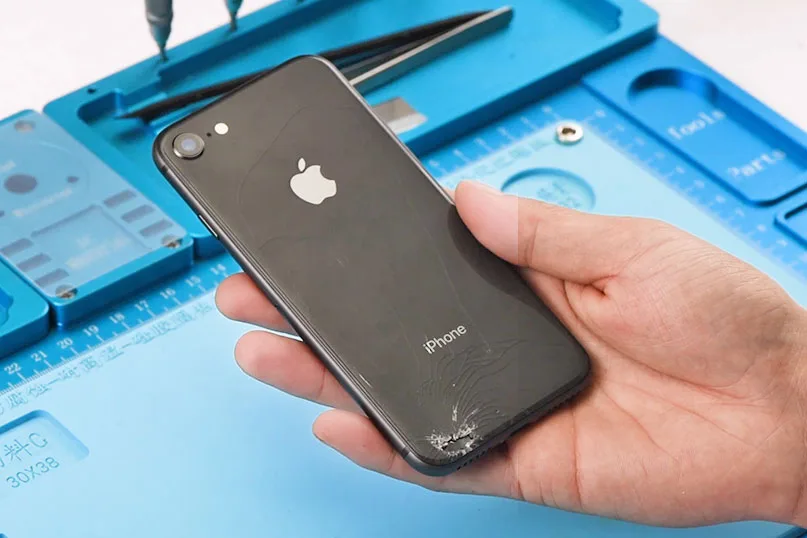
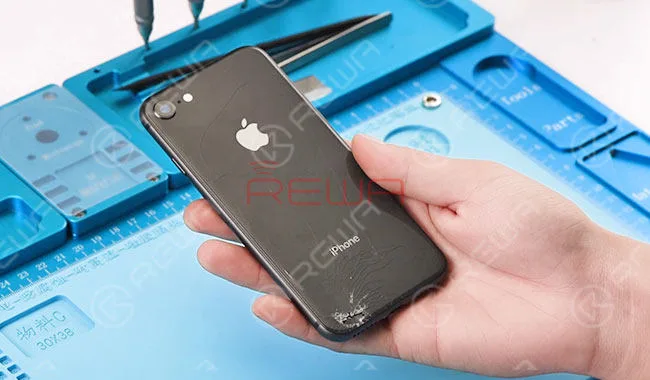
iPhone 8 broken back glass
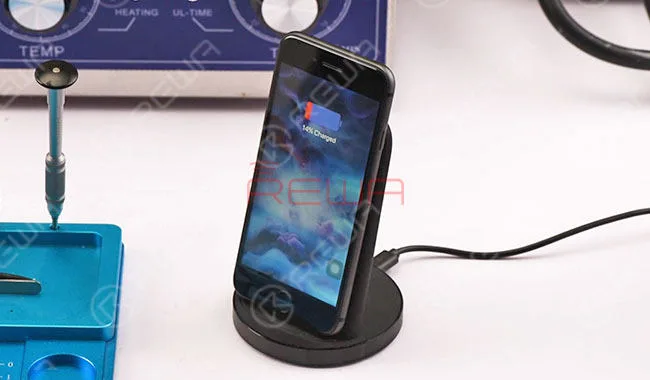
Damaged Back Glass iPhone 8 back glass is damaged but still comes with normal wireless charging.
iPhone 8 wireless charging
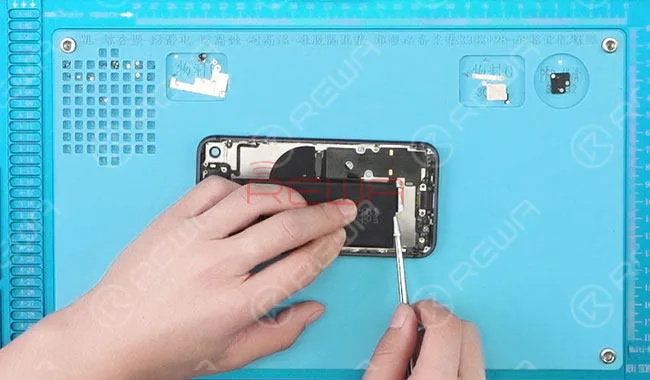
DisassemblingTake down the display assembly.
Remove the screws, rear camera, logic board, louder speaker and taptic engine, then take out the battery and disconnect the charging port flex cable.
Remove the wireless charging coil by heating with Pistola ad aria calda , and disconnect the power switch volume flex cable.
Disassemble the iPhone 8
Back Glass Repairing
Pour adequate dispergator into the container of Ultrasonic Cleaner, then soak the back glass in the container and get the lid on. Set the time of the Ultrasonic Cleaner at 30m , and temperature at 60℃ .
After 30 minutes, take out the glass back.
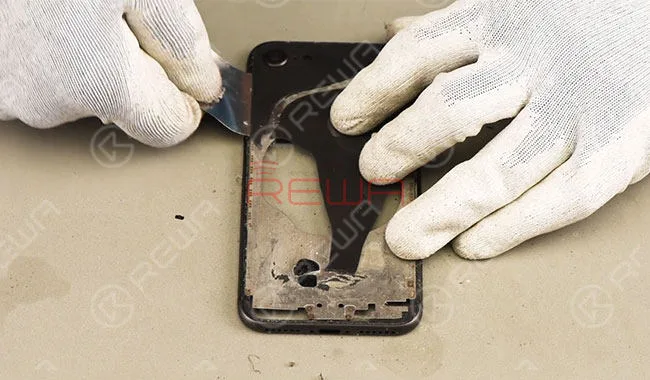
Separate the broken back glass from the middle frame with Pry Sheet.
In case the broken glasses hurt your hands, please clean the table and be careful during the separating process.
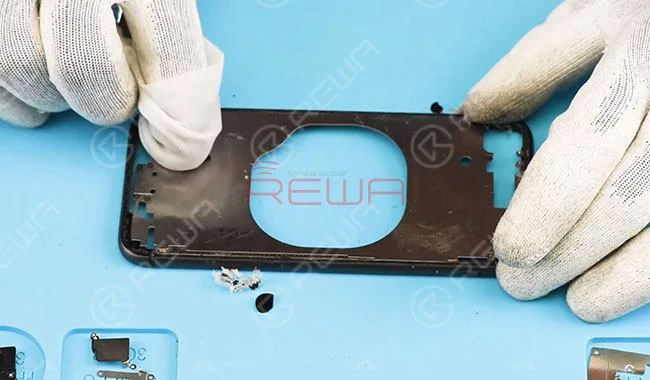
Remove the glue residue on the middle frame with Razor Blade and clean it with N-hexane.
So far back glass separating completed without any injuries on the sides.
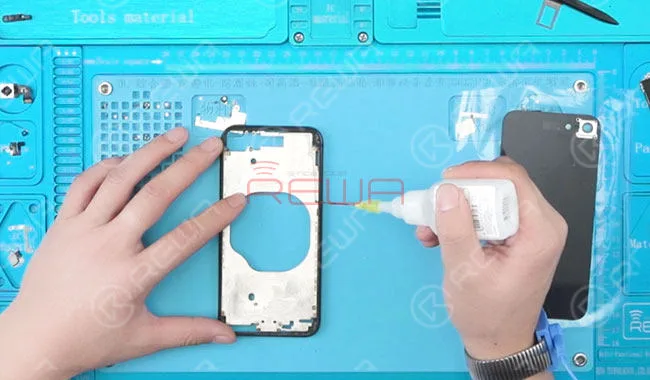
Apply some glue to the middle frame and spread it evenly.
After that, align the rear camera to the right position, then apply pressure and attach the back glass to middle frame tightly.
Once done, clean the glue residue.
Apply glue on the middle frame
ssemble the phone and test, and the phone runs normally with wireless charging.
Per maggiori dettagli su iPhone 8/X Back Glass Repair, please check our video guide.
Now you can order Tools & Parts used in this video on our online shop.
Any questions about these replacement parts/tools, or need assistance when placing your order, please contact us at sales@rewatechnology.com and we will help you ASAP.
iPhone 6 keeps searching for signal? There are many possibilities for the causes of iPhone showing “searching” issue. As soon as they see “Searching”, a lot of people assume the built-in antenna on their iPhone is broken and head straight for the Apple Store. While it’s true that a defective internal antenna can cause the iPhone searching problem, it is by no means the only cause. You may try to figure it out by replacing a new SIM card, restarting the phone or resetting the network.
What if these do not work? This video introduced a logic board solution to fix iPhone 6 constantly searching for network. Let’s check the video for the detailed tutorial.
How To Fix An iPhone That Says Searching
We’ll walk you through the process of troubleshooting an iPhone that says iPhone searching for network, and help you fix the problem, if it can be fixed.
We structure our articles with the simple fixes first, and then we move on to the more complicated fixes if and when they become necessary. If we discover there really is a hardware problem with your iPhone, you can watch our video and we will steps to teach you how to repair your iPhone keeps searching for service.
1.Turn your iPhone off turn on again
This is a simple and necessary steps, when you turn on your iPhone again and then you need to check if your iPhone can search the signal?
2. Update your carrier settings
Sometimes wireless carriers release software updates that change the way your iPhone interacts with the cellular network. Sometimes, these updates fix problems that can cause your iPhone to say “Searching…” all the time.
3. Reset Network Settings
Reset Network Settings restores your iPhone’s cellular data configuration back to factory defaults. It’s an easy way to eliminate the possibility that an accidental change in the Settings app is preventing your iPhone from connecting to the network.
4.Fix Problems With Your SIM Card
All iPhones have a tiny SIM card that wireless carriers use to identify specific iPhones on their network. Your SIM card gives your iPhone your phone number – it’s what tells your carrier you’re you. SIM card problems are a common reason why iPhones say “Searching for service”.
If these steps are not solve your iPhone keeps searching for service, so it means your hardware is broken, you can watch our video to help you solve this question.
Con fino a 15 passaggi all'interno del processo di laminazione, la riparazione dello schermo di solo vetro dell'iPhone X è molto più complicata rispetto allo schermo LCD dei precedenti modelli di iPhone. In considerazione del costo ufficiale di manutenzione dello schermo rotto e della difficile fornitura di schermi sostitutivi di fabbricazione cinese a breve termine, REWA LAB è onorata di presentarvi il nostro successo guadagnato con la rimessa a nuovo dello schermo OLED dell'iPhone X.
Inoltre: Per chi ne ha bisogno, REWA offre anche un servizio di ricondizionamento per i modelli dall'iPhone 5 all'iPhone X. Non esitate a contattarci.
iPhone 8 stuck on Apple logo with an unresponsive home button? Why and how? Different from previous versions, there is a built-in hardware detection during booting process for iPhone 8. Once touch ID gets malfunctioned, the phone will hang on Apple logo during startup and won’t turn on. If you are troubled with the same problem that iPhone 8 can not be activated, check this video for the solution!


 English
 Español
 Français
 Deutsch
 Italiano