Etiqueta: reparación de iphone

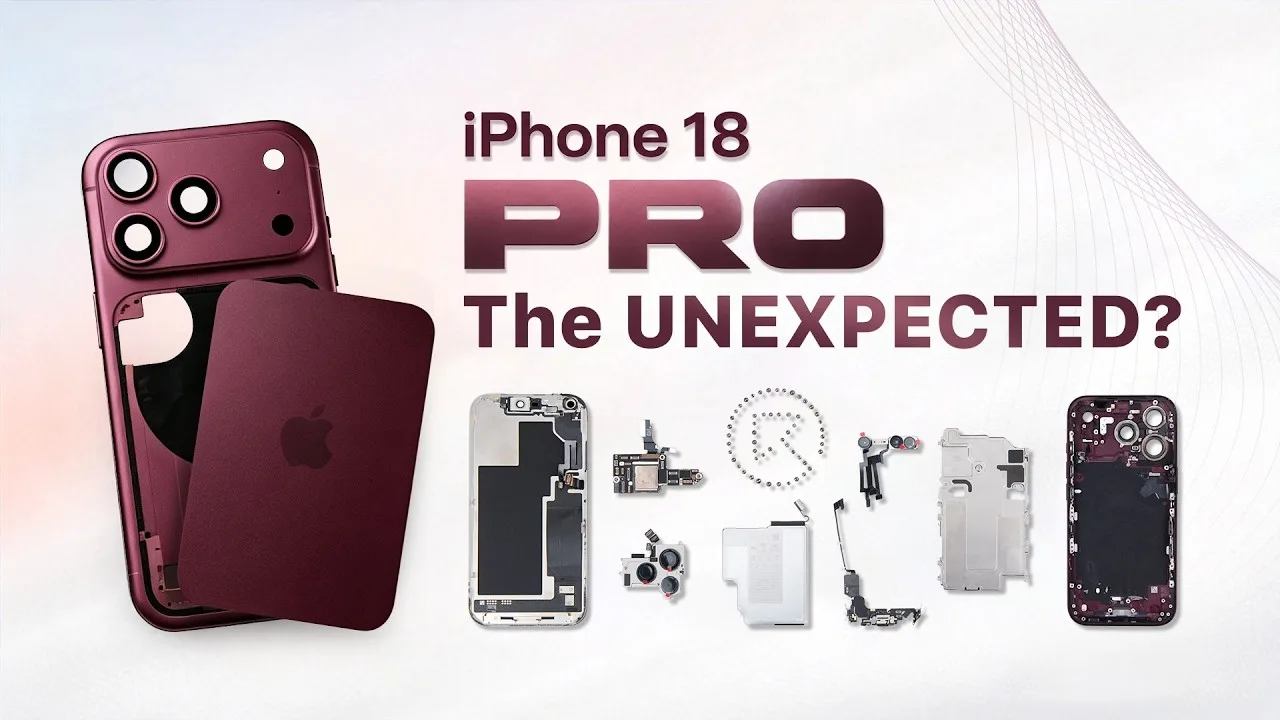
  • iPhone 18 Pro Teardown: What Changed Inside and How Does It Affect Repairability

    iPhone 18 Pro Teardown: What Changed Inside and How Does It Affect Repairability

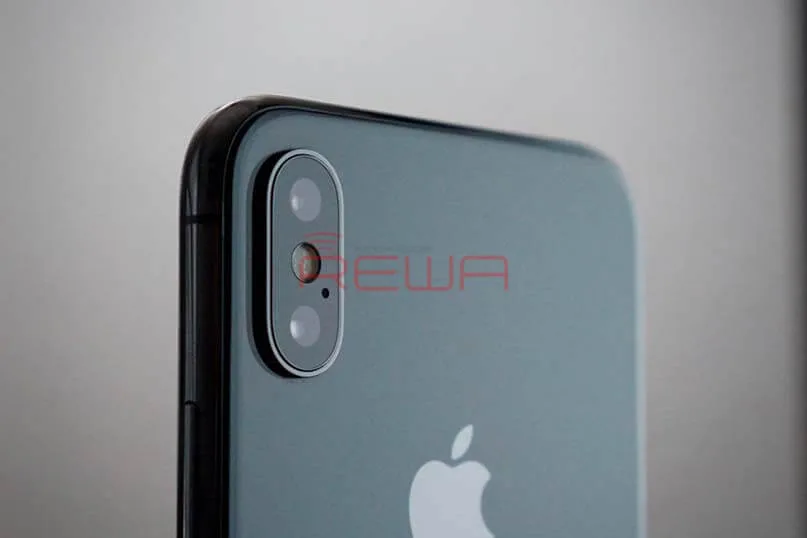
    The iPhone 18 Pro brings several significant changes beneath its familiar exterior. From a smaller Dynamic Island and a new under-display infrared camera to a dramatically larger vapor chamber and a redesigned motherboard layout, Apple has changed more than just the phone’s appearance.

    In this full teardown by REWA Lab, we dive deep into the internal structural changes and analyze what these updates mean for third-party repair shops and aftermarket component manufacturers.

    Step-by-Step Disassembly Process

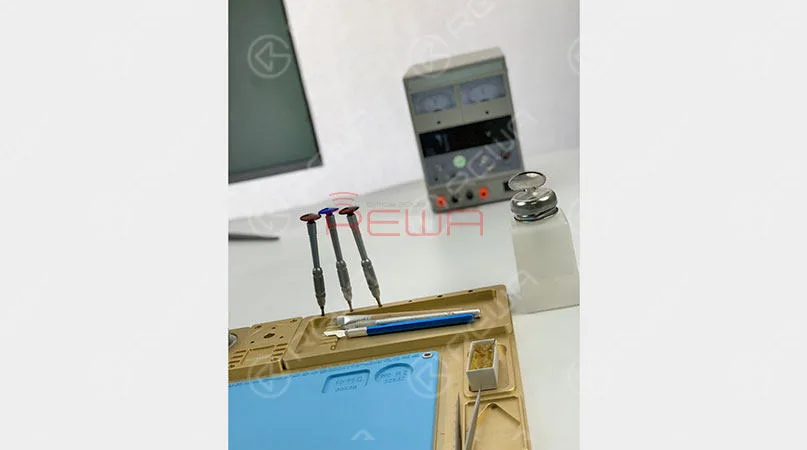
    Opening the iPhone 18 Pro requires specialized repair tools and a cautious approach to avoid damaging internal flexes and sensors. Standard safety and prep steps are as follows:

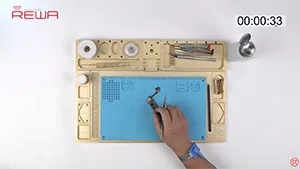
    Preparation Before Teardown: Power off the device and remove the bottom screws with the Pentalobe screwdriver.
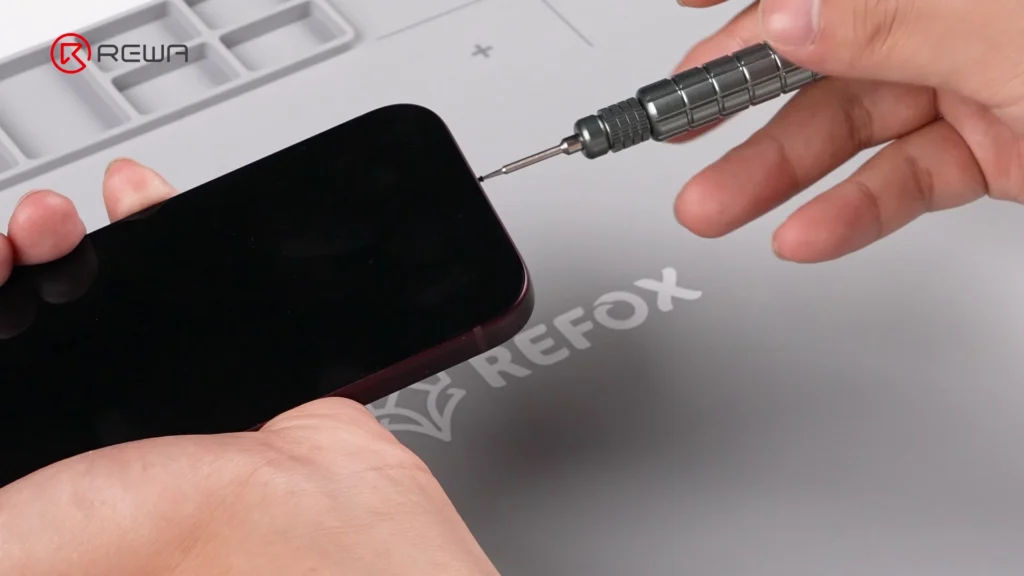
    Removing the bottom screw of an iPhone using a precision Pentalobe screwdriver

    Screen Removal: Heat the screen to soften the perimeter waterproof adhesive. Use an opening tool with suction cup and alcohol isopropílico to gently slice through the seal with an opening pick.

    Camera Protection: Cover the front camera module with protective sponge stickers to prevent dust or scratches.

    Bracket & Flex Cable Disconnection: Unscrew and remove the battery and display connector bracket. Disconnect the battery flex cable, display cable, and front sensor cable to free the screen.

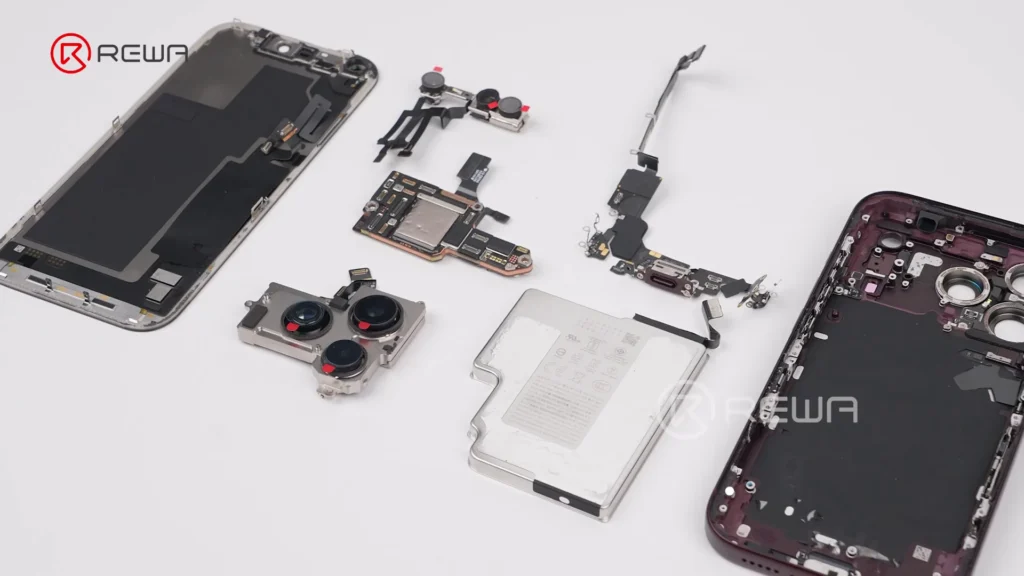
    Vapor Chamber & Cameras: Unscrew the vapor chamber using a 4IP screwdriver. Disconnect and remove the front / rear camera modules.
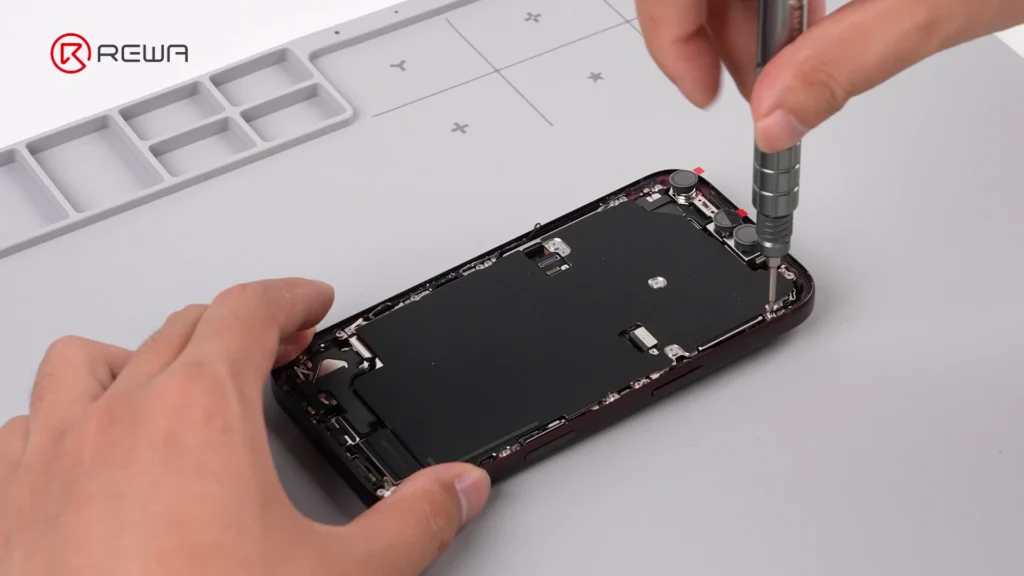
    using a screwdriver to open iPhone 18 Pro for teardown

    Motherboard & Peripheral Removal: Unscrew and flip over the motherboard to disconnect the wireless charging coil. Remove flashlight, LiDAR, SIM tray, SIM card reader, bottom speaker, charging port, Taptic Engine, and microphone in sequence.
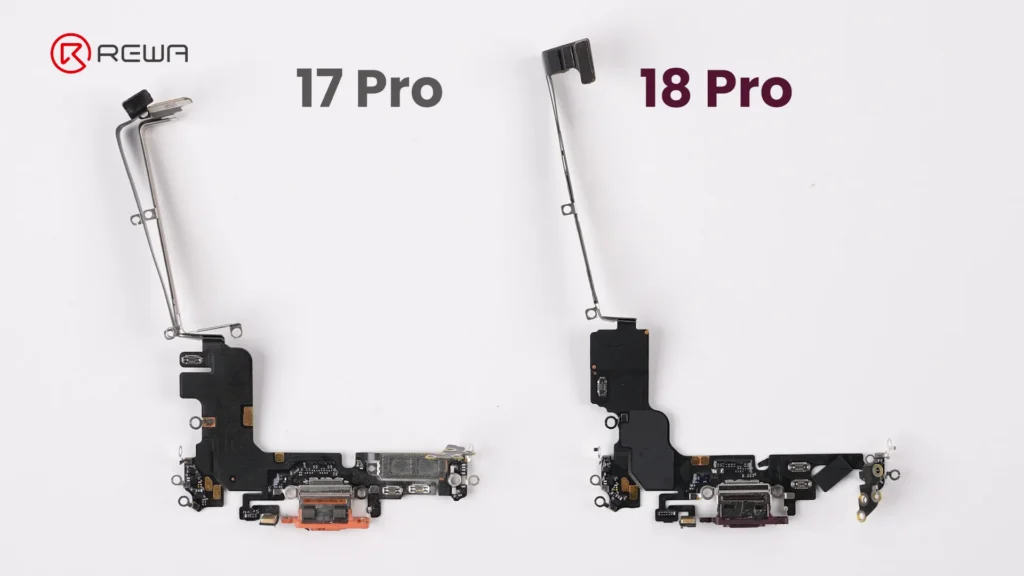
    iphone 18 pro teardown what changed inside how does it affect 3

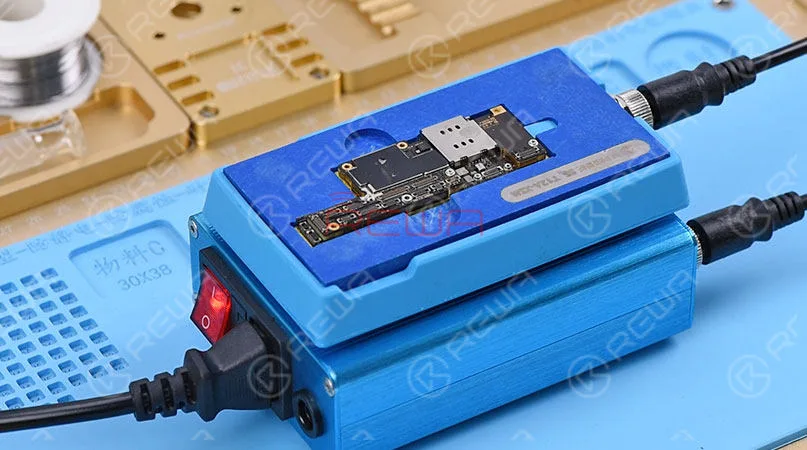
    Battery Debonding: Apply a 9V DC voltage between the silver battery tab (positive probe) and the vapor chamber (negative probe) to electronically deactivate the adhesive, allowing easy battery removal.
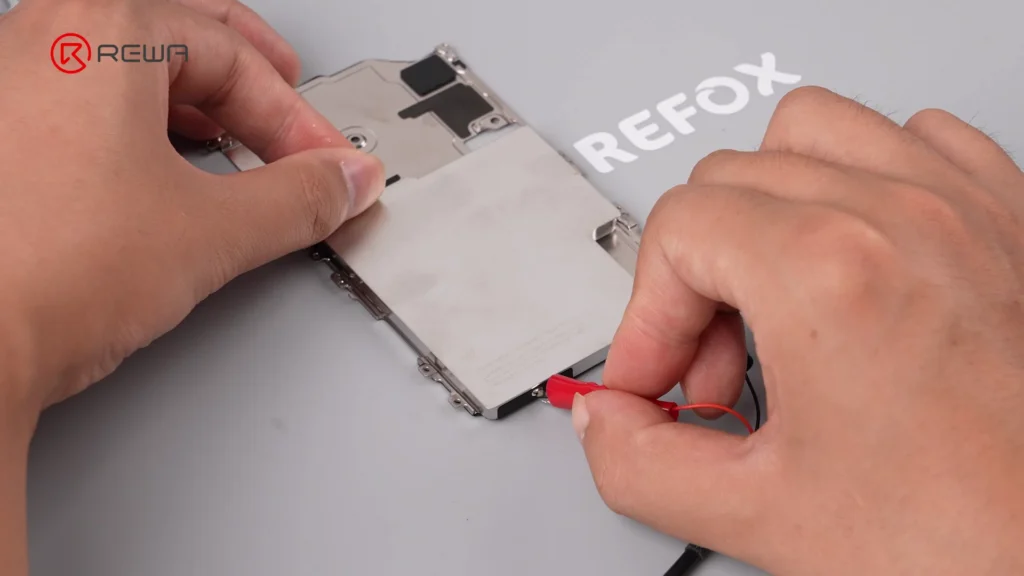
    iphone 18 pro teardown what changed inside how does it affect 4

    Display & Dynamic Island: Under-Display Infrared Tech

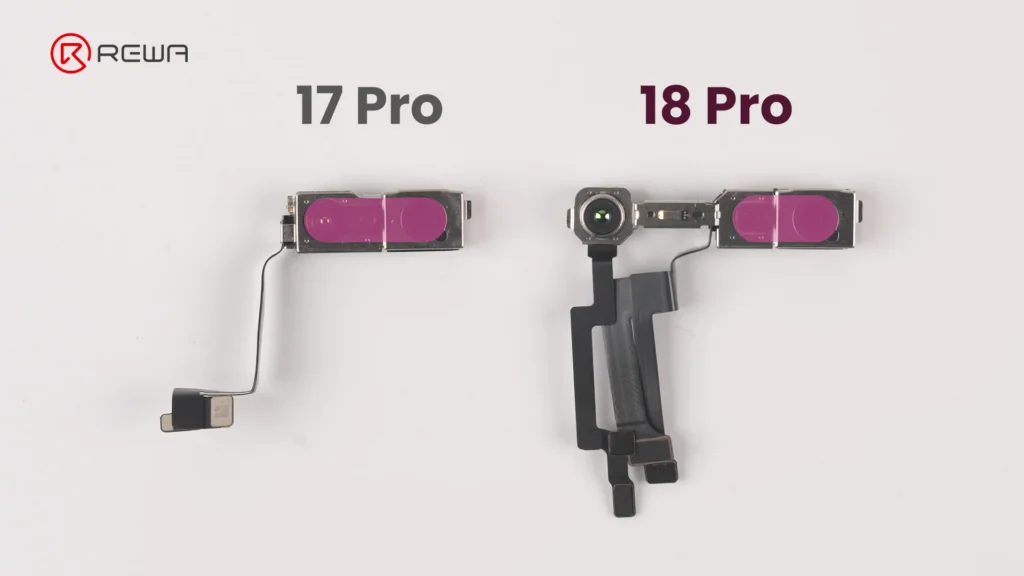
    Apple’s smaller Dynamic Island introduces a more complex under-display optical structure, creating new challenges for display refurbishment. This shrink is achieved by relocating the infrared camera under the display assembly and positioning it near the screen corner.
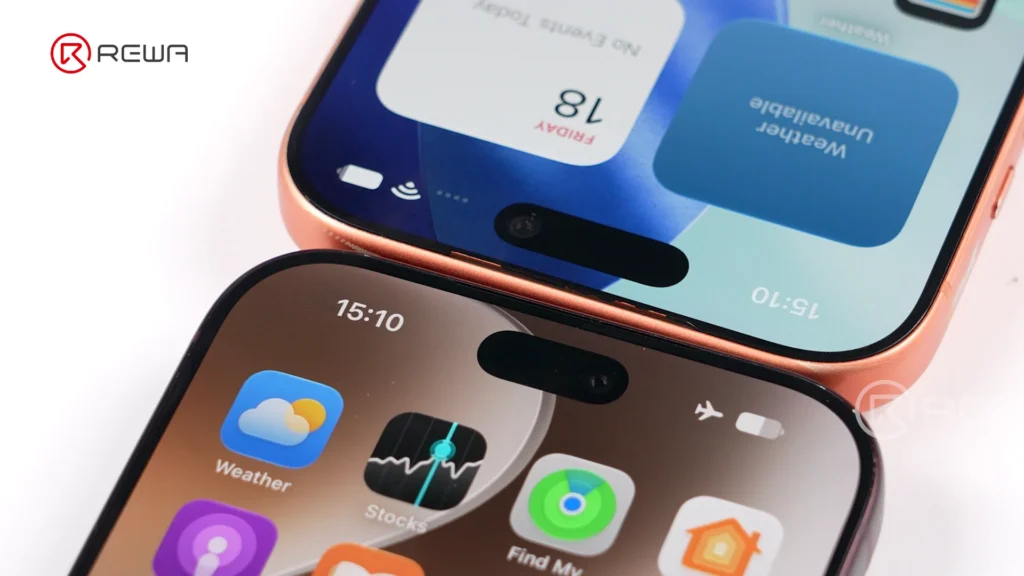
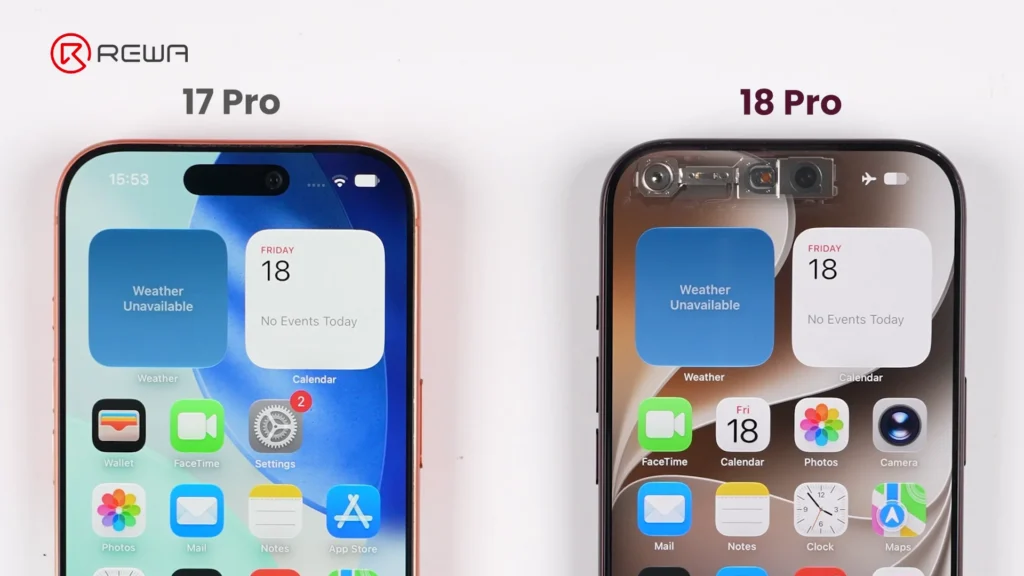
    iphone 18 pro teardown what changed inside how does it affect 5
    iphone 18 pro teardown what changed inside how does it affect 6

    Key display architecture updates include:

    Adjusted Pixel Matrix: The display above the infrared camera features a modified pixel density and arrangement to allow infrared light transmission for Face ID functionality.

    iphone 18 pro teardown what changed inside how does it affect 7

    Unfixed Flex Cable: The display flex cable is no longer secured with heavy adhesive, making screen separation cleaner during repair and refurbishment.

    Aftermarket Challenge: Third-party display manufacturers will face higher precision requirements to replicate the light-transmitting pixel window for Face ID functionality.

    Motherboard Architecture: Higher Difficulty for Micro-Soldering

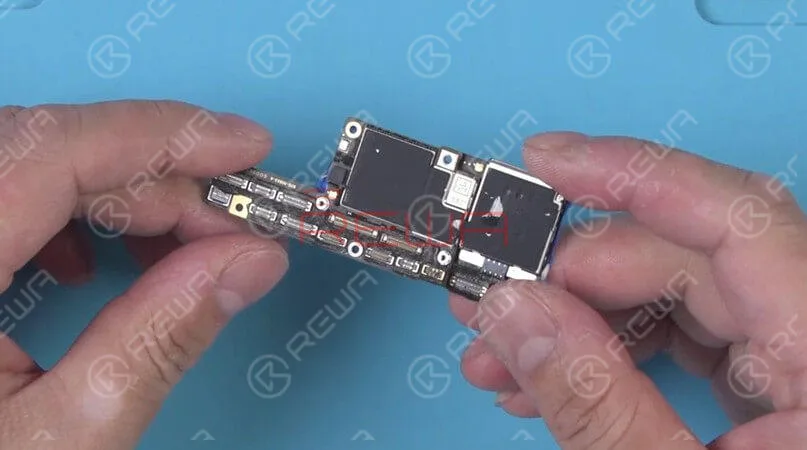
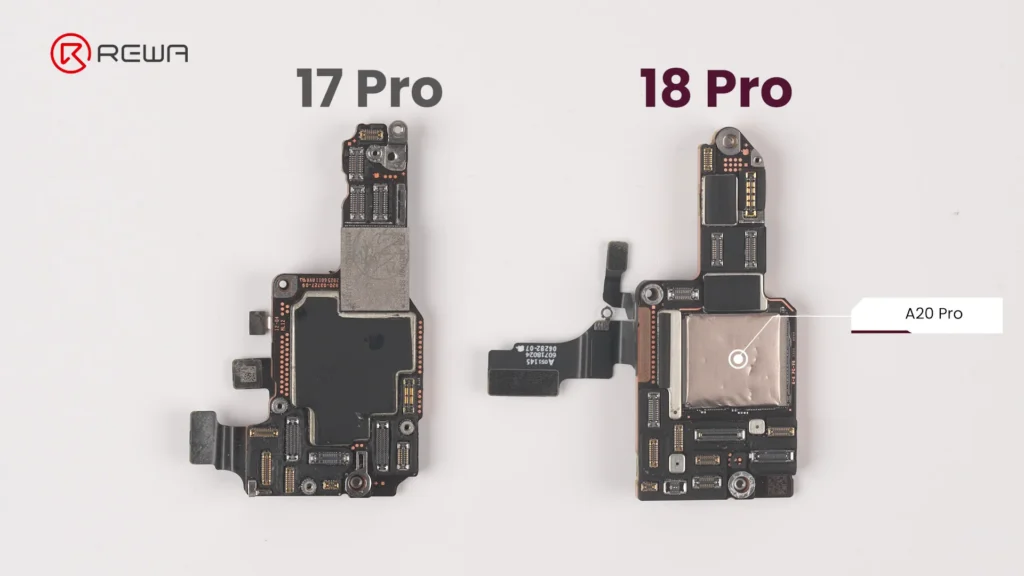
    The updated motherboard layout places crucial chips in vulnerable locations while sandwiching NAND and power IC between layers. For micro-soldering technicians, the iPhone 18 Pro motherboard presents an elevated level of complexity.
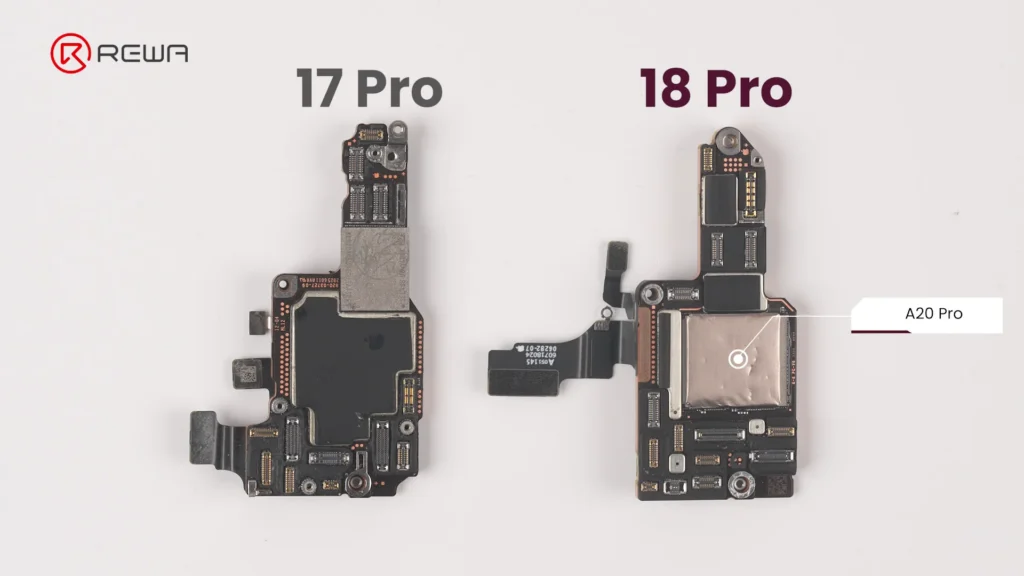
    iphone 18 pro teardown what changed inside how does it affect 8

    Apple has reorganized chip placement and shielding:

    Exposed Logic EEPROM: The Logic EEPROM chip on the board surface lacks a protective metal shield, leaving it significantly more susceptible to physical damage and technician error.
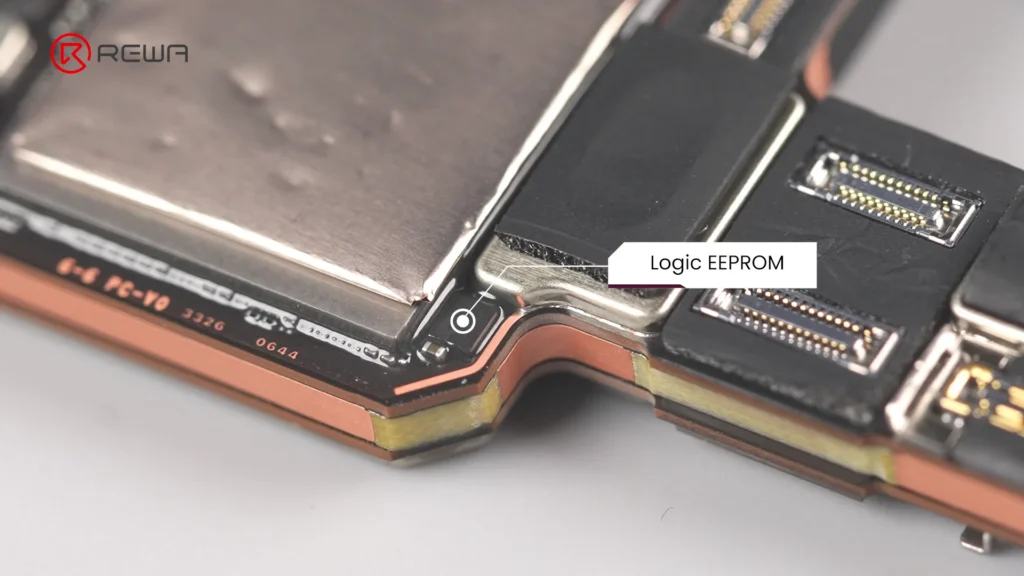
    iphone 18 pro teardown what changed inside how does it affect 9

    Layered Sandwich Design: The NAND storage chip and Power IC are sandwiched inside the multi-layer PCB structure. Replacing or repairing these components requires demanding motherboard desoldering and reballing.

    Relocated A20 Pro Chip: The main processor sits directly on the motherboard surface, and in direct contact with the vapor chamber for substantial improvement in thermal performance.
    iphone 18 pro teardown what changed inside how does it affect 10

    Upgraded Camera Modules

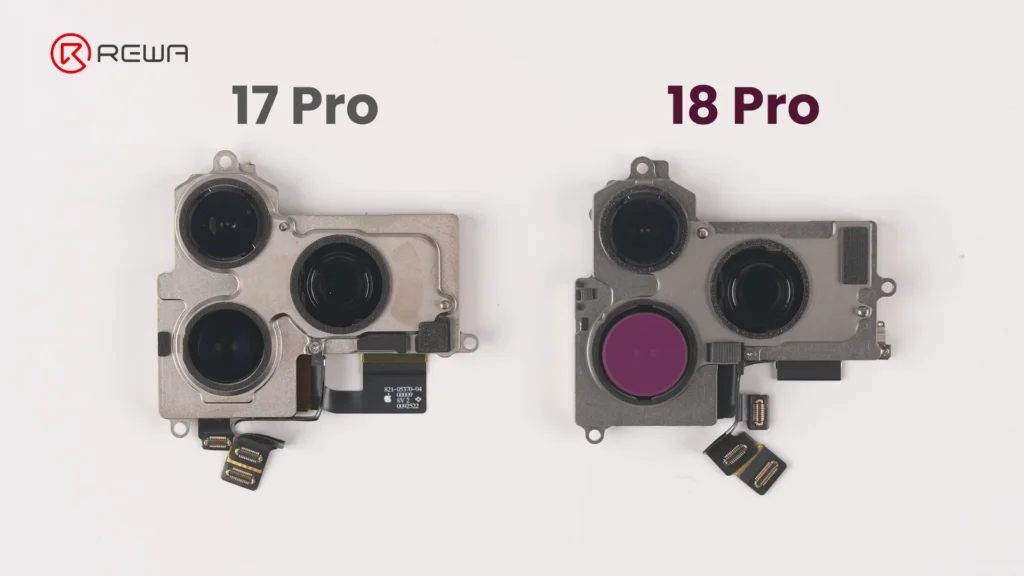
    The iPhone 18 Pro’s camera modules feature noticeable changes in mechanical design, module size, and cable layout.

    Fusion Main Camera: The rear camera module features a variable aperture for greater control over depth of field.
    iphone 18 pro teardown what changed inside how does it affect 11

    Separated Infrared Sensor: The front camera and under-display infrared camera are connected via three separate flex cables, bridged across a wider distance to facilitate the shrunken Dynamic Island.
    iphone 18 pro teardown what changed inside how does it affect 12

    Thermal Management & Battery Changes

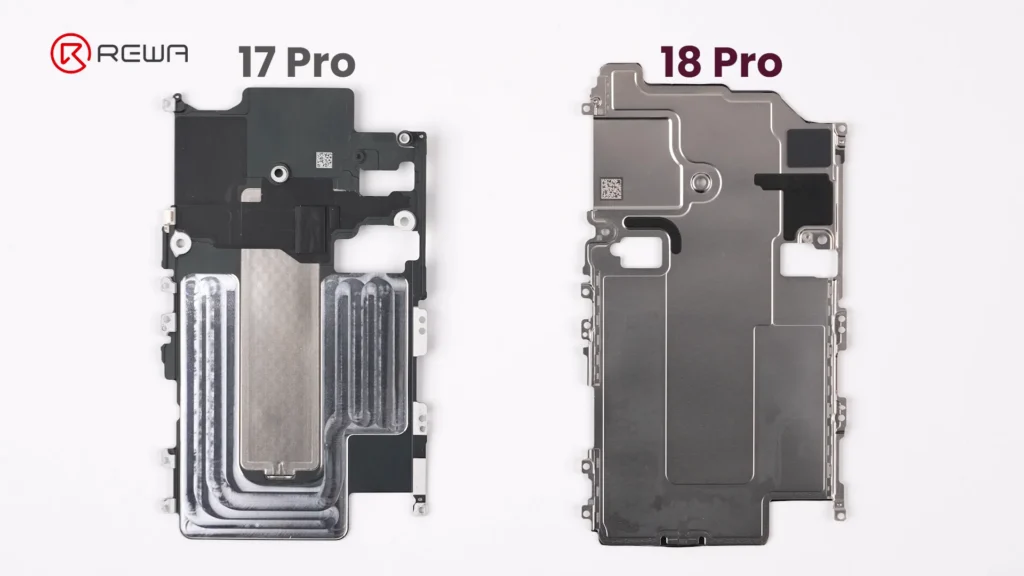
    Vapor chamber on the iPhone 18 Pro receives its largest redesign in years. Apple has integrated a significantly larger vapor chamber, with three times the surface area of the one used in the iPhone 17 Pro.
    iphone 18 pro teardown what changed inside how does it affect 13

    Simply Put:

    A vapor chamber is a flat, sealed metal enclosure containing a small amount of liquid. When the chips heat up, the liquid absorbs heat and evaporates. The vapor then spreads through the chamber, transferring heat to cooler areas where it condenses back into liquid. This helps the phone maintain stable performance under sustained workloads.

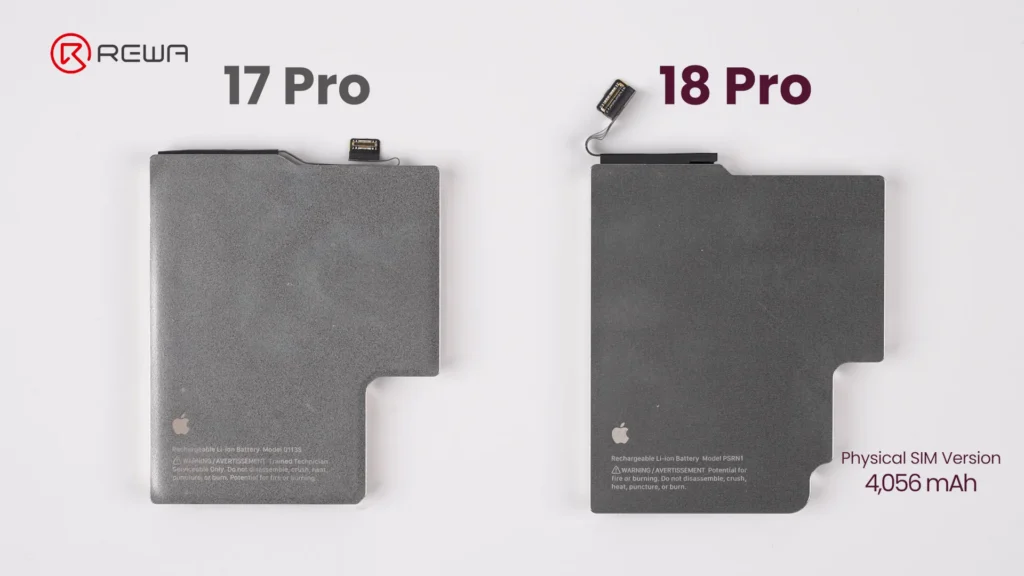
    The battery capacity of iPhone 18 Pro is slightly bigger than that on iPhone 17 Pro. In physical SIM version, it packs 4,056mAh, achieving about 1.7% increase over previous generation. Apple officially confirms that the redesigned battery architecture and charging system enable faster charging, reaching 50% in approximately 15 minutes.
    iphone 18 pro teardown what changed inside how does it affect 14

    Repair Difficulty Assessment: Pros & Cons

    A concise summary of what makes repairing the iPhone 18 Pro easier or harder for repair professionals.

    Componente Changes Made Repair Difficulty
    Pantalla
    • Smaller Dynamic Island
    • Under-display infrared camera
    • Display flex cable not fixed with adhesive
    Easy
    Batería
    • Larger capacity: 4,056mAh (SIM tray version)
    • Larger connector
    • Multi-layer cable
    Easy
    Front Camera Module
    • Infrared camera moved to the corner
    • Three separate cables
    Very Easy
    Rear Camera Module
    • Larger Fusion Main Camera
    • Cable layout changed
    Hard
    Placa base
    • A20 Pro chip on the surface
    • Logic EEPROM chip without a shield
    • NAND and Power IC sandwiched inside
    Very Hard

    Preguntas más frecuentes (FAQ)

    Why is iPhone 18 Pro motherboard repair more difficult?

    The main reason is the new layered motherboard architecture. NAND storage and the power IC are positioned between PCB layers, meaning technicians need to separate the board layers to access them. This increases the complexity, heat exposure, labor, and risk involved in component-level repair.

    Why is the Dynamic Island smaller on the iPhone 18 Pro?

    The infrared camera used for Face ID has been moved under the display and toward the corner. The display uses a modified pixel arrangement in this area to allow infrared light to pass through. This allows Apple to reduce the size of the visible Dynamic Island.

    How big is the iPhone 18 Pro battery?

    The iPhone 18 Pro shown in the REWA Lab teardown is the physical-SIM version and has a 4,056mAh battery, approximately 1.7% higher than the iPhone 17 Pro. Battery capacity varies by regional configuration; in eSIM-only version, the iPhone 18 Pro has a 4,288mAh battery.

    How much larger is the iPhone 18 Pro vapor chamber?

    iPhone 18 Pro vapor chamber has three times the surface area of the vapor chamber in the iPhone 17 Pro. Apple says the redesigned thermal system enables up to 40% better sustained performance compared with the previous generation.

    What is the biggest repair challenge revealed by REWA Lab’s iPhone 18 Pro teardown?

    For board-level technicians, the layered motherboard architecture is one of the most significant challenges because it complicates access to NAND and power-management components. For aftermarket parts manufacturers, the new under-display infrared camera arrangement creates another major challenge because display structure, optical transmission, and Face ID compatibility must all work together.

    Did Apple make major changes to the iPhone 18 Pro’s frame and back cover?

    No. The iPhone 18 Pro retains a largely similar frame and back cover structure to the iPhone 17 Pro. The back cover uses a more color-matched aluminum and glass design in iPhone 18 Pro.

    Conclusión:

    The iPhone 18 Pro showcases impressive internal engineering, highlighted by under-display Face ID technology, triple-sized vapor chamber, and larger variable-aperture main camera.
    iphone 18 pro teardown what changed inside how does it affect 15

    However, for the independent repair industry, these advancements come with obvious challenges: motherboard layering makes micro-soldering more demanding, and screen replacement requires precise technical alignment and careful handling to ensure proper Face ID functionality.

    As phone architectures become more complex, having high-grade repair tools, reliable replacement parts, and advanced technical training is essential, please Contacto for OEM/aftermarket replacement parts, professional repair tools, and step-by-step technical guides.
  • Soluciona el mensaje de "Pieza desconocida" del iPhone utilizando piezas compatibles con el diagnóstico

    Soluciona el mensaje de "Pieza desconocida" del iPhone utilizando piezas compatibles con el diagnóstico

    El Asistente de Reparación de Apple ha transformado la forma en que se realizan las reparaciones de iPhone. Hoy en día, simplemente instalar una pantalla o batería de posventa ya no es suficiente. Para evitar el Mensaje de parte desconocida del iPhone, el componente de reemplazo también debe ser compatible con el Asistente de Reparación de Apple y superar con éxito el proceso de diagnóstico posterior a la reparación. El uso de piezas compatibles con el diagnóstico ayuda a garantizar una experiencia de reparación sin problemas y evita mensajes de advertencia que pueden afectar la confianza del usuario.

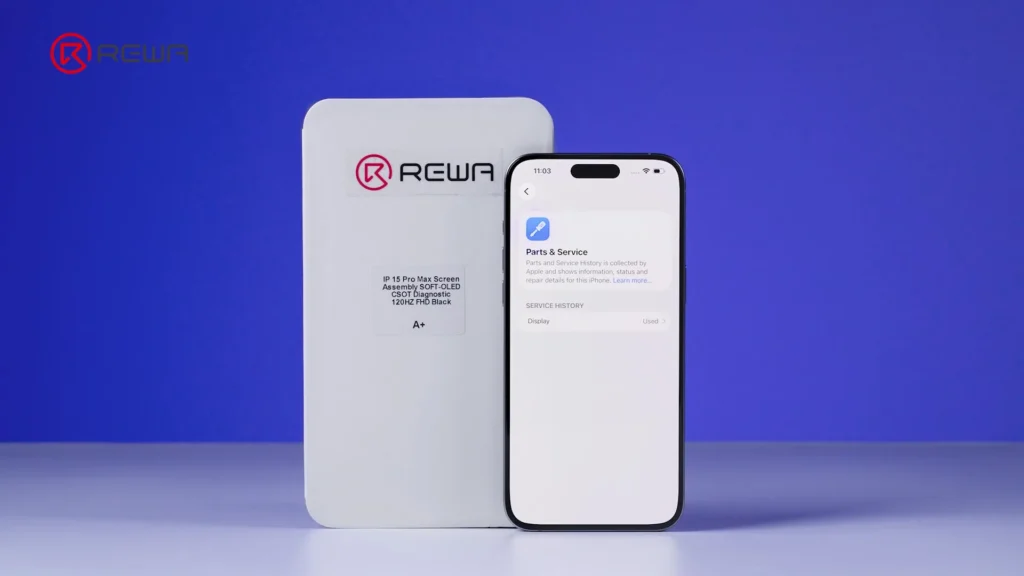
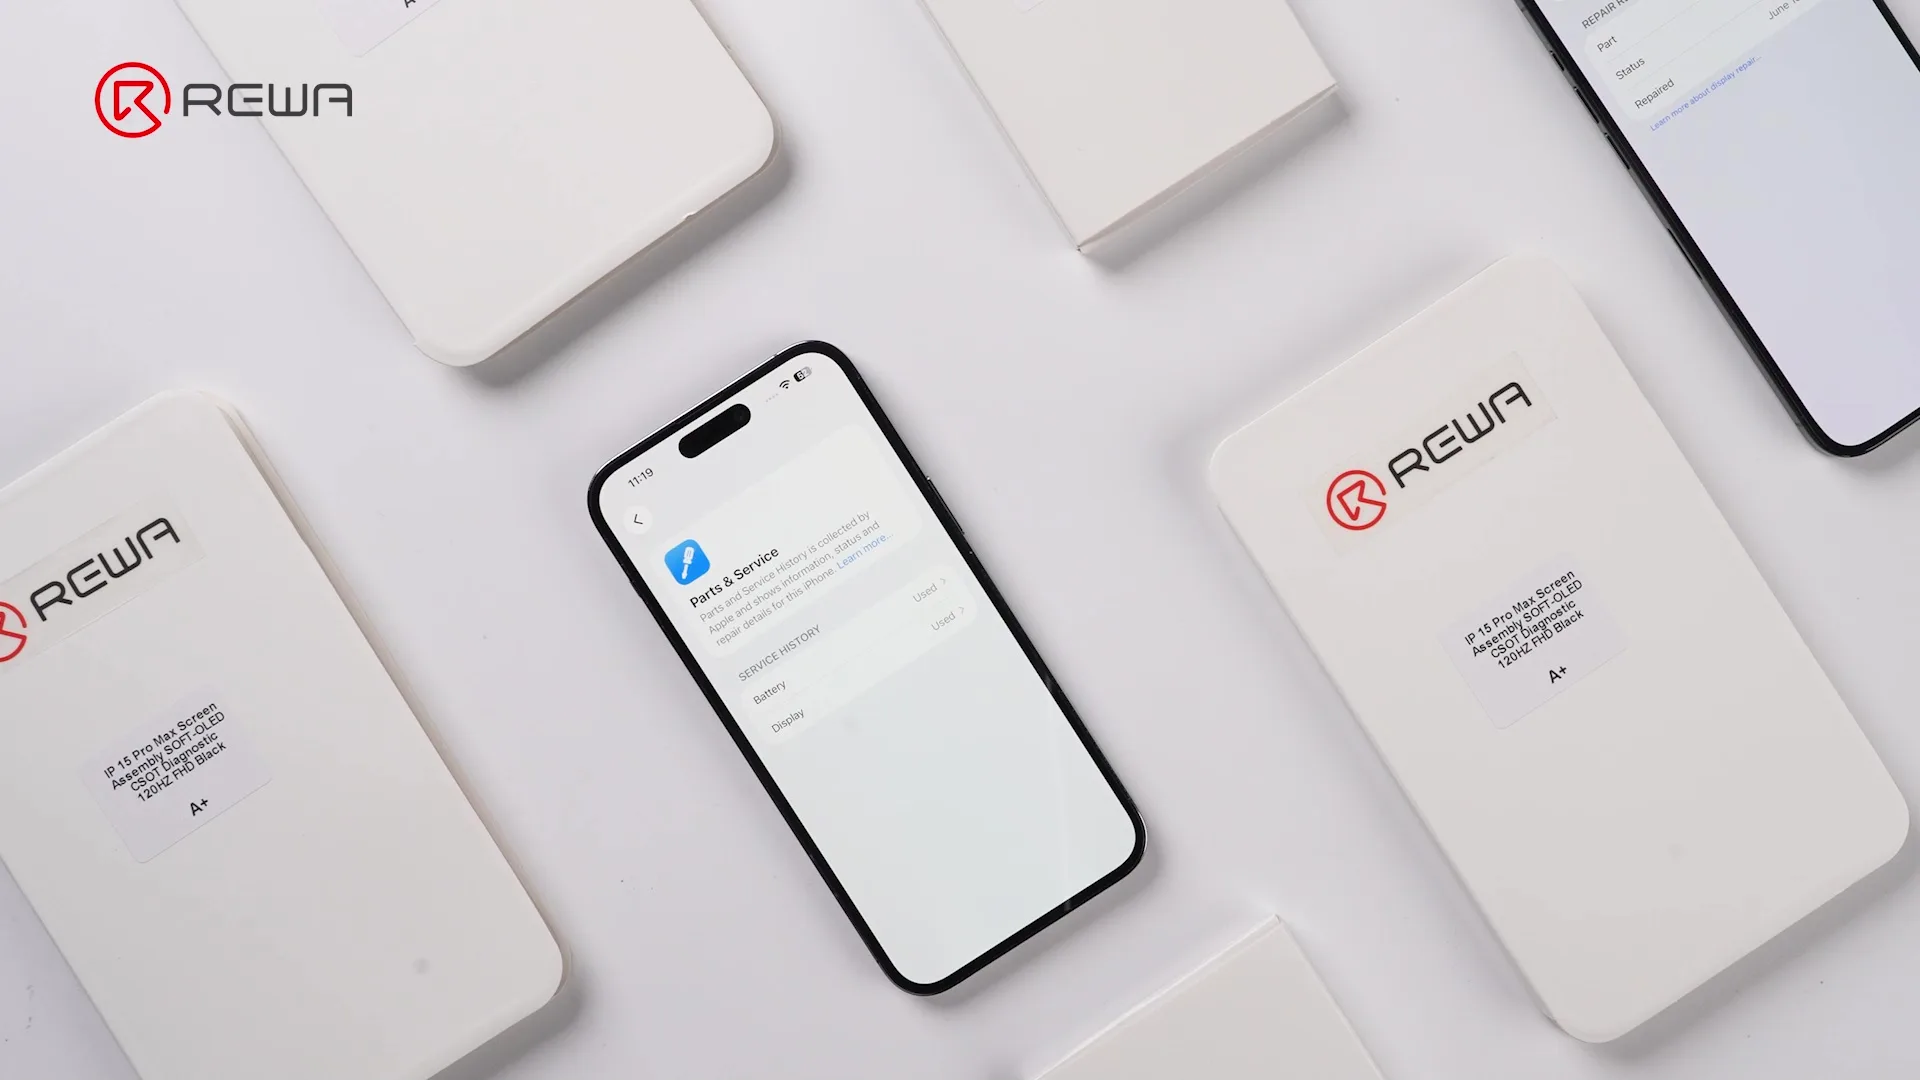
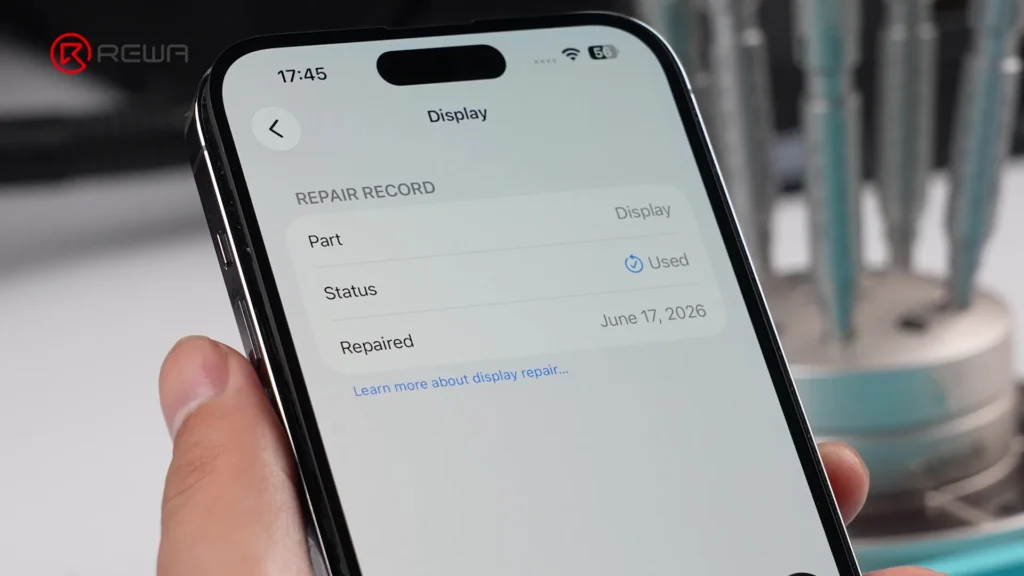
    Pantalla de un iPhone en la que se muestra un historial de reparaciones de una pantalla con el estado «Usada»


    Como resultado, las pantallas y baterías compatibles con diagnóstico se han disparado rápidamente en la industria de reparación de móviles en 2025. Prometen un proceso de instalación mucho más sencillo, al tiempo que evitan el mensaje "Pieza desconocida del iPhone" que las piezas tradicionales de terceros suelen activar.

    En esta guía, REWA desglosará la tecnología detrás de las piezas compatibles con diagnóstico en lenguaje sencillo, discutirá sus ventajas y limitaciones, y te ayudará a decidir si son la opción adecuada para tu negocio de reparaciones.
    ¿Qué son las piezas compatibles con diagnóstico de iPhone?

    Una pieza compatible con diagnóstico es un componente de reemplazo del mercado de accesorios diseñado para funcionar sin problemas con el Asistente de Reparación de Apple. Después de la instalación, puede completar con éxito el proceso de emparejamiento y diagnóstico, lo que ayuda a evitar que aparezca el mensaje de pieza desconocida del iPhone. Esto permite a los usuarios disfrutar de una experiencia de reparación más fluida, manteniendo el reconocimiento adecuado de las piezas y la funcionalidad del sistema.

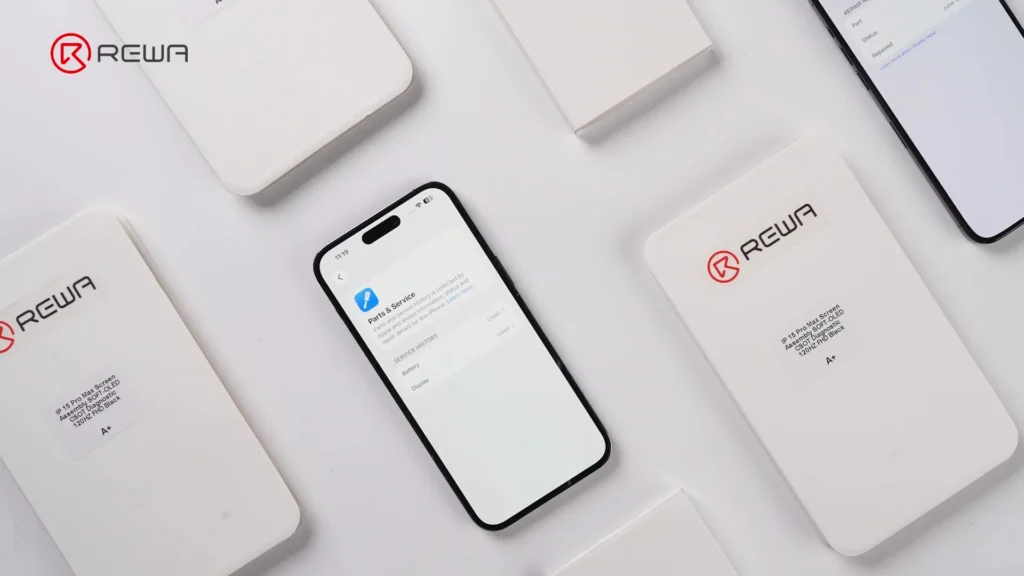
    Pantalla de diagnóstico REWA para iPhone 15 Pro Max (solución al mensaje de pieza desconocida) embalaje y un iPhone que muestra una pantalla reconocida en el historial de servicio

    Normalmente, las pantallas y baterías de terceros no son reconocidas como componentes genuinos emparejados por iOS. Como resultado, los usuarios pueden ver:

    • “Notificaciones de ”Pieza desconocida"
    • Funcionalidad limitada después del reemplazo
    • Fallo durante el proceso de calibración de piezas de Apple

    Las piezas compatibles con diagnóstico están diseñadas específicamente para superar estos problemas, lo que permite completar muchas reparaciones sin realizar trasplantes de chips IC de riesgo.

    En pocas palabras:

    Repair Assistant es el sistema de calibración de software de Apple introducido para los iPhones más nuevos. Después de reemplazar ciertos componentes, los técnicos pueden ejecutar Repair Assistant para verificar y calibrar las piezas instaladas.
    ¿Cómo funciona una pantalla compatible con diagnóstico?

    La tecnología detrás de las pantallas compatibles con diagnósticos puede sonar complicada al principio, pero el concepto básico es sorprendentemente sencillo. Vamos a desglosarlo paso a paso. El secreto no es el panel OLED en sí. En cambio, el componente clave es el IC táctil extraído del OEM.

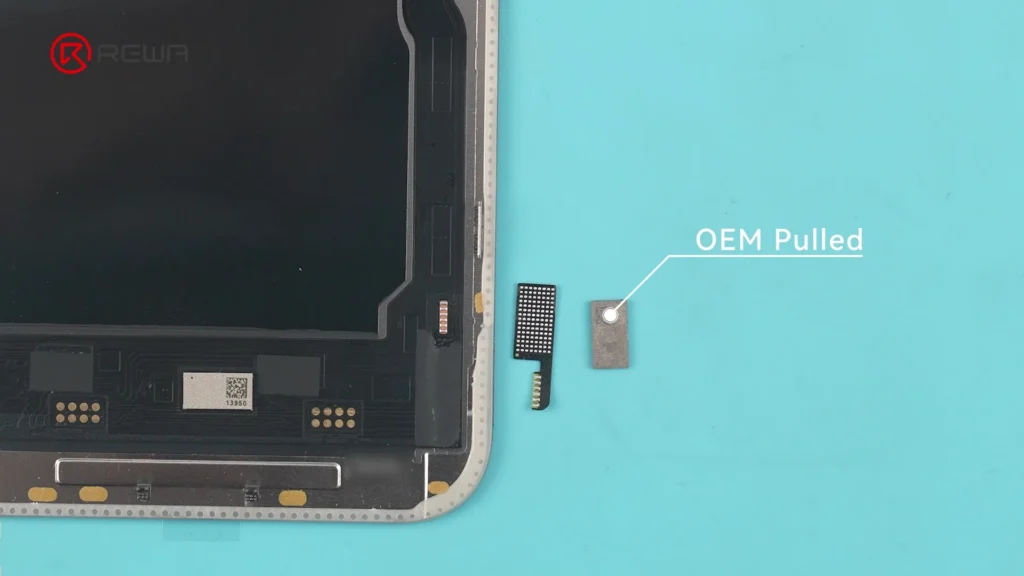
    Un chip rectangular pequeño etiquetado como OEM Pulled al lado de un ensamblaje de pantalla de iPhone
    Un IC OEM extraído es un chip original de Apple retirado de otra pantalla genuina de iPhone.

    Dado que la información de calibración cifrada de Apple se almacena dentro del chip táctil, los fabricantes trasplantan un chip táctil original a una pantalla OLED del mercado de accesorios. Esto permite que la pantalla se presente al sistema de una manera que permite que Repair Assistant se complete con éxito.

    Todo el proceso de calibración es así:

    • Extrae un CI táctil original de una pantalla donante.
    • Soldar el CI en una pantalla OLED del mercado de accesorios.
    • Instalar la pantalla.
    • Ejecuta el Asistente de Reparación de Apple.
    • Completar Calibración de Piezas.

    ¿Por qué es importante el Flex del Sensor Frontal?

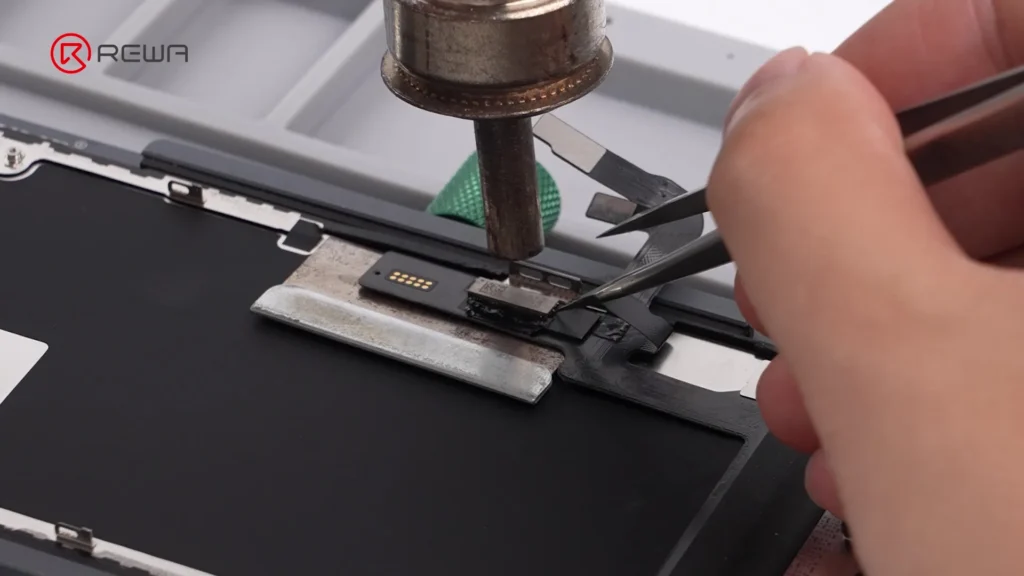
    Hay otro detalle importante que muchos técnicos pasan por alto, especialmente en los iPhones más nuevos. Después de la Calibración de Piezas, el cable flexible del sensor frontal se vuelve crítico.

    Para Serie iPhone 14 y anteriores, la reparación es relativamente indulgente. Siempre que se instale un cable flexible del sensor frontal compatible, la pantalla generalmente puede pasar el Asistente de reparación.

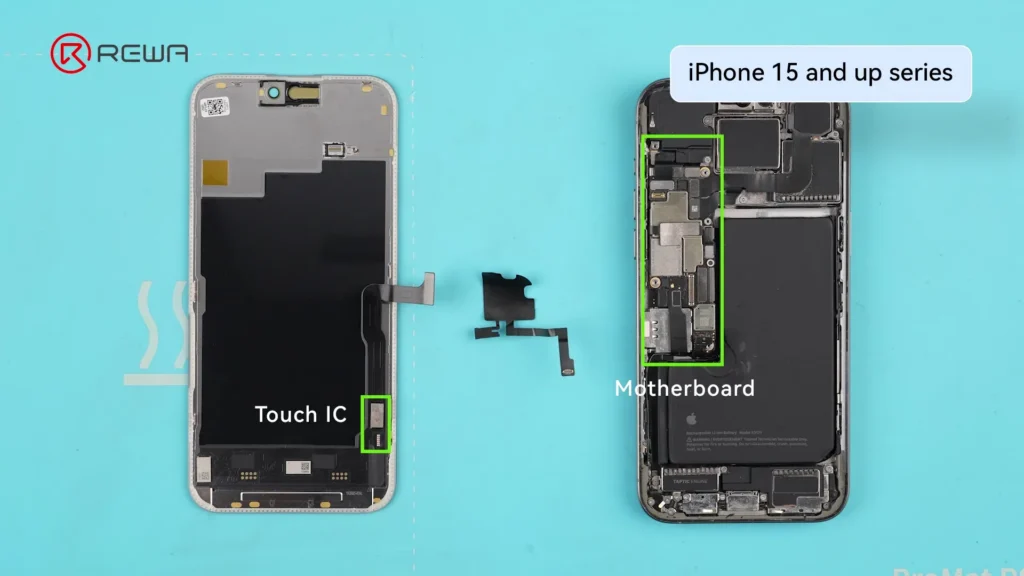
    Para Serie iPhone 15 y modelos posteriores, los requisitos se vuelven mucho más estrictos. El flex del sensor frontal debe ser el flex original emparejado con la placa base, o debe coincidir perfectamente con el IC táctil instalado en la pantalla de reemplazo. De lo contrario, la calibración puede fallar, incluso si la pantalla en sí es compatible con el diagnóstico.

    Componentes de la serie iPhone 15 que destacan el circuito integrado táctil (Touch IC) de la pantalla, el flex del sensor frontal y la placa base

    ¿Cómo Funciona una Batería Compatible con Diagnóstico?

    La misma filosofía de diseño se aplica también a las baterías. En lugar de depender de la celda de la batería en sí, el componente clave es la placa del sistema de gestión de la batería (BMS).

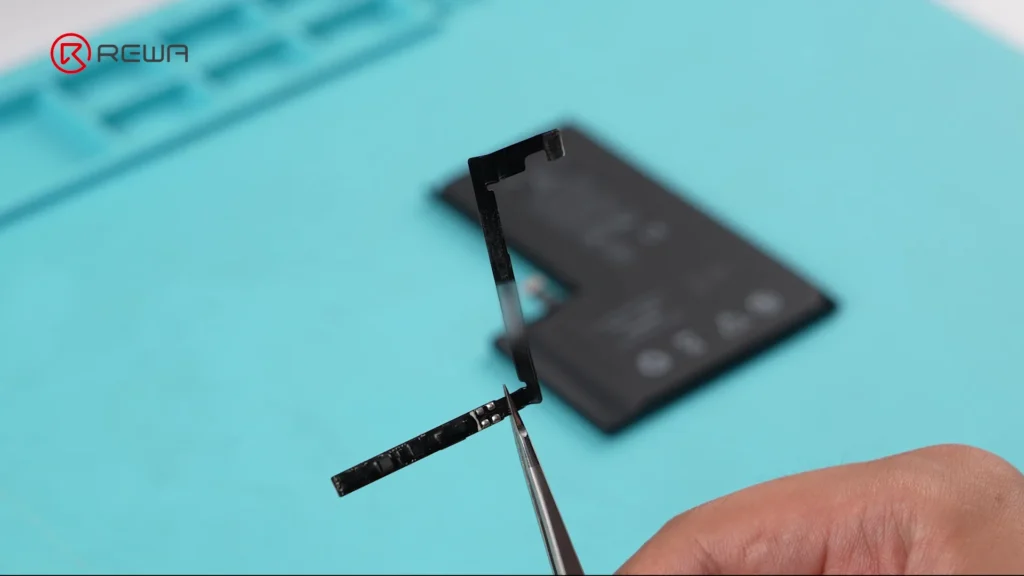
    Una placa de sistema de gestión de batería (BMS) delgada, negra y en forma de L sostenida con pinzas
    Una pequeña placa de circuito unida a cada batería de iPhone.

    La placa BMS controla funciones que incluyen la carga, la protección de la batería, la gestión de energía, la información sobre el estado de la batería y la medición del nivel de carga. Los fabricantes de baterías compatibles con diagnóstico reemplazan la placa BMS tradicional del mercado de accesorios con:

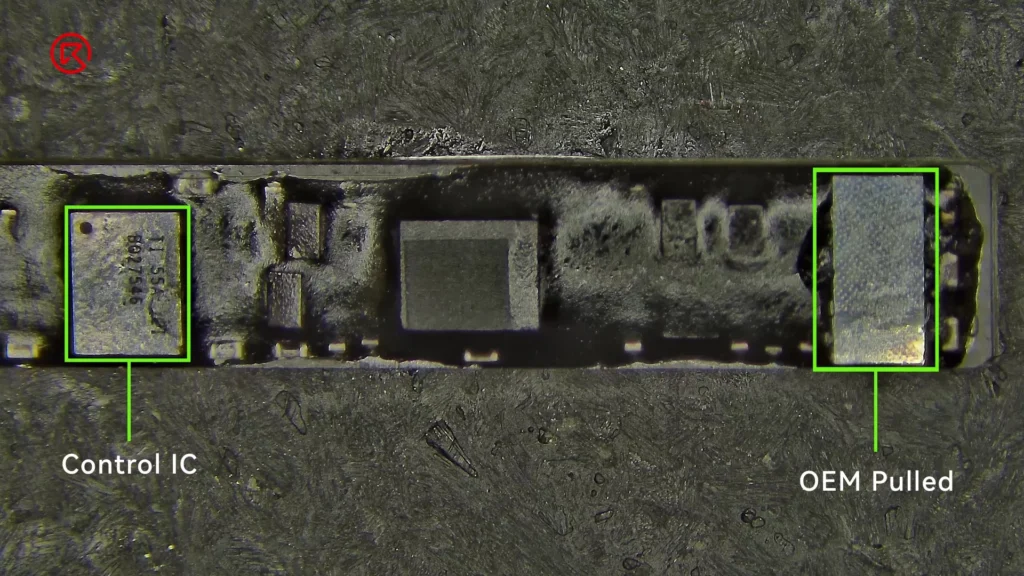
    • un CI de autenticación OEM
    • un CI de control para gestión de baterías
    Placa BMS que muestra el circuito integrado de control (Control IC) y el circuito integrado de autenticación extraído de equipo original (OEM Pulled authentication IC)

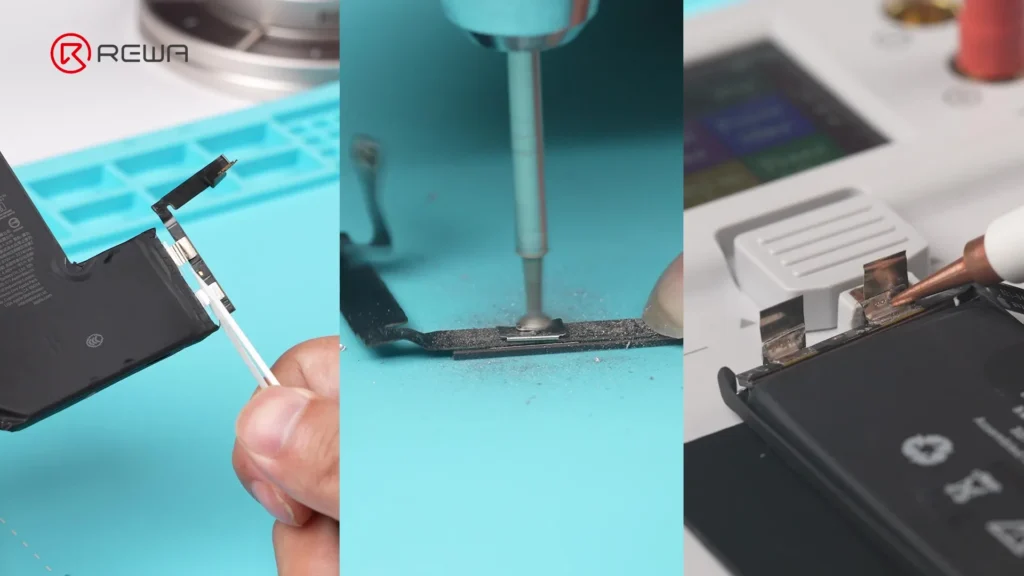
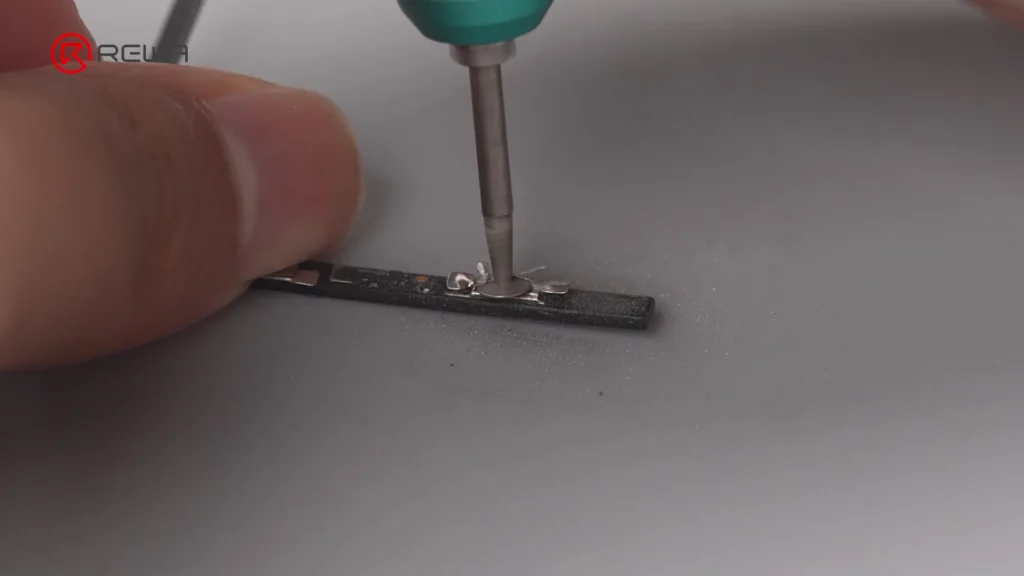
    Después de soldar este circuito de gestión de batería (BMS) a una nueva celda de batería, la batería puede completar con éxito el Asistente de Reparación mientras sigue funcionando como una batería de reemplazo normal.

    Una secuencia de tres paneles que muestra la preparación y la soldadura por puntos de una placa BMS en una nueva celda de batería

    Consejo rápido:

    Medición de combustible se refiere al sistema que calcula el porcentaje de batería que se muestra en tu iPhone.

    Ventajas de las piezas compatibles con diagnóstico

    Las piezas compatibles con diagnóstico se han vuelto populares porque resuelven varios desafíos de reparación persistentes. He aquí por qué muchos talleres de reparación están prestando atención.

    1. Menor riesgo durante la instalación

    Las soluciones tradicionales a menudo requieren el trasplante de un chip de pantalla, el trasplante del BMS de la batería y microsoldadura de precisión.

    Estos procedimientos requieren equipo costoso y técnicos con mucha experiencia. Las piezas compatibles con el diagnóstico reducen significativamente la posibilidad de fallos inducidos por el técnico.

    2. Tiempos de reparación más rápidos

    Sin intercambiar chips, las reparaciones se vuelven mucho más rápidas. Para las empresas, un tiempo de respuesta más rápido a menudo significa una mayor rentabilidad.

    Los talleres pueden:

    • Realiza más reparaciones cada día
    • Aliviar la carga de trabajo del técnico
    • Reduce el tiempo de espera del cliente

    3. Menor coste que las piezas OEM

    Las piezas de repuesto originales de Apple siguen siendo caras. Las piezas compatibles con diagnósticos ofrecen muchos de los mismos beneficios para el usuario y cuestan considerablemente menos, lo que las hace atractivas para:

    • Talleres de reparación de cadenas
    • Distribuidores
    • Reacondicionadores
    • Comerciantes de dispositivos de segunda mano

    Riesgos ocultos que debes conocer

    Aunque las piezas compatibles con diagnóstico ofrecen una comodidad impresionante, no son una solución perfecta. Como cualquier tecnología de reparación emergente, existen varias limitaciones que vale la pena considerar.

    1. Las futuras actualizaciones de iOS pueden romper la compatibilidad

    Las piezas compatibles con diagnóstico solo garantizan la compatibilidad actual con iOS. Esta sigue siendo una de las mayores incertidumbres.

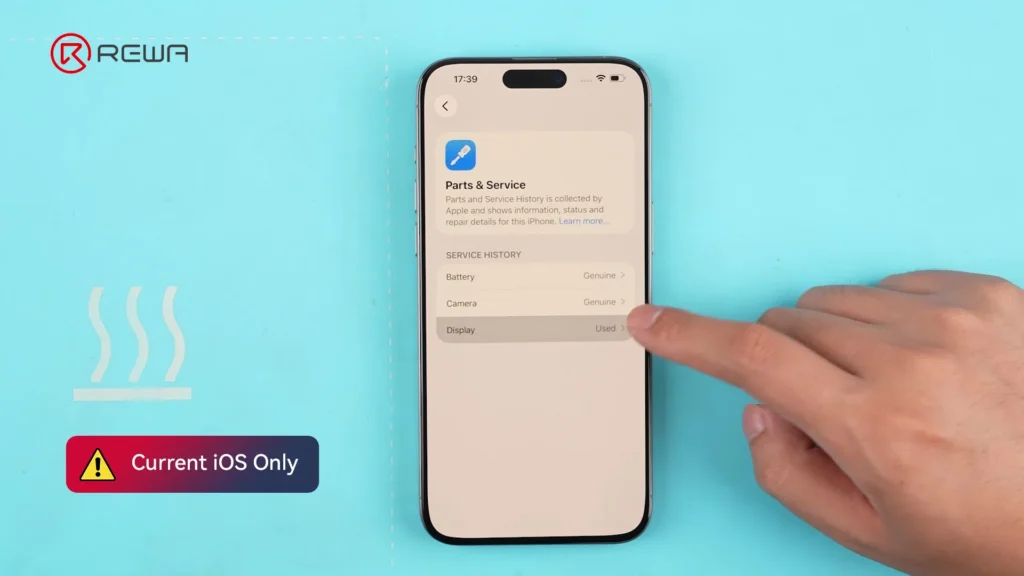
    Pantalla de Piezas y servicio del iPhone que muestra las piezas reconocidas con una etiqueta de advertencia que dice Solo iOS actual

    Si Apple cambia su algoritmo de verificación en futuras versiones de iOS, las piezas actualmente compatibles podrían:

    • Asistente de reparación de Apple fallido
    • Mostrar advertencias de pieza desconocida
    • Perder la compatibilidad de diagnóstico

    2. Los circuitos integrados donantes siguen siendo componentes utilizados

    Los circuitos integrados de autenticación se extraen de dispositivos donantes. Aunque son originales, no son nuevos.

    Los chips más antiguos pueden experimentar eventualmente envejecimiento, inestabilidad y fallas de diagnóstico aleatorias. Su confiabilidad a largo plazo depende en gran medida de la calidad de los componentes cosechados.

    3. La fiabilidad a largo plazo aún se está demostrando

    La calidad de fabricación sigue mejorando, pero el rendimiento en campo a largo plazo todavía requiere más validación. Porque las soluciones compatibles con diagnósticos siguen siendo demasiado nuevas.

    Las pruebas de la industria y los primeros datos de RMA sugieren que algunos lotes de producción han experimentado fallos aleatorios, fallas intermitentes y una estabilidad inconsistente.

    Preguntas frecuentes

    1. ¿Pueden las piezas compatibles con diagnóstico eliminar permanentemente el mensaje de Pieza Desconocida del iPhone?

    No necesariamente. Están diseñados para pasar la versión actual del Asistente de Reparación de Apple, pero futuras actualizaciones de iOS podrían cambiar los mecanismos de verificación de Apple y afectar la compatibilidad.

    2. ¿Son las pantallas compatibles con diagnóstico pantallas genuinas de Apple?

    No. El panel de pantalla en sí es un repuesto. Sin embargo, normalmente incorpora un chip IC táctil OEM extraído que permite el proceso de autenticación.

    3. ¿Las piezas compatibles con diagnóstico reducen el riesgo del microsoldado?

    Sí. Una de las mayores ventajas de las piezas compatibles con diagnóstico es que solucionan la necesidad de trasplantar complejos CI o sistemas de gestión de baterías (BMS) durante la instalación.

    4. ¿Qué es la flexión del sensor frontal? ¿Por qué es importante en el iPhone 15 y modelos posteriores?

    El flex del sensor frontal es el cable que conecta componentes como el sensor de luz ambiental y el sensor de proximidad ubicados cerca del ensamblaje de la cámara frontal. Y Apple introdujo requisitos de emparejamiento más estrictos en el iPhone 15 y modelos posteriores. El flex del sensor frontal debe ser el original emparejado con la placa base o estar correctamente emparejado con el circuito integrado (IC) táctil de la pantalla de reemplazo para completar la calibración con éxito.

    5. ¿Son las baterías compatibles con diagnóstico tan confiables como las baterías OEM?

    La confiabilidad depende de la calidad de fabricación, la condición del circuito integrado de autenticación reutilizado y el control de calidad del proveedor. Debido a que la tecnología es todavía relativamente nueva, los datos de rendimiento a largo plazo aún se están desarrollando.

    6. ¿Quién debería considerar usar piezas compatibles con diagnóstico?

    Son muy adecuados para talleres de reparación independientes, empresas de reacondicionamiento, distribuidores y técnicos que buscan reparaciones más rápidas, menores costos de mano de obra y una alternativa más asequible a las piezas OEM.

    Conclusión:

    Las pantallas y baterías compatibles con diagnósticos representan uno de los mayores avances en el mercado secundario de reparación de iPhone en los últimos años.

    Pantallas compatibles con el diagnóstico de REWA junto a un iPhone que muestra las piezas reconocidas en el menú de Piezas y servicio

    Al integrar chips de autenticación originales extraídos de otros equipos (OEM) en componentes de posventa, hacen posible completar el Asistente de Reparación de Apple sin la compleja microsoldadura que tradicionalmente se requiere para el trasplante de chips IC.

    A medida que el mercado de accesorios continúa evolucionando, es probable que las piezas compatibles con diagnóstico desempeñen un papel cada vez más importante, pero elegir productos de proveedores confiables con un control de calidad comprobado sigue siendo fundamental. REWA Technology es un proveedor global de soluciones de reparación de productos electrónicos y aplica un riguroso proceso de control de calidad antes de enviar cada lote de productos. Si tiene alguna pregunta, no dude en Contacto.

  • ¿Qué conocimientos necesitan los talleres para ser profesionales en la reparación de iPhone?

    ¿Qué conocimientos necesitan los talleres para ser profesionales en la reparación de iPhone?

    iPhone no se enciende? iPhone atascado en el logotipo de Apple? iPhone sigue reiniciándose¿Bucle de arranque del iPhone? Para los técnicos y talleres de reparación, los problemas de arranque del iPhone son uno de los casos más frecuentes en su trabajo diario de reparación. Frente a estos problemas comunes pero también difíciles, ¿con qué se suele empezar?

    Sí, somos técnicos profesionales y sabemos por dónde empezar. Es posible que su intuición le diga que puede haber algún problema con el circuito de arranque y puede empezar por medir la corriente de arranque. Sin embargo, teóricamente, ¿saben realmente los técnicos de reparación cómo tratar el problema del arranque de forma sistemática en lugar de confiar simplemente en su experiencia?

    Por sistemática, a continuación se exponen algunos principios que todos los técnicos de reparación deberían tener en cuenta a la hora de trabajar en la reparación de la placa lógica del iPhone.

    En primer lugar, debemos entender el flujo de trabajo de los distintos circuitos del iPhone: cómo funciona cada circuito, cómo cooperan los distintos circuitos y qué pueden conseguir.

    En segundo lugar, tenemos que averiguar qué circuito puede ser el responsable del problema que estamos tratando.

    Por último, debemos dominar el proceso general de resolución de problemas de cada circuito.

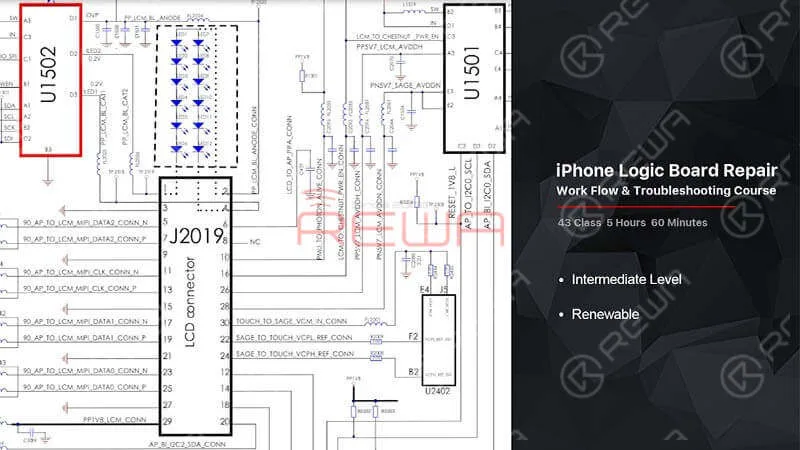
    ¿Suena complicado? Bueno, por eso te traemos este Curso de flujo de trabajo y resolución de problemas de circuitos de iPhone.

    Curso de flujo de trabajo y resolución de problemas de circuitos de iPhone

    Curso de flujo de trabajo y resolución de problemas de circuitos de iPhone

    Resumen del curso

    Este paquete de cursos de flujo de trabajo y solución de problemas de circuitos cubre el iPhone 6 y el iPhone 7. Realice este curso y comprenderá completamente el flujo de trabajo de los diferentes circuitos del iPhone, averiguará las posibles causas de los diferentes problemas y dominará el proceso general de solución de problemas de cada circuito. Fórmate con este curso de circuitos y aprende a solucionar problemas de forma eficiente en tu trabajo diario de reparación.

    Quién debe hacer el curso

    Técnicos de reparación de iPhone y entusiastas que deseen comprender a fondo el flujo de trabajo de los circuitos de iPhone y dominar el proceso de solución de problemas de diferentes circuitos.

    Técnicos de reparación de iPhone y entusiastas que deseen comprender a fondo el flujo de trabajo de los circuitos de iPhone y dominar el proceso de solución de problemas de diferentes circuitos.

    Flujo de trabajo y proceso de solución de problemas del circuito del iPhone 6

    Comprender el flujo de trabajo del circuito de arranque del iPhone 6, el circuito de la pantalla, el circuito de retroiluminación, etc.

    Dominar el proceso general de localización de averías de diferentes circuitos.

    Flujo de trabajo y proceso de solución de problemas del circuito del iPhone 7

    Comprender el flujo de trabajo del circuito de arranque del iPhone 7, el circuito de la pantalla, el circuito de retroiluminación, etc.

    Dominar el proceso general de localización de averías de diferentes circuitos.

    Consejos:Tenga en cuenta que este paquete de cursos es renovable. Adquiera este paquete de cursos y podrá acceder gratuitamente a todos los cursos recién añadidos al paquete dentro del periodo de validez.

    Ahora volvamos a los problemas de arranque más comunes mencionados al principio. ¿Qué sabes sobre el circuito de arranque del iPhone después de manejar tantos problemas de arranque? El circuito de arranque puede considerarse como el circuito de activación de la placa lógica. Para que el teléfono se encienda, las condiciones de trabajo como la fuente de alimentación, la señal de reloj y la señal de reinicio son indispensables. Además, la CPU tiene que conseguir que los componentes clave entren en el proceso de autocomprobación de encendido y que se importe el bootstrap. Dado que hay tantos componentes involucrados en el proceso, las razones por las que el teléfono no se enciende también pueden ser varias.         ------Cómo funciona el circuito de arranque del iPhone X

    También puede visitar Canal YouTube de REWA o Academia REWA para consultar la explicación detallada sobre el circuito de arranque del iPhone X.

    Y aquí hay algunas buenas noticias. REWA Academy ha tomado la decisión de compartir cursos gratuitos de reparación de placas lógicas en nuestro canal de YouTube(REWA Technology). Y le guiaremos a través del flujo de trabajo del circuito de arranque del iPhone X.

    Y aquí hay algunas buenas noticias. REWA Academy ha tomado la decisión de compartir cursos gratuitos de reparación de placas lógicas en nuestro canal de YouTube(REWA Technology). Y le guiaremos a través del flujo de trabajo del circuito de arranque del iPhone X.

    ¿Qué temas de arranque le interesan más? Por favor, no dude en dejar un comentario a continuación.Para obtener más información del curso y soporte técnico, por favor permanezca atento a REWA FaceBook Página. Nuestros mentores y gestores de cuentas están a su servicio.

    ACADEMIA REWA
  • Power On a Wet iPhone – Stop with the Rice!

    Power On a Wet iPhone – Stop with the Rice!

    When talking about a water-damaged device, putting it in rice is just a myth. Rice is unable to pull moisture from inside your device. Check out this video to see what will happen when you try to power on a wet/water-damaged iPhone!

  • Important iPhone Battery Message Removing

    Important iPhone Battery Message Removing

    The annoying “Important Battery Message” of iPhone now can be removed in an effective way.

  • Tips For iPhone 7 Qualcomm No Service Common Issue Troubleshooting

    Tips For iPhone 7 Qualcomm No Service Common Issue Troubleshooting

    Faced with iPhone 7 No Service Issue, repair technicians will troubleshoot from baseband PMU pseudo soldered to baseband CPU shorted. For pseudo soldering problem, we can fix it by re-soldering the baseband PMU. As for the shorted problem, since the baseband CPU cannot be replaced alone, there is no need to proceed with the repair. Here REWA provides a quick solution. So that you won’t waste your time troubleshooting step by step. And ends up with nonrepairable.

  • iPhone X Incoming Calls Not Showing – Fixed By Jumping Wires

    Llamadas entrantes de iPhone X no aparecen – Solucionado mediante puente de cables

    Ahora mismo, hay pocas soluciones para arreglar que el iPhone no responda en modo de suspensión al recibir llamadas entrantes. El proceso de reparación general de un técnico de reparación es sacar la placa base, verificar el PMU y la CPU de banda base, y luego reemplazar o volver a soldar el componente defectuoso. Todo el proceso de reparación es complicado y difícil. Echa un vistazo a nuestro video de hoy y REWA LAB te mostrará una nueva solución de ‘préstamo de señal’ para solucionar el problema rápida y eficientemente.

    • 00:00 Introducción
    • Herramientas y Materiales
    • 00:56 Diagnóstico
    • 02:37 Confirmar la ubicación de la señal
    • 03:27 Robar señal haciendo un puente con un cable
    • 05:50 Montar el teléfono y probar
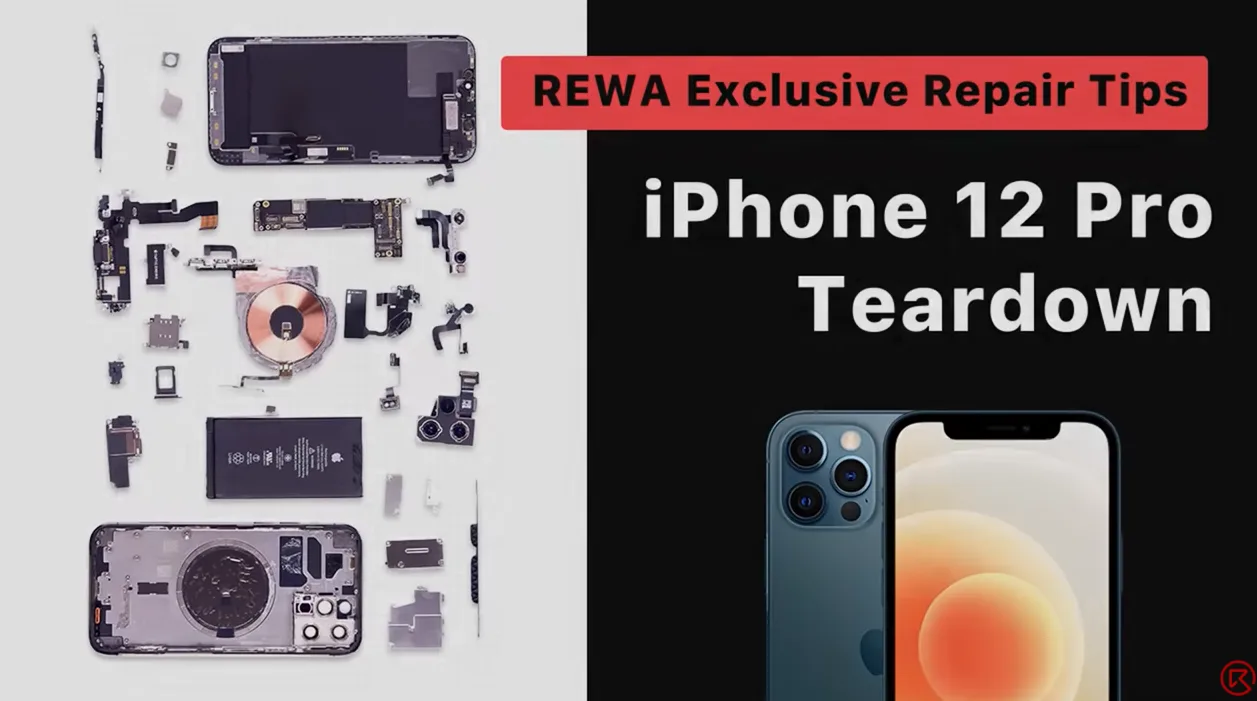
  • iPhone 12 Pro Detailed Teardown Tips For Repair Shop Technicians

    iPhone 12 Pro Detailed Teardown Tips For Repair Shop Technicians

    Apple’s new iPhone 12 models have been the talk of the town. For repair shop owners, the biggest concern is what to pay attention during disassembly. Today, REWA LAB is going to share a detailed teardown tutorial of the iPhone 12 Pro. Let’s take a look!

    Productos recomendados en este vídeo:

    • Mobile Phone Disassemble Set
    • REWA SELECTED iPhone 12 Series Accessories:
    • Phone Case
    • Charger Plug
    • Screen Protector
    • Earphone
  • Troubleshooting iPhone XS Max Portrait Mode Not Working

    Troubleshooting iPhone XS Max Portrait Mode Not Working

    Many iPhone XS Max users have the complaint that the Portrait Mode on their phones is not working. And it’s not a strange thing to see that questions like ‘Why does my iPhone XS Max Portrait Mode not working’ and ‘How to fix my iPhone XS Max Portrait Mode not working’ have been so frequently searched on Google. If you are one of them, this article will help you to solve this issue. Here REWA is going to tell you how to fix Portrait Mode not working on iPhone XS Max.

    Usually, there are two different causes for Portrait Mode not working on iPhone XS Max. Software problems or hardware problems. Here we have some solutions for software problems.

    Nota: Don’t use portrait mode in dark places or low light. Because portrait mode will not work in low light. And make sure that the distance between the phone and the subject is proper(neither too far nor too close). Keep at least 19 inches distance between the phone and the subject.

    1. Restart your iPhone XS Max or camera app. 2. Upgrading iOS: Go to Set->General->Software Update. 3. Reset all settings: Go to Set->General->Reset-> Reset All Settings. 4. Restore your iPhone XS Max to Factory Settings(Factory Reset): Go to Settings->General->Reset-> Erase All Contents and Settings. Take a backup before resetting your iPhone to Factory Settings, since this action will erase all data from your device.

    So, these are some methods to resolve the iPhone XS Max portrait mode not working issue. You can try them out. However, if nothing works, the possible situation is that the motherboard or the camera has been damaged. In this case, you need to have the damaged one replaced. Well, you can also follow our solution below.

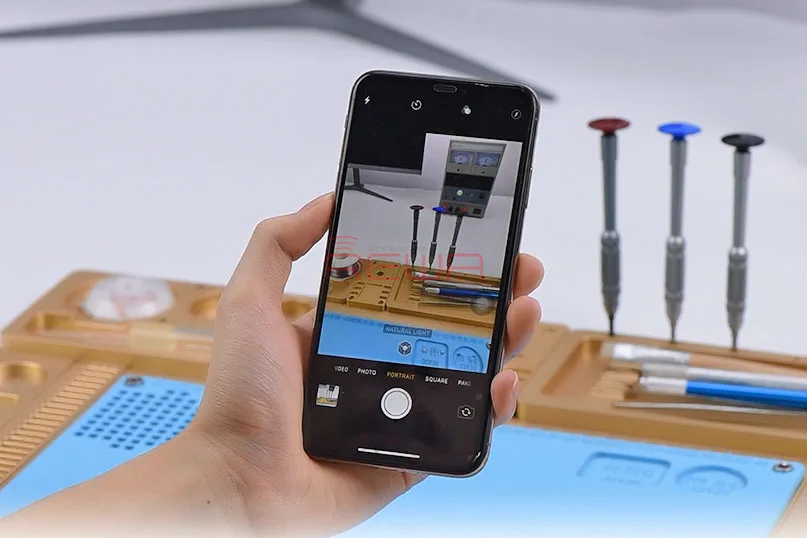
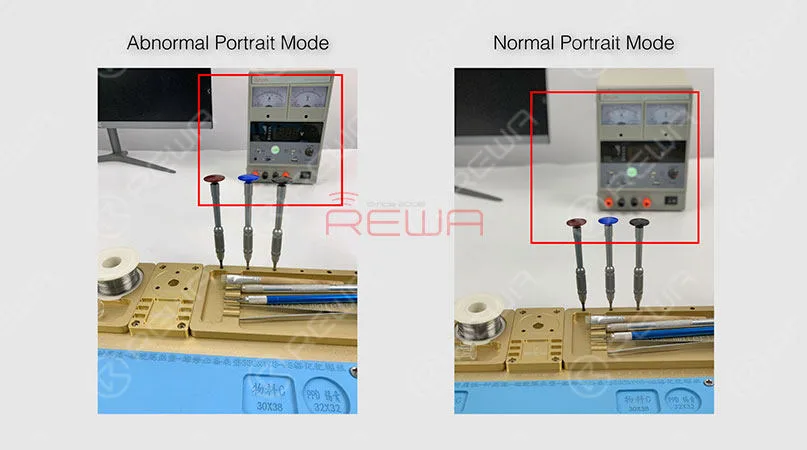
    The first thing we do is to check if the Portrait Mode is in a normal status. Open the camera app and swipe to portrait mode. We can see clearly that the background is not blurred. Which indicates that the wide-angle lens is working normally, while the telephoto lens is not working at all.

    iPhone XS Max Portrait Mode Not Working Troubleshooting

    Take apart the phone and take out the motherboard. Run diode mode measurement of the Tele camera connector J4000. The measured value of Pin 25 is OL, which is abnormal. Which also indicates that Pin 25 relevant circuit has open-circuited(The circuit is formed by a zero-ohm resistor R4006, several capacitors and the camera power supply IC U3700). Since capacitors have nothing to do with the open-circuited condition. So the first thing we do is to check the zero-ohm resistor R4006. Run diode mode measurement of R4006. Judging by the measured value, R4006 has not open-circuited. We can confirm that the fault is probably related to U3700.

    iPhone XS Max Portrait Mode Not Working Troubleshooting

    Try to replace with a new camera power supply IC. You need to separate the upper and the lower layer first. And then detach U3700. Continue to clean the bonding pad and solder a new camera power supply IC. Solder the two layers together later. Detailed steps go as follows:

    iPhone XS Max Portrait Mode Not Working Troubleshooting

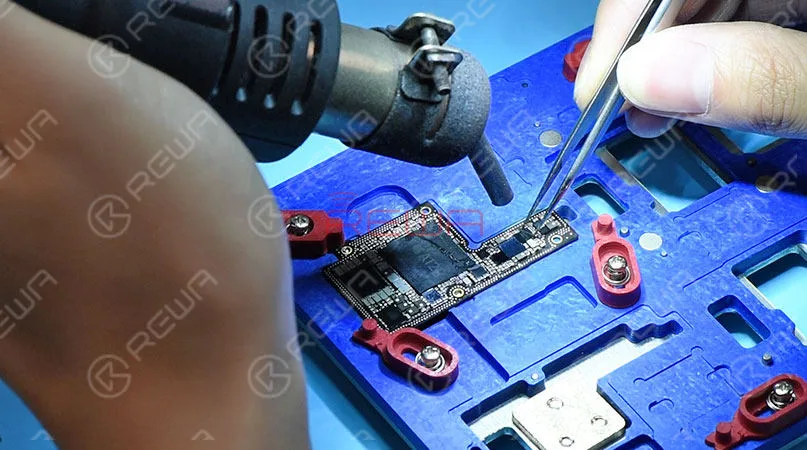
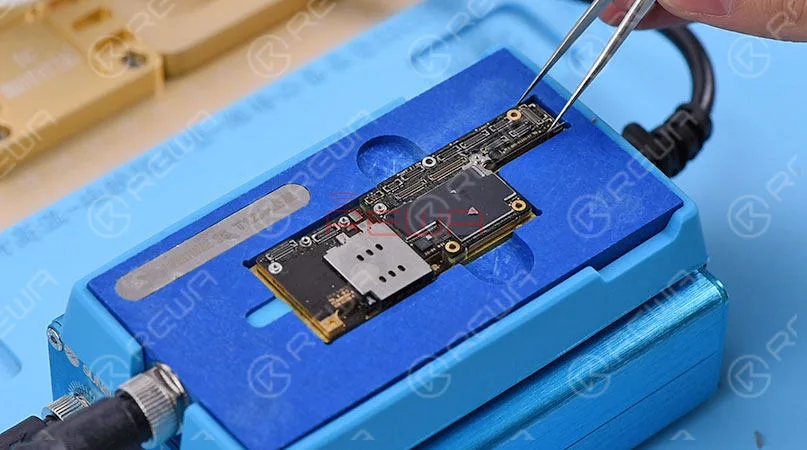
    Place the motherboard on the Heating Platform. This machine can quickly desolder & resolder iPhone XS Max double-layer motherboard. It offers heat evenly that can protect the motherboard from damage. With accurate temperature control and temperature adjustment, it is highly recommended for motherboard repair. Pick up the upper layer with tweezers once solder on the third space PCB has melted, and detach U3700 from the board with Pistola de aire caliente.

    iPhone XS Max Portrait Mode Not Working Troubleshooting

    Apply solder to clean the bonding pad first. Then clean thoroughly with rosin soaked Solder Wick. Clean with PCB Cleaner afterwards. Get a new camera power supply IC in position and solder with Hot Air Gun. Next thing we need to do is to solder the two layers together. Clean the third space PCB with rosin soaked solder wick first, then reball the lower layer. Solidify the third space PCB with Paste Flux afterwards. Once done, apply some BGA Paste Flux to the third space PCB. Get the upper layer and the lower layer in position. Use the iPhone XS Max Motherboard Soldering/Desoldering Rework Station to solder the double-layer motherboard.

    iPhone XS Max Portrait Mode Not Working Troubleshooting

    Once we have confirmed that the motherboard has been soldered successfully, we can assemble the phone and test. Warm tips: get the phone full assembled after confirmation of fault clearance. Get the motherboard and display assembly installed. Connect the battery and press the power button. The iPhone XS Max turns on normally. Open the camera app and swipe to Portrait Mode. We can see that the subject is being focused and the background is blurred. The Portrait mode not working on iPhone XS Max issue has been solved successfully.

    iPhone XS Max Portrait Mode Not Working Troubleshooting

    PLUS:  with our unique teaching system, REWA offline training course can help technicians improve their repair skills by mastering repair thoughts and repair techniques.

    Tools used:

    Estación de soldadura/desoldadura de la placa base del iPhone XS Max

    Explosion-Proof PCB holder for iPhone XS/XS Max

    Estación de retrabajo con pistola de aire caliente - 990AD

    Estación de soldadura - 969A

    Microscopio electrónico - Tipo 1

    Multímetro digital

    Alicates de apertura LCD

    Mecha de soldadura

    Fundente de colofonia

    Pinza recta

    Pinzas de gancho curvo

    Destornillador

    Cepillo suave

    Palanca de plástico antiestática

    Rascador BGA de acero inoxidable

  • How to Fix iPhone X Camera Not Working Issues – Logic Board Repair

    How to Fix iPhone X Camera Not Working Issues – Logic Board Repair

    The iPhone has a very precise motherboard. Once the phone falls, it is easy to affect the shooting function. Today, REWA LAB will show you how to solve the camera not working problems on iPhone X.

    Inspección cosmética

    First, run cosmetic inspection. The board hasn’t been water damaged or dropped.

    First, run cosmetic inspection. The board hasn’t been water damaged or dropped.

    Test & Assemble

    Second, get the motherboard installed and test. Get a known good iPhone X back glass assembly then get the motherboard well installed. Connect the power flex cable, the charging port flex cable, cameras, etc..

    Key Tips: It’s necesarry to connect the earpiece speaker and sensor flex cable. Otherwise the screen will dim after booting up.

    Second, get the motherboard installed and test.

    After finish the assemble, turn on the phone. Tap ‘Camera’ icon and enter into camera mode. We can find that the front camera and the rear camera can not be activated. What’s more, the flashlight also can not be activated also. Judging from this, we need to focus on the rear camera circuit.

    Diagnóstico

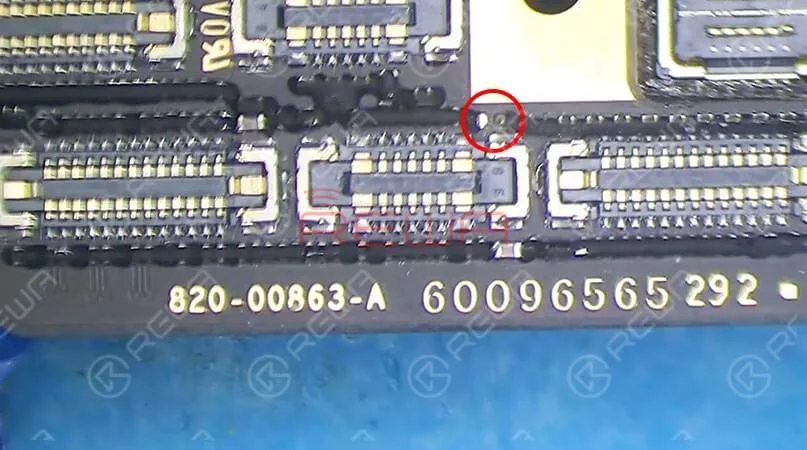
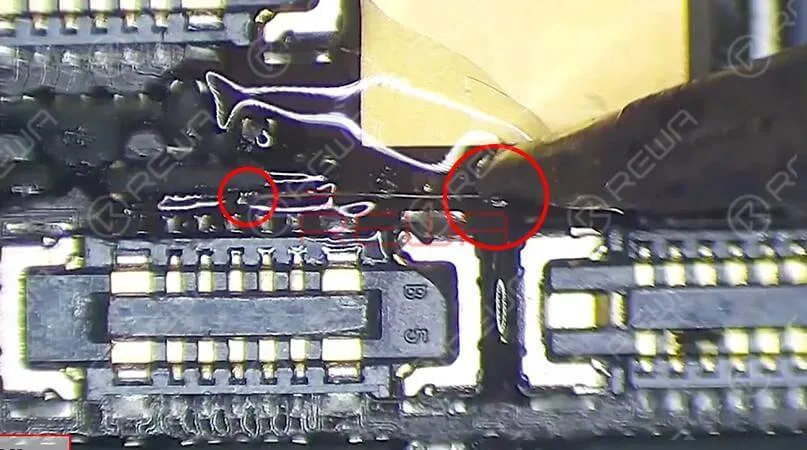
    For better inspection, tear off sponge around connectors first. Then we should check the motherboard under the microscope. We can find that one component next to the power flex cable has fallen off the board.

    Let’s attach the motherboard to the PCB Holder. For better inspection, tear off sponge around connectors first. Then we should check the motherboard under the microscope. We can find that one component next to the power flex cable has fallen off the board.

    Our guess is that due to improper operation, the component was pried off when the power flex cable was disconnected by the unknown repairman. Beside, the bonding pad has also been pried off the board.

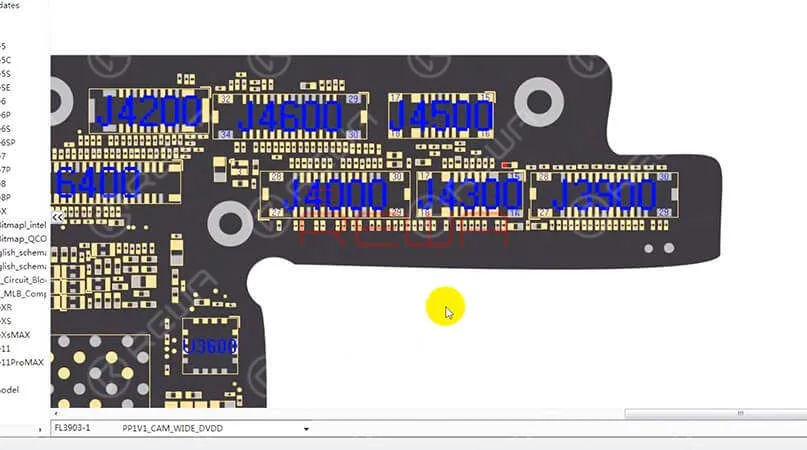
     Next we need to open the point map and find the relevant component information. Here we recommend using REFOX. A concise and smooth bitmap software that provides reliable schematics and board files for Apple/Samsung/Huawei (so far) motherboard repair.

    Next we need to open the point map and find the relevant component information. Here we recommend using REFOX. A concise and smooth bitmap software that provides reliable schematics and board files for Apple/Samsung/Huawei (so far) motherboard repair.

    The missing component is inductor FL3903 which is the protective inductor on the 1V1 power supply line of the rear camera. Since the bonding pad has also fallen off the board, we need to connect Pin 1 of FL3903 with Pin 1 of C3928 by jumping wire.

    Jump Wire

    Jumping a wire between the two pins with Soldering Iron.

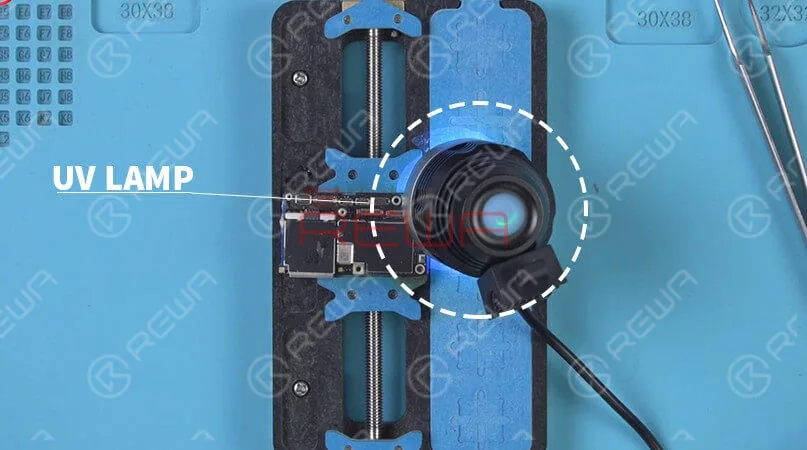
    Solidify the board under UV Dryer Lamp for 5 minutes.

    Here are the specific steps:

    Assemble & Test

    assemble the phone and test

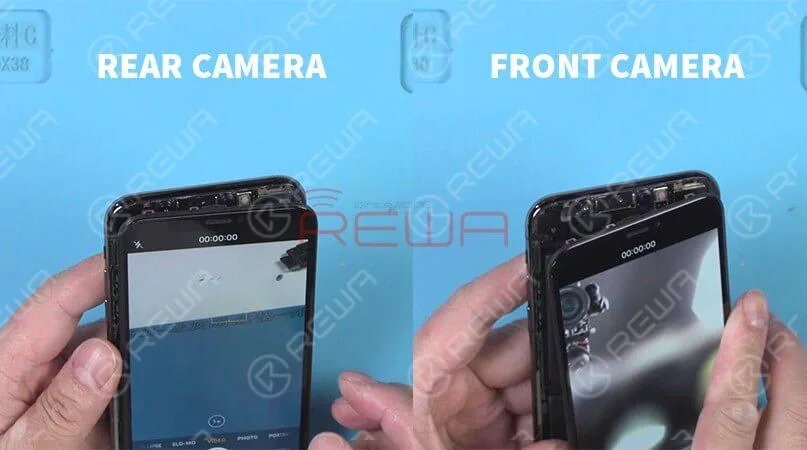
    Finally, we can assemble the phone and test. Tap ‘Camera’ icon and enter into camera mode. The front camera and the rear camera work normally.

    Consejos de abrigo: obtener el teléfono completamente montado tras la confirmación de la eliminación de la avería.

    Academia REWA

    If you’re interested in learning more about cell phone repair, you can visit Academia REWA. They offer free courses, video tutorials, and other resources to help you acquire the skills required to become a successful cell phone repair technician. Additionally, you may contact REWA Academy to schedule a free consultation or to inquire about cell phone repair.

    For more details on the repair operation, click on the video below:

  • Las reparaciones de iPhone podrían ser mucho más baratas gracias a estas máquinas láser de REWA

    Las reparaciones de iPhone podrían ser mucho más baratas gracias a estas máquinas láser de REWA

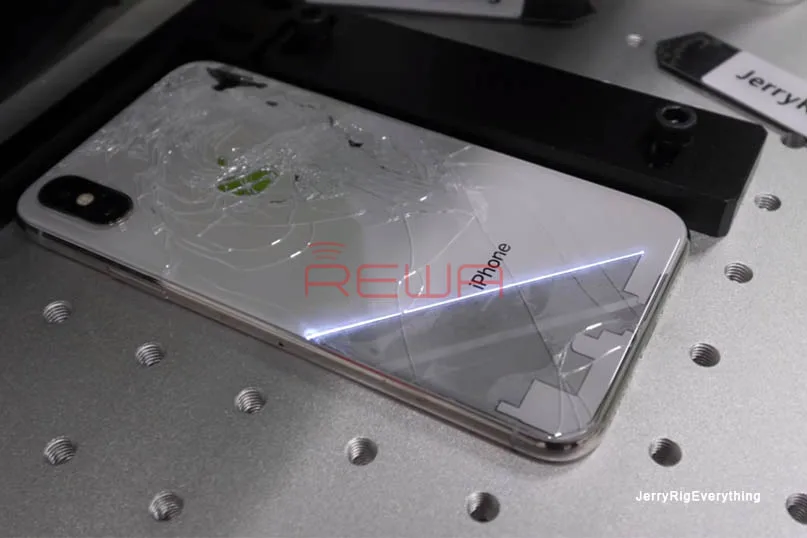
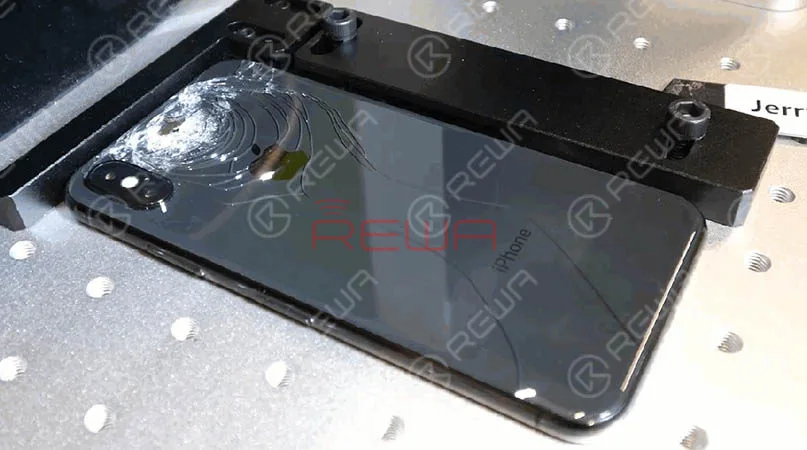
    Siempre ha sido caro reparar un Teléfono roto, pero el último par de años, los precios oficiales realmente se han disparado a un territorio ridículo. Sustituir una pantalla rota del iPhone XS Max o del iPhone 11 Pro Max, por ejemplo, te costará $329 si no tienes AppleCare+. Irónicamente, sustituir el cristal trasero de un iPhone cuesta aún más. hasta $600 según Apple. Llegados a ese punto, da igual que te compres un teléfono nuevo, que bien podría ser lo que Apple quiere.

    Pero no tiene por qué ser así. Como muestra YouTuber JerryRigEverything (de nombre real Zack Nelson), sustituir el cristal trasero de un iPhone nuevo puede ser un asunto relativamente barato... si tienes un gran máquina láser rewa para ayudarte.

    Verás, Apple comenzó a usar un adhesivo permanente en la parte posterior de sus teléfonos con el iPhone X. Esto hace que quitar el cristal roto sea mucho más difícil que en el teléfono típico, con el que una pistola de calor básica es suficiente para ablandar el adhesivo y quitar el cristal con una herramienta de palanca. Así que en lugar de eso, las reparaciones en realidad reemplazan toda la carcasa trasera. Por eso cuesta tanto.

    Sin embargo, existen máquinas diseñadas específicamente para quitar el cristal trasero de los teléfonos mediante láser. Nelson utiliza una $2,041 máquina de REWA. Existen varias máquinas de este tipo en el mercado, pero todas funcionan básicamente de la misma manera: un haz de alta potencia es capaz de quemar literalmente el adhesivo situado bajo el panel trasero, siendo lo suficientemente preciso como para no dañar otros componentes. El proceso también quema el colorante que hay bajo el cristal, pero queda impresionante al hacerlo.

    Pero resulta que hay máquinas diseñadas específicamente para quitar el cristal trasero de los teléfonos con láser. Nelson utiliza una máquina $2,041 de REWA. Hay varias máquinas de este tipo en el mercado, pero todas funcionan básicamente de la misma manera: un rayo de alta potencia es capaz de quemar literalmente el adhesivo bajo el panel trasero, siendo lo suficientemente preciso como para no dañar otros componentes. El proceso también quema el colorante de debajo del cristal, pero tiene un aspecto impresionante.

    Una vez que el cristal trasero está completamente roto, es mucho más fácil quitarlo con una palanca. Todavía llevará algún tiempo, sobre todo si el teléfono está completamente agrietado (el cristal agrietado difumina y debilita el rayo láser), pero es definitivamente factible para una persona de reparación capacitada. A continuación, basta con aplicar un poco de adhesivo y una nueva parte posterior, y voilá - usted tiene un nuevo aspecto iPhone.

    Hay algunas advertencias. Por un lado, es difícil encontrar un cristal trasero de repuesto con el logotipo de Apple, por lo que es posible que tengas que optar por un aspecto sin marca. Algunos pensarán que, llegados a este punto, es mejor optar por la funda. Por otro, probablemente no tenga sentido que un particular compre una máquina de $2.000 para arreglar un teléfono individual.

    Pero, de todos modos, la mayoría de la gente no va a sustituir la parte trasera de su iPhone. En cambio, parece una inversión obvia para los pequeños talleres de reparación que buscan ofrecer una alternativa más asequible a la solución de Apple. Esto es doblemente cierto, ya que funciona para casi cualquier otro smartphone con trasera de cristal también - sólo tiene que seleccionar el preajuste correcto en la máquina.

    Echa un vistazo al vídeo de Nelson para ver más, merece la pena por los láseres:

    Y aquí hay otro vídeo de la máquina láser REWA que profundiza un poco más en el proceso:

    Esperemos que algún día no sea tan caro reparar tu nuevo y reluciente iPhone en una tienda local. Fuente e imagen thenextweb.com.

  • Is iPhone Screen Repair Too Expensive?

    Is iPhone Screen Repair Too Expensive?

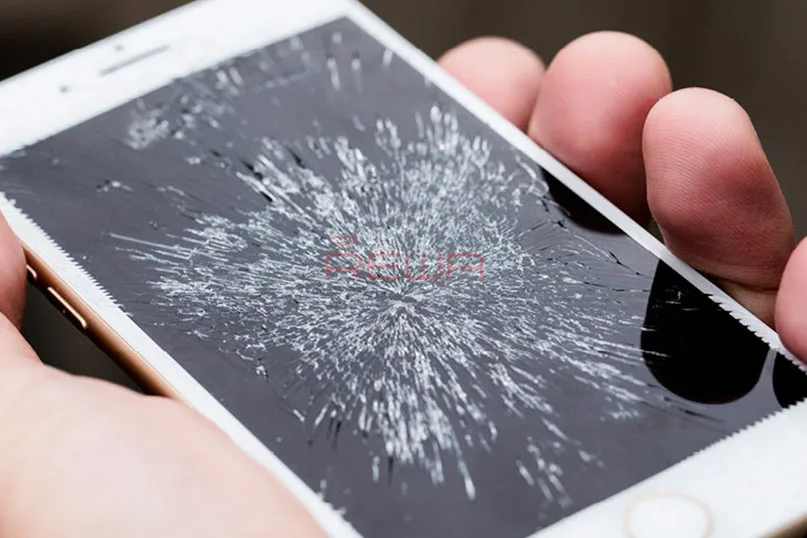
    You just dropped your iPhone and the cracks appeared on your screen. How ubiquitous these kinds of scenes are. While you have no choice but face the reality. The case should be more complicated when you do not have any insurance covered, because you will get an eye-watering price if you turn to Apple official support.

    Given that the smart phone has already gone into a mature stage, you would have thought the price of display would have gone done with time. However, The price of iPhone LCD screen digitizer has been persistently high.

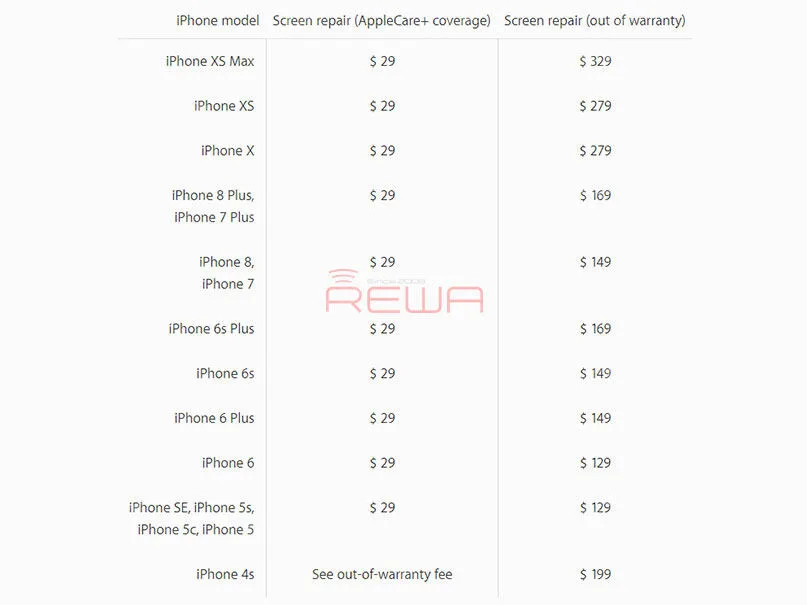
    Let’s check the Apple official quotes for reference to see how much you will cost for your broken screen.

    iPhone Screen Repair Too Expensive

    Apple official Quotes for Screen Repair[/caption] If you have Apple Care+(with additional repair coverage and technical support) and within the coverage, you only have to pay $29 to save your cracked iPhone screen. A couple of years after purchasing, you have to shell out full fund to get it repaired. From the official data, we can see that it takes $329 to repair a broken iPhone Xs Max screen when it is out of warranty. Worse still, Apple will charge you extra repair fee if there are any physical damages, and this seems to be often.

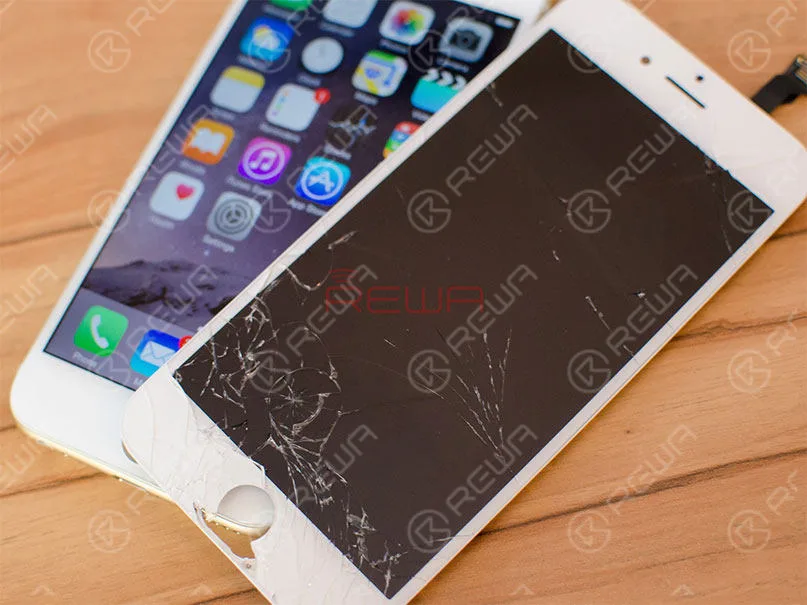
    Therefore, how to get your cracked phone repaired at a more reasonable price? Third party repair shop is a good choice. Since iPhone is so popular and many third party repair stores can offer relative replacements or iPhone glass only repair services. Compared with Apple official, these repair stores offer you a various choice from general to a high level both in quality and price, and you can also get OEM parts and components. Whereas, there are still some small barriers, for instance, Apple disabled true-tone function after screen replacement by third-party repair shops.

    iPhone Screen Repair Too Expensive

    To some degree, repair services from the third party are more convenient and faster. It’s unworthy to afford a pretty penny and tired to wait for a long time to get back your iPhone screen. While, still, third party repair will void your Apple warranty. If you definitely mind the warranty or have some concerns, it would be better to turn to Apple Service Center. For solution from the third party, it is critically important to choose a reliable and reputable repair store.

    How would you like to get your broken screen repaired? Do you prefer reviving your iPhone with Apple Service Center with official support in a high price or taking it to a third party repair shop for a cost-effective service? Share us your ideas.