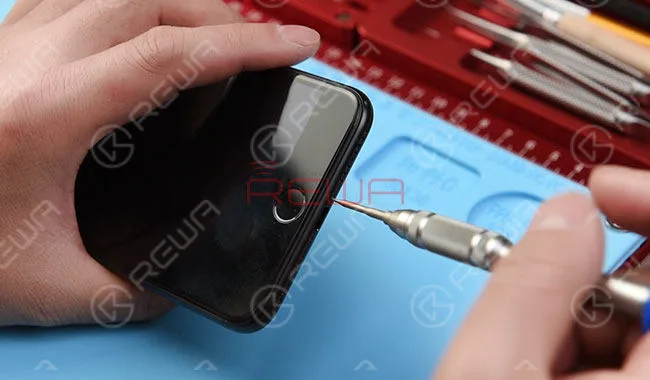
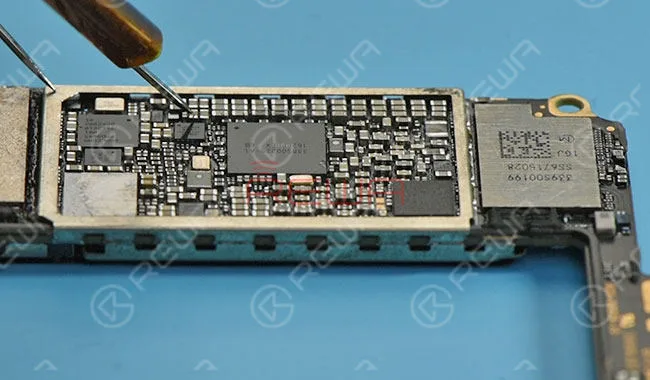
Water damage is a common issue for iPhone in daily use. In this video, the home button of iPhone 7 is not working after water damaged, because lines on logic board get corroded and damaged. Since there is a high failure risk in repairing, REWA LAB presents you a method to fix heavily corroded and damaged logic board step by step by Ultrasonic Cleaner and making jumper wire. To fix your iPhone 7 home button issue caused by water damage, please follow the repair operations of our tutorial video.
Was können Sie tun, wenn sich Ihr iPhone nicht mehr einschalten lässt?
Der erste Schritt besteht darin, den Grund für das Nicht-Einschalten des iPhones zu finden. Es könnte ein Hardware- oder Softwareproblem im Zusammenhang mit Ihrem Gerät sein.
Wie physisch beschädigt oder in Wasser oder einen anderen Grund fallen gelassen, und es gibt viele Lösungen Form Internet, wie laden Sie Ihr iPhone, Neustart, Hard Neustart, verwenden Sie Software zu beheben ... für diese Lösungen, können Sie einen Versuch haben, aber hier werden wir ein hohes Niveau und professionelle Lösung zu beheben iPhone nicht einschalten.
Das iPhone X mit seinem übergroßen Display, der neuesten biometrischen Technologie - Face ID, dem widerstandsfähigsten Glas, drahtlosem Aufladen und so weiter, traf bei seiner Veröffentlichung im Oktober 2017 das Herz der Mehrheit.
Auch wenn sie noch so perfekt ist, zeigt sie im Laufe der Zeit Mängel.
Am Anfang gab es Fehlfunktionen wie nicht reagierende Berührungen, steckengebliebene Bildschirme und andere Anzeigeprobleme. In letzter Zeit, einige Logik-Board-Fehlfunktionen zeigen. Zum Beispiel, iPhone X wird nicht einschalten etc,.
Wenn Sie die Struktur des iPhone X Logic Board kennenlernen, sollten Sie wissen, dass das iPhone X Logic Board in der Hälfte gefaltet wurde und die beiden Schichten dann zusammengelötet wurden - die obere Schicht ist die Hauptplatine, und die untere Schicht ist die Signalplatine.
Das erschwerte den Fortgang der Reparatur erheblich.
Heute teilen wir eine Reparatur Fall von iPhone X wird nicht auf Logik-Board Reparatur einschalten. Lassen Sie uns sehen, was der schwierigste Teil ist.
Demontieren Sie
Zerlegen Sie das iPhone X. Nehmen Sie die doppellagige Hauptplatine heraus.
Hier kommt die erste Schwierigkeit - das zusammengeklappte Motherboard zu trennen, was eine strenge Temperaturkontrolle erfordert.
Eine zu hohe Temperatur würde die Komponenten beschädigen, aber eine zu niedrige Temperatur kann sie nicht trennen. Mit Geduld und Zeit trennen wir die Logikkarte erfolgreich.
Diagnose
Nachdem die Logikplatine abgetrennt wurde, verbinden Sie die obere Schicht mit der DC-Stromversorgung.
Der abgelesene Strom ist abnormal. Wir lokalisieren den Fehler also in der oberen Schicht.
Um unsere Diagnose fortzusetzen, messen wir die Versorgungsspannung der oberen Schicht mit einem Multimeter.
Und finden Sie heraus, dass es keinen Spannungswert an C2771 und C2770 gibt.
Messen Sie mit dem Multimeter und wir können bestätigen, dass die Spule L2770 beschädigt ist.
Wartung und Prüfung
Wir müssen also die Spule L2770 ausbauen und durch eine neue ersetzen.
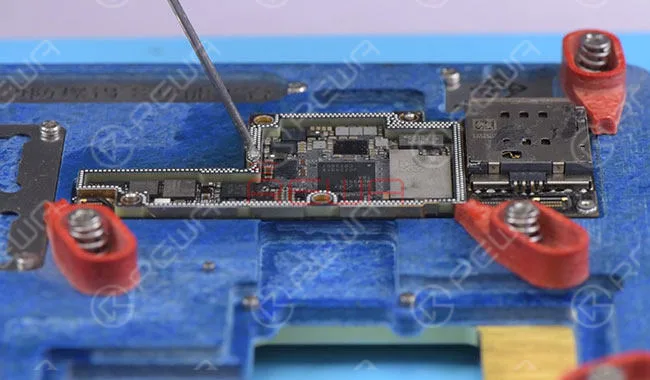
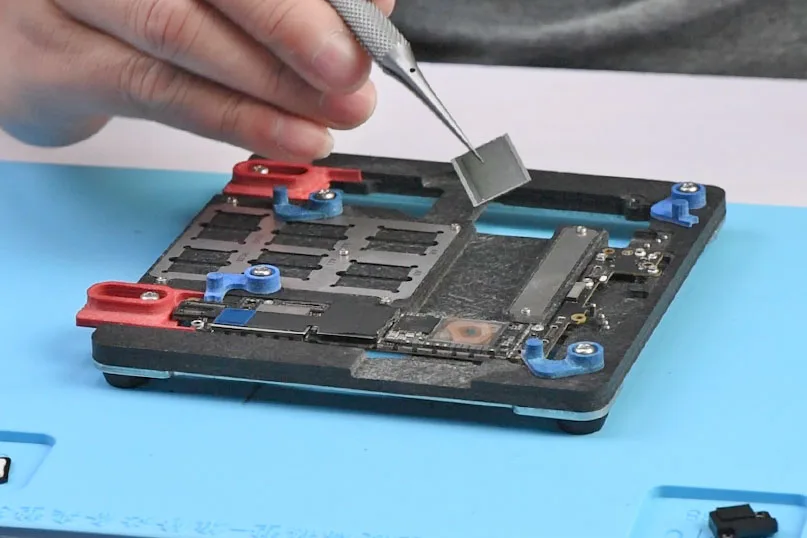
Befestigen Sie zunächst die obere Lage auf dem Leiterplattenhalter.
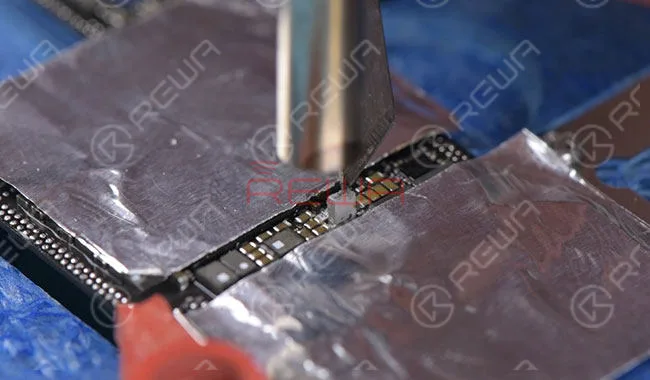
Und kleben Sie zum Schutz Hochtemperatur-Klebeband auf die Bauteile um die L2770.
Dann mit einer neuen Spule neu verlöten.
Nach der Abkühlung messen Sie den Stromwert erneut, indem Sie ihn an die Gleichstromversorgung anschließen.
Der gemessene Stromwert auf dem Amperemeter ist dieses Mal normal. Störung behoben.
wieder zusammenbauen.
Raten Sie mal! Hier kommt der schwierigste Teil der Reparatur - um Dosen aus den beiden Schichten getrennt zu entfernen.
Wir übertragen die Richtung 5 Mal und beenden schließlich den Prozess der Zinnentfernung.
Dann ein weiterer schwieriger Teil - die untere Schicht neu zu ballen.
Wir haben es tatsächlich erst beim zweiten Versuch geschafft.
Schließlich haben wir die beiden Platinen neu verlötet und das Telefon wieder zusammengebaut, das iPhone X lässt sich nicht mehr einschalten, das Problem war endlich gelöst.
Weitere Einzelheiten entnehmen Sie bitte dem Video.
iPhone won’t turn on and the screen is black or frozen? After software issue being excluded, the problem may be caused by a faulty logic board. Since logic board of iPhone X is a single one that’s basically been folded over and soldered together, the unique design and structure have made any repairs to the logic board far more difficult than previous series. With our iPhone X won’t power on repair case today, the fault has been confirmed as inductor damage by voltage measurement. And we can fix the iPhone X won’t turn on issue by inductor replacing and board re-soldering.
Einfach 4 steps to fix your iPhone x won’t turn on.
1. Disassemble
Disassemble the won’t turn on iPhone X. Take out the double layer motherboard. Here comes the first difficulty – separate the folded motherboard. which requires severely temperature controlling. Excessively high temperature would damage the components around, but too low temperature cannot separate them. With patience and time, we separate the logic board successfully.
2. Diagnosis
After the logic board was separated, connect the upper layer with DC Power Supply. The reading current is abnormal. So we locate the fault to the upper layer. To continue our diagnosis, we measure power supply voltage of the upper layer with Multimeter. And find out there is no voltage value on C2771 and C2770. Measure with Multimeter and we can confirm that the inductor L2770 is damaged.
3. Maintenance & Test
So we need to take down inductor L2770, and replace with a new inductor. Firstly, attach the upper layer to the PCB Holder. And stick High-Temperature Adhesive Tape on components around L2770 for protection. Then re-solder with a new inductor. After cooling down, measure the current value again via connect it with DC Power Supply. The measured current value on the ammeter is normal this time. Fault cleared.
4. Reassemble
Guess what? Here comes the most difficult part of the repair – to remove tins from the two layers separately. We transfer the direction for 5 times and finally finish the tin removing process. Then another difficult part – to reball the lower layer. We actually made it only at our second attempt. Eventually, we got re-solder the two boards and reassemble the phone, the iPhone X won’t turn on issue was finally solved.
Recently, REWA has received feedback from several third-party repair shops regarding issues with the ambient light sensor not working on some iPhone 8 series and iPhone X devices after repair. After conducting tests and analysis, REWA LAB has discovered that Apple may have implemented technical barriers to prevent customers from seeking third-party repairs. Watch the video to see the testing procedures and results.
What should you do if your iPhone 7 won’t turn on after being dropped?
The problem may be caused by a software crash or a complicated hardware issue.
We have published an iPhone 6 won’t turn on and iPhone X won’t turn on guide video, and this time, we received an dropped iPhone 7 Plus which cannot turn on.
The problem was finally detected as CPU being short-circuited. Here we have detailed troubleshooting procedures.
iPhone 7 won’t turn on Diagnosis
Take apart the phone and disconnect the battery, then connect the phone with the DC-Stromversorgung and press the power button to power on.
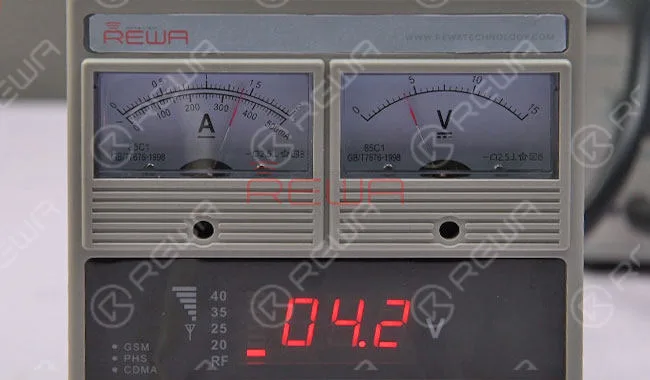
The current reading of the ammeter jumps to 350mA and then stays still, which is abnormal and indicates that the logic board is short-circuited.
disassemble the phone and detach the battery
Disconnect the power supply and take out the logic board.
Run diode measurements on capacitors around power IC one by one.
All the values are normal except C1823 – It displays 0, which indicates that C1823 is short-circuited.
From the schematics, we can see that C1823 is the filter capacitor of PP1V8-SDRAM, and it is directly connected to CPU SDRAM.
diode measurements on capacitors around power IC Repair
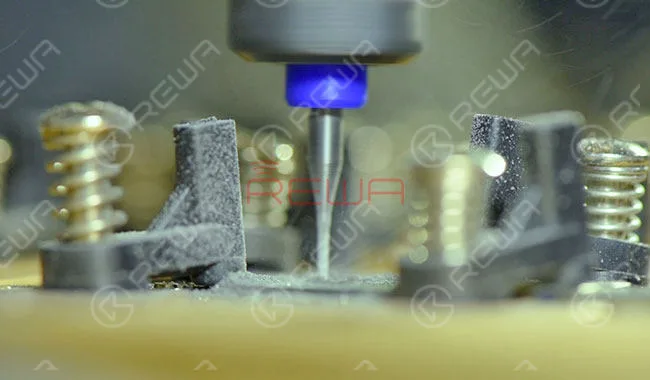
Befestigen Sie die Logikkarte an der PCB-Halter, and take down the shielding cover by heating with Hot Air Gun, then remove CPU SDRAM with CNC-Spanbearbeitungsmaschine.
After chip grinding, attach the logic board to the PCB Holder and clean it with PCB Cleaner, then remove the black adhesive around with Sculpture Knife.
After that, apply some BGA Paste Flux to the bonding pad.
Align the new SDRAM to the right place(Don’t reverse the direction), and then solder with Hot Air Gun. After cooling for 5 minutes, clean thoroughly with PCB Cleaner.
CPU SDRAM chip grinding Testing
Connect the phone with the DC Power Supply, then short Pin 13 of J4504 to the ground with the tweezer to trigger the power on the system.
This time, the current reading on the ammeter is normal.
connect the phone with the DC Power Supply
Get the logic board assembled and buckle the display assembly.
Connect the phone to the computer, then press and hold volume down and power button to get into DFU mode. Restore the phone via iTunes.
Once done, insert the SIM card and activate the phone.
After testing, All the functions work normally.
current reading on the ammeter
For more details about iPhone 7 won’t turn on repair and iPhone repair videos, please check our YouTube video.
Need cell phone repair replacement parts or tools?
REWA offers wholesale and retail mobile phone repair parts/tools with affordable prices for 10 years. Welcome to check our online store shop.rewa.tech.
iPhone 7/7 Plus lässt sich nach einem Sturz nicht mehr einschalten? Aufgrund der unvollkommenen Technologie des CPU-Lieferanten kann der SDRAM der iPhone 7/7 Plus-Serie leicht beschädigt werden. Nach einem Sturz kann das SDRAM einen Kurzschluss erleiden und das Telefon lässt sich danach nicht mehr einschalten. Klicken Sie auf das Video, um zu erfahren, wie wir das Problem, dass sich das iPhone 7 Plus nicht mehr einschalten lässt, effizienter lösen.
Diagnose
Zerlegen Sie das Telefon und trennen Sie die Batterie, verbinden Sie dann das Telefon mit dem Gleichstromnetzteil und drücken Sie den Einschaltknopf, um es einzuschalten. Der Stromwert des Amperemeters springt auf 350 mA und bleibt dann stehen, was abnormal ist und darauf hinweist, dass die Hauptplatine kurzgeschlossen ist.
Trennen Sie die Stromversorgung und nehmen Sie die Hauptplatine heraus. Führen Sie nacheinander Diodenmessungen an den Kondensatoren um den Power-IC durch. Alle Werte sind normal, außer C1823 – er zeigt 0 an, was darauf hinweist, dass C1823 kurzgeschlossen ist. Aus dem Schaltplan können wir ersehen, dass C1823 der Filterkondensator von PP1V8-SDRAM ist und direkt mit der CPU-SDRAM verbunden ist.
Befestigen Sie die Platine am PCB-Halter, nehmen Sie die Abschirmung durch Erhitzen mit einer Heißluftpistole ab und entfernen Sie dann die CPU-SDRAM mit einer CNC-Chip-Schleifmaschine. Befestigen Sie die Platine nach dem Chipschleifen am PCB-Halter und reinigen Sie sie mit PCB-Reiniger, und entfernen Sie dann den schwarzen Klebstoff drumherum mit einem Skalpell. Tragen Sie danach etwas BGA-Flussmittel auf das Anschlusspad auf. Richten Sie die neue SDRAM an der richtigen Stelle aus (verkehren Sie nicht die Richtung) und löten Sie sie dann mit einer Heißluftpistole an. Nach 5 Minuten Abkühlzeit gründlich mit PCB-Reiniger reinigen.
Prüfung
Verbinden Sie das Telefon mit dem Gleichstromnetzteil und überbrücken Sie dann Pin 13 von J4504 mit einer Pinzette mit der Masse, um das System einzuschalten. Zu diesem Zeitpunkt ist der Strommesswert am Amperemeter normal.
Montieren Sie die Hauptplatine und rasten Sie die Displaybaugruppe ein. Schließen Sie das Telefon an den Computer an und halten Sie dann die Leiser-Taste und die Ein-/Aus-Taste gedrückt, um in den DFU-Modus zu gelangen. Stellen Sie das Telefon über iTunes wiederherstellen. Setzen Sie nach Abschluss die SIM-Karte ein und aktivieren Sie das Telefon. Nach dem Testen funktionieren alle Funktionen normal.
iPhone 6s overheating and getting hot? Usually the problem is caused by excessive running apps, but in this tutorial video, we demonstrated a logic board repair method. After current detecting and rosin detecting, we can confirm that the problem was caused by damaged capacitors inside the WiFi module. With our repairing experience, we adopt a exclusive repair solution to fix the iPhone 6s high temperature warning screen issue.
Have you ever encountered with a problem of iPhone 6 no speaker sound while receiving dialing or playing music via louder speaker, and if you plug EarPods in, the sound come out again? This iPhone speaker no sound problem may be caused by some components pseudo soldering while the iPhone leaving factory. As time goes by, operating environment and personal habits of users may acceleratethe oxidation or shedding of pseudo soldered components. Let us check the video and find out how to fix iPhone speaker not working problem.
Have you checked our newly released about cracked iPhone 7 screen repair tutorial?
It is worth to take a look. Compare to iPhone 7, iPhone 8 and iPhone X look gorgeous, but also make them vulnerable, especially the back glass.
The fragile back glass is long reported extremely difficult to repair and may cost you more than expected due to the new design with wireless charging, embed camera and stubborn glue.
Have no idea about how to start your repair?
Don’t be frustrated. After the iPhone X OLED screen glass-only repair guide ,REWA here rolls out a new and quick solution for iPhone 8 and iPhone X back glass repair .
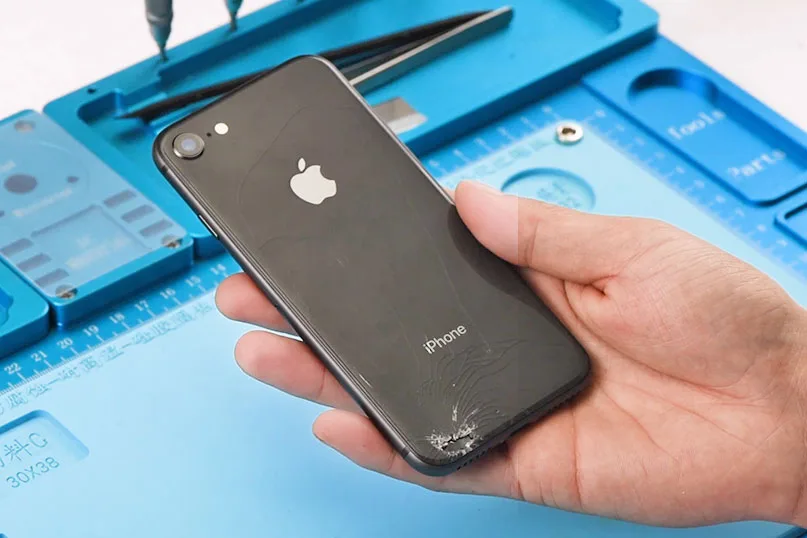
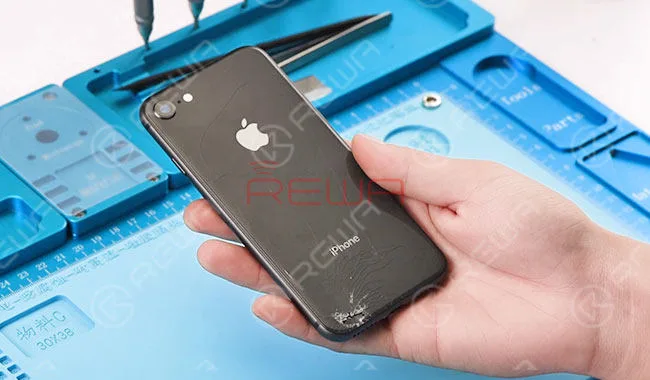
iPhone 8 broken back glass
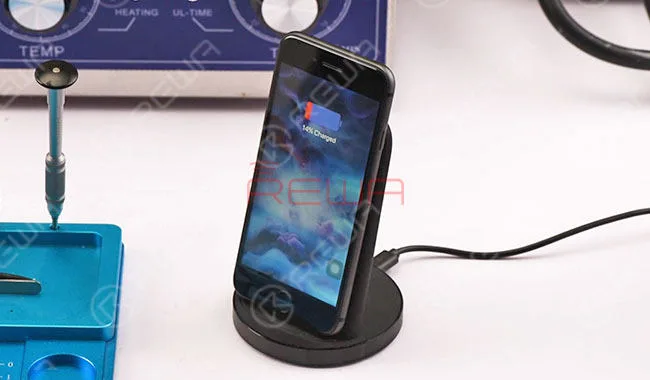
Damaged Back Glass iPhone 8 back glass is damaged but still comes with normal wireless charging.
iPhone 8 wireless charging
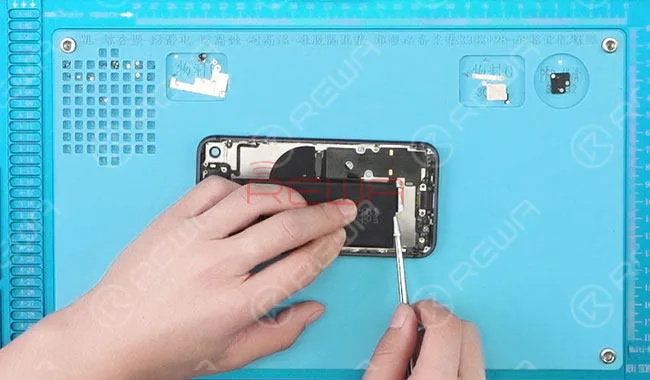
DisassemblingTake down the display assembly.
Remove the screws, rear camera, logic board, louder speaker and taptic engine, then take out the battery and disconnect the charging port flex cable.
Remove the wireless charging coil by heating with Heißluftpistole , and disconnect the power switch volume flex cable.
Disassemble the iPhone 8
Back Glass Repairing
Pour adequate dispergator into the container of Ultrasonic Cleaner, then soak the back glass in the container and get the lid on. Set the time of the Ultrasonic Cleaner at 30m , and temperature at 60℃ .
After 30 minutes, take out the glass back.
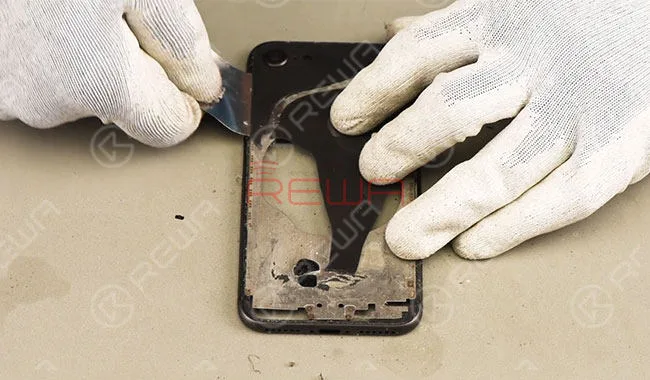
Separate the broken back glass from the middle frame with Pry Sheet.
In case the broken glasses hurt your hands, please clean the table and be careful during the separating process.
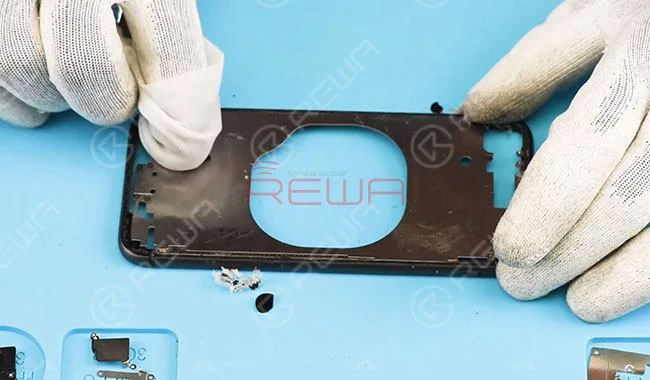
Remove the glue residue on the middle frame with Razor Blade and clean it with N-hexane.
So far back glass separating completed without any injuries on the sides.
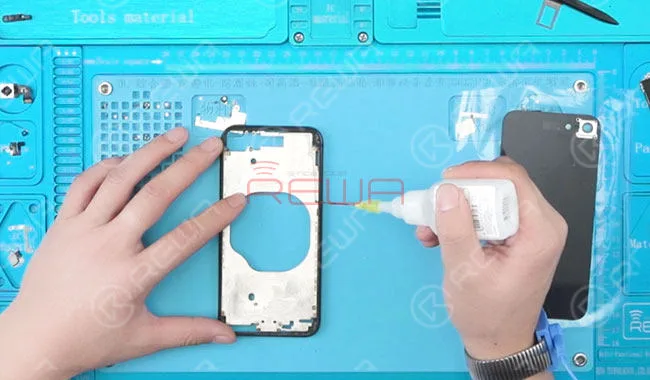
Apply some glue to the middle frame and spread it evenly.
After that, align the rear camera to the right position, then apply pressure and attach the back glass to middle frame tightly.
Once done, clean the glue residue.
Apply glue on the middle frame
ssemble the phone and test, and the phone runs normally with wireless charging.
Für weitere Informationen über iPhone 8/X Back Glass Repair, please check our video guide.
Now you can order Tools & Parts used in this video on our online shop.
Any questions about these replacement parts/tools, or need assistance when placing your order, please contact us at sales@rewatechnology.com and we will help you ASAP.
iPhone 6 keeps searching for signal? There are many possibilities for the causes of iPhone showing “searching” issue. As soon as they see “Searching”, a lot of people assume the built-in antenna on their iPhone is broken and head straight for the Apple Store. While it’s true that a defective internal antenna can cause the iPhone searching problem, it is by no means the only cause. You may try to figure it out by replacing a new SIM card, restarting the phone or resetting the network.
What if these do not work? This video introduced a logic board solution to fix iPhone 6 constantly searching for network. Let’s check the video for the detailed tutorial.
How To Fix An iPhone That Says Searching
We’ll walk you through the process of troubleshooting an iPhone that says iPhone searching for network, and help you fix the problem, if it can be fixed.
We structure our articles with the simple fixes first, and then we move on to the more complicated fixes if and when they become necessary. If we discover there really is a hardware problem with your iPhone, you can watch our video and we will steps to teach you how to repair your iPhone keeps searching for service.
1.Turn your iPhone off turn on again
This is a simple and necessary steps, when you turn on your iPhone again and then you need to check if your iPhone can search the signal?
2. Update your carrier settings
Sometimes wireless carriers release software updates that change the way your iPhone interacts with the cellular network. Sometimes, these updates fix problems that can cause your iPhone to say “Searching…” all the time.
3. Reset Network Settings
Reset Network Settings restores your iPhone’s cellular data configuration back to factory defaults. It’s an easy way to eliminate the possibility that an accidental change in the Settings app is preventing your iPhone from connecting to the network.
4.Fix Problems With Your SIM Card
All iPhones have a tiny SIM card that wireless carriers use to identify specific iPhones on their network. Your SIM card gives your iPhone your phone number – it’s what tells your carrier you’re you. SIM card problems are a common reason why iPhones say “Searching for service”.
If these steps are not solve your iPhone keeps searching for service, so it means your hardware is broken, you can watch our video to help you solve this question.
With up to 15 steps within the laminating process, iPhone X glass only screen repair is much more complicated than LCD screen of previous iPhone models. In consideration of the $279 official maintenance cost of broken screen and tough supply of China-made screen replacements in the short term, REWA LAB is honored to present you our hard-earned success with iPhone X OLED screen refurbishing.
Plus: For those in need, REWA also provides refurbishing service for models from iPhone 5 to iPhone X. Please feel free to contact us.
Das iPhone 8 bleibt beim Apple-Logo hängen und reagiert nicht mehr auf die Home-Taste? Warum und wie? Anders als bei früheren Versionen gibt es beim iPhone 8 eine integrierte Hardware-Erkennung während des Startvorgangs. Sobald die Touch ID nicht mehr funktioniert, bleibt das Telefon während des Starts am Apple-Logo hängen und lässt sich nicht mehr einschalten. Wenn Sie das gleiche Problem haben, dass sich das iPhone 8 nicht aktivieren lässt, finden Sie in diesem Video die Lösung!


 English
 Español
 Français
 Deutsch
 Italiano