Tag: iphone xr

  • How to Fix iPhone XR Keeps Rebooting While Gaming: Full Chip-Level Repair Guide

    How to Fix iPhone XR Keeps Rebooting While Gaming: Full Chip-Level Repair Guide

    Is your iPhone XR keeps rebooting, especially when playing games? You’re not alone. This common issue often stems from overheating at the chip level, causing the device to trigger Apple panic codes and enter a reboot loop. In this tutorial, we’ll walk you through a professional-level solution: chip-level board repair involving CPU, NAND, EEPROM, and baseband CPU transfer. Whether you’re a repair shop, technician, or DIYer, this guide will help you understand the root cause and how to fix it permanently.
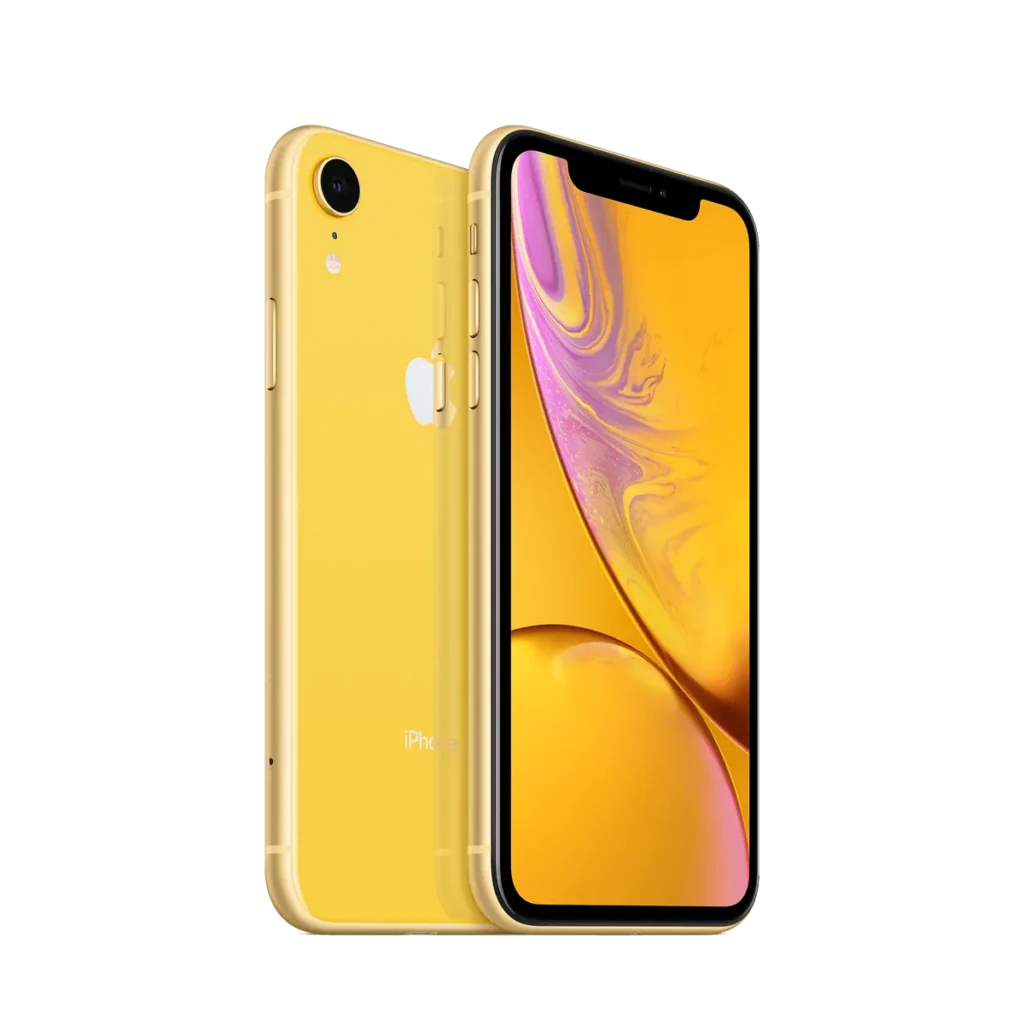
    iPhone XR Rebooting While Gaming

    Device Details

    Model: iPhone XR

    Announced: September 12, 2018

    Customer Faced iPhone XR Keeps Rebooting

    A customer’s iPhone XR would crash while playing games and then enter a constant reboot loop. The device wasn’t dropped, water-damaged, or improperly charged—ruling out external physical causes.

    Step 1: Observe the Boot Loop

    The phone repeatedly shows the Apple logo but fails to boot into iOS. Occasionally, it enters the system after several failed attempts.
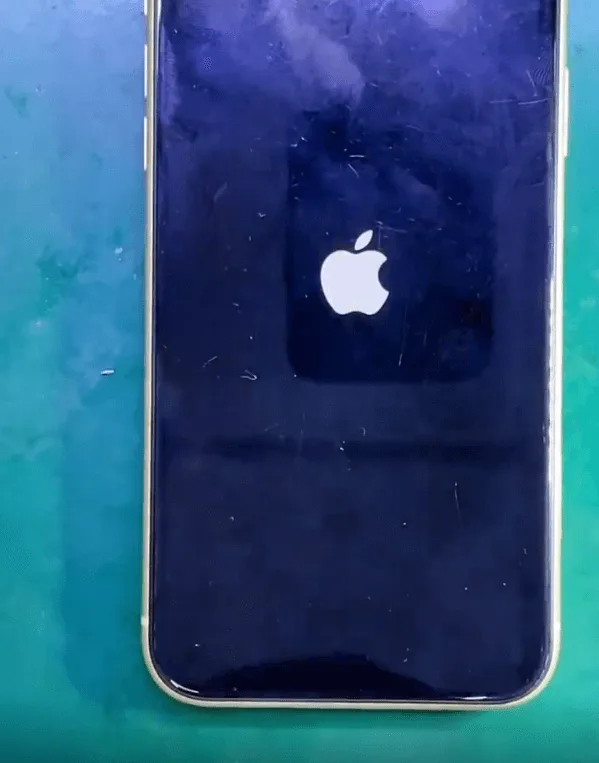
    iPhone XR keeps rebooting

    Step 2: Analyze Panic Logs

    We check the panic-full logs in the system. One key entry stands out:

    AppleSocHot
    Hot Hot Hot...

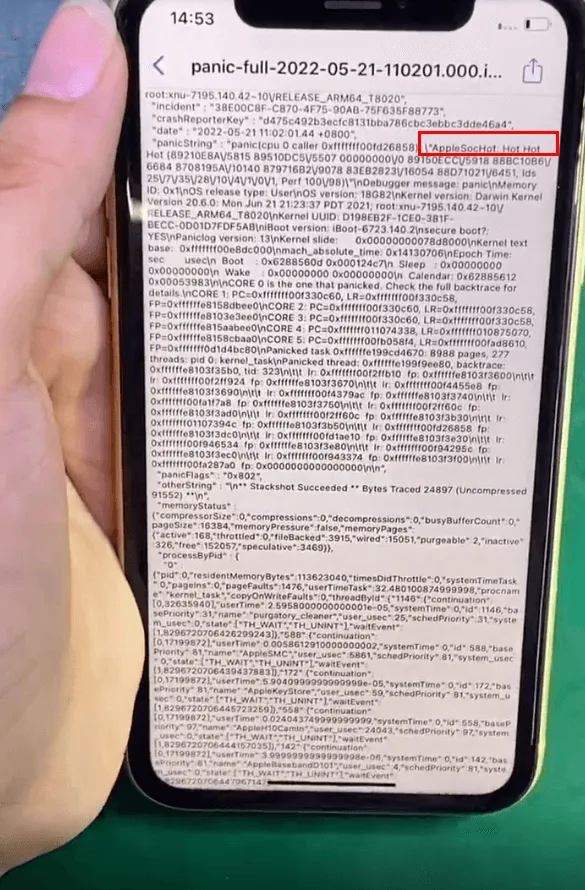
    This message indicates SoC (System on Chip) overheating, which causes the phone to reboot. This type of error often stems from internal chip failure rather than external factors.

    Solution: Swap Encrypted Chips to Another Working Board

    Due to the chip-level failure, a board swap with encrypted chip transfer is required. The following components need to be moved:

    • CPU
    • NAND chip
    • Baseband CPU
    • Logic EEPROM

    Repair Process

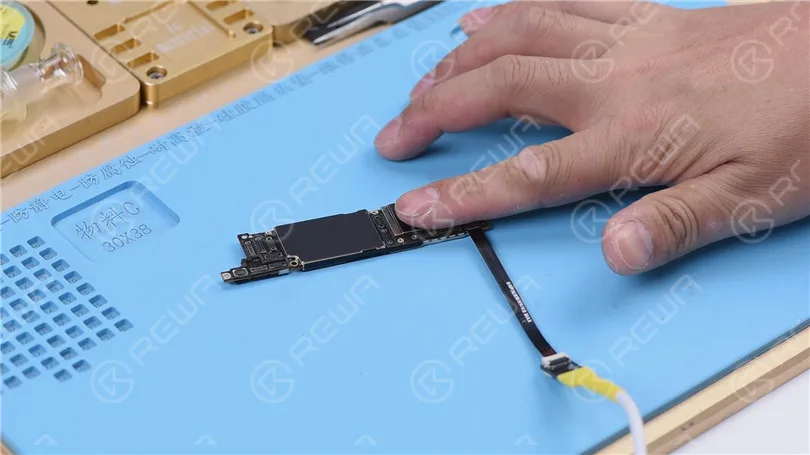
    1. Disassemble the iPhone and Remove the Motherboard

    Open the phone and safely remove the motherboard.
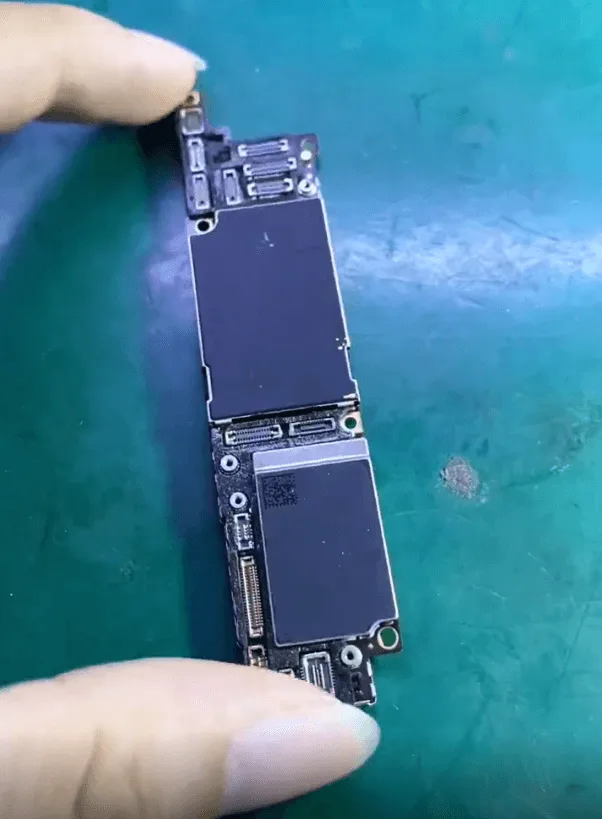
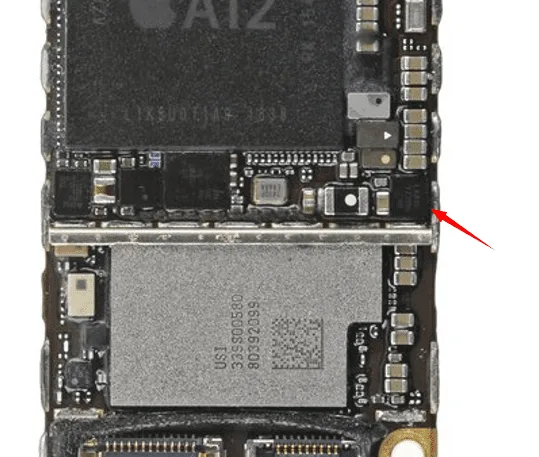
    iphone motherboard

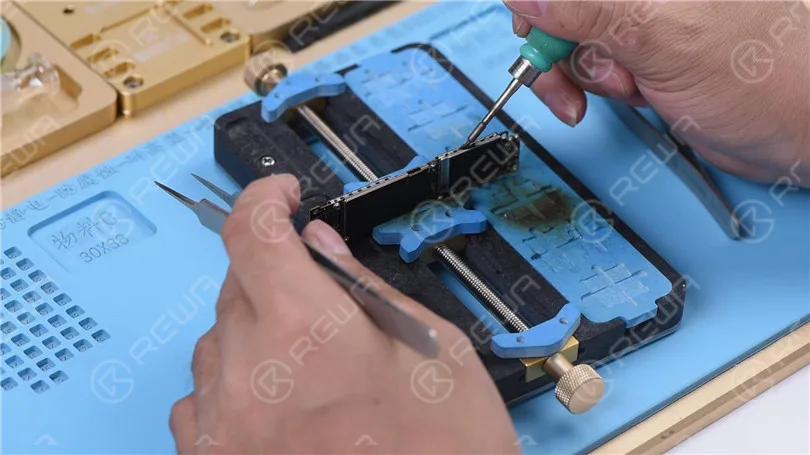
    2. Remove the Shielding Cover and Clean CPU

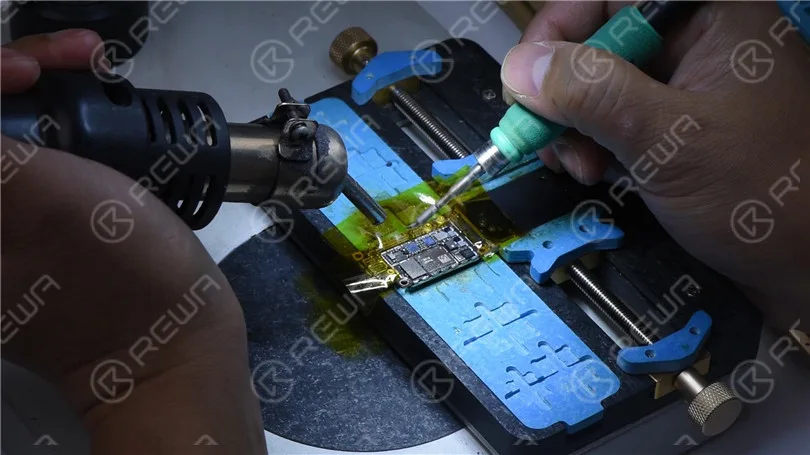
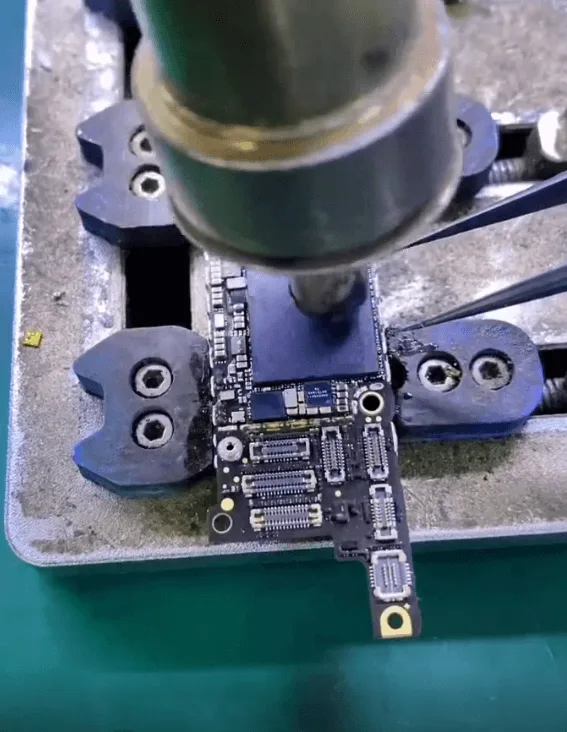
    • Use a hot air gun to remove the shielding cover.
    • Clean the thermal grease from the CPU.
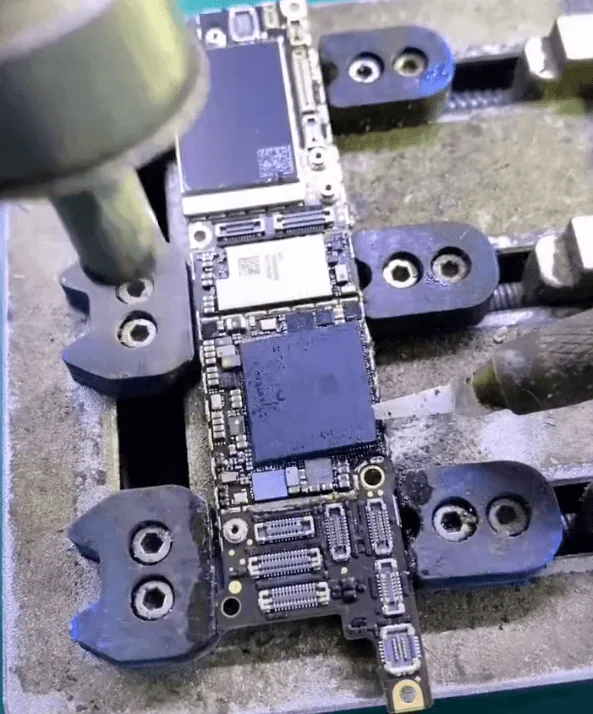
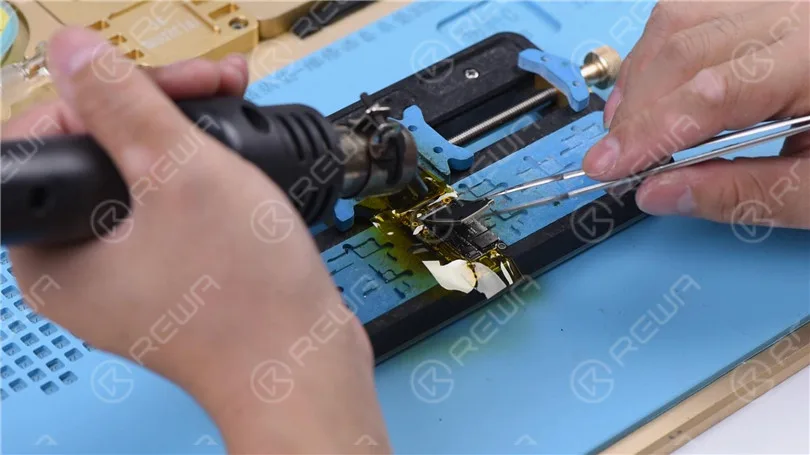
    3. Remove Black Glue & Detach the CPU

    • Carefully remove the black glue surrounding the CPU.
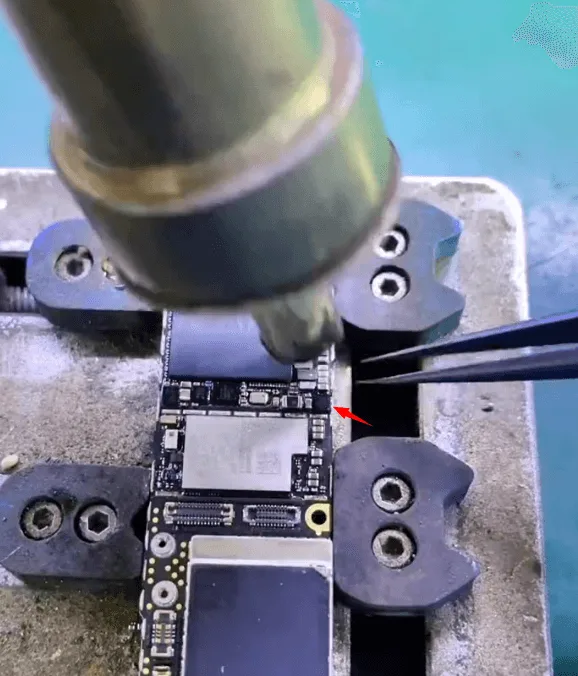
    • Reheat the area using a hot air gun.
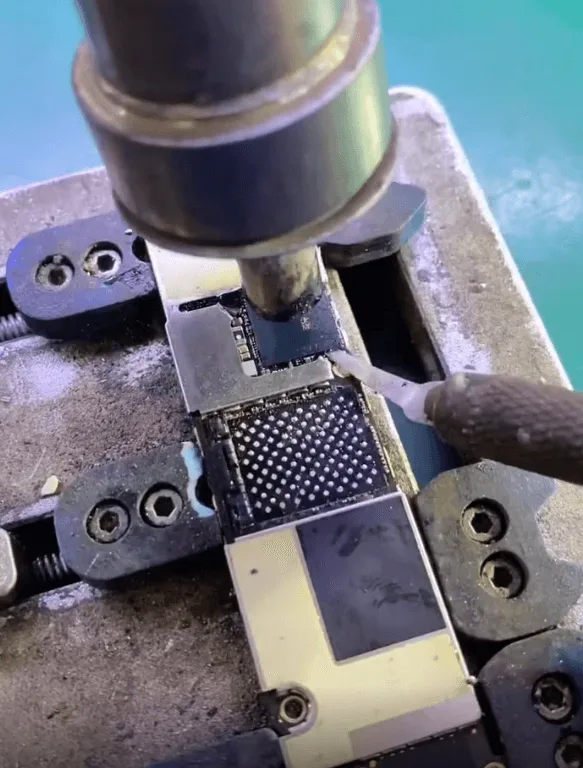
    • Gently insert a thin blade while heating until the CPU chip is removed.
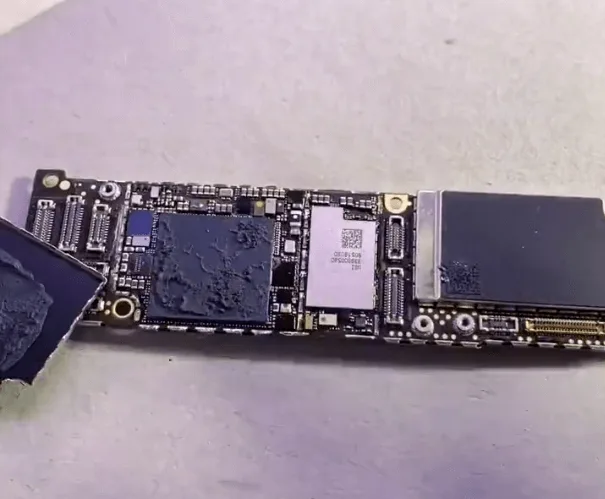
    ⚠️ Caution: Do not blow away the nearby Logic EEPROM (U1401) when heating.

    4. Clean and Resolder the CPU

    • Clean the removed CPU and the board’s contact pads.
    • Reball and solder the CPU to a new donor motherboard.
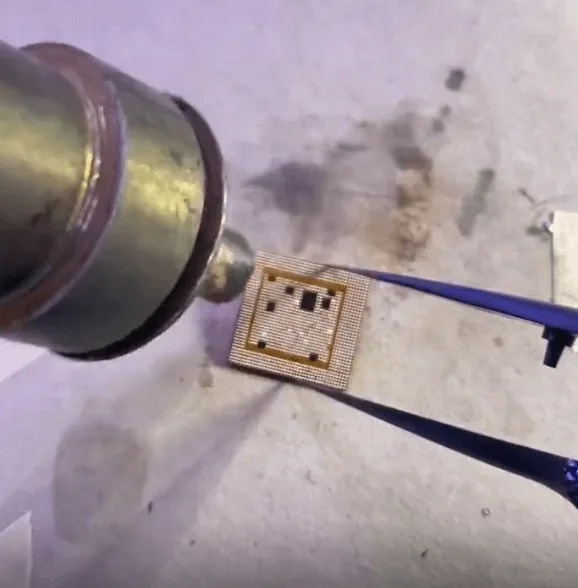
    iphone cpu repair

    5. Resolder the Logic EEPROM

    Once the CPU is soldered, install the Logic EEPROM back in place.
    Power-On Test

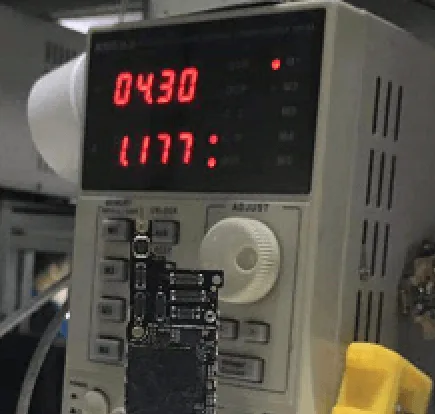
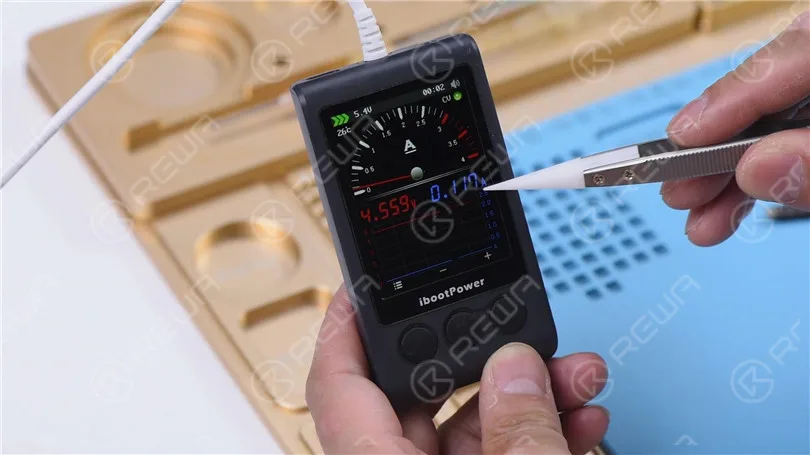
    Connect the reassembled motherboard to a DC power supply and trigger the boot. A stable current jump to around 50mA indicates the CPU is functioning correctly.
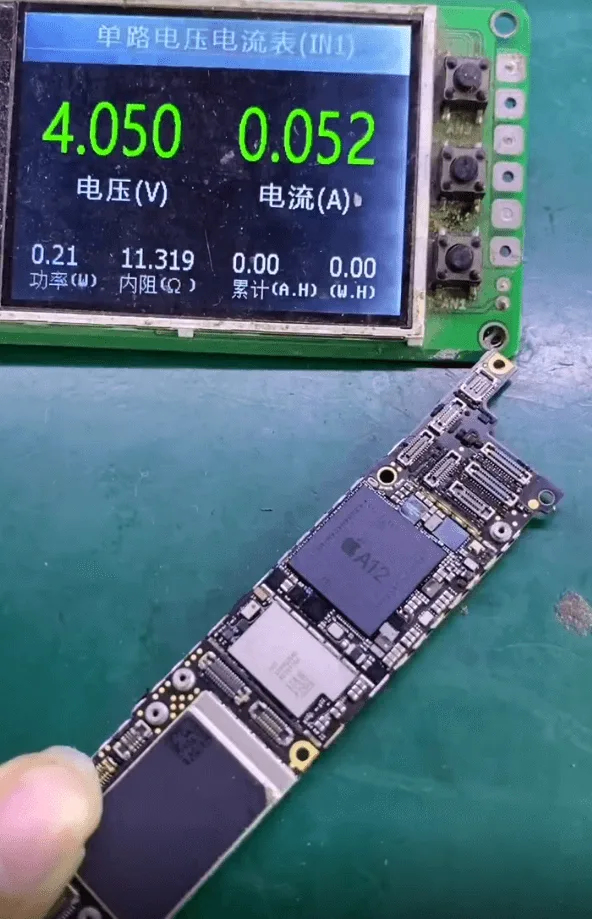
    check motherboard with Dc power supply

    Remaining Steps

    • Remove and reball the NAND chip and Baseband CPU from the original board.
    • Solder them onto the new motherboard along with the already-transferred CPU and EEPROM.
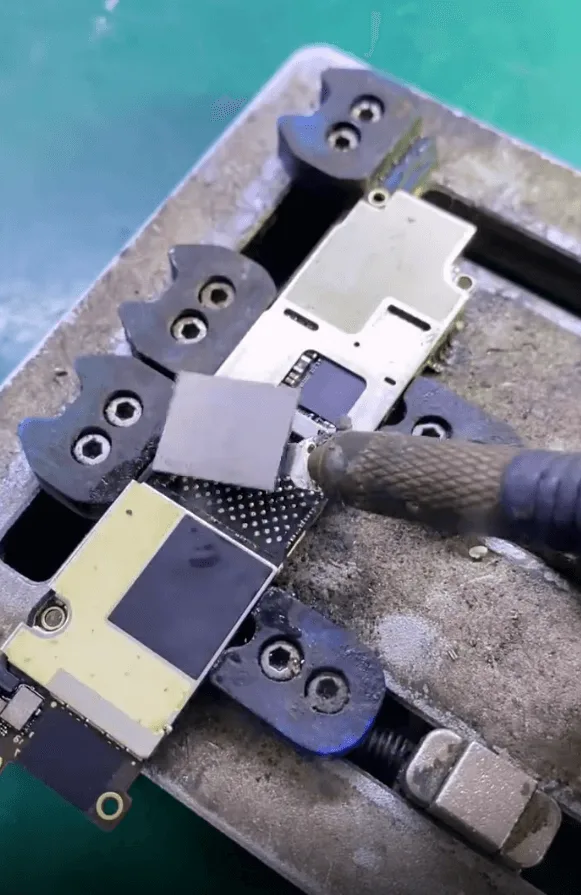
    Reballing and soldering steps are similar to the techniques taught in REWA’s Handwork Course.

    Final Testing

    Once all encrypted chips are swapped and the board cools down, reassemble the phone.

    Results:

    • All functions work normally.
    • The phone no longer reboots.
    • It runs games and videos smoothly for over 30 minutes with no crash or loop.
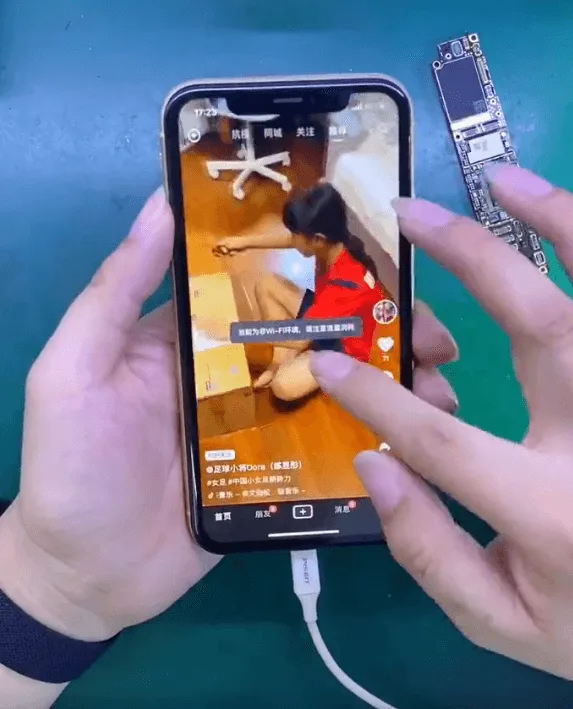
    iPhone XR Keep Rebooting

    Conclusion

    An iPhone XR keeps rebooting while gaming is typically suffering from a chip-level fault, especially overheating related to the SoC. The key solution is swapping all critical encrypted chips—CPU, NAND, Baseband CPU, and EEPROM—to a healthy donor board. Though this process requires advanced soldering skills and professional tools, it’s a proven and permanent solution. For repair shops and experienced technicians, this guide offers a reliable path to restore full functionality to affected iPhones.

    Tools & Parts Used:

    Tools:

    • Hot air gun
    • Thin blade
    • Tweezers
    • DC power supply
    • Soldering iron
    • Microscope (recommended)
    • Thermal grease cleaner
    • Reballing station (optional but preferred)

    Parts:

    • Donor iPhone XR motherboard
    • Original iPhone XR CPU (encrypted)
    • Original NAND chip
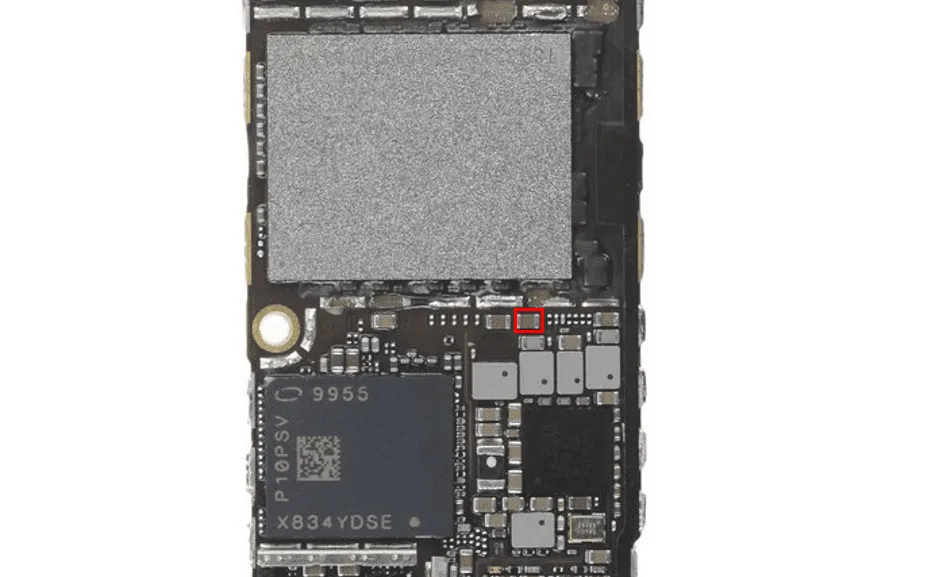
    • Original Logic EEPROM (U1401)
    • Original Baseband CPU

    Technical Term Clarifications:

    • AppleSocHot – A panic log error indicating SoC overheating.
    • CPU (Central Processing Unit) – Main processor of the phone.
    • NAND chip – Memory storage chip that holds iOS and user data.
    • Logic EEPROM (U1401) – Stores logic configuration data.
    • Baseband CPU – Handles communication functions like cellular and WiFi.
    • Reballing – Reapplying solder balls to a chip to prepare it for resoldering.
  • Real iPhone XR Repair Cases: Boot Failure, No Display, Speaker Issues & Baseband Fixes

    Real iPhone XR Repair Cases: Boot Failure, No Display, Speaker Issues & Baseband Fixes

    The iPhone XR remains a popular device, but like any smartphone, it’s not immune to hardware issues. Whether you’re a professional technician, repair shop owner, or DIY enthusiast, understanding real-world failure cases can help you troubleshoot and fix common problems more efficiently.

    In this article, we share four practical iPhone XR repair cases covering issues such as failure to boot, speaker malfunctions, display problems, and baseband failure after a drop. Each case includes clear diagnostics, repair techniques, and component-level solutions to guide your repair process with confidence.

    Case 1: iPhone XR Cannot Boot – High Current Draw on DC Power Supply

    Symptoms:

    • Phone won’t boot
    • Large current spike when connected to a DC power supply

    Diagnosis & Fix:

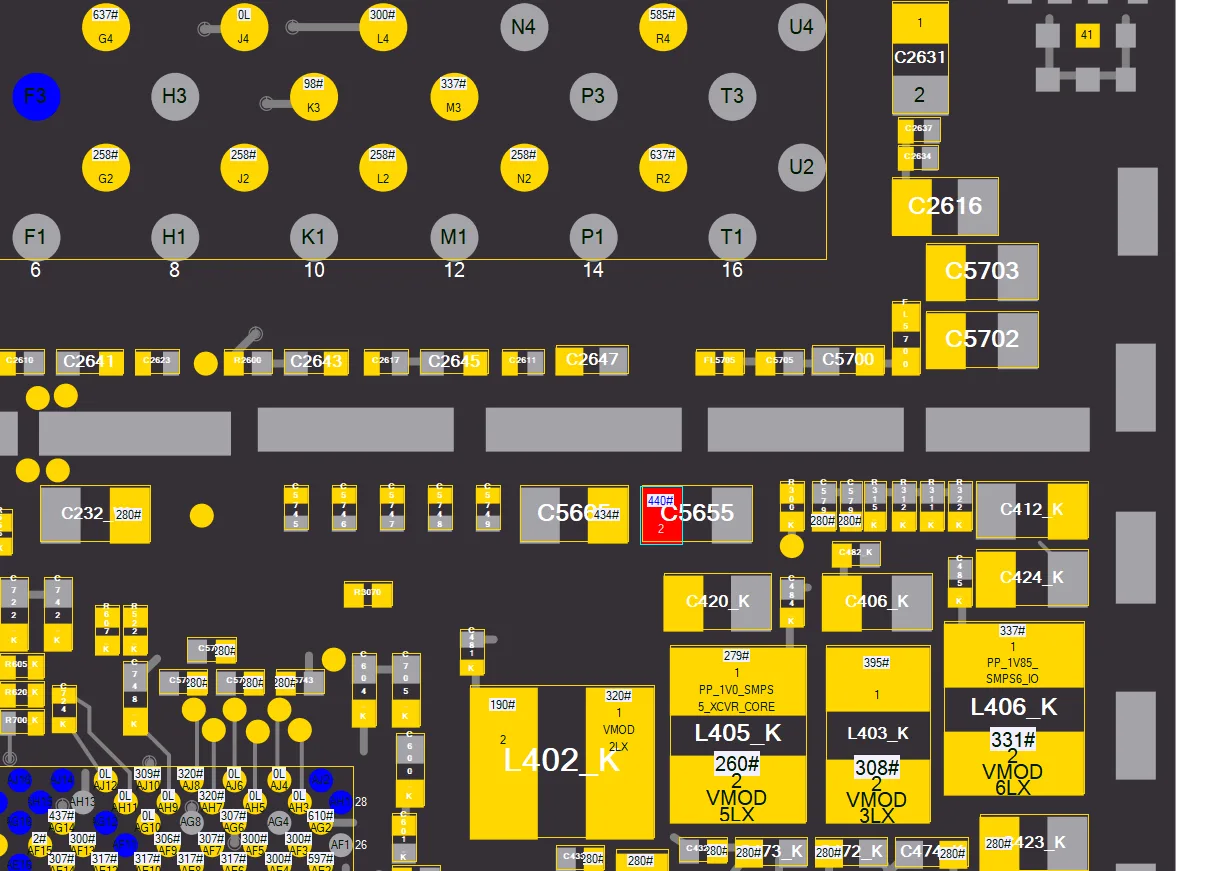
    Using the rosin inspection method (a technique where rosin is applied to the board and heated to detect short circuits visually), a shorted capacitor—C5655—was found. This component is associated with the PP_DISPLAY_BL12_ANODE line, which powers the backlight.

    Solution:

    Replace the shorted C5655 capacitor. Once replaced, the short circuit disappears and the phone powers on normally.

    Case 2: Speaker Rings Once, Then No Sound

    Symptoms:

    • The speaker makes a single ring or sound
    • No audio afterward

    Diagnosis & Fix:

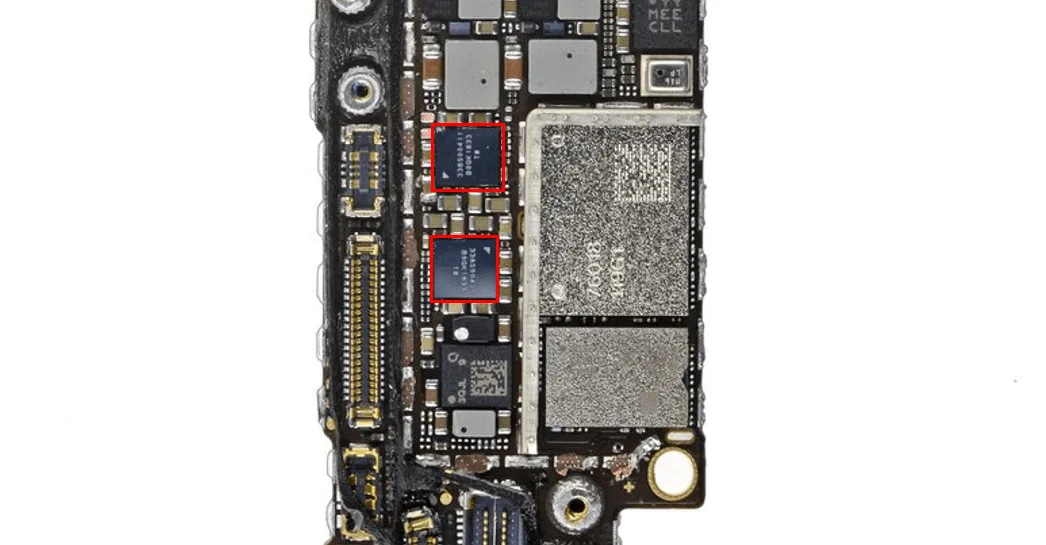
    This issue is typically caused by poor soldering of the speaker amplifier ICs. Diagnosing each chip individually can be time-consuming, so the recommended approach is to directly replace both speaker amplifier ICs: U5102 and U4902.

    Solution:

    Replace both chips. After replacement, the speaker function returns to normal.

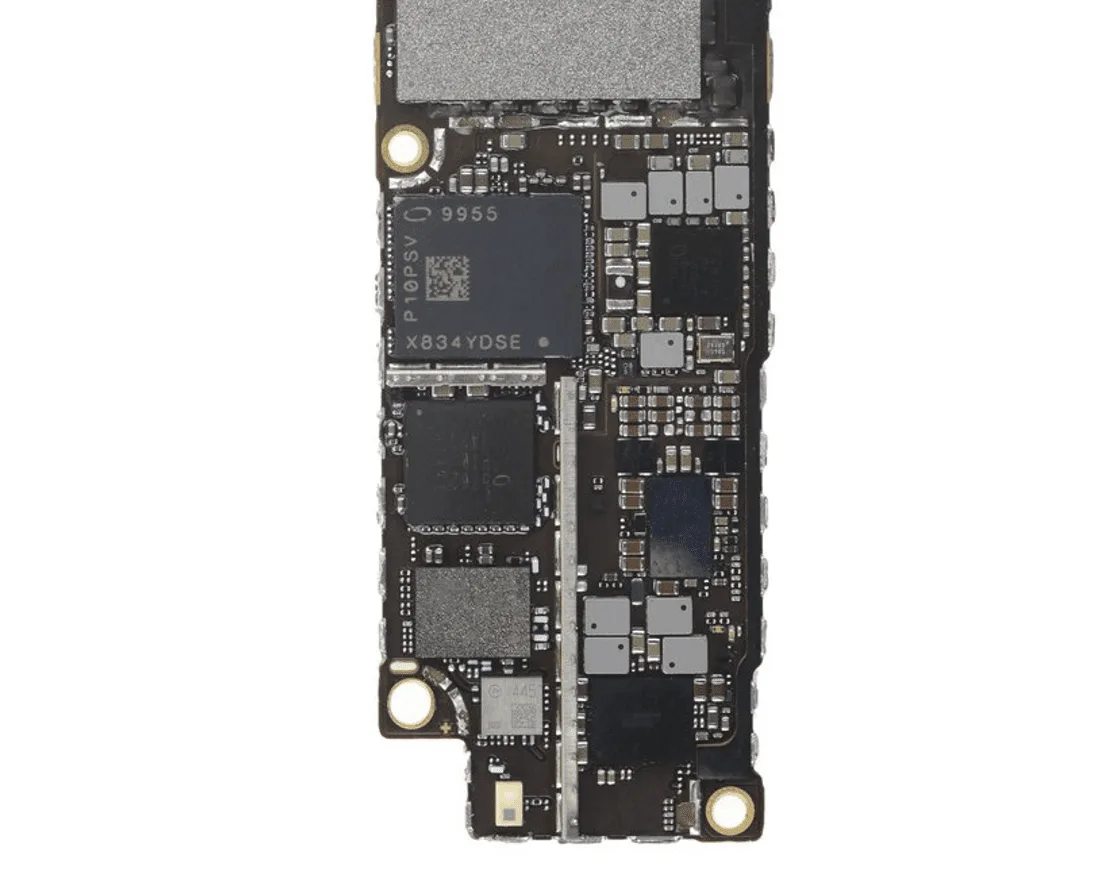
    iphone xr motherboard

    Case 3: No Display, But Normal Boot Current

    Symptoms:

    • Screen remains black
    • DC power supply shows normal boot current

    Diagnosis & Fix:

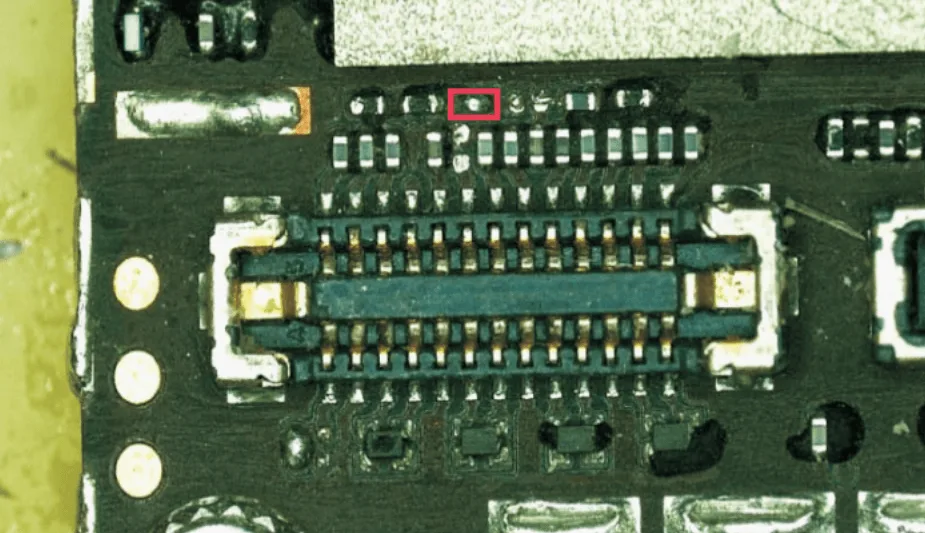
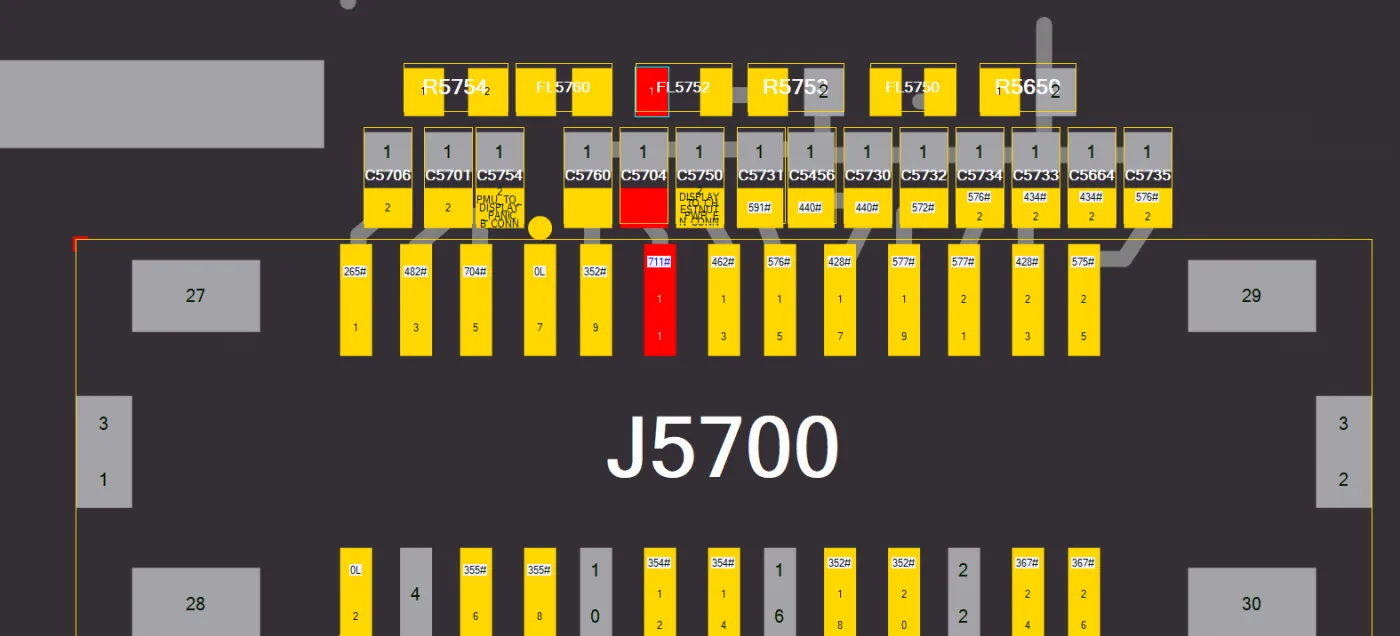
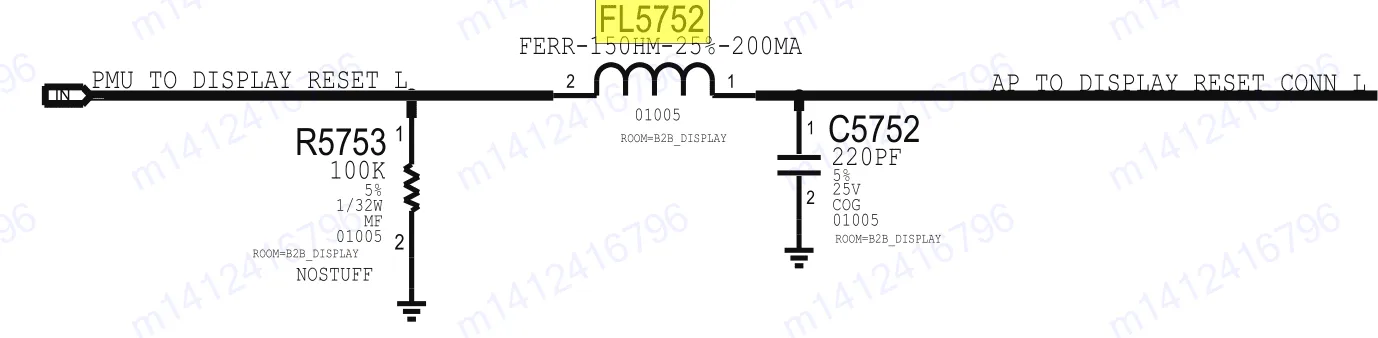
    Check the display connector and nearby components. The FL5752 inductor was found missing. This inductor is responsible for the PMU_TO_DISPLAY_RESET_CONN_L signal, which is crucial for initializing the display.

    Solution:

    First, test by jumping a wire across the missing inductor location. If the display lights up, replace the FL5752 inductor with one of the same specification to complete the repair.

    iphone xr motherboard
    iphone xr motherboard
    iphone xr repair

    Case 4: No Baseband Function After Drop Damage

    Symptoms:

    • Phone shows no service
    • Baseband information missing

    Diagnosis & Fix:
    Focus on components related to the Baseband CPU, Baseband PMU, and transceiver IC. Start by removing the shielding cover with a hot air gun (avoid using a cutter to prevent damage).

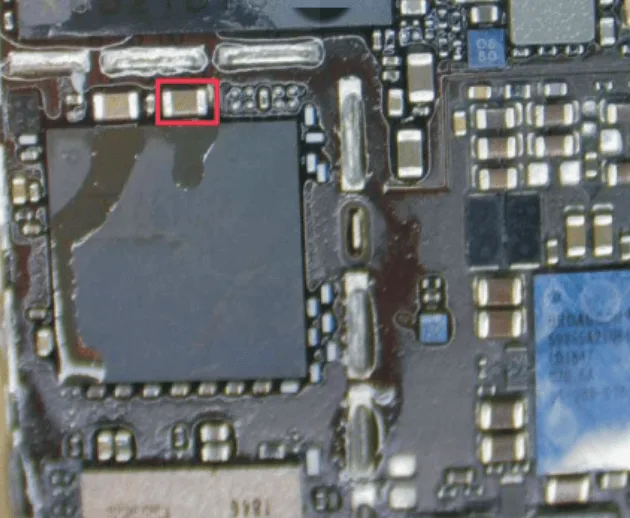
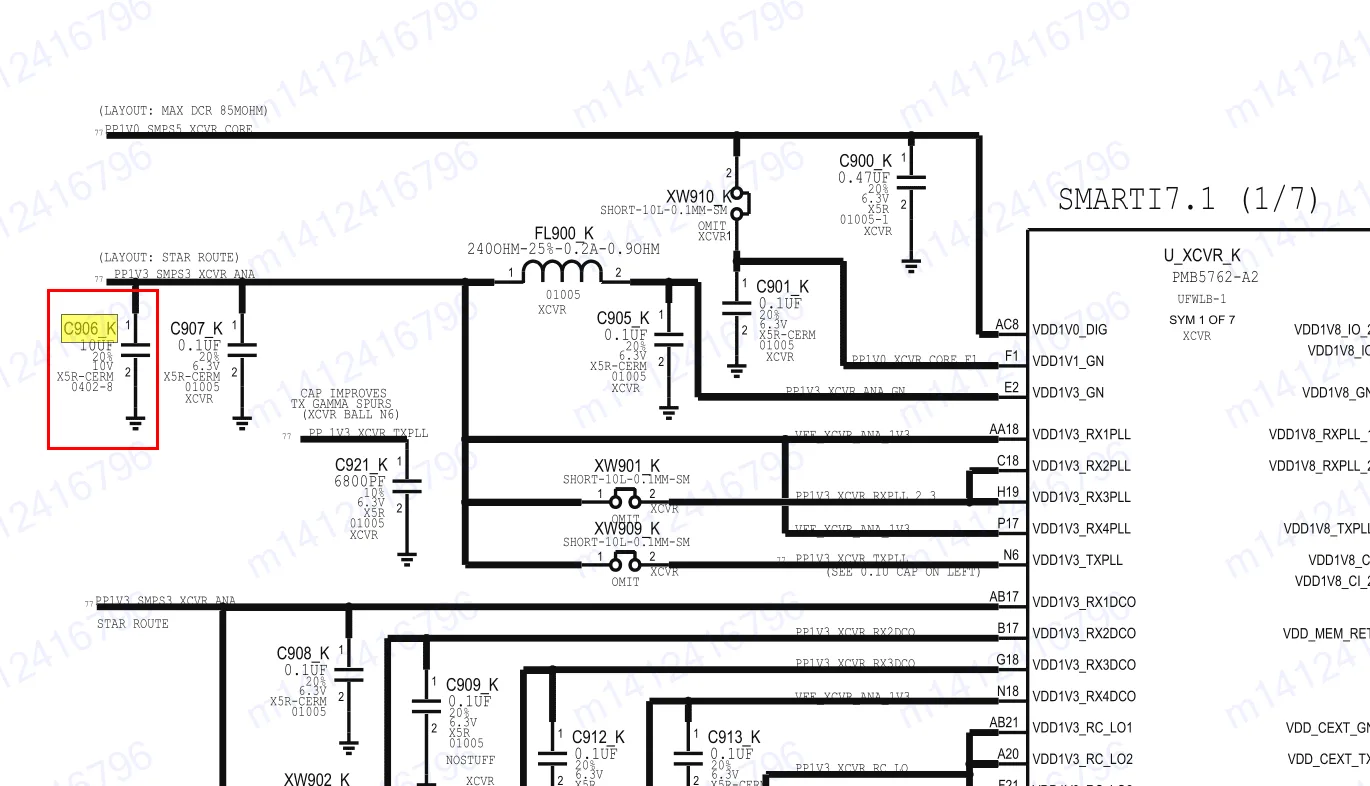
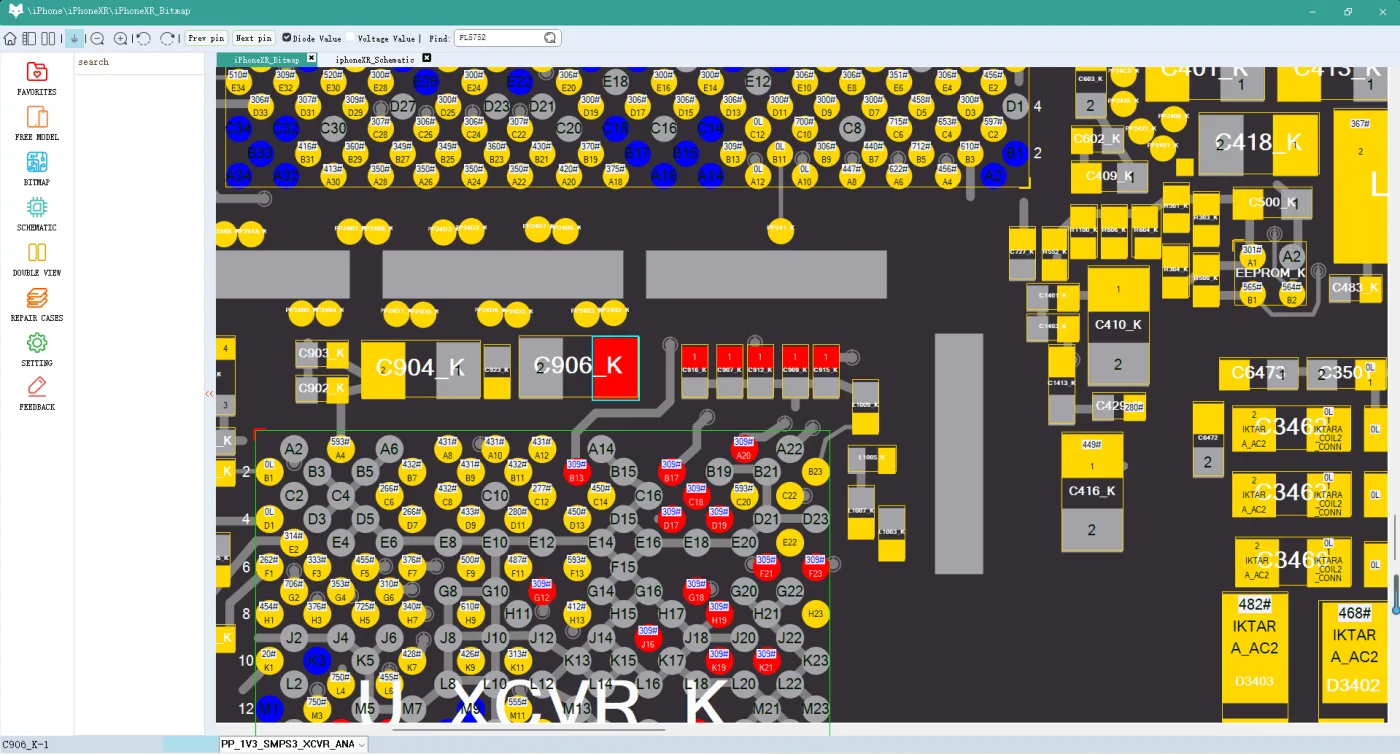
    Next, measure the diode readings around these chips. In this case, C906_K capacitor was found shorted. It is connected to the PP_1V3_SMPS3_XCVR_ANA power supply and acts as a filter.

    Solution:
    Replace the shorted C906_K capacitor with a new one of the same specification. This ensures long-term stability for the Baseband and RF functions.

    (Tips: Use a hot air gun to remove the shielding cover slightly. Avoid using a cutter in order to prevent crack damage to the chips underneath)

    Tools & Parts List

    🛠 Tools:

    • DC Power Supply
    • Rosin + Heat Source (for rosin inspection)
    • Hot Air Gun
    • Multimeter (for diode value testing)
    • Soldering Station
    • REFOX Bitmap/Boardview Software
    • Precision Tweezers
    • Flux

    🔩 Parts:

    • Capacitor C5655 (PP_DISPLAY_BL12_ANODE line)
    • Inductor FL5752
    • Capacitor C906_K (PP_1V3_SMPS3_XCVR_ANA line)
    • Speaker Amplifier ICs: U5102, U4902

    Conclusion

    These real-world iPhone XR function failure cases provide valuable insights into common hardware issues and how to fix them. From identifying shorted capacitors and missing inductors to replacing speaker amplifier ICs, the cases demonstrate how careful inspection and chip-level diagnosis can quickly restore devices.

    Whether you’re an experienced technician or just starting with phone repairs, understanding these examples can enhance your repair skills and confidence. Always use boardview tools like REFOX for guidance and replace components with exact specifications to ensure long-lasting results.

    Technical Term Explanation

    • Rosin Inspection Method: A technique used to locate shorts by applying rosin and heating it. The spot with a short typically produces smoke or changes color first.
    • PP_DISPLAY_BL12_ANODE: A power rail that supplies the display backlight circuit.
    • PMU_TO_DISPLAY_RESET_CONN_L: A low-level reset signal from the power management unit to the display.
    • PP_1V3_SMPS3_XCVR_ANA: A power supply line for the RF transceiver’s analog section.
    • Diode Value Test: A multimeter-based test to identify whether small components like capacitors or diodes are shorted or functioning.
  • How to Fix an iPhone XR Won’t Turn On: Short Circuit Diagnosis and Repair Guide

    How to Fix an iPhone XR Won’t Turn On: Short Circuit Diagnosis and Repair Guide

    When your iPhone XR won’t turn on, it can be frustrating — especially when there’s no visible damage. In this repair case, we’ll show you how a short circuit near the audio amplifier IC caused the iPhone XR to draw excessive current and fail to boot. Using professional tools like a DC power supply, rosin, and REFOX Bitmap, we accurately diagnosed and fixed the issue by replacing a faulty capacitor.

    Whether you’re a repair technician, a DIYer, or a repair shop owner, this detailed guide will help you approach similar “no boot” cases with confidence.

    Repair Case: iPhone XR Not Powering On

    Upon receiving the iPhone XR, we connected it to a DC power supply for diagnosis. The current draw was around 1A, indicating a possible short circuit on the board.

    Since the current leakage starts immediately after connecting to DC power, we suspected a short on one of the following power rails:

    • PP_BATT_VCC
    • PP_VDD_MAIN
    • PP_VDD_BOOST
    dc power supply

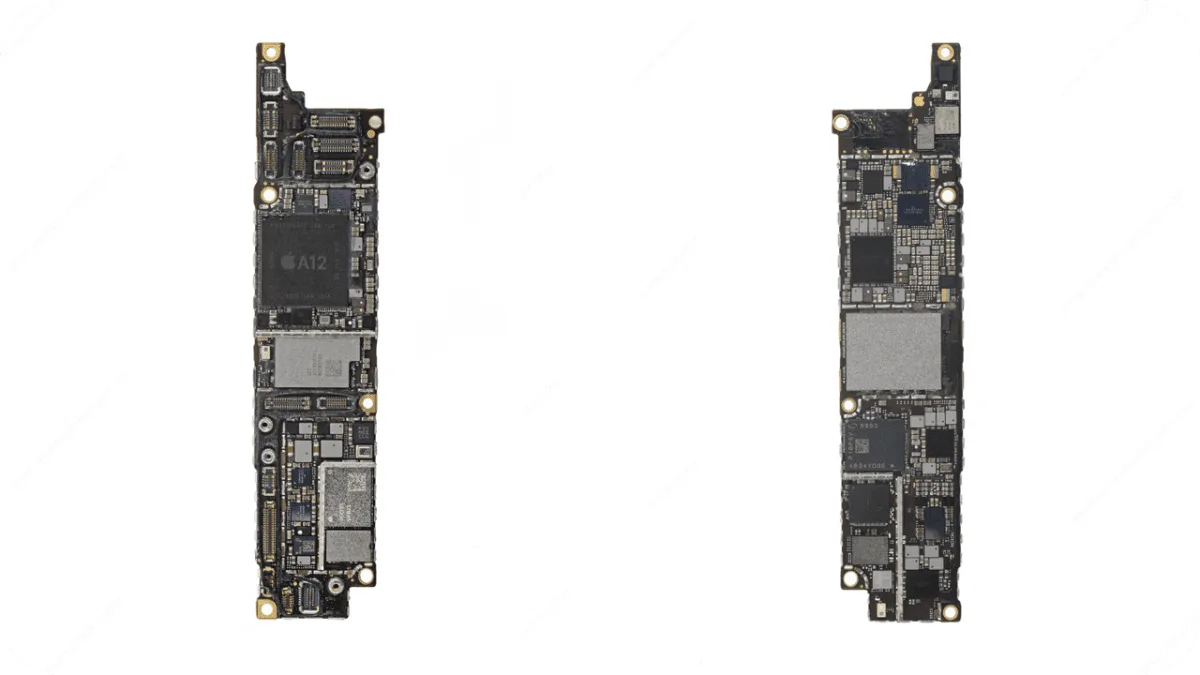
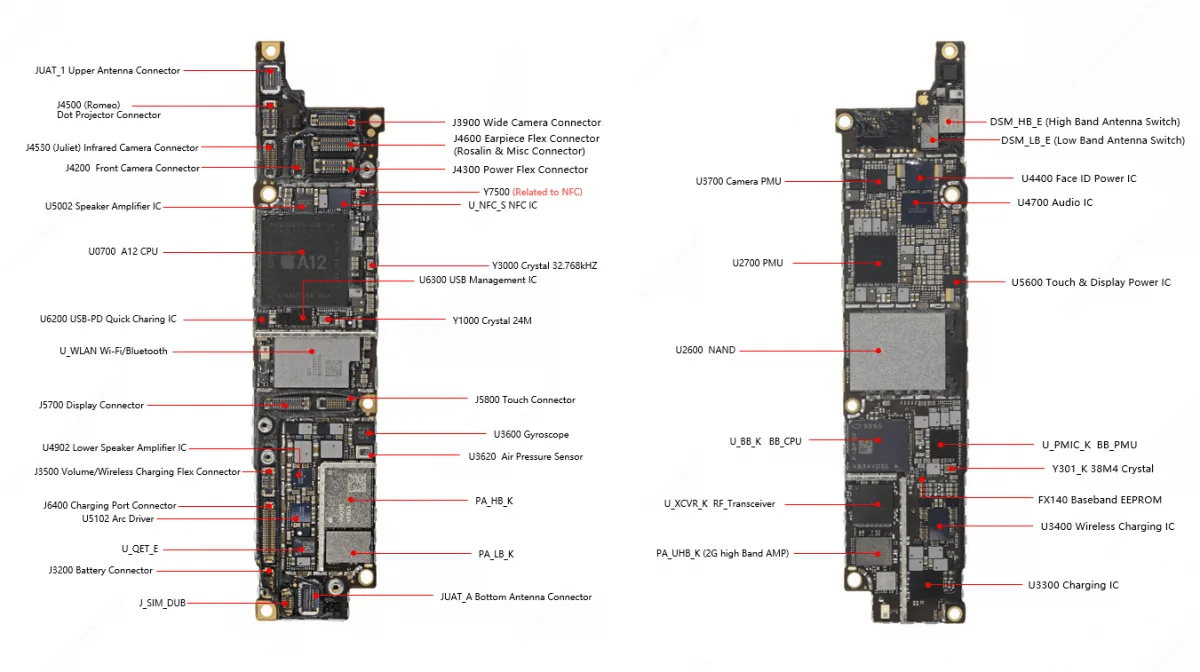
    The iPhone XR’s board structure is similar to that of older models like the iPhone 8 Plus. Based on experience, we can use either the rosin inspection method or a thermal imager to detect overheating components.

    iphone xr board vs iphone 8 plus

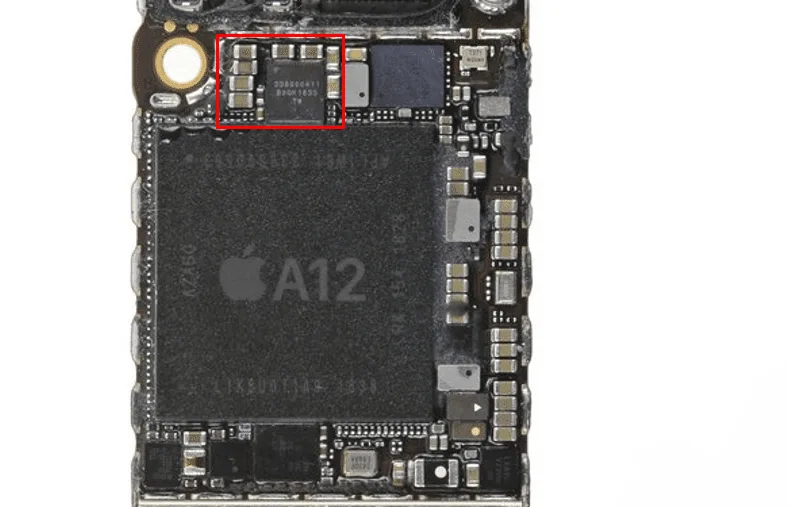
    Before using any tools, we first applied a simple method: finger test while applying DC power. We felt unusual heat around the audio amplifier IC area.

    To confirm, we applied rosin to the board and powered it again. The rosin melted directly on top of the audio amplifier IC, confirming heat in that area.

    iphone a12 chip

    At this point, most would replace the audio amplifier IC. However, due to its proximity to the CPU, replacing it could risk CPU pseudo soldering (a condition where CPU connections become unstable from heat exposure). Additionally, the audio amplifier circuit has multiple power lines, meaning a shorted capacitor could also be the cause.

    Narrowing Down the Issue

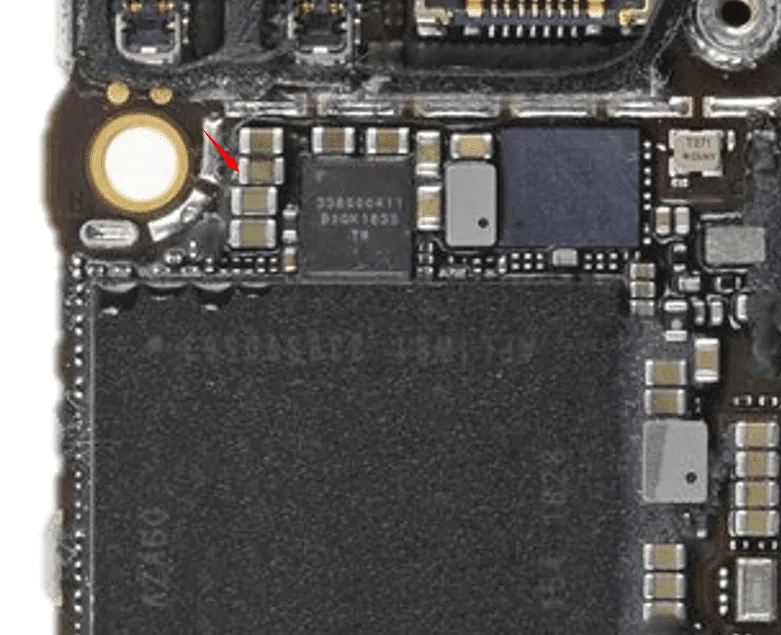
    Using this insight, we inspected the small capacitors around the audio amplifier IC. Sure enough, we located a shorted capacitor, as shown in the image (marked with an arrow in the original content).

    iPhone XR no boot

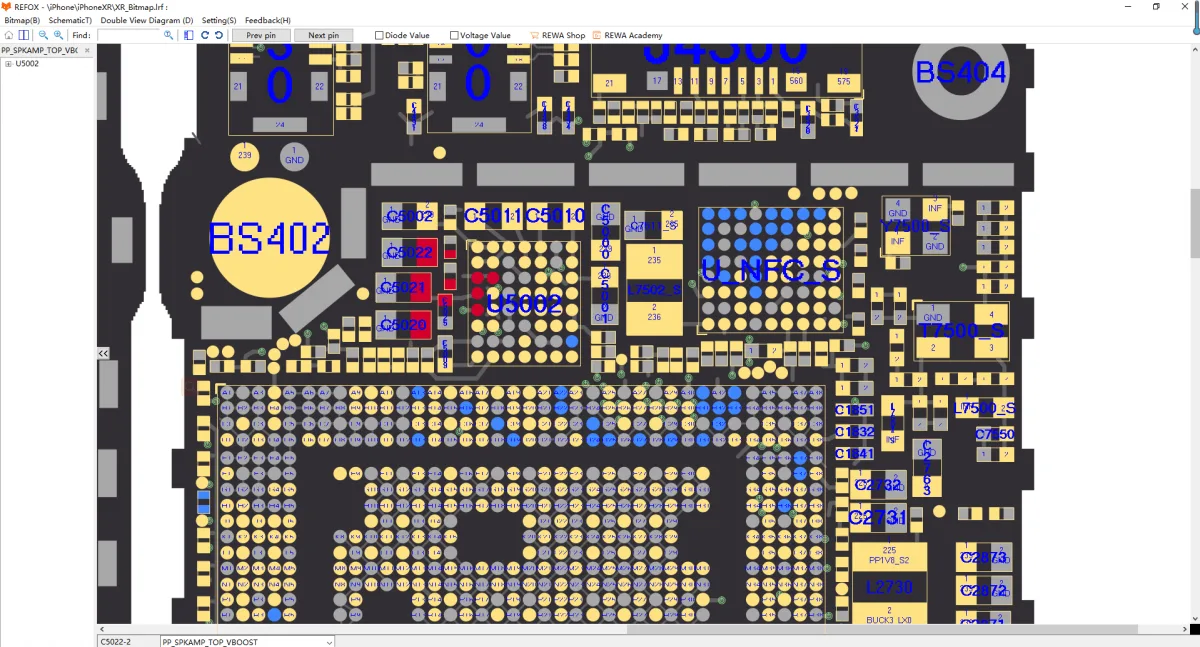
    By checking with the REFOX Bitmap, we identified this capacitor belonged to the PP_SPKAMP_TOP_VBOOST power rail.

    iphone xr diagram

    Repair Process

    We removed the faulty capacitor and tested the current draw again. The startup current returned to normal levels.

    Next, we replaced the capacitor with one of identical specification. After reinstalling, the iPhone XR booted up normally.

    We reassembled the phone and conducted a full function test — all features worked perfectly.

    Pro Tips

    • In this case, replacing a single shorted capacitor was enough to fix a severe no-boot issue.
    • When multiple components feel hot, check small passive components (like capacitors) first.
    iPhone XR No Boot

    Conclusion

    A no-boot iPhone XR might seem like a major failure, but with the right diagnostic approach, even complex issues like short circuits can be fixed efficiently. In this case, a careful inspection revealed a shorted capacitor near the audio amplifier IC, and replacing it brought the phone back to life. This repair highlights the importance of understanding circuit behavior, using boardview tools like REFOX Bitmap, and not rushing to replace major chips. If you’re in the repair business or enjoy DIY phone repairs, mastering these diagnostic techniques can save you time, reduce risk, and improve success rates.

  • Troubleshooting iPhone XR Signal Issues Due to Motherboard Electricity Leakage

    Troubleshooting iPhone XR Signal Issues Due to Motherboard Electricity Leakage

    In this article, we will address with the iPhone XR signal issues or “Searching for Signal” problem. We will explore how motherboard electricity leakage can cause this issue and provide a step-by-step guide on how to diagnose and fix it.

    Preliminary Inspection

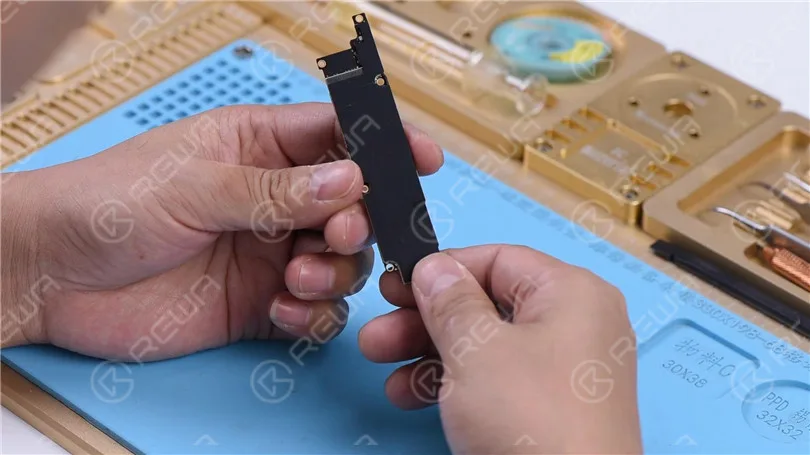
    Before diving into the troubleshooting process, conduct a cosmetic inspection of the motherboard. Ensure it is not deformed or water damaged.

    iPhone XR Keeps Searching For Signal with Motherboard Electricity Leakage

    Assembling and Testing

    Assemble the Phone: Begin by installing the motherboard and connecting the display assembly. Connect the battery connector with the DC Power Supply.

    iPhone XR Keeps Searching For Signal with Motherboard Electricity Leakage

    Current Reading: Check the current reading on the ammeter. If it’s abnormally high, it may indicate motherboard electricity leakage.

    Diagnosing the Issue

    iPhone XR Keeps Searching For Signal with Motherboard Electricity Leakage

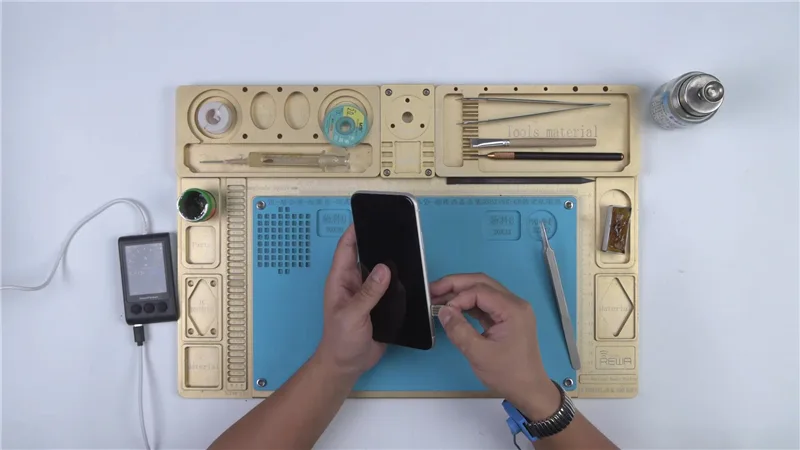
    Insert the SIM Card: After confirming the motherboard’s physical condition, insert the SIM card.

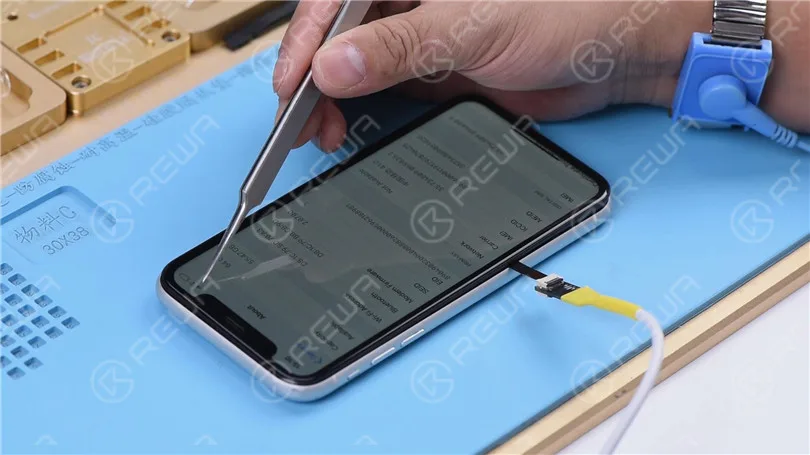
    Power On: Press the power button to turn on the phone. Check for normal functionality. Verify ICCID and IMEI numbers in Settings > General > About.

    Signal Search: The phone’s continuous signal searching indicates that the baseband circuit is functioning properly. It is likely that the issue lies with the signal power amplifier circuit.

    Deeper Inspection

    iPhone XR Keeps Searching For Signal with Motherboard Electricity Leakage

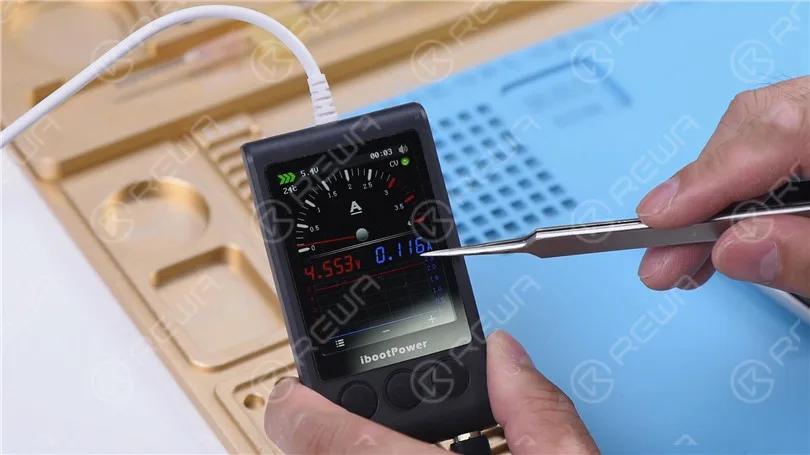
    Disconnect the Power Supply: Turn off the power supply, remove the motherboard, and reconnect the battery connector to the DC Power Supply. Ammeter shows a current reading of 116mA. If the current reading remains high, it indicates motherboard electricity leakage.

    iPhone XR Keeps Searching For Signal with Motherboard Electricity Leakage

    Locate the Hot Spot: Touch the motherboard, and you may find that the signal power amplifier area is hot.

    Removing Shielding Cover: Remove the shielding cover to facilitate closer examination of the area. Remove the dust-proof sponge from the board. Securely fasten the motherboard to the PCB Holder. It is important to consider applying low-temp solder paste along the side of the motherboard to decrease the melting point in this location.

    iPhone XR Keeps Searching For Signal with Motherboard Electricity Leakage

    Replacing Faulty Component

    Apply high-temperature tape on connectors surrounding. Heat the four edges of the shielding cover using a Hot Air Gun set at 400℃ with an air flow of 3. Proceed to lift the shielding cover using tweezers. The burnt-out power amplifier IC U_QET_E will be visible. Utilize PCB Cleaner to clean U_QET_E.

    iPhone XR Keeps Searching For Signal with Motherboard Electricity Leakage

    Remove the IC: Heat with a Hot Air Gun at 360℃, air flow 3. Take down U_QET_E from the board carefully. We can see that U_QET_E and its bonding pad have been burnt. Apply some medium-temp solder paste to the bonding pad. Clean the bonding pad with Soldering Iron at 365℃.

    iPhone XR Keeps Searching For Signal with Motherboard Electricity Leakage

    Repairing Bonding Pads: Apply medium-temp solder paste to the bonding pad, clean it thoroughly with a rosin-soaked solder wick, and apply a UV-curable solder mask.

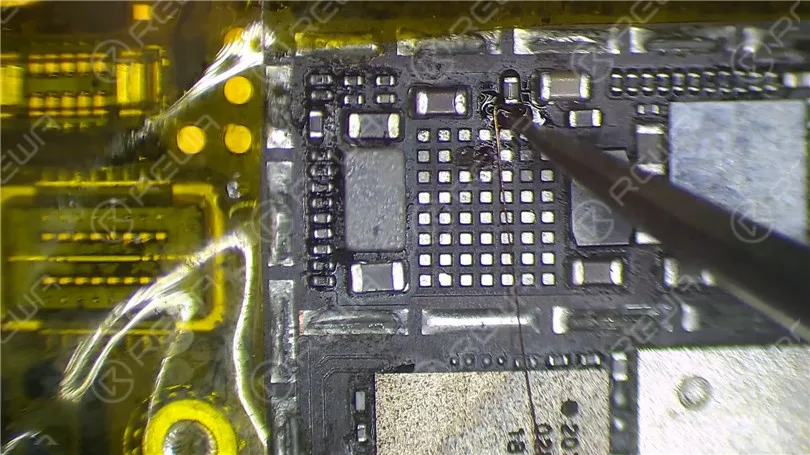
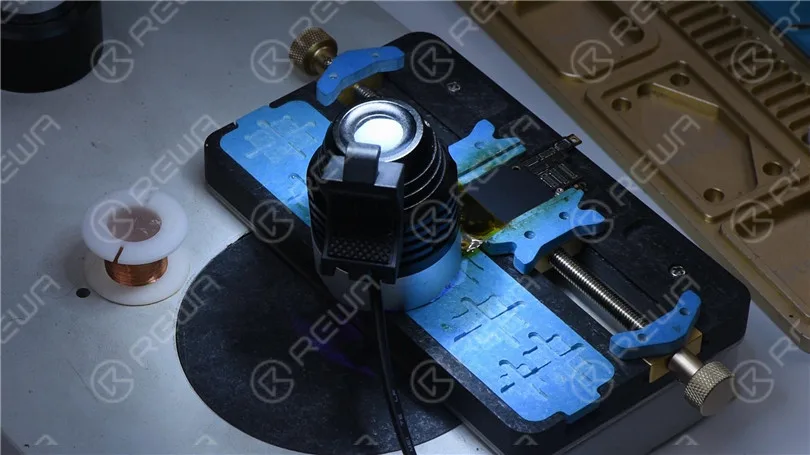
    Jumping Wires: Clean the burnt Pin C2 and Pin D2 on the bonding pad. The relevant circuits of these two pins have also suffered damage. Pin C2 and Pin D2 serve as power supply pins for PP_VDD_MAIN. Since the circuits connected to these pins are burnt, it is necessary to establish a connection between them using C1208 and jumping wires. Apply UV curable solder mask to Pin C2 and Pin D2. Use a UV lamp to solidify it for 2 minutes. Then flatten the surface using a sculpture knife. Apply paste flux to C1208. Use 0.02mm Enameled Copper Wire to solder one end to C1208 at 365℃ using a Soldering Iron. Loop the other end of the wire around Pin C2 and Pin D2. Finally, apply UV curable solder mask to the soldered wire and solidify it under the UV lamp.

    iPhone XR Keeps Searching For Signal with Motherboard Electricity Leakage

    Soldering a New IC: Solder a new power amplifier IC in place. Ensure it’s positioned correctly and solder it with a hot air gun at 360℃ and airflow of 3.

    iPhone XR Keeps Searching For Signal with Motherboard Electricity Leakage

    Final Testing

    1. Cool Down: Use the a Hot Air Gun to solder at 360℃ with an air flow of 3. Allow the motherboard to cool for 5 minutes before cleaning it with PCB Cleaner. Next, reconnect the battery connector to the DC Power Supply. The current reading on the ammeter should now be normal.

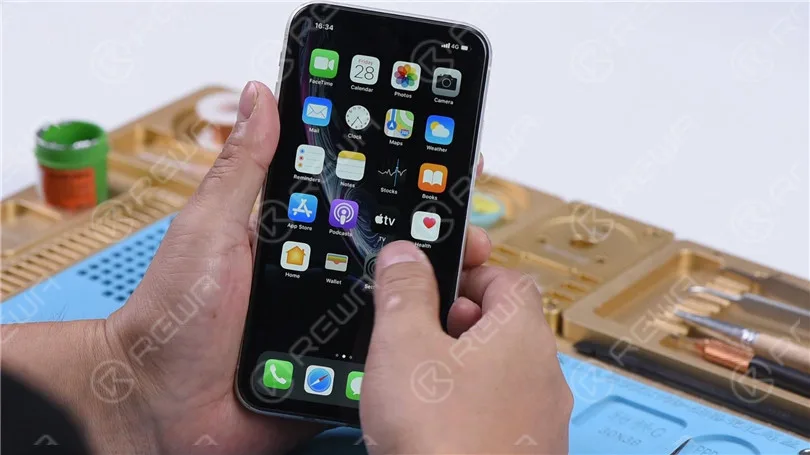
    2. Assemble and Test: Reassemble the phone, insert the SIM card, and power it on. The phone powers on without any issues. If the signal bars are back to normal, the fault has been cleared.

    iPhone XR Keeps Searching For Signal with Motherboard Electricity Leakage

    Conclusion

    This article addressed the “iPhone XR Keeps Searching For Signal” issue caused by motherboard electricity leakage. By diagnosing, identifying, and repairing the faulty component, we successfully resolved the problem. If you encounter this issue, follow the steps outlined in this guide for an effective solution.