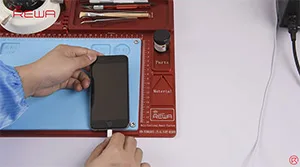
iTunes Error 9 often appears when processing firmware update or system restores by iTunes. Several reasons are attributed towards the problem, and we have already posted a solution for iPhone error 9 fixes related to the NAND Flash error before. Here this video shows a different solution regarding iPhone 6 error 9 without removing CPU. With the help of our newly developed CNC chip grinding machine, this job can be done even safer and quicker without damaging the logic board and nearby chips.
Tag: iphone 6
-
Fix iPhone 6s Overheating Issue – Logic Board Repair Guide
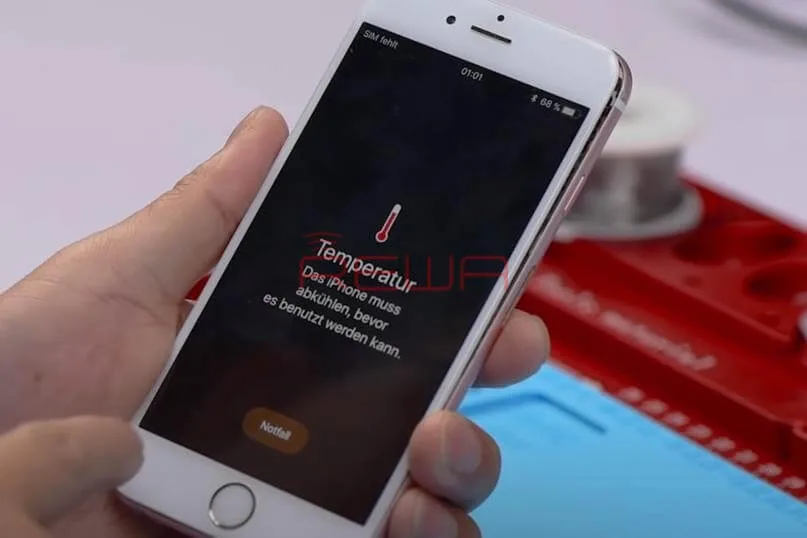
iPhone 6s comes with a high-temperature warning screen after turning on. Usually the problem is caused by excessive running apps. Yet in our repair guide today, we are working with logic board repair. After current detecting and rosin detecting, we can confirm that the problem was caused by damaged capacitors inside the WiFi module. With our repairing experience, we adopt a new repair solution to fix the issue.
Problem Identification:
We got one malfunctioned board from a client. First thing we do is to get the logic board mounted on the phone. Then buckle the display assembly and power on. The phone turns on with normal display.
Yet, with the phone running for 3 minutes, the screen suddenly dims. And a high temperature warning screen appears. The phone then goes with black screen.
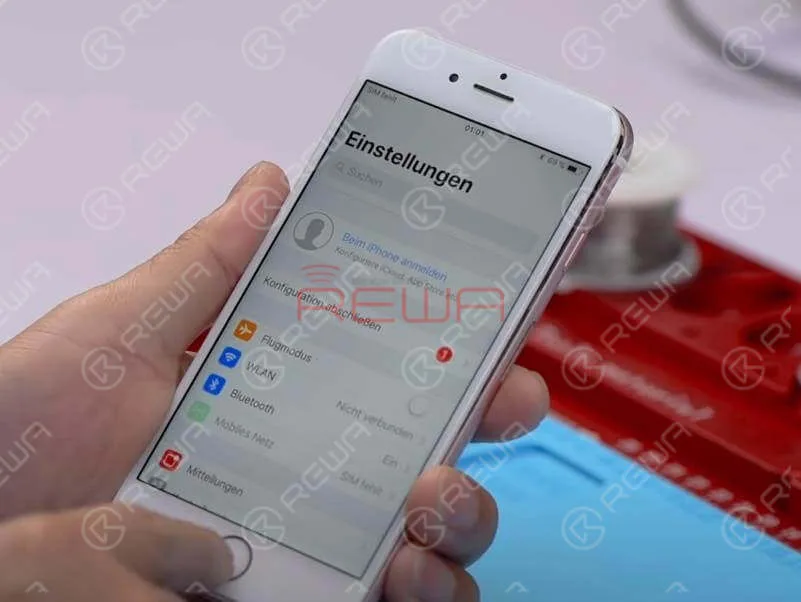
Analysis
Disconnect the battery. Connect the logic board with DC Power Supply and power on. Current reading on the ammeter is abnormal and the phone keeps restarting.
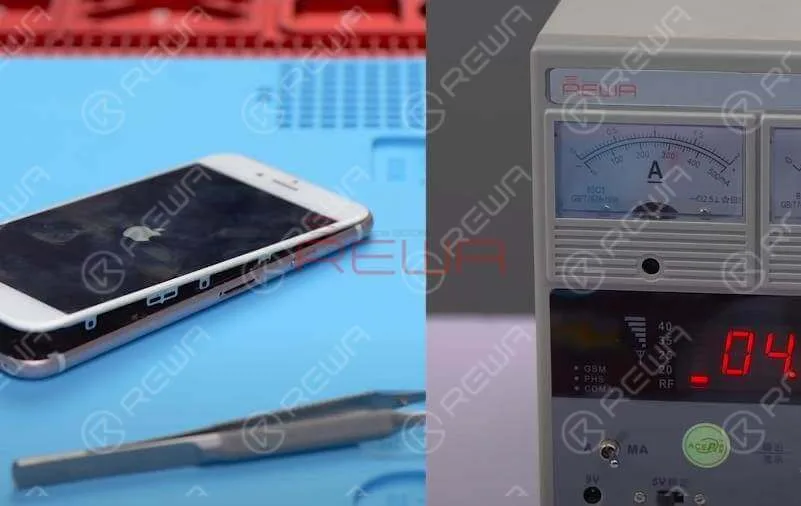
Pre-judgment: abnormal boot current causes the logic board burning issue which results in high temperature warning screen on the phone.
Diagnosis Process:
Remove the display assembly and take out the logic board. Touch the logic board with the spare hand. A sensation of burning can be experienced on area from the power chip to WiFi module. So we can confirm the possible fault area now.
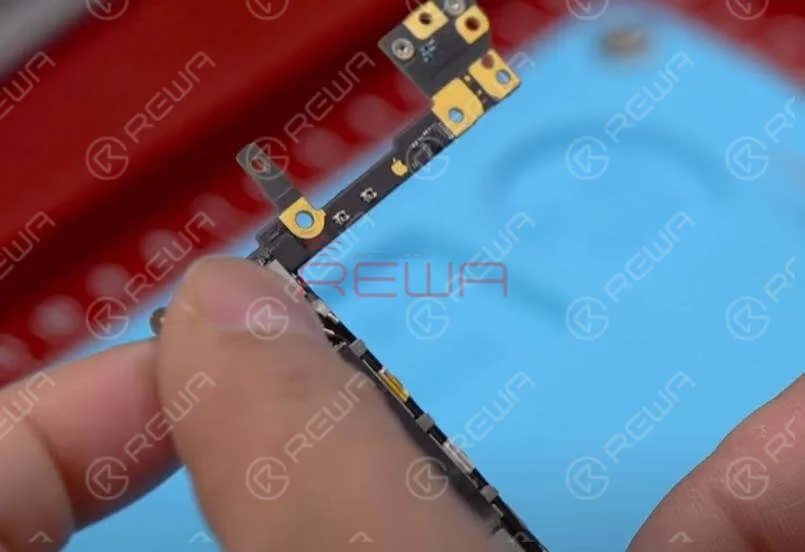
Since some components are located under shielding cover, we need to remove the shielding cover with Hot Air Gun first. Then we need to confirm the specific fault position with ‘rosin detecting’. Use Soldering Iron to smoke rosin on components of the burning area. Make sure all associated components are covered with white smoke.
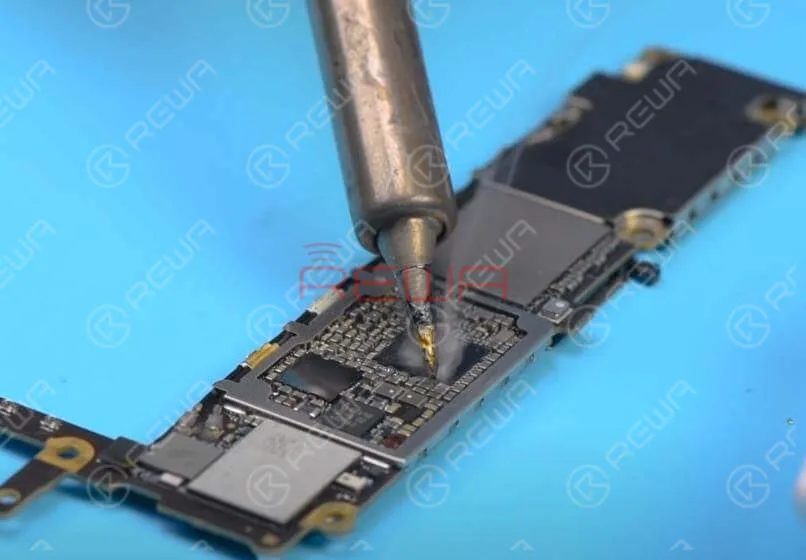
Tips: Since the phone keeps restarting as powered on with power button, we can turn on the phone by battery triggering.15s later, rosin on the WiFi module starts to melt. We can confirm the fault component as WiFi module.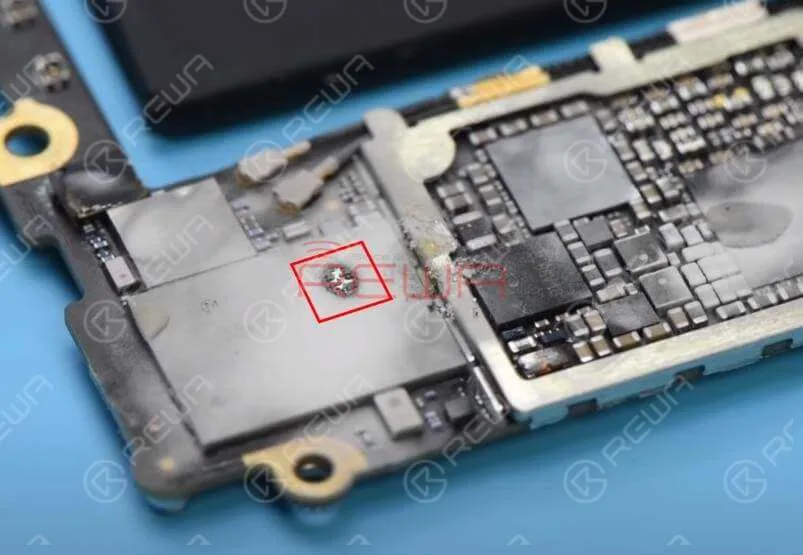
Troubleshooting
Burning issue of components inside the WiFi module can be related to capacitors inside the WiFi module or chips inside the WiFi module. Traditional repairing method is to replace the WiFi module and detach the NAND flash chip from the logic board. Then have the WiFi unbound.
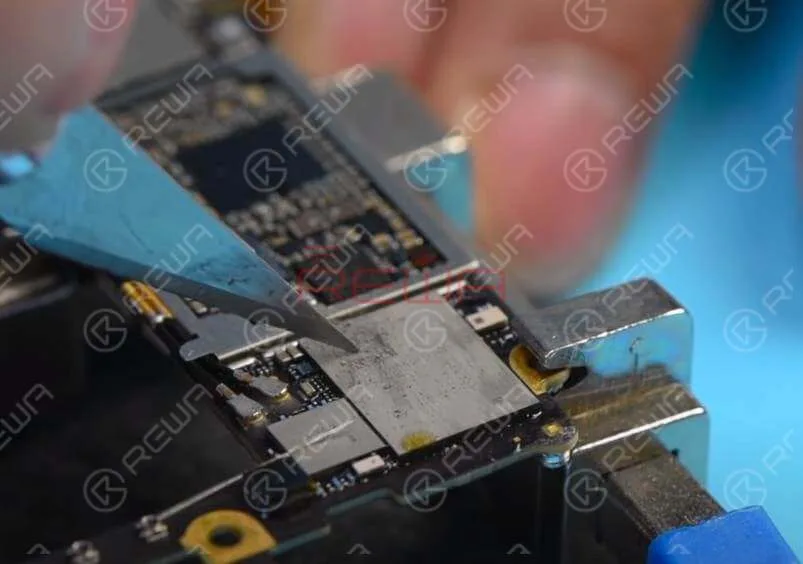
Based on repairing experience, two capacitors are located right under the rosin melted position. The fault was caused by the two capacitors. We will adopt a new repair solution today. Confirm the rosin melted position on surface of the WiFi module at first. Then scrape off the specific surface and heat with Hot Air Gun at 330℃ for 5s. Pry up the capacitors with sculpture knife.
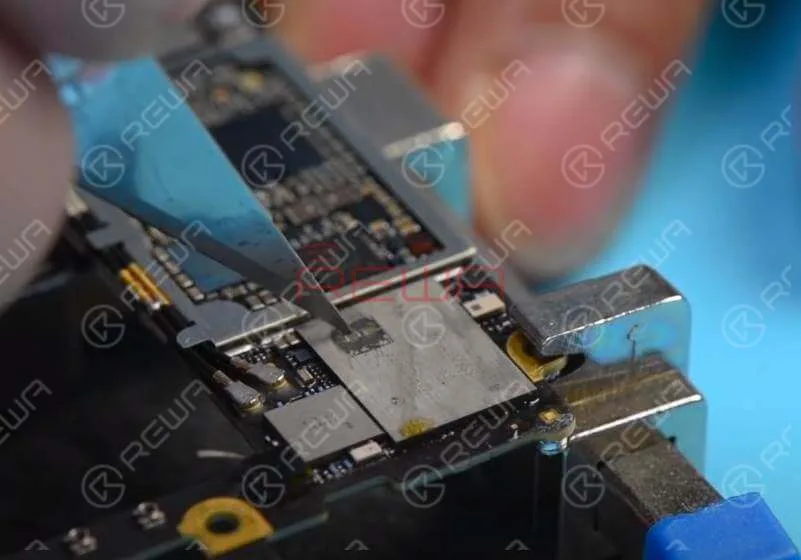
Once done, stick high temperature adhesive tape on the WiFi module for insulation.
Reassemble And Test
Get the logic board assembled and buckle the display assembly. Connect the logic board with DC Power Supply to power on. Current reading on the ammeter is normal this time and the phone stops restarting. The logic board also does not burn.
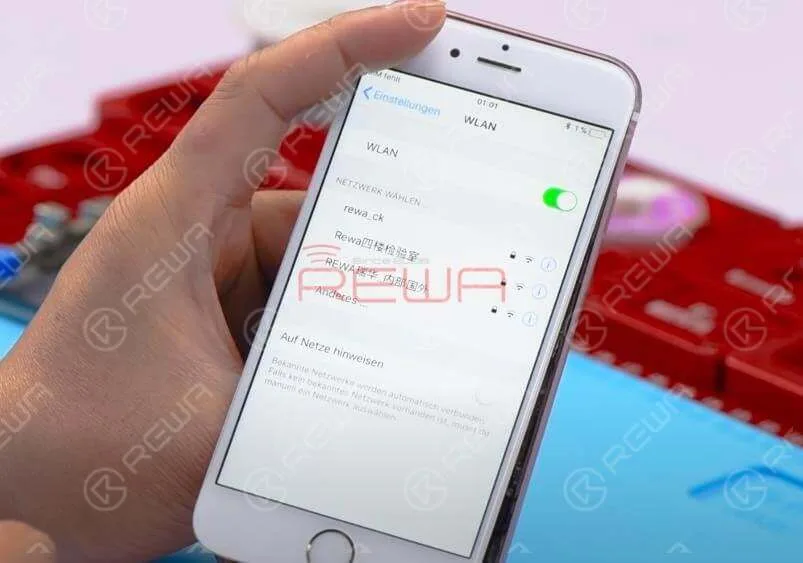
Continue to test WiFi function and all going well. Fault cleared.
Tools Used
- Hot Air Gun Rework Station – 990AD
- Integrated Repair Platform
- Digital Multimeter
- Communication Maintenance Power Supply
- Electron Microscope
Conclusion
This innovative repair solution provides a cost-effective alternative to replacing the entire WiFi module. By addressing the specific capacitor issue within the module, you can resolve the iPhone 6s overheating problem and prevent further damage to the logic board.
For a detailed visual guide on this repair process, visit the REWA YouTube Channel. Explore our online shop for quality parts and tools to assist you in your device repair endeavors.
-

iPhone 6 Wont Turn On – Water Damage Repair
iPhone water damage is a very common repair case, and it can result in different issues. For case today, iPhone 6 can’t turn on after water damage. We start the repair work from moldy components. As it is often suggested that we should always begin with simple, then complex. However, the problem remains unresolved. Run further measurement and the faulty position is finally confirmed. We can complete the iPhone 6 water damage repair work by replacing faulty components. Let’s check the video to see how to fix iPhone 6 won’t turn on caused by water damage.
-

iPhone 6 Error 9 CPU Repair Without BGA Reball

Have you ever come across with iPhone 6 error 9 issues? (check this post to know: What Do All These iPhone Error Codes Mean) It is well known that once iPhone 6 error 9 appears while performing firmware update or system restores via iTunes, the normal function becomes disrupted. And if this occurs frequently, that will be hard to handle. Several reasons are attributed towards the problem, and primary suspicion relates to the NAND Flash error as our previous blog iPhone 6 Keeps Restarting? – Fix Error 9 14 40 has illustrated. This time REWA comes with a totally different solution regarding iPhone 6 error 9 CPU repair caused by insufficient soldering within CPU BGA. With the help of our newly developed CNC chip grinding machine, chip removing can be safe and quick without damaging the logic board and nearby chips. If you have different opinions and solutions, please leave a comment below.iPhone 6 Error 9 CPU Repair Without BGA Reball1. Phone DisassemblingThe phone is stuck in Recovery Mode when trying to start up. Connect it to a computer and start system restore via iTunes.
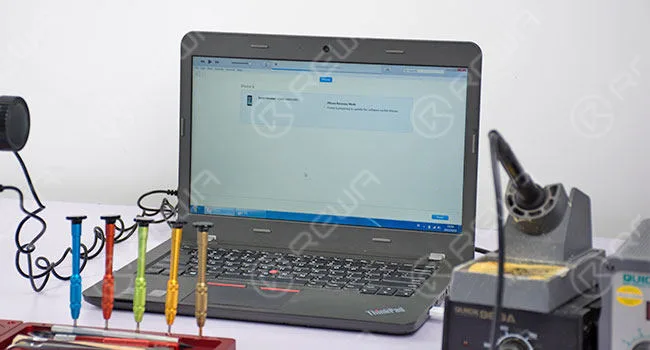
Error 9 appears. Disassemble the phone and take out the logic board. Remove a part of the shield plate with cutting nipper.
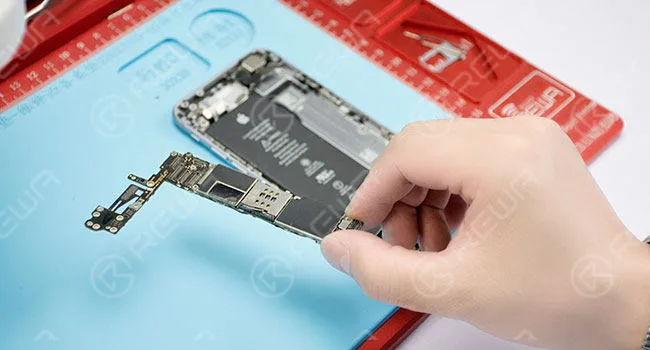
2. Malfunction Diagnosing
The test grounding resistance value of resistor R0317 and R0316 with diode mode-Abnormal value (480 under normal circumstances). R0317 and R0316 are connected with CPU pin AP31-SDA and pin AR31-SCL directly.
3. Malfunction Repairing
Take down the shield plate of CPU with a hot air gun. Then put the logic board on the corresponding position of the CNC mold and fix it tightly. Load iPhone 6 corresponding logic board chip grinding program and start grinding.
Once finished, take out the logic board and use a sculpture knife to scrape carefully until the CPU sublayer circuit comes out. After that, clean with PCB cleaner.
Apply some UV curable solder mask to the exposed area, apart from the two bonding pads (SDA, SCL). Once it has been done, put the logic board under the UV dryer lamp for 10 minutes and then take out the logic board.
Solder tins on the two bonding pads with soldering iron. Then solder the 0.02mm copper wire to the two bonding pads respectively. The two soldered wires connect R0317-corresponding pad SDA and R0317-corresponding pad SCL respectively.
The test grounding resistance value of R0317, R0316 with the diode mode again-Normal value this time.
4. Phone Testing
Assemble the phone and restore via iTunes. Then activate the phone and test, malfunction fixed.
Once test finished, take out the logic board. Then apply some UV curable solder mask to the soldered place again. Put the logic board under the UV dryer lamp for 10 minutes.
Assemble the phone and test again, all work normally.
For more details on iPhone 6 error 9 CPU repair guide, please go to REWA YouTube channel.
-
iPhone 6 Keeps Restarting? – Fix Error 9 14 40
More and more people reported that their iPhone stuck in a restart loop. As we know, the cell phone has been more and more important in our life, we trust our iPhone and they need to work all the time. But When your iPhone keeps restarting and you can’t use your iPhone well, it will be very terrible. So what should you do when your iPhone 6 keeps restarting? We’ll explain what causes your iPhone 6 to keep restarting and how to fix the restarting iPhone problem.
First, you should know why does your iPhone keep restarting?
Usually, there are two categories of iPhone keep restarting:
- iPhones that restart intermittently: You can use your iPhone for a while with no problem at all, and then your iPhone suddenly restarts.
- iPhones stuck in a restart loop: Your iPhone continuously restarts and it’s totally unusable. The Apple logo appears and disappears on the screen, over and over again.
For the first category, you can do the following steps will solve your problem.
1. Back Up Your iPhone
Before we do any troubleshooting at all, make sure your iPhone is backed up. This is a necessary step to protect your personal data.
2. Update Your iPhone’s iOS(if your iOS is the latest version, you don’t need do this step)
iOS updates always contain lots of fixes for software bugs and other problems. Sometimes, a software update fixes the problem that’s causing your iPhone to restart.
3. Reset All Settings and APP
If you installed an app just before your iPhone began restarting, uninstall that app and see if the problem resolves itself. If it’s not this reason, you can try reset all setting.
If the above steps can’t solve your problem, your iPhone may fall into the second category. When you have eliminated the possibility a software issue is causing your iPhone to keep restarting and you have checked for hardware issues on the outside of your iPhone. If your iPhone is still restarting, your iPhone probably needs to be repaired. You need to repair your iPhone, there is a video iPhone 6 Keeps Restarting Repair will teach you how to fix it?
This video show you show how to fix iPhone keeps restarting. The iPhone continuously restarts and became totally unusable, the Apple logo appears and disappear, over and over again. Does your phone ever meet this common problem which drives you crazy? Watch our video to get it fixed now!
The detail steps:
1. Take down the LCD screen assembly
2. Test voltage of the battery with the digital multimeter. Battery voltage is 4.21V, battery test signal voltage is 2.02V. The battery is normal, so we install the LCD screen assembly to check other malfunctions.
3. Failure detection: connect the phone to computer, it could not be restored by iTunes, an unknown error occurred (9), so that we can draw a conclusion that NAND flash or CPU is cracked.
4. Detach the motherboard from the phone, and fix it on PCB holder.
5. Remove the NAND flash chip from motherboard carefully.
6. Clean the bonding pad with a soldering iron, knife, BGA paste flux, rosin, solder wick and PCB cleaner.
7. Connect the NAND flash programmer with a computer, transfer the data from the old NAND flash to a new one.
8. New NAND flash chip BGA rebelling.
9. Install the new NAND flash chip to the motherboard.
10. Install the motherboard on the phone.
11. Connect the phone to computer, it can be restored by iTunes successfully.
12. Test if it works well.
Tips:
1. Prepare a new 64GB NAND flash memory chip.
2.Error 21, 9, 2009, 4005, 14, 40 indicate NAND flash or CPU malfunction.
3.You may need to repair the CPU if the phone still keeps restarting after the NAND flash chip is replaced.
Tools Used:
- 64 Bit Nand Flash Memory Chip Programmer
- Mobile Phone Repair Platform
- Digital Multimeter
- Electric Soldering Iron
- Hot Air Gun
- PCB Holder
- Screwdriver
- Tweezers
-
How To Distinguish iPhone 6 LCD Screen?
Have you ever been confused by different qualities of iPhone 6 LCD screens in the market and do not know how to choose the right one you really need or else your customers actually want?
For many iPhone parts distributors or cell phone repair business owners, one of the most common misconceptions you find is likely the true meaning and understanding of the definition of AAA Grade LCD Screens and Original (OEM) LCD Screens.
As more and more Chinese iPhone screens came into the market which eventually got decent popularity unexpectedly, thus you get more options out there on account of their good performance in display and stability.
Of course, they get better pricing compared with OEM ones.
If you are a bit unsure, don’t panic! We are about to help you to define the root differences of the OEM NEW , AA Grade , A Grade (which respectively manufactured by TIANMA, JDF and LT) iPhone 6 LCD Screens.
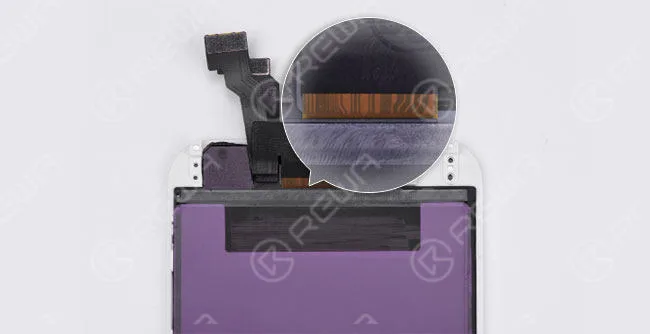
I hope that you will be able to distinguish them in an easier way through FLEX CABLE DISTINCTION and COLOR DIFFERENCE .
FLEX CABLE DISTINCTION
OEM NEW
The lines on an OEM New screen flex cable are mostly curving if you check carefully.
And the background color is yellow.
(The glass lens comes with a colored ring around the camera ring, all ORIGINAL and NEW from OEM factory)
AA GRADE
(Original LCD but Compatible LCD Flex Cable, also glass lens, bezel frame and flex cables are assembled by the third-party factory)
The lines are almost the same as on the OEM New flex cable. But the background color is brighter.
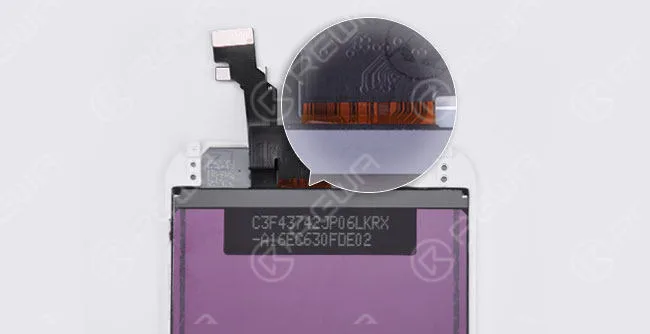
A GRADE (TIANMA)
(All parts apply compatible materials, and assembled by China LCD vendors)
The two curving lines on the right side can be seen as a sign of TIANMA screens.
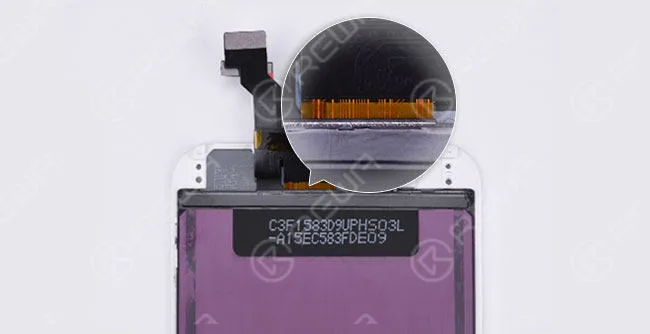
A GRADE (JDF)
The symmetric curving lines in the middle make it looks like a “door”. And there is also a small “door” on the right side.
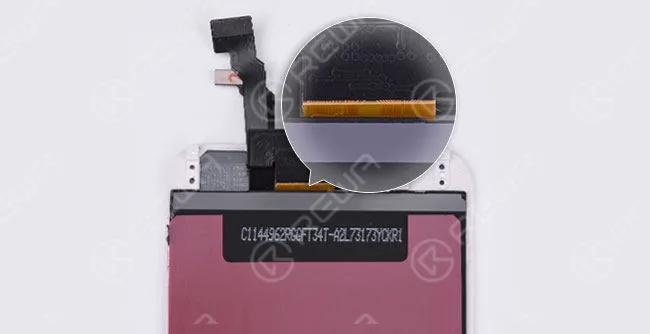
A GRADE (LT)
The flex cable is wider than OEM New. Besides, it has yellow lines with the black background color.
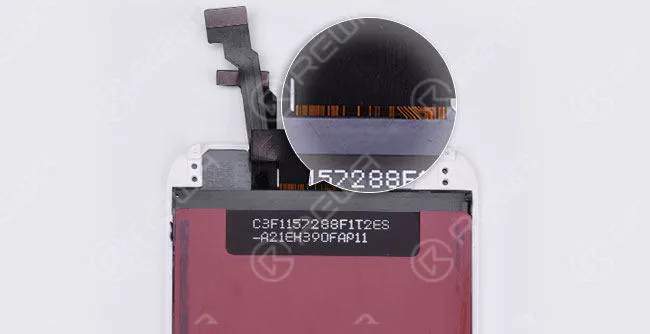
COLOR DIFFERENCE
The display effects of sample LCDs here are for reference, they may vary with different LCD batches and vendors.
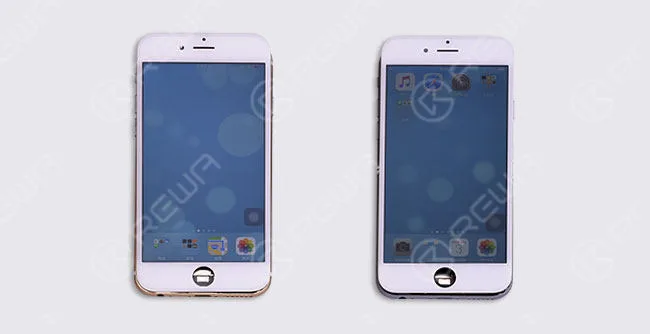
OEM NEW Original LCD with Compatible Flex Cable
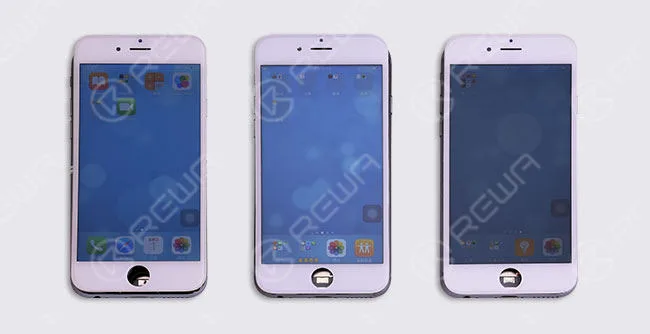
NOTICE:
There are different ways to tell original iPhone screen from China Made screen.
Here we have the easiest and most effective way to distinguish different qualities of iPhone 6 screens through the lines on the back of LCD flex cable.
Now, would you like to check your screens through this way?
Want to order our products? Please contact us:
PRE-SALES Skype: rewatech Email: service@rewa.tech
AFTER-SALES Skype: support-rewatech
Email: support@rewatechnology.com
 English
 Español
 Français
 Deutsch
 Italiano