Tag: ipad repair

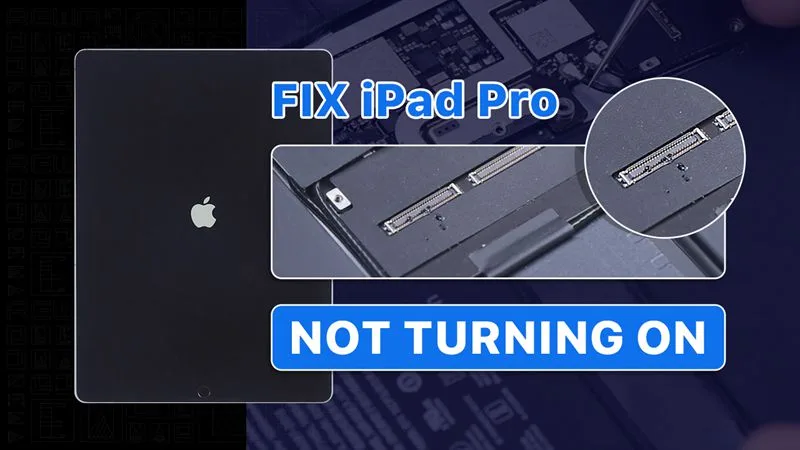
  • Fix iPad Pro Not Turning On by Replacing Connectors

    Fix iPad Pro Not Turning On by Replacing Connectors

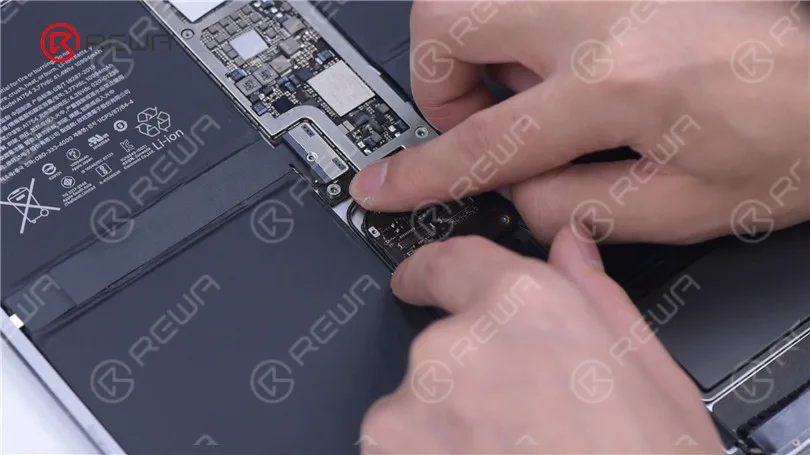
    We have received an iPad Pro from our fan. The original fault of the iPad Pro was the top left corner speaker with noise.

    After speaker replacement, the connectors of the motherboard and display are burnt out while connecting the display. Now the iPad Pro won’t turn on.

    So the fan mailed the iPad Pro to REWA for repair. Let’s check out how we fix the iPad Pro.

    In the first place, we remove the display. We can see that the connectors are burnt out.

    Since the battery is connected to the motherboard, the connectors will burn out with the device turned on and display connected.

    To avoid unnecessary damage, we recommend you disconnect the battery first during repair.

    After the display is connected, connect the battery to turn on the device.
    Fix iPad Pro Not Turning On By Replacing Connectors

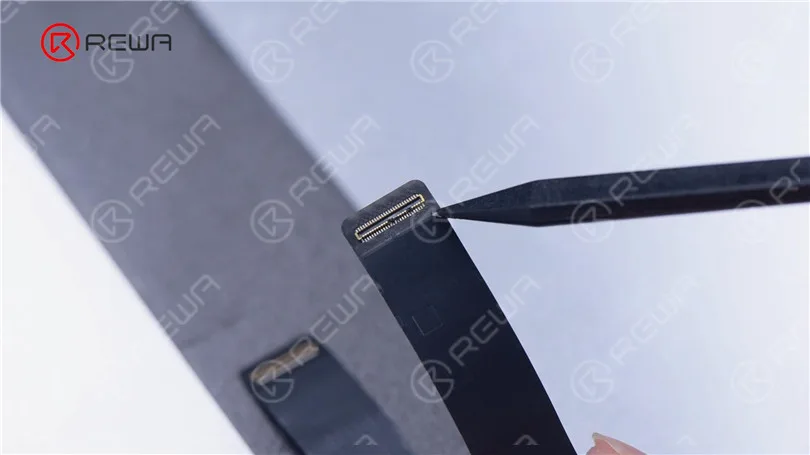
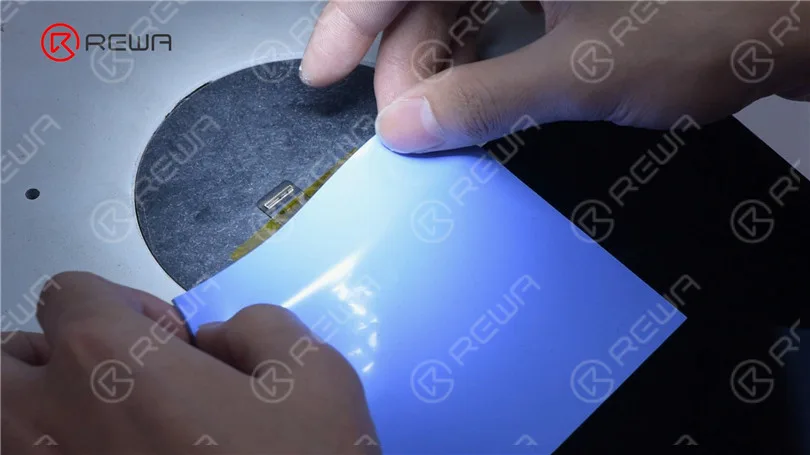
    Next, we replace the connectors. First of all, we replace the display connector. Fix the flex cable with high-temperature tape and cover the screen with an insulation mat.
    Fix iPad Pro Not Turning On By Replacing Connectors

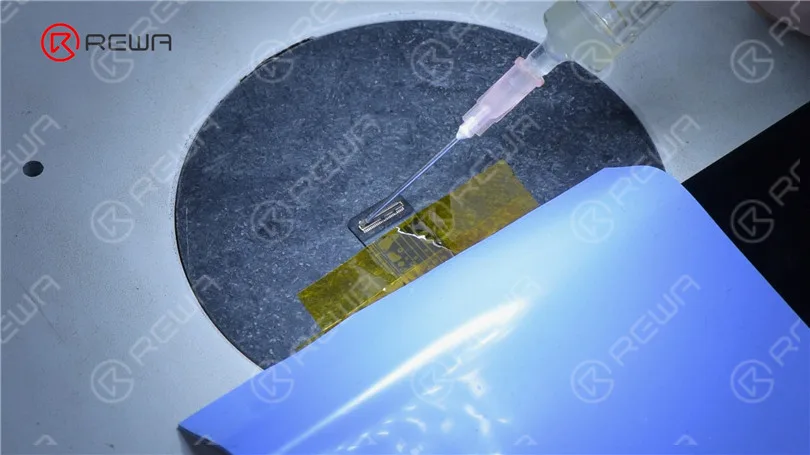
    Apply some Paste Flux to the connector. Heat with Hot Air Gun to remove the damaged connector.
    Fix iPad Pro Not Turning On By Replacing Connectors

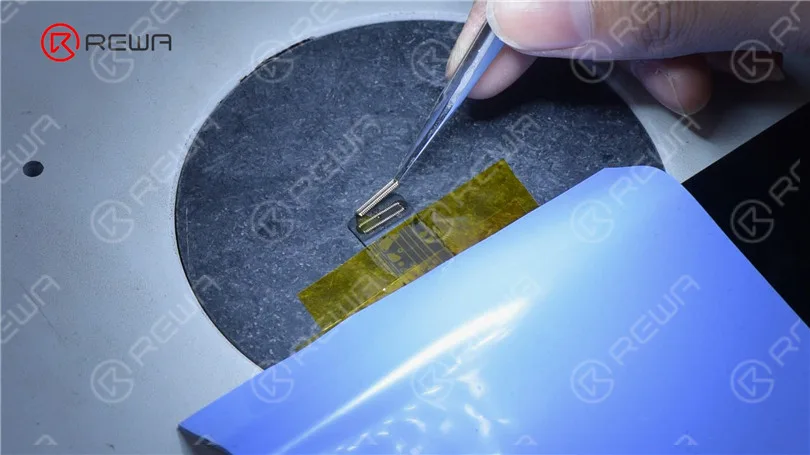
    Keep applying Paste Flux. Get a new connector and align the connector.
    Fix iPad Pro Not Turning On By Replacing Connectors

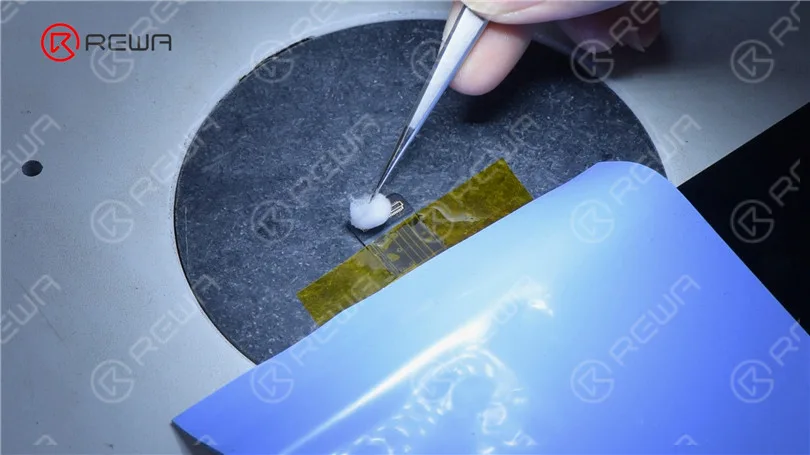
    Heat to solder the connector with Hot Air Gun. After soldering and the connector has cooled, clean with PCB Cleaner.
    Fix iPad Pro Not Turning On By Replacing Connectors

    Check soldering pads one by one with tweezers. It can be seen that the soldering is perfect.
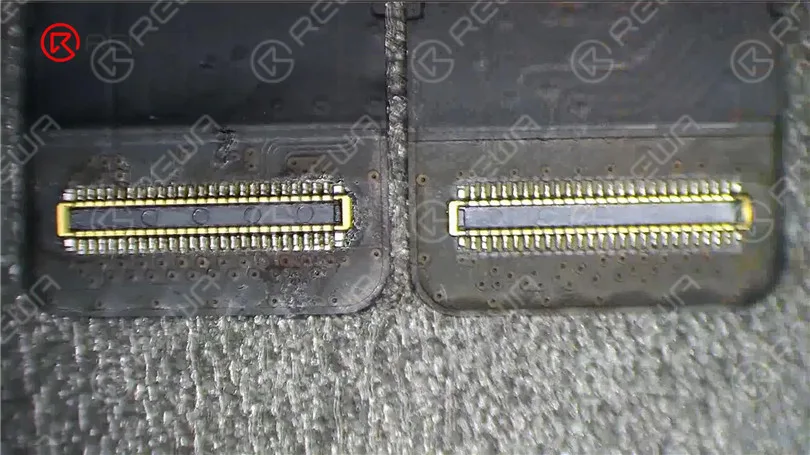
    Fix iPad Pro Not Turning On By Replacing Connectors

    Then we replace the connector on the motherboard. Firstly, remove the shielding cover.
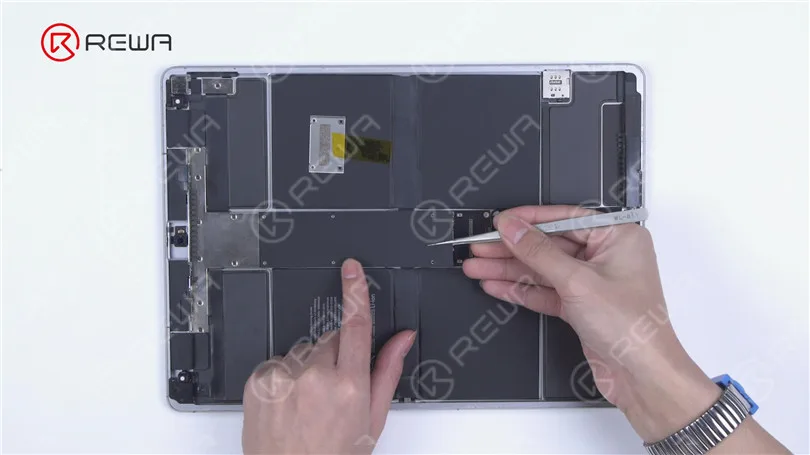
    Fix iPad Pro Not Turning On By Replacing Connectors

    Disconnect the battery and the antenna.
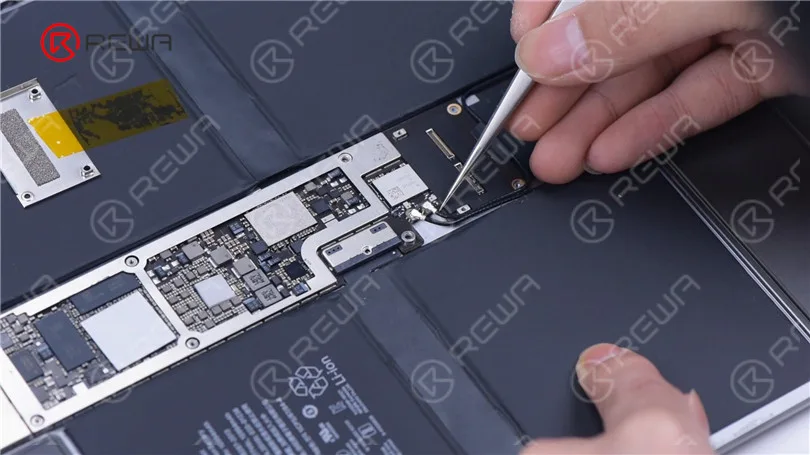
    Fix iPad Pro Not Turning On By Replacing Connectors

    To protect the motherboard, pry up the motherboard gently, disconnecting the battery from the motherboard.
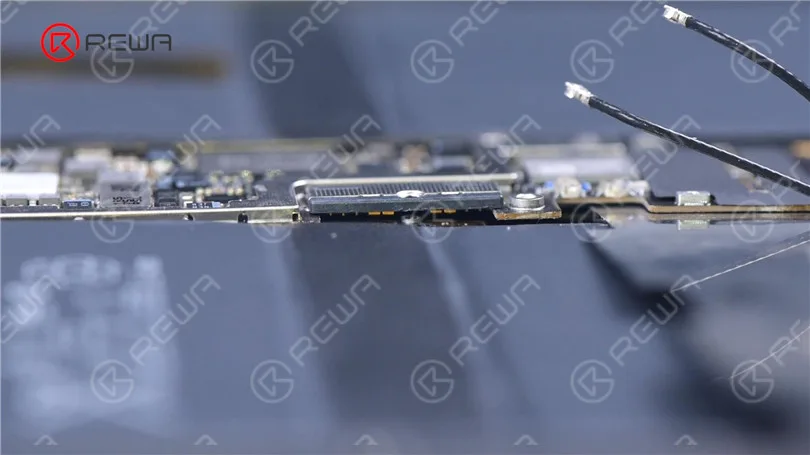
    Fix iPad Pro Not Turning On By Replacing Connectors

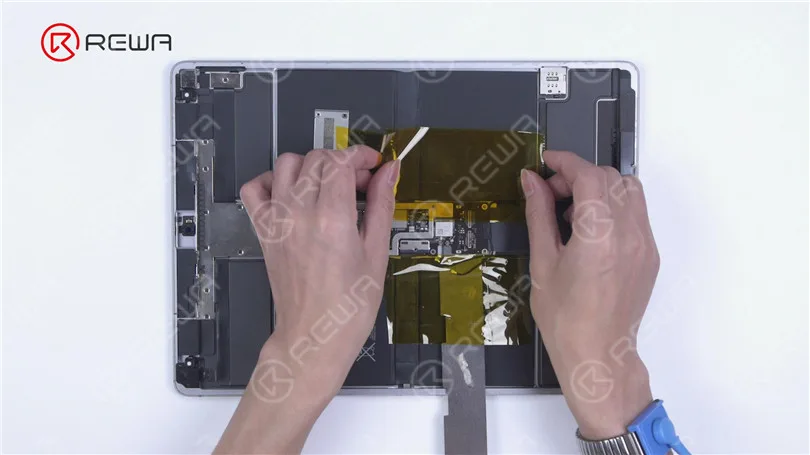
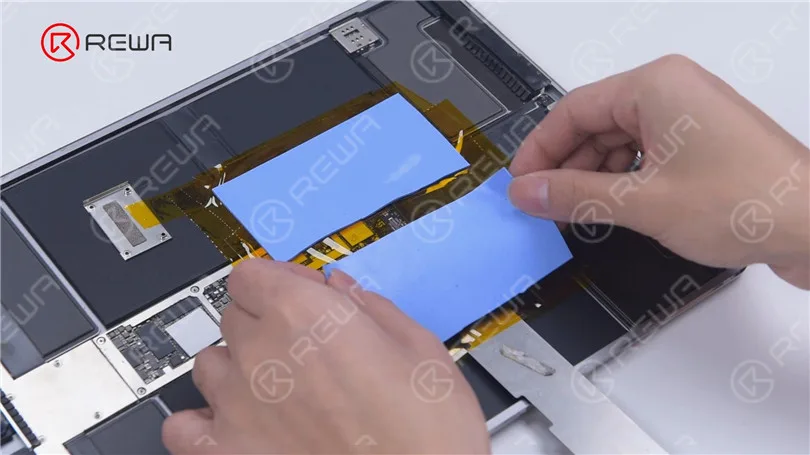
    Remove the shielding tape of the connector. Since the motherboard is surrounded by batteries, we need to insulate the area.

    Apply high-temperature tape around the motherboard. For better protection, we advise you to apply several layers. Then apply the insulation mats.
    Fix iPad Pro Not Turning On By Replacing Connectors
    Fix iPad Pro Not Turning On By Replacing Connectors

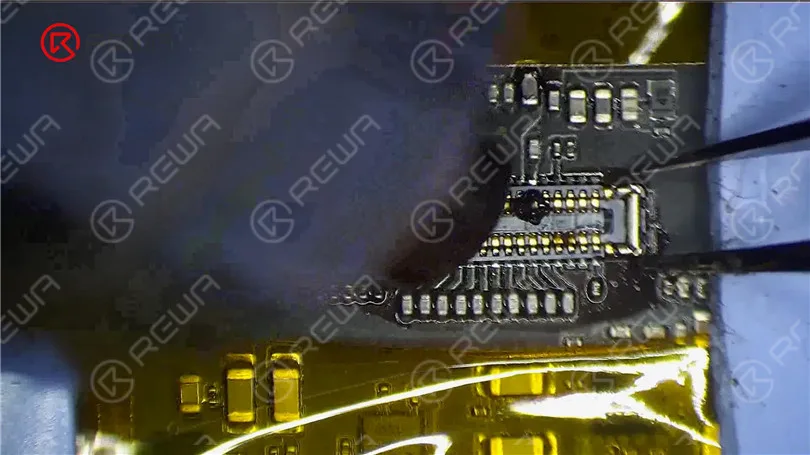
    Apply some Paste Flux to the connector. Remove the damaged connector with Hot Air Gun.
    Fix iPad Pro Not Turning On By Replacing Connectors

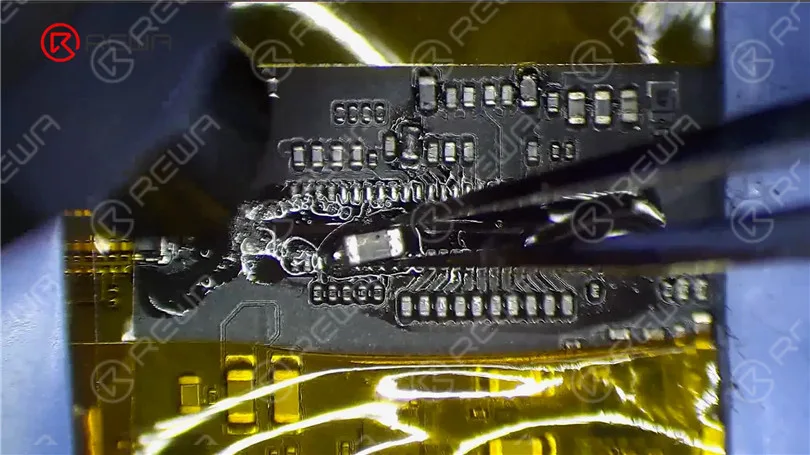
    Apply some middle-temperature Solder Paste and Paste Flux. Get an inductor. Make soldering pads uniform by sliding the inductor.
    Fix iPad Pro Not Turning On By Replacing Connectors

    Clean tin around the connector with Hot Air Gun and Solder Wick.
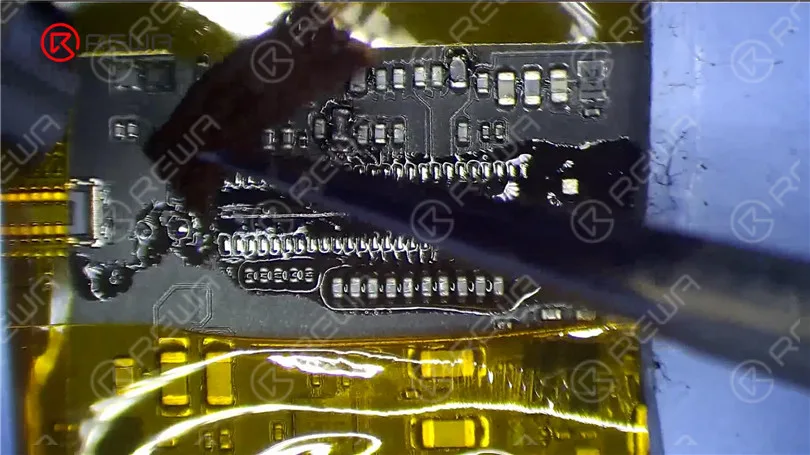
    Fix iPad Pro Not Turning On By Replacing Connectors

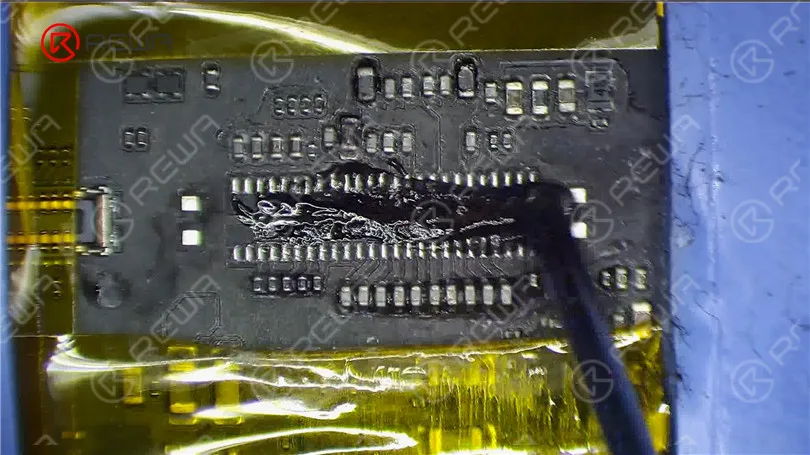
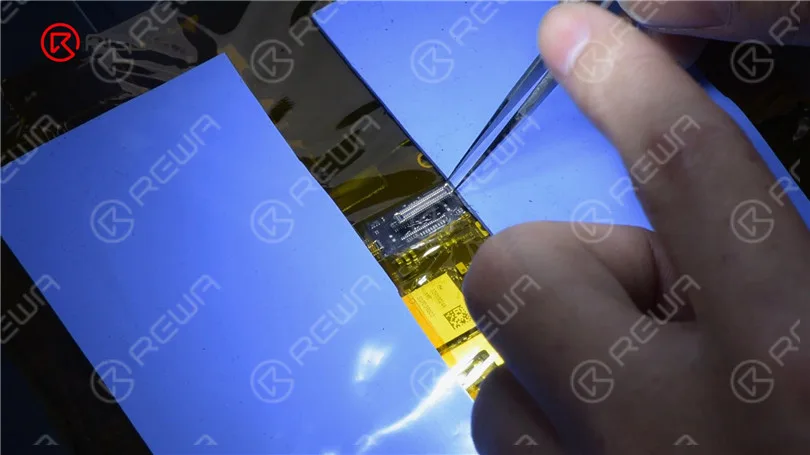
    Clean the bonding pad with PCB Cleaner. Apply some Paste Flux and put the new connector in position. Heat to solder the connector with Hot Air Gun. Clean the connector with PCB Cleaner.
    Fix iPad Pro Not Turning On By Replacing Connectors
    Fix iPad Pro Not Turning On By Replacing Connectors

    Then we connect the antenna.

    Fix iPad Pro Not Turning On By Replacing Connectors

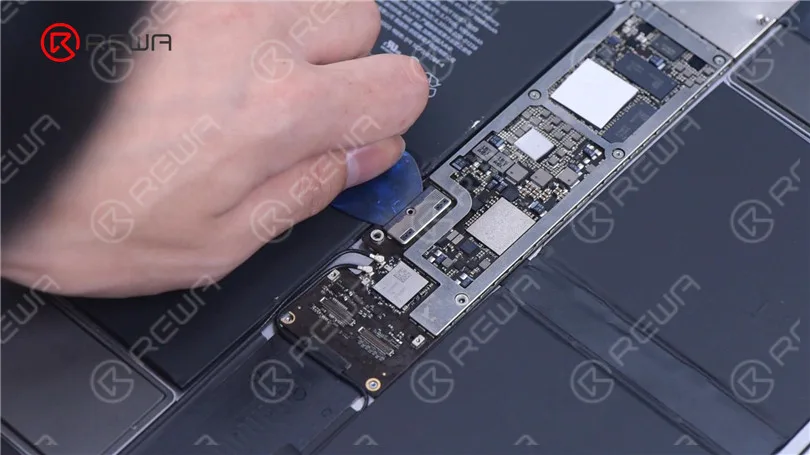
    Disconnect the battery from the motherboard with a Pry Piece, which is to prevent the connector from being damaged with the screen connected.
    Fix iPad Pro Not Turning On By Replacing Connectors

    Then we connect the screen. Remove the Pry Piece. Screw the battery and motherboard.
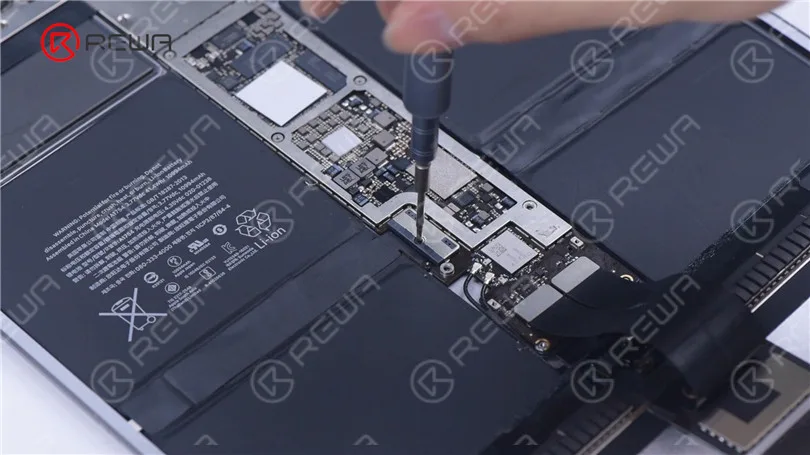
    Fix iPad Pro Not Turning On By Replacing Connectors

    Turn on the iPad Pro to test. The iPad Pro can be turned on. Both the display and touch work well. The music can be played without noise.

    Fix iPad Pro Not Turning On By Replacing Connectors

    iPad Pro won’t turn on has been successfully fixed.

    Please feel free to leave a comment on iPad repair topics that you are interested in.

    Watch the below video to see how we fix an iPad Pro that won’t turn on.
  • Tough iPhone & iPad Repairs? We Can Fix!

    Tough iPhone & iPad Repairs? We Can Fix!

    When it comes to electronic products like phones, tablets and computers, iPhone & iPad repairs can often be cost-effective alternatives to buying new. However, it’s easy for us to spell the word ‘repair’ while practical repair work can be a real meticulous process. Repair shops spring up with the development of electronics all around the world, in the meantime, malfunction grew to be more and more precise. Repair experts can be professional at some point but they cannot be almighty for all fault caused by the daily updated electronic products. So what to do? It’s never too late for you to ask for support and REWA always got a repair solution for you. Our network of repair services are positioned to offer efficient logic board repair and cracked screen repair services for all in need. We want you to boost your business and stand out from others, and we are honored to be there to help.

    Advantages of iPhone & iPad Repairs With REWA

    Tough iPhone & iPad Repairs

    One-stop Meets All

    REWA is capable of supplying all of our customer’s needs within our services. Whatever your problem, no matter how big or small, our dedicated sales and customer service team will provide a competitive and reliable solution.

    Prompt And Efficient

    Don’t get into a spin with your unsolved problem, REWA offers prompt and efficient service for your emergency. Contact us now to solve your problem quickly and cheaply.

    Leading Technology

    Faced with a problem your experts may have a question with? Turn to REWA for support. Our experts and engineers are highly skilled and equipped to deal with a broad range of products like iPhone, Samsung, Huawei etc.

    Transparent Service

    Transparency creates trust! REWA believes that the best approach is to step outside of the business realm and into the human realm. Our customers are kept informed of all information they need from repair process to price details and so on.

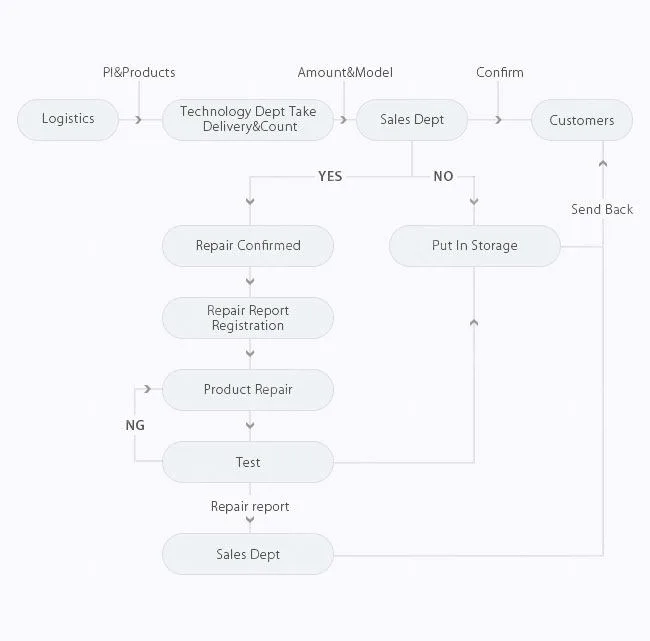
    How REWA Repair Service Works

    Tough iPhone & iPad Repairs

    Logic Board Repair Service Includes1.

    Camera chip repair: iPhone 6 Camera not working;

    2. Touch screen chip repair: iPhone 7 touch screen not working or unresponsive touch;

    3. Display chip repair: LCD doesn’t display images properly, or it doesn’t display at all;

    4. Charging chip repair: The device not charging, or you have trouble connecting the device to computer or charger;

    5. WiFi chip repair: How to fix wifi on iPhone 6, WiFi can’t open, or WiFi cannot be connected, or WiFi has no signals;

    6. Speaker chip repair: Can’t hear your audio or use your loudspeaker, sound of ear speaker fades in and out, or iPhone 6 no sound at all;

    7. Signal chip repair: iPhone 6 No Service Hardware Fix Solution, Can’t connect to a cellular network, can’t make or receive calls

    8. Logic board connector repair: Connectors on logic board damaged

    9. Touch ID chip repair: iPhone 7 home button not working, the touch ID flex cable cracked, but the home button is OK

    10. Upgrade storage: upgrade your iPhone & iPad storage to 64GB/128GB/256GB, such as How to upgrade iPhone storage;

    11. No turning on: iPhone won’t turn on, no function; fixed display; restarting; white screen; red screen; blue screen; no display at all;

    12. Unlock iPad iCloud: How to unlock iPad air;

    13. Fix compass problems

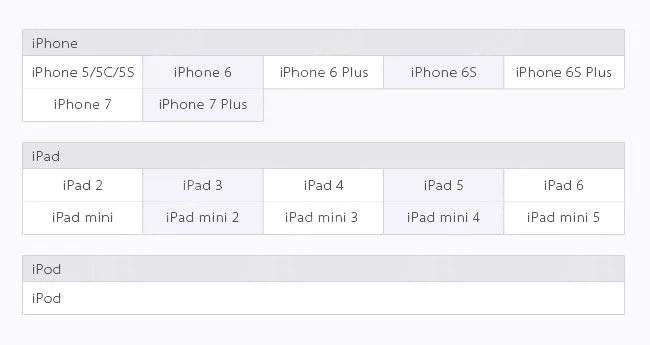
    Logic Board Repair Service – Models

    Tough iPhone & iPad Repairs

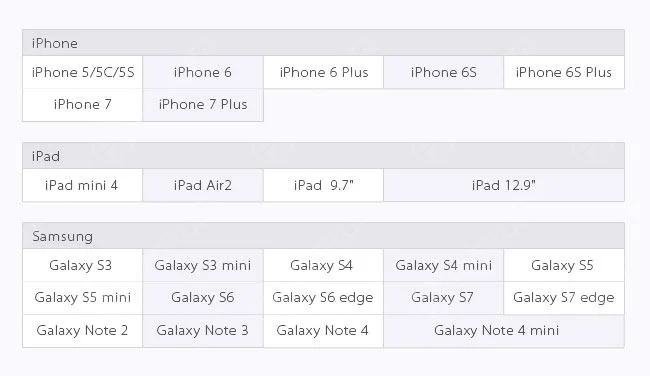
    Cracked Screen Repair Service – Models

    Tough iPhone & iPad Repairs

    Customer Notification

    Here are some details we would like you to know before sending out

    1. MOQ: 10PCS

    2. The repair process(not including delivery time) typically takes about 7 days.

    3. Delivery charges are the responsibility of customers.

    4. Mark the malfunctions of each device and record their IMEI before delivery.

    5. If locked, please provide the password to your phone so that we can test functionality.

    6. If possible, please provide iCloud account and password; Or please delete your iCloud account from your device(We do not repair a device that has no iCloud password). 7. If you require a touch ID repair service, please send the home button assembly together with the logic board.

    8. For iPhone storage upgrade, please update your device to the latest IOS operating system.

    9. We are unable to repair a device that rust and corrosion on too many components.

    10. If you don’t accept our test report and decide to give up the repair service. You should bear the return shipping.

    11. The repair charge depends on the exact damage and amount of damage to your device. We can only offer you an estimated repair price before repair completed.

  • REWA iPad Air Touch Screen Partially Unresponsive Repair

    REWA iPad Air Touch Screen Partially Unresponsive Repair

    What to do when iPad Air touch screen partially unresponsive? Replace with a new touch screen and the screen freezing problem remains unsolved? It’s time for you to view our video and get refreshed with a totally new logic board solution regarding iPad touch screen not working issue.

    Tools Used:

  • iPad Touch Screen Home Button Assembling Tutorial

    iPad Touch Screen Home Button Assembling Tutorial

    So you need iPad touch screen digitizer assembly replacements for your repair work. You search on the internet and find that some of them are not well assembled with home buttons. Yet the home button on the iPad controls the tablet and all of its functionality, missing of which can render your iPad almost useless. Well, how to piece those home button assembly parts together and make it work perfectly with the iPad touch screen digitizer assembly?REWA offers detailed step-by-step guides to assist you with the home button assembling process and get it working as you need. (such as iPhone won’t turn on after screen replacement, iPhone 7 touch screen not working,  iPhone 7 home button not working)

    Note: four iPad series are applied to this home button assembling guide – iPad 2, iPad 3, iPad 4, iPad 5 and iPad mini.

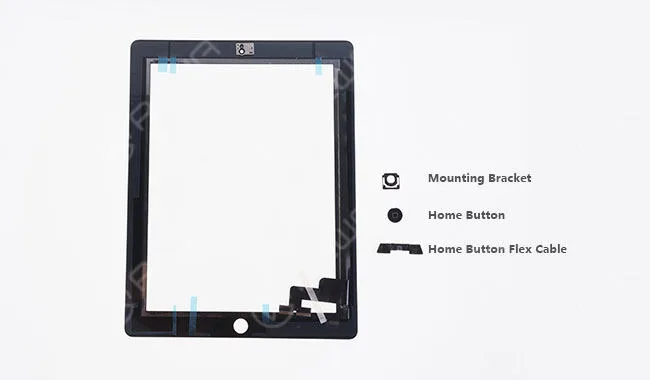
    iPad 2

    ipad touch screen home button assembling tutorial 2

    Parts contained: Home Button; Mounting Bracket; Home Button Flex Cable

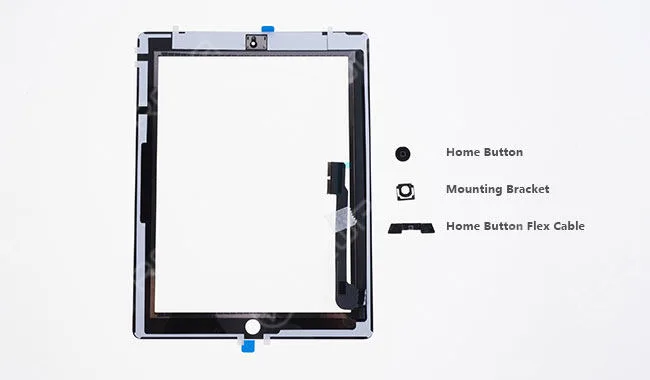
    iPad 3

    ipad touch screen home button assembling tutorial 3

    Parts contained: Home Button; Mounting Bracket; Home Button Flex Cable

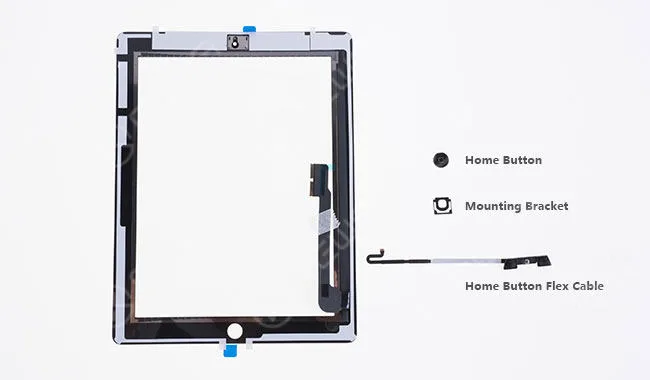
    iPad 4

    ipad touch screen home button assembling tutorial 4

    Parts contained: Home Button; Mounting Bracket; Home Button Flex Cable

    The three of them have the same steps as below (take iPad 3 as an example).

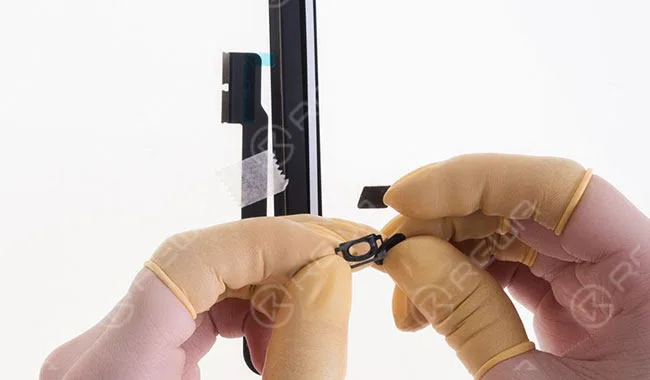
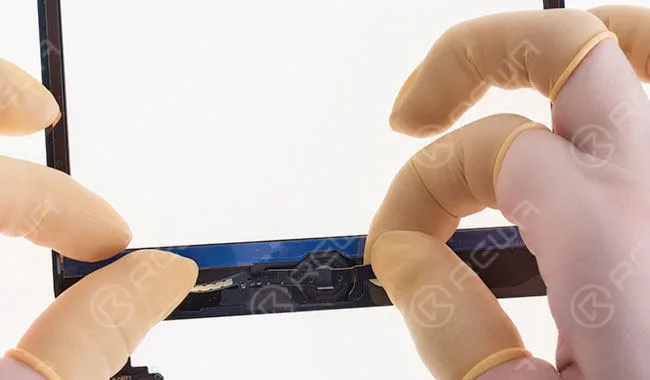
    Step 1 Seat the home button with the mounting bracket.

    ipad touch screen home button assembling tutorial dsc4700

    Step 2 Align them to the home button hole of the iPad touch screen digitizer assembly.

    ipad touch screen home button assembling tutorial dsc4715

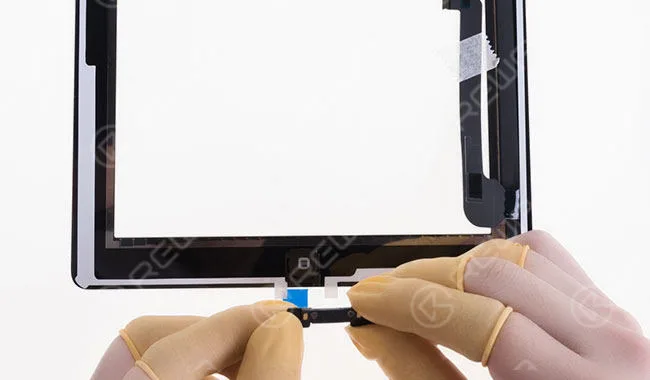
    Step 3 Align the home button flex cable.

    ipad touch screen home button assembling tutorial dsc4707

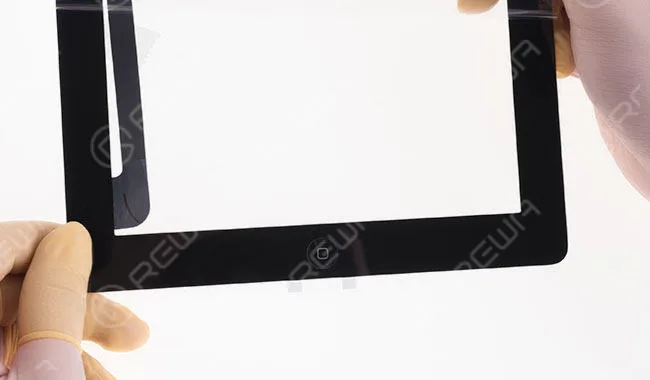
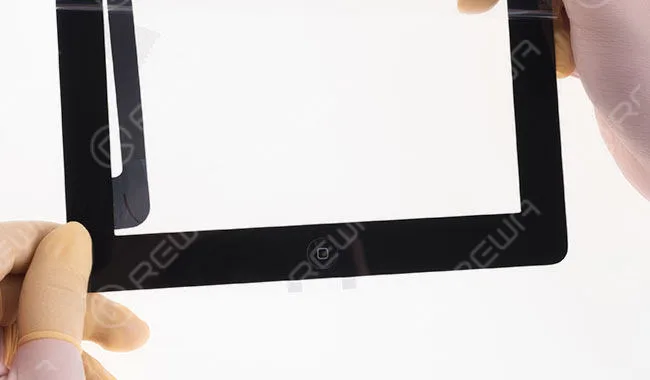
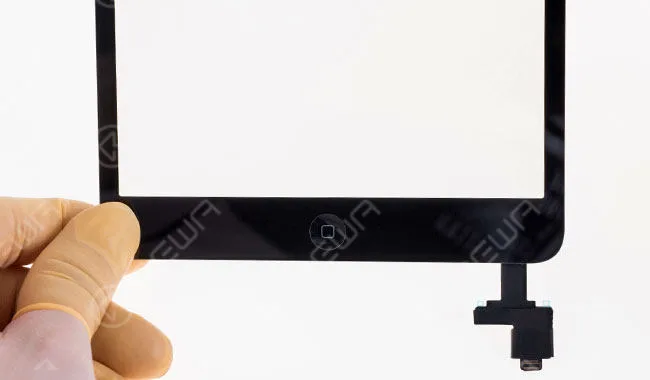
    Step 4 Once finished, check the assembling effect.

    ipad touch screen home button assembling tutorial dsc4715 2

    iPad 5

    ipad touch screen home button assembling tutorial 5

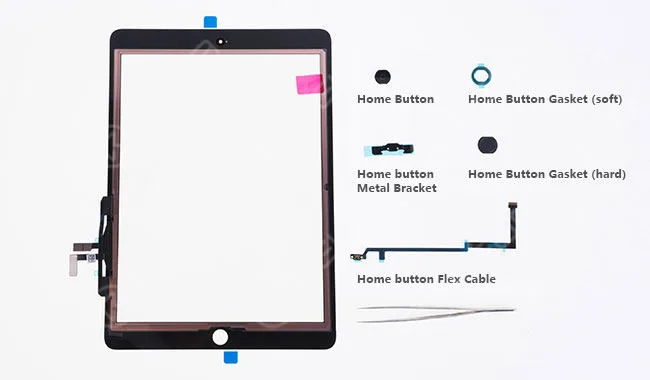
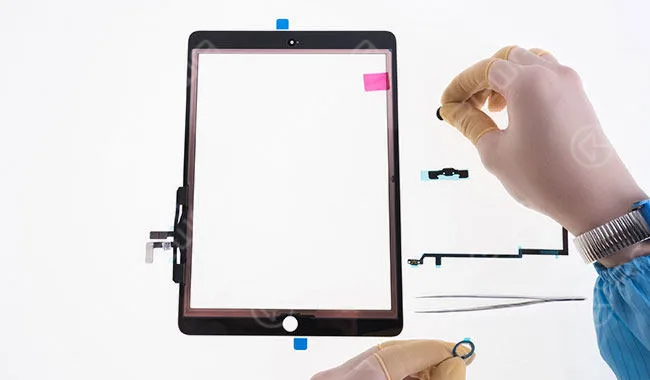
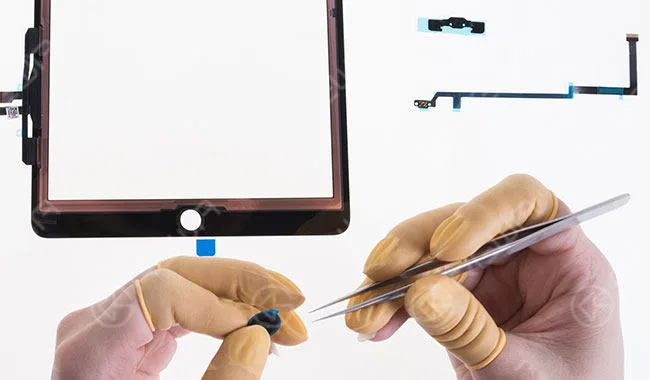
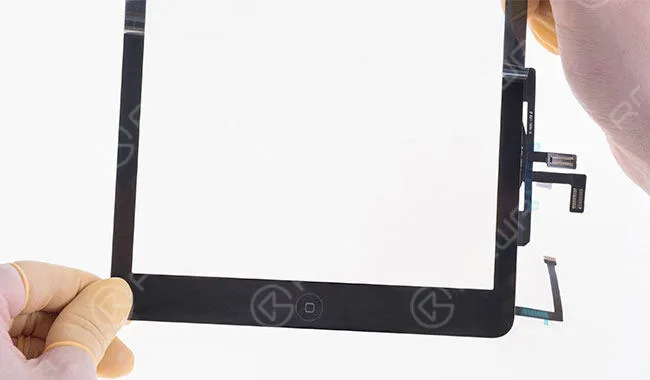
    Parts contained: Home Button; Home Button Gasket (soft); Home button Metal Bracket; Home Button Gasket (hard); Home Button Flex Cable Step 1 Tear off the front self-adhesive sticker of the soft home button gasket, paste the home button to it and then tear off the rear self-adhesive sticker. Then align them to the home button hole of the iPad touch screen digitizer assembly.

    ipad touch screen home button assembling tutorial dsc4742

    Step 2 Tear off the self-adhesive sticker of the hard home button gasket and paste it to the home button hole of the iPad touch screen digitizer assembly.

    ipad touch screen home button assembling tutorial dsc4752

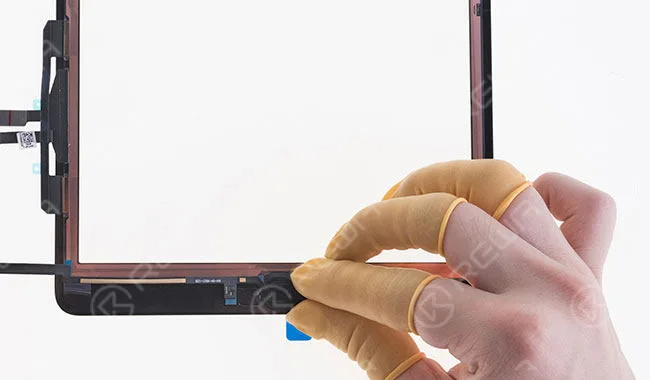
    Step 3 Tear off the self-adhesive sticker of the home button metal bracket and align it to the home button flex cable. Then adhere the two to the right place of the iPad touch screen digitizer assembly.

    ipad touch screen home button assembling tutorial dsc4766

    Step 4 Once finished, check the assembling effect.

    ipad touch screen home button assembling tutorial dsc4780

    iPad mini

    ipad touch screen home button assembling tutorial mini

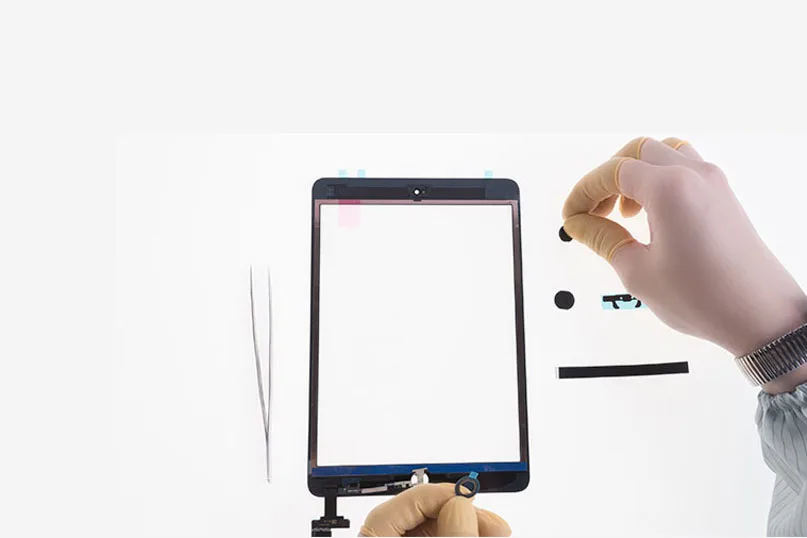
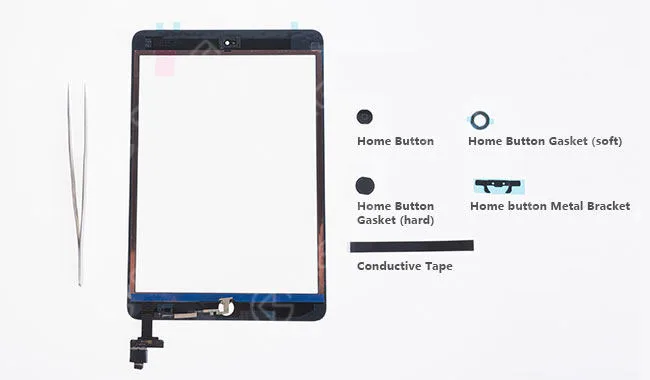
    Parts contained: Home Button; Home Button Gasket (soft); Home Button Gasket (hard); Home button Metal Bracket; Conductive Tape.

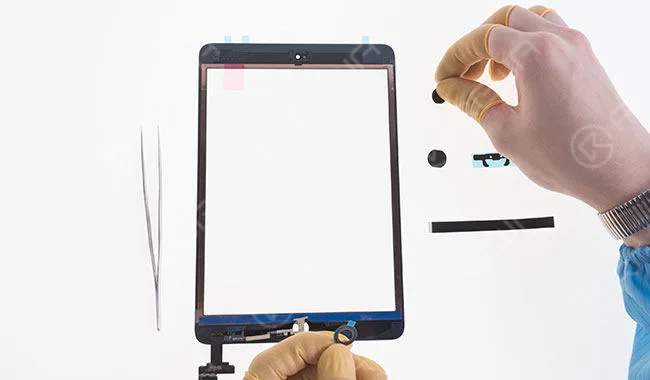
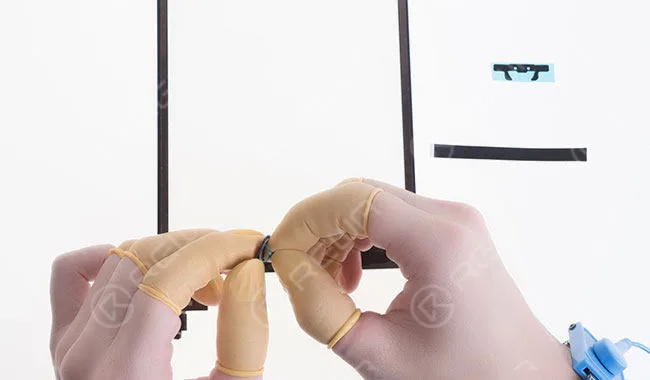
    Step 1 Tear off the front self-adhesive sticker of the soft home button gasket, paste the home button to it and then tear off the rear self-adhesive sticker. Then align them to the home button hole of the iPad touch screen digitizer assembly.

    ipad touch screen home button assembling tutorial dsc4790

    Step 2 Tear off the self-adhesive sticker of the hard home button gasket and paste it to the home button hole of the iPad touch screen digitizer assembly.

    ipad touch screen home button assembling tutorial dsc4802

    Step 3 Tear off the self-adhesive sticker of the home button metal bracket and align it to the right place. Then seal with the conductive tape.

    ipad touch screen home button assembling tutorial dsc4818

    Step 4 Once finished, check the assembling effect.

    ipad touch screen home button assembling tutorial dsc4830