Tag: sostituzione della batteria

  • iPhone 12 Pro Battery Replacement: Cost & Shop Guide

    iPhone 12 Pro Battery Replacement: Cost & Shop Guide

    iPhone 12 Pro battery replacement is more than a simple cell swap. This model uses an encrypted battery protection board, so aftermarket installs usually need a BMS transfer, data rewrite, and a tag-on flex. Genuine Apple batteries follow a different path with Apple Service Toolkit 2 (AST2).

    This guide walks through when to replace, what it typically costs, the shop method vs Apple parts, and how to clear the “Unable to verify this iPhone has a genuine Apple battery” alert. It is written for repair shops and advanced DIY techs who already work with heat, adhesive, and small connectors.
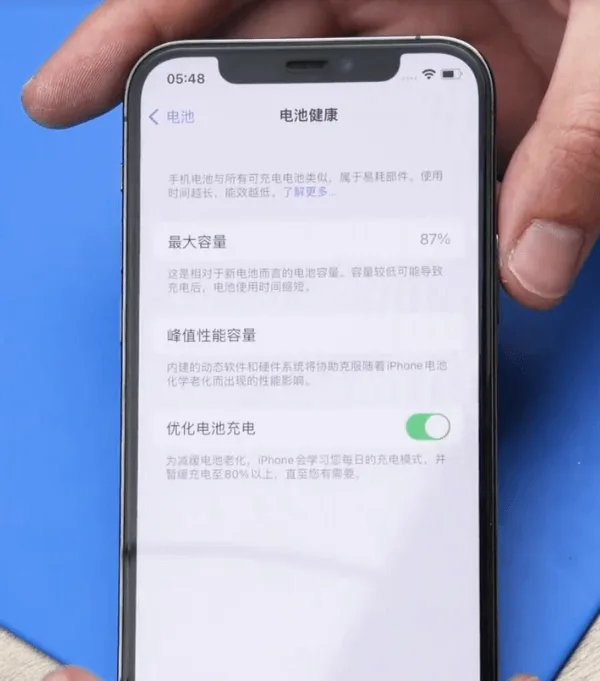
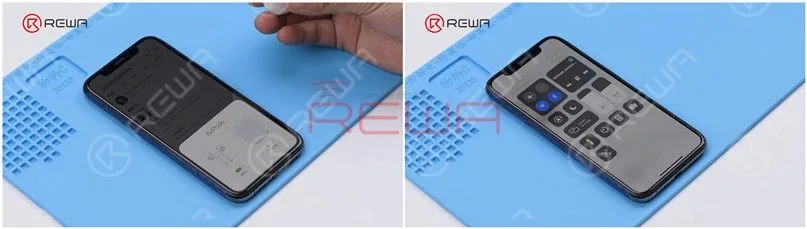
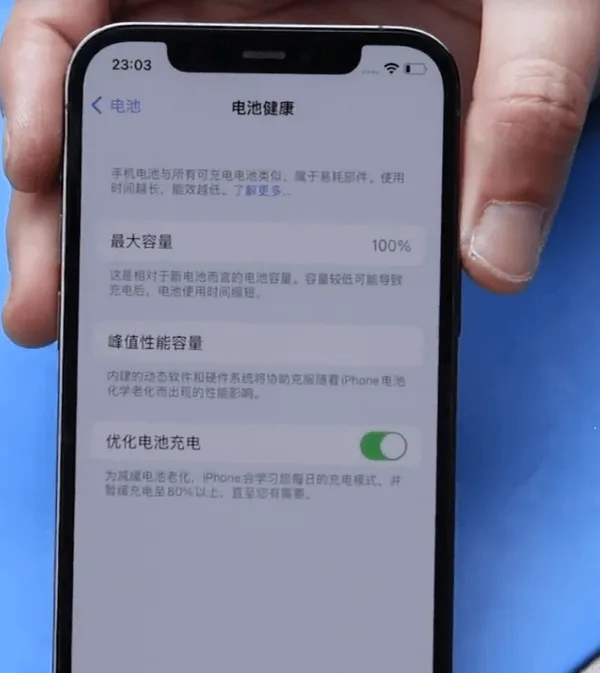
    iPhone 12 Pro battery health at 87 percent

    Example device: iPhone 12 Pro
    Battery Health: 87% (Settings → Battery → Battery Health → Maximum Capacity)

    When to replace an iPhone 12 Pro battery

    Apple designs iPhone batteries (14 and earlier, including the 12 Pro) to retain about 80% capacity at 500 complete charge cycles under ideal conditions. Many techs still quote a swap near or below 80%, or when Battery Health shows a Service recommendation. Customers sometimes request a replacement earlier (for example at 85-90%) to restore full-day runtime. That is a preference call, not a hard Apple rule.

    In the example above, health sits at 87%. A replacement can still make sense if the customer wants better runtime, or if the phone shows unexpected shutdowns, heat while charging, or peak performance messages.

    Cost and battery specs (quick reference)

    Prices vary by country, tax, and part grade. Use these U.S.-oriented figures as a planning baseline, then confirm local quotes:

    • Apple / AppleCare+ service: about $89 out of warranty for iPhone 12 / 12 Pro battery service (AppleCare+ is often no extra charge when capacity is below 80%). Always re-check Apple’s current estimate tool.
    • Independent shop: often about $50-$100+ depending on city, warranty, and whether the shop transfers the BMS or uses AST2.
    • DIY / wholesale cell: kits often land around $40-$60 retail; shop wholesale cells can undercut that.

    Capacity reference (teardown consensus, not an Apple datasheet line): about 2,815 mAh (~10.78 Wh at 3.83 V). Common part marking refs include A2479 (also seen as styles like 11CP5/45/85 on replacement listings). iPhone 12 and 12 Pro share the same capacity class; 12 Pro Max does not.

    How to replace an iPhone 12 Pro battery

    1. Battery protection board encryption (aftermarket path)

    The iPhone 12 Pro uses an encrypted battery protection board. Dropping in a raw aftermarket cell without handling the board and data is how shops get a permanent Important Battery Message and missing health percentage.

    Transfer the protection board: Carefully remove the old pack, separate the original BMS / protection board, and spot-weld that board onto the new cell tabs with a proper fixture. Use a welding machine (or equivalent laser / resistance welder). Align anode and cathode correctly, then insulate with the correct tape and bracket.

    2. Rewrite battery data

    Models before 2018: A battery programmer rewrite was often enough.

    XS and later (including iPhone 12 Pro): After board transfer and data rewrite with a programmatore, attach a tag-on flex when you change cell data so authentication does not leave a permanent alert.

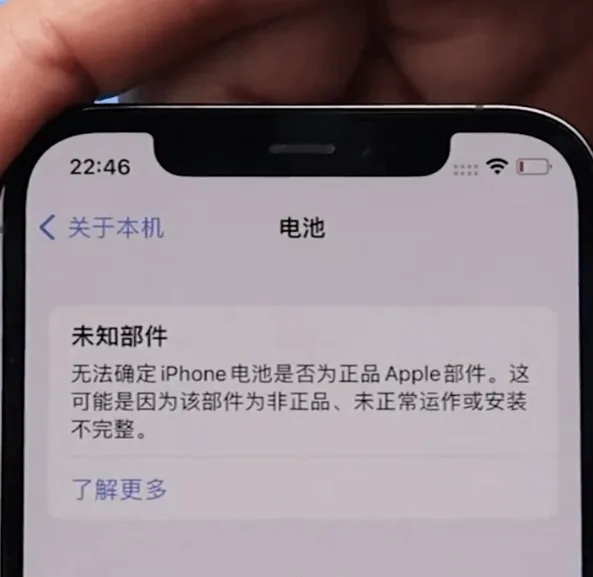
    Nota: Skip these steps and you will usually see “Unable to verify this iPhone has a genuine Apple battery” after power-on.

    3. Official Apple battery + AST2

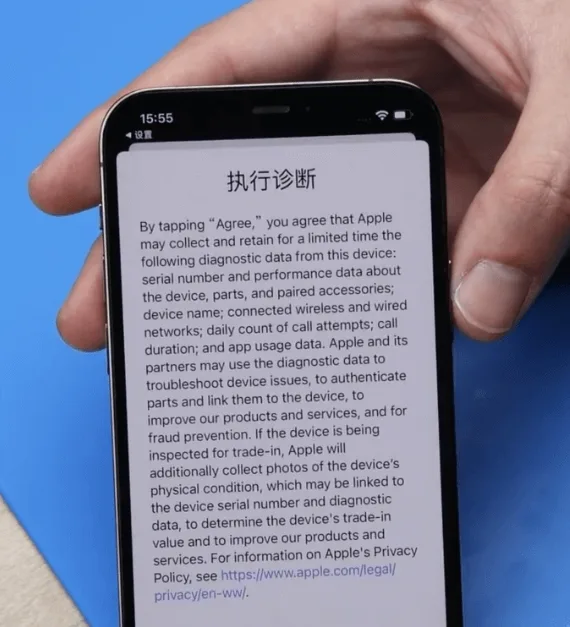
    For genuine Apple parts, keep the phone on Wi-Fi and use Apple Service Toolkit 2 (AST2):
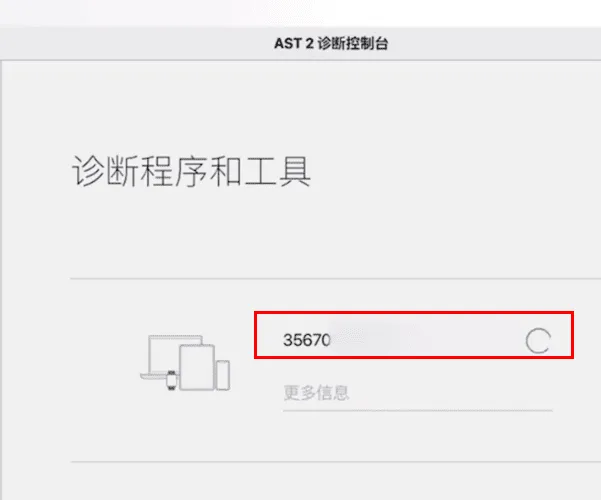
    Apple Service Toolkit 2 (AST2):

    • Log in to AST2.
    • Enter the battery serial number and run diagnostics on the phone.
    • After diagnostics clear, proceed with the battery install.

    4. Remove the old battery
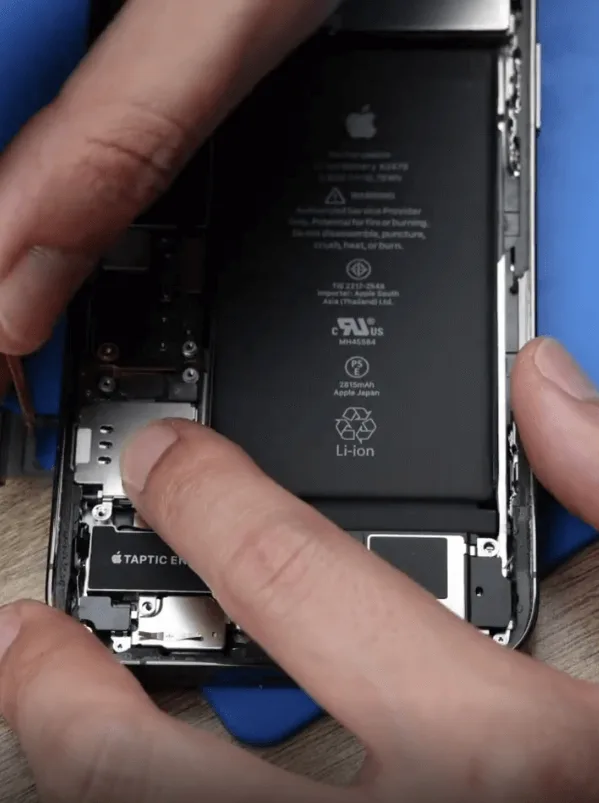
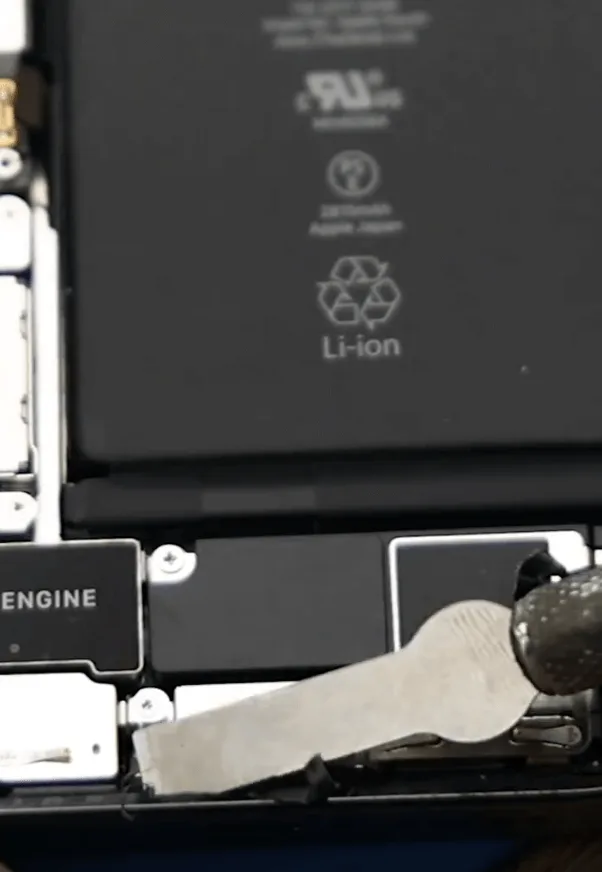
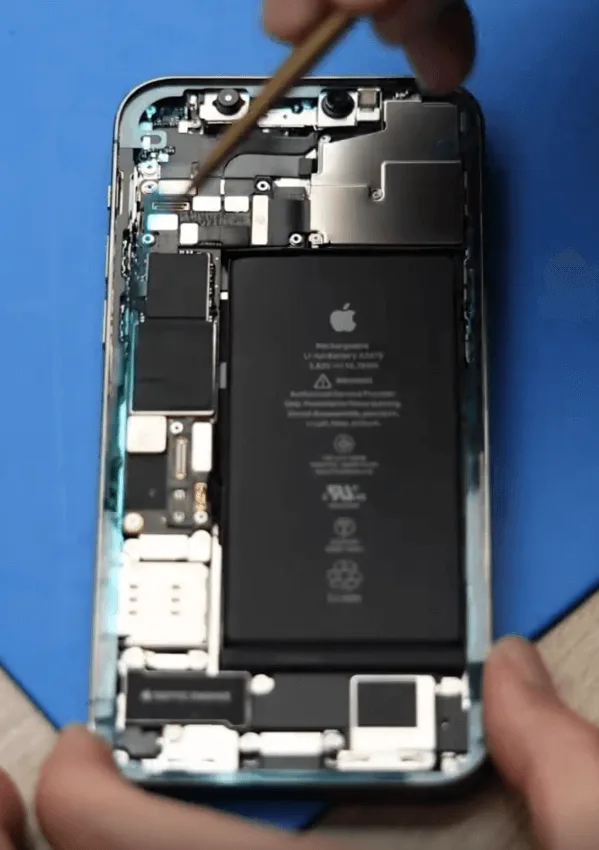
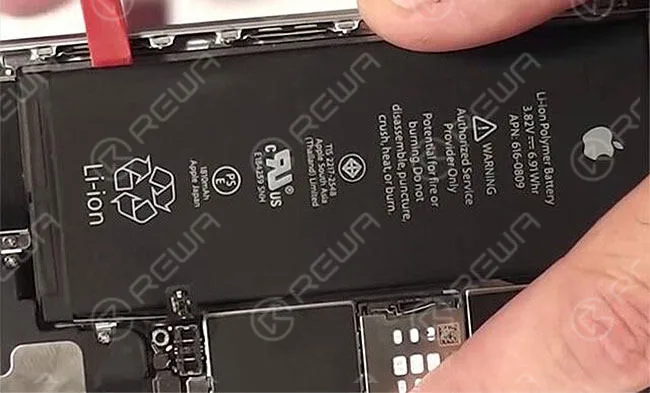
    Remove the original iPhone 12 Pro battery carefully
    • Open the display safely; do not crease flexes.
    • Disconnect the battery connector, then remove the original pack with adhesive pull tabs or isopropyl. Never lever hard under a swollen cell.
    • Apply new waterproof frame adhesive. It restores a seal; it does not magically restore factory IP68 rating.

    5. Install the new battery
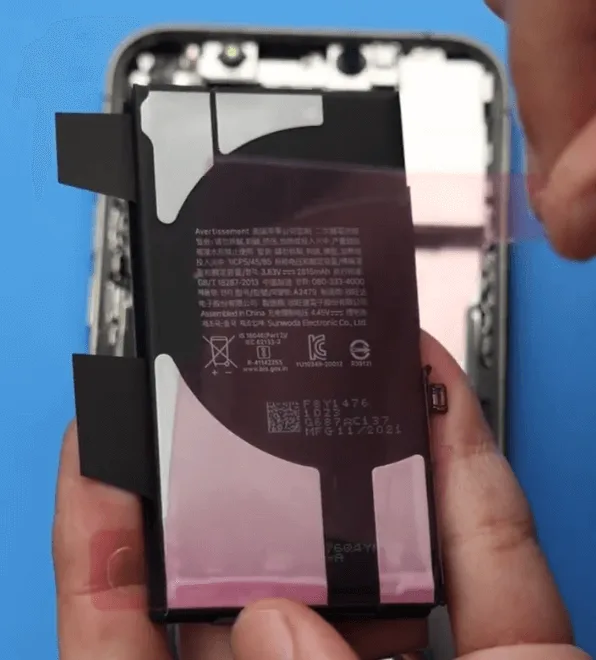
    • Seat the new iPhone 12 Pro battery (or your shop cell with transferred BMS).
    • Reconnect the battery connector, reassemble the display, and power on.
    • Verify charge, Battery Health visibility, and that the phone boots cleanly under load.

    6. Clear the genuine battery alert
    iPhone 12 Pro battery replacement complete
    • Initial alert: On first power-up you may see “Unable to verify this iPhone has a genuine Apple battery.”
    • Genuine Apple path: Log back into AST2 and run diagnostics again to clear the non-original alert.
    • Aftermarket path: Confirm BMS transfer, programmer write, and tag-on flex were done correctly. Persistent alerts usually mean a skipped auth step.

    Watch how to clear Important Battery Message pop-ups on iPhone XS through 12 Pro Max:

    iPhone XS-12 Pro Max Important Battery Message pop-ups removing

    Domande frequenti

    Do iPhone 12 and iPhone 12 Pro use the same battery?

    Teardown reporting puts them in the same capacity class (~2,815 mAh). Always match connector, tab layout, and thickness for your fixture. 12 Pro Max is a different pack.

    Should I replace at 87% Battery Health?

    Apple’s usual guidance centers on ~80% or a Service recommendation. At 87%, replace if runtime no longer meets the customer’s needs or if shutdowns and heat point to a weak cell.

    Why does an aftermarket battery show an Important Battery Message?

    The 12 Pro pairs battery authentication to the phone. Without a correct BMS transfer, data rewrite, and tag-on when required, iOS flags the pack as non-genuine.

    Is AST2 required for every battery job?

    No. AST2 is the genuine Apple / authorized-service path. Aftermarket shop jobs use board transfer, programmer, and tag-on instead.

    Will new waterproof adhesive restore water resistance?

    It restores a seal and is good practice. It does not guarantee factory IP68 performance after a open-repair.

    How much does Apple charge for an iPhone 12 Pro battery?

    Out-of-warranty battery service is commonly cited around $89 for iPhone 12 / 12 Pro in the U.S. Confirm Apple’s current estimate for your region before quoting.

    Wrap-up

    A clean iPhone 12 Pro battery replacement means picking the right path: aftermarket (BMS transfer + programmer + tag-on) or genuine Apple (AST2 diagnostics). Keep adhesives fresh, never force a swollen cell, and verify auth and health on first boot so you avoid callbacks.

    Need cells, welders, or programmers for the bench? Browse REWA tools, including iPhone battery cell replacements, battery programmers, e spot welding machines.

  • Sostituzione della batteria degli AirPods

    Sostituzione della batteria degli AirPods

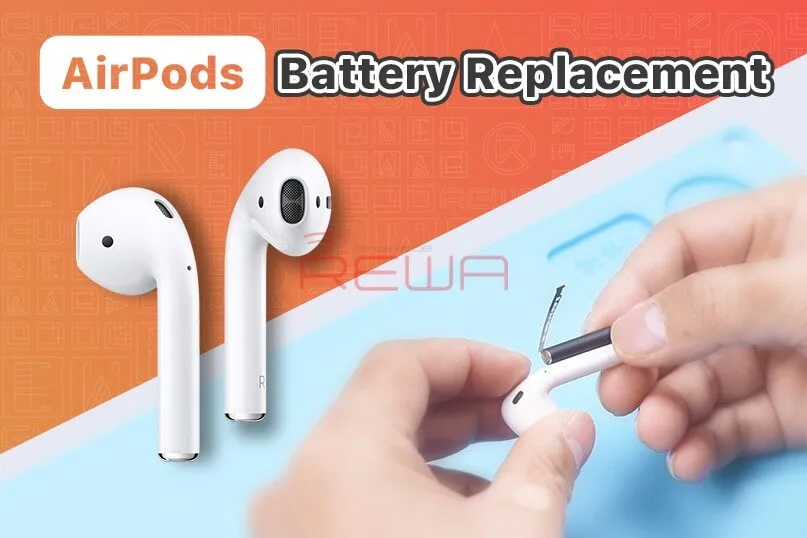
    Apple ha dichiarato che gli AirPods sono poco riparabili a causa delle dimensioni e del processo di produzione. Per questo motivo, quando si parla di politica post-vendita degli AirPods, Apple adotta una politica di sostituzione. Molti utenti segnalano che la durata della batteria degli AirPods si riduce nel tempo e non possono farli riparare perché fuori garanzia. Guardate questo video e scoprite come sostituire la batteria degli AirPods!

  • Sostituzione della batteria della custodia di ricarica degli AirPods -REWA

    Sostituzione della batteria della custodia di ricarica degli AirPods -REWA

    Gli AirPods sono sempre stati considerati non riparabili. Guardate questo video per vedere come sostituire la batteria della custodia di ricarica AirPods.

  • Sostituzione della batteria degli AirPods - Problema di scaricamento troppo rapido

    Sostituzione della batteria degli AirPods - Problema di scaricamento troppo rapido

    La riparazione degli AirPods è sempre stata una difficoltà non solo per i riparatori ma anche per Apple. La politica post-vendita di Apple prevede ora la sostituzione degli AirPods che soddisfano gli standard post-vendita direttamente con quelli nuovi. Dal punto di vista dell'esperienza utente, questo approccio può garantire la soddisfazione dell'utente, ma riflette anche la difficoltà della riparazione.

    Sostituzione della batteria degli AirPods

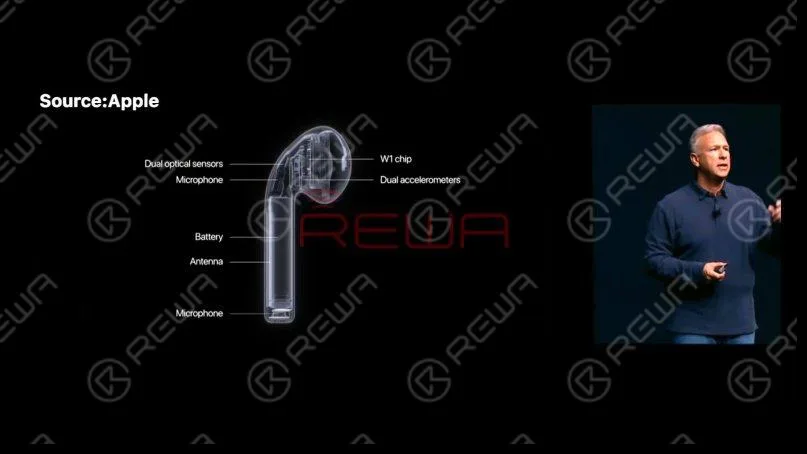
    Oggi il nostro corso di riparazione riguarda la sostituzione della batteria degli AirPods 1. Prima di tutto, diamo un'occhiata alla struttura degli AirPods. Per risparmiare spazio, Apple ha reso le parti interne degli AirPods molto compatte. Le parti sono inoltre collegate, il che aumenta la difficoltà di riparazione.

    Struttura degli AirPods

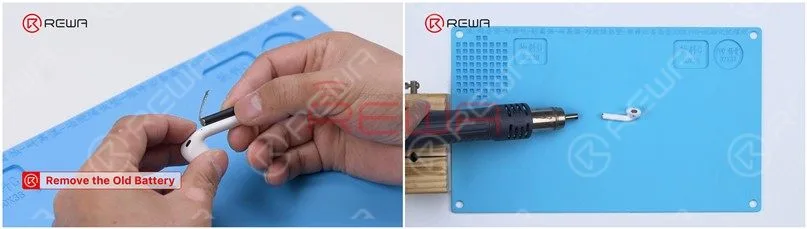
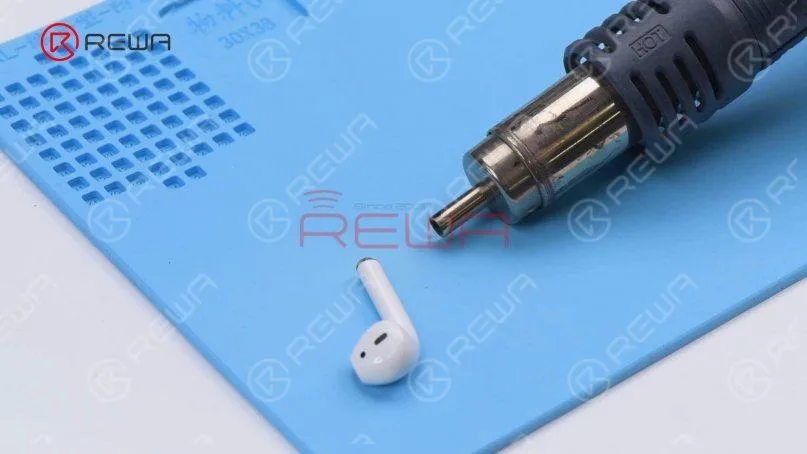
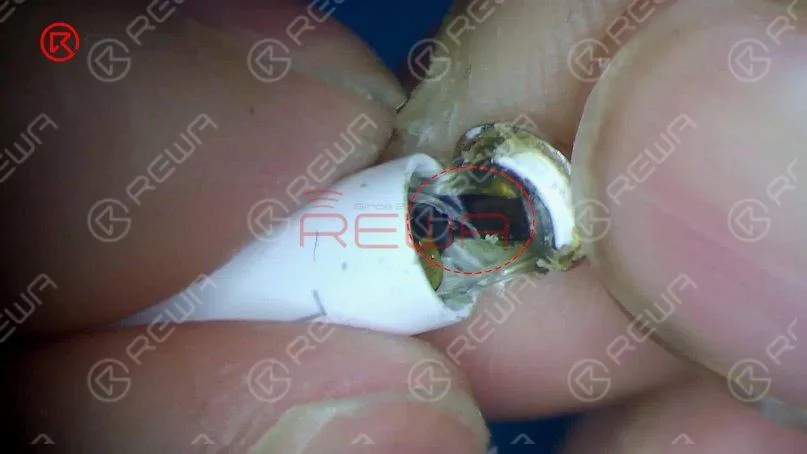
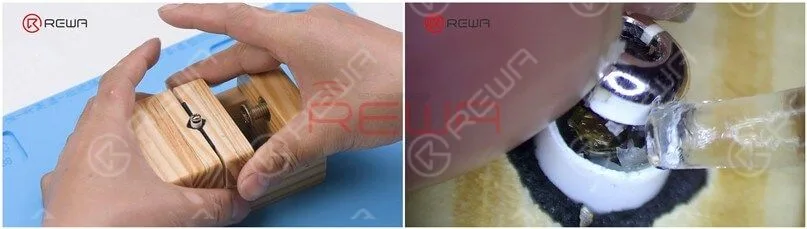
    Gli AirPods 1 e 2 hanno batterie cilindriche che si inseriscono direttamente nel corpo. È necessario utilizzare una pistola ad aria calda con vento elicoidale per riscaldare il cappuccio metallico e rimuovere la batteria. Tenere presente che il vento verticale non può essere utilizzato perché è troppo concentrato e può facilmente danneggiare la custodia. Impostare la temperatura della pistola ad aria calda a 100℃ e il flusso d'aria a 7. Passare al vento elicoidale. Posizionare gli AirPods a 20 mm intorno alla pistola ad aria calda e riscaldare il cappuccio metallico per 3 minuti. Durante il processo di riscaldamento, è necessario girare costantemente gli AirPods per riscaldarli in modo uniforme.
    Sostituzione della batteria degli AirPods

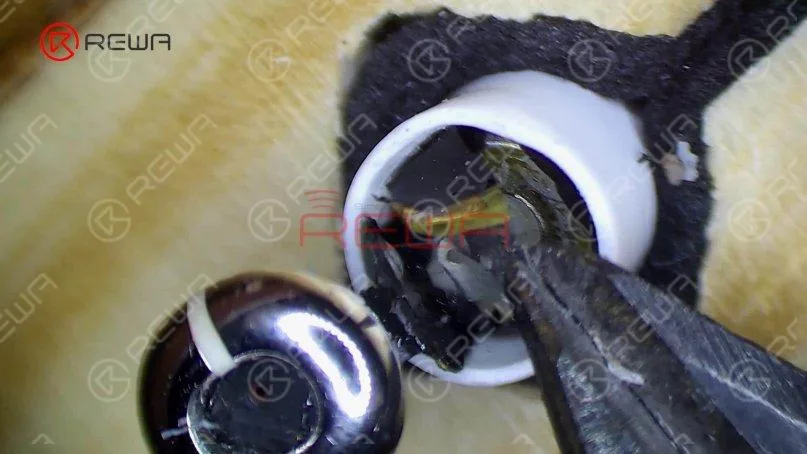
    Sollevare il coperchio metallico dal lato con la L. Sul retro del lato L è presente un cavo flessibile. Non danneggiare il cavo flessibile mentre si fa leva. Rimuovere l'adesivo con una pinzetta. È necessario riscaldare costantemente gli AirPods durante la rimozione dell'adesivo.

    Sostituzione della batteria degli AirPods

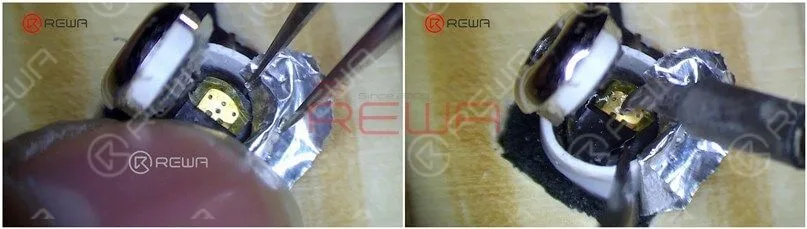
    Prestare attenzione al cavo flessibile nero mentre si fa leva sul tappo metallico. Attaccare gli AirPods al supporto e continuare a rimuovere l'adesivo con una pinzetta. Per estrarre la batteria, l'adesivo deve essere rimosso completamente. È possibile aggiungere una piccola quantità di alcol per facilitare la rimozione dell'adesivo.
    Sostituzione della batteria degli AirPods
    Sostituzione della batteria degli AirPods

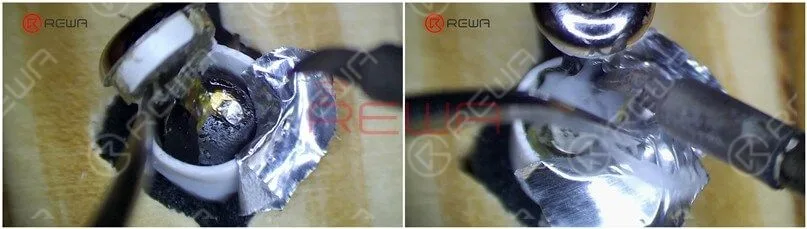
    Isolare con un foglio di alluminio dopo la rimozione dell'adesivo. Impostare la temperatura del saldatore a 365℃ e applicare un po' di Paste Flux sul pad di incollaggio.
    Sostituzione della batteria degli AirPods

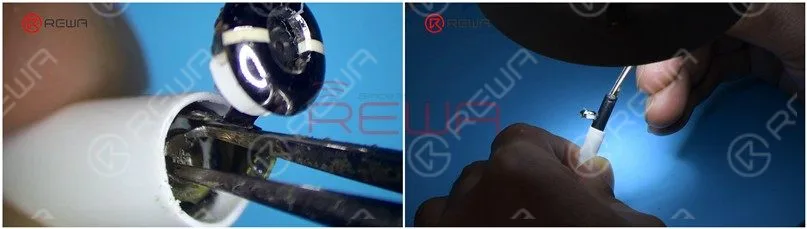
    Riscaldare con il saldatore e sollevare il catodo della batteria. Non toccare il foglio di alluminio mentre si applica il calore per evitare di danneggiare l'involucro di plastica. Poiché l'anodo della batteria si trova dall'altra parte del catodo del cavo flessibile, è necessario fare leva sul cavo flessibile. Continuare ad applicare una piccola quantità di Paste Flux. Riscaldare con il saldatore per separare l'anodo della batteria dal cavo flessibile.
    Sostituzione della batteria degli AirPods

    Rimuovere la piastra di ferro anodica della batteria con un taglierino. Quindi estrarre la batteria con una pinzetta rinnovata. Staccare gli AirPods dal supporto. Riscaldare uniformemente la parte inferiore degli AirPods per 3-5 minuti con una pistola ad aria calda a 100℃. Inserire i due fori dell'anodo della batteria con una pinzetta e bloccare l'anodo per rimuovere la batteria.

    Sostituzione della batteria degli AirPods
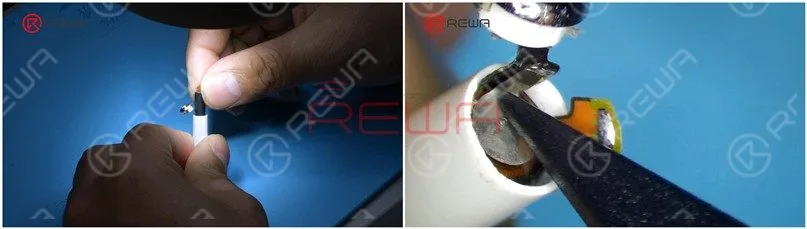
    Sostituzione della batteria degli AirPodsRimuovere l'adesivo in eccesso. Per facilitare l'installazione successiva, rimuovere completamente l'adesivo intorno al tappo metallico. Applicare lo stagno sull'anodo della batteria con il saldatore.
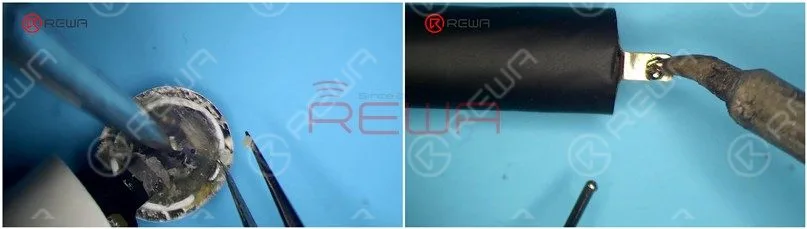
    Sostituzione della batteria degli AirPodsCollegare il batteria negli AirPods. Tenere presente che l'anodo della batteria deve essere allineato con il pad di collegamento anodico sul cavo flessibile.
    Sostituzione della batteria degli AirPodsCollegare gli AirPods al supporto e isolare con un foglio di alluminio. Riscaldare con il saldatore per saldare l'anodo della batteria al cavo flessibile. Dopo la saldatura, premere il cavo flessibile verso il basso. Posizionare l'anodo della batteria e riscaldare con il saldatore per saldare.
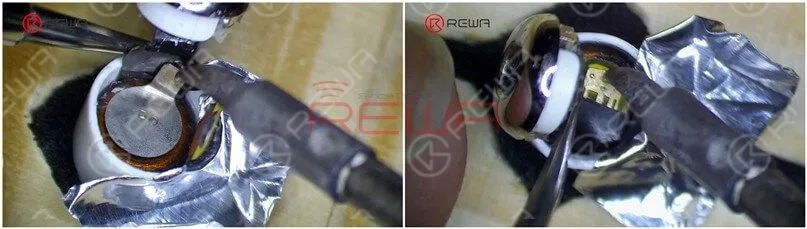
    Sostituzione della batteria degli AirPodsPoi abbiamo inserito gli AirPods nella custodia di ricarica per effettuare il test. Gli AirPods possono essere caricati.
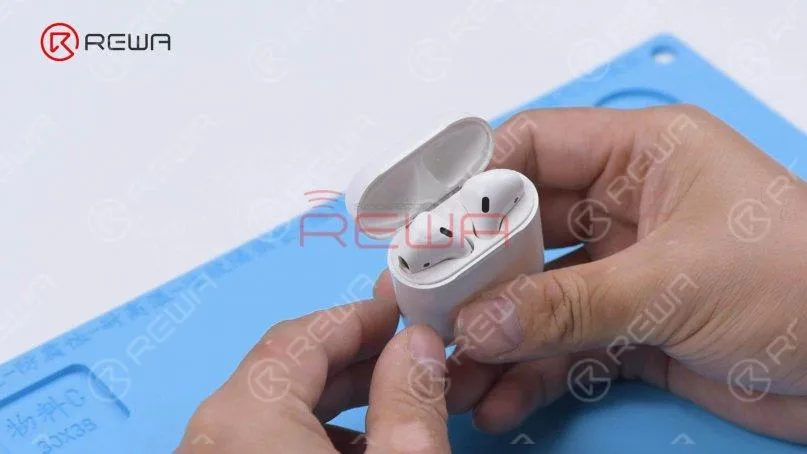
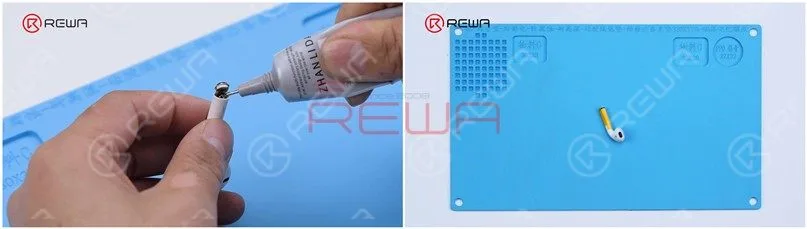
    Sostituzione della batteria degli AirPodsApplicare Adesivo B7000 alla base degli AirPods. Chiudere il tappo metallico e fissarlo con il nastro adesivo. Dopo circa 1 ora, l'adesivo si è solidificato e si toglie il nastro.
    Sostituzione della batteria degli AirPods

    Inserire gli AirPods nella custodia di ricarica per eseguire il test. Gli AirPods possono accoppiarsi con il telefono e la musica può essere riprodotta. Se si tolgono gli AirPods, la musica si interrompe. La batteria è stata sostituita con successo.

    Sostituzione della batteria degli AirPods

    Conclusione:

    Per sostituire la batteria di AirPods, utilizzare la pistola ad aria calda con vento elicoidale per riscaldare il cappuccio metallico. Dopo aver riscaldato il tappo metallico per circa tre minuti, sollevarlo lateralmente con una lettera a L. Quindi rimuovere l'adesivo e prestare attenzione a non danneggiare il cavo flessibile. Dopo la rimozione dell'adesivo, proteggere la custodia di plastica con un foglio di alluminio e separare il catodo e l'anodo della batteria dal cavo flessibile. Per rimuovere la batteria, continuare a riscaldare la parte inferiore degli AirPods ed estrarre la batteria con una pinzetta rinnovata. Infine, installiamo la nuova batteria, saldiamo il catodo e l'anodo della batteria e fissiamo con l'adesivo.Guardate il video qui sotto per vedere come sostituire la batteria degli AirPods.

  • The Signs That Your Phone Needs A New Battery

    The Signs That Your Phone Needs A New Battery

    signs that your phone needs new battery the

    The likelihood of your cell phone’s performance will not stay at one hundred percent forever. Your cell phone is likely to give a little more trouble, slow down or lose charge quickly as time goes by. The problems you may be experiencing with your phone may be caused by various things, including the need for a new battery for your phone.

    signs that your phone needs new battery

    There are various signs that can tell you if your phone needs to get a new battery. You can tell that your battery needs changing if…

    1. Your phone is dead: We mean completely and permanently dead. We mean that it just isn’t charging or able to come on. When there are no signs of power or life in the phone, even after it has been charged with a good charger, you may just need to get a new battery.

    2. Your phone only shows power when it’s on the charger or it doesn’t power on after it has been given ample time to charge up: This means that your battery does not hold the energy that it gets from the power source. If this is the case with your battery, you need a new one.

    3. Your phone dies quickly: If you’re not playing games, listening to music surfing the web, using Bluetooth or doing something else that may be causing your battery to die. However, a battery that dies very quickly after it has been fully charged, may also be a classic sign that you need a new battery.

    4. Your battery or phone starts getting very hot: It is actually quite normal for batteries to generate heat when charging, but their heat is internalized. Batteries that need to be changed, are those that generate or cause the phone to generate external heat.

    5. Your battery bulges: The bulge in a battery means that the internal cells have ruptured and that simply means that the battery needs to be changed.