Tag: riparazione iphone 12

  • iPhone X-12 Separazione e ricombinazione delle schede a doppia pila | Suggerimenti dell'Accademia REWA

    iPhone X-12 Separazione e ricombinazione delle schede a doppia pila | Suggerimenti dell'Accademia REWA

    Per separare e ricombinare la scheda madre a doppio strato è un passaggio molto importante per la riparazione della scheda madre dell'iPhone X e dei modelli successivi. Lievi errori possono causare pseudo saldature o altri problemi. Gli studenti della REWA Academy hanno recentemente segnalato che i due strati spesso non si adattano correttamente nella riparazione delle schede madri a doppio strato. Ci sono persino grandi spazi vuoti, che causano pseudo saldature. A tal proposito, condivideremo suggerimenti e note per la separazione e la ricombinazione delle schede madri a doppio strato. I suggerimenti in questo articolo si applicano all'iPhone X e ai modelli successivi.

    Separazione

    Sbucciare la schiuma sulla scheda madre prima di scaldare. Si prega di notare che sconsigliamo ai principianti di scaldare la scheda madre con una pistola ad aria calda. Perché la scheda madre può ricevere calore in modo non uniforme e deformarsi. Una scheda madre professionale piattaforma di riscaldamento è quello che suggeriamo.
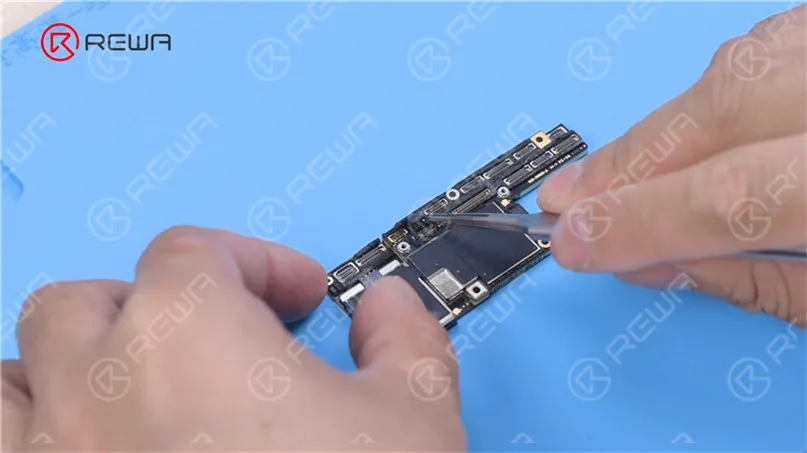
    Sbucciare la schiuma dalla scheda madre

    Scaldare la scheda madre

    Per facilitare la rimozione successiva della scheda logica, avvita una vite sulla scheda logica. Taglia il nastro con un Coltello da scultura.
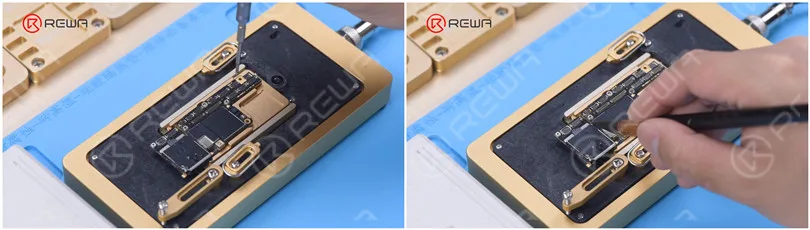
    surriscaldamento della scheda madre

    La logic board e lo strato intermedio sono saldati con pasta saldante a bassa temperatura. Quindi la temperatura migliore per la piattaforma di riscaldamento sarà 155 °C-165 °C. Spingere delicatamente la logic board con una pinzetta quando la temperatura raggiunge i 165 °C. Se la logic board è allentata, la stagno si è sciolta.
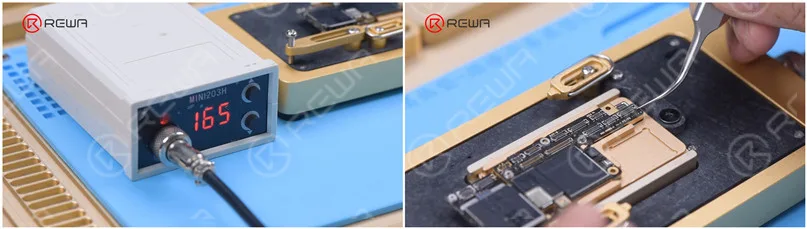
    surriscaldamento della scheda madre

    Serra la vite per rimuovere la scheda logica e quindi rimuovere la scheda del segnale.
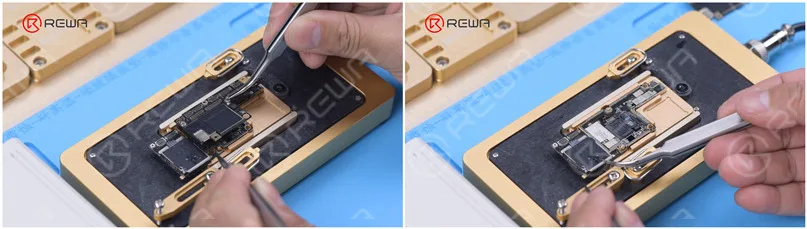
    separazione della scheda madre

    Pulizia della scheda madre

    Rimuovere la pasta termica con un taglierino. La pasta termica deve essere rimossa completamente. Altrimenti, la pasta termica toccherà la scheda logica causando saldature spurie durante la ricombinazione. Fissare la scheda del segnale al supporto e applicare un giro di Flusso di pasta.
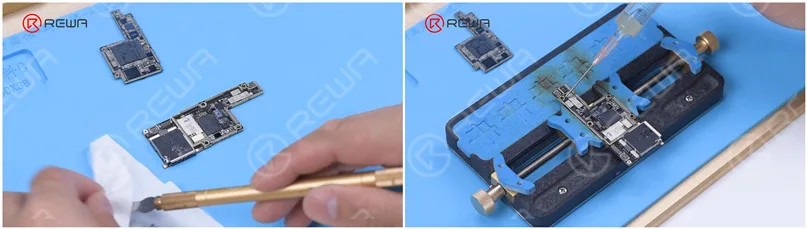
    Rimuovere la pasta termoconduttiva con un taglierino da scultura. La pasta termoconduttiva deve essere rimossa completamente. Altrimenti, la pasta termoconduttiva toccherà la scheda logica dando origine a saldature spurie nella ricombinazione. Fissare la scheda del segnale al supporto e applicare un giro di flussante in pasta.

    Rimuovere lo stagno sul tampone di incollaggio con micro saldatore strumenti Saldatore a 365 °C e calza dissaldante. La stagnatura sul pad di collegamento deve essere completamente rimossa. La stagnatura residua influenzerà la saldatura successiva. Pulire il pad di collegamento con PCB Cleaner.
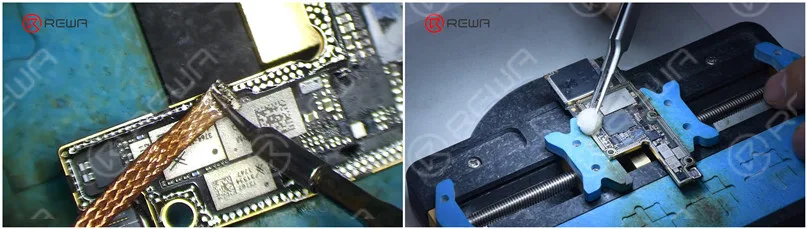
    Rimuovere la stagnatura dal pad di saldatura con il saldatore

    Pulisci la logic board con lo stesso metodo. Ti preghiamo di non danneggiare i componenti attorno al pad di bonding della logic board durante la pulizia. È necessario verificare che il pad di bonding sia ordinato dopo la pulizia.

    Ribaltamento

    Attacca il segnale a Piattaforma di Reballing. Posiziona lo stencil di reballing in modo che aderisca al circuito stampato. Per impedire che la pasta saldante finisca nello spazio della scheda madre, inserisci una piastra metallica.
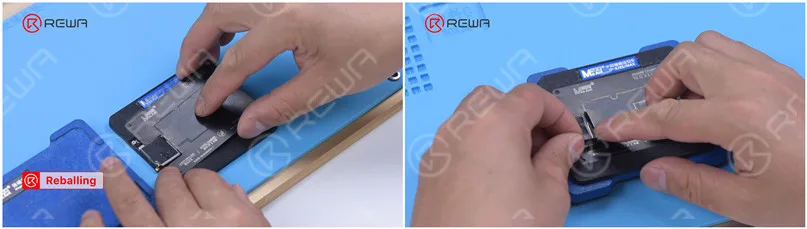
    Attacca il pannello di segnalazione

    Applica uno strato di Pasta saldante a bassa temperatura e pulisci l'eccesso di pasta saldante con un panno privo di lanugine. Rimuovi la maschera di reballing. Verifica se la pasta saldante sulla scheda del segnale è completa.
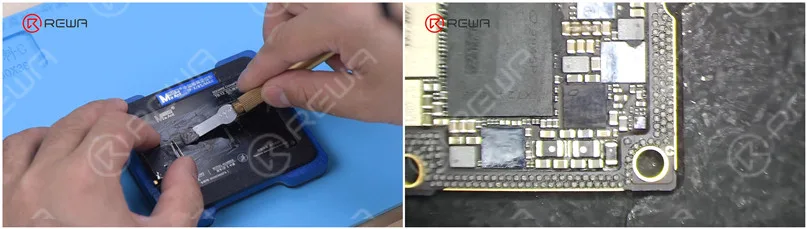
    Applicare uno strato di pasta saldante a bassa temperatura e rimuovere la pasta saldante in eccesso con una salvietta priva di lanugine. Rimuovere lo stencil di reballing. Verificare se la pasta saldante sulla scheda del segnale è piena.

    Quando si applica la pasta saldante, assicurarsi che abbia una certa umidità. Se la pasta saldante è troppo secca, aderirà allo stencil di rifuling quando lo stencil viene rimosso. Di conseguenza, la pasta saldante sulla scheda di segnale non sarà uniforme, il che può facilmente portare a una saldatura scadente.
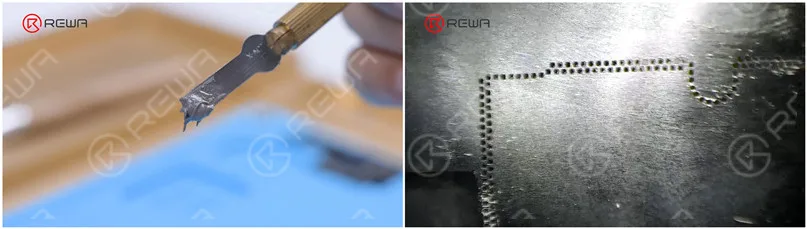
    applicazione della pasta saldante

    Ricombinazione

    Mettere la scheda del segnale sulla piastra riscaldante a 165 °C per scaldare. Interrompere il riscaldamento dopo che le sfere di saldatura si sono formate. Applicare una piccola quantità di pasta flussante dopo che la scheda del segnale si è raffreddata.
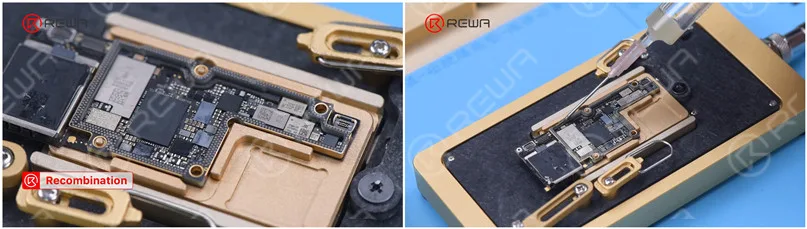
    Posizionare la scheda del segnale sulla Piattaforma Riscaldante a 165 °C per riscaldare

    Allineare la scheda logica con la scheda segnale. Continuare a scaldare sulla piattaforma riscaldante a 165°C. Quando il flusso di saldatura fuoriesce e la scheda logica affonda, spingere delicatamente la scheda logica con le pinzette per garantire che i due strati aderiscano strettamente. La spinta deve essere delicata e leggera.
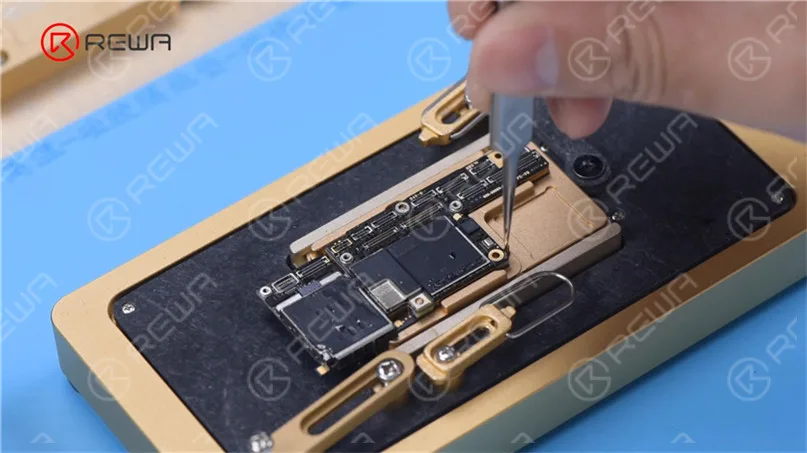
    Allinea la scheda logica con la scheda del segnale

    Pulisci la scheda madre con il detergente per PCB dopo che la scheda madre si è raffreddata.

    Se trovi la scheda madre deformata durante la ricombinazione, puoi posizionarla su una superficie piana e fissarla con un elastico. Premi delicatamente due lati della scheda madre. Per evitare di schiacciare i componenti, posiziona un foglio di carta morbida sotto la scheda madre.
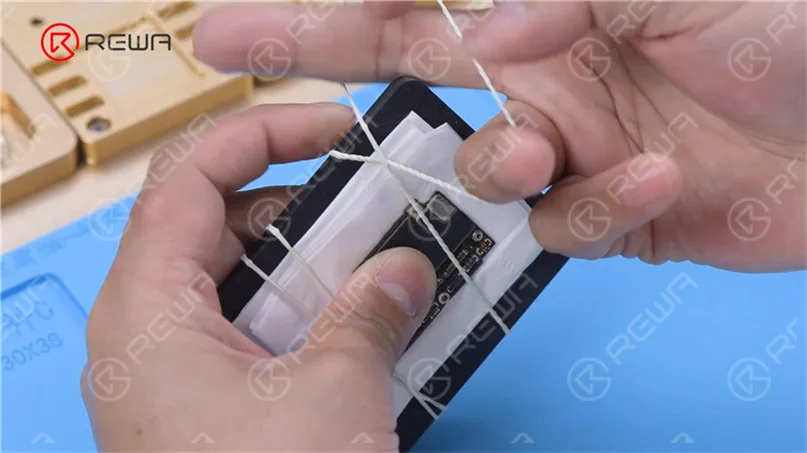
    Fissare la scheda madre con un elastico

    Successivamente, condivideremo un altro metodo di ricombinazione. Il metodo può essere attuato se il pad di collegamento centrale non è danneggiato.

    Quando lo stagno si scioglie, rimuovere la scheda logica in modo verticale con una pinzetta. Si può vedere che c'è un pad metallico di 0,05 mm di spessore attorno alla scheda del segnale a una certa distanza. Questo pad metallico è progettato per mantenere uno spazio di 0,05 mm tra la scheda logica e lo strato intermedio, prevenendo il ponte tra le sfere di saldatura durante la saldatura.
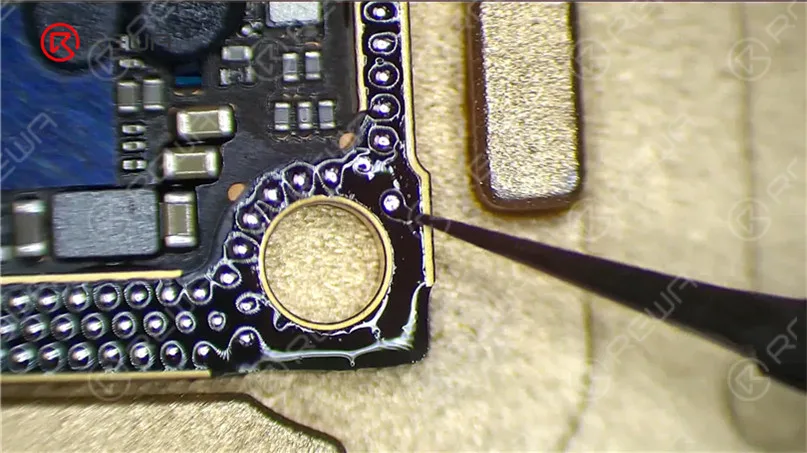
    iphone 12 double stacked board separation recombination rewa academy 13

    È necessario rimuovere la pasta termica dalla scheda madre solo quando la riparazione è completata. Mantenere la saldatura originale sul pad di collegamento e applicare una piccola quantità di pasta flussante.
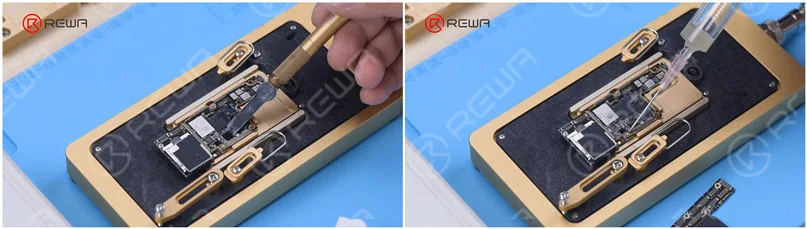
    È necessario rimuovere la pasta termica dalla scheda madre solo quando la riparazione è completata. Mantenere la saldatura originale sul pad di collegamento e applicare una piccola quantità di pasta flussante.

    Infine, allineare la scheda logica con la scheda del segnale. Quando la temperatura raggiunge 165 °C e lo stagno si scioglie, spegnere l'alimentazione. Premere le due estremità della scheda logica con una pinzetta finché la scheda madre non si è raffreddata. In questo modo la scheda logica e la scheda del segnale si incastrano perfettamente. Non ci saranno ponti né fuoriuscita di sfere di stagno.

    Visita Accademia REWA Se vuoi imparare altre abilità di riparazione. Abbiamo pacchetti completi di corsi per il miglioramento delle capacità diagnostiche e di riparazione delle schede madri. Sentiti libero di lasciare un commento sui tuoi pensieri riguardo alla separazione e ricombinazione di schede madri a doppio strato.

    Guarda il video completo qui sotto per vedere come separiamo e ricombiniamo una scheda madre a doppio strato.
     

  • iPhone 12 Lineup Soluzione di ricondizionamento dello schermo OLED da parte di REWA

    iPhone 12 Lineup Soluzione di ricondizionamento dello schermo OLED da parte di REWA

    The repair rate of the screen is one of the highest among many mobile phone parts. Professional screen refurbishment tools and techniques can not only reduce screen replacement failure rate but also improve repair efficiency. It is well known that the iPhone 12 lineup features an OLED screen. Today REWA LAB will take the iPhone 12 screen refurbishment as an example to introduce the up-to-date screen refurbishment techniques and machines in the industry.

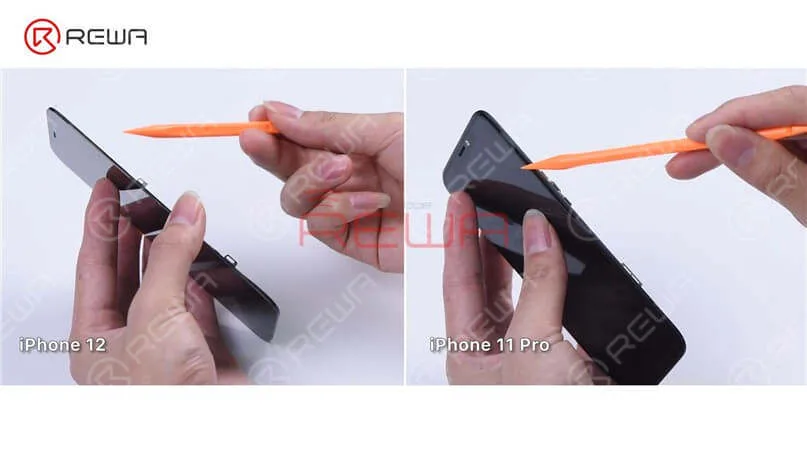
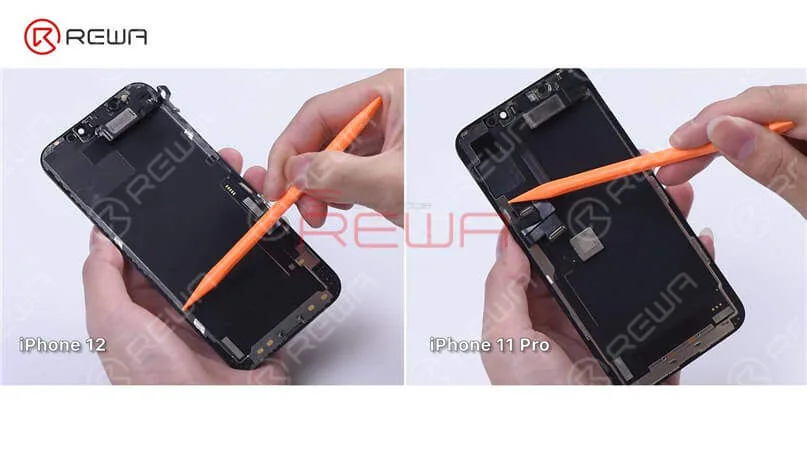
    Firstly, let’s run a cosmetic inspection of the screen. We can see that the iPhone 12 has a narrower bezel than the iPhone 11 Pro, so the iPhone 12 bezel may be a little easier to disassemble. In addition to that, the iPhone 12 bezel doesn’t wrap around the glass lens anymore. Therefore, the material requirements for the bezel adhesive will be relatively high to prevent the adhesive from falling off. To dig deeper, we will refurbish the iPhone 12 screen.

     We can see that the iPhone 12 has a narrower bezel than the iPhone 11 Pro, so the iPhone 12 bezel may be a little easier to disassemble. In addition to that, the iPhone 12 bezel doesn’t wrap around the glass lens anymore. Therefore, the material requirements for the bezel adhesive will be relatively high to prevent the adhesive from falling off. To dig deeper, we will refurbish the iPhone 12 screen.
     We can see that the iPhone 12 has a narrower bezel than the iPhone 11 Pro, so the iPhone 12 bezel may be a little easier to disassemble. In addition to that, the iPhone 12 bezel doesn’t wrap around the glass lens anymore. Therefore, the material requirements for the bezel adhesive will be relatively high to prevent the adhesive from falling off. To dig deeper, we will refurbish the iPhone 12 screen.

    Step 1: Screen Testing

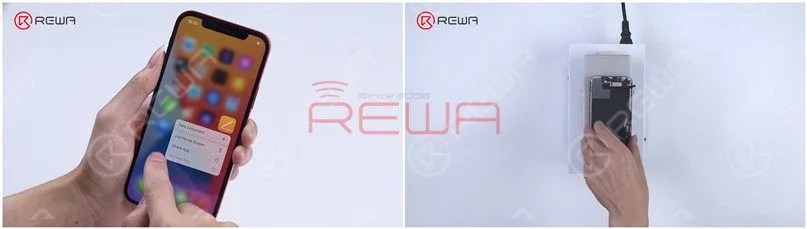
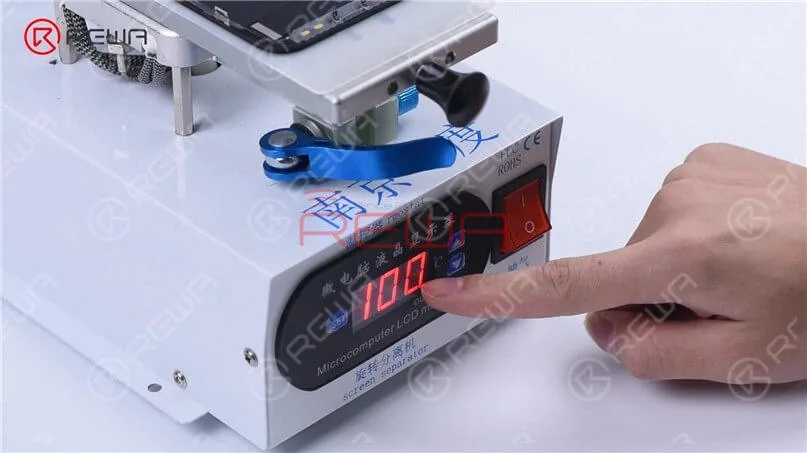
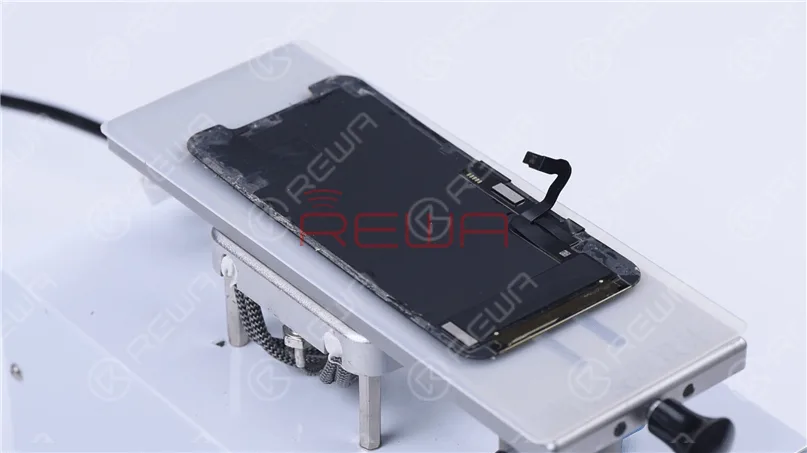
    First of all, let’s test the screen. The display, touch, and 3D Touch all function well. Place the screen upside down on the Screen Separator, set the temperature to 100 ℃, and start the suction.

    Place the screen upside down on the Screen Separator, set the temperature to 100 ℃, and start the suction.
    Place the screen upside down on the Screen Separator, set the temperature to 100 ℃, and start the suction.

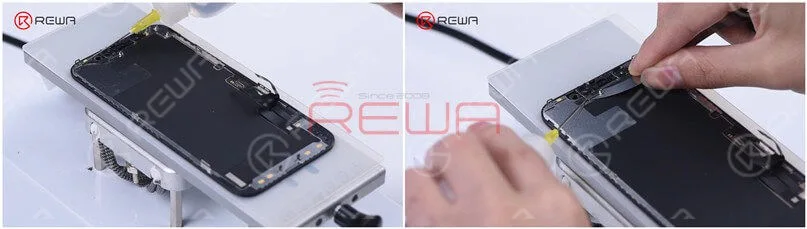
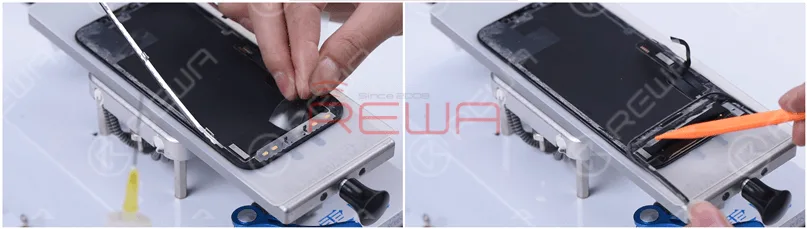
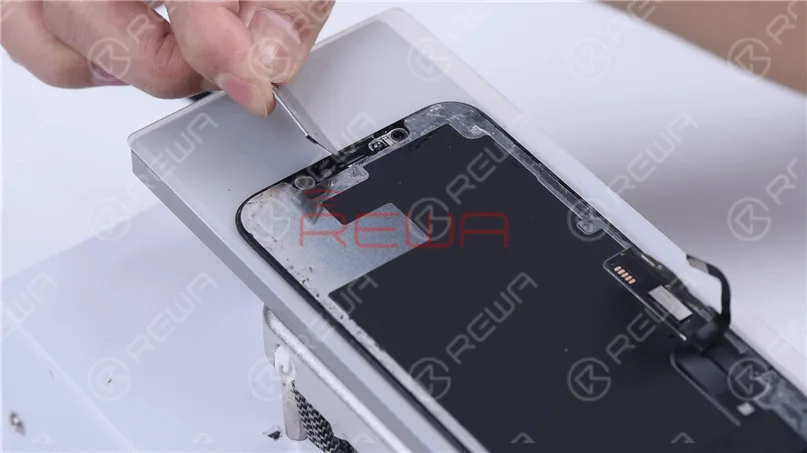
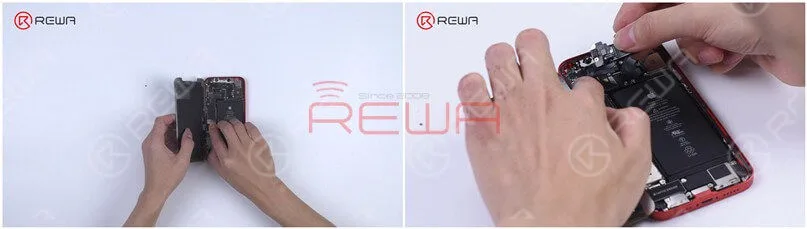
    Remove the ear speaker flex cable first. Since the ear speaker flex cable is very easy to damage, please be noted that we need to heat the screen before removing it. Besides, the iPhone 12 ear speaker sensor ring is integrated into the bezel.

    Remove the ear speaker flex cable first. Since the ear speaker flex cable is very easy to damage, please be noted that we need to heat the screen before removing it. Besides, the iPhone 12 ear speaker sensor ring is integrated into the bezel.

    Step 2: Bezel Removing

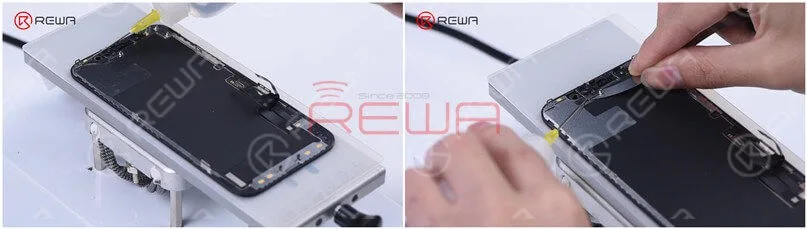
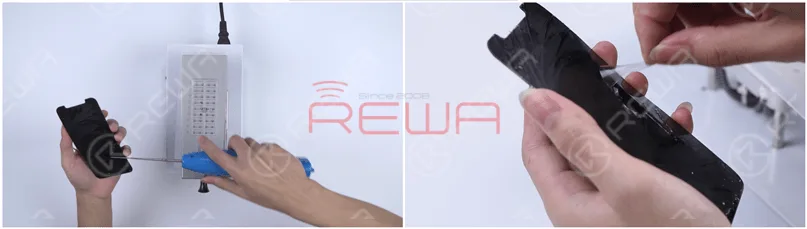
    Now, let’s remove the bezel. Dip adhesive remover on the bezel first. While using the Razor Blade to separate the bezel, you need to dip some adhesive remover too. Slide the Razor Blade back and forth, and pry up the bezel carefully.

    Now, let’s remove the bezel. Dip adhesive remover on the bezel first. While using the Razor Blade to separate the bezel, you need to dip some adhesive remover too. Slide the Razor Blade back and forth, and pry up the bezel carefully.
    Now, let’s remove the bezel. Dip adhesive remover on the bezel first. While using the Razor Blade to separate the bezel, you need to dip some adhesive remover too. Slide the Razor Blade back and forth, and pry up the bezel carefully.

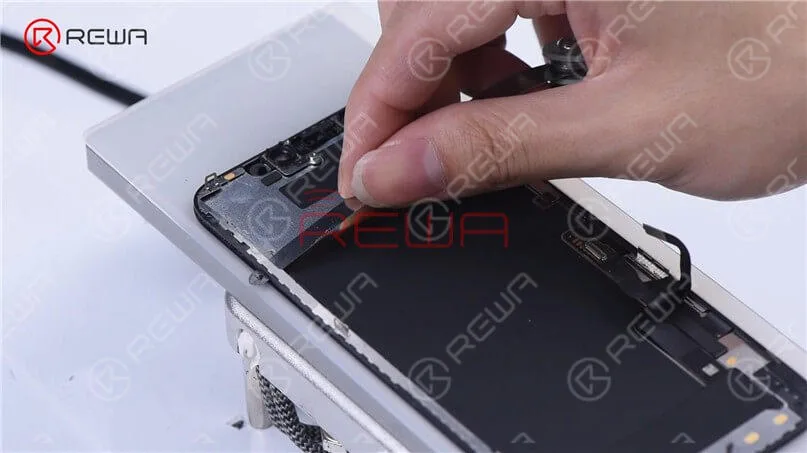
    As the ear speaker flex cable part has more adhesive, we can dip more adhesive remover to make it loose. Hold the two corners of the bezel in both hands, and detach the bezel slowly with caution. Our original thought was to separate the bezel in a complete manner and then reuse it. But now the bezel is broken here. So please notice that this part of the bezel is made of plastic material, which is extremely easy to break. If you want to separate the bezel completely, you need to pay extra attention.

    As the ear speaker flex cable part has more adhesive, we can dip more adhesive remover to make it loose. Hold the two corners of the bezel in both hands, and detach the bezel slowly with caution. Our original thought was to separate the bezel in a complete manner and then reuse it. But now the bezel is broken here. So please notice that this part of the bezel is made of plastic material, which is extremely easy to break. If you want to separate the bezel completely, you need to pay extra attention.
    As the ear speaker flex cable part has more adhesive, we can dip more adhesive remover to make it loose. Hold the two corners of the bezel in both hands, and detach the bezel slowly with caution. Our original thought was to separate the bezel in a complete manner and then reuse it. But now the bezel is broken here. So please notice that this part of the bezel is made of plastic material, which is extremely easy to break. If you want to separate the bezel completely, you need to pay extra attention.

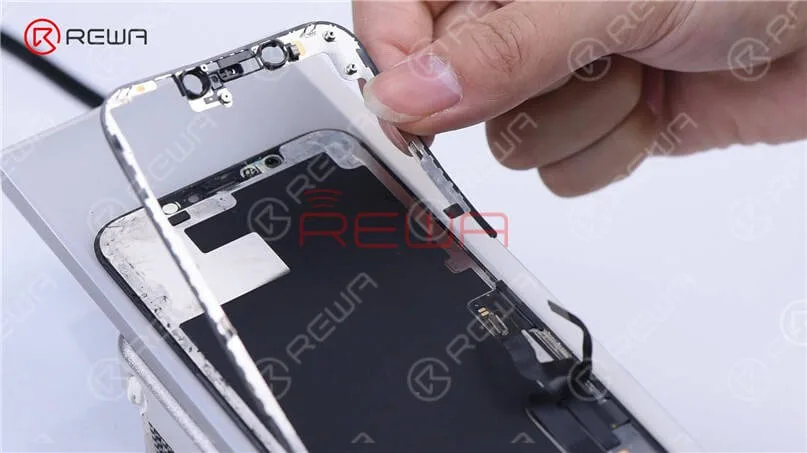
    In order not to induce damage, we use a thin film to remove the flex cable part. Remove the bezel, and it can be seen that the 3M adhesive used in the bezel flex cable part is no longer the cold adhesive. The 3M adhesive makes the bezel relatively easy to remove.

    In order not to induce damage, we use a thin film to remove the flex cable part. Remove the bezel, and it can be seen that the 3M adhesive used in the bezel flex cable part is no longer the cold adhesive. The 3M adhesive makes the bezel relatively easy to remove.

    Step 3: Glass Lens Separating

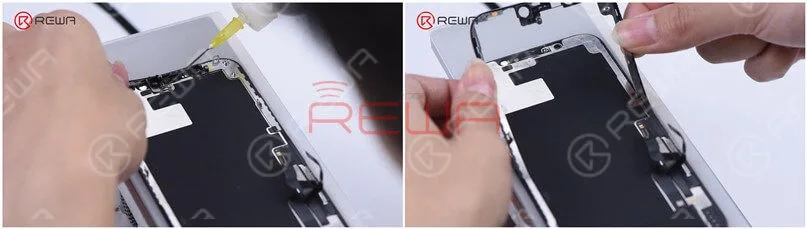
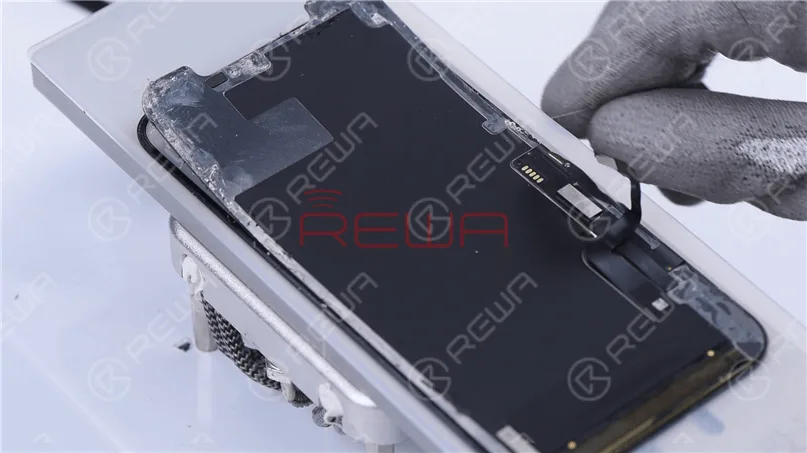
    Remove excess adhesive on the ear speaker flex cable part.

    Remove excess adhesive on the ear speaker flex cable part.

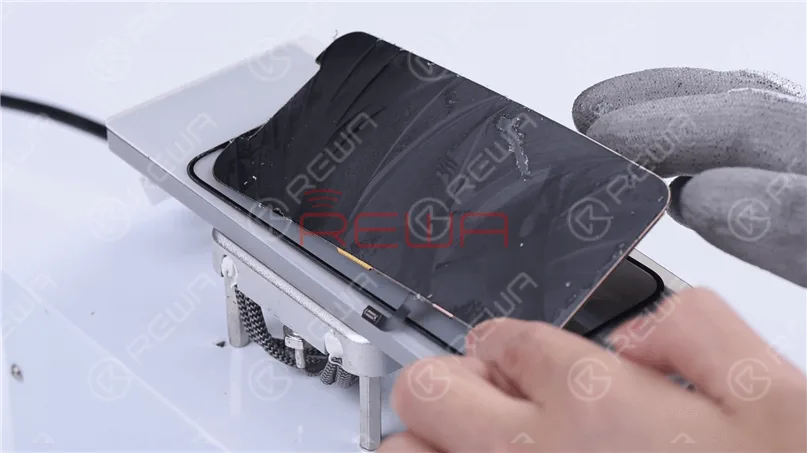
    Start separating the OLED along the bottom layer of the glass lens with Cutting Wire.

    Start separating the OLED along the bottom layer of the glass lens with Cutting Wire.

    Through our observation, we found that the touch panel of the iPhone 12 screen is better than that of the iPhone 11 Pro, which is not easy to damage. To put it specifically, the touch panel of the iPhone 12 is thicker, and the cut lines are clearer and wider.

    Through our observation, we found that the touch panel of the iPhone 12 screen is better than that of the iPhone 11 Pro, which is not easy to damage. To put it specifically, the touch panel of the iPhone 12 is thicker, and the cut lines are clearer and wider.

    Step 4: OCA Adhesive Removing

    Place the OLED on the heating platform.

    Place the OLED on the heating platform.

    Roll up the OCA adhesive with the Electric Adhesive Removing Tool and remove the remaining OCA adhesive with a hand.

    Roll up the OCA adhesive with the Electric Adhesive Removing Tool and remove the remaining OCA adhesive with a hand.

    Connect the OLED and ear speaker flex cable. The display and touch function works well. A point worth mentioning is that not connecting the ear speaker flex cable will lead to the absence of light-sensing. The screen will be too dark to be tested.

    Connect the OLED and ear speaker flex cable. The display and touch function works well. A point worth mentioning is that not connecting the ear speaker flex cable will lead to the absence of light-sensing. The screen will be too dark to be tested.
    Connect the OLED and ear speaker flex cable. The display and touch function works well. A point worth mentioning is that not connecting the ear speaker flex cable will lead to the absence of light-sensing. The screen will be too dark to be tested.

    Step 5: Laminating 

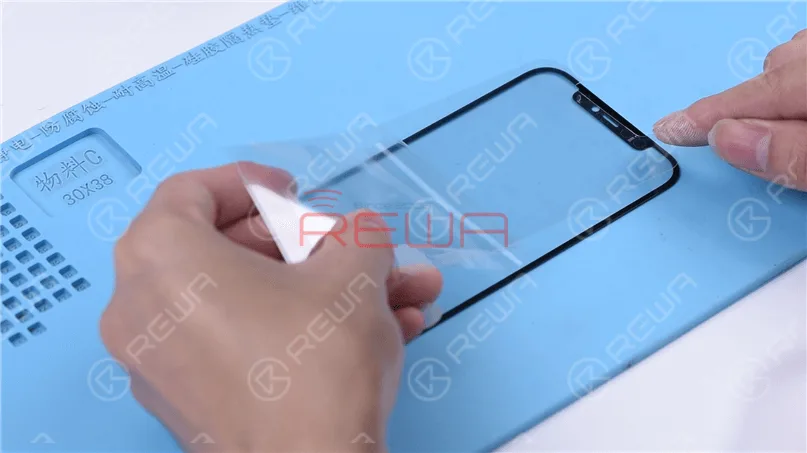
    Attach the OCA adhesive to the glass lens.

    Attach the OCA adhesive to the glass lens.

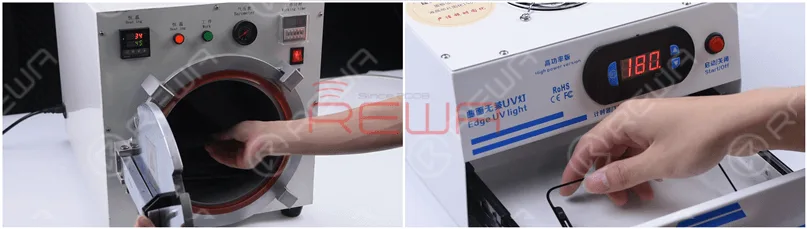
    Put the glass lens with OCA adhesive into the Bubble Removing Machine for 3 minutes. Then put it into the UV Lamp for Curing OCA Glue for 5 seconds.

    Put the glass lens with OCA adhesive into the Bubble Removing Machine for 3 minutes. Then put it into the UV Lamp for Curing OCA Glue for 5 seconds.

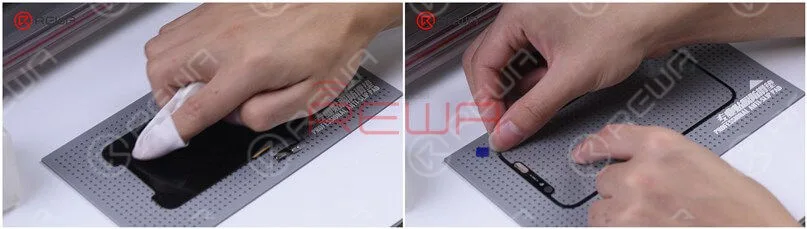
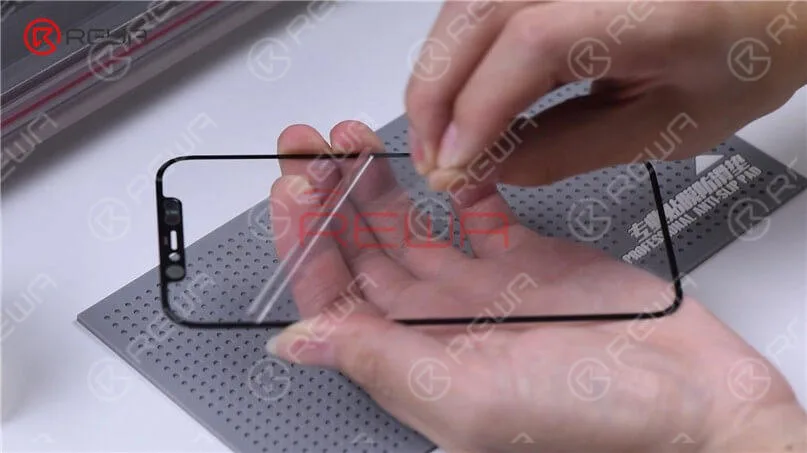
    Wipe clean the OLED, and use pull tape to stick a corner of the glass lens. Press the pull tape for seconds, and then tear off the protective film of the OCA adhesive.

    Wipe clean the OLED, and use pull tape to stick a corner of the glass lens. Press the pull tape for seconds, and then tear off the protective film of the OCA adhesive.
    Wipe clean the OLED, and use pull tape to stick a corner of the glass lens. Press the pull tape for seconds, and then tear off the protective film of the OCA adhesive.

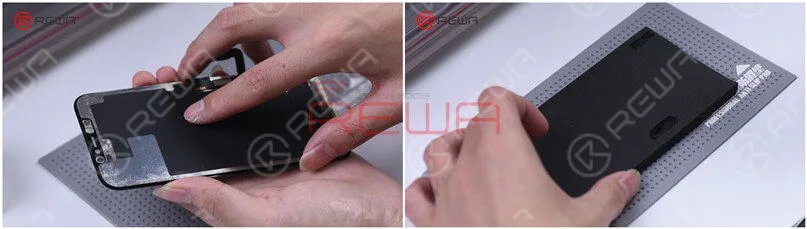
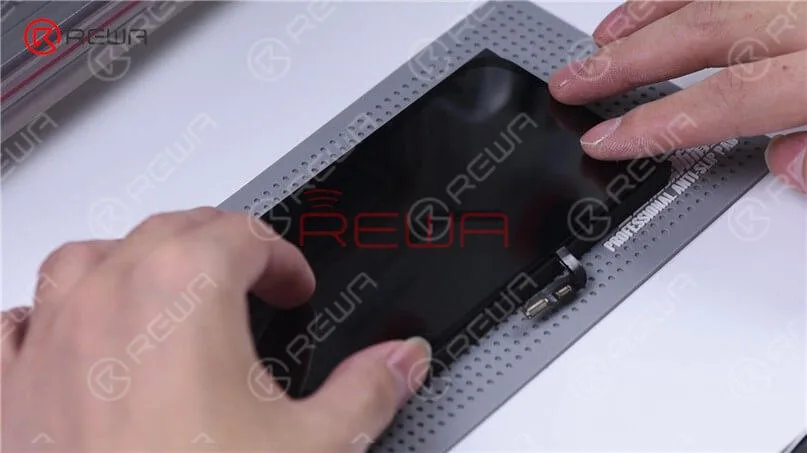
    Since the iPhone 12 aligning mold has not come out yet, we use manual alignment. After alignment, place the screen on the laminating sponge. Please notice that two slots are cut on the sponge in order to prevent OLED damage.

    Since the iPhone 12 aligning mold has not come out yet, we use manual alignment. After alignment, place the screen on the laminating sponge. Please notice that two slots are cut on the sponge in order to prevent OLED damage.
    Since the iPhone 12 aligning mold has not come out yet, we use manual alignment. After alignment, place the screen on the laminating sponge. Please notice that two slots are cut on the sponge in order to prevent OLED damage.

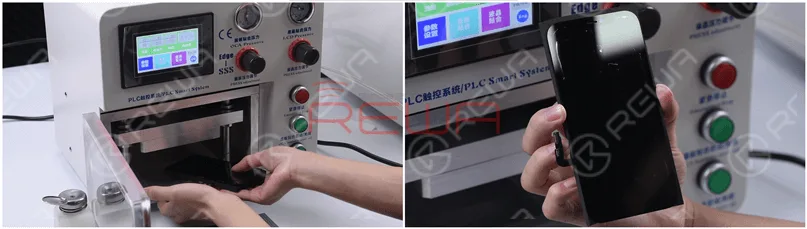
    Put the screen into the laminating machine, and press “LCD laminate start”. Take out the screen and we can see there are bubbles on the screen.

    Put the screen into the laminating machine, and press “LCD laminate start”. Take out the screen and we can see there are bubbles on the screen.

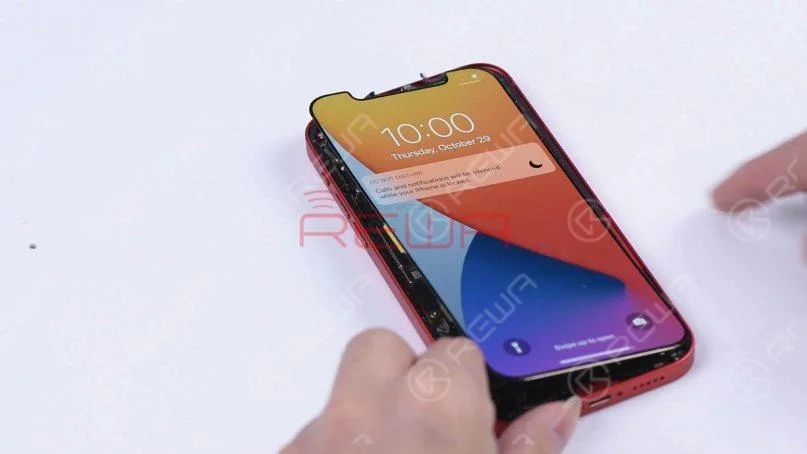
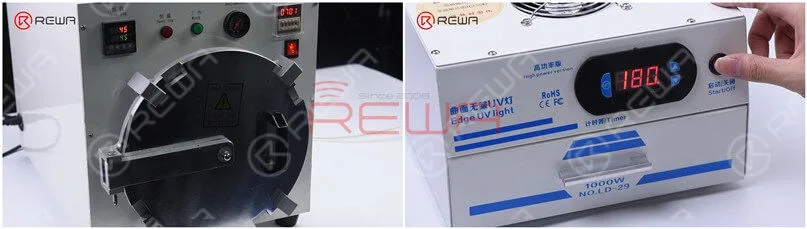
    Put the screen back into the Bubble Removing Machine for 10 minutes, and then put the screen into the UV Lamp for Curing OCA Glue for 180 seconds. Assemble the refurbished screen on the phone, and all functions work well.

    Put the screen back into the Bubble Removing Machine for 10 minutes, and then put the screen into the UV Lamp for Curing OCA Glue for 180 seconds. Assemble the refurbished screen on the phone, and all functions work well.
    Put the screen back into the Bubble Removing Machine for 10 minutes, and then put the screen into the UV Lamp for Curing OCA Glue for 180 seconds. Assemble the refurbished screen on the phone, and all functions work well.

    Visitate il nostro negozio online per i pezzi di ricambio e gli strumenti. Assicurati di seguire il nostro Canale YouTube, so you will get the newest repair information.For more detailed refurbishment techniques of the iPhone 12, please watch the video below!