Tag: riparazione del telefono

  • Guida completa agli schermi OLED aftermarket di iPhone X

    Guida completa agli schermi OLED aftermarket di iPhone X

    Here comes iPhone X Aftermarket OLED Screen! With iPhone X Aftermarket LCD Screen springing up in the market, much attention had been paid to iPhone X Aftermarket OLED Screen.

    We got samples of iPhone X Aftermarket OLED Screen from the factory at the first sign of production and carried out a series of tests afterwards.

    The Aftermarket OLED Screen performed well with no function problem, which has met the product standards of usage.

    Now, let’s take a close look at iPhone X Aftermarket OLED Screen with test results.

    The IC on iPhone X Aftermarket OLED Screen and OEM Screen get high similarity.
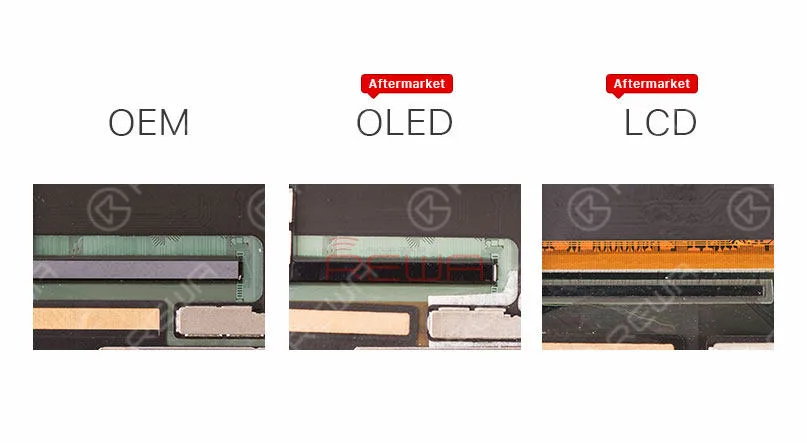
    Deep Analysis On iPhone X Aftermarket OLED Screen

    iPhone X Aftermarket OLED Screen and OEM Screen also share the same textures on LCD flex cable.
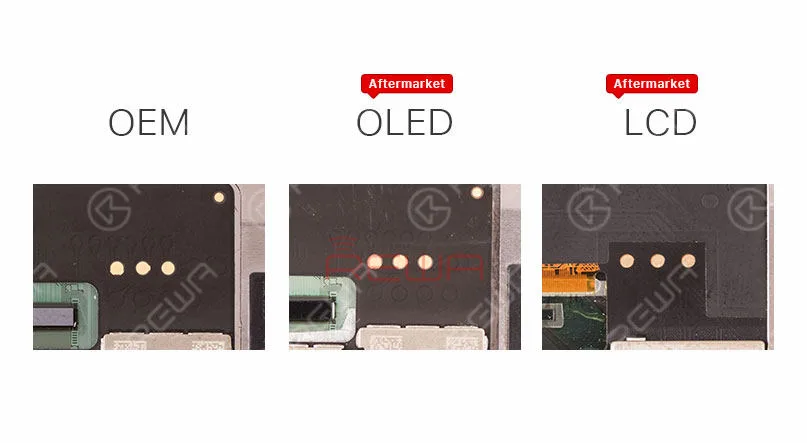
    Deep Analysis On iPhone X Aftermarket OLED Screen

    Aftermarket OLED Screen and Aftermarket LCD screen feature with the same textures on Touch flex cable.
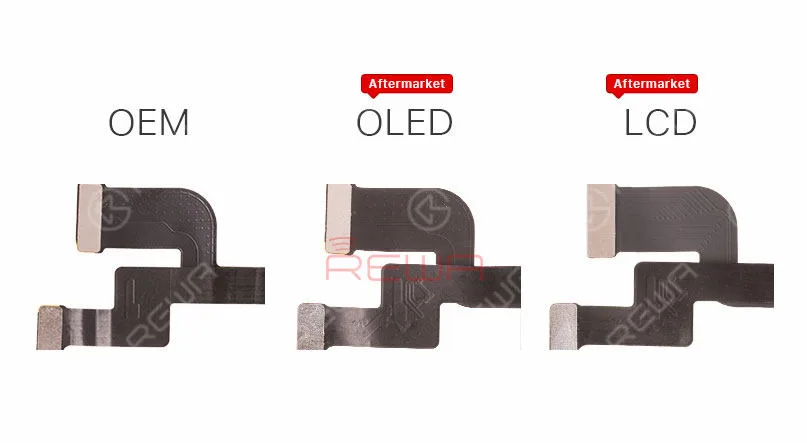
    Deep Analysis On iPhone X Aftermarket OLED Screen

    Aftermarket OLED Screen and Aftermarket LCD screen also share the same 3D Touch flex cable.
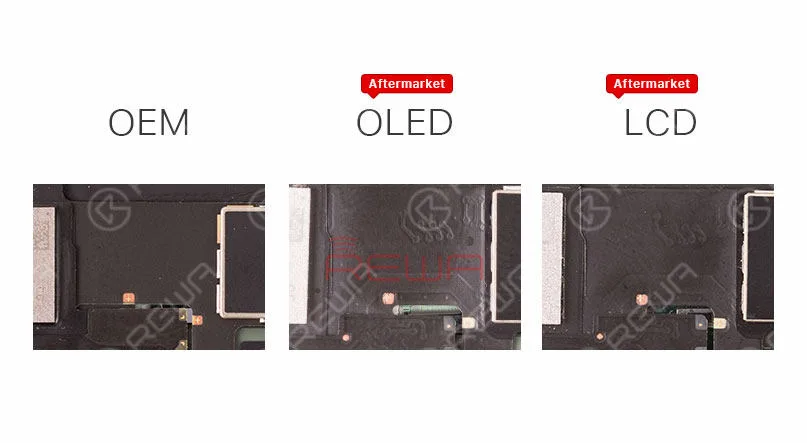
    Deep Analysis On iPhone X Aftermarket OLED Screen

    Check the thickness of iPhone X OEM Screen, iPhone X Aftermarket OLED Screen and iPhone X LCD Screen.
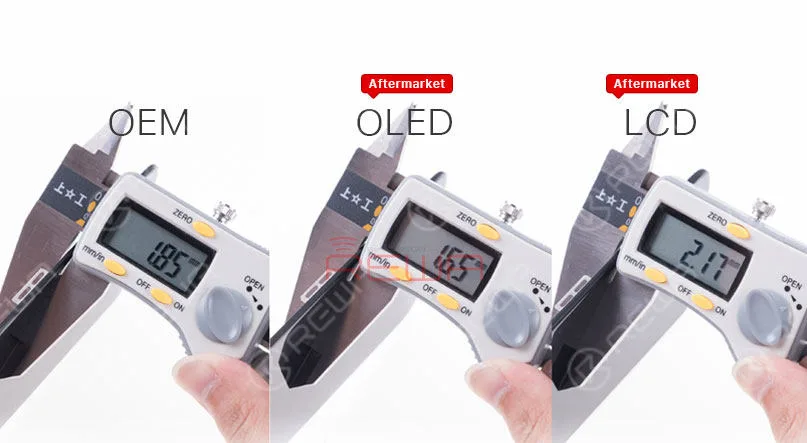
    Deep Analysis On iPhone X Aftermarket OLED Screen

    Since the 3D touch module of iPhone X Aftermarket OLED Screen is thinner, it will be slightly thinner when measuring, Yet the bezel much thicker than iPhone X OEM Screen, so it will little higher after installation.

    Besides, iPhone X Aftermarket OLED Screen features with four golden contacts which is highly similar to those on iPhone X OEM Screen.
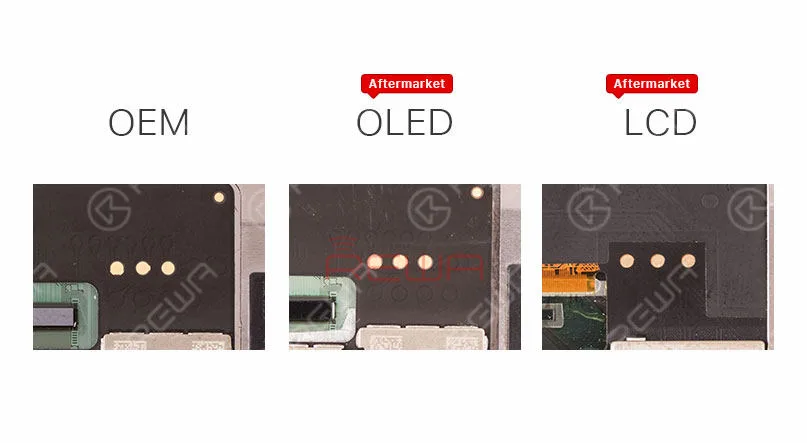
    Deep Analysis On iPhone X Aftermarket OLED Screen

    Test di funzionamento

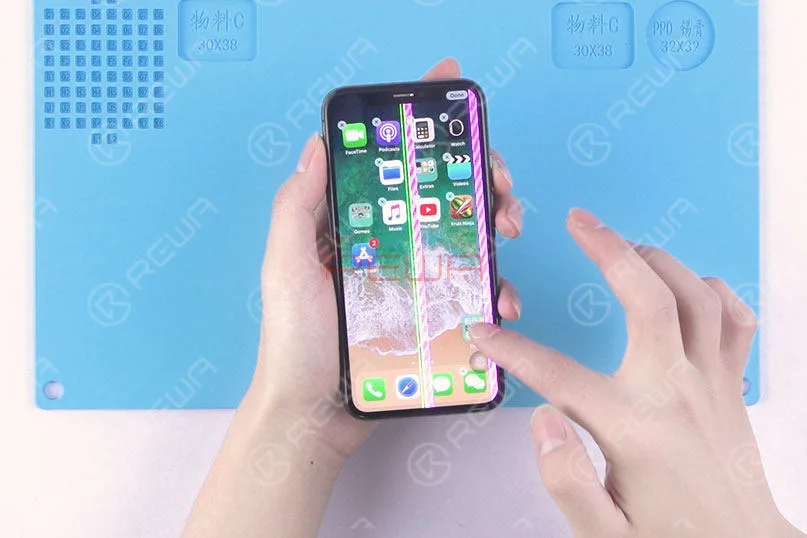
    Since the LCD panel of iPhone X Aftermarket OLED Screen and OEM Screen share the same production process, the vertical line issue due to bonding procedure can also be frequently seen with our test samples.

    Still, these imperfect screens can be screened out in subsequent quality inspection.

    Also, because of the vertical line issue, there is no brightness test in our video today.

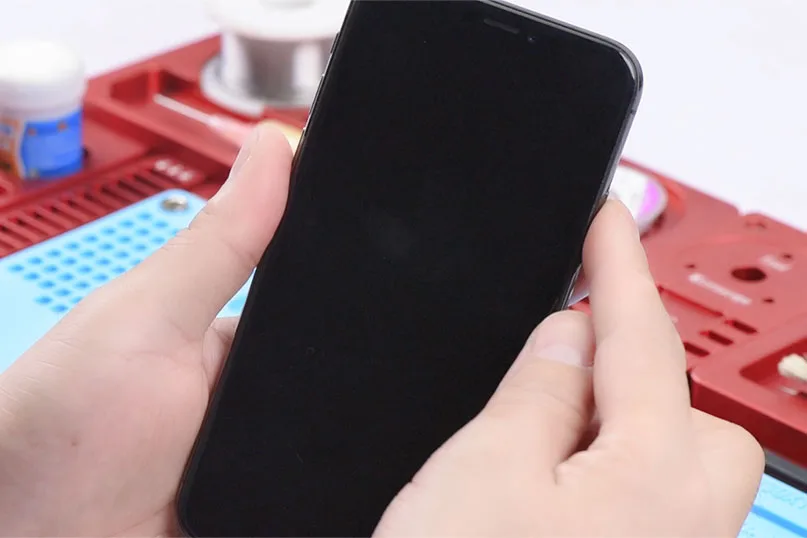
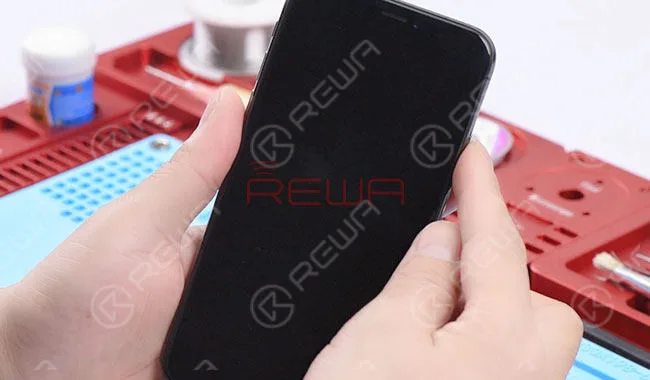
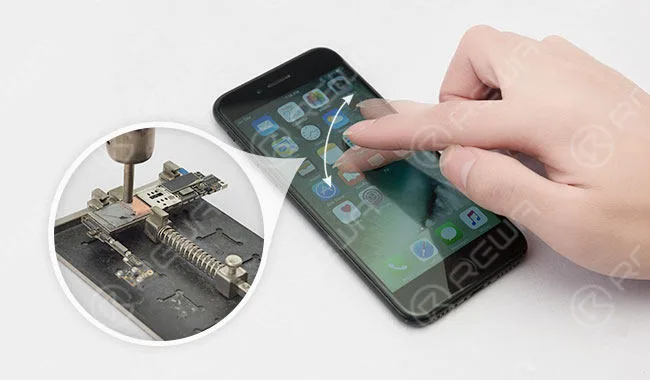
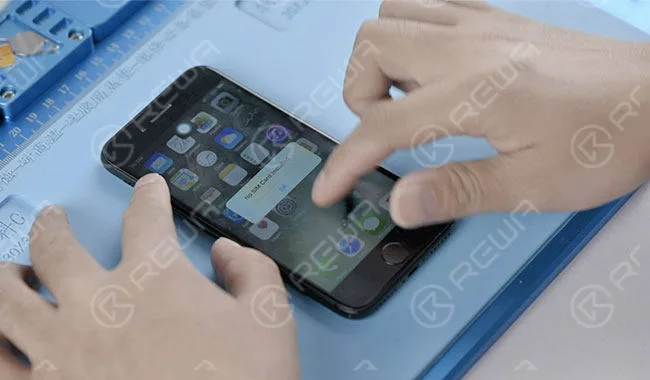
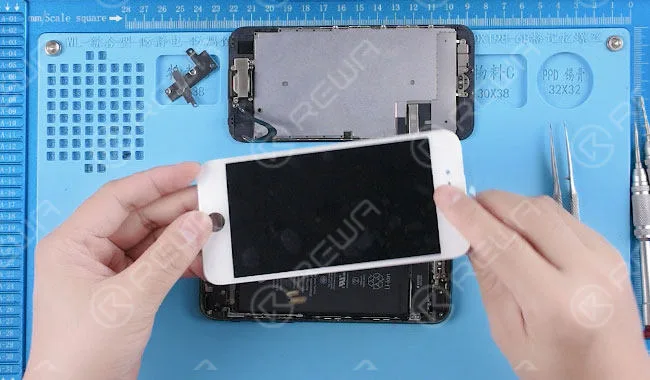
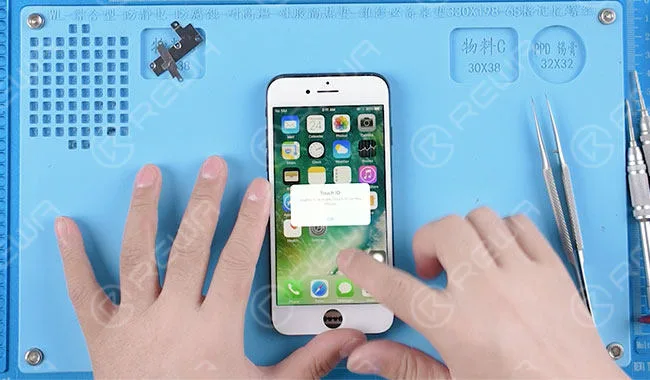
    First, run touch function test, the phone performs with normal touch function.

    Yet the screen is not running smoothly because of glass lens material.

    We believe that this will be improved when it comes to full production.
    Deep Analysis On iPhone X Aftermarket OLED Screen

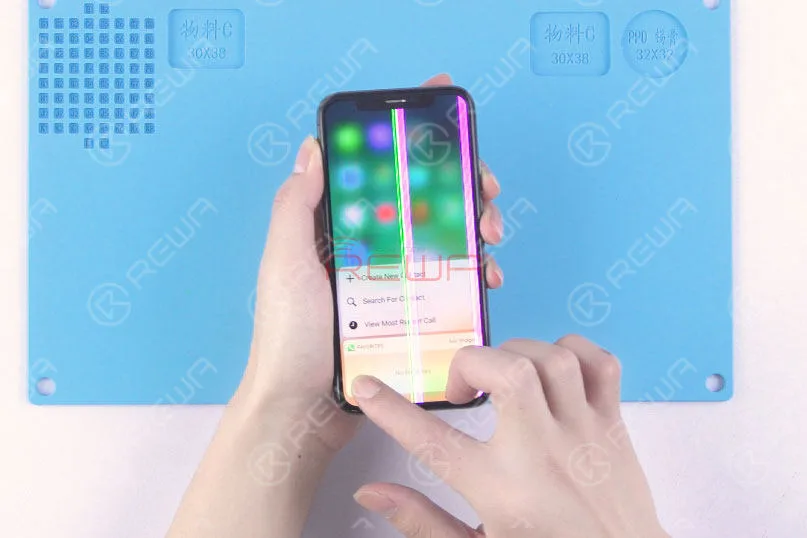
    Continue to run 3D Touch function test, the phone performs with normal 3D Touch function.
    Deep Analysis On iPhone X Aftermarket OLED Screen

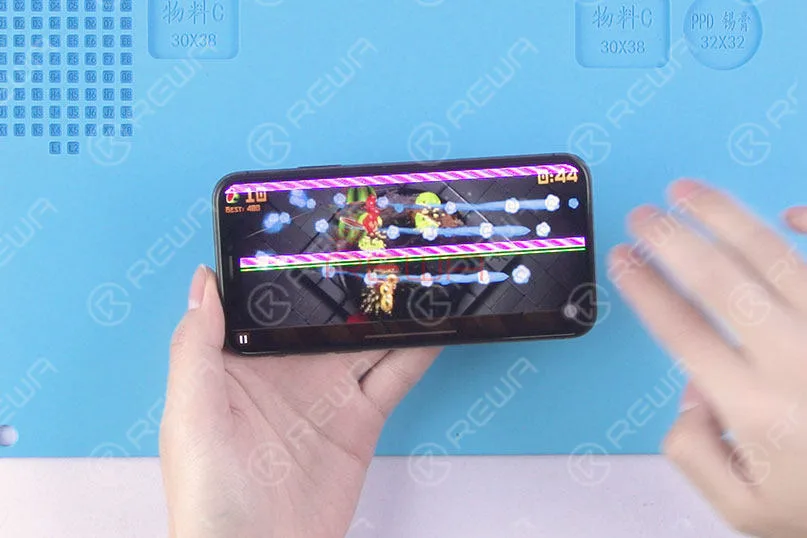
    Run the multi-touch test in game mode, the phone performs normally.
    Deep Analysis On iPhone X Aftermarket OLED Screen

    Conclusione:

    Within a few days of trying out the iPhone X with Aftermarket OLED Screen, our technicians carried out a series of tests under the condition of excluding the impact of the vertical issue.

    The Aftermarket OLED Screen of iPhone X performed well with no function problem, which has met the product standards of usage.

    Please stay tuned and we will pay close attention to the product in the future.

    For more iPhone X Aftermarket OLED Screen test details please view our Youtube video here:

    REWA cell phone repair replacement parts:
  • Consigli degli esperti per la risoluzione dei problemi dello schermo nero di iPhone 8 Plus

    Consigli degli esperti per la risoluzione dei problemi dello schermo nero di iPhone 8 Plus

    Con cosa inizierai se un iPhone 8 Plus si accende con lo schermo nero?

    Per i problemi dello schermo, la soluzione più comune è la sostituzione con un nuovo gruppo display per verificare se si tratta di un problema dello schermo o della scheda.

    Per quanto riguarda i problemi di schermo nero, possiamo anche iniziare dalla corrente di avvio.

    Eseguire prima la misurazione della corrente di boot.

    Se la corrente di avvio è normale, allora possiamo confermare che il telefono si sta accendendo senza display.

    Per quanto riguarda i problemi di visualizzazione, individua il connettore del display all'inizio.

    Post correlato: Samsung Galaxy S6 edge+ si accende con schermo nero

    Sembra piuttosto semplice? Beh, segui la nostra guida alla riparazione e potrai capirlo da solo.

    Problema

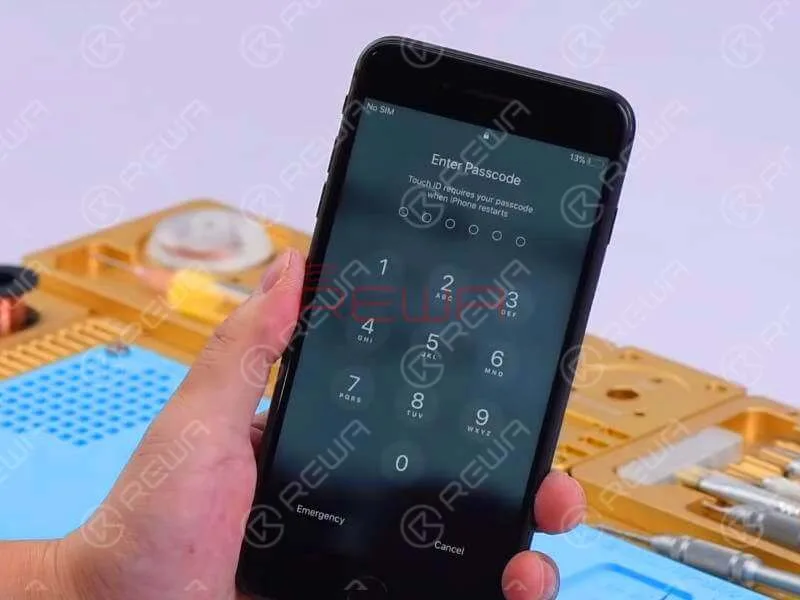
    Premi il pulsante di accensione per accendere. Il telefono non risponde.

    Smonta il telefono e scollega la batteria.

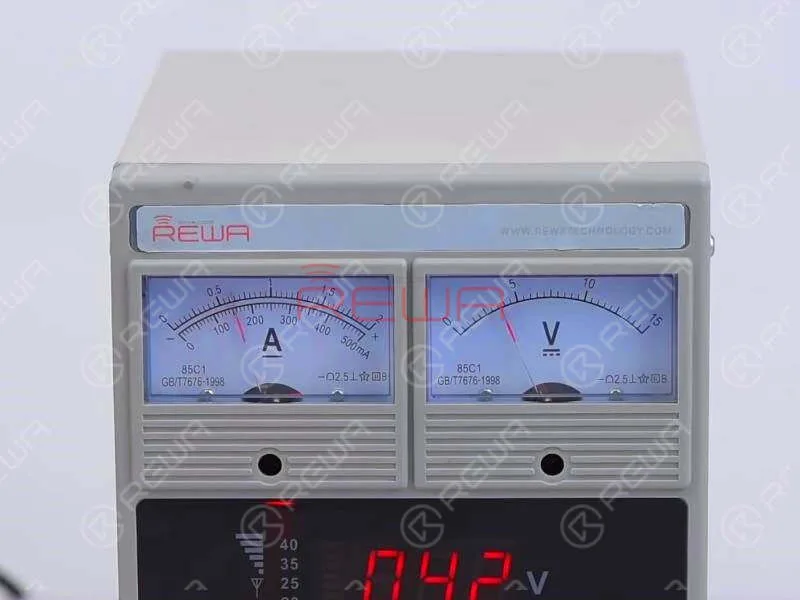
    Collega il connettore della batteria con Alimentazione CC e premi il pulsante di accensione per accendere.

    La lettura attuale sull'amperometro è normale.

    Ciò indica che il telefono si sta accendendo, ma con lo schermo nero.

    Come riparare lo schermo nero / nessun display su iPhone 8 Plus

    Diagnosi

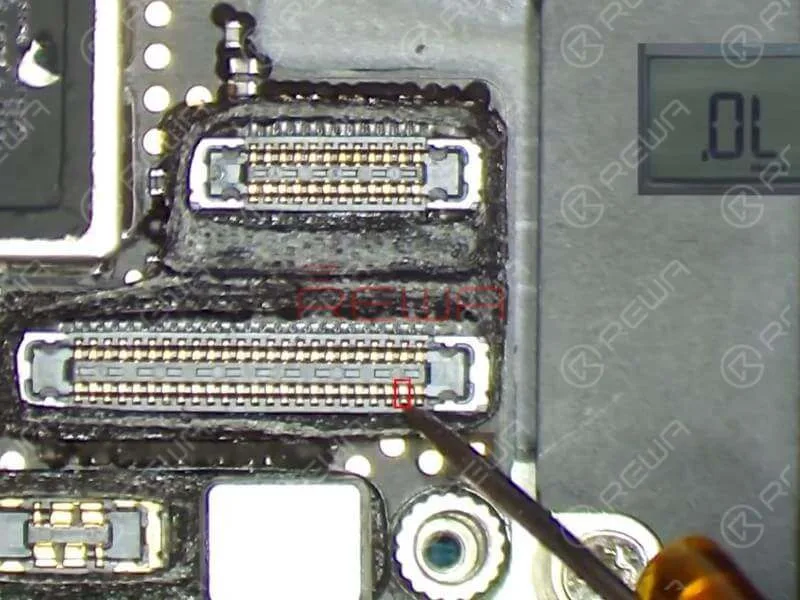
    Poiché J5700 è il connettore LCD/touchscreen della scheda madre, dobbiamo prima eseguire la misurazione in modalità diodo di J5700.

    Il valore misurato del Pin 39 e del Pin 45 su J5700 è 0. A giudicare da questo, il guasto è correlato al circuito pertinente dei due pin.

    Come riparare lo schermo nero / nessun display su iPhone 8 Plus

    Fare riferimento a Refox – il disegno di manutenzione e possiamo vedere che i due circuiti fanno parte del circuito di retroilluminazione dello schermo.

    Ora dobbiamo eseguire ulteriori misurazioni dei due circuiti. Possiamo iniziare con R5730 e R5733.

    I due sono “resistenze” a zero ohm che di solito svolgono ruoli protettivi sul circuito.

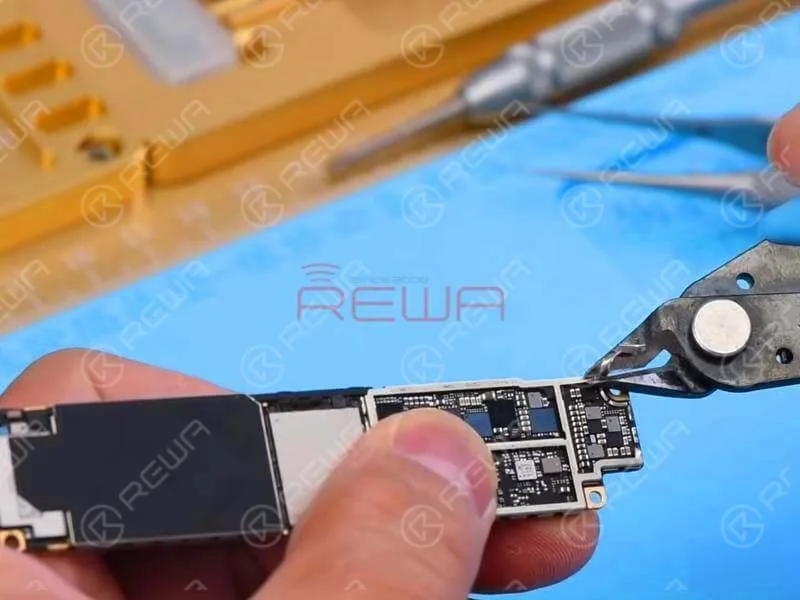
    R5730 e R5733 si trovano sotto il coperchio di schermatura.

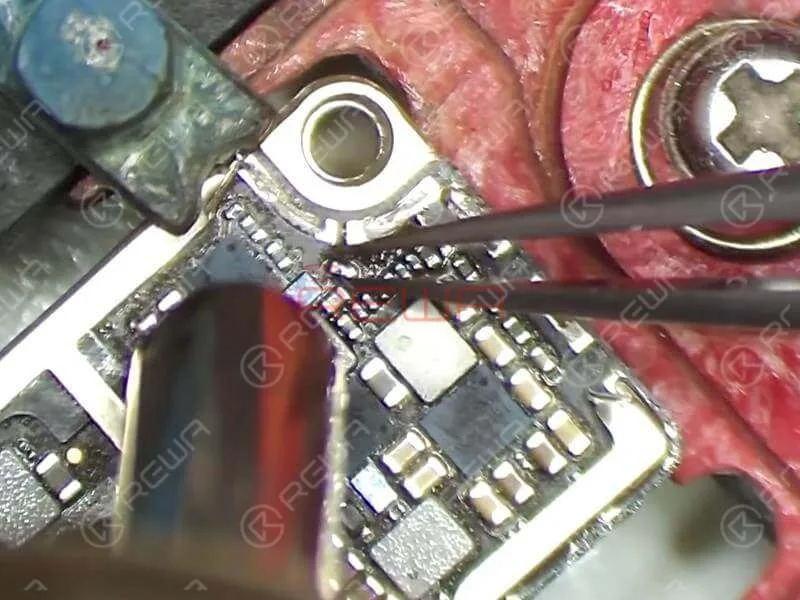
    Per un migliore funzionamento, dobbiamo prima staccare la pasta schermante e rimuovere la staffa di schermatura con una tenaglia a tagliente.

    Come riparare lo schermo nero / nessun display su iPhone 8 Plus

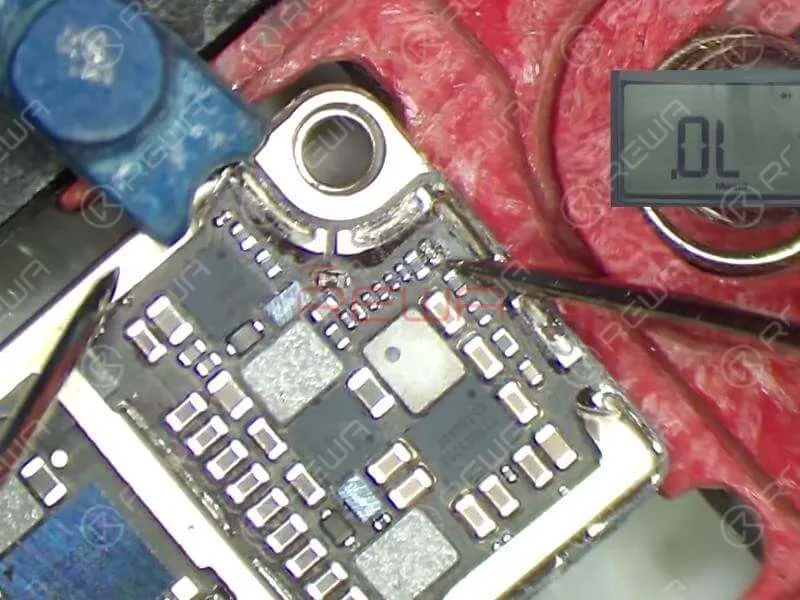
    Fissa la scheda logica al supporto per PCB ed esegui la misurazione in modalità diodo di R5733 e R5730.

    Il valore misurato del Pin 1 su R5733 è normale e non c'è alcun valore misurato del Pin 2 su R5733, il che è anomalo.

    Il valore misurato del pin 1 su R5730 è normale e non c'è alcun valore misurato del pin 2 su R5730, il che è anch'esso anomalo.

    Come riparare lo schermo nero / nessun display su iPhone 8 Plus

    A giudicare da questo, R5733 e R5730 sono stati danneggiati e dobbiamo sostituirli con nuovi resistori.

    Suggerimenti

    Siccome R5733 e R5730 sono “resistenze” da zero ohm, possiamo semplicemente sostituirle con nuove resistenze o con induttori in ferrite bead.

    Risoluzione dei problemi

    Dissalda R5733 e R5730 dalla scheda con la pistola ad aria calda.

    Applicare del flusso per pasta BGA sul pad di saldatura. Quindi applicare dello stagno a media temperatura sul pad di saldatura con il saldatore. Una volta fatto, pulire il pad di saldatura con un detergente per PCB.

    Come riparare lo schermo nero / nessun display su iPhone 8 Plus

    Quindi applica del flusso per pasta BGA sul pad di contatto e allinea i due induttori nella posizione corretta. Salda con una pistola ad aria calda.

    Una volta terminato, attendere che la scheda logica si raffreddi per 5 minuti. Quindi pulire accuratamente con un detergente per PCB.

    Riassemblaggio e test

    Monta prima la scheda madre. Poi esegui la misurazione in modalità diodo dei pin 39 e 45 su J5700.

    Il valore misurato è normale questa volta. Continuare ad agganciare il gruppo display e collegare la batteria. Premere il pulsante di accensione per accendere.

    Come riparare lo schermo nero / nessun display su iPhone 8 Plus

    Il telefono si accende con display normale. Eseguire il test delle funzioni. Tutto procede bene.

    Strumenti e parti necessarie

    Potete anche visitare Canale YouTube REWA per guardare il nostro video e imparare come risolvere il problema dello schermo nero dell'iPhone 8 Plus.

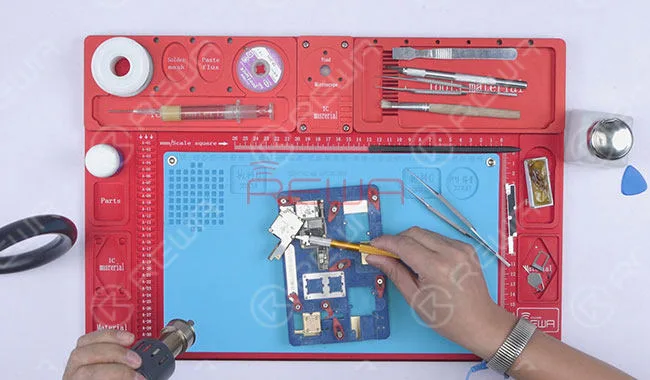
  • L'iPhone X non si accende? Riparalo con la riparazione della scheda logica

    L'iPhone X non si accende? Riparatelo con la riparazione della scheda logica

    Quando il vostro iPhone non si accende, cosa potete fare?

    Il primo passo è quello di trovare il motivo per cui l'iPhone non si accende: potrebbe esserci un problema hardware o software relativo al dispositivo.

    Ad esempio, se l'iPhone è stato danneggiato fisicamente o è caduto in acqua o per altri motivi, ci sono molte soluzioni su Internet, come la ricarica dell'iPhone, il riavvio, il riavvio duro, l'utilizzo di software per risolvere il problema... Per queste soluzioni, potete provare, ma qui vi forniremo una soluzione di alto livello e professionale per risolvere il problema dell'iPhone che non si accende.

    L'iPhone X, con il suo display di dimensioni super, la più recente tecnologia biometrica - Face ID, il vetro più resistente, la ricarica wireless e così via, ha colpito il cuore della maggioranza al momento della sua uscita nell'ottobre 2017.

    Per quanto sia perfetto, con il passare del tempo mostra dei malfunzionamenti.

    All'inizio si sono verificati malfunzionamenti dovuti alla mancata risposta al tocco, allo schermo bloccato e ad altri problemi di visualizzazione. Ultimamente, sono comparsi alcuni malfunzionamenti della scheda logica. Ad esempio, l'iPhone X non si accende, ecc.

    Se si conosce la struttura della scheda logica dell'iPhone X, si deve sapere che la scheda logica dell'iPhone X è stata piegata a metà e i due strati sono stati saldati insieme: lo strato superiore è la scheda principale e lo strato inferiore è la scheda dei segnali.

    Il che ha reso molto difficile la nostra riparazione. 

    Oggi condividiamo un caso di riparazione della scheda logica dell'iPhone X che non si accende. Vediamo qual è la parte più difficile.

    Come riparare l'iPhone X che non si accende con la riparazione della scheda logica

    Smontaggio

    Smontare l'iPhone X che non si accende. Estrarre la scheda madre a doppio strato.

    Ecco la prima difficoltà: separare la scheda madre piegata, che richiede un controllo rigoroso della temperatura.

    Una temperatura troppo elevata danneggerebbe i componenti circostanti, ma una temperatura troppo bassa non può separarli. Con pazienza e tempo, riusciamo a separare la scheda logica con successo.

    Come riparare l'iPhone X che non si accende con la riparazione della scheda logica

    Diagnosi

    Dopo aver separato la scheda logica, collegare lo strato superiore con l'alimentazione CC.

    La corrente di lettura è anormale. Pertanto, il guasto viene localizzato nello strato superiore.

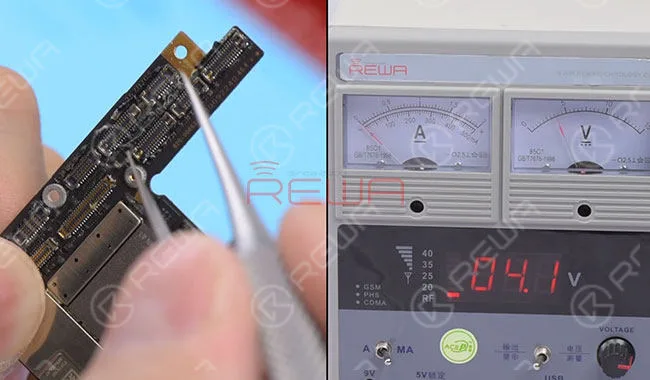
    Per continuare la diagnosi, misuriamo la tensione di alimentazione dello strato superiore con un multimetro.

    E scoprire che non c'è alcun valore di tensione su C2771 e C2770.

    Misurando con il multimetro si può confermare che l'induttore L2770 è danneggiato.

    Come riparare l'iPhone X che non si accende con la riparazione della scheda logica

    Manutenzione e test

    È quindi necessario smontare l'induttore L2770 e sostituirlo con uno nuovo.

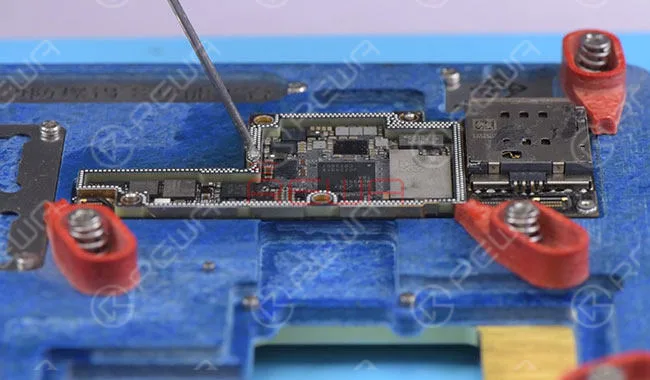
    In primo luogo, fissare lo strato superiore al supporto del PCB.

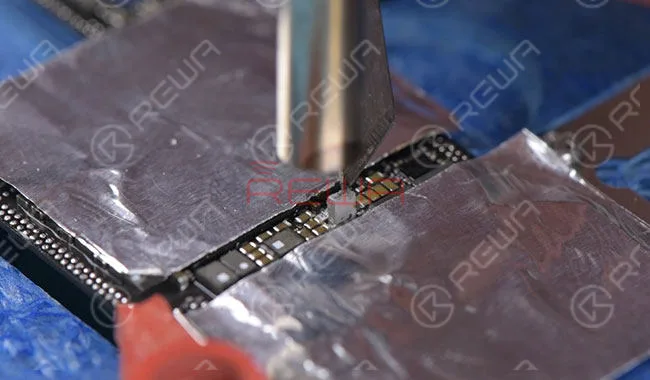
    Per proteggere i componenti intorno a L2770, applicare il nastro adesivo per alte temperature.

    Quindi risaldare con un nuovo induttore.

    Dopo il raffreddamento, misurare nuovamente il valore di corrente collegandolo all'alimentazione CC.

    Questa volta il valore di corrente misurato sull'amperometro è normale. Guasto eliminato.

    Come riparare l'iPhone X che non si accende con la riparazione della scheda logica

    Riassemblare

    Indovinate un po'? Arriva la parte più difficile della riparazione: rimuovere le lattine dai due strati separatamente.

    Trasferiamo la direzione per 5 volte e infine terminiamo il processo di rimozione dello stagno.

    Poi un'altra parte difficile: il reballaggio dello strato inferiore.

    In realtà ce l'abbiamo fatta solo al secondo tentativo.

    Alla fine, dopo aver risaldato le due schede e riassemblato il telefono, il problema dell'iPhone X che non si accende è stato risolto.

    Come riparare l'iPhone X che non si accende con la riparazione della scheda logica

    Per maggiori dettagli, consultare il video. 

    Elenco degli strumenti:

  • Risoluzione dei problemi: l'iPhone 7 non si accende

    Risoluzione dei problemi: l'iPhone 7 non si accende

    What should you do if your iPhone 7 won’t turn on after being dropped?

    The problem may be caused by a software crash or a complicated hardware issue.

    We have published an iPhone 6 won’t turn on and iPhone X won’t turn on guide video, and this time, we received an dropped iPhone 7 Plus which cannot turn on.

    The problem was finally detected as CPU being short-circuited. Here we have detailed troubleshooting procedures.

    Fix iPhone 7 Won't Turn On

    iPhone 7 won’t turn on Diagnosis

    Take apart the phone and disconnect the battery, then connect the phone with the Alimentazione CC and press the power button to power on.

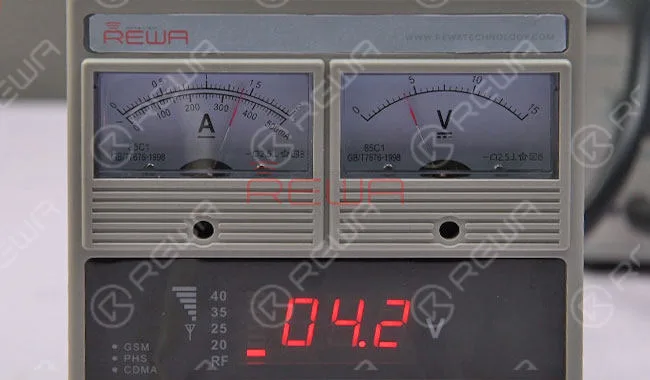
    The current reading of the ammeter jumps to 350mA and then stays still, which is abnormal and indicates that the logic board is short-circuited.

    Fix iPhone 7 Won't Turn On

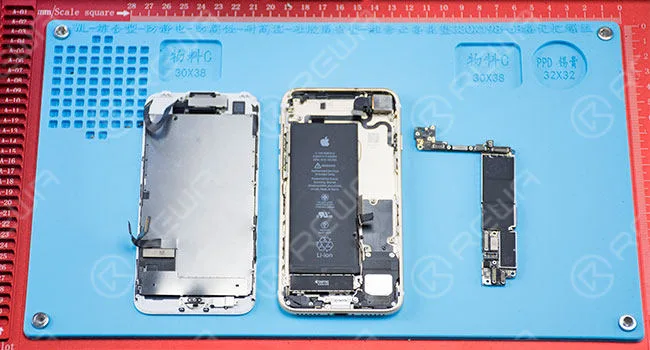
    disassemble the phone and detach the battery

    Disconnect the power supply and take out the logic board.

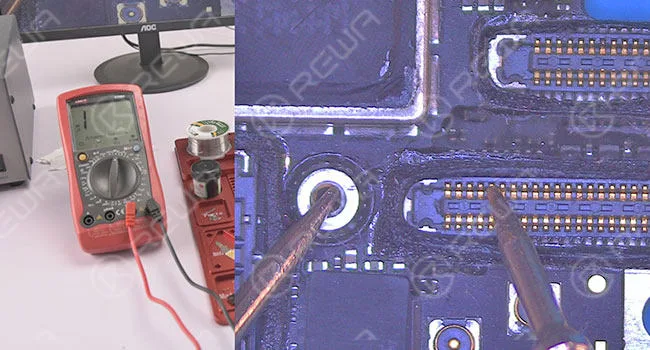
    Run diode measurements on capacitors around power IC one by one.

    All the values are normal except C1823 – It displays 0, which indicates that C1823 is short-circuited.

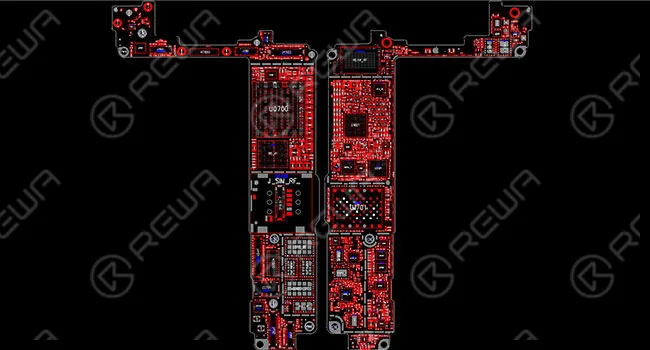
    From the schematics, we can see that C1823 is the filter capacitor of PP1V8-SDRAM, and it is directly connected to CPU SDRAM.

    Fix iPhone 7 Won't Turn On

    diode measurements on capacitors around power IC Repair

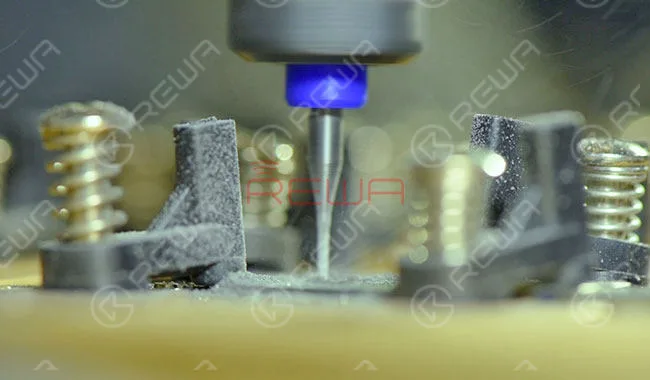
    Collegare la scheda logica al Supporto per PCB, and take down the shielding cover by heating with Hot Air Gun, then remove CPU SDRAM with CNC Chip Grinding Machine.

    After chip grinding, attach the logic board to the PCB Holder and clean it with PCB Cleaner, then remove the black adhesive around with Sculpture Knife.

    After that, apply some BGA Paste Flux to the bonding pad. 

    Align the new SDRAM to the right place(Don’t reverse the direction), and then solder with Hot Air Gun. After cooling for 5 minutes, clean thoroughly with PCB Cleaner.

    Fix iPhone 7 Won't Turn On

    CPU SDRAM chip grinding Testing

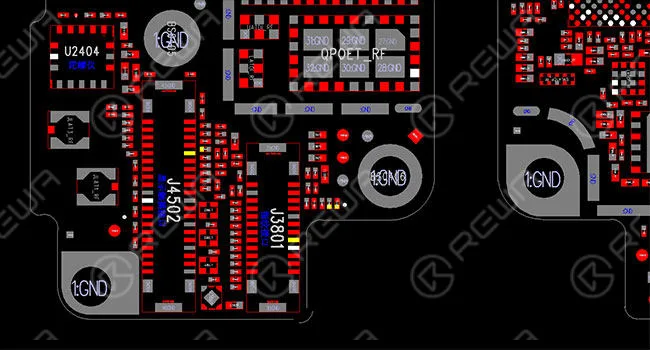
    Connect the phone with the DC Power Supply, then short Pin 13 of J4504 to the ground with the tweezer to trigger the power on the system.

    This time, the current reading on the ammeter is normal.

    Fix iPhone 7 Won't Turn On

    connect the phone with the DC Power Supply

    Get the logic board assembled and buckle the display assembly.

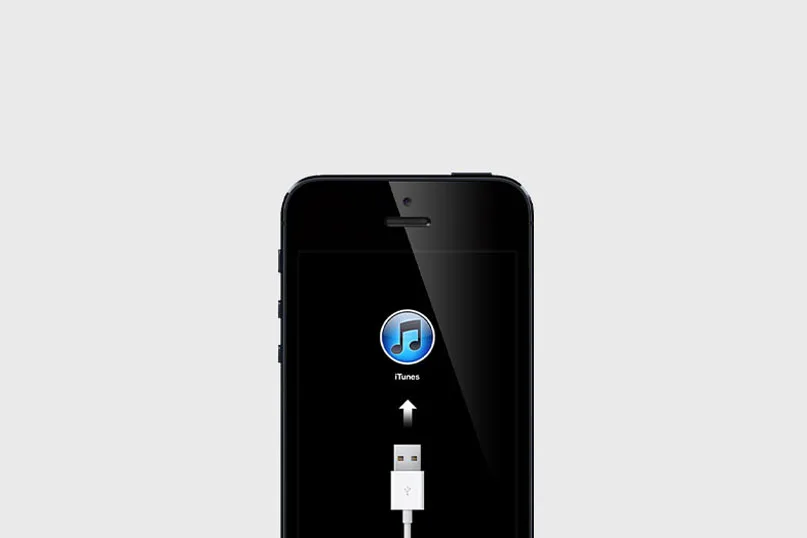
    Connect the phone to the computer, then press and hold volume down and power button to get into DFU mode. Restore the phone via iTunes.

    Once done, insert the SIM card and activate the phone.

    After testing, All the functions work normally.

    Fix iPhone 7 Won't Turn On

    current reading on the ammeter

    For more details about iPhone 7 won’t turn on repair and iPhone repair videos, please check our YouTube video.

    Need cell phone repair replacement parts or tools?

    REWA offers wholesale and retail mobile phone repair parts/tools with affordable prices for 10 years. Welcome to check our online store shop.rewa.tech.

  • Affordable iPhone 8 Back Glass Repair- Expert Tips

    Affordable iPhone 8 Back Glass Repair- Expert Tips

    Have you checked our newly released about  cracked iPhone 7 screen repair tutorial?

    It is worth to take a look. Compare to iPhone 7, iPhone 8 and iPhone X look gorgeous, but also make them vulnerable, especially the back glass.

    The fragile back glass is long reported extremely difficult to repair and may cost you more than expected due to the new design with wireless charging, embed camera and stubborn glue.

    Have no idea about how to start your repair?

    Don’t be frustrated. After the iPhone X OLED screen glass-only repair guide ,REWA here rolls out a new and quick solution for iPhone 8 and iPhone X back glass repair .

    iPhone 8 Back Glass Repair

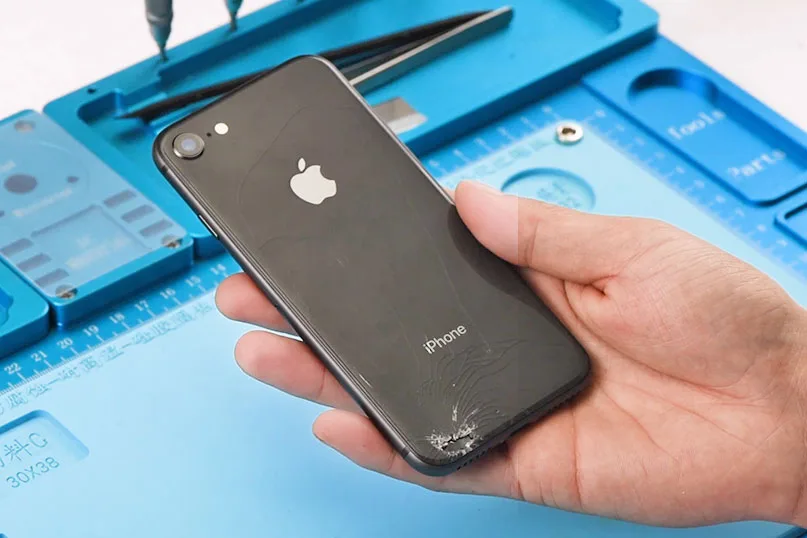
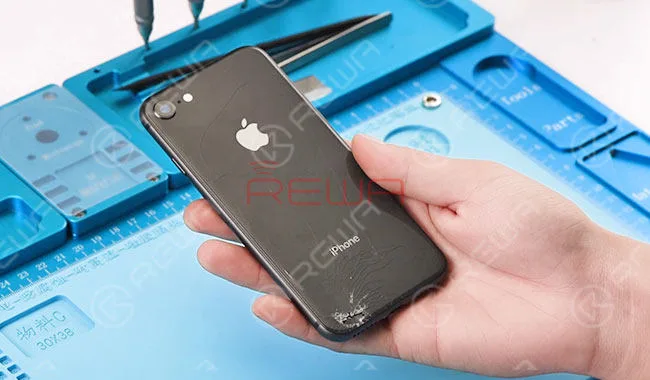
    iPhone 8 broken back glass

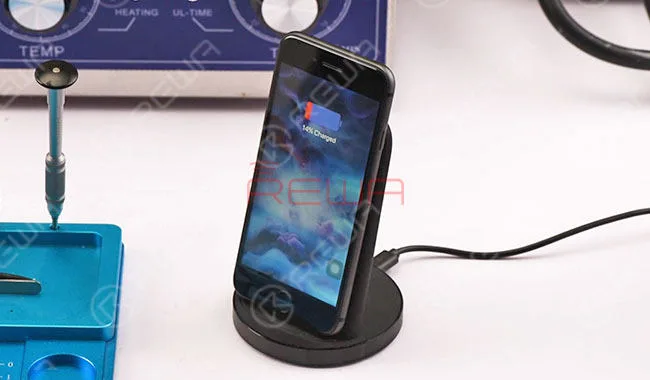
    Damaged Back Glass iPhone 8 back glass is damaged but still comes with normal wireless charging.

    iPhone 8 Back Glass Repair

    iPhone 8 wireless charging

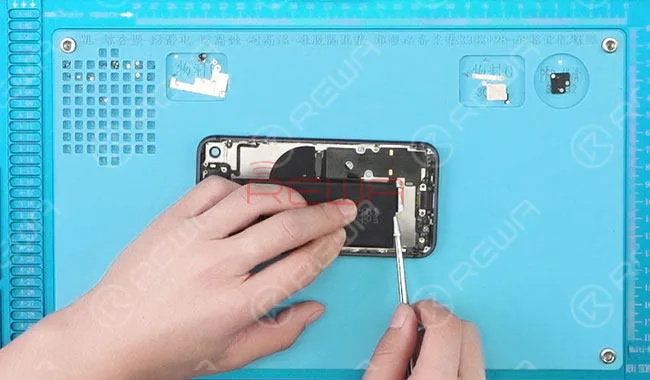
    DisassemblingTake down the display assembly.

    Remove the screws, rear camera, logic board, louder speaker and taptic engine, then take out the battery and disconnect the charging port flex cable.

    Remove the wireless charging coil by heating with Pistola ad aria calda , and disconnect the power switch volume flex cable.

    iPhone 8 Back Glass Repair

    Disassemble the iPhone 8

    Back Glass Repairing

    Pour adequate dispergator into the container of Ultrasonic Cleaner, then soak the back glass in the container and get the lid on. Set the time of the Ultrasonic Cleaner at 30m , and temperature at 60℃ .

    After 30 minutes, take out the glass back.

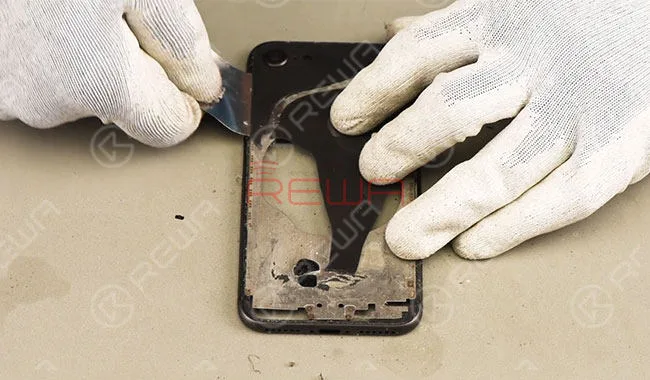
    Separate the broken back glass from the middle frame with Pry Sheet.

    In case the broken glasses hurt your hands, please clean the table and be careful during the separating process.

    iPhone 8 Back Glass Repair

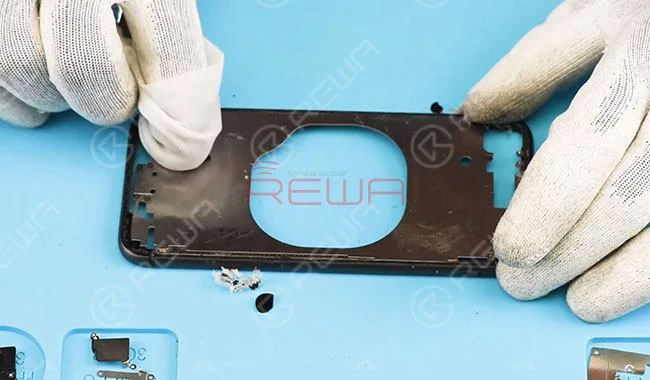
    Remove the glue residue on the middle frame with Razor Blade and clean it with N-hexane.

    So far back glass separating completed without any injuries on the sides.

    iPhone 8 Back Glass Repair

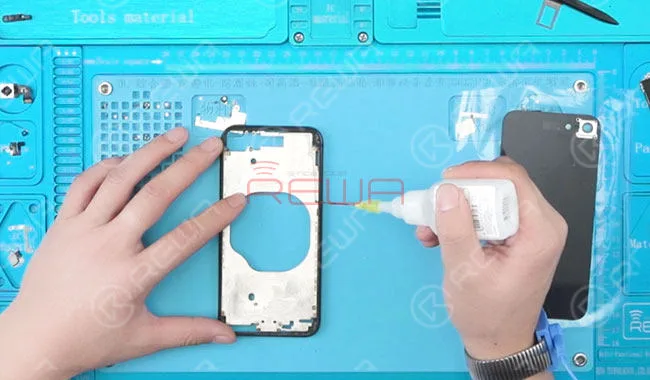
    Apply some glue to the middle frame and spread it evenly.

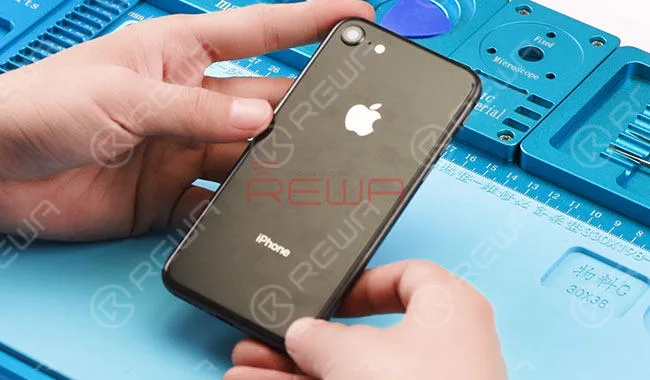
    After that, align the rear camera to the right position, then apply pressure and attach the back glass to middle frame tightly.

    Once done, clean the glue residue.

    iPhone 8 Back Glass Repair

    Apply glue on the middle frame

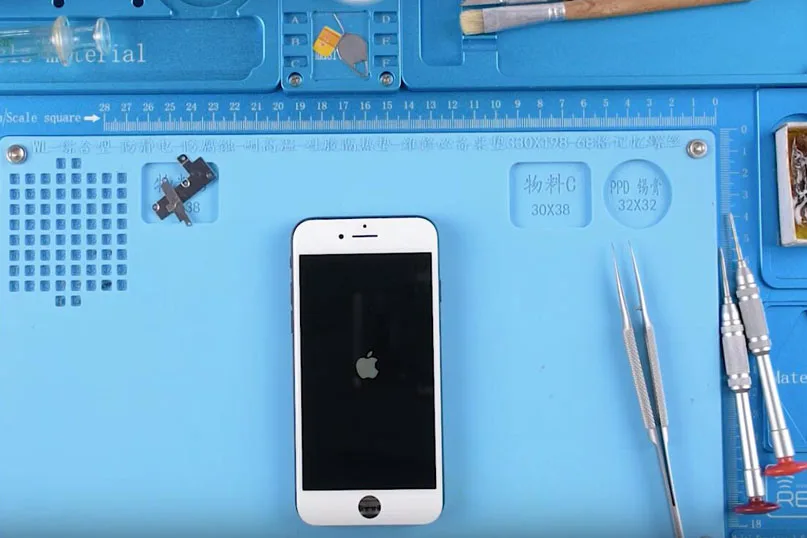
    ssemble the phone and test, and the phone runs normally with wireless charging.

    iPhone 8 Back Glass Repair

    Per maggiori dettagli su iPhone 8/X Back Glass Repair, please check our video guide.

    Now you can order Tools & Parts used in this video on our online shop.

    Any questions about these replacement parts/tools, or need assistance when placing your order, please contact us at sales@rewatechnology.com and we will help you ASAP.

  • iPhone Frozen Screen Issue – Logic Board Repair Solution

    iPhone Frozen Screen Issue – Logic Board Repair Solution

    Some users complained about the iPhone frozen issue of their iPhone 7 after dropped.

    Even reinstallation couldn’t help with the iPhone frozen problem once and for all.

    The malfunction was caused by the iPhone 7 production process, which could be fixed by maintaining audio circuits.

    REWA offers a new iPhone frozen solution regarding logic board repair!
    How to Fix The iPhone Frozen Screen Issue

    Fix The iPhone Frozen Screen Issue With Logic board Repair Solution

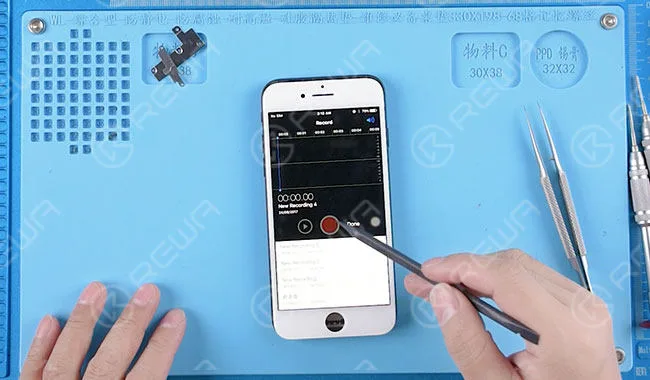
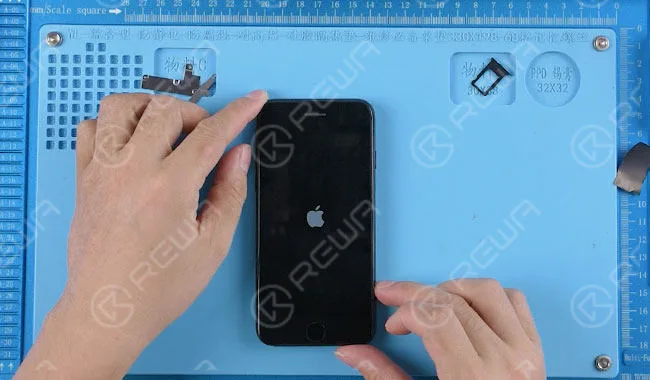
    Power on, the screen is stuck off and power button responses slowly.

    Power on, the screen is stuck off and power button responses slowly.

    Disassemble the phone, detach the display assembly. Replace with a new display assembly.
    Disassemble the phone, detach the display assembly. Replace with a new display assembly.

    Turn on the phone and test. The screen is still stuck off.

    Turn on the phone and test. The screen is still stuck off.

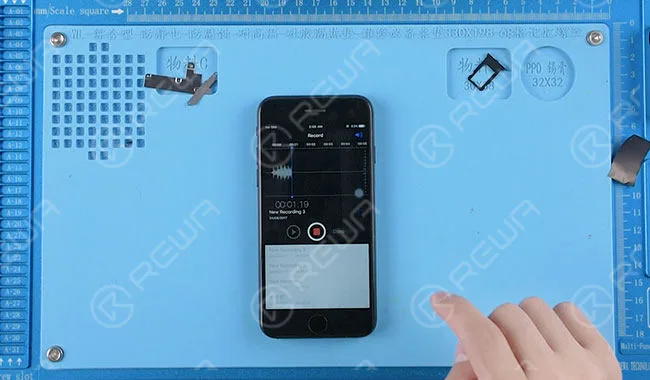
    Enter into record mode, the record icon is in nonfunction state.

    Screen replacing doesn’t help on the stuck issue, we can tell that there is a problem with the audio circuit. Move on to logic board repairing.

    Enter into record mode, the record icon is in nonfunction state. Screen replacing doesn’t help on the stuck issue, we can tell that there is a problem with the audio circuit. Move on to logic board repairing.

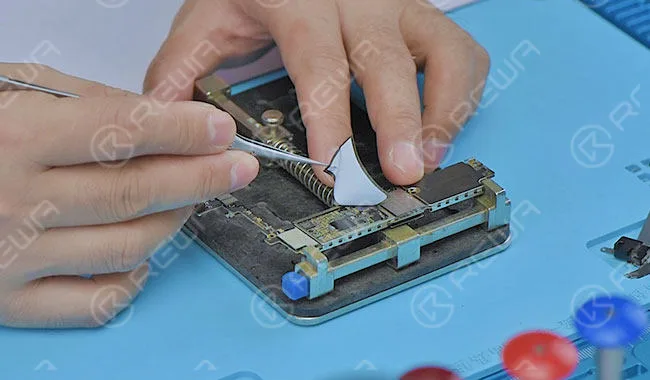
    Take out the logic board and tear off the shield sticker.

    Take out the logic board and tear off the shield sticker.

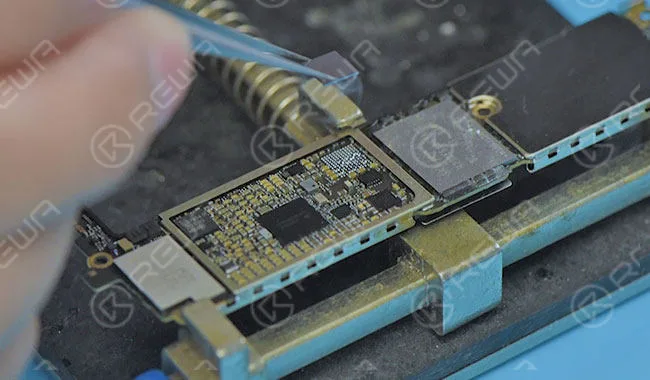
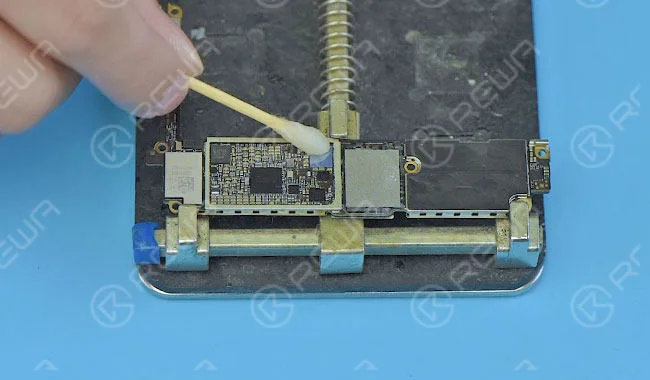
    Apply some BGA paste flux around the audio IC and blow it with hot air gun at 300 degrees.

    Then take down the audio IC.
    Apply some BGA paste flux around the audio IC and blow it with hot air gun at 300 degrees. Then take down the audio IC.

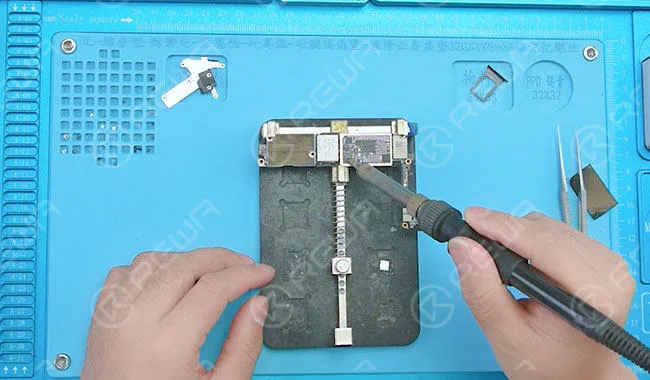
    Dip some rosin with soldering iron to clean the tins.

    Then dip some rosin with Goot wick for secondary cleaning. After that, clean again with PCB cleaner.
    Dip some rosin with soldering iron to clean the tins. Then dip some rosin with Goot wick for secondary cleaning. After that, clean again with PCB cleaner.

    Test resistance value of pin C12 (U3101 audio IC). The resistance value is swinging.
    Test resistance value of pin C12 (U3101 audio IC). The resistance value is swinging.

    Prendi il disegno di manutenzione come riferimento.

    Locate the signal of pin C12: 12S-AP-TO-CODEC-MCLK. The signal was connected with CPU via resistor R1103.
    Roll out the maintenance drawing for reference. Locate the signal of pin C12: 12S-AP-TO-CODEC-MCLK. The signal was connected with CPU via resistor R1103.

    Scrape the insulation varnish off the copper wire connecting pin C12 and resistor R1103. Solder tins and then solder the 0.02mm copper wire.
    Scrape the insulation varnish off the copper wire connecting pin C12 and resistor R1103. Solder tins and then solder the 0.02mm copper wire.

    Apply some UV curable solder mast to the soldered copper wire and put the logic board under the UV dryer lamp for 15 minutes.
    Apply some UV curable solder mast to the soldered copper wire and put the logic board under the UV dryer lamp for 15 minutes.

    Reball the audio IC with BGA reballing stencil.

    Reball the audio IC with BGA reballing stencil.

    Apply some BGA paste flux to the bonding pad.

    Then align the audio IC to the right place and blow it with a hot air gun at 280 degrees.
    Apply some BGA paste flux to the bonding pad. Then align the audio IC to the right place and blow it with a hot air gun at 280 degrees.

    Once the logic board is cooling enough, clean it with PCB cleaner.

    Once the logic board is cooling enough, clean it with PCB cleaner.

    Assemble the phone and test.

    Assemble the phone and test.

    Touch function and record function back to normal.

    Touch function and record function back to normal.

    For more details on iPhone Frozen Screen Repair guide.

  • Decodificare i codici di errore dell'iPhone: Capire il loro significato

    Decodificare i codici di errore dell'iPhone: Capire il loro significato

    Incontrare codici di errore sull'iPhone o su iTunes durante aggiornamenti, ripristini o downgrade può essere frustrante. Questi codici compaiono inaspettatamente, indicando che qualcosa è andato storto. Con numerosi codici di errore, spesso è difficile individuare rapidamente il vero problema.

    Codici di errore comuni di iPhone e iTunes:
    • 1, 3, 10, 11, 12, 13, 14, 16, 20, 21, 23, 26, 27, 28, 29, 34, 35, 36, 37, 40, 1000, 1002, 1004, 1011, 1012, 1014, 1667 o 1669

    Problemi hardware: Errori hardware sconosciuti sull'iPhone o sul computer possono interrompere la connessione, causando errori come 2, 4, 6, 9, 1000, 1611, 9006, 9807 o 9844.
    Problemi con il software di sicurezza: Software di sicurezza di terze parti, non di Apple, possono interferire con iTunes, causando gli errori 13, 14, 1600, 1601, 1602, 1603, 1604, 1611, 1643-1650, 2000, 2001, 2002, 2005, 2006, 2009, 4005, 4013, 4014, 4016.

    Problemi di connessione USB: Errori come 17, 1004, 1013, 1638, 3014, 3194, 3000, 3002, 3004, 3013, 3014, 3015, 3194 o 3200 segnalano spesso un problema di connessione USB, spesso dovuto a un cavo allentato o a un hub USB difettoso.

    Problemi di rete e di comunicazione: I problemi di comunicazione tra iTunes e il server di aggiornamento di Apple possono causare errori come 9, 4005, 4013, 4014. Possono verificarsi durante i download del firmware o le connessioni al server per i ripristini.

    Altri codici di errore degni di nota:

    • Errore 11/16: file di libreria incompatibili.
    • Errore 53: Test di sicurezza fallito; rilevati componenti non ufficiali.
    • Errore 54: file bloccato sul computer o sul dispositivo iOS.
    • Errore 1015: Problemi di software obsoleto o beta (ad esempio, software jailbroken).

    Ulteriori errori legati al jailbreak:

    • 1600, 1601, 1602, 1603, 1604, 1611: Problemi del dispositivo jailbroken.
    • Errore 1671: iTunes sta scaricando il software necessario.
    • 4014, 4016, 3194, 3004, 3194: Nessuna risposta dal server.

    Per trovare soluzioni a questi e altri errori, visitate il nostro FORUM DOMANDA. Semplificate il processo di risoluzione dei problemi e rendete più fluida la vostra esperienza con l'iPhone!

  • 6 consigli essenziali per migliorare la sicurezza dell'iPhone

    6 consigli essenziali per migliorare la sicurezza dell'iPhone

    essential tips enhancing iphone security to increase your

    It is not a surprising thing that ordinary people, like most of us, prefer convenience over security. Especially when it comes to our daily used iPhones.

    Sure, we are not celebrities who have lots of things to hide from the public.

    But still, there is a risk that someday someone might want access to other people’s digital life.

    Thieves, for example, can be an animated example to violate the privacy and security of ordinary people by breaking in their iPhone.

    So, what can we do to avoid the violation of iPhone security?

    Here are some REWA tips to help to increase the iPhone security!

    Passcode & Touch ID

    The first but also most important security setting to enable is the passcode.

    If you already have one, then try to improve it with a 6-digit or alphanumeric code.

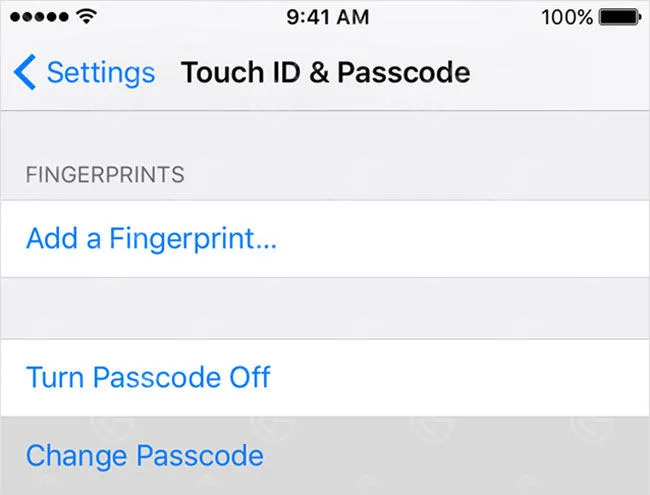
    Vai a Settings>Touch ID & Passcode, choose Change Passcode. (First, you’ll have to enter in your current one.)

    Then tap Passcode Options and choose Custom Alphanumeric Code to set your new, more complex passcode.

    essential tips enhancing iphone security

    As for touch ID, some users might set up Touch ID so that they can unlock the iPhone quickly and easily using their fingerprint.

    Yet the touch ID also adds a layer of iPhone security by allowing users to use a fingerprint scan in lieu of typing in their passcode.

    Simply go to Settings and tap on Touch ID & Passcode to set it up.

    Home Screen Features

    essential tips enhancing iphone security 2

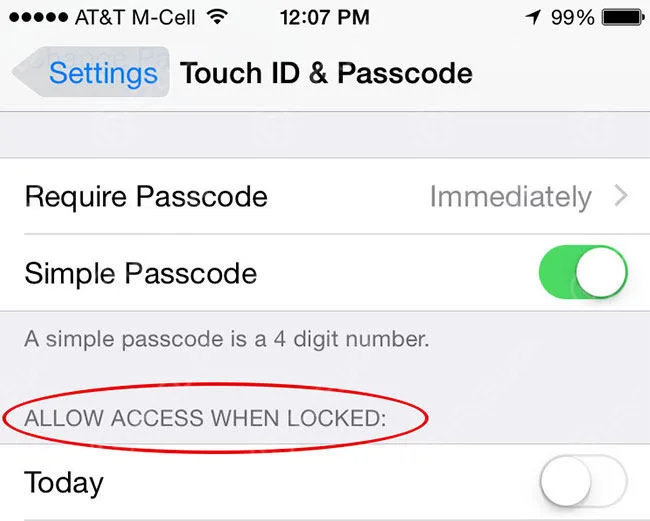
    One more assignment with Touch ID & Passcode. Go to Impostazioni > Touch ID e codice, and scroll down to see your lock screen access.

    Items here can truly reveal a lot of things and the fewer that are on, the better.

    Turn off as many features as you’d like under the Allow Access When Locked section.

    Once turned off, you won’t be able to access these features until you unlock your iPhone.Location Protection

    essential tips enhancing iphone security 3

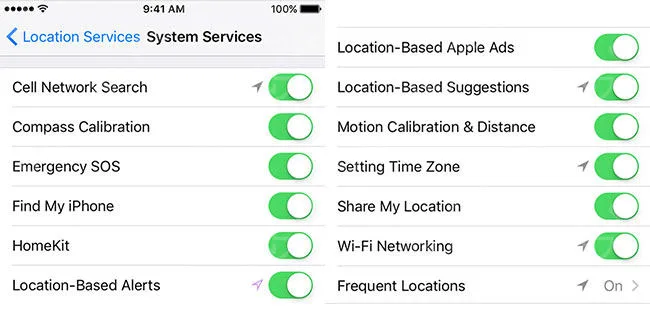
    Your iPhone can track you wherever you go – Go to Settings>Privacy>Location Services>System Services and figure out which of Apple’s system services are tracking your location.

    Disable the ones you don’t use. And for senior privacy purpose, you can also turn the feature off in Settings>Privacy>Location Services>System Services>Frequent Locations.Control Center

    Control Center can be really convenient for your operation with unlocking.

    But it also lets a thief turn on Airplane Mode, disable the GPS as well as cellular and WiFi.

    In this way, the iPhone they have just stole cannot be tracked.

    Vai a Settings and select Control Center. From there, disable Access on Lock Screen.

    Erase data

    Con il Touch ID & Passcode category, there is a built-in security setting many people don’t know.

    At the bottom of the Settings>Touch ID & Passcode screen, you’ll find the Erase Data toggle. Enable it and all data on your iPhone will be erased after 10 failed passcode attempts.

    Well, don’t be anxious, back up through iCloud and you should be able to retrieve most of it later on.

    Two-Factor Authentication

    For iPhone security layer, you have a passcode, and you have touch id.

    The sad thing is that Apple doesn’t allow you to use both passcode and Touch ID for added iPhone security. That’s when we put up with two-factor authentication.

    Which means that when you enter your Apple ID and password for the first time on a new device, there are two steps waiting for you.

    Enter your regular password at the beginning.

    Then you will have to verify your identity with a six-digit verification code using one of your other devices. You can manage this on your Apple ID account page.

    Of course, there are other iPhone security settings waiting for us to dig out.

    Do you have any iPhone security suggestions to share? Please leave comments below.

  • Migliorare la durata della batteria del iPhone in standby: consigli definitivi per professionisti

    Migliorare la durata della batteria del iPhone in standby: consigli definitivi per professionisti

    improve iphone standby time ultimate tips professionals

    Tempo in Standby dell'iPhone si riferisce all'accumulo di tutto il tempo in cui è acceso dall'ultima carica completa.

    Sia che l'iPhone sia attivamente in uso, funzionante con lo schermo spento o in standby, questo tempo viene conteggiato nella categoria di standby.

    In generale, l'autonomia in standby dell'iPhone è calcolata in base alla capacità della batteria rispetto al consumo del sistema dal suo ultimo ciclo di carica completo.

    Ciò significa anche che a parità di capacità della batteria, minore è il consumo energetico, maggiore sarà il tempo di standby. E viceversa.

    Ecco alcuni consigli REWA per migliorare l'autonomia in standby dell'iPhone.

    Suggerimento 1 Smettila di chiudere le app

    Il Genius dell'Apple Store, Scotty Loveless, spiega che quando chiudi un'app, la rimuovi dalla RAM. Pensi di aver fatto la cosa giusta, ma non è così.

    La prossima volta che apri nuovamente la stessa app, l'iPhone dovrà caricarla nuovamente in memoria. “Tutto questo caricamento e scaricamento mette più stress sul tuo dispositivo che lasciarlo tranquillo”, scrive.

    Il fatto è che le app “in esecuzione” in background di solito non sono realmente in esecuzione, sono bloccate, in attesa che tu le avvii di nuovo.

    Tuttavia, ci sono anche eccezioni.

    Una volta abilitato l'aggiornamento in background delle app, alcune app progettate per eseguire operazioni in background, come le app di navigazione o di posta elettronica, continueranno a funzionare in background.

    Per risolvere efficacemente il problema delle app, puoi disattivare le notifiche, il servizio di localizzazione e il refresh in background per impedire alle applicazioni di consumare la batteria in background.

    Suggerimento 2 Attiva la modalità di risparmio energetico

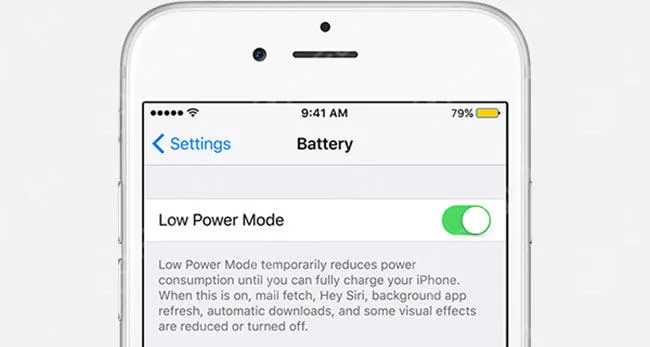
    La modalità a basso consumo serve a ridurre il fabbisogno energetico complessivo e fa durare la batteria più a lungo.

    Apple afferma persino che la modalità a basso consumo ti permetterà di guadagnare tre ore extra di autonomia dalla batteria del tuo iPhone.

    improve iphone standby time ultimate tips professionals

    Di seguito è riportato ciò che la ”documentazione Apple sulla modalità a basso consumo” scrive riguardo a questo argomento.

    La modalità a basso consumo riduce o influisce su queste funzionalità: Recupera email “Ehi Siri” Aggiornamento in background delle app Download automatici Alcuni effetti visivi Blocco automatico (impostazione predefinita a 30 secondi)

    Suggerimento 3 Controlla lo stato della batteria

    Se la batteria dell'iPhone è in stato normale e l'alimentazione dell'iPhone non è semplicemente sufficiente, il problema può essere risolto con un pacco batteria esterno o una cover di protezione della batteria.

    Oppure il problema potrebbe essere che la batteria dell'iPhone sta arrivando alla fine della sua vita utile.

    Un modo rapido per verificare se c'è davvero un problema con la batteria del tuo iPhone è andare su Impostazioni > Generali > Batteria e attendere il caricamento del rapporto sull'utilizzo della batteria.

    Il tempo di utilizzo e il tempo di standby possono indicare se c'è un problema di scarica della batteria. Se qualcosa va storto, beh, basta riparare o sostituire la batteria con una nuova.

    Suggerimento 4 Attiva la modalità aereo quando necessario

    Una delle maggiori cause di scaricamento della batteria è l'antenna. Poiché è costantemente alla ricerca di reti cellulari e Wi-Fi nelle vicinanze.

    Se non c'è necessità di accedere ai dati, effettuare o ricevere chiamate, o aprire il GPS, allora basta mettere il telefono in modalità aereo e interrompere ogni uso dell'antenna dell'iPhone.

    Inoltre, la connessione Wi-Fi può funzionare anche con la modalità aereo.

    Suggerimento 5 Altre impostazioni

    Ecco altre impostazioni per l'iPhone per risparmiare la durata della batteria in standby.

    • Riduci la luminosità dello schermo
    • 2. Disattiva download automatici, iCloud e fuso orario automatico
    • 3. Disabilita Bluetooth e Wi-Fi
    • 4. Disattiva AirDrop, Monitoraggio Attività, Hey Siri e Spotlight
    • 5. Impostare il blocco automatico
    • 6. Disattiva 3G, 4G
    • 7. Abbassare il volume
    • 8. Smesso di vibrare
    • 9. Smorza gli effetti visivi
    • 10. Interrompi le notifiche push e rimuovi account email multipli.
  • Strumenti essenziali per i negozi di riparazione di iPhone professionali

    Strumenti essenziali per i negozi di riparazione di iPhone professionali

    So you want to start an iPhone repair business?

    Whether you repair phones locally, online, for friends, family, or for profit, there are some essential tools you need for the job.

    Here are some essential tools that REWA highly recommends.

    Disassembling Tools

    essential tools professional iphone repair shops

    Cacciavite Set: Screwdrivers are of many types.

    Mainly used for iPhone repairs are listed as 0.8mm pentagon, 1.5mm Phillips screwdriver, 2.5mm cross-shaped medium plate screwdriver, 2.5mm medium plate socket screwdriver, and 0.6mm Y tri-point screwdriver.

    Pinzette: Tools for holding and manipulating small and delicate components.

    Pinze per apertura LCD: This ingenious tool makes quick work for phone dismantling.

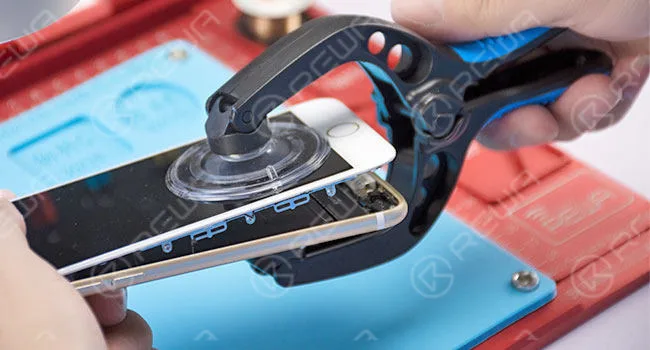
    Ventosa: To assure the safety of the touch screen when dismantling the phone, a professional vacuum suction cup with extra strength is needed.

    Barra di plastica: Mainly used to pry up flex cables when dismantling the phone.

    Screwdriver Magnetizer/Demagnetizer: Easily magnetize or demagnetize screwdrivers.

    Screw Memory Board: Organizes and magnetically secures all your screws while you work on the device.

    Coltello da scultura: Used to pry up chips and scrape off glue residue.

    Brush: Used to remove and clean any dirt or dust inside the phone or on the PCB.

    Repairing Materials

    essential tools professional iphone repair shops 2

    Rosin: High-purity rosin soldering flux for soldering work.

    Stoppino per saldatura: a braided copper wire helps to remove solder from circuit boards and other electrical components.

    UV-Curable Solder Mask: Used in electronic components insulation and welding protection.

    Filo di saldatura: A solder wire is used for soldering components.

    Solder Paste: Used for the soldering process.

    Jumper Wire: It is a copper wire that is used for making jumpers from one point to another if a track is open (broken).

    Aluminum Foil Paster: Used for heat protection when removing chips.

    PCB Cleaner: Used for PCB cleaning.

    BGA Paste Flux: It is used for heating and removal of ICs. It is applied on the edges of the IC when heating and removing them.

    Miscellaneous Tools

    essential tools professional iphone repair shops 3

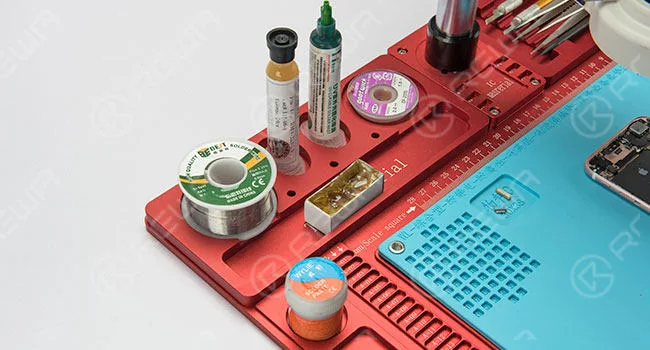
    Maintenance Platform: One integrated aluminum alloy pad maintenance platform with suppliers and tools placing slots for mobile phone repair. Combined with microscope fixed base.

    Pistola ad aria calda: Used for heating and replacing ICs (Chips) on the logic board. It is also used for removing or mounting soldered parts and components on the PCB.

    Saldatore: A soldering iron is used for soldering and de-soldering the parts and components that are soldered on the PCB. It is also used for making jumpers i.e. bridging broken tracks.

    Supporto per PCB: While working on a PCB for soldering, you will need a PCB holder so that the PCB does not move.

    Handheld Magnifier: It is necessary to see all the minute components and to view the PCB.

    DC Power Supply For Mobile Phone Repair Test: It is used to supply power for logic board repairing and booting tests.

    Multimetro digitale: A multimeter is used for checking and testing various spare parts and components. It is also used to check broken tracks on the PCB.

    BGA Reballing Kit: Used for chip reballing process.

    Taglierina: Used for shield plate removal.

    Lampada UV per essiccazione: Used to solidify UV curable solder mask.

    Professional Equipment

    essential tools professional iphone repair shops 4

    64 Bit Nand Flash Memory Chip Programmer

    Used for iPhone & iPad chip reprogramming and storage upgrading. Fix iTunes errors 9, 14, 4005 (for iPhone 5s/6/6 Plus/iPad 5/ipad 6/mini2/mini 3/mini4).

    PCIE Nand Flash Memory Chip Programmer

    Used for iPhone & iPad chip reprogramming and storage upgrading. Fix iTunes errors 9, 14, and 4005 (for iPhone 6s/6s Plus/SE/ iPad Pro/7/7+).

    CNC Chip Grinding Machine

    With the CNC chip grinding machine, iPhone & iPad chip removal can be safe and quick without damaging the logic board and nearby chips.

    And more…

    Stay tuned for more publications to help you along your journey.

  • Suggerimenti per prolungare la durata limitata dell'iPhone

    Suggerimenti per prolungare la durata limitata dell'iPhone

    tips prolong your limited iphone lifespan android vs


    Scegliere tra iPhone e Android: Un dilemma per gli utenti

    Rimanere aggiornati sui progetti di prodotti elettronici e sulle novità tecnologiche è fondamentale per il settore delle riparazioni.

    Il mondo si sta evolvendo rapidamente, soprattutto il panorama elettronico, con la serie iPhone di Apple che domina una quota di mercato significativa.

    Tuttavia, la rivalità tra iPhone e Android è stata la parola d'ordine della città tecnologica negli ultimi dieci anni.

    Da che parte stanno i consumatori? Gli utenti Android hanno a disposizione una vasta gamma di dispositivi a vari livelli di prezzo, che offrono funzionalità complete a prezzi accessibili.

    D'altra parte, gli utenti di iPhone sono attratti dall'esperienza di qualità di Apple, dalla garanzia di aggiornamenti software, dalla sicurezza e dall'ambiente user-friendly.

    Ma che dire della durata di vita di un iPhone perfettamente funzionante? Secondo Apple, gli iPhone durano circa tre anni con il primo proprietario.

    Nonostante gli aggiornamenti annuali di Apple, i dispositivi più vecchi potrebbero faticare a sostenere il peso aggiuntivo delle nuove funzioni. Come possono gli utenti prolungare la durata di vita del loro iPhone oltre i tre anni?

    Consigli REWA per prolungare la durata dell'iPhone:

    1. Gestire l'archiviazione dei dati:

      • Archiviare i file di grandi dimensioni su una scheda di memoria rimovibile o eseguire il backup dei file più vecchi all'esterno.
      • Cancellare regolarmente i file in cache in eccesso.
      • Mantenete sul telefono solo le applicazioni utilizzate di frequente per gestire in modo efficiente l'archiviazione dei dati.
    2. Cura della batteria:

      • Gli iPhone perdono circa 20% di capacità della batteria dopo 500 cicli di carica.
      • Tenetevi informati sui segnali che indicano la necessità di una nuova batteria.
      • Per batterie per iPhone aftermarket a prezzi convenienti, contattare REWA per assistenza.

    In un mondo di aggiornamenti costanti, questi semplici consigli possono aiutare gli utenti a sfruttare al meglio i loro iPhone, assicurando che funzionino senza problemi e che durino oltre i tre anni di vita tipici.

  • Come riparare il touch screen dell'iPhone 7 che non funziona

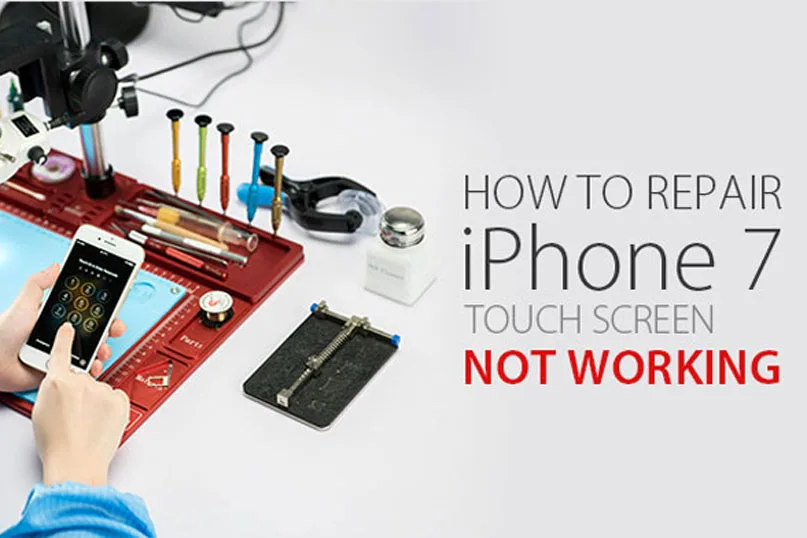
    Come riparare il touch screen dell'iPhone 7 che non funziona

    Gli utenti di iPhone potrebbero aver vissuto un momento così frustrante: lo schermo dell'iPhone si blocca improvvisamente, non importa quanto forte lo tocchino o quante volte lo riavviino, semplicemente non dà alcuna risposta.

    E sappiamo tutti che un telefono con lo schermo bloccato non vale più di un mattone: non ci puoi fare niente.

    Quindi, cosa fanno di solito i centri di riparazione con il problema del touch screen dell'iPhone 7 che non funziona?

    Innanzitutto, pulisci lo schermo. In secondo luogo, prova a riavviare forzatamente l'iPhone 7.

    Se il problema persiste, prova a ripristinare l'iPhone da un backup.

    Non funziona ancora? Il passaggio successivo è cancellarlo e configurarlo come nuovo, il che significa ripristinarlo alle impostazioni di fabbrica (ricordati di fare un backup prima di farlo).

    Se nessuno di questi passaggi funziona, il problema potrebbe essere legato a difetti fisici del display dello schermo, poiché chiunque potrebbe aver danneggiato accidentalmente il proprio telefono senza saperlo.

    In tale evenienza, riparazione schermo rotto la riparazione di LCD per iPad e iPhone potrebbe essere la soluzione perfetta.

    Il touch screen dell'iPhone 7 non funziona

    Se hai riavviato forzatamente l'iPhone 7, hai ripristinato l'iPhone 7 da un backup, hai configurato l'iPhone 7 come nuovo, e hai riparato lo schermo rotto e l'LCD, e il touchscreen continua a non rispondere, è arrivato il momento di cambiare prospettiva e cercare una soluzione completamente diversa.

    REWA presenta qui una rinfrescante soluzione per la scheda logica riguardante il problema del touchscreen non rispondente dell'iPhone 7.

    Se avete domande o opinioni diverse, non esitate a contattarci!

    Riparazione touch screen iPhone 7 non funzionante

    1. Smontaggio del telefono

    Accendi il telefono, la funzione touch è disabilitata.

    Rimuovere le viti della porta di ricarica e staccare il gruppo display.

    Scollega i cavi flessibili e rimuovi le viti della scheda madre.

    Quindi estrai la scheda logica.

    Smontaggio dello smartphone

    2. Diagnostica dei malfunzionamenti

    Verificare la resistenza del connettore dell'assemblaggio del display con un multimetro digitale.

    La resistenza del pin 10 mostra un valore anomalo (470 in condizioni normali).

    Diagnosi dei malfunzionamenti

    Prendi il disegno di manutenzione come riferimento.

    Avvia la manutenzione

    Il pin 10 ha funzionato come segnale AP_TO _TOUCH _MAMBA _CONN _MAMBA _CONN _L. Il segnale era collegato al pin AT2 della CPU tramite l'induttore FL3904.

    Pin CPU AT2 tramite induttore FL3904

    Il circuito tra il pin 10 e l'induttore FL3904 viene visualizzato normalmente.

    l'induttore FL3904 funziona normalmente

    Testare la resistenza dall'induttore FL3904 alla CPU, il dispositivo mostra un valore normale.

    Quindi possiamo trarre la conclusione che l'induttore FL3904 è stato danneggiato.

    Resistenza di prova dell'induttore FL3904

    3. Riparazione dei malfunzionamenti Dissalda l'induttore con il saldatore a stagno.

    Riparazione guasti

    Stagna i cavi di rame.

    Successivamente, collega le due piazzole di saldatura dell'induttore con il filo di rame.

    Quindi taglia via il resto con un coltello da scultura.

    Stagna i fili di rame

    Controllare nuovamente la resistenza del pin 10 con il multimetro digitale; questa volta otteniamo un valore normale, il che significa che il problema è stato risolto.

    Testare la resistenza del pin 10

    4. Test di funzionalità Pulisci il pad di bonding con il detergente per PCB.

    Test di funzionamento

    Assemblare il telefono e testare. La funzione touch è tornata alla normalità.

    Assembla il telefono e prova

    Per maggiori dettagli sulla guida alla riparazione dello schermo touch dell'iPhone 7 non funzionante, visita il canale YouTube di REWA.