Tag: kit di test per iphone

  • Kit di test delle parti dell'iPhone integrato per la serie iPhone 7

    Kit di test delle parti dell'iPhone integrato per la serie iPhone 7

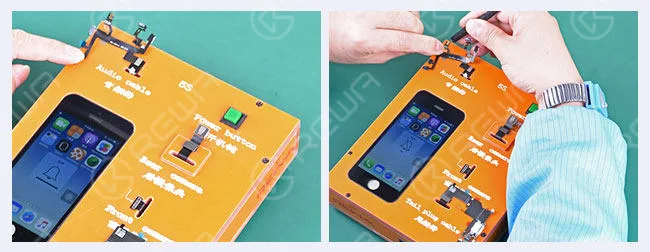
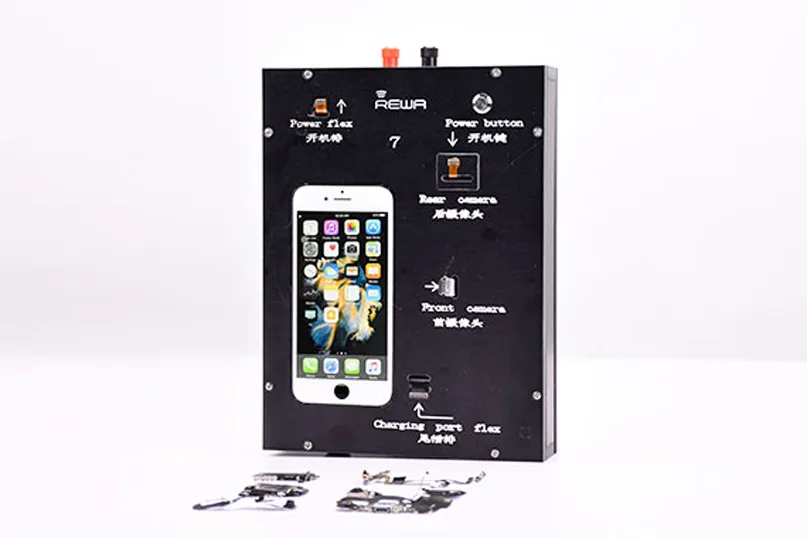
    Kit per il test dei componenti dell'iPhone aggiornato! Nuovo kit di test delle parti dell'iPhone con dimensioni considerevoli, facile da usare per la serie iPhone 7. Funzione di test essenziale per Parti dell'iPhone, I componenti del kit, dai cavi flessibili alle fotocamere, sono facilmente raggiungibili con un'unica interfaccia. Gli speciali cavi flessibili progettati per la compatibilità, rendono il kit di test dei componenti dell'iPhone durevole e la procedura di test efficiente.

    Come funziona il kit di test delle parti dell'iPhoneTest della fotocamera posteriore

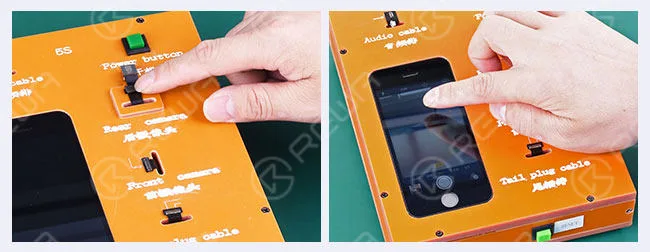
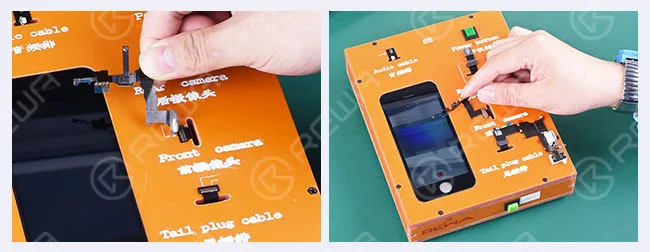
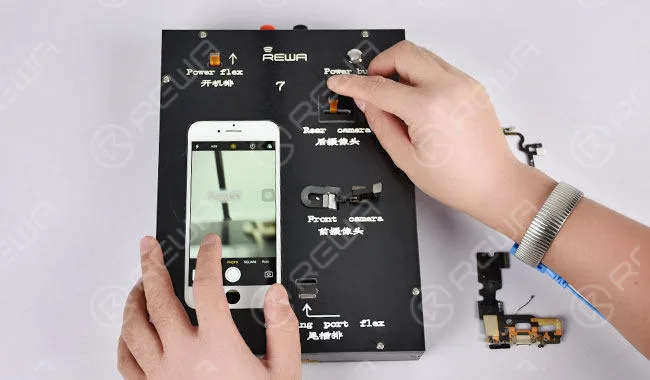
    Installare la fotocamera posteriore/la telecamera posteriore sulla macchina, premere il pulsante di accensione. Una volta acceso lo schermo, toccare l'icona “Fotocamera” e accedere alla modalità fotocamera posteriore, regolare la messa a fuoco e scattare una foto, quindi controllare l'immagine.
    Test della telecamera posteriore

    Nota: Una volta terminato un ciclo di test, premere il pulsante di accensione per attivare la modalità di sospensione. Il secondo ciclo di test segue la stessa procedura descritta sopra.

    Test della fotocamera frontale

    Installare la telecamera frontale/la telecamera secondaria sulla macchina, premere il pulsante di accensione. Una volta acceso lo schermo, toccare l'icona “Fotocamera” e accedere alla modalità fotocamera frontale, regolare la messa a fuoco e scattare una foto, quindi controllare l'immagine.
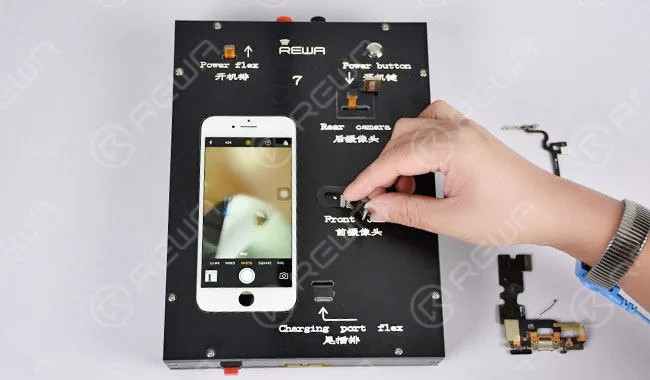
    Test della telecamera frontale

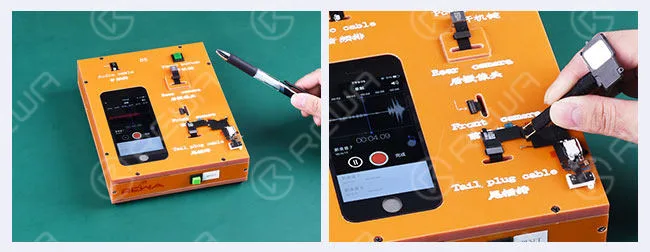
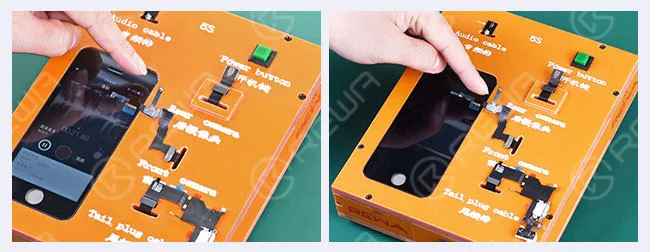
    Toccare l'icona “Voci e memo” e accedere alla modalità di registrazione. Schermare il sensore di prossimità della fotocamera anteriore con una mano, il telefono diventa nero e viceversa. Toccare “Pausa” per interrompere la registrazione, quindi riprodurre la registrazione attraverso il cicalino/altoparlante.
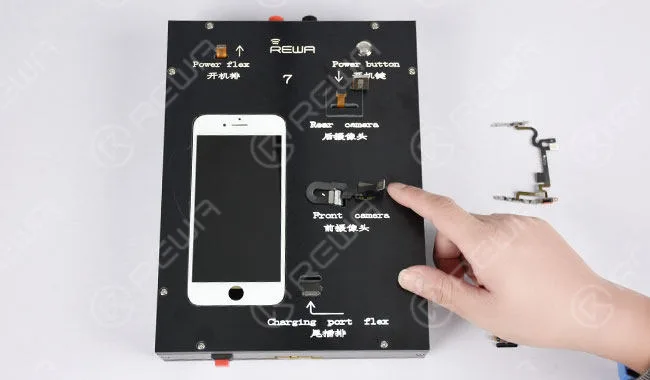
    Toccare l'icona “Voices&Memos” e accedere alla modalità di registrazione. Schermare il sensore di prossimità della fotocamera anteriore con una mano, il telefono diventa nero e viceversa. Toccare “Pausa” per interrompere la registrazione, quindi riprodurre la registrazione attraverso il cicalino/altoparlante.

    Testare il sensore di luce ambientale abbassando la luminosità al minimo. Quindi attivare la “Luminosità automatica” e lo schermo torna alla luminosità normale.
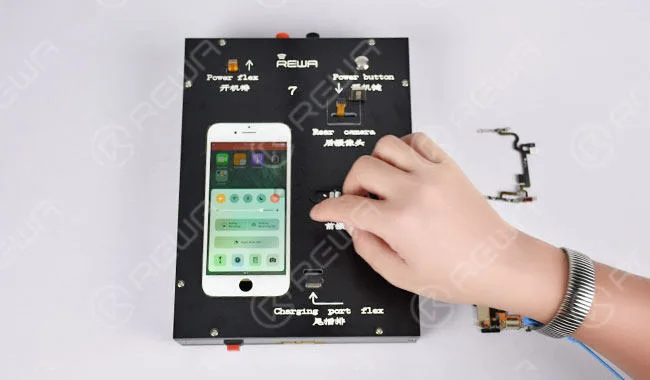
    Testare il sensore di luce ambientale abbassando la luminosità al minimo. Quindi attivare la “Luminosità automatica” e lo schermo torna alla luminosità normale.

    Nota: Una volta terminato un ciclo di test, premere il pulsante di accensione per attivare la modalità di sospensione. Il secondo ciclo di test segue la stessa procedura descritta sopra.

    Interruttore di alimentazione Volume Test del cavo flessibile

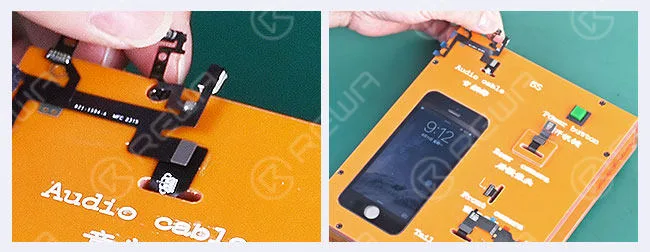
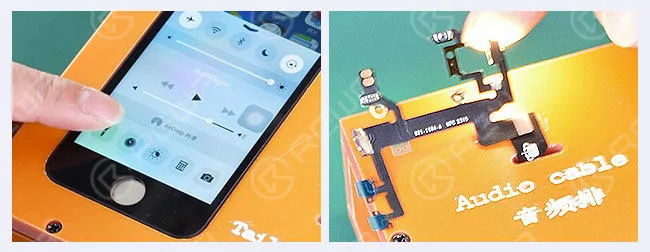
    Installare la telecamera posteriore/la telecamera posteriore sulla macchina, quindi installare interruttore di alimentazione cavo flessibile del volume e premere il pulsante di accensione. Una volta illuminato lo schermo, toccare l'icona “torcia” per verificare la funzione della torcia. Quindi verificare il tasto Mute e i tasti Volume su/giù uno per uno.
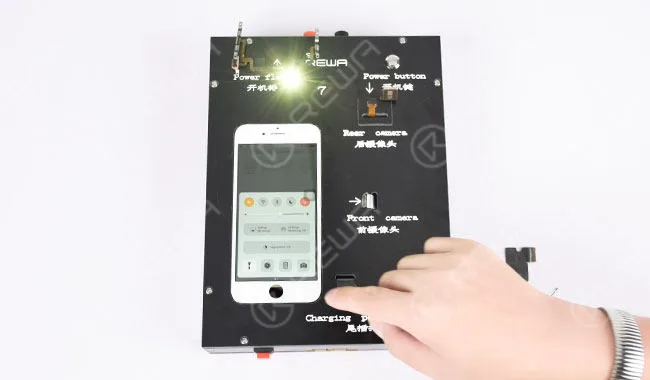
    Test del cavo flessibile del volume dell'interruttore

    Nota: Una volta terminato un ciclo di test, premere il pulsante di accensione per attivare la modalità di sospensione. Il secondo ciclo di test segue la stessa procedura descritta sopra.

    Test del cavo flessibile della porta di ricarica

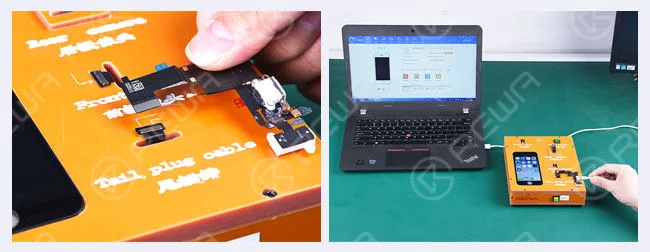
    Installare cavo flessibile della porta di ricarica sull'apparecchio e premere il pulsante di accensione. Collegare la porta di ricarica e il computer con un cavo lightning; l'icona di ricarica sullo schermo indica la perfetta funzionalità della porta di ricarica.
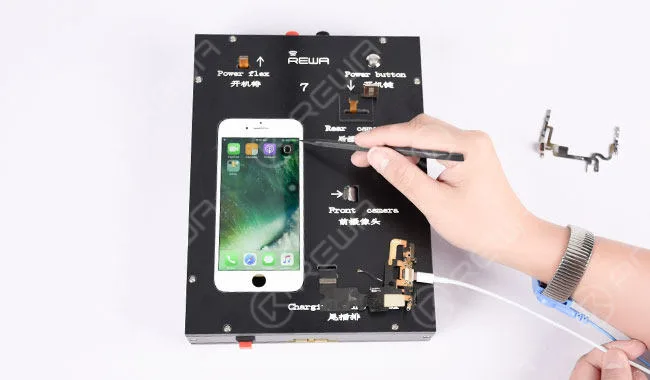
    Test del cavo flessibile della porta di ricarica

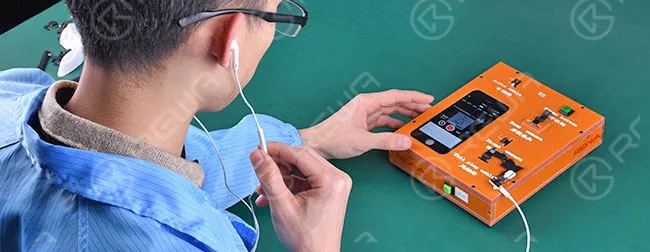
    Toccare l'icona “Voci e memo” e accedere alla modalità di registrazione. Inserire l'auricolare nella presa audio. Riprodurre la registrazione e regolare il volume con i tasti volume su/giù dell'auricolare.
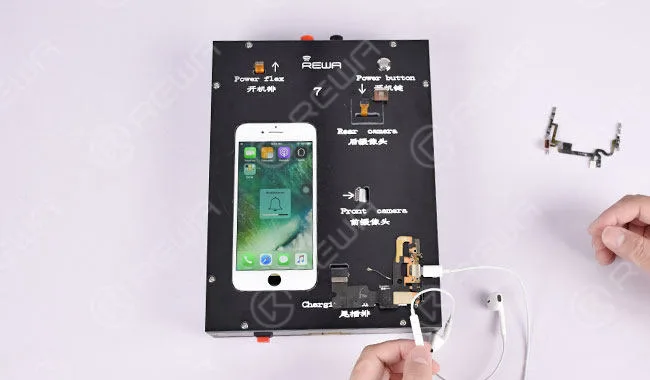
    Toccare l'icona “Voci&Memo” e accedere alla modalità di registrazione. Inserire l'auricolare nella presa audio. Riprodurre la registrazione e regolare il volume con i tasti volume su/giù dell'auricolare.

    Nota: Una volta terminato un ciclo di test, premere il pulsante di accensione per attivare la modalità di sospensione. Il secondo ciclo di test segue la stessa procedura sopra descritta. Parti di ricambio per la riparazione del telefono cellulare REWA:
  • Hot iPhone Parts Testing Kit – DIY by REWA

    Hot iPhone Parts Testing Kit – DIY by REWA

    hot iphone parts testing kit diy rewa by

    iPhone Parts/

    Small Components Testing Kit /

    Testing Tool Set /

    Testing Machine /Testing Box for iPhone 4, 4s, 5, 5c, 5s, 6, 6 plus, 6s, 6s plus Repair and Test

    Prompt caldo:

    1) This mobile phone parts testing kit does not need an extra dry battery to be supplied. They should use their included batteries.

    2) This testing kit comes with 2 buttons, one is in the top right corner of the control panel – power button, the other one is at the bottom – reset button. “Power button” is the substitute of iPhone power switch button and “reset button” can prevent the logic board installed in the testing kit from being burned out when the phone crashes or when we encounter any emergency due to mishandling in the process of testing.

    3) At the top of this testing machine, we specially install two power interface to help with the power supply in case of battery runs out or runs into inactivate state.

    Brief introduction

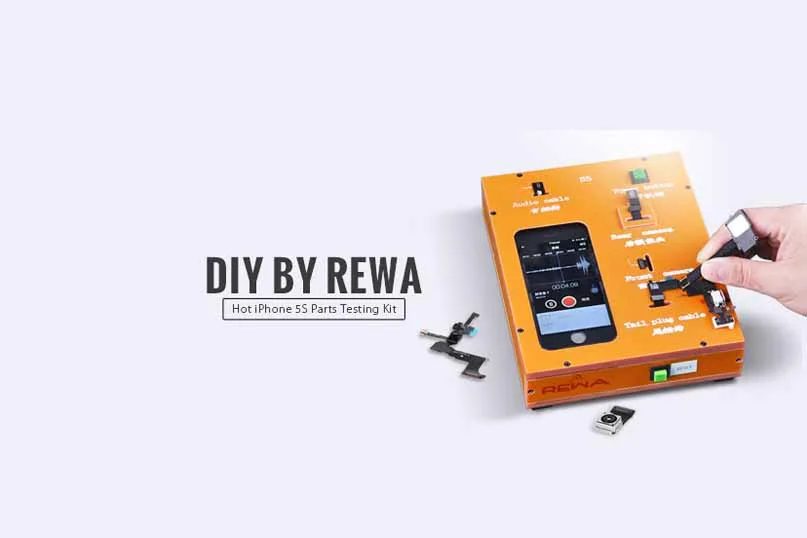
    This Hot iPhone Parts Testing Kit aims at testing 4 iPhone small components – power switch volume control flex cable, rear-facing camera flex cable ribbon, front-facing camera ribbon cable and dock connector charging port flat cable. And it’s completely customized by REWA Technical Engineers and specially designed for mobile phone repair shops/stores and cell phone spare parts distributors. Next we’ll illustrate how this iPhone parts testing box works.

    Test del cavo flessibile della porta di ricarica

    hot iphone parts testing kit diy rewa

    1) Install dock connector charging port flex cable (tail plug cable) after starting up. Connect the USB data cable to the computer, we can get device information by “iTools” software and charge indicator icon is lit up.

    hot iphone parts testing kit diy rewa 2

    2) Install charging port dock connector flex ribbon cable(tail plug cable) after power on. Connect the USB data cable to the computer, similarly we can get device information through “iTools”.

    hot iphone parts testing kit diy rewa 3

    3) Plug earphones and manage to do some sound recording and playing and adjust volume up/down in the course of record and play.

    hot iphone parts testing kit diy rewa 4

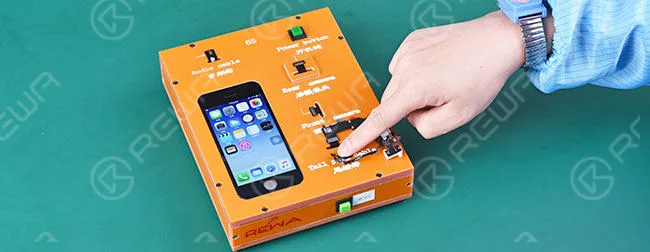
    4) Install home button flex cable, press home button to return to the main menu.

    Test della telecamera posteriore

    hot iphone parts testing kit diy rewa 5

    Install rear-facing camera/back camera on the machine, enter into camera mode, adjust focus and take a picture, then check the picture.

    Test della fotocamera frontale

    hot iphone parts testing kit diy rewa 6

    1) Install front facing camera / secondary camera, enter into front camera mode and make a video for 6 seconds, then play it through the buzzer/loudspeaker

    hot iphone parts testing kit diy rewa 7

    2) Enter into record mode and play a record, cover and uncover the proximity sensor area to see if the screens go black or are lit up.

    Interruttore di alimentazione Volume Test del cavo flessibile

    hot iphone parts testing kit diy rewa 8

    1) Install power switch on-off volume control flex cable ribbon (audio cable), press the power switch button to check if the screen can be lit up.

    hot iphone parts testing kit diy rewa 9

    2) Test the volume up/down button, adjust mute button, the vibrator motor and loudspeaker/buzzer responding accordingly.

    hot iphone parts testing kit diy rewa 10

    3) Enter into flashlight mode, flashlight lighting. So why should I use this iPhone parts testing kits? Firstly, it obviously will save you a lot of time. Let’s assume you are a mobile phone parts distributor or repair shop owner and have a number of flex cables mentioned above to be tested before reselling them to your customers or used to repair cellular phones. This toolkit is easy enough to test them all in bulk in a more efficient way and save time when you installed faulty parts and have your customers waiting twice the as long time. Secondly, it can reduce the chances of connector failure to the motherboard. Without using this phone parts testing tool, you will be burning through logic boards faster. You can expect the motherboard to fail after just a few hundred connections if you connect those flex cables to logic board directly. When encountered the connection failure, we just need to replace the corresponding extended flex cables. Last but not least, applying this toolset in your working will make it absolutely possible to keep the logic board closed when doing phone parts testing. Want to order our products? Please go to shop.rewa.tech to get. Each product has shown the prices, shipping fees as well.

    Any questions please contact service@rewa.tech