Tag: iPhone: un teardown

  • iPhone 18 Pro Teardown: What Changed Inside and How Does It Affect Repairability

    iPhone 18 Pro Teardown: What Changed Inside and How Does It Affect Repairability

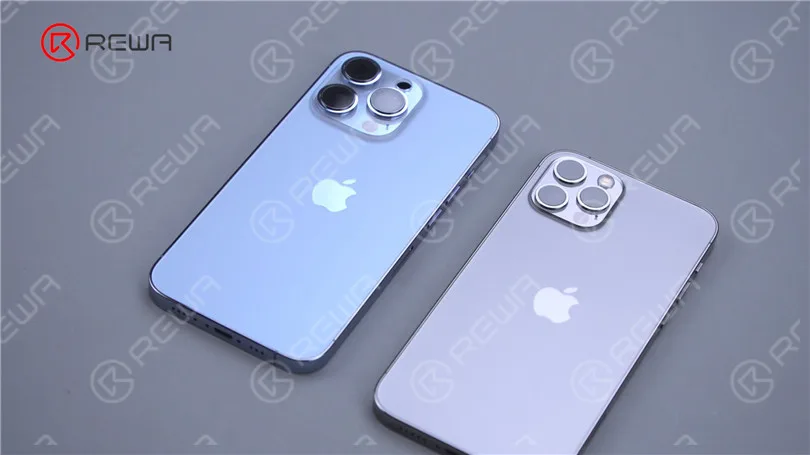
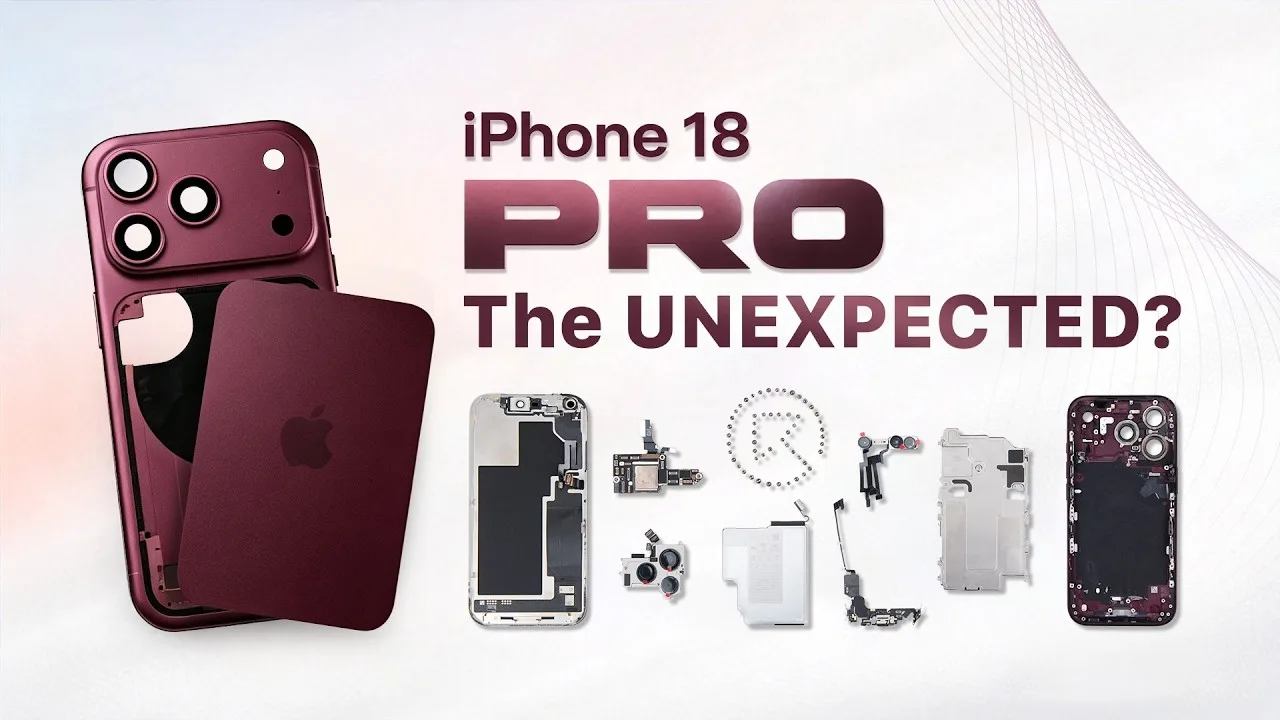
    The iPhone 18 Pro brings several significant changes beneath its familiar exterior. From a smaller Dynamic Island and a new under-display infrared camera to a dramatically larger vapor chamber and a redesigned motherboard layout, Apple has changed more than just the phone’s appearance.

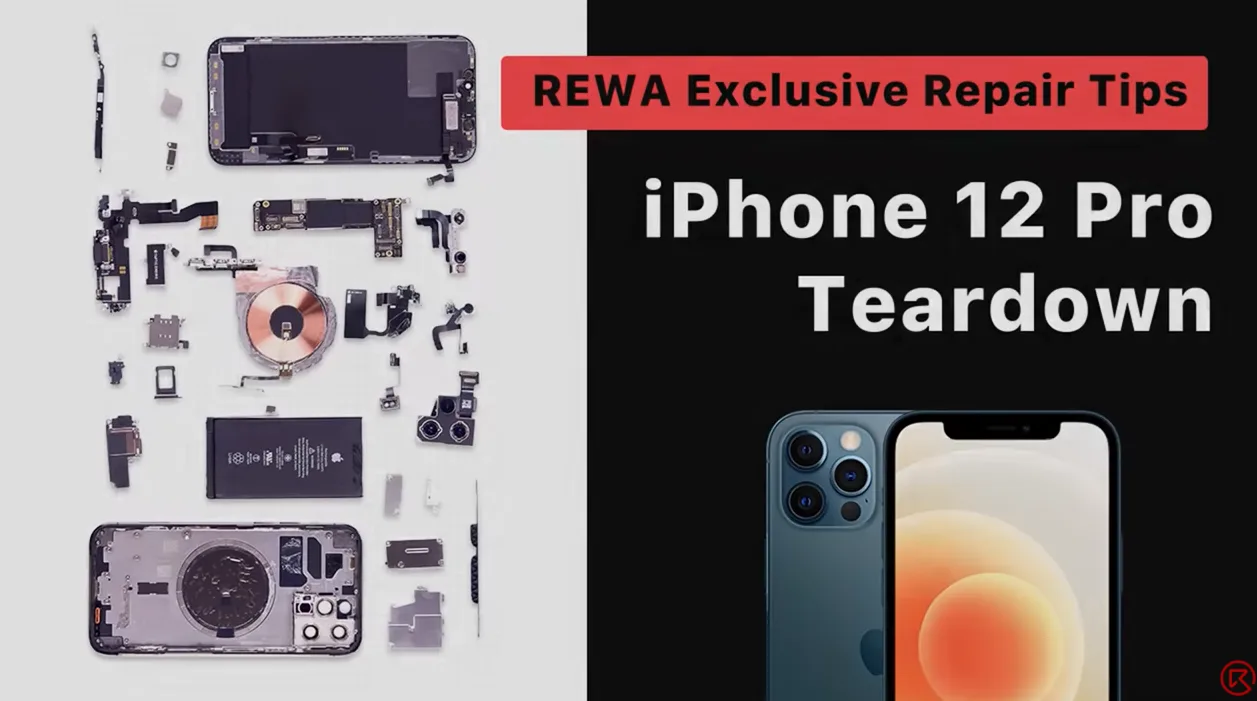
    In this full teardown by REWA Lab, we dive deep into the internal structural changes and analyze what these updates mean for third-party repair shops and aftermarket component manufacturers.

    Step-by-Step Disassembly Process

    Opening the iPhone 18 Pro requires specialized repair tools and a cautious approach to avoid damaging internal flexes and sensors. Standard safety and prep steps are as follows:

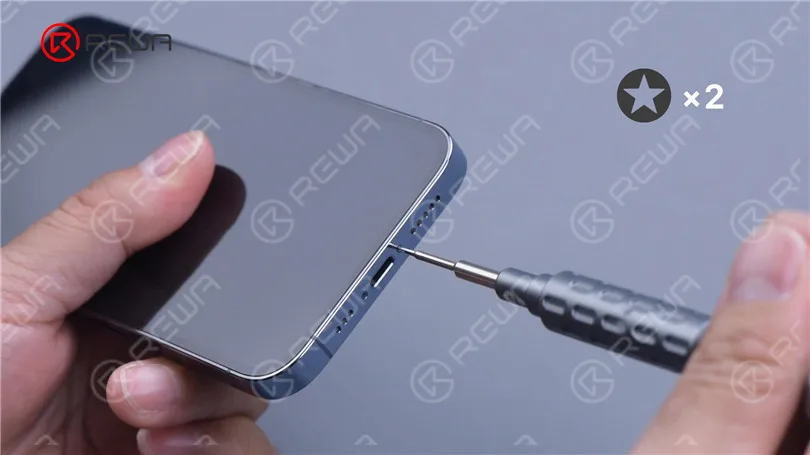
    Preparation Before Teardown: Power off the device and remove the bottom screws with the Pentalobe screwdriver.
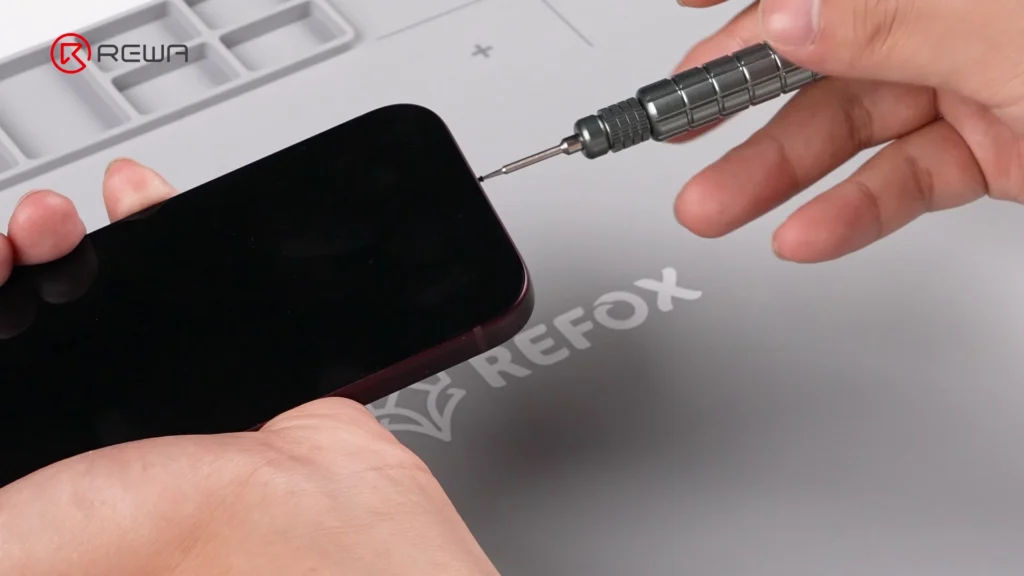
    Removing the bottom screw of an iPhone using a precision Pentalobe screwdriver

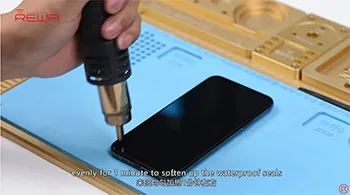
    Screen Removal: Heat the screen to soften the perimeter waterproof adhesive. Use an opening tool with suction cup and alcool isopropilico to gently slice through the seal with an opening pick.

    Camera Protection: Cover the front camera module with protective sponge stickers to prevent dust or scratches.

    Bracket & Flex Cable Disconnection: Unscrew and remove the battery and display connector bracket. Disconnect the battery flex cable, display cable, and front sensor cable to free the screen.

    Vapor Chamber & Cameras: Unscrew the vapor chamber using a 4IP screwdriver. Disconnect and remove the front / rear camera modules.
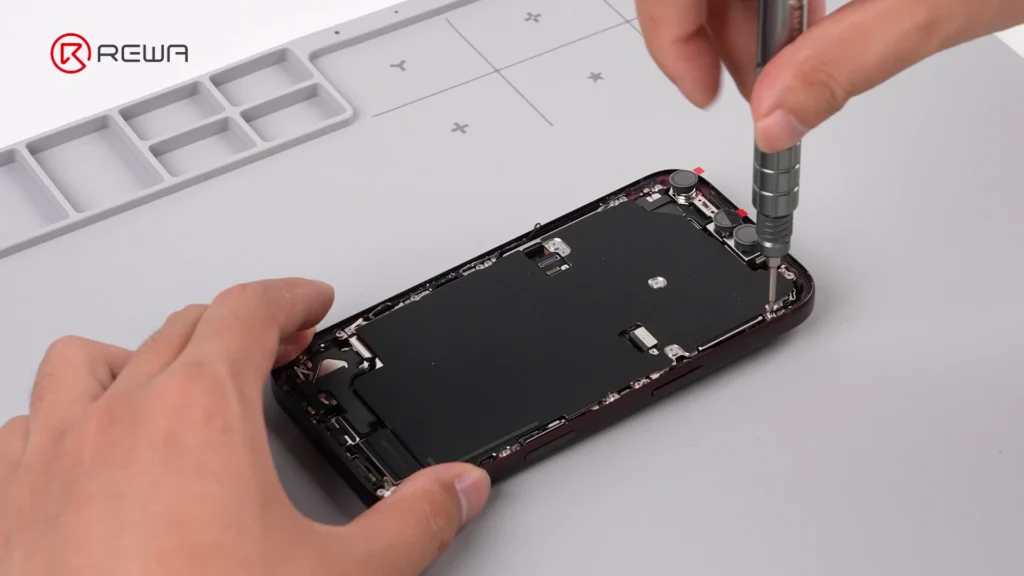
    using a screwdriver to open iPhone 18 Pro for teardown

    Motherboard & Peripheral Removal: Unscrew and flip over the motherboard to disconnect the wireless charging coil. Remove flashlight, LiDAR, SIM tray, SIM card reader, bottom speaker, charging port, Taptic Engine, and microphone in sequence.
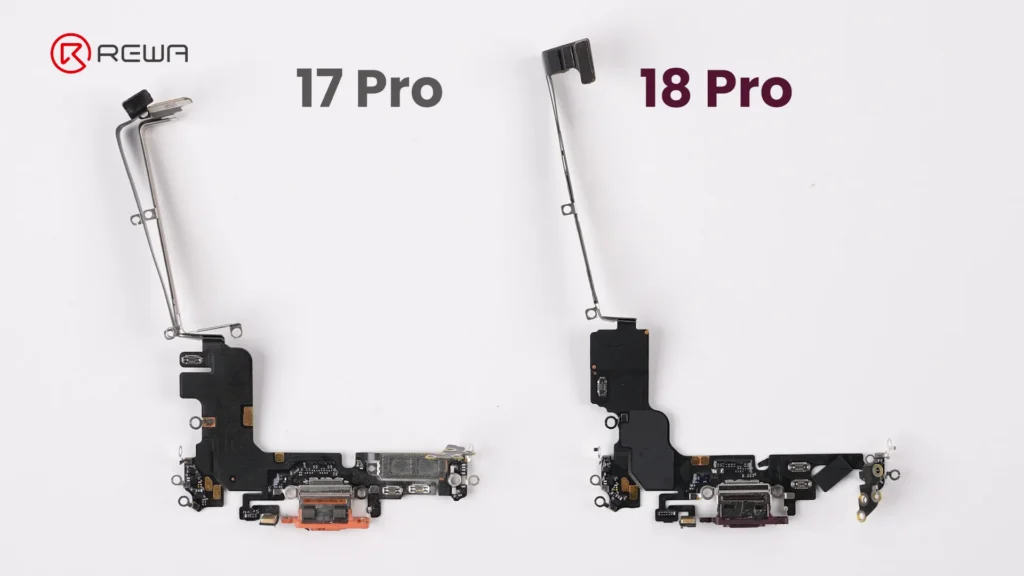
    iphone 18 pro teardown what changed inside how does it affect 3

    Battery Debonding: Apply a 9V DC voltage between the silver battery tab (positive probe) and the vapor chamber (negative probe) to electronically deactivate the adhesive, allowing easy battery removal.
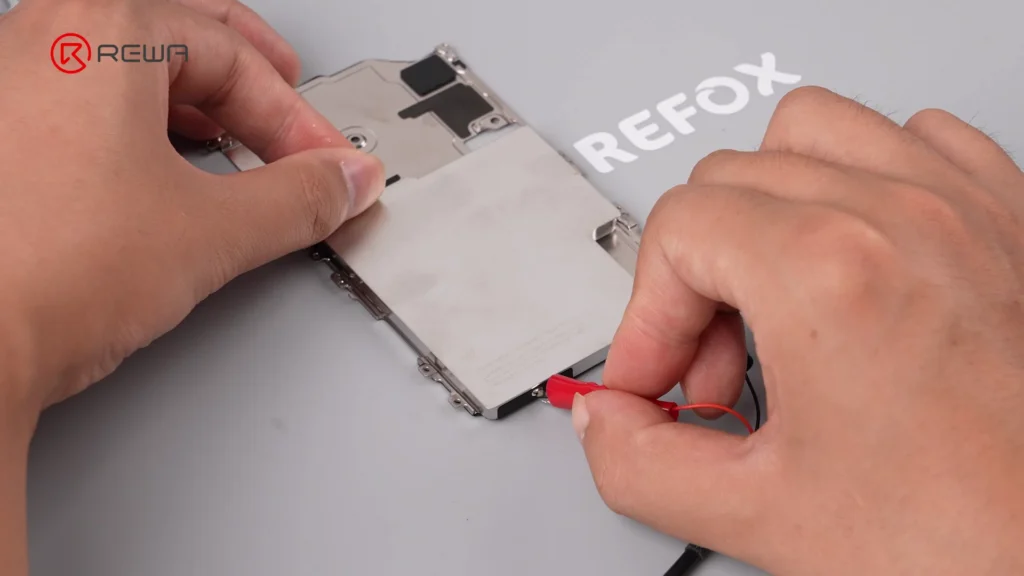
    iphone 18 pro teardown what changed inside how does it affect 4

    Display & Dynamic Island: Under-Display Infrared Tech

    Apple’s smaller Dynamic Island introduces a more complex under-display optical structure, creating new challenges for display refurbishment. This shrink is achieved by relocating the infrared camera under the display assembly and positioning it near the screen corner.
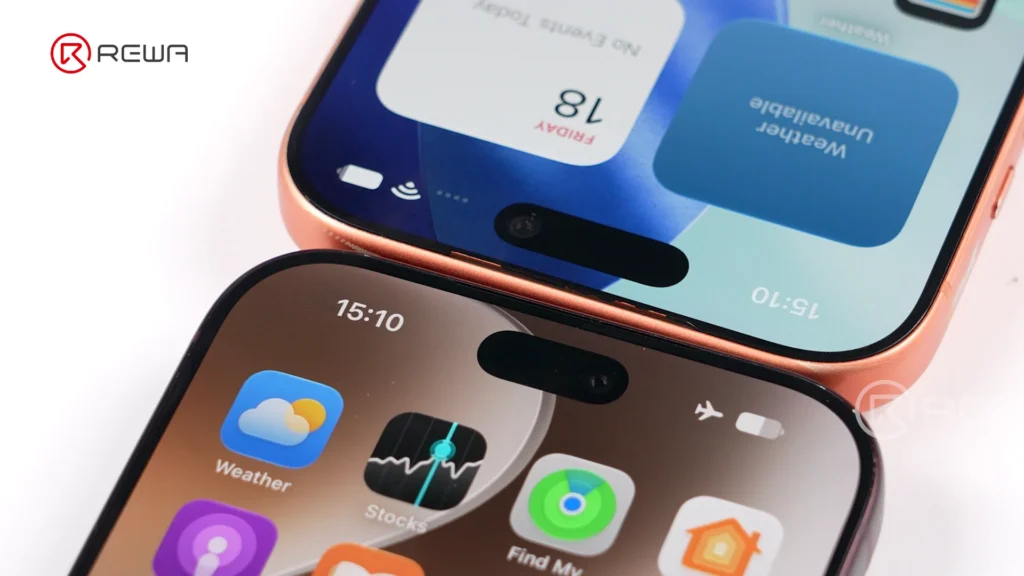
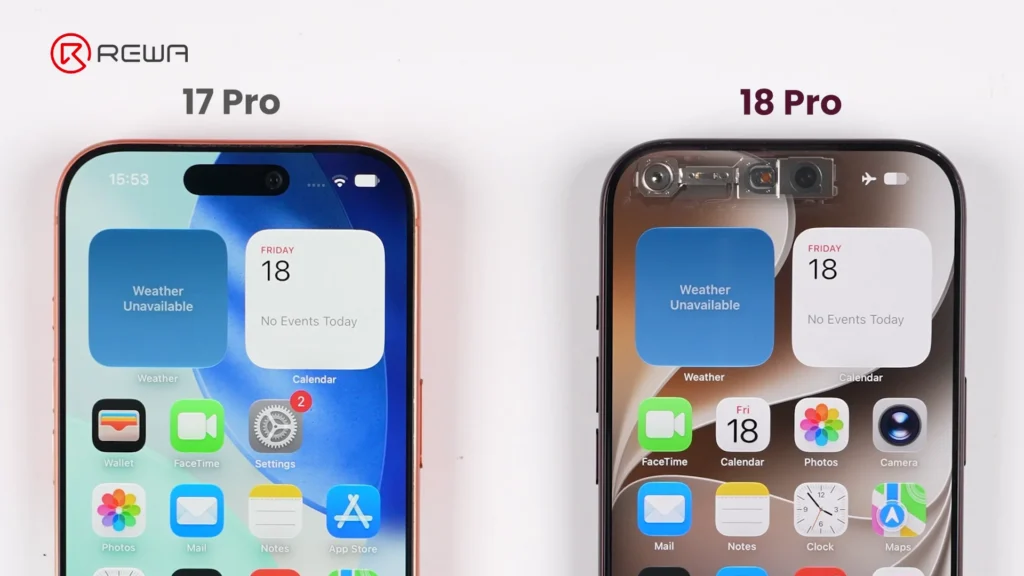
    iphone 18 pro teardown what changed inside how does it affect 5
    iphone 18 pro teardown what changed inside how does it affect 6

    Key display architecture updates include:

    Adjusted Pixel Matrix: The display above the infrared camera features a modified pixel density and arrangement to allow infrared light transmission for Face ID functionality.

    iphone 18 pro teardown what changed inside how does it affect 7

    Unfixed Flex Cable: The display flex cable is no longer secured with heavy adhesive, making screen separation cleaner during repair and refurbishment.

    Aftermarket Challenge: Third-party display manufacturers will face higher precision requirements to replicate the light-transmitting pixel window for Face ID functionality.

    Motherboard Architecture: Higher Difficulty for Micro-Soldering

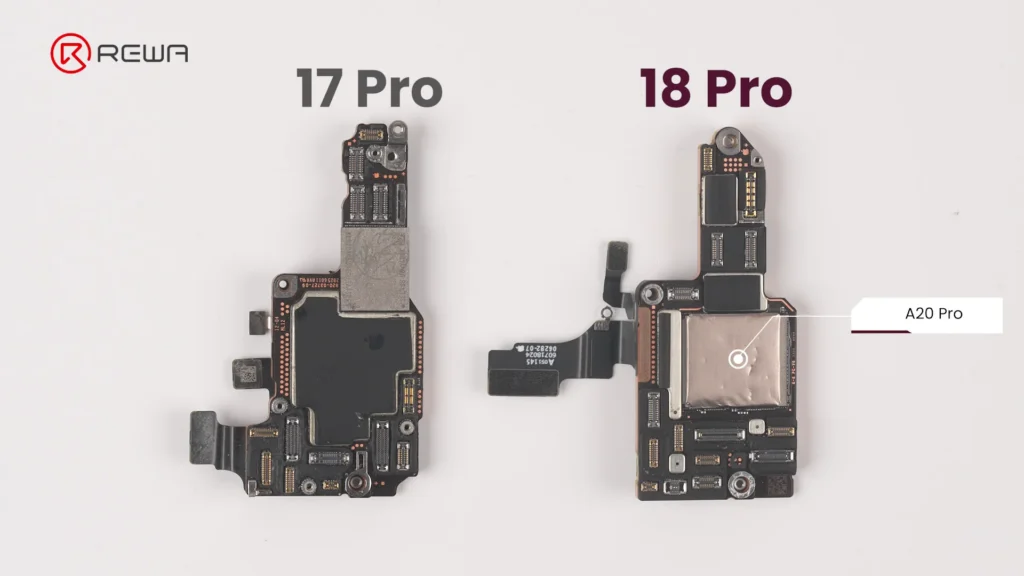
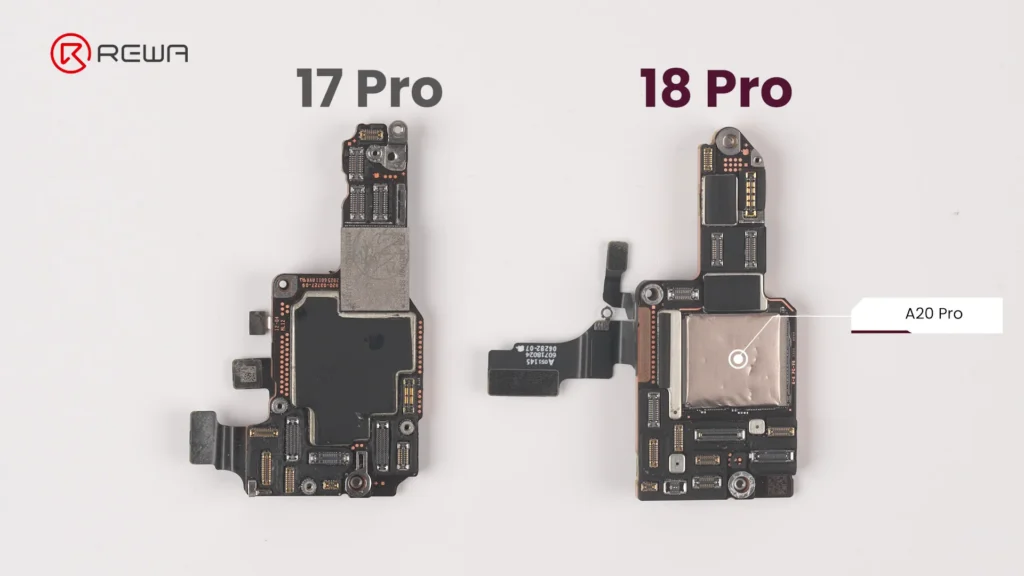
    The updated motherboard layout places crucial chips in vulnerable locations while sandwiching NAND and power IC between layers. For micro-soldering technicians, the iPhone 18 Pro motherboard presents an elevated level of complexity.
    iphone 18 pro teardown what changed inside how does it affect 8

    Apple has reorganized chip placement and shielding:

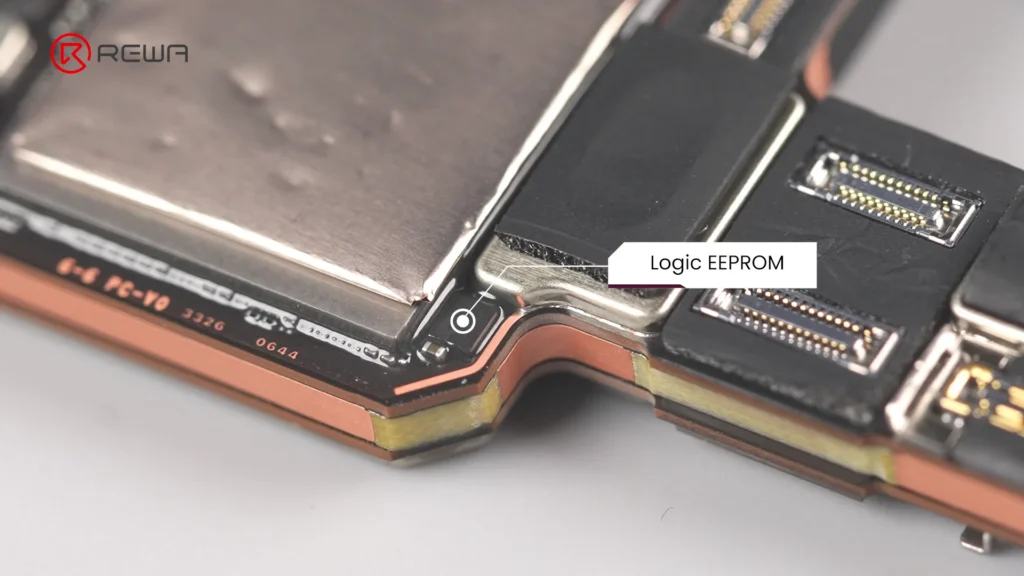
    Exposed Logic EEPROM: The Logic EEPROM chip on the board surface lacks a protective metal shield, leaving it significantly more susceptible to physical damage and technician error.
    iphone 18 pro teardown what changed inside how does it affect 9

    Layered Sandwich Design: The NAND storage chip and Power IC are sandwiched inside the multi-layer PCB structure. Replacing or repairing these components requires demanding motherboard desoldering and reballing.

    Relocated A20 Pro Chip: The main processor sits directly on the motherboard surface, and in direct contact with the vapor chamber for substantial improvement in thermal performance.
    iphone 18 pro teardown what changed inside how does it affect 10

    Upgraded Camera Modules

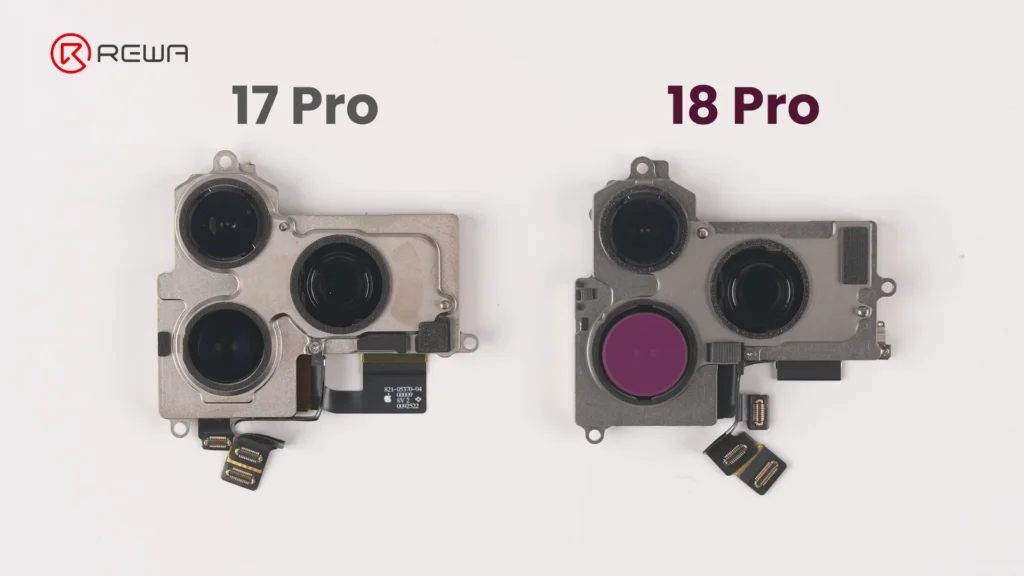
    The iPhone 18 Pro’s camera modules feature noticeable changes in mechanical design, module size, and cable layout.

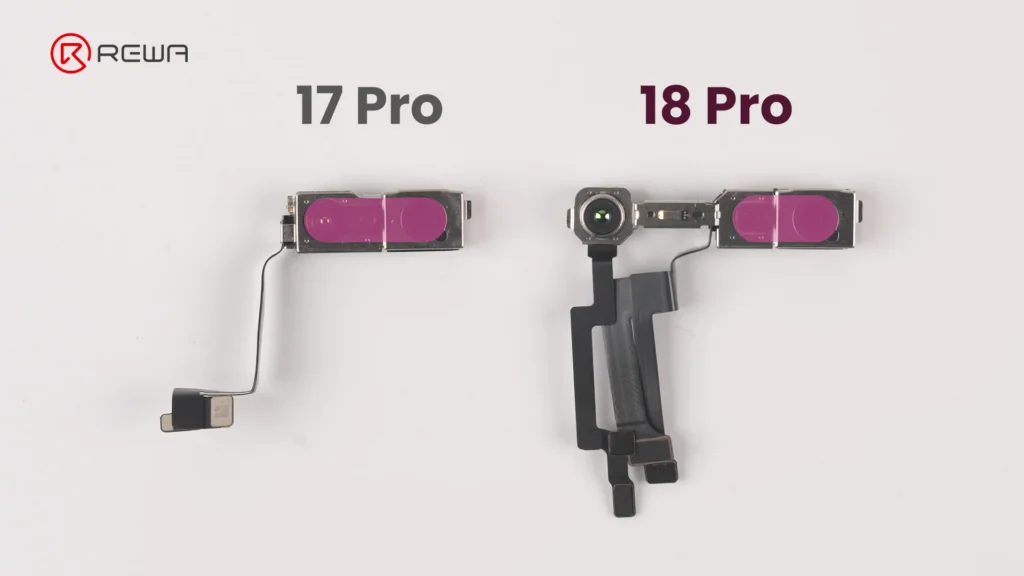
    Fusion Main Camera: The rear camera module features a variable aperture for greater control over depth of field.
    iphone 18 pro teardown what changed inside how does it affect 11

    Separated Infrared Sensor: The front camera and under-display infrared camera are connected via three separate flex cables, bridged across a wider distance to facilitate the shrunken Dynamic Island.
    iphone 18 pro teardown what changed inside how does it affect 12

    Thermal Management & Battery Changes

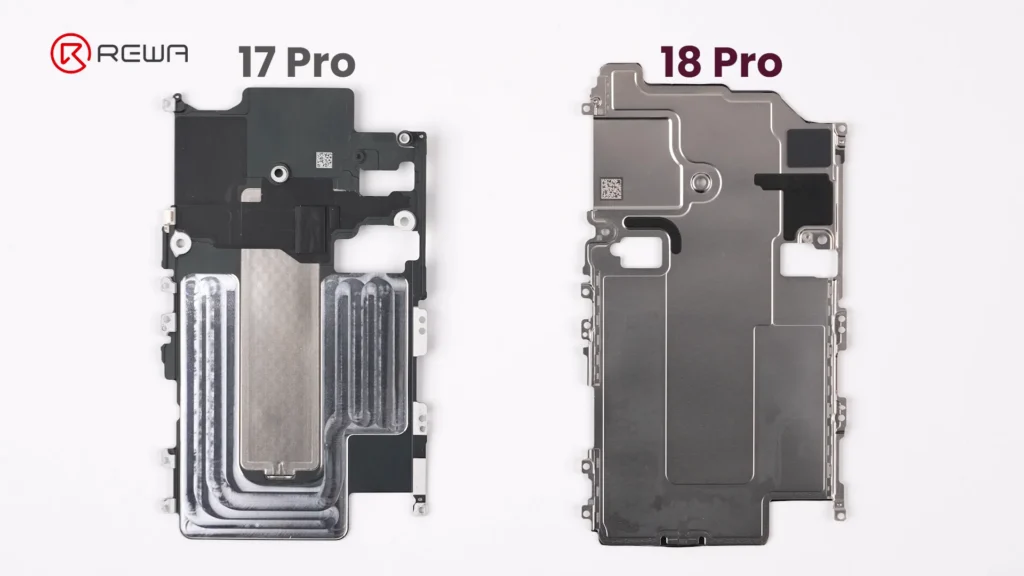
    Vapor chamber on the iPhone 18 Pro receives its largest redesign in years. Apple has integrated a significantly larger vapor chamber, with three times the surface area of the one used in the iPhone 17 Pro.
    iphone 18 pro teardown what changed inside how does it affect 13

    Simply Put:

    A vapor chamber is a flat, sealed metal enclosure containing a small amount of liquid. When the chips heat up, the liquid absorbs heat and evaporates. The vapor then spreads through the chamber, transferring heat to cooler areas where it condenses back into liquid. This helps the phone maintain stable performance under sustained workloads.

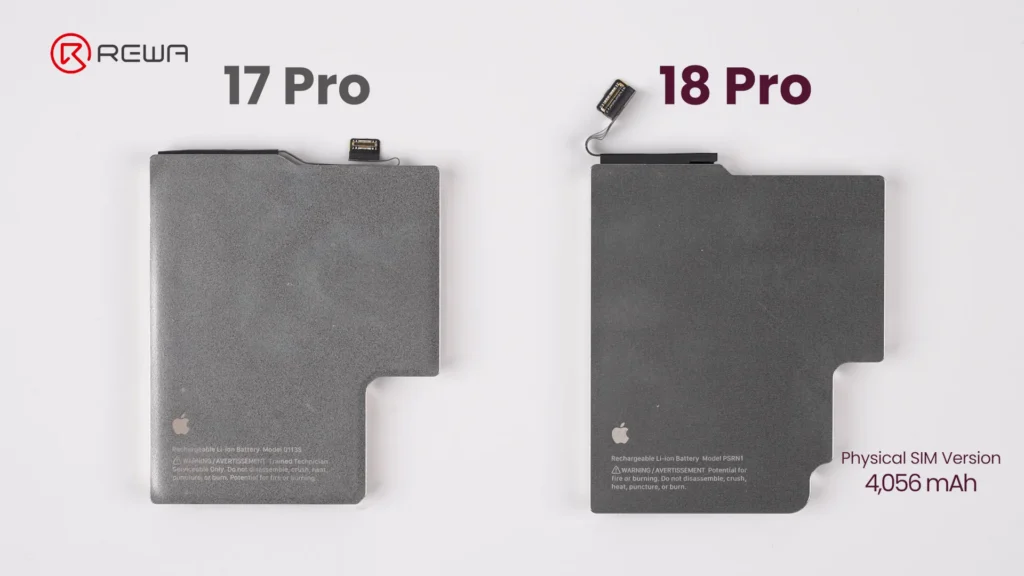
    The battery capacity of iPhone 18 Pro is slightly bigger than that on iPhone 17 Pro. In physical SIM version, it packs 4,056mAh, achieving about 1.7% increase over previous generation. Apple officially confirms that the redesigned battery architecture and charging system enable faster charging, reaching 50% in approximately 15 minutes.
    iphone 18 pro teardown what changed inside how does it affect 14

    Repair Difficulty Assessment: Pros & Cons

    A concise summary of what makes repairing the iPhone 18 Pro easier or harder for repair professionals.

    Componente Changes Made Repair Difficulty
    Schermo
    • Smaller Dynamic Island
    • Under-display infrared camera
    • Display flex cable not fixed with adhesive
    Easy
    Batteria
    • Larger capacity: 4,056mAh (SIM tray version)
    • Larger connector
    • Multi-layer cable
    Easy
    Front Camera Module
    • Infrared camera moved to the corner
    • Three separate cables
    Very Easy
    Rear Camera Module
    • Larger Fusion Main Camera
    • Cable layout changed
    Hard
    Scheda madre
    • A20 Pro chip on the surface
    • Logic EEPROM chip without a shield
    • NAND and Power IC sandwiched inside
    Very Hard

    Domande frequenti (FAQ)

    Why is iPhone 18 Pro motherboard repair more difficult?

    The main reason is the new layered motherboard architecture. NAND storage and the power IC are positioned between PCB layers, meaning technicians need to separate the board layers to access them. This increases the complexity, heat exposure, labor, and risk involved in component-level repair.

    Why is the Dynamic Island smaller on the iPhone 18 Pro?

    The infrared camera used for Face ID has been moved under the display and toward the corner. The display uses a modified pixel arrangement in this area to allow infrared light to pass through. This allows Apple to reduce the size of the visible Dynamic Island.

    How big is the iPhone 18 Pro battery?

    The iPhone 18 Pro shown in the REWA Lab teardown is the physical-SIM version and has a 4,056mAh battery, approximately 1.7% higher than the iPhone 17 Pro. Battery capacity varies by regional configuration; in eSIM-only version, the iPhone 18 Pro has a 4,288mAh battery.

    How much larger is the iPhone 18 Pro vapor chamber?

    iPhone 18 Pro vapor chamber has three times the surface area of the vapor chamber in the iPhone 17 Pro. Apple says the redesigned thermal system enables up to 40% better sustained performance compared with the previous generation.

    What is the biggest repair challenge revealed by REWA Lab’s iPhone 18 Pro teardown?

    For board-level technicians, the layered motherboard architecture is one of the most significant challenges because it complicates access to NAND and power-management components. For aftermarket parts manufacturers, the new under-display infrared camera arrangement creates another major challenge because display structure, optical transmission, and Face ID compatibility must all work together.

    Did Apple make major changes to the iPhone 18 Pro’s frame and back cover?

    No. The iPhone 18 Pro retains a largely similar frame and back cover structure to the iPhone 17 Pro. The back cover uses a more color-matched aluminum and glass design in iPhone 18 Pro.

    Conclusione:

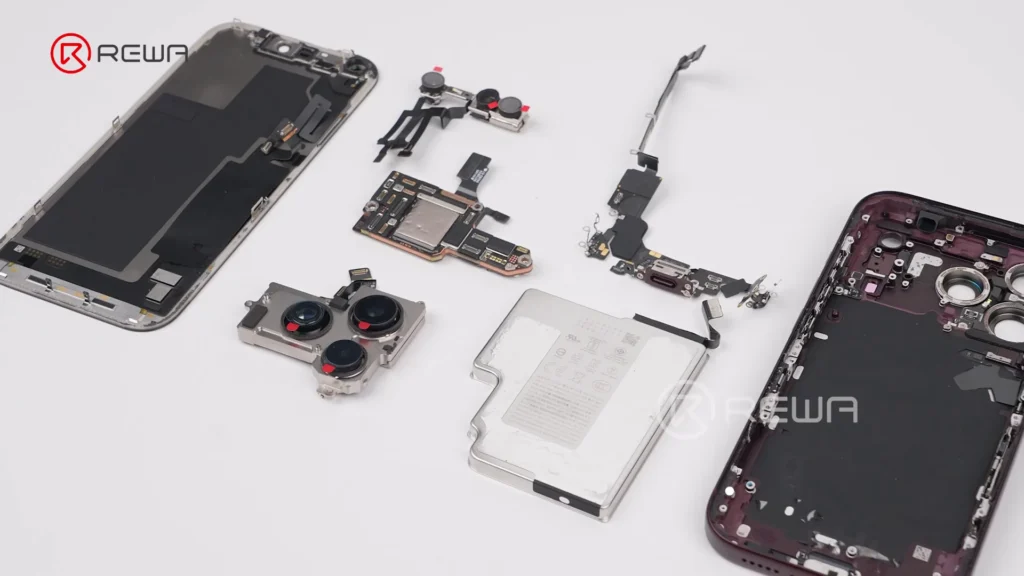
    The iPhone 18 Pro showcases impressive internal engineering, highlighted by under-display Face ID technology, triple-sized vapor chamber, and larger variable-aperture main camera.
    iphone 18 pro teardown what changed inside how does it affect 15

    However, for the independent repair industry, these advancements come with obvious challenges: motherboard layering makes micro-soldering more demanding, and screen replacement requires precise technical alignment and careful handling to ensure proper Face ID functionality.

    As phone architectures become more complex, having high-grade repair tools, reliable replacement parts, and advanced technical training is essential, please contattateci for OEM/aftermarket replacement parts, professional repair tools, and step-by-step technical guides.
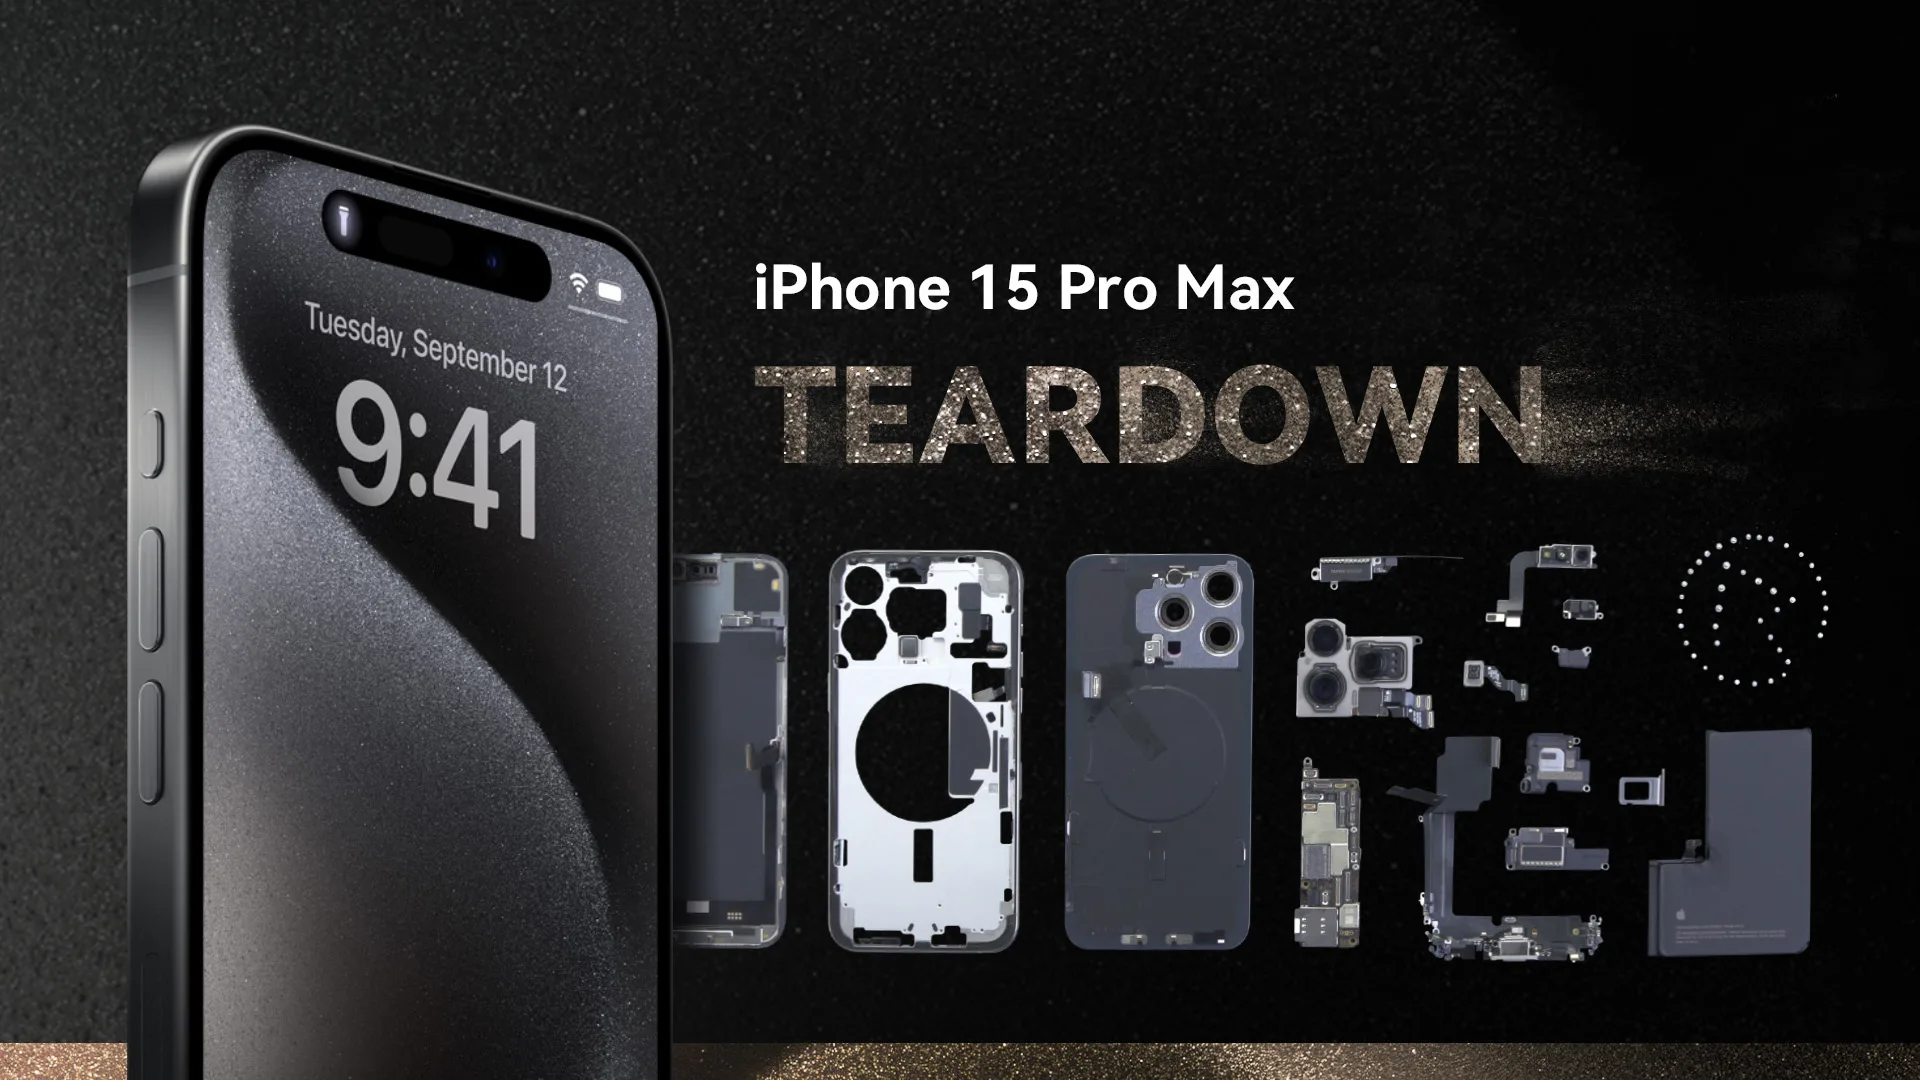
  • Teardown dell'iPhone 15 Pro Max

    Teardown dell'iPhone 15 Pro Max

    Questo video fornisce un teardown dettagliato dell'iPhone 15 Pro Max, svelando i suoi segreti e rispondendo alle preoccupazioni dei tecnici. Un cambiamento degno di nota è l'uso di un nuovo materiale in lattice bianco tra la cornice e la cover, che potrebbe potenzialmente migliorare l'impermeabilità del telefono. Tuttavia, questa modifica potrebbe creare difficoltà per la ristrutturazione dello schermo anteriore. 

    Il video evidenzia anche la presenza di un chip di crittografia, poiché il telefono si riavvia automaticamente quando viene posizionato su un caricatore wireless. Inoltre, il teardown dimostra che la cover posteriore dell'iPhone 15 Pro Max è facilmente riparabile, una caratteristica che è costante in tutta la serie iPhone 15. 

    Rimanete aggiornati per ulteriori informazioni sull'impatto di queste modifiche sulla resistenza all'acqua del dispositivo. Consultate il nostro canale per guardare il video e scoprire tutti gli affascinanti dettagli dell'iPhone 15 Pro Max.

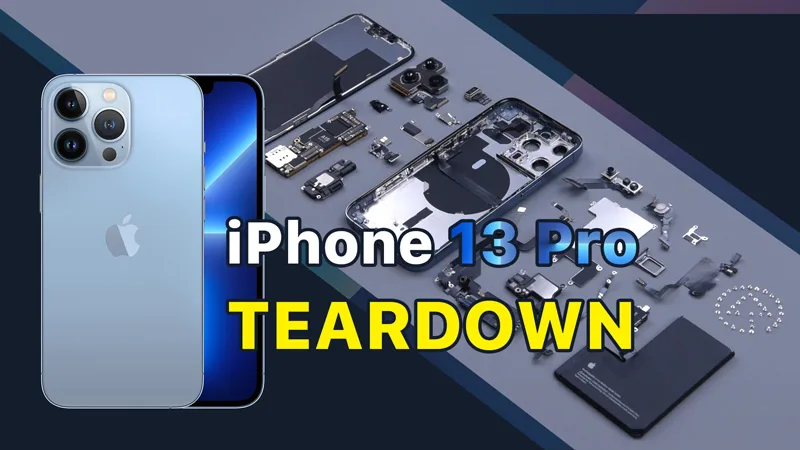
  • Teardown dell'iPhone 13 Pro

    Teardown dell'iPhone 13 Pro

    La nuova linea di iPhone 13 di Apple ha fatto il suo debutto all'evento Apple del 14 settembre, con la presentazione di quattro nuovi modelli.

    I nuovi modelli con aggiornamenti tecnologici comportano sempre nuove sfide di riparazione.

    Oggi smonteremo l'iPhone 13 Pro per vedere le modifiche strutturali interne e come queste influiranno sulla riparazione.

    Teardown dell'iPhone 13 Pro

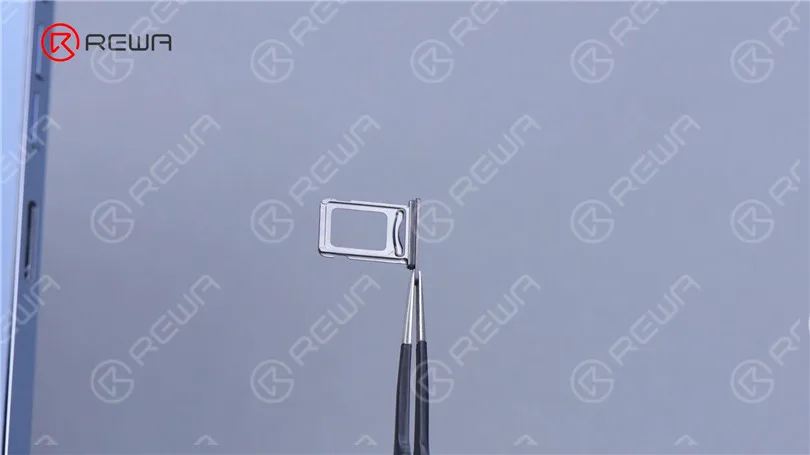
    In primo luogo, rimuovere il vassoio della scheda. Il vassoio delle schede è in metallo ed è dotato di Dual SIM con anello in gomma impermeabile e antipolvere all'interno.

    Teardown dell'iPhone 13 Pro

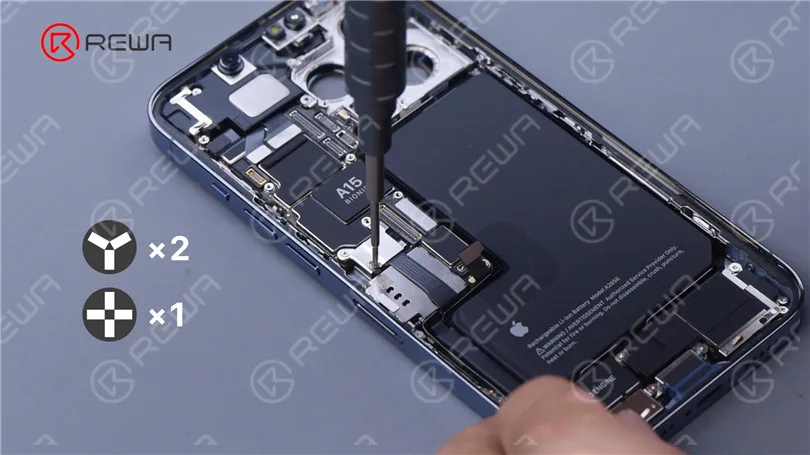
    Oltre all'adesivo, l'iPhone utilizza anche le viti inferiori per rinforzare il fissaggio. Rimuovere due viti dalla parte inferiore.

    Teardown dell'iPhone 13 Pro

    Riscaldare il telefono con una piastra riscaldante per circa 3 minuti. Sollevare il display con una ventosa.

    Inserire una tessera di plastica quando c'è uno spazio vuoto.

    Quindi far scorrere lungo la fessura. Come per l'iPhone 12 Pro, il cavo flessibile del display dell'iPhone 13 Pro si trova a sinistra.

    Anche il display dell'iPhone 13 Pro si apre dal bordo destro.

    Teardown dell'iPhone 13 Pro

    Inoltre, il cavo flessibile del modulo sensore è molto corto.

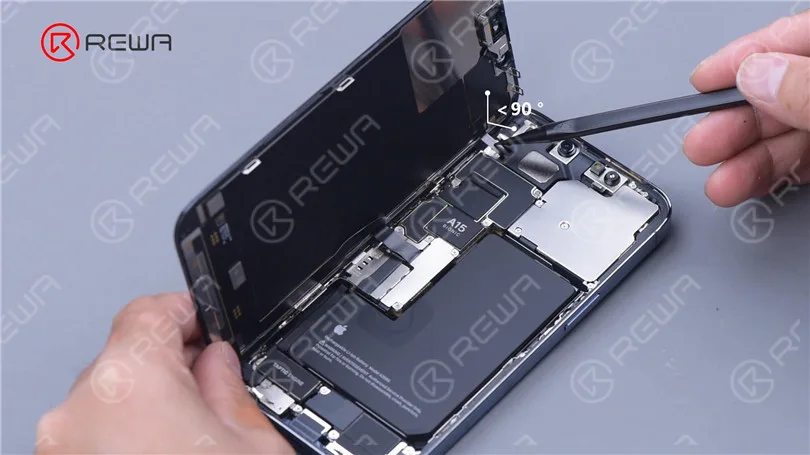
    Pertanto, quando si solleva il display, l'angolo non deve essere superiore a 90 gradi per evitare di rompere il cavo flessibile.

    Teardown dell'iPhone 13 Pro

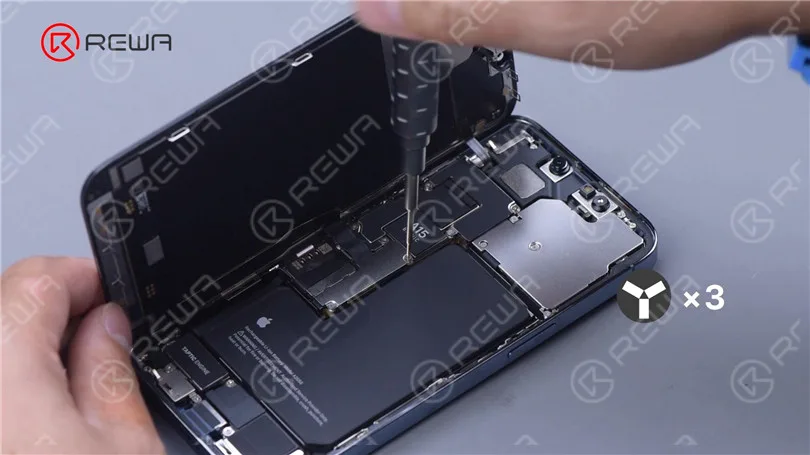
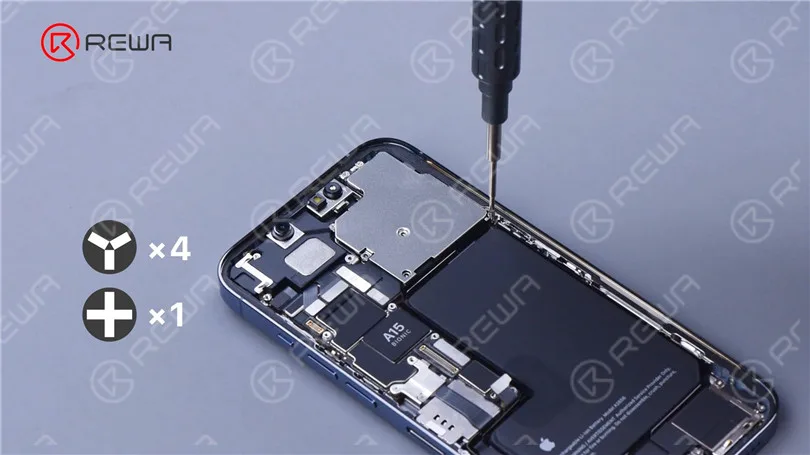
    Rimuovere le tre viti che fissano il coperchio di protezione della batteria.

    Staccare il coperchio di schermatura. Scollegare la batteria.

    Teardown dell'iPhone 13 Pro

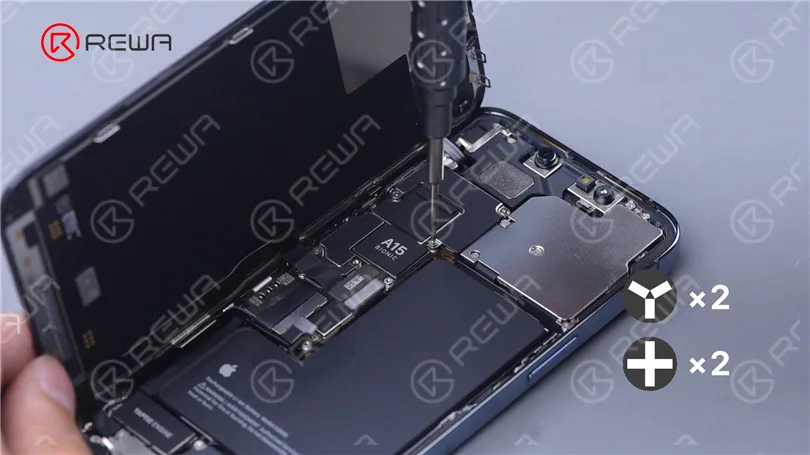
    Continuare a rimuovere le quattro viti che tengono il coperchio di protezione del modulo sensore.

    Scollegare i cavi flessibili del sensore e dello schermo per rimuovere lo schermo.

    Teardown dell'iPhone 13 Pro

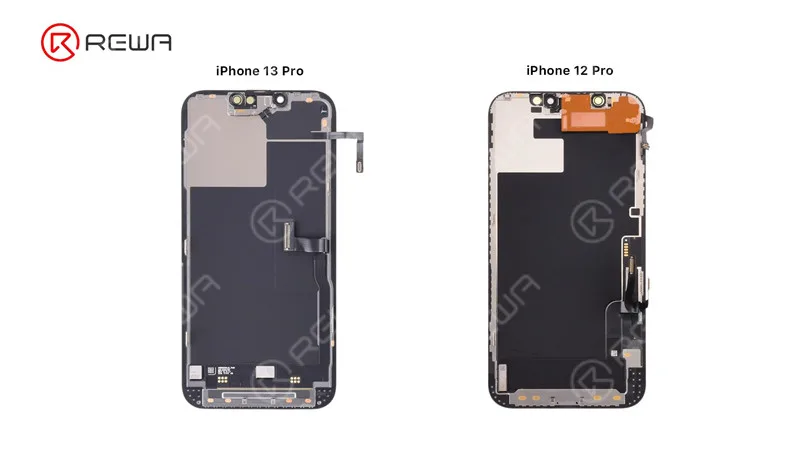
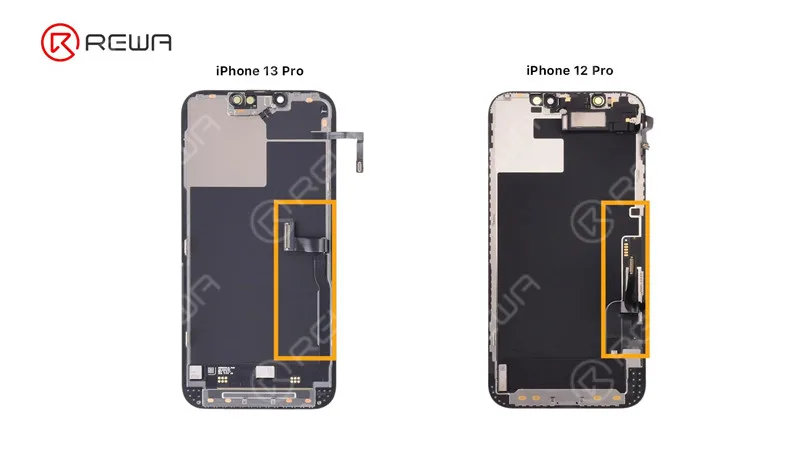
    L'auricolare dell'iPhone 13 Pro è stato spostato sull'alloggiamento, mentre quello dell'iPhone 12 Pro e dei modelli precedenti si trova sullo schermo.

    I cavi flessibili del display e del touch sono ora integrati. La difficoltà di ricondizionamento dello schermo dell'iPhone 13 Pro dovrebbe essere maggiore.

    Teardown dell'iPhone 13 Pro
    Teardown dell'iPhone 13 Pro
    Teardown dell'iPhone 13 Pro

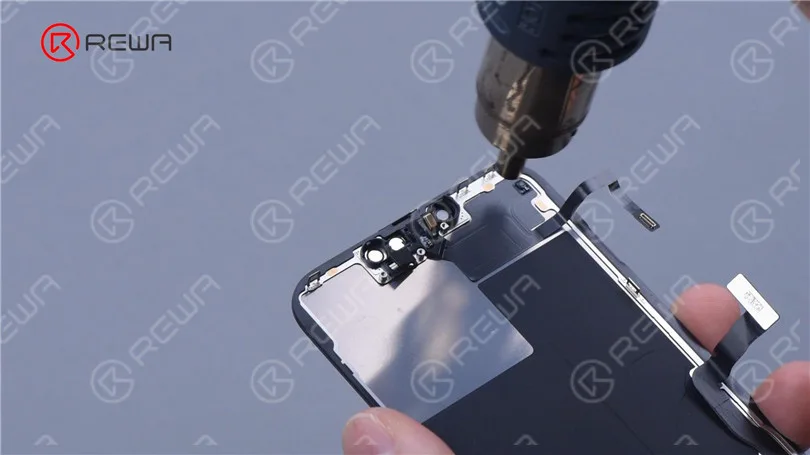
    Rimuovere le tre viti che tengono il cavo flessibile del sensore. Riscaldare con la pistola ad aria calda per rimuovere il cavo flessibile.

    Teardown dell'iPhone 13 Pro

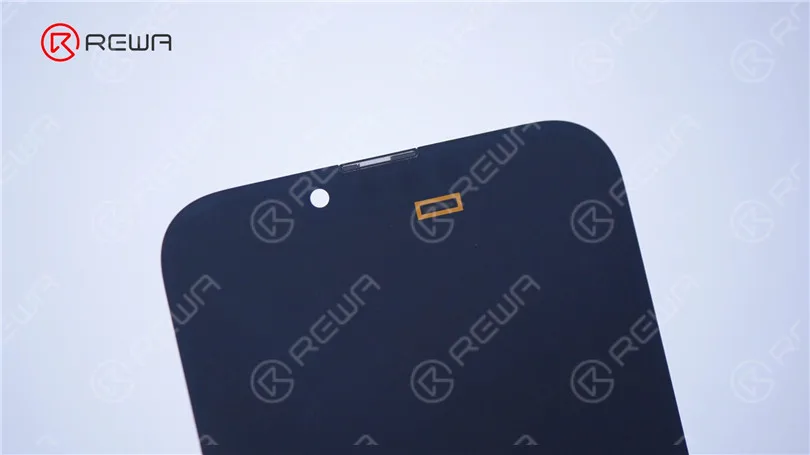
    L'apertura del sensore di luce ambientale si trova in basso a destra della tacca.

    Teardown dell'iPhone 13 Pro

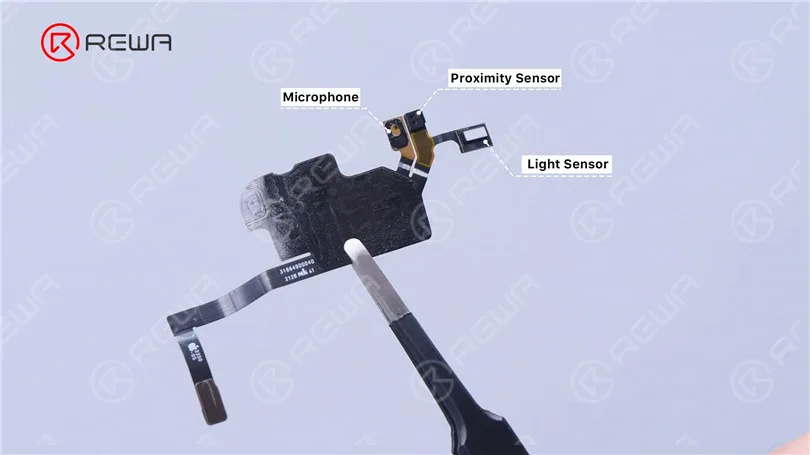
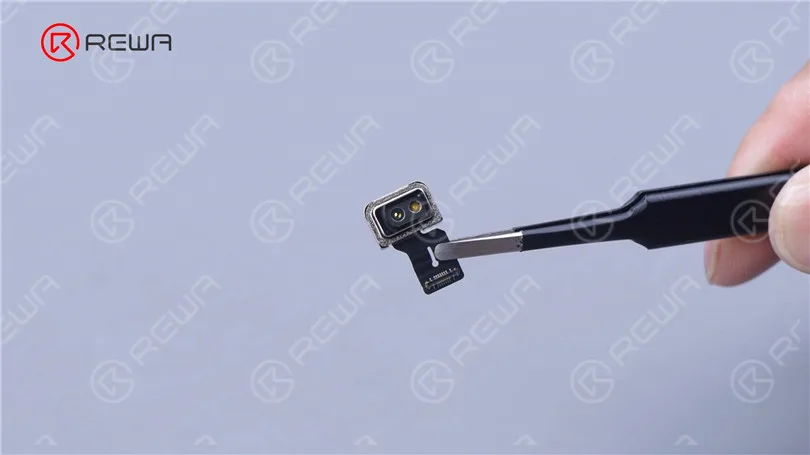
    Il cavo flessibile integra un microfono frontale, un sensore di distanza e un sensore di luce ambientale.

    È meno illuminante rispetto all'iPhone 12 Pro.

    Teardown dell'iPhone 13 Pro

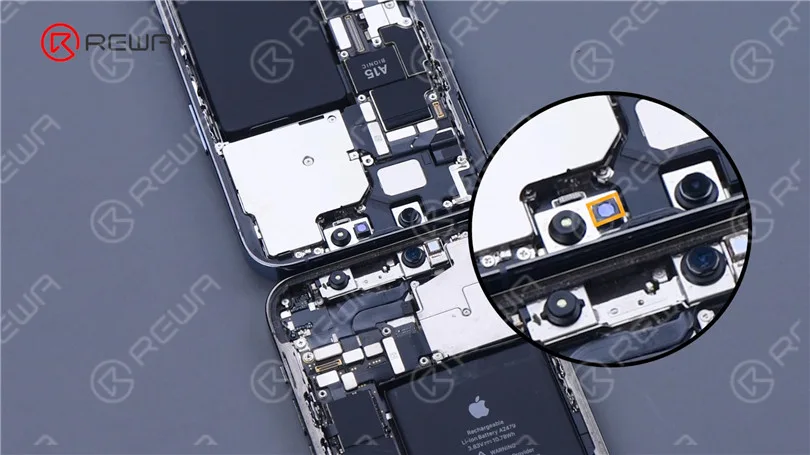
    Il proiettore di punti dell'iPhone 13 Pro è stato spostato al centro.

    Teardown dell'iPhone 13 Pro

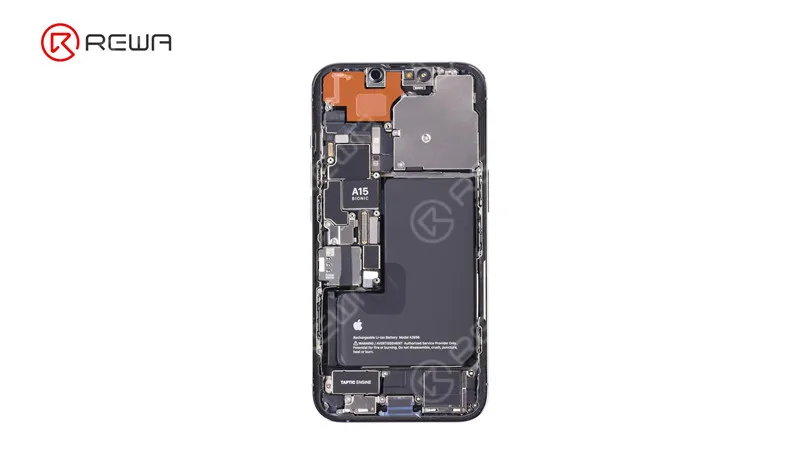
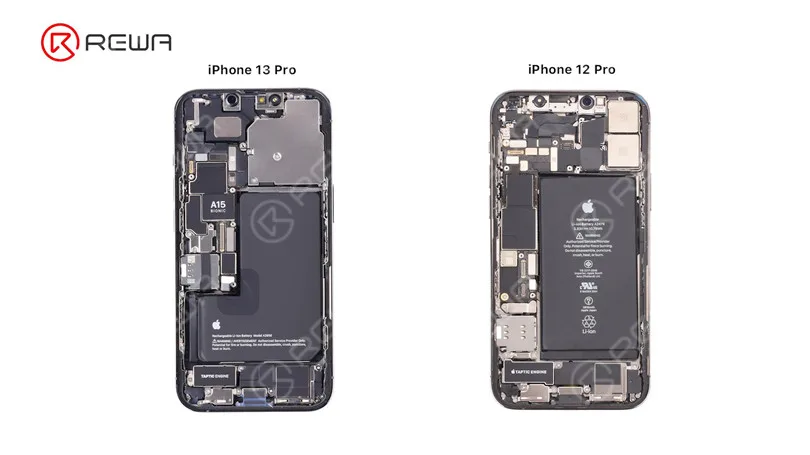
    Diamo poi un'occhiata alla struttura interna complessiva. L'iPhone 13 Pro ha un aspetto molto più pulito rispetto all'iPhone 12 Pro perché ci sono meno stampe sulla superficie della batteria. E c'è A15 sulla scheda madre.

    Teardown dell'iPhone 13 Pro

    Rimuovere le 5 viti che tengono il coperchio di protezione della fotocamera posteriore.

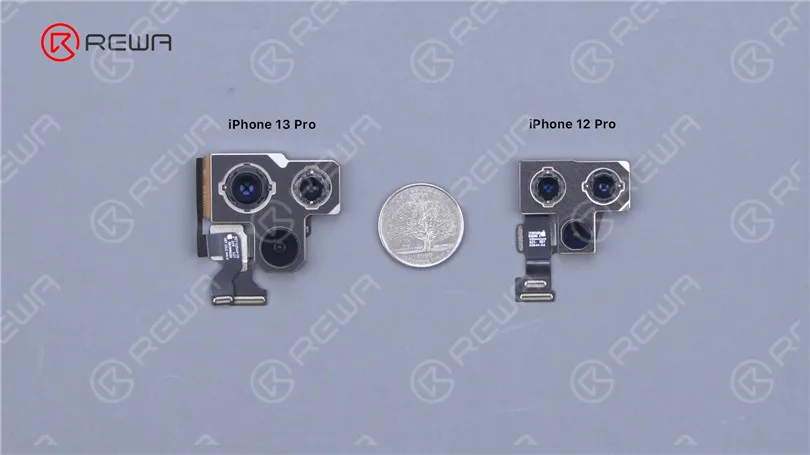
    Scollegare il cavo flessibile della fotocamera. L'iPhone 13 Pro ha una fotocamera più grande rispetto all'iPhone 12 Pro. 

    Teardown dell'iPhone 13 Pro
    Teardown dell'iPhone 13 Pro

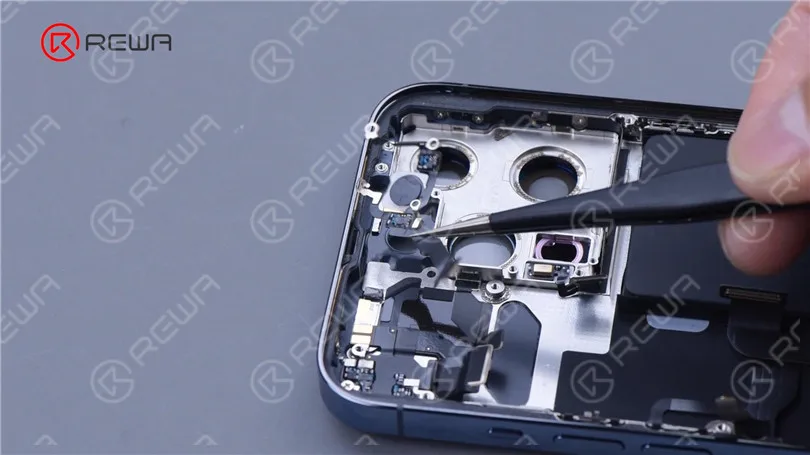
    Staccare il LiDAR. Tutti i lati del LiDAR sono protetti da schiuma tampone.

    Teardown dell'iPhone 13 Pro

    Scollegare i cavi flessibili dell'antenna inferiore e della porta di ricarica. Quindi scollegare i cavi flessibili del proiettore di punti e del modulo Face ID.

    Teardown dell'iPhone 13 Pro

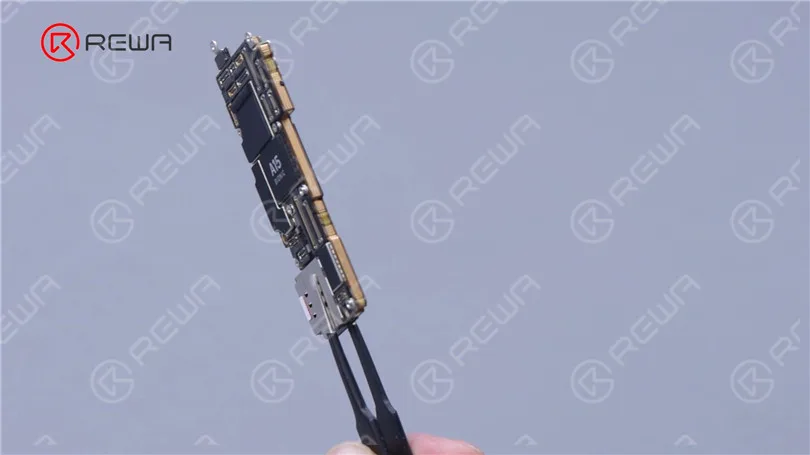
    Rimuovere la scheda madre. La scheda madre adotta ancora un design a doppio strato. Il lettore di schede SIM è saldato sulla scheda madre.

    Su entrambi i lati della scheda madre sono presenti nastri per la dissipazione del calore.

    Teardown dell'iPhone 13 Pro

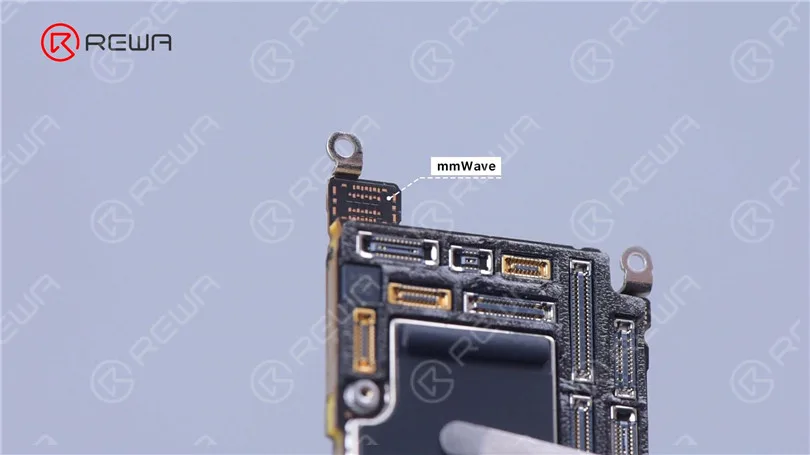
    La sede di mmWave è vuota sulla scheda madre.

    Teardown dell'iPhone 13 Pro

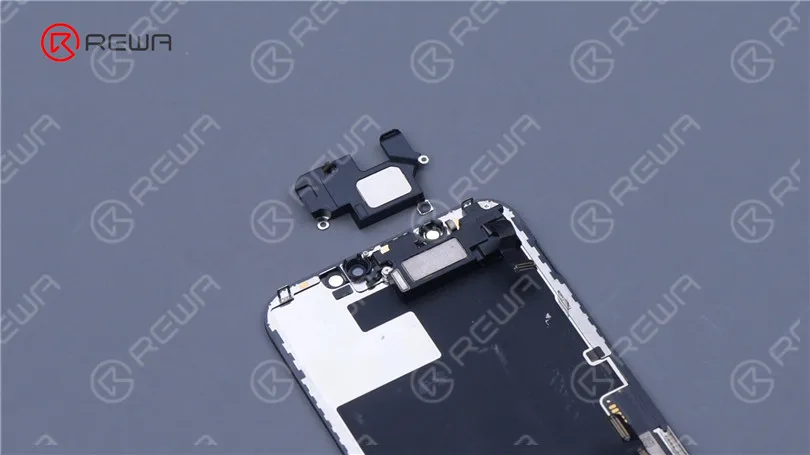
    Rimuovere l'auricolare. Le dimensioni sono aumentate rispetto al modello precedente.

    Teardown dell'iPhone 13 Pro

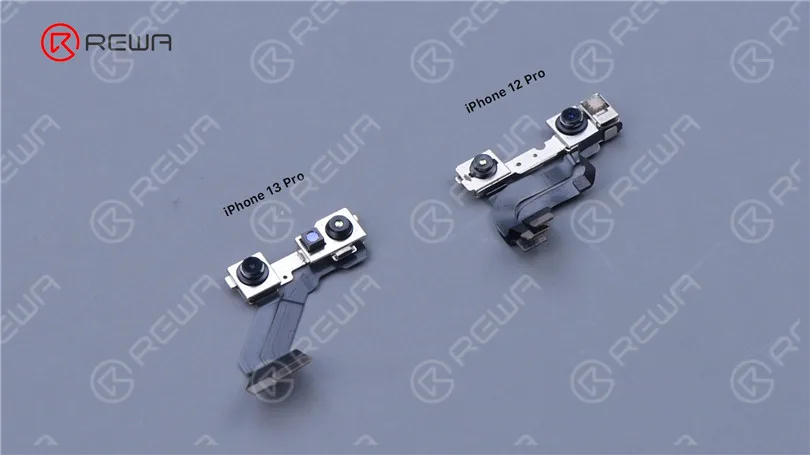
    Rimuovere il cavo flessibile Face ID. Il proiettore di punti e la fotocamera a infrarossi dell'iPhone 13 Pro sono integrati in un unico cavo flessibile. 

    Ciò rende indubbiamente più difficile una futura riparazione del Face ID.

    Teardown dell'iPhone 13 Pro

    Rimuovere il cavo flash flex.

    Svitare le viti che fissano l'antenna del segnale e quindi l'antenna del segnale. Rimuovere l'antenna NFC.

    Teardown dell'iPhone 13 Pro

    Rimuovere le viti che tengono il cavo flessibile della porta di ricarica.

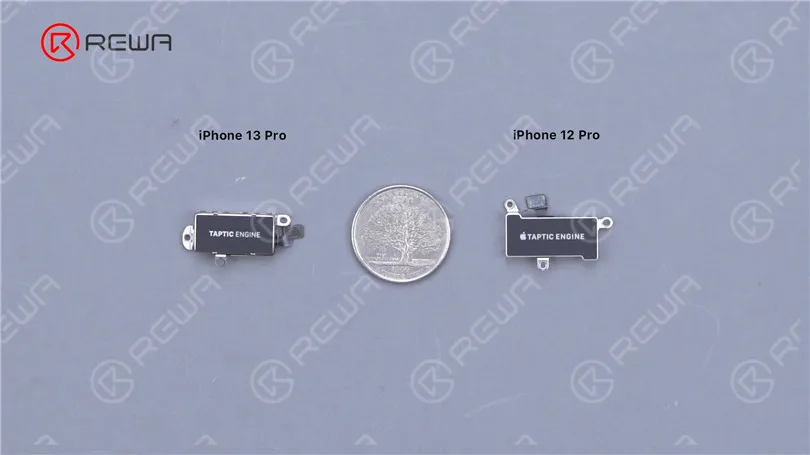
    Estrarre l'altoparlante e il Taptic Engine. Il motore tattile dell'iPhone 13 Pro è più piccolo.

    Teardown dell'iPhone 13 Pro

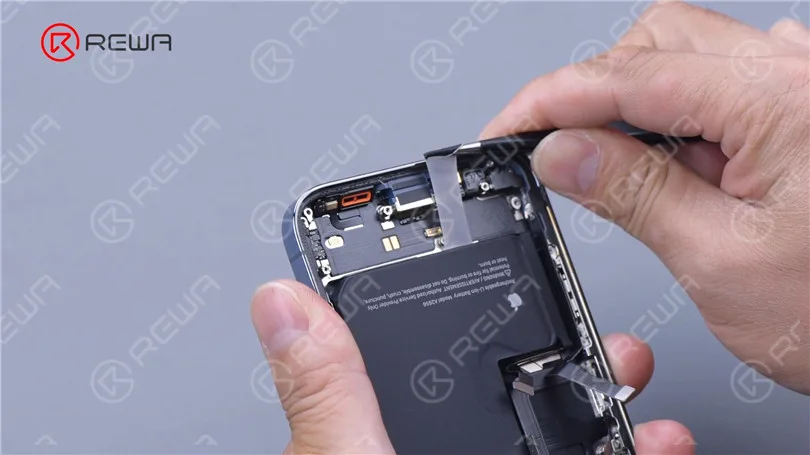
    Poi rimuoviamo la batteria. 

    Utilizzare una pinzetta per estrarre lentamente le strisce adesive.

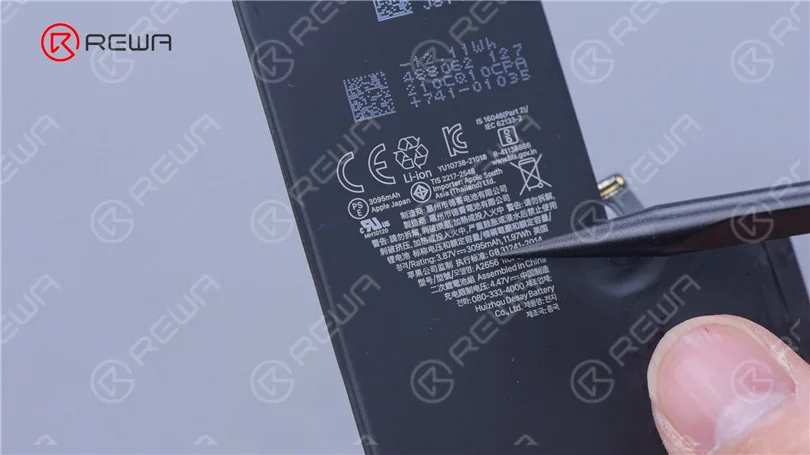
    La capacità della batteria è aumentata da 2815 mAh a 3095 mAh.

    Teardown dell'iPhone 13 Pro
    Teardown dell'iPhone 13 Pro

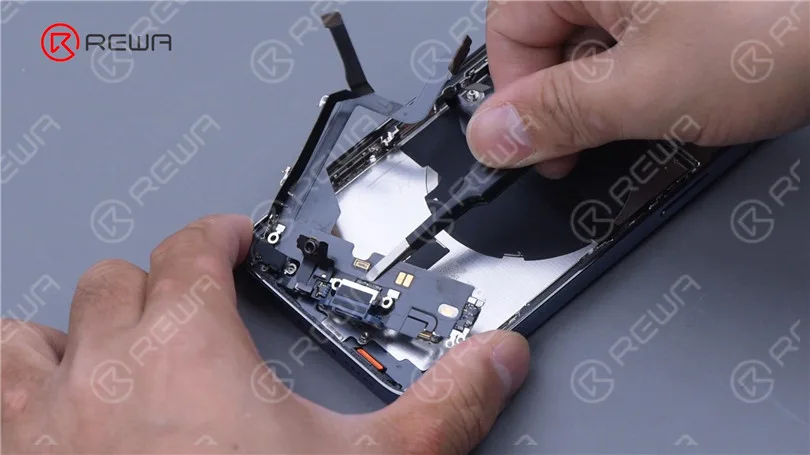
    Infine, rimuovere la parte in plastica e il cavo flessibile della porta di ricarica.

    Teardown dell'iPhone 13 Pro

    La cover posteriore dell'iPhone 13 Pro è identica a quella dell'iPhone 12 Pro.

    Si presume che il metodo di ricondizionamento sia lo stesso dell'iPhone 12 Pro. In generale, il teardown dell'iPhone 13 Pro è più semplice rispetto al suo predecessore.

    La riparazione dello schermo e del Face ID diventerà più difficile. Più tardi pubblicheremo dei video sulla separazione della scheda madre, sulla rimessa a nuovo dello schermo e della cover posteriore per discutere in dettaglio le difficoltà di riparazione dell'iPhone 13 Pro. Restate sintonizzati.

    Teardown dell'iPhone 13 Pro
  • iPhone 3GS Teardown

    iPhone 3GS Teardown

    It’s been 12 years since iPhone 3GS was released. Let’s enjoy some vintage disassembly!

  • iPhone 11 Pro Teardown

    iPhone 11 Pro Teardown

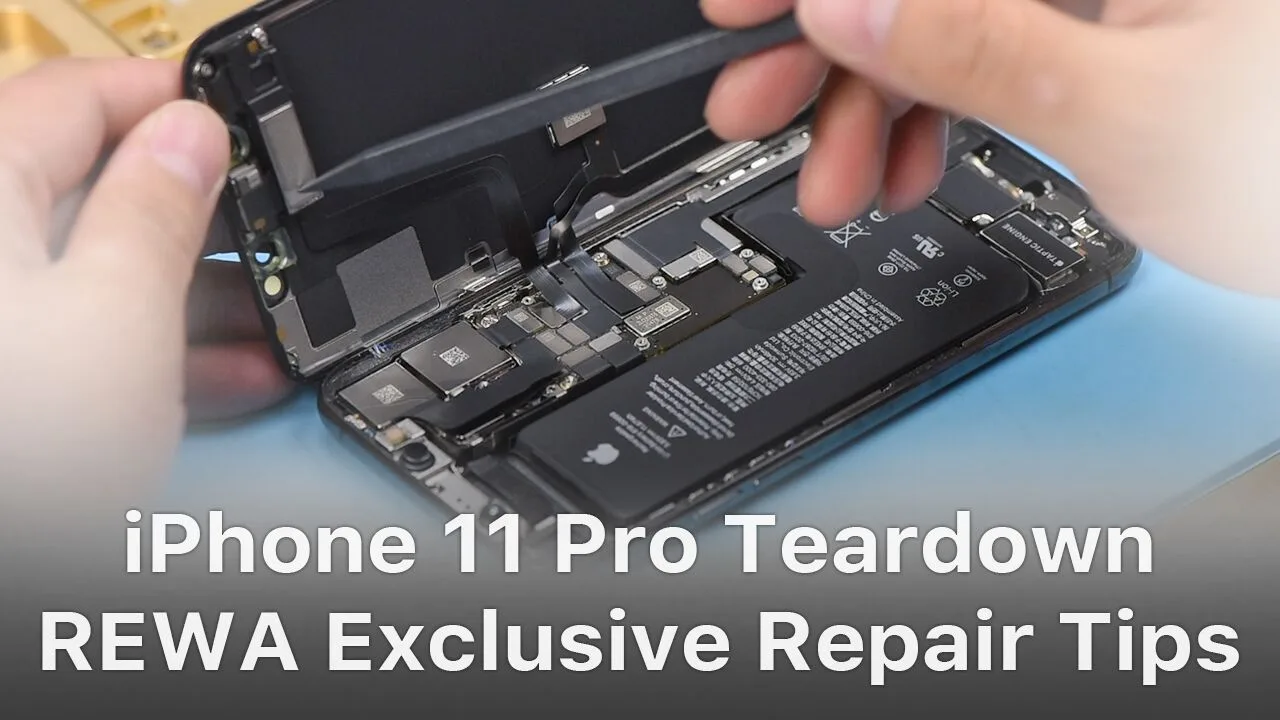
    The iPhone 11 series has impressed the repair industry again with its new iPhones. What does the new design mean to our repair work? In our video, we will show you each part inside the iPhone 11 pro and share repair tips from REWA perspective.

  • iPhone 12 Pro Detailed Teardown Tips For Repair Shop Technicians

    iPhone 12 Pro Detailed Teardown Tips For Repair Shop Technicians

    Apple’s new iPhone 12 models have been the talk of the town. For repair shop owners, the biggest concern is what to pay attention during disassembly. Today, REWA LAB is going to share a detailed teardown tutorial of the iPhone 12 Pro. Let’s take a look!

    Prodotti consigliati in questo video:

    • Mobile Phone Disassemble Set
    • REWA SELECTED iPhone 12 Series Accessories:
    • Phone Case
    • Charger Plug
    • Screen Protector
    • Earphone
  • Teardown dell'iPhone 11 Pro - Suggerimenti per la riparazione esclusivi di REWA

    Teardown dell'iPhone 11 Pro - Suggerimenti per la riparazione esclusivi di REWA

    The iPhone 11 series has impressed the repair industry again with its new iPhones. What does the new design mean to our repair work? In our video, we will show you each part inside the iPhone 11 pro and share repair tips from REWA perspective.

    Tools & Parts used to teardown iPhone 11 Pro:

  • Analisi completa dello smontaggio dello schermo OLED di iPhone X

    Analisi completa dello smontaggio dello schermo OLED di iPhone X

    REWA LAB has conducted a deeper teardown of iPhone X OLED screen Recently. After separation, you will find the differences between iPhone X display and the screens of previous iPhone models. 

    1. iPhone X display comes with different driver IC bonding technique. iPhone X applies COF, while previous iPhone applies COG.

    2. iPhone X screen digitizer has its 3D touch module adhered to OLED backplate.

    3. The 3D touch module of iPhone X is bonded to the OLED panel.

    As a new product of OLED combined with 3D Touch function, iPhone X screen has surprised all of us with its features. REWA LAB works with iPhone X screen teardown and presents its novelty, disassembly difficulties and structure analysis. Laminating process of iPhone X OLED screen is much complicated than LCD screen. Laminate OLED with TP first, then OLED with 3D Touch. The whole process counts more than 15 procedures.

    Smontaggio completo dello schermo OLED di iPhone X

    Test dello schermo

    Test the iPhone X screen before tearing down. Run function test – Display; Touch; 3D Touch and Swipe-up. All going well.

    Rimozione della lunetta

    Place the OLED Screen Assembly on the Heat Platform. Remove bezel slowly with Pry Piece and Glue Cleaner. Cut a plastic horn of the bezel with the blade if necessary and then remove bezel with Pry Piece and Glue Cleaner carefully. Be careful with flex cables when removing bezel in the flex cable area.

    The Pry Piece accidentally damages flex cables when removing the bezel. Which may result in the abnormal display. Test the screen again. Run function test – Display; Touch; 3D Touch and Swipe-up. Touch, 3D Touch, and Swipe-up work normally while there are two vertical lines on the display.

    Separazione del vetro 

    Posizionare il gruppo dello schermo OLED sulla piastra riscaldante. Separare il vetro dall'OLED utilizzando il filo da taglio. Stiamo lavorando con uno schermo flessibile OLED, quindi fare attenzione con il lavoro manuale.

    Test again after separating. Run function test- Display; Touch; 3D Touch and Swipe-up. Touch, 3D Touch, and Swipe-up work normally while there are two vertical lines on the display.

    Rimozione della colla

    La rimozione della colla per lo schermo di iPhone X può essere eseguita strappandola a mano.

    3D Touch Layer Removing

    Different from Samsung smartphones, iPhone X has its 3D Touch module adhered to OLED backplane. Different from all iPhone previous versions, the 3D Touch module of iPhone X is bonded to the OLED panel. To fully analyze its structure, we take a disruptive disassembly of the 3D Touch module. The 3D Touch and TP flex bonding is separated completely after the disassembly.