Tag: iphone touch id

  • How to Restore iPhone Touch ID With Home Button Flex Repairing

    How to Restore iPhone Touch ID With Home Button Flex Repairing

    iPhone touch ID not working issue has been a sticky business for repair technicians for a long time. What’s more, iPhone touch ID of iPhone 6 and later versions are bonded with CPU (iPhone 6s home button not working), and Home Button replacing by users has a destructive effect on touch ID fingerprint sensor function. The fact is that about 80% of iPhone Touch ID failures are caused by damaged home button flex. Well, this time REWA come up with a new solution regarding the damaged home button flex. Check it out by yourself now.
    How to Restore iPhone Touch ID With Home Button Flex Repairing

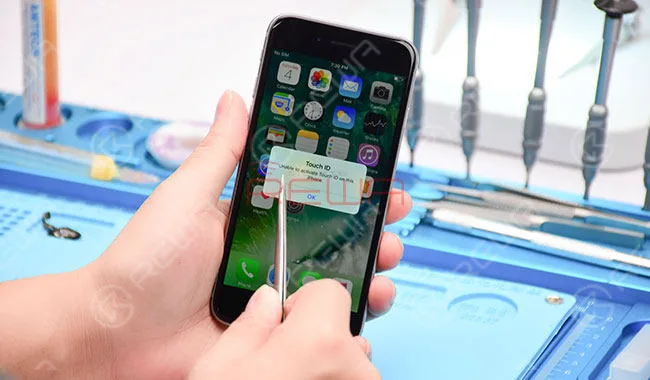
    Restore iPhone Touch ID With Home Button Flex RepairingPower on and test. “Unable to activate Touch ID on this iPhone”. Press Home Button, the returning function is normal.
    How to Restore iPhone Touch ID With Home Button Flex Repairing

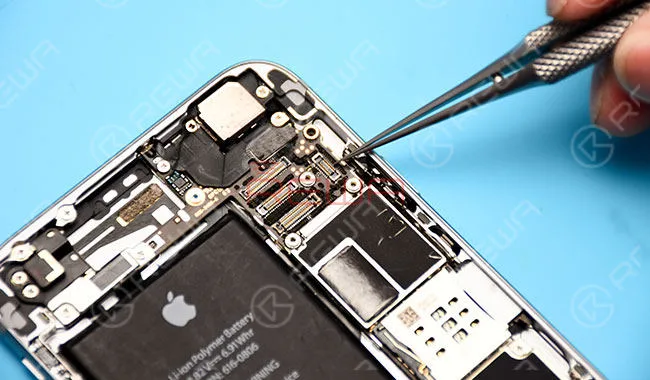
    Disassemble the phone and remove the display assembly. First of all, check the logic board connector J2118 for moldy condition and dry Joint. Everything is fine.
    How to Restore iPhone Touch ID With Home Button Flex Repairing

    Then, measure the resistance between J2118 and grounding. The value is also normal.

    How to Restore iPhone Touch ID With Home Button Flex Repairing

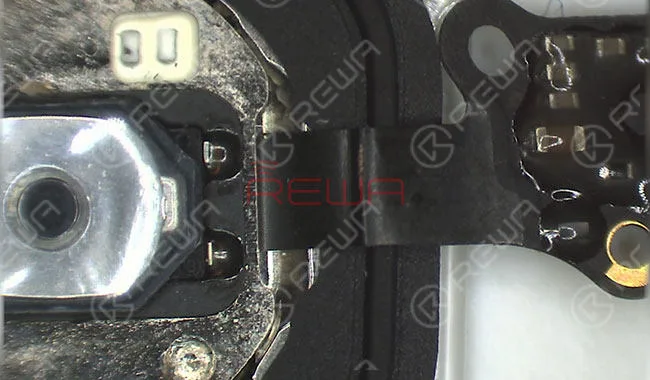
    Take down the Home Touch Sensor Assembly and check the home button flex cable. There are obviously broken traces on the flex cable.

    How to Restore iPhone Touch ID With Home Button Flex Repairing

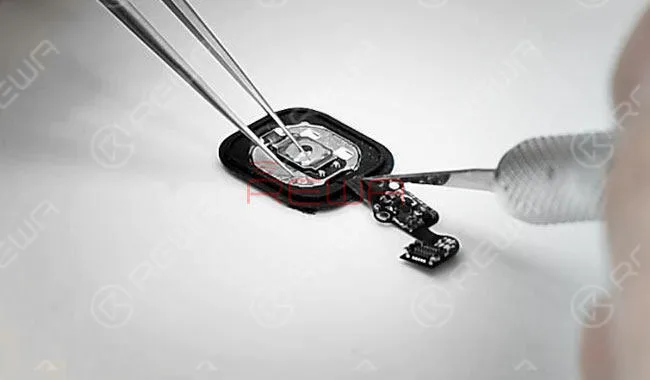
    Preliminary judgment – Touch ID malfunction is caused by fractured flex cable circuit. We can fix the problem by replacing the fractured section with a new length of the flex cable.Pry up the back plate with Tweezer and Soldering Iron. Cut the fractured part from the flex cable with Sculpture Knife.

    How to Restore iPhone Touch ID With Home Button Flex Repairing

    Scrape out the flex cable circuit. Be careful not to cut the circuit off.

    How to Restore iPhone Touch ID With Home Button Flex Repairing

    Apply some BGA paste flux to the flex cable and then solder tins with Soldering Iron. Clean with PCB Cleaner after cooling.

    How to Restore iPhone Touch ID With Home Button Flex Repairing

    Prepare a new Home Touch Sensor Assembly.

    How to Restore iPhone Touch ID With Home Button Flex Repairing

    Pry up the back plate of the new Home Touch Sensor Assembly. Cut a length of flex cable from the new Home Touch Sensor Assembly (allow for some adjustment in length of the cut cable).

    How to Restore iPhone Touch ID With Home Button Flex Repairing

    Fix the newly cut cable with double-sided adhesive. Then, scrape out the newly cut flex cable circuit. Be careful not to cut the circuit off.

    How to Restore iPhone Touch ID With Home Button Flex Repairing

    Apply some BGA paste flux to the newly cut flex cable. Then solder tins with Soldering Iron. Clean with PCB Cleaner after cooling.

    How to Restore iPhone Touch ID With Home Button Flex Repairing

    Cut out the excess parts of the newly cut flex cable. After that, apply 460 Glue to the bonding part and adhere the two cables carefully. Pay attention to the aligning position.

    How to Restore iPhone Touch ID With Home Button Flex Repairing

    Once cables are fixed, apply some BGA paste flux and solder flex cables with Soldering Iron. Be careful with bridging and disturbed solder condition.

    How to Restore iPhone Touch ID With Home Button Flex Repairing

    Clean with PCB Cleaner after cooling. Remember to check the circuit for bridging and disturbed solder.

    How to Restore iPhone Touch ID With Home Button Flex Repairing

    Get the Home Touch Sensor Assembly mounted on the screen. Then buckle the display assembly to the logic board.

    How to Restore iPhone Touch ID With Home Button Flex Repairing

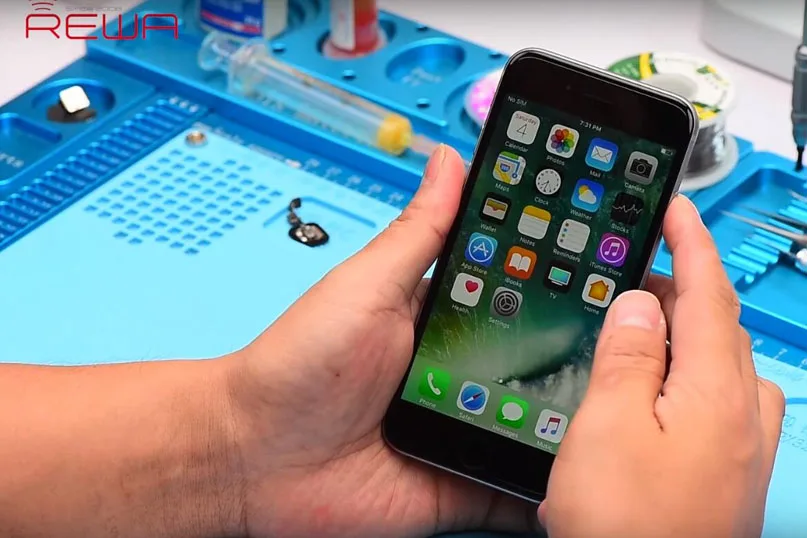
    Power on and run Touch ID function test. Touch ID back to normal.

    How to Restore iPhone Touch ID With Home Button Flex Repairing

    Take down the display assembly after test and take out the Home Touch Sensor Assembly. Prepare another length of the cable. And then adhere the cable to the previous bonding part.

    How to Restore iPhone Touch ID With Home Button Flex Repairing

    To further secure flex cables, solder with Soldering Iron. And then secure the back plate with Glue carefully.

    How to Restore iPhone Touch ID With Home Button Flex Repairing

    Get the Home Touch Sensor Assembly mounted on the screen. Buckle the display assembly to the logic board. After that, power on and test. The phone works with normal Touch ID function.

    How to Restore iPhone Touch ID With Home Button Flex Repairing

    For more details on restore iPhone Touch ID with Home Button flex repairing, please go to Canale YouTube di REWA.

    Parti e strumenti necessari

  • How to Restore Touch ID of iPhone Due to Home Button Flex Broken

    How to Restore Touch ID of iPhone Due to Home Button Flex Broken

    iPhone users might be in despair when their iPhone home button touch ID gets into trouble or even doesn’t work after replaced home button. Why? For iPhone 6 and later versions, touch ID is bonded with CPU, and the user who has replaced his home button will then lose its touch ID fingerprint function. For a long time, it is a sticky business for repair technicians to repair the iPhone touch ID issue, but actually, about 80% of the touch ID failures are resulted by damaged home button touch ID flex. REWA therefore released a video about how to restore iPhone 6/6 plus/6s/6s plus home button touch id issue by making a jumper on flex.

    Restore iPhone Touch ID With Home Button Flex Reparing

    Power on and test. “Unable to activate Touch ID on this iPhone”. Press Home Button, the returning function is normal.

    Disassemble the phone and remove the display assembly. First of all, check the logic board connector J2118 for mouldy condition and dry Joint. Everything is fine.

    Then, measure the resistance between J2118 and grounding. The value is also normal.
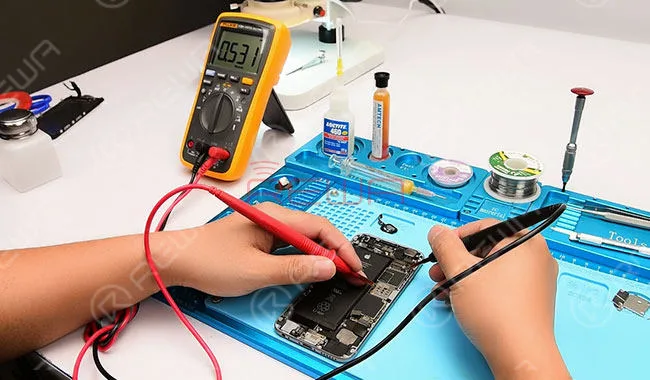
    Take down the Home Touch Sensor Assembly and check the home button flex cable. There are obvious broken traces on the flex cable.

    Preliminary judgment – Touch ID malfunction is caused by fractured flex cable circuit. We can fix the problem by replacing the fractured section with a new length of flex cable.

    Pry up the back plate with Tweezer and Soldering Iron. Cut the fractured part from the flex cable with Sculpture Knife.
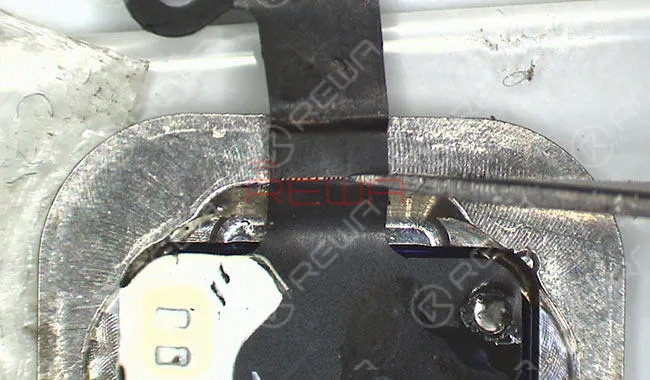
    Scrape out the flex cable circuit. Be careful not to cut the circuit off.
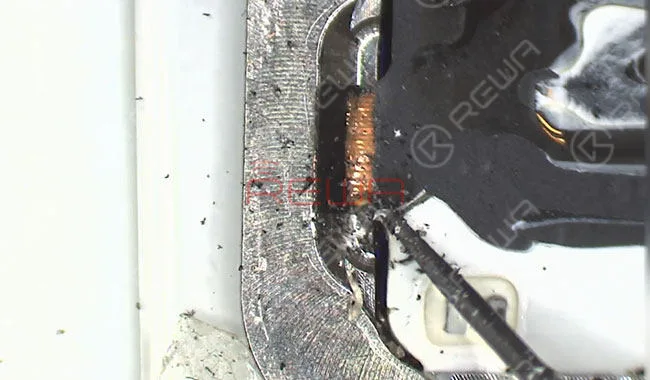
    Apply some BGA paste flux to the flex cable and then solder tins with Soldering Iron. Clean with PCB Cleaner after cooling.
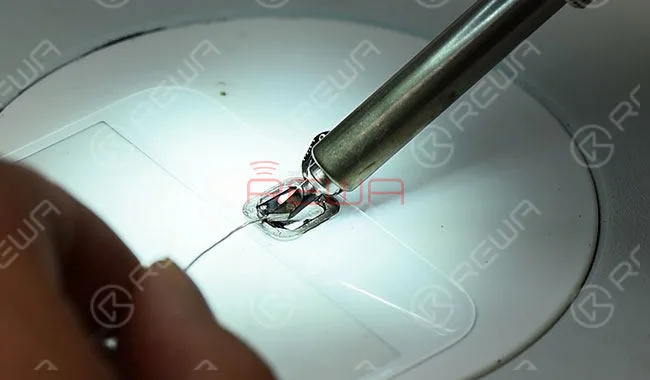
    Prepare a new Home Touch Sensor Assembly.
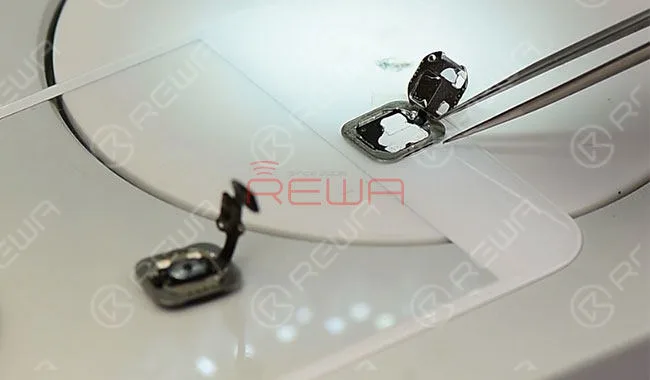
    Pry up the back plate of the new Home Touch Sensor Assembly. Cut a length of flex cable from the new Home Touch Sensor Assembly (allow for some adjustment in length of the cut cable).
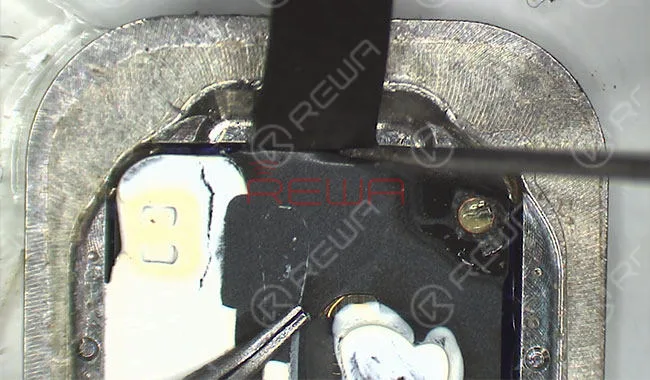
    Fix the newly cut cable with double-sided adhesive. Then, scrape out the newly cut flex cable circuit. Be careful not to cut the circuit off.
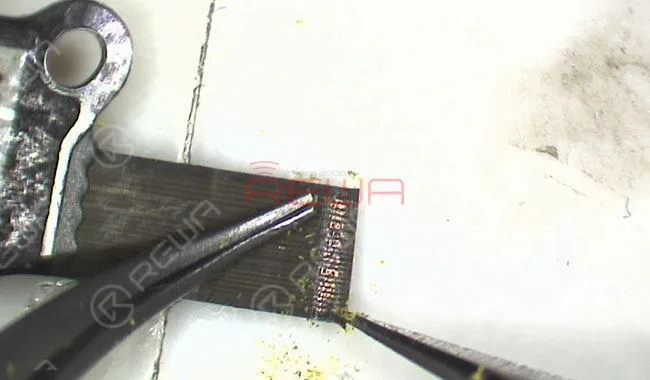
    Apply some BGA paste flux to the newly cut flex cable. Then solder tins with Soldering Iron. Clean with PCB Cleaner after cooling.
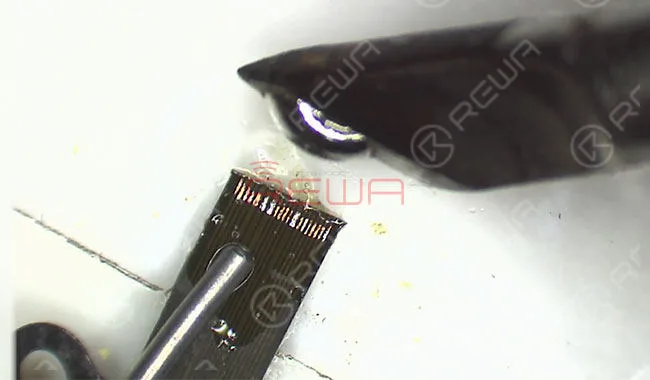
    Cut out the excess parts of the newly cut flex cable. After that, apply 460 Glue to the bonding part and adhere the two cables carefully. Pay attention to the aligning position.
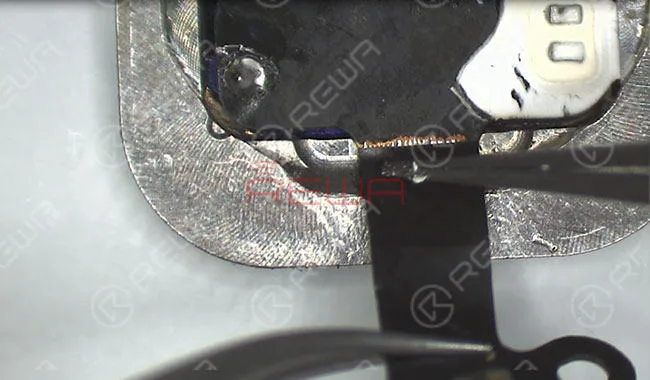
    Once cables are fixed, apply some BGA paste flux and solder flex cables with Soldering Iron. Be careful with bridging and disturbed solder condition.
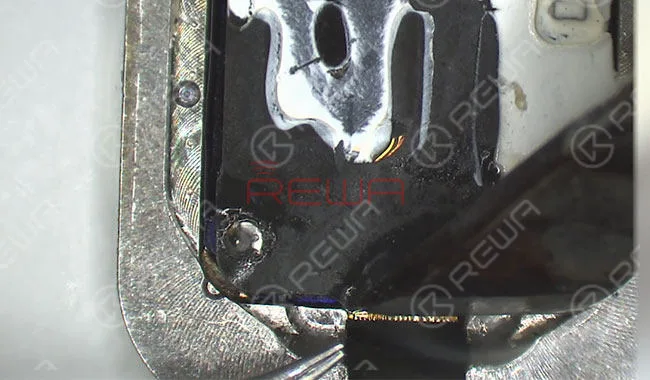
    Clean with PCB Cleaner after cooling. Remember to check the circuit for bridging and disturbed solder.
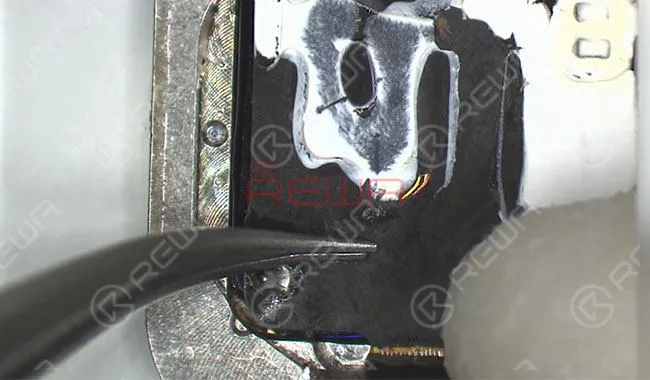
    Get the Home Touch Sensor Assembly mounted on the screen. Then buckle the display assembly to the logic board.
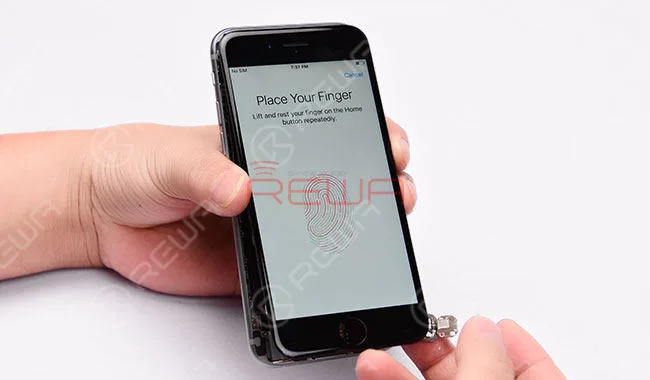
    Power on and run Touch ID function test. Touch ID back to normal.
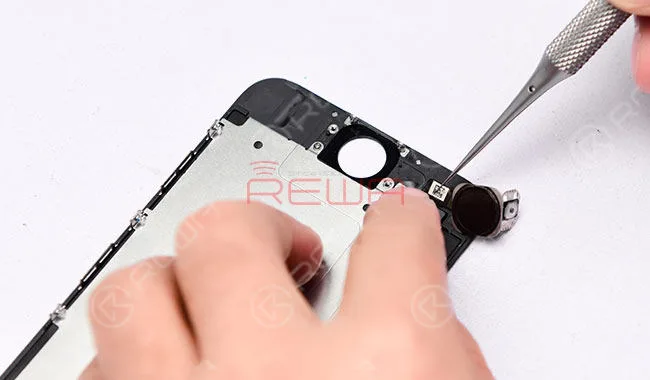
    Take down the display assembly after test and take out the Home Touch Sensor Assembly. Prepare another length of cable. And then adhere the cable to the previous bonding part.
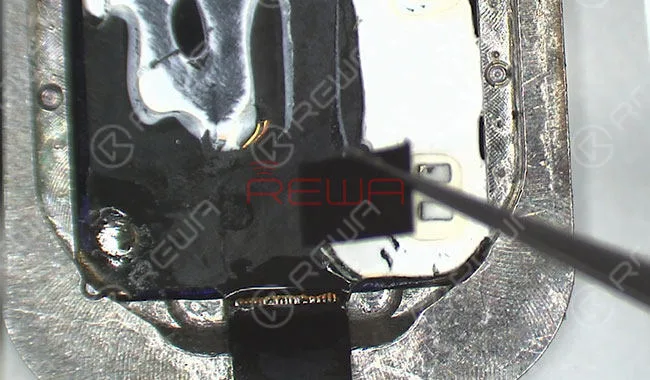
    To further secure flex cables, solder with Soldering Iron. And then secure the back plate with Glue carefully.
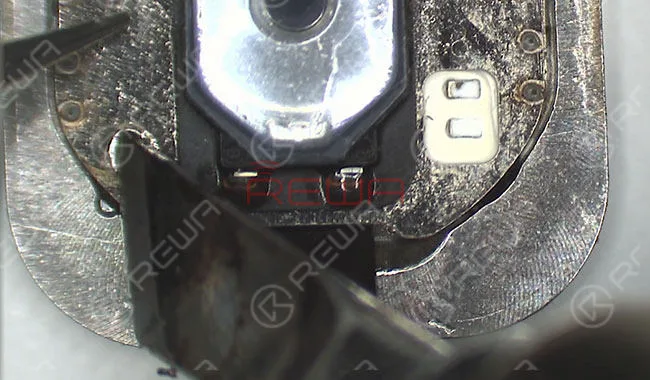
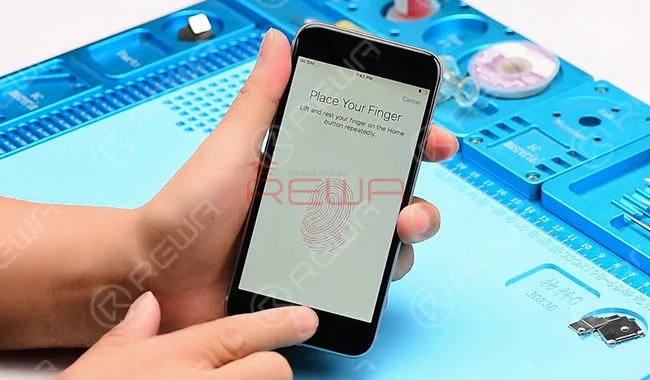
    Get the Home Touch Sensor Assembly mounted on the screen. Buckle the display assembly to the logic board. After that, power on and test. The phone works with normal Touch ID function.
  • Come riparare il Touch ID o il tasto Home dell'iPhone 7 che non funziona

    Come riparare il Touch ID o il tasto Home dell'iPhone 7 che non funziona

    Spesso abbiamo sentito molti utenti di iPhone porre questa domanda: “Il Touch ID e il pulsante Home del mio iPhone 7 non funzionano più. Devo premere il pulsante Home molto forte per farlo rispondere e la funzione Touch ID non funziona, è rotto permanentemente? C'è una soluzione?’

    Pulsante Home o Touch ID dell'iPhone non funzionante (appare anche su iPhone 5S, iPhone 6/6 Plus, iPhone 6S/6S Plus, iPhone 7/7 Plus, iPhone 8 e iPhone X)? Per alcuni modelli di iPhone (in particolare i vecchi iPhone 4, sebbene anche alcuni iPhone più recenti siano stati interessati) questo è un reclamo comune, ma potremmo essere in grado di offrire alcuni consigli su come risolverlo. Abbiamo anche una comoda soluzione software che potrebbe rendere la vita sopportabile se il tuo iPhone è fuori garanzia o se è altrimenti impossibile riparare il problema hardware.

    Ecco come riparare un tasto Home rotto di iPhone e Touch ID, video dettagliato e immagini, passo dopo passo per insegnarti “Come risolvere il problema di Touch ID o del pulsante Home dell'iPhone che non funziona”. Quando il Touch ID del tuo iPhone 6 o iPhone 7 non funziona, non sarai in grado di attivare il touch ID su questo iPhone, c'è una soluzione dettagliata per la sostituzione del Touch ID o del pulsante Home dell'iPhone 6 che ti aiuterà a riparare il tuo iPhone.

    iPhone 7 soluzionare problemi Touch ID dettagliata guida passo passo:

    È risaputo che il chip Touch ID è esclusivamente abbinato alla scheda madre. Se si cambia solo un nuovo pulsante Home, la funzione Touch ID scompare in quanto viene cambiato anche il chip unico. Quindi, se il pulsante Home è purtroppo rotto, come riparare il Touch ID dell'iPhone che non funziona? Ecco la soluzione!

    I passaggi

    1. Accendi il telefono, impossibile attivare il suo Touch ID.

    2.Vai su impostazioni – Touch ID e codice – inserisci il tuo codice, l'impronta digitale è disattivata.

    3. Rimuovere il cavo flessibile del pulsante Home.

    4.Abbiamo controllato il cavo flessibile del tasto Home al microscopio, abbiamo riscontrato che il cavo a nastro è rotto.

    5. Rimuovere il rivestimento dal cavo del nastro con un coltello.

    6. Applicare un po' di flussante in pasta BGA e saldare i pin con la stazione saldante.

    7. Rimuovere la guaina dal filo sul lato posteriore.

    8. Applicare un po' di flussante in pasta BGA, quindi saldare le stagnature con la stazione di saldatura.

    9. Tagliare i fili, quindi allinearli correttamente, riscaldare con una pistola ad aria calda e saldare.

    10. Ruotare il cavo flessibile sul retro, saldarlo con il filo.

    11.Verificare se si tratta di un cortocircuito con un multimetro digitale.

    12. Installare il pulsante home e testare.

    13. Applicare un po' di mastice saldante UV-curable sul filo per fissare il giunto di saldatura.

    14.Installare il gruppo dello schermo LCD e testare, il lettore di impronte digitali funziona bene.

    Riguardo alla riparazione del tasto Home dell'iPhone 7, abbiamo utilizzato i seguenti strumenti, se non li avete potete controllare i link e acquistarli, per diventare un riparatore professionista di iPhone.

    Touch ID dell'iPhone non funziona

    Da quando l'iPhone 7 e l'iPhone 7 Plus non hanno più un tasto Home fisico, c'è ancora la possibilità che il tasto si guasti, come è successo a Dwayne sui forum di MacRumors. Fortunatamente, Apple ha integrato un'opzione di riserva che mostra una notifica che ti informa di usare un ‘tasto Home sullo schermo’ prima di portarlo in assistenza.

    Questa nuova funzionalità di Apple è passata inosservata – principalmente perché la maggior parte non ha notato alcun problema con il proprio nuovo acquisto di telefono. Troviamo questa funzionalità fantastica per gli utenti di iPhone 7 e iPhone 7 Plus – in quanto fornisce un'opzione secondaria di default. Se non hai il nuovo iPhone, continua a leggere per scoprire le nostre soluzioni.

    Se vuoi saperne di più su come riparare i tuoi iPhone, puoi visitare il nostro sito o iscriverti al nostro canale YouTube, aggiorneremo regolarmente video tutorial di qualità.