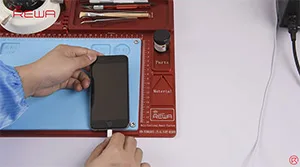
iTunes Error 9 often appears when processing firmware update or system restores by iTunes. Several reasons are attributed towards the problem, and we have already posted a solution for iPhone error 9 fixes related to the NAND Flash error before. Here this video shows a different solution regarding iPhone 6 error 9 without removing CPU. With the help of our newly developed CNC chip grinding machine, this job can be done even safer and quicker without damaging the logic board and nearby chips.
Tag: iPhone 6
-
Risolvi il problema del surriscaldamento di iPhone 6s – Guida alla riparazione della scheda madre
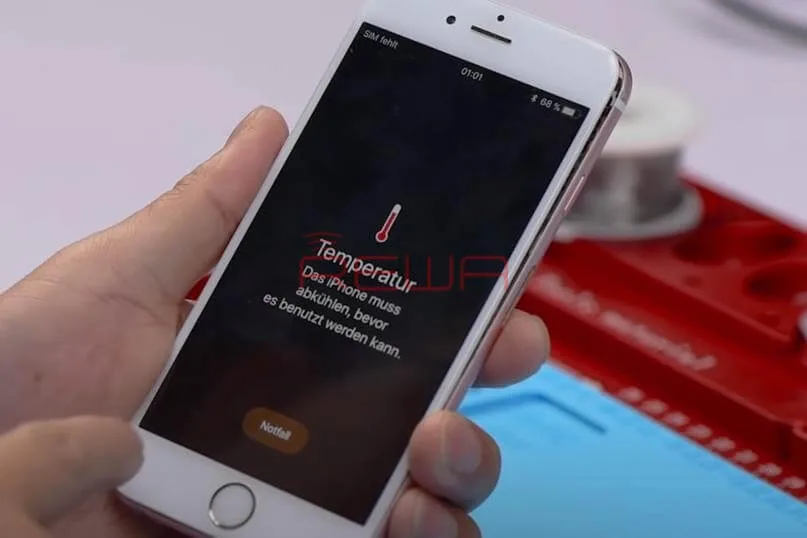
L'iPhone 6s si avvia mostrando una schermata di avviso di alta temperatura. Solitamente il problema è causato da un numero eccessivo di applicazioni in esecuzione. Tuttavia, nella nostra guida alla riparazione di oggi, ci occuperemo della riparazione della scheda madre. Dopo il rilevamento della corrente e il test con la colofonia, possiamo confermare che il problema è stato causato da condensatori danneggiati all'interno del modulo WiFi. Con la nostra esperienza di riparazione, adottiamo una nuova soluzione di riparazione per risolvere il problema.
Identificazione del problema:
Abbiamo ricevuto una scheda difettosa da un cliente. La prima cosa che facciamo è montare la scheda logica sul telefono. Poi colleghiamo il gruppo display e accendiamo. Il telefono si accende con un display normale.
Eppure, con il telefono in funzione per 3 minuti, lo schermo improvvisamente si oscura. E appare una schermata di avviso di alta temperatura. Il telefono si spegne quindi con lo schermo nero.
Analisi
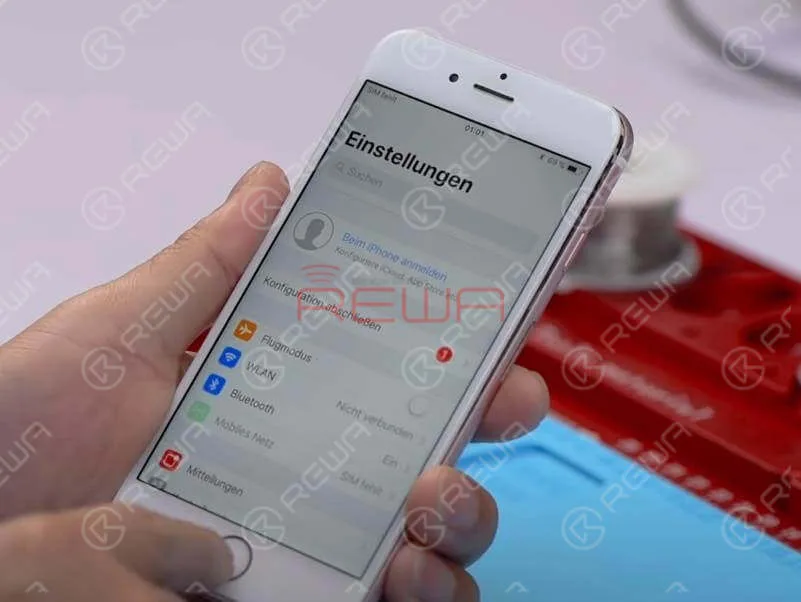
Scollegare la batteria. Collegare la scheda madre all'alimentatore DC e accendere. La lettura della corrente sull'amperometro è anomala e il telefono continua a riavviarsi.
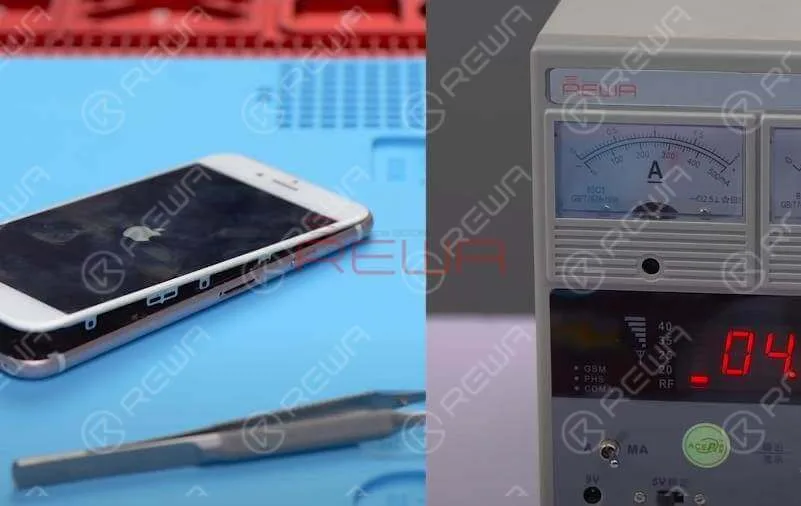
Pre-giudizio: una corrente di avvio anomala causa il problema di bruciatura della scheda logica, che si traduce in una schermata di avviso di temperatura elevata sul telefono.
Processo di diagnosi:
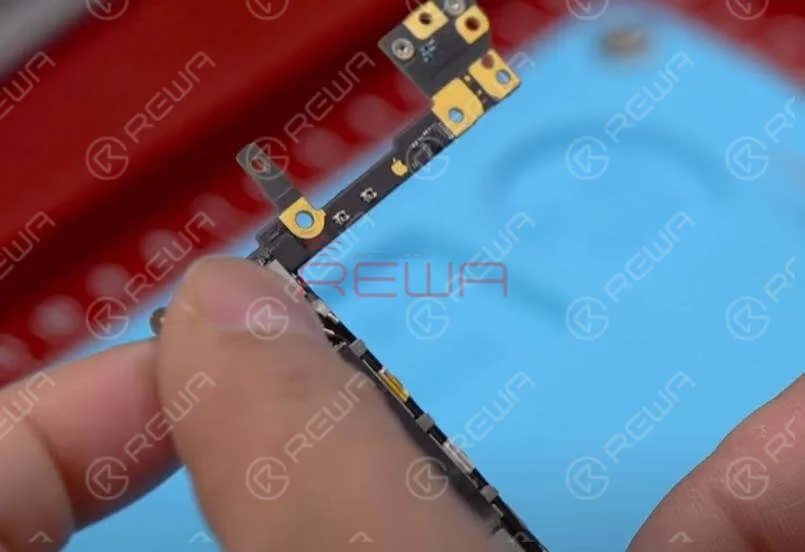
Rimuovere il gruppo dello schermo ed estrarre la scheda madre. Toccare la scheda madre con la mano libera. Si può avvertire una sensazione di bruciore nell'area compresa tra il chip di alimentazione e il modulo WiFi. Quindi ora possiamo confermare la possibile area del guasto.
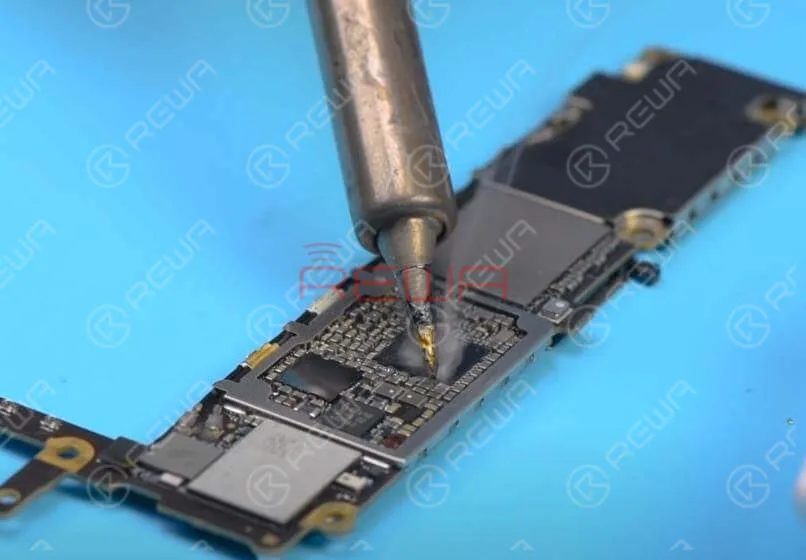
Poiché alcuni componenti si trovano sotto la copertura di schermatura, dobbiamo prima rimuovere la copertura di schermatura con una pistola termica. Quindi dobbiamo confermare la posizione specifica del guasto con il ‘rilevamento a colofonia’. Utilizzare il saldatore per fumo di colofonia sui componenti dell'area bruciata. Assicurarsi che tutti i componenti associati siano coperti di fumo bianco.
Suggerimenti: Poiché il telefono continua a riavviarsi quando viene acceso con il pulsante di accensione, possiamo accendere il telefono attivando la batteria. 15 secondi dopo, la colofonia sul modulo WiFi inizia a sciogliersi. Possiamo confermare che il componente difettoso è il modulo WiFi.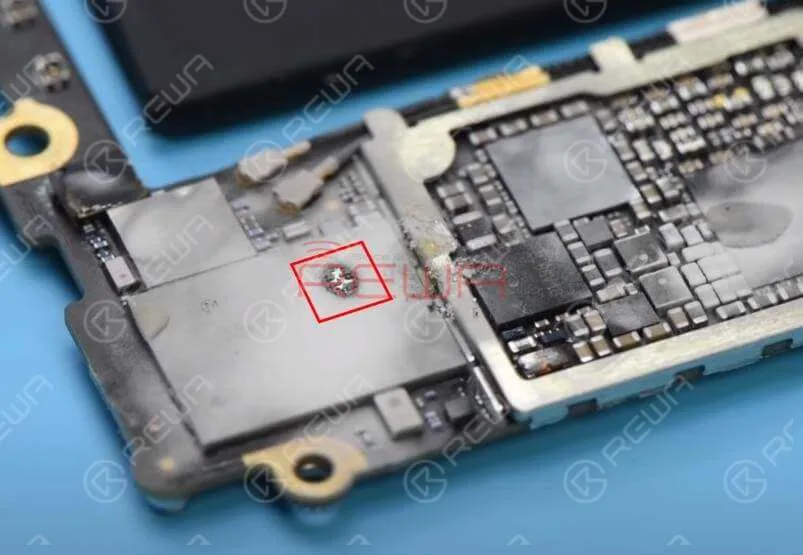
Risoluzione dei problemi
Il problema della bruciatura dei componenti all'interno del modulo WiFi può essere correlato ai condensatori all'interno del modulo WiFi o ai chip all'interno del modulo WiFi. Il metodo di riparazione tradizionale consiste nel sostituire il modulo WiFi e dissaldare il chip di memoria NAND dalla scheda logica. Quindi, procedere allo sblocco del WiFi.
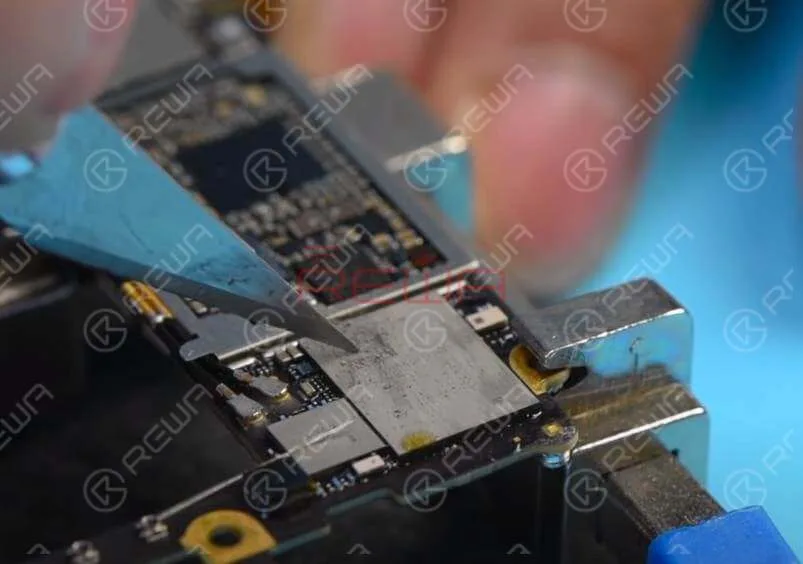
Sulla base dell'esperienza di riparazione, due condensatori si trovano esattamente sotto la posizione in cui si è fusa la colofonia. Il guasto è stato causato dai due condensatori. Oggi adotteremo una nuova soluzione di riparazione. Per prima cosa, confermare la posizione della colofonia fusa sulla superficie del modulo WiFi. Quindi raschiare la superficie specifica e riscaldare con una pistola ad aria calda a 330℃ per 5 secondi. Sollevare i condensatori facendo leva con un coltello da scultore.
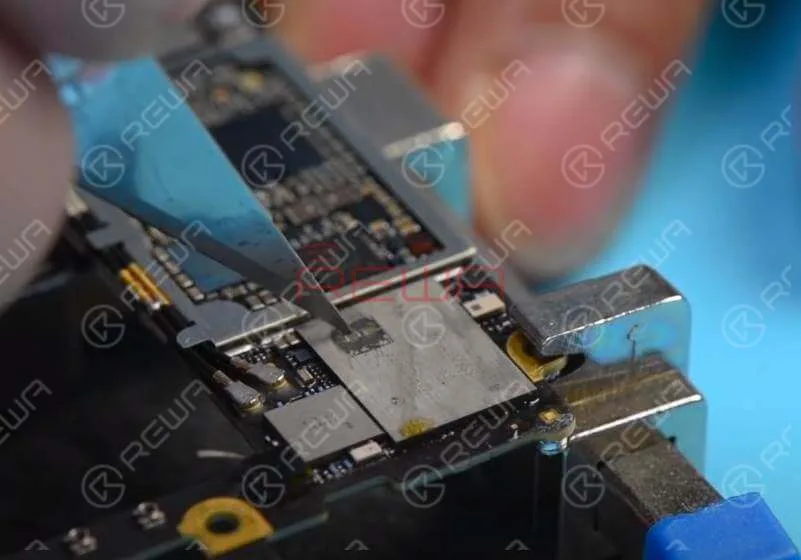
Una volta fatto, attacca del nastro adesivo ad alta temperatura sul modulo WiFi per l'isolamento.
Riassemblaggio e test
Assemblare la scheda madre e agganciare il gruppo display. Collegare la scheda madre all'alimentatore in corrente continua per l'accensione. Questa volta la lettura della corrente sull'amperometro è normale e il telefono smette di riavviarsi. Inoltre la scheda madre non si brucia.
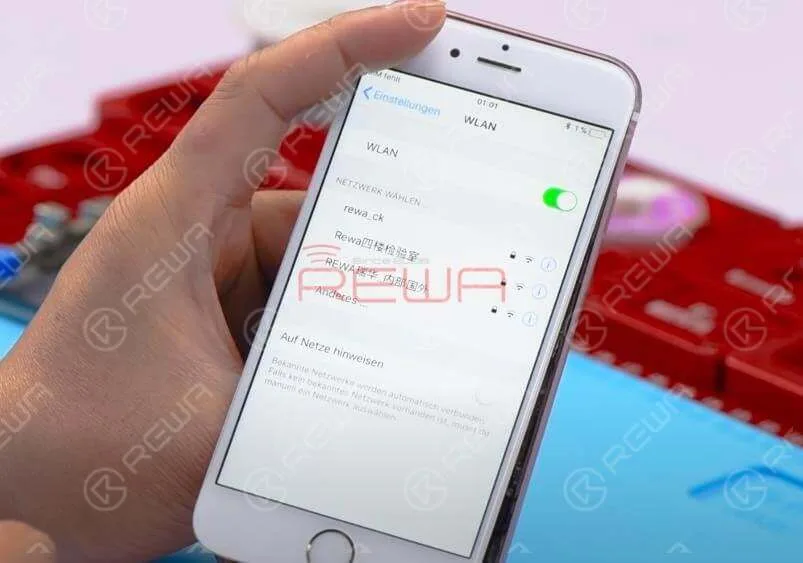
Continuare a testare la funzione WiFi e tutto procede bene. Guasto risolto.
Strumenti utilizzati
- Stazione di rilavorazione con pistola ad aria calda - 990AD
- Piattaforma di riparazione integrata
- Multimetro digitale
- Comunicazione Manutenzione Alimentazione
- Microscopio elettronico
Conclusione:
Questa soluzione di riparazione innovativa offre un'alternativa economica alla sostituzione dell'intero modulo WiFi. Risolvendo lo specifico problema del condensatore all'interno del modulo, è possibile risolvere il problema del surriscaldamento dell'iPhone 6s e prevenire ulteriori danni alla scheda madre.
Per una guida visiva dettagliata su questo processo di riparazione, visita il Canale YouTube REWA. Esplora il nostro negozio online per trovare parti e strumenti di qualità che ti aiuteranno nella riparazione dei tuoi dispositivi.
-

iPhone 6 Wont Turn On – Water Damage Repair
iPhone water damage is a very common repair case, and it can result in different issues. For case today, iPhone 6 can’t turn on after water damage. We start the repair work from moldy components. As it is often suggested that we should always begin with simple, then complex. However, the problem remains unresolved. Run further measurement and the faulty position is finally confirmed. We can complete the iPhone 6 water damage repair work by replacing faulty components. Let’s check the video to see how to fix iPhone 6 won’t turn on caused by water damage.
-

iPhone 6 Errore 9 Riparazione della CPU senza BGA Reball

Vi siete mai imbattuti nel problema dell'errore 9 dell'iPhone 6? (consultate questo post per sapere: cosa significano tutti questi codici di errore dell'iPhone) È risaputo che una volta che l'errore 9 dell'iPhone 6 viene visualizzato durante l'esecuzione di un aggiornamento del firmware o di un ripristino del sistema tramite iTunes, il normale funzionamento viene interrotto. E se questo si verifica frequentemente, sarà difficile da gestire. Diverse ragioni sono state attribuite al problema, e il sospetto principale riguarda la Flash NAND come illustrato nel nostro precedente blog iPhone 6 Keeps Restarting? - Fix Error 9 14 40 ha illustrato. Questa volta REWA propone una soluzione completamente diversa per la riparazione dell'errore 9 CPU dell'iPhone 6, causato da una saldatura insufficiente all'interno della CPU BGA. Con l'aiuto della nostra macchina per la rettifica dei chip CNC di nuova concezione, la rimozione dei chip può essere sicura e veloce senza danneggiare la scheda logica e i chip vicini. Se avete opinioni e soluzioni diverse, lasciate un commento qui sotto.iPhone 6 Error 9 CPU Repair Without BGA Reball1. Disassemblaggio del telefonoIl telefono è bloccato in modalità di recupero quando cerca di avviarsi. Collegatelo a un computer e avviate il ripristino del sistema tramite iTunes.
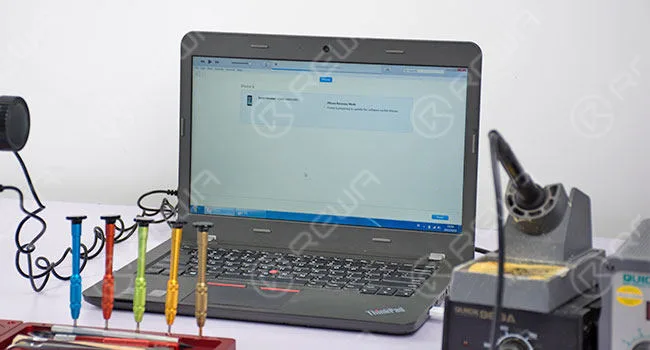
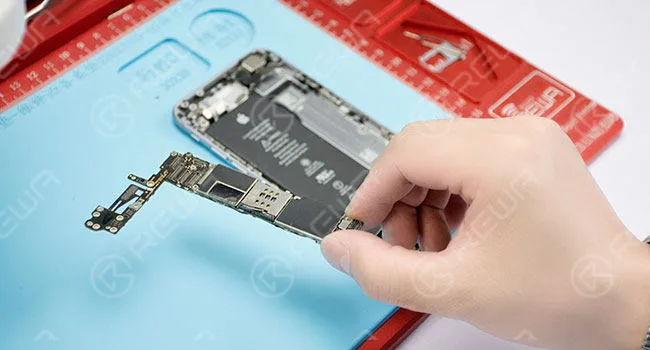
Viene visualizzato l'errore 9. Smontare il telefono ed estrarre la scheda logica. Rimuovere una parte della piastra di schermatura con una tronchesina.
2. Diagnosi dei malfunzionamenti
Il valore della resistenza di messa a terra di prova dei resistori R0317 e R0316 con modalità diodo - valore anormale (480 in circostanze normali). R0317 e R0316 sono collegati direttamente al pin AP31-SDA e al pin AR31-SCL della CPU.
3. Riparazione dei malfunzionamenti
Abbattere la piastra di protezione della CPU con una pistola ad aria calda. Quindi mettere la scheda logica nella posizione corrispondente dello stampo CNC e fissarla saldamente. Caricare il programma di rettifica del chip della scheda logica corrispondente all'iPhone 6 e avviare la rettifica.
Una volta terminato, estrarre la scheda logica e utilizzare un coltello da scultura per raschiare accuratamente fino a far uscire il circuito del sottolivello della CPU. Successivamente, pulire con un detergente per circuiti stampati.
Applicare una maschera di saldatura a polimerizzazione UV sull'area esposta, a parte le due piazzole di collegamento (SDA, SCL). Una volta terminata l'operazione, mettere la scheda logica sotto la lampada di essiccazione UV per 10 minuti e poi estrarla.
Saldare le lattine sulle due piazzole di collegamento con il saldatore. Quindi saldare il filo di rame da 0,02 mm sulle due piazzole di collegamento. I due fili saldati collegano rispettivamente la piazzola SDA corrispondente a R0317 e la piazzola SCL corrispondente a R0317.
Il valore della resistenza di messa a terra di R0317, R0316 con la modalità diodo è di nuovo normale.
4. Test telefonico
Assemblare il telefono e ripristinare tramite iTunes. Quindi attivare il telefono e testare, il malfunzionamento è stato risolto.
Una volta terminato il test, togliere la scheda logica. Applicare quindi una maschera di saldatura a polimerizzazione UV al punto di saldatura. Mettere la scheda logica sotto la lampada di essiccazione UV per 10 minuti.
Assemblare il telefono e testare di nuovo, tutto funziona normalmente.
Per ulteriori dettagli sulla guida alla riparazione dell'errore 9 CPU dell'iPhone 6, visitare il canale YouTube di REWA.
-
iPhone 6 Keeps Restarting? – Fix Error 9 14 40
More and more people reported that their iPhone stuck in a restart loop. As we know, the cell phone has been more and more important in our life, we trust our iPhone and they need to work all the time. But When your iPhone keeps restarting and you can’t use your iPhone well, it will be very terrible. So what should you do when your iPhone 6 keeps restarting? We’ll explain what causes your iPhone 6 to keep restarting and how to fix the restarting iPhone problem.
First, you should know why does your iPhone keep restarting?
Usually, there are two categories of iPhone keep restarting:
- iPhones that restart intermittently: You can use your iPhone for a while with no problem at all, and then your iPhone suddenly restarts.
- iPhones stuck in a restart loop: Your iPhone continuously restarts and it’s totally unusable. The Apple logo appears and disappears on the screen, over and over again.
For the first category, you can do the following steps will solve your problem.
1. Eseguire il backup dell'iPhone
Before we do any troubleshooting at all, make sure your iPhone is backed up. This is a necessary step to protect your personal data.
2. Update Your iPhone’s iOS(if your iOS is the latest version, you don’t need do this step)
iOS updates always contain lots of fixes for software bugs and other problems. Sometimes, a software update fixes the problem that’s causing your iPhone to restart.
3. Reset All Settings and APP
If you installed an app just before your iPhone began restarting, uninstall that app and see if the problem resolves itself. If it’s not this reason, you can try reset all setting.
If the above steps can’t solve your problem, your iPhone may fall into the second category. When you have eliminated the possibility a software issue is causing your iPhone to keep restarting and you have checked for hardware issues on the outside of your iPhone. If your iPhone is still restarting, your iPhone probably needs to be repaired. You need to repair your iPhone, there is a video iPhone 6 Keeps Restarting Repair will teach you how to fix it?
This video show you show how to fix iPhone keeps restarting. The iPhone continuously restarts and became totally unusable, the Apple logo appears and disappear, over and over again. Does your phone ever meet this common problem which drives you crazy? Watch our video to get it fixed now!
The detail steps:
1. Take down the LCD screen assembly
2. Test voltage of the battery with the digital multimeter. Battery voltage is 4.21V, battery test signal voltage is 2.02V. The battery is normal, so we install the LCD screen assembly to check other malfunctions.
3. Failure detection: connect the phone to computer, it could not be restored by iTunes, an unknown error occurred (9), so that we can draw a conclusion that NAND flash or CPU is cracked.
4. Detach the motherboard from the phone, and fix it on PCB holder.
5. Remove the NAND flash chip from motherboard carefully.
6. Clean the bonding pad with a soldering iron, knife, BGA paste flux, rosin, solder wick and PCB cleaner.
7. Connect the NAND flash programmer with a computer, transfer the data from the old NAND flash to a new one.
8. New NAND flash chip BGA rebelling.
9. Install the new NAND flash chip to the motherboard.
10. Install the motherboard on the phone.
11. Connect the phone to computer, it can be restored by iTunes successfully.
12. Test if it works well.
Suggerimenti:
1. Prepare a new 64GB NAND flash memory chip.
2.Error 21, 9, 2009, 4005, 14, 40 indicate NAND flash or CPU malfunction.
3.You may need to repair the CPU if the phone still keeps restarting after the NAND flash chip is replaced.
Strumenti utilizzati:
- 64 Bit Nand Flash Memory Chip Programmer
- Piattaforma di Riparazione Cellulari
- Multimetro digitale
- Electric Soldering Iron
- Pistola ad aria calda
- Supporto per PCB
- Cacciavite
- Pinzette
-
How To Distinguish iPhone 6 LCD Screen?
Have you ever been confused by different qualities of iPhone 6 LCD screens in the market and do not know how to choose the right one you really need or else your customers actually want?
For many iPhone parts distributors or cell phone repair business owners, one of the most common misconceptions you find is likely the true meaning and understanding of the definition of AAA Grade LCD Screens and Original (OEM) LCD Screens.
As more and more Chinese iPhone screens came into the market which eventually got decent popularity unexpectedly, thus you get more options out there on account of their good performance in display and stability.
Of course, they get better pricing compared with OEM ones.
If you are a bit unsure, don’t panic! We are about to help you to define the root differences of the OEM NUOVO , Grado AA , A Grade (which respectively manufactured by TIANMA, JDF and LT) iPhone 6 LCD Screens.
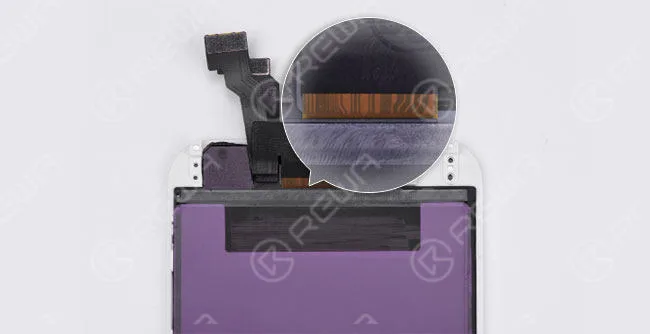
I hope that you will be able to distinguish them in an easier way through FLEX CABLE DISTINCTION e DIFFERENZA DI COLORE .
FLEX CABLE DISTINCTION
OEM NUOVO
The lines on an OEM New screen flex cable are mostly curving if you check carefully.
And the background color is yellow.
(The glass lens comes with a colored ring around the camera ring, all ORIGINAL and NEW from OEM factory)
GRADO AA
(Original LCD but Compatible LCD Flex Cable, also glass lens, bezel frame and flex cables are assembled by the third-party factory)
The lines are almost the same as on the OEM New flex cable. But the background color is brighter.
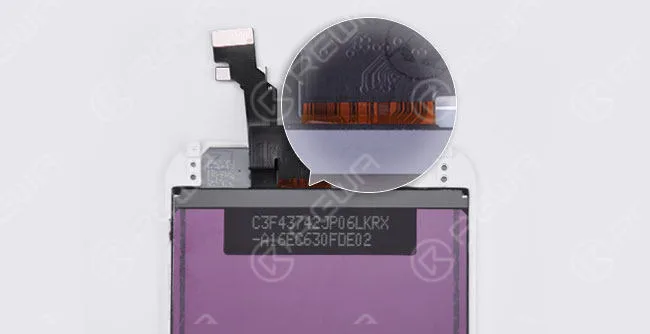
A GRADE (TIANMA)
(All parts apply compatible materials, and assembled by China LCD vendors)
The two curving lines on the right side can be seen as a sign of TIANMA screens.
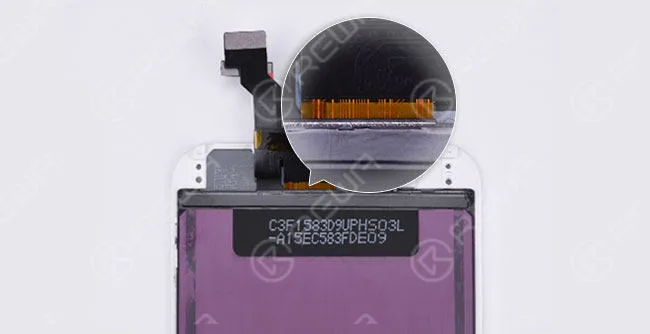
A GRADE (JDF)
The symmetric curving lines in the middle make it looks like a “door”. And there is also a small “door” on the right side.
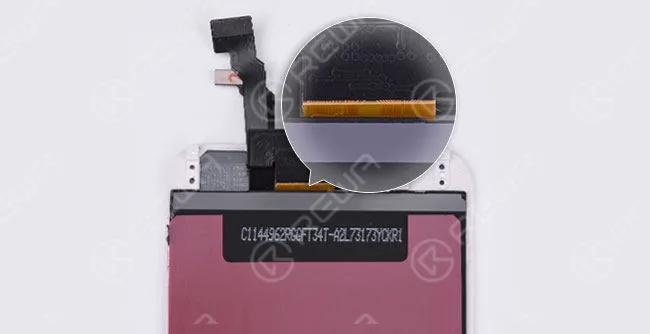
A GRADE (LT)
The flex cable is wider than OEM New. Besides, it has yellow lines with the black background color.
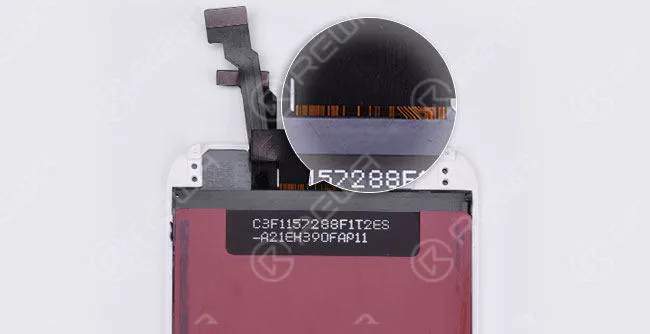
DIFFERENZA DI COLORE
Gli effetti di visualizzazione degli LCD campione qui riportati sono di riferimento e possono variare a seconda dei lotti e dei fornitori di LCD.
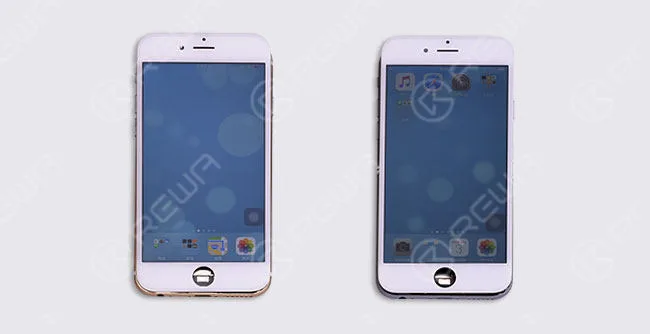
OEM NEW Original LCD with Compatible Flex Cable
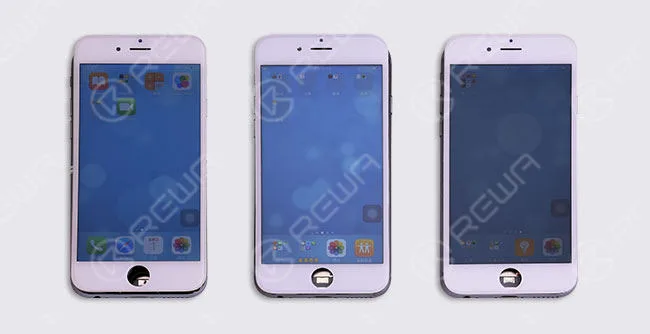
AVVISO:
There are different ways to tell original iPhone screen from China Made screen.
Here we have the easiest and most effective way to distinguish different qualities of iPhone 6 screens through the lines on the back of LCD flex cable.
Now, would you like to check your screens through this way?
Volete ordinare i nostri prodotti? Contattateci:
PRE-VENDITA Skype: rewatech Email: service@rewa.tech
DOPO LA VENDITA Skype: support-rewatech
Email: support@rewatechnology.com
 English
 Español
 Français
 Deutsch
 Italiano