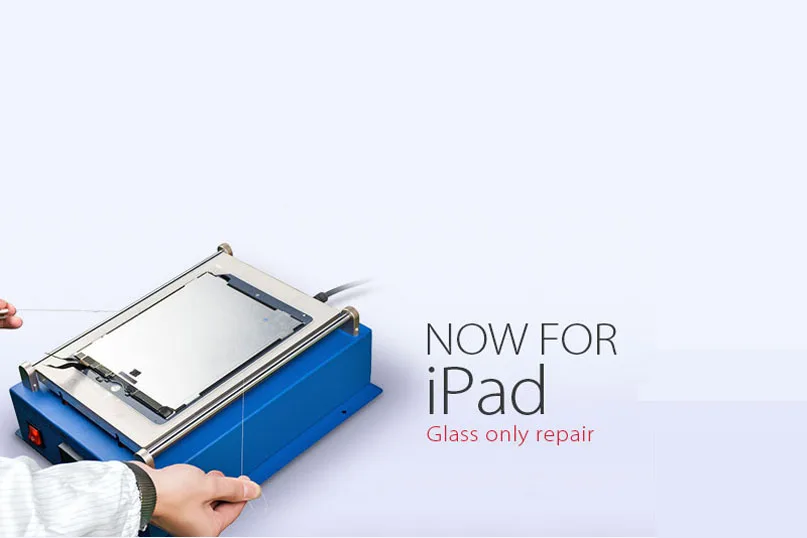
Tag: iPad air

  • Guida alla sostituzione del vetro dell'iPad Air 2 | Risparmio sulle riparazioni

    Guida alla sostituzione del vetro dell'iPad Air 2 | Risparmio sulle riparazioni

    iPad Air 2 was first debuted in Oct. 2014 and it has been more than 2 years so far. If you happen to get one Apple’s iPad Air 2 and it recently became the victim of an unfortunate accident, how will you deal with it?

    I’m afraid you’ll need to cough up some serious money to get it fixed or replace it.

    If you’re handy, however, and you can manage to source iPad spare parts at a decent price.

    As a repair shop, you can earn more profits by fixing iPad for your customers by following along our latest LCD refurbishing instructions.

    As a matter of fact, we have already published a few articles with regard to LCD refurbishing guidance for some flagship models of Apple and Samsung phone.

    But as for iPad or tablet PC, it’s the first time that we get involved in the iPad broken screen refurbishment.

    As such, iPad repair knowledge isn’t readily available to the public and falls into the category of “catch as catch can”.

    Now let’s get through and take first look at the latest broken LCD refurbishing techniques and equipment.

    This refurbishing process will include some of the recommended macchine per la ricondizionatura of high performance and easy-to-use virtues as well as materials and tools .

    Test dello schermo rotto

    Firstly, you need an iPad Air 2 screen with broken glass lens but properly working touch digitizer and LCD display.

    Install LCD to motherboard plate, then test if the display, touch functionality is OK.
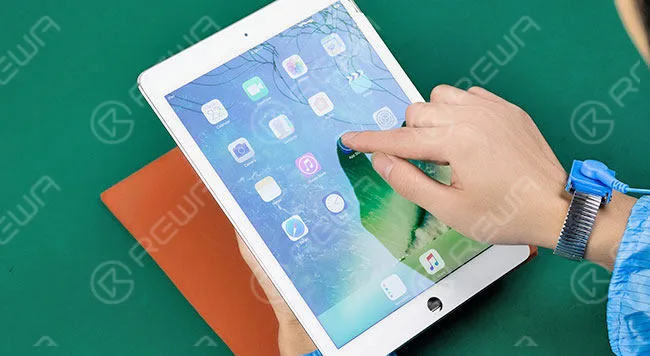
    ipad air glass replacement guide save money repairs

    LCD Separating

    In the first place, we need to stick a layer of adhesive tape on the full surface of the LCD screen.

    Get it heated on 13” LCD Separating Machine.

    Press the vacuum button, then embed the filo per il taglio dell'oro nella parte inferiore dello schermo LCD, tirare a destra e a sinistra finché il vetro non si separa.
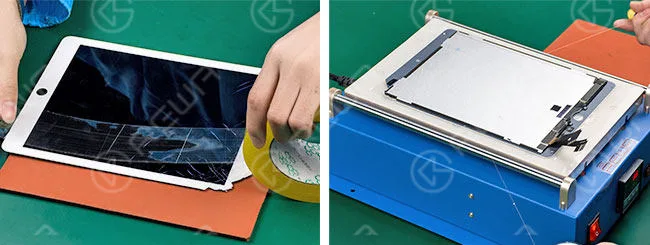
    ipad air glass replacement guide save money repairs 2

    Rimozione della colla

    Dip some 8333 OCA Cleaner con Tergicristallo antistatico, spread it on LCD for 1 minute.

    And remove the residue adhesive.
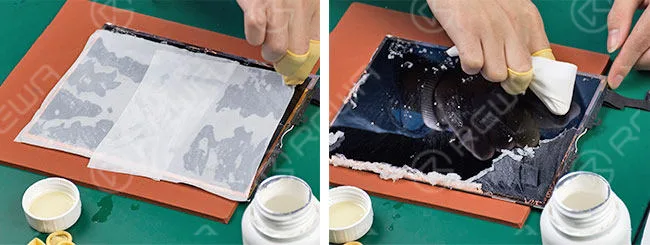
    ipad air glass replacement guide save money repairs 3

    OCA Laminating and Bubble Removing

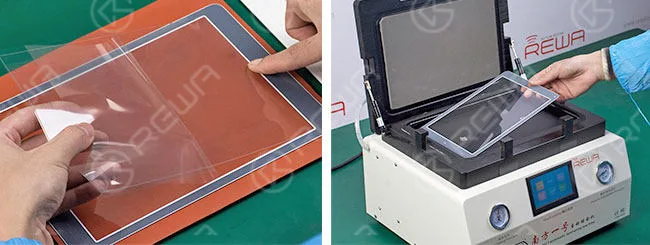
    Respectively tear off the protective films on new glass lens and OCA, align them then laminate.

    After that, place glass lens into Macchina per la laminazione del vetro for bubble removing for 3 minutes to make sure air bubbles between OCA and glass lens completely removed.
    ipad air glass replacement guide save money repairs 4

    Glass Laminating and Bubble Removing

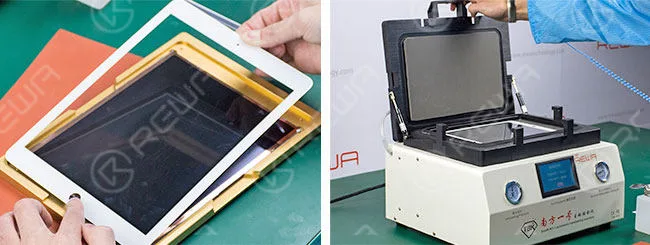
    Mettere il display LCD in Alignment LCD Mold and clean it.

    Tear off another protective film on OCA glue. Then align glass lens with LCD and put it into a mold for preliminary lamination.

    Take out the LCD and put it into Glass Laminating Machine with a laminate cushion placed under it. You should be more careful of the placement of LCD flex cables at this moment.

    Place another clean glass lens onto the LCD Assembly and align them to make complete lamination. Take it out after glass laminating is done.
    ipad air glass replacement guide save money repairs 5

    Test di ritorno

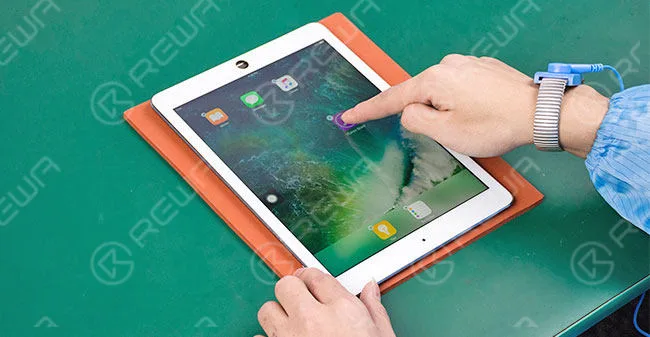
    Connect the LCD to the motherboard, and then test the display and touch functionality again, both are OK.
    ipad air glass replacement guide save money repairs 6

    Prompt caldo: This broken screen refurbishing service for iPad series currently cover iPad mini 4, iPad Air 2 and iPad Pro.

    Now is when we should call it a day.

    Because at this point a cracked iPad Air 2 screen is successfully refurbished.

    If you still have any other questions or are looking for LCD refurbish machines, materials, demo videos and technical support or on-site training, please feel free to contact us via service@rewa.tech o visitare il sito web all'indirizzo shop.rewa.tech .

    Video tutorial
  • Come sbloccare l'iPad Air

    Come sbloccare l'iPad Air

    Il video è stato realizzato per la condivisione tecnica, se avete un iCloud bloccato, contattate il servizio ufficiale Apple. Con uno strumento di riparazione del sistema a 64 bit, è possibile rimuovere il blocco di attivazione di iPhone 5s/6/6 plus/iPad Air/Air 2/mini/mini 2/mini 3/mini 4 modificando il numero di serie.

    È facile che molti utenti di iPad dimentichino la loro password/il loro pin. Abbiamo spesso sentito molte domande simili da diversi canali: cosa fare se ho dimenticato la password dell'iPad? Come sbloccare il mio iPad? Come sbloccare il blocco di attivazione dell'iPad? Pertanto, questo video è stato realizzato per aiutare coloro che hanno bisogno di sbloccare l'iPad senza password o di ripristinare l'iPad disabilitato. Il metodo può essere utilizzato per accedere a iPad Pro, iPad 2/3/4, iPad Air 1/2, iPad Mini 1/2/3 bloccati senza password.

    Esistono diversi modi per risolvere il problema dello sblocco di un iPad, sia software che hardware, ma il nostro video parla principalmente di come aggirare il blocco di attivazione dell'iPad Air a livello hardware.

    Il dispositivo non può essere attivato senza l'ID e la password giusti, quindi possiamo usare lo sblocco hardware iCloud di iPad Air. Ecco i passaggi dettagliati per insegnarvi come sbloccare un iPad Air - Sblocco hardware iCloud di iPad Air con lo strumento di riparazione del sistema a 64 bit

    E se non volete usare l'hardware per sbloccare iCloud dell'iPad, potete provare questo software per risolvere il vostro problema. È necessario utilizzare un software chiamato iOS Lock Screen Removal, un software professionale per sbloccare un telefono senza password. Supporta sia iOS che Android. Per quanto riguarda iOS, questo sbloccatore per iPhone funziona benissimo con l'ultimo iOS 11 e l'iPhone X/iPhone 8. 

    Un solo clic per bypassare la password della schermata di blocco su iPad Pro

    Passo 1. Collegare l'iPad Pro al PC

    Innanzitutto, installate iOS Lock Screen Removal ed eseguitelo sul vostro computer. Poi fate clic su "Sblocca" tra tutte le scelte.

    Successivamente, è possibile concatenare l'iPad Pro al computer utilizzando un cavo lightning e fare clic su "Avvia" sul programma.

    Passo 2. Avviare l'iPad Pro in modalità DFU

    Per poter bypassare la schermata di blocco dell'iPad Pro, è necessario avviarlo in modalità DFU. Se non avete idea di come avviarla, potete seguire gli ordini su dr.fone per completarla.

    1. Spegnete l'iPad Pro.

    2. Tenere premuti insieme il pulsante Volume giù e il pulsante di accensione per 10 secondi.

    3. Liberate il pulsante di accensione e tenete premuto il pulsante Volume giù finché l'iPad Pro non si trova in modalità DFU.

    Passo 3. Identificare le informazioni del dispositivo iOS

    Dopo che il dispositivo è in modalità DFU, dr.fone scansionerà il telefono e visualizzerà le informazioni sul dispositivo, come la generazione dell'iPad, la versione di iOS, ecc. Se le informazioni sono sbagliate, è possibile selezionare quelle corrette dagli elenchi a discesa. Quindi fare clic su "Download" per scaricare il firmware per il vostro iPad Pro.

    Passo 4. Sbloccare il blocco schermo dell'iPad Pro

    Dopo essere riusciti a scaricare il firmware, fate clic su "Sblocca ora" per avviare lo sblocco del vostro iPad Pro. Riuscite a credere che in pochi secondi il vostro iPad Pro sarà sbloccato con successo? Che ci crediate o no, dr.fone è così efficiente.

    Attenzione, è inevitabile che il corso di sblocco cancelli anche i dati sul vostro iPad Pro. A dire il vero, al momento non esiste sul mercato una soluzione per bypassare la schermata di blocco dell'iPhone/iPad senza perdita di dati.

    Avviso:

    La soluzione software è stata consigliata da alcuni utenti di iPad, non l'abbiamo verificata, se avete un iPad con blocco iCloud da riparare, vi consigliamo la soluzione hardware.




