Étiquette : réparation de l'iphone 12

  • iPhone X-12 Double-stacked Board Separation & Recombination | REWA Academy Tips

    iPhone X-12 Double-stacked Board Separation & Recombination | Conseils de l'Académie REWA

    To separate and recombine the double-stacked motherboard is a very important step for motherboard repair of iPhone X and models above. Slight errors may result in pseudo soldering or other problems. REWA Academy students recently gave feedback that the two layers often fail to fit closely in double-stacked motherboard repair. There are even large gaps, causing pseudo soldering. In response, we will share tips and notes when separating and recombining double-stacked motherboard. The tips in this article apply to iPhone X and models above.

    Separation

    Peel off foam on the motherboard before heating. Please be noted that we do not recommend beginners to heat the motherboard with a hot air gun. Because the motherboard may receive heat unevenly and deform. A professional motherboard plate-forme de chauffage is what we suggest.
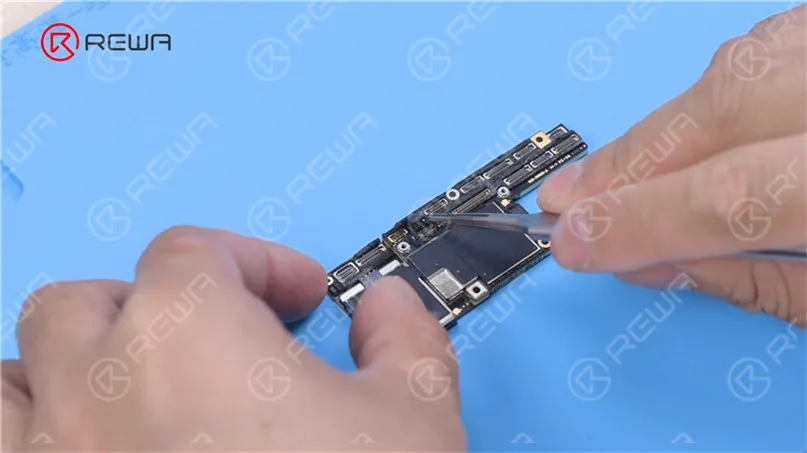
    Peel off foam on the motherboard

    Heat the Motherboard

    To facilitate later removal of the logic board, drive a screw on the logic board. Cut through the tape with a Couteau à sculpter.
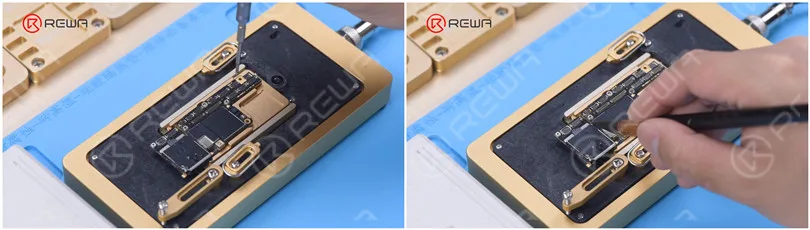
    motherboard heating

    The logic board and middle layer are soldered with low-temperature solder paste. So the best temperature for the heating platform will be 155 °C-165 °C. Push the logic board gently with tweezers when the temperature reaches 165 °C. If the logic board is loose, the tin has melted.
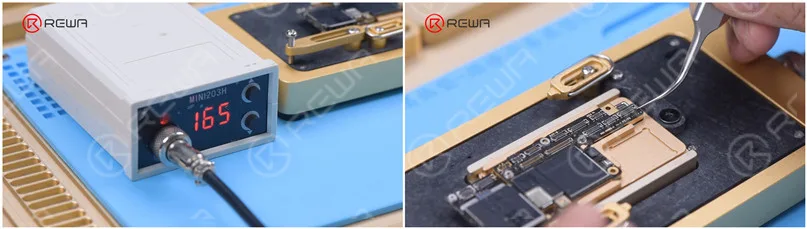
    motherboard heating

    Clamp the screw to remove the logic board and then remove the signal board.
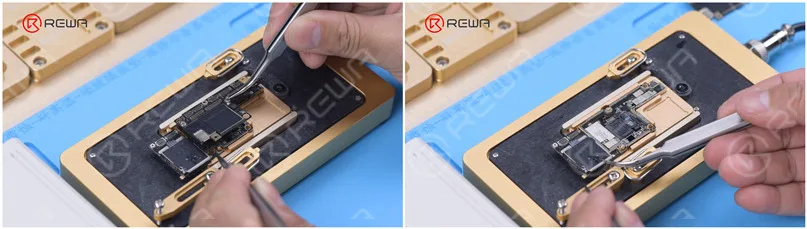
    séparation de la carte mère

    Motherboard Cleaning

    Remove thermal grease with a Sculpture Knife. Thermal grease must be removed completely. Otherwise, the thermal grease will touch the logic board to give rise to pseudo soldering in recombination. Attach the signal board to the holder and apply a round of Flux en pâte.
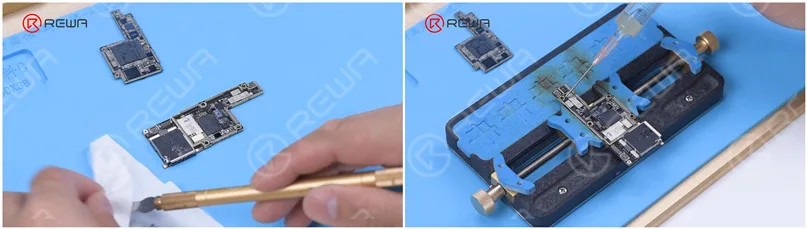
    Remove thermal grease with a Sculpture Knife. Thermal grease must be removed completely. Otherwise, the thermal grease will touch the logic board to give rise to pseudo soldering in recombination. Attach the signal board to the holder and apply a round of Paste Flux.

    Enlever l'étain sur le tampon de collage avec micro soldering tools soldering Iron at 365 °C and Solder Wick. Tin on the bonding pad must be completely removed. The residual tin will affect the subsequent soldering. Clean the bonding pad with PCB Cleaner.
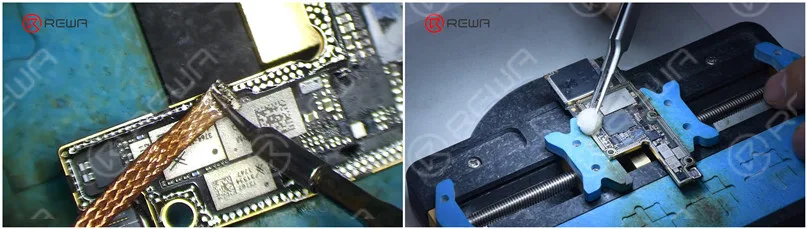
    Remove tin on the bonding pad with Soldering Iron

    Clean the logic board with the same method. Please do not damage components around the bonding pad of the logic board while cleaning. It is necessary to check if the bonding pad is neat after cleaning.

    Reballage

    Attach the signal board to the Reballing Platform. Put the reballing stencil in position to make sure that it is pressing against the signal board. To prevent the solder paste from flowing into the motherboard gap, insert a metal plate.
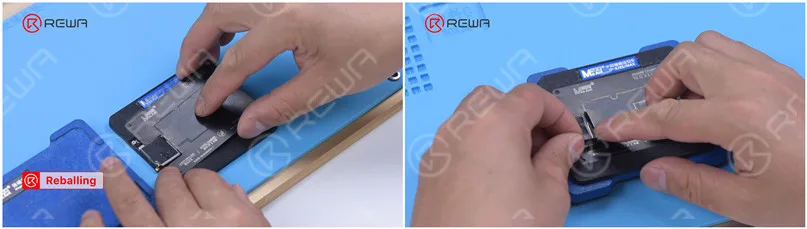
    Attach the signal board

    Apply a layer of low-temperature Solder Paste and wipe off excess solder paste with a Lint-free Wipe. Remove the reballing stencil. Check if solder paste on the signal board is full.
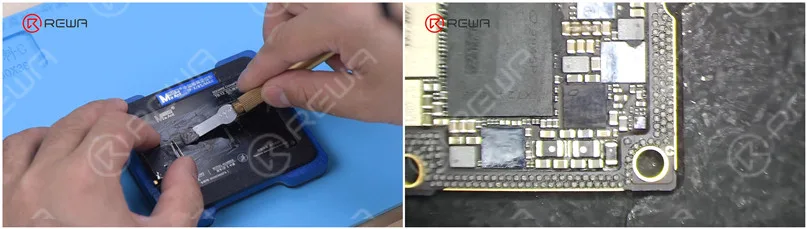
    Apply a layer of low-temperature Solder Paste and wipe off excess solder paste with a Lint-free Wipe. Remove the reballing stencil. Check if solder paste on the signal board is full.

    While applying solder paste, please make sure that solder paste must have a certain humidity. If the solder paste is too dry, it will adhere to the reballing stencil when the stencil is removed. As a result, the solder paste on the signal board will not be uniform, which can easily lead to poor soldering.
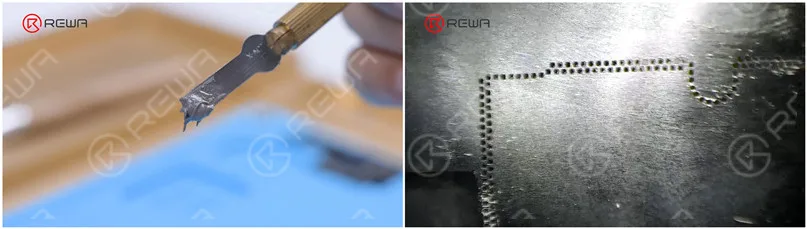
    applying solder paste

    Recombination

    Put the signal board on the 165 °C Heating Platform to heat. Stop heating after the solder balls are formed. Apply a small amount of Paste Flux after the signal board has cooled.
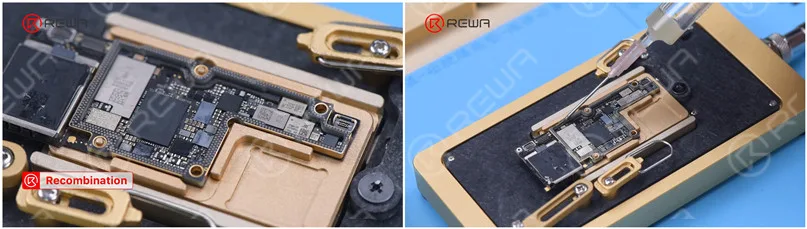
    Put the signal board on the 165 °C Heating Platform to heat

    Align the logic board with the signal board. Keep heating on the 165 °C Heating Platform. When the solder flux spills and logic board sinks, nudge the logic board gently with tweezers to ensure the two layers fit closely. The nudge must be gentle and small.
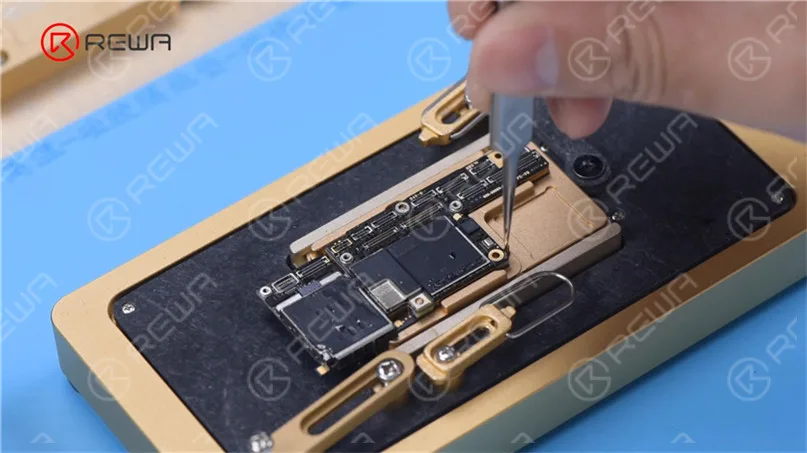
    Align the logic board with the signal board

    Clean the motherboard with PCB Cleaner after the motherboard has cooled.

    If you find the motherboard deformed while recombining, you can put the motherboard on a flat board and fasten it with a rubber band. Press two sides of the motherboard gently. To avoid crushing components, please put a soft paper under the motherboard.
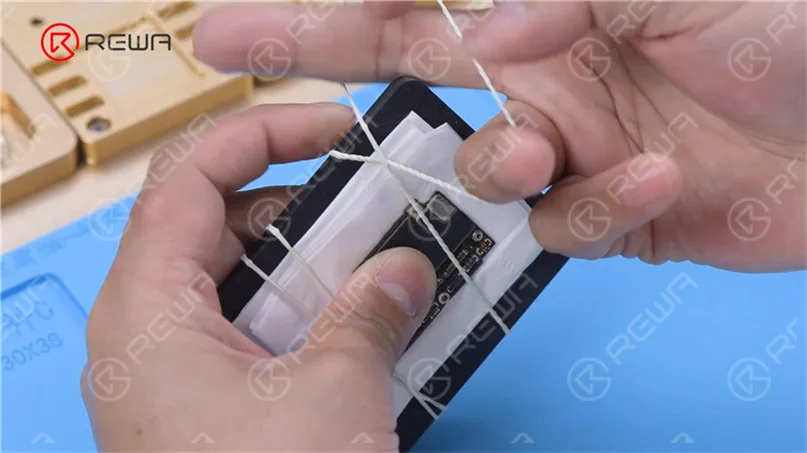
    fasten motherboard with a rubber band

    Next, we will share another recombination method. The method can be taken if the middle bonding pad is not damaged.

    When the tin melts, remove the logic board in a vertical manner with tweezers. It can be seen that there is a metal pad of 0.05 mm thickness around the signal board at a certain distance. This metal pad is designed to keep a 0.05 mm gap between the logic board and the middle layer, preventing the solder balls from bridging while soldering.
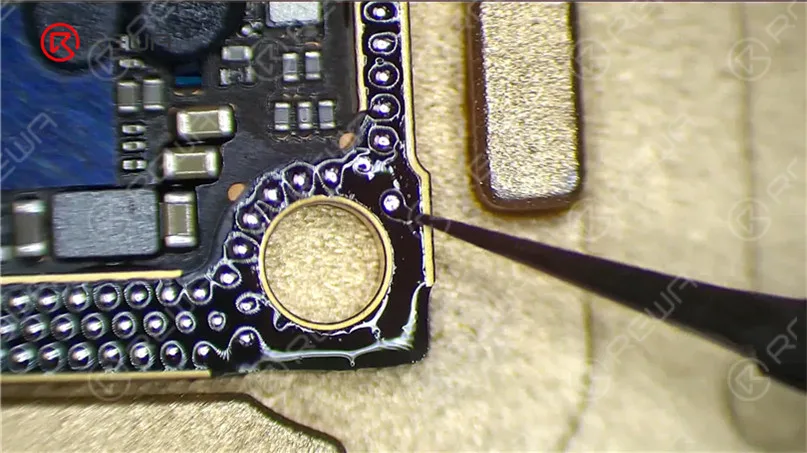
    iphone 12 double stacked board separation recombination rewa academy 13

    You only need to remove thermal grease on the motherboard when the repair is done. Keep original tin on the bonding pad and apply a small amount of Paste Flux.
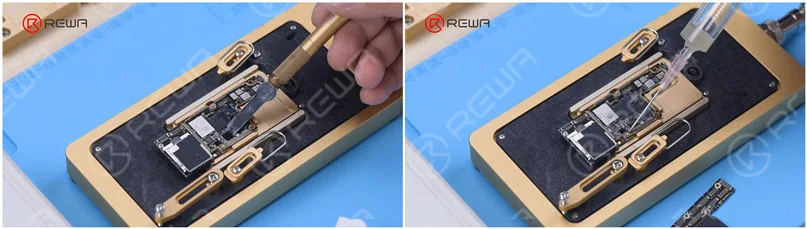
    You only need to remove thermal grease on the motherboard when the repair is done. Keep original tin on the bonding pad and apply a small amount of Paste Flux.

    Lastly, align the logic board with the signal board. When the temperature reaches 165 °C and the tin melts, turn the power off. Press two ends of the logic board with tweezers until the motherboard has cooled. The logic board and the signal board fit closely in this way. There will be no bridging and solder balls spillover.

    Visiter Académie REWA if you want to learn more repair skills. We have complete course packages for motherboard diagnosis and repair ability improvement. Feel free to leave a comment of your thought on double-stacked motherboard separation and recombination.

    Watch the full video below to see how we separate and recombine a double-stacked motherboard.
     

  • Solution de remise à neuf de l'écran OLED de la gamme iPhone 12 par REWA

    Solution de remise à neuf de l'écran OLED de la gamme iPhone 12 par REWA

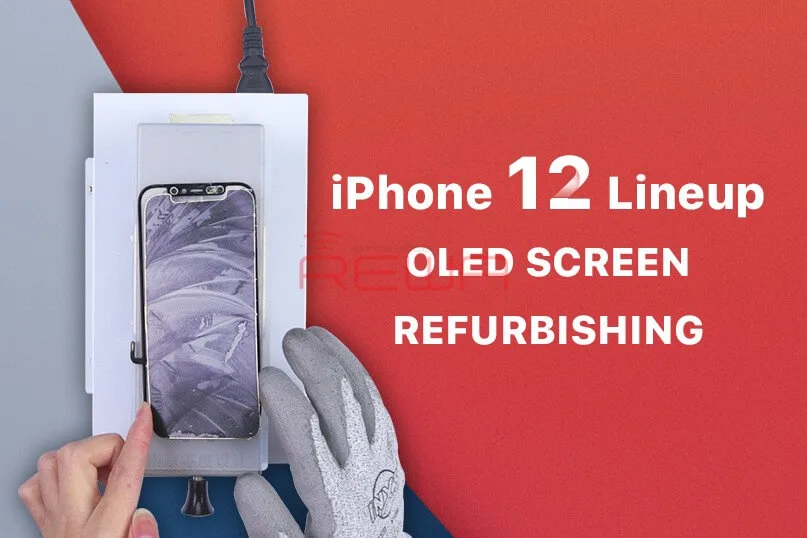
    The repair rate of the screen is one of the highest among many mobile phone parts. Professional screen refurbishment tools and techniques can not only reduce screen replacement failure rate but also improve repair efficiency. It is well known that the iPhone 12 lineup features an OLED screen. Today REWA LAB will take the iPhone 12 screen refurbishment as an example to introduce the up-to-date screen refurbishment techniques and machines in the industry.

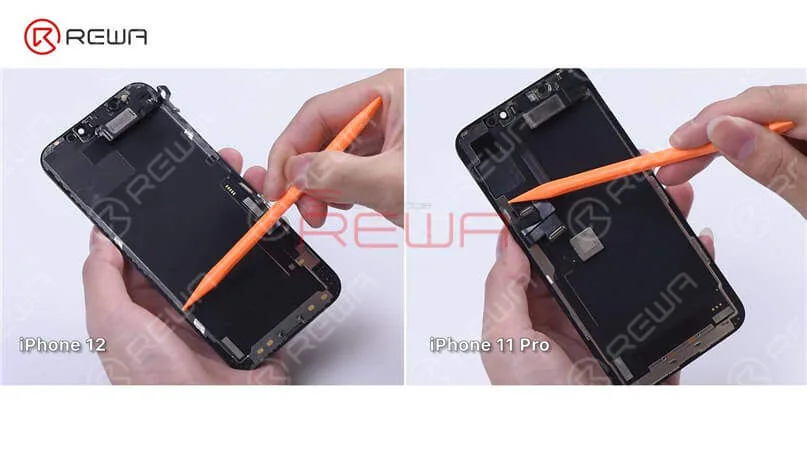
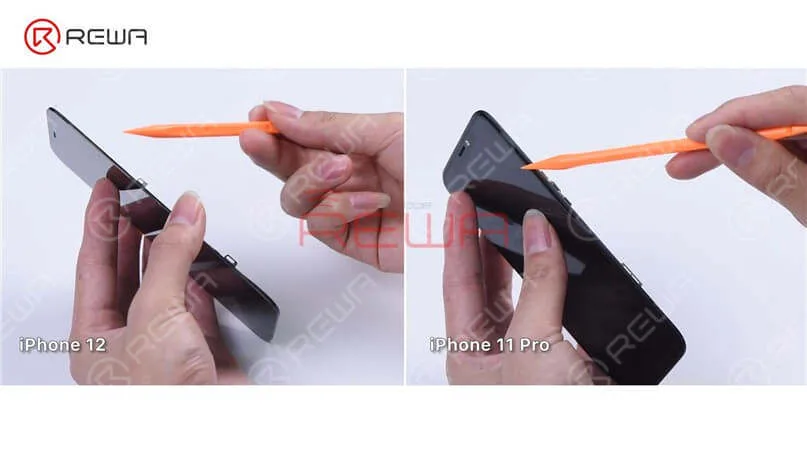
    Firstly, let’s run a cosmetic inspection of the screen. We can see that the iPhone 12 has a narrower bezel than the iPhone 11 Pro, so the iPhone 12 bezel may be a little easier to disassemble. In addition to that, the iPhone 12 bezel doesn’t wrap around the glass lens anymore. Therefore, the material requirements for the bezel adhesive will be relatively high to prevent the adhesive from falling off. To dig deeper, we will refurbish the iPhone 12 screen.

     We can see that the iPhone 12 has a narrower bezel than the iPhone 11 Pro, so the iPhone 12 bezel may be a little easier to disassemble. In addition to that, the iPhone 12 bezel doesn’t wrap around the glass lens anymore. Therefore, the material requirements for the bezel adhesive will be relatively high to prevent the adhesive from falling off. To dig deeper, we will refurbish the iPhone 12 screen.
     We can see that the iPhone 12 has a narrower bezel than the iPhone 11 Pro, so the iPhone 12 bezel may be a little easier to disassemble. In addition to that, the iPhone 12 bezel doesn’t wrap around the glass lens anymore. Therefore, the material requirements for the bezel adhesive will be relatively high to prevent the adhesive from falling off. To dig deeper, we will refurbish the iPhone 12 screen.

    Step 1: Screen Testing

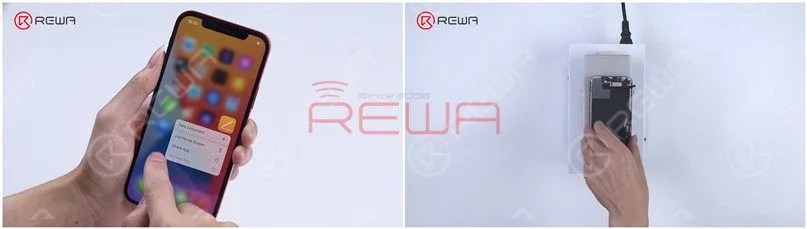
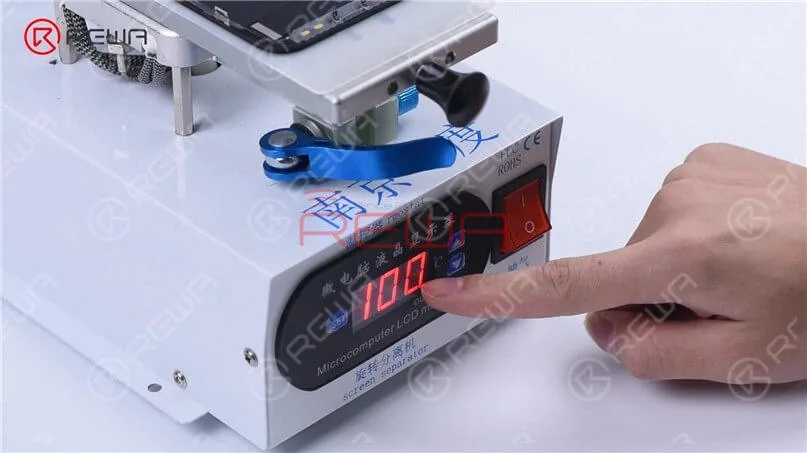
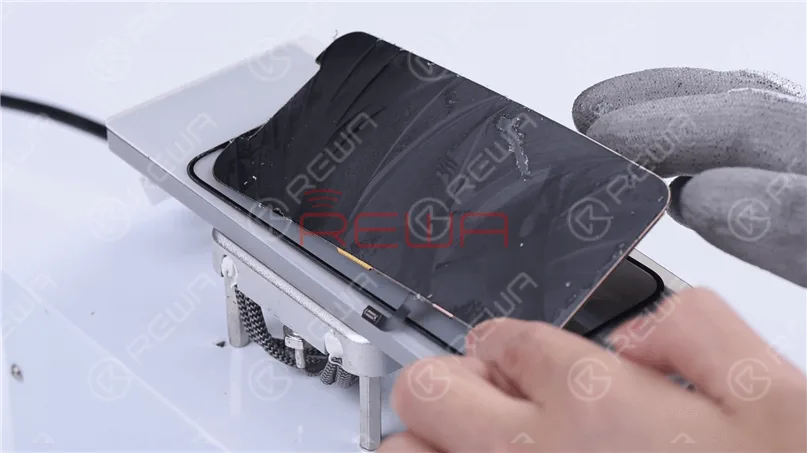
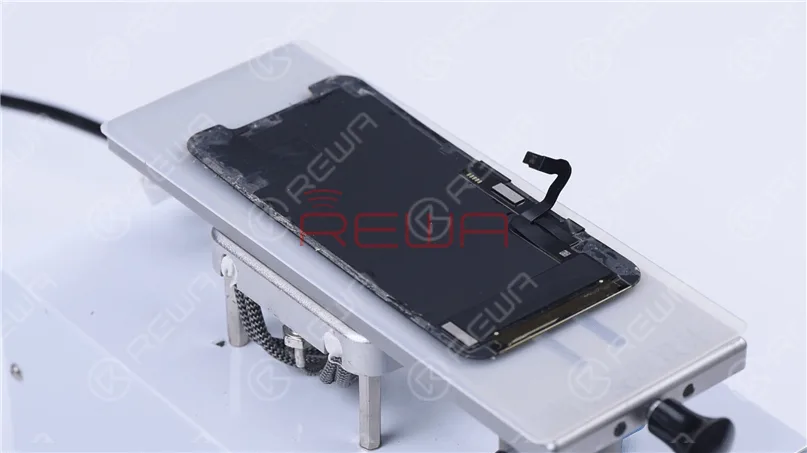
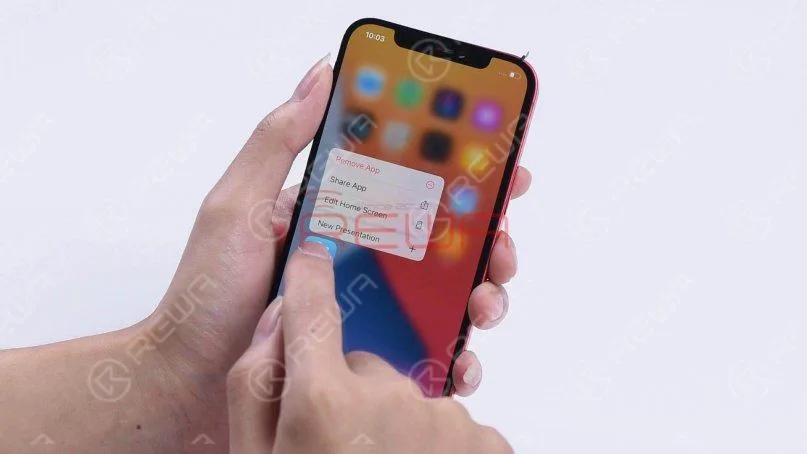
    First of all, let’s test the screen. The display, touch, and 3D Touch all function well. Place the screen upside down on the Screen Separator, set the temperature to 100 ℃, and start the suction.

    Place the screen upside down on the Screen Separator, set the temperature to 100 ℃, and start the suction.
    Place the screen upside down on the Screen Separator, set the temperature to 100 ℃, and start the suction.

    Remove the ear speaker flex cable first. Since the ear speaker flex cable is very easy to damage, please be noted that we need to heat the screen before removing it. Besides, the iPhone 12 ear speaker sensor ring is integrated into the bezel.

    Remove the ear speaker flex cable first. Since the ear speaker flex cable is very easy to damage, please be noted that we need to heat the screen before removing it. Besides, the iPhone 12 ear speaker sensor ring is integrated into the bezel.

    Step 2: Bezel Removing

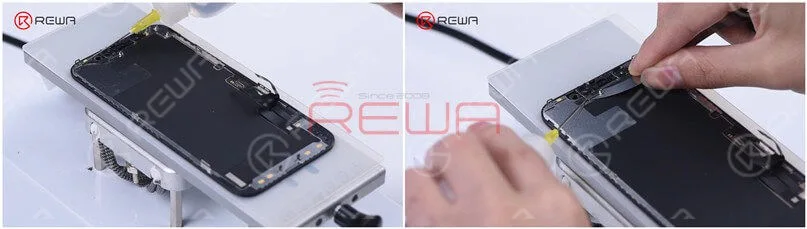
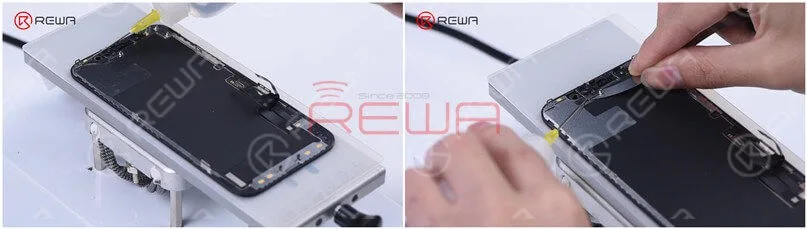
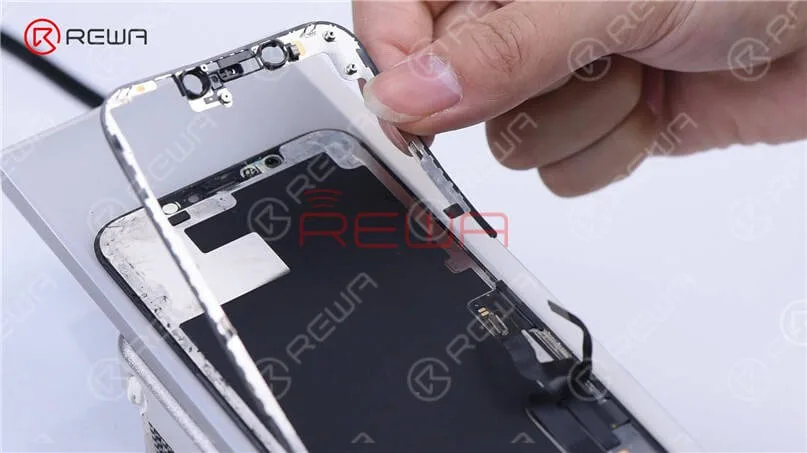
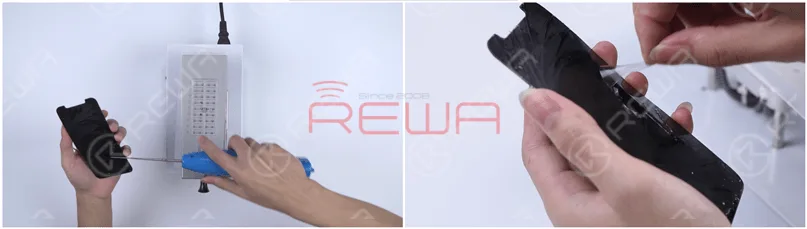
    Now, let’s remove the bezel. Dip adhesive remover on the bezel first. While using the Razor Blade to separate the bezel, you need to dip some adhesive remover too. Slide the Razor Blade back and forth, and pry up the bezel carefully.

    Now, let’s remove the bezel. Dip adhesive remover on the bezel first. While using the Razor Blade to separate the bezel, you need to dip some adhesive remover too. Slide the Razor Blade back and forth, and pry up the bezel carefully.
    Now, let’s remove the bezel. Dip adhesive remover on the bezel first. While using the Razor Blade to separate the bezel, you need to dip some adhesive remover too. Slide the Razor Blade back and forth, and pry up the bezel carefully.

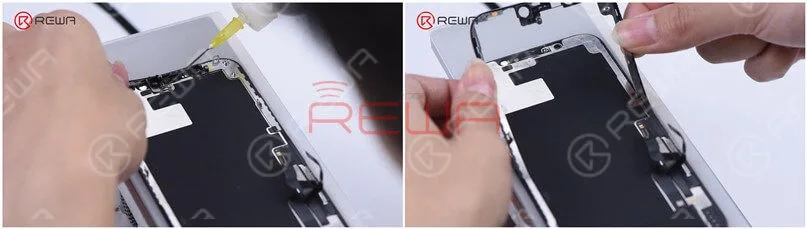
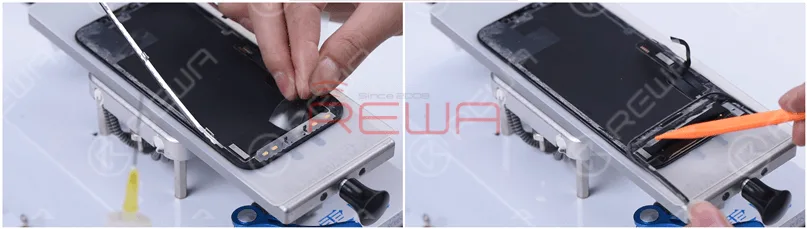
    As the ear speaker flex cable part has more adhesive, we can dip more adhesive remover to make it loose. Hold the two corners of the bezel in both hands, and detach the bezel slowly with caution. Our original thought was to separate the bezel in a complete manner and then reuse it. But now the bezel is broken here. So please notice that this part of the bezel is made of plastic material, which is extremely easy to break. If you want to separate the bezel completely, you need to pay extra attention.

    As the ear speaker flex cable part has more adhesive, we can dip more adhesive remover to make it loose. Hold the two corners of the bezel in both hands, and detach the bezel slowly with caution. Our original thought was to separate the bezel in a complete manner and then reuse it. But now the bezel is broken here. So please notice that this part of the bezel is made of plastic material, which is extremely easy to break. If you want to separate the bezel completely, you need to pay extra attention.
    As the ear speaker flex cable part has more adhesive, we can dip more adhesive remover to make it loose. Hold the two corners of the bezel in both hands, and detach the bezel slowly with caution. Our original thought was to separate the bezel in a complete manner and then reuse it. But now the bezel is broken here. So please notice that this part of the bezel is made of plastic material, which is extremely easy to break. If you want to separate the bezel completely, you need to pay extra attention.

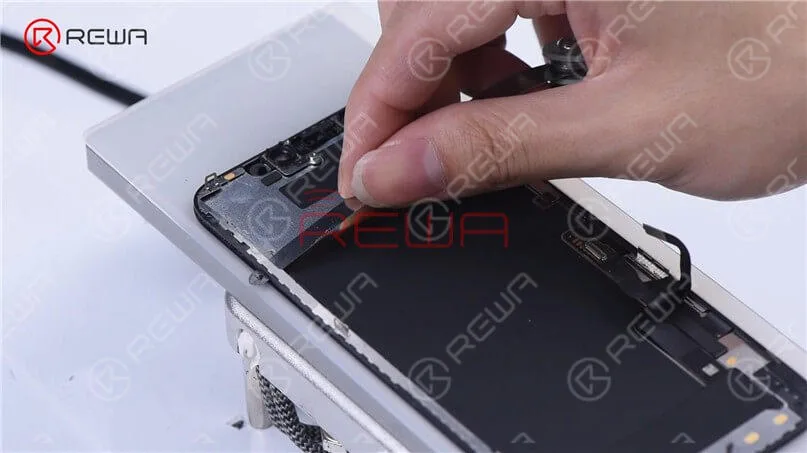
    In order not to induce damage, we use a thin film to remove the flex cable part. Remove the bezel, and it can be seen that the 3M adhesive used in the bezel flex cable part is no longer the cold adhesive. The 3M adhesive makes the bezel relatively easy to remove.

    In order not to induce damage, we use a thin film to remove the flex cable part. Remove the bezel, and it can be seen that the 3M adhesive used in the bezel flex cable part is no longer the cold adhesive. The 3M adhesive makes the bezel relatively easy to remove.

    Step 3: Glass Lens Separating

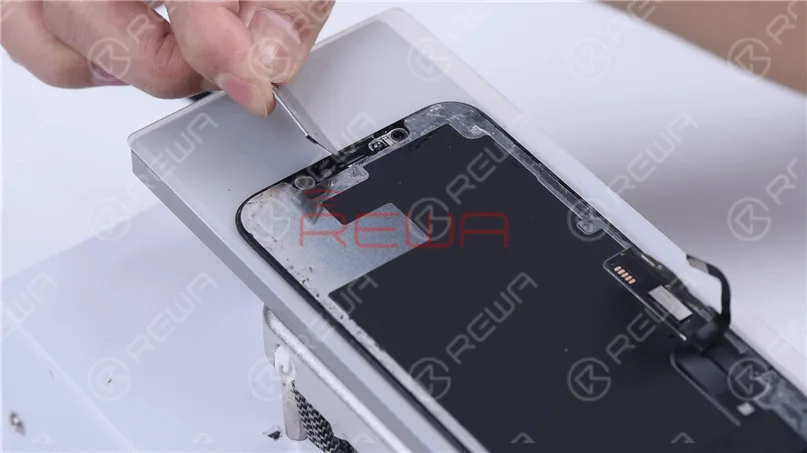
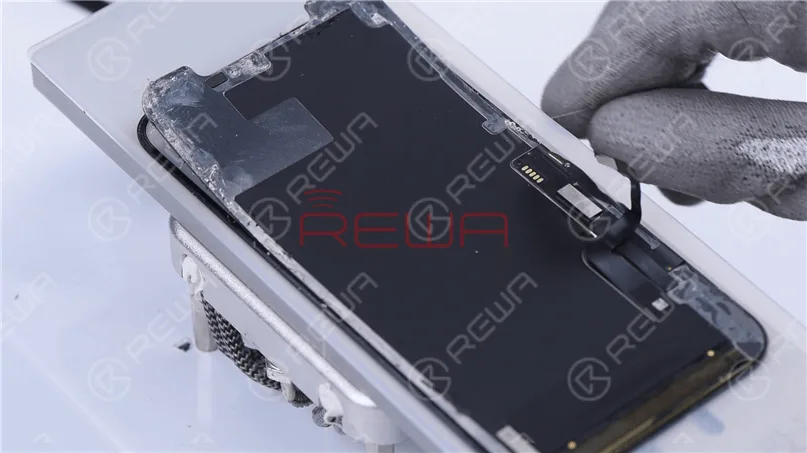
    Remove excess adhesive on the ear speaker flex cable part.

    Remove excess adhesive on the ear speaker flex cable part.

    Start separating the OLED along the bottom layer of the glass lens with Cutting Wire.

    Start separating the OLED along the bottom layer of the glass lens with Cutting Wire.

    Through our observation, we found that the touch panel of the iPhone 12 screen is better than that of the iPhone 11 Pro, which is not easy to damage. To put it specifically, the touch panel of the iPhone 12 is thicker, and the cut lines are clearer and wider.

    Through our observation, we found that the touch panel of the iPhone 12 screen is better than that of the iPhone 11 Pro, which is not easy to damage. To put it specifically, the touch panel of the iPhone 12 is thicker, and the cut lines are clearer and wider.

    Step 4: OCA Adhesive Removing

    Place the OLED on the heating platform.

    Place the OLED on the heating platform.

    Roll up the OCA adhesive with the Electric Adhesive Removing Tool and remove the remaining OCA adhesive with a hand.

    Roll up the OCA adhesive with the Electric Adhesive Removing Tool and remove the remaining OCA adhesive with a hand.

    Connect the OLED and ear speaker flex cable. The display and touch function works well. A point worth mentioning is that not connecting the ear speaker flex cable will lead to the absence of light-sensing. The screen will be too dark to be tested.

    Connect the OLED and ear speaker flex cable. The display and touch function works well. A point worth mentioning is that not connecting the ear speaker flex cable will lead to the absence of light-sensing. The screen will be too dark to be tested.
    Connect the OLED and ear speaker flex cable. The display and touch function works well. A point worth mentioning is that not connecting the ear speaker flex cable will lead to the absence of light-sensing. The screen will be too dark to be tested.

    Step 5: Laminating 

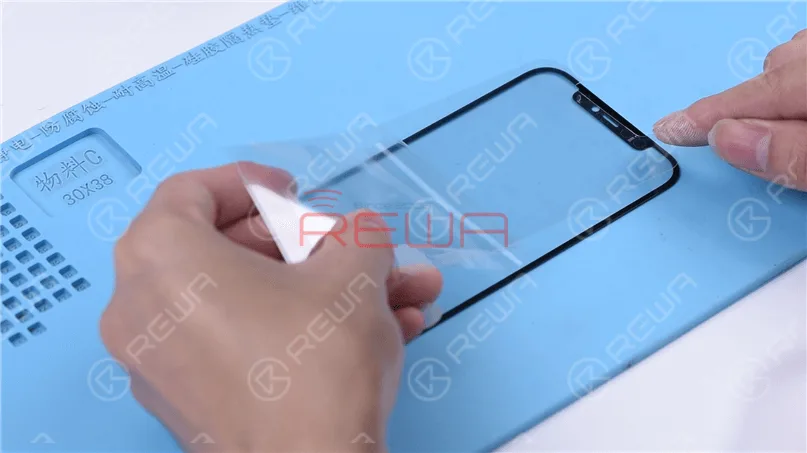
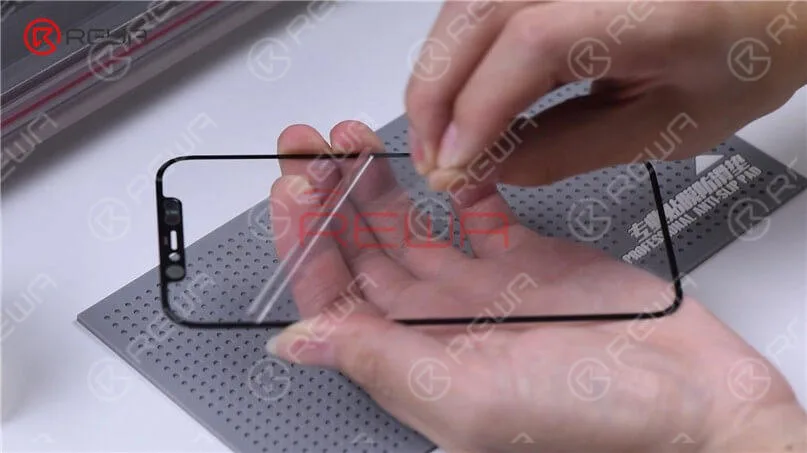
    Attach the OCA adhesive to the glass lens.

    Attach the OCA adhesive to the glass lens.

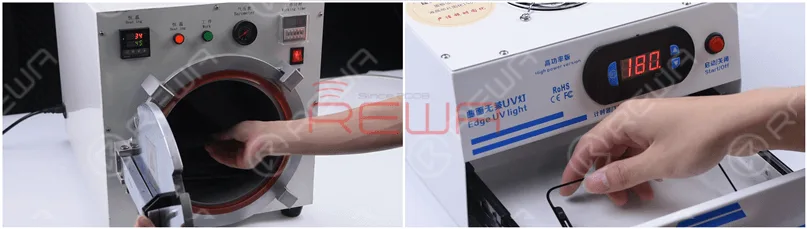
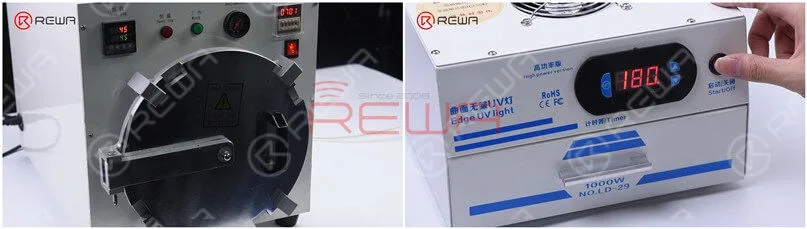
    Put the glass lens with OCA adhesive into the Bubble Removing Machine for 3 minutes. Then put it into the UV Lamp for Curing OCA Glue for 5 seconds.

    Put the glass lens with OCA adhesive into the Bubble Removing Machine for 3 minutes. Then put it into the UV Lamp for Curing OCA Glue for 5 seconds.

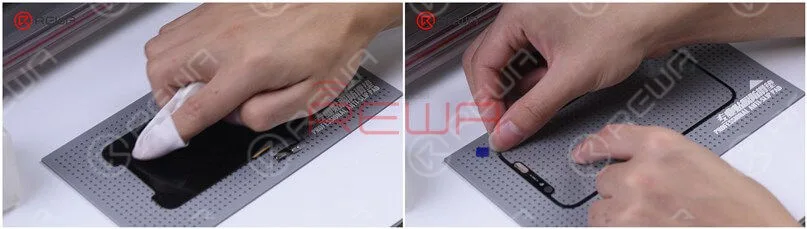
    Wipe clean the OLED, and use pull tape to stick a corner of the glass lens. Press the pull tape for seconds, and then tear off the protective film of the OCA adhesive.

    Wipe clean the OLED, and use pull tape to stick a corner of the glass lens. Press the pull tape for seconds, and then tear off the protective film of the OCA adhesive.
    Wipe clean the OLED, and use pull tape to stick a corner of the glass lens. Press the pull tape for seconds, and then tear off the protective film of the OCA adhesive.

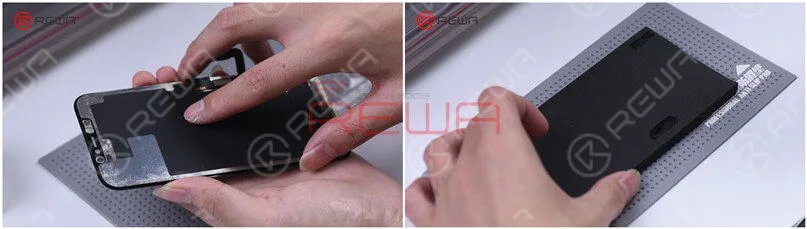
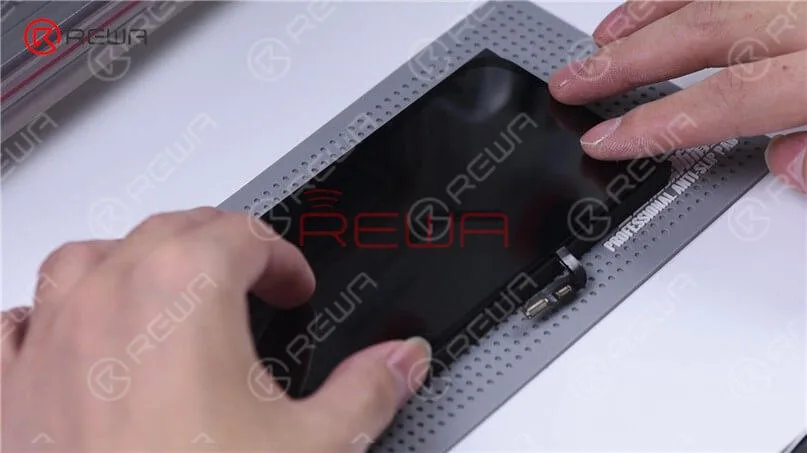
    Since the iPhone 12 aligning mold has not come out yet, we use manual alignment. After alignment, place the screen on the laminating sponge. Please notice that two slots are cut on the sponge in order to prevent OLED damage.

    Since the iPhone 12 aligning mold has not come out yet, we use manual alignment. After alignment, place the screen on the laminating sponge. Please notice that two slots are cut on the sponge in order to prevent OLED damage.
    Since the iPhone 12 aligning mold has not come out yet, we use manual alignment. After alignment, place the screen on the laminating sponge. Please notice that two slots are cut on the sponge in order to prevent OLED damage.

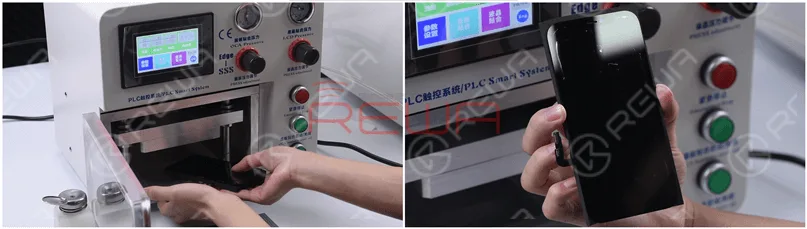
    Put the screen into the laminating machine, and press “LCD laminate start”. Take out the screen and we can see there are bubbles on the screen.

    Put the screen into the laminating machine, and press “LCD laminate start”. Take out the screen and we can see there are bubbles on the screen.

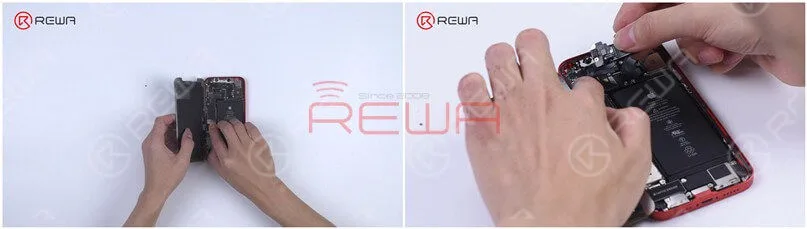
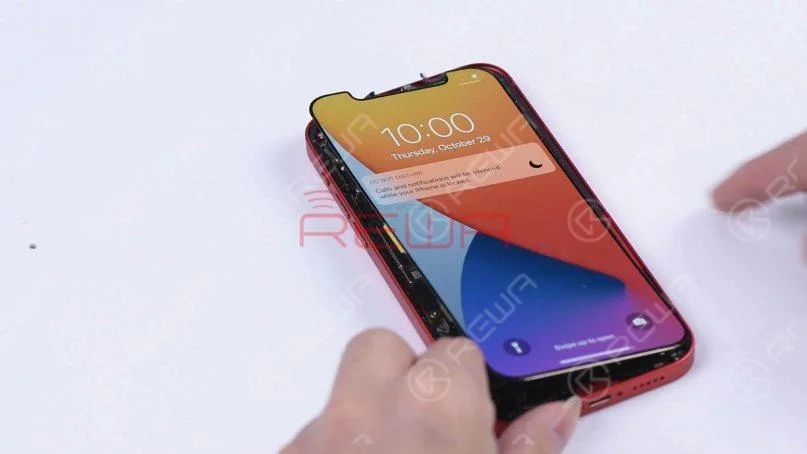
    Put the screen back into the Bubble Removing Machine for 10 minutes, and then put the screen into the UV Lamp for Curing OCA Glue for 180 seconds. Assemble the refurbished screen on the phone, and all functions work well.

    Put the screen back into the Bubble Removing Machine for 10 minutes, and then put the screen into the UV Lamp for Curing OCA Glue for 180 seconds. Assemble the refurbished screen on the phone, and all functions work well.
    Put the screen back into the Bubble Removing Machine for 10 minutes, and then put the screen into the UV Lamp for Curing OCA Glue for 180 seconds. Assemble the refurbished screen on the phone, and all functions work well.

    Visitez notre boutique en ligne for repair parts and tools.Be sure to follow our Chaîne YouTube, so you will get the newest repair information.For more detailed refurbishment techniques of the iPhone 12, please watch the video below!