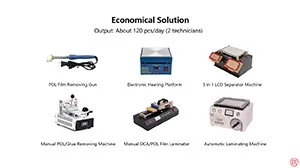
With 7 machines in total, this economical broken LCD screen refurbishing solution features high cost performance, offering an output of 120 pieces per day, which is specially for small factories. Please check the video for the more efficient and economical mobile phone glass-only repair solution.
Étiquette : remise à neuf
-
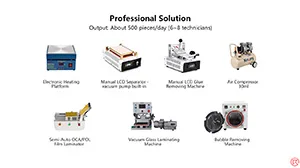
Solution Professionnelle – Solution de reconditionnement d'écran LCD cassé de téléphone mobile REWA V4.0
With 9 machines in total, this professional broken LCD screen refurbishing solution features high efficiency, offering an output of 500 pieces per day, which is specially for mass production factories. Please check the video for the professional cell phone broken screen glass-only repair solution with high efficiency.
-
Formation à la rénovation d'écrans LCD cassés REWA – Remplacement des verres avant et arrière
Les écrans ou dos en verre cassés constituent le problème le plus fréquent rencontré par les techniciens spécialisés dans la réparation de téléphones portables. Selon des statistiques non exhaustives, les réparations d’écrans ou de dos en verre cassés représentent 60% de l’activité d’un atelier de réparation. Aujourd'hui, avec l'amélioration constante des technologies de fabrication des écrans et des faces arrière en verre, ainsi que le développement rapide des réseaux 5G, la maîtrise de la technique de remise à neuf du verre deviendra sans aucun doute un atout majeur pour vous permettre de rester compétitif et d'augmenter vos revenus. Inscrivez-vous dès maintenant ici à notre formation de juin sur la remise à neuf des écrans et des faces arrière en verre.
-
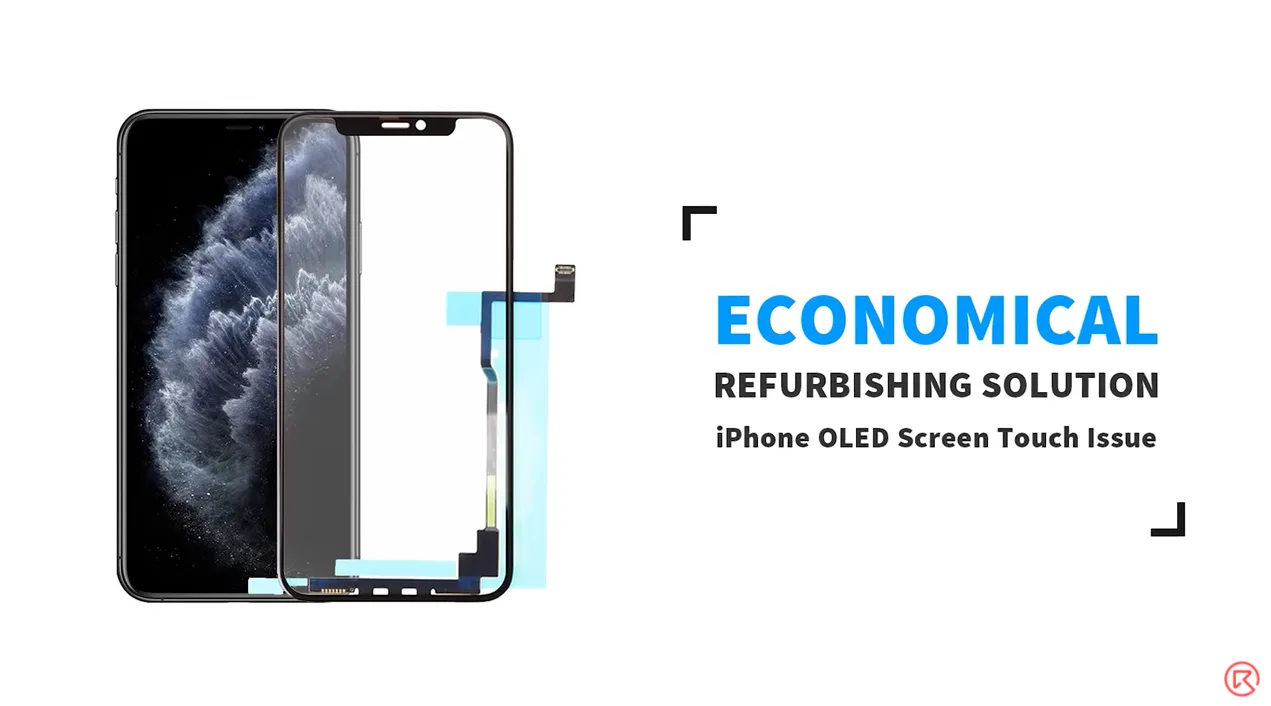
The Cost-effective Refurbishing Solution for iPhone Screen Touch Issue (iPhone 11 Pro Max Demo)
Most of the time the touch issue of iPhone X and above is a screen/motherboard issue. For touch issues caused by screen malfunction, a screen replacement is usually the solution adopted by repair shops. The operation of screen replacement is simple but the price of a new screen is high. It’s time for you to make a change and stand out from competitors in your city with this brand new and cost-effective refurbishing solution – touch panel replacement.
- 00:00 Introduction
- 01:11 Bezel Removing
- 03:15 TP Separating
- 05:10 Glue Removing
- 07:00 Laminating
- 13:03 Test
-
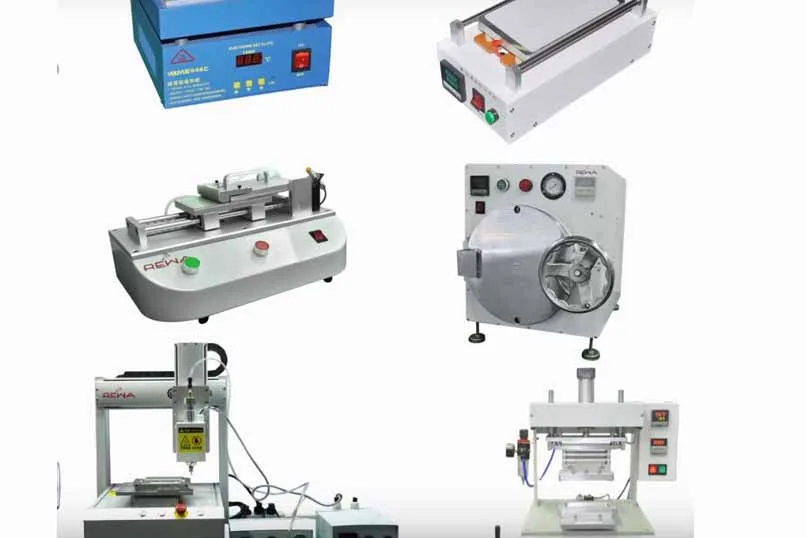
REWA Mobile Phone LCD Refurbish Solution v2.0 - Solution professionnelle
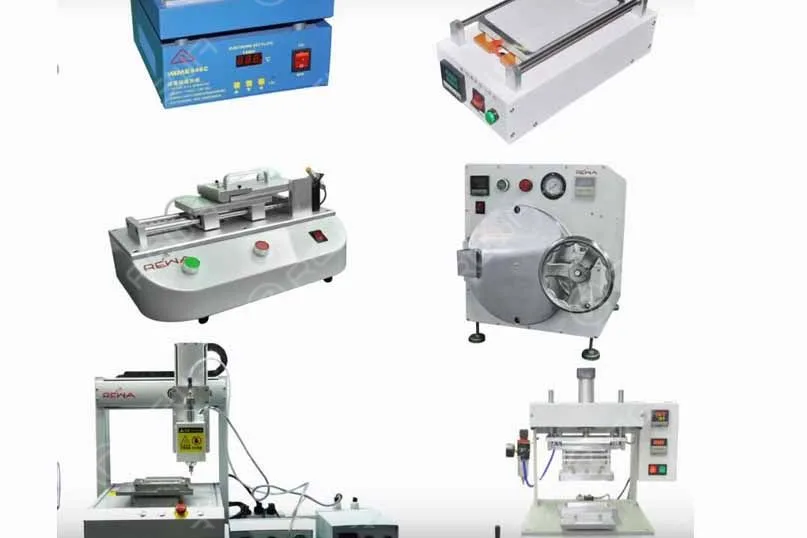 Dans les premiers temps, les téléphones portables utilisaient encore un écran tactile capacitif et étaient remis en état en remplaçant l'écran tactile endommagé par un nouveau. Mais cela n'est plus possible depuis la popularisation, ces dernières années, de la technologie intégrée dans les cellules appliquée aux écrans des téléphones portables. D'autre part, en raison du coût élevé des réparations, les écrans tactiles des téléphones portables ne peuvent plus être réparés. écran LCD original Alors que les clients et les fournisseurs de services s'efforcent de réduire les coûts en tirant le meilleur parti des ressources existantes, la tendance au reconditionnement des écrans de téléphones portables devient de plus en plus claire. Des méthodes innovantes sont nécessaires de toute urgence, que ce soit du point de vue économique ou environnemental.
En tant que défenseur et praticien de l'idée de maximiser l'utilisation du téléphone portable dans le secteur de l'après-vente, REWA a développé trois solutions pour les clients ayant des exigences différentes grâce à une exploration et une optimisation à long terme. Par conséquent, nous nous efforçons de fournir des solutions de haut niveau pour répondre aux différentes exigences des distributeurs de pièces détachées, des grossistes, des usines de remise à neuf, des installations de réparation ainsi que des revendeurs en ligne.
De plus, nous améliorons également nos solutions lorsque cela est nécessaire, afin de maintenir l'efficacité et la compétitivité de chaque solution.
-
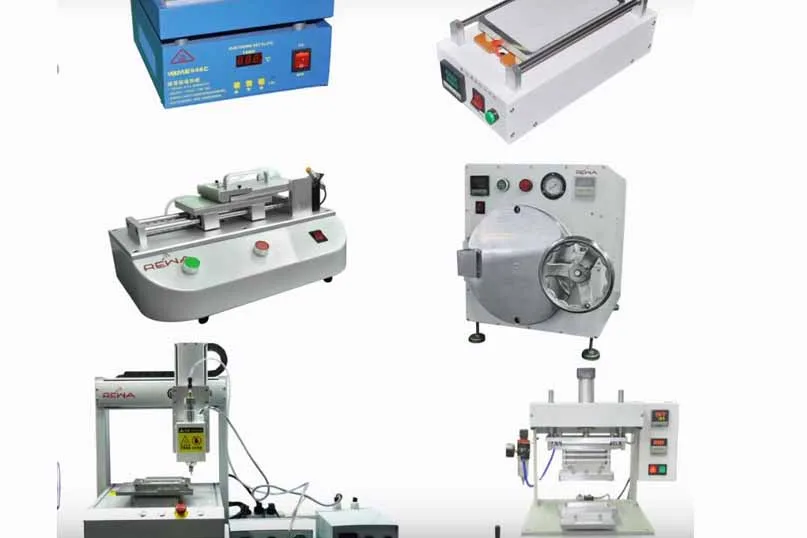
REWA Mobile Phone LCD Refurbish Solution v2.0 - Solution économique
Lancement de la technologie REWA Solution de remise à neuf des écrans LCD de téléphones portables V2.0 qui a été soigneusement conçu pour inclure TROIS solutions indépendantes : Primaire, Economique et Professionnelle qui couvrent l'ensemble des processus de récupération des écrans cassés. Aujourd'hui, faisons connaissance avec la première.
La solution économique est la version améliorée de la solution primaire, conçue pour les petites usines. En tant que solution de transition, elle compense le manque d'efficacité et de productivité de la première solution. La solution économique comprend 8 machines au total.
-
The Cost-effective Refurbishing Solution for iPhone Screen Touch Issue
Most of the time the touch issue of iPhone X and above is a screen/motherboard issue. For touch issues caused by screen malfunction, a screen replacement is usually the solution adopted by repair shops. The operation of screen replacement is simple but the price of a new screen is high. It’s time for you to make a change and stand out from competitors in your city with this brand new and cost-effective refurbishing solution – touch panel replacement. Before we introduce the new solution, let’s check out the difference between screen replacement and touch panel replacement.
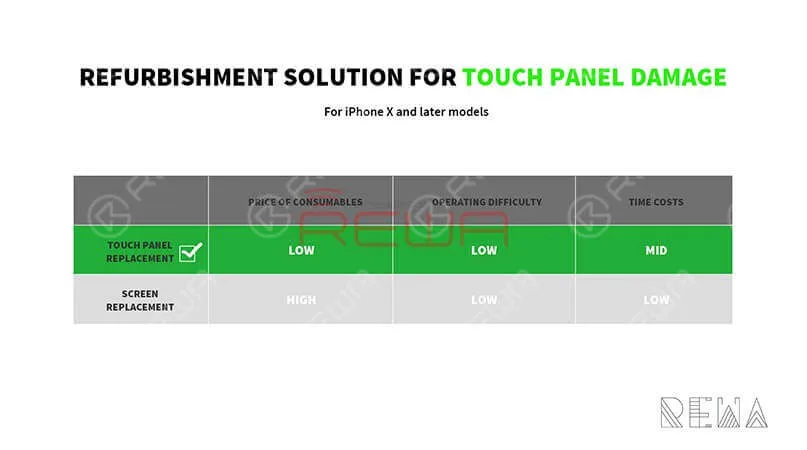
We can see from the figure above that the touch panel replacement solution helps repair shops save more money than the other one. This Refurbishing Solution mainly uses the following equipment:
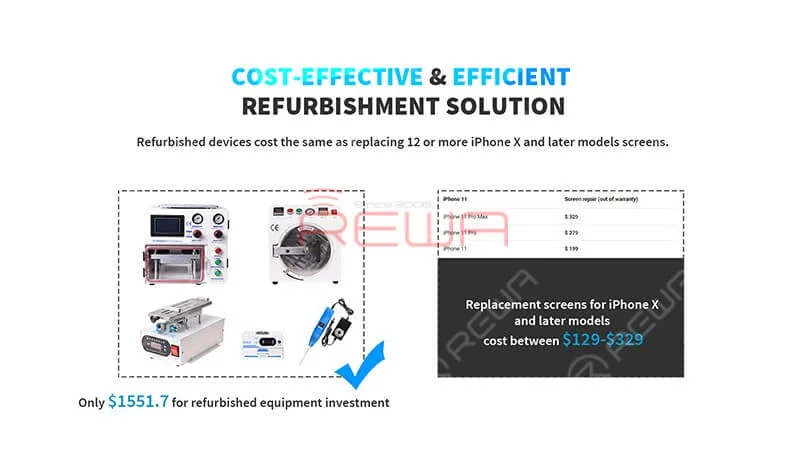
Séparateur LCD à écran incurvé rotatif
Outil électrique pour enlever la colle
Machine à stratifier pour écran incurvé
iPhone 11 PRO MAX Touch Screen Digitizer
Refurbishing Guide
Dépose de la lunette
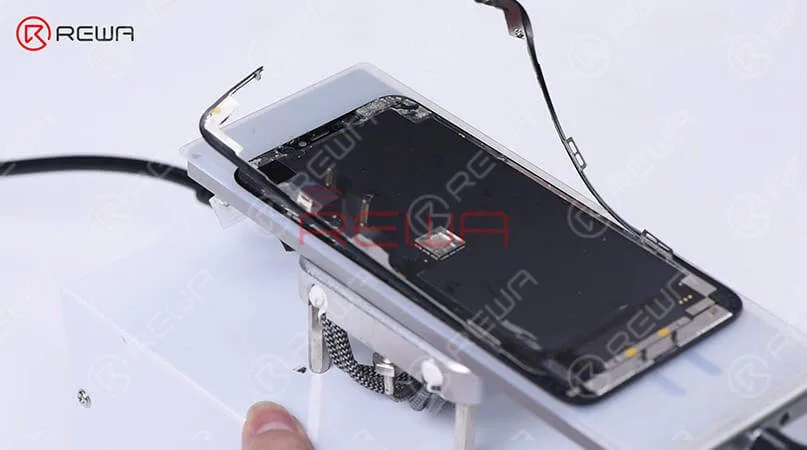
Slice through adhesive sealing the top edge of the bezel, and then cut the top bezel open with the Cutting Nipper.
TP Separating
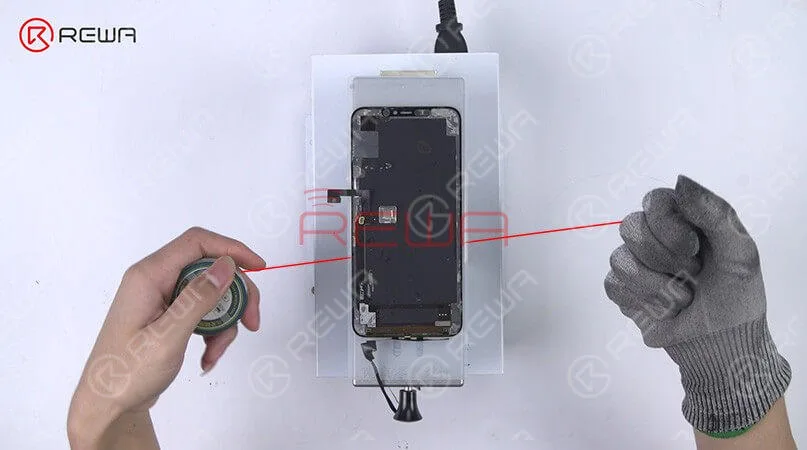
separate the TP flex cable and the display flex cable first. Set the LCD Cutting Wire to the gap between TP and OLED. Keep pulling the wire back and forth to separate OLED from TP and the glass lens.
Retrait de la colle
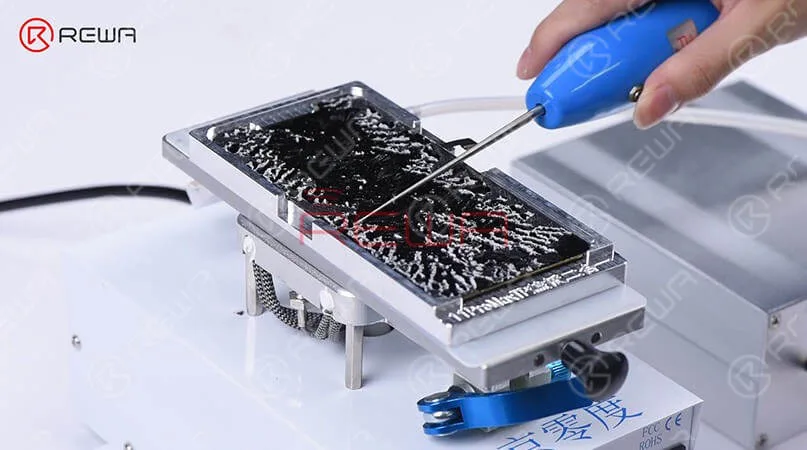
Place the OLED into the adsorption mold and remove residual glue with the Electric Glue Removing Device.
Contrecollage
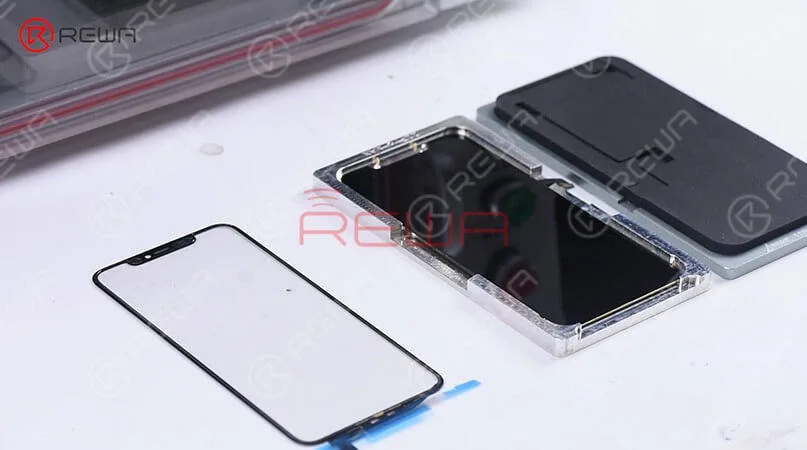
Put the OCA+TP laminated glass lens into the bubble removing machine. Take it out and make sure there is no bubble inside. Attach the OCA+TP laminated glass lens to the OLED, and then adhere the TP flex cable to the right position. Place the OLED screen assembly into the laminating mold. Next, put it into the laminating machine. Once finished, solidify the OLED screen assembly in the High Power UV Lamp for 3 minutes.
Test
Get the OLED screen assembly connected. Run function test.
Get Free Gift From SHOP.REWA.TECH. Buy any of the products below and get a free refurbishment course. For more information about this Promo, please contact your account manager.
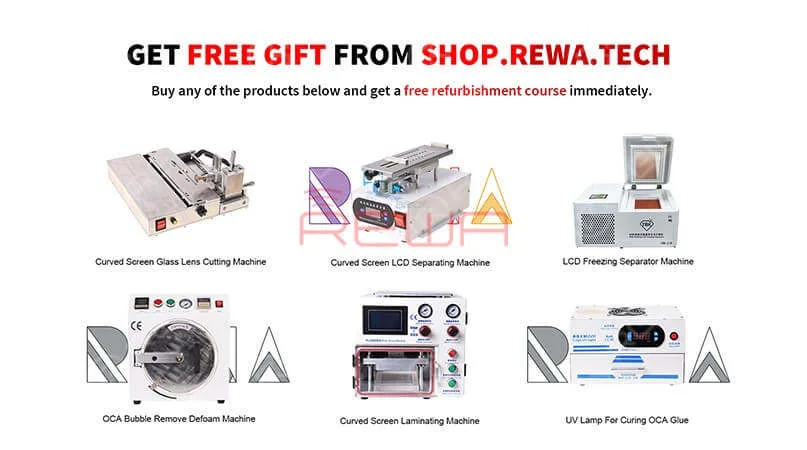
For more details on this Refurbishing solution, please go to Chaîne YouTube de REWA.
-
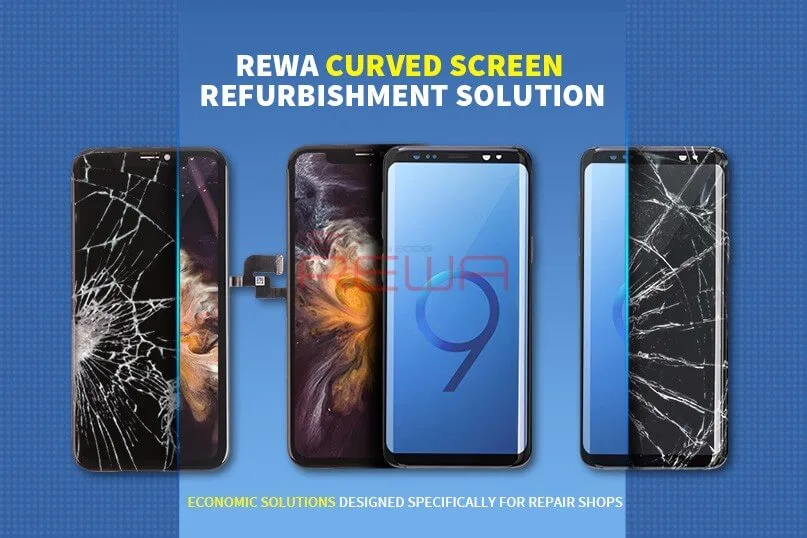
Samsung Galaxy S9/S9+ Cracked Screen Glass Only Repair – Refurbishing Solution V5.0
With the emergence of more and more curved-screen mobile phones on the market, curved-screen technology becomes more and more complicated, adding the difficulty of curved-screen refurbishing. The release of the Samsung S9 series also brings a new challenge since traditional curved-screen refurbishing solutions with freeze assistance cannot meet its need. That’s why we bring you this latest curved-screen refurbishing solution with heat assistance, which can meet the refurbishing needs of most curved-screen and flexible-screen mobile phones.
This Refurbishing Solution V5.0 mainly uses the following equipment:
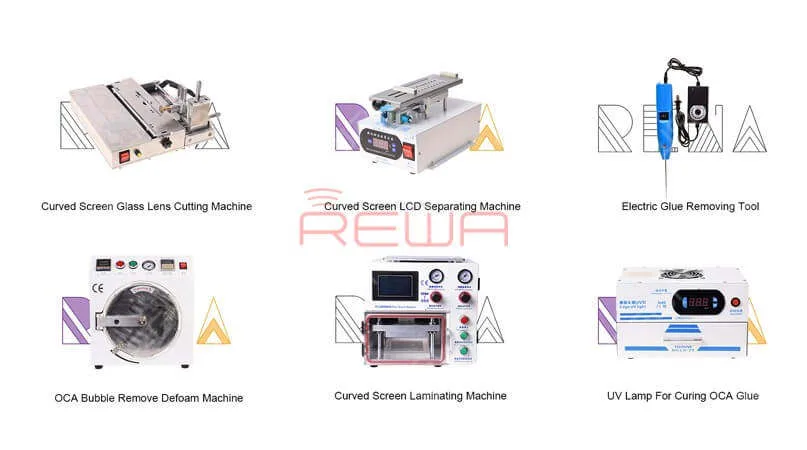
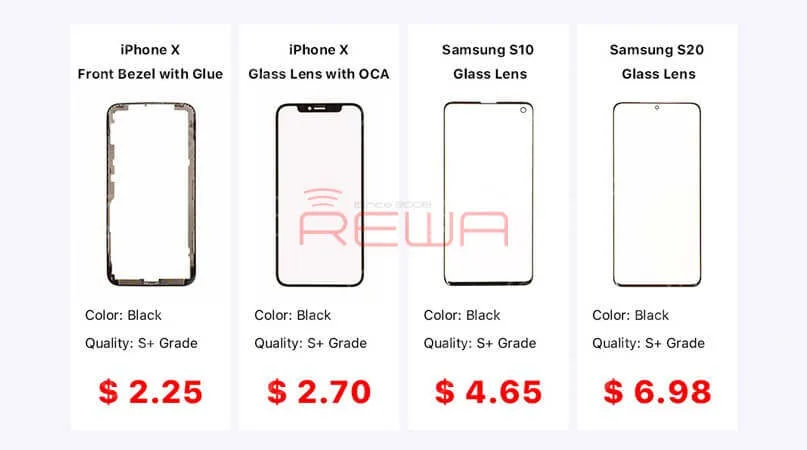
Lentille en verre pour Samsung & iPhone
Machine de découpe de verres d'écran incurvés
Séparateur LCD à écran incurvé rotatif
Outil électrique pour enlever la colle
Machine à stratifier pour écran incurvé
For more detailed info on each product, contact us at sales@rewatechnology.com, or go to the shop.rewa.tech to learn more!
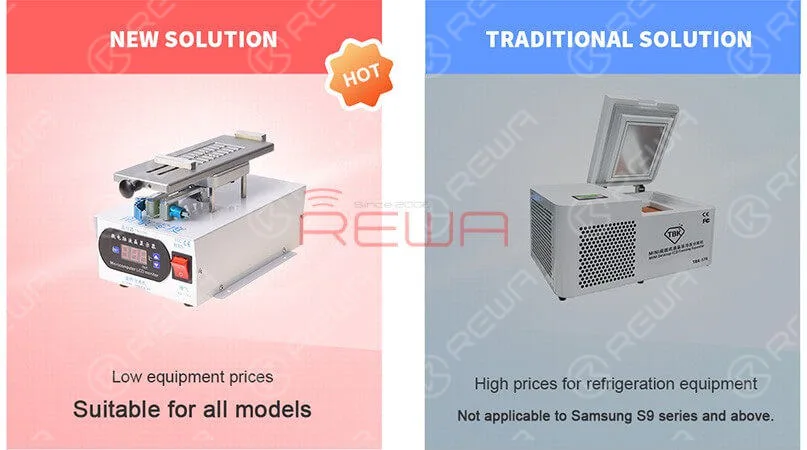
Compared to a traditional solution, the Refurbishing Solution V5.0 is suitable for all models. Especially suitable for the Samsung S9 series and above. The new solution can solve the problem of LCD layering, avoiding cold damage to the LCD. Also, the overall equipment price is lower than traditional solutions. Better than any other solution on the market, we provide the best technical support which includes online customer service and a full range of instructional video services.
Better than any other solution on the market, we provide the best technical support which includes online customer service and a full range of instructional video services.
For more details on the operation, watch the video below:
-
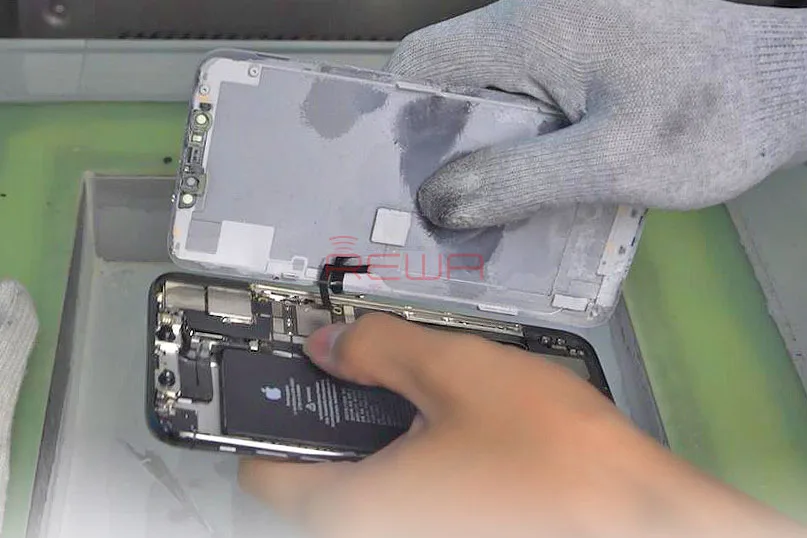
iPhone 11 Pro Max Screen Refurbishing – Detailed Operation
For iPhone X and later iPhone models, the bracket covering the bottom flex cable bonding area is adhered by cold adhesive. The traditional method with heating assistance when removing bezel might damage the screen. After several attempts, REWA LAB found that the new method with cold assistance can improve the success rate and efficiency of screen refurbishing. Check our blog today for detailed operation process of iPhone 11 Pro Max screen refurbishing.
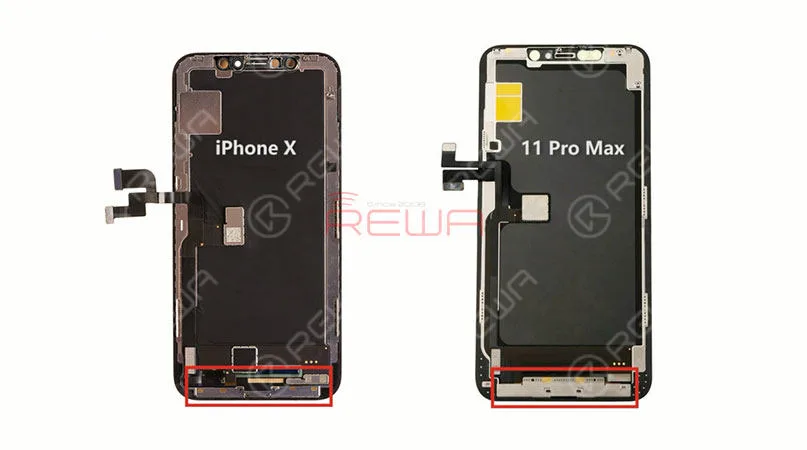
The screen structure of iPhone 11 Pro Max is the same as that of iPhone X series. Therefore, the screen refurbishing process is also similar. Different from iPhone X series, the bracket covering the bottom flex cable bonding area of iPhone 11 Pro Max is relatively wide, which increases the difficulty of screen refurbishing. Therefore, we need to be extremely careful when removing the bezel.
Reconditionnement d'écran iPhone 11 Pro Max
Step 1 Screen Testing
The first thing we do is to test the screen. Test the display, touch functionality and Haptic Touch of the screen. All going well.
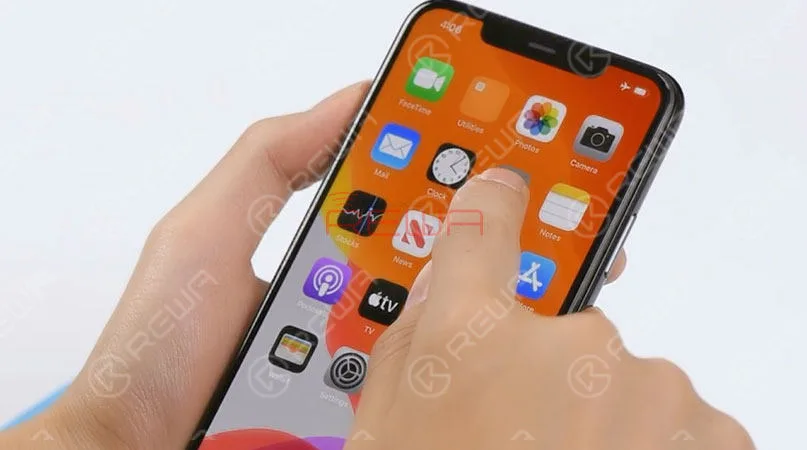
Please be noted that when testing iPhone 11 Pro Max’s screen, the default brightness of the screen is set at the lowest level. To adjust brightness of the screen during the testing, we need to get the front panel sensor assembly flex cable connected. Disconnect the front panel sensor assembly flex cable and remove the OLED screen assembly. Then remove the front panel sensor assembly flex cable.
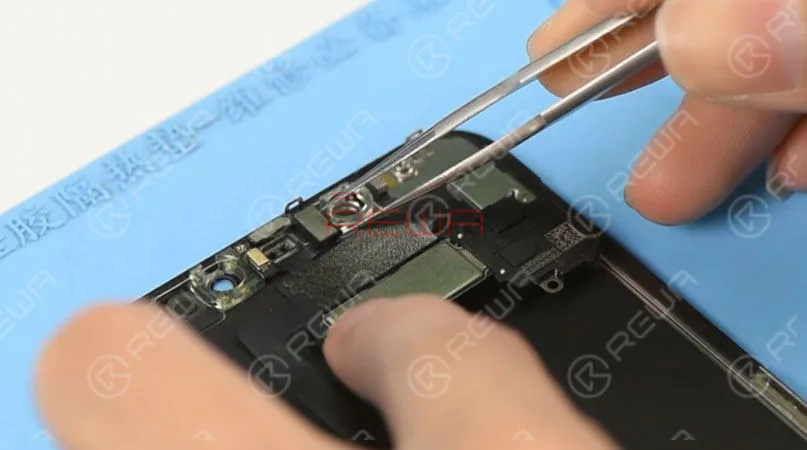
Tips: it is not easy to remove the front panel sensor assembly flex cable, which can be easily damaged during the operation. And the damage can also affect the function of Face ID. So we need to be extremely careful when operating
Step 2 Bezel Removing
Place the OLED screen assembly upside down into the -180℃ Frozen LCD Screen Separator. Insert a 0.06mm metal pry piece under the bracket covering the bottom flex cable bonding area. Slide back and forth to slice through the cold adhesive here. Once done, connect the screen and test. All going well.
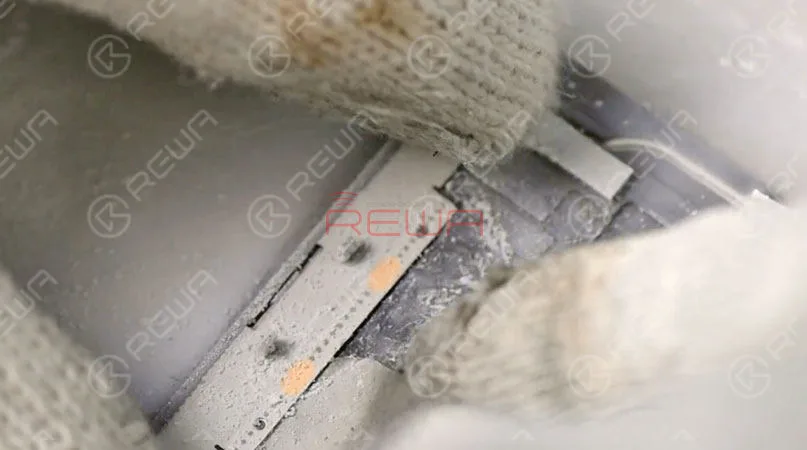
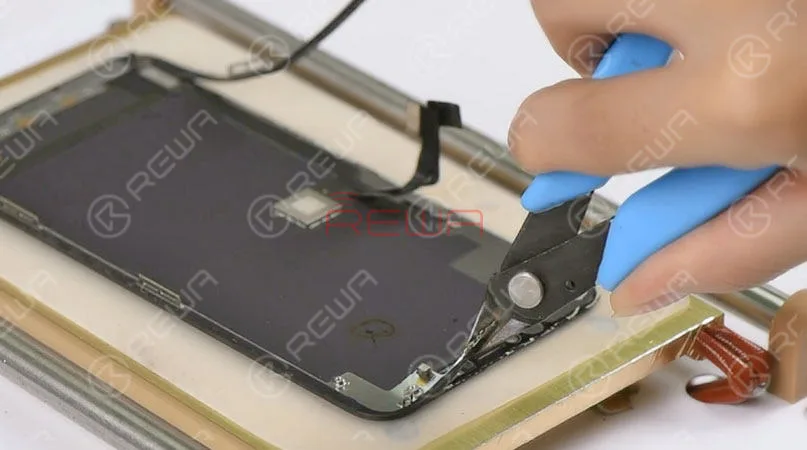
Tips: since the front panel sensor assembly flex cable is not connected, the default brightness of the screen is set at the lowest level. Set temperature of the Heat Platform at 100℃. Then put the OLED Screen Assembly on the preheated platform. Press the ‘Start’ button to suck the screen. 1 minute later, remove the front camera and sensor holder. Cut out the top bracket with the Cutting Nipper. Then separate the bezel from the OLED with the Cutting Nipper.
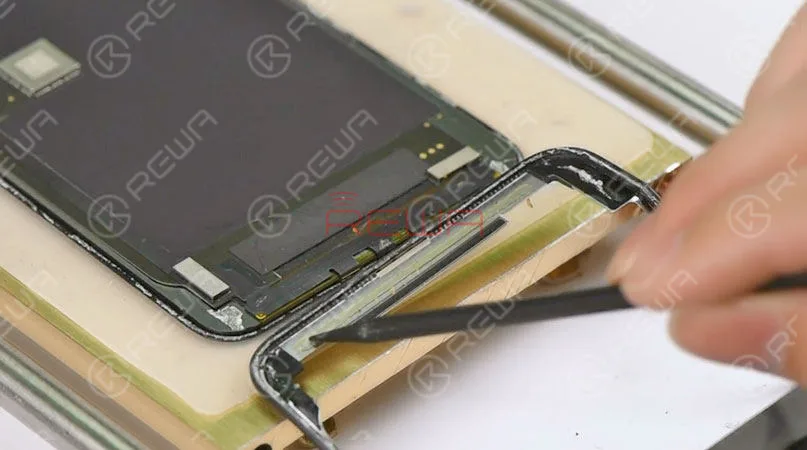
Tips: when detaching the bezel at the bottom area of the phone, we need to insert the metal pry piece under the bracket covering the bottom flex cable bonding area and slide back and forth. This is to confirm that the cold adhesive here has been sliced open. The bezel has been removed completely. As you can see, the area here is adhered by cold adhesive in large amounts. To protect the OLED from damage, we’d better freeze the screen during the operation.
Again, let’s test the OLED Screen Assembly. All going well.
Step 3 Glass Lens Separating
Now, let’s move to the glass lens separating process.
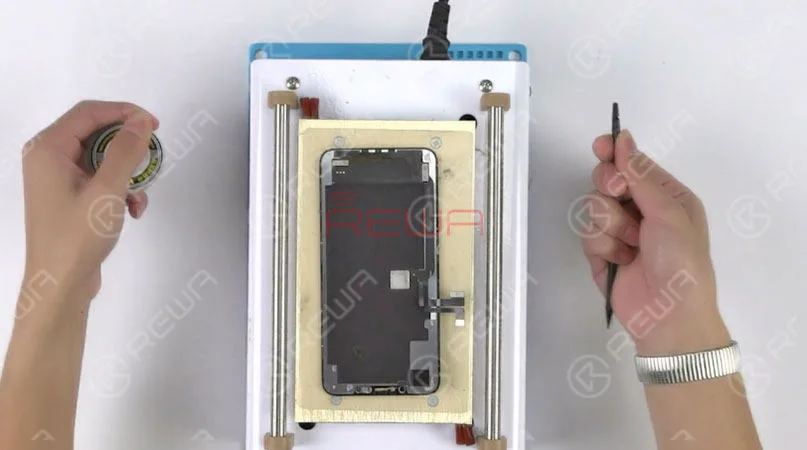
Place the OLED Screen Assembly upside down on the Heat Platform. Remove residual glue on the earpiece speaker area with a blade. So that the Touch Panel will not be damaged when operating with the Cutting Wire. Next, separate the glass lens from OLED with Cutting Wire. Test again after separating. All going well.
Step 4 OCA Glue Removing
Let’s continue with OCA glue removing.
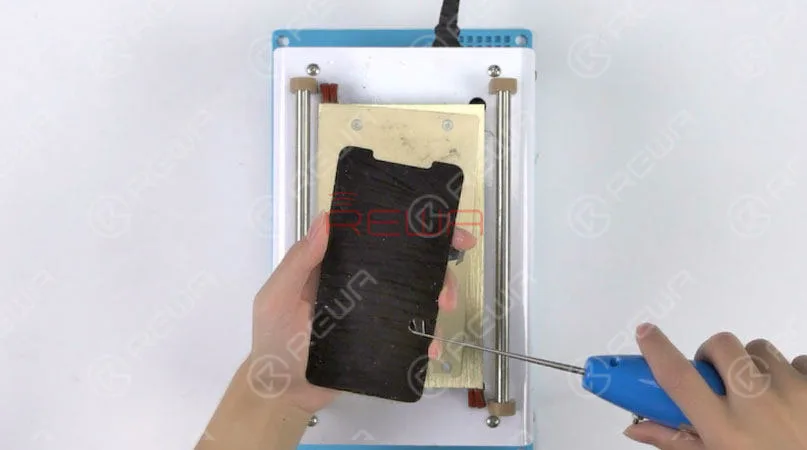
Put the OLED screen upside down on the Heat Platform for 3 minutes. Make an incision with the Electric Glue Removing Device. Then continue to tear off the OCA Glue with one hand. Also, be careful with force applied. This is to avoid damaging the OLED screen. Once done, test the OLED Screen. All going well.
Step 5 Laminating
Tear off the protective film on the backside of the glass lens and attach the OCA to the right position of the glass lens. Then put the OCA attached glass lens into the bubble removing machine for 5 minutes. Once finished, take out the OCA attached glass lens.
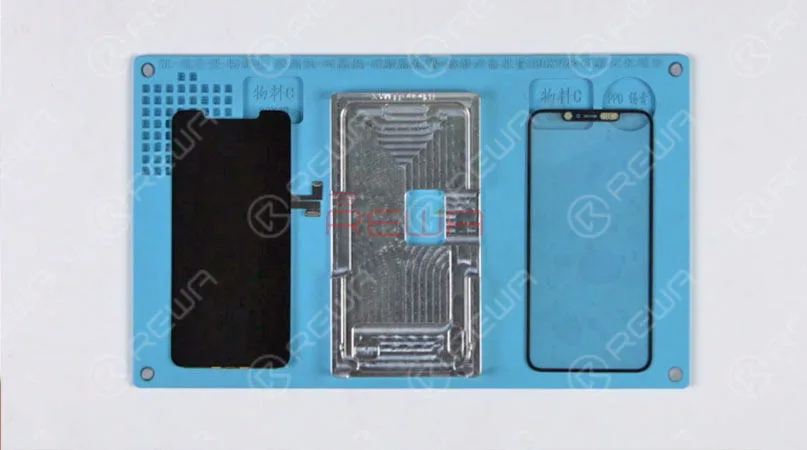
Now we need to laminate the OCA attached glass lens to the OLED Screen. Place the OLED screen into the OLED aligning mold. Clean the screen with the lint-free wiper. Tear off another layer of the OCA protective film and attach the OCA attached glass lens to the right position of the screen. Press gently to fit the glass lens with the screen. Place the mold upside down and take out the OLED Screen Assembly. Tear off the protective film on the glass lens. Cover the backside of the OLED Screen Assembly with a laminating sponge and then place the OLED Screen Assembly into the laminating machine. Choose ‘start’ on the LED panel. The machine starts to work. Laminating finished after several minutes. Again, let’s test the OLED Screen Assembly. All going well.
Step 6 Bubble Removing
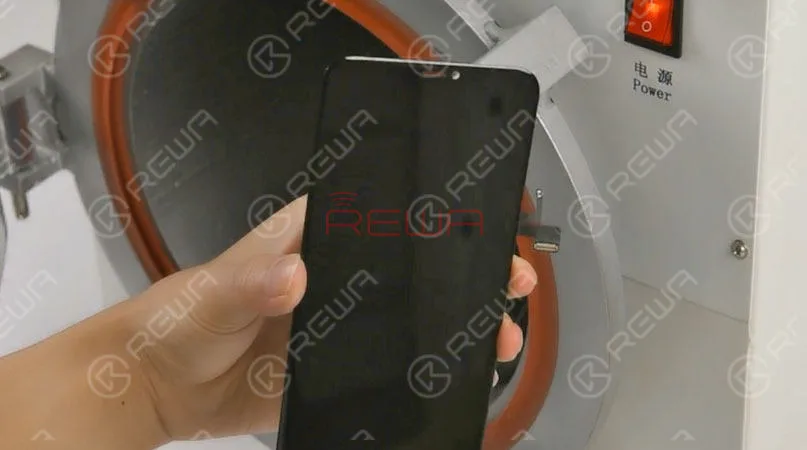
Put the OLED Screen Assembly into Bubble Removing Machine for 10 minutes. Once finished, take out the OLED Screen Assembly.
Step 7 Bezel Attaching
Prepare a new piece of iPhone 11 Pro Max bezel. Tear off the protective film on the bezel. Apply the specialized glue to the bezel. Then apply pressure to fit the OLED Screen Assembly with the bezel.
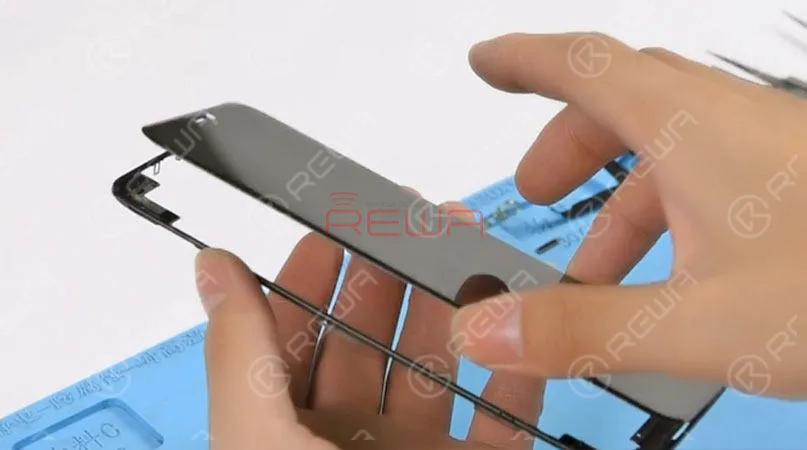
Please be noted the FPC area on the bottom is very fragile. Be careful when operating. Otherwise, you might damage the OLED screen.
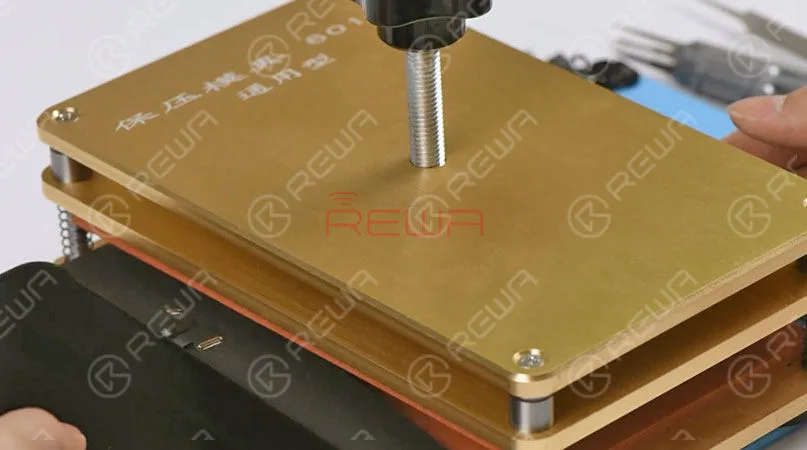
Cover the backside of the OLED Screen Assembly with a laminating sponge. Then place the OLED Screen Assembly into the bezel laminating mold and fix it. Tighten the screw and wait for 10 minutes. Take out the OLED Screen Assembly afterwards.
Step 8 Screen Testing
Get the front camera and sensor holder installed, and then the earpiece speaker mesh. Get the front panel sensor assembly flex cable and the OLED Screen Assembly installed. Run function test – Display; Touch; Haptic Touch. Display, Touch, and Haptic Touch work normally.
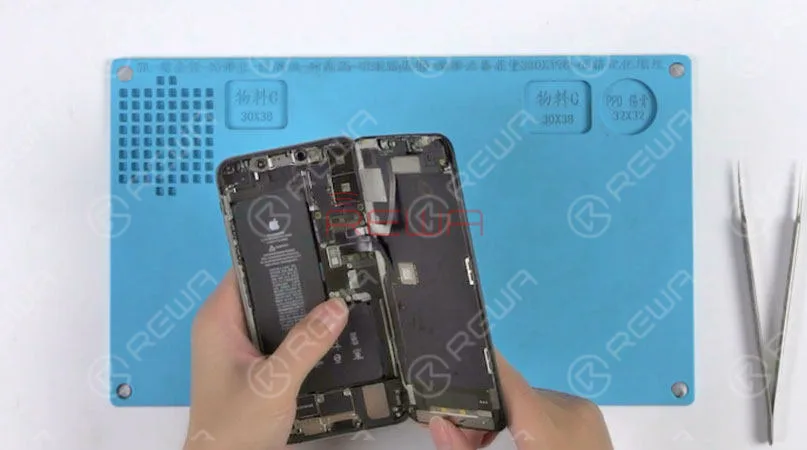
iPhone 11 Pro Max screen refurbishing has been completed perfectly.
Outils et pièces détachées utilisés
- Fil de découpe LCD
- Refurbishing Machines
- Pistolet à air chaud Station de reprise
- Pince à épiler droite
- Tournevis
- Plate-forme intégrée de réparation de téléphones mobiles
- Barre de levier antistatique
- Machine à enlever les bulles
- Bezel Laminating Mold
Vous pouvez également visiter Chaîne Youtube de REWA to check our video of iPhone 11 pro max refurbishing.
-
Economical Solution – REWA Broken LCD Refurbishing Solution
With 7 machines in total, this economical broken LCD screen refurbishing solution features high cost performance, offering an output of 120 pieces per day, which is specially for small factories. Please check the video for the more efficient and economical mobile phone glass-only repair solution.
Machines remises à neuf incluses :
- Electronic Heating Platform
- 3 in 1 Heating, LCD Separator and Frame Disassemble Machine
- Manual POL/LCD Glue Removing Machine
- Stratifieuse de films OCA/POL manuelle (pompe à vide intégrée)
- Machine automatique de lamination du verre et d'élimination des bulles
- Bezel Assemble Machine
- Air Compressor – 30L
-
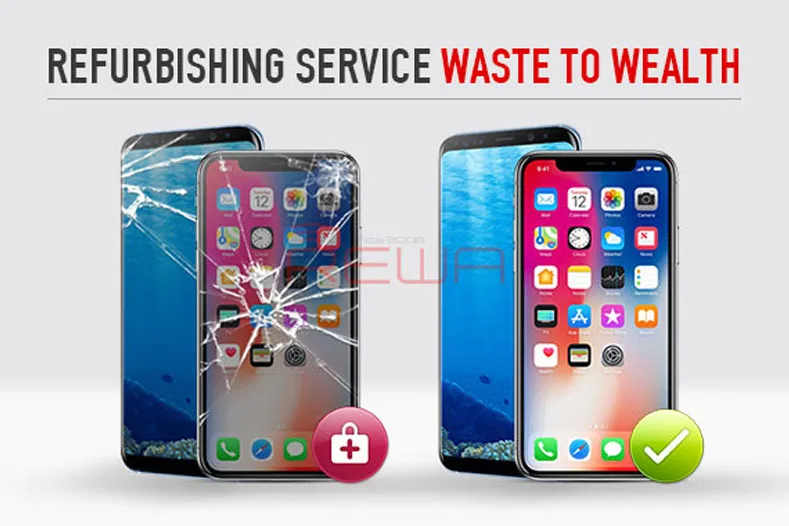
Service de remise à neuf de REWA - Waste to Wealth
Il vous reste de nombreux écrans cassés dans votre entrepôt ? C'est dommage de les jeter ou de les vendre à bas prix ? Rassemblez tous vos écrans cassés, envoyez-les à REWA et faites-les revivre ! Visitez REWA Service de remise à neuf des écrans LCD et OLED cassés Pourquoi nous choisir ?
1. Nous proposons des services de remise à neuf depuis plus de 5 ans. Grâce à notre riche expérience, nous avons considérablement amélioré notre taux de réussite en matière de remise à neuf, qui atteint aujourd'hui près de 100%.
2. Au lieu d'acheter un nouvel écran, vous pouvez obtenir un écran moins cher de même qualité en le remettant à neuf. Envoyez tous les écrans cassés à REWA et laissez-nous faire le travail de remise à neuf pour vous afin d'économiser du temps et de la main d'œuvre.
3. REWA a une bonne politique de garantie pour tous ses produits. En ce qui concerne les écrans reconditionnés présentant un problème de qualité dans les trois mois, nous pouvons fournir un deuxième reconditionnement gratuit ou un crédit pour le prochain achat.
Pour l'instant, nous fournissons un service de remise à neuf pour les modèles suivants :
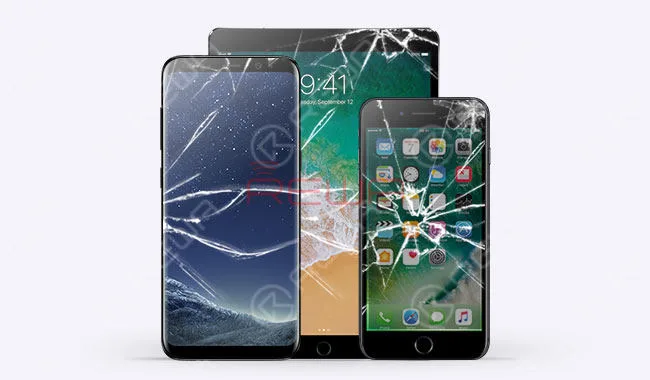
1. iPhone 5 / 5c / 5s / 6 / 6 Plus / 6s / 6s Plus / 7 / 7 Plus / 8 / 8 Plus / X
2. iPad mini 4 / Air 2 / 9.7 / 12.9
3. Galaxy S III / S III Mini / S4 / S4 Mini / S5 / S5 Mini / S6(G920) / S6 edge(G925) / S6 edge+(G928) / S7(G930) / S7 edge(G935) / S8(G950) / S8 edge(G955) / Note 1 / Note 2 / Note 3 / Note 4 / Note 4 Mini / Note 4 edge(N915) / Note 5
Avis
1. Si le rétroéclairage d'un écran cassé doit être remplacé en raison de dommages tels qu'un dégât des eaux, une déformation, une fuite de lumière, un dégât des poussières ou d'autres défauts du rétroéclairage, le remplacement du rétroéclairage sera facturé en conséquence. Il en va de même pour le remplacement du cadre central de Samsung.
2. Les écrans cassés dont l'affichage et la fonction tactile sont endommagés ne méritent pas d'être remis à neuf.
Comment fonctionne le service de remise à neuf de REWA
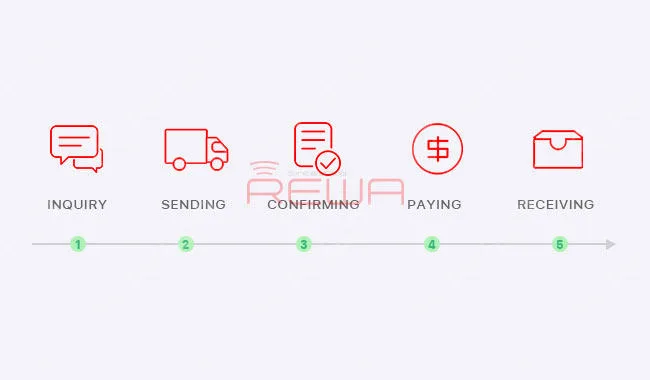
Demande de renseignements
-Contacter notre service commercial et décrire les problèmes afin d'obtenir un devis préliminaire.
-Nous vous assisterons pour le test de l'écran brisé, l'emballage et la logistique.
Envoi
Débarrassez-vous de vos écrans cassés
-Veuillez envoyer à REWA sales votre liste d'emballage électronique, la photo du colis et le numéro de suivi.
Confirmation
-Confirmer la quantité d'écrans cassés à remettre en état
-Après le test de l'écran brisé, nous émettrons un rapport de test.
-Une fois que le rapport d'essai a été confirmé par le client, nous entamons le processus de remise à neuf.
Payer
-Confirmer la quantité d'écrans, de rétroéclairages et de cadres intermédiaires remis à neuf qui ont été remplacés.
-Nous vous enverrons l'IP et commencerons la réparation une fois le paiement effectué.
Réception
-Pour les écrans cassés qui ne méritent pas d'être remis à neuf ou les écrans dont la remise à neuf a échoué, nous vous demanderons si vous souhaitez les renvoyer. Si c'est le cas, les frais de retour sont à votre charge.
-Nous renvoyons le colis après confirmation du paiement.
Service après-vente
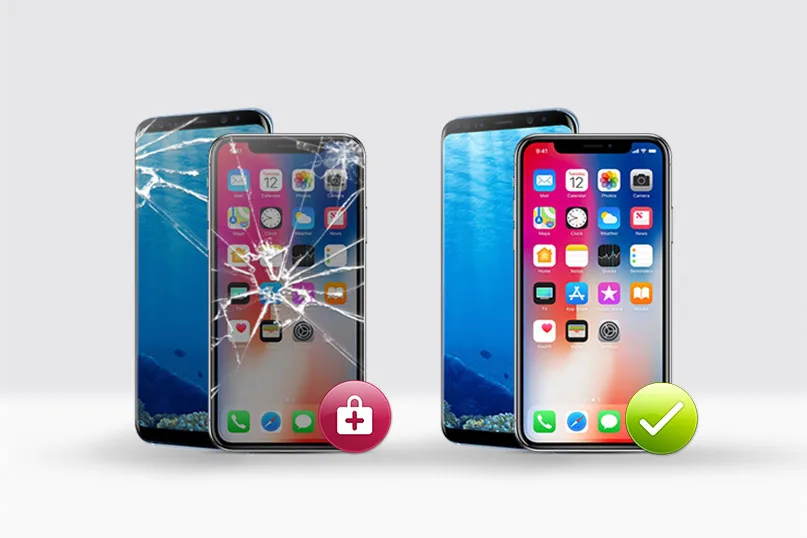
Tous les écrans remis à neuf sont couverts par une garantie de 3 mois. Pour certains cas particuliers, nous négocierons immédiatement avec vous.
La garantie ne couvre pas les situations suivantes :
1. Dommages dus à une erreur personnelle (installation incorrecte) et à une modification de l'environnement (haute pression, coup de lumière, dégâts des eaux, etc.).
2. Détérioration de l'étiquette de garantie.
Avis aux clients
Voici quelques détails que nous aimerions vous communiquer avant la livraison
1. Le processus de reconditionnement (hors délai de livraison) prend généralement entre 3 et 7 jours (10-100 PCS). Si la quantité de cartes logiques que vous envoyez est supérieure à 100 PCS, vous devez alors négocier avec nous le délai de reconditionnement.
2. Le client prend en charge les frais de transport vers la Chine.
3. Le client doit assumer le risque d'échec de la remise à neuf.
4. Le client doit tester entièrement les écrans cassés avant de les envoyer. Pour les écrans cassés dont l'affichage et la fonction tactile sont endommagés et qui ne sont pas dignes d'être remis à neuf, nous vous demanderons si vous souhaitez les renvoyer. Si c'est le cas, les frais de retour sont à votre charge.
-
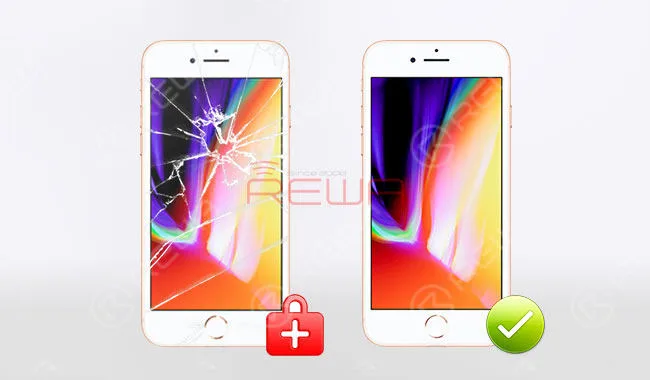
Reconditionnement d'écran LCD cassé d'iPhone 8 – Réparation de vitre seule
For a long time, REWA has been dealt with broken screen refurbishing of some flag-ship models like iPhone X Screen Refurbishing – Glass Only Repair and Samsung Galaxy S7 edge glass replacement. And this time, with the iPhone 8 being the subject of intense social debate, we also come up with an exclusive iPhone repair solution that shall definitely surprise you. Latest iPhone 8 broken LCD screen glass-only refurbishing technique, supported by REWA LAB, cost-effective and efficient for all iPhone repair professionals and enthusiasts. Don’t miss it!
Reconditionnement d'écran LCD cassé d'iPhone 8 – Réparation de vitre seule
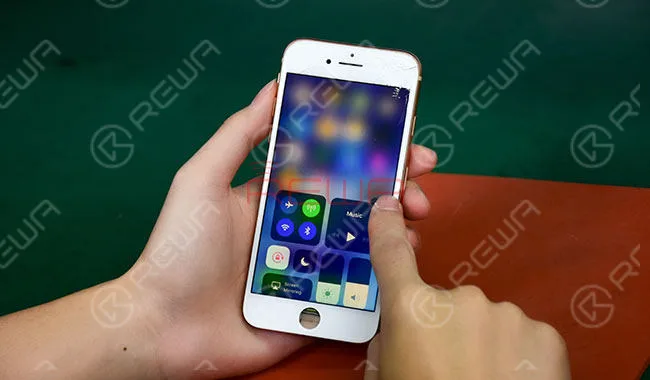
Test de l'écran brisé
Here comes one iPhone 8 LCD display assembly with broken glass lens. The first thing we need to do is to test if the display, touch and 3D touch functionality is OK.
Dépose de la lunette
Detach flex cables and remove the display assembly.
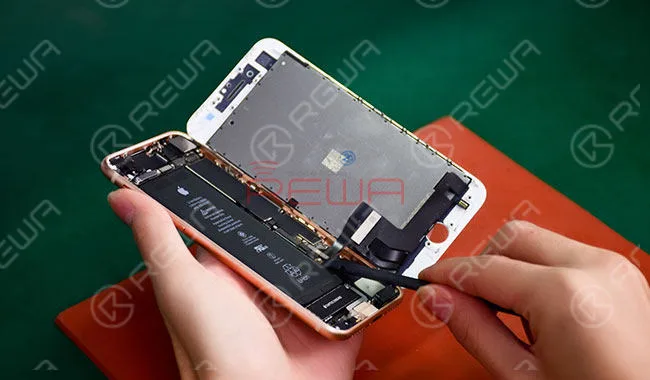
Then heat and remove bezel with Bezel Removing Machine at 230℃.
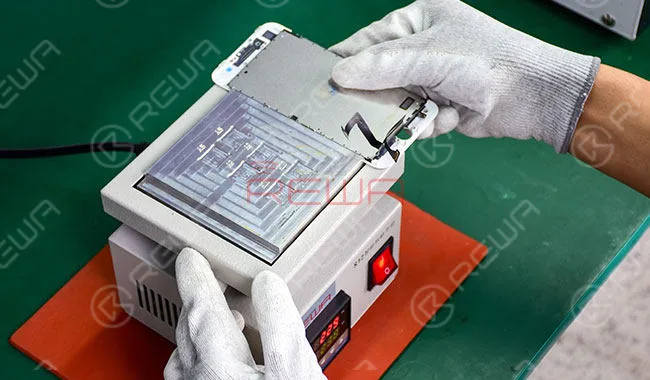
Séparation des lentilles de verre
Stick adhesive tape on broken glass to prevent further damage. Then place the display assembly onto the Manual Separating Machine. Heat up at 69℃ for 30s.
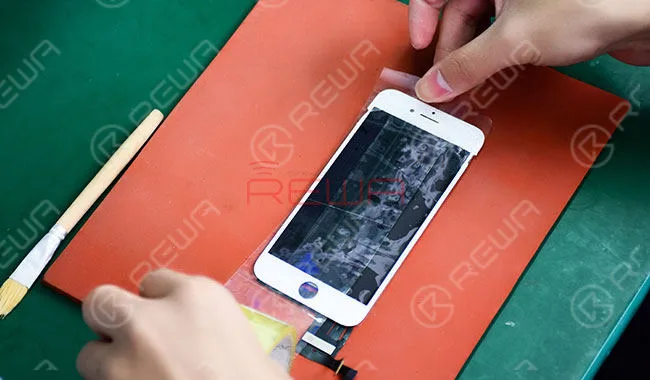
Press the ‘Start’ button and separate the glass lens from LCD with LCD cutting wire.
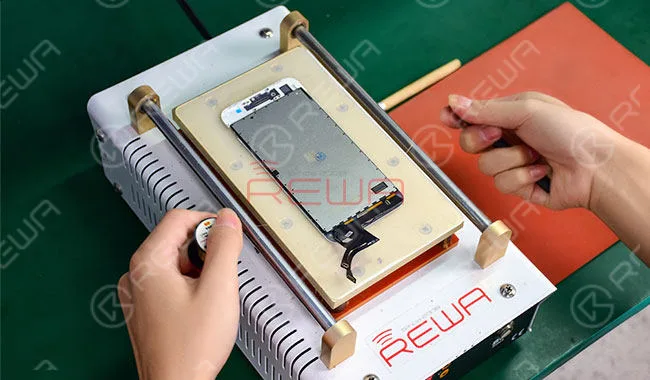
POL Suppression
Remove the POL Film evenly with Glue Removing Machine. After that, remove the glue residue with LCM Cleaner. (Remove the residual POL film with razor blade if necessary. Once finished, remove the glue residue with LCM Cleaner.) Once done, clean again with N-hexane.
OCA & POL Laminating
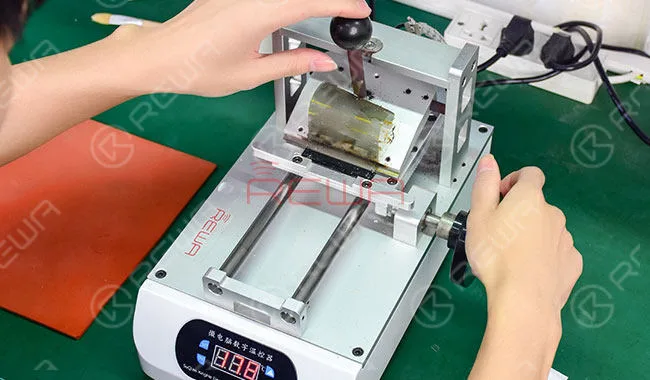
Place the LCD onto the POL Laminating Machine. Do remember to clean completely with N-hexane at first. Align the POL Film with LCD correspondingly. Then press ‘Pump Down’ button to help stick the POL film to the top panel.
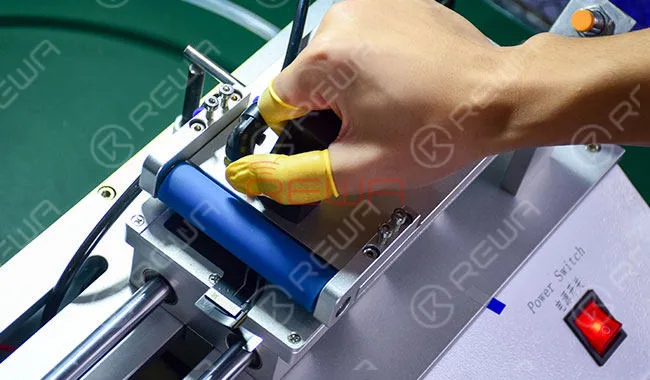
Tear off the first layer of POL protective film with Easy Tear Sticker. Force down the top panel with activating button to finish POL laminating.
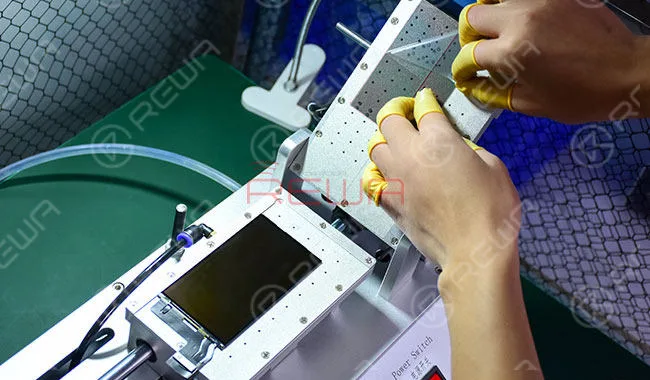
Tear off the first layer of OCA protective film. Align the OCA Sheet with LCD correspondingly. Then press ‘Pump Down’ button to help stick the OCA to the top panel.
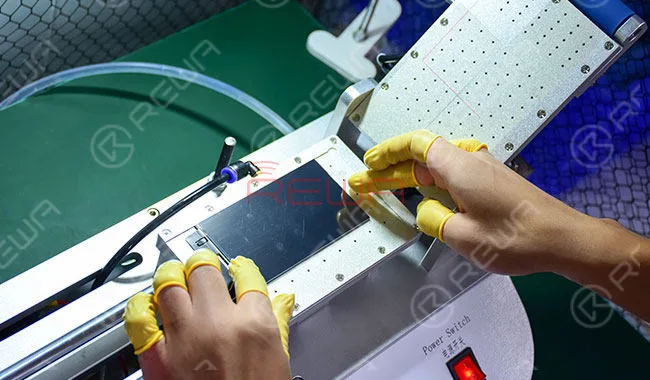
Tear off the second layer of POL protective film with Easy Tear Sticker. Tear off the second layer of OCA protective film with Easy Tear Sticker. Force down the top panel with activating button to finish OCA laminating.
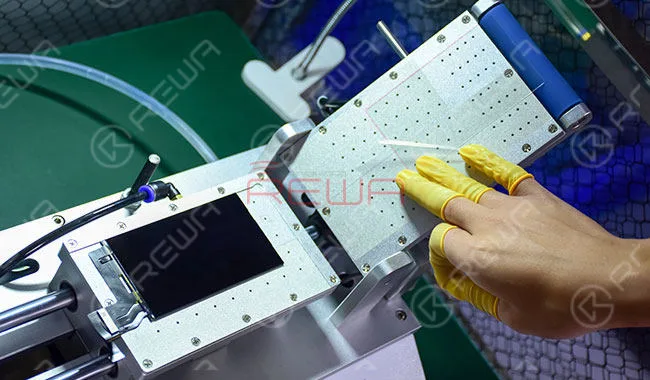
Glass Lens Laminating
Stick an Easy Tear Sticker to the top right corner of the LCD. Then put the LCD into the align mold.
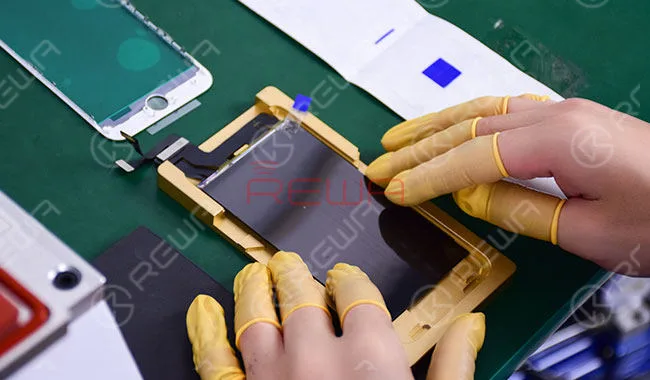
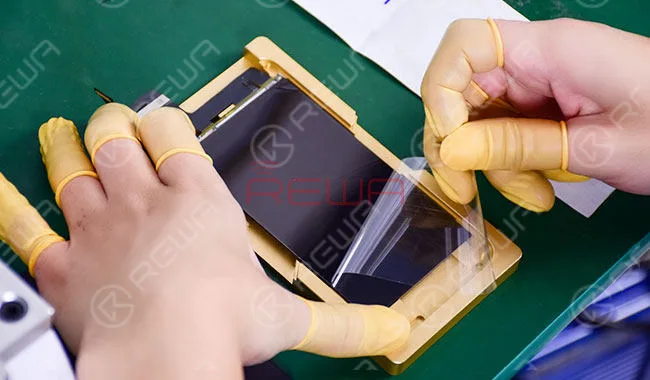
Tear off the back cover protective film of the Integrated iPhone 8 Glass Lens with Front Bezel with Easy Tear Sticker and tear off the last layer of OCA protective film with Easy Tear Sticker.
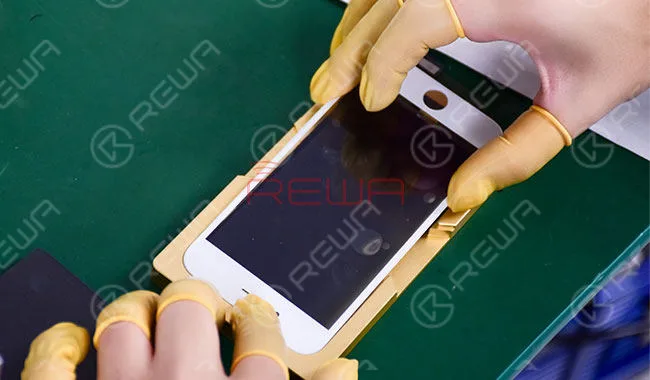
Align the Integrated iPhone 8 Glass Lens with Front Bezel with LCD in the align mold correspondingly. Place upside down the align mold and take out the LCD display assembly.
Cover the back side of the LCD display assembly with a laminating sponge. Put the LCD display assembly into the Glass Laminating Machine.
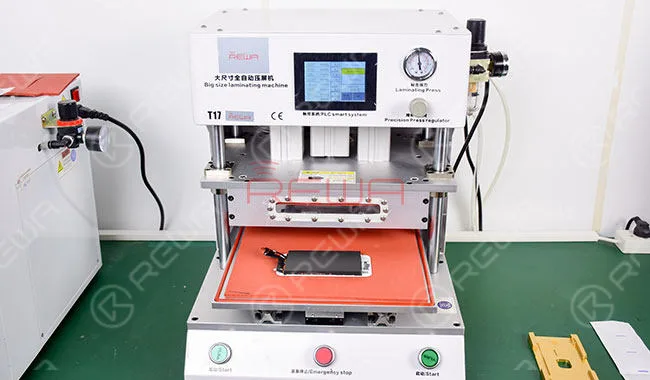
Take out the LCD display assembly and evaluate the effect.
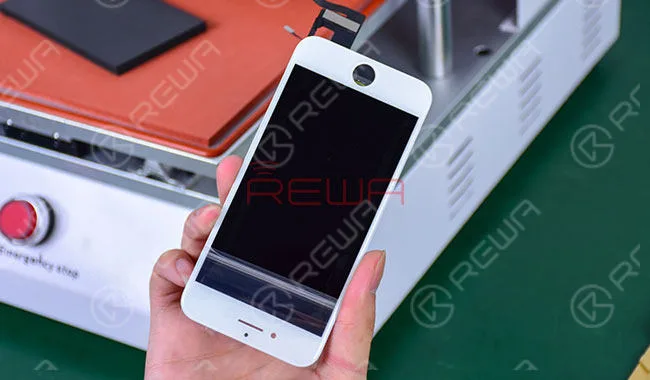
Elimination des bulles
Put the LCD display assembly into the Bubble Removing Machine for 10 minutes.
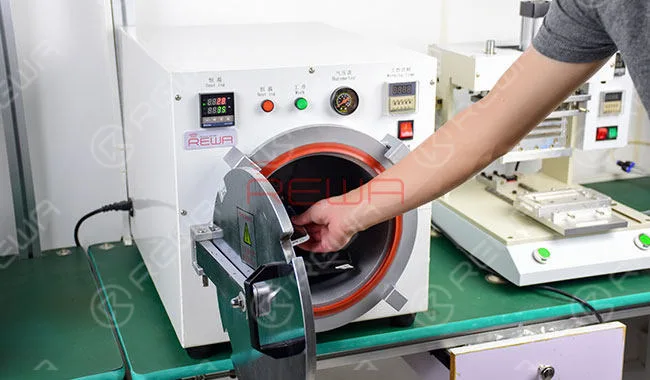
Take out the LCD display assembly and evaluate the effect.
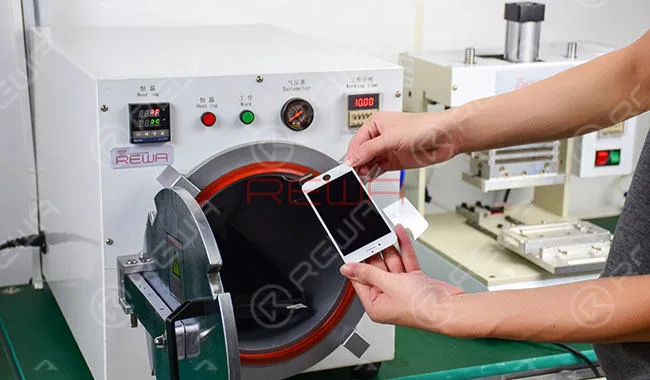
Test d'écran remis à neuf
Connect the LCD display assembly to the logic board and run function test on a refurbished screen. Test the display, 3D touch and touch functionality again.
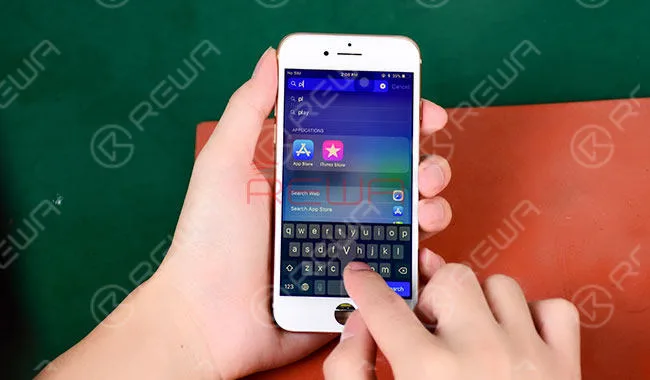
For more details on iPhone 8 Broken LCD Screen Refurbishing, please go to Chaîne YouTube de REWA.
Pièces et outils nécessaires
- Apple iPhone 8 Glass Lens with Front Bezel Replacement
- Apple iPhone 8 OCA Glue Sheet
- Apple iPhone 8 Top Polarizer Film
- Fil de découpe LCD
- Glass Lens with Bezel Frame Alignment Mold for iPhone 8
- Machine à enlever les lunettes
- Machine à séparer manuelle
- Machine à enlever la colle
- OCA & POL Laminating Machine
- Machine à laminer le verre
 English
 Español
 Français
 Deutsch
 Italiano