Étiquette : iphone touch id

  • How to Restore iPhone Touch ID With Home Button Flex Repairing

    How to Restore iPhone Touch ID With Home Button Flex Repairing

    iPhone touch ID not working issue has been a sticky business for repair technicians for a long time. What’s more, iPhone touch ID of iPhone 6 and later versions are bonded with CPU (iPhone 6s home button not working), and Home Button replacing by users has a destructive effect on touch ID fingerprint sensor function. The fact is that about 80% of iPhone Touch ID failures are caused by damaged home button flex. Well, this time REWA come up with a new solution regarding the damaged home button flex. Check it out by yourself now.
    How to Restore iPhone Touch ID With Home Button Flex Repairing

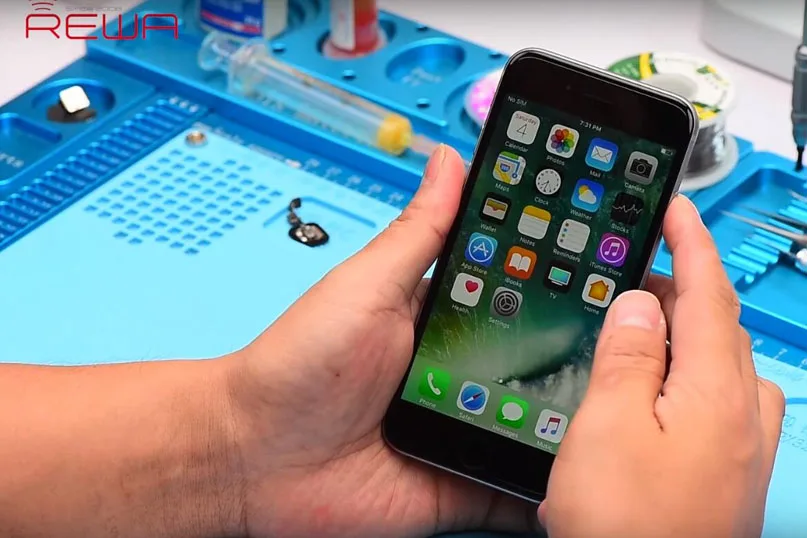
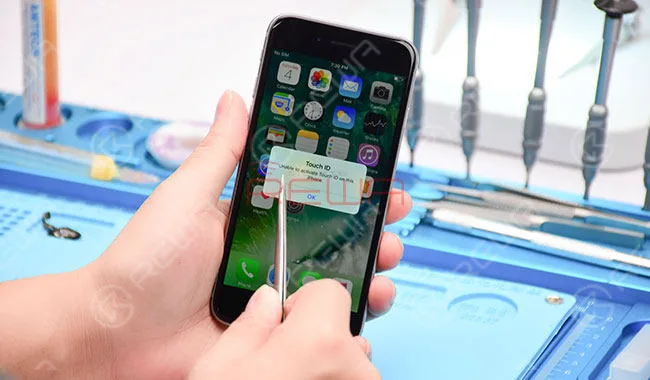
    Restore iPhone Touch ID With Home Button Flex RepairingPower on and test. “Unable to activate Touch ID on this iPhone”. Press Home Button, the returning function is normal.
    How to Restore iPhone Touch ID With Home Button Flex Repairing

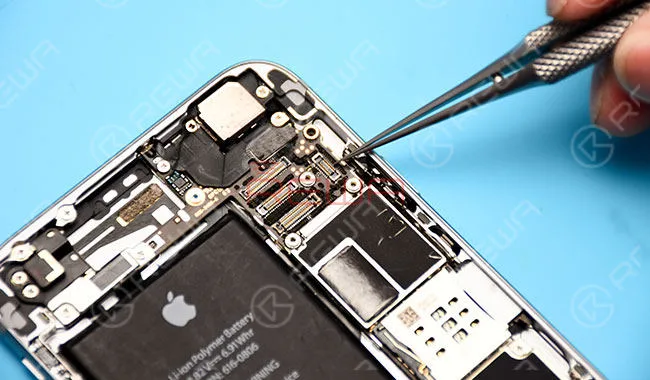
    Disassemble the phone and remove the display assembly. First of all, check the logic board connector J2118 for moldy condition and dry Joint. Everything is fine.
    How to Restore iPhone Touch ID With Home Button Flex Repairing

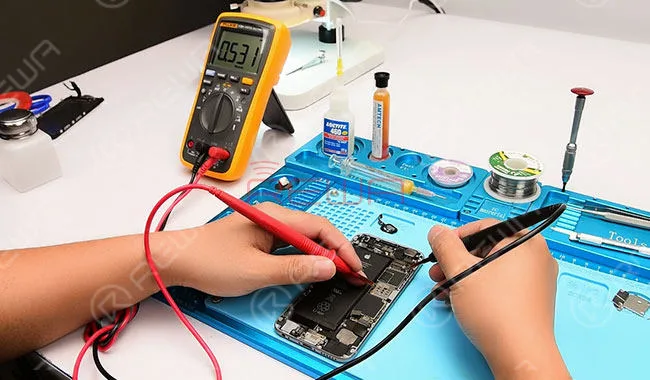
    Then, measure the resistance between J2118 and grounding. The value is also normal.

    How to Restore iPhone Touch ID With Home Button Flex Repairing

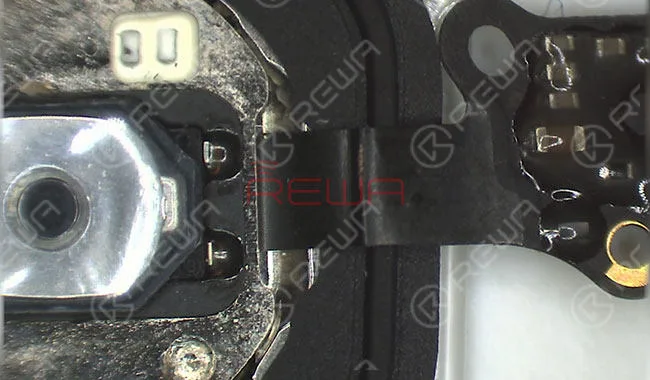
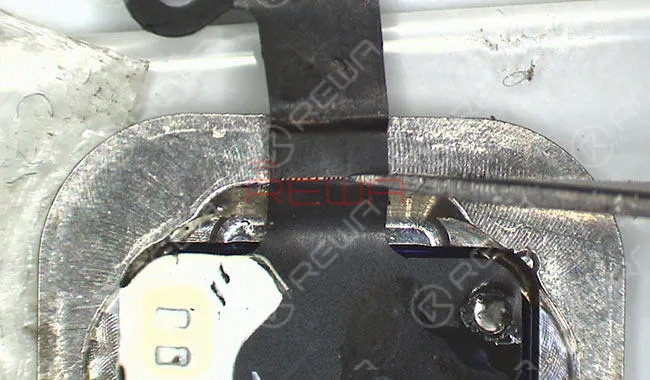
    Take down the Home Touch Sensor Assembly and check the home button flex cable. There are obviously broken traces on the flex cable.

    How to Restore iPhone Touch ID With Home Button Flex Repairing

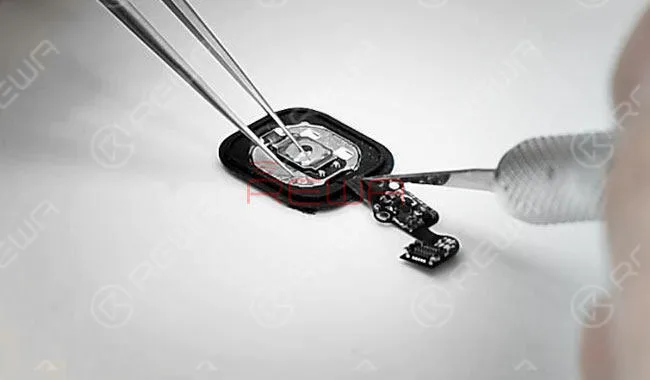
    Preliminary judgment – Touch ID malfunction is caused by fractured flex cable circuit. We can fix the problem by replacing the fractured section with a new length of the flex cable.Pry up the back plate with Tweezer and Soldering Iron. Cut the fractured part from the flex cable with Sculpture Knife.

    How to Restore iPhone Touch ID With Home Button Flex Repairing

    Scrape out the flex cable circuit. Be careful not to cut the circuit off.

    How to Restore iPhone Touch ID With Home Button Flex Repairing

    Apply some BGA paste flux to the flex cable and then solder tins with Soldering Iron. Clean with PCB Cleaner after cooling.

    How to Restore iPhone Touch ID With Home Button Flex Repairing

    Prepare a new Home Touch Sensor Assembly.

    How to Restore iPhone Touch ID With Home Button Flex Repairing

    Pry up the back plate of the new Home Touch Sensor Assembly. Cut a length of flex cable from the new Home Touch Sensor Assembly (allow for some adjustment in length of the cut cable).

    How to Restore iPhone Touch ID With Home Button Flex Repairing

    Fix the newly cut cable with double-sided adhesive. Then, scrape out the newly cut flex cable circuit. Be careful not to cut the circuit off.

    How to Restore iPhone Touch ID With Home Button Flex Repairing

    Apply some BGA paste flux to the newly cut flex cable. Then solder tins with Soldering Iron. Clean with PCB Cleaner after cooling.

    How to Restore iPhone Touch ID With Home Button Flex Repairing

    Cut out the excess parts of the newly cut flex cable. After that, apply 460 Glue to the bonding part and adhere the two cables carefully. Pay attention to the aligning position.

    How to Restore iPhone Touch ID With Home Button Flex Repairing

    Once cables are fixed, apply some BGA paste flux and solder flex cables with Soldering Iron. Be careful with bridging and disturbed solder condition.

    How to Restore iPhone Touch ID With Home Button Flex Repairing

    Clean with PCB Cleaner after cooling. Remember to check the circuit for bridging and disturbed solder.

    How to Restore iPhone Touch ID With Home Button Flex Repairing

    Get the Home Touch Sensor Assembly mounted on the screen. Then buckle the display assembly to the logic board.

    How to Restore iPhone Touch ID With Home Button Flex Repairing

    Power on and run Touch ID function test. Touch ID back to normal.

    How to Restore iPhone Touch ID With Home Button Flex Repairing

    Take down the display assembly after test and take out the Home Touch Sensor Assembly. Prepare another length of the cable. And then adhere the cable to the previous bonding part.

    How to Restore iPhone Touch ID With Home Button Flex Repairing

    To further secure flex cables, solder with Soldering Iron. And then secure the back plate with Glue carefully.

    How to Restore iPhone Touch ID With Home Button Flex Repairing

    Get the Home Touch Sensor Assembly mounted on the screen. Buckle the display assembly to the logic board. After that, power on and test. The phone works with normal Touch ID function.

    How to Restore iPhone Touch ID With Home Button Flex Repairing

    For more details on restore iPhone Touch ID with Home Button flex repairing, please go to Chaîne YouTube de REWA.

    Pièces et outils nécessaires

  • How to Restore Touch ID of iPhone Due to Home Button Flex Broken

    How to Restore Touch ID of iPhone Due to Home Button Flex Broken

    iPhone users might be in despair when their iPhone home button touch ID gets into trouble or even doesn’t work after replaced home button. Why? For iPhone 6 and later versions, touch ID is bonded with CPU, and the user who has replaced his home button will then lose its touch ID fingerprint function. For a long time, it is a sticky business for repair technicians to repair the iPhone touch ID issue, but actually, about 80% of the touch ID failures are resulted by damaged home button touch ID flex. REWA therefore released a video about how to restore iPhone 6/6 plus/6s/6s plus home button touch id issue by making a jumper on flex.

    Restore iPhone Touch ID With Home Button Flex Reparing

    Power on and test. “Unable to activate Touch ID on this iPhone”. Press Home Button, the returning function is normal.

    Disassemble the phone and remove the display assembly. First of all, check the logic board connector J2118 for mouldy condition and dry Joint. Everything is fine.

    Then, measure the resistance between J2118 and grounding. The value is also normal.
    Take down the Home Touch Sensor Assembly and check the home button flex cable. There are obvious broken traces on the flex cable.

    Preliminary judgment – Touch ID malfunction is caused by fractured flex cable circuit. We can fix the problem by replacing the fractured section with a new length of flex cable.

    Pry up the back plate with Tweezer and Soldering Iron. Cut the fractured part from the flex cable with Sculpture Knife.
    Scrape out the flex cable circuit. Be careful not to cut the circuit off.
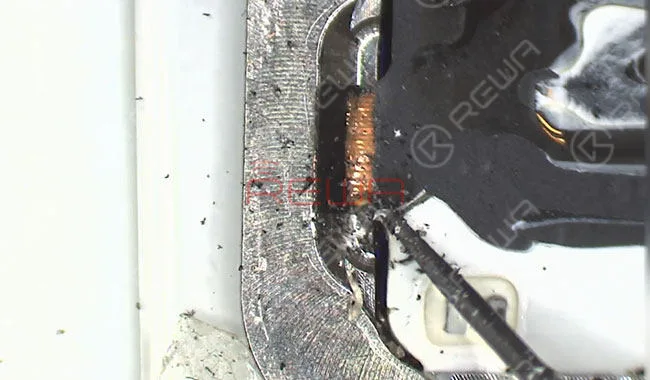
    Apply some BGA paste flux to the flex cable and then solder tins with Soldering Iron. Clean with PCB Cleaner after cooling.
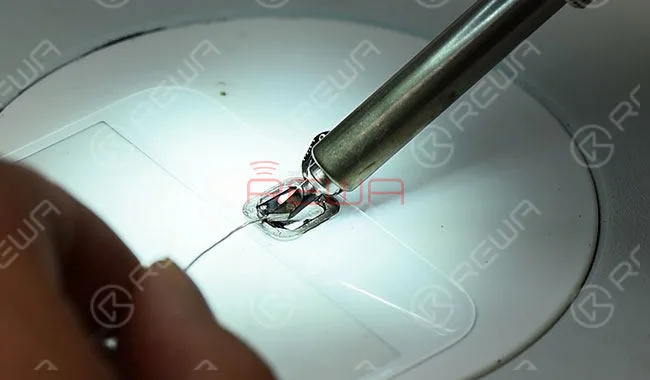
    Prepare a new Home Touch Sensor Assembly.
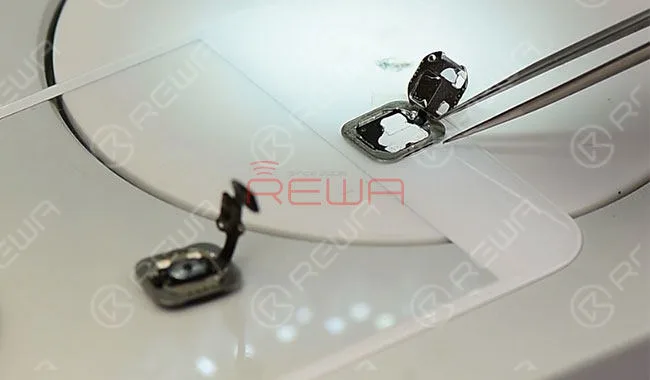
    Pry up the back plate of the new Home Touch Sensor Assembly. Cut a length of flex cable from the new Home Touch Sensor Assembly (allow for some adjustment in length of the cut cable).
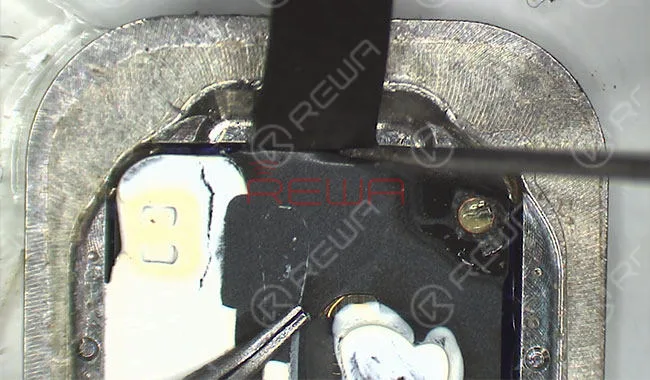
    Fix the newly cut cable with double-sided adhesive. Then, scrape out the newly cut flex cable circuit. Be careful not to cut the circuit off.
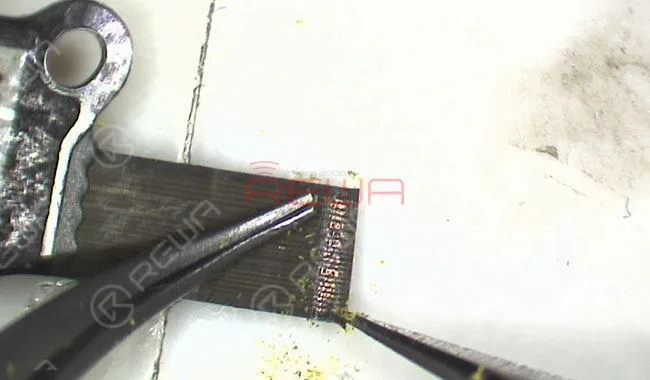
    Apply some BGA paste flux to the newly cut flex cable. Then solder tins with Soldering Iron. Clean with PCB Cleaner after cooling.
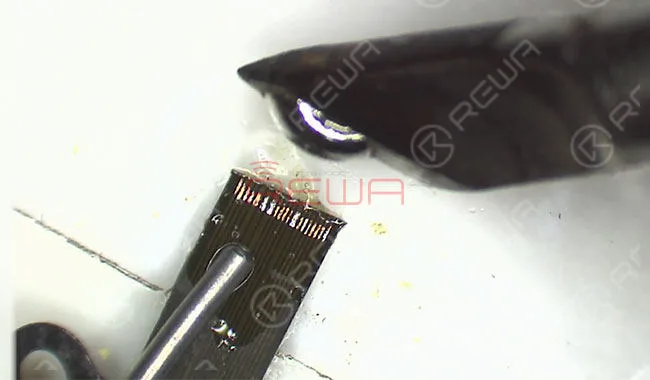
    Cut out the excess parts of the newly cut flex cable. After that, apply 460 Glue to the bonding part and adhere the two cables carefully. Pay attention to the aligning position.
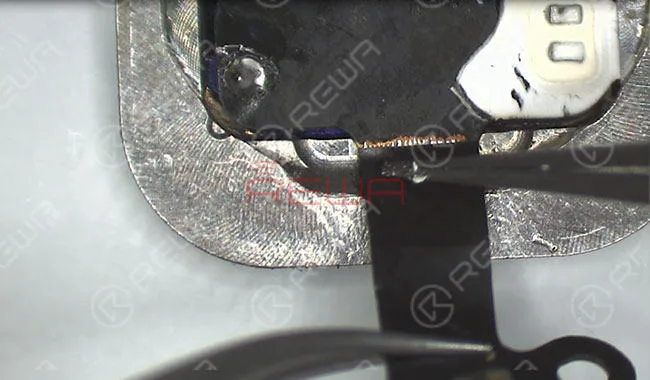
    Once cables are fixed, apply some BGA paste flux and solder flex cables with Soldering Iron. Be careful with bridging and disturbed solder condition.
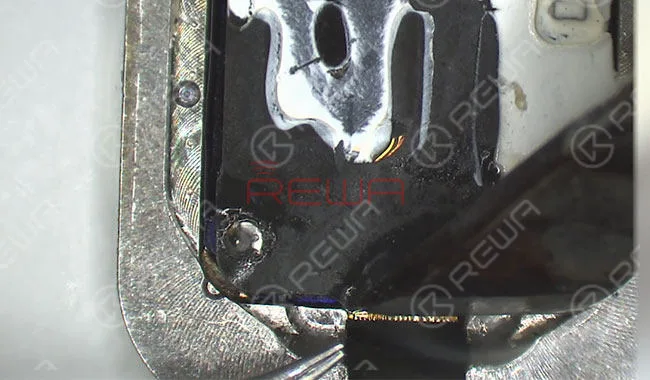
    Clean with PCB Cleaner after cooling. Remember to check the circuit for bridging and disturbed solder.
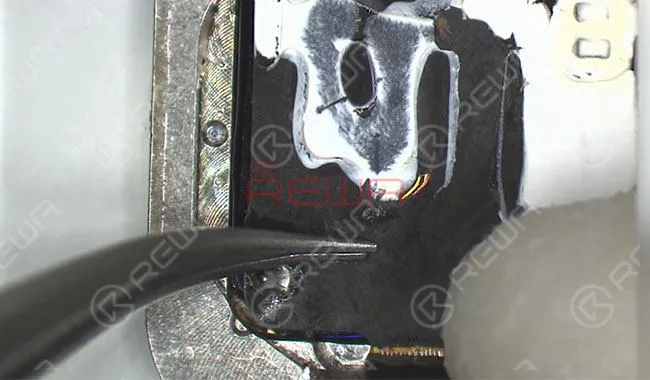
    Get the Home Touch Sensor Assembly mounted on the screen. Then buckle the display assembly to the logic board.
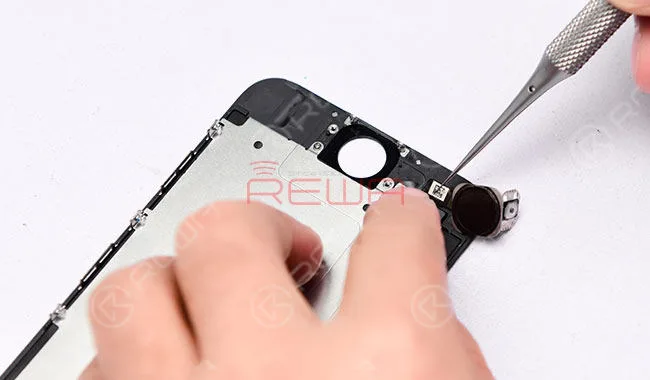
    Power on and run Touch ID function test. Touch ID back to normal.
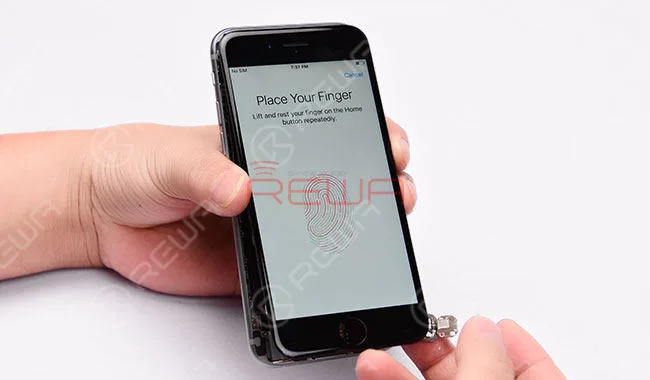
    Take down the display assembly after test and take out the Home Touch Sensor Assembly. Prepare another length of cable. And then adhere the cable to the previous bonding part.
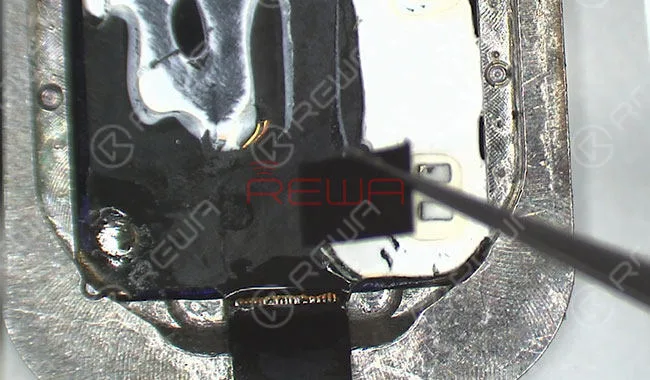
    To further secure flex cables, solder with Soldering Iron. And then secure the back plate with Glue carefully.
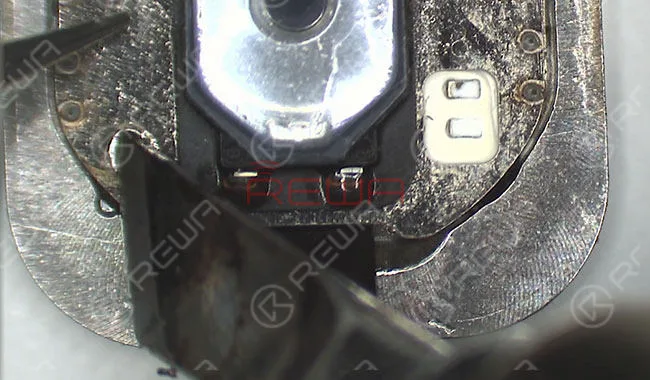
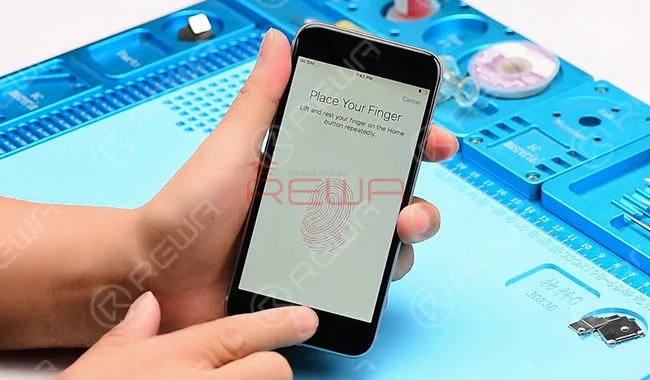
    Get the Home Touch Sensor Assembly mounted on the screen. Buckle the display assembly to the logic board. After that, power on and test. The phone works with normal Touch ID function.
  • How to repair iPhone 7 Touch ID or home button not working

    How to repair iPhone 7 Touch ID or home button not working

    We often heard many iPhone users asked this question: “My iPhone 7’s Touch ID and home button doesn’t work anymore. I have to press the Home button really hard to get it to respond and the Touch ID function can’t work, is it permanently broken? Is there a fix?”

    iPhone Home button or Touch ID not working(also appear on iPhone 5S, iPhone 6/6 Plus, iPhone 6S/6S Plus, iPhone 7/7 Plus, iPhone8 and iPhone X)? For certain models of iPhone (particularly the old iPhone 4, although some more recent iPhones have been affected too) this is a common complaint, but we may be able to offer some advice on getting it fixed. We’ve also got a handy software workaround that may make life bearable if your iPhone is out of warranty or it’s otherwise impossible to repair the hardware problem.

    Here’s how to fix a broken iPhone Home button and Touch ID detail video and pictures step by step to teach you “How to fix iPhone Touch ID not working or home button not working”. When your iPhone 6 or iPhone 7 Touch ID Not Working, you will be unable to activate touch id on this iPhone, there is a detail iPhone 6 touch ID or home button replacement solution help you repair your iPhone.

    iPhone 7 Touch ID fix detail teach steps:

    It is well known that Touch ID chip is exclusively matched with the motherboard. If change a new home button only, the Touch ID function disappears as the unique chip is also changed. So if the home button is unfortunately broken, How to fix iPhone Touch ID not working? Here is the solution!

    The steps

    1. Turn on the phone, unable to activate its Touch ID.

    2.Go to settings – Touch ID & passcode – enter your passcode, the fingerprint is grayed out.

    3.Take down the home button flex cable.

    4.Check the home button flex cable under the microscope, we found that the ribbon cable is broken.

    5.Scrape the coating off the wire on the ribbon cable with a knife.

    6.Apply some BGA paste flux and solder the tins with the soldering station.

    7.Scrape the coating off the wire on the reverse side.

    8.Apply some BGA paste flux, then solder the tins with the soldering station.

    9.Cut the wires then align them correctly, heat it up with hot air gun and weld.

    10.Turn the flex cable to the reverse side, weld it with the wire.

    11.Test if it is a short circuit with a digital multimeter.

    12.Install the home button and test.

    13.Apply some UV curable solder mast on the wire to fix the welding joint.

    14.Install the LCD screen assembly and test, fingerprint works well.

    About fix iPhone 7 home button, we used the following tools, if you don’t have them, you can check the links and buy them, to become a professional iPhone fixer.

    iPhone touch id not working

    Since the iPhone 7 and iPhone 7 Plus iPhones haven’t had a physical Home button, but there is still a chance of the button malfunctioning – as it did for Dwayne on the MacRumors Forums. Thankfully, Apple has integrated a fail-safe option, which brings up a notification informing you to use an ‘onscreen Home button’ before taking it in for a service.

    This new feature by Apple went unnoticed – mainly because most didn’t notice any problems with their new phone purchase. We find the feature fantastic for iPhone 7 and iPhone 7 Plus users – as it provides a default secondary option. If you do not have the new iPhone, read on to see our solutions.

    If you want to learn more about how to fix your iPhones, you can collect our site or subscribe our Youtube, we will update quality instructional video regularly.