Etiqueta: reparación de iPad

  • Arreglar el iPad Pro que no se enciende sustituyendo los conectores

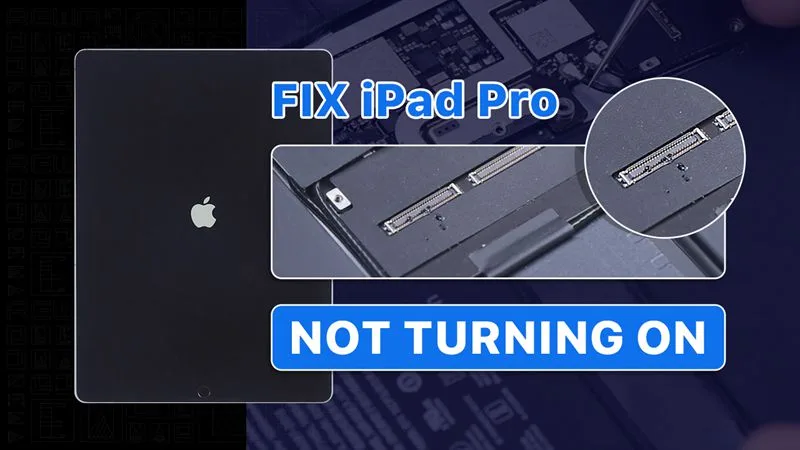
    Arreglar el iPad Pro que no se enciende sustituyendo los conectores

    Hemos recibido un iPad Pro de nuestro fan. El fallo original del iPad Pro era el altavoz de la esquina superior izquierda con ruido.

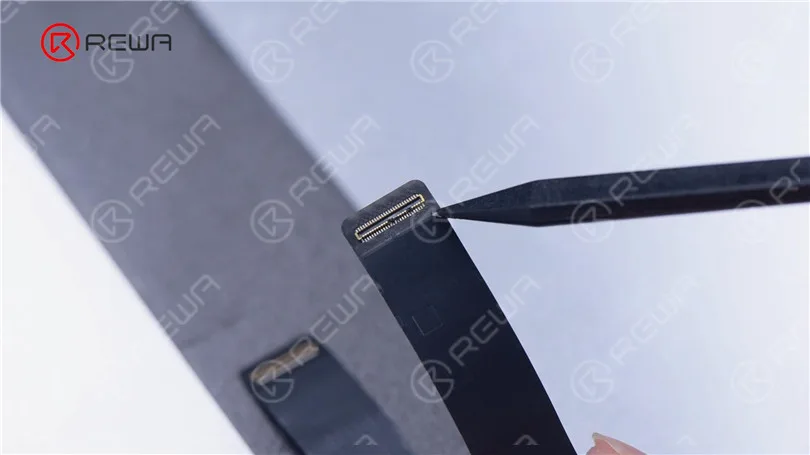
    Después de reemplazar el altavoz, los conectores de la placa base y de la pantalla se quemaron al conectar la pantalla. Ahora el iPad Pro no enciende.

    Así que el fan le envió el iPad Pro a REWA para su reparación. Veamos cómo arreglamos el iPad Pro.

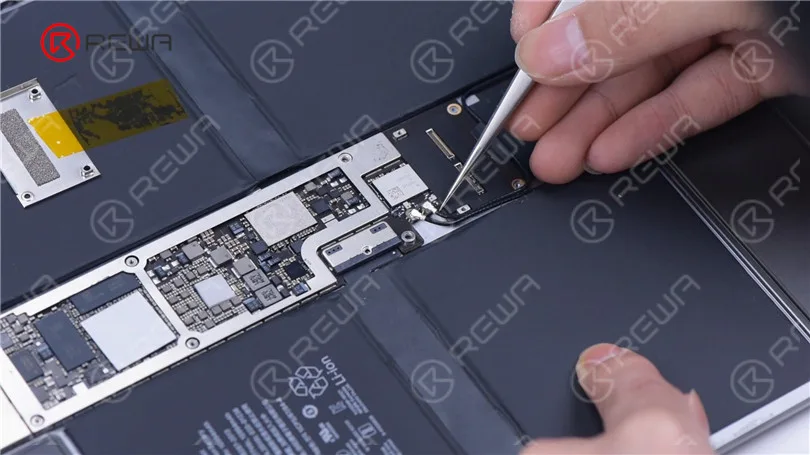
    En primer lugar, retiramos la pantalla. Podemos ver que los conectores están quemados.

    Dado que la batería está conectada a la placa base, los conectores se quemarán con el dispositivo encendido y la pantalla conectada.

    Para evitar daños innecesarios, le recomendamos que primero desconecte la batería durante la reparación.

    Después de conectar la pantalla, conecte la batería para encender el dispositivo.
    Reparar el iPad Pro que no enciende reemplazando los conectores

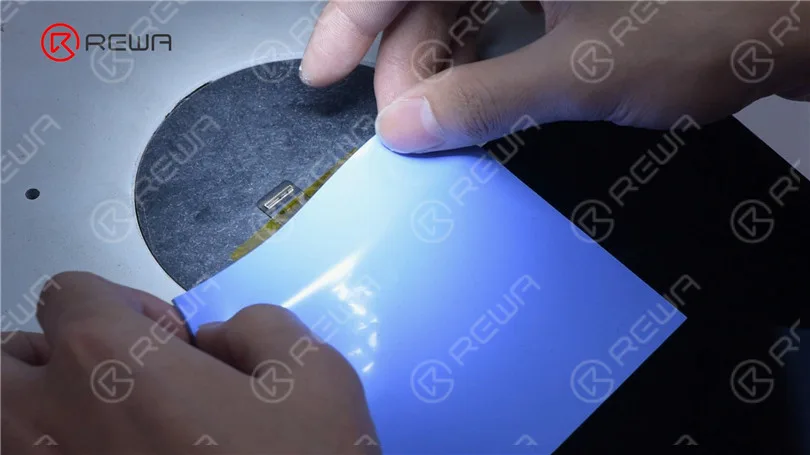
    A continuación, reemplazamos los conectores. En primer lugar, reemplazamos el conector de la pantalla. Fija el cable flexible con cinta de alta temperatura y cubre la pantalla con una alfombrilla aislante.
    Reparar el iPad Pro que no enciende reemplazando los conectores

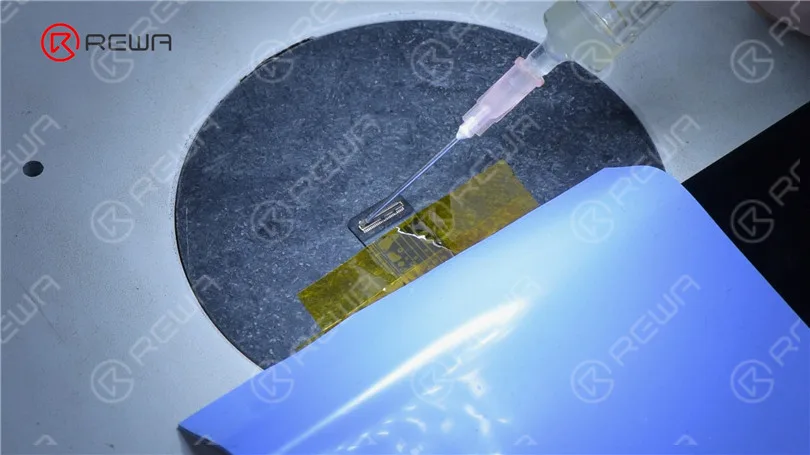
    Aplica algo de flujo en pasta al conector. Calienta con la pistola de aire caliente para retirar el conector dañado.
    Reparar el iPad Pro que no enciende reemplazando los conectores

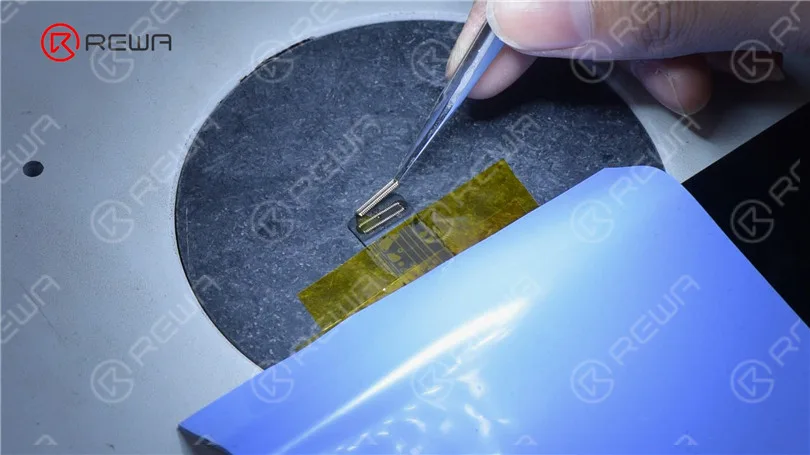
    Sigue aplicando pasta de flujo. Consigue un nuevo conector y alinea el conector.
    Reparar el iPad Pro que no enciende reemplazando los conectores

    Aplicar calor para soldar el conector con pistola de aire caliente. Después de soldar y de que el conector se haya enfriado, limpiar con limpiador de PCB.
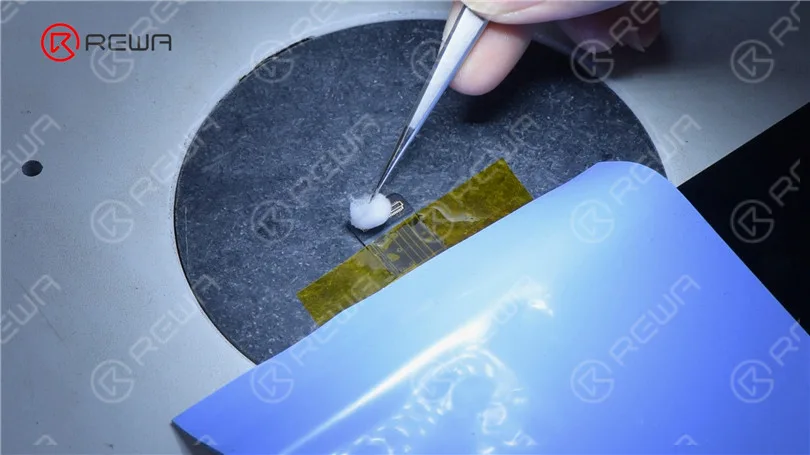
    Reparar el iPad Pro que no enciende reemplazando los conectores

    Compruebe las almohadillas de soldadura una por una con unas pinzas. Se puede ver que la soldadura es perfecta.
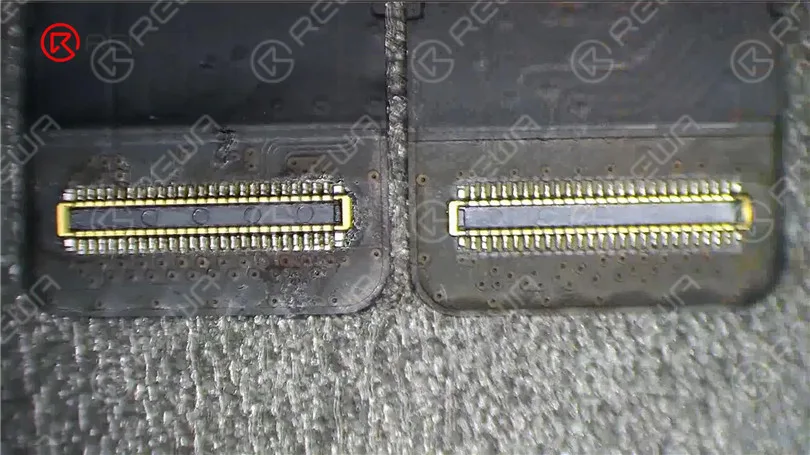
    Reparar el iPad Pro que no enciende reemplazando los conectores

    Luego reemplazamos el conector en la placa base. Primero, retire la cubierta de protección.
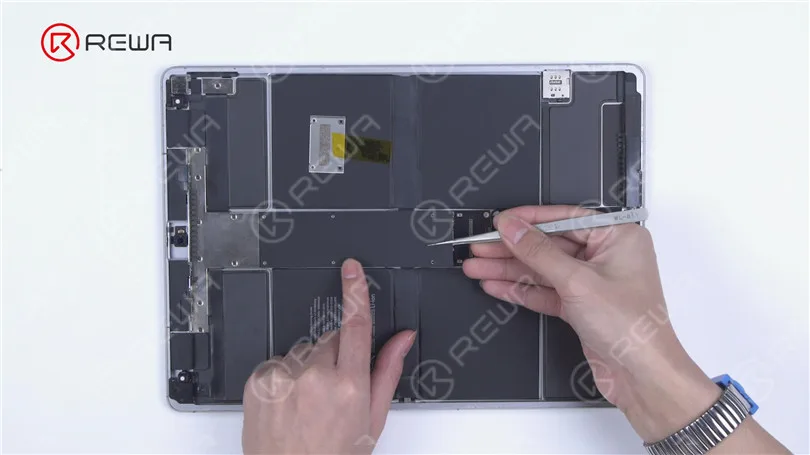
    Reparar el iPad Pro que no enciende reemplazando los conectores

    Desconecte la batería y la antena.

    Reparar el iPad Pro que no enciende reemplazando los conectores

    Para proteger la placa base, haga palanca en la placa base con cuidado, desconectando la batería de la placa base.
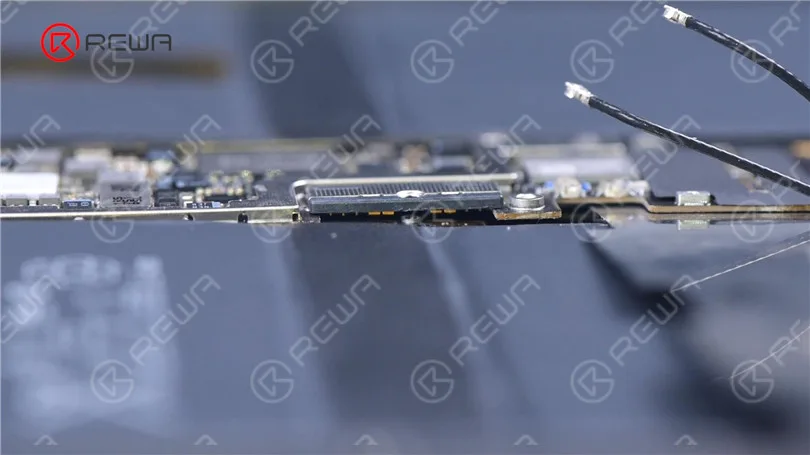
    Reparar el iPad Pro que no enciende reemplazando los conectores

    Retire la cinta de blindaje del conector. Dado que la placa base está rodeada de baterías, necesitamos aislar la zona.

    Aplica cinta de alta temperatura alrededor de la placa base. Para una mejor protección, te aconsejamos aplicar varias capas. Luego, aplica las alfombrillas aislantes.
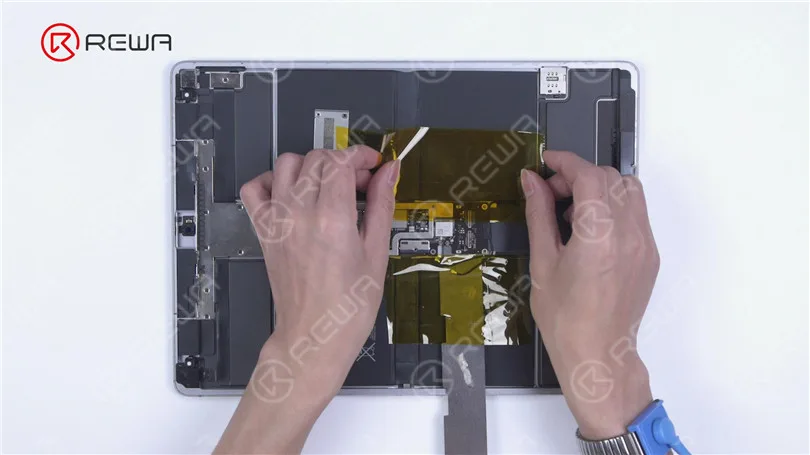
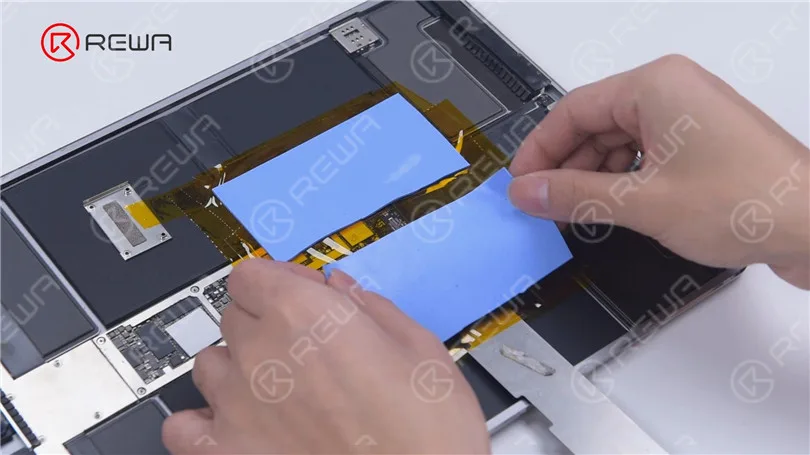
    Reparar el iPad Pro que no enciende reemplazando los conectores
    Reparar el iPad Pro que no enciende reemplazando los conectores

    Aplica un poco de fundente en pasta al conector. Retira el conector dañado con una pistola de aire caliente.
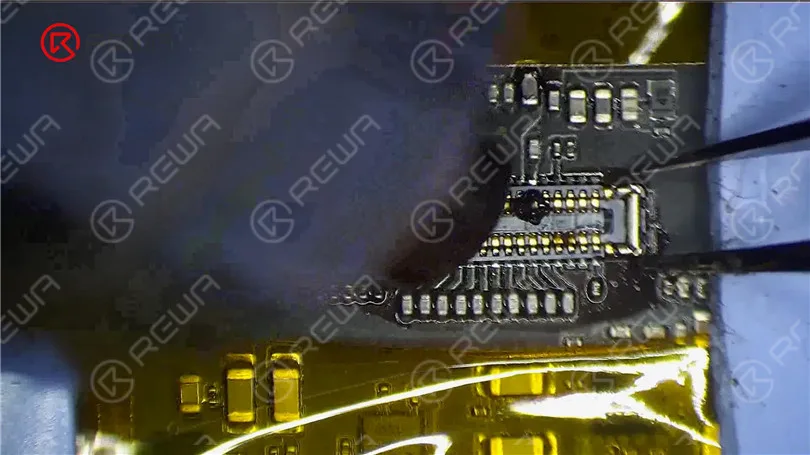
    Reparar el iPad Pro que no enciende reemplazando los conectores

    Aplica un poco de pasta de soldar de temperatura media y fundente en pasta. Toma un inductor. Iguala las almohadillas de soldadura deslizando el inductor.
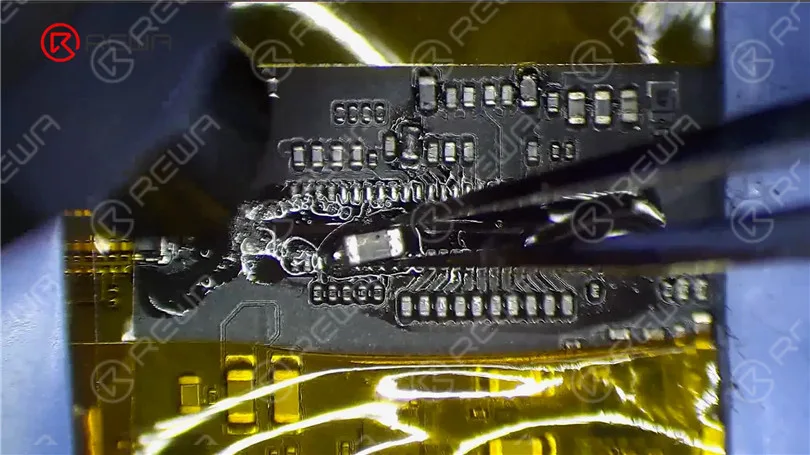
    Reparar el iPad Pro que no enciende reemplazando los conectores

    Limpiar el estaño alrededor del conector con pistola de aire caliente y malla desoldadora.
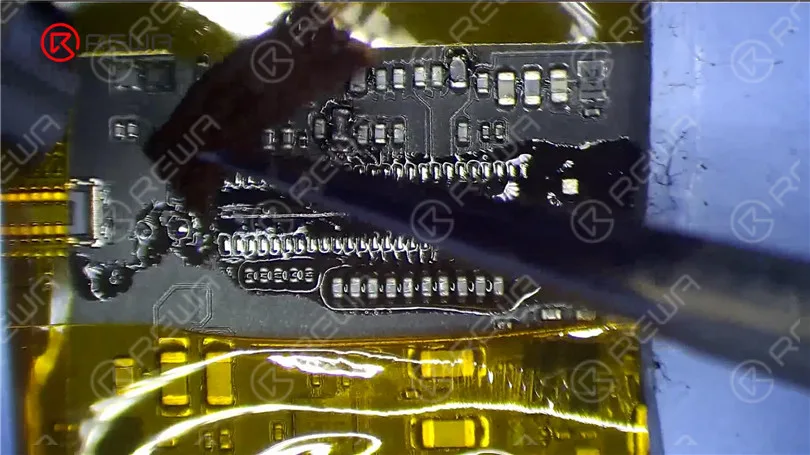
    Reparar el iPad Pro que no enciende reemplazando los conectores

    Limpie la almohadilla de unión con limpiador de PCB. Aplique un poco de fundente en pasta y coloque el nuevo conector en su posición. Caliente para soldar el conector con una pistola de aire caliente. Limpie el conector con limpiador de PCB.
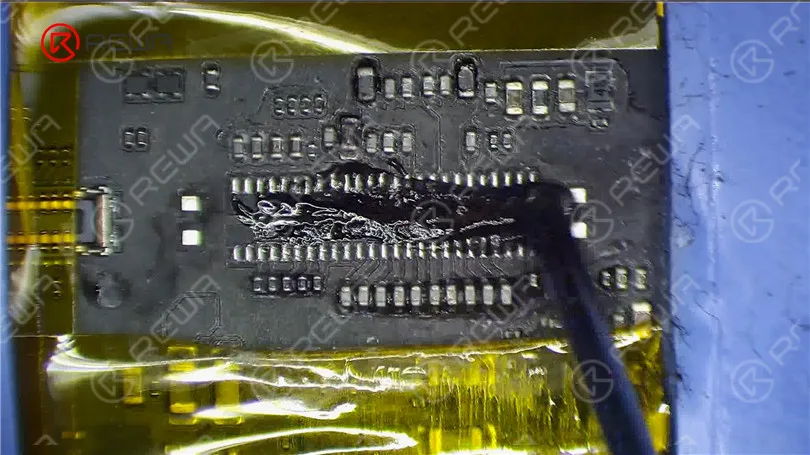
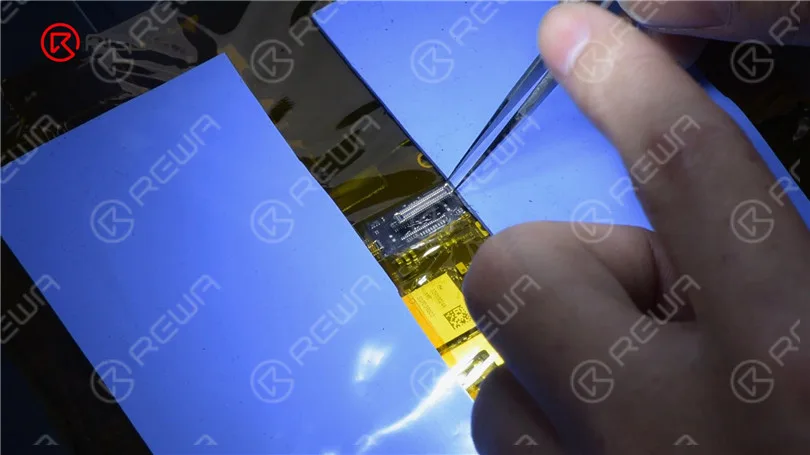
    Reparar el iPad Pro que no enciende reemplazando los conectores
    Reparar el iPad Pro que no enciende reemplazando los conectores

    Luego conectamos la antena.

    Reparar el iPad Pro que no enciende reemplazando los conectores

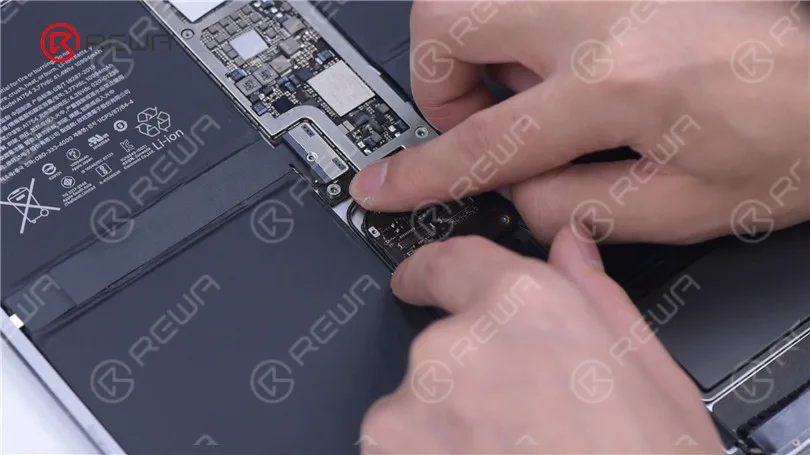
    Desconecte la batería de la placa base con una púa, lo que sirve para evitar que el conector se dañe con la pantalla conectada.
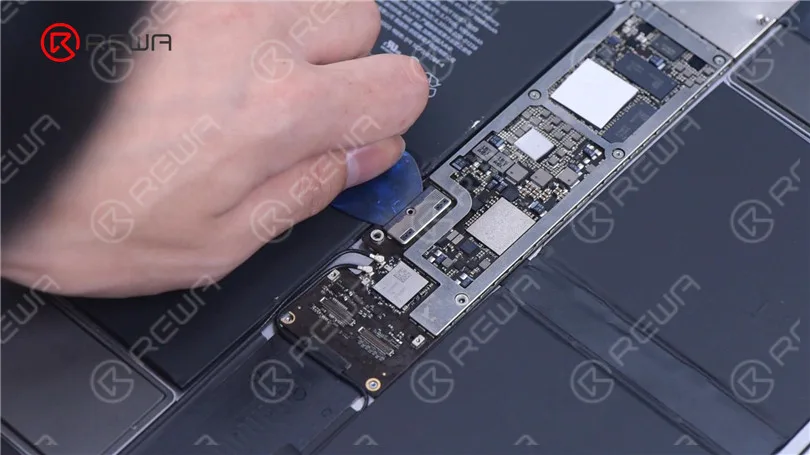
    Reparar el iPad Pro que no enciende reemplazando los conectores

    Luego conectamos la pantalla. Retire la púa de apertura. Atornille la batería y la placa base.
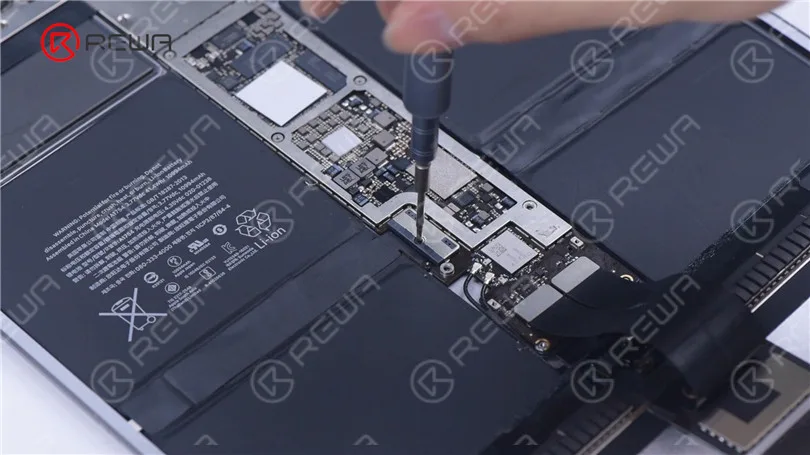
    Reparar el iPad Pro que no enciende reemplazando los conectores

    Enciende el iPad Pro para probarlo. El iPad Pro se puede encender. Tanto la pantalla como el tacto funcionan bien. La música se puede reproducir sin ruido.

    Reparar el iPad Pro que no enciende reemplazando los conectores

    El iPad Pro que no encendía se ha reparado con éxito.

    Por favor, siéntase libre de dejar un comentario sobre temas de reparación de iPad que le interesen.

    Mira el siguiente video para ver cómo arreglar un iPad Pro que no enciende.
  • Tough iPhone & iPad Repairs? We Can Fix!

    Tough iPhone & iPad Repairs? We Can Fix!

    When it comes to electronic products like phones, tablets and computers, iPhone & iPad repairs can often be cost-effective alternatives to buying new. However, it’s easy for us to spell the word ‘repair’ while practical repair work can be a real meticulous process. Repair shops spring up with the development of electronics all around the world, in the meantime, malfunction grew to be more and more precise. Repair experts can be professional at some point but they cannot be almighty for all fault caused by the daily updated electronic products. So what to do? It’s never too late for you to ask for support and REWA always got a repair solution for you. Our network of repair services are positioned to offer efficient logic board repair and cracked screen repair services for all in need. We want you to boost your business and stand out from others, and we are honored to be there to help.

    Advantages of iPhone & iPad Repairs With REWA

    Tough iPhone & iPad Repairs

    Una ventanilla única para todo

    REWA es capaz de satisfacer todas las necesidades de nuestros clientes con nuestros servicios. Sea cual sea su problema, por grande o pequeño que sea, nuestro dedicado equipo de ventas y atención al cliente le proporcionará una solución competitiva y fiable.

    Rapidez y eficacia

    No se complique con su problema sin resolver, REWA le ofrece un servicio rápido y eficaz para su emergencia. Póngase en contacto con nosotros ahora para solucionar su problema de forma rápida y económica.

    Tecnología punta

    Faced with a problem your experts may have a question with? Turn to REWA for support. Our experts and engineers are highly skilled and equipped to deal with a broad range of products like iPhone, Samsung, Huawei etc.

    Servicio transparente

    La transparencia genera confianza REWA cree que lo mejor es salir del ámbito empresarial y entrar en el humano. Nuestros clientes reciben toda la información que necesitan, desde el proceso de reparación hasta los precios.

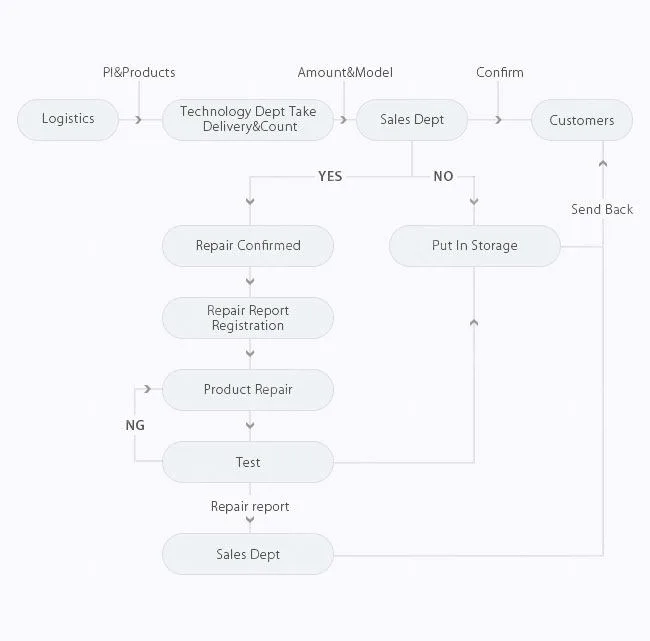
    Cómo funciona el servicio de reparación REWA

    Tough iPhone & iPad Repairs

    Logic Board Repair Service Includes1.

    Camera chip repair: iPhone 6 Camera not working;

    2. Touch screen chip repair: iPhone 7 touch screen not working or unresponsive touch;

    3. Display chip repair: LCD doesn’t display images properly, or it doesn’t display at all;

    4. Charging chip repair: The device not charging, or you have trouble connecting the device to computer or charger;

    5. WiFi chip repair: How to fix wifi on iPhone 6, WiFi can’t open, or WiFi cannot be connected, or WiFi has no signals;

    6. Speaker chip repair: Can’t hear your audio or use your loudspeaker, sound of ear speaker fades in and out, or iPhone 6 no sound at all;

    7. Signal chip repair: iPhone 6 No Service Hardware Fix Solution, Can’t connect to a cellular network, can’t make or receive calls

    8. Logic board connector repair: Connectors on logic board damaged

    9. Touch ID chip repair: iPhone 7 home button not working, the touch ID flex cable cracked, but the home button is OK

    10. Upgrade storage: upgrade your iPhone & iPad storage to 64GB/128GB/256GB, such as How to upgrade iPhone storage;

    11. No turning on: iPhone won’t turn on, no function; fixed display; restarting; white screen; red screen; blue screen; no display at all;

    12. Unlock iPad iCloud: How to unlock iPad air;

    13. Fix compass problems

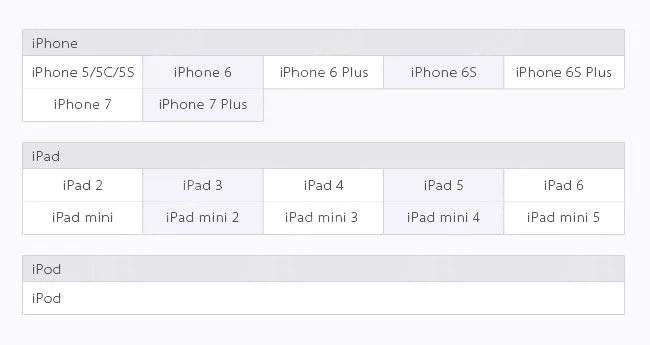
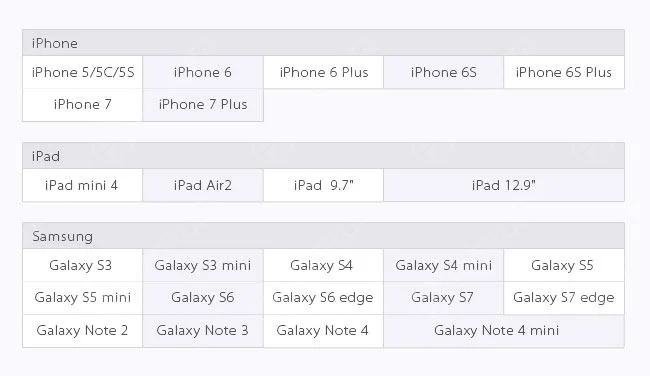
    Logic Board Repair Service – Models

    Tough iPhone & iPad Repairs

    Cracked Screen Repair Service – Models

    Tough iPhone & iPad Repairs

    Notificación al cliente

    A continuación le indicamos algunos detalles que nos gustaría que conociera antes del envío

    1. Cantidad mínima de pedido: 10 unidades

    2. El proceso de reparación (sin incluir el tiempo de entrega) suele tardar unos 7 días.

    3. Los gastos de envío correrán a cargo de los clientes.

    4. Marque los fallos de funcionamiento de cada dispositivo y registre su IMEI antes de la entrega.

    5. Si está bloqueado, por favor proporcione la contraseña de su teléfono para que podamos probar la funcionalidad.

    6. If possible, please provide iCloud account and password; Or please delete your iCloud account from your device(We do not repair a device that has no iCloud password). 7. If you require a touch ID repair service, please send the home button assembly together with the logic board.

    8. For iPhone storage upgrade, please update your device to the latest IOS operating system.

    9. We are unable to repair a device that rust and corrosion on too many components.

    10. If you don’t accept our test report and decide to give up the repair service. You should bear the return shipping.

    11. The repair charge depends on the exact damage and amount of damage to your device. We can only offer you an estimated repair price before repair completed.

  • REWA iPad Air Touch Screen Partially Unresponsive Repair

    REWA iPad Air Touch Screen Partially Unresponsive Repair

    What to do when iPad Air touch screen partially unresponsive? Replace with a new touch screen and the screen freezing problem remains unsolved? It’s time for you to view our video and get refreshed with a totally new logic board solution regarding iPad touch screen not working issue.

    Herramientas utilizadas:

  • Tutorial de montaje del botón de inicio de la pantalla táctil del iPad

    Tutorial de montaje del botón de inicio de la pantalla táctil del iPad

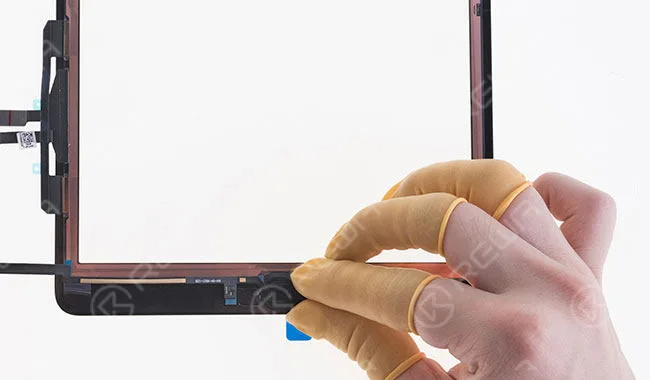
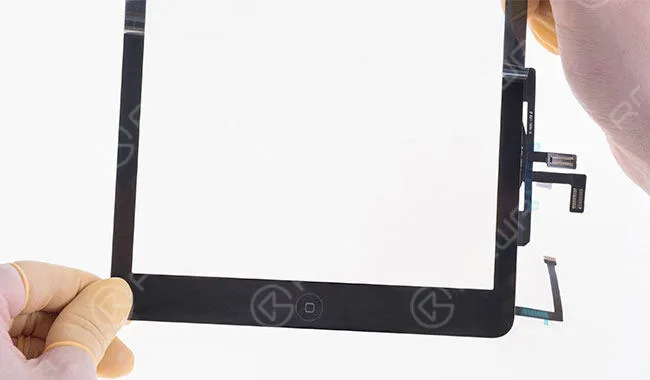
    So you need iPad touch screen digitizer assembly replacements for your repair work. You search on the internet and find that some of them are not well assembled with home buttons. Yet the home button on the iPad controls the tablet and all of its functionality, missing of which can render your iPad almost useless. Well, how to piece those home button assembly parts together and make it work perfectly with the iPad touch screen digitizer assembly?REWA offers detailed step-by-step guides to assist you with the home button assembling process and get it working as you need. (such as iPhone won’t turn on after screen replacement, iPhone 7 touch screen not working,  iPhone 7 home button not working)

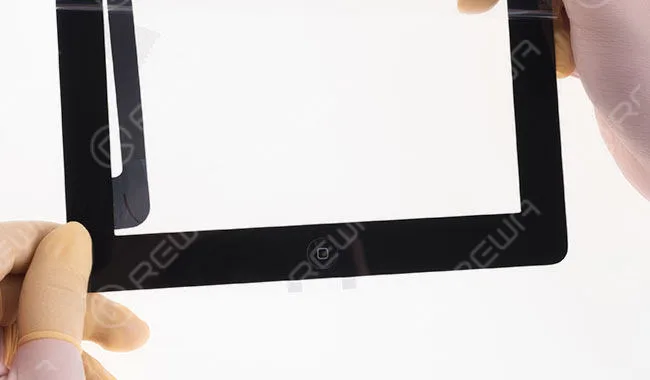
    Note: four iPad series are applied to this home button assembling guide – iPad 2, iPad 3, iPad 4, iPad 5 and iPad mini.

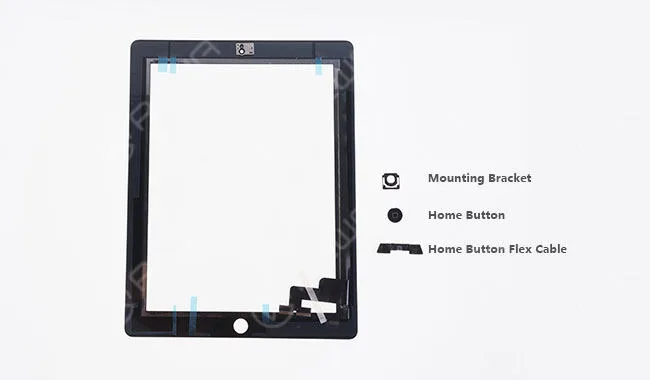
    iPad 2

    ipad touch screen home button assembling tutorial 2

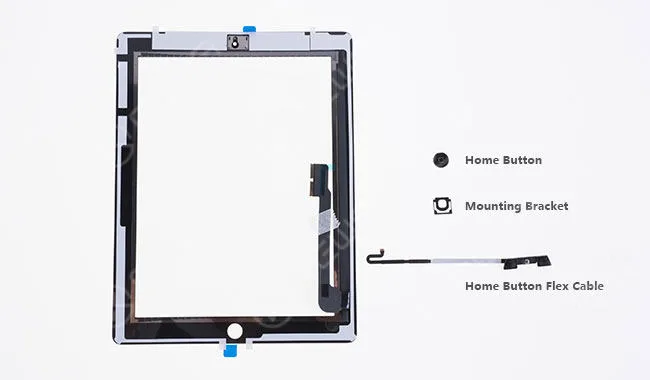
    Parts contained: Home Button; Mounting Bracket; Home Button Flex Cable

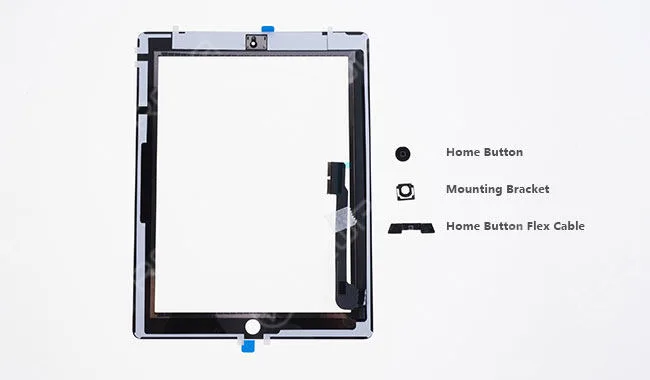
    iPad 3

    ipad touch screen home button assembling tutorial 3

    Parts contained: Home Button; Mounting Bracket; Home Button Flex Cable

    iPad 4

    ipad touch screen home button assembling tutorial 4

    Parts contained: Home Button; Mounting Bracket; Home Button Flex Cable

    The three of them have the same steps as below (take iPad 3 as an example).

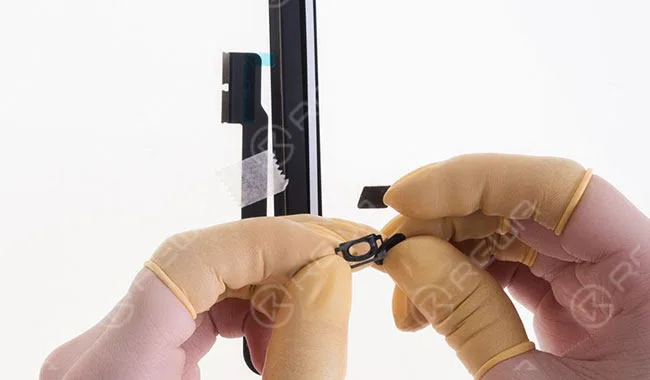
    Primer paso Seat the home button with the mounting bracket.

    ipad touch screen home button assembling tutorial dsc4700

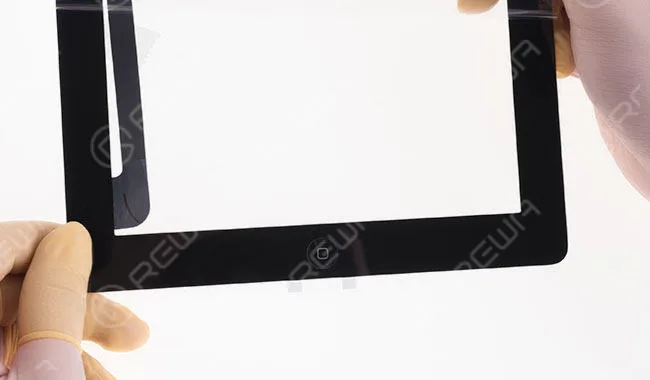
    Paso 2 Align them to the home button hole of the iPad touch screen digitizer assembly.

    ipad touch screen home button assembling tutorial dsc4715

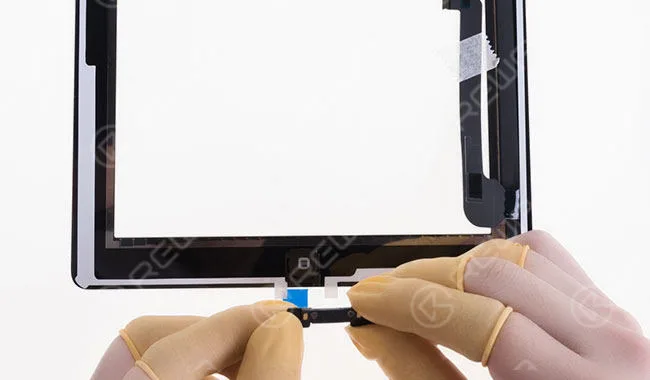
    Paso 3 Align the home button flex cable.

    ipad touch screen home button assembling tutorial dsc4707

    Step 4 Once finished, check the assembling effect.

    ipad touch screen home button assembling tutorial dsc4715 2

    iPad 5

    ipad touch screen home button assembling tutorial 5

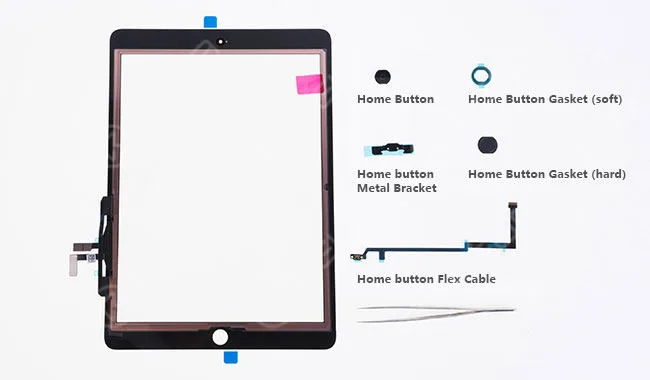
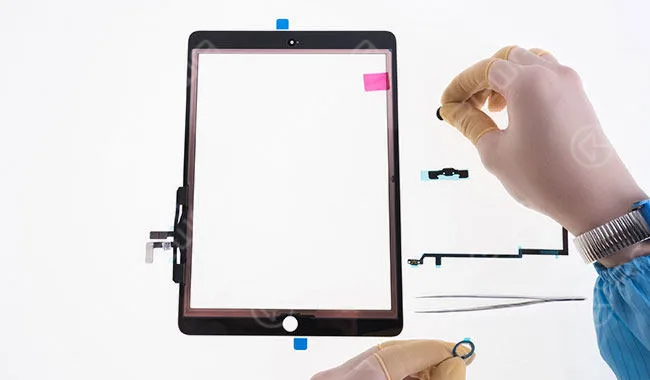
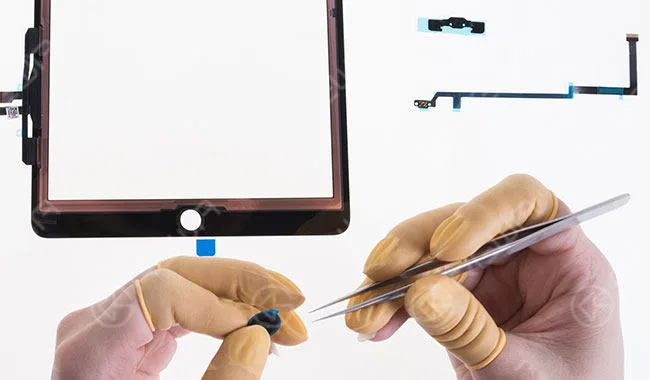
    Parts contained: Home Button; Home Button Gasket (soft); Home button Metal Bracket; Home Button Gasket (hard); Home Button Flex Cable Step 1 Tear off the front self-adhesive sticker of the soft home button gasket, paste the home button to it and then tear off the rear self-adhesive sticker. Then align them to the home button hole of the iPad touch screen digitizer assembly.

    ipad touch screen home button assembling tutorial dsc4742

    Step 2 Tear off the self-adhesive sticker of the hard home button gasket and paste it to the home button hole of the iPad touch screen digitizer assembly.

    ipad touch screen home button assembling tutorial dsc4752

    Paso 3 Tear off the self-adhesive sticker of the home button metal bracket and align it to the home button flex cable. Then adhere the two to the right place of the iPad touch screen digitizer assembly.

    ipad touch screen home button assembling tutorial dsc4766

    Paso 4 Once finished, check the assembling effect.

    ipad touch screen home button assembling tutorial dsc4780

    iPad mini

    ipad touch screen home button assembling tutorial mini

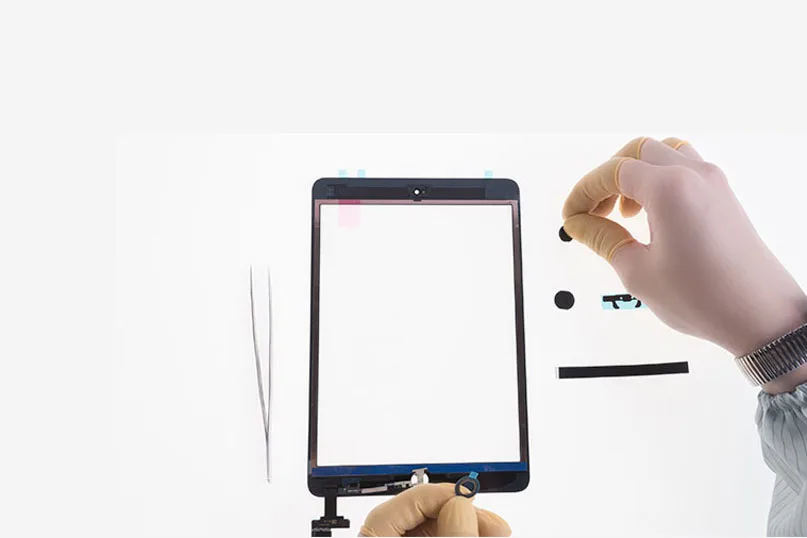
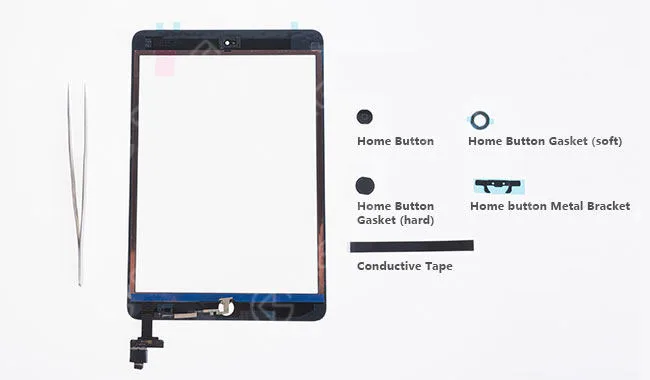
    Parts contained: Home Button; Home Button Gasket (soft); Home Button Gasket (hard); Home button Metal Bracket; Conductive Tape.

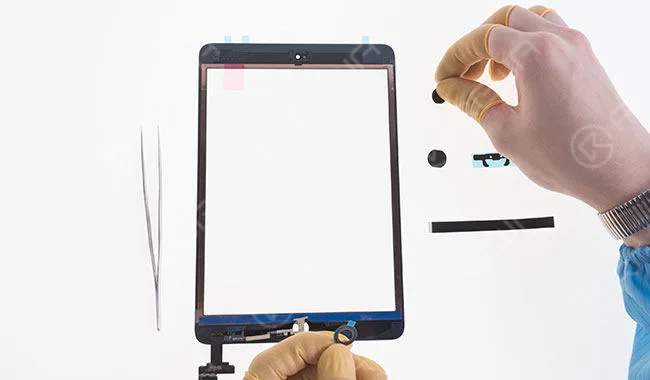
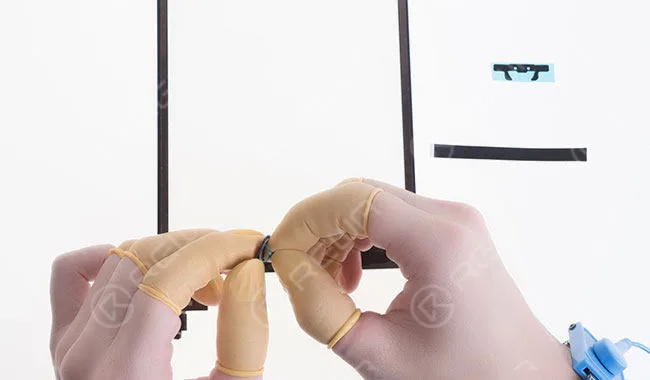
    Primer paso Tear off the front self-adhesive sticker of the soft home button gasket, paste the home button to it and then tear off the rear self-adhesive sticker. Then align them to the home button hole of the iPad touch screen digitizer assembly.

    ipad touch screen home button assembling tutorial dsc4790

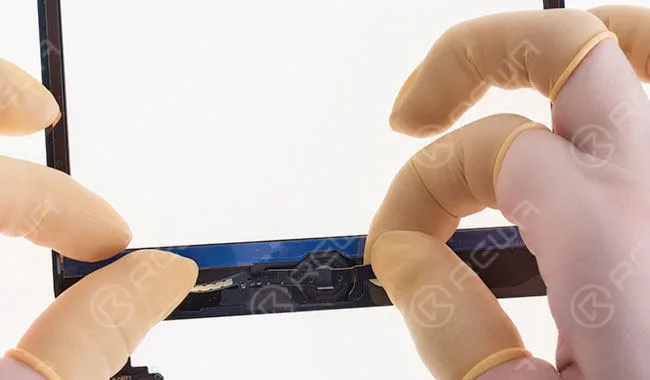
    Paso 2 Tear off the self-adhesive sticker of the hard home button gasket and paste it to the home button hole of the iPad touch screen digitizer assembly.

    ipad touch screen home button assembling tutorial dsc4802

    Paso 3 Tear off the self-adhesive sticker of the home button metal bracket and align it to the right place. Then seal with the conductive tape.

    ipad touch screen home button assembling tutorial dsc4818

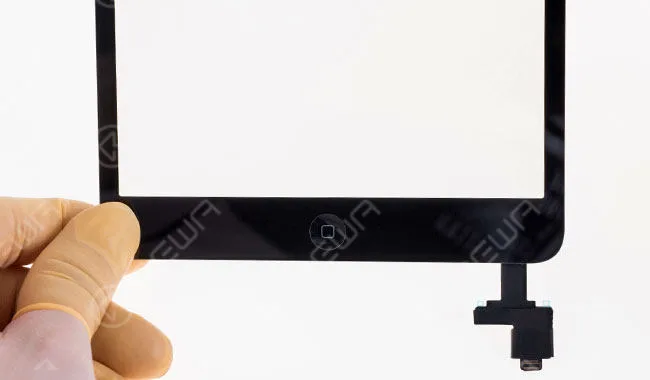
    Step 4 Once finished, check the assembling effect.

    ipad touch screen home button assembling tutorial dsc4830