Etiqueta: iphone face id

  • Razones por las que el Face ID del iPhone no está disponible

    Razones por las que el Face ID del iPhone no está disponible

    Antes del lanzamiento del iPhone 12, los rumores afirmaban que el nuevo modelo contaría tanto con Touch ID como con Face ID. Ahora que estos mitos se han desmentido, el iPhone 12 ha conservado la función Face ID, que ha demostrado ser una tecnología de reconocimiento más segura y eficaz.

    Aunque Face ID es práctico, numerosos usuarios han descubierto que a veces no funciona, por lo que no tienen más remedio que introducir el código para desbloquear.
    Face ID no funciona

    Por lo general, hay varias razones por las que Face ID no está disponible.

    Protección de seguridad

    Al igual que el desbloqueo con código, Face ID también cuenta con un sistema de protección de seguridad. Una vez activado el sistema, debes introducir el código para completar la verificación de seguridad adicional.

    1. El dispositivo simplemente se enciende o se reinicia.

    2. El dispositivo lleva bloqueado más de 48 horas.

    3. En los últimos seis días y medio, el dispositivo no se ha desbloqueado con un código de acceso y no se ha desbloqueado con Face ID en las últimas 4 horas.

    4. El iPhone recibe la instrucción de bloqueo remoto.

    5. El desbloqueo mediante Face ID ha fallado 5 veces.

    6. Mantenga pulsados simultáneamente el botón lateral y cualquiera de los botones de volumen hasta que aparezcan en la pantalla los controles deslizantes “Deslizar para apagar” y “SOS de emergencia”.

    Otras condiciones

    El Face ID también puede fallar en algunas condiciones:

    1. Cara cubierta

    Si usas gafas de sol o un sombrero, esto impedirá que Face ID funcione correctamente.

    2. Cámara cubierta

    Si aplicas una película protectora en tu teléfono o hay suciedad cerca de la cámara TrueDepth, la sensibilidad de Face ID puede verse afectada en cierta medida.
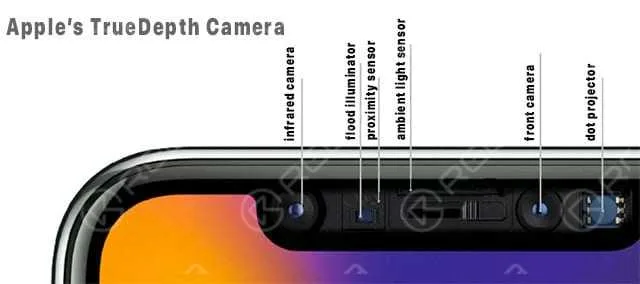
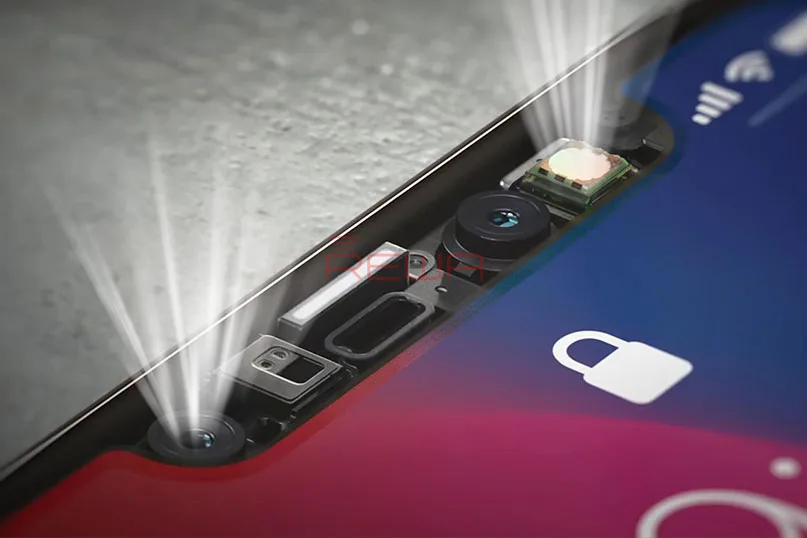
    Cámara TrueDepth de Apple

    3. Problema de hardware

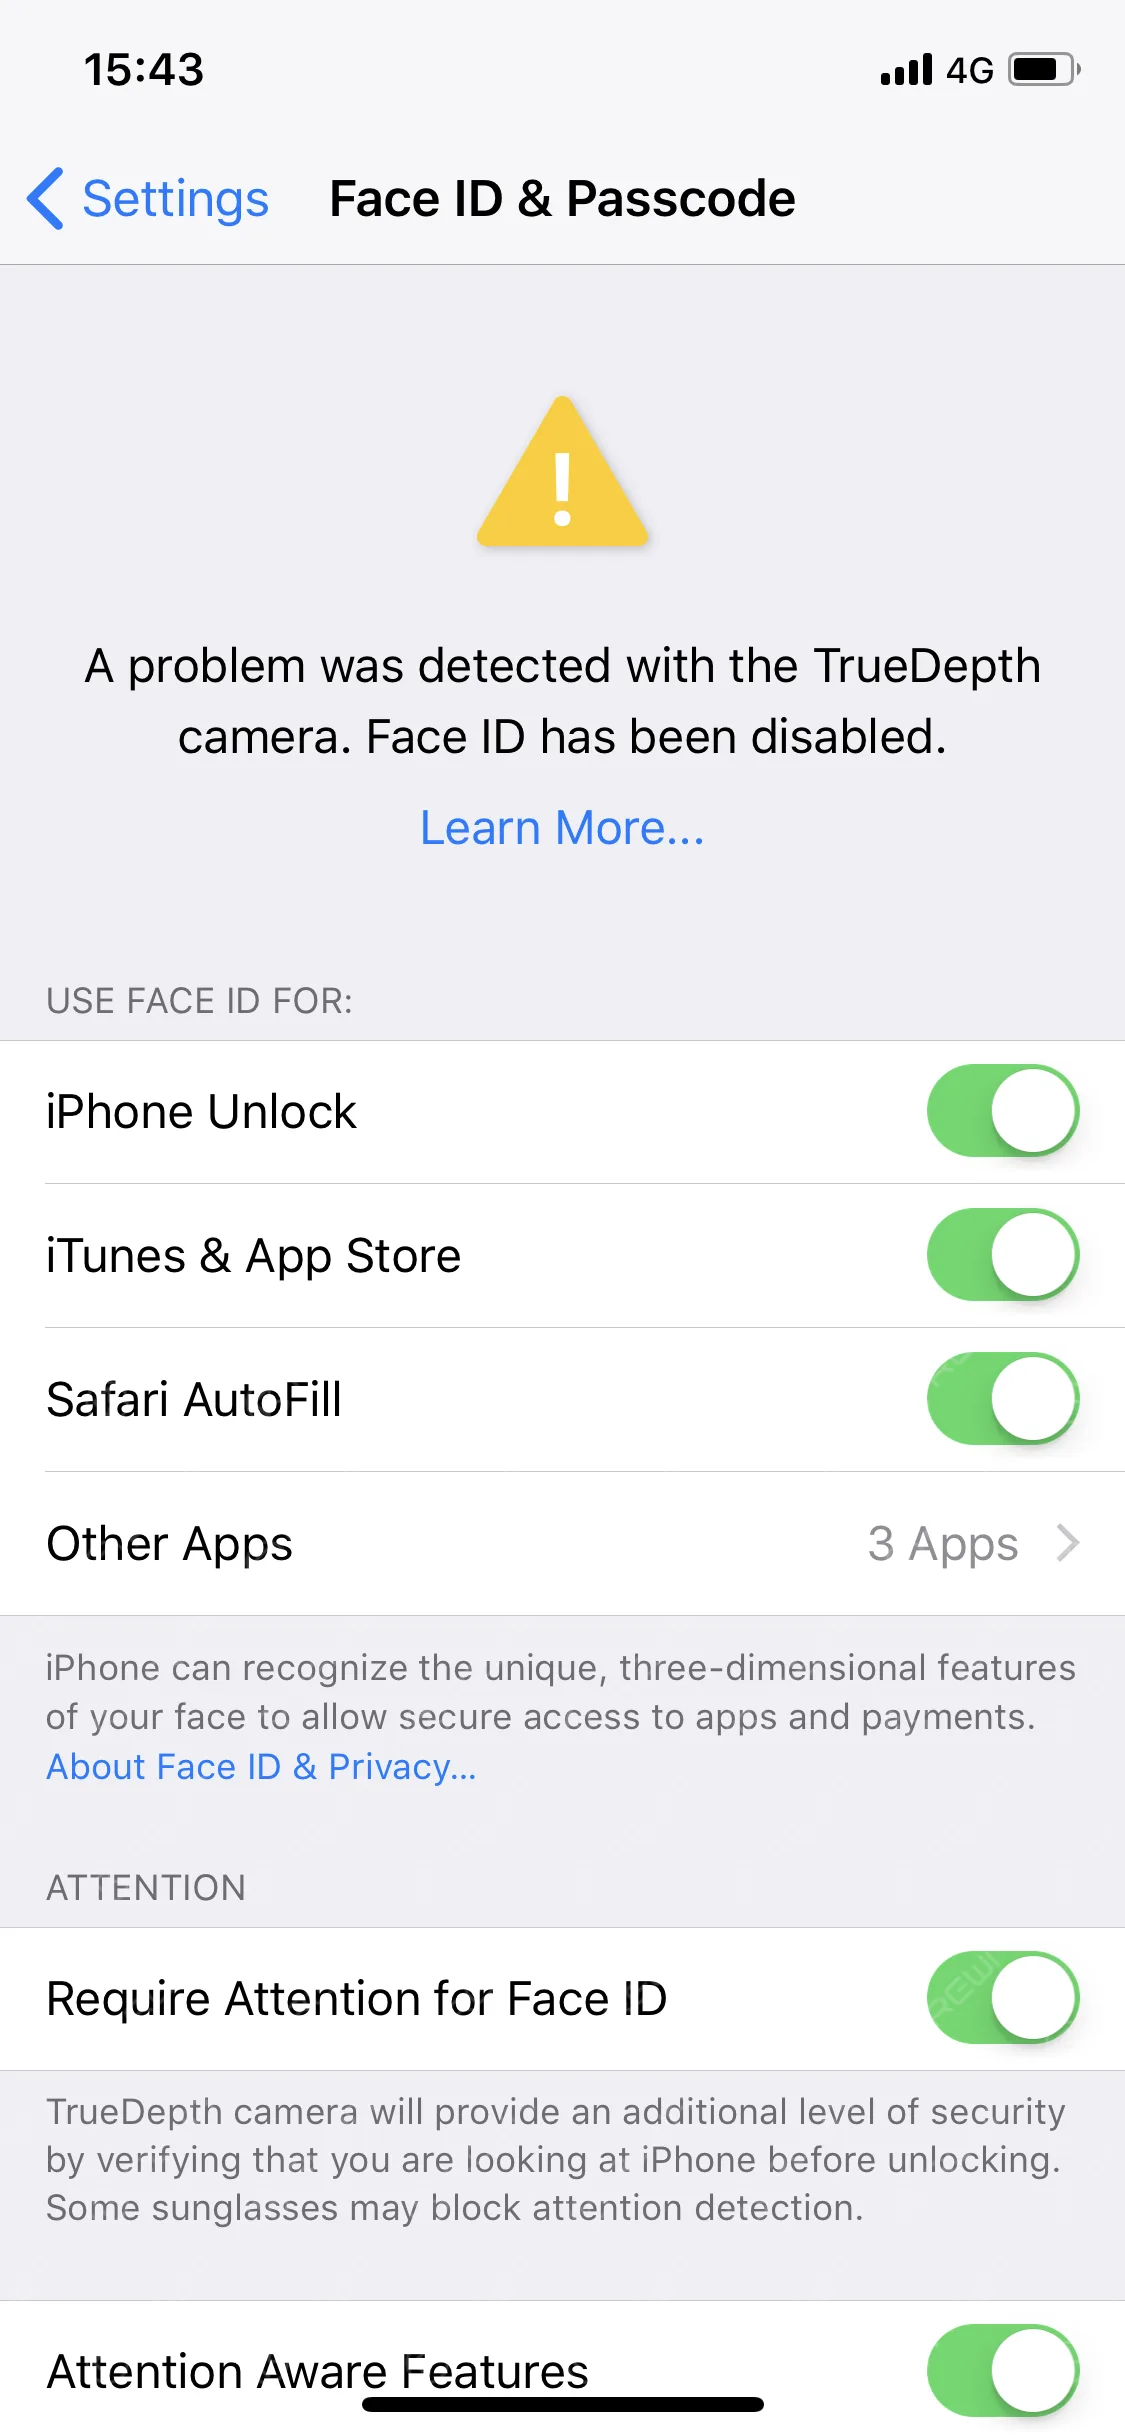
    Si ves “Se ha detectado un problema con la cámara TrueDepth. Face ID se ha desactivado”, significa que iOS ha detectado un daño en el hardware del dispositivo y es necesario repararlo.

    Aunque Face ID es muy práctico, el coste de reparación de los daños en el hardware también es muy elevado. Si hay algún problema con Face ID, primero puedes intentar solucionarlo restableciendo y restaurando el sistema.

    Si se determina que se trata de un problema de hardware, probablemente tendrás que llevar tu iPhone a la tienda Apple Store más cercana para que lo reparen.

    No dudes en dejar cualquier otra pregunta que tengas sobre Face ID en la sección de comentarios más abajo.
  • How to Fix iPhone Face ID – Move iPhone a Little Lower

    How to Fix iPhone Face ID – Move iPhone a Little Lower

    Many iPhone users may encounter a frustrating problem where Face ID continues to show”Move iPhone a Little Lower/Higher,” making it impossible to reset the feature. In this article, we will explore effective methods to resolve this issue and ensure the smooth functioning of Face ID on your iPhone.

    How to Fix face ID Move iPhone a Little Lower

    We have discovered several possible solutions fixing move the iPhone a little lower. These methods have proven effective and may work for your specific needs.

    1. Restart your Device

    To address software or temporary system failures, a simple restart can often resolve the problem. Follow these steps to restart your iPhone X or later models:

    • Press and hold the side button and any volume button simultaneously until the slider appears.
    • Slide the slider to power off the device.
    • Press and hold the side button until the Apple logo appears, indicating the device is restarting.

    2. Remove Film or Check For Dirt

    Inspect the area around the front camera for any stains or obstructions that may interfere with Face ID recognition. Clean the camera lens with a microfiber cloth or a gentle lift to ensure optimal performance.

    face id problems

    3. Check for water damage

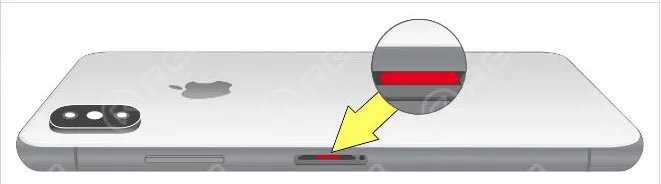
    If your iPhone has been exposed to water or liquid, it may result in Face ID malfunction. In such cases, it is recommended to seek assistance from Apple’s after-sales service. To determine if your device has suffered water damage, you can check the Liquid Contact Indicator (LCI):

    The majority of iPhone models are equipped with an LCI that can be viewed from the outside. The LCI is capable of detecting whether the device has been exposed to liquid or aqueous liquid. In general, the indicator should be white or silver in color. However, it will become red when it comes into contact with water or aqueous liquid.

    In order to determine if the LCI of your device is touching the liquid, you can refer to the following image to help you see the LCI.

    LCI

    It is recommended that you use a lamp or magnifying glass in order to see the LCI. Make sure you adjust the angle of the light or device until you can see it.

    4. Update the system

    If the device has not suffered from any water or drop damage, it is highly recommended to update the system to the latest version available. This is because Apple frequently releases new software versions that include essential bug fixes and exciting new features that are worth exploring.

    The majority of iPhone-related software issues can be resolved through the installation of the latest iOS update. Therefore, it is always advisable to keep your device up-to-date with the newest software releases to ensure optimal performance and a seamless user experience.

    Conclusión:

    By following these troubleshooting methods, you can overcome the “Move a Little Lower/Higher” prompt and restore the functionality of Face ID on your iPhone. Remember, if the problem persists, it is advisable to seek professional assistance from Apple’s support team. Enjoy the convenience and security of Face ID on your iPhone with these helpful tips.

  • Solución de problemas relacionados con Face ID y mensajes en pantalla del iPhone 13 tras sustituir la pantalla

    Solución de problemas relacionados con Face ID y mensajes en pantalla del iPhone 13 tras sustituir la pantalla

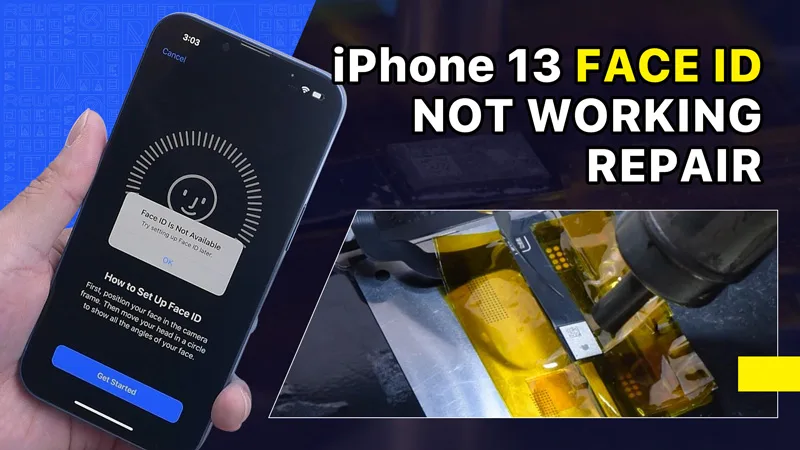
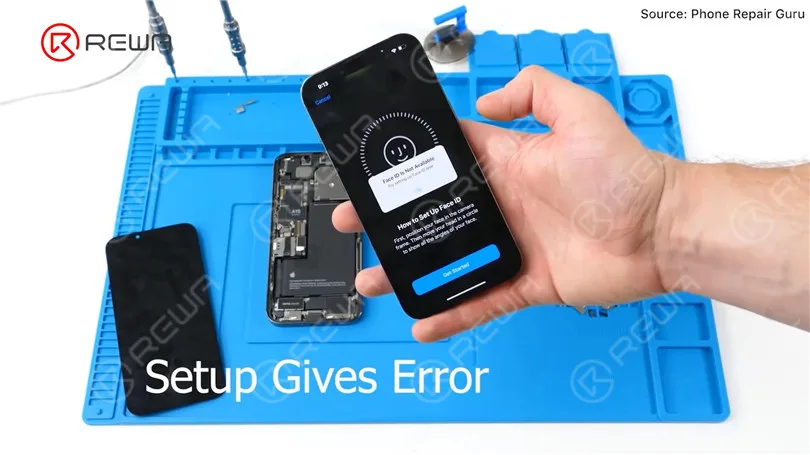
    Recientemente, Phone Repair Guru publicó un vídeo sobre la sustitución de la pantalla del iPhone 13. Tras la sustitución, aparece el mensaje “Important Display Message” (Mensaje importante sobre la pantalla). Y lo que es peor, Face ID no está disponible.

    Arreglar iPhone 13 Face ID no funciona y mensaje de pantalla importante después de reemplazar la pantalla

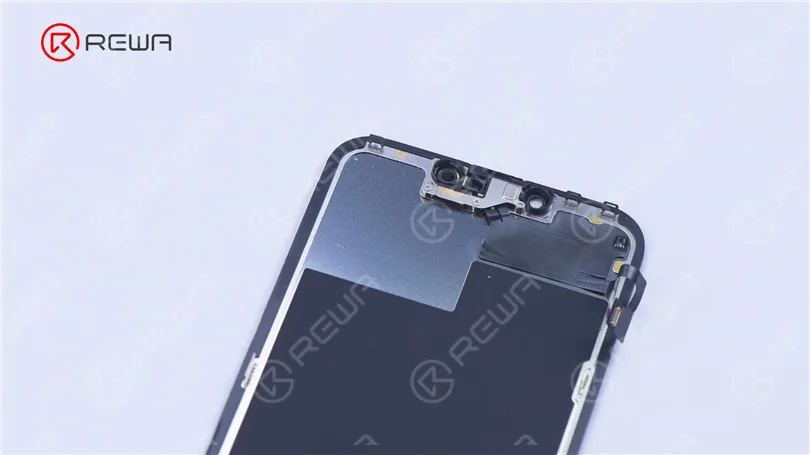
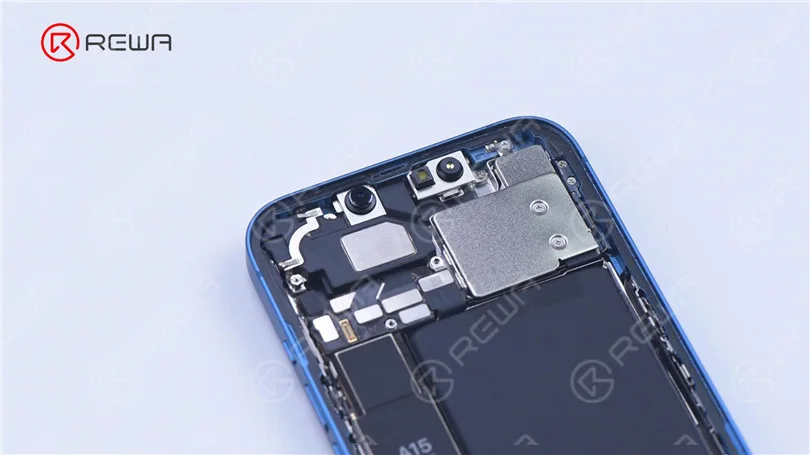
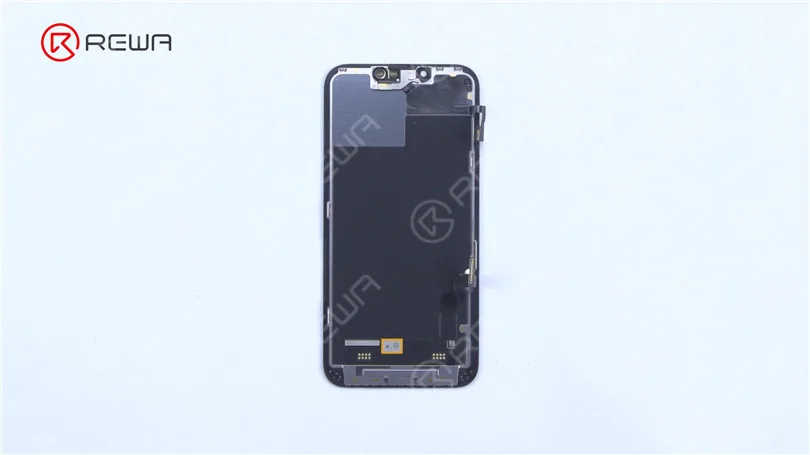
    Dado que la pantalla del iPhone 13 no incluye ningún módulo iluminador de inundación y todas las piezas del sistema TrueDepth están alojadas en el propio iPhone,

    Arreglar iPhone 13 Face ID no funciona y mensaje de pantalla importante después de reemplazar la pantalla
    Arreglar iPhone 13 Face ID no funciona y mensaje de pantalla importante después de reemplazar la pantalla

    REWA LAB especula que el chip de la pantalla original tiene guardados los datos del Face ID. Transferir el chip a la nueva pantalla podría resolver el problema. Hoy, vamos a verificar esta especulación.

    Arreglar iPhone 13 Face ID no funciona y mensaje de pantalla importante después de reemplazar la pantalla

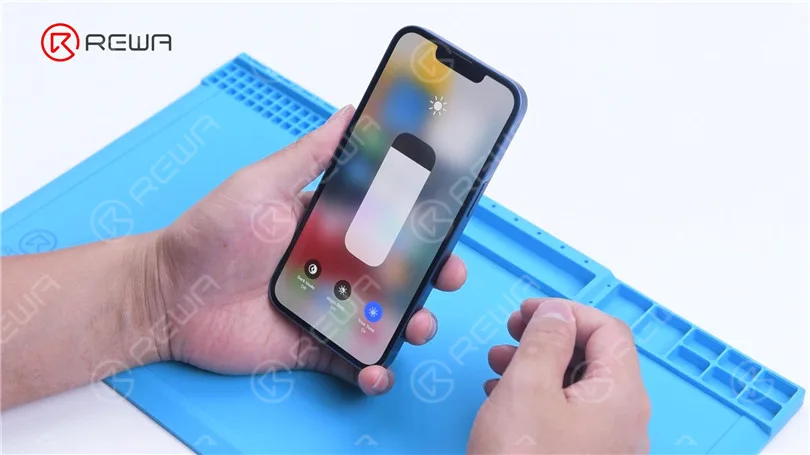
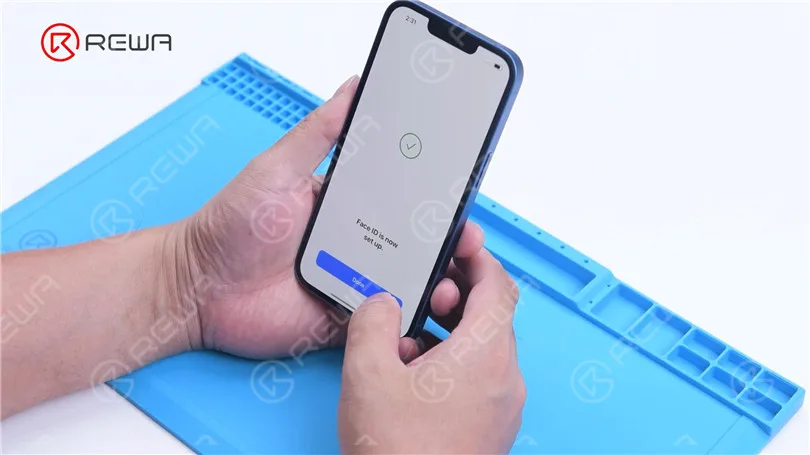
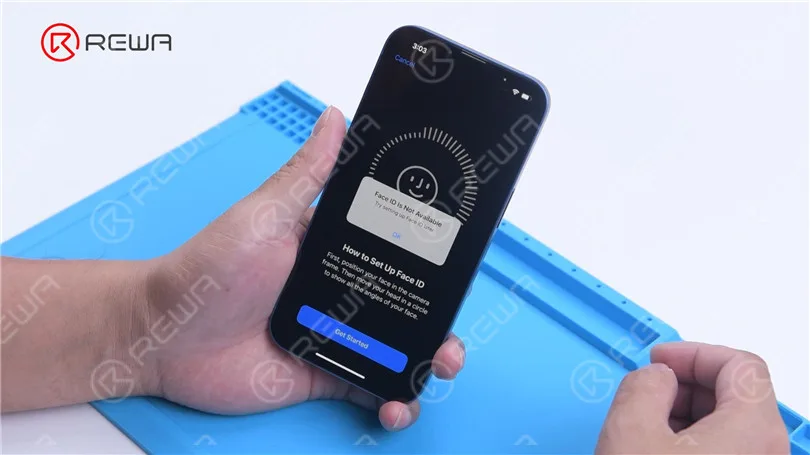
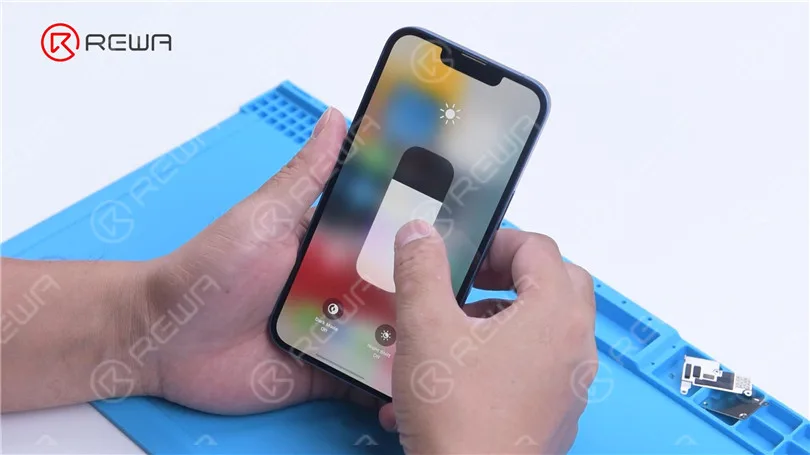
    En primer lugar, probamos la función Face ID del iPhone 13. La función True Tone funciona con normalidad. Face ID se puede configurar y funciona correctamente.

    Arreglar iPhone 13 Face ID no funciona y mensaje de pantalla importante después de reemplazar la pantalla
    Arreglar iPhone 13 Face ID no funciona y mensaje de pantalla importante después de reemplazar la pantalla

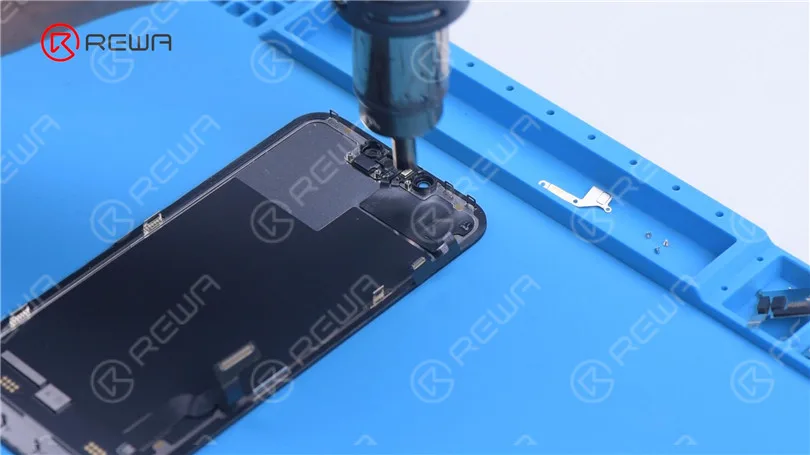
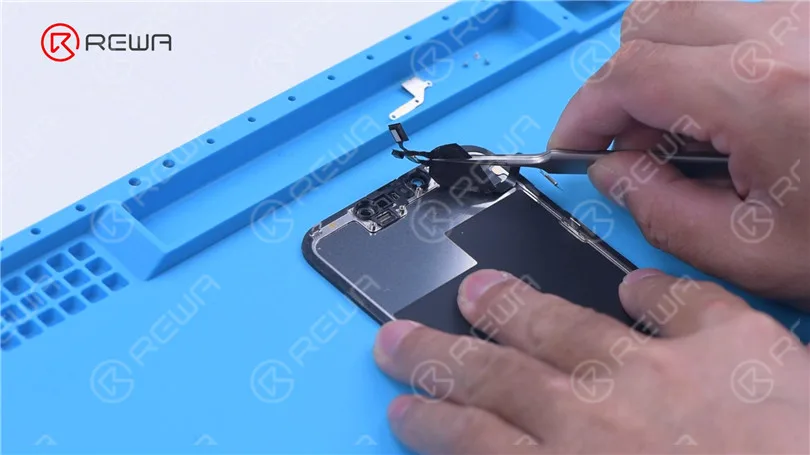
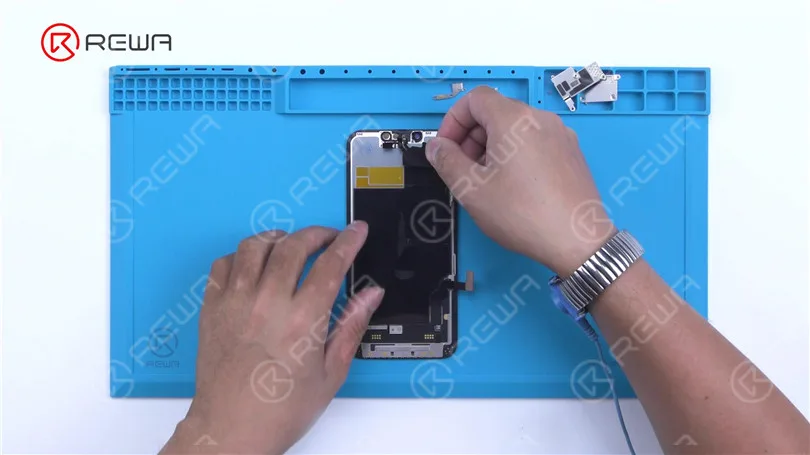
    A continuación, desmontamos el teléfono e intentamos sustituir la pantalla por una original y auténtica. Quitar la pantalla original. Separe el cable flex del sensor con Pistola de aire caliente a 100 °C. Tenga cuidado de no dañar el cable flexible al retirarlo. 

    Arreglar iPhone 13 Face ID no funciona y mensaje de pantalla importante después de reemplazar la pantalla
    Arreglar iPhone 13 Face ID no funciona y mensaje de pantalla importante después de reemplazar la pantalla

    Conecte el cable flexible del sensor retirado a la nueva pantalla. Instale los tornillos. Conecte la nueva pantalla. Encienda el teléfono. Aparece "Mensaje de pantalla importante". Face ID no se puede configurar. Desaparece True Tone.

    Arreglar iPhone 13 Face ID no funciona y mensaje de pantalla importante después de reemplazar la pantalla
    Arreglar iPhone 13 Face ID no funciona y mensaje de pantalla importante después de reemplazar la pantalla
    Arreglar iPhone 13 Face ID no funciona y mensaje de pantalla importante después de reemplazar la pantalla

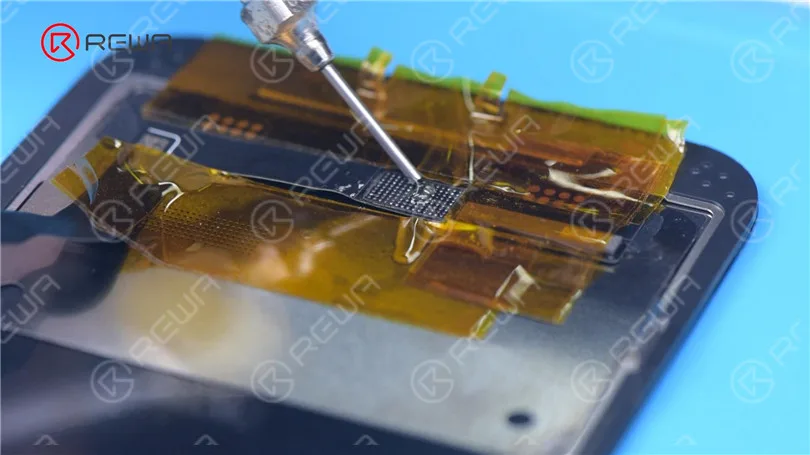
    A continuación, intentamos transferir el circuito integrado de la pantalla original a la nueva pantalla.

    Retire la nueva pantalla. Para evitar arañazos en la pantalla durante las operaciones,

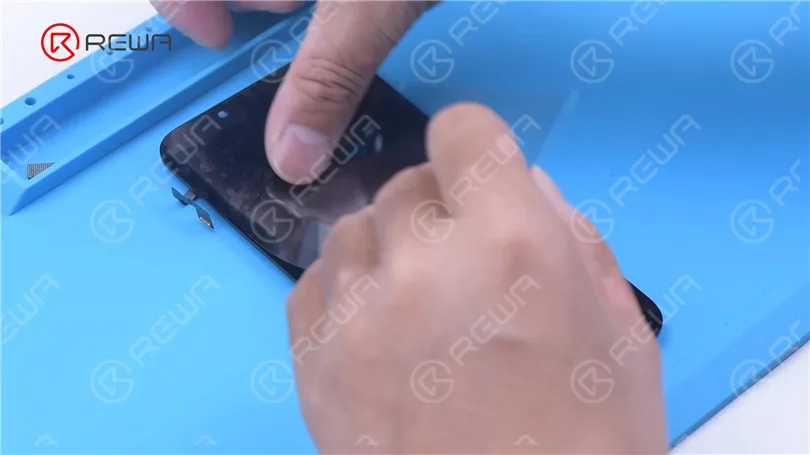
    Aplicar una película protectora a la pantalla. 

    Arreglar iPhone 13 Face ID no funciona y mensaje de pantalla importante después de reemplazar la pantalla

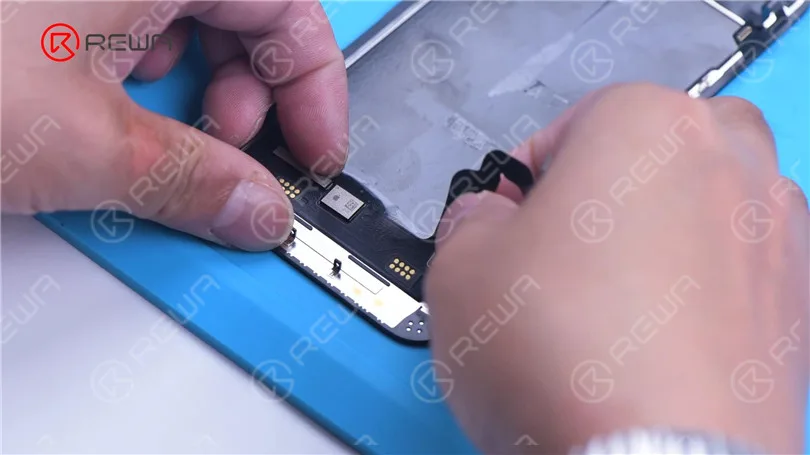
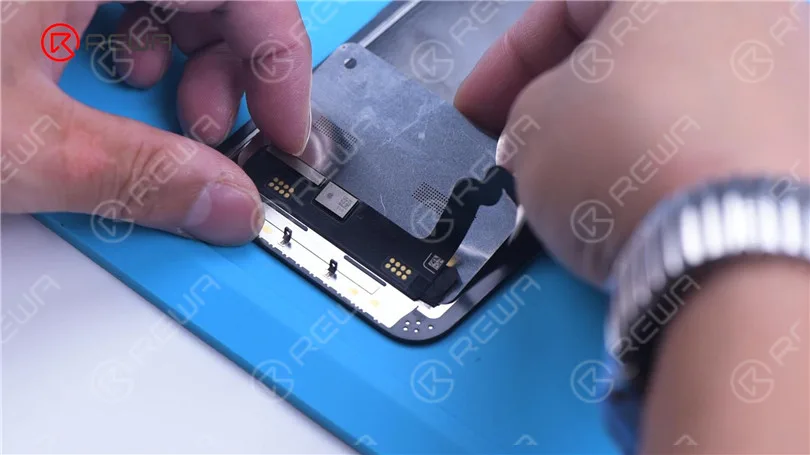
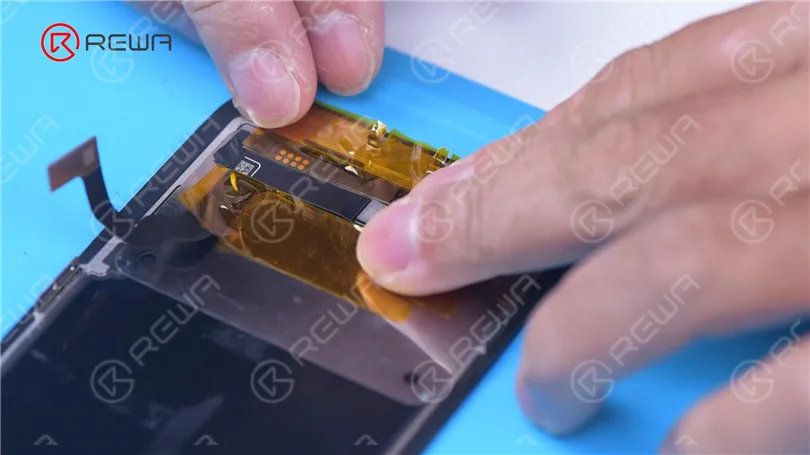
    Calienta el cable flexible de la pantalla con una pistola de aire caliente a 100 °C. Tira suavemente del cable flexible hacia arriba.

    Para proteger la pantalla, inserte la plantilla de reballing debajo del cable flexible para aislarla. Aplique cinta adhesiva resistente a altas temperaturas.

    Arreglar iPhone 13 Face ID no funciona y mensaje de pantalla importante después de reemplazar la pantalla
    Arreglar iPhone 13 Face ID no funciona y mensaje de pantalla importante después de reemplazar la pantalla
    Arreglar iPhone 13 Face ID no funciona y mensaje de pantalla importante después de reemplazar la pantalla

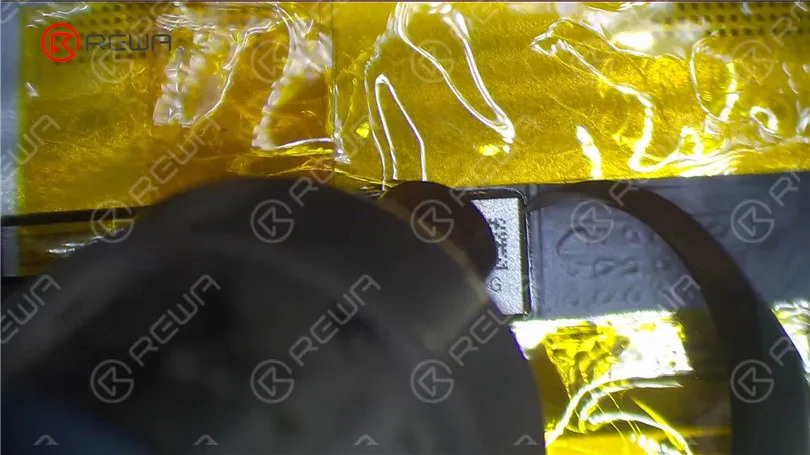
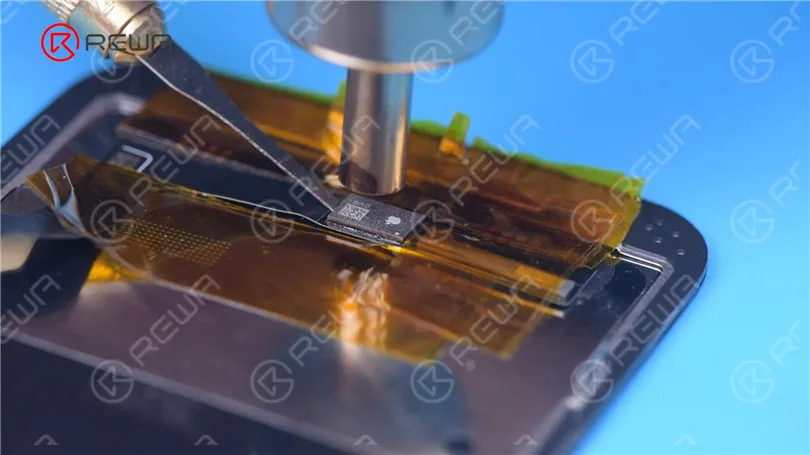
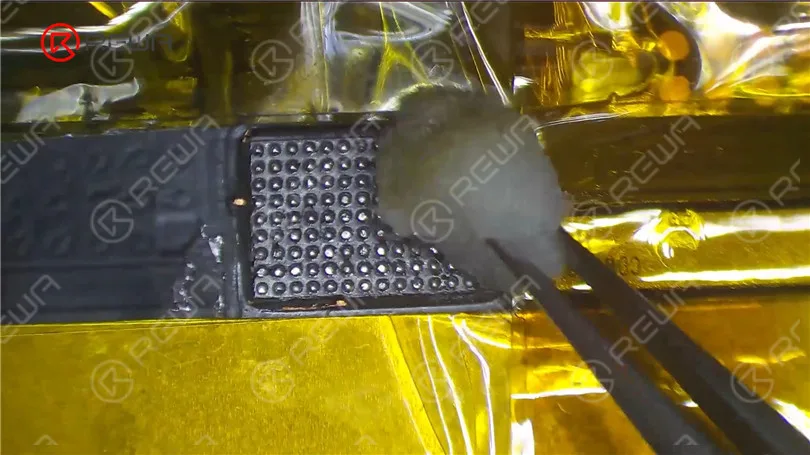
    Retire el adhesivo negro alrededor del chip con una pistola de aire caliente a 240 °C.

    Para eliminar las virutas, ajuste la temperatura a 300 °C y el flujo de aire a 6.

    Arreglar iPhone 13 Face ID no funciona y mensaje de pantalla importante después de reemplazar la pantalla
    Arreglar iPhone 13 Face ID no funciona y mensaje de pantalla importante después de reemplazar la pantalla

    Aplica un poco de pasta de soldadura a temperatura media.

    Limpie las almohadillas de unión con un soldador a 360 °C y una mecha de soldadura.

    Siga limpiando las almohadillas de unión con PCB Cleaner.

    Arreglar iPhone 13 Face ID no funciona y mensaje de pantalla importante después de reemplazar la pantalla
    Arreglar iPhone 13 Face ID no funciona y mensaje de pantalla importante después de reemplazar la pantalla

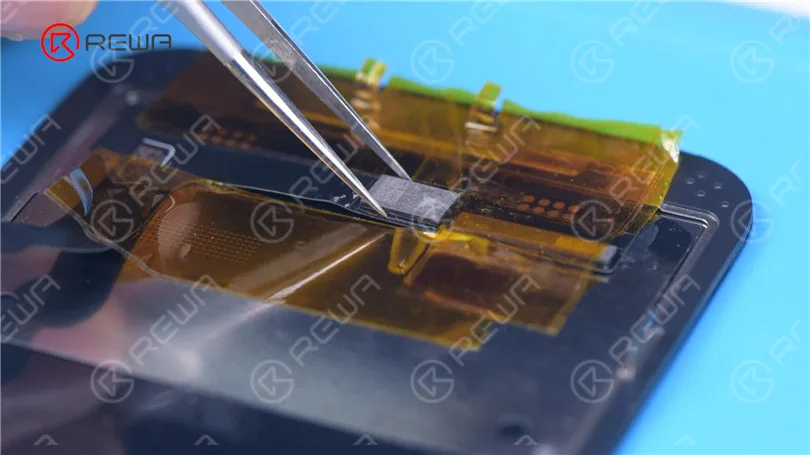
    A continuación, retire el chip de la pantalla original con el mismo método.

    Limpia la lata en el chip de la pantalla original.

    Aplique un poco de pasta de soldadura a temperatura media a las almohadillas de unión.

    Limpia el estaño y el adhesivo negro de las almohadillas de unión del chip con una mecha de soldadura.

    Siga limpiando las almohadillas de unión con PCB Cleaner.

    Arreglar iPhone 13 Face ID no funciona y mensaje de pantalla importante después de reemplazar la pantalla

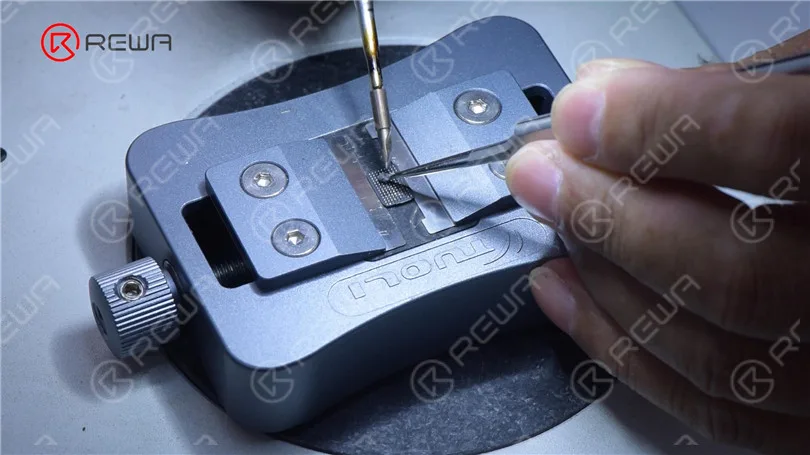
    A continuación, vuelva a colocar las bolas en el chip. Coloque la plantilla de recolocación de bolas en su posición.

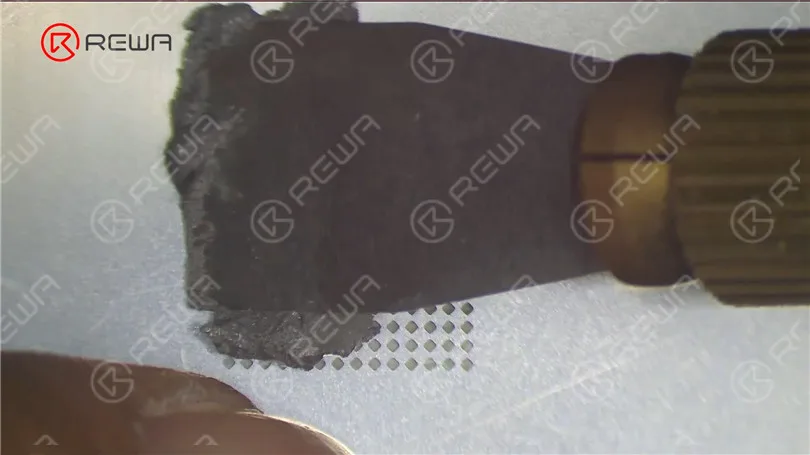
    Aplique una capa uniforme de pasta de soldadura de temperatura media.

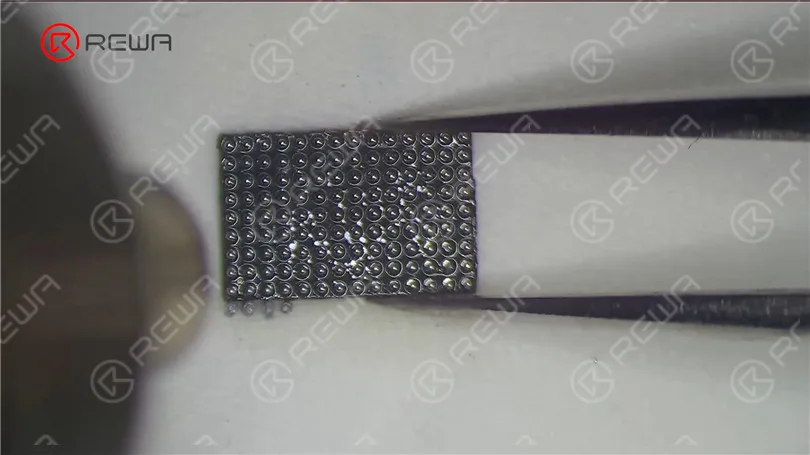
    Calentar con una pistola de aire caliente a 300 °C para formar las bolas de soldadura.

    Una vez formadas las bolas de soldadura, limpie con un limpiador de PCB.

    Arreglar iPhone 13 Face ID no funciona y mensaje de pantalla importante después de reemplazar la pantalla
    Arreglar iPhone 13 Face ID no funciona y mensaje de pantalla importante después de reemplazar la pantalla

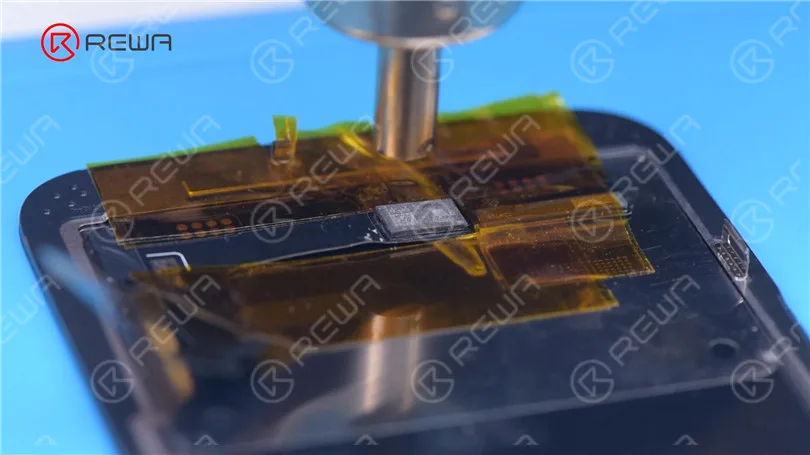
    Aplica pasta fundente a las almohadillas de unión de la nueva pantalla.

    Alinea el chip de la pantalla original.

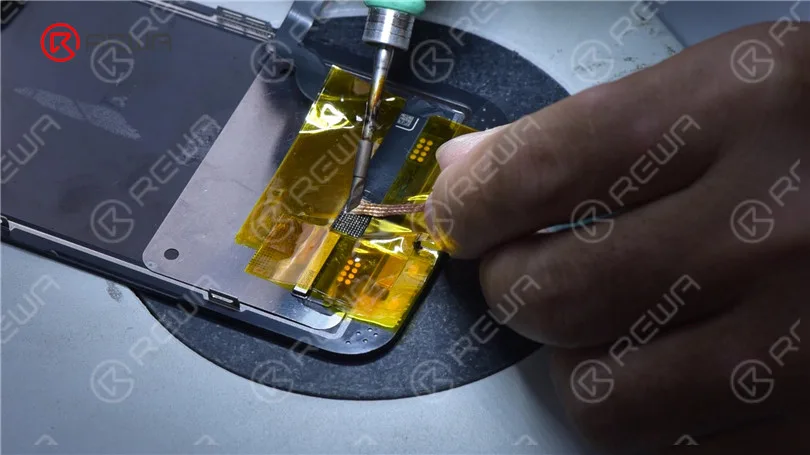
    Suelde el chip con una pistola de aire caliente a 300 °C.

    Arreglar iPhone 13 Face ID no funciona y mensaje de pantalla importante después de reemplazar la pantalla
    Arreglar iPhone 13 Face ID no funciona y mensaje de pantalla importante después de reemplazar la pantalla
    Arreglar iPhone 13 Face ID no funciona y mensaje de pantalla importante después de reemplazar la pantalla

    Retire la cinta resistente a altas temperaturas una vez que el cable flexible se haya enfriado.

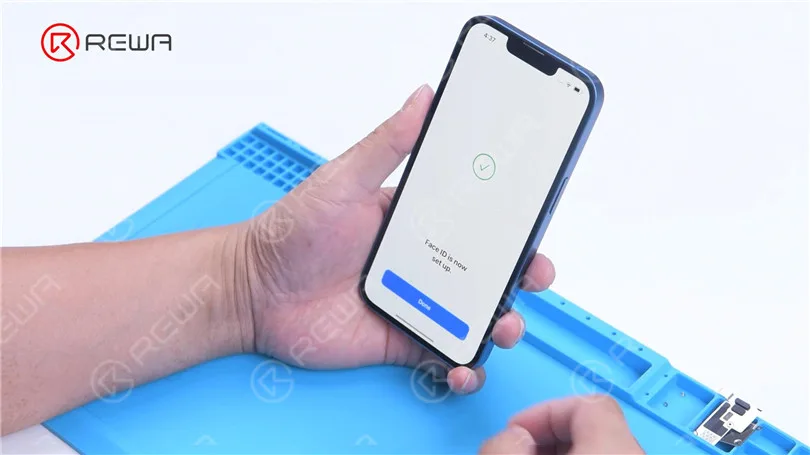
    Conecta la pantalla. Enciende el teléfono.

    No hay ningún “mensaje importante en pantalla”. Face ID se puede configurar y funciona correctamente.

    Pero True Tone no se ha restaurado.

    Arreglar iPhone 13 Face ID no funciona y mensaje de pantalla importante después de reemplazar la pantalla

    Apple ha sido objeto de críticas durante mucho tiempo por mostrar mensajes como “Mensaje importante sobre la batería” y “Mensaje importante sobre la cámara”, lo que dificulta a los talleres de reparación externos reparar sus productos.

    Arreglar iPhone 13 Face ID no funciona y mensaje de pantalla importante después de reemplazar la pantalla
    Arreglar iPhone 13 Face ID no funciona y mensaje de pantalla importante después de reemplazar la pantalla

    Con el iPhone 13 de este año, Apple dificulta aún más a los clientes la posibilidad de reparar sus dispositivos en tiendas de terceros.

    Sin embargo, es arriesgado sustituir el chip para solucionar el problema de que Face ID no funcione tras sustituir la pantalla del iPhone 13. REWA LAB no recomienda que personas no profesionales prueben este método.

    Apple podría solucionar esto mediante una actualización de iOS en el futuro.

    Esperemos y veamos. No dude en dejar sus comentarios sobre el problema.

  • Face ID Not Working? 8 Simple Fixes to Save Your iPhone

    Face ID Not Working? 8 Simple Fixes to Save Your iPhone

    Apple’s Face ID is commended for its speed and precision. It is the most helpful approach to open your iPhone after Apple decided to dispose of the Home Button for their iPhone X and latter models.

    It’s likewise secure to the point that Apple says the likelihood of an arbitrary individual could unlock your iPhone (or iPad) utilizing Face ID is around 1 out of 1,000,000, that is with a solitary enrolled appearance.

    iPhone and iPad Face ID solely permits up to five unsuccessful attempts before the password is needed.

    Face ID is also used to validate buys and sign in to applications. Be that as it may, what occurs if your Face ID quits working?

    Follow the below steps to fix your Face ID

    1. Check Your Face ID Settings

    Apple educates you to go to Settings > Face ID and Passcode.

    See that your Face ID is set ready for action, with the vital features flipped on.

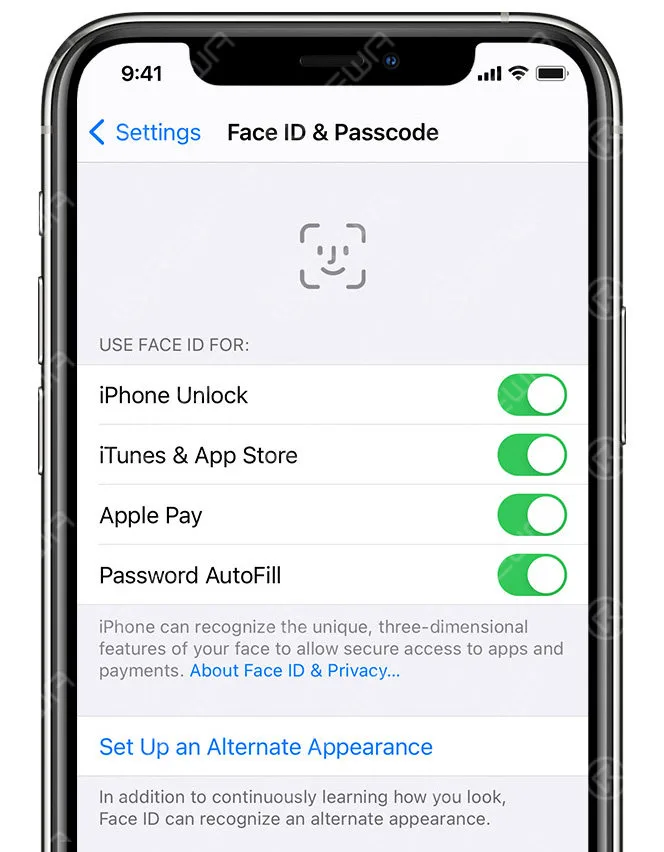
    In case there are a few features off, feel free to flip the settings you need to utilize Face ID for while you’re there: Apple Pay, opening your iPhone, Password AutoFill, and the iTunes and App Store,

    In case it’s not set up, tap “Set Up Face ID.” Your cell phone will walk you through the means which includes shifting and pivoting your head for the face examines.

    If you can’t move your head, Apple’s Accessibility Options button is additionally there for you to tap.

    A password will be needed on the off chance that you’ve had five unsuccessful Face ID attempts and need to get to your phone.

    2. Ensure Nothing is Covering Your Face

    The TrueDepth camera needs to see your eyes, nose, and mouth completely noticeable for the Face ID to work.

    That implies you can’t utilize it while wearing a face veil.

    Face ID can work with numerous shades, however.

    In any case, Apple cautions that a few sunglasses that are intended to hinder particular kinds of light can impede the infrared light utilized by the TrueDepth camera and thus Face ID can’t remember you.

    If that is the case, take your shades off when expecting to utilize Face ID.

    3. Reset Face ID

    If none of the past ways work, reset Face ID. Just head to Settings > Face ID and Passcode and tap “Reset Face ID”. It’s underneath “Set Up and Alternate Appearance.”

    Whenever that is done, go ahead and set up Face ID once more.

    4. Restart Your iPhone (or iPad)

    This might sound senseless but now and then software can glitch and a straightforward restart can assist with getting things back altogether.

    Go ahead to restart your cell phone by either going to Settings > General > Shut Down or squeezing your Side Button and either one of the Volume Buttons together.

    5. Set up an Alternate Appearance

    In the event that you have an appearance that can appear to be endlessly unique from the first enrolled appearance, you can set up a substitute appearance so Face ID can in any case remember you and let you access your iPhone.

    Note that this doesn’t work in case you’re wearing a face veil, Apple says.

    To add an alternate appearance, go to Settings > Face ID and Passcode. You may be needed to enter your password. Tap “Set Up an Alternate Appearance” and begin.

    It’s fundamentally the same way you set up your first enrolled appearance. Once more, if you are unable to move your head, the Accessibility Option button can help you with that.

    6. Make Sure that the TrueDepth Camera is Free of Barrier

    Apple advised ensuring nothing is covering the TrueDepth camera, which includes your phone case or the protector. Make sure no dirt or buildup is covering the TrueDepth camera.

    7. Ensure You’re Facing the Camera The Right Way

    For iPhone users, hold your iPhone in a portrait direction when utilizing Face ID. Those who use iPad can utilize it in any direction.

    Additionally, ensure you are confronting the camera straightforwardly.

    Apple says the TrueDepth camera has a comparable scope of view as when you take a selfie or make a video call. So ensure that your phone is at a safe distance or 10-20 inches away from your face.

    8. Contact Apple Support

    In the event that all these steps have been conducted, Face ID is as yet not working and you accept that this is a result of a new iOS update.

    Feel free to contact Apple Support and report the issue.

    In case there are different reasons you suspect like you can’t enroll your appearance or different issues, Apple Support ought to have the option to help you with that.

  • ¿Por qué Face ID se daña tan fácilmente y apenas se puede reparar?

    ¿Por qué Face ID se daña tan fácilmente y apenas se puede reparar?

    Face ID es una nueva función introducida en el iPhone X/XS/XR/XS Max. Aunque es un componente muy potente que permite la autenticación biométrica para desbloquear un dispositivo, hay bastantes casos en los que Face ID no funcionará.

  • Troubleshooting Face ID Issues on iPhone: Solutions and Tips

    Troubleshooting Face ID Issues on iPhone: Solutions and Tips

    Using Face ID on your iPhone can be a convenient and secure way to unlock your device and authenticate various actions. However, like any technology, it may encounter issues that hinder its functionality. In this article, we will explore common problems with Face ID and provide effective solutions to resolve them. Whether you are experiencing the “Move a Little Lower/Higher” prompt or other Face ID-related difficulties, we’ve got you covered.

    Please check if there

    Section 1: Restart Your Device

    One of the simplest yet effective solutions to fix Face ID problems is to restart your iPhone. To do this, press and hold the side button and any volume button until the slider appears. Slide the slider to power off your device. Once it is off, press and hold the side button until the Apple logo appears, indicating that your device is restarting. Rebooting your iPhone can often resolve software or temporary system failures that may be affecting Face ID.

    Section 2: Check for Obstructions

    Ensure that there is nothing covering the front-facing TrueDepth camera on your iPhone. Sometimes, a film or dirt can obstruct the camera, causing Face ID to malfunction. Carefully inspect the area around the camera and clean it with a gentle cloth or lift if necessary. Removing any obstructions can significantly improve the performance of Face ID.

    Section 3: Assess Water Damage

    If your iPhone has been exposed to water or liquid, it may lead to Face ID not working properly. In such cases, it is recommended to visit an authorized Apple service center. To check for water damage, look for the Liquid Contact Indicator (LCI) on your device. The LCI is usually located externally and changes color (from white or silver to red) when it comes into contact with liquid. Use a lamp magnifying glass to locate and inspect the LCI for any signs of water damage.

    LCI

    Section 4: Update Your System

    Keeping your iPhone’s operating system up to date is crucial for maintaining optimal performance. If Face ID issues persist even after trying the previous solutions, it is advisable to update your device to the latest iOS version. Apple regularly releases software updates that address bugs and improve system stability. Navigate to Settings > General > Software Update and follow the prompts to install any available updates.

    Conclusión:

    Face ID is a remarkable feature that enhances the security and convenience of using your iPhone. However, occasional issues may arise that require troubleshooting. By following the steps outlined in this article, you can effectively resolve Face ID problems such as the “Move a Little Lower/Higher” prompt or other related difficulties. Remember to restart your device, check for obstructions, assess water damage, and update your system regularly. These measures will help ensure a seamless Face ID experience on your iPhone.

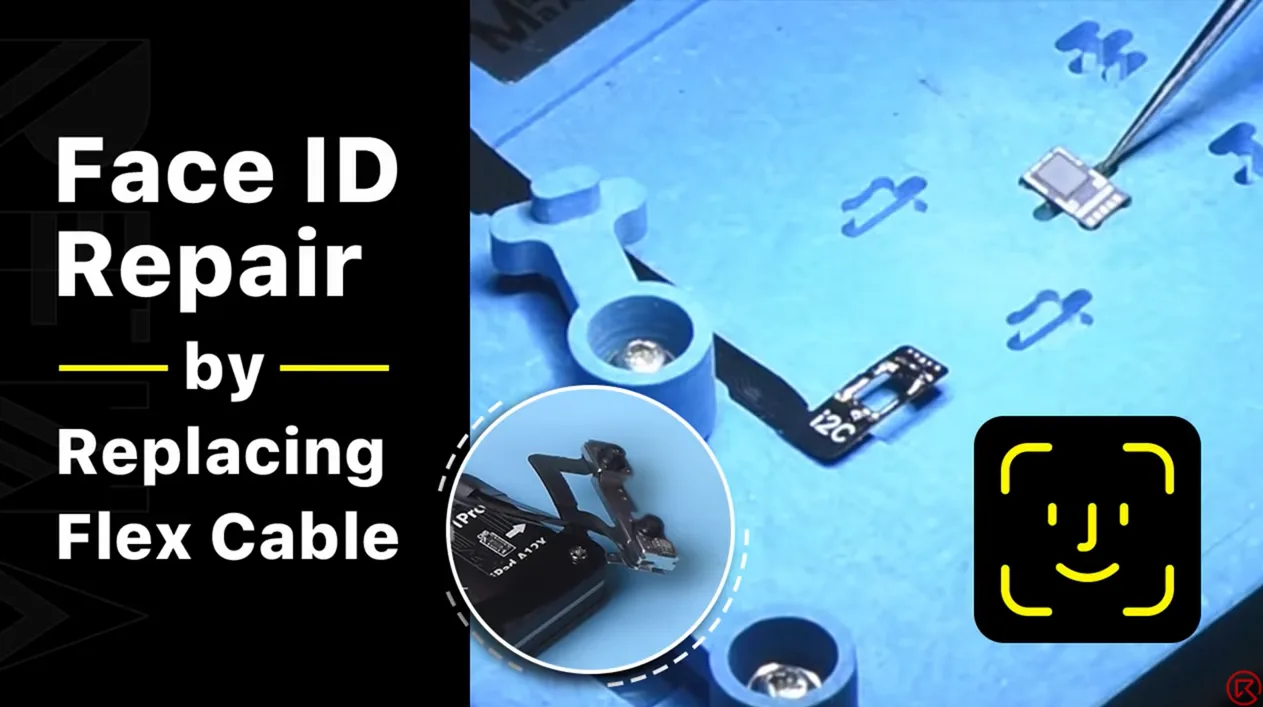
  • Reparación del proyector de puntos Face ID del iPhone (sustituyendo el cable flexible)

    Reparación del proyector de puntos Face ID del iPhone (sustituyendo el cable flexible)

    Las piezas del proyector de puntos son sumamente frágiles. Una caída o daño por agua pueden afectar las piezas del proyector de puntos, provocando un mal funcionamiento de Face ID. Dado que el circuito integrado del proyector de puntos está encriptado y su reemplazo requiere un enlace de encriptación de datos para el nuevo circuito integrado, a los técnicos de reparación les resulta un desafío reparar Face ID. La buena noticia es que REWA LAB ha desarrollado un método simple y eficiente para reparar Face ID. ¡Vamos a verlo!

    Productos recomendados en este vídeo:

  • ¿Puede el iPhone tener 2 Face ID?

    ¿Puede el iPhone tener 2 Face ID?

    El iPhone 8 y los modelos anteriores con Touch ID pueden añadir varias huellas dactilares para desbloquear, por lo que puedes añadir las huellas dactilares de otras personas para desbloquear tu iPhone. En el caso del iPhone X y modelos posteriores, utiliza el reconocimiento facial para desbloquear. De hecho, este método de desbloqueo puede tener 2 informaciones faciales.

    Touch ID

    Para configurar una apariencia alternativa, siga estos pasos:

    1. Ir a "Ajustes" - "Face ID y código de acceso“.
    2. Grifo "Configurar una comparecencia alternativa“.
    información facial

    El siguiente paso es introducir la información de la cara: mire directamente al iPhone o IPAD y coloque la cara en el recuadro de visión, gire lentamente la cabeza para completar la captación completa, complete el primer escaneado de identificación de la cara, pulse "Continuar" y, a continuación, gire lentamente La cabeza se completa para la segunda captación completa. Después de completar la configuración de ID de la cara, toque "Completar".

    Una vez completada la entrada, ambas caras pueden desbloquear el iPhone.

  • Apple desvela su revolucionario Face ID

    Apple desvela su revolucionario Face ID

    Face ID es una identificación cara a cara, un sistema de reconocimiento facial para el diseño y la liberación de Apple, se utiliza por primera vez en el iPhone X; que permite a los usuarios desbloquear los dispositivos de Apple, la compra en cada Apple Digital Media Store, y como Apple Pay o Aplicaciones El método de autenticación paga dentro.

    Compromiso de seguridad de Apple

    Apple presume de que Face ID ofrece una probabilidad entre un millón de ser desbloqueado por un usuario no autorizado. Face ID destaca por su enfoque de la seguridad de los datos. A diferencia de algunos sistemas que almacenan datos confidenciales en la nube, el Face ID de Apple almacena la información de reconocimiento facial en un enclave seguro dentro del chip Apple A11 Bionic. Esto garantiza que sus datos personales permanezcan en su dispositivo y en la nube.

    Dispositivos compatibles

    Presentado inicialmente con el iPhone X, Face ID ha formado parte de varios dispositivos de Apple, entre ellos:

    • iPhone X, Xʀ, Xs/Max, 11, 11 Pro/Max, 12/Mini y 12 Pro/Pro Max
    • iPad Pro (tercera y cuarta generación)

    Cómo funciona Face ID

    Face ID se basa en un proceso de varios pasos para identificar con precisión al usuario:

    1. Iluminación e imágenes infrarrojas: Face ID ilumina primero la cara del usuario con luz infrarroja y captura una imagen infrarroja 2D mediante un sensor de luz.
    2. Reconocimiento de cámaras de infrarrojos: A continuación, una cámara de infrarrojos escanea el rostro del usuario para captar sus rasgos distintivos.
    3. Proyección de matriz de puntos: Más de 30.000 puntos infrarrojos codificados se proyectan sobre el rostro del usuario. Estos puntos se reflejan en la cámara de infrarrojos, creando un mapa 3D de la superficie de la cara.
    4. Tratamiento de datos: Se analiza el desfase entre la imagen infrarroja original y los puntos infrarrojos reflejados, construyendo un modelo 3D preciso de la cara del usuario.
    5. Transformación matemática: La imagen infrarroja y el modelo 3D se envían al procesador del aparato, donde se transforman en una expresión matemática.
    6. Comparación de caras: El dispositivo compara la expresión matemática con los datos faciales previamente registrados, determinando si concede el acceso.

    Características adicionales

    Face ID incorpora varias funciones para mejorar la seguridad y la precisión:

    • Proyector: La luz infrarroja invisible ayuda a la identificación facial, incluso en condiciones de poca luz. Esto garantiza que el sistema pueda discernir si los ojos del usuario están abiertos y mirando hacia el dispositivo.
    • Proyector matricial de puntos: Más de 30.000 puntos invisibles se proyectan sobre el rostro del usuario para construir un modelo facial 3D preciso. La disposición de estos puntos es distinta para cada individuo.
    • Cámara de infrarrojos: Esta cámara captura una imagen infrarroja 2D mientras lee el patrón único de matriz de puntos. A continuación, los datos se analizan y se envían al enclave seguro dentro del chip A11 Bionic para su comparación.

    Proveedor técnico: Face ID incorpora tecnología de Sensomotoric INSTRUMENTS, utilizando PrimeSense Structural Light Technology y Faceshift para la tecnología de captura facial.

    Conclusión:

    El Face ID de Apple no es solo una forma cómoda de desbloquear tu dispositivo; es un sistema de reconocimiento facial sofisticado y muy seguro que aprovecha la tecnología más avanzada para garantizar tu privacidad y seguridad. Con funciones como iluminación, proyección de matriz de puntos e imágenes infrarrojas, no es de extrañar que Face ID se haya convertido en un referente de la autenticación biométrica segura en el mundo de la tecnología. A medida que Apple continúe innovando, podemos esperar desarrollos aún más emocionantes en este espacio.

  • Cómo arreglar el Face ID del iPhone 11 Pro Max que no funciona

    Cómo arreglar el Face ID del iPhone 11 Pro Max que no funciona

    Las piezas del proyector de puntos son extremadamente frágiles. Una caída o daños por agua pueden dañar las piezas del proyector de puntos, lo que provoca que Face ID no funcione.

    Este artículo explora un método innovador desarrollado por REWA LAB para reparar Face ID, haciéndolo accesible y eficaz.

    El problema

    El corazón de Face ID radica en el circuito integrado (IC) del proyector de puntos, un componente crítico y encriptado. Reemplazar este IC requiere un proceso complejo que involucra la unión de encriptación de datos, lo cual los técnicos de reparación suelen encontrar intimidante.

    La solución

    Afortunadamente, REWA LAB ha ideado un enfoque optimizado y eficiente para resolver los problemas de Face ID.

    La guía paso a paso presentada aquí le ayudará a comprender y realizar el procedimiento de reparación.

    Paso 1: Diagnóstico inicial

    • Comienza navegando a la configuración de tu dispositivo, luego selecciona “Face ID y código” y “Configurar Face ID”.”
    • Durante el proceso de configuración, es posible que aparezca el mensaje “Mueve el iPhone un poco más abajo/arriba”. Esto indica un fallo en el proyector de puntos.

    Paso 2: Desmontaje

    • Para acceder al proyector de puntos, retire la pantalla del dispositivo.
    • Si observa una marca roja, sugiere que el teléfono ha sufrido daños por agua.
    • Conecte el cable flex del proyector de puntos al programador de reparación I2C y realice una prueba de diagnóstico, confirmando un mal funcionamiento.

    Paso 3: Transferencia de datos y reparación del cristal

    • Utilice el programador para leer los datos del cable flexible defectuoso.
    • Reemplace el cable flexible por uno nuevo y transfiera los datos leídos anteriormente.
    • Aplique una pequeña cantidad de adhesivo UV para asegurar el cristal del cable flexible del proyector de puntos utilizando una lámpara UV.

    Paso 4: Extracción del proyector de puntos

    • Retira la espuma que cubre la parte trasera del proyector de puntos.
    • Para una alineación precisa durante el reensamblaje, marque el módulo con un cuchillo para escultura.
    • Levanta la placa metálica para acceder al cable flexible del proyector de puntos que se encuentra debajo.
    Paso 5: Trabajo de precisión

    • Utilice un dispositivo de sujeción para la manipulación precisa del módulo de Face ID.
    • Esmerila la posición de soldadura de la placa de metal para acceder al proyector de puntos.
    • Desprenda con cuidado el módulo del proyector de puntos usando una pistola de aire caliente.
    • Retire el MOSFET calentando a 320 °C.

    Paso 6: Soldadura y reensamblaje

    • Aplique pasta de soldar a la almohadilla de unión con un soldador y haga un puente entre los pines 2 y 3 del MOSFET usando alambre de cobre de 0.02 mm.
    • Limpie el módulo del proyector de puntos con resina y malla de soldadura, seguido de un limpiador de placas de circuito impreso (PCB).
    • Rebaja el nuevo cable flexible, aplica pasta de flux y suelda al módulo del proyector de puntos.

    Paso 7: Pruebas y ensamblaje final

    • Conecta el cable flex soldado al programador I2C y ejecuta una prueba.
    • Si la prueba es exitosa, conecte el cable flexible al dispositivo de sujeción y alinéelo con el módulo del proyector de puntos.
    • Aplique Adhesivo 460 para asegurar los componentes.
    • Instala el cable flex en el teléfono.
    • Enciende el dispositivo y configura los ajustes de Face ID.
    Conclusión:

    Siguiendo estos minuciosos pasos, puedes restaurar con éxito la funcionalidad de Face ID de tu dispositivo. La falla se eliminará y tu teléfono recuperará su función de autenticación segura y conveniente. 

    No dude en visitar nuestra tienda en línea para piezas de reparación y herramientas.

    Mira el vídeo a continuación para obtener una reparación más detallada del Face ID del iPhone 11 Pro Max.

  • Reparación del Face ID del iPhone X que no funciona

    Reparación del Face ID del iPhone X que no funciona

    With the diffused application of Face ID on iPhone X – 11 series, Face ID failure also appears at a high frequency.

    As our previous Vídeo de desmontaje de Face ID has introduced, Face ID can be easily damaged and hardly repaired. If the problem is related to the flex cable, then it’s simple.

    However, based on statistics of REWA chip-level motherboard repair service, Face ID failure is caused by damage of the Flood illuminator/Dot Projector in most cases, which can not be repaired.

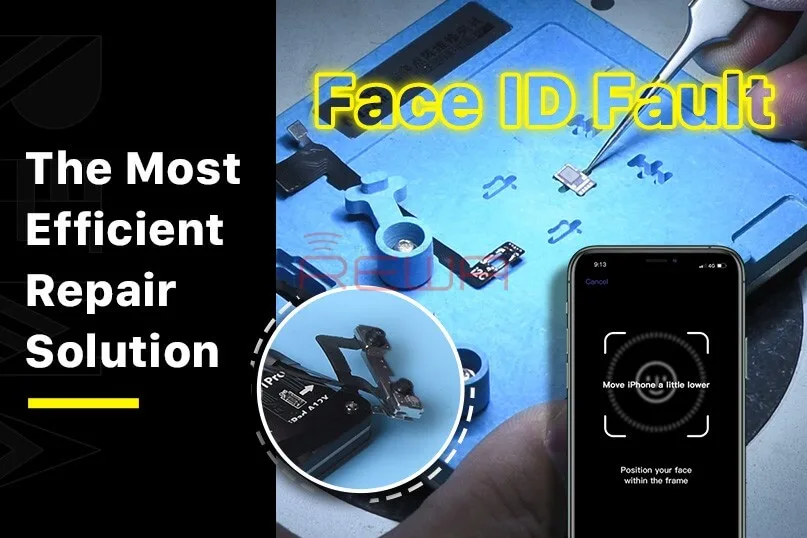
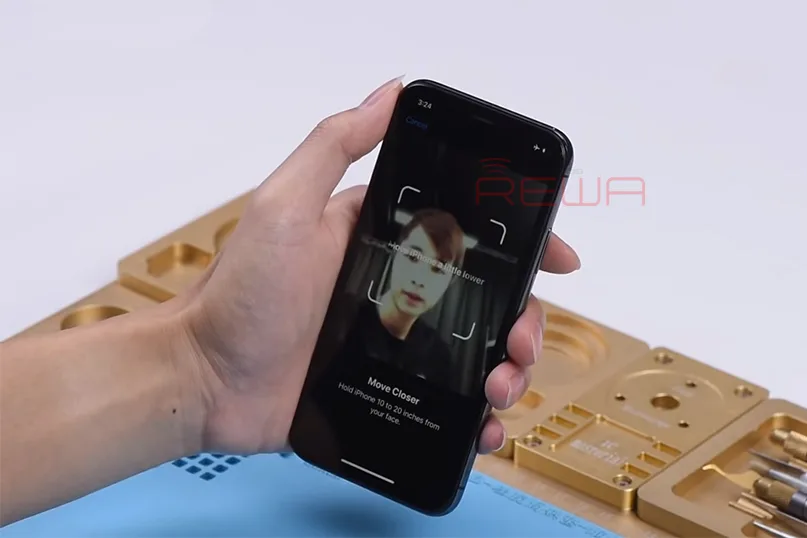
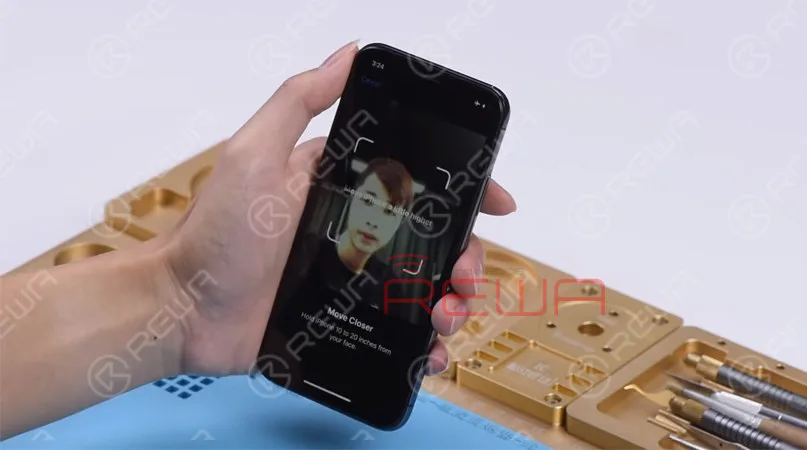
    La configuración de Face ID no funciona.

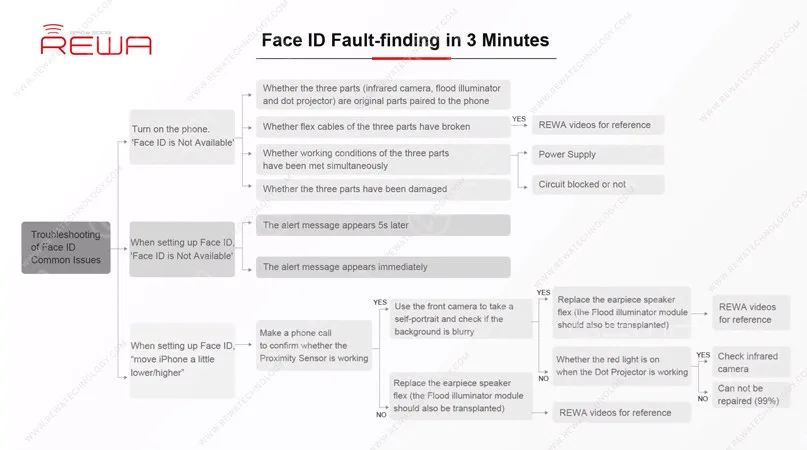
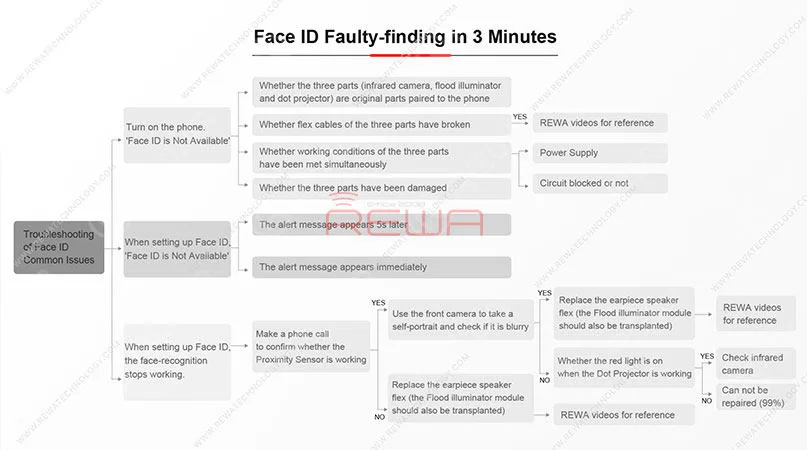
    Hoy queremos compartir un caso sobre ‘mover el iPhone un poco más abajo/arriba al configurar Face ID’ y mostraros cómo nuestros técnicos detectan el fallo en 3 minutos con la ayuda de los trucos de reparación exclusivos de REWA para la resolución de problemas de Face ID. ¡Empecemos!

    Face ID no funciona. Fallo de funcionamiento.

    El teléfono sigue enviando mensajes: ‘mueva el iPhone un poco más abajo/arriba’ durante el proceso de configuración de Face ID. Esto significa que Face ID no se puede configurar correctamente en el teléfono.

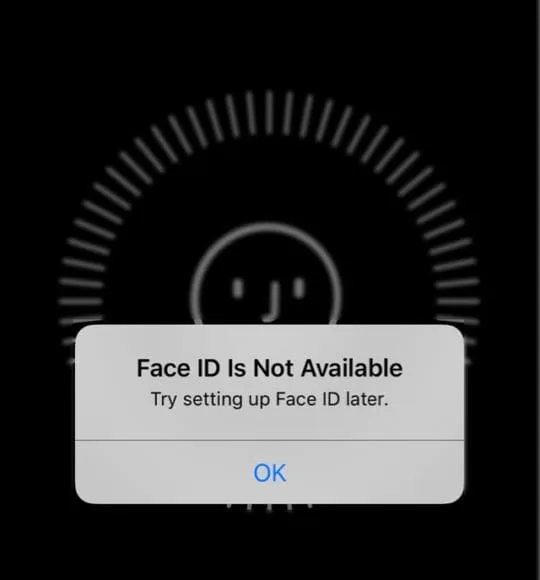
    Face ID no está disponible.

    Face id not available troubleshooting

    Ahora, vamos a averiguar cuál es el fallo paso a paso.

    Paso 1 Prueba del iluminador de inundación

    Based on REWA exclusive repair tricks, let’s start with the Flood Illuminator. There are two important Face ID parts whose behavior relies on the support of the Flood Illuminator. In our daily repair work, we can test the Proximity Sensor and the Ambient Light Sensor to confirm whether the Flood Illunmunator is working normally.

    ¿Por qué no funciona mi Face ID?

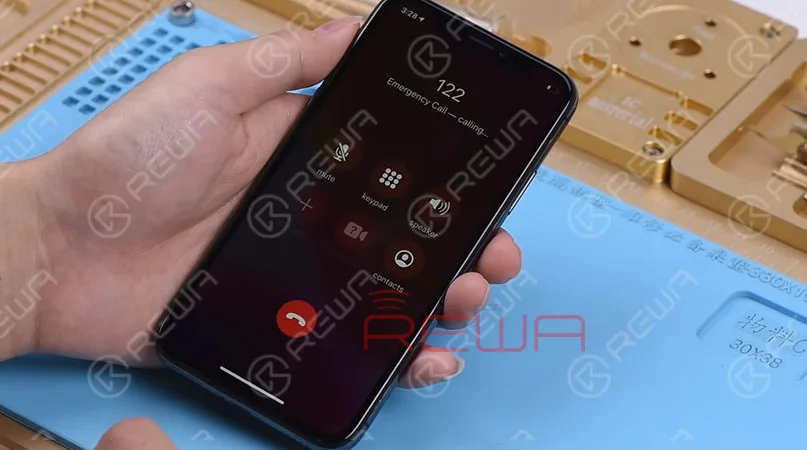
    Let’s make a phone call to confirm whether the Proximity Sensor is working.

    Durante la llamada telefónica, cubra la parte superior de la pantalla con una mano.

    We can see that the screen turns black immediately.

    Judging by this, the Proximity Sensor is working normally.

    how to fix face id

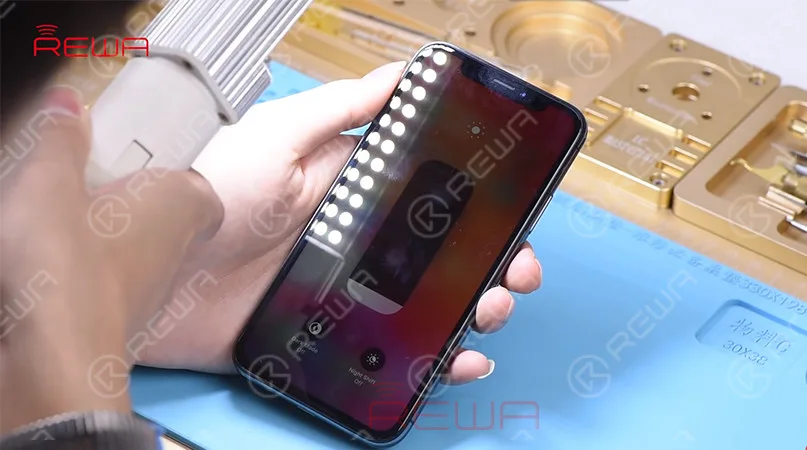
    A continuación, comprueba el sensor de luz ambiental. Ajusta el brillo de la pantalla al mínimo y luego sostén el teléfono bajo una luz brillante.

    With the screen getting brighter, we can confirm that the Ambient Light Sensor is also working normally. Judging by this, the Face ID failure is not caused by Flood Illuminator.

    my face id wont work

    Paso 2: Prueba las piezas de la cámara frontal

    Pasemos al siguiente paso de face id no funciona – Prueba las piezas de la cámara frontal.

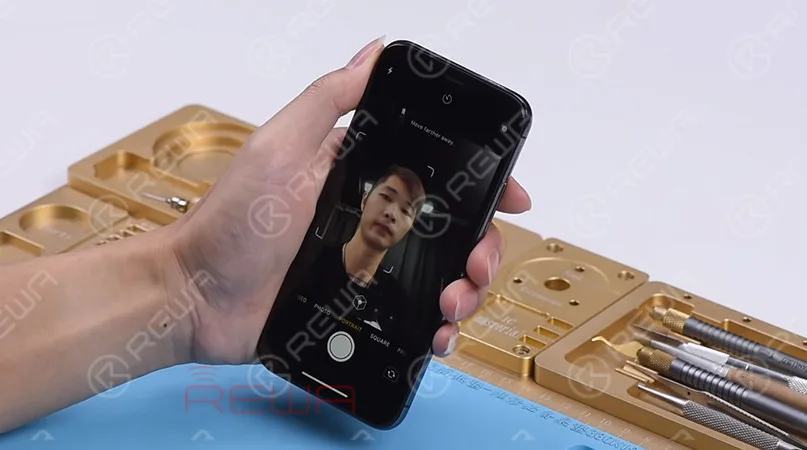
    Abre la aplicación de la cámara y desliza el dedo hasta el modo Retrato. El fondo no se ve borroso, lo cual es anormal.

    why is face id not working

    Paso 3 Observación del proyector de puntos

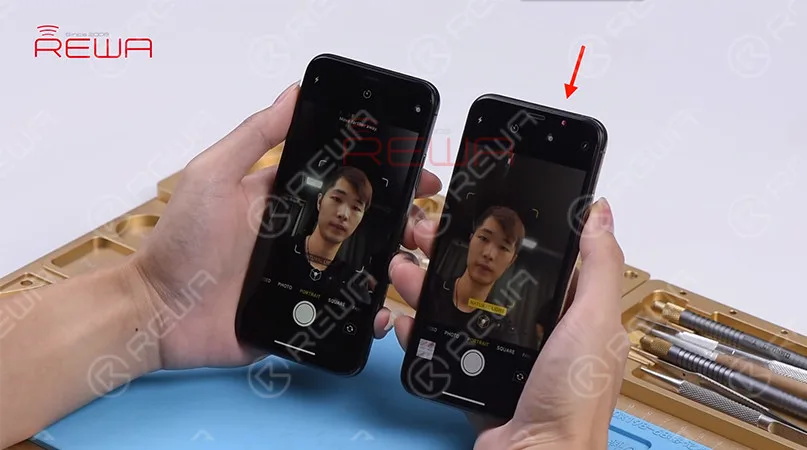
    At the Portrait Mode, there is no flashing red light from the Dot Projector.

    But the Dot Projector should emit flashing red light in normal status.

    We can confirm now that the Dot Projector has malfunctioned.

    This is the fault that causes the Face ID to set up failure. And the problem cannot be fixed.

    why wont my face id work

    Consejos:

    Las tres partes (cámara infrarroja, iluminador de inundación y proyector de puntos) están emparejadas con el teléfono. El daño de cualquiera de ellas puede provocar un fallo en Face ID y dicho problema es irreparable.

    Right now, Face ID failure has become a common problem in our daily repair work.

    Whether the problem you are dealing with can be repaired or not is really an important thing for repair technicians.

    ¡No te preocupes! Trucos de reparación exclusivos de REWA en face id no funciona puede ser una gran referencia para los técnicos de reparación a la hora de localizar las posiciones defectuosas y mejorar la eficiencia de las reparaciones.

    Para obtener más información sobre este caso, consulte el vídeo de YouTube que aparece a continuación.

    ¿Desea adquirir conocimientos básicos sobre la placa base del iPhone, dominar las técnicas de microsoldadura del iPhone, comprender el flujo de trabajo de los distintos circuitos del iPhone, dominar los procesos de solución de distintos problemas del iPhone y aprender los pasos detallados de restauración de la pantalla y el cristal trasero?

    Academia REWA es una plataforma que ofrece aprendizaje de técnicas de reparación, demostraciones prácticas e intercambio de ideas para profesionales del sector de la reparación electrónica.

    You can also click the course link below to know more!

  • The Vulnerabilities of Face ID: Why Face ID Can Be Easily Damaged and Hardly Repaired?

    The Vulnerabilities of Face ID: Why Face ID Can Be Easily Damaged and Hardly Repaired?

    As a facial-recognition technology initially launched on iPhone X, Face ID has been applied to latest iPhones, including iPhone XS,XS Max and XR. With this amazing Face ID system, users can unlock their devices by scanning and confirming facial identity. Whether you are wearing a hat, putting on glasses or you are in the dark.

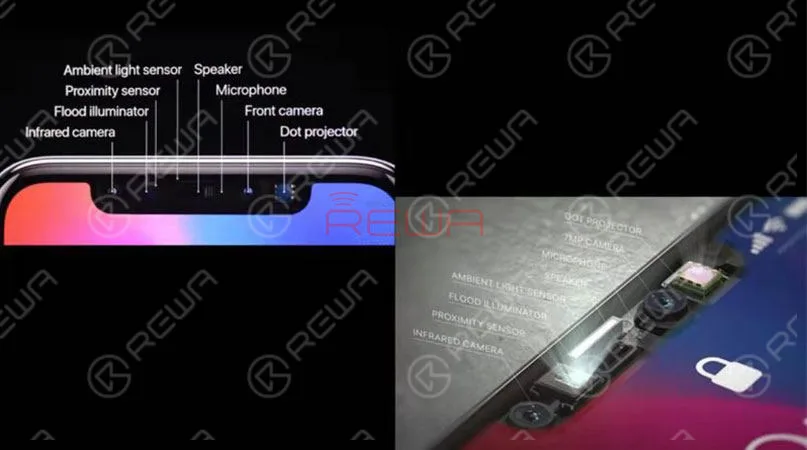
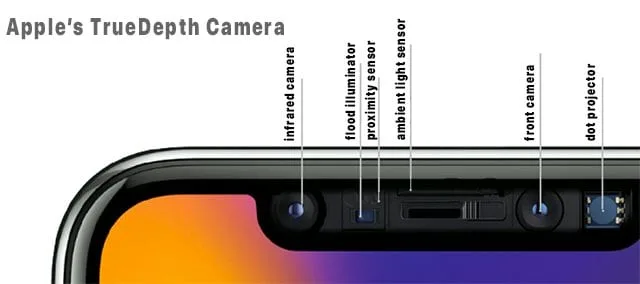
     There are 8 components packed into the front of the phone.   Infrared Camera   Flood Illuminator   Proximity Sensor   Ambient Light Sensor   Speaker   Microphone   Front Camera

    There are 8 components packed into the front of the phone.

    • Cámara de infrarrojos
    • Flood Illuminator
    • Proximity Sensor
    • Ambient Light Sensor
    • Speaker
    • Micrófono
    • Cámara frontal

    Dot ProjectorThe infrared camera, the dot projector and the front camera are located on the back glass assembly. The flood illuminator, the proximity sensor, the ambient light sensor, the speaker and the microphone are located on the display assembly. Please be careful when disassembling or repairing the phone. Damage of any component will cause Face ID failure.

    Next, we will disassemble the flood illuminator module and the dot projector and find out the reason why Face ID can be so easily damaged.

     Next, we will disassemble the flood illuminator module and the dot projector and find out the reason why Face ID can be so easily damaged.

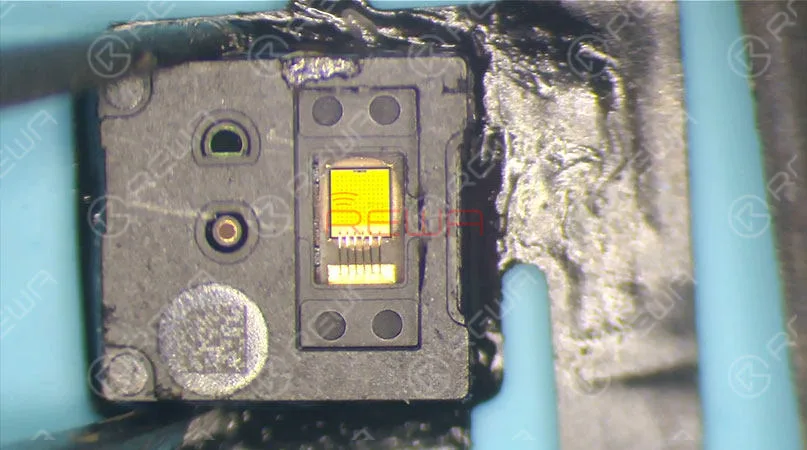
    Let’s disassemble the flood illuminator module first. Pry open the glass cover with a blade. We can see that there are many holes on the flood illuminator that are arranged in a matrix of 11×11. The chip is connected to the circuit board with the help of gold wires. Once water damaged, these holes can be blocked. And you will be faced up with Face ID failure.

    Let’s continue!

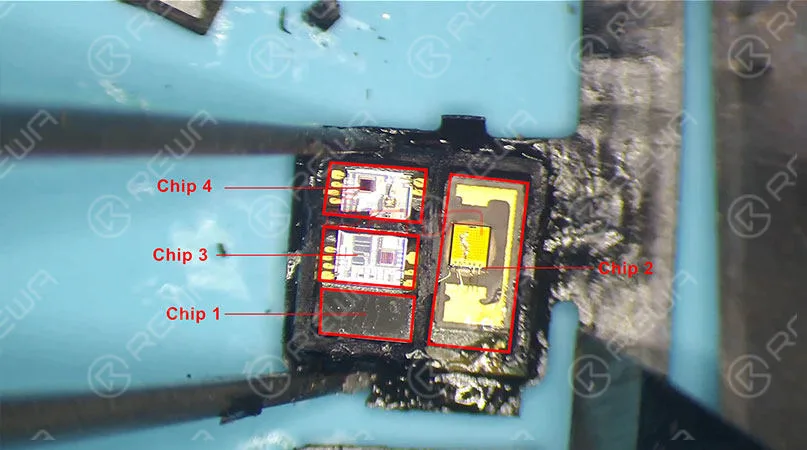
     Chip 1 is an unencrypted chip. Since some repair technicians have replaced it before, our guess is that chip 1 might be a boost chip or an EEPROM chip. So chip 2, chip 3, or chip 4 might be the encrypted chip. Still, due to the difficulty of replacing, no one has verified that. As you can see, with thousands of components integrated, the composition of the flood illuminator module is very precise.   Chip 2 is the flood illuminator.   Chip 3 and Chip 4 are proximity sensors that are responsible for receiving and transmitting respectively. The infrared light emitted from the two proximity sensors could be a single dot or a single set of dots. Independent of each other, the three chips are indispensable. And this is what you should know about the flood illuminator module.

    Chip 1 is an unencrypted chip. Since some repair technicians have replaced it before, our guess is that chip 1 might be a boost chip or an EEPROM chip. So chip 2, chip 3, or chip 4 might be the encrypted chip. Still, due to the difficulty of replacing, no one has verified that. As you can see, with thousands of components integrated, the composition of the flood illuminator module is very precise.

    Chip 2 is the flood illuminator

    Chip 3 and Chip 4 are proximity sensors that are responsible for receiving and transmitting respectively. The infrared light emitted from the two proximity sensors could be a single dot or a single set of dots. Independent of each other, the three chips are indispensable. And this is what you should know about the flood illuminator module. Let’s move on to the dot projector.

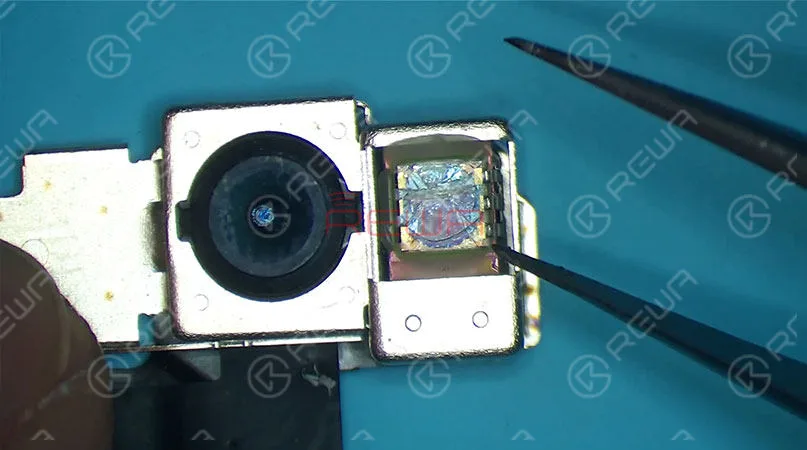
    En camera parts of iPhone X work in the same way as front cameras of other iPhone series. Now we will focus on the dot projector. The outer layer of the dot projector is sealed with resin and protected by metal welding techniques. Pay attention to these welding points.

    Easily Damaged And Hardly Repaired

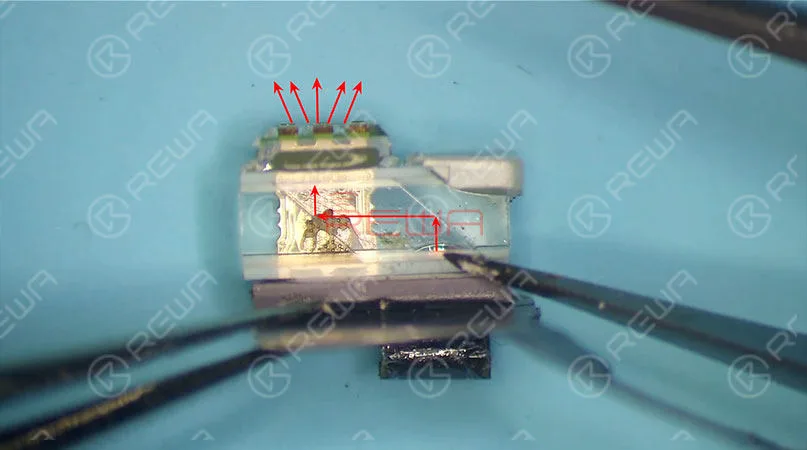
    They can easily fall off once the phone is dropped. And once off, they cannot be restored. When disassembling, we need to cut open the outer metal cover at first. Then heat with the Pistola de aire caliente and remove the resin with tweezers. Once the dot projector has been detached, we can see a crystal that looks just like a diamond lens. The infrared light is emitted from here. Then reflected by the crystal. Its projection range is determined by the lens afterwards.

     They can easily fall off once the phone is dropped. And once off, they cannot be restored. When disassembling, we need to cut open the outer metal cover at first. Then heat with the Hot Air Gun and remove the resin with tweezers. Once the dot projector has been detached, we can see a crystal that looks just like a diamond lens. The infrared light is emitted from here. Then reflected by the crystal. Its projection range is determined by the lens afterwards.

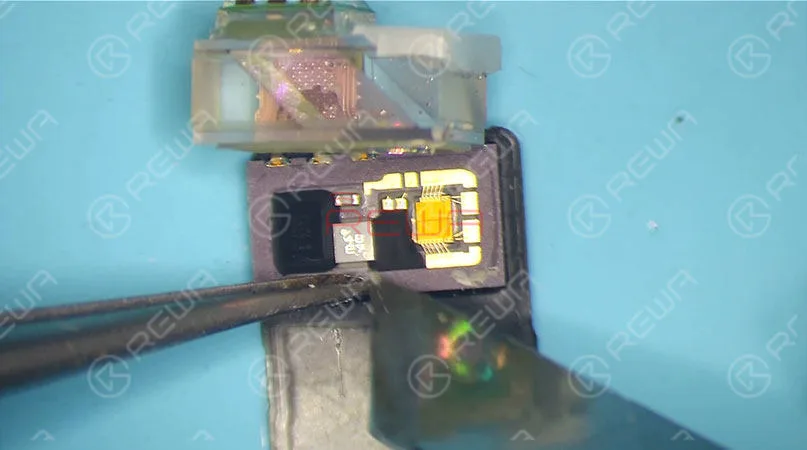
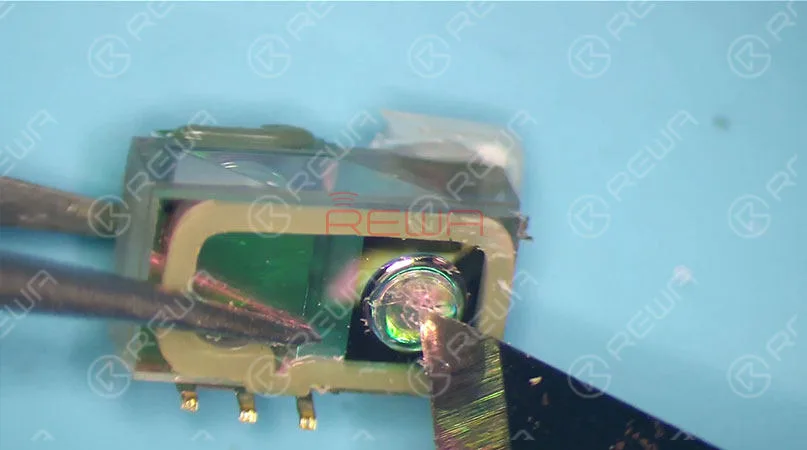
    Pry open the crystal, here we can see the complete internal structure of the dot projector.

    Pry open the crystal, here we can see the complete internal structure of the dot projector.

    The chip on the left is used to store data, whereas the chip on the right side acts just like a projector. We can see that there are thousands of dots arranged here. The infrared light is emitted from here. Since necessary power supply is needed for chip on the right side to work normally, once water damaged, circuits here are most likely to get short. Which can also result in Face ID not working. And please be noted that the chip is exposed without black adhesive seal. So it can be easily damaged once water-damaged or dropped. What’s more, it also can not be restored once damaged. And this is the internal structure of the dot projector. Let’s continue with the crystal part of the dot projector.

    The chip on the left is used to store data, whereas the chip on the right side acts just like a projector. We can see that there are thousands of dots arranged here. The infrared light is emitted from here. Since necessary power supply is needed for chip on the right side to work normally, once water damaged, circuits here are most likely to get short. Which can also result in Face ID not working. And please be noted that the chip is exposed without black adhesive seal. So it can be easily damaged once water-damaged or dropped. What’s more, it also can not be restored once damaged. And this is the internal structure of the dot projector. Let’s continue with the crystal part of the dot projector.

    We can see that there is a concave lens and a convex lens on the crystal. And the two are made of glass. Once dropped, Face ID can also be affected.

    Judging by what we have learned during the disassembling, main circuits of the Face ID are exposed. Once water damaged or exposed to a relatively humid environment, there might be electricity leakage or short-circuit problem that can result in Face ID failure. What’s more, most of the Face ID parts are made of glass. Once dropped, Face ID is most likely to be unavailable.

     We can see that there is a concave lens and a convex lens on the crystal. And the two are made of glass. Once dropped, Face ID can also be affected.  Judging by what we have learned during the disassembling, main circuits of the Face ID are exposed. Once water damaged or exposed to a relatively humid environment, there might be electricity leakage or short-circuit problem that can result in Face ID failure. What’s more, most of the Face ID parts are made of glass. Once dropped, Face ID is most likely to be unavailable.

    In summary, Face ID can be easily damaged and hard to be restored. Therefore, please be very careful in daily use. Make sure the phone is protected from water-damage or heavy falling. Repair technicians must exercise caution when repairing the logic board or replacing the display assembly. Also, for those in need, we have summarized repair experience of REWA repair technicians and hereby present you the following troubleshooting guide on common Face ID failure.

    Here is the detailed video for your reference.

    Al reparar placas lógicas de iPhone, primero identificamos el problema, luego averiguamos por qué ocurrió y, por último, determinamos cómo solucionarlo. Este es un proceso general adoptado por técnicos de reparación profesionales de todo el mundo.

    ¿Quieres ser un técnico de reparación profesional y manejar reparaciones difíciles de iPhone? Necesitas cursos de formación sistemáticos sobre Academia REWA.