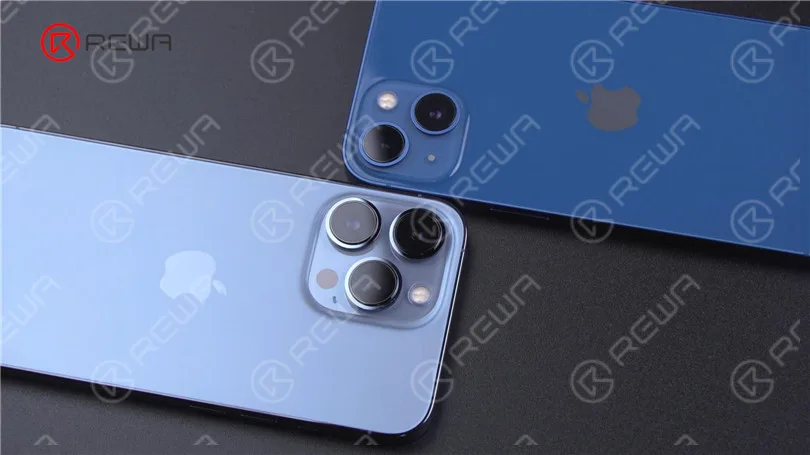
Etiqueta: desmontaje del iphone

  • iPhone 18 Pro Teardown: What Changed Inside and How Does It Affect Repairability

    iPhone 18 Pro Teardown: What Changed Inside and How Does It Affect Repairability

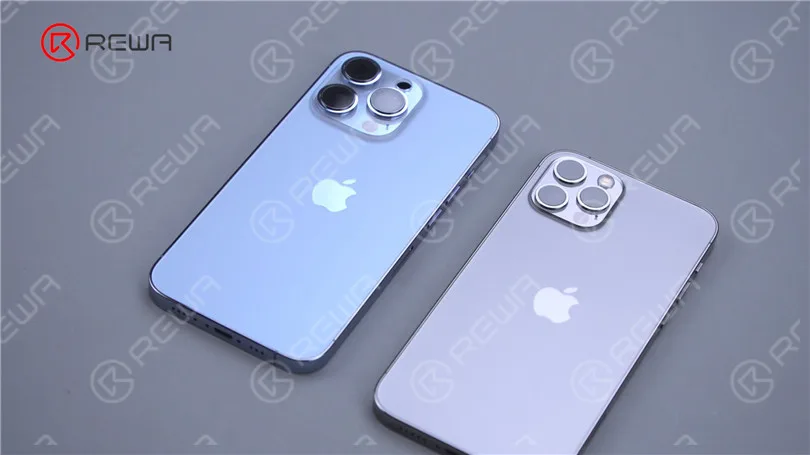
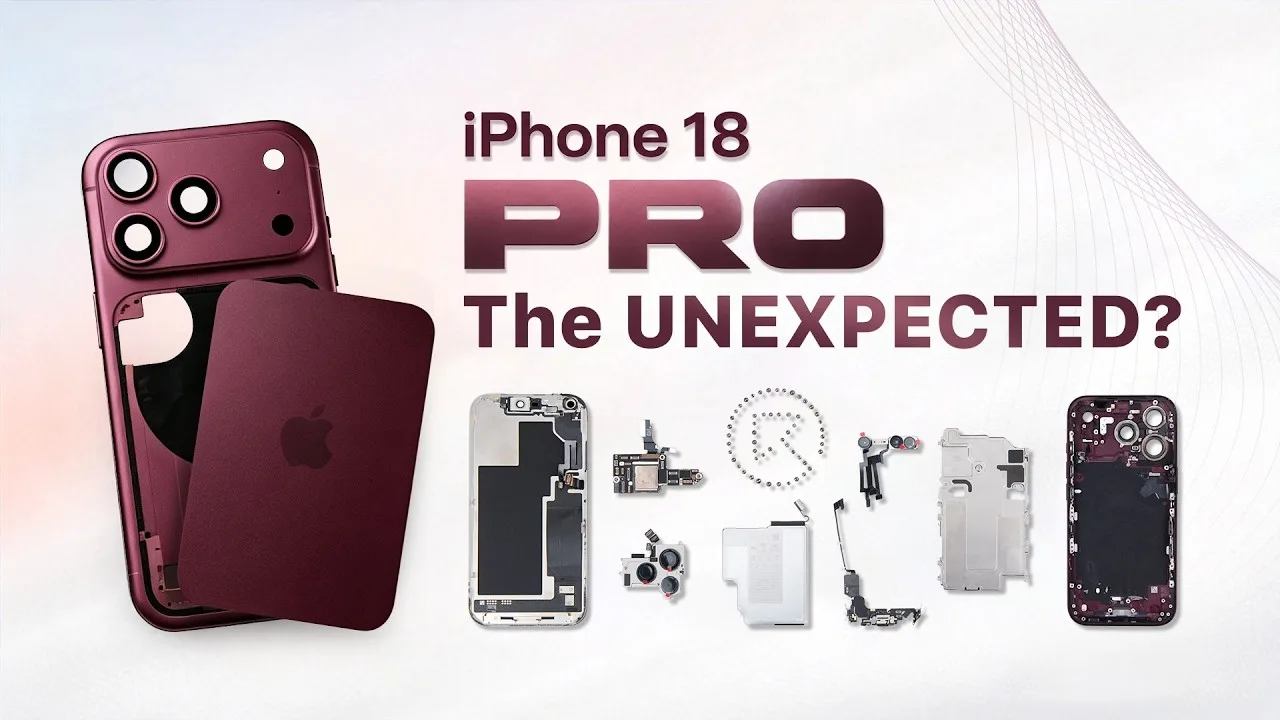
    The iPhone 18 Pro brings several significant changes beneath its familiar exterior. From a smaller Dynamic Island and a new under-display infrared camera to a dramatically larger vapor chamber and a redesigned motherboard layout, Apple has changed more than just the phone’s appearance.

    In this full teardown by REWA Lab, we dive deep into the internal structural changes and analyze what these updates mean for third-party repair shops and aftermarket component manufacturers.

    Step-by-Step Disassembly Process

    Opening the iPhone 18 Pro requires specialized repair tools and a cautious approach to avoid damaging internal flexes and sensors. Standard safety and prep steps are as follows:

    Preparation Before Teardown: Power off the device and remove the bottom screws with the Pentalobe screwdriver.
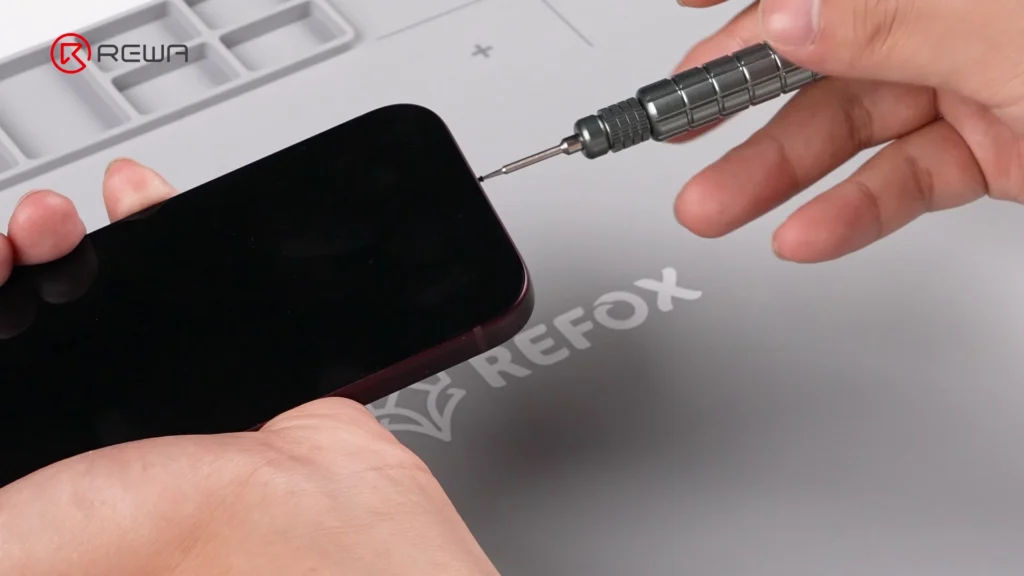
    Removing the bottom screw of an iPhone using a precision Pentalobe screwdriver

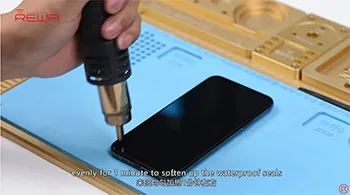
    Screen Removal: Heat the screen to soften the perimeter waterproof adhesive. Use an opening tool with suction cup and alcohol isopropílico to gently slice through the seal with an opening pick.

    Camera Protection: Cover the front camera module with protective sponge stickers to prevent dust or scratches.

    Bracket & Flex Cable Disconnection: Unscrew and remove the battery and display connector bracket. Disconnect the battery flex cable, display cable, and front sensor cable to free the screen.

    Vapor Chamber & Cameras: Unscrew the vapor chamber using a 4IP screwdriver. Disconnect and remove the front / rear camera modules.
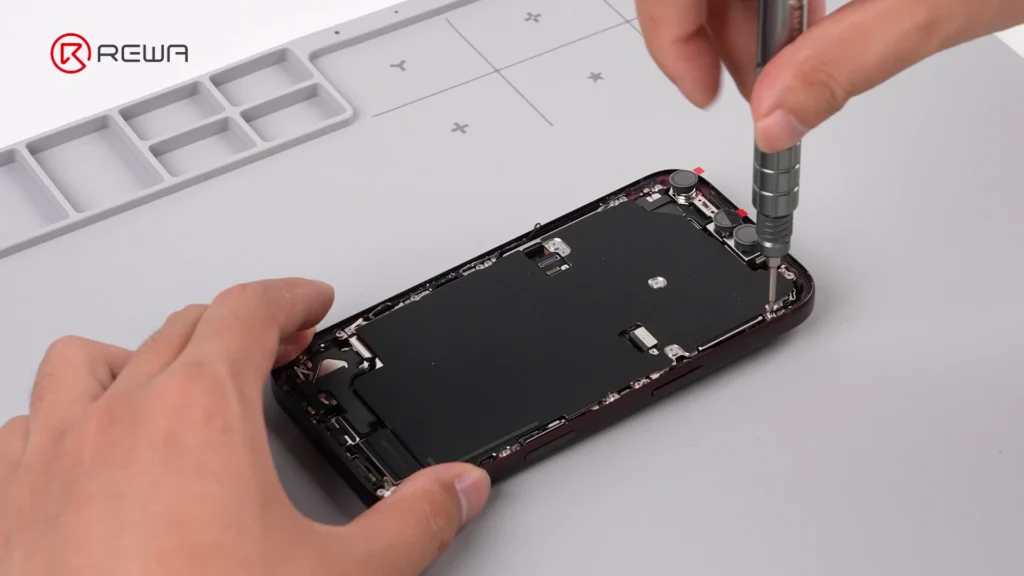
    using a screwdriver to open iPhone 18 Pro for teardown

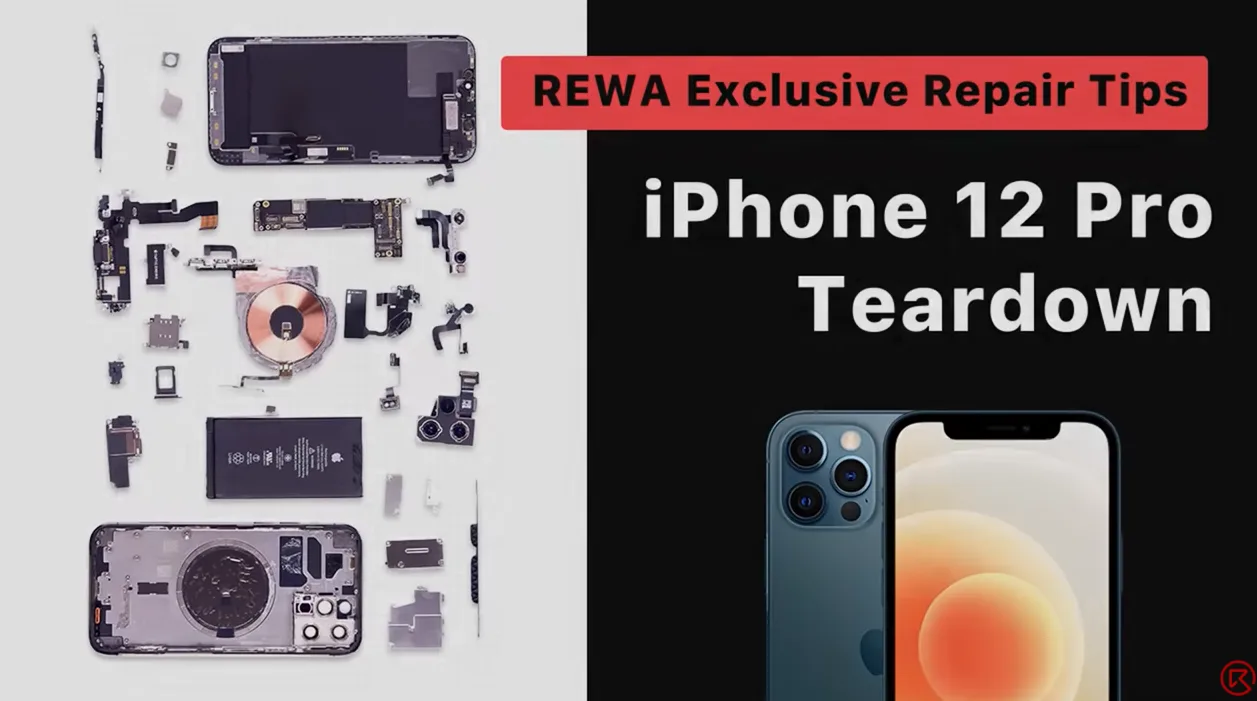
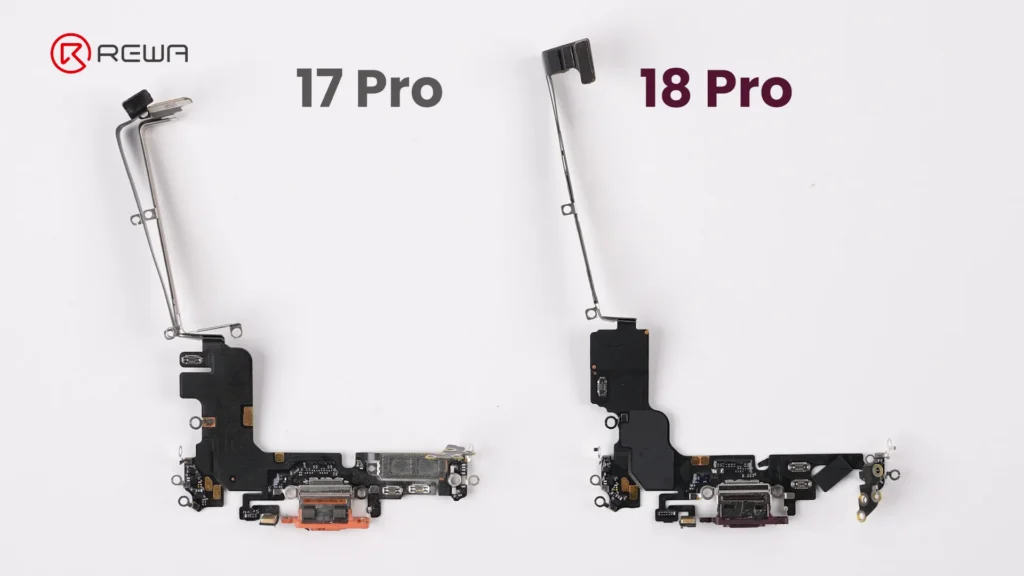
    Motherboard & Peripheral Removal: Unscrew and flip over the motherboard to disconnect the wireless charging coil. Remove flashlight, LiDAR, SIM tray, SIM card reader, bottom speaker, charging port, Taptic Engine, and microphone in sequence.
    iphone 18 pro teardown what changed inside how does it affect 3

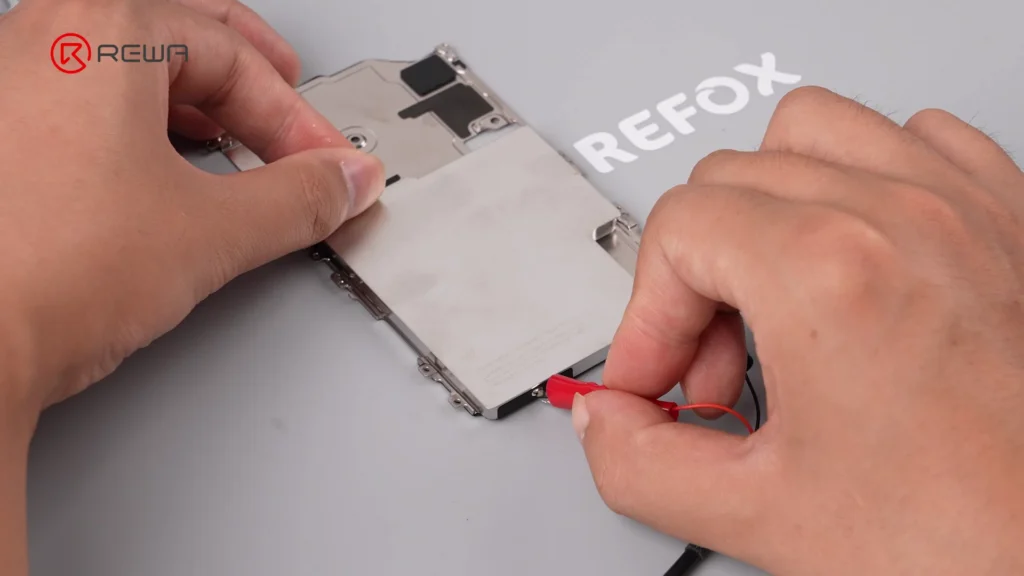
    Battery Debonding: Apply a 9V DC voltage between the silver battery tab (positive probe) and the vapor chamber (negative probe) to electronically deactivate the adhesive, allowing easy battery removal.
    iphone 18 pro teardown what changed inside how does it affect 4

    Display & Dynamic Island: Under-Display Infrared Tech

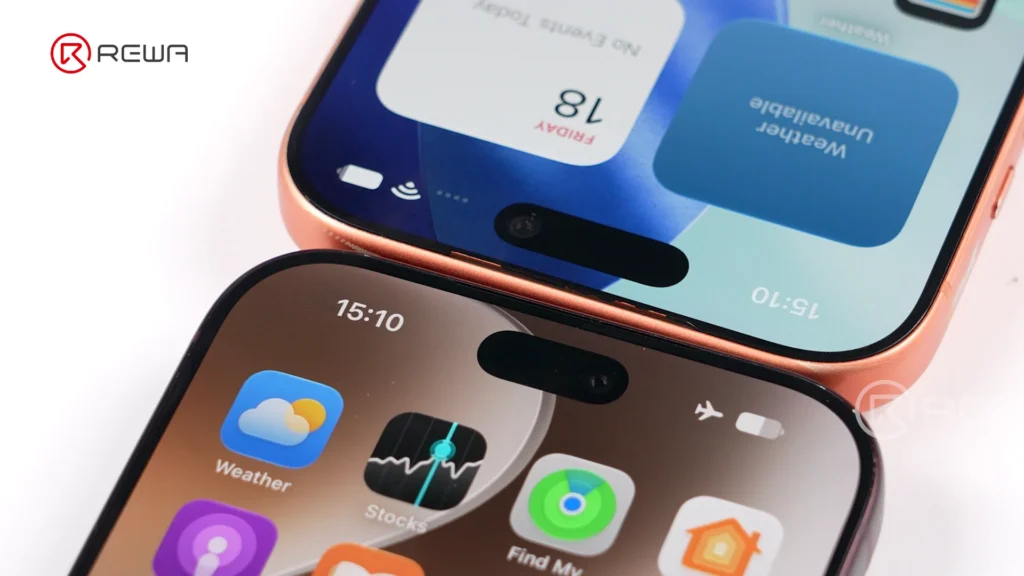
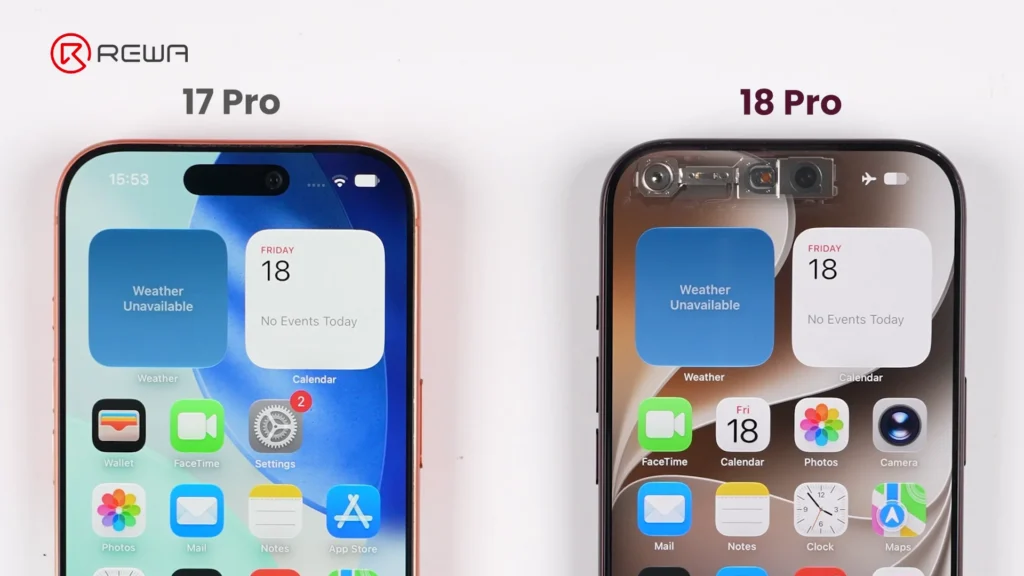
    Apple’s smaller Dynamic Island introduces a more complex under-display optical structure, creating new challenges for display refurbishment. This shrink is achieved by relocating the infrared camera under the display assembly and positioning it near the screen corner.
    iphone 18 pro teardown what changed inside how does it affect 5
    iphone 18 pro teardown what changed inside how does it affect 6

    Key display architecture updates include:

    Adjusted Pixel Matrix: The display above the infrared camera features a modified pixel density and arrangement to allow infrared light transmission for Face ID functionality.

    iphone 18 pro teardown what changed inside how does it affect 7

    Unfixed Flex Cable: The display flex cable is no longer secured with heavy adhesive, making screen separation cleaner during repair and refurbishment.

    Aftermarket Challenge: Third-party display manufacturers will face higher precision requirements to replicate the light-transmitting pixel window for Face ID functionality.

    Motherboard Architecture: Higher Difficulty for Micro-Soldering

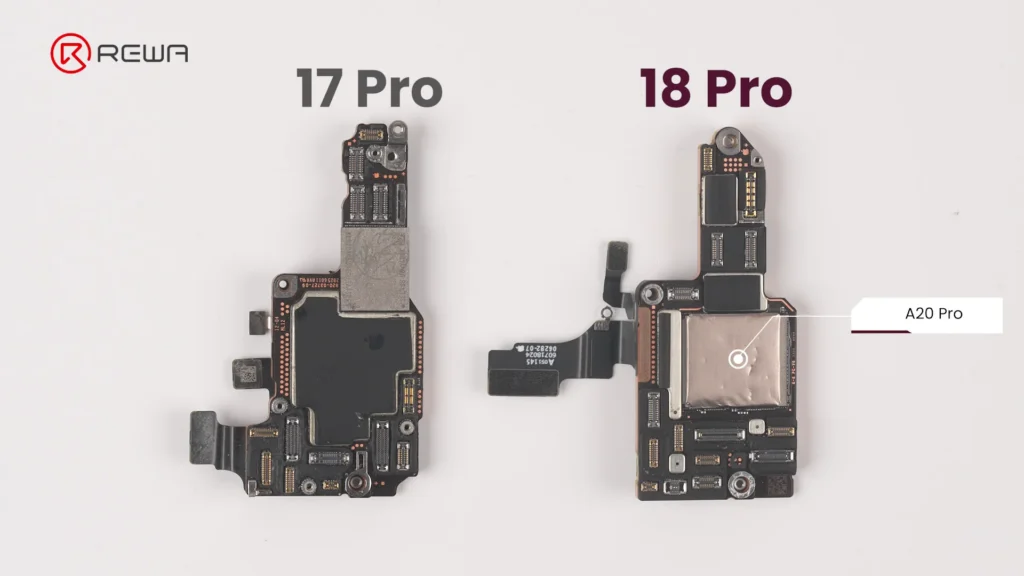
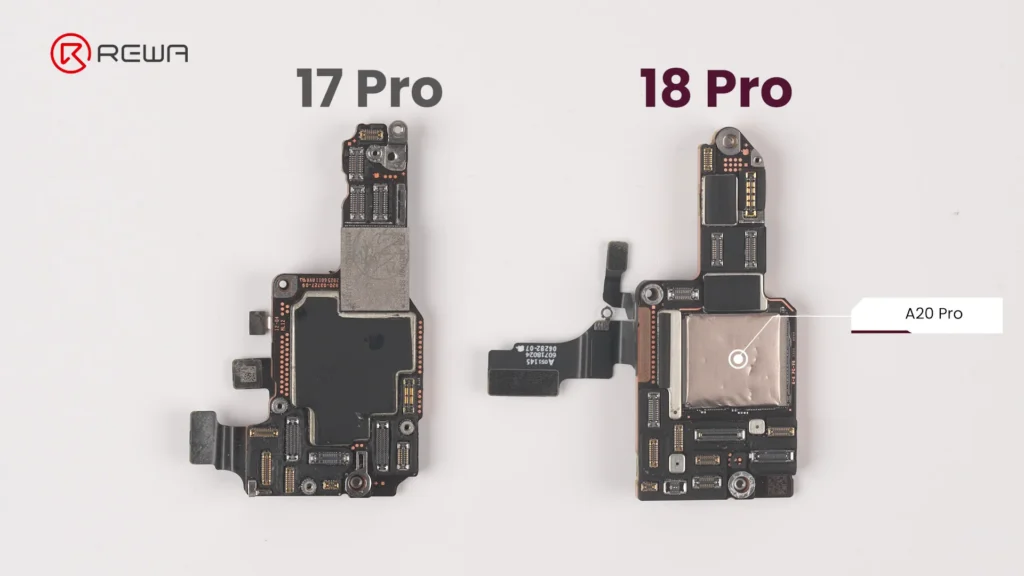
    The updated motherboard layout places crucial chips in vulnerable locations while sandwiching NAND and power IC between layers. For micro-soldering technicians, the iPhone 18 Pro motherboard presents an elevated level of complexity.
    iphone 18 pro teardown what changed inside how does it affect 8

    Apple has reorganized chip placement and shielding:

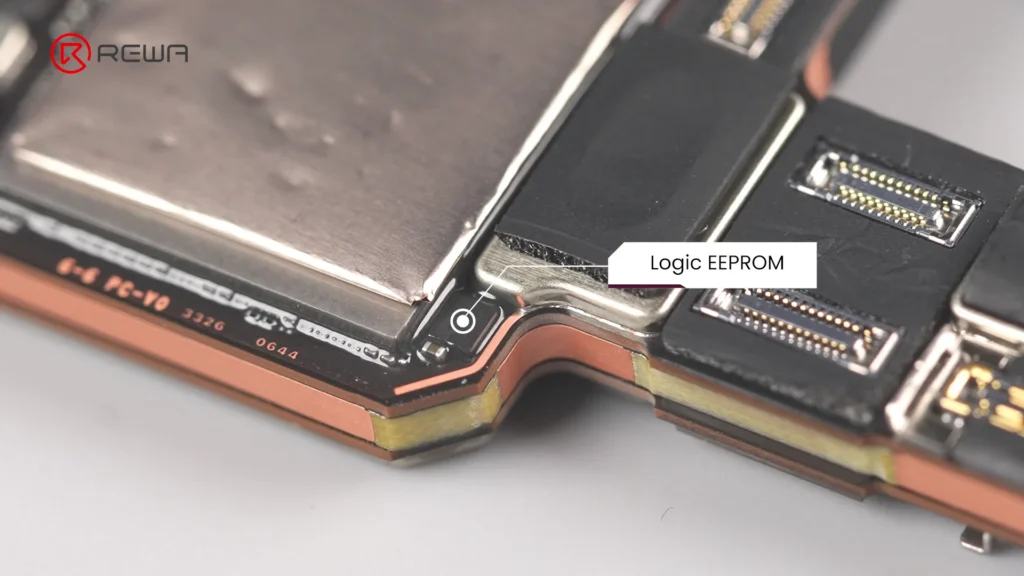
    Exposed Logic EEPROM: The Logic EEPROM chip on the board surface lacks a protective metal shield, leaving it significantly more susceptible to physical damage and technician error.
    iphone 18 pro teardown what changed inside how does it affect 9

    Layered Sandwich Design: The NAND storage chip and Power IC are sandwiched inside the multi-layer PCB structure. Replacing or repairing these components requires demanding motherboard desoldering and reballing.

    Relocated A20 Pro Chip: The main processor sits directly on the motherboard surface, and in direct contact with the vapor chamber for substantial improvement in thermal performance.
    iphone 18 pro teardown what changed inside how does it affect 10

    Upgraded Camera Modules

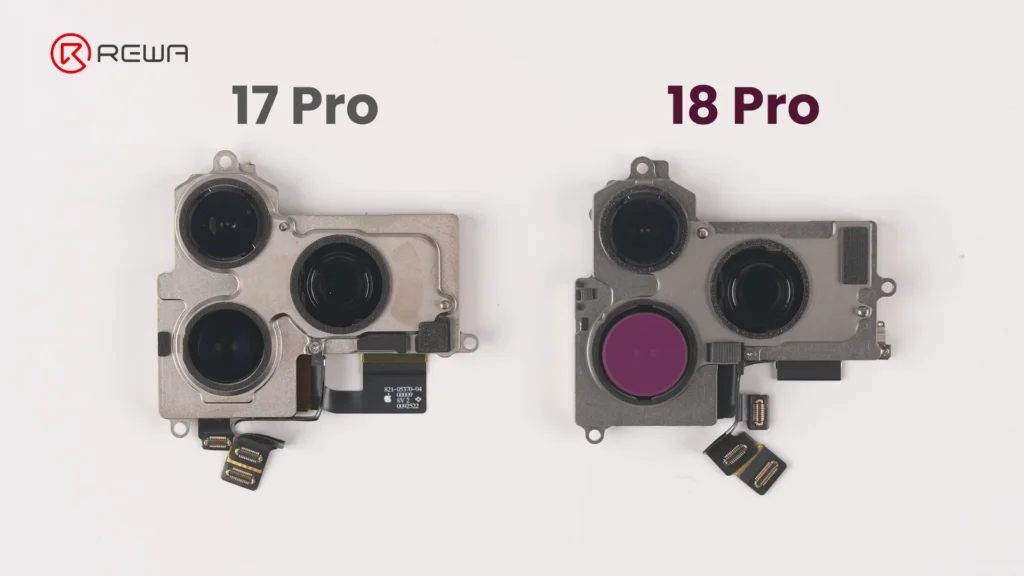
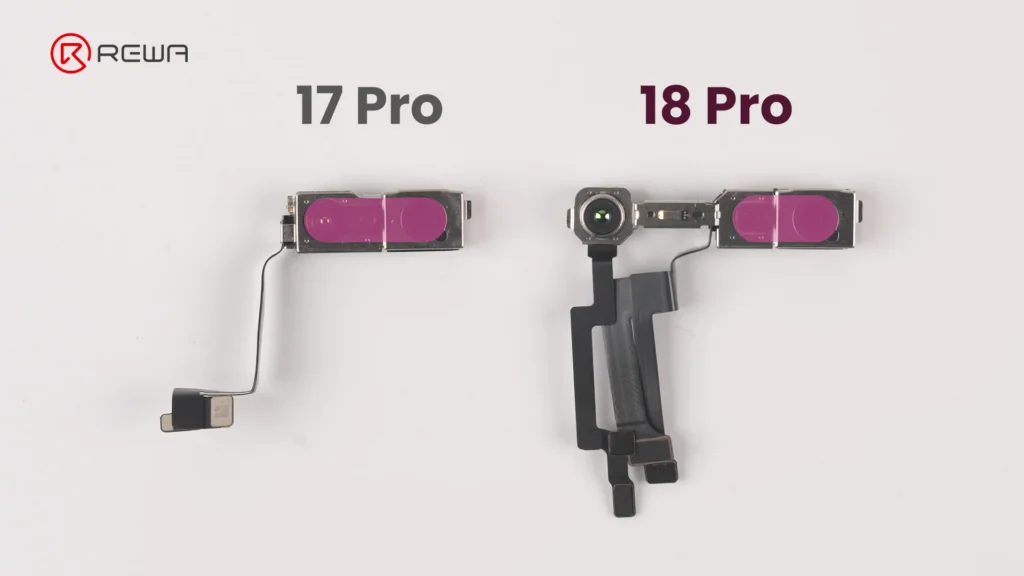
    The iPhone 18 Pro’s camera modules feature noticeable changes in mechanical design, module size, and cable layout.

    Fusion Main Camera: The rear camera module features a variable aperture for greater control over depth of field.
    iphone 18 pro teardown what changed inside how does it affect 11

    Separated Infrared Sensor: The front camera and under-display infrared camera are connected via three separate flex cables, bridged across a wider distance to facilitate the shrunken Dynamic Island.
    iphone 18 pro teardown what changed inside how does it affect 12

    Thermal Management & Battery Changes

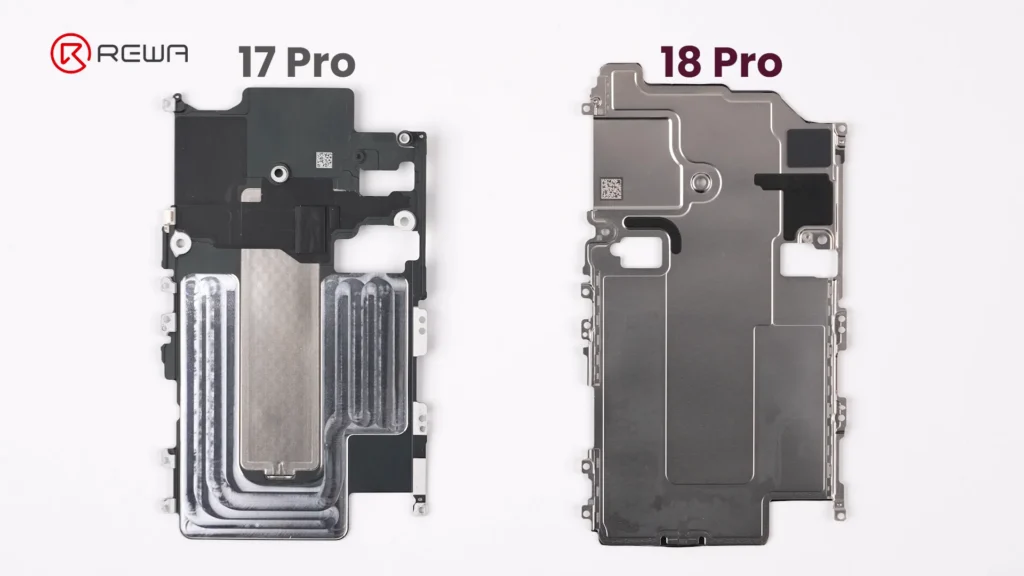
    Vapor chamber on the iPhone 18 Pro receives its largest redesign in years. Apple has integrated a significantly larger vapor chamber, with three times the surface area of the one used in the iPhone 17 Pro.
    iphone 18 pro teardown what changed inside how does it affect 13

    Simply Put:

    A vapor chamber is a flat, sealed metal enclosure containing a small amount of liquid. When the chips heat up, the liquid absorbs heat and evaporates. The vapor then spreads through the chamber, transferring heat to cooler areas where it condenses back into liquid. This helps the phone maintain stable performance under sustained workloads.

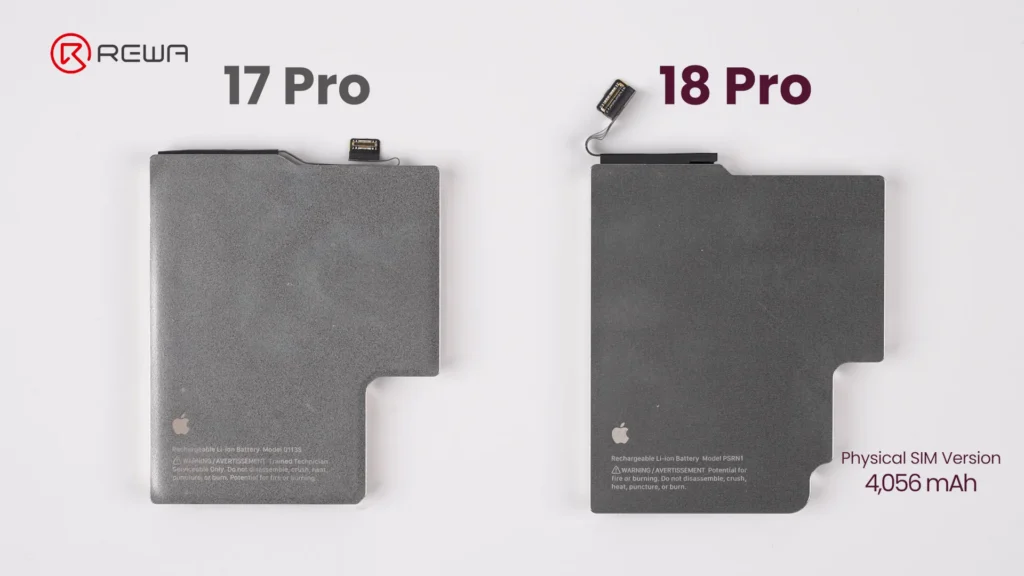
    The battery capacity of iPhone 18 Pro is slightly bigger than that on iPhone 17 Pro. In physical SIM version, it packs 4,056mAh, achieving about 1.7% increase over previous generation. Apple officially confirms that the redesigned battery architecture and charging system enable faster charging, reaching 50% in approximately 15 minutes.
    iphone 18 pro teardown what changed inside how does it affect 14

    Repair Difficulty Assessment: Pros & Cons

    A concise summary of what makes repairing the iPhone 18 Pro easier or harder for repair professionals.

    Componente Changes Made Repair Difficulty
    Pantalla
    • Smaller Dynamic Island
    • Under-display infrared camera
    • Display flex cable not fixed with adhesive
    Easy
    Batería
    • Larger capacity: 4,056mAh (SIM tray version)
    • Larger connector
    • Multi-layer cable
    Easy
    Front Camera Module
    • Infrared camera moved to the corner
    • Three separate cables
    Very Easy
    Rear Camera Module
    • Larger Fusion Main Camera
    • Cable layout changed
    Hard
    Placa base
    • A20 Pro chip on the surface
    • Logic EEPROM chip without a shield
    • NAND and Power IC sandwiched inside
    Very Hard

    Preguntas más frecuentes (FAQ)

    Why is iPhone 18 Pro motherboard repair more difficult?

    The main reason is the new layered motherboard architecture. NAND storage and the power IC are positioned between PCB layers, meaning technicians need to separate the board layers to access them. This increases the complexity, heat exposure, labor, and risk involved in component-level repair.

    Why is the Dynamic Island smaller on the iPhone 18 Pro?

    The infrared camera used for Face ID has been moved under the display and toward the corner. The display uses a modified pixel arrangement in this area to allow infrared light to pass through. This allows Apple to reduce the size of the visible Dynamic Island.

    How big is the iPhone 18 Pro battery?

    The iPhone 18 Pro shown in the REWA Lab teardown is the physical-SIM version and has a 4,056mAh battery, approximately 1.7% higher than the iPhone 17 Pro. Battery capacity varies by regional configuration; in eSIM-only version, the iPhone 18 Pro has a 4,288mAh battery.

    How much larger is the iPhone 18 Pro vapor chamber?

    iPhone 18 Pro vapor chamber has three times the surface area of the vapor chamber in the iPhone 17 Pro. Apple says the redesigned thermal system enables up to 40% better sustained performance compared with the previous generation.

    What is the biggest repair challenge revealed by REWA Lab’s iPhone 18 Pro teardown?

    For board-level technicians, the layered motherboard architecture is one of the most significant challenges because it complicates access to NAND and power-management components. For aftermarket parts manufacturers, the new under-display infrared camera arrangement creates another major challenge because display structure, optical transmission, and Face ID compatibility must all work together.

    Did Apple make major changes to the iPhone 18 Pro’s frame and back cover?

    No. The iPhone 18 Pro retains a largely similar frame and back cover structure to the iPhone 17 Pro. The back cover uses a more color-matched aluminum and glass design in iPhone 18 Pro.

    Conclusión:

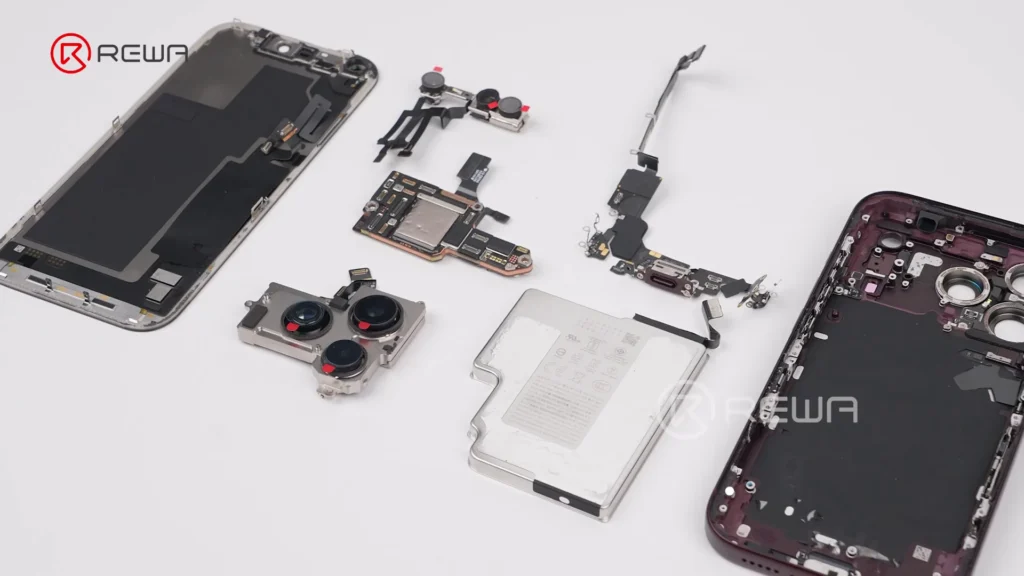
    The iPhone 18 Pro showcases impressive internal engineering, highlighted by under-display Face ID technology, triple-sized vapor chamber, and larger variable-aperture main camera.
    iphone 18 pro teardown what changed inside how does it affect 15

    However, for the independent repair industry, these advancements come with obvious challenges: motherboard layering makes micro-soldering more demanding, and screen replacement requires precise technical alignment and careful handling to ensure proper Face ID functionality.

    As phone architectures become more complex, having high-grade repair tools, reliable replacement parts, and advanced technical training is essential, please Contacto for OEM/aftermarket replacement parts, professional repair tools, and step-by-step technical guides.
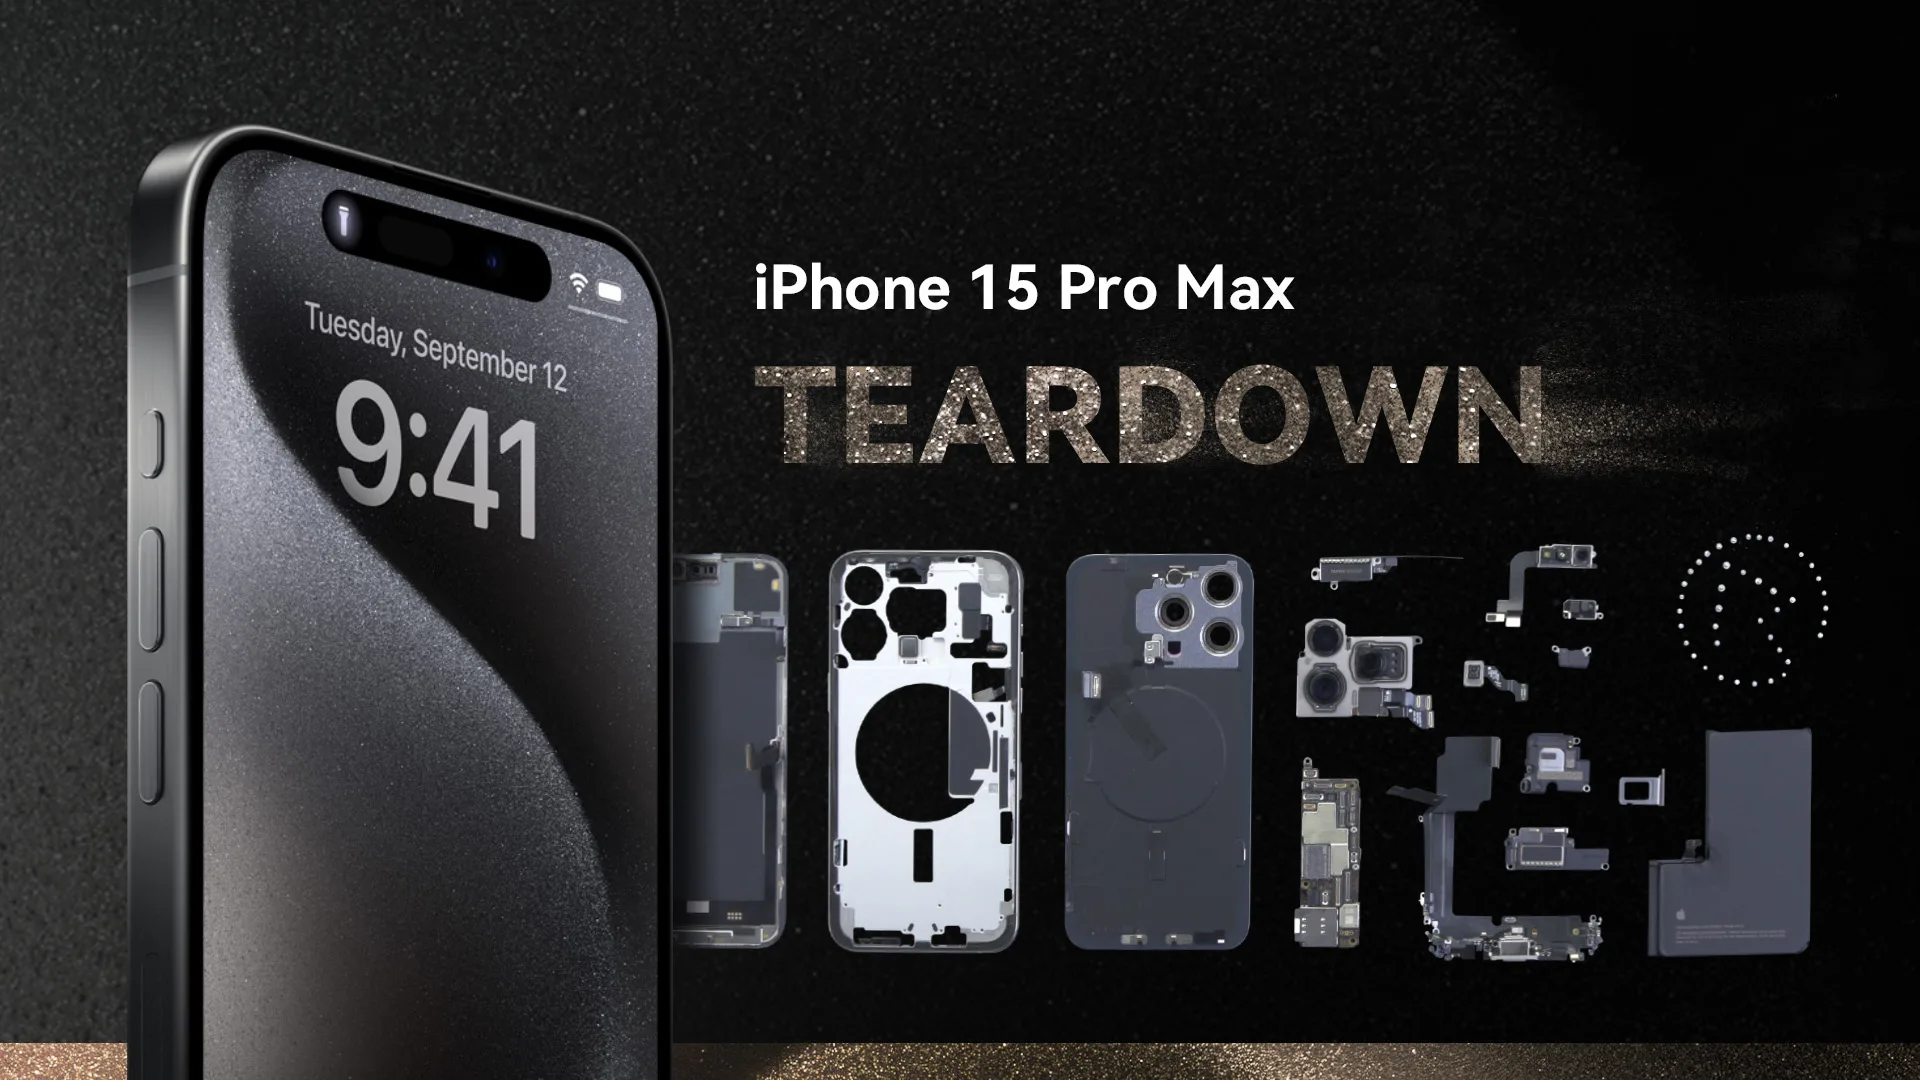

  • Desmontaje del iPhone 15 Pro Max

    Desmontaje del iPhone 15 Pro Max

    Este vídeo ofrece un despiece detallado del iPhone 15 Pro Max, desvelando sus secretos y resolviendo las dudas de los técnicos. Un cambio digno de mención es el uso de un nuevo material de látex blanco entre el bisel y la cubierta, que podría mejorar la impermeabilidad del teléfono. Sin embargo, esta modificación puede plantear dificultades para el reacondicionamiento de la pantalla frontal. 

    El vídeo también destaca la presencia de un chip de cifrado, ya que el teléfono se reinicia automáticamente cuando se coloca en un cargador inalámbrico. Además, el desmontaje demuestra que la cubierta trasera del iPhone 15 Pro Max es fácilmente reparable, una característica que es consistente en toda la serie iPhone 15. 

    Mantente al día para obtener más información sobre el impacto de estos cambios en la resistencia al agua del dispositivo. Echa un vistazo a nuestro canal para ver el vídeo y descubrir todos los fascinantes detalles del iPhone 15 Pro Max.

  • Desmontaje del iPhone 13 Pro

    Desmontaje del iPhone 13 Pro

    La nueva gama de iPhone 13 de Apple hizo su debut en el Apple Event del 14 de septiembre, en el que se mostraron cuatro nuevos modelos.

    Los nuevos modelos con actualización tecnológica siempre vienen acompañados de nuevos retos de reparación.

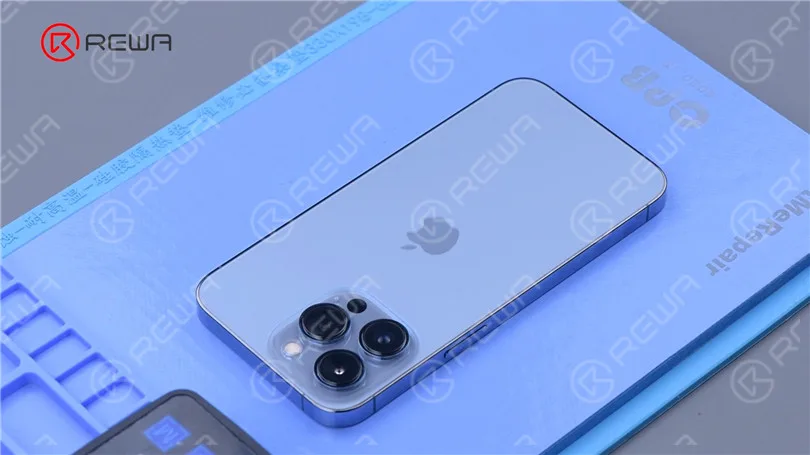
    Hoy desmontaremos el iPhone 13 Pro para ver los cambios estructurales interiores y cómo afectarán esos cambios a la reparación.

    Desmontaje del iPhone 13 Pro

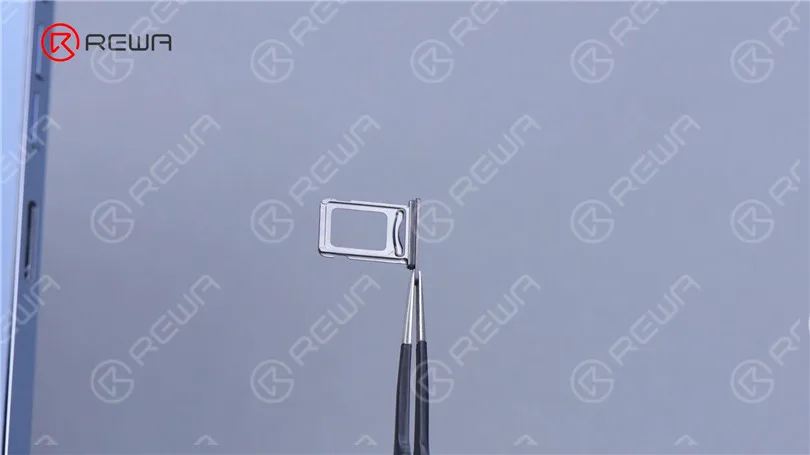
    En primer lugar, retire la bandeja de la tarjeta. La bandeja de la tarjeta está hecha de metal y cuenta con Dual SIM con anillo de goma a prueba de agua y polvo en el interior.

    Desmontaje del iPhone 13 Pro

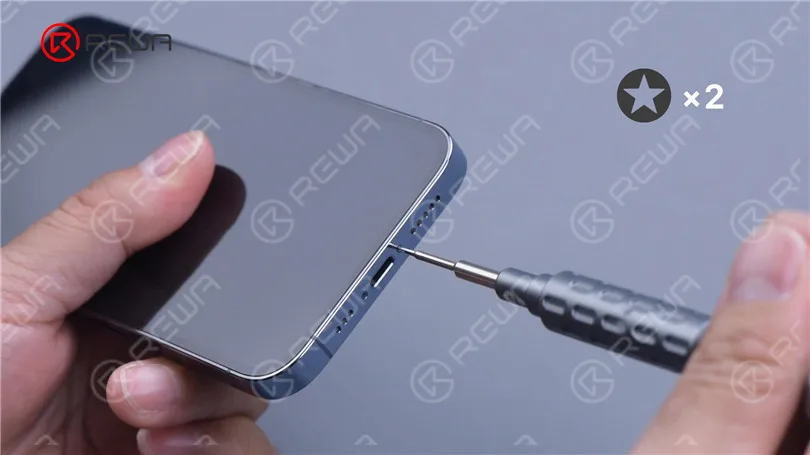
    Además del adhesivo, el iPhone también utiliza los tornillos inferiores para reforzar la fijación. Retira dos tornillos de la parte inferior.

    Desmontaje del iPhone 13 Pro

    Caliente el teléfono con la almohadilla térmica durante unos 3 minutos. Levante la pantalla con una ventosa.

    Inserte una tarjeta de plástico cuando haya un hueco.

    A continuación, deslice a lo largo de la brecha. Al igual que el iPhone 12 Pro, el cable flexible de la pantalla del iPhone 13 Pro está a la izquierda.

    Así que la pantalla del iPhone 13 Pro también se abre por el borde derecho.

    Desmontaje del iPhone 13 Pro

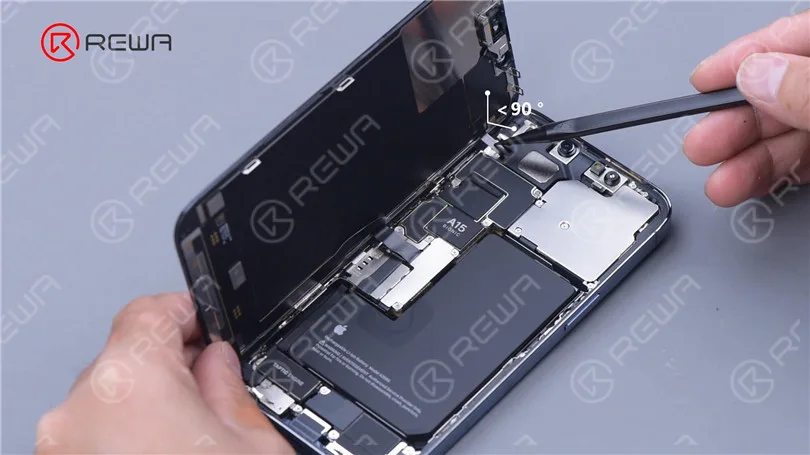
    Además, el cable flexible del módulo sensor es muy corto.

    Por lo tanto, al levantar la pantalla, el ángulo no debe ser superior a 90 grados para evitar la rotura del cable flexible.

    Desmontaje del iPhone 13 Pro

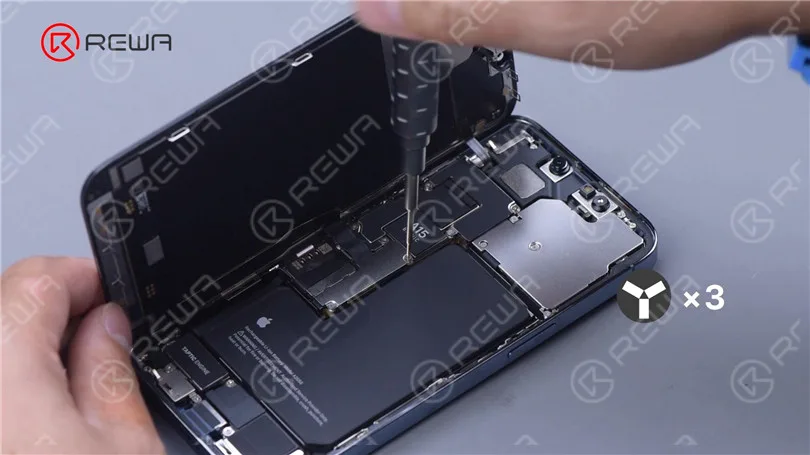
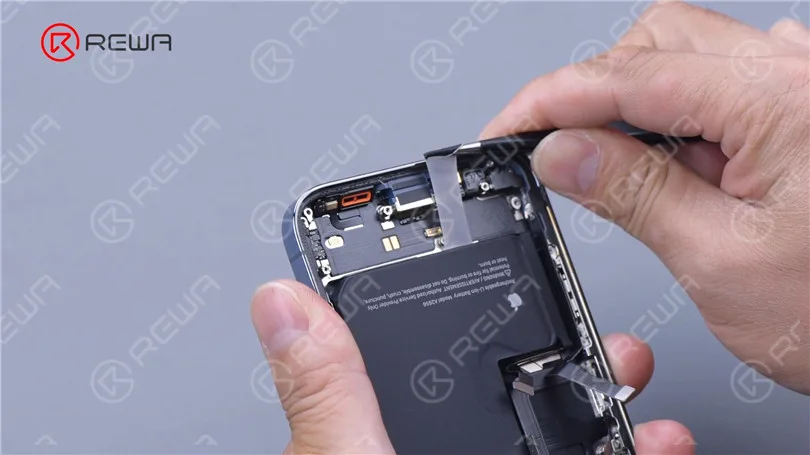
    Retire los tres tornillos que fijan la tapa de protección de la batería.

    Retire la cubierta de protección. Desconecte la batería.

    Desmontaje del iPhone 13 Pro

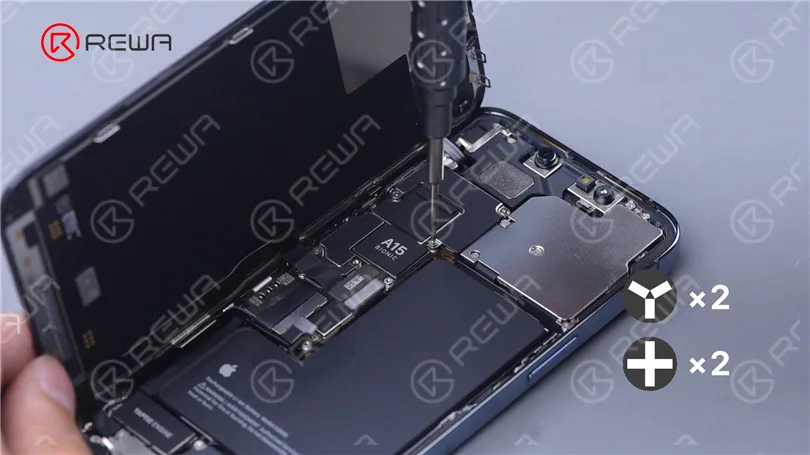
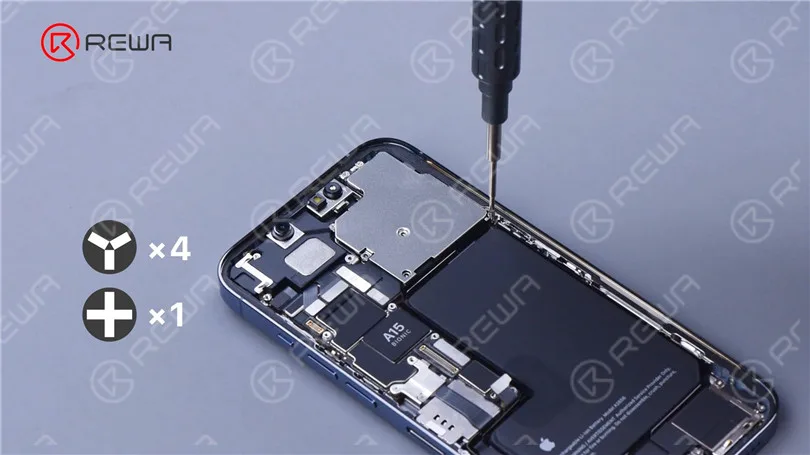
    Continúe retirando los cuatro tornillos que sujetan la cubierta de protección del módulo sensor.

    Desconecte los cables flexibles del sensor y de la pantalla para extraer la pantalla.

    Desmontaje del iPhone 13 Pro

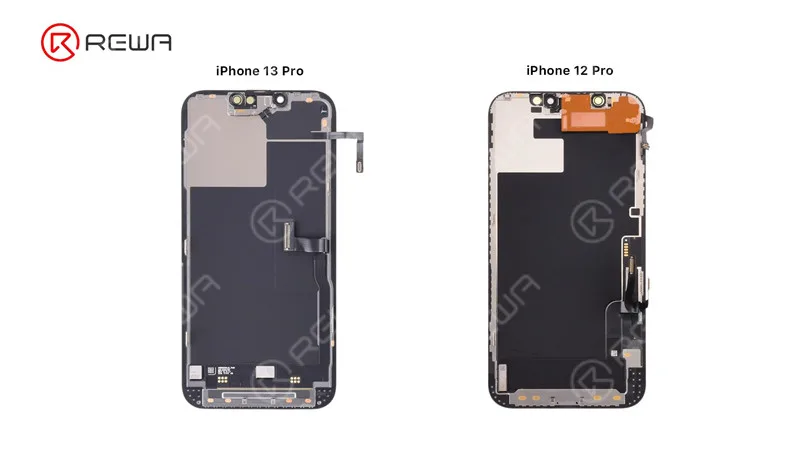
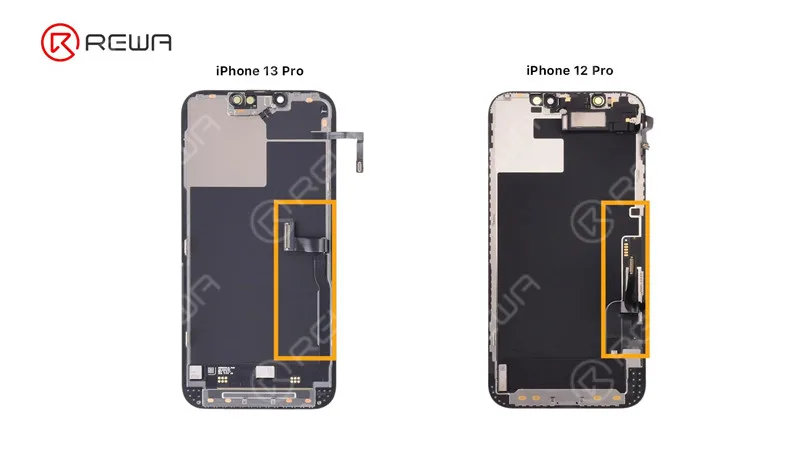
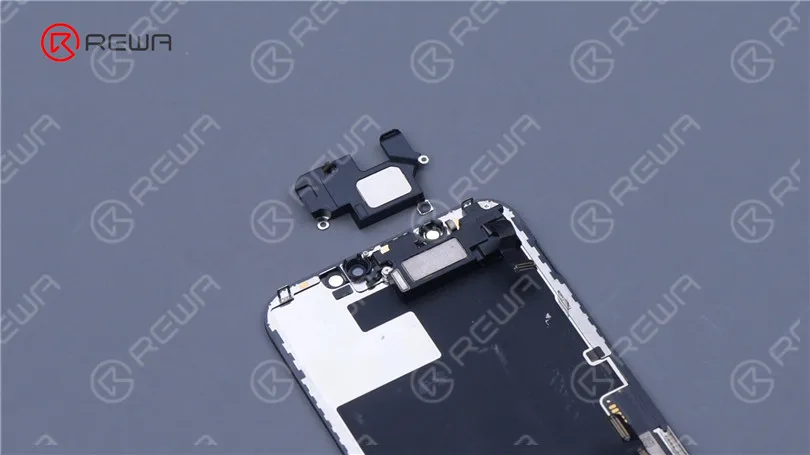
    El auricular del iPhone 13 Pro se traslada a la carcasa, mientras que el del iPhone 12 Pro y modelos anteriores está en la pantalla.

    Los cables flexibles de la pantalla y el táctil están ahora integrados. Se espera que la dificultad de renovación de la pantalla del iPhone 13 Pro sea mayor.

    Desmontaje del iPhone 13 Pro
    Desmontaje del iPhone 13 Pro
    Desmontaje del iPhone 13 Pro

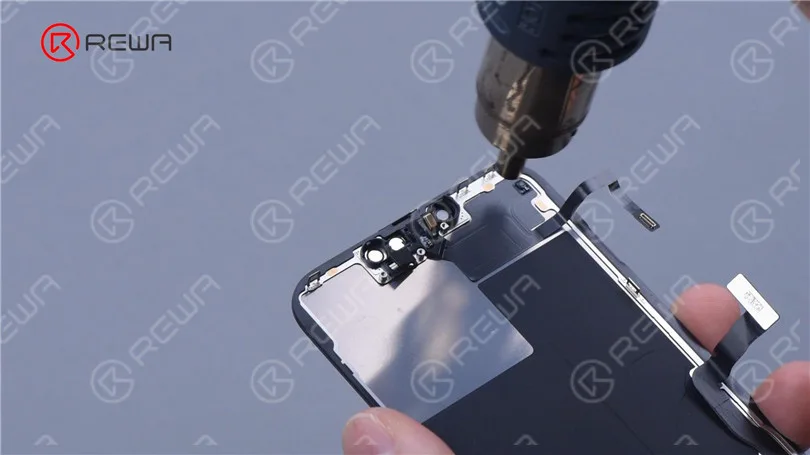
    Retire los tres tornillos que sujetan el cable flexible del sensor. Caliente con pistola de aire caliente para retirar el cable flex.

    Desmontaje del iPhone 13 Pro

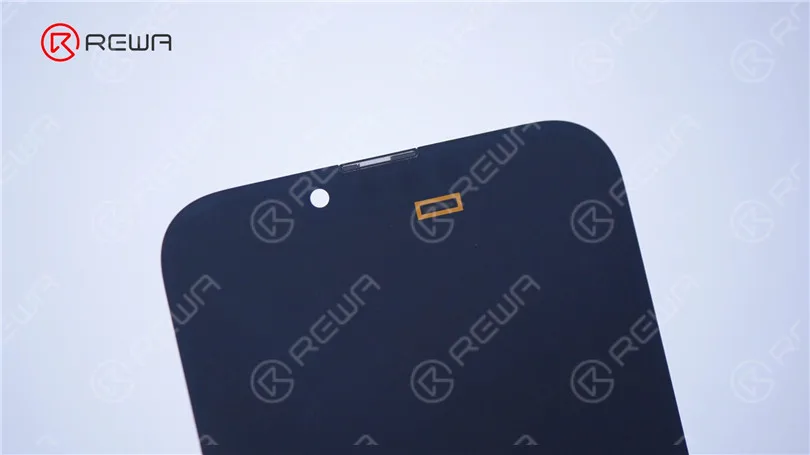
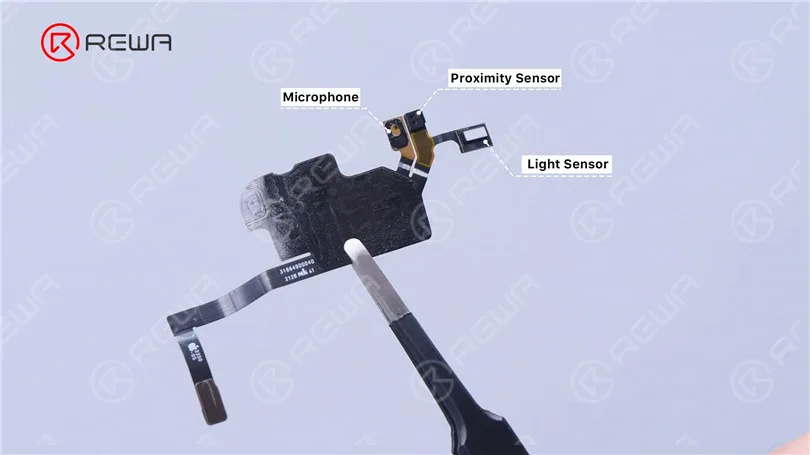
    La apertura del sensor de luz ambiental está en la parte inferior derecha de la muesca.

    Desmontaje del iPhone 13 Pro

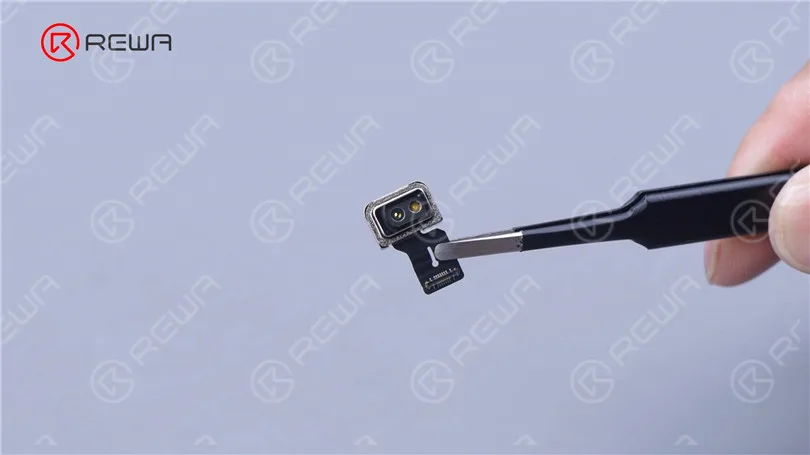
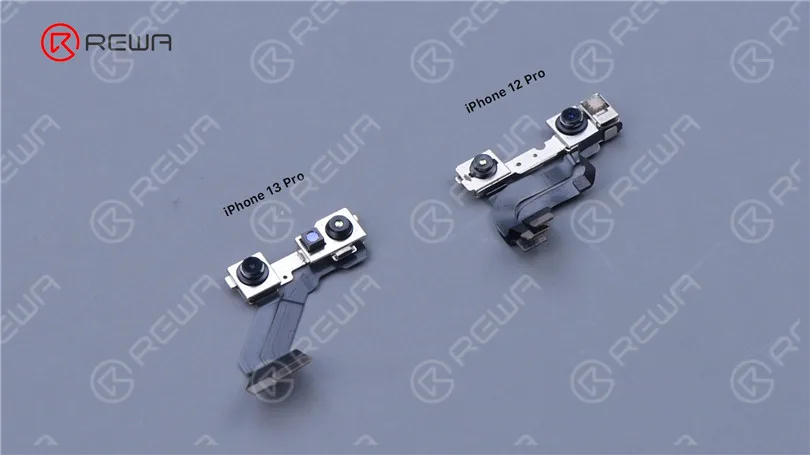
    El cable flexible integra un micrófono frontal, un sensor de distancia y un sensor de luz ambiental.

    Es menos iluminador que el del iPhone 12 Pro.

    Desmontaje del iPhone 13 Pro

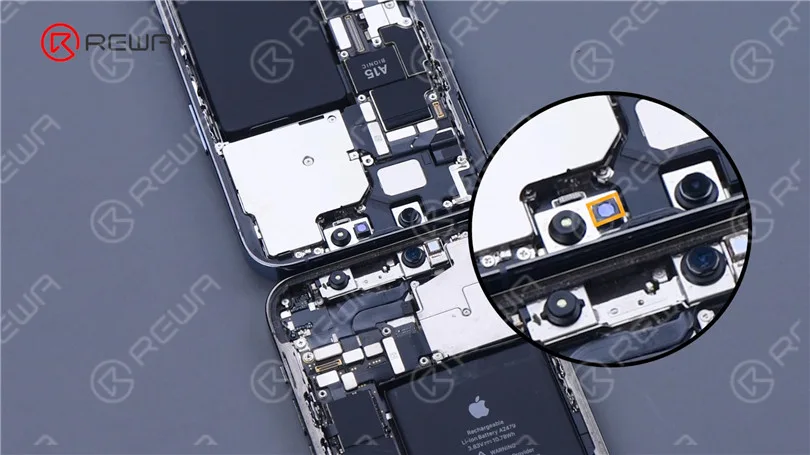
    El proyector de puntos del iPhone 13 Pro se ha desplazado al centro.

    Desmontaje del iPhone 13 Pro

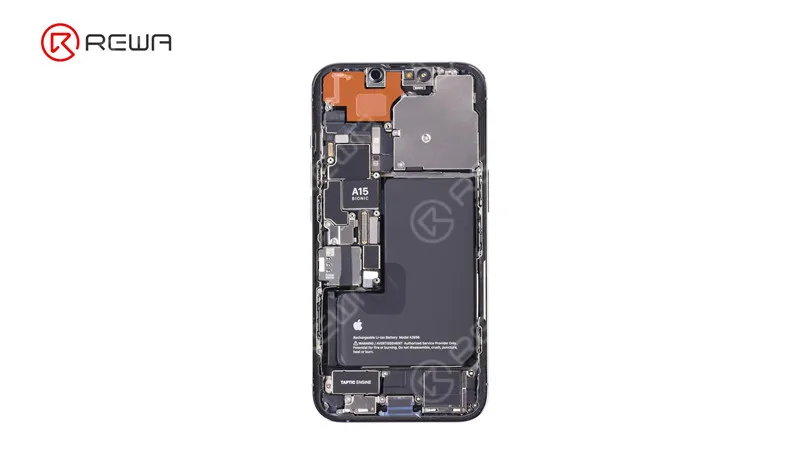
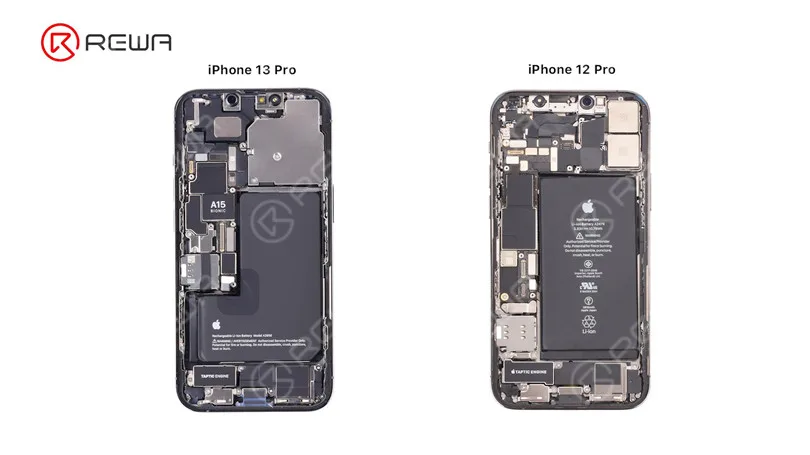
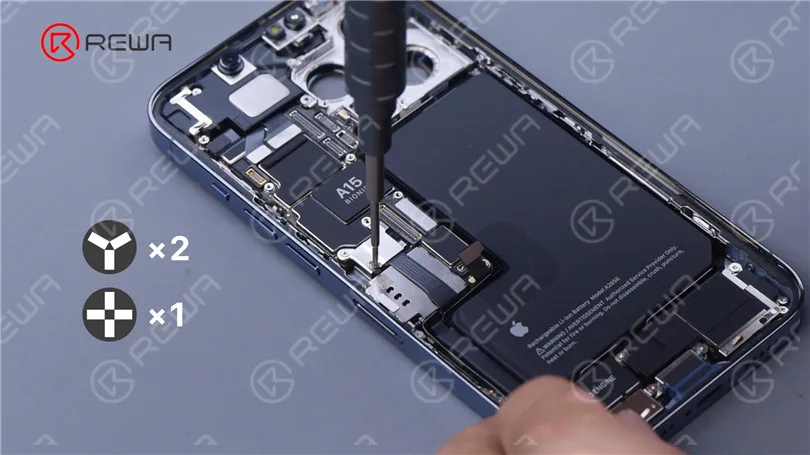
    A continuación, echemos un vistazo a la estructura interior general. El iPhone 13 Pro parece mucho más limpio que el iPhone 12 Pro porque hay menos impresiones en la superficie de la batería. Y hay A15 en la placa base.

    Desmontaje del iPhone 13 Pro

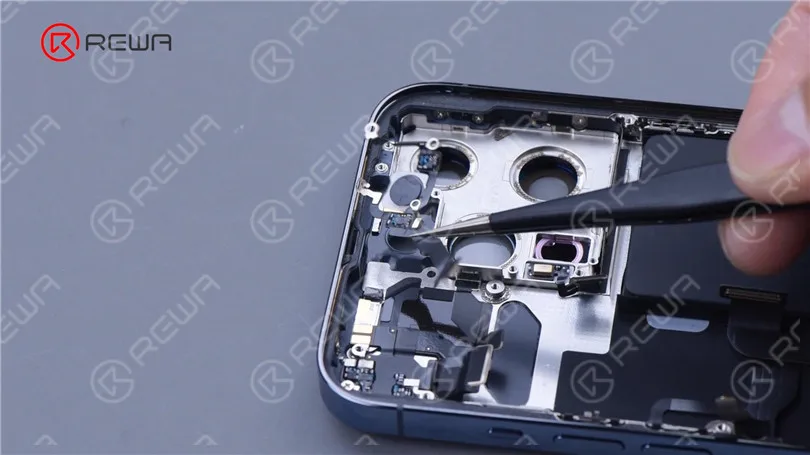
    Retire los 5 tornillos que sujetan la tapa de protección de la cámara trasera.

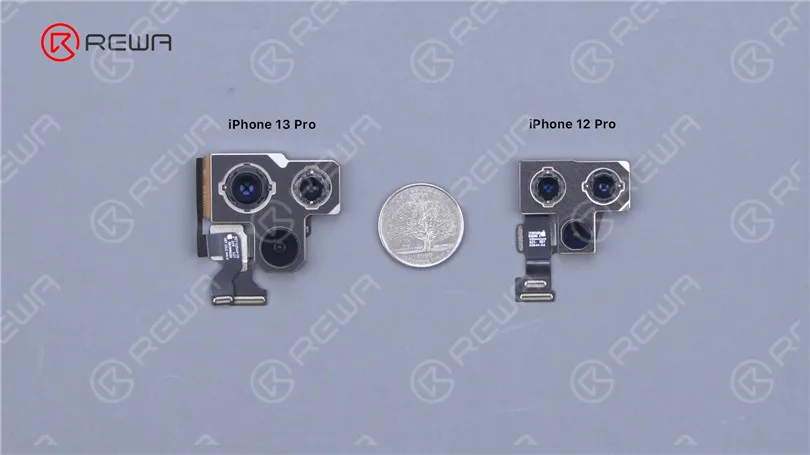
    Desconecta el cable flex de la cámara. Extrae la cámara. El iPhone 13 Pro tiene una cámara más grande que el iPhone 12 Pro. 

    Desmontaje del iPhone 13 Pro
    Desmontaje del iPhone 13 Pro

    Separe el LiDAR. Todos los lados del LiDAR están protegidos por espuma amortiguadora.

    Desmontaje del iPhone 13 Pro

    Desconecte los cables flexibles de la antena inferior y del puerto de carga. A continuación, desconecte los cables flexibles del proyector de puntos y del módulo de Face ID.

    Desmontaje del iPhone 13 Pro

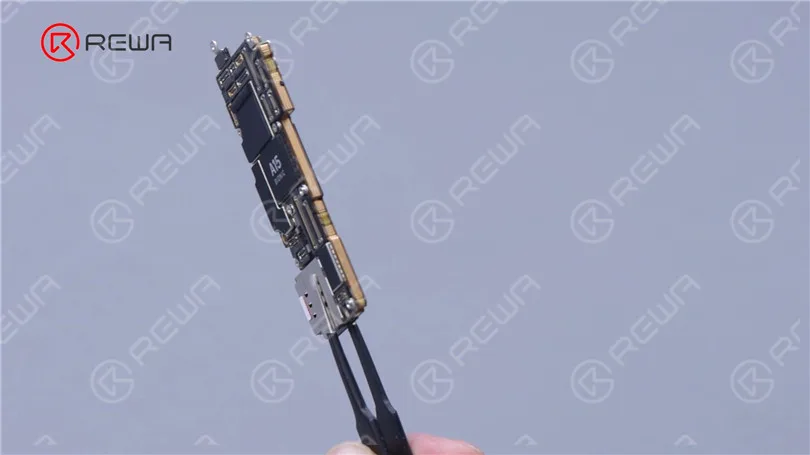
    Retire la placa base. La placa base sigue adoptando un diseño de doble capa. El lector de la tarjeta SIM está soldado a la placa base.

    Hay cintas de disipación de calor en ambos lados de la placa base.

    Desmontaje del iPhone 13 Pro

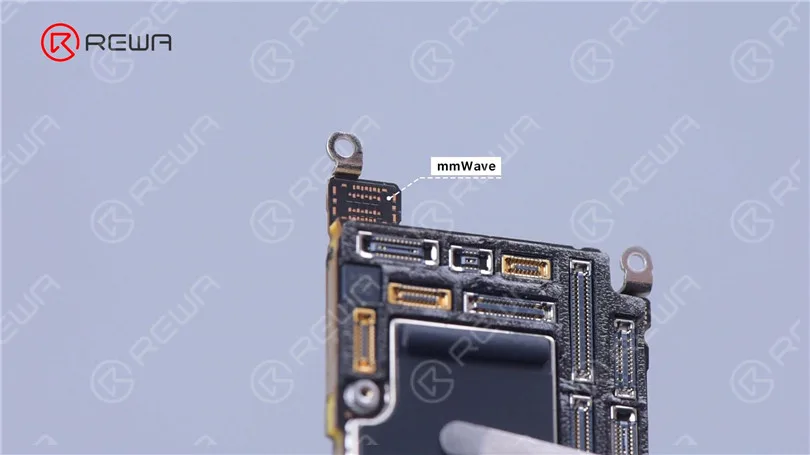
    El asiento de mmWave está vacío en la placa base.

    Desmontaje del iPhone 13 Pro

    Retire el auricular. El tamaño ha aumentado en comparación con el modelo anterior.

    Desmontaje del iPhone 13 Pro

    Retire el cable flexible del Face ID. El proyector de puntos y la cámara de infrarrojos del iPhone 13 Pro están integrados en un cable flexible. 

    Esto, sin duda, dificulta futuras reparaciones del Face ID.

    Desmontaje del iPhone 13 Pro

    Retire el cable flexible del flash.

    Desatornille los tornillos que fijan la antena de señal y, a continuación, la antena de señal. Retire la antena NFC.

    Desmontaje del iPhone 13 Pro

    Retire los tornillos que sujetan el cable flexible del puerto de carga.

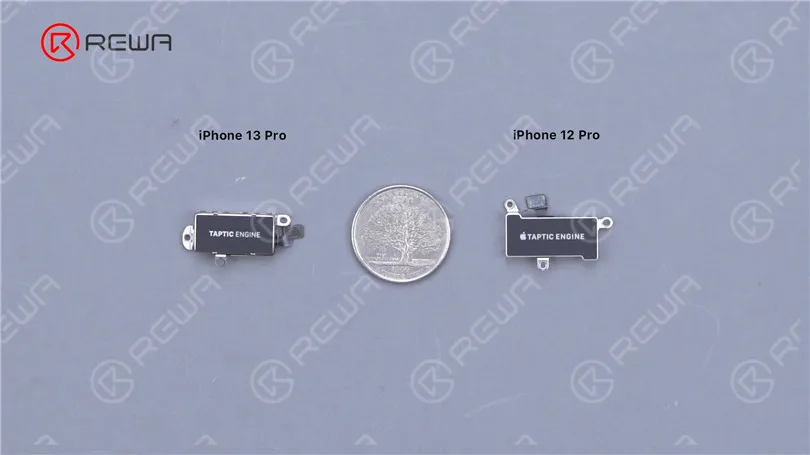
    Saca el altavoz y el Taptic Engine. El Taptic Engine del iPhone 13 Pro es más pequeño.

    Desmontaje del iPhone 13 Pro

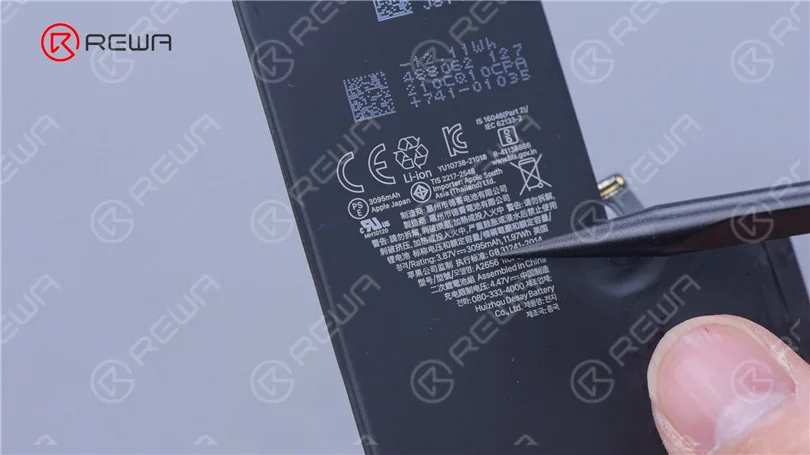
    Luego quitamos la batería. 

    Utiliza unas pinzas para retirar lentamente las tiras adhesivas.

    La capacidad de la batería ha aumentado de 2815 mAh a 3095 mAh.

    Desmontaje del iPhone 13 Pro
    Desmontaje del iPhone 13 Pro

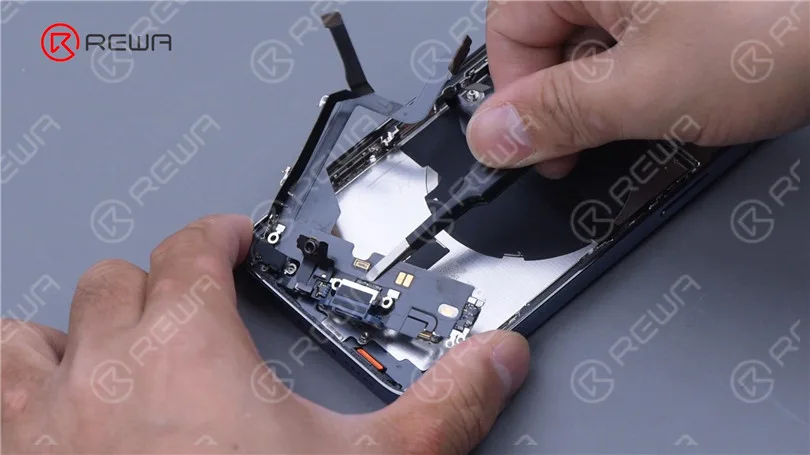
    Por último, retira la pieza de plástico y, a continuación, el cable flexible del puerto de carga.

    Desmontaje del iPhone 13 Pro

    La cubierta trasera del iPhone 13 Pro tiene el mismo aspecto que la del iPhone 12 Pro.

    Suponemos que el método de reacondicionamiento es el mismo que el del iPhone 12 Pro. En general, el desmontaje del iPhone 13 Pro es más fácil que el de su predecesor.

    El reacondicionamiento de la pantalla y la reparación del Face ID serán más difíciles. Más adelante tendremos vídeos sobre la separación de la placa base, el reacondicionamiento de la pantalla y la cubierta trasera para hablar de la dificultad de reparación del iPhone 13 Pro en detalle. Por favor, manténgase en sintonía.

    Desmontaje del iPhone 13 Pro
  • Desarme del iPhone 3GS

    Desarme del iPhone 3GS

    Han pasado 12 años desde el lanzamiento del iPhone 3GS. ¡Disfrutemos de un desmontaje clásico!

  • iPhone 11 Pro Teardown

    iPhone 11 Pro Teardown

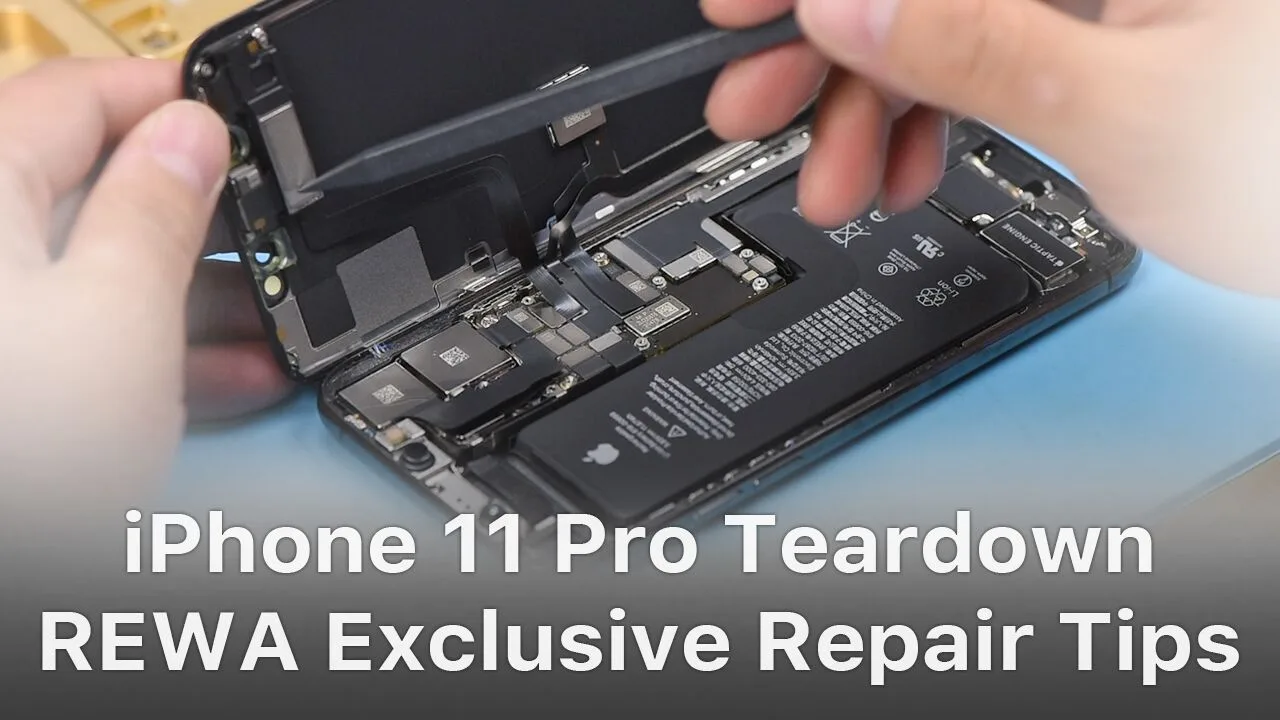
    The iPhone 11 series has impressed the repair industry again with its new iPhones. What does the new design mean to our repair work? In our video, we will show you each part inside the iPhone 11 pro and share repair tips from REWA perspective.

  • iPhone 12 Pro Detailed Teardown Tips For Repair Shop Technicians

    iPhone 12 Pro Detailed Teardown Tips For Repair Shop Technicians

    Apple’s new iPhone 12 models have been the talk of the town. For repair shop owners, the biggest concern is what to pay attention during disassembly. Today, REWA LAB is going to share a detailed teardown tutorial of the iPhone 12 Pro. Let’s take a look!

    Productos recomendados en este vídeo:

    • Mobile Phone Disassemble Set
    • REWA SELECTED iPhone 12 Series Accessories:
    • Phone Case
    • Charger Plug
    • Screen Protector
    • Earphone
  • iPhone 11 Pro Teardown – REWA Exclusive Repair Tips

    iPhone 11 Pro Teardown – REWA Exclusive Repair Tips

    The iPhone 11 series has impressed the repair industry again with its new iPhones. What does the new design mean to our repair work? In our video, we will show you each part inside the iPhone 11 pro and share repair tips from REWA perspective.

    Tools & Parts used to teardown iPhone 11 Pro:

  • Análisis total de la pantalla OLED del iPhone X

    Análisis total de la pantalla OLED del iPhone X

    REWA LAB ha realizado un teardown más profundo de la pantalla OLED del iPhone X Recientemente. Después de la separación, usted encontrará las diferencias entre la pantalla del iPhone X y las pantallas de los modelos anteriores de iPhone. 

    1. La pantalla del iPhone X viene con una técnica de unión de IC de controlador diferente. El iPhone X aplica COF, mientras que el iPhone anterior aplica COG.

    2. El digitalizador de la pantalla del iPhone X tiene su módulo táctil 3D adherido a la placa posterior OLED.

    3. El módulo 3D touch del iPhone X está adherido al panel OLED.

    Como nuevo producto de OLED combinado con la función 3D Touch, la pantalla del iPhone X nos ha sorprendido a todos con sus características. REWA LAB trabaja con el desmontaje de la pantalla del iPhone X y presenta su novedad, dificultades de desmontaje y análisis de la estructura. El proceso de laminado de la pantalla OLED del iPhone X es mucho más complicado que el de la pantalla LCD. Primero se lamina OLED con TP, luego OLED con 3D Touch. Todo el proceso cuenta con más de 15 procedimientos.

    Desmontaje total de la pantalla OLED del iPhone X

    Pruebas de pantalla

    Prueba la pantalla del iPhone X antes de desmontarlo. Ejecutar la prueba de función - Pantalla; Toque; 3D Touch y Swipe-up. Todo va bien.

    Extracción del bisel

    Coloque el conjunto de la pantalla OLED sobre la plataforma térmica. Retire el bisel lentamente con la palanca y el limpiador de pegamento. Corte un cuerno de plástico del bisel con la cuchilla si es necesario y, a continuación, retire el bisel con la palanca y el limpiador de pegamento con cuidado. Tenga cuidado con los cables flexibles cuando retire el bisel en la zona de los cables flexibles.

    La palanca daña accidentalmente los cables flexibles al retirar el bisel. Lo que puede resultar en la pantalla anormal. Pruebe la pantalla de nuevo. Ejecute la prueba de funcionamiento - Pantalla; Touch; 3D Touch y Swipe-up. Touch, 3D Touch y Swipe-up funcionan normalmente mientras haya dos líneas verticales en la pantalla.

    Separación de vidrio 

    Coloque el conjunto de la pantalla OLED sobre la plataforma térmica. Separe la lente de cristal del OLED con alambre de corte. Estamos trabajando con una pantalla flexible OLED, así que ten cuidado con el trabajo manual.

    Prueba de nuevo después de separar. Ejecute la prueba de funcionamiento - Pantalla; Toque; 3D Touch y Swipe-up. Touch, 3D Touch y Swipe-up funcionan con normalidad mientras haya dos líneas verticales en la pantalla.

    Quitar pegamento

    La eliminación de pegamento para la pantalla del iPhone X se puede aplicar con el desgarro de la mano.

    Eliminación de capas 3D Touch

    A diferencia de los smartphones Samsung, el iPhone X tiene su módulo 3D Touch adherido al panel trasero OLED. A diferencia de todas las versiones anteriores del iPhone, el módulo 3D Touch del iPhone X está adherido al panel OLED. Para analizar a fondo su estructura, llevamos a cabo un desmontaje disruptivo del módulo 3D Touch. El 3D Touch y la unión flexible TP se separan completamente tras el desmontaje.