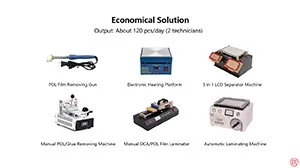
With 7 machines in total, this economical broken LCD screen refurbishing solution features high cost performance, offering an output of 120 pieces per day, which is specially for small factories. Please check the video for the more efficient and economical mobile phone glass-only repair solution.
Schlagwort: Überholung
-
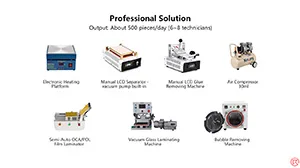
Professional Solution – REWA Mobile Phone Broken LCD Screen Refurbishing Solution V4.0
With 9 machines in total, this professional broken LCD screen refurbishing solution features high efficiency, offering an output of 500 pieces per day, which is specially for mass production factories. Please check the video for the professional cell phone broken screen glass-only repair solution with high efficiency.
-
REWA Broken LCD Screen Refurbishing Training – Front & Back Glass Replacement
Broken screen/glass back is the most frequent issue encountered by mobile phone repair technicians. According to incomplete statistics, broken screen/glass back repair accounts for 60% of a repair shop’s business. Now with the continuous upgrading of the manufacturing technology of screen&glass back, together with the fast growing of 5G networks, mastering the glass refurbishing technology will definitely become a strong guarantee for you to maintain competitiveness and increase income. Enroll our June front&back glass refurbishing training course here now.
-
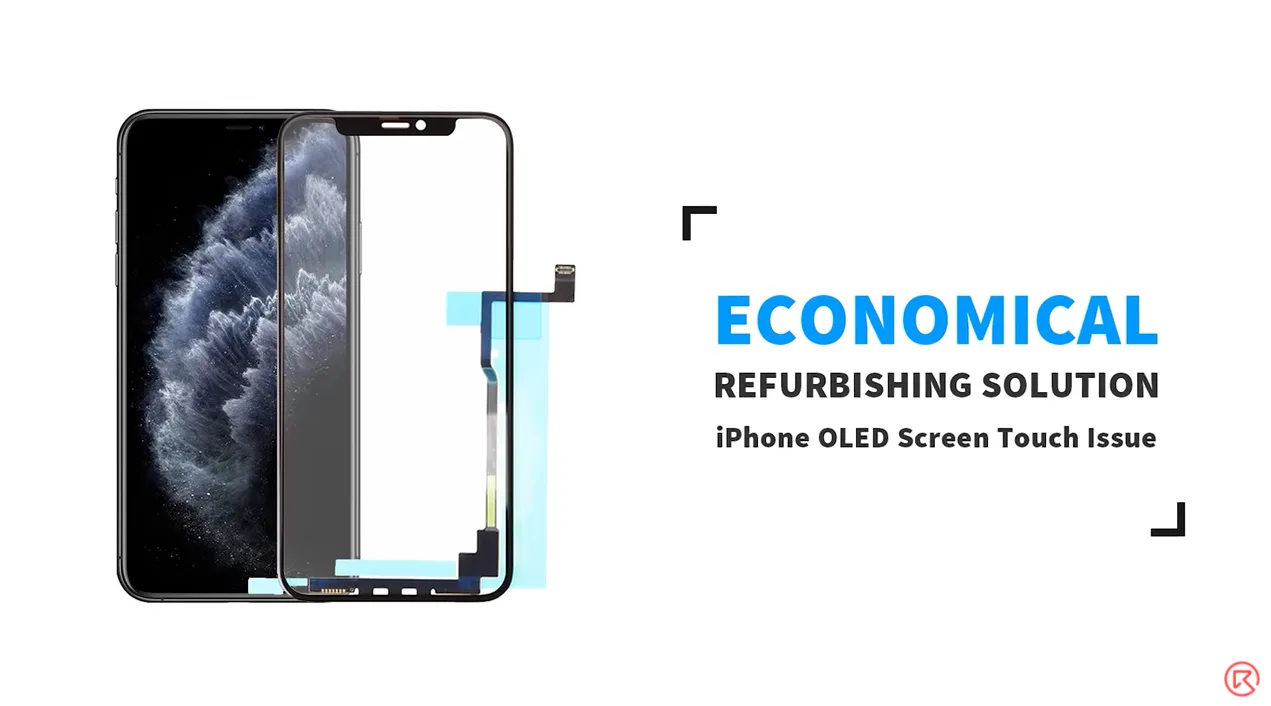
The Cost-effective Refurbishing Solution for iPhone Screen Touch Issue (iPhone 11 Pro Max Demo)
Most of the time the touch issue of iPhone X and above is a screen/motherboard issue. For touch issues caused by screen malfunction, a screen replacement is usually the solution adopted by repair shops. The operation of screen replacement is simple but the price of a new screen is high. It’s time for you to make a change and stand out from competitors in your city with this brand new and cost-effective refurbishing solution – touch panel replacement.
- 00:00 Intro
- 01:11 Bezel Removing
- 03:15 TP Separating
- 05:10 Glue Removing
- 07:00 Laminating
- 13:03 Test
-
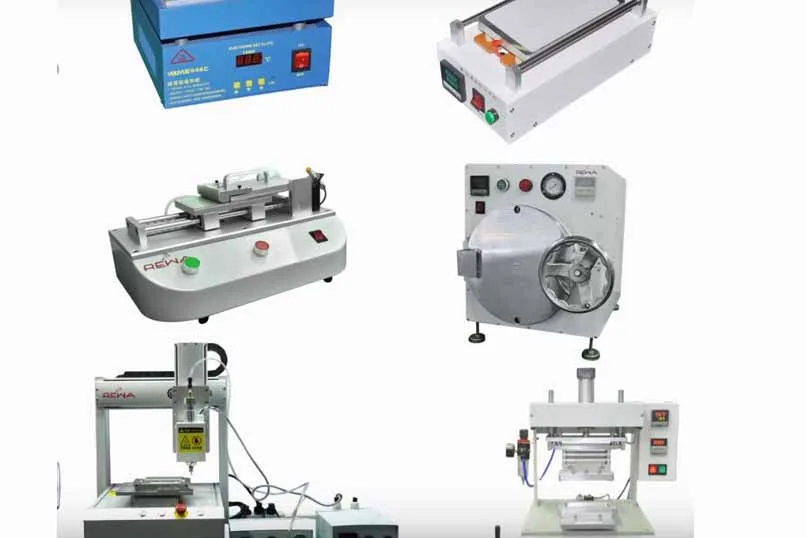
REWA Mobile Phone LCD Refurbish Solution v2.0 - Professionelle Lösung
 Früher wurden Mobiltelefone noch mit einem kapazitiven Touchscreen ausgestattet und durch den Austausch des beschädigten Touchscreens gegen einen neuen aufgearbeitet. Mit der Verbreitung der integrierten In-Cell-Technologie, die in den letzten Jahren in Handy-Bildschirme integriert wurde, ist dies jedoch nicht mehr praktikabel. Auf der anderen Seite sind die Kosten für die Reparatur mit Original-LCD-Anzeige , Da Kunden und Dienstleister versuchen, die Kosten zu senken, indem sie das Beste aus den vorhandenen Ressourcen machen, wird der Trend zur Aufarbeitung von Handydisplays immer deutlicher. Und innovative Methoden sind dringend erforderlich, sei es in wirtschaftlicher Hinsicht oder unter Umweltaspekten.
Als Befürworterin und Verfechterin der Idee, die Nutzung von Mobiltelefonen in der After-Sale-Branche zu maximieren, hat REWA Folgendes entwickelt drei Lösungen für Kunden mit unterschiedlichen Anforderungen durch langfristige Erforschung und Optimierung. Daher sind wir bestrebt, Lösungen auf höchstem Niveau zu bieten, um die unterschiedlichen Anforderungen von Teilehändlern, Großhändlern, Aufarbeitungsbetrieben, Reparaturbetrieben und Online-Händlern zu erfüllen.
Darüber hinaus entwickeln wir unsere Lösungen bei Bedarf weiter, um die Effizienz und Wettbewerbsfähigkeit jeder Lösung zu erhalten.
-
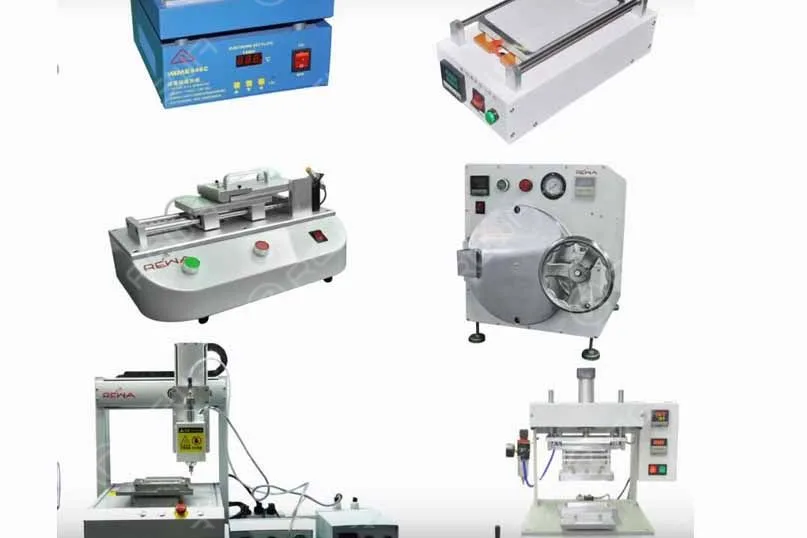
REWA Mobile Phone LCD Refurbish Solution v2.0 - Wirtschaftliche Lösung
REWA-Technologie eingeführt Handy LCD Refurbish Lösung V2.0 die sorgfältig entwickelt wurde, um DREI unabhängige Lösungen zu umfassen: Primäre, wirtschaftliche und professionelle Lösungen, die den gesamten Prozess der Wiederherstellung eines gebrochenen Bildschirms abdecken. Heute haben wir eine gute Kenntnis der ersten.
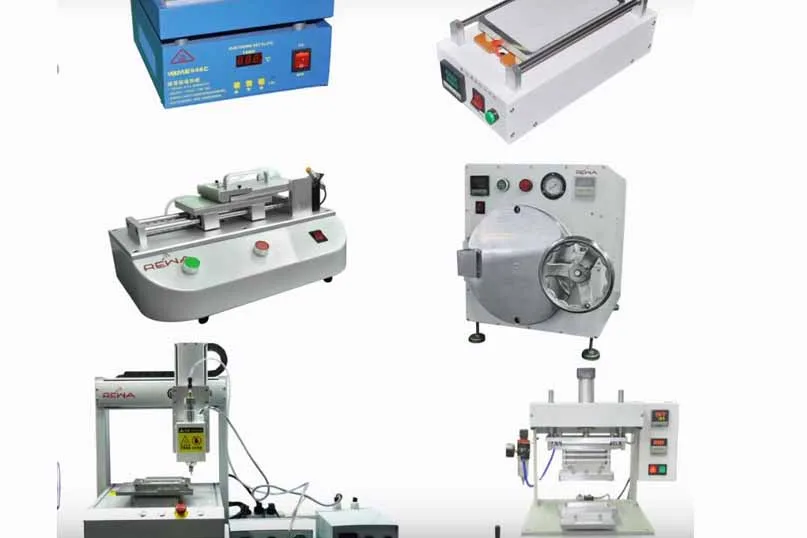
Die wirtschaftliche Lösung ist die aufgerüstete Version der primären Lösung, die für kleine Fabriken konzipiert ist. Als Übergangslösung gleicht sie die geringe Effizienz und Produktivität der früheren Lösung aus, die wirtschaftliche Lösung besteht aus insgesamt 8 Maschinen.
-
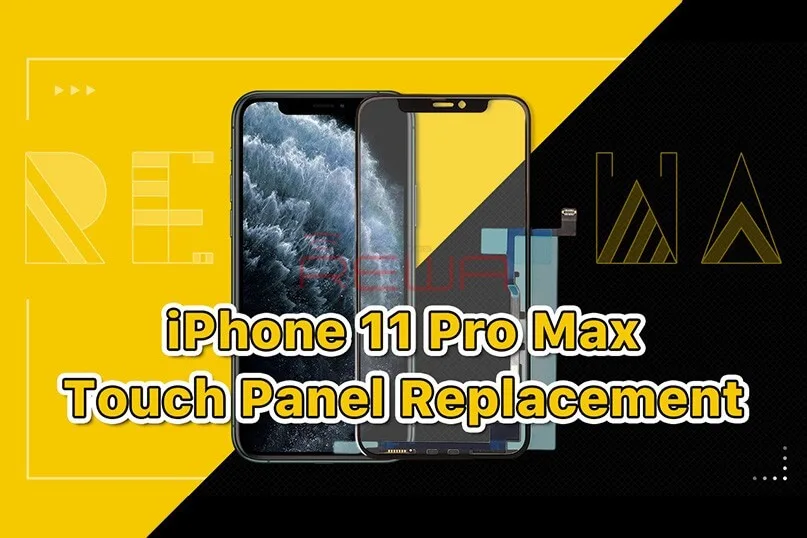
The Cost-effective Refurbishing Solution for iPhone Screen Touch Issue
Most of the time the touch issue of iPhone X and above is a screen/motherboard issue. For touch issues caused by screen malfunction, a screen replacement is usually the solution adopted by repair shops. The operation of screen replacement is simple but the price of a new screen is high. It’s time for you to make a change and stand out from competitors in your city with this brand new and cost-effective refurbishing solution – touch panel replacement. Before we introduce the new solution, let’s check out the difference between screen replacement and touch panel replacement.
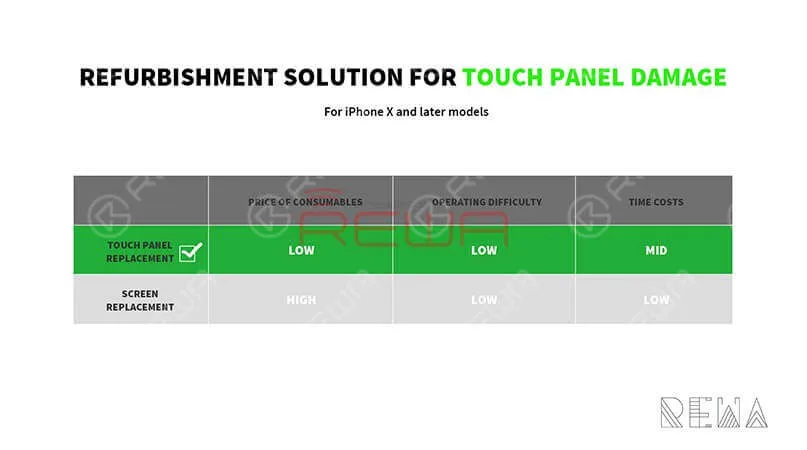
We can see from the figure above that the touch panel replacement solution helps repair shops save more money than the other one. This Refurbishing Solution mainly uses the following equipment:
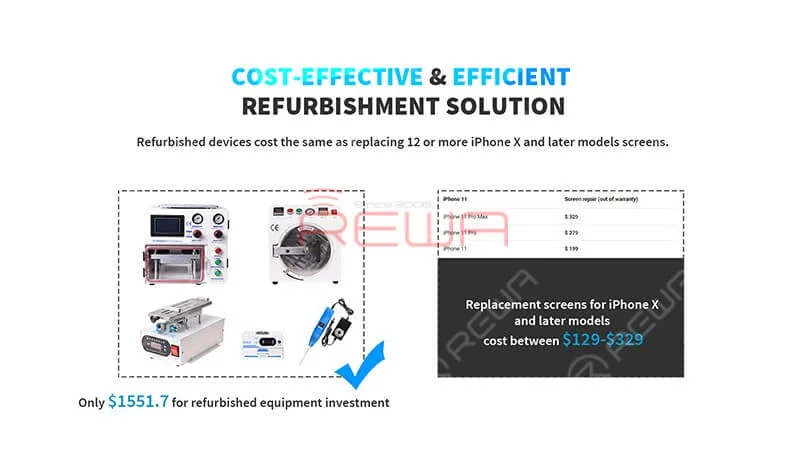
Rotierende LCD-Trennmaschine für gebogene Bildschirme
Elektrisches Klebstoffentfernungsgerät
Laminiermaschine für gebogene Siebe
Maschine zum Entfernen von Luftblasen
iPhone 11 PRO MAX Touch Screen Digitizer
Refurbishing Guide
Abnehmen der Blende
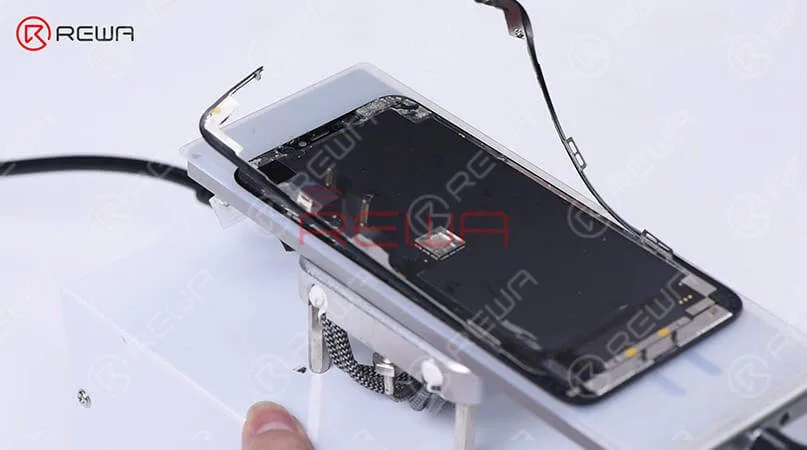
Slice through adhesive sealing the top edge of the bezel, and then cut the top bezel open with the Cutting Nipper.
TP Separating
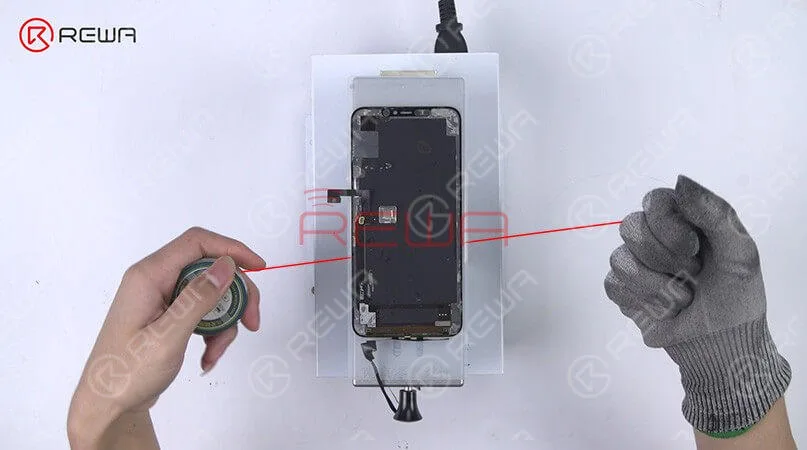
separate the TP flex cable and the display flex cable first. Set the LCD Cutting Wire to the gap between TP and OLED. Keep pulling the wire back and forth to separate OLED from TP and the glass lens.
Entfernen von Klebstoff
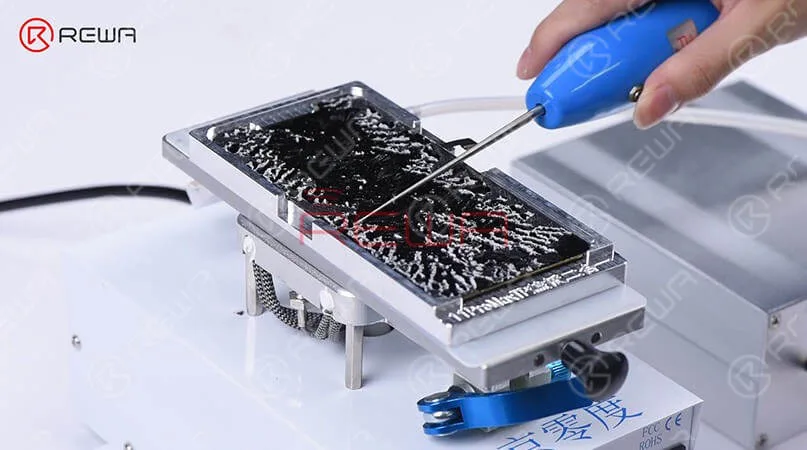
Place the OLED into the adsorption mold and remove residual glue with the Electric Glue Removing Device.
Kaschieren
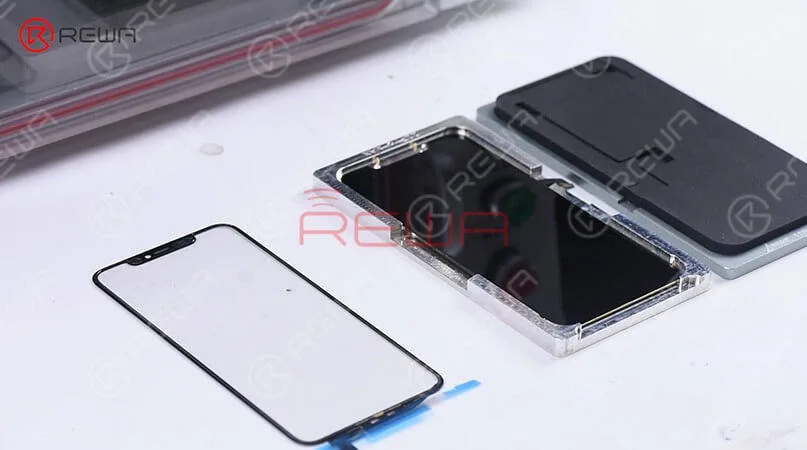
Put the OCA+TP laminated glass lens into the bubble removing machine. Take it out and make sure there is no bubble inside. Attach the OCA+TP laminated glass lens to the OLED, and then adhere the TP flex cable to the right position. Place the OLED screen assembly into the laminating mold. Next, put it into the laminating machine. Once finished, solidify the OLED screen assembly in the High Power UV Lamp for 3 minutes.
Test
Get the OLED screen assembly connected. Run function test.
Get Free Gift From SHOP.REWA.TECH. Buy any of the products below and get a free refurbishment course. For more information about this Promo, please contact your account manager.
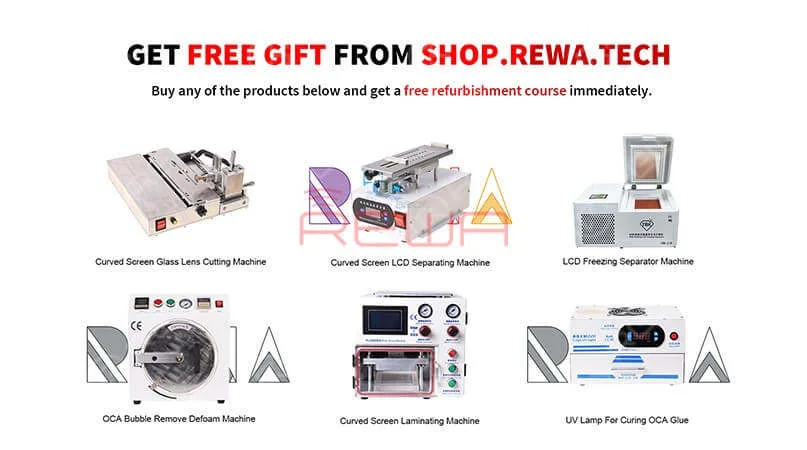
For more details on this Refurbishing solution, please go to REWA YouTube-Kanal.
-
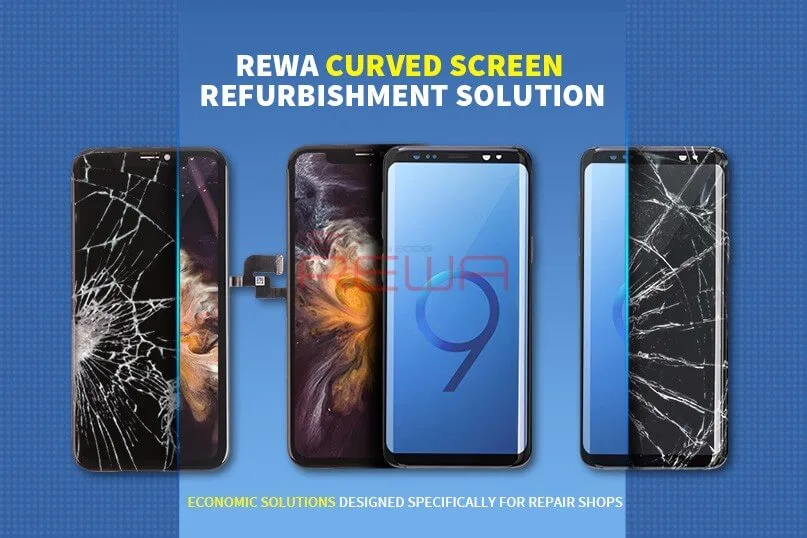
Samsung Galaxy S9/S9+ Reparatur nur des gebrochenen Frontglases – Aufbereitungslösung V5.0
Mit dem Aufkommen immer mehr Mobiltelefone mit gebogenem Bildschirm auf dem Markt wird die Technologie für gebogene Bildschirme immer komplizierter, was die Schwierigkeit der Aufarbeitung gebogener Bildschirme erhöht. Die Veröffentlichung der Samsung S9-Serie bringt zudem eine neue Herausforderung mit sich, da herkömmliche Lösungen zur Aufarbeitung gebogener Bildschirme mit Gefrierunterstützung deren Anforderungen nicht mehr erfüllen können. Aus diesem Grund präsentieren wir Ihnen diese neueste Lösung zur Aufarbeitung gebogener Bildschirme mit Wärmeunterstützung, die die Anforderungen an die Aufarbeitung der meisten Mobiltelefone mit gebogenem und flexiblem Bildschirm erfüllen kann.
Diese Überholungslösung V5.0 verwendet hauptsächlich die folgende Ausrüstung:
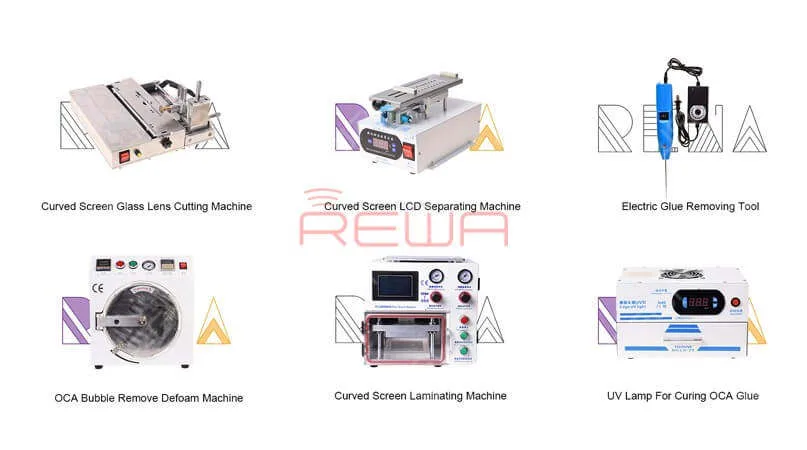
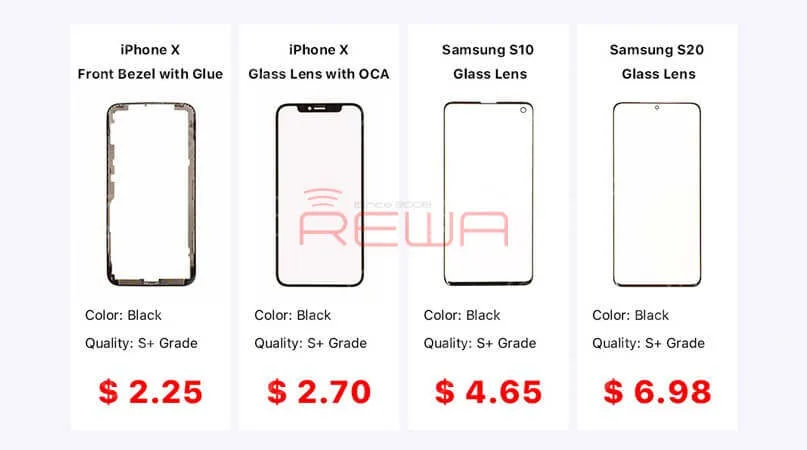
Glaslinse für Samsung & iPhone
Maschine zum Schneiden von gewölbten Bildschirm-Glaslinsen
Rotierende LCD-Trennmaschine für gebogene Bildschirme
Elektrisches Klebstoffentfernungsgerät
Laminiermaschine für gebogene Siebe
Maschine zum Entfernen von Luftblasen
Für nähere Informationen zu den einzelnen Produkten kontaktieren Sie uns unter sales@rewatechnology.com oder besuchen Sie die shop.rewa.tech um mehr zu erfahren!
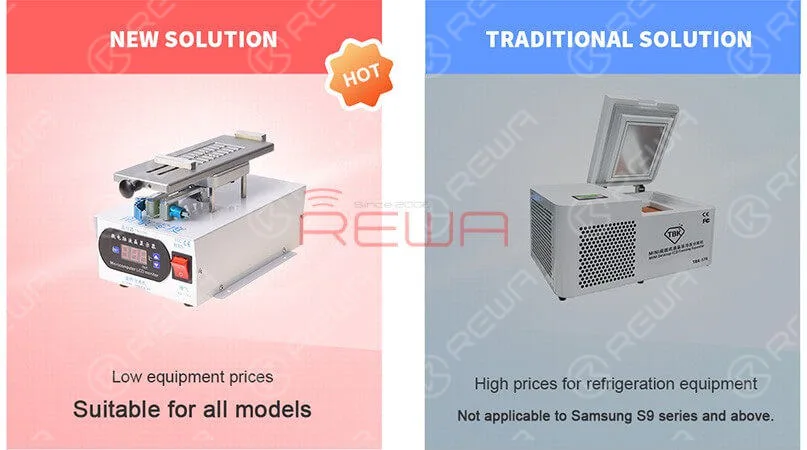
Im Vergleich zu einer herkömmlichen Lösung ist die Refurbishing-Lösung V5.0 für alle Modellen geeignet. Besonders geeignet für die Samsung S9 Serie und höher. Die neue Lösung kann das Problem der LCD-Ablösung lösen und Kälteschäden am LCD verhindern. Außerdem ist der Gesamtpreis der Ausrüstung niedriger als bei herkömmlichen Lösungen. Besser als jede andere Lösung auf dem Markt bieten wir den besten technischen Support, der einen Online-Kundendienst und eine umfassende Palette an Schulungsvideo-Diensten umfasst.
Besser als jede andere Lösung auf dem Markt bieten wir den besten technischen Support, der Online-Kundenservice und ein umfassendes Angebot an Schulungsvideos umfasst.
Weitere Einzelheiten zu der Operation finden Sie in dem nachstehenden Video:
-
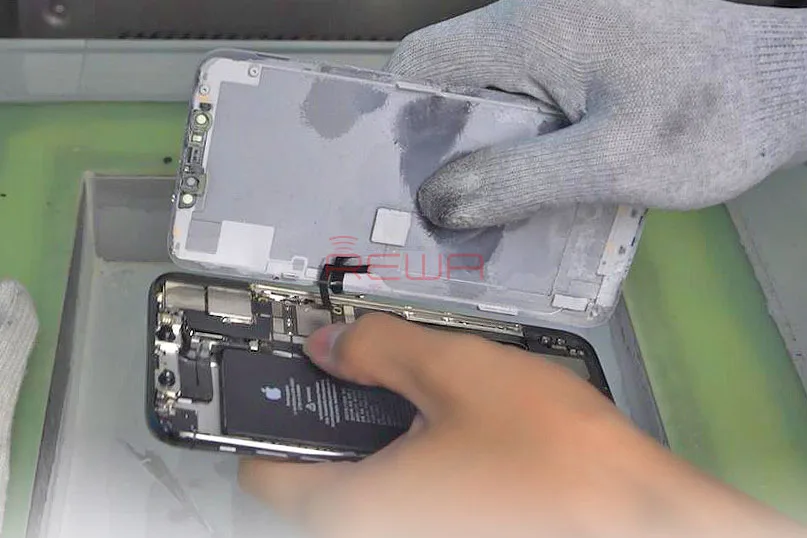
iPhone 11 Pro Max Screen Refurbishing – Detailed Operation
For iPhone X and later iPhone models, the bracket covering the bottom flex cable bonding area is adhered by cold adhesive. The traditional method with heating assistance when removing bezel might damage the screen. After several attempts, REWA LAB found that the new method with cold assistance can improve the success rate and efficiency of screen refurbishing. Check our blog today for detailed operation process of iPhone 11 Pro Max screen refurbishing.
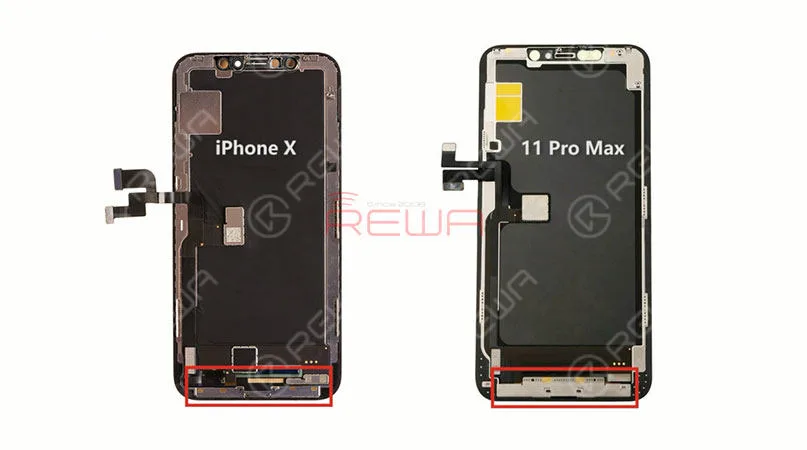
The screen structure of iPhone 11 Pro Max is the same as that of iPhone X series. Therefore, the screen refurbishing process is also similar. Different from iPhone X series, the bracket covering the bottom flex cable bonding area of iPhone 11 Pro Max is relatively wide, which increases the difficulty of screen refurbishing. Therefore, we need to be extremely careful when removing the bezel.
iPhone 11 Pro Max Screen Refurbishing
Step 1 Screen Testing
The first thing we do is to test the screen. Test the display, touch functionality and Haptic Touch of the screen. All going well.
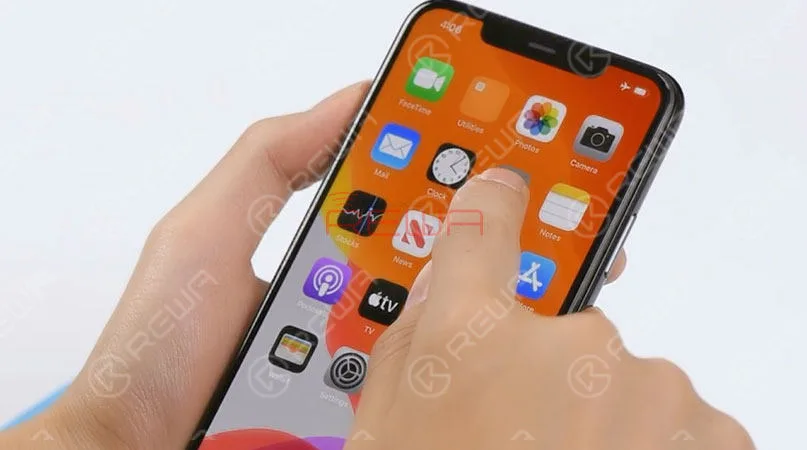
Please be noted that when testing iPhone 11 Pro Max’s screen, the default brightness of the screen is set at the lowest level. To adjust brightness of the screen during the testing, we need to get the front panel sensor assembly flex cable connected. Disconnect the front panel sensor assembly flex cable and remove the OLED screen assembly. Then remove the front panel sensor assembly flex cable.
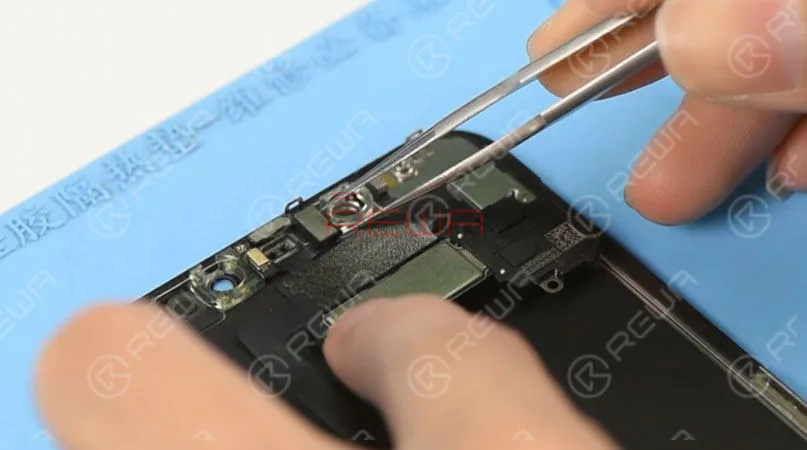
Tips: it is not easy to remove the front panel sensor assembly flex cable, which can be easily damaged during the operation. And the damage can also affect the function of Face ID. So we need to be extremely careful when operating
Step 2 Bezel Removing
Place the OLED screen assembly upside down into the -180℃ Frozen LCD Screen Separator. Insert a 0.06mm metal pry piece under the bracket covering the bottom flex cable bonding area. Slide back and forth to slice through the cold adhesive here. Once done, connect the screen and test. All going well.
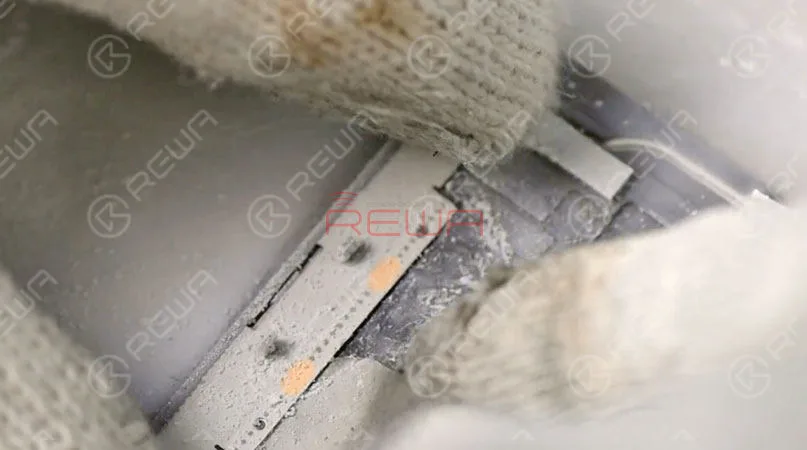
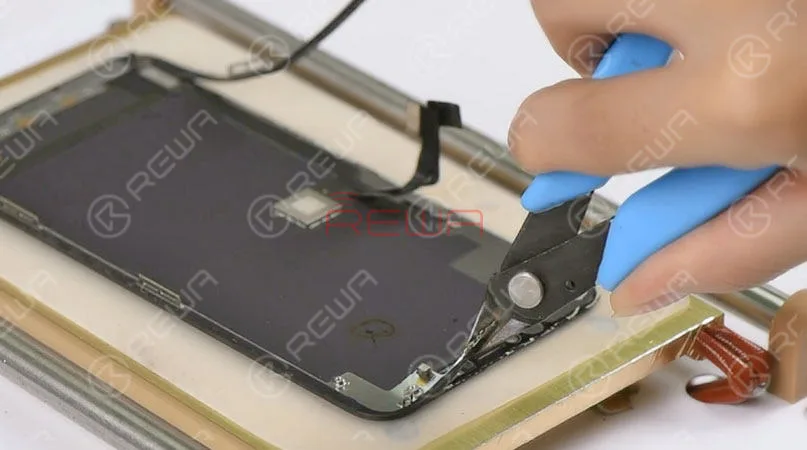
Tips: since the front panel sensor assembly flex cable is not connected, the default brightness of the screen is set at the lowest level. Set temperature of the Heat Platform at 100℃. Then put the OLED Screen Assembly on the preheated platform. Press the ‘Start’ button to suck the screen. 1 minute later, remove the front camera and sensor holder. Cut out the top bracket with the Cutting Nipper. Then separate the bezel from the OLED with the Cutting Nipper.
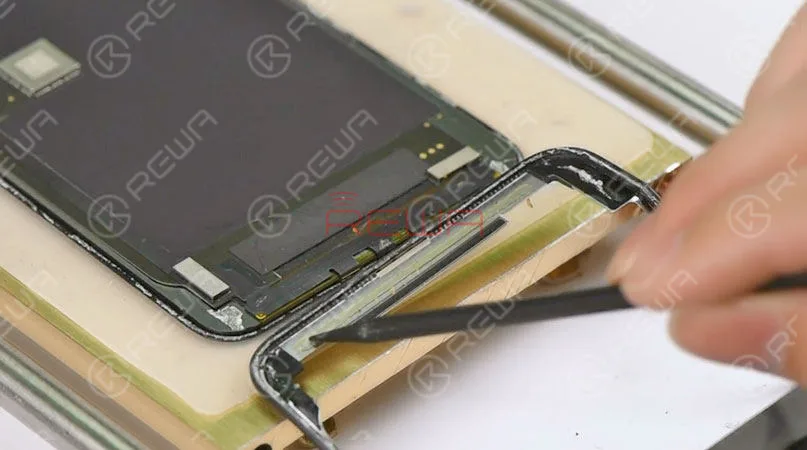
Tips: when detaching the bezel at the bottom area of the phone, we need to insert the metal pry piece under the bracket covering the bottom flex cable bonding area and slide back and forth. This is to confirm that the cold adhesive here has been sliced open. The bezel has been removed completely. As you can see, the area here is adhered by cold adhesive in large amounts. To protect the OLED from damage, we’d better freeze the screen during the operation.
Again, let’s test the OLED Screen Assembly. All going well.
Step 3 Glass Lens Separating
Now, let’s move to the glass lens separating process.
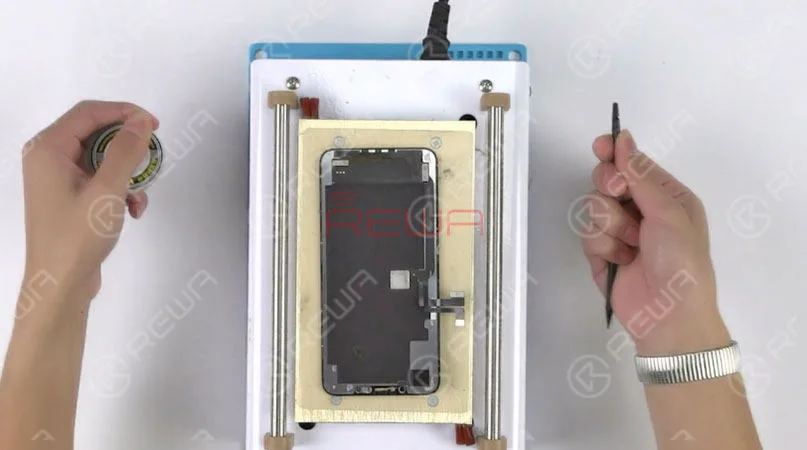
Place the OLED Screen Assembly upside down on the Heat Platform. Remove residual glue on the earpiece speaker area with a blade. So that the Touch Panel will not be damaged when operating with the Cutting Wire. Next, separate the glass lens from OLED with Cutting Wire. Test again after separating. All going well.
Step 4 OCA Glue Removing
Let’s continue with OCA glue removing.
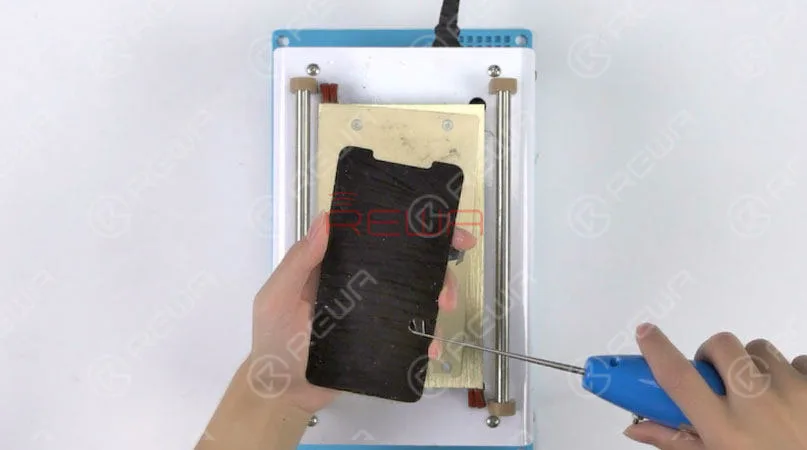
Put the OLED screen upside down on the Heat Platform for 3 minutes. Make an incision with the Electric Glue Removing Device. Then continue to tear off the OCA Glue with one hand. Also, be careful with force applied. This is to avoid damaging the OLED screen. Once done, test the OLED Screen. All going well.
Step 5 Laminating
Tear off the protective film on the backside of the glass lens and attach the OCA to the right position of the glass lens. Then put the OCA attached glass lens into the bubble removing machine for 5 minutes. Once finished, take out the OCA attached glass lens.
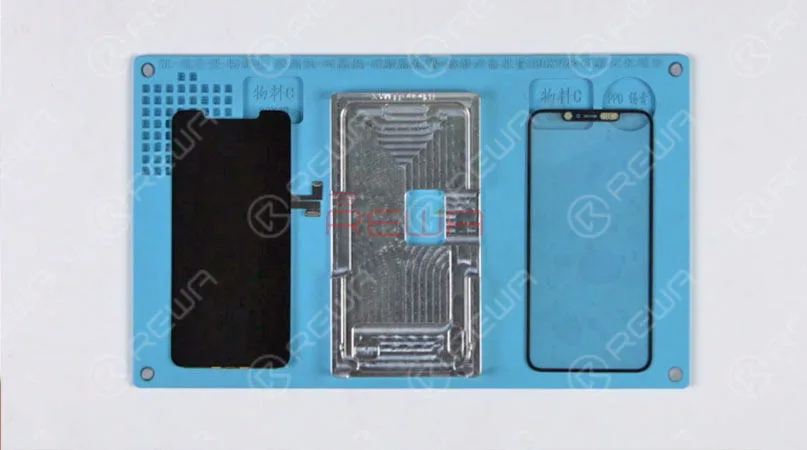
Now we need to laminate the OCA attached glass lens to the OLED Screen. Place the OLED screen into the OLED aligning mold. Clean the screen with the lint-free wiper. Tear off another layer of the OCA protective film and attach the OCA attached glass lens to the right position of the screen. Press gently to fit the glass lens with the screen. Place the mold upside down and take out the OLED Screen Assembly. Tear off the protective film on the glass lens. Cover the backside of the OLED Screen Assembly with a laminating sponge and then place the OLED Screen Assembly into the laminating machine. Choose ‘start’ on the LED panel. The machine starts to work. Laminating finished after several minutes. Again, let’s test the OLED Screen Assembly. All going well.
Step 6 Bubble Removing
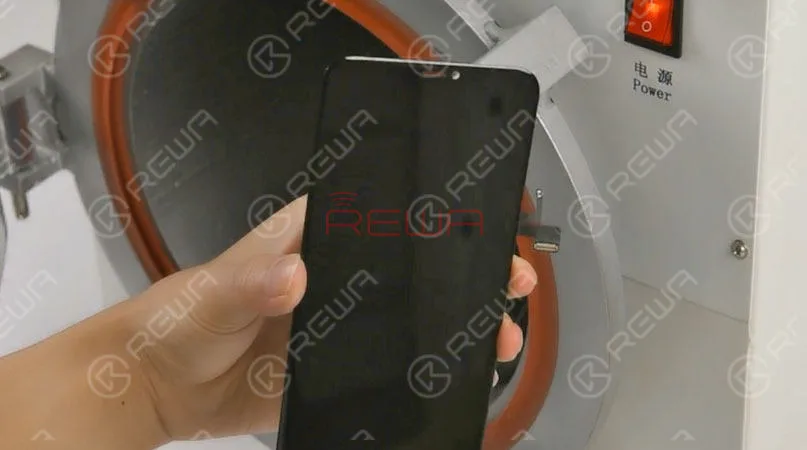
Put the OLED Screen Assembly into Bubble Removing Machine for 10 minutes. Once finished, take out the OLED Screen Assembly.
Step 7 Bezel Attaching
Prepare a new piece of iPhone 11 Pro Max bezel. Tear off the protective film on the bezel. Apply the specialized glue to the bezel. Then apply pressure to fit the OLED Screen Assembly with the bezel.
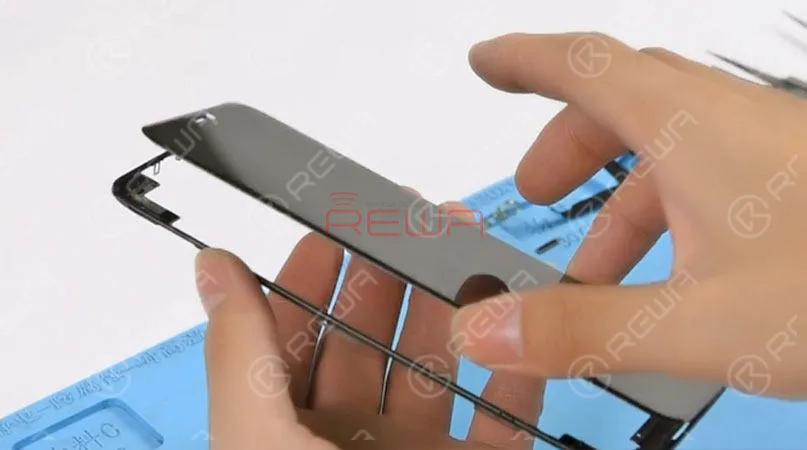
Please be noted the FPC area on the bottom is very fragile. Be careful when operating. Otherwise, you might damage the OLED screen.
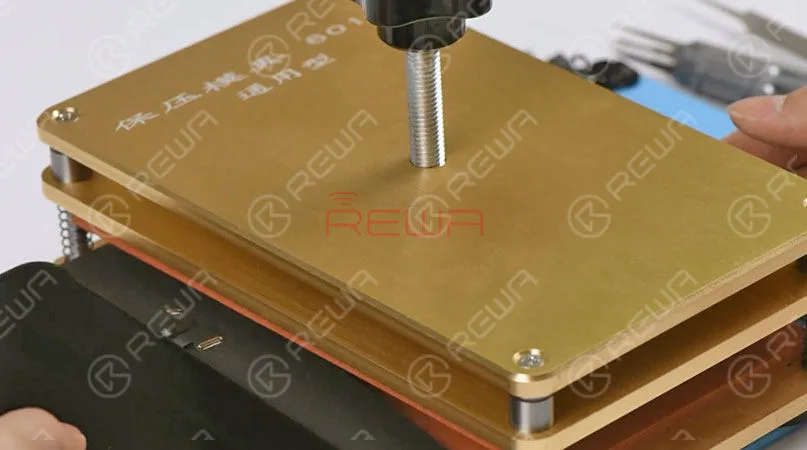
Cover the backside of the OLED Screen Assembly with a laminating sponge. Then place the OLED Screen Assembly into the bezel laminating mold and fix it. Tighten the screw and wait for 10 minutes. Take out the OLED Screen Assembly afterwards.
Step 8 Screen Testing
Get the front camera and sensor holder installed, and then the earpiece speaker mesh. Get the front panel sensor assembly flex cable and the OLED Screen Assembly installed. Run function test – Display; Touch; Haptic Touch. Display, Touch, and Haptic Touch work normally.
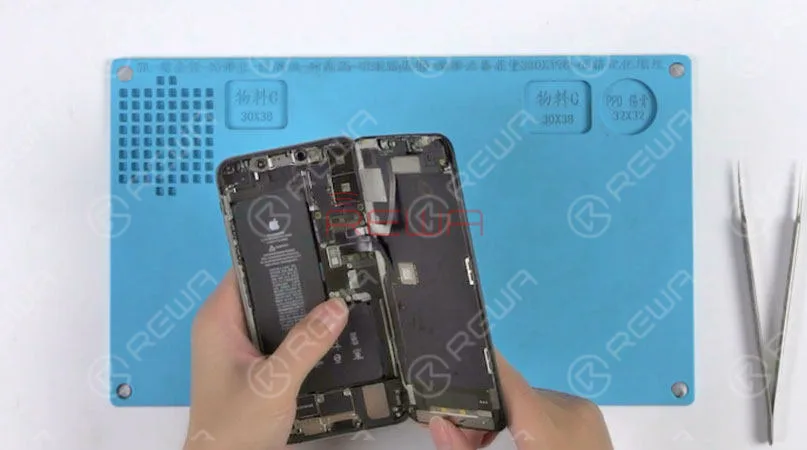
iPhone 11 Pro Max screen refurbishing has been completed perfectly.
Verwendete Werkzeuge und Teile
- LCD-Schneidedraht
- Refurbishing Machines
- Heißluftpistole Rework Station
- Gerade Pinzette
- Schraubendreher
- Integrierte Plattform für Mobiltelefonreparaturen
- Antistatische Hebeleisen
- Maschine zum Entfernen von Luftblasen
- Bezel Laminating Mold
Sie können auch besuchen REWA Youtube Kanal to check our video of iPhone 11 pro max refurbishing.
-
Economical Solution – REWA Broken LCD Refurbishing Solution
With 7 machines in total, this economical broken LCD screen refurbishing solution features high cost performance, offering an output of 120 pieces per day, which is specially for small factories. Please check the video for the more efficient and economical mobile phone glass-only repair solution.
Refurbishing Machines included:
- Elektronische Heizplattform
- 3 in 1 Heating, LCD Separator and Frame Disassemble Machine
- Manual POL/LCD Glue Removing Machine
- Manual OCA/POL Film Laminator (Vacuum pump built-in)
- Automatic Glass Laminating and Bubble Removing Machine
- Bezel Assemble Machine
- Air Compressor – 30L
-
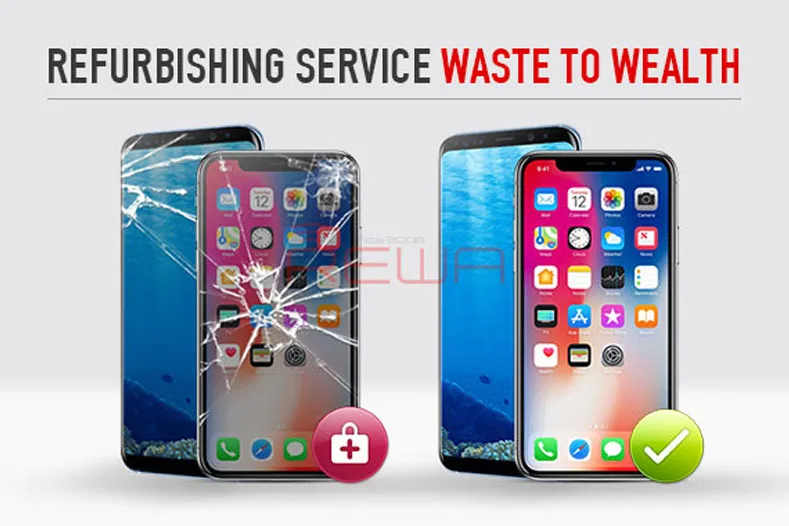
REWA-Sanierungsservice - Aus Abfall wird Reichtum
Sie haben also noch viele kaputte Bildschirme im Lager? Zu schade, um sie wegzuwerfen oder zu einem niedrigen Preis zu verkaufen? Sammeln Sie alle Ihre kaputten Bildschirme, schicken Sie sie zu REWA und machen Sie sie wieder lebendig! Besuchen Sie REWA Reparaturservice für defekte LCD- und OLED-Bildschirme Warum sollten Sie uns wählen?
1. Wir haben Aufarbeitung Service für mehr als 5 Jahren begonnen. Mit der reichen Erfahrung haben wir unsere Aufarbeitung Erfolgsquote auf fast 100% stark verbessert.
2. Anstatt einen neuen Bildschirm zu kaufen, können Sie einen billigeren Bildschirm mit der gleichen Qualität erhalten, indem Sie ihn aufarbeiten. Schicken Sie alle kaputten Bildschirme an REWA und lassen Sie uns die Aufarbeitung für Sie erledigen, um Zeit und Arbeitskosten zu sparen.
3. REWA hat gute Garantiepolitik für alle unsere Produkte. Wie zu überholten Bildschirmen mit Qualitätsproblem innerhalb von drei Monaten auftreten, können wir eine zweite Aufarbeitung kostenlos oder Kredit für den nächsten Kauf bieten.
Zurzeit bieten wir einen Aufarbeitungsservice für die folgenden Modelle an:
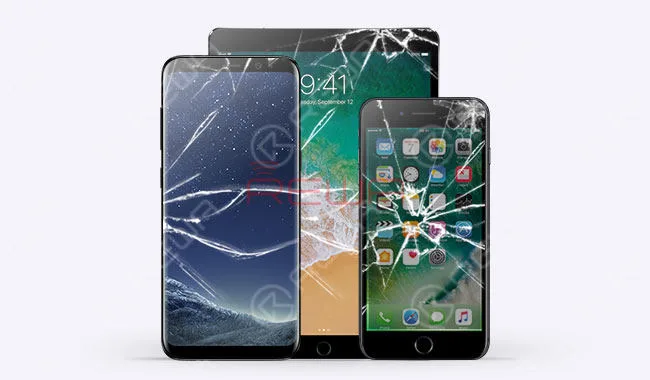
1. iPhone 5 / 5c / 5s / 6 / 6 Plus / 6s / 6s Plus / 7 / 7 Plus / 8 / 8 Plus / X
2. iPad mini 4 / Air 2 / 9.7 / 12.9
3. Galaxy S III / S III Mini / S4 / S4 Mini / S5 / S5 Mini / S6(G920) / S6 edge(G925) / S6 edge+(G928) / S7(G930) / S7 edge(G935) / S8(G950) / S8 edge(G955) / Note 1 / Note 2 / Note 3 / Note 4 / Note 4 Mini / Note 4 edge(N915) / Note 5
Hinweis
1. Wenn die Hintergrundbeleuchtung des zerbrochenen Bildschirms aufgrund von Schäden wie Wasserschäden, Verformungen, Lichtlecks, Staubschäden oder anderen Defekten der Hintergrundbeleuchtung ersetzt werden muss, wird der Ersatz der Hintergrundbeleuchtung entsprechend berechnet. Das Gleiche gilt für den Austausch des mittleren Rahmens von Samsung.
2. Zerbrochene Bildschirme mit beschädigtem Display und beschädigter Touch-Funktion sind einer Aufarbeitung nicht würdig.
So funktioniert der REWA-Aufbereitungsservice
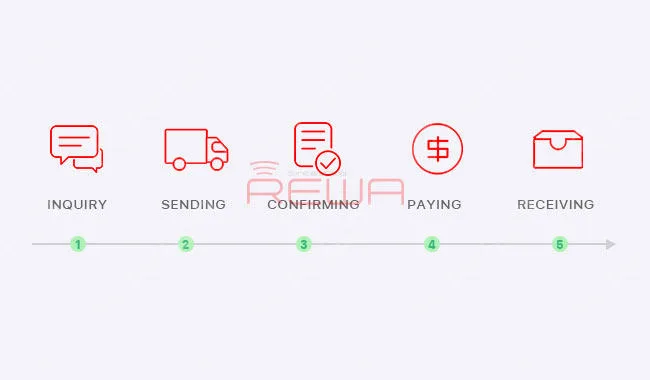
Anfrage
-Setzen Sie sich mit unserem Vertrieb in Verbindung und beschreiben Sie das Problem, um einen vorläufigen Kostenvoranschlag zu erhalten.
-Wir unterstützen Sie bei der Prüfung des gebrochenen Bildschirms, der Verpackung und der Logistik
Senden von
-Schicken Sie Ihre kaputten Bildschirme weg
Bitte senden Sie REWA sales Ihre e-packing Liste, das Bild des Pakets und die Tracking-Nummer
Bestätigen Sie
-Bestätigen Sie die Anzahl der defekten Bildschirme, die aufgearbeitet werden müssen.
-nach dem Test des gebrochenen Bildschirms stellen wir einen Testbericht aus
-Sobald der Prüfbericht vom Kunden bestätigt wurde, beginnen wir mit der Aufarbeitung
Bezahlen
-Bestätigen Sie die Anzahl der überholten Bildschirme, Hintergrundbeleuchtungen und mittleren Rahmen, die ersetzt wurden.
-Wir senden PI an Sie und beginnen mit der Reparatur, sobald die Zahlung eingegangen ist.
Empfang von
-Für kaputte Bildschirme, die es nicht wert sind, wiederhergestellt zu werden, oder für Bildschirme, die nicht erfolgreich wiederhergestellt wurden, werden wir Ihnen bestätigen, ob Sie sie zurückgeben möchten. Wenn JA, sollten Sie die Rücksendekosten tragen.
-Wir senden das Paket zurück, nachdem die Zahlung bestätigt wurde.
Nachverkaufs-Service
Für alle überholten Bildschirme gilt eine 3-monatige Garantie. In Einzelfällen werden wir sofort mit Ihnen verhandeln.
Die Garantie gilt nicht für die folgenden Fälle:
1. Schäden aufgrund von persönlichen Fehlern (unsachgemäße Installation) und Umweltveränderungen (hoher Druck, Blitzschlag, Wasserschäden usw.).
2. Beschädigung des Garantieetiketts.
Kundenbenachrichtigung
Hier sind einige Details, die wir Ihnen vor der Lieferung mitteilen möchten
1. Der Aufarbeitungsprozess (ohne Lieferzeit) dauert in der Regel etwa 3-7 Tage (10-100 PCS) Wenn die Menge der Logikkarte, die Sie gesendet haben, mehr als 100 PCS ist, dann müssen Sie mit uns über die Aufarbeitungszeit verhandeln.
2. Der Kunde trägt die Frachtkosten nach China.
3. Der Kunde muss das Risiko des Scheiterns der Renovierung tragen.
4. Der Kunde muss kaputte Bildschirme vor dem Absenden vollständig testen. Für gebrochene Bildschirme mit beschädigtem Display und Touch-Funktion, die es nicht wert sind, aufgearbeitet zu werden, werden wir bestätigen, ob Sie sie zurück wollen. Wenn JA, sollten Sie die Kosten für die Rücksendung tragen.
-
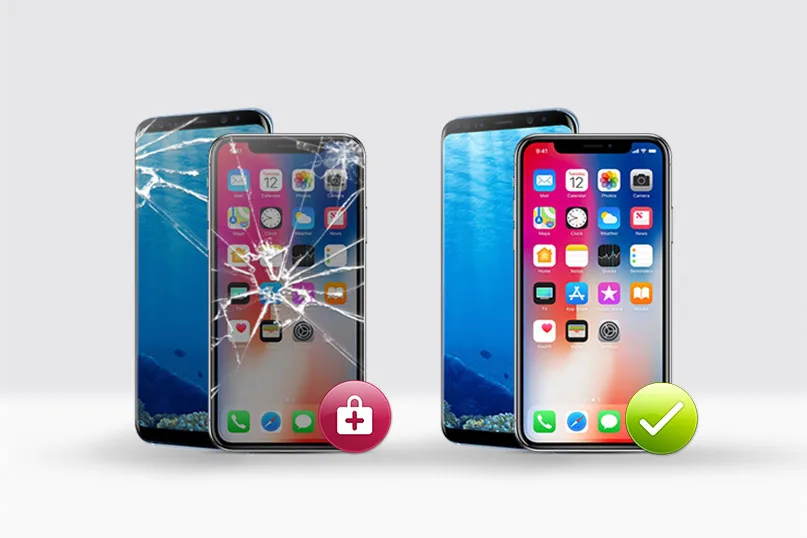
iPhone 8 Broken LCD Screen Refurbishing – Glass Only Repair
For a long time, REWA has been dealt with broken screen refurbishing of some flag-ship models like iPhone X Screen Refurbishing – Glass Only Repair and Samsung Galaxy S7 edge glass replacement. And this time, with the iPhone 8 being the subject of intense social debate, we also come up with an exclusive iPhone repair solution that shall definitely surprise you. Latest iPhone 8 broken LCD screen glass-only refurbishing technique, supported by REWA LAB, cost-effective and efficient for all iPhone repair professionals and enthusiasts. Don’t miss it!
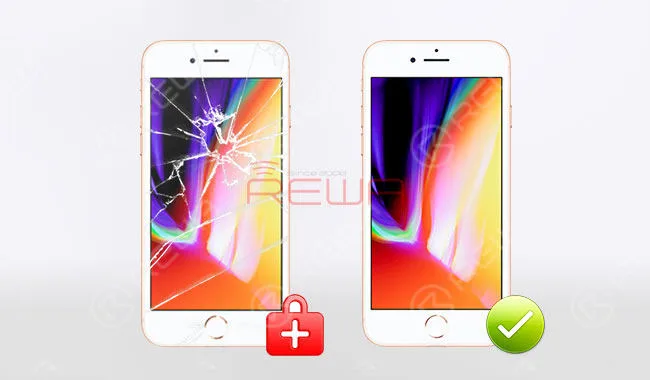
iPhone 8 Broken LCD Screen Refurbishing – Glass Only Repair
Prüfung von gebrochenen Bildschirmen
Here comes one iPhone 8 LCD display assembly with broken glass lens. The first thing we need to do is to test if the display, touch and 3D touch functionality is OK.
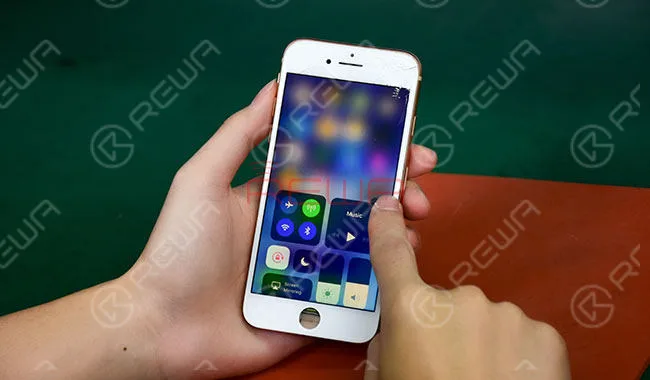
Abnehmen der Blende
Detach flex cables and remove the display assembly.
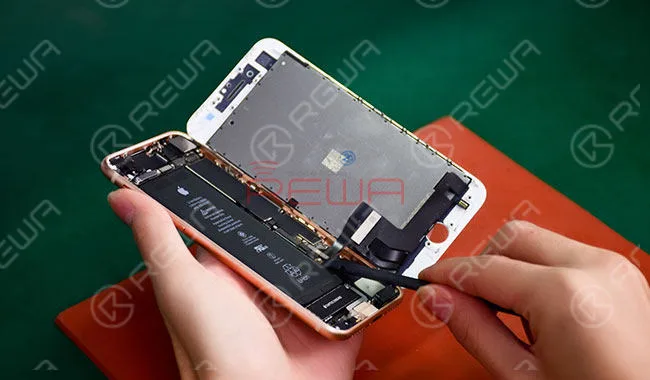
Then heat and remove bezel with Bezel Removing Machine at 230℃.
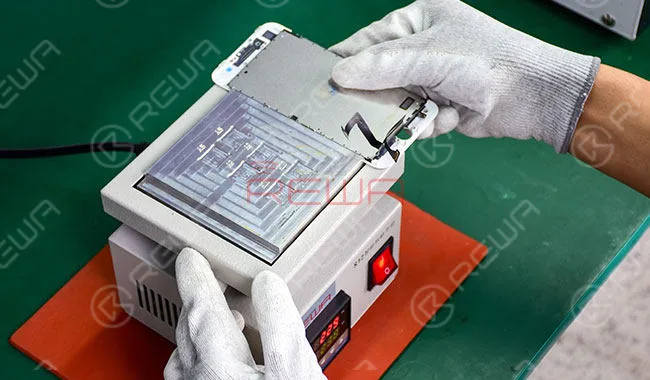
Glaslinse trennend
Stick adhesive tape on broken glass to prevent further damage. Then place the display assembly onto the Manual Separating Machine. Heat up at 69℃ for 30s.
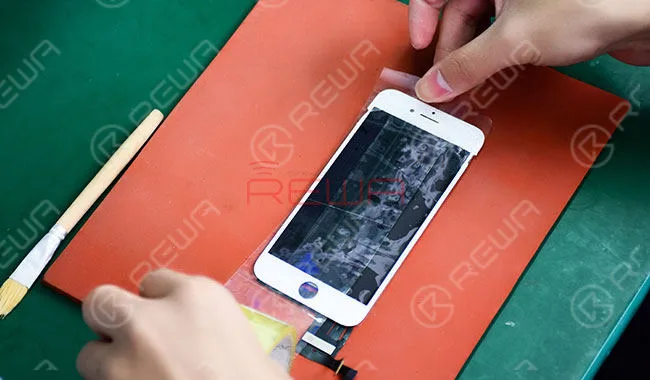
Press the ‘Start’ button and separate the glass lens from LCD with LCD cutting wire.
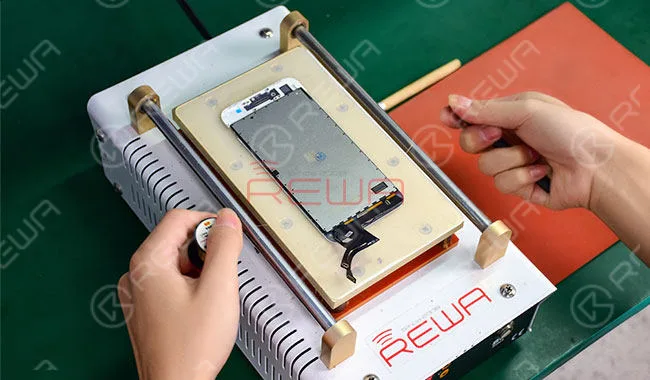
POL Entfernen
Remove the POL Film evenly with Glue Removing Machine. After that, remove the glue residue with LCM Cleaner. (Remove the residual POL film with razor blade if necessary. Once finished, remove the glue residue with LCM Cleaner.) Once done, clean again with N-hexane.
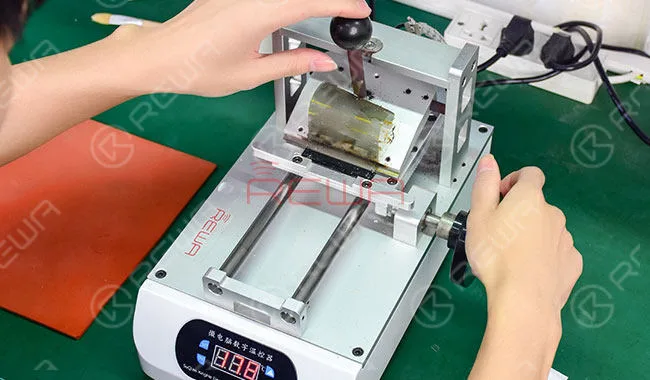
OCA & POL Laminating
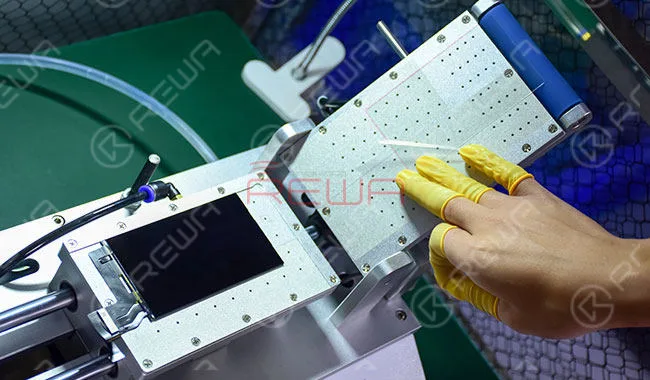
Place the LCD onto the POL Laminating Machine. Do remember to clean completely with N-hexane at first. Align the POL Film with LCD correspondingly. Then press ‘Pump Down’ button to help stick the POL film to the top panel.
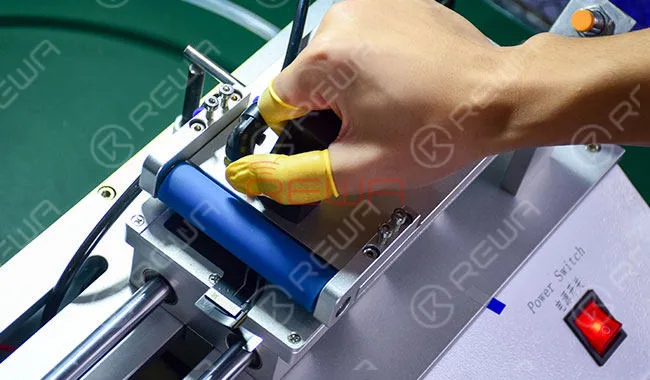
Tear off the first layer of POL protective film with Easy Tear Sticker. Force down the top panel with activating button to finish POL laminating.
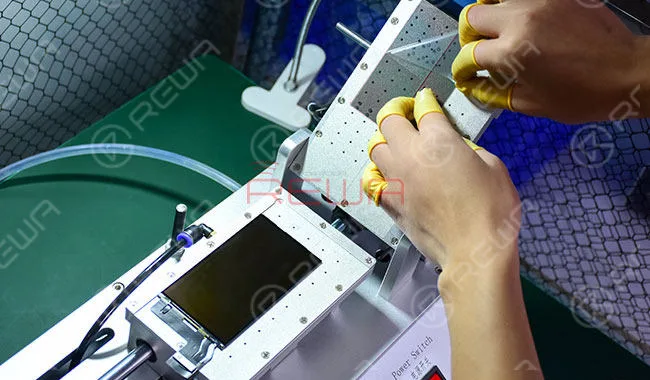
Tear off the first layer of OCA protective film. Align the OCA Sheet with LCD correspondingly. Then press ‘Pump Down’ button to help stick the OCA to the top panel.
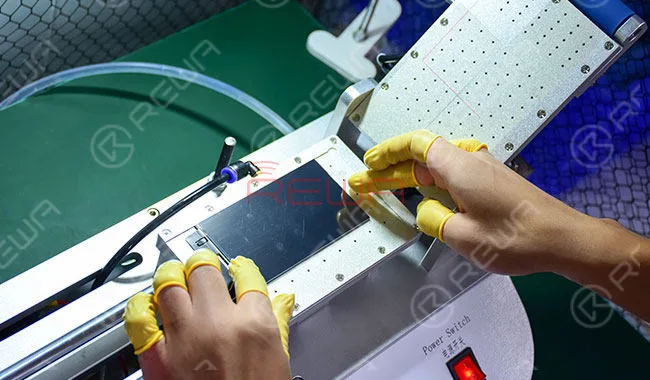
Tear off the second layer of POL protective film with Easy Tear Sticker. Tear off the second layer of OCA protective film with Easy Tear Sticker. Force down the top panel with activating button to finish OCA laminating.
Glass Lens Laminating
Stick an Easy Tear Sticker to the top right corner of the LCD. Then put the LCD into the align mold.
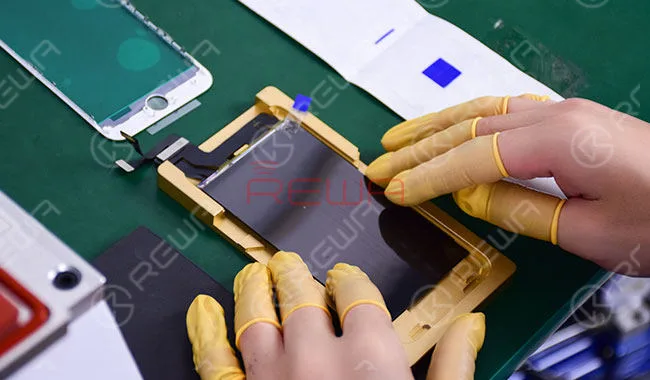
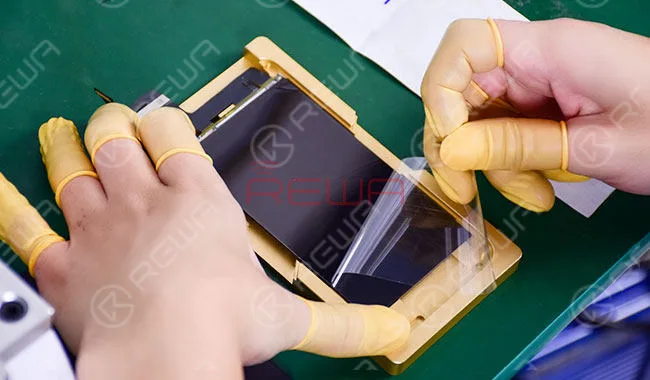
Tear off the back cover protective film of the Integrated iPhone 8 Glass Lens with Front Bezel with Easy Tear Sticker and tear off the last layer of OCA protective film with Easy Tear Sticker.
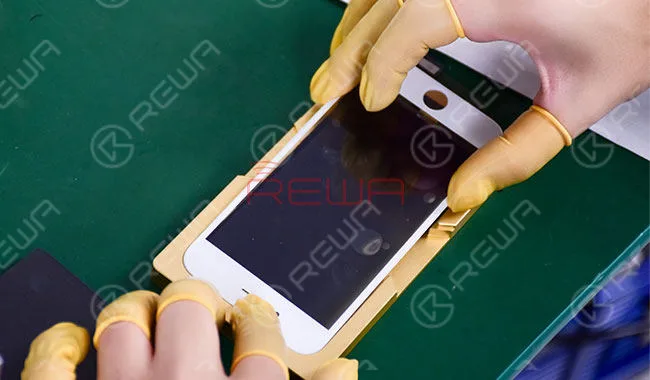
Align the Integrated iPhone 8 Glass Lens with Front Bezel with LCD in the align mold correspondingly. Place upside down the align mold and take out the LCD display assembly.
Cover the back side of the LCD display assembly with a laminating sponge. Put the LCD display assembly into the Glass Laminating Machine.
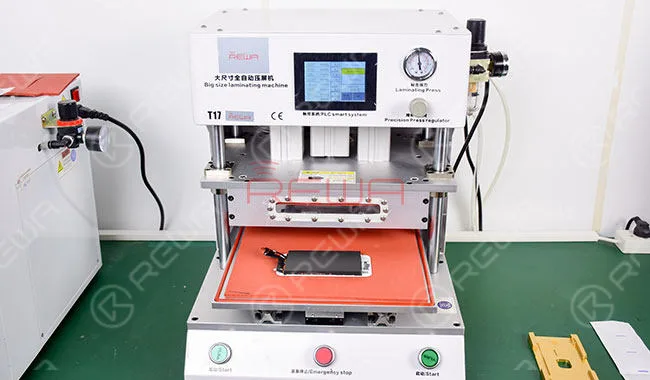
Take out the LCD display assembly and evaluate the effect.
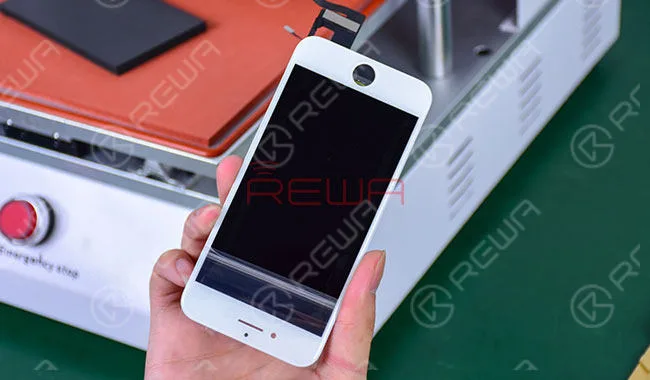
Entfernen von Blasen
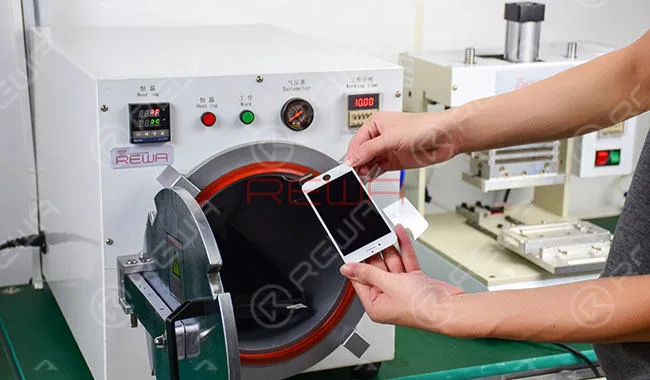
Put the LCD display assembly into the Bubble Removing Machine for 10 minutes.
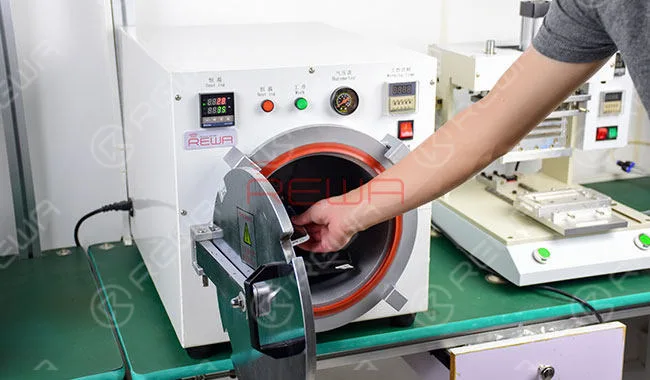
Take out the LCD display assembly and evaluate the effect.
Überholung von Bildschirmtests
Connect the LCD display assembly to the logic board and run function test on a refurbished screen. Test the display, 3D touch and touch functionality again.
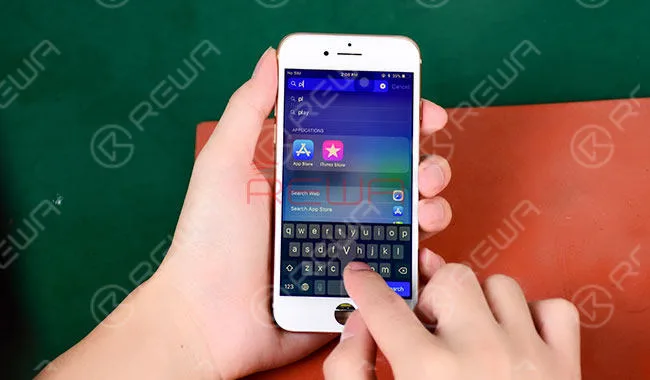
For more details on iPhone 8 Broken LCD Screen Refurbishing, please go to REWA YouTube-Kanal.
Erforderliche Teile und Werkzeuge
- Apple iPhone 8 Glass Lens with Front Bezel Replacement
- Apple iPhone 8 OCA Glue Sheet
- Apple iPhone 8 Top Polarizer Film
- LCD-Schneidedraht
- Glass Lens with Bezel Frame Alignment Mold for iPhone 8
- Bezel Removing Machine
- Manual Separating Machine
- Glue Removing Machine
- OCA & POL Laminating Machine
- Glas-Laminiermaschine
 English
 Español
 Français
 Deutsch
 Italiano