Schlagwort: iphone teardown

  • iPhone 18 Pro Teardown: What Changed Inside and How Does It Affect Repairability

    iPhone 18 Pro Teardown: What Changed Inside and How Does It Affect Repairability

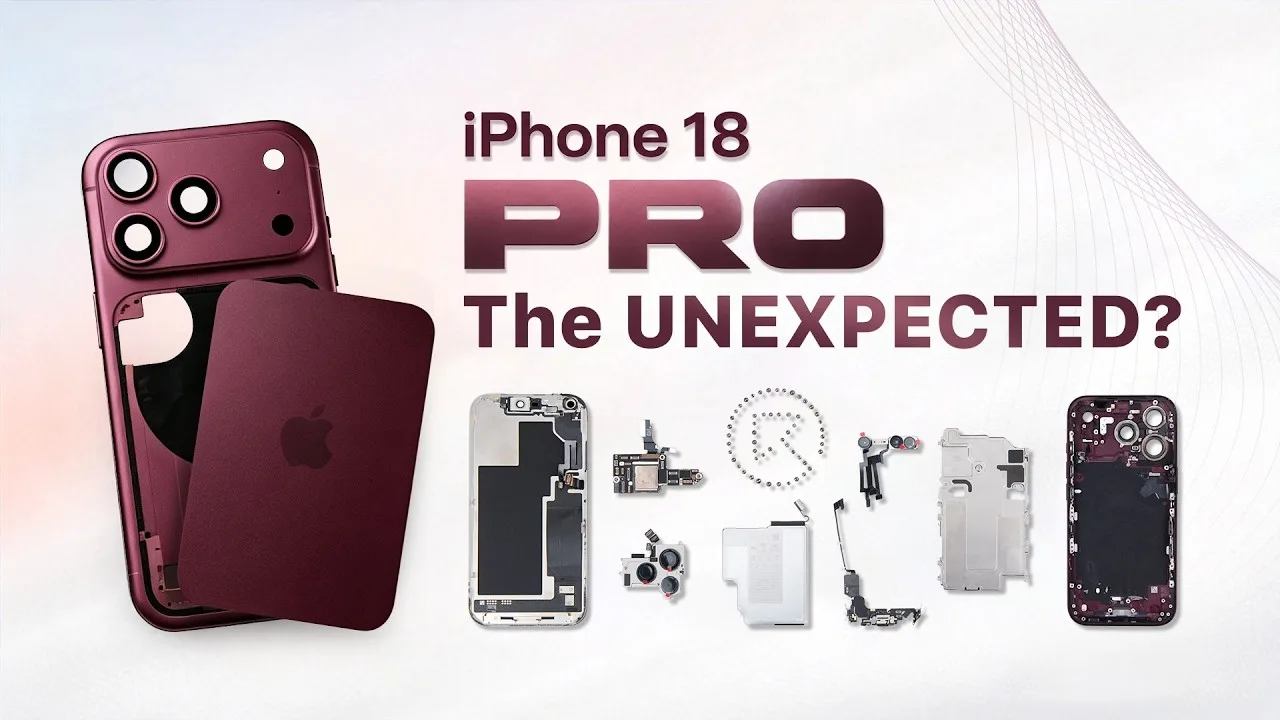
    The iPhone 18 Pro brings several significant changes beneath its familiar exterior. From a smaller Dynamic Island and a new under-display infrared camera to a dramatically larger vapor chamber and a redesigned motherboard layout, Apple has changed more than just the phone’s appearance.

    In this full teardown by REWA Lab, we dive deep into the internal structural changes and analyze what these updates mean for third-party repair shops and aftermarket component manufacturers.

    Step-by-Step Disassembly Process

    Opening the iPhone 18 Pro requires specialized repair tools and a cautious approach to avoid damaging internal flexes and sensors. Standard safety and prep steps are as follows:

    Preparation Before Teardown: Power off the device and remove the bottom screws with the Pentalobe screwdriver.
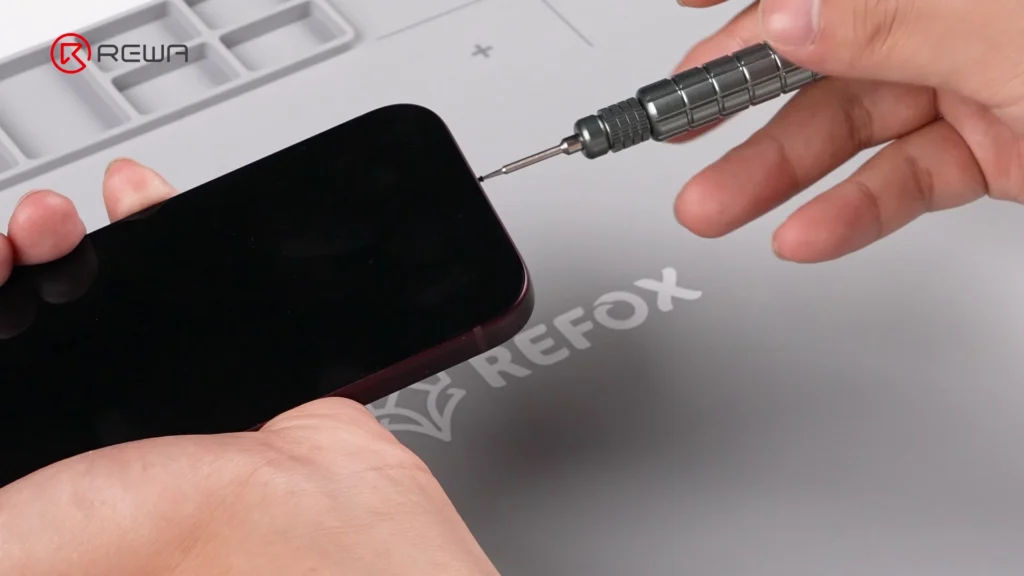
    Removing the bottom screw of an iPhone using a precision Pentalobe screwdriver

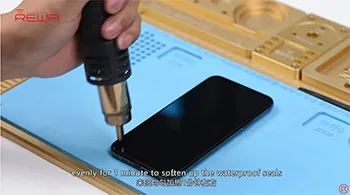
    Screen Removal: Heat the screen to soften the perimeter waterproof adhesive. Use an opening tool with suction cup and Isopropylalkohol to gently slice through the seal with an opening pick.

    Camera Protection: Cover the front camera module with protective sponge stickers to prevent dust or scratches.

    Bracket & Flex Cable Disconnection: Unscrew and remove the battery and display connector bracket. Disconnect the battery flex cable, display cable, and front sensor cable to free the screen.

    Vapor Chamber & Cameras: Unscrew the vapor chamber using a 4IP screwdriver. Disconnect and remove the front / rear camera modules.
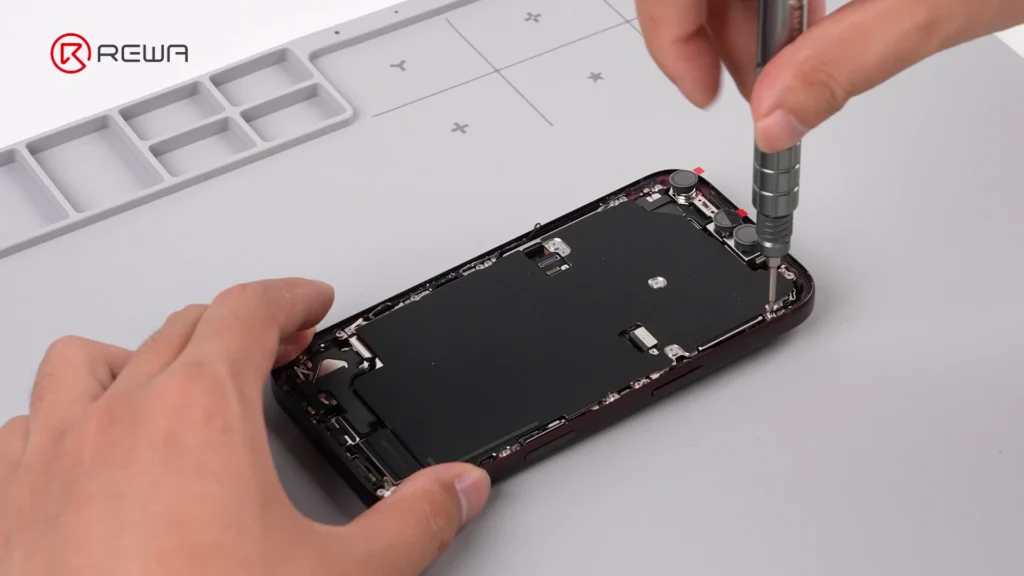
    using a screwdriver to open iPhone 18 Pro for teardown

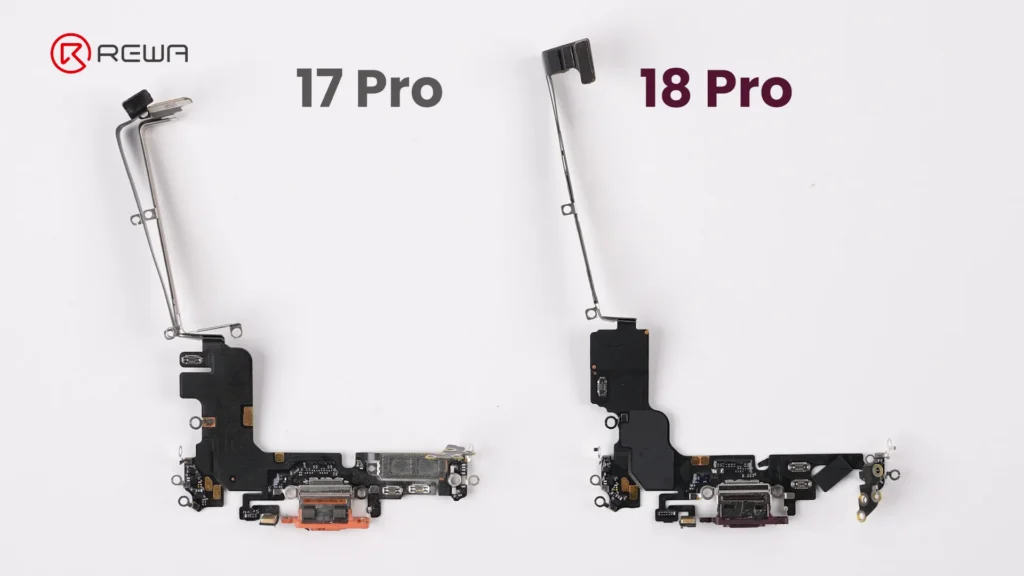
    Motherboard & Peripheral Removal: Unscrew and flip over the motherboard to disconnect the wireless charging coil. Remove flashlight, LiDAR, SIM tray, SIM card reader, bottom speaker, charging port, Taptic Engine, and microphone in sequence.
    iphone 18 pro teardown what changed inside how does it affect 3

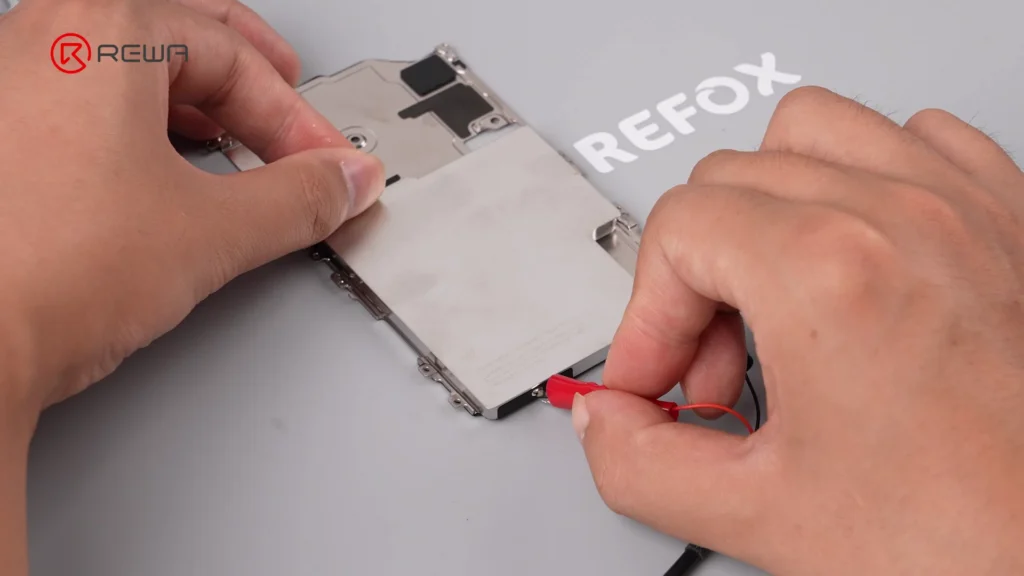
    Battery Debonding: Apply a 9V DC voltage between the silver battery tab (positive probe) and the vapor chamber (negative probe) to electronically deactivate the adhesive, allowing easy battery removal.
    iphone 18 pro teardown what changed inside how does it affect 4

    Display & Dynamic Island: Under-Display Infrared Tech

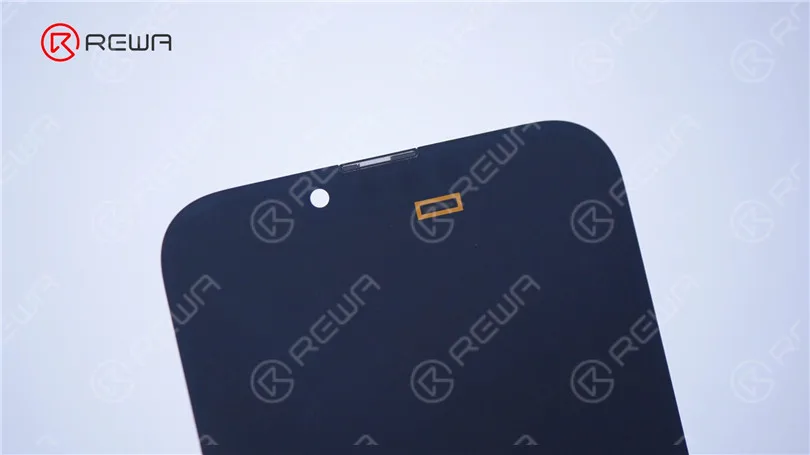
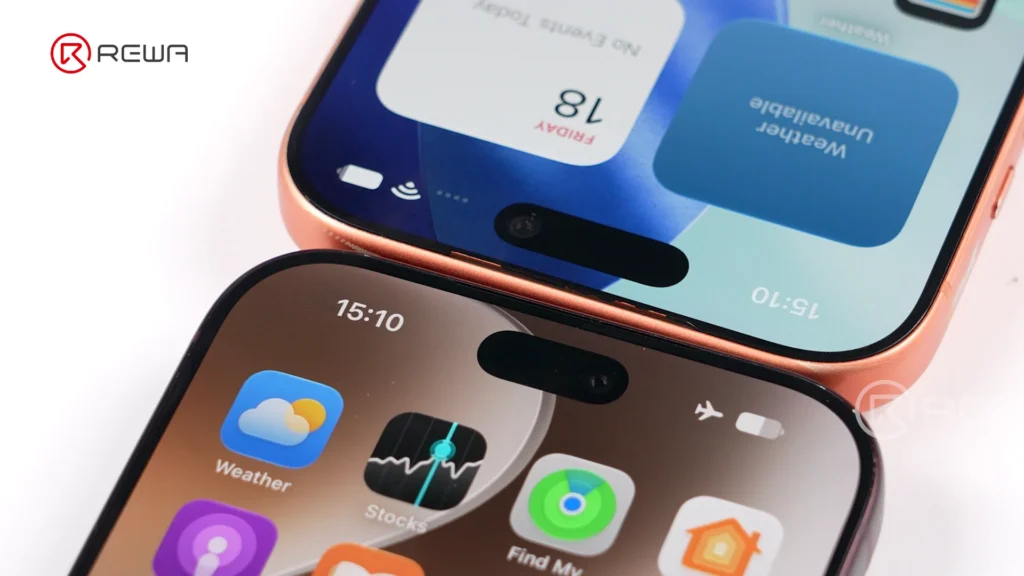
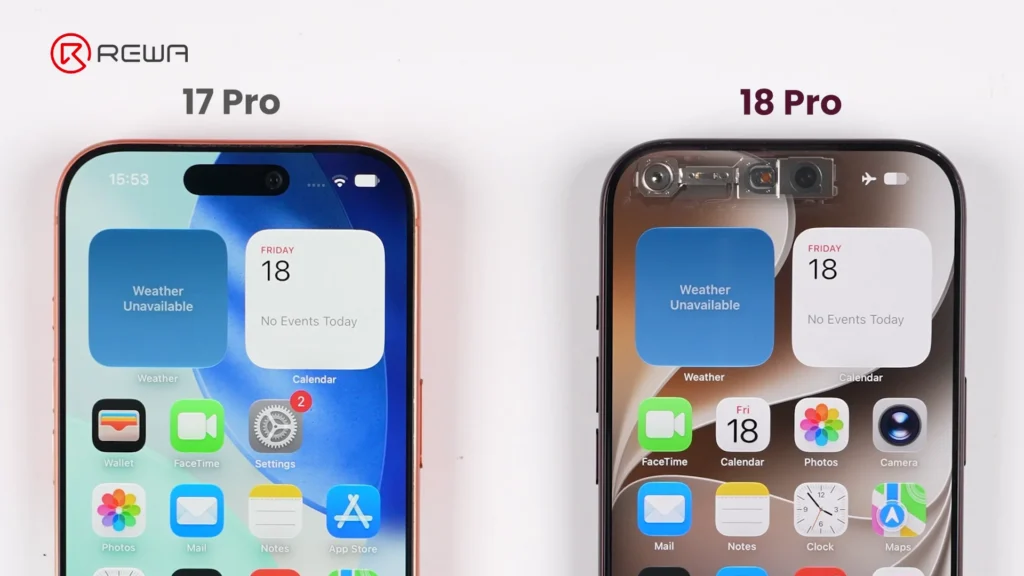
    Apple’s smaller Dynamic Island introduces a more complex under-display optical structure, creating new challenges for display refurbishment. This shrink is achieved by relocating the infrared camera under the display assembly and positioning it near the screen corner.
    iphone 18 pro teardown what changed inside how does it affect 5
    iphone 18 pro teardown what changed inside how does it affect 6

    Key display architecture updates include:

    Adjusted Pixel Matrix: The display above the infrared camera features a modified pixel density and arrangement to allow infrared light transmission for Face ID functionality.

    iphone 18 pro teardown what changed inside how does it affect 7

    Unfixed Flex Cable: The display flex cable is no longer secured with heavy adhesive, making screen separation cleaner during repair and refurbishment.

    Aftermarket Challenge: Third-party display manufacturers will face higher precision requirements to replicate the light-transmitting pixel window for Face ID functionality.

    Motherboard Architecture: Higher Difficulty for Micro-Soldering

    The updated motherboard layout places crucial chips in vulnerable locations while sandwiching NAND and power IC between layers. For micro-soldering technicians, the iPhone 18 Pro motherboard presents an elevated level of complexity.
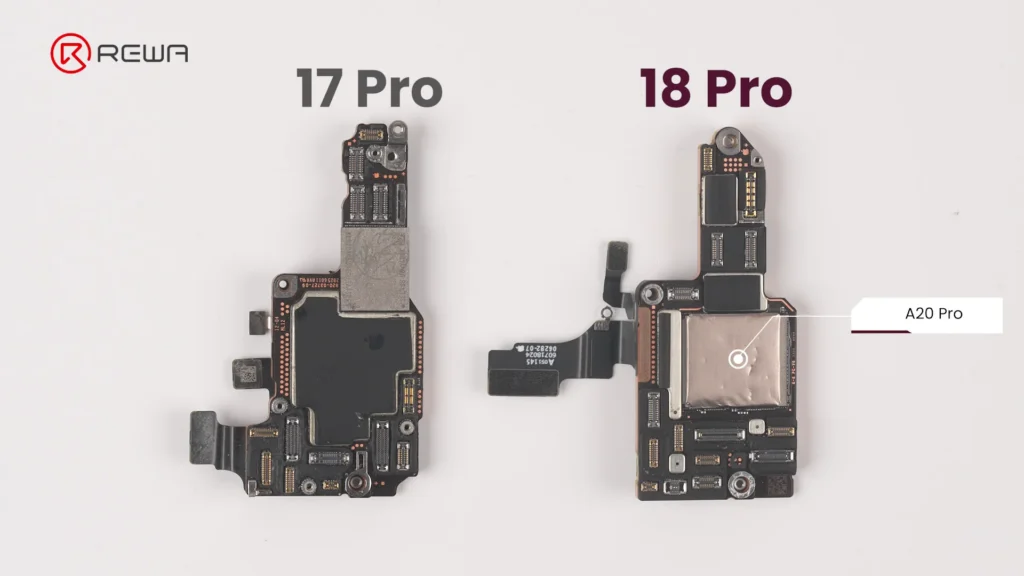
    iphone 18 pro teardown what changed inside how does it affect 8

    Apple has reorganized chip placement and shielding:

    Exposed Logic EEPROM: The Logic EEPROM chip on the board surface lacks a protective metal shield, leaving it significantly more susceptible to physical damage and technician error.
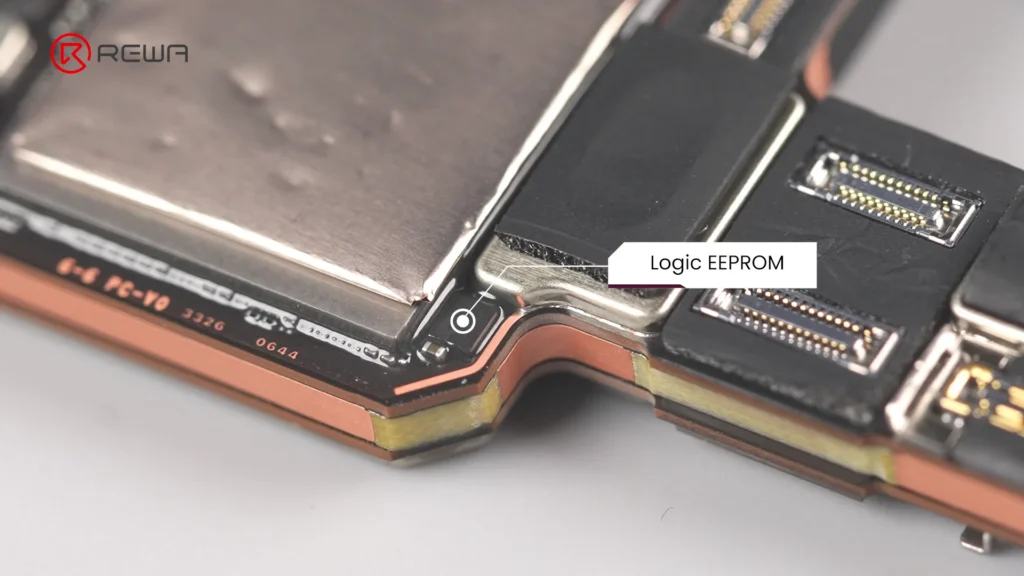
    iphone 18 pro teardown what changed inside how does it affect 9

    Layered Sandwich Design: The NAND storage chip and Power IC are sandwiched inside the multi-layer PCB structure. Replacing or repairing these components requires demanding motherboard desoldering and reballing.

    Relocated A20 Pro Chip: The main processor sits directly on the motherboard surface, and in direct contact with the vapor chamber for substantial improvement in thermal performance.
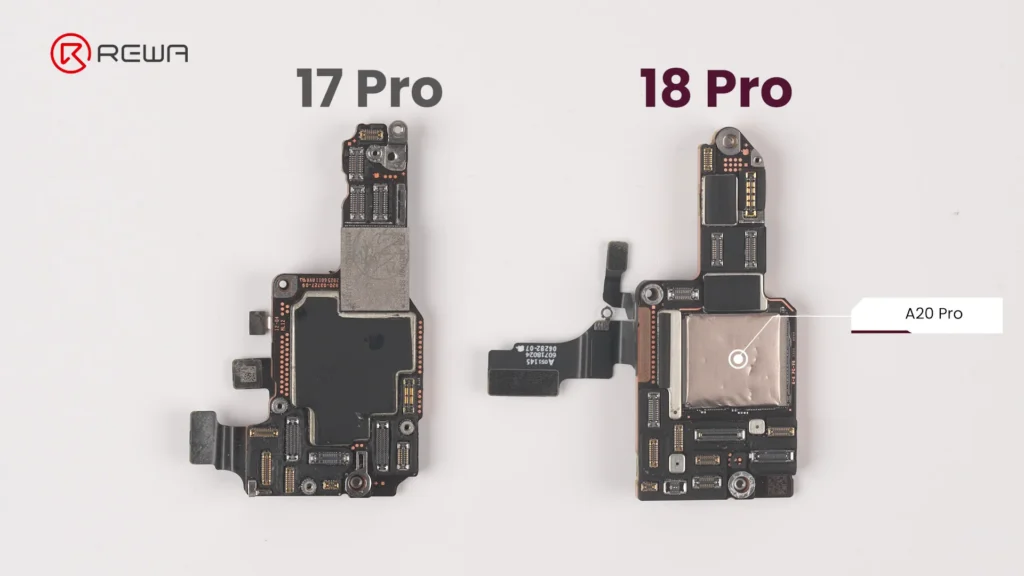
    iphone 18 pro teardown what changed inside how does it affect 10

    Upgraded Camera Modules

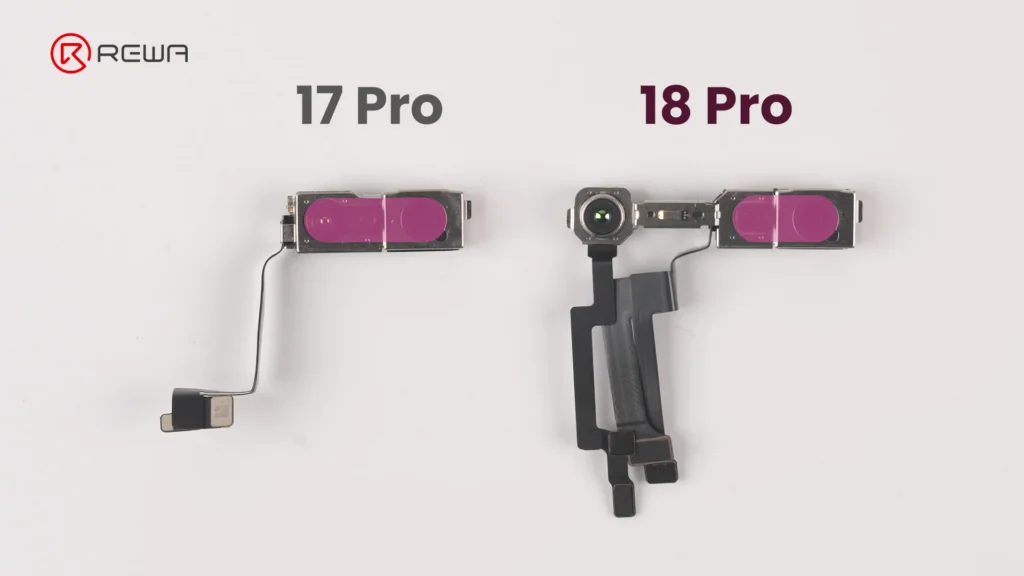
    The iPhone 18 Pro’s camera modules feature noticeable changes in mechanical design, module size, and cable layout.

    Fusion Main Camera: The rear camera module features a variable aperture for greater control over depth of field.
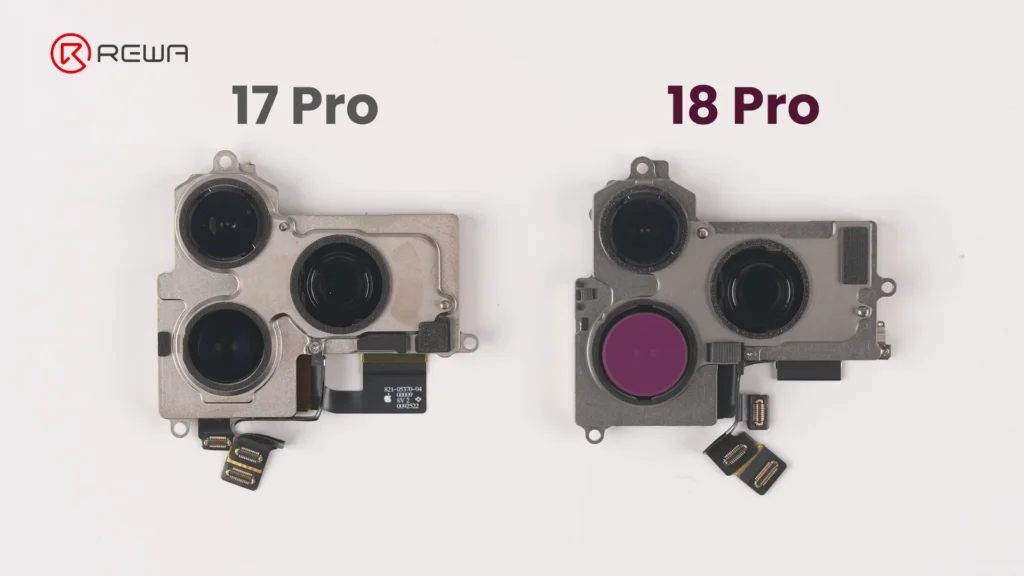
    iphone 18 pro teardown what changed inside how does it affect 11

    Separated Infrared Sensor: The front camera and under-display infrared camera are connected via three separate flex cables, bridged across a wider distance to facilitate the shrunken Dynamic Island.
    iphone 18 pro teardown what changed inside how does it affect 12

    Thermal Management & Battery Changes

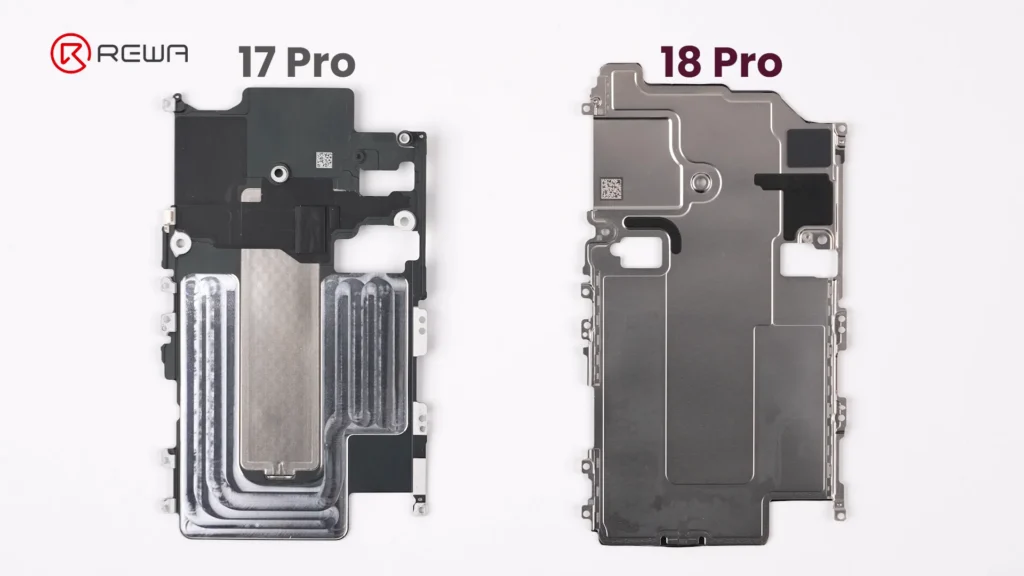
    Vapor chamber on the iPhone 18 Pro receives its largest redesign in years. Apple has integrated a significantly larger vapor chamber, with three times the surface area of the one used in the iPhone 17 Pro.
    iphone 18 pro teardown what changed inside how does it affect 13

    Simply Put:

    A vapor chamber is a flat, sealed metal enclosure containing a small amount of liquid. When the chips heat up, the liquid absorbs heat and evaporates. The vapor then spreads through the chamber, transferring heat to cooler areas where it condenses back into liquid. This helps the phone maintain stable performance under sustained workloads.

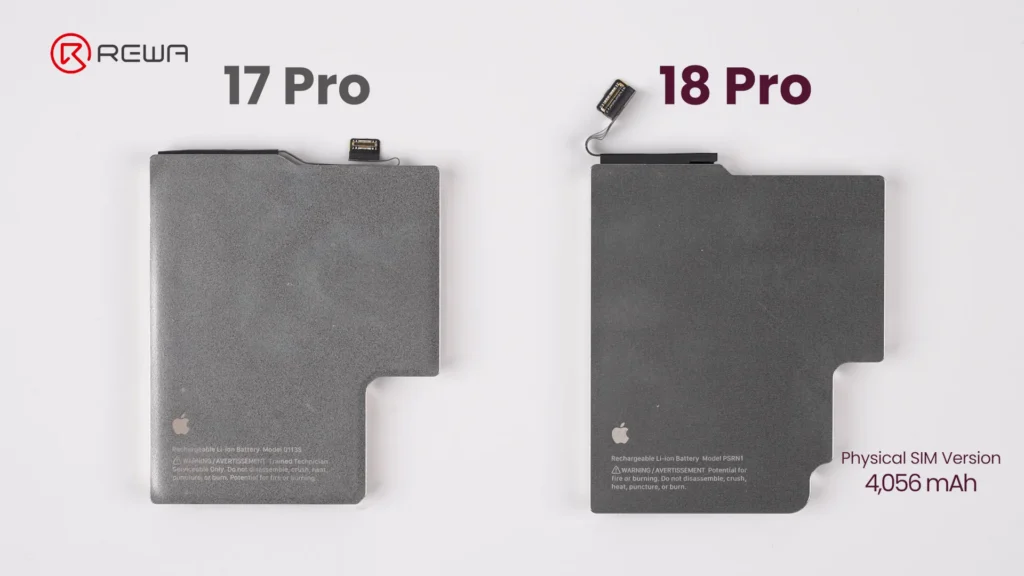
    The battery capacity of iPhone 18 Pro is slightly bigger than that on iPhone 17 Pro. In physical SIM version, it packs 4,056mAh, achieving about 1.7% increase over previous generation. Apple officially confirms that the redesigned battery architecture and charging system enable faster charging, reaching 50% in approximately 15 minutes.
    iphone 18 pro teardown what changed inside how does it affect 14

    Repair Difficulty Assessment: Pros & Cons

    A concise summary of what makes repairing the iPhone 18 Pro easier or harder for repair professionals.

    Komponente Changes Made Repair Difficulty
    Bildschirm
    • Smaller Dynamic Island
    • Under-display infrared camera
    • Display flex cable not fixed with adhesive
    Easy
    Batterie
    • Larger capacity: 4,056mAh (SIM tray version)
    • Larger connector
    • Multi-layer cable
    Easy
    Front Camera Module
    • Infrared camera moved to the corner
    • Three separate cables
    Very Easy
    Rear Camera Module
    • Larger Fusion Main Camera
    • Cable layout changed
    Hard
    Hauptplatine
    • A20 Pro chip on the surface
    • Logic EEPROM chip without a shield
    • NAND and Power IC sandwiched inside
    Very Hard

    Häufig gestellte Fragen (FAQs)

    Why is iPhone 18 Pro motherboard repair more difficult?

    The main reason is the new layered motherboard architecture. NAND storage and the power IC are positioned between PCB layers, meaning technicians need to separate the board layers to access them. This increases the complexity, heat exposure, labor, and risk involved in component-level repair.

    Why is the Dynamic Island smaller on the iPhone 18 Pro?

    The infrared camera used for Face ID has been moved under the display and toward the corner. The display uses a modified pixel arrangement in this area to allow infrared light to pass through. This allows Apple to reduce the size of the visible Dynamic Island.

    How big is the iPhone 18 Pro battery?

    The iPhone 18 Pro shown in the REWA Lab teardown is the physical-SIM version and has a 4,056mAh battery, approximately 1.7% higher than the iPhone 17 Pro. Battery capacity varies by regional configuration; in eSIM-only version, the iPhone 18 Pro has a 4,288mAh battery.

    How much larger is the iPhone 18 Pro vapor chamber?

    iPhone 18 Pro vapor chamber has three times the surface area of the vapor chamber in the iPhone 17 Pro. Apple says the redesigned thermal system enables up to 40% better sustained performance compared with the previous generation.

    What is the biggest repair challenge revealed by REWA Lab’s iPhone 18 Pro teardown?

    For board-level technicians, the layered motherboard architecture is one of the most significant challenges because it complicates access to NAND and power-management components. For aftermarket parts manufacturers, the new under-display infrared camera arrangement creates another major challenge because display structure, optical transmission, and Face ID compatibility must all work together.

    Did Apple make major changes to the iPhone 18 Pro’s frame and back cover?

    No. The iPhone 18 Pro retains a largely similar frame and back cover structure to the iPhone 17 Pro. The back cover uses a more color-matched aluminum and glass design in iPhone 18 Pro.

    Schlussfolgerung:

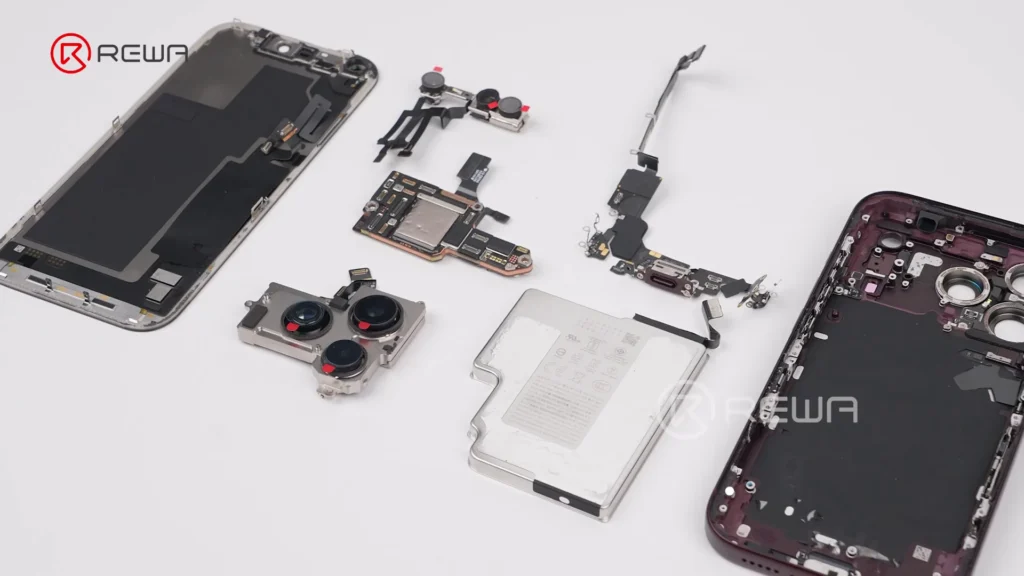
    The iPhone 18 Pro showcases impressive internal engineering, highlighted by under-display Face ID technology, triple-sized vapor chamber, and larger variable-aperture main camera.
    iphone 18 pro teardown what changed inside how does it affect 15

    However, for the independent repair industry, these advancements come with obvious challenges: motherboard layering makes micro-soldering more demanding, and screen replacement requires precise technical alignment and careful handling to ensure proper Face ID functionality.

    As phone architectures become more complex, having high-grade repair tools, reliable replacement parts, and advanced technical training is essential, please Kontaktieren Sie uns for OEM/aftermarket replacement parts, professional repair tools, and step-by-step technical guides.
  • iPhone 15 Pro Max Teardown

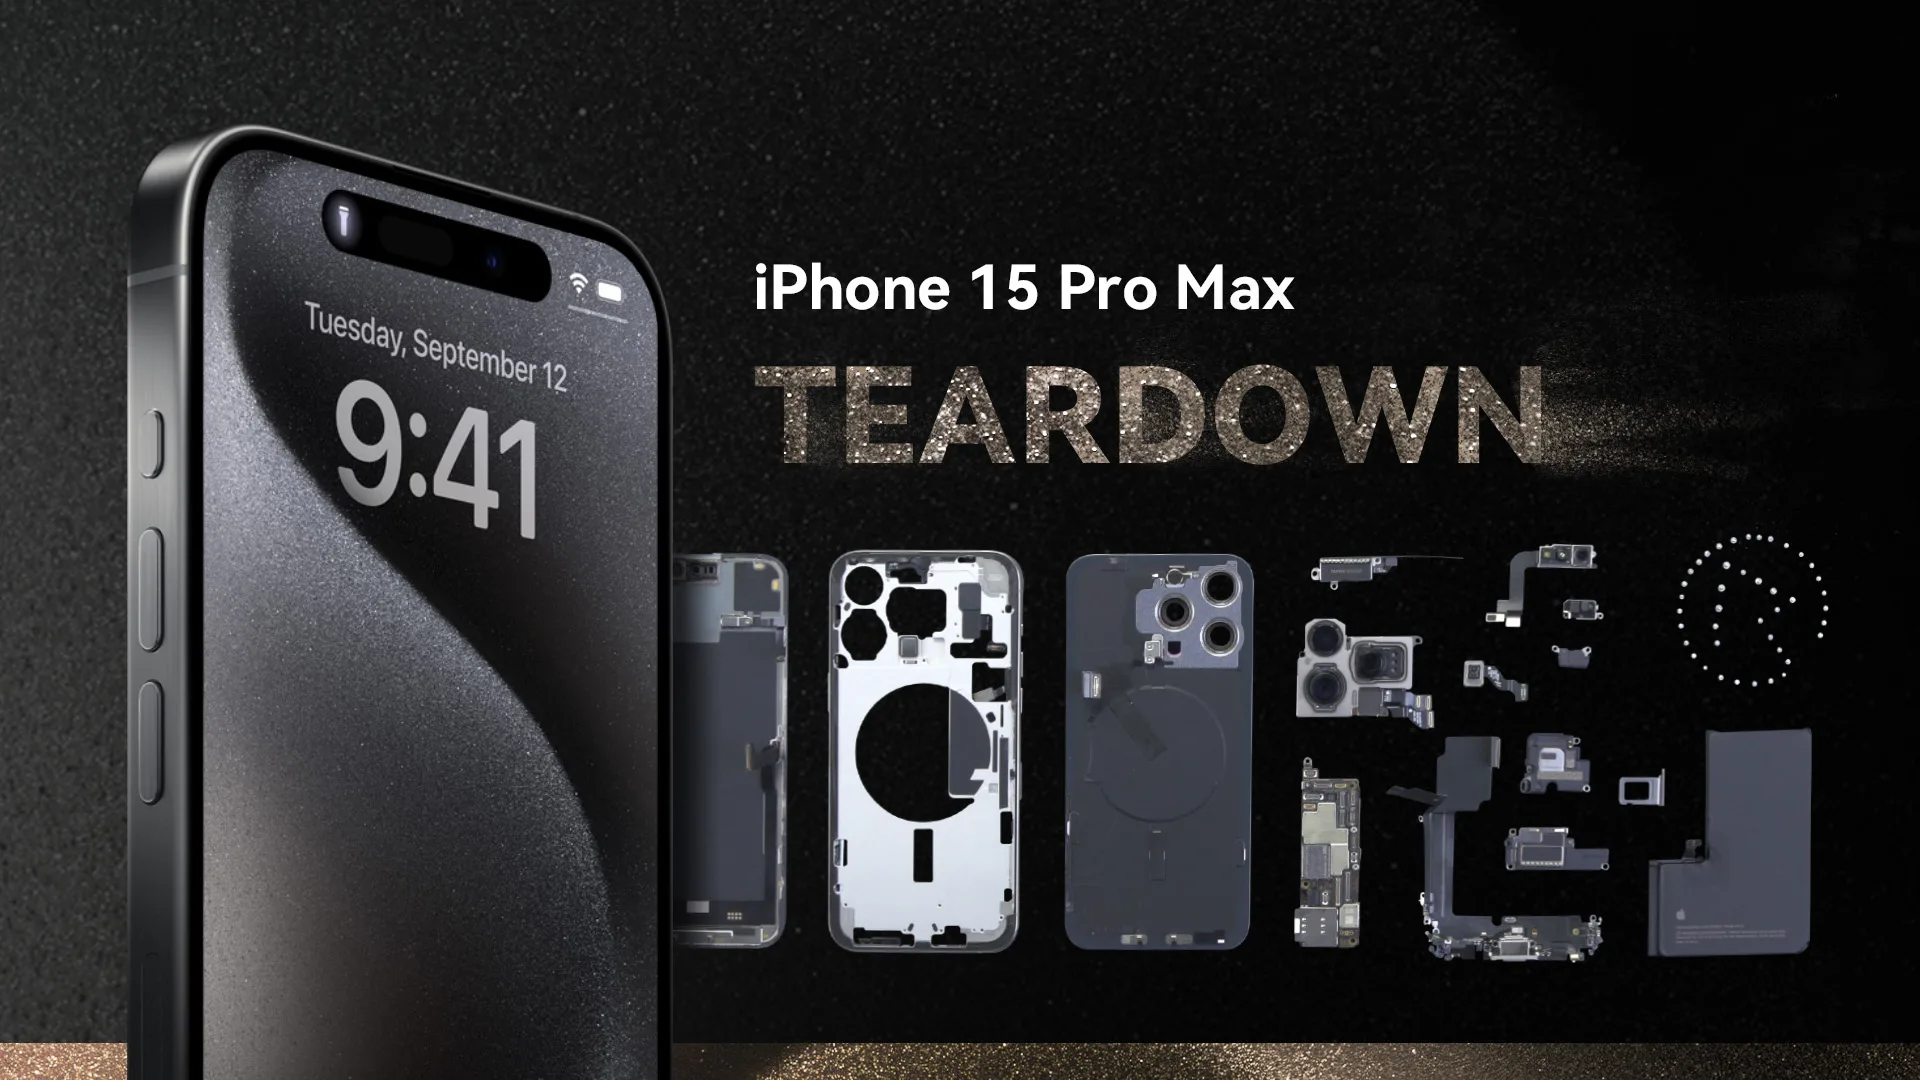
    iPhone 15 Pro Max Teardown

    Dieses Video bietet einen detaillierten Teardown des iPhone 15 Pro Max, deckt seine Geheimnisse auf und geht auf Bedenken der Techniker ein. Eine bemerkenswerte Änderung ist die Verwendung eines neuen weißen Latexmaterials zwischen dem Rahmen und der Abdeckung, das möglicherweise die Wasserdichtigkeit des Telefons verbessert. Diese Modifikation kann jedoch Schwierigkeiten bei der Aufarbeitung des Frontbildschirms verursachen. 

    Das Video zeigt auch das Vorhandensein eines Verschlüsselungschips, da das Telefon automatisch neu startet, wenn es auf ein drahtloses Ladegerät gelegt wird. Darüber hinaus zeigt der Teardown, dass die Rückseite des iPhone 15 Pro Max leicht zu reparieren ist, ein Merkmal, das sich durch die gesamte iPhone 15 Serie zieht. 

    Bleiben Sie auf dem Laufenden, um weitere Informationen über die Auswirkungen dieser Änderungen auf die Wasserdichtigkeit des Geräts zu erhalten. Besuchen Sie unseren Kanal, um das Video anzusehen und alle faszinierenden Details des iPhone 15 Pro Max zu entdecken.

  • iPhone 13 Pro Teardown

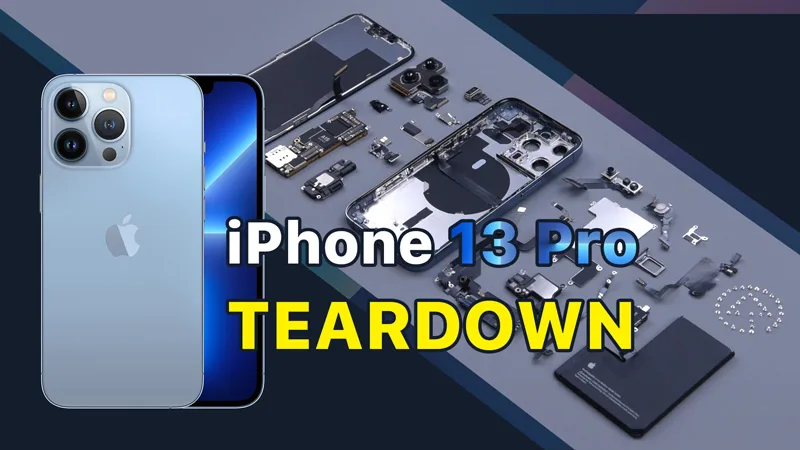
    iPhone 13 Pro Teardown

    Apples neue iPhone 13-Reihe wurde auf dem Apple Event am 14. September vorgestellt, bei dem vier neue Modelle präsentiert wurden.

    Neue Modelle, die technisch aufgerüstet werden, bringen immer auch neue Herausforderungen für die Reparatur mit sich.

    Heute werden wir das iPhone 13 Pro zerlegen, um die strukturellen Änderungen im Inneren zu sehen und wie sich diese Änderungen auf die Reparatur auswirken.

    iPhone 13 Pro Teardown

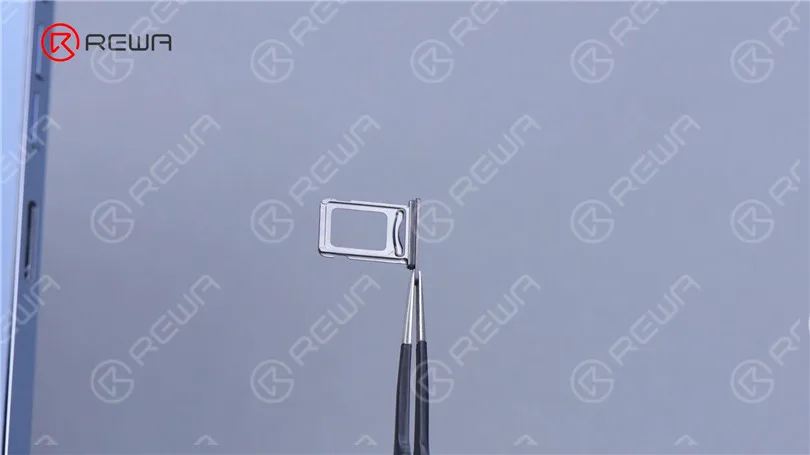
    Nehmen Sie zunächst das Kartenfach heraus. Das Kartenfach ist aus Metall und verfügt über eine Dual-SIM-Karte mit einem wasser- und staubdichten Gummiring im Inneren.

    iPhone 13 Pro Teardown

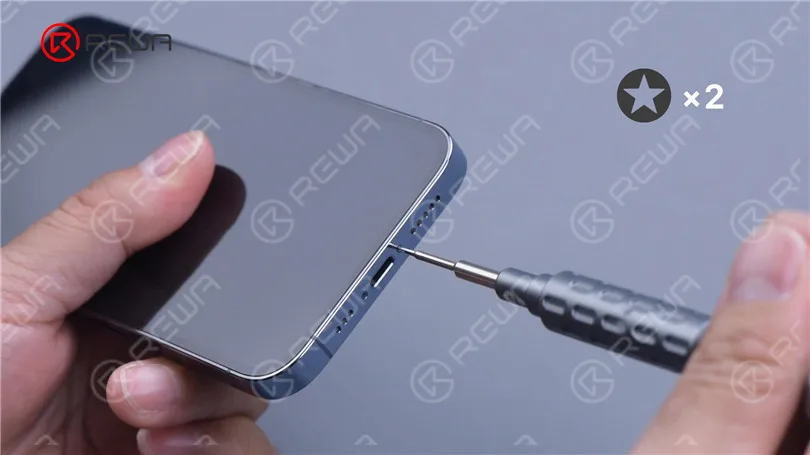
    Neben dem Klebstoff verwendet das iPhone auch die unteren Schrauben, um die Befestigung zu verstärken. Entfernen Sie zwei Schrauben an der Unterseite.

    iPhone 13 Pro Teardown

    Erhitzen Sie das Telefon mit einem Heizkissen für etwa 3 Minuten. Heben Sie das Display mit einem Saugnapf an.

    Legen Sie eine Plastikkarte ein, wenn eine Lücke vorhanden ist.

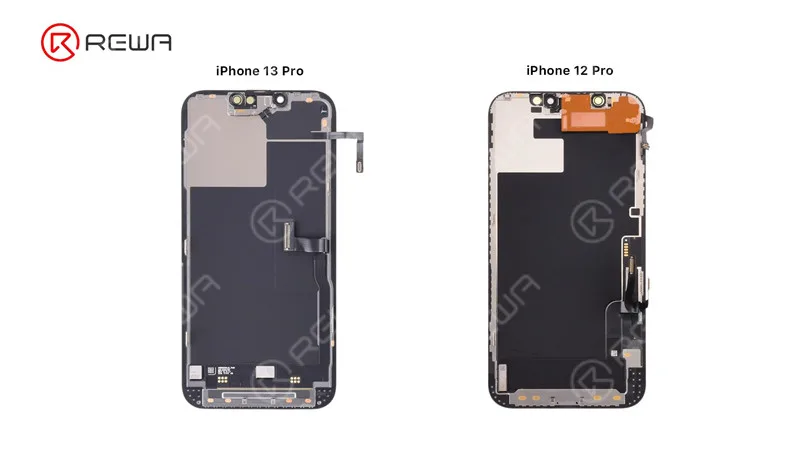
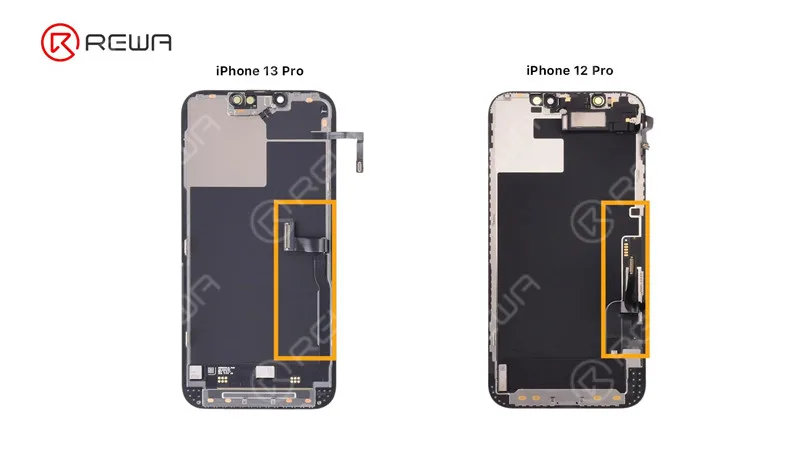
    Schieben Sie dann den Spalt entlang. Wie beim iPhone 12 Pro befindet sich auch beim iPhone 13 Pro das Display-Flexkabel auf der linken Seite.

    Das Display des iPhone 13 Pro lässt sich also auch vom rechten Rand aus öffnen.

    iPhone 13 Pro Teardown

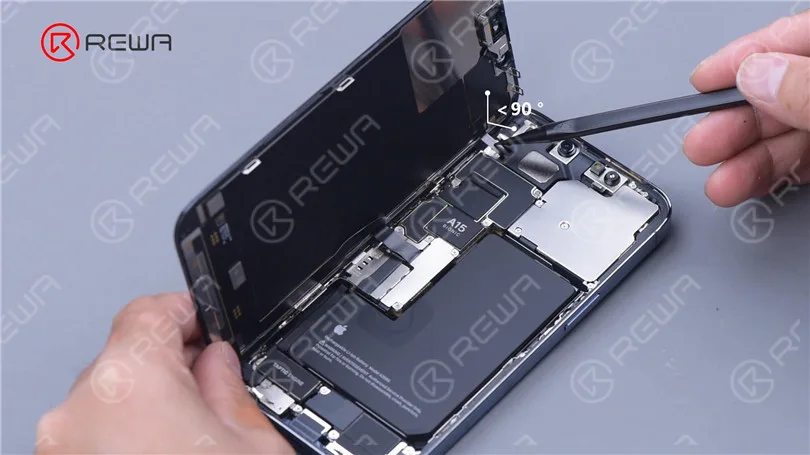
    Außerdem ist das Flexkabel des Sensormoduls sehr kurz.

    Daher sollte der Winkel beim Anheben des Displays nicht größer als 90 Grad sein, um einen Bruch des Flexkabels zu vermeiden.

    iPhone 13 Pro Teardown

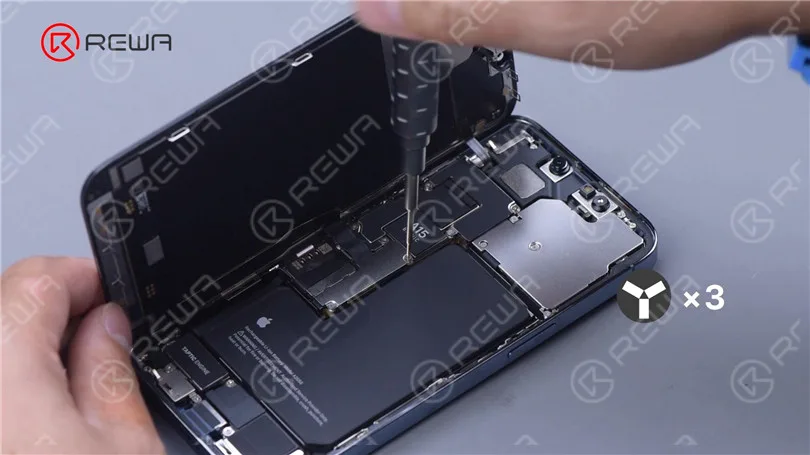
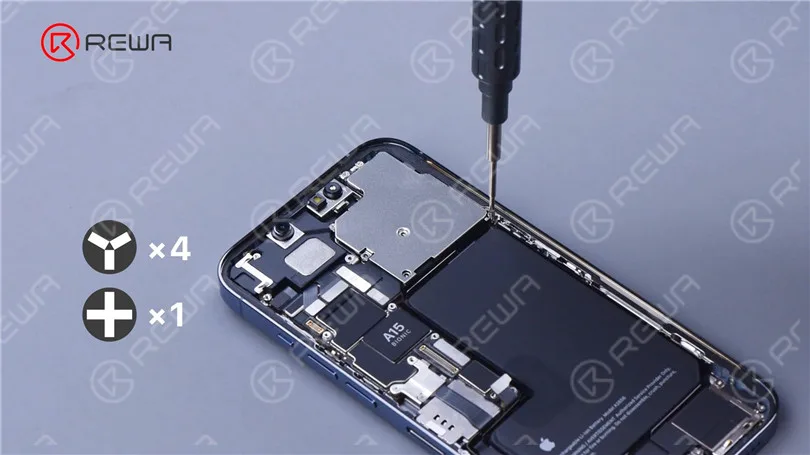
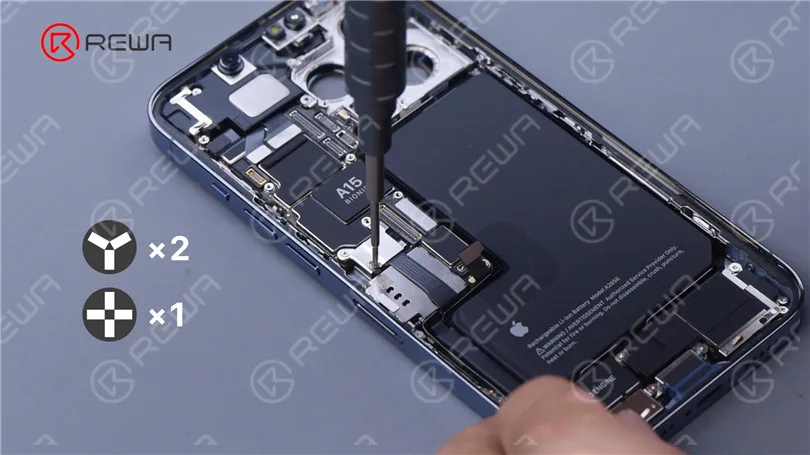
    Entfernen Sie die drei Schrauben, mit denen die Batterieabdeckung befestigt ist.

    Nehmen Sie die Abschirmungsabdeckung ab. Klemmen Sie die Batterie ab.

    iPhone 13 Pro Teardown

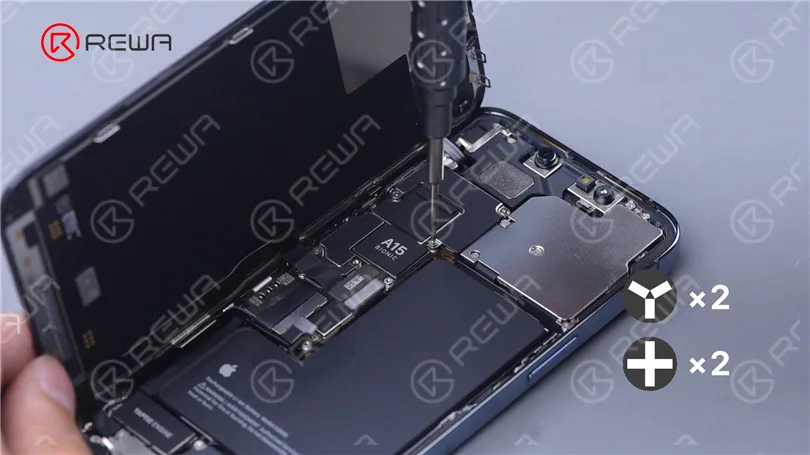
    Entfernen Sie weiter die vier Schrauben, die die Abschirmung des Sensormoduls halten.

    Trennen Sie die Flexkabel von Sensor und Bildschirm, um den Bildschirm zu entfernen.

    iPhone 13 Pro Teardown

    Die Hörmuschel des iPhone 13 Pro ist in das Gehäuse verlegt, während sich die Hörmuschel des iPhone 12 Pro und der Vorgängermodelle auf dem Bildschirm befindet.

    Die flexiblen Kabel von Display und Touch sind jetzt integriert. Es wird erwartet, dass der Schwierigkeitsgrad der Bildschirmaufbereitung beim iPhone 13 Pro höher ist.

    iPhone 13 Pro Teardown
    iPhone 13 Pro Teardown
    iPhone 13 Pro Teardown

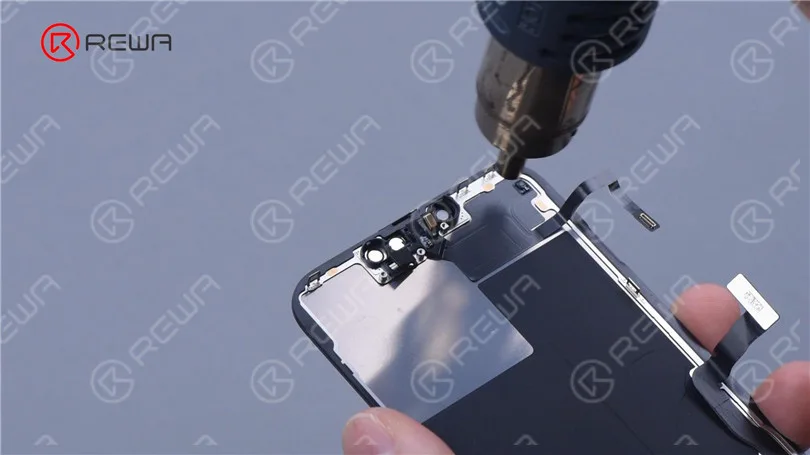
    Entfernen Sie die drei Schrauben, die das flexible Sensorkabel halten. Erhitzen Sie das Flexkabel mit einer Heißluftpistole, um es zu entfernen.

    iPhone 13 Pro Teardown

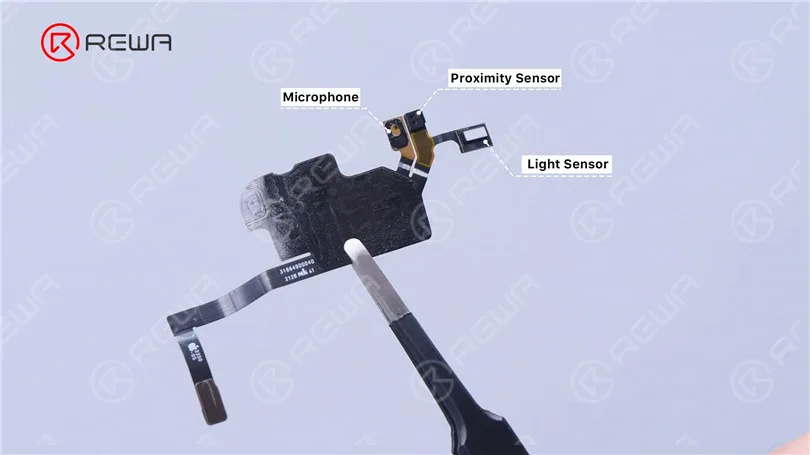
    Die Öffnung des Umgebungslichtsensors befindet sich unten rechts in der Aussparung.

    iPhone 13 Pro Teardown

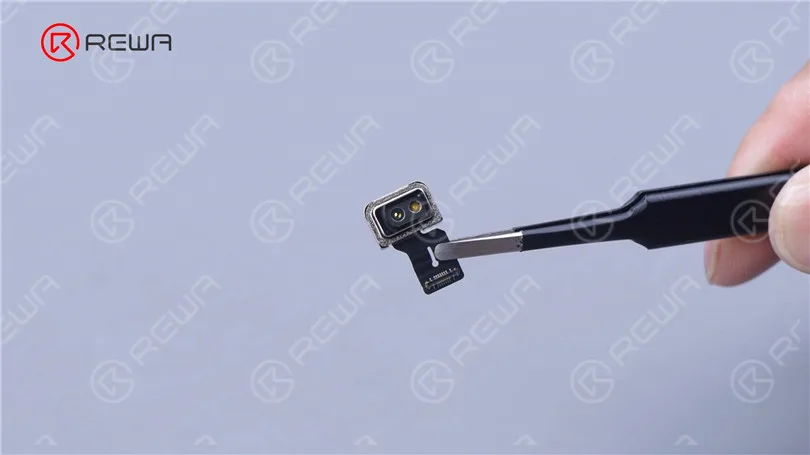
    In das Flexkabel sind ein Frontmikrofon, ein Abstandssensor und ein Umgebungslichtsensor integriert.

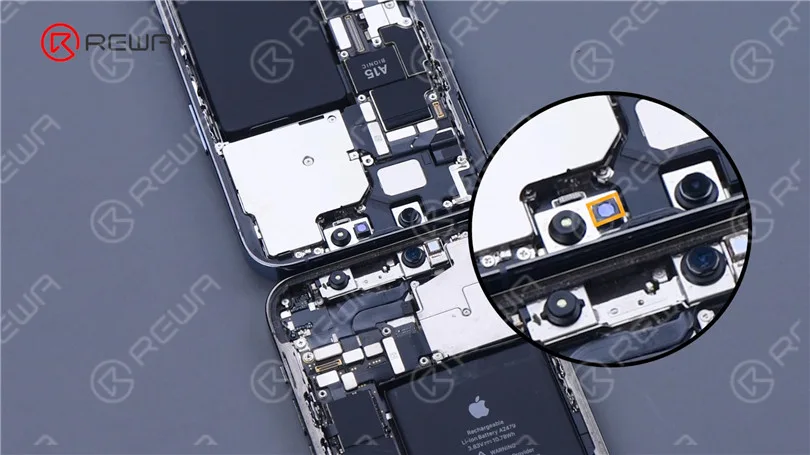
    Es ist weniger ein Flutlichtstrahler als das iPhone 12 Pro.

    iPhone 13 Pro Teardown

    Der Punktprojektor des iPhone 13 Pro ist in die Mitte gerückt.

    iPhone 13 Pro Teardown

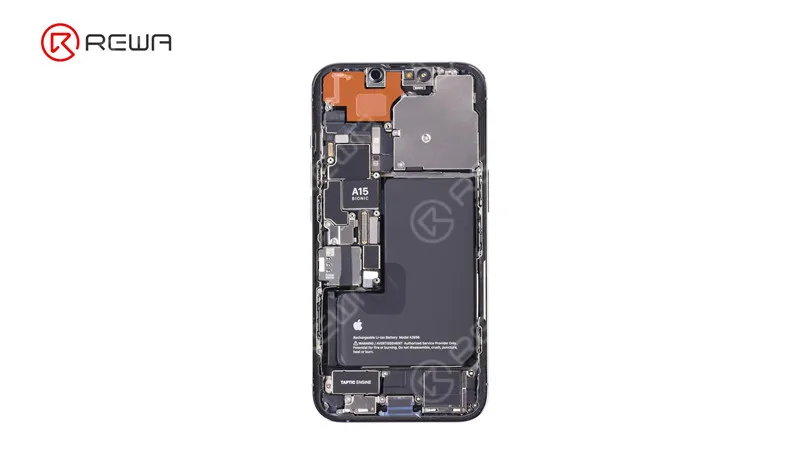
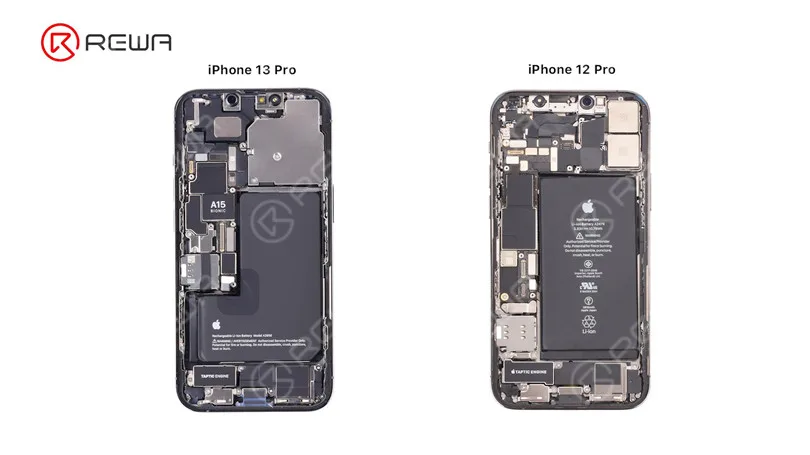
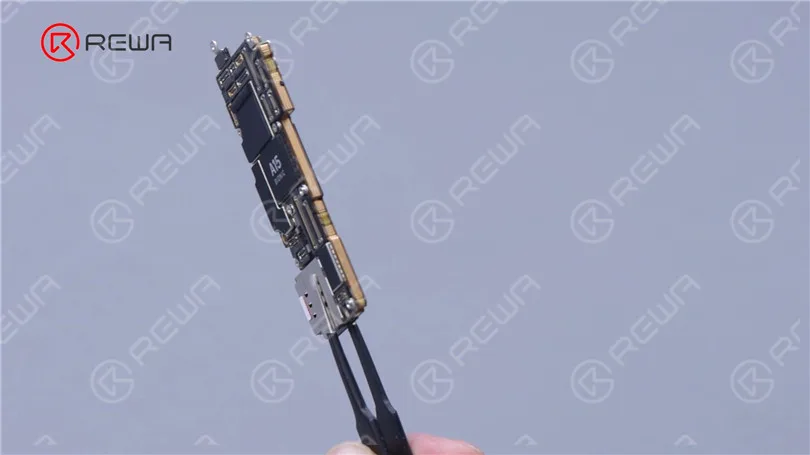
    Das iPhone 13 Pro sieht viel sauberer aus als das iPhone 12 Pro, weil es weniger Aufdrucke auf der Oberfläche der Batterie gibt. Und es gibt A15 auf dem Motherboard.

    iPhone 13 Pro Teardown

    Entfernen Sie die 5 Schrauben, mit denen die Abdeckung der Rückfahrkamera befestigt ist.

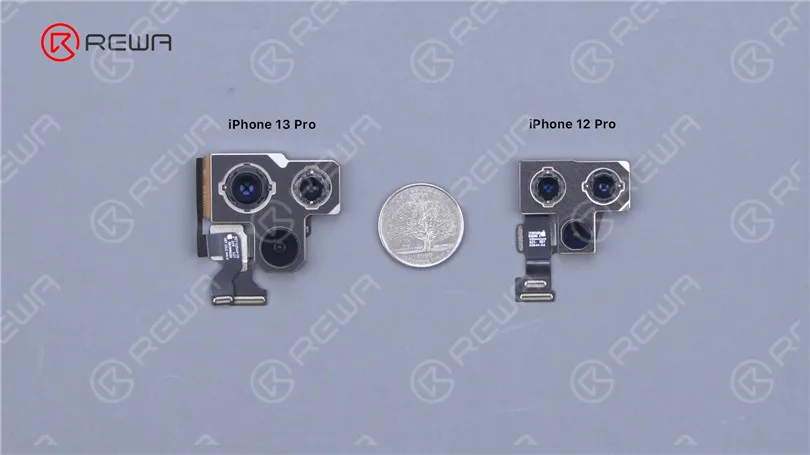
    Trennen Sie das Flexkabel der Kamera ab. Entfernen Sie die Kamera. Das iPhone 13 Pro hat eine größere Kamera als das iPhone 12 Pro. 

    iPhone 13 Pro Teardown
    iPhone 13 Pro Teardown

    Nehmen Sie den LiDAR ab. Alle Seiten des LiDAR sind durch Pufferschaum geschützt.

    iPhone 13 Pro Teardown

    Trennen Sie die Flexkabel der unteren Antenne und des Ladeanschlusses. Trennen Sie dann die flexiblen Kabel des Dot-Projektors und des Face ID-Moduls.

    iPhone 13 Pro Teardown

    Entfernen Sie die Hauptplatine. Die Hauptplatine ist nach wie vor doppellagig aufgebaut. Der SIM-Kartenleser ist auf die Hauptplatine geschweißt.

    Auf beiden Seiten der Hauptplatine befinden sich Bänder zur Wärmeableitung.

    iPhone 13 Pro Teardown

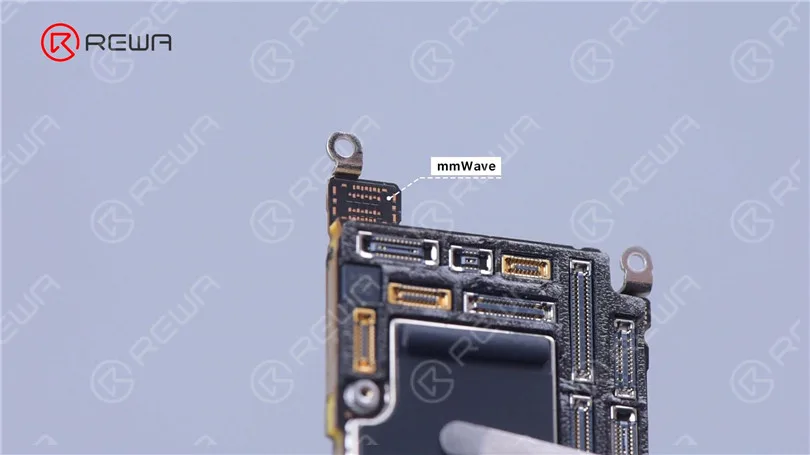
    Der Sitz von mmWave ist auf der Hauptplatine leer.

    iPhone 13 Pro Teardown

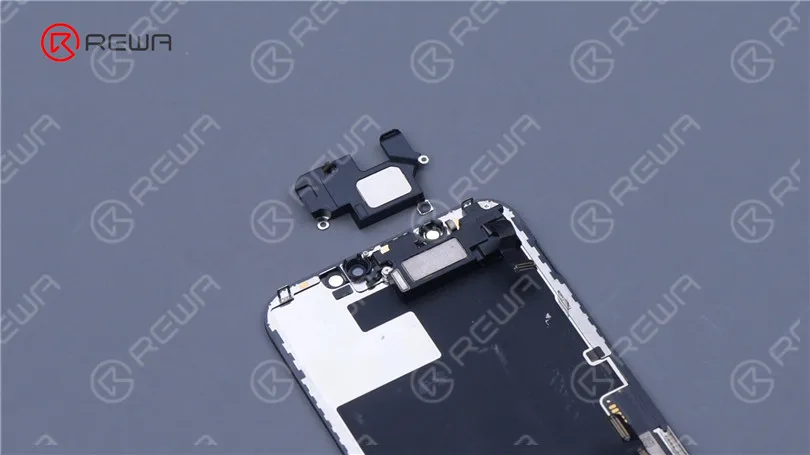
    Nehmen Sie die Hörmuschel ab. Die Größe wurde im Vergleich zum Vorgängermodell erhöht.

    iPhone 13 Pro Teardown

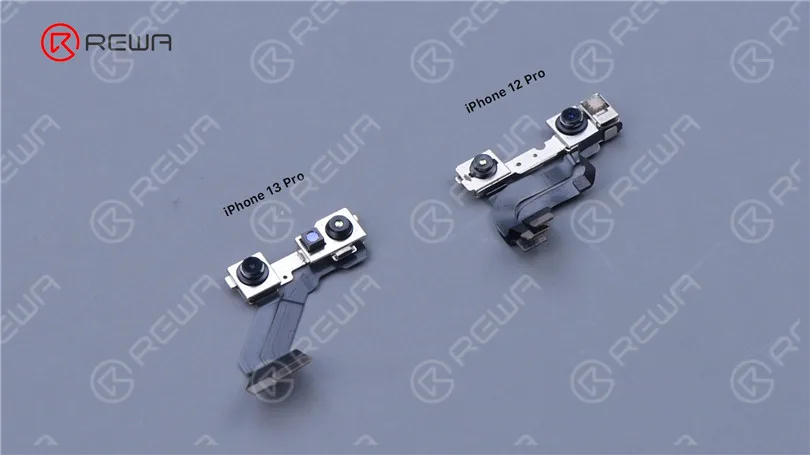
    Entfernen Sie das Face ID-Flexkabel. Der Punktprojektor und die Infrarotkamera des iPhone 13 Pro sind in einem flexiblen Kabel integriert. 

    Dies erschwert zweifelsohne die zukünftige Reparatur von Face ID.

    iPhone 13 Pro Teardown

    Entfernen Sie das Blitzflexkabel.

    Lösen Sie die Schrauben, mit denen die Signalantenne befestigt ist, und dann die Signalantenne. Entfernen Sie die NFC-Antenne.

    iPhone 13 Pro Teardown

    Entfernen Sie die Schrauben, die das Flexkabel des Ladeanschlusses halten.

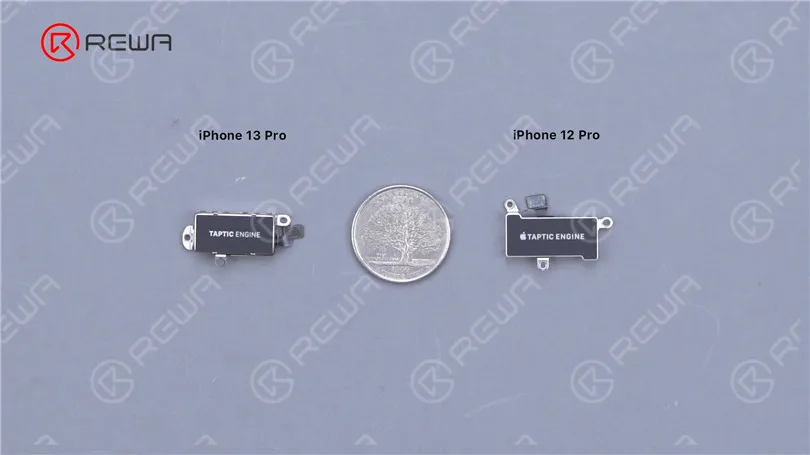
    Ziehen Sie den Lautsprecher und die Taptic Engine heraus. Die Taptic Engine des iPhone 13 Pro ist kleiner.

    iPhone 13 Pro Teardown

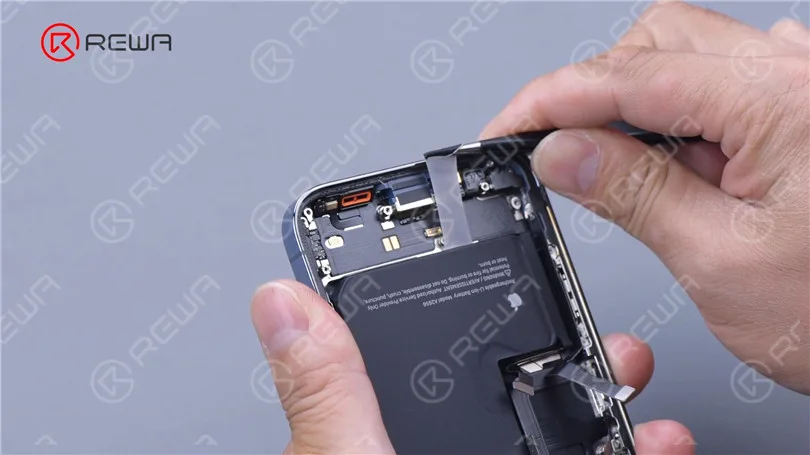
    Dann entfernen wir die Batterie. 

    Ziehen Sie die Klebestreifen mit einer Pinzette langsam heraus.

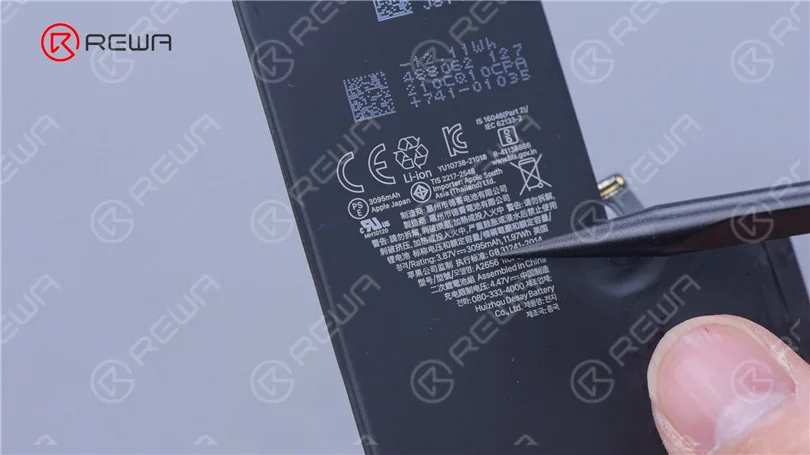
    Die Batteriekapazität wurde von 2815 mAh auf 3095 mAh erhöht.

    iPhone 13 Pro Teardown
    iPhone 13 Pro Teardown

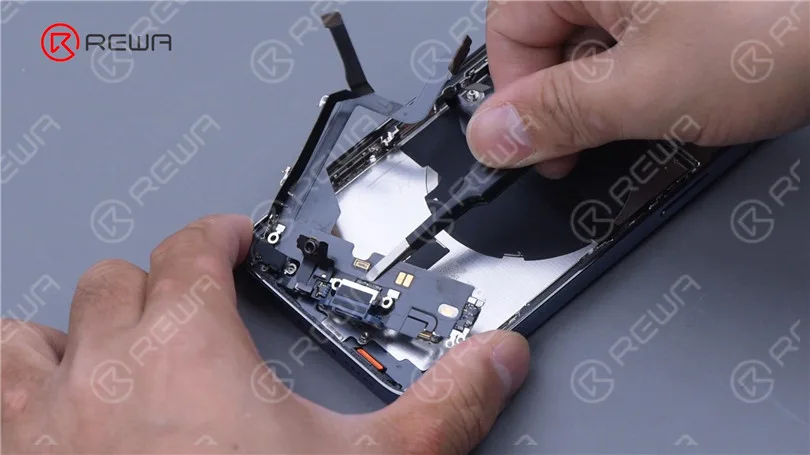
    Entfernen Sie schließlich das Kunststoffteil und dann das flexible Kabel des Ladeanschlusses.

    iPhone 13 Pro Teardown

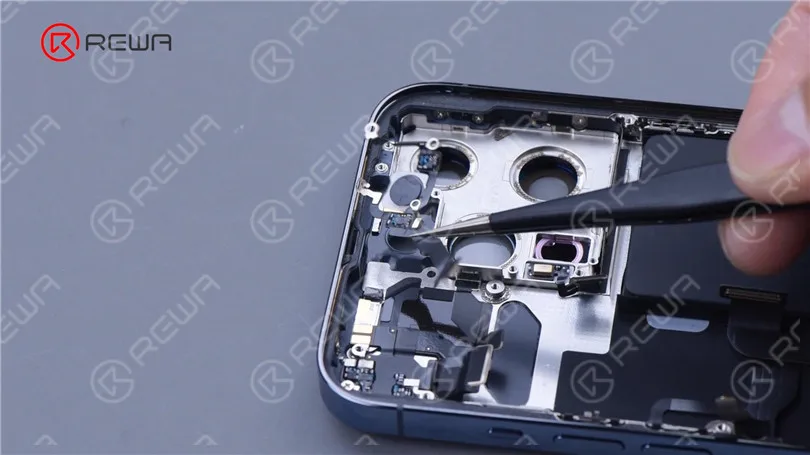
    Die Rückseite des iPhone 13 Pro sieht genauso aus wie die des iPhone 12 Pro.

    Wir gehen davon aus, dass die Wiederherstellungsmethode die gleiche ist wie beim iPhone 12 Pro. Im Allgemeinen ist das iPhone 13 Pro Teardown einfacher als sein Vorgänger.

    Die Wiederherstellung des Bildschirms und die Reparatur von Face ID wird schwieriger werden. Später werden wir Videos über die Trennung der Hauptplatine, den Bildschirm und die Wiederherstellung der Rückabdeckung haben, um die Reparatur Schwierigkeit des iPhone 13 Pro im Detail zu diskutieren. Bitte bleiben Sie dran.

    iPhone 13 Pro Teardown
  • iPhone 3GS Teardown

    iPhone 3GS Teardown

    Es ist 12 Jahre her, dass das iPhone 3GS veröffentlicht wurde. Genießen wir ein bisschen Vintage-Demontage!

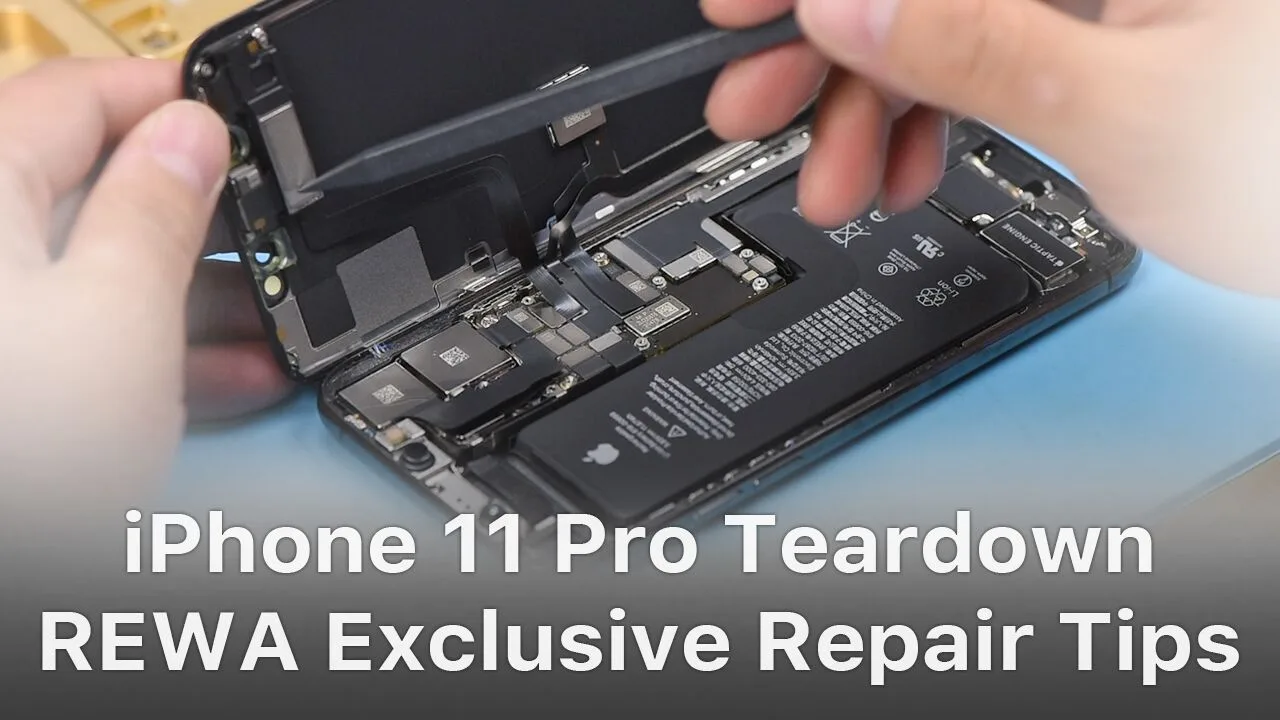
  • iPhone 11 Pro Teardown

    iPhone 11 Pro Teardown

    The iPhone 11 series has impressed the repair industry again with its new iPhones. What does the new design mean to our repair work? In our video, we will show you each part inside the iPhone 11 pro and share repair tips from REWA perspective.

  • iPhone 12 Pro Detailed Teardown Tips For Repair Shop Technicians

    iPhone 12 Pro Detailed Teardown Tips For Repair Shop Technicians

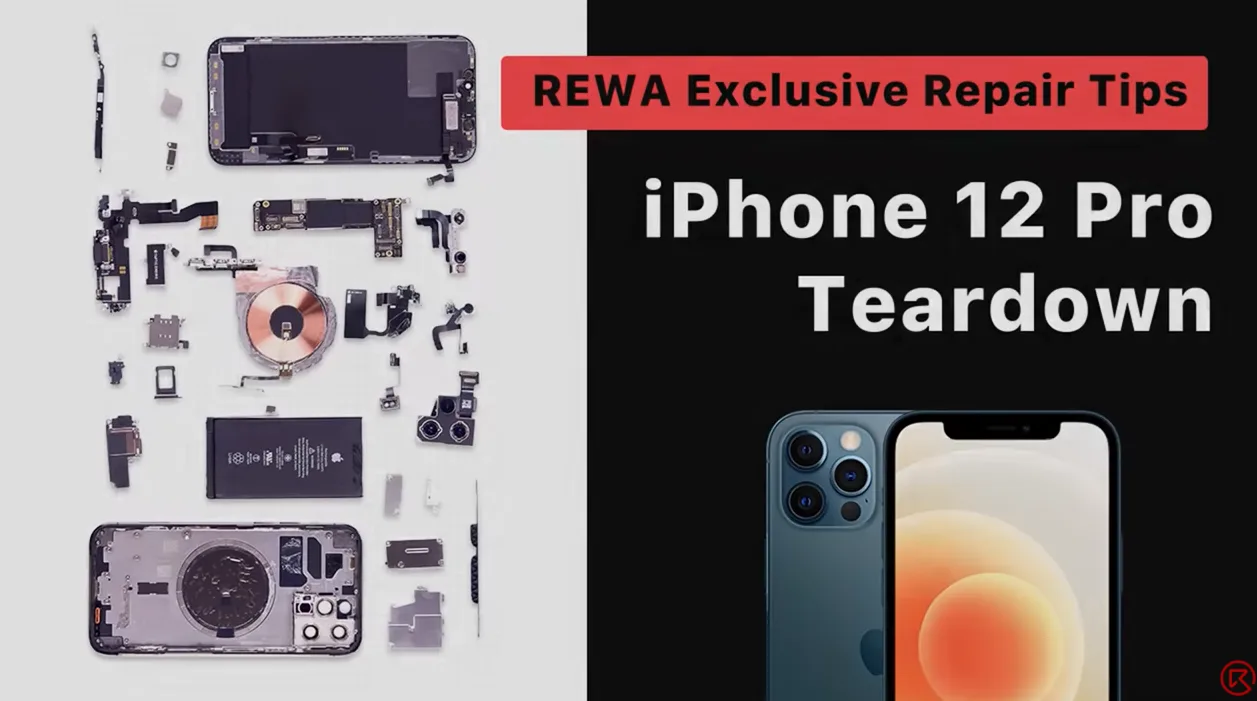
    Apple’s new iPhone 12 models have been the talk of the town. For repair shop owners, the biggest concern is what to pay attention during disassembly. Today, REWA LAB is going to share a detailed teardown tutorial of the iPhone 12 Pro. Let’s take a look!

    In diesem Video empfohlene Produkte:

    • Mobile Phone Disassemble Set
    • REWA SELECTED iPhone 12 Series Accessories:
    • Phone Case
    • Charger Plug
    • Screen Protector
    • Earphone
  • iPhone 11 Pro Teardown - REWA Exklusive Reparatur Tipps

    iPhone 11 Pro Teardown - REWA Exklusive Reparatur Tipps

    The iPhone 11 series has impressed the repair industry again with its new iPhones. What does the new design mean to our repair work? In our video, we will show you each part inside the iPhone 11 pro and share repair tips from REWA perspective.

    Tools & Parts used to teardown iPhone 11 Pro:

  • iPhone X OLED Screen Total Teardown Analysis

    iPhone X OLED Screen Total Teardown Analysis

    REWA LAB has conducted a deeper teardown of iPhone X OLED screen Recently. After separation, you will find the differences between iPhone X display and the screens of previous iPhone models. 

    1. iPhone X display comes with different driver IC bonding technique. iPhone X applies COF, while previous iPhone applies COG.

    2. iPhone X screen digitizer has its 3D touch module adhered to OLED backplate.

    3. The 3D touch module of iPhone X is bonded to the OLED panel.

    As a new product of OLED combined with 3D Touch function, iPhone X screen has surprised all of us with its features. REWA LAB works with iPhone X screen teardown and presents its novelty, disassembly difficulties and structure analysis. Laminating process of iPhone X OLED screen is much complicated than LCD screen. Laminate OLED with TP first, then OLED with 3D Touch. The whole process counts more than 15 procedures.

    iPhone X OLED Screen Total Teardown

    Bildschirmtest

    Test the iPhone X screen before tearing down. Run function test – Display; Touch; 3D Touch and Swipe-up. All going well.

    Abnehmen der Blende

    Place the OLED Screen Assembly on the Heat Platform. Remove bezel slowly with Pry Piece and Glue Cleaner. Cut a plastic horn of the bezel with the blade if necessary and then remove bezel with Pry Piece and Glue Cleaner carefully. Be careful with flex cables when removing bezel in the flex cable area.

    The Pry Piece accidentally damages flex cables when removing the bezel. Which may result in the abnormal display. Test the screen again. Run function test – Display; Touch; 3D Touch and Swipe-up. Touch, 3D Touch, and Swipe-up work normally while there are two vertical lines on the display.

    Glas Trennen 

    Place the OLED Screen Assembly on the Heat Platform. Separate the glass lens from OLED with cutting wire. We are working with one OLED flexible screen, so be careful with your handwork.

    Test again after separating. Run function test- Display; Touch; 3D Touch and Swipe-up. Touch, 3D Touch, and Swipe-up work normally while there are two vertical lines on the display.

    Entfernen von Klebstoff

    Glue removing for iPhone X screen can be applied with hand tearing.

    3D Touch Layer Removing

    Different from Samsung smartphones, iPhone X has its 3D Touch module adhered to OLED backplane. Different from all iPhone previous versions, the 3D Touch module of iPhone X is bonded to the OLED panel. To fully analyze its structure, we take a disruptive disassembly of the 3D Touch module. The 3D Touch and TP flex bonding is separated completely after the disassembly.