Schlagwort: iphone face id

  • Gründe für iPhone Face ID nicht verfügbar

    Gründe für iPhone Face ID nicht verfügbar

    Im Vorfeld der Vorstellung des iPhone 12 gab es Gerüchte, dass das neue Modell sowohl über Touch ID als auch über Face ID verfügen wird. Nun, da diese Mythen zerstreut wurden, hat das iPhone 12 die Face ID-Funktion beibehalten, die sich als eine sicherere und effektivere Erkennungstechnologie erweist.

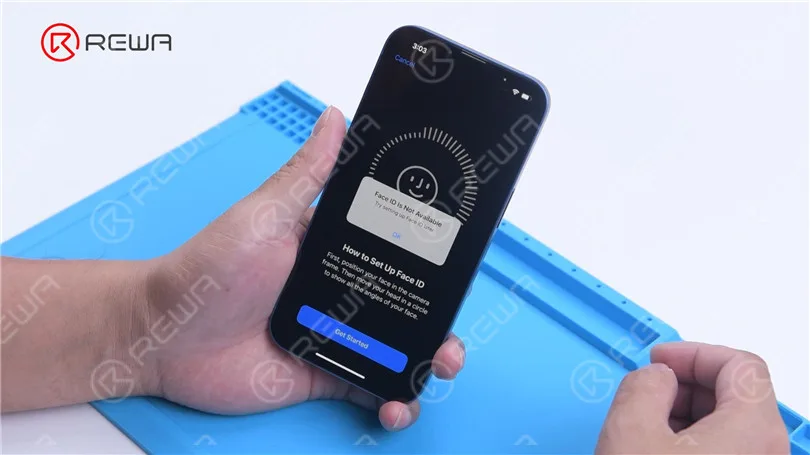
    Obwohl Face ID praktisch ist, haben zahlreiche Nutzer festgestellt, dass Face ID manchmal nicht funktioniert und sie keine andere Wahl haben, als den Passcode zum Entsperren einzugeben.
    Face ID funktioniert nicht

    Im Allgemeinen gibt es mehrere Gründe, warum Face ID nicht verfügbar ist.

    Schutz der Sicherheit

    Wie die Passcode-Entsperrung verfügt auch Face ID über ein Sicherheitsschutzsystem. Sobald das System aktiviert ist, müssen Sie den Passcode eingeben, um die zusätzliche Sicherheitsüberprüfung abzuschließen.

    1. Das Gerät schaltet sich einfach ein oder startet neu.

    2. Das Gerät ist für mehr als 48 Stunden gesperrt.

    3. In den letzten sechseinhalb Tagen wurde das Gerät nicht mit einem Passcode entsperrt und in den letzten 4 Stunden wurde das Gerät nicht mit Face ID entsperrt.

    4. Das iPhone empfängt die Anweisung zur Fernsperre.

    5. Die Entsperrung mit Face ID ist 5 Mal fehlgeschlagen.

    6. Halten Sie gleichzeitig die Seitentaste und eine der beiden Lautstärketasten gedrückt, bis die Schieberegler “Slide to power off” und “Emergency SOS” auf dem Display erscheinen.

    Andere Bedingungen

    Die Gesichtserkennung kann unter bestimmten Bedingungen auch fehlschlagen:

    1. Gesicht bedeckt

    Wenn Sie eine Sonnenbrille oder einen Hut tragen, kann Face ID nicht erfolgreich funktionieren.

    2. Kamera abgedeckt

    Wenn Sie eine Schutzfolie auf Ihrem Telefon anbringen oder sich Schmutz in der Nähe der TrueDepth-Kamera befindet, kann die Empfindlichkeit von Face ID bis zu einem gewissen Grad beeinträchtigt werden.
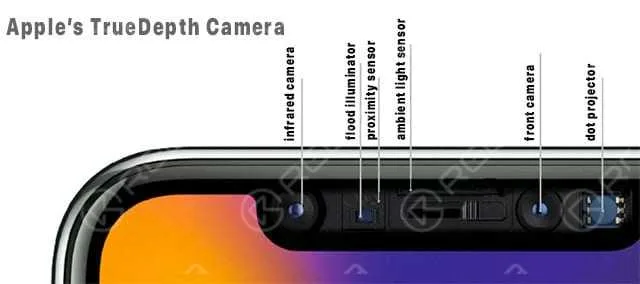
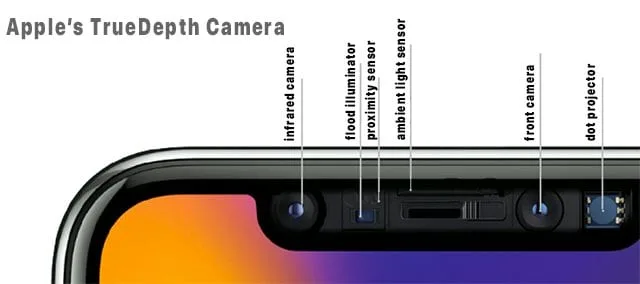
    Die TrueDepth-Kamera von Apple

    3. Hardware Problem

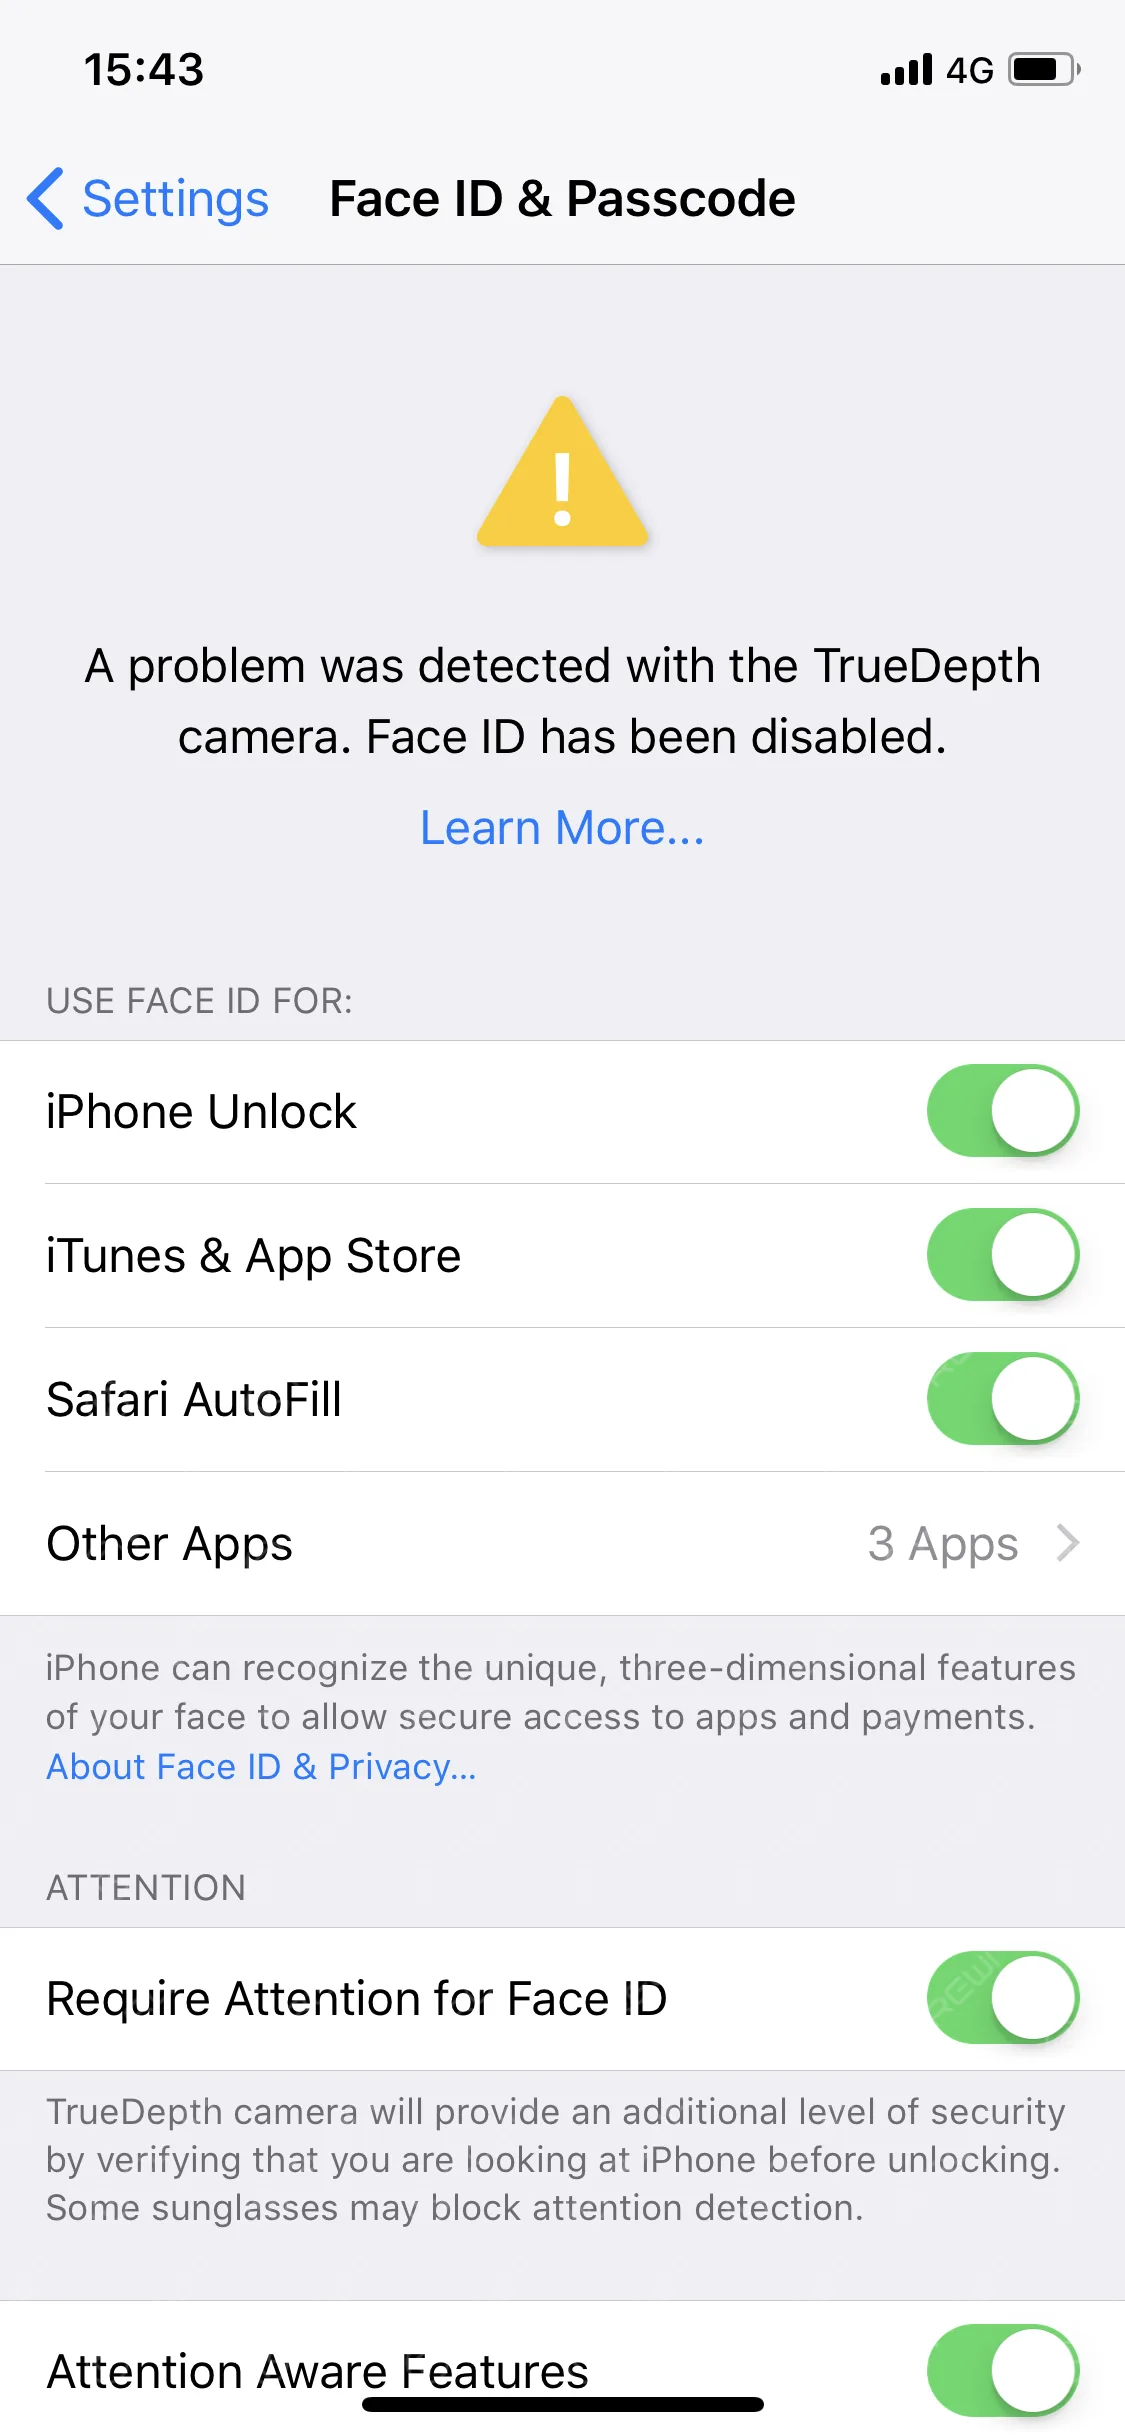
    Wenn Sie die Meldung “Es wurde ein Problem mit der TrueDepth-Kamera festgestellt. Face ID wurde deaktiviert”, bedeutet dies, dass iOS einen Hardwareschaden am Gerät festgestellt hat und dieser repariert werden muss.

    Face ID ist zwar praktisch, aber die Reparaturkosten für Hardwareschäden sind auch sehr hoch. Wenn es ein Problem mit Face ID gibt, können Sie zunächst versuchen, es durch Zurücksetzen und Wiederherstellen des Systems zu lösen.

    Wenn es sich um ein Hardwareproblem handelt, müssen Sie Ihr iPhone wahrscheinlich zur Reparatur in den nächsten Apple Store bringen.

    Wenn Sie weitere Fragen zu Face ID haben, können Sie diese gerne unten im Kommentarbereich stellen.
  • How to Fix iPhone Face ID – Move iPhone a Little Lower

    How to Fix iPhone Face ID – Move iPhone a Little Lower

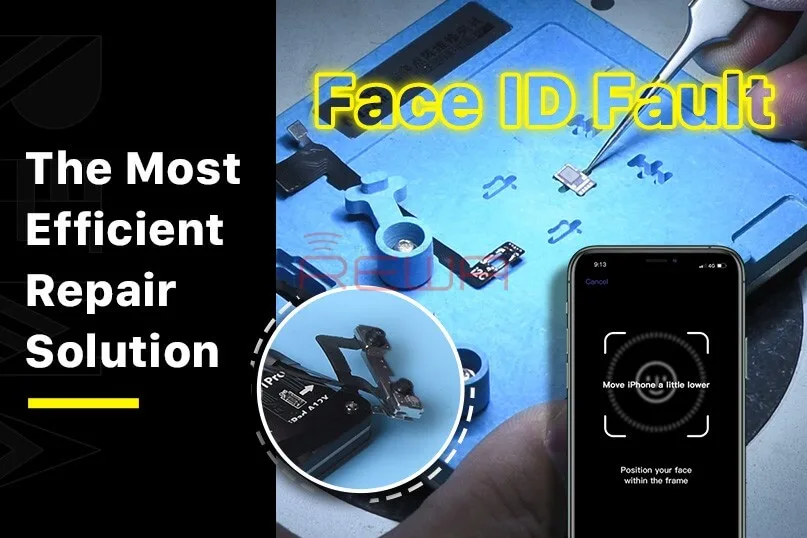
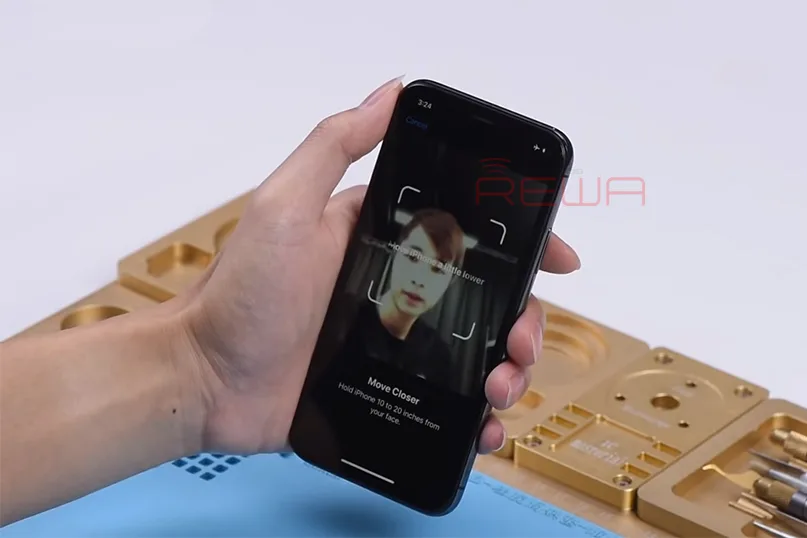
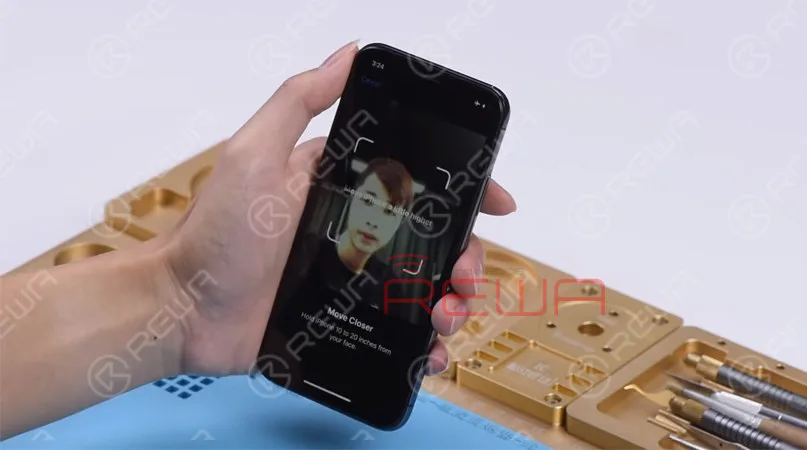
    Many iPhone users may encounter a frustrating problem where Face ID continues to show”Move iPhone a Little Lower/Higher,” making it impossible to reset the feature. In this article, we will explore effective methods to resolve this issue and ensure the smooth functioning of Face ID on your iPhone.

    How to Fix face ID Move iPhone a Little Lower

    We have discovered several possible solutions fixing move the iPhone a little lower. These methods have proven effective and may work for your specific needs.

    1. Restart your Device

    To address software or temporary system failures, a simple restart can often resolve the problem. Follow these steps to restart your iPhone X or later models:

    • Press and hold the side button and any volume button simultaneously until the slider appears.
    • Slide the slider to power off the device.
    • Press and hold the side button until the Apple logo appears, indicating the device is restarting.

    2. Remove Film or Check For Dirt

    Inspect the area around the front camera for any stains or obstructions that may interfere with Face ID recognition. Clean the camera lens with a microfiber cloth or a gentle lift to ensure optimal performance.

    face id problems

    3. Check for water damage

    If your iPhone has been exposed to water or liquid, it may result in Face ID malfunction. In such cases, it is recommended to seek assistance from Apple’s after-sales service. To determine if your device has suffered water damage, you can check the Liquid Contact Indicator (LCI):

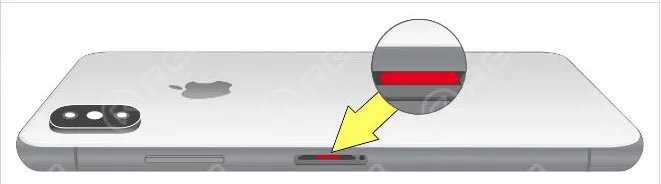
    The majority of iPhone models are equipped with an LCI that can be viewed from the outside. The LCI is capable of detecting whether the device has been exposed to liquid or aqueous liquid. In general, the indicator should be white or silver in color. However, it will become red when it comes into contact with water or aqueous liquid.

    In order to determine if the LCI of your device is touching the liquid, you can refer to the following image to help you see the LCI.

    LCI

    It is recommended that you use a lamp or magnifying glass in order to see the LCI. Make sure you adjust the angle of the light or device until you can see it.

    4. Update the system

    If the device has not suffered from any water or drop damage, it is highly recommended to update the system to the latest version available. This is because Apple frequently releases new software versions that include essential bug fixes and exciting new features that are worth exploring.

    The majority of iPhone-related software issues can be resolved through the installation of the latest iOS update. Therefore, it is always advisable to keep your device up-to-date with the newest software releases to ensure optimal performance and a seamless user experience.

    Schlussfolgerung:

    By following these troubleshooting methods, you can overcome the “Move a Little Lower/Higher” prompt and restore the functionality of Face ID on your iPhone. Remember, if the problem persists, it is advisable to seek professional assistance from Apple’s support team. Enjoy the convenience and security of Face ID on your iPhone with these helpful tips.

  • Fehlerbehebung für iPhone 13 Face ID & Display Message Probleme nach dem Austausch des Bildschirms

    Fehlerbehebung für iPhone 13 Face ID & Display Message Probleme nach dem Austausch des Bildschirms

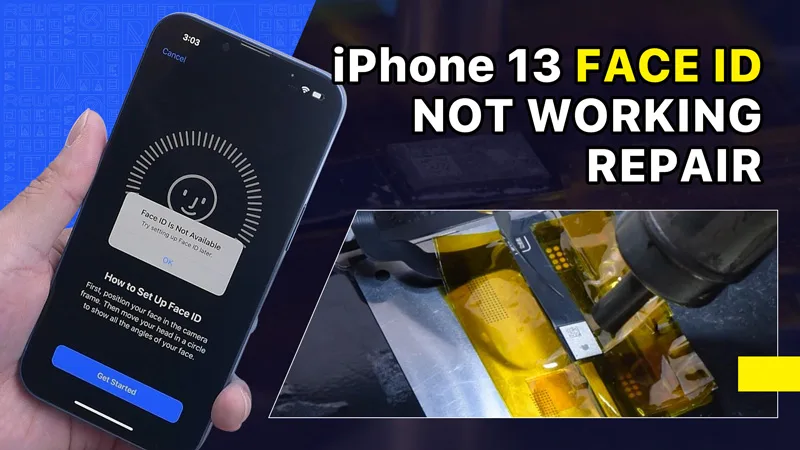
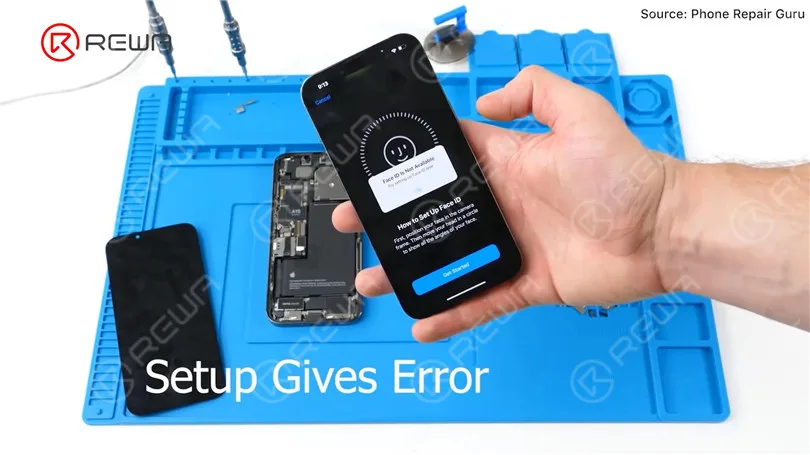
    Vor kurzem hat Phone Repair Guru ein Video über den Austausch des iPhone 13-Bildschirms veröffentlicht. Nach dem Austausch erscheint die Meldung "Important Display Message". Was noch schlimmer ist, Face ID ist nicht verfügbar.

    iPhone 13 Face ID funktioniert nicht und wichtige Display-Meldung nach Austausch des Bildschirms beheben

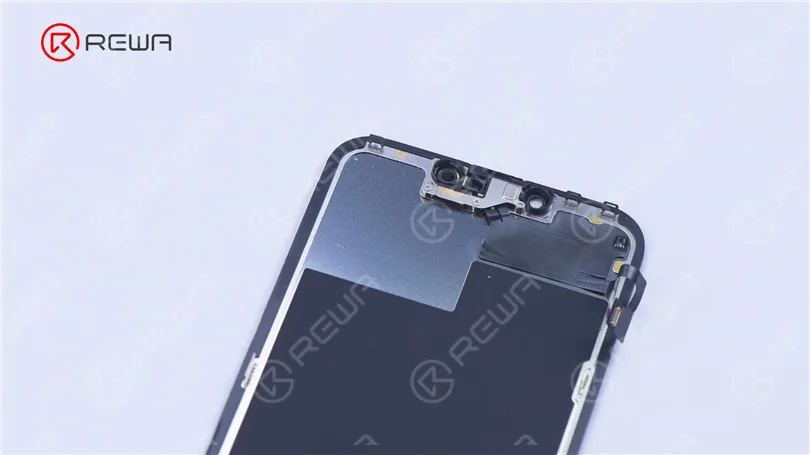
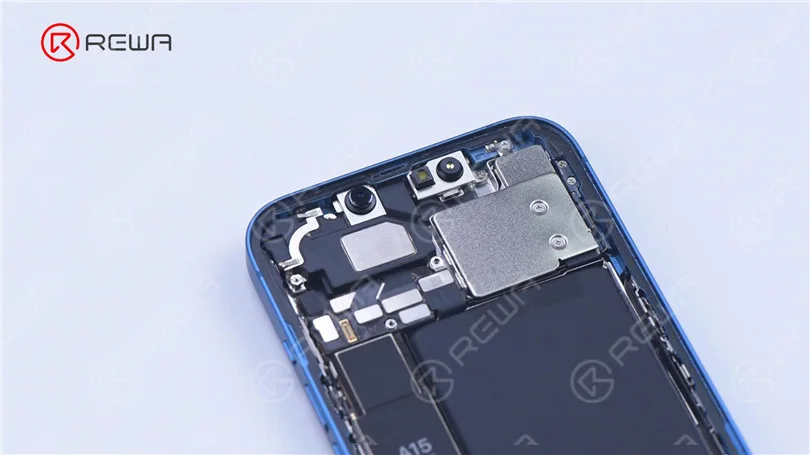
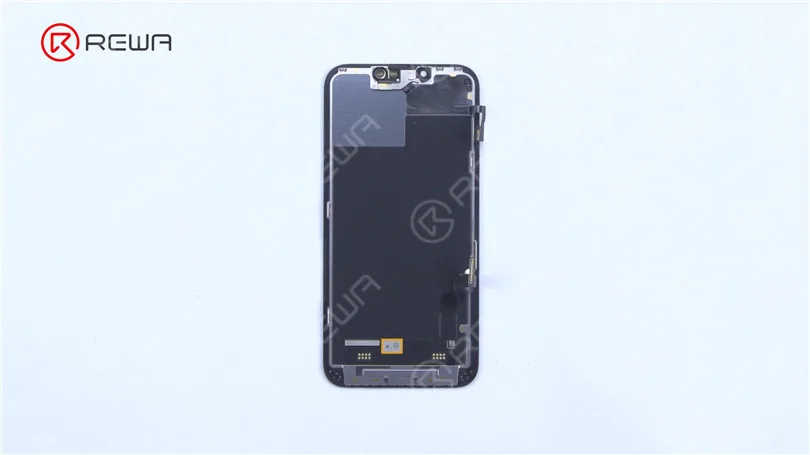
    Da der Bildschirm des iPhone 13 kein Flutlichtmodul enthält und alle Teile für das TrueDepth System im iPhone selbst untergebracht sind,

    iPhone 13 Face ID funktioniert nicht und wichtige Display-Meldung nach Austausch des Bildschirms beheben
    iPhone 13 Face ID funktioniert nicht und wichtige Display-Meldung nach Austausch des Bildschirms beheben

    REWA LAB vermutet, dass der Chip auf dem ursprünglichen Bildschirm Face ID-Daten gespeichert hat. Das Übertragen des Chips auf das neue Display könnte das Problem lösen. Heute wollen wir diese Spekulation überprüfen.

    iPhone 13 Face ID funktioniert nicht und wichtige Display-Meldung nach Austausch des Bildschirms beheben

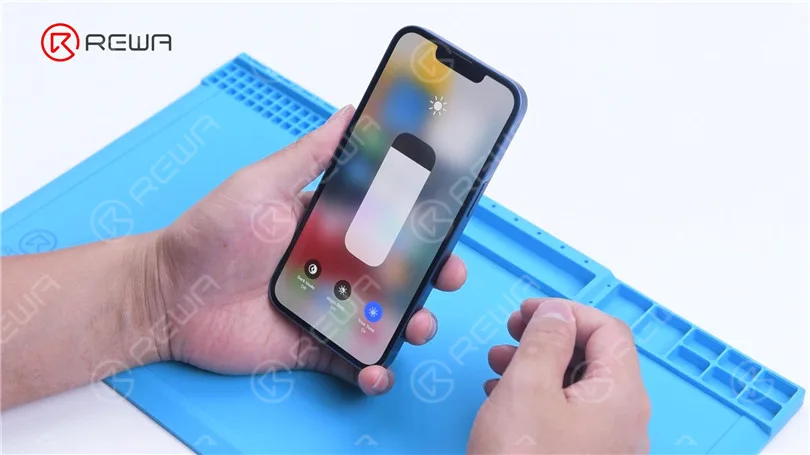
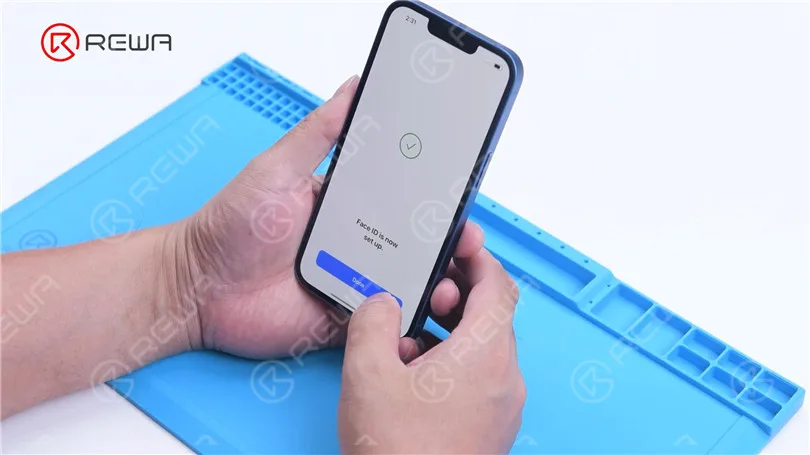
    Als Erstes testen wir die Face ID-Funktion des iPhone 13. Die True Tone Funktion ist normal. Face ID lässt sich einrichten und funktioniert einwandfrei.

    iPhone 13 Face ID funktioniert nicht und wichtige Display-Meldung nach Austausch des Bildschirms beheben
    iPhone 13 Face ID funktioniert nicht und wichtige Display-Meldung nach Austausch des Bildschirms beheben

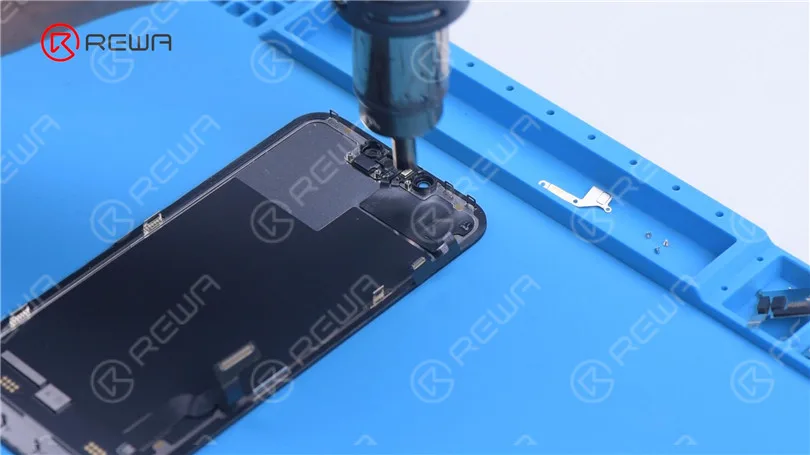
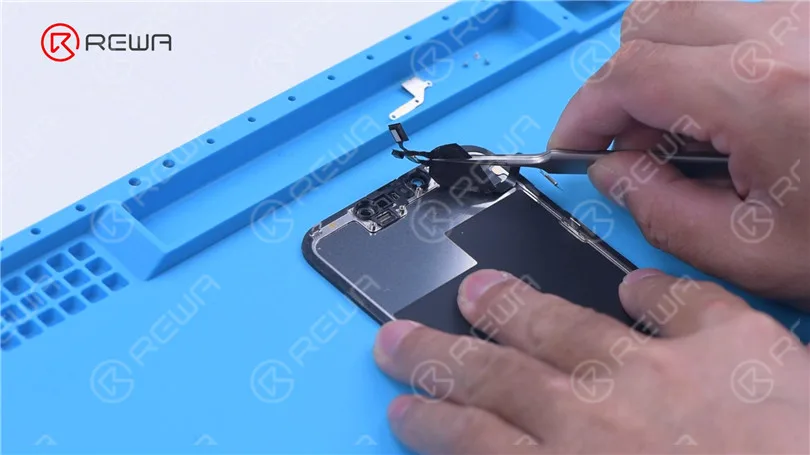
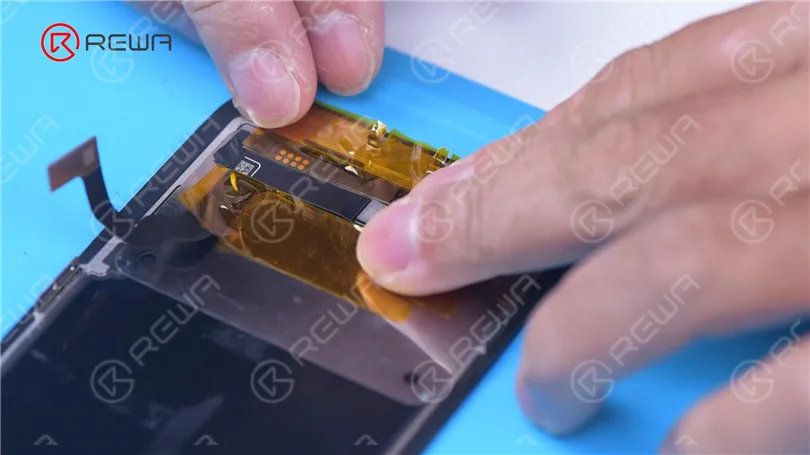
    Dann zerlegen wir das Telefon und versuchen, den Bildschirm durch einen originalen und echten Bildschirm zu ersetzen. Entfernen Sie den Originalbildschirm. Lösen Sie das Sensorflexkabel mit Heißluftpistole bei 100 °C. Achten Sie darauf, das Flexkabel nicht zu beschädigen, wenn Sie es entfernen. 

    iPhone 13 Face ID funktioniert nicht und wichtige Display-Meldung nach Austausch des Bildschirms beheben
    iPhone 13 Face ID funktioniert nicht und wichtige Display-Meldung nach Austausch des Bildschirms beheben

    Befestigen Sie das entfernte Sensorflexkabel an der neuen Abschirmung. Bringen Sie die Schrauben an. Schließen Sie den neuen Bildschirm an. Schalten Sie das Telefon ein. "Wichtige Displaymeldung" erscheint. Face ID kann nicht eingerichtet werden. True Tone wird ausgeblendet.

    iPhone 13 Face ID funktioniert nicht und wichtige Display-Meldung nach Austausch des Bildschirms beheben
    iPhone 13 Face ID funktioniert nicht und wichtige Display-Meldung nach Austausch des Bildschirms beheben
    iPhone 13 Face ID funktioniert nicht und wichtige Display-Meldung nach Austausch des Bildschirms beheben

    Als nächstes versuchen wir, den IC auf dem ursprünglichen Bildschirm auf den neuen Bildschirm zu übertragen.

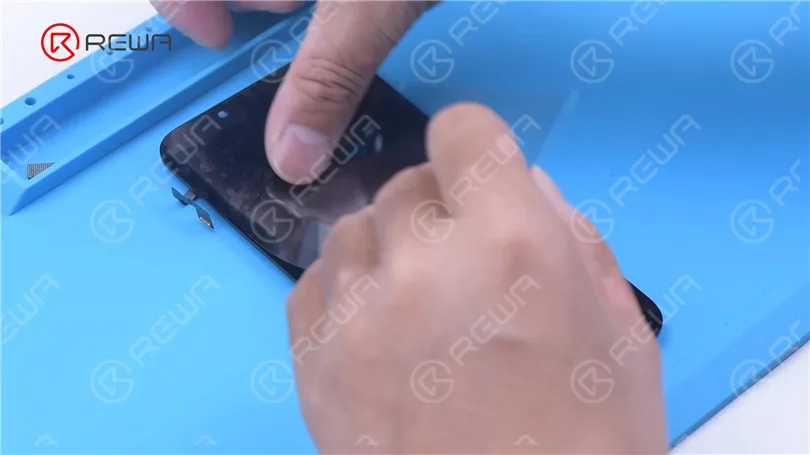
    Entfernen Sie den neuen Bildschirm. Um Kratzer auf dem Bildschirm während des Betriebs zu vermeiden,

    eine Schutzfolie auf dem Bildschirm anbringen. 

    iPhone 13 Face ID funktioniert nicht und wichtige Display-Meldung nach Austausch des Bildschirms beheben

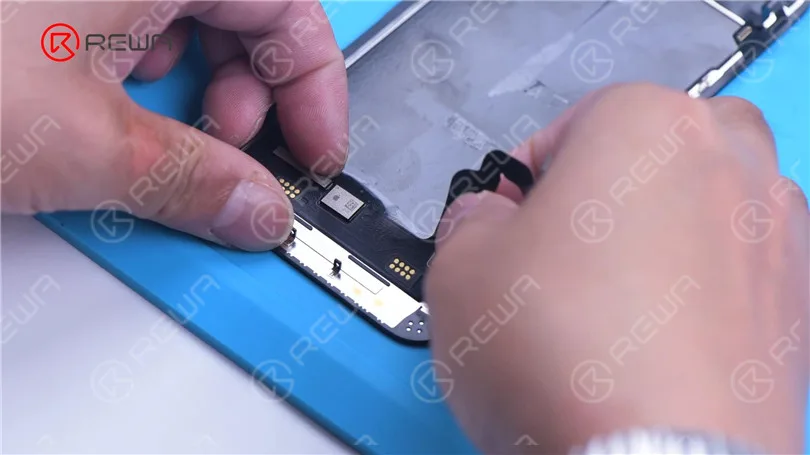
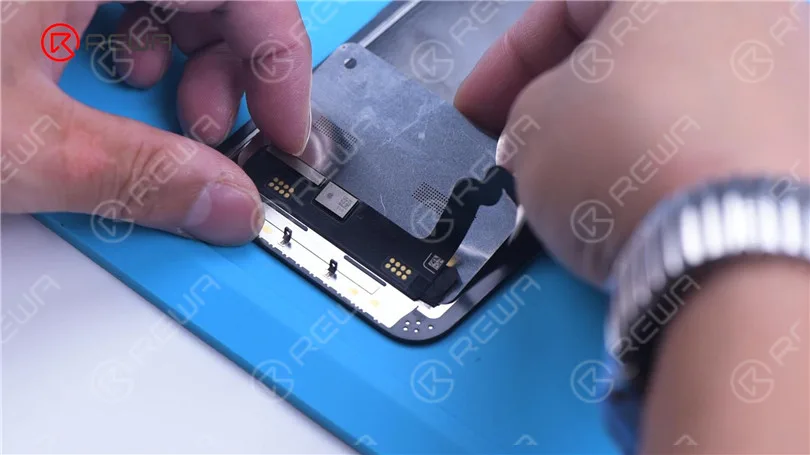
    Erhitzen Sie das Flexkabel der Abschirmung mit einer Heißluftpistole auf 100 °C. Ziehen Sie das Flexkabel vorsichtig nach oben.

    Zum Schutz der Abschirmung die Reballing-Schablone zur Isolierung unter das Flexkabel legen. Bringen Sie Hochtemperaturklebeband an.

    iPhone 13 Face ID funktioniert nicht und wichtige Display-Meldung nach Austausch des Bildschirms beheben
    iPhone 13 Face ID funktioniert nicht und wichtige Display-Meldung nach Austausch des Bildschirms beheben
    iPhone 13 Face ID funktioniert nicht und wichtige Display-Meldung nach Austausch des Bildschirms beheben

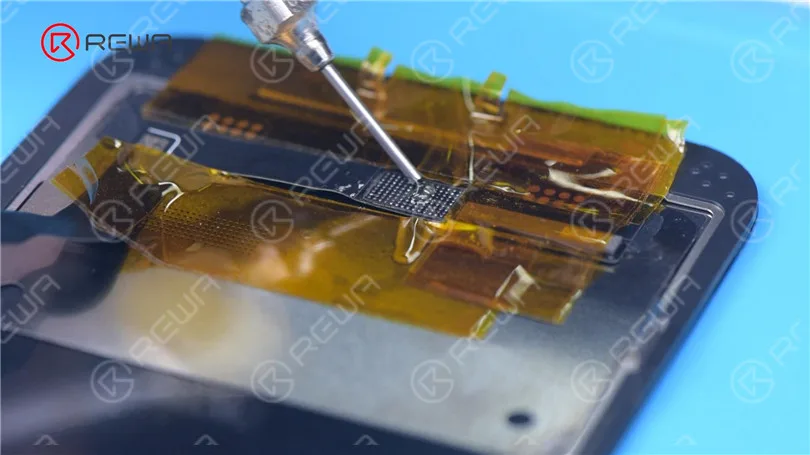
    Entfernen Sie den schwarzen Kleber um den Chip mit einer Heißluftpistole bei 240 °C.

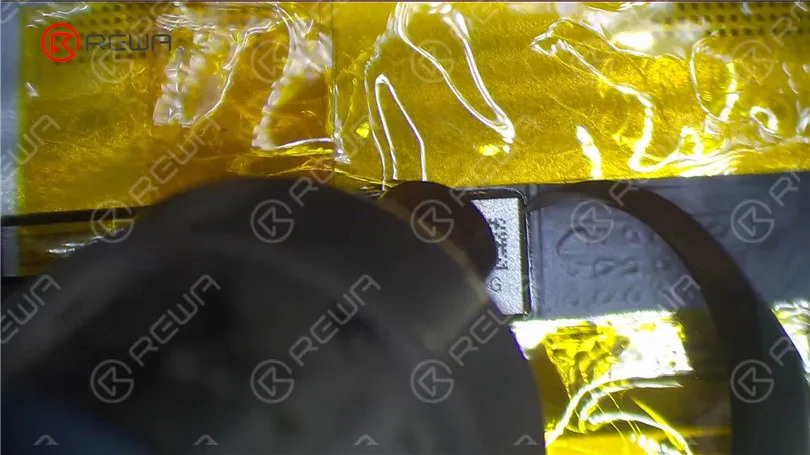
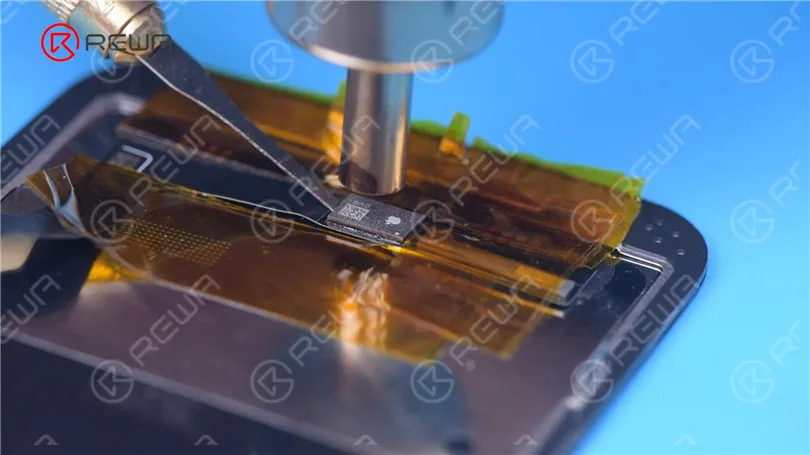
    Um den Chip zu entfernen, stellen Sie die Temperatur auf 300 °C und den Luftstrom auf 6.

    iPhone 13 Face ID funktioniert nicht und wichtige Display-Meldung nach Austausch des Bildschirms beheben
    iPhone 13 Face ID funktioniert nicht und wichtige Display-Meldung nach Austausch des Bildschirms beheben

    Tragen Sie etwas Lötpaste bei mittlerer Temperatur auf.

    Reinigen Sie die Klebeflächen mit einem Lötkolben bei 360 °C und einem Lötdocht.

    Reinigen Sie die Klebepads immer wieder mit PCB Cleaner.

    iPhone 13 Face ID funktioniert nicht und wichtige Display-Meldung nach Austausch des Bildschirms beheben
    iPhone 13 Face ID funktioniert nicht und wichtige Display-Meldung nach Austausch des Bildschirms beheben

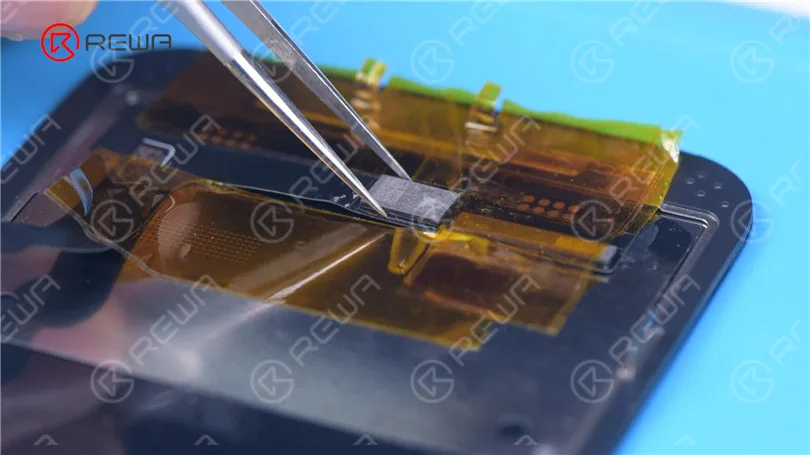
    Entfernen Sie dann den Chip auf dem ursprünglichen Bildschirm mit der gleichen Methode.

    Sauberes Zinn auf dem Chip des Originalbildschirms.

    Tragen Sie etwas Mitteltemperatur-Lotpaste auf die Klebepads auf.

    Reinigen Sie Zinn und schwarzen Klebstoff auf den Bondpads des Chips mit Solder Wick.

    Reinigen Sie die Klebepads immer wieder mit PCB Cleaner.

    iPhone 13 Face ID funktioniert nicht und wichtige Display-Meldung nach Austausch des Bildschirms beheben

    Als Nächstes wird der Chip reballiert. Bringen Sie die Reballing-Schablone in Position.

    Tragen Sie eine Schicht mittelwarme Lötpaste gleichmäßig auf.

    Mit einer Heißluftpistole bei 300 °C erhitzen, um die Lötkugeln zu formen.

    Nachdem die Lötkugeln geformt sind, reinigen Sie sie mit Leiterplattenreiniger.

    iPhone 13 Face ID funktioniert nicht und wichtige Display-Meldung nach Austausch des Bildschirms beheben
    iPhone 13 Face ID funktioniert nicht und wichtige Display-Meldung nach Austausch des Bildschirms beheben

    Tragen Sie Paste Flux auf die Klebepads des neuen Schirms auf.

    Richten Sie den Chip des Originalbildschirms aus.

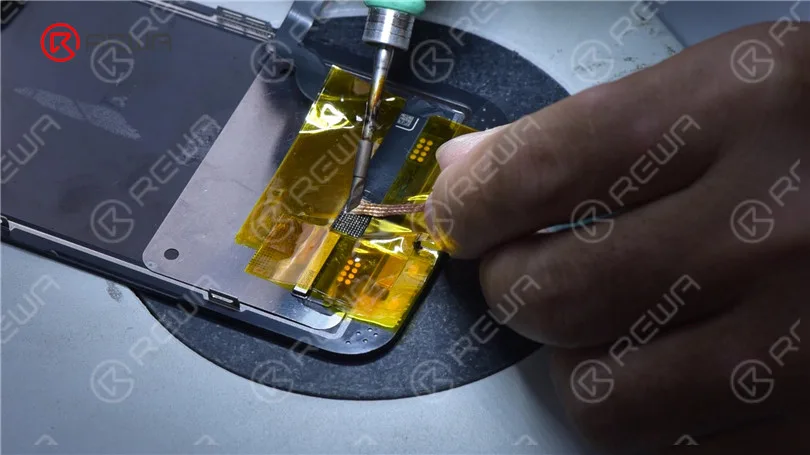
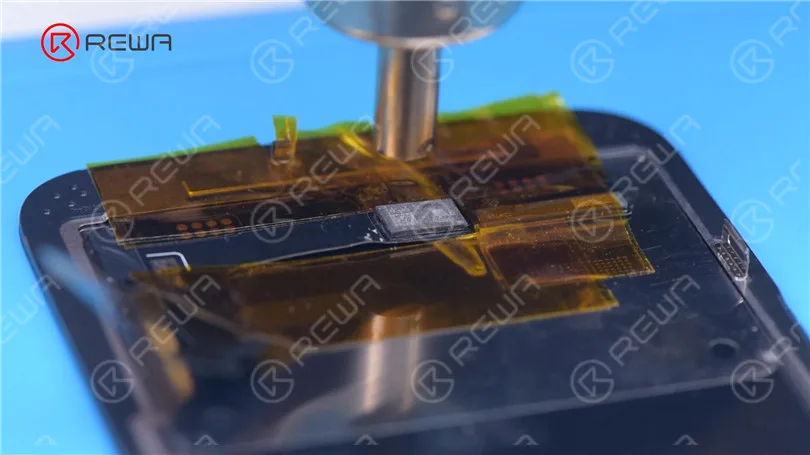
    Löten Sie den Chip mit einer Heißluftpistole bei 300 °C.

    iPhone 13 Face ID funktioniert nicht und wichtige Display-Meldung nach Austausch des Bildschirms beheben
    iPhone 13 Face ID funktioniert nicht und wichtige Display-Meldung nach Austausch des Bildschirms beheben
    iPhone 13 Face ID funktioniert nicht und wichtige Display-Meldung nach Austausch des Bildschirms beheben

    Entfernen Sie das Hochtemperaturband, nachdem das Flexkabel abgekühlt ist.

    Schließen Sie den Bildschirm an. Schalten Sie das Telefon ein.

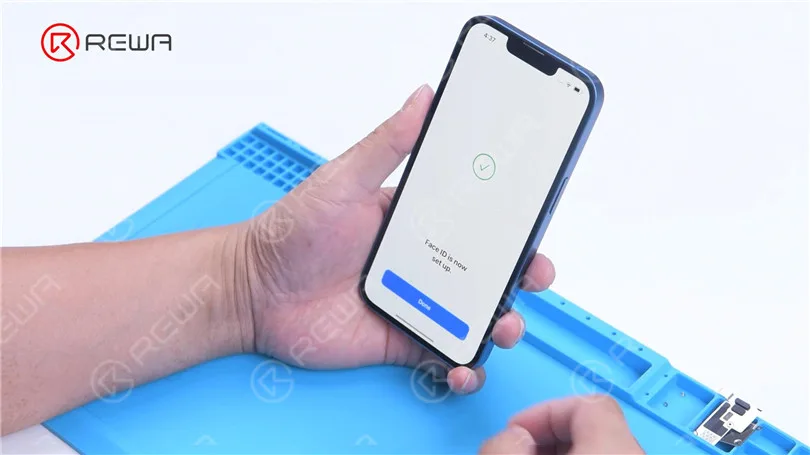
    Es gibt keine "Wichtige Display-Meldung". Face ID kann eingerichtet werden und funktioniert einwandfrei.

    Aber True Tone ist nicht wiederhergestellt worden.

    iPhone 13 Face ID funktioniert nicht und wichtige Display-Meldung nach Austausch des Bildschirms beheben

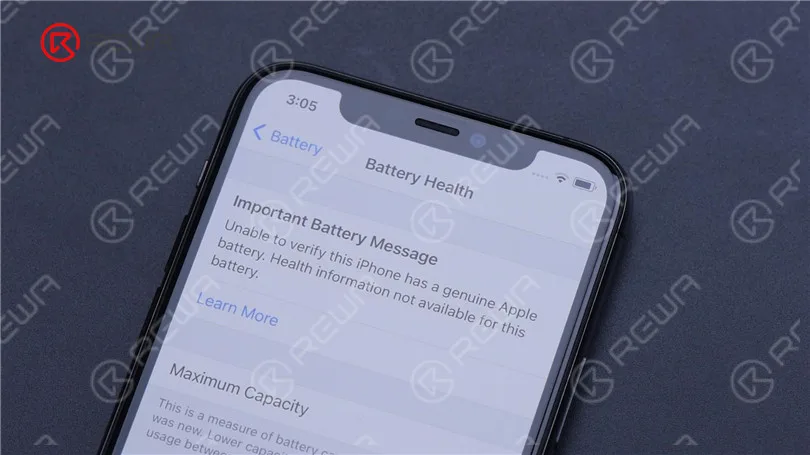
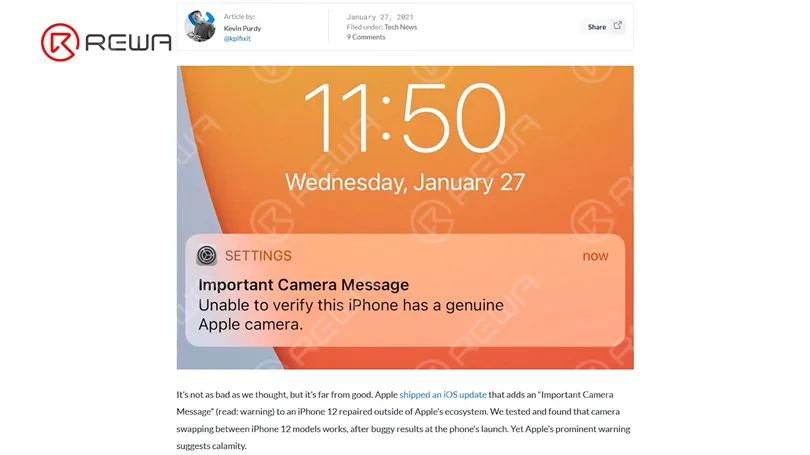
    Apple steht seit langem in der Kritik, weil die Anzeige von Hinweisen wie "Wichtige Batteriemeldung" und "Wichtige Kamerameldung" die Reparatur von Produkten durch Drittanbieter erschwert.

    iPhone 13 Face ID funktioniert nicht und wichtige Display-Meldung nach Austausch des Bildschirms beheben
    iPhone 13 Face ID funktioniert nicht und wichtige Display-Meldung nach Austausch des Bildschirms beheben

    Mit dem iPhone 13 in diesem Jahr macht Apple es seinen Kunden noch schwerer, Reparaturen von Drittanbietern zu erhalten.

    Es ist jedoch riskant, den Chip zu ersetzen, um Face ID nach dem Austausch des iPhone 13-Bildschirms zu lösen. REWA LAB rät Laien davon ab, diese Methode zu versuchen.

    Apple könnte dieses Problem in Zukunft mit einem iOS-Update beheben.

    Warten wir ab und sehen wir weiter. Bitte teilen Sie uns Ihre Meinung zu diesem Problem mit.

  • Face ID funktioniert nicht? 8 einfache Lösungen für dein iPhone

    Face ID funktioniert nicht? 8 einfache Lösungen für dein iPhone

    Apple’s Face ID is commended for its speed and precision. It is the most helpful approach to open your iPhone after Apple decided to dispose of the Home Button for their iPhone X and latter models.

    It’s likewise secure to the point that Apple says the likelihood of an arbitrary individual could unlock your iPhone (or iPad) utilizing Face ID is around 1 out of 1,000,000, that is with a solitary enrolled appearance.

    iPhone and iPad Face ID solely permits up to five unsuccessful attempts before the password is needed.

    Face ID is also used to validate buys and sign in to applications. Be that as it may, what occurs if your Face ID quits working?

    Follow the below steps to fix your Face ID

    1. Check Your Face ID Settings

    Apple educates you to go to Settings > Face ID and Passcode.

    See that your Face ID is set ready for action, with the vital features flipped on.

    In case there are a few features off, feel free to flip the settings you need to utilize Face ID for while you’re there: Apple Pay, opening your iPhone, Password AutoFill, and the iTunes and App Store,

    In case it’s not set up, tap “Set Up Face ID.” Your cell phone will walk you through the means which includes shifting and pivoting your head for the face examines.

    If you can’t move your head, Apple’s Accessibility Options button is additionally there for you to tap.

    A password will be needed on the off chance that you’ve had five unsuccessful Face ID attempts and need to get to your phone.

    2. Ensure Nothing is Covering Your Face

    The TrueDepth camera needs to see your eyes, nose, and mouth completely noticeable for the Face ID to work.

    That implies you can’t utilize it while wearing a face veil.

    Face ID can work with numerous shades, however.

    In any case, Apple cautions that a few sunglasses that are intended to hinder particular kinds of light can impede the infrared light utilized by the TrueDepth camera and thus Face ID can’t remember you.

    If that is the case, take your shades off when expecting to utilize Face ID.

    3. Reset Face ID

    If none of the past ways work, reset Face ID. Just head to Settings > Face ID and Passcode and tap “Reset Face ID”. It’s underneath “Set Up and Alternate Appearance.”

    Whenever that is done, go ahead and set up Face ID once more.

    4. Restart Your iPhone (or iPad)

    This might sound senseless but now and then software can glitch and a straightforward restart can assist with getting things back altogether.

    Go ahead to restart your cell phone by either going to Settings > General > Shut Down or squeezing your Side Button and either one of the Volume Buttons together.

    5. Set up an Alternate Appearance

    In the event that you have an appearance that can appear to be endlessly unique from the first enrolled appearance, you can set up a substitute appearance so Face ID can in any case remember you and let you access your iPhone.

    Note that this doesn’t work in case you’re wearing a face veil, Apple says.

    To add an alternate appearance, go to Settings > Face ID and Passcode. You may be needed to enter your password. Tap “Set Up an Alternate Appearance” and begin.

    It’s fundamentally the same way you set up your first enrolled appearance. Once more, if you are unable to move your head, the Accessibility Option button can help you with that.

    6. Make Sure that the TrueDepth Camera is Free of Barrier

    Apple advised ensuring nothing is covering the TrueDepth camera, which includes your phone case or the protector. Make sure no dirt or buildup is covering the TrueDepth camera.

    7. Ensure You’re Facing the Camera The Right Way

    For iPhone users, hold your iPhone in a portrait direction when utilizing Face ID. Those who use iPad can utilize it in any direction.

    Additionally, ensure you are confronting the camera straightforwardly.

    Apple says the TrueDepth camera has a comparable scope of view as when you take a selfie or make a video call. So ensure that your phone is at a safe distance or 10-20 inches away from your face.

    8. Contact Apple Support

    In the event that all these steps have been conducted, Face ID is as yet not working and you accept that this is a result of a new iOS update.

    Feel free to contact Apple Support and report the issue.

    In case there are different reasons you suspect like you can’t enroll your appearance or different issues, Apple Support ought to have the option to help you with that.

  • Why Face ID Can Be So Easily Damaged And Hardly Repaired?

    Why Face ID Can Be So Easily Damaged And Hardly Repaired?

    Face ID is a new feature introduced to iPhone X/XS/XR/XS Max. While it is a most powerful component allow biometric authentication for unlocking a device, there are quite a lot of instances when Face ID will not work.

  • Fehlerbehebung bei Face ID-Problemen auf dem iPhone: Lösungen und Tipps

    Fehlerbehebung bei Face ID-Problemen auf dem iPhone: Lösungen und Tipps

    Using Face ID on your iPhone can be a convenient and secure way to unlock your device and authenticate various actions. However, like any technology, it may encounter issues that hinder its functionality. In this article, we will explore common problems with Face ID and provide effective solutions to resolve them. Whether you are experiencing the “Move a Little Lower/Higher” prompt or other Face ID-related difficulties, we’ve got you covered.

    Please check if there

    Section 1: Restart Your Device

    One of the simplest yet effective solutions to fix Face ID problems is to restart your iPhone. To do this, press and hold the side button and any volume button until the slider appears. Slide the slider to power off your device. Once it is off, press and hold the side button until the Apple logo appears, indicating that your device is restarting. Rebooting your iPhone can often resolve software or temporary system failures that may be affecting Face ID.

    Section 2: Check for Obstructions

    Ensure that there is nothing covering the front-facing TrueDepth camera on your iPhone. Sometimes, a film or dirt can obstruct the camera, causing Face ID to malfunction. Carefully inspect the area around the camera and clean it with a gentle cloth or lift if necessary. Removing any obstructions can significantly improve the performance of Face ID.

    Section 3: Assess Water Damage

    If your iPhone has been exposed to water or liquid, it may lead to Face ID not working properly. In such cases, it is recommended to visit an authorized Apple service center. To check for water damage, look for the Liquid Contact Indicator (LCI) on your device. The LCI is usually located externally and changes color (from white or silver to red) when it comes into contact with liquid. Use a lamp magnifying glass to locate and inspect the LCI for any signs of water damage.

    LCI

    Section 4: Update Your System

    Keeping your iPhone’s operating system up to date is crucial for maintaining optimal performance. If Face ID issues persist even after trying the previous solutions, it is advisable to update your device to the latest iOS version. Apple regularly releases software updates that address bugs and improve system stability. Navigate to Settings > General > Software Update and follow the prompts to install any available updates.

    Schlussfolgerung:

    Face ID is a remarkable feature that enhances the security and convenience of using your iPhone. However, occasional issues may arise that require troubleshooting. By following the steps outlined in this article, you can effectively resolve Face ID problems such as the “Move a Little Lower/Higher” prompt or other related difficulties. Remember to restart your device, check for obstructions, assess water damage, and update your system regularly. These measures will help ensure a seamless Face ID experience on your iPhone.

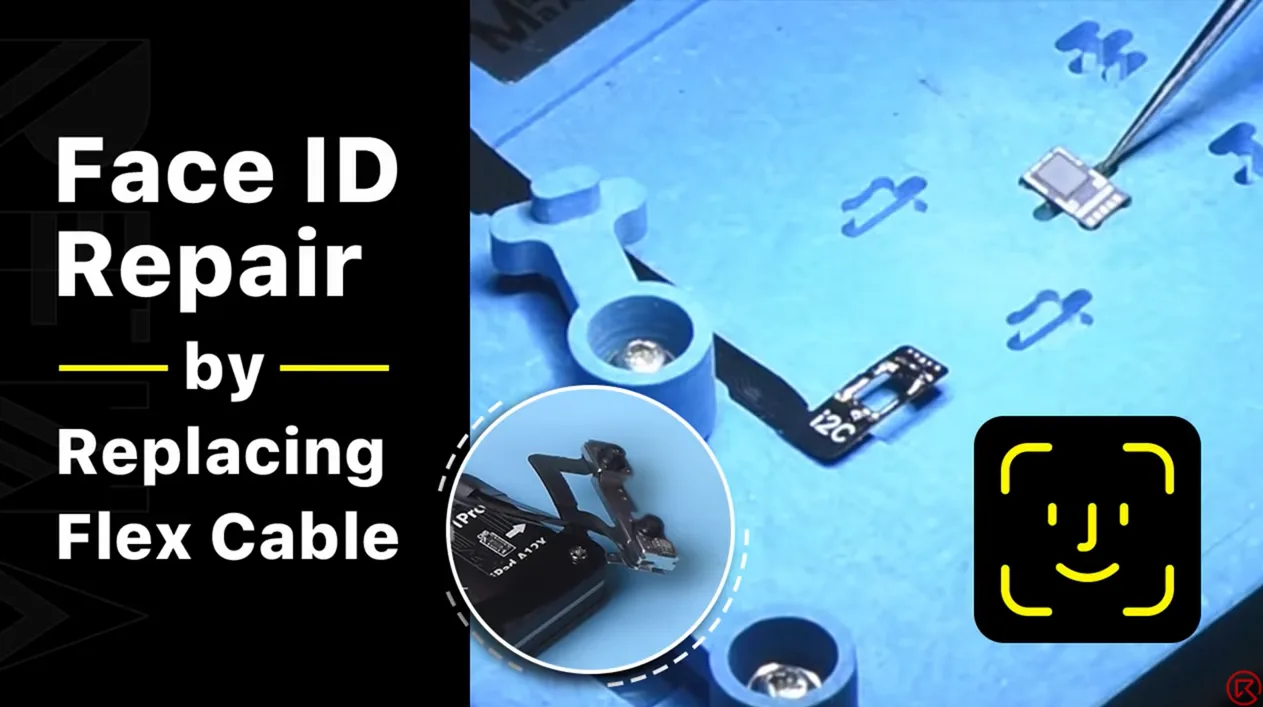
  • iPhone Face ID Dot Projektor Reparatur (durch Ersetzen des Flexkabels)

    iPhone Face ID Dot Projektor Reparatur (durch Ersetzen des Flexkabels)

    Dot projector parts are extremely fragile. A fall or water damage may harm dot projector parts, inducing Face ID malfunction. Since the dot projector IC is encrypted and replacement requires data encryption bonding for the new IC, repair technicians find it a challenge to repair the Face ID. The good news is that REWA LAB has developed a simple and efficient method to repair the Face ID. Let’s check it out!

    In diesem Video empfohlene Produkte:

  • Kann das iPhone 2 Face ID haben?

    Kann das iPhone 2 Face ID haben?

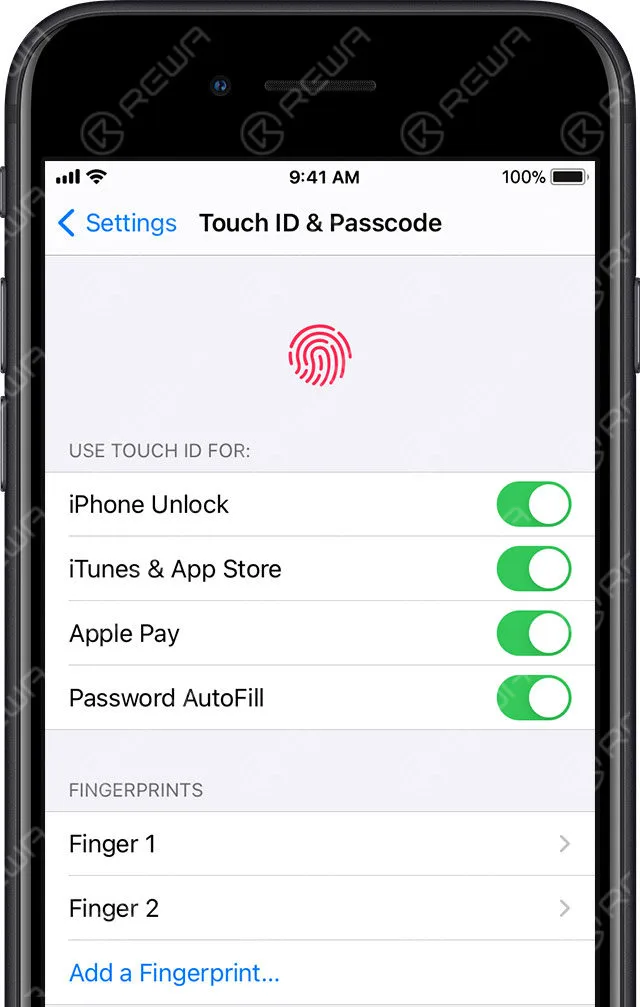
    Das iPhone 8 und ältere Modelle mit Touch ID können mehrere Fingerabdrücke zum Entsperren hinzufügen, sodass Sie die Fingerabdrücke anderer Personen zum Entsperren Ihres iPhones verwenden können. Für das iPhone X und neuere Modelle wird die Gesichtserkennung zum Entsperren verwendet. In der Tat kann diese Entsperrmethode 2 Gesichtsinformationen haben.

    Touch ID

    Führen Sie die folgenden Schritte aus, um ein alternatives Erscheinungsbild einzurichten:

    1. Gehen Sie zu "Einstellungen" - "Gesichtserkennung und Passcode“.
    2. Gewindebohrer "Einrichten eines alternativen Erscheinungsbildes“.
    Informationen zum Gesicht

    Der nächste Schritt ist die Eingabe der Gesichtsinformationen: Schauen Sie direkt auf das iPhone oder IPAD und platzieren Sie das Gesicht im Sichtfeld, drehen Sie langsam den Kopf, um die Rundum-Erfassung abzuschließen, schließen Sie den ersten Gesichts-ID-Scan ab, tippen Sie auf "Weiter", drehen Sie dann langsam den Kopf für die zweite Rundum-Erfassung ab. Nach Abschluss der Gesichts-ID-Einstellung tippen Sie auf "Fertig".

    Nachdem die Eingabe abgeschlossen ist, können beide Gesichter das iPhone entsperren.

  • Enthüllung von Apples revolutionärer Gesichtserkennung

    Enthüllung von Apples revolutionärer Gesichtserkennung

    Face ID ist eine Face-to-Face-ID, ein Gesichtserkennungssystem für das Design und die Freigabe von Apple, wird erstmals im iPhone X verwendet; es ermöglicht den Nutzern, Apple-Geräte zu entsperren, in jedem Apple Digital Media Store einzukaufen und als Apple Pay oder Anwendungen zu bezahlen Die Authentifizierungsmethode zahlt innerhalb.

    Apples Sicherheitsverpflichtung

    Apple rühmt sich damit, dass die Chance, von einem unbefugten Benutzer entsperrt zu werden, bei Face ID bei eins zu einer Million liegt. Face ID hebt sich durch seinen Ansatz zur Datensicherheit ab. Im Gegensatz zu anderen Systemen, die sensible Daten in der Cloud speichern, speichert Apple Face ID Ihre Gesichtserkennungsdaten in einer sicheren Enklave innerhalb des Apple A11 Bionic Chips. Dadurch wird sichergestellt, dass Ihre persönlichen Daten auf Ihrem Gerät und in der Cloud bleiben.

    Kompatible Geräte

    Ursprünglich mit dem iPhone X eingeführt, ist Face ID inzwischen in verschiedenen Apple-Geräten zu finden, darunter:

    • iPhone X, Xʀ, Xs/Max, 11, 11 Pro/Max, 12/Mini, und 12 Pro/Pro Max
    • iPad Pro (dritte und vierte Generation)

    So funktioniert Face ID

    Face ID basiert auf einem mehrstufigen Verfahren zur genauen Identifizierung des Benutzers:

    1. Beleuchtung und Infrarotbildgebung: Face ID beleuchtet zunächst das Gesicht des Benutzers mit Infrarotlicht und erfasst ein 2D-Infrarotbild mit einem Flutlichtsensor.
    2. Infrarotkamera-Erkennung: Eine Infrarotkamera scannt dann das Gesicht des Benutzers, um bestimmte Merkmale zu erfassen.
    3. Dot Array Projektion: Über 30.000 einzigartige kodierte Infrarotpunkte werden auf das Gesicht des Benutzers projiziert. Diese Punkte werden zur Infrarotkamera zurückreflektiert, wodurch eine 3D-Karte der Gesichtsoberfläche entsteht.
    4. Datenverarbeitung: Der Versatz zwischen dem Original-Infrarotbild und den reflektierten Infrarotpunkten wird analysiert, um ein präzises 3D-Modell des Gesichts des Benutzers zu erstellen.
    5. Mathematische Transformation: Das Infrarotbild und das 3D-Modell werden an den Prozessor des Geräts gesendet, wo sie in einen mathematischen Ausdruck umgewandelt werden.
    6. Vergleich der Gesichter: Das Gerät vergleicht den mathematischen Ausdruck mit zuvor registrierten Gesichtsdaten und entscheidet, ob der Zugang gewährt wird.

    Zusätzliche Merkmale

    Face ID enthält mehrere Funktionen zur Verbesserung der Sicherheit und Genauigkeit:

    • Flutlicht: Unsichtbares Infrarotlicht hilft bei der Gesichtserkennung, auch bei schlechten Lichtverhältnissen. So kann das System erkennen, ob die Augen des Benutzers geöffnet und auf das Gerät gerichtet sind.
    • Dot-Matrix-Projektor: Mehr als 30.000 unsichtbare Punkte werden auf das Gesicht des Benutzers projiziert, um ein genaues 3D-Gesichtsmodell zu erstellen. Die Anordnung dieser Punkte ist bei jeder Person anders.
    • Infrarotkamera: Diese Kamera nimmt ein 2D-Infrarotbild auf, während sie das einzigartige Punktmatrixmuster liest. Die Daten werden dann analysiert und zum Vergleich an die sichere Enklave im A11 Bionic Chip gesendet.

    Technischer Anbieter: Face ID beinhaltet die Technologie von Sensomotoric INSTRUMENTS, die PrimeSense Structural Light Technology und Faceshift für die Gesichtserfassungstechnologie verwendet.

    Schlussfolgerung:

    Die Gesichtserkennung von Apple ist nicht nur eine bequeme Möglichkeit, Ihr Gerät zu entsperren, sondern auch ein ausgeklügeltes und hochsicheres Gesichtserkennungssystem, das modernste Technologie nutzt, um Ihre Privatsphäre und Sicherheit zu gewährleisten. Mit Funktionen wie Flutlicht, Punktmatrixprojektion und Infrarotbildgebung ist es kein Wunder, dass Face ID zu einem Maßstab für die sichere biometrische Authentifizierung in der Tech-Welt geworden ist. Da Apple weiterhin innovativ ist, können wir noch weitere spannende Entwicklungen in diesem Bereich erwarten.

  • Beheben von iPhone 11 Pro Max Face ID funktioniert nicht

    Beheben von iPhone 11 Pro Max Face ID funktioniert nicht

    Die Teile des Dot-Projektors sind äußerst empfindlich. Ein Sturz oder ein Wasserschaden kann Teile des Dot-Projektors beschädigen und dazu führen, dass Face ID nicht funktioniert.

    Dieser Artikel befasst sich mit einer bahnbrechenden Methode, die von REWA LAB entwickelt wurde, um Face ID zu reparieren, und macht sie zugänglich und effektiv.

    Das Problem

    Das Herzstück von Face ID ist der Dot Projector Integrated Circuit (IC), eine kritische und verschlüsselte Komponente. Der Austausch dieses ICs erfordert einen komplexen Prozess, der eine Datenverschlüsselung beinhaltet, was für Reparaturtechniker in der Regel entmutigend ist.

    Die Lösung

    Glücklicherweise hat REWA LAB einen rationalisierten und effizienten Ansatz zur Lösung von Face ID-Problemen entwickelt.

    Die hier vorgestellte Schritt-für-Schritt-Anleitung wird Ihnen helfen, das Reparaturverfahren zu verstehen und durchzuführen.

    Schritt 1: Erstdiagnose

    • Navigieren Sie zunächst zu den Einstellungen Ihres Geräts und wählen Sie dann “Face ID & Passcode” und “Face ID einrichten”.”
    • Während des Einrichtungsvorgangs kann die Meldung “Bewegen Sie das iPhone etwas tiefer/höher” erscheinen. Dies weist auf eine Fehlfunktion des Dot-Projektors hin.

    Schritt 2: Demontage

    • Um auf den Dot-Projektor zuzugreifen, entfernen Sie das Display des Geräts.
    • Wenn Sie eine rote Markierung sehen, deutet dies auf einen Wasserschaden hin.
    • Schließen Sie das Flexkabel des Punktprojektors an das I2C-Reparaturprogrammiergerät an und führen Sie einen Diagnosetest durch, um eine Fehlfunktion zu bestätigen.

    Schritt 3: Datenübertragung und Crystal Fix

    • Verwenden Sie das Programmiergerät, um Daten aus dem defekten Flexkabel zu lesen.
    • Tauschen Sie das Flexkabel gegen ein neues aus und übertragen Sie die zuvor gelesenen Daten.
    • Tragen Sie mit einer UV-Lampe eine kleine Menge UV-Kleber auf, um den Kristall des Punktprojektor-Flexkabels zu sichern.

    Schritt 4: Entfernen des Dot-Projektors

    • Entfernen Sie den Schaumstoff auf der Rückseite des Dot-Projektors.
    • Für eine genaue Ausrichtung beim Zusammenbau markieren Sie das Modul mit einem Bildhauermesser.
    • Heben Sie die Metallplatte an, um an das darunter liegende Dot-Projektor-Flexkabel zu gelangen.

    Schritt 5: Präzisionsarbeit

    • Verwenden Sie eine Haltevorrichtung für die präzise Handhabung des Face ID-Moduls.
    • Schleifen Sie die Schweißposition der Metallplatte, um an den Punktprojektor zu gelangen.
    • Lösen Sie das Dot-Projektor-Modul vorsichtig mit einem Heißluftgebläse.
    • Entfernen Sie den MOSFET durch Erhitzen auf 320°C.

    Schritt 6: Löten und Wiederzusammenbau

    • Tragen Sie mit einem Lötkolben Lötpaste auf das Kontaktierungsfeld auf und verbinden Sie die Pins 2 und 3 des MOSFETs mit 0,02 mm Kupferdraht.
    • Reinigen Sie das Punktprojektormodul mit Kolophonium und Lötkolben und anschließend mit PCB Cleaner.
    • Rollen Sie das neue Flexkabel wieder auf, tragen Sie Flussmittel auf und löten Sie es an das Punktprojektormodul.

    Schritt 7: Prüfung und Endmontage

    • Schließen Sie das gelötete Flexkabel an den I2C-Programmer an und führen Sie einen Test durch.
    • Wenn der Test erfolgreich war, befestigen Sie das Flexkabel an der Haltevorrichtung und richten Sie es auf das Punktprojektormodul aus.
    • Tragen Sie 460 Klebstoff auf, um die Komponenten zu befestigen.
    • Stecken Sie das Flexkabel in das Telefon.
    • Schalten Sie das Gerät ein und konfigurieren Sie die Face ID-Einstellungen.

    Schlussfolgerung:

    Wenn Sie diese sorgfältigen Schritte befolgen, können Sie die Face ID-Funktion Ihres Geräts erfolgreich wiederherstellen. Der Fehler wird behoben, und Ihr Telefon erhält seine sichere und bequeme Authentifizierungsfunktion zurück. 
    Bitte besuchen Sie unsere Internetshop für Reparaturteile und Werkzeuge.

    Sehen Sie sich das Video unten an, um eine detailliertere iPhone 11 Pro Max Face ID Reparatur zu erhalten.
  • iPhone X Face ID funktioniert nicht Reparatur

    iPhone X Face ID funktioniert nicht Reparatur

    Durch die verbreitete Nutzung von Face ID bei der iPhone X–11-Serie tritt ein Ausfall von Face ID ebenfalls häufig auf.

    Wie zuvor Face-ID-Demontagevideo eingeführt, kann Face ID leicht beschädigt und kaum repariert werden. Wenn das Problem mit dem Flexkabel zusammenhängt, ist es einfach.
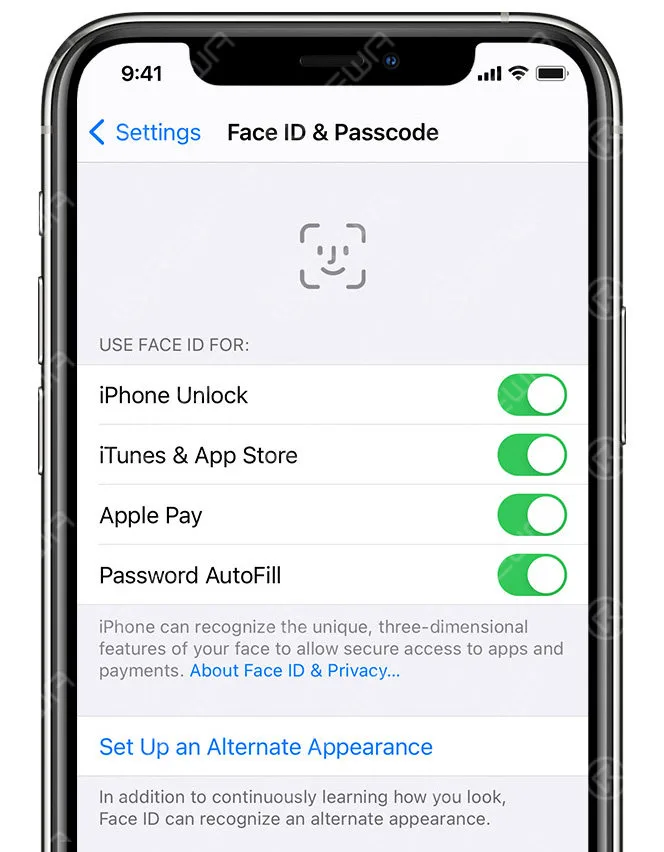
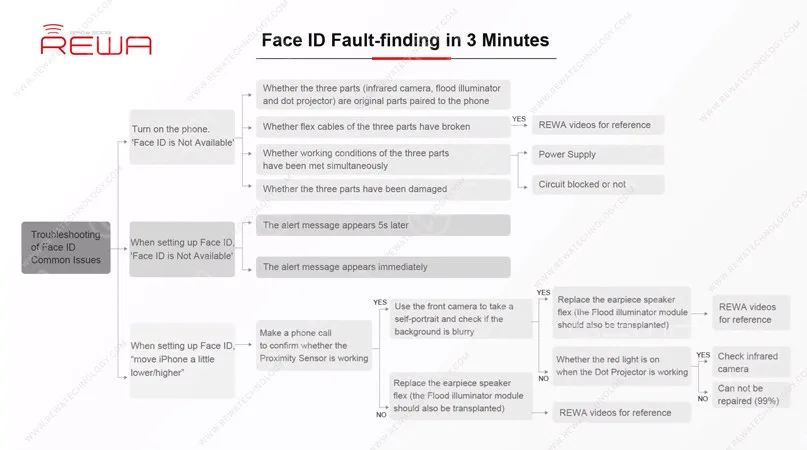
    Basierend auf den Statistiken des REWA-Reparaturservice für Mainboards auf Chipebene wird ein Ausfall von Face ID in den meisten Fällen jedoch durch eine Beschädigung des Flood-Illuminators bzw. des Punktprojektors verursacht, die nicht repariert werden kann.

    Face-ID-Einrichtung funktioniert nicht

    Heute möchten wir einen Fall zum Thema ‘iPhone beim Einrichten von Face ID etwas weiter nach unten/oben bewegen’ mit Ihnen teilen und Ihnen zeigen, wie unsere Techniker mit Hilfe exklusiver REWA-Repaturtricks zur Fehlerbehebung bei Face ID den Fehler in 3 Minuten finden. Fangen wir an!

    Face ID funktioniert nicht (Fehlfunktion)

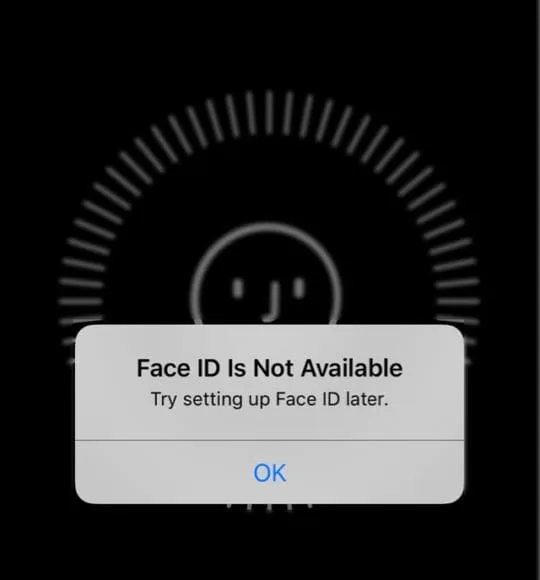
    Das Telefon zeigt während des Einrichtungsprozesses von Face ID immer wieder die Meldung an: ‘iPhone etwas weiter nach unten/oben bewegen’. Das bedeutet, dass Face ID auf dem Telefon nicht erfolgreich eingerichtet werden kann.

    Face ID ist nicht verfügbar

    Face ID nicht verfügbar Fehlerbehebung

    Lassen wir uns nun den Fehler Schritt für Schritt ermitteln.

    Schritt 1: Testen des Flood Illuminators

    Basierend auf den exklusiven Reparaturtricks von REWA beginnen wir mit dem Flood Illuminator (Punktprojektor/Flutlichtstrahler). Es gibt zwei wichtige Face ID-Komponenten, deren Funktion von der Unterstützung des Flood Illuminators abhängen. Bei unserer täglichen Reparaturarbeit können wir den Annäherungssensor (Proximity Sensor) und den Umgebungslichtsensor (Ambient Light Sensor) testen, um zu bestätigen, ob der Flood Illuminator ordnungsgemäß funktioniert.

    Warum funktioniert meine Face ID nicht?

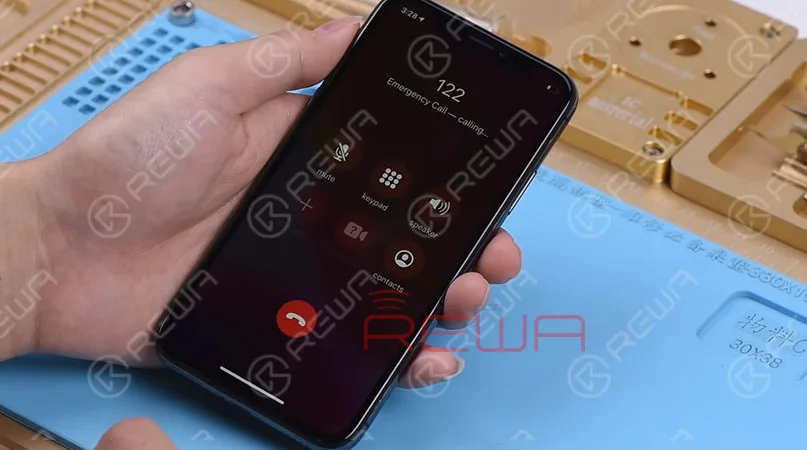
    Lass uns einen Anruf tätigen, um zu überprüfen, ob der Annäherungssensor funktioniert.

    Decken Sie während des Telefongesprächs die Oberseite des Bildschirms mit einer Hand ab.

    Wir können sehen, dass der Bildschirm sofort schwarz wird.

    Nach diesen Angaben funktioniert der Näherungssensor einwandfrei.

    Wie man Face ID repariert

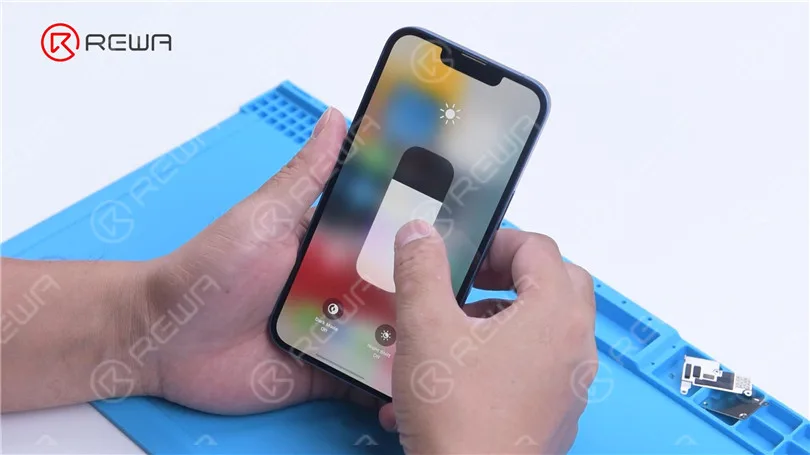
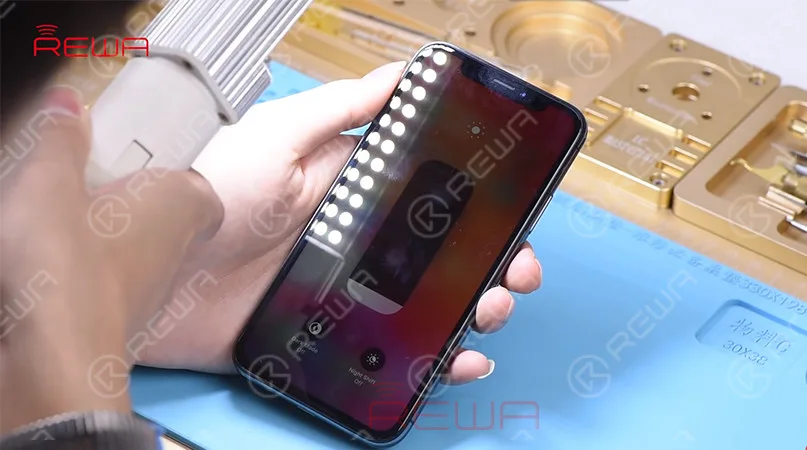
    Testen Sie als Nächstes den Umgebungslichtsensor. Stellen Sie die Bildschirmhelligkeit auf das Minimum ein und halten Sie das Telefon dann unter eine helle Lichtquelle.

    Da der Bildschirm heller wird, können wir bestätigen, dass auch der Umgebungslichtsensor normal funktioniert. Demnach wird der Face-ID-Fehler nicht durch den Flood Illuminator verursacht.

    Face ID funktioniert bei mir nicht

    Schritt 2: Testen der Vorderkamera-Teile

    Gehen wir zum nächsten Schritt über face id funktioniert nicht – die Teile der Frontkamera testen.

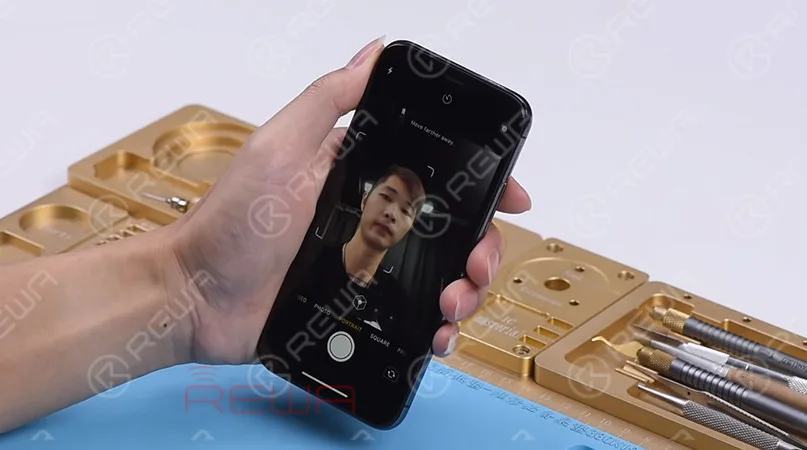
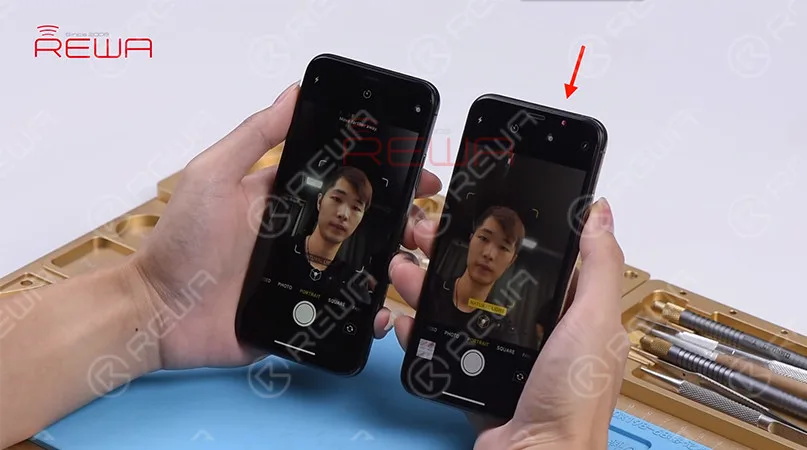
    Öffnen Sie die Kamera-App und wischen Sie zum Porträtmodus. Der Hintergrund ist nicht unscharf, was unnormal ist.

    Warum funktioniert Face ID nicht?

    Schritt 3: Beobachten des Punktprojektors

    Im Porträtmodus blinkt kein rotes Licht vom Punktprojektor.

    Aber der Dot-Projektor sollte im Normalzustand ein blinkendes rotes Licht aussenden.

    Wir können nun bestätigen, dass der Dot-Projektor eine Fehlfunktion aufweist.

    Dies ist der Fehler, der dazu führt, dass die Einrichtung von Face ID fehlschlägt. Und das Problem kann nicht behoben werden.

    Warum funktioniert meine Face ID nicht?

    Tipps:

    Die drei Teile (Infrarotkamera, Flood Illuminator und Dot Projector) sind mit dem Telefon gekoppelt. Die Beschädigung eines beliebigen Teils kann zum Ausfall von Face ID führen, und ein solcher Fehler ist irreparabel.

    Der Ausfall von Face ID ist mittlerweile zu einem häufigen Problem bei unseren täglichen Reparaturarbeiten geworden.

    Ob das Problem, mit dem Sie es zu tun haben, repariert werden kann oder nicht, ist für Reparaturtechniker wirklich eine wichtige Sache.

    Keine Sorge! REWA-Exklusiv-Reparaturtipps folgen face id funktioniert nicht kann eine große Hilfe für Reparaturtechniker sein, um fehlerhafte Stellen zu finden und die Reparaturseffizienz zu verbessern.

    Einzelheiten zu diesem Fall finden Sie im YouTube-Video unten.

    Sie möchten grundlegende Kenntnisse über die iPhone-Hauptplatine erwerben, iPhone-Mikro-Löttechniken beherrschen, den Arbeitsablauf verschiedener iPhone-Schaltkreise verstehen, Fehlerbehebungsprozesse für verschiedene iPhone-Probleme beherrschen und detaillierte Schritte zur Wiederherstellung des Bildschirms bzw. der Glasrückseite erlernen?

    REWA-Akademie ist eine Plattform zum Erlernen von Reparaturtechniken, zur praktischen Demonstration und zum Ideenaustausch für Fachleute aus der Elektronikreparaturbranche.

    Sie können auch auf den Kurslink unten klicken, um mehr zu erfahren!

  • The Vulnerabilities of Face ID: Why Face ID Can Be Easily Damaged and Hardly Repaired?

    The Vulnerabilities of Face ID: Why Face ID Can Be Easily Damaged and Hardly Repaired?

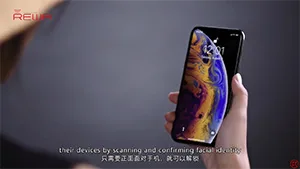
    As a facial-recognition technology initially launched on iPhone X, Face ID has been applied to latest iPhones, including iPhone XS,XS Max and XR. With this amazing Face ID system, users can unlock their devices by scanning and confirming facial identity. Whether you are wearing a hat, putting on glasses or you are in the dark.

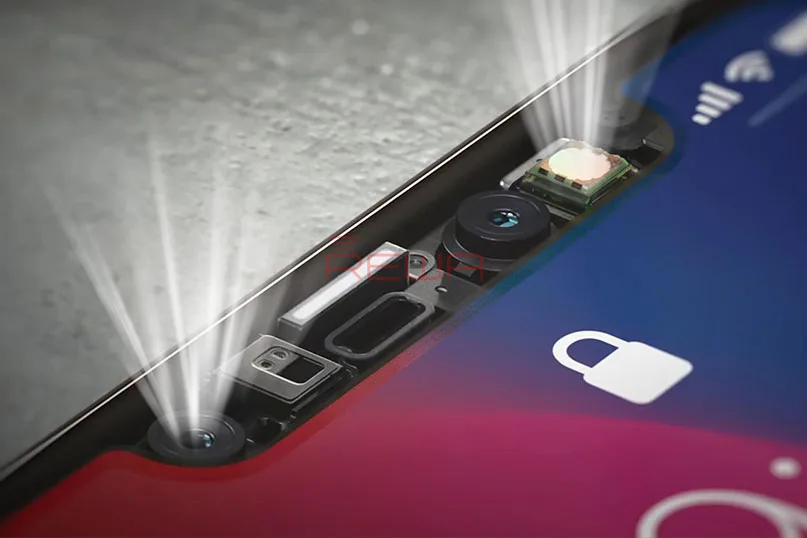
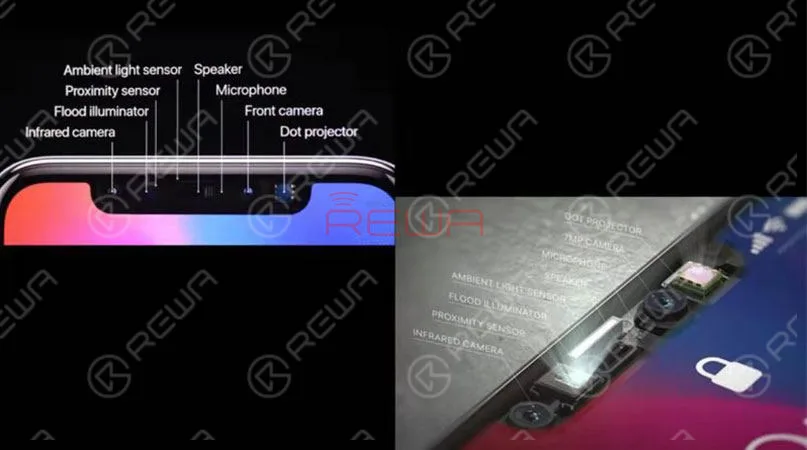
     There are 8 components packed into the front of the phone.   Infrared Camera   Flood Illuminator   Proximity Sensor   Ambient Light Sensor   Speaker   Microphone   Front Camera

    There are 8 components packed into the front of the phone.

    • Infrarotkamera
    • Flood Illuminator
    • Proximity Sensor
    • Ambient Light Sensor
    • Speaker
    • Mikrofon
    • Front Camera

    Dot ProjectorThe infrared camera, the dot projector and the front camera are located on the back glass assembly. The flood illuminator, the proximity sensor, the ambient light sensor, the speaker and the microphone are located on the display assembly. Please be careful when disassembling or repairing the phone. Damage of any component will cause Face ID failure.

    Next, we will disassemble the flood illuminator module and the dot projector and find out the reason why Face ID can be so easily damaged.

     Next, we will disassemble the flood illuminator module and the dot projector and find out the reason why Face ID can be so easily damaged.

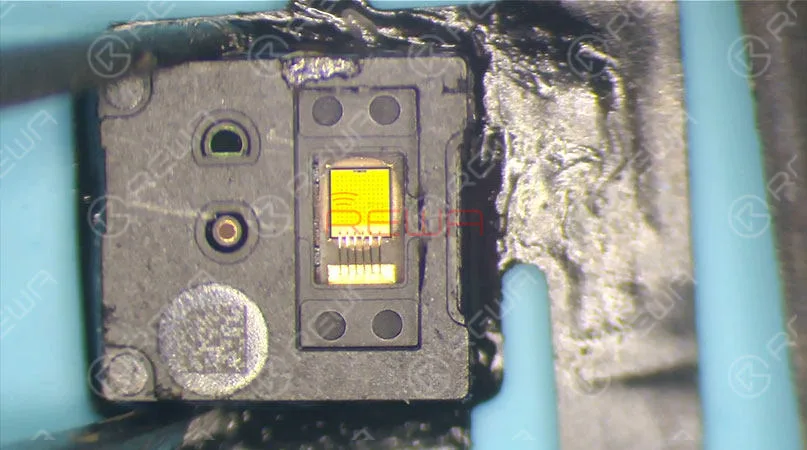
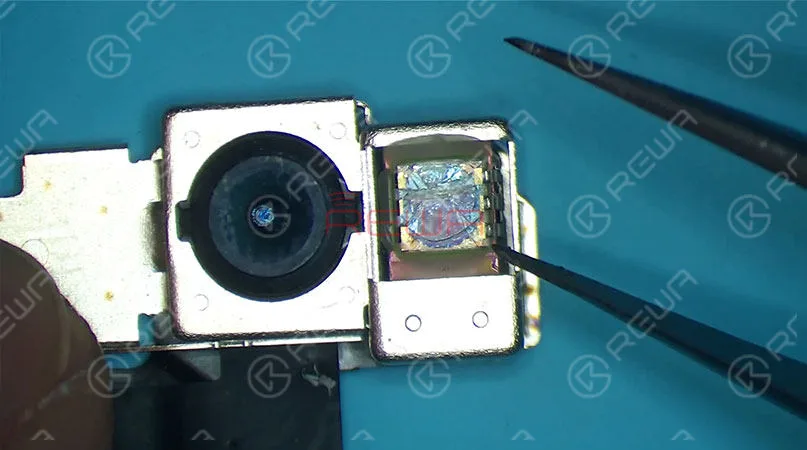
    Let’s disassemble the flood illuminator module first. Pry open the glass cover with a blade. We can see that there are many holes on the flood illuminator that are arranged in a matrix of 11×11. The chip is connected to the circuit board with the help of gold wires. Once water damaged, these holes can be blocked. And you will be faced up with Face ID failure.

    Let’s continue!

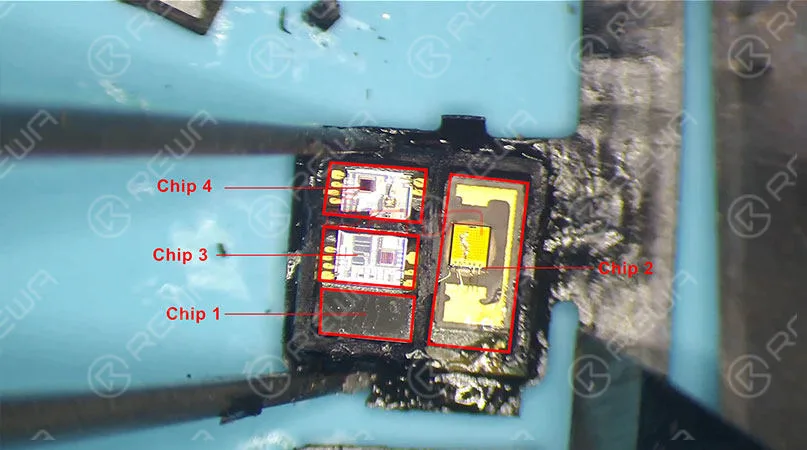
     Chip 1 is an unencrypted chip. Since some repair technicians have replaced it before, our guess is that chip 1 might be a boost chip or an EEPROM chip. So chip 2, chip 3, or chip 4 might be the encrypted chip. Still, due to the difficulty of replacing, no one has verified that. As you can see, with thousands of components integrated, the composition of the flood illuminator module is very precise.   Chip 2 is the flood illuminator.   Chip 3 and Chip 4 are proximity sensors that are responsible for receiving and transmitting respectively. The infrared light emitted from the two proximity sensors could be a single dot or a single set of dots. Independent of each other, the three chips are indispensable. And this is what you should know about the flood illuminator module.

    Chip 1 is an unencrypted chip. Since some repair technicians have replaced it before, our guess is that chip 1 might be a boost chip or an EEPROM chip. So chip 2, chip 3, or chip 4 might be the encrypted chip. Still, due to the difficulty of replacing, no one has verified that. As you can see, with thousands of components integrated, the composition of the flood illuminator module is very precise.

    Chip 2 is the flood illuminator

    Chip 3 and Chip 4 are proximity sensors that are responsible for receiving and transmitting respectively. The infrared light emitted from the two proximity sensors could be a single dot or a single set of dots. Independent of each other, the three chips are indispensable. And this is what you should know about the flood illuminator module. Let’s move on to the dot projector.

    Die camera parts of iPhone X work in the same way as front cameras of other iPhone series. Now we will focus on the dot projector. The outer layer of the dot projector is sealed with resin and protected by metal welding techniques. Pay attention to these welding points.

    Easily Damaged And Hardly Repaired

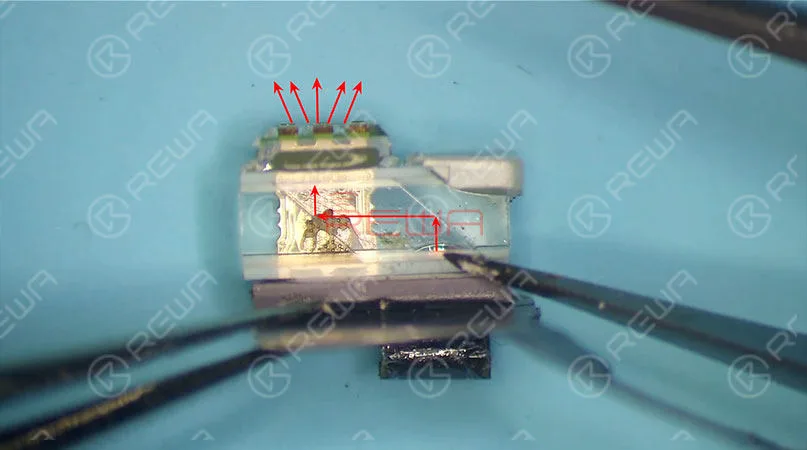
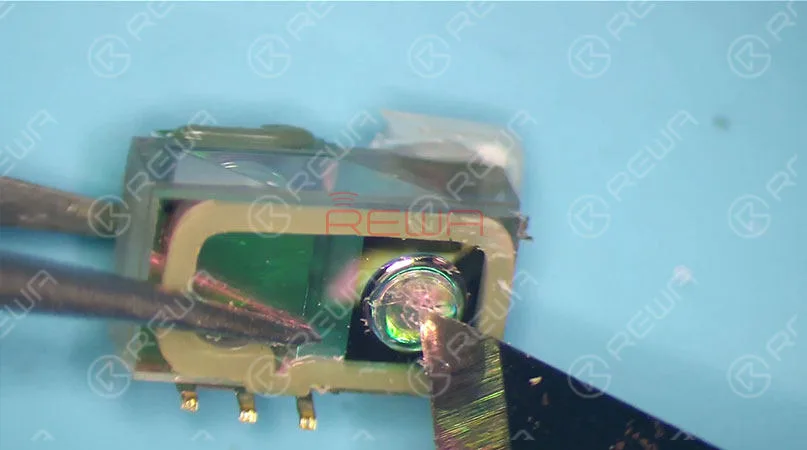
    They can easily fall off once the phone is dropped. And once off, they cannot be restored. When disassembling, we need to cut open the outer metal cover at first. Then heat with the Heißluftpistole and remove the resin with tweezers. Once the dot projector has been detached, we can see a crystal that looks just like a diamond lens. The infrared light is emitted from here. Then reflected by the crystal. Its projection range is determined by the lens afterwards.

     They can easily fall off once the phone is dropped. And once off, they cannot be restored. When disassembling, we need to cut open the outer metal cover at first. Then heat with the Hot Air Gun and remove the resin with tweezers. Once the dot projector has been detached, we can see a crystal that looks just like a diamond lens. The infrared light is emitted from here. Then reflected by the crystal. Its projection range is determined by the lens afterwards.

    Pry open the crystal, here we can see the complete internal structure of the dot projector.

    Pry open the crystal, here we can see the complete internal structure of the dot projector.

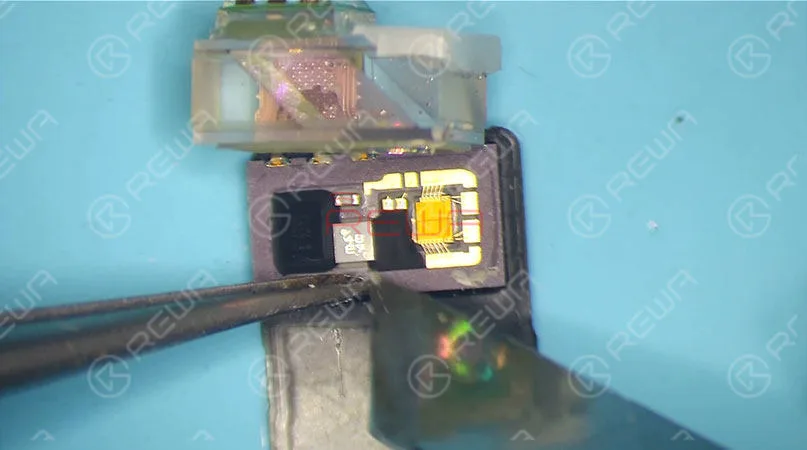
    The chip on the left is used to store data, whereas the chip on the right side acts just like a projector. We can see that there are thousands of dots arranged here. The infrared light is emitted from here. Since necessary power supply is needed for chip on the right side to work normally, once water damaged, circuits here are most likely to get short. Which can also result in Face ID not working. And please be noted that the chip is exposed without black adhesive seal. So it can be easily damaged once water-damaged or dropped. What’s more, it also can not be restored once damaged. And this is the internal structure of the dot projector. Let’s continue with the crystal part of the dot projector.

    The chip on the left is used to store data, whereas the chip on the right side acts just like a projector. We can see that there are thousands of dots arranged here. The infrared light is emitted from here. Since necessary power supply is needed for chip on the right side to work normally, once water damaged, circuits here are most likely to get short. Which can also result in Face ID not working. And please be noted that the chip is exposed without black adhesive seal. So it can be easily damaged once water-damaged or dropped. What’s more, it also can not be restored once damaged. And this is the internal structure of the dot projector. Let’s continue with the crystal part of the dot projector.

    We can see that there is a concave lens and a convex lens on the crystal. And the two are made of glass. Once dropped, Face ID can also be affected.

    Judging by what we have learned during the disassembling, main circuits of the Face ID are exposed. Once water damaged or exposed to a relatively humid environment, there might be electricity leakage or short-circuit problem that can result in Face ID failure. What’s more, most of the Face ID parts are made of glass. Once dropped, Face ID is most likely to be unavailable.

     We can see that there is a concave lens and a convex lens on the crystal. And the two are made of glass. Once dropped, Face ID can also be affected.  Judging by what we have learned during the disassembling, main circuits of the Face ID are exposed. Once water damaged or exposed to a relatively humid environment, there might be electricity leakage or short-circuit problem that can result in Face ID failure. What’s more, most of the Face ID parts are made of glass. Once dropped, Face ID is most likely to be unavailable.

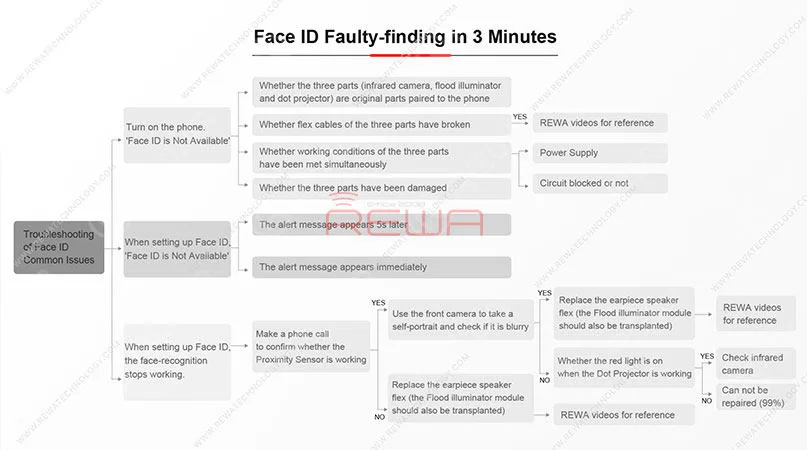
    In summary, Face ID can be easily damaged and hard to be restored. Therefore, please be very careful in daily use. Make sure the phone is protected from water-damage or heavy falling. Repair technicians must exercise caution when repairing the logic board or replacing the display assembly. Also, for those in need, we have summarized repair experience of REWA repair technicians and hereby present you the following troubleshooting guide on common Face ID failure.

    Here is the detailed video for your reference.

    Bei der Reparatur von iPhone-Logikplatinen ermitteln wir zunächst das Problem, finden dann heraus, warum es aufgetreten ist, und überlegen, wie wir es schließlich beheben können. Dies ist ein allgemeiner Prozess, der von professionellen Reparaturtechnikern auf der ganzen Welt angewendet wird.

    Willst du ein professioneller Reparaturtechniker sein und das iPhone reparieren? Sie brauchen systematische Schulungen zu folgenden Themen REWA-Akademie.