Schlagwort: iphone 12 reparatur

  • iPhone X-12 Doppelt gestapelte Platine Trennung & Rekombination | REWA-Akademie Tipps

    iPhone X-12 Doppelt gestapelte Platine Trennung & Rekombination | REWA-Akademie Tipps

    Das Trennen und Wiederzusammenfügen der doppelt gestapelten Hauptplatine ist ein sehr wichtiger Schritt bei der Reparatur der Hauptplatine des iPhone X und anderer Modelle. Leichte Fehler können zu Pseudolötungen oder anderen Problemen führen. REWA-Akademie-Studenten gaben kürzlich die Rückmeldung, dass die beiden Lagen bei der Reparatur von doppelt gestapelten Motherboards oft nicht genau zusammenpassen. Es gibt sogar große Lücken, die Pseudolötungen verursachen. Als Antwort darauf geben wir Tipps und Hinweise zum Trennen und Wiederzusammensetzen von doppelt gestapelten Hauptplatinen. Die Tipps in diesem Artikel gelten für das iPhone X und die oben genannten Modelle.

    Trennung

    Ziehen Sie den Schaumstoff auf der Hauptplatine vor dem Erhitzen ab. Bitte beachten Sie, dass wir Anfängern nicht empfehlen, die Hauptplatine mit einer Heißluftpistole zu erhitzen. Denn die Hauptplatine könnte ungleichmäßig erhitzt werden und sich verformen. Ein professionelles Motherboard Heizplattform ist das, was wir vorschlagen.
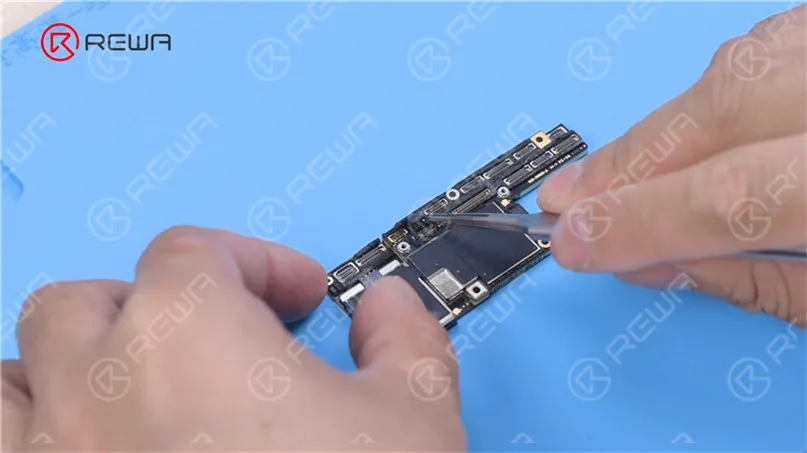
    Schaumstoff auf der Hauptplatine abziehen

    Erhitzen der Hauptplatine

    Um den späteren Ausbau der Logikkarte zu erleichtern, drehen Sie eine Schraube auf die Logikkarte. Schneiden Sie das Band mit einer Skulptur-Messer.
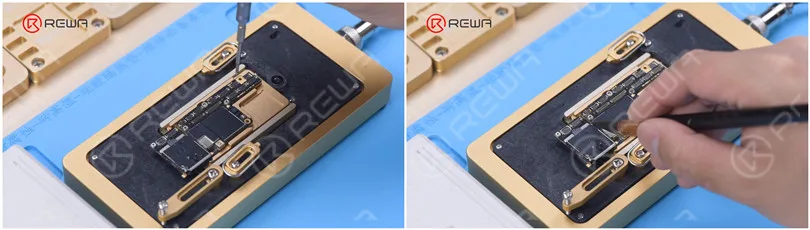
    Motherboard-Heizung

    Die Logikplatine und die mittlere Schicht werden mit Niedertemperatur-Lötpaste gelötet. Die beste Temperatur für die Heizplattform liegt daher bei 155 °C-165 °C. Drücken Sie die Logikplatine vorsichtig mit einer Pinzette, wenn die Temperatur 165 °C erreicht hat. Wenn die Logikplatine locker ist, ist das Zinn geschmolzen.
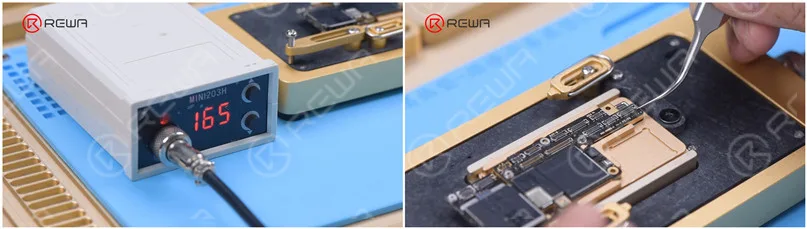
    Motherboard-Heizung

    Klemmen Sie die Schraube fest, um die Logikplatine zu entfernen, und entfernen Sie dann die Signalplatine.
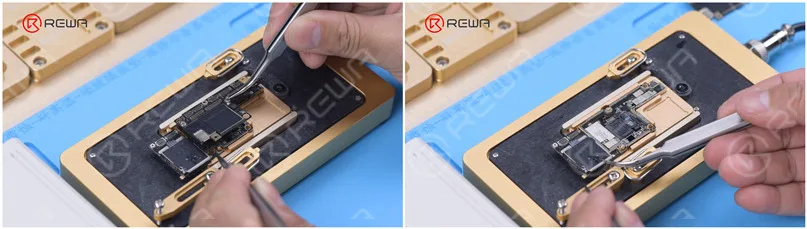
    Motherboard-Trennung

    Motherboard-Reinigung

    Entfernen Sie das Wärmeleitfett mit einem Bildhauermesser. Das Wärmeleitfett muss vollständig entfernt werden. Andernfalls berührt das Wärmeleitfett die Logikplatine und führt zu Pseudolötungen bei der Rekombination. Bringen Sie die Signalplatine am Halter an und tragen Sie eine Runde Paste Flussmittel.
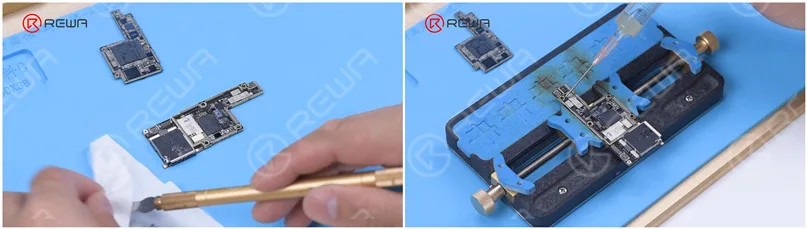
    Entfernen Sie das Wärmeleitfett mit einem Bildhauermesser. Das Wärmeleitfett muss vollständig entfernt werden. Andernfalls berührt das Wärmeleitpaste die Logikplatine, was zu einer Pseudolötung in Rekombination führt. Bringen Sie die Signalplatine am Halter an und tragen Sie eine Runde Paste Flux auf.

    Entfernen Sie das Zinn auf dem Klebepad mit Mikrolötkolben Lötkolben bei 365 °C und Lötdocht. Zinn auf dem Bondingpad muss vollständig entfernt werden. Die Zinnreste beeinträchtigen das spätere Löten. Reinigen Sie die Klebefläche mit PCB Cleaner.
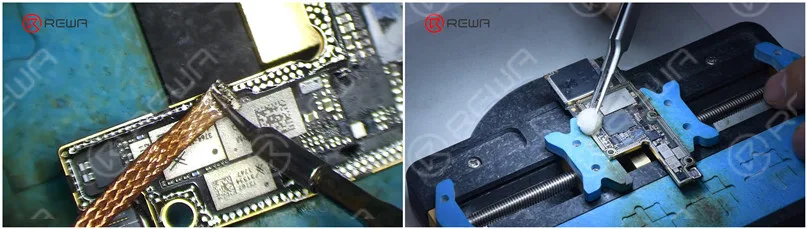
    Zinn auf dem Klebepad mit dem Lötkolben entfernen

    Reinigen Sie die Logikkarte mit der gleichen Methode. Bitte beschädigen Sie bei der Reinigung nicht die Komponenten rund um das Bonding Pad der Logikkarte. Prüfen Sie, ob die Klebefläche nach der Reinigung sauber ist.

    Reballing

    Befestigen Sie die Signalplatine an der Reballing-Plattform. Bringen Sie die Reballing-Schablone in Position, um sicherzustellen, dass sie gegen die Signalplatine gedrückt wird. Um zu verhindern, dass die Lötpaste in den Spalt der Hauptplatine fließt, legen Sie eine Metallplatte ein.
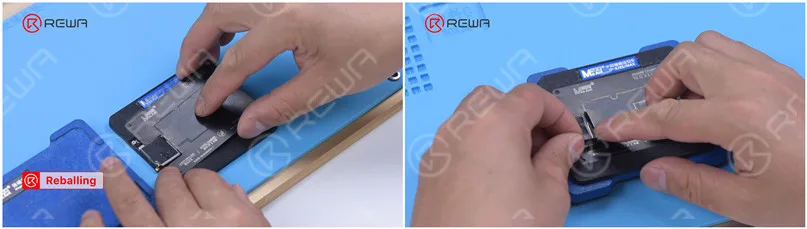
    Befestigen Sie die Signaltafel

    Auftragen einer Schicht aus Niedertemperatur-Lötpaste und wischen Sie überschüssige Lotpaste mit einem fusselfreien Tuch ab. Entfernen Sie die Reballing-Schablone. Prüfen Sie, ob die Lötpaste auf der Signalplatine voll ist.
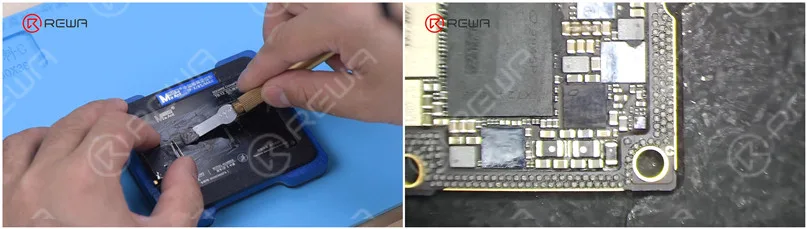
    Tragen Sie eine Schicht Niedertemperatur-Lotpaste auf und wischen Sie überschüssige Lotpaste mit einem fusselfreien Tuch ab. Entfernen Sie die Reballing-Schablone. Prüfen Sie, ob die Lötpaste auf der Signalplatine voll ist.

    Beim Auftragen der Lötpaste ist darauf zu achten, dass die Lötpaste eine gewisse Feuchtigkeit aufweisen muss. Wenn die Lötpaste zu trocken ist, haftet sie an der Reballing-Schablone, wenn die Schablone entfernt wird. Infolgedessen wird die Lötpaste auf der Signalplatine nicht gleichmäßig sein, was leicht zu schlechten Lötungen führen kann.
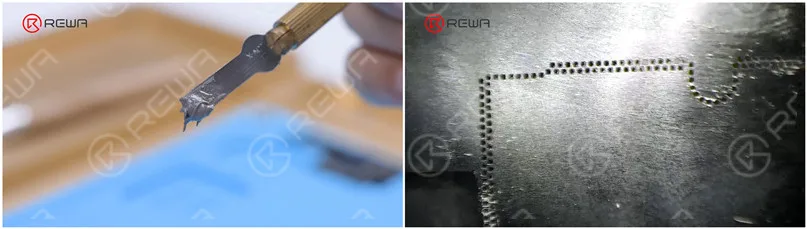
    Auftragen von Lotpaste

    Rekombination

    Legen Sie die Signalplatine zum Erhitzen auf die 165 °C heiße Heizplattform. Beenden Sie das Erhitzen, wenn sich die Lötkugeln gebildet haben. Tragen Sie eine kleine Menge Flussmittel auf, nachdem die Signalplatine abgekühlt ist.
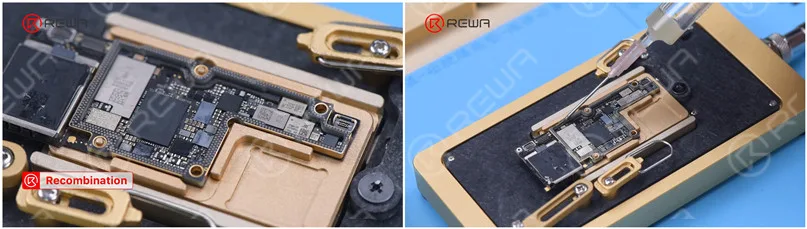
    Legen Sie die Signalplatine zum Aufheizen auf die 165 °C heiße Heizplattform.

    Richten Sie die Logikplatine mit der Signalplatine aus. Heizen Sie weiter auf der 165 °C-Heizplattform. Wenn das Flussmittel ausläuft und die Logikplatine absinkt, stoßen Sie die Logikplatine vorsichtig mit einer Pinzette an, um sicherzustellen, dass die beiden Schichten eng aneinander liegen. Der Stupser muss sanft und klein sein.
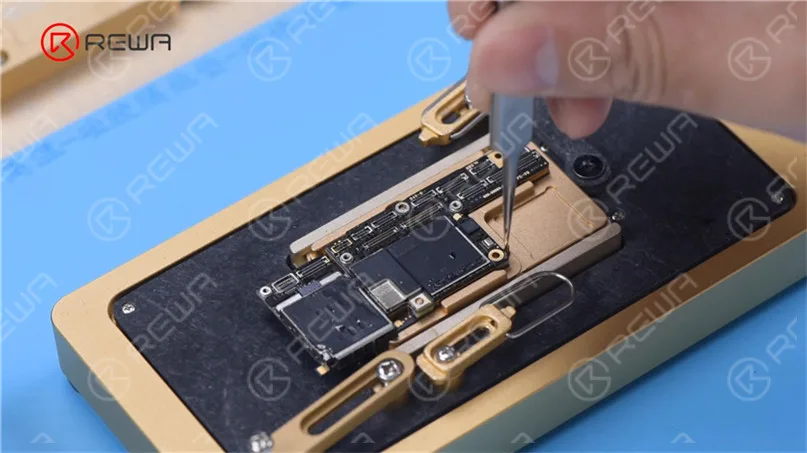
    Richten Sie die Logikplatine an der Signalplatine aus.

    Reinigen Sie die Hauptplatine mit PCB Cleaner, nachdem die Hauptplatine abgekühlt ist.

    Wenn Sie feststellen, dass sich die Hauptplatine beim Zusammensetzen verformt, können Sie sie auf ein flaches Brett legen und mit einem Gummiband befestigen. Drücken Sie die beiden Seiten der Hauptplatine vorsichtig an. Legen Sie ein weiches Papier unter die Hauptplatine, um zu verhindern, dass Komponenten zerdrückt werden.
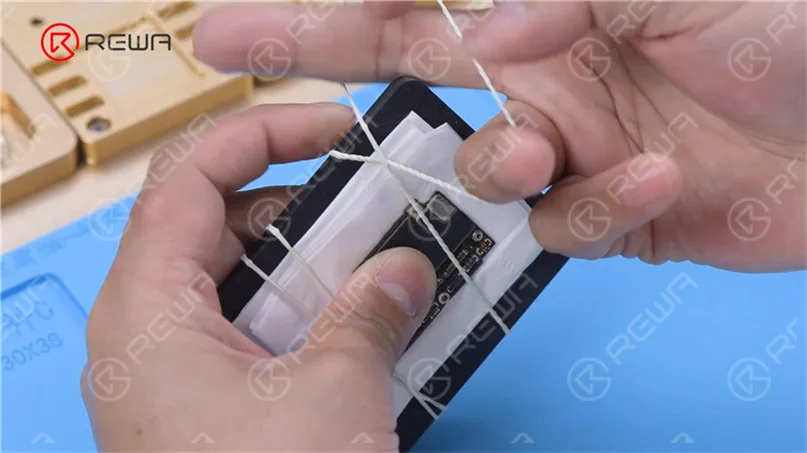
    Hauptplatine mit einem Gummiband befestigen

    Als nächstes werden wir eine weitere Rekombinationsmethode vorstellen. Diese Methode kann angewendet werden, wenn das mittlere Klebepad nicht beschädigt ist.

    Wenn das Zinn schmilzt, entfernen Sie die Logikplatine mit einer Pinzette senkrecht. Es ist zu erkennen, dass um die Signalplatine herum in einem bestimmten Abstand ein 0,05 mm dickes Metallpad vorhanden ist. Dieses Metallpad dient dazu, einen Abstand von 0,05 mm zwischen der Logikplatine und der mittleren Schicht zu halten, um zu verhindern, dass die Lötkugeln beim Löten eine Brücke bilden.
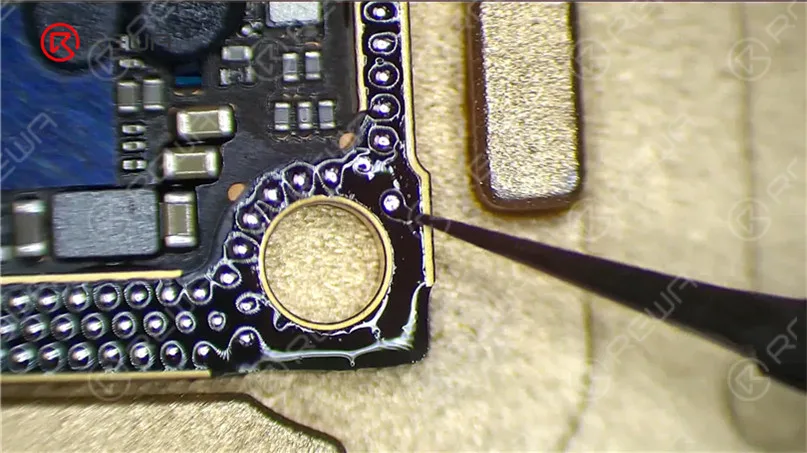
    iphone 12 double stacked board separation recombination rewa academy 13

    Sie müssen nur das Wärmeleitpaste auf der Hauptplatine entfernen, wenn die Reparatur abgeschlossen ist. Behalten Sie das ursprüngliche Zinn auf dem Klebepad bei und tragen Sie eine kleine Menge Paste Flux auf.
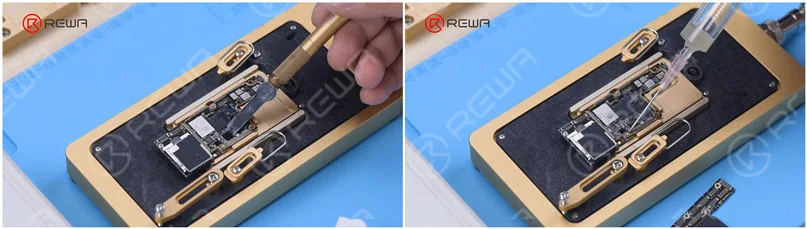
    Sie müssen nur das Wärmeleitpaste auf der Hauptplatine entfernen, wenn die Reparatur abgeschlossen ist. Behalten Sie das ursprüngliche Zinn auf dem Klebepad bei und tragen Sie eine kleine Menge Paste Flux auf.

    Richten Sie abschließend die Logikplatine auf die Signalplatine aus. Wenn die Temperatur 165 °C erreicht hat und das Zinn schmilzt, schalten Sie das Gerät aus. Drücken Sie die beiden Enden der Logikplatine mit einer Pinzette zusammen, bis die Hauptplatine abgekühlt ist. Auf diese Weise passen die Logikplatine und die Signalplatine eng zusammen. So gibt es keine Überbrückung und kein Überschwappen der Lötkugeln.

    Besuchen Sie REWA-Akademie wenn Sie weitere Reparaturfähigkeiten erlernen möchten. Wir haben komplette Kurspakete zur Verbesserung der Diagnose- und Reparaturfähigkeit von Motherboards. Fühlen Sie sich frei, einen Kommentar über Ihre Gedanken zur Trennung und Rekombination von doppelt gestapelten Motherboards zu hinterlassen.

    Schauen Sie sich das vollständige Video unten an, um zu sehen, wie wir ein doppelt gestapeltes Motherboard trennen und wieder zusammensetzen.
     

  • iPhone 12 Lineup OLED-Bildschirm Refurbishing-Lösung von REWA

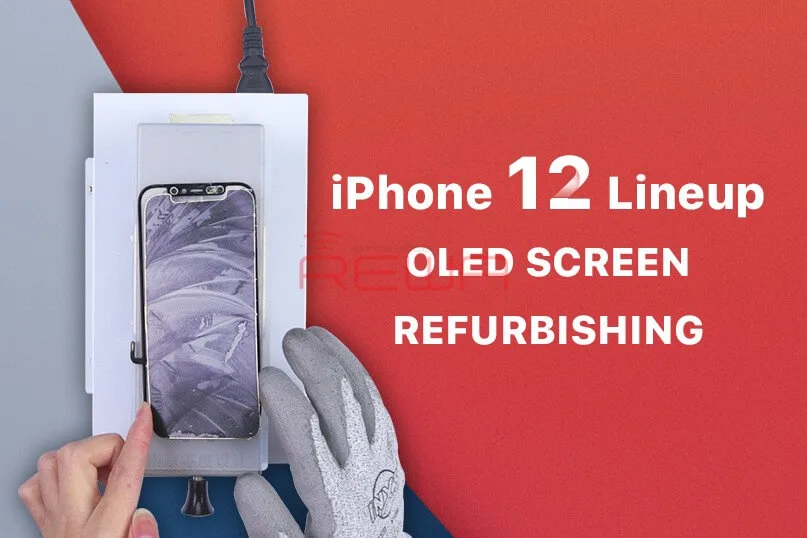
    iPhone 12 Lineup OLED-Bildschirm Refurbishing-Lösung von REWA

    The repair rate of the screen is one of the highest among many mobile phone parts. Professional screen refurbishment tools and techniques can not only reduce screen replacement failure rate but also improve repair efficiency. It is well known that the iPhone 12 lineup features an OLED screen. Today REWA LAB will take the iPhone 12 screen refurbishment as an example to introduce the up-to-date screen refurbishment techniques and machines in the industry.

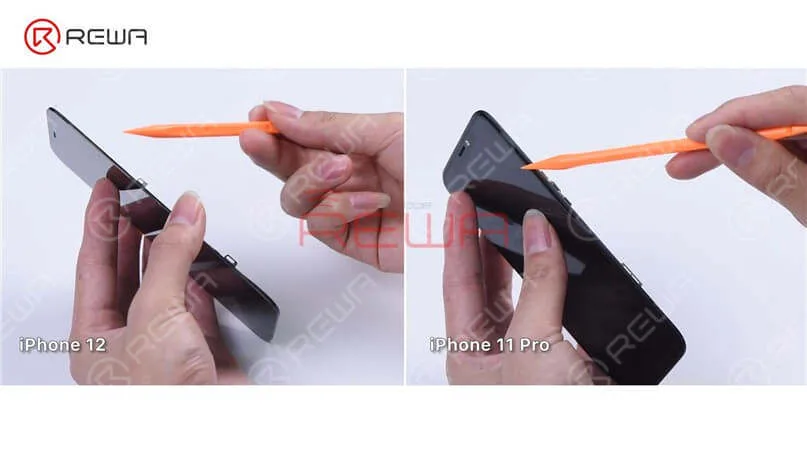
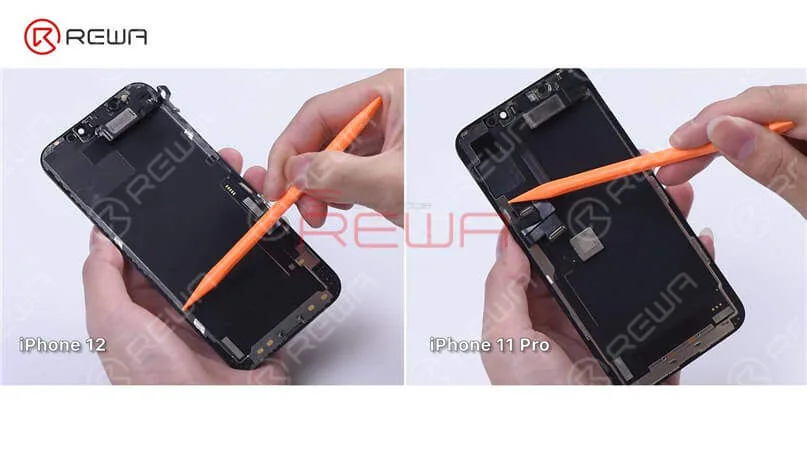
    Firstly, let’s run a cosmetic inspection of the screen. We can see that the iPhone 12 has a narrower bezel than the iPhone 11 Pro, so the iPhone 12 bezel may be a little easier to disassemble. In addition to that, the iPhone 12 bezel doesn’t wrap around the glass lens anymore. Therefore, the material requirements for the bezel adhesive will be relatively high to prevent the adhesive from falling off. To dig deeper, we will refurbish the iPhone 12 screen.

     We can see that the iPhone 12 has a narrower bezel than the iPhone 11 Pro, so the iPhone 12 bezel may be a little easier to disassemble. In addition to that, the iPhone 12 bezel doesn’t wrap around the glass lens anymore. Therefore, the material requirements for the bezel adhesive will be relatively high to prevent the adhesive from falling off. To dig deeper, we will refurbish the iPhone 12 screen.
     We can see that the iPhone 12 has a narrower bezel than the iPhone 11 Pro, so the iPhone 12 bezel may be a little easier to disassemble. In addition to that, the iPhone 12 bezel doesn’t wrap around the glass lens anymore. Therefore, the material requirements for the bezel adhesive will be relatively high to prevent the adhesive from falling off. To dig deeper, we will refurbish the iPhone 12 screen.

    Step 1: Screen Testing

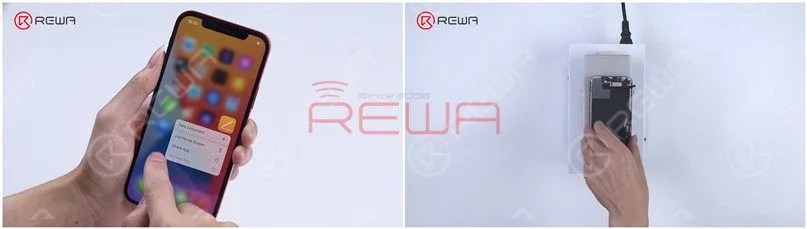
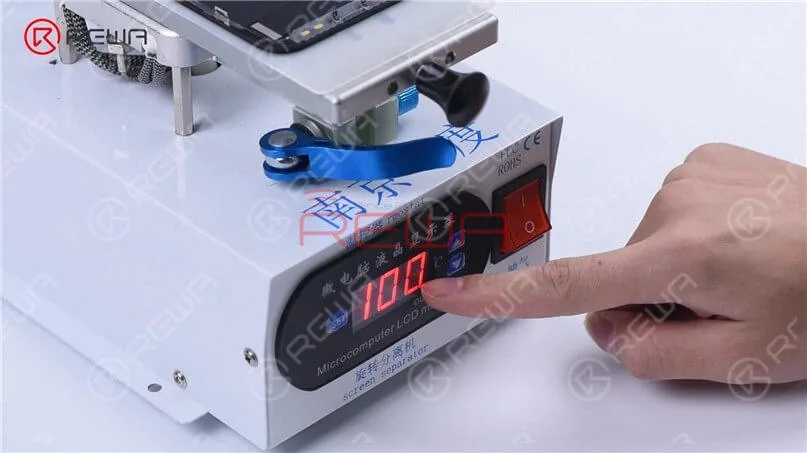
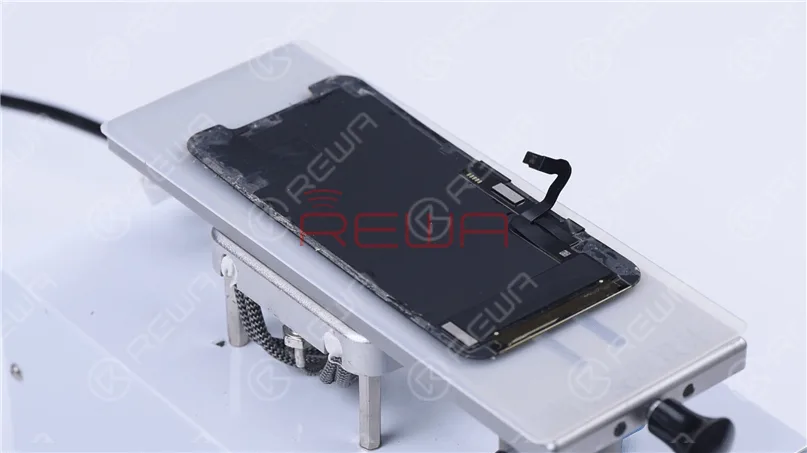
    First of all, let’s test the screen. The display, touch, and 3D Touch all function well. Place the screen upside down on the Screen Separator, set the temperature to 100 ℃, and start the suction.

    Place the screen upside down on the Screen Separator, set the temperature to 100 ℃, and start the suction.
    Place the screen upside down on the Screen Separator, set the temperature to 100 ℃, and start the suction.

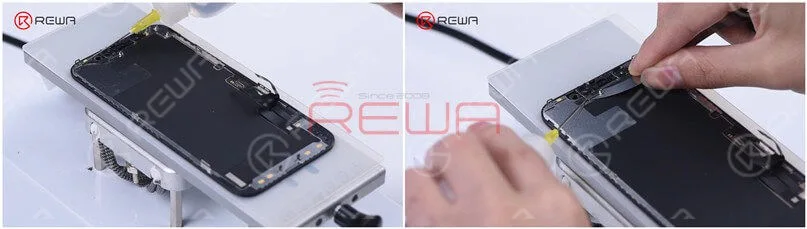
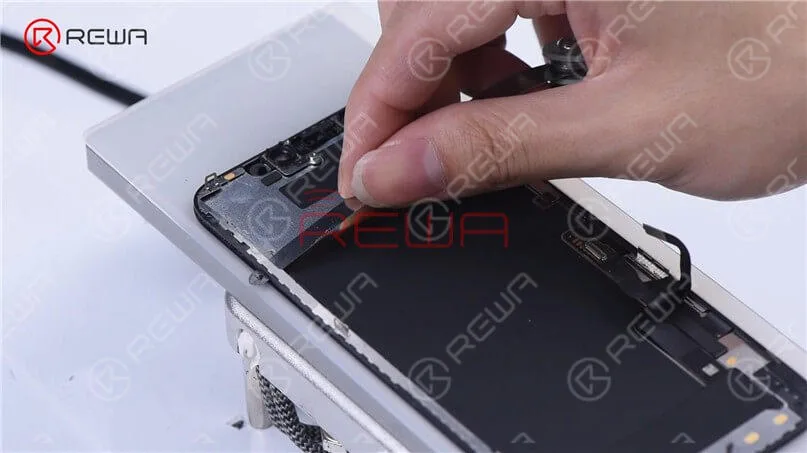
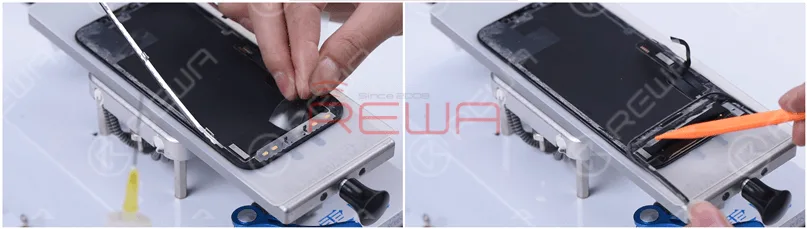
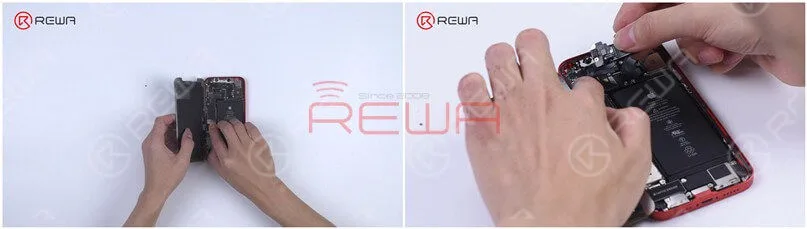
    Remove the ear speaker flex cable first. Since the ear speaker flex cable is very easy to damage, please be noted that we need to heat the screen before removing it. Besides, the iPhone 12 ear speaker sensor ring is integrated into the bezel.

    Remove the ear speaker flex cable first. Since the ear speaker flex cable is very easy to damage, please be noted that we need to heat the screen before removing it. Besides, the iPhone 12 ear speaker sensor ring is integrated into the bezel.

    Step 2: Bezel Removing

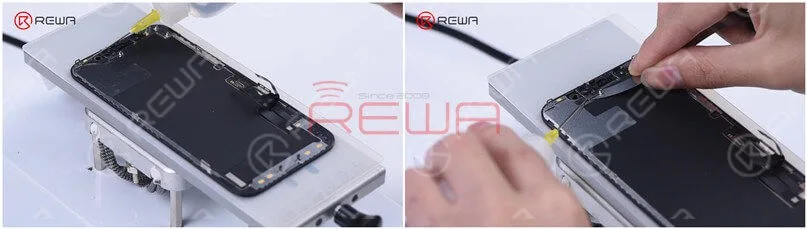
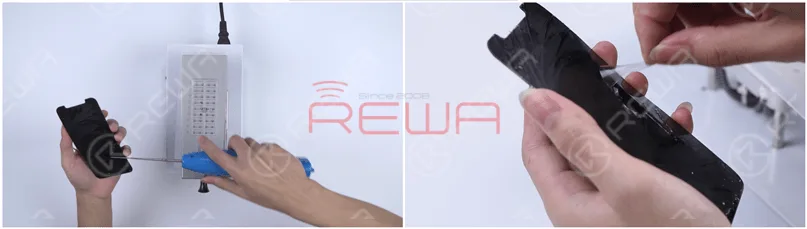
    Now, let’s remove the bezel. Dip adhesive remover on the bezel first. While using the Razor Blade to separate the bezel, you need to dip some adhesive remover too. Slide the Razor Blade back and forth, and pry up the bezel carefully.

    Now, let’s remove the bezel. Dip adhesive remover on the bezel first. While using the Razor Blade to separate the bezel, you need to dip some adhesive remover too. Slide the Razor Blade back and forth, and pry up the bezel carefully.
    Now, let’s remove the bezel. Dip adhesive remover on the bezel first. While using the Razor Blade to separate the bezel, you need to dip some adhesive remover too. Slide the Razor Blade back and forth, and pry up the bezel carefully.

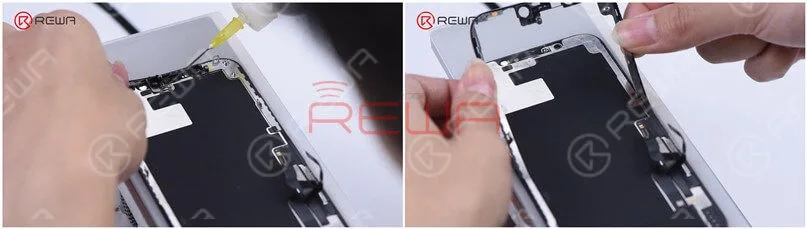
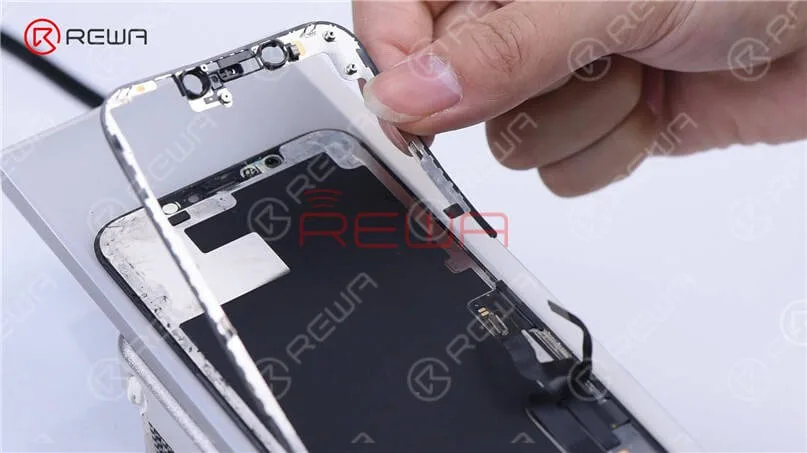
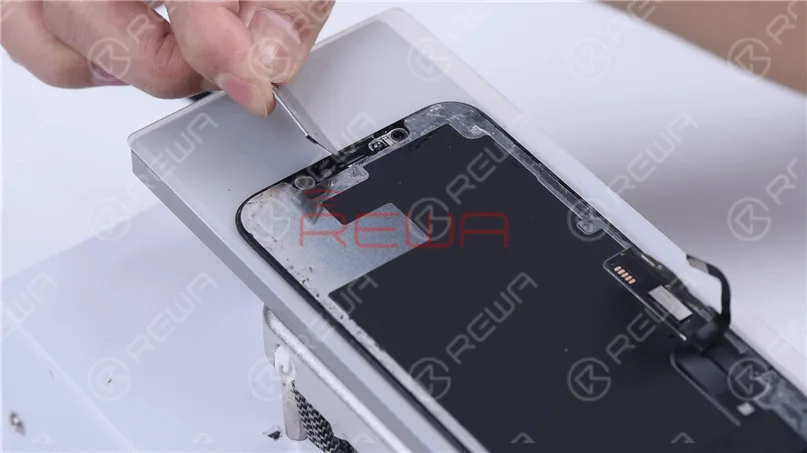
    As the ear speaker flex cable part has more adhesive, we can dip more adhesive remover to make it loose. Hold the two corners of the bezel in both hands, and detach the bezel slowly with caution. Our original thought was to separate the bezel in a complete manner and then reuse it. But now the bezel is broken here. So please notice that this part of the bezel is made of plastic material, which is extremely easy to break. If you want to separate the bezel completely, you need to pay extra attention.

    As the ear speaker flex cable part has more adhesive, we can dip more adhesive remover to make it loose. Hold the two corners of the bezel in both hands, and detach the bezel slowly with caution. Our original thought was to separate the bezel in a complete manner and then reuse it. But now the bezel is broken here. So please notice that this part of the bezel is made of plastic material, which is extremely easy to break. If you want to separate the bezel completely, you need to pay extra attention.
    As the ear speaker flex cable part has more adhesive, we can dip more adhesive remover to make it loose. Hold the two corners of the bezel in both hands, and detach the bezel slowly with caution. Our original thought was to separate the bezel in a complete manner and then reuse it. But now the bezel is broken here. So please notice that this part of the bezel is made of plastic material, which is extremely easy to break. If you want to separate the bezel completely, you need to pay extra attention.

    In order not to induce damage, we use a thin film to remove the flex cable part. Remove the bezel, and it can be seen that the 3M adhesive used in the bezel flex cable part is no longer the cold adhesive. The 3M adhesive makes the bezel relatively easy to remove.

    In order not to induce damage, we use a thin film to remove the flex cable part. Remove the bezel, and it can be seen that the 3M adhesive used in the bezel flex cable part is no longer the cold adhesive. The 3M adhesive makes the bezel relatively easy to remove.

    Step 3: Glass Lens Separating

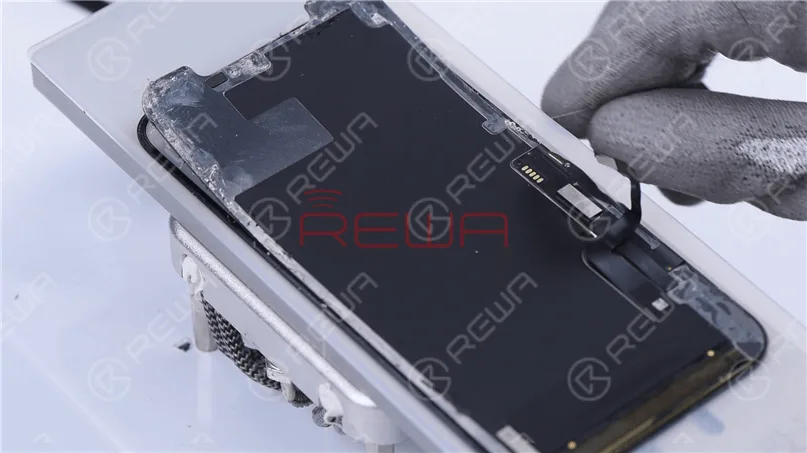
    Remove excess adhesive on the ear speaker flex cable part.

    Remove excess adhesive on the ear speaker flex cable part.

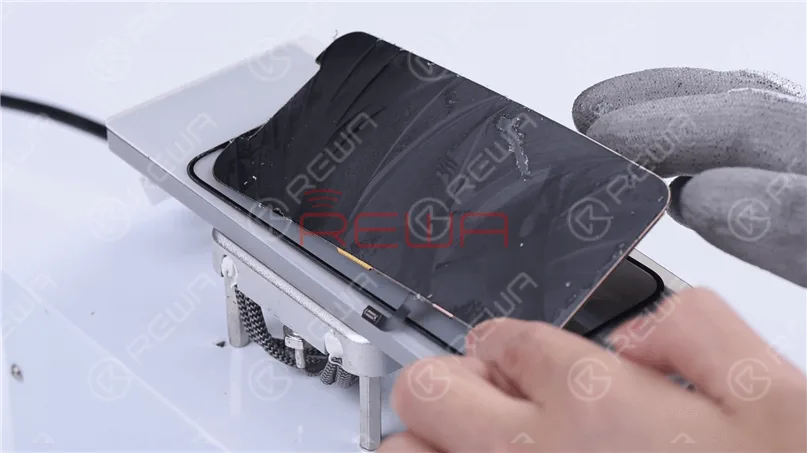
    Start separating the OLED along the bottom layer of the glass lens with Cutting Wire.

    Start separating the OLED along the bottom layer of the glass lens with Cutting Wire.

    Through our observation, we found that the touch panel of the iPhone 12 screen is better than that of the iPhone 11 Pro, which is not easy to damage. To put it specifically, the touch panel of the iPhone 12 is thicker, and the cut lines are clearer and wider.

    Through our observation, we found that the touch panel of the iPhone 12 screen is better than that of the iPhone 11 Pro, which is not easy to damage. To put it specifically, the touch panel of the iPhone 12 is thicker, and the cut lines are clearer and wider.

    Step 4: OCA Adhesive Removing

    Place the OLED on the heating platform.

    Place the OLED on the heating platform.

    Roll up the OCA adhesive with the Electric Adhesive Removing Tool and remove the remaining OCA adhesive with a hand.

    Roll up the OCA adhesive with the Electric Adhesive Removing Tool and remove the remaining OCA adhesive with a hand.

    Connect the OLED and ear speaker flex cable. The display and touch function works well. A point worth mentioning is that not connecting the ear speaker flex cable will lead to the absence of light-sensing. The screen will be too dark to be tested.

    Connect the OLED and ear speaker flex cable. The display and touch function works well. A point worth mentioning is that not connecting the ear speaker flex cable will lead to the absence of light-sensing. The screen will be too dark to be tested.
    Connect the OLED and ear speaker flex cable. The display and touch function works well. A point worth mentioning is that not connecting the ear speaker flex cable will lead to the absence of light-sensing. The screen will be too dark to be tested.

    Step 5: Laminating 

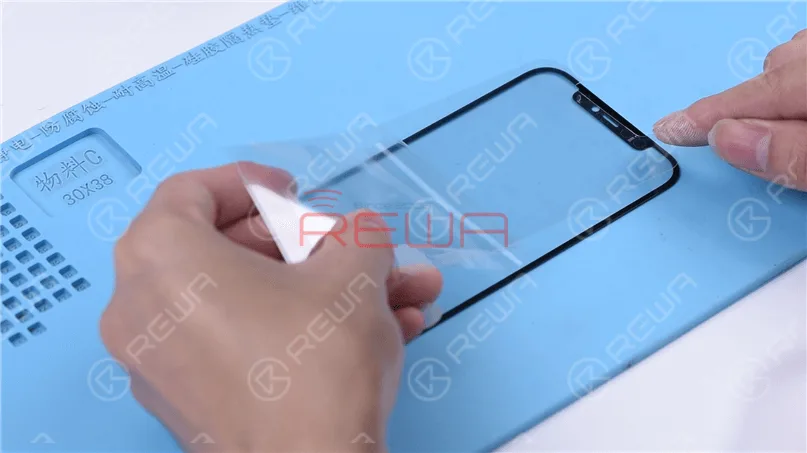
    Attach the OCA adhesive to the glass lens.

    Attach the OCA adhesive to the glass lens.

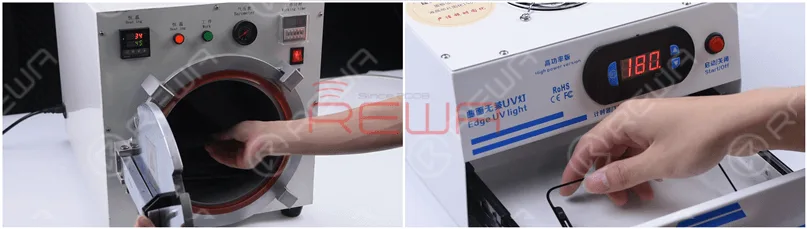
    Put the glass lens with OCA adhesive into the Bubble Removing Machine for 3 minutes. Then put it into the UV Lamp for Curing OCA Glue for 5 seconds.

    Put the glass lens with OCA adhesive into the Bubble Removing Machine for 3 minutes. Then put it into the UV Lamp for Curing OCA Glue for 5 seconds.

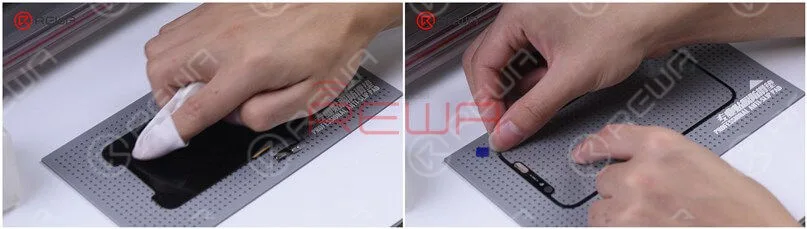
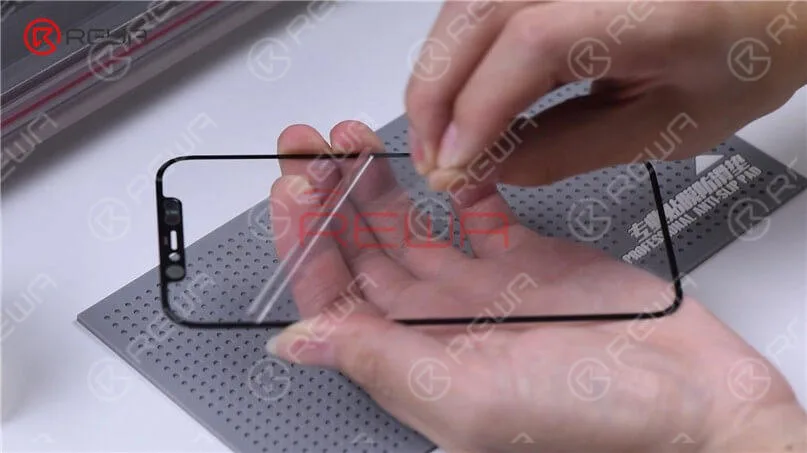
    Wipe clean the OLED, and use pull tape to stick a corner of the glass lens. Press the pull tape for seconds, and then tear off the protective film of the OCA adhesive.

    Wipe clean the OLED, and use pull tape to stick a corner of the glass lens. Press the pull tape for seconds, and then tear off the protective film of the OCA adhesive.
    Wipe clean the OLED, and use pull tape to stick a corner of the glass lens. Press the pull tape for seconds, and then tear off the protective film of the OCA adhesive.

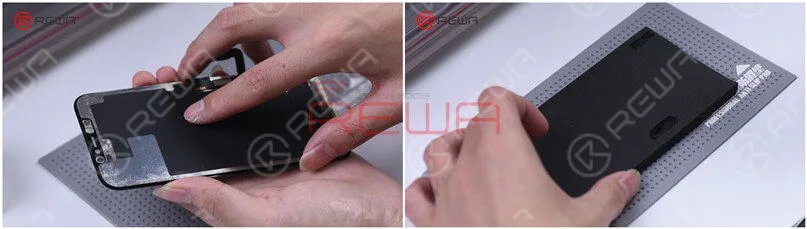
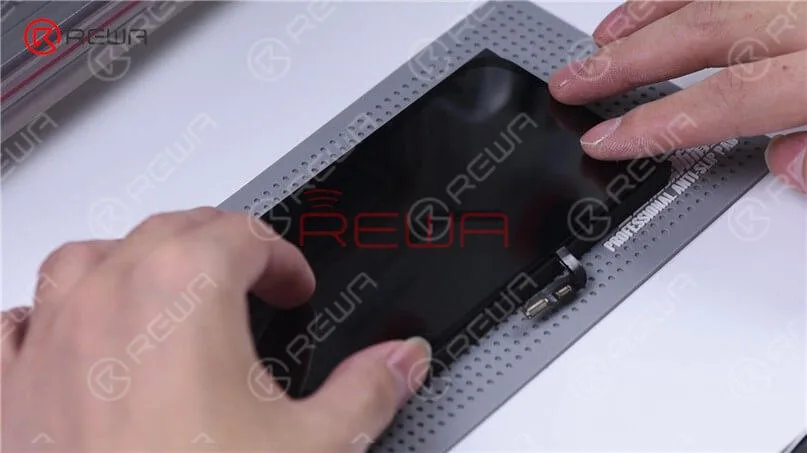
    Since the iPhone 12 aligning mold has not come out yet, we use manual alignment. After alignment, place the screen on the laminating sponge. Please notice that two slots are cut on the sponge in order to prevent OLED damage.

    Since the iPhone 12 aligning mold has not come out yet, we use manual alignment. After alignment, place the screen on the laminating sponge. Please notice that two slots are cut on the sponge in order to prevent OLED damage.
    Since the iPhone 12 aligning mold has not come out yet, we use manual alignment. After alignment, place the screen on the laminating sponge. Please notice that two slots are cut on the sponge in order to prevent OLED damage.

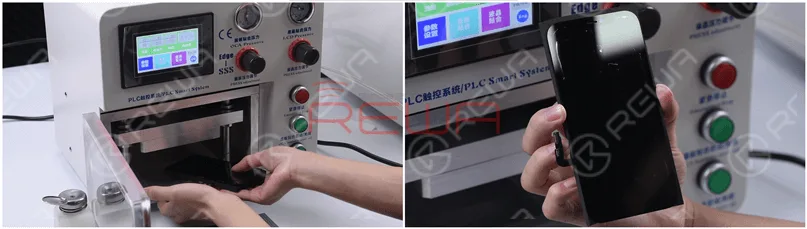
    Put the screen into the laminating machine, and press “LCD laminate start”. Take out the screen and we can see there are bubbles on the screen.

    Put the screen into the laminating machine, and press “LCD laminate start”. Take out the screen and we can see there are bubbles on the screen.

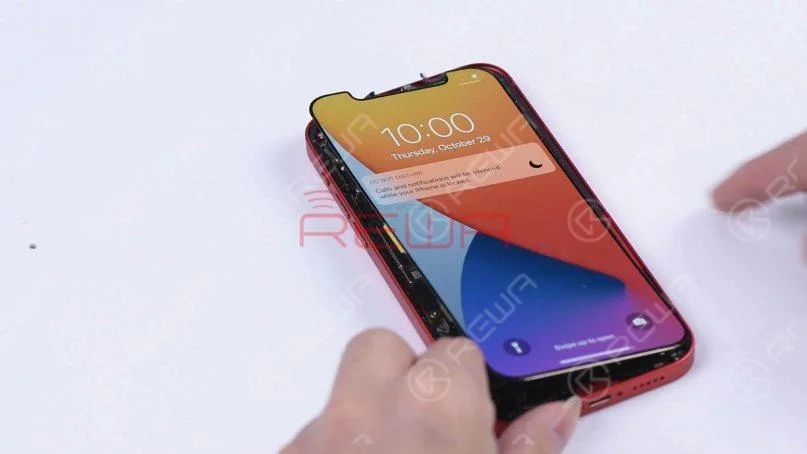
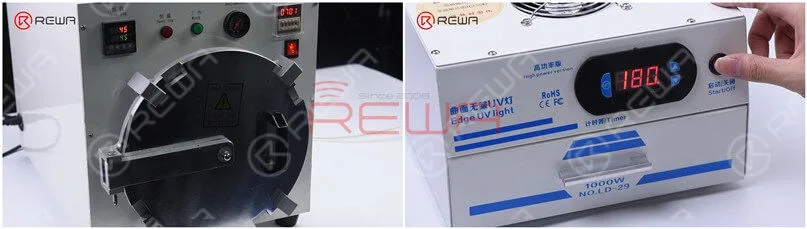
    Put the screen back into the Bubble Removing Machine for 10 minutes, and then put the screen into the UV Lamp for Curing OCA Glue for 180 seconds. Assemble the refurbished screen on the phone, and all functions work well.

    Put the screen back into the Bubble Removing Machine for 10 minutes, and then put the screen into the UV Lamp for Curing OCA Glue for 180 seconds. Assemble the refurbished screen on the phone, and all functions work well.
    Put the screen back into the Bubble Removing Machine for 10 minutes, and then put the screen into the UV Lamp for Curing OCA Glue for 180 seconds. Assemble the refurbished screen on the phone, and all functions work well.

    Besuchen Sie unser Internetshop für Reparaturteile und Werkzeuge. Folgen Sie unbedingt unserer YouTube-Kanal, so you will get the newest repair information.For more detailed refurbishment techniques of the iPhone 12, please watch the video below!