Schlagwort: ipad reparatur

  • Reparieren des iPad Pro, das sich nicht einschaltet, durch Austauschen der Stecker

    Reparieren des iPad Pro, das sich nicht einschaltet, durch Austauschen der Stecker

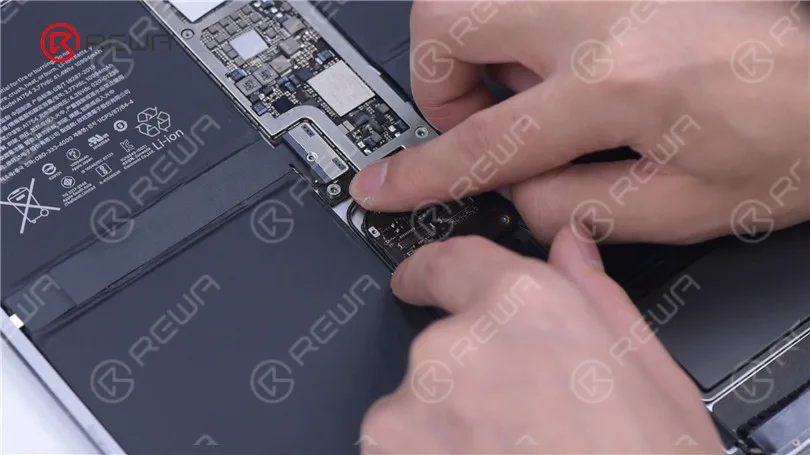
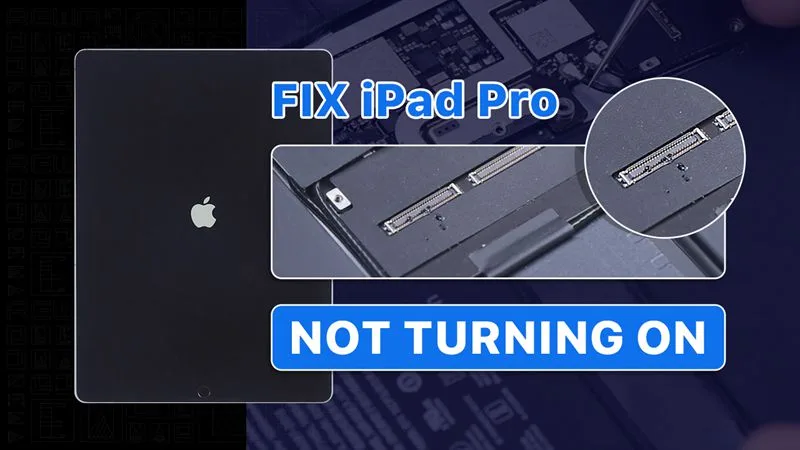
    We have received an iPad Pro from our fan. The original fault of the iPad Pro was the top left corner speaker with noise.

    After speaker replacement, the connectors of the motherboard and display are burnt out while connecting the display. Now the iPad Pro won’t turn on.

    So the fan mailed the iPad Pro to REWA for repair. Let’s check out how we fix the iPad Pro.

    In the first place, we remove the display. We can see that the connectors are burnt out.

    Since the battery is connected to the motherboard, the connectors will burn out with the device turned on and display connected.

    To avoid unnecessary damage, we recommend you disconnect the battery first during repair.

    After the display is connected, connect the battery to turn on the device.
    Fix iPad Pro Not Turning On By Replacing Connectors

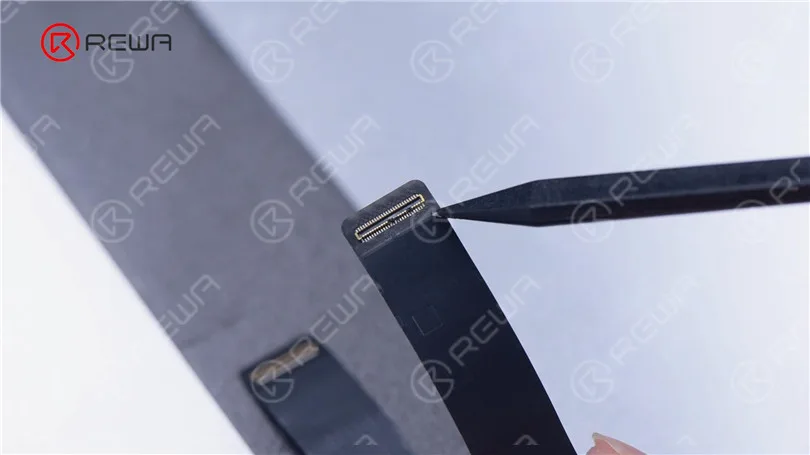
    Next, we replace the connectors. First of all, we replace the display connector. Fix the flex cable with high-temperature tape and cover the screen with an insulation mat.
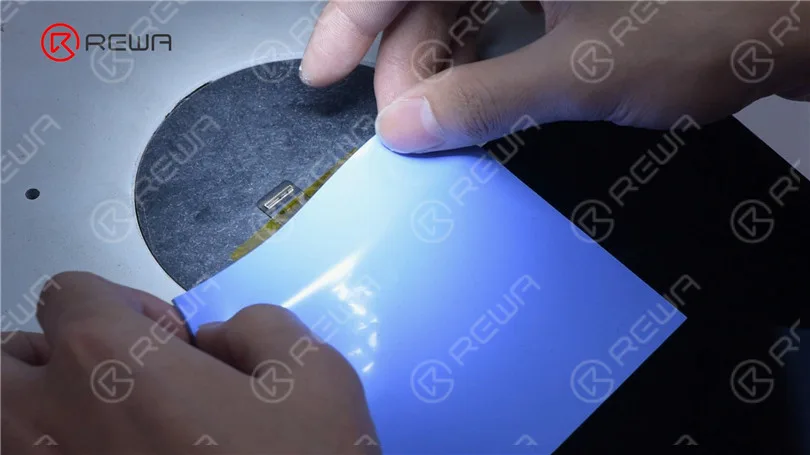
    Fix iPad Pro Not Turning On By Replacing Connectors

    Apply some Paste Flux to the connector. Heat with Hot Air Gun to remove the damaged connector.
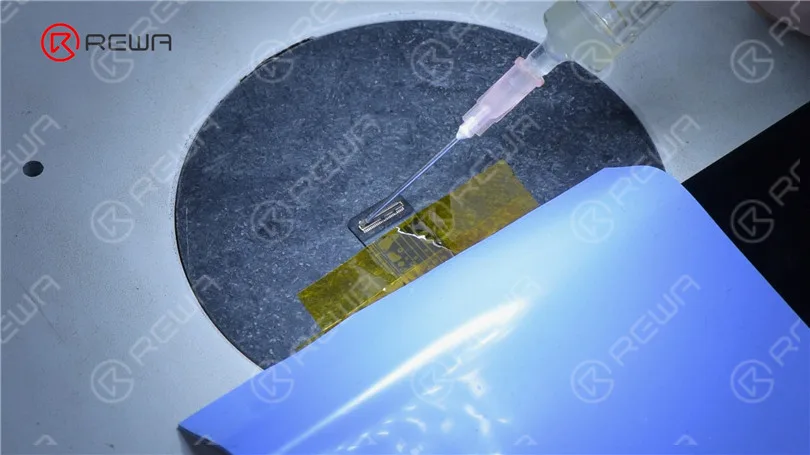
    Fix iPad Pro Not Turning On By Replacing Connectors

    Keep applying Paste Flux. Get a new connector and align the connector.
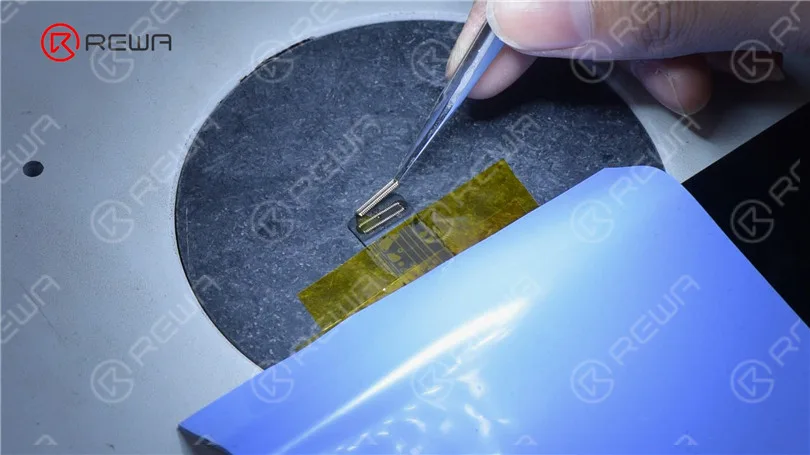
    Fix iPad Pro Not Turning On By Replacing Connectors

    Heat to solder the connector with Hot Air Gun. After soldering and the connector has cooled, clean with PCB Cleaner.
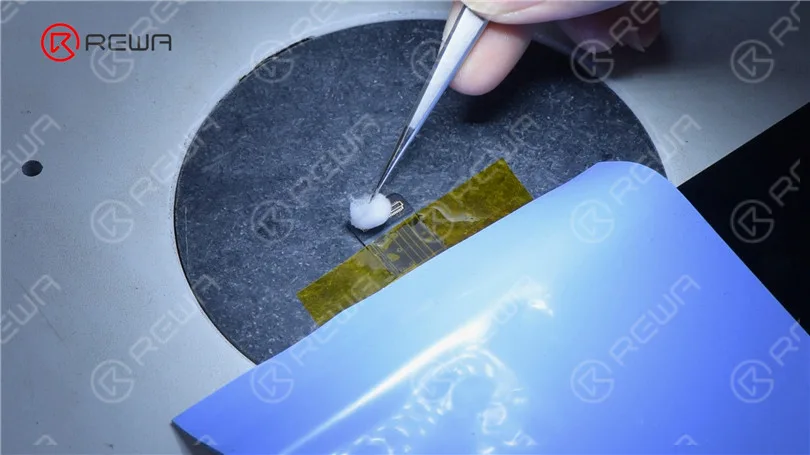
    Fix iPad Pro Not Turning On By Replacing Connectors

    Check soldering pads one by one with tweezers. It can be seen that the soldering is perfect.
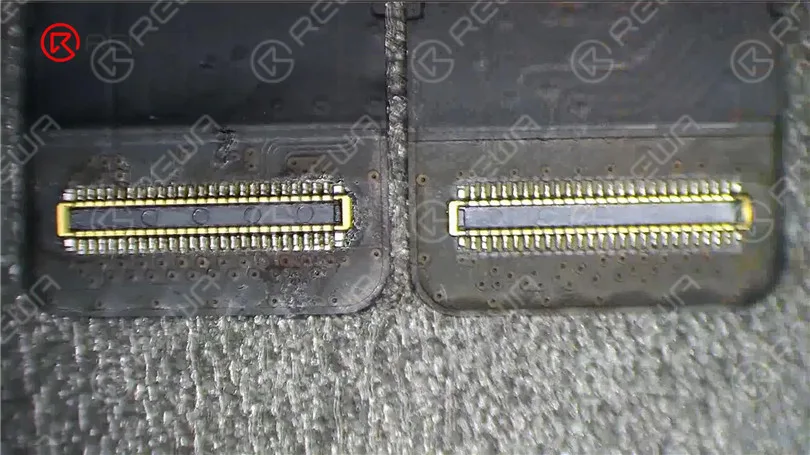
    Fix iPad Pro Not Turning On By Replacing Connectors

    Then we replace the connector on the motherboard. Firstly, remove the shielding cover.
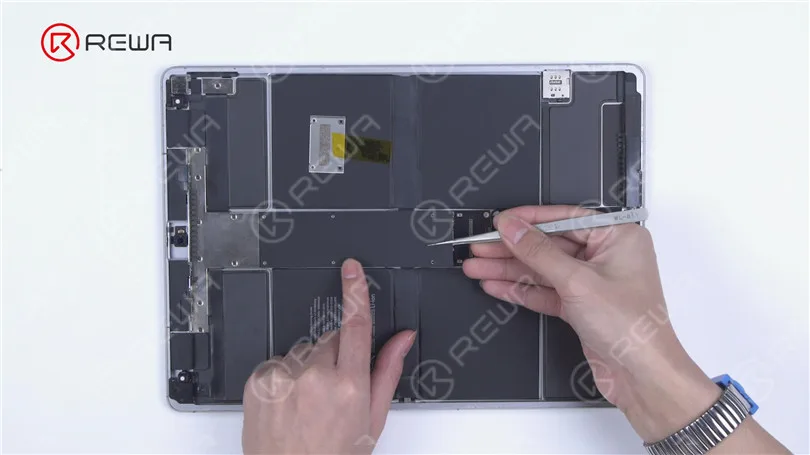
    Fix iPad Pro Not Turning On By Replacing Connectors

    Disconnect the battery and the antenna.
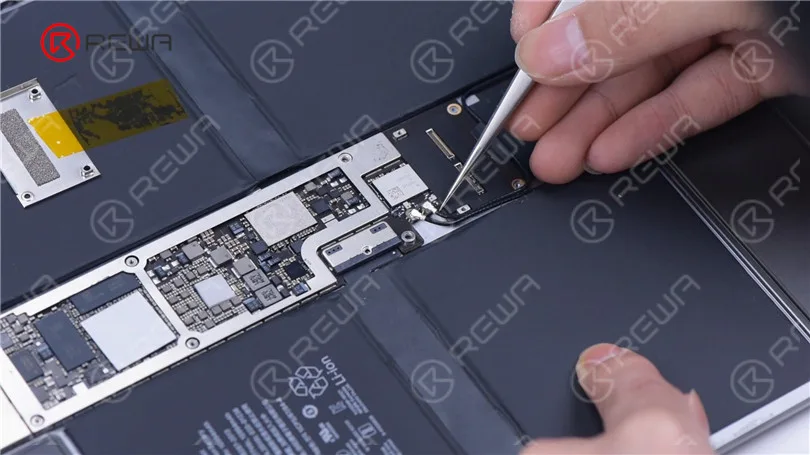
    Fix iPad Pro Not Turning On By Replacing Connectors

    To protect the motherboard, pry up the motherboard gently, disconnecting the battery from the motherboard.
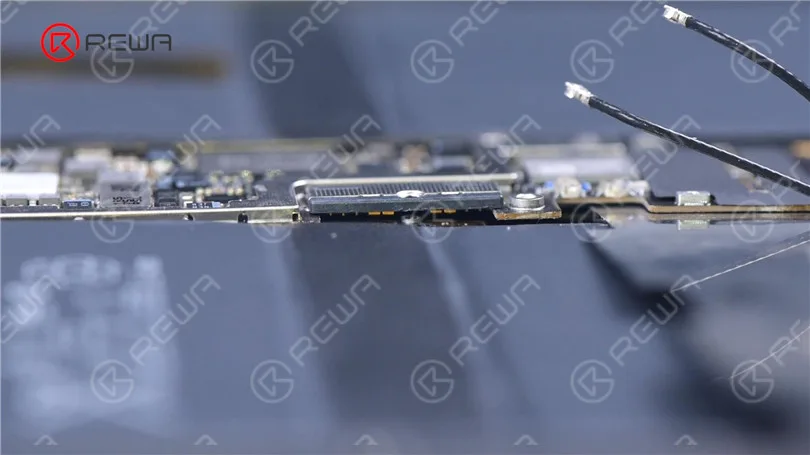
    Fix iPad Pro Not Turning On By Replacing Connectors

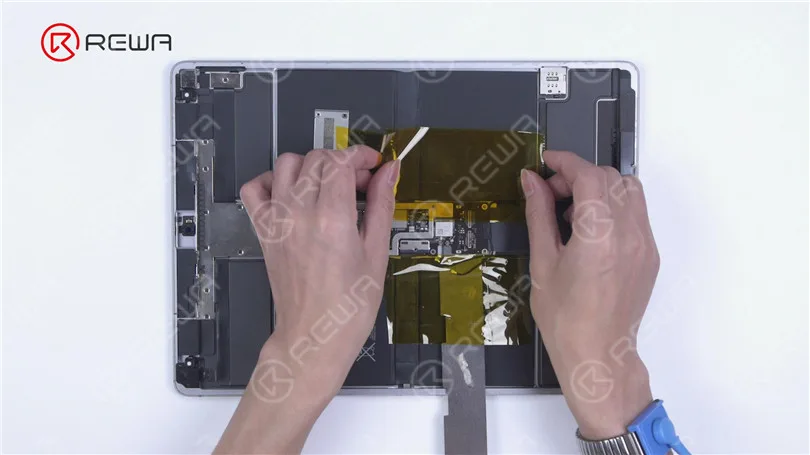
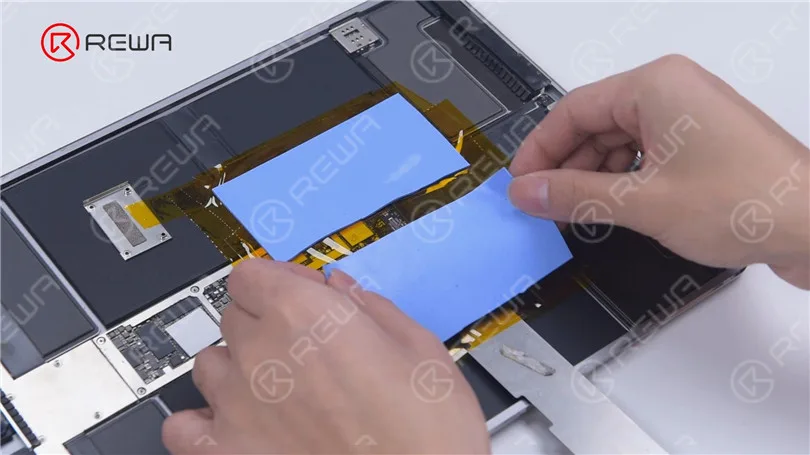
    Remove the shielding tape of the connector. Since the motherboard is surrounded by batteries, we need to insulate the area.

    Apply high-temperature tape around the motherboard. For better protection, we advise you to apply several layers. Then apply the insulation mats.
    Fix iPad Pro Not Turning On By Replacing Connectors
    Fix iPad Pro Not Turning On By Replacing Connectors

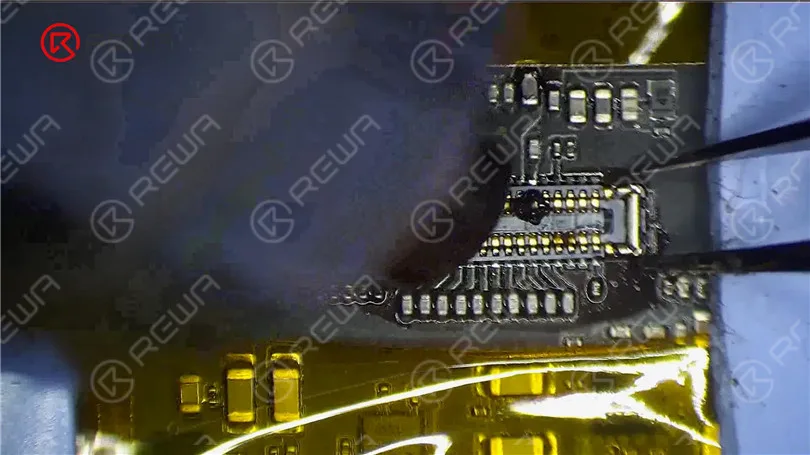
    Apply some Paste Flux to the connector. Remove the damaged connector with Hot Air Gun.
    Fix iPad Pro Not Turning On By Replacing Connectors

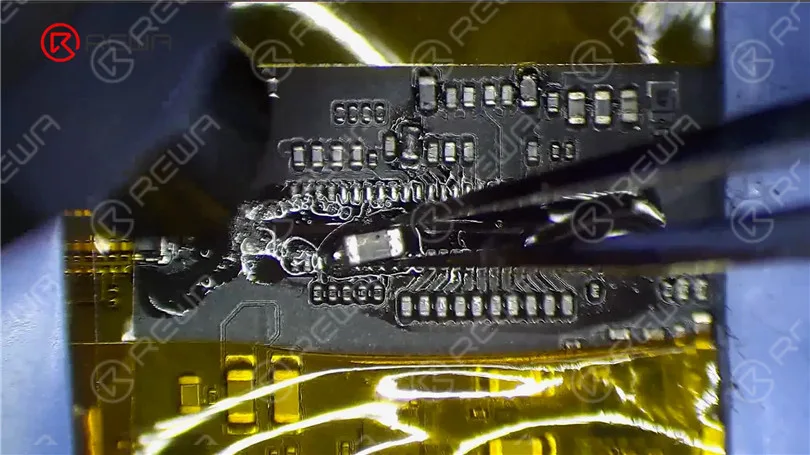
    Apply some middle-temperature Solder Paste and Paste Flux. Get an inductor. Make soldering pads uniform by sliding the inductor.
    Fix iPad Pro Not Turning On By Replacing Connectors

    Clean tin around the connector with Hot Air Gun and Solder Wick.
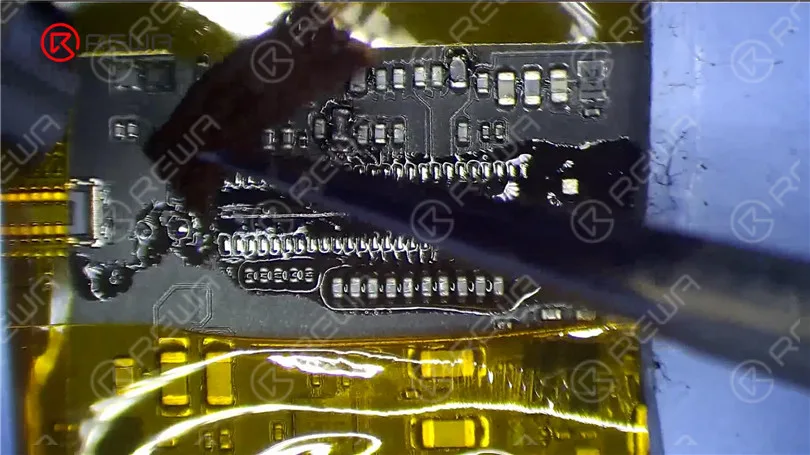
    Fix iPad Pro Not Turning On By Replacing Connectors

    Clean the bonding pad with PCB Cleaner. Apply some Paste Flux and put the new connector in position. Heat to solder the connector with Hot Air Gun. Clean the connector with PCB Cleaner.
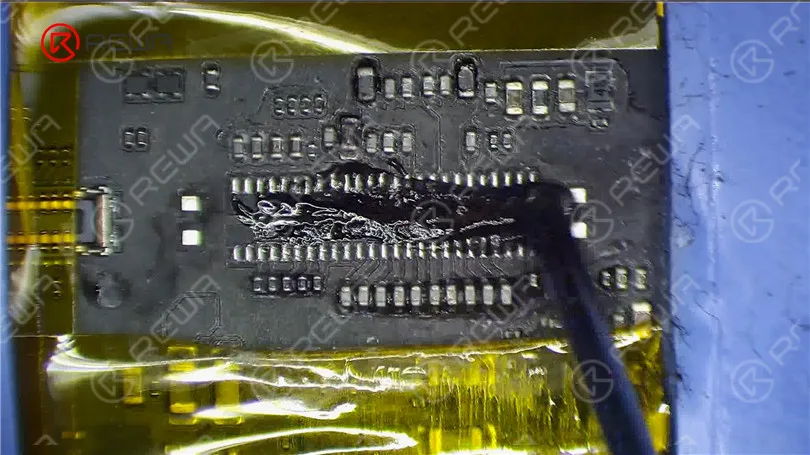
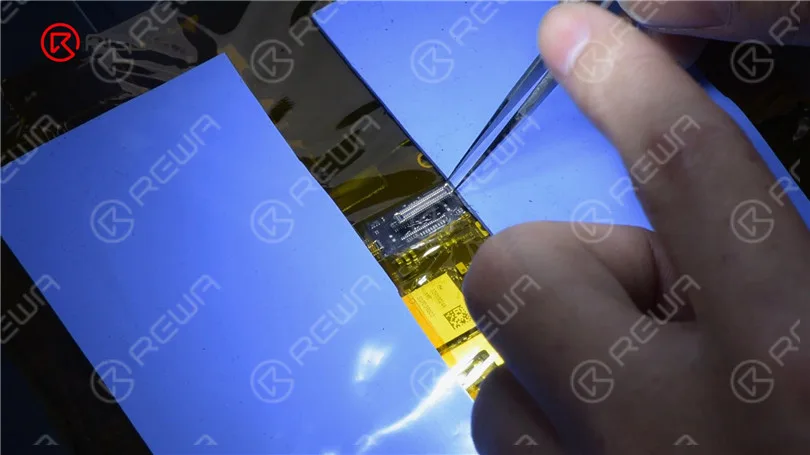
    Fix iPad Pro Not Turning On By Replacing Connectors
    Fix iPad Pro Not Turning On By Replacing Connectors

    Then we connect the antenna.

    Fix iPad Pro Not Turning On By Replacing Connectors

    Disconnect the battery from the motherboard with a Pry Piece, which is to prevent the connector from being damaged with the screen connected.
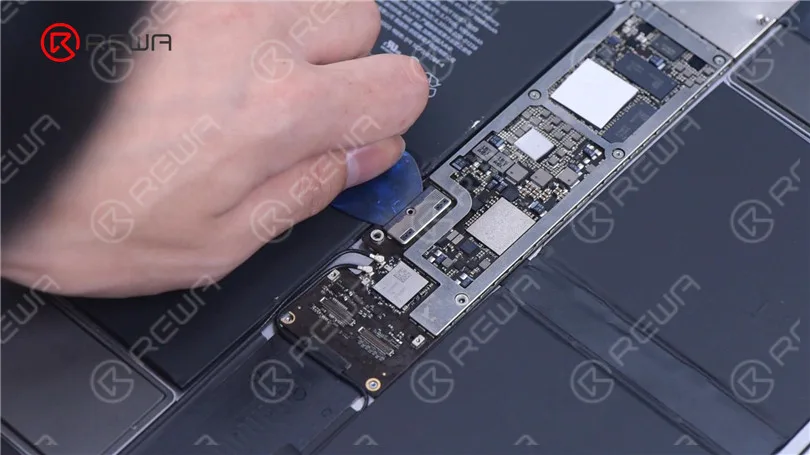
    Fix iPad Pro Not Turning On By Replacing Connectors

    Then we connect the screen. Remove the Pry Piece. Screw the battery and motherboard.
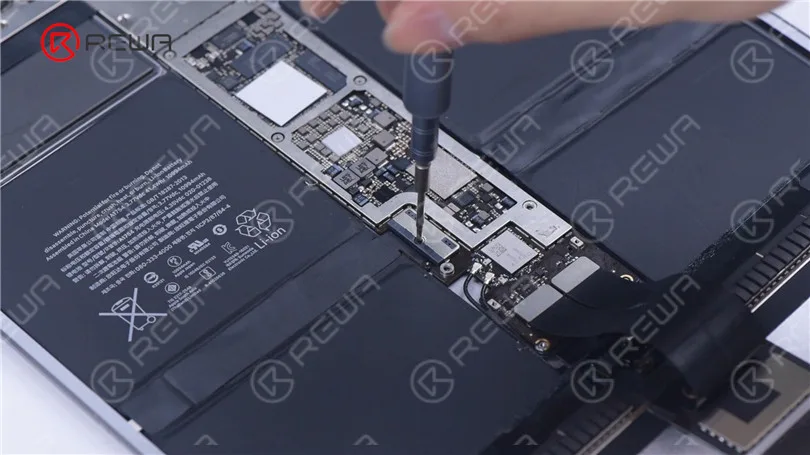
    Fix iPad Pro Not Turning On By Replacing Connectors

    Turn on the iPad Pro to test. The iPad Pro can be turned on. Both the display and touch work well. The music can be played without noise.

    Fix iPad Pro Not Turning On By Replacing Connectors

    iPad Pro won’t turn on has been successfully fixed.

    Please feel free to leave a comment on iPad repair topics that you are interested in.

    Watch the below video to see how we fix an iPad Pro that won’t turn on.
  • Schwierige iPhone- und iPad-Reparaturen? Wir können reparieren!

    Schwierige iPhone- und iPad-Reparaturen? Wir können reparieren!

    Wenn es um elektronische Produkte wie Telefone, Tablets und Computer geht, können iPhone- und iPad-Reparaturen oft eine kostengünstige Alternative zum Neukauf sein. Allerdings ist es für uns einfach, das Wort ‘Reparatur’ zu buchstabieren, während die praktische Reparaturarbeit ein wirklich akribischer Prozess sein kann. Reparaturwerkstätten sind mit der Entwicklung der Elektronik auf der ganzen Welt aus dem Boden geschossen, und in der Zwischenzeit sind die Fehlfunktionen immer präziser geworden. Reparaturexperten können zwar professionell sein, aber sie sind nicht allmächtig für alle Fehler, die durch die täglich aktualisierten elektronischen Produkte verursacht werden. Was ist also zu tun? Es ist nie zu spät für Sie, um Unterstützung zu bitten, und REWA hat immer eine Reparaturlösung für Sie. Unser Netzwerk von Reparaturdiensten ist so aufgestellt, dass wir Ihnen eine effiziente Reparatur von Logikkarten und Reparatur von gesprungenen Bildschirmen für alle Bedürftigen. Wir möchten, dass Sie Ihr Geschäft ankurbeln und sich von anderen abheben, und es ist uns eine Ehre, Ihnen dabei zu helfen.

    Vorteile einer iPhone- und iPad-Reparatur bei REWA

    Schwierige iPhone- und iPad-Reparaturen

    Alles aus einer Hand

    REWA ist in der Lage, alle Kundenwünsche im Rahmen unserer Dienstleistungen zu erfüllen. Was auch immer Ihr Problem ist, egal wie groß oder klein, unser engagiertes Vertriebs- und Kundendienstteam wird eine wettbewerbsfähige und zuverlässige Lösung anbieten.

    Zügig und effizient

    Lassen Sie sich von Ihrem ungelösten Problem nicht aus der Ruhe bringen, REWA bietet Ihnen einen schnellen und effizienten Service für Ihren Notfall. Kontaktieren Sie uns jetzt, um Ihr Problem schnell und kostengünstig zu lösen.

    Führende Technologie

    Stehen Sie vor einem Problem, zu dem Ihre Experten eine Frage haben? Wenden Sie sich an REWA für Unterstützung. Unsere Experten und Ingenieure sind hochqualifiziert und für eine breite Palette von Produkten wie iPhone, Samsung, Huawei usw. ausgerüstet.

    Transparenter Dienst

    Transparenz schafft Vertrauen! REWA ist der Meinung, dass der beste Ansatz darin besteht, aus dem geschäftlichen Bereich herauszutreten und sich auf die menschliche Ebene zu begeben. Unsere Kunden werden über alle Informationen, die sie benötigen, informiert - vom Reparaturprozess bis hin zu den Preisangaben usw.

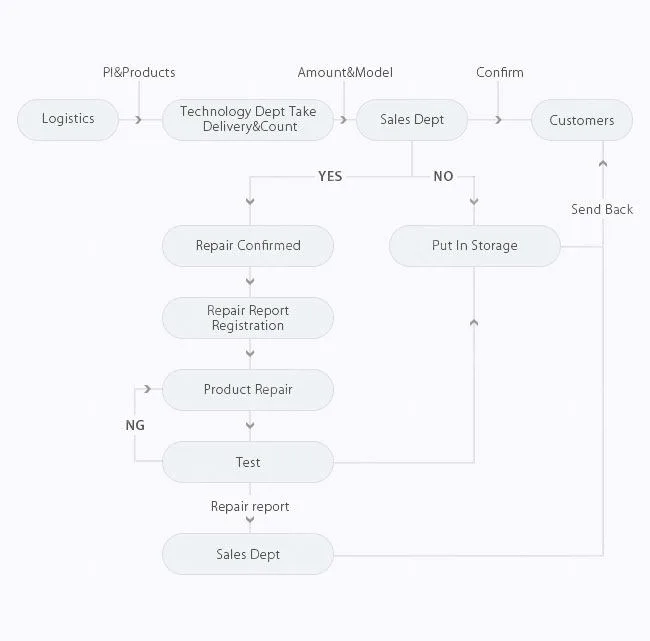
    So funktioniert der REWA-Reparaturservice

    Schwierige iPhone- und iPad-Reparaturen

    Der Reparaturservice für Logikkarten umfasst1.

    Reparatur des Kamerachips: iPhone 6 Kamera funktioniert nicht;

    2. Touchscreen-Chip-Reparatur: iPhone 7 Touchscreen nicht funktioniert oder unempfindlich Touch;

    3. Reparatur des Anzeigechips: Das LCD zeigt Bilder nicht richtig oder gar nicht an;

    4. Reparatur des Ladechips: Das Gerät lädt nicht, oder Sie haben Probleme, das Gerät an den Computer oder das Ladegerät anzuschließen;

    5. WiFi-Chip-Reparatur: Wie man WiFi auf dem iPhone 6 repariert, WiFi kann nicht geöffnet werden, oder WiFi kann nicht verbunden werden, oder WiFi hat keine Signale;

    6. Lautsprecherchip-Reparatur: Sie können Ihren Ton nicht hören oder Ihren Lautsprecher nicht benutzen, der Ton des Ohrlautsprechers wird ein- und ausgeblendet oder das iPhone 6 hat überhaupt keinen Ton;

    7. Signalchip-Reparatur: iPhone 6 No Service Hardware Fix Solution, Kann keine Verbindung zu einem Mobilfunknetz herstellen, kann keine Anrufe tätigen oder empfangen

    8. Reparatur von Steckern auf der Logikkarte: Steckverbinder auf der Logikkarte beschädigt

    9. Touch ID Chip Reparatur: iPhone 7 Home-Button funktioniert nicht, das Touch ID Flexkabel ist gerissen, aber der Home-Button ist OK

    10. Speicher aufrüsten: Rüsten Sie Ihren iPhone- und iPad-Speicher auf 64 GB/128 GB/256 GB auf, z. B. wie Sie den iPhone-Speicher aufrüsten;

    11. Kein Einschalten: Das iPhone lässt sich nicht einschalten, keine Funktion, feste Anzeige, Neustart, weißer Bildschirm, roter Bildschirm, blauer Bildschirm, überhaupt keine Anzeige;

    12. iPad iCloud entsperren: Wie man das iPad air entsperrt;

    13. Behebung von Kompassproblemen

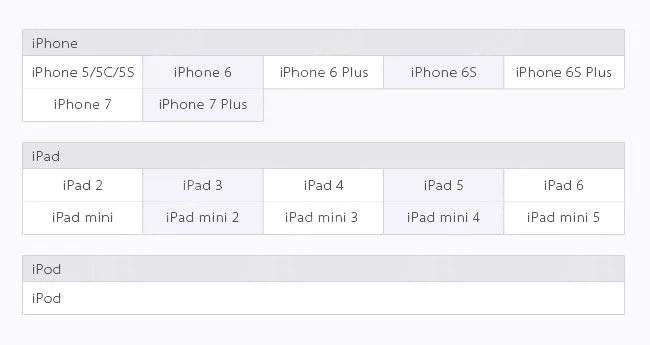
    Logikplatinen-Reparaturservice - Modelle

    Schwierige iPhone- und iPad-Reparaturen

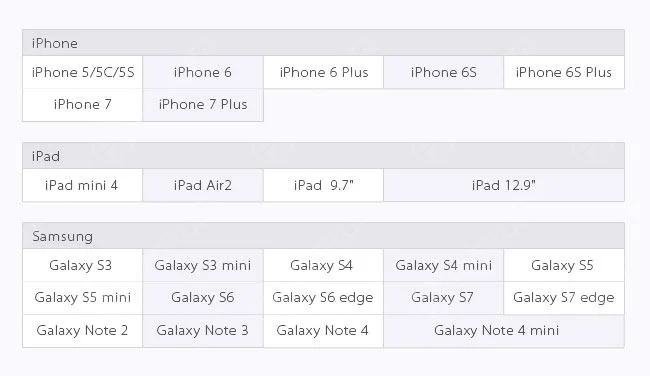
    Rissiger Bildschirm Reparatur Service - Modelle

    Schwierige iPhone- und iPad-Reparaturen

    Kundenbenachrichtigung

    Hier sind einige Details, die Sie vor dem Versand wissen sollten

    1. MOQ: 10PCS

    2. Der Reparaturprozess (ohne Lieferzeit) dauert normalerweise etwa 7 Tage.

    3. Die Versandkosten gehen zu Lasten des Kunden.

    4. Markieren Sie die Fehlfunktionen jedes Geräts und notieren Sie deren IMEI vor der Auslieferung.

    5. Falls gesperrt, geben Sie bitte das Passwort Ihres Telefons an, damit wir die Funktionalität testen können.

    6. Wenn möglich, geben Sie bitte iCloud-Konto und Passwort; Oder löschen Sie bitte Ihr iCloud-Konto von Ihrem Gerät (Wir reparieren nicht ein Gerät, das kein iCloud-Passwort hat). 7. Wenn Sie eine Touch-ID-Reparatur benötigen, senden Sie bitte die Home-Button-Baugruppe zusammen mit der Logikplatine.

    8. Für das iPhone-Speicher-Upgrade aktualisieren Sie Ihr Gerät bitte auf das neueste IOS-Betriebssystem.

    9. Wir sind nicht in der Lage, ein Gerät, das Rost und Korrosion auf zu viele Komponenten zu reparieren.

    10. Wenn Sie unseren Prüfbericht nicht akzeptieren und auf den Reparaturservice verzichten wollen. Sie sollten die Kosten für die Rücksendung tragen.

    11. Die Reparaturkosten hängen von der genauen Beschädigung und dem Ausmaß des Schadens an Ihrem Gerät ab. Wir können Ihnen nur einen geschätzten Reparaturpreis anbieten, bevor die Reparatur abgeschlossen ist.

  • REWA iPad Air Touch Screen Partially Unresponsive Repair

    REWA iPad Air Touch Screen Partially Unresponsive Repair

    What to do when iPad Air touch screen partially unresponsive? Replace with a new touch screen and the screen freezing problem remains unsolved? It’s time for you to view our video and get refreshed with a totally new logic board solution regarding iPad touch screen not working issue.

    Verwendete Werkzeuge:

  • iPad Touchscreen Home-Taste Zusammenbau Tutorial

    iPad Touchscreen Home-Taste Zusammenbau Tutorial

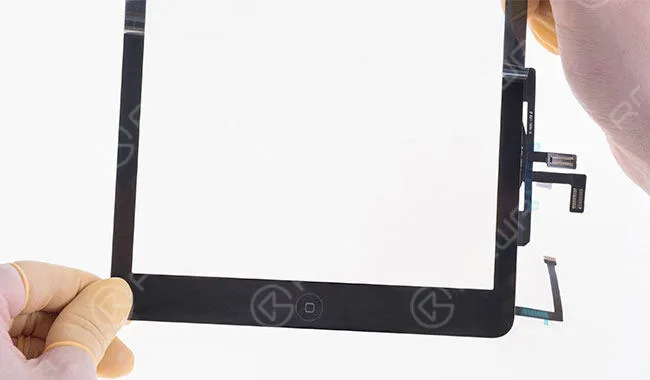
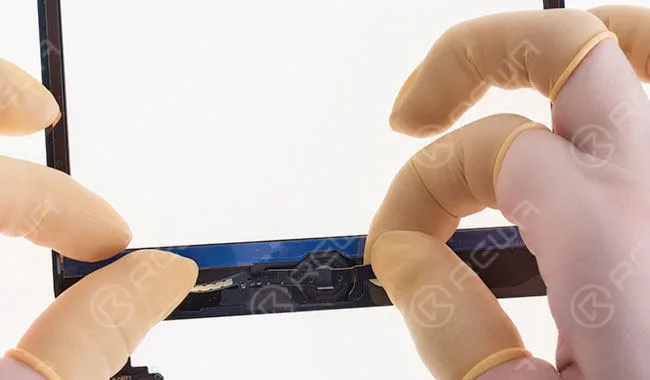
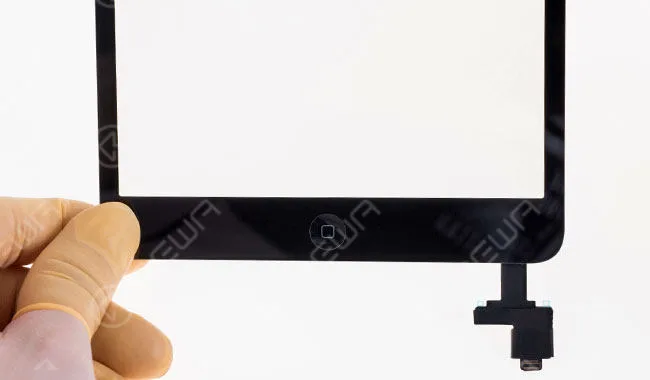
    So you need iPad touch screen digitizer assembly replacements for your repair work. You search on the internet and find that some of them are not well assembled with home buttons. Yet the home button on the iPad controls the tablet and all of its functionality, missing of which can render your iPad almost useless. Well, how to piece those home button assembly parts together and make it work perfectly with the iPad touch screen digitizer assembly?REWA offers detailed step-by-step guides to assist you with the home button assembling process and get it working as you need. (such as iPhone won’t turn on after screen replacement, iPhone 7 touch screen not working,  iPhone 7 home button not working)

    Note: four iPad series are applied to this home button assembling guide – iPad 2, iPad 3, iPad 4, iPad 5 and iPad mini.

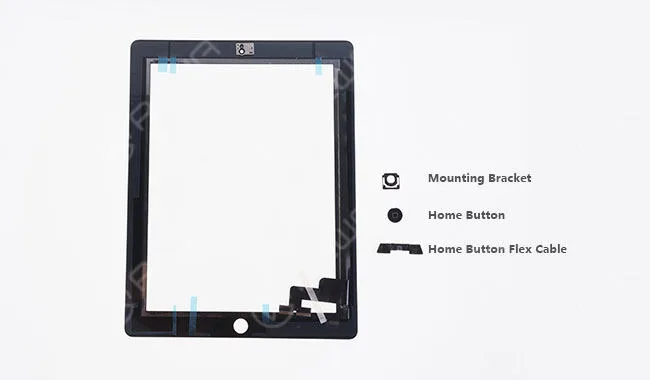
    iPad 2

    ipad touch screen home button assembling tutorial 2

    Parts contained: Home Button; Mounting Bracket; Home Button Flex Cable

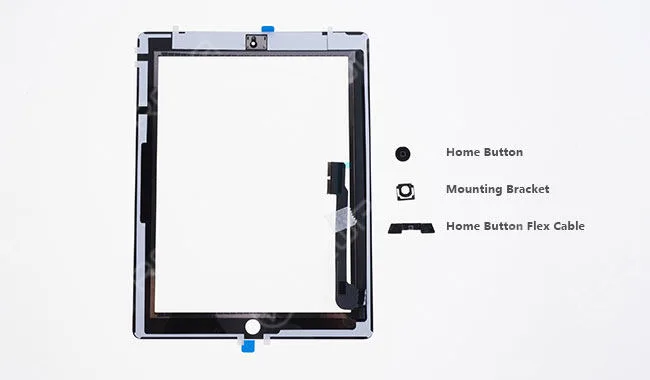
    iPad 3

    ipad touch screen home button assembling tutorial 3

    Parts contained: Home Button; Mounting Bracket; Home Button Flex Cable

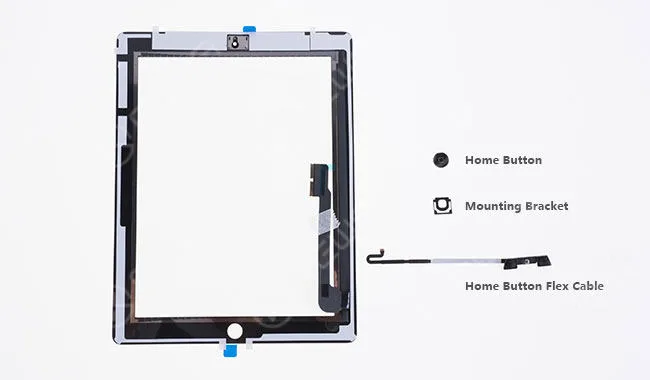
    iPad 4

    ipad touch screen home button assembling tutorial 4

    Parts contained: Home Button; Mounting Bracket; Home Button Flex Cable

    The three of them have the same steps as below (take iPad 3 as an example).

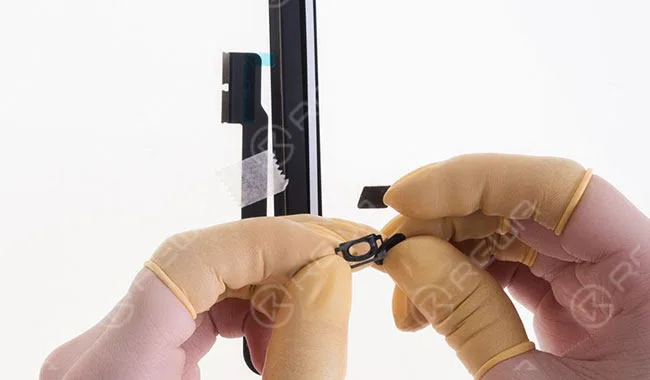
    Schritt 1 Seat the home button with the mounting bracket.

    ipad touch screen home button assembling tutorial dsc4700

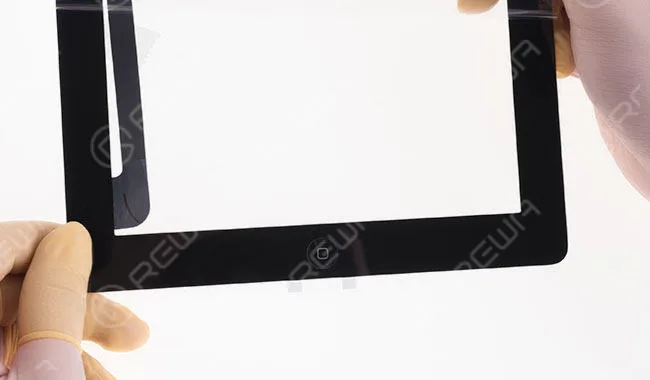
    Schritt 2 Align them to the home button hole of the iPad touch screen digitizer assembly.

    ipad touch screen home button assembling tutorial dsc4715

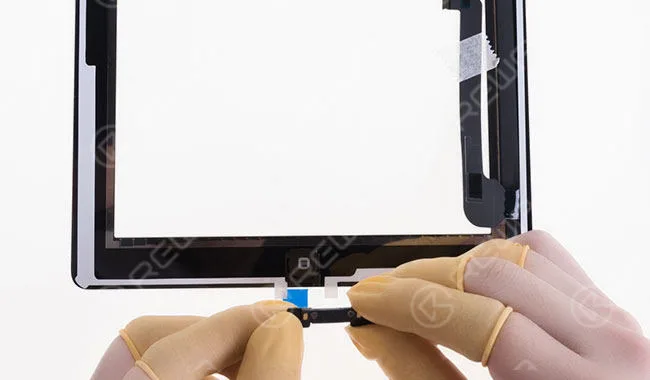
    Schritt 3 Align the home button flex cable.

    ipad touch screen home button assembling tutorial dsc4707

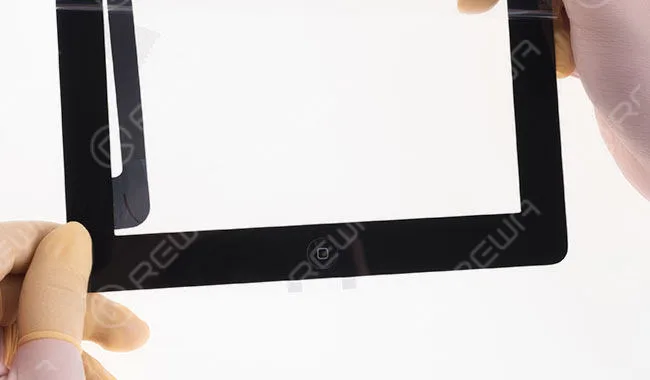
    Step 4 Once finished, check the assembling effect.

    ipad touch screen home button assembling tutorial dsc4715 2

    iPad 5

    ipad touch screen home button assembling tutorial 5

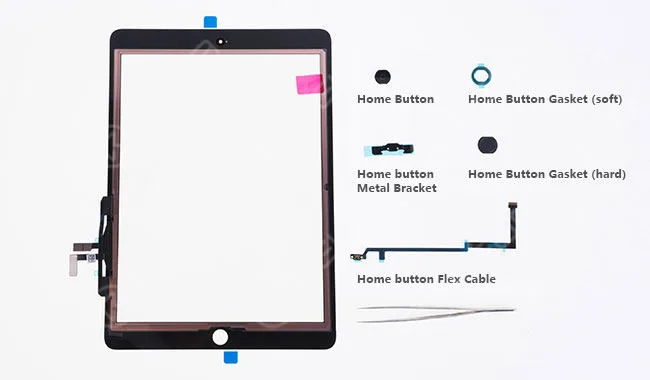
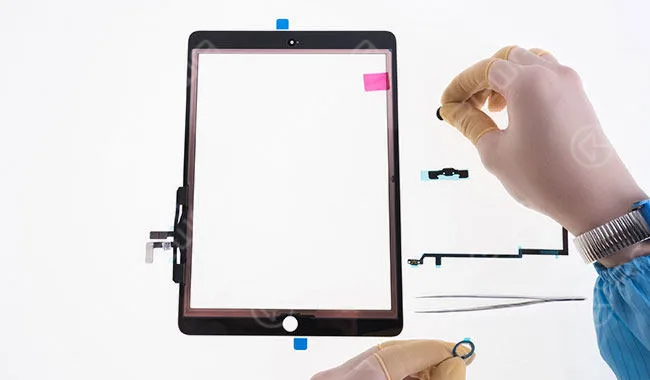
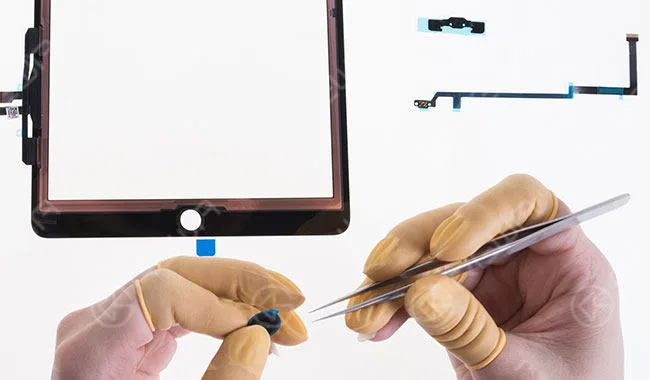
    Parts contained: Home Button; Home Button Gasket (soft); Home button Metal Bracket; Home Button Gasket (hard); Home Button Flex Cable Step 1 Tear off the front self-adhesive sticker of the soft home button gasket, paste the home button to it and then tear off the rear self-adhesive sticker. Then align them to the home button hole of the iPad touch screen digitizer assembly.

    ipad touch screen home button assembling tutorial dsc4742

    Step 2 Tear off the self-adhesive sticker of the hard home button gasket and paste it to the home button hole of the iPad touch screen digitizer assembly.

    ipad touch screen home button assembling tutorial dsc4752

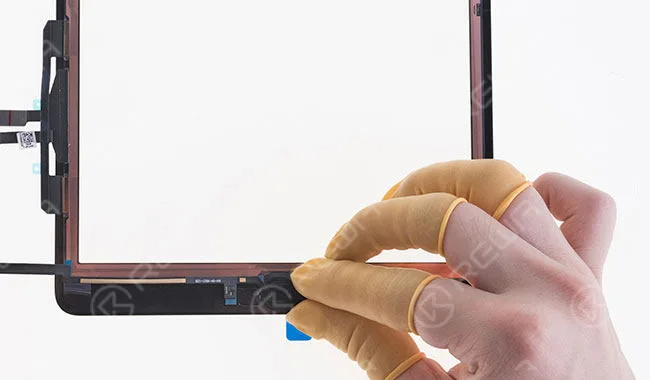
    Schritt 3 Tear off the self-adhesive sticker of the home button metal bracket and align it to the home button flex cable. Then adhere the two to the right place of the iPad touch screen digitizer assembly.

    ipad touch screen home button assembling tutorial dsc4766

    Schritt 4 Once finished, check the assembling effect.

    ipad touch screen home button assembling tutorial dsc4780

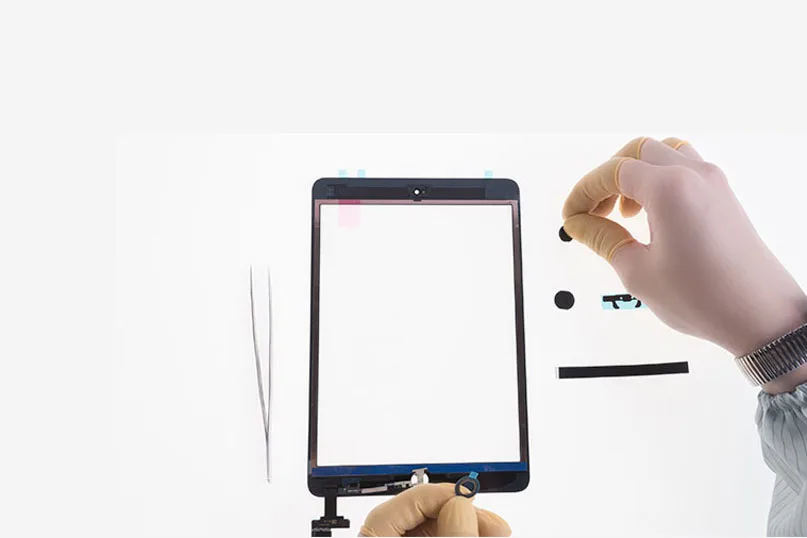
    iPad mini

    ipad touch screen home button assembling tutorial mini

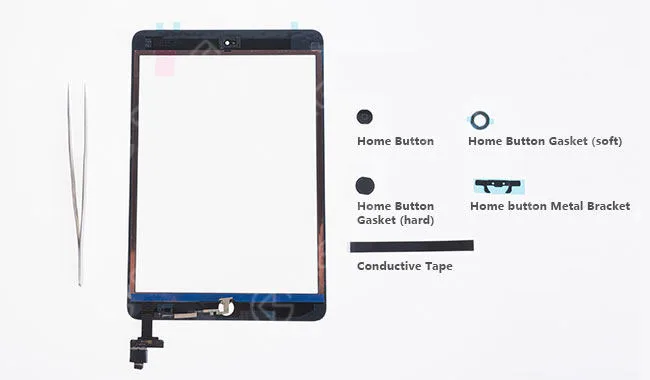
    Parts contained: Home Button; Home Button Gasket (soft); Home Button Gasket (hard); Home button Metal Bracket; Conductive Tape.

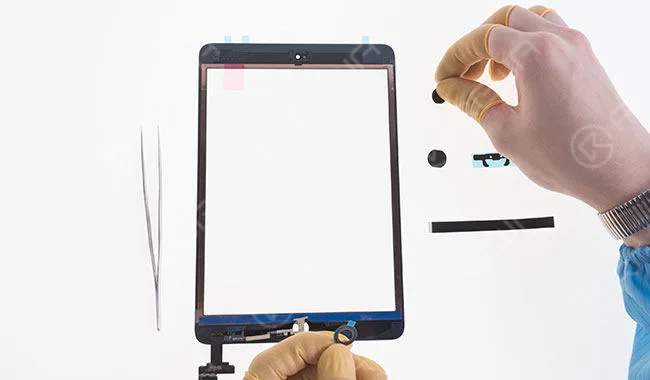
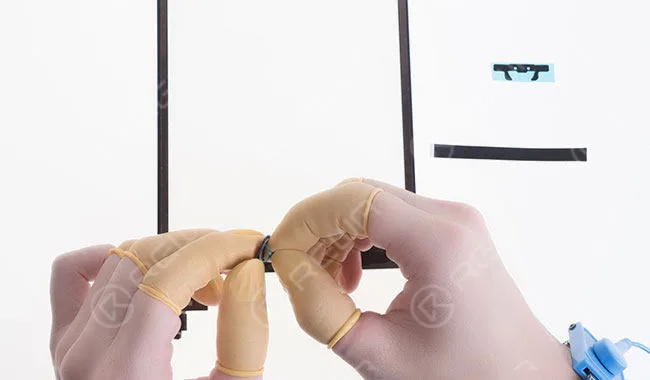
    Schritt 1 Tear off the front self-adhesive sticker of the soft home button gasket, paste the home button to it and then tear off the rear self-adhesive sticker. Then align them to the home button hole of the iPad touch screen digitizer assembly.

    ipad touch screen home button assembling tutorial dsc4790

    Schritt 2 Tear off the self-adhesive sticker of the hard home button gasket and paste it to the home button hole of the iPad touch screen digitizer assembly.

    ipad touch screen home button assembling tutorial dsc4802

    Schritt 3 Tear off the self-adhesive sticker of the home button metal bracket and align it to the right place. Then seal with the conductive tape.

    ipad touch screen home button assembling tutorial dsc4818

    Step 4 Once finished, check the assembling effect.

    ipad touch screen home button assembling tutorial dsc4830