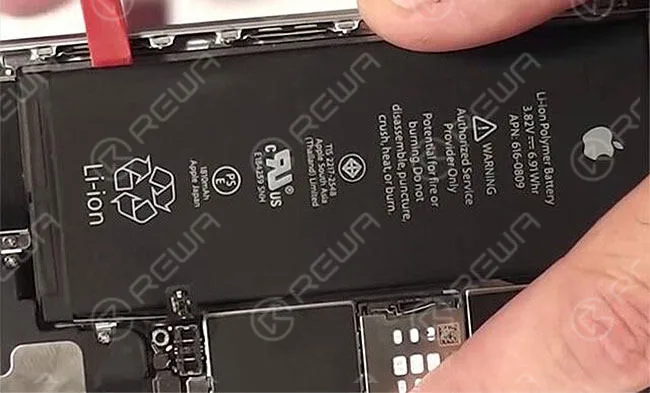
Schlagwort: Batteriewechsel

  • iPhone 12 Pro Battery Replacement: Cost & Shop Guide

    iPhone 12 Pro Battery Replacement: Cost & Shop Guide

    iPhone 12 Pro battery replacement is more than a simple cell swap. This model uses an encrypted battery protection board, so aftermarket installs usually need a BMS transfer, data rewrite, and a tag-on flex. Genuine Apple batteries follow a different path with Apple Service Toolkit 2 (AST2).

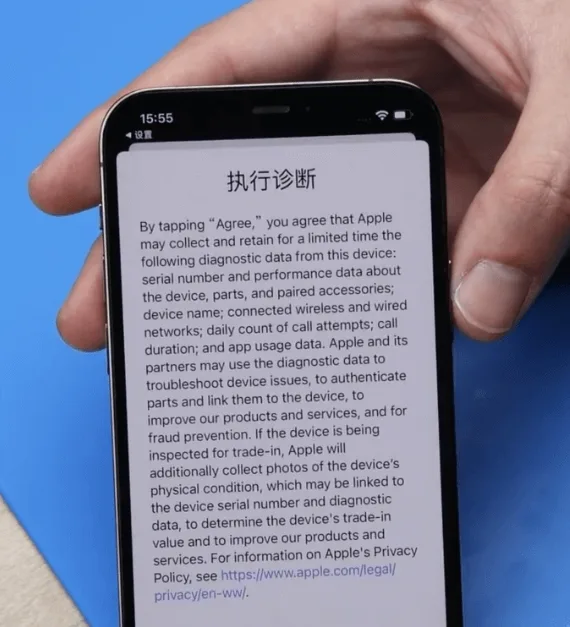
    This guide walks through when to replace, what it typically costs, the shop method vs Apple parts, and how to clear the “Unable to verify this iPhone has a genuine Apple battery” alert. It is written for repair shops and advanced DIY techs who already work with heat, adhesive, and small connectors.
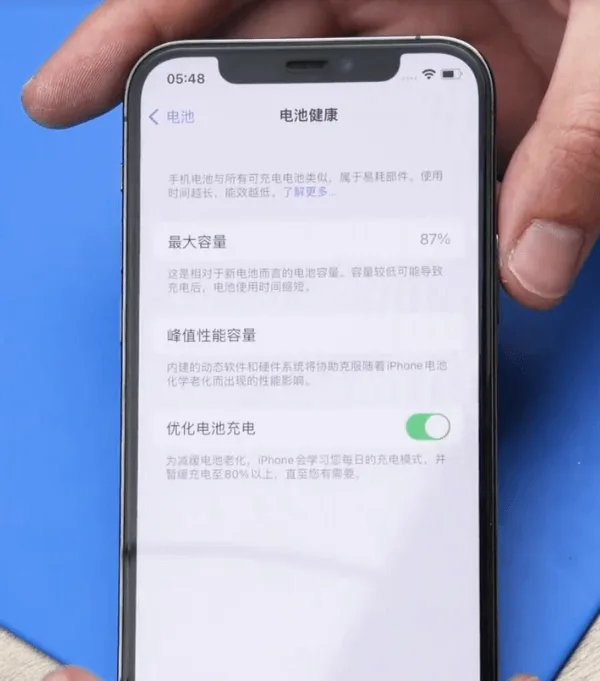
    iPhone 12 Pro battery health at 87 percent

    Example device: iPhone 12 Pro
    Batteriezustand: 87% (Settings → Battery → Battery Health → Maximum Capacity)

    When to replace an iPhone 12 Pro battery

    Apple designs iPhone batteries (14 and earlier, including the 12 Pro) to retain about 80% capacity at 500 complete charge cycles under ideal conditions. Many techs still quote a swap near or below 80%, or when Battery Health shows a Service recommendation. Customers sometimes request a replacement earlier (for example at 85-90%) to restore full-day runtime. That is a preference call, not a hard Apple rule.

    In the example above, health sits at 87%. A replacement can still make sense if the customer wants better runtime, or if the phone shows unexpected shutdowns, heat while charging, or peak performance messages.

    Cost and battery specs (quick reference)

    Prices vary by country, tax, and part grade. Use these U.S.-oriented figures as a planning baseline, then confirm local quotes:

    • Apple / AppleCare+ service: about $89 out of warranty for iPhone 12 / 12 Pro battery service (AppleCare+ is often no extra charge when capacity is below 80%). Always re-check Apple’s current estimate tool.
    • Independent shop: often about $50-$100+ depending on city, warranty, and whether the shop transfers the BMS or uses AST2.
    • DIY / wholesale cell: kits often land around $40-$60 retail; shop wholesale cells can undercut that.

    Capacity reference (teardown consensus, not an Apple datasheet line): about 2,815 mAh (~10.78 Wh at 3.83 V). Common part marking refs include A2479 (also seen as styles like 11CP5/45/85 on replacement listings). iPhone 12 and 12 Pro share the same capacity class; 12 Pro Max does not.

    How to replace an iPhone 12 Pro battery

    1. Battery protection board encryption (aftermarket path)

    The iPhone 12 Pro uses an encrypted battery protection board. Dropping in a raw aftermarket cell without handling the board and data is how shops get a permanent Important Battery Message and missing health percentage.

    Transfer the protection board: Carefully remove the old pack, separate the original BMS / protection board, and spot-weld that board onto the new cell tabs with a proper fixture. Use a Schweißmaschine (or equivalent laser / resistance welder). Align anode and cathode correctly, then insulate with the correct tape and bracket.

    2. Rewrite battery data

    Models before 2018: A battery programmer rewrite was often enough.

    XS and later (including iPhone 12 Pro): After board transfer and data rewrite with a Programmierer, attach a tag-on flex when you change cell data so authentication does not leave a permanent alert.

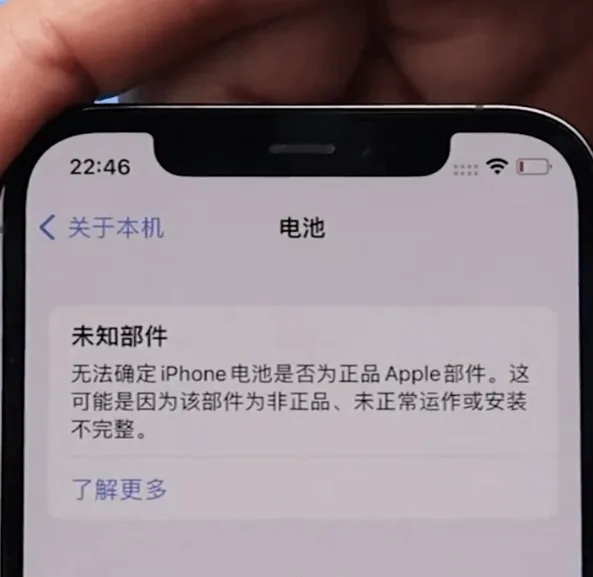
    Anmerkung: Skip these steps and you will usually see “Unable to verify this iPhone has a genuine Apple battery” after power-on.

    3. Official Apple battery + AST2

    For genuine Apple parts, keep the phone on Wi-Fi and use Apple Service Toolkit 2 (AST2):
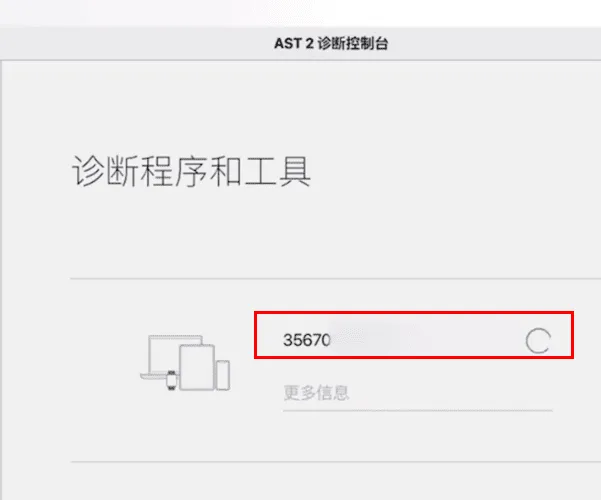
    Apple Service Toolkit 2 (AST2):

    • Melden Sie sich bei AST2 an.
    • Enter the battery serial number and run diagnostics on the phone.
    • After diagnostics clear, proceed with the battery install.

    4. Remove the old battery
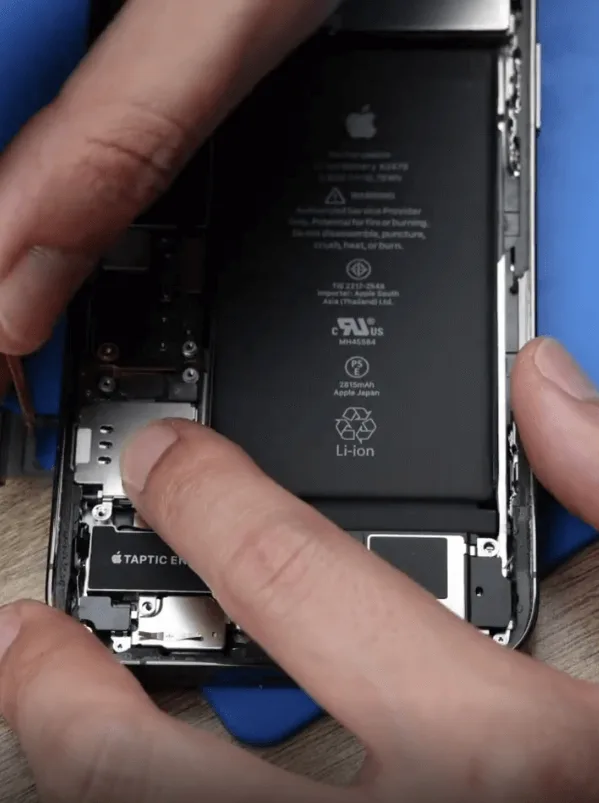
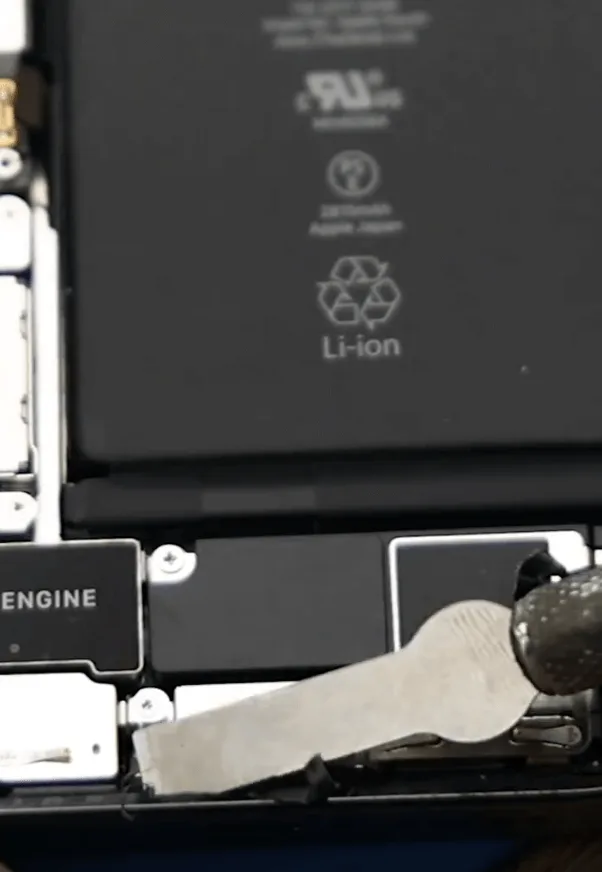
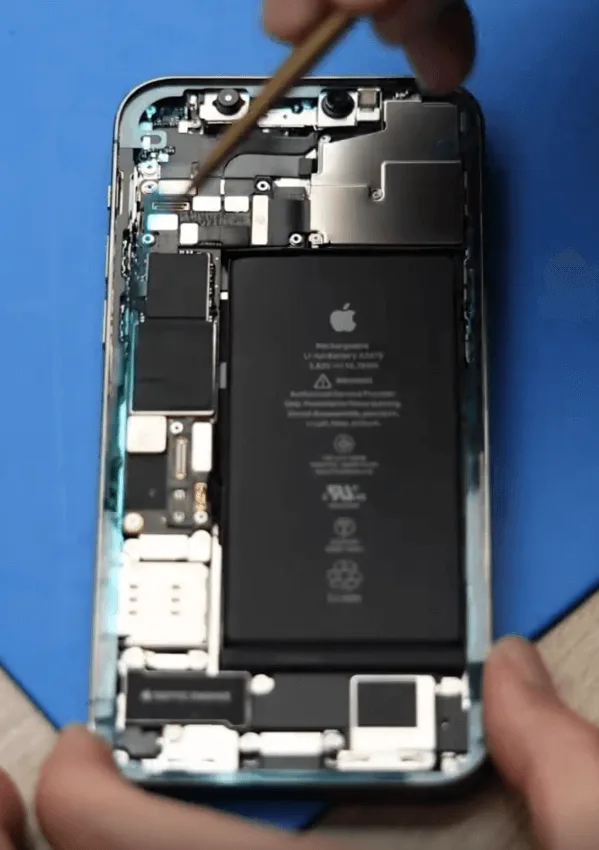
    Remove the original iPhone 12 Pro battery carefully
    • Open the display safely; do not crease flexes.
    • Disconnect the battery connector, then remove the original pack with adhesive pull tabs or isopropyl. Never lever hard under a swollen cell.
    • Apply new waterproof frame adhesive. It restores a seal; it does not magically restore factory IP68 rating.

    5. Install the new battery
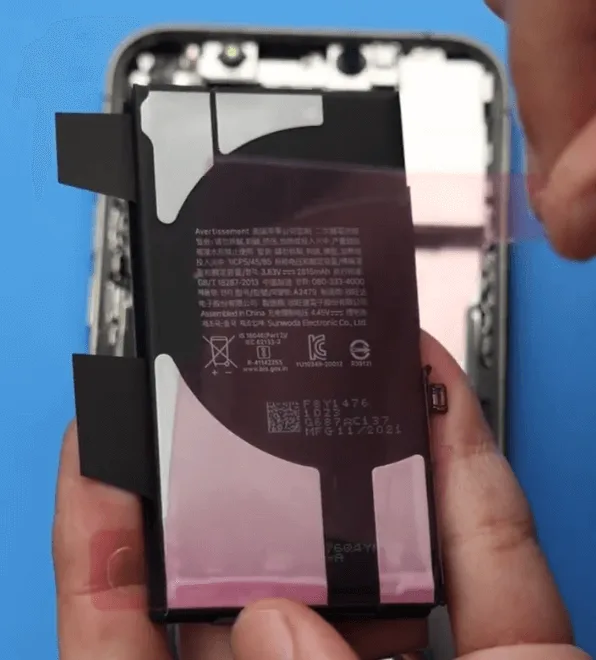
    • Seat the new iPhone 12 Pro Akku (or your shop cell with transferred BMS).
    • Reconnect the battery connector, reassemble the display, and power on.
    • Verify charge, Battery Health visibility, and that the phone boots cleanly under load.

    6. Clear the genuine battery alert
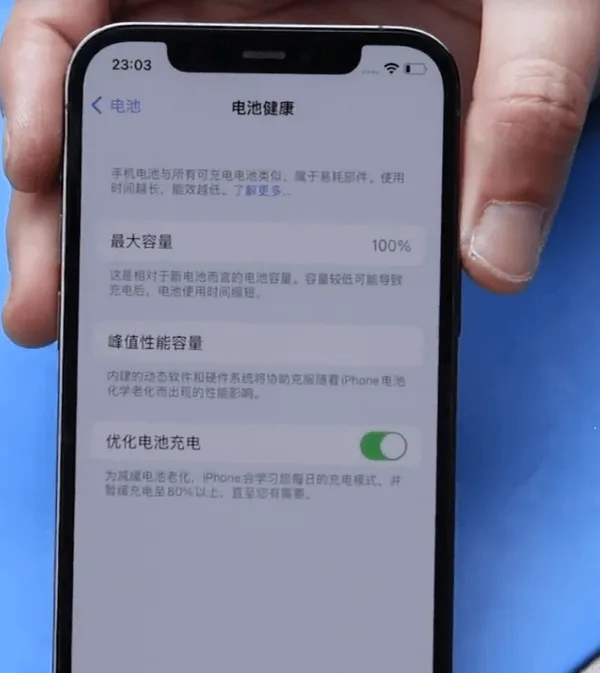
    iPhone 12 Pro battery replacement complete
    • Initial alert: On first power-up you may see “Unable to verify this iPhone has a genuine Apple battery.”
    • Genuine Apple path: Log back into AST2 and run diagnostics again to clear the non-original alert.
    • Aftermarket path: Confirm BMS transfer, programmer write, and tag-on flex were done correctly. Persistent alerts usually mean a skipped auth step.

    Watch how to clear Important Battery Message pop-ups on iPhone XS through 12 Pro Max:

    iPhone XS-12 Pro Max Important Battery Message pop-ups removing

    Häufig gestellte Fragen

    Do iPhone 12 and iPhone 12 Pro use the same battery?

    Teardown reporting puts them in the same capacity class (~2,815 mAh). Always match connector, tab layout, and thickness for your fixture. 12 Pro Max is a different pack.

    Should I replace at 87% Battery Health?

    Apple’s usual guidance centers on ~80% or a Service recommendation. At 87%, replace if runtime no longer meets the customer’s needs or if shutdowns and heat point to a weak cell.

    Why does an aftermarket battery show an Important Battery Message?

    The 12 Pro pairs battery authentication to the phone. Without a correct BMS transfer, data rewrite, and tag-on when required, iOS flags the pack as non-genuine.

    Is AST2 required for every battery job?

    No. AST2 is the genuine Apple / authorized-service path. Aftermarket shop jobs use board transfer, programmer, and tag-on instead.

    Will new waterproof adhesive restore water resistance?

    It restores a seal and is good practice. It does not guarantee factory IP68 performance after a open-repair.

    How much does Apple charge for an iPhone 12 Pro battery?

    Out-of-warranty battery service is commonly cited around $89 for iPhone 12 / 12 Pro in the U.S. Confirm Apple’s current estimate for your region before quoting.

    Wrap-up

    A clean iPhone 12 Pro battery replacement means picking the right path: aftermarket (BMS transfer + programmer + tag-on) or genuine Apple (AST2 diagnostics). Keep adhesives fresh, never force a swollen cell, and verify auth and health on first boot so you avoid callbacks.

    Need cells, welders, or programmers for the bench? Browse REWA tools, including iPhone battery cell replacements, battery programmersund spot welding machines.


  • AirPods Batteriewechsel

    AirPods Batteriewechsel

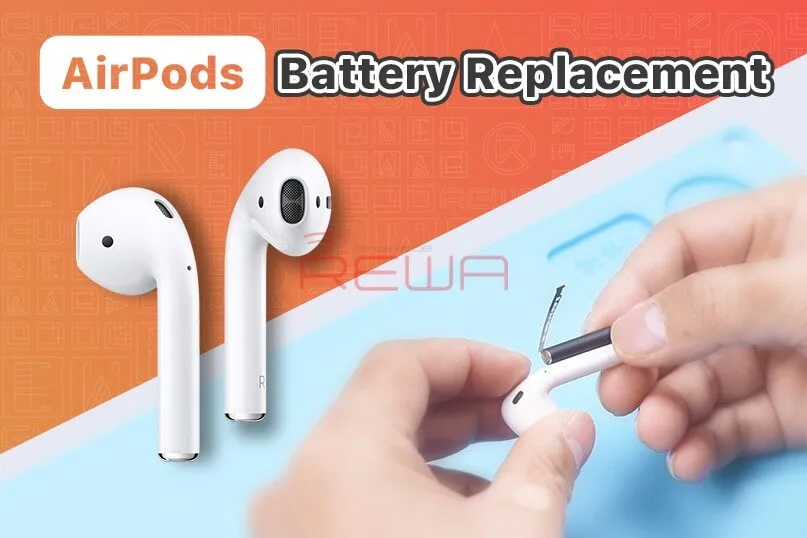
    Apple has said that AirPods have low repairability due to the size and manufacturing process. So when it comes to AirPods after-sales policy, Apple adopts a replacement policy. Many users report that the AirPods battery life reduces over time and can’t get the AirPods fixed since it is out of warranty. Watch this video and see how we replace the battery of AirPods!

  • AirPods Ladegehäuse Akku-Ersatz -REWA

    AirPods Ladegehäuse Akku-Ersatz -REWA

    Die AirPods galten schon immer als nicht reparabel. In diesem Video sehen Sie, wie wir den Akku des AirPods-Ladegeräts ersetzen.

  • AirPods-Akku ersetzen - Problem mit zu schneller Entladung

    AirPods-Akku ersetzen - Problem mit zu schneller Entladung

    Die Reparatur von AirPods war schon immer ein Problem, nicht nur für Reparaturwerkstätten, sondern auch für Apple. Die After-Sales-Politik von Apple besteht nun darin, AirPods, die die After-Sales-Standards nicht erfüllen, direkt durch neue AirPods zu ersetzen. Aus der Perspektive der Benutzererfahrung kann dieser Ansatz die Zufriedenheit der Benutzer sicherstellen, aber er spiegelt auch die Schwierigkeit der Reparatur wider.

    AirPods Batteriewechsel

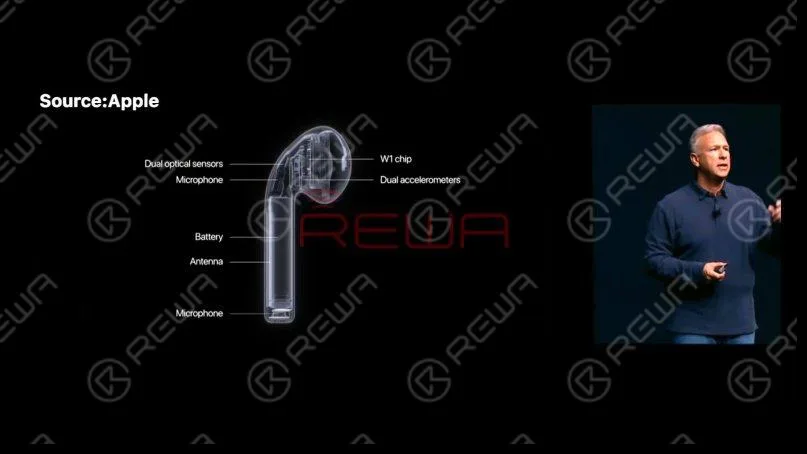
    Heute geht es in unserem Reparaturkurs um den Austausch der Batterie der AirPods 1. Werfen wir zunächst einen Blick auf die Struktur der AirPods. Um Platz zu sparen, hat Apple die Innenteile der AirPods sehr kompakt gestaltet. Außerdem sind die Teile miteinander verbunden, was die Reparatur erschwert.

    Aufbau der AirPods

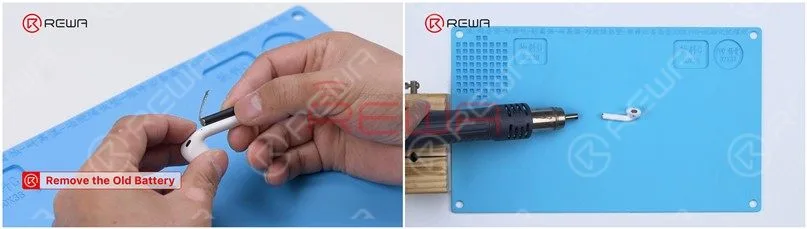
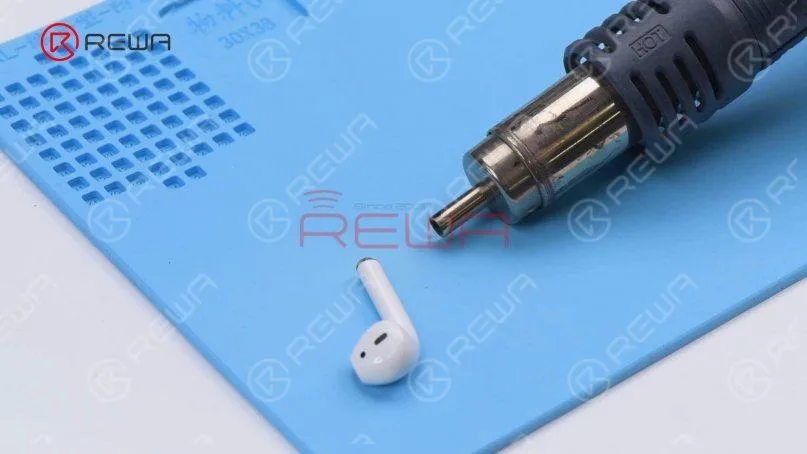
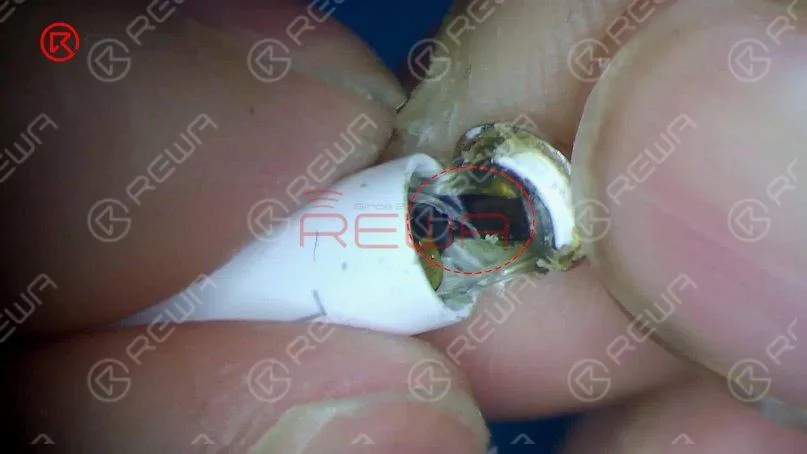
    Die AirPods 1 und 2 haben zylindrische Batterien, die direkt in das Gehäuse eingesteckt werden. Wir müssen eine Heißluftpistole mit spiralförmigem Wind verwenden, um die Metallkappe zu erhitzen und die Batterie zu entfernen. Bitte beachten Sie, dass vertikale Winde nicht verwendet werden können, da sie zu konzentriert sind und das Gehäuse leicht beschädigen können. Stellen Sie die Temperatur der Heißluftpistole auf 100℃ und den Luftstrom auf 7. Schalten Sie auf spiralförmigen Wind um. Platzieren Sie die AirPods 20mm um die Heißluftpistole und erhitzen Sie die Metallkappe für 3 Minuten. Während des Erhitzungsprozesses müssen wir die AirPods ständig umdrehen, um sie gleichmäßig zu erhitzen.
    AirPods Batteriewechsel

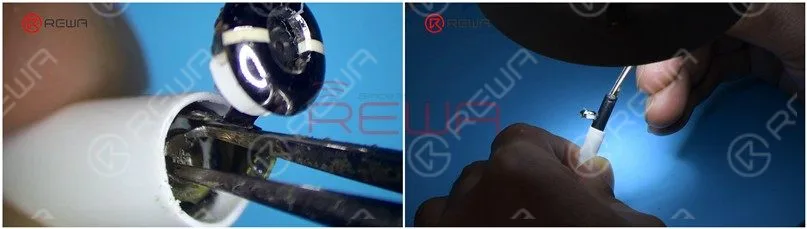
    Heben Sie die Metallkappe an der Seite mit dem L auf. Auf der Rückseite der L-Seite befindet sich ein Flexkabel. Bitte beschädigen Sie das Flexkabel beim Aufhebeln nicht. Entfernen Sie den Klebstoff mit einer Pinzette. Die AirPods müssen beim Entfernen des Klebers ständig erhitzt werden.

    AirPods Batteriewechsel

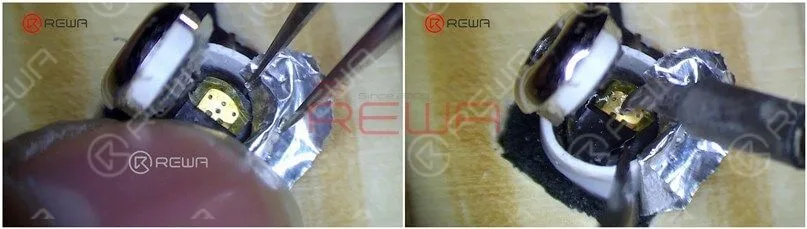
    Achten Sie beim Aufbrechen der Metallkappe auf das schwarze Flexkabel. Bringen Sie die AirPods an der Halterung an und entfernen Sie den Kleber mit einer Pinzette weiter. Um die Batterie herauszunehmen, muss der Klebstoff vollständig entfernt werden. Eine kleine Menge Alkohol kann hinzugefügt werden, um die Entfernung des Klebers zu erleichtern.
    AirPods Batteriewechsel
    AirPods Batteriewechsel

    Isolieren Sie nach dem Entfernen des Klebers mit Aluminiumfolie. Stellen Sie die Temperatur des Lötkolbens auf 365℃ ein und tragen Sie etwas Pastenflussmittel auf das Klebepad auf.
    AirPods Batteriewechsel

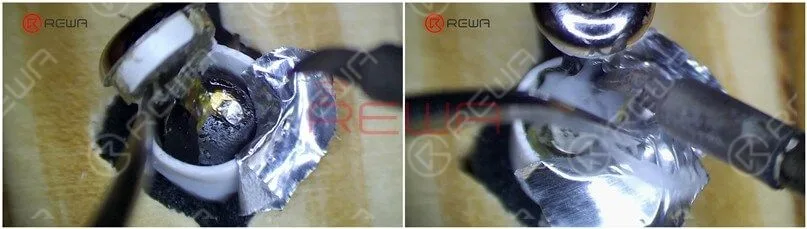
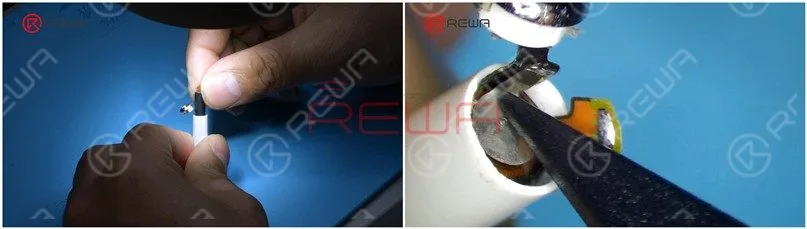
    Erhitzen Sie die Batterie mit einem Lötkolben und heben Sie die Kathode der Batterie heraus. Bitte berühren Sie beim Erhitzen nicht die Aluminiumfolie, um das Kunststoffgehäuse nicht zu beschädigen. Da sich die Anode der Batterie auf der anderen Seite der Kathode des Flexkabels befindet, müssen wir das Flexkabel aufhebeln. Tragen Sie weiterhin eine kleine Menge Flussmittelpaste auf. Mit dem Lötkolben erhitzen, um die Anode der Batterie vom Flexkabel zu trennen.
    AirPods Batteriewechsel

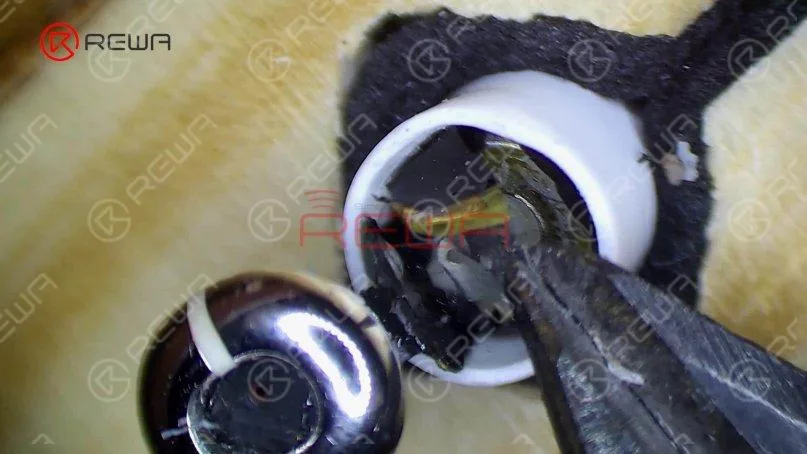
    Entfernen Sie die Anoden-Eisenplatte der Batterie mit einer Schneidzange. Dann nehmen wir die Batterie mit einer umgestalteten Pinzette heraus. Lösen Sie die AirPods aus der Halterung. Erhitzen Sie die Unterseite der AirPods gleichmäßig für 3-5 Minuten mit einer Heißluftpistole bei 100℃. Führen Sie die beiden Löcher der Batterieanode mit einer Pinzette ein und klemmen Sie die Anode ein, um die Batterie zu entfernen.

    AirPods Batteriewechsel
    AirPods BatteriewechselEntfernen Sie den überschüssigen Klebstoff. Um später den Einbau zu erleichtern, entfernen Sie den Kleber um die Metallkappe vollständig. Mit dem Lötkolben Zinn auf die Anode der Batterie auftragen.
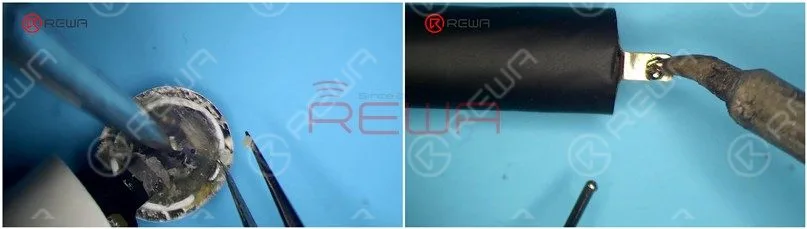
    AirPods BatteriewechselStecken Sie den Batterie in die AirPods ein. Bitte beachten Sie, dass die Anode des Akkus mit dem Anoden-Bonding-Pad am Flexkabel ausgerichtet sein muss.
    AirPods BatteriewechselBefestigen Sie die AirPods an der Halterung und isolieren Sie sie mit Aluminiumfolie. Erhitzen Sie den Lötkolben, um die Batterieanode an das Flexkabel zu löten. Drücken Sie das Flexkabel nach dem Löten nach unten. Bringen Sie die Batterieanode in Position und erhitzen Sie sie mit dem Lötkolben, um sie zu verlöten.
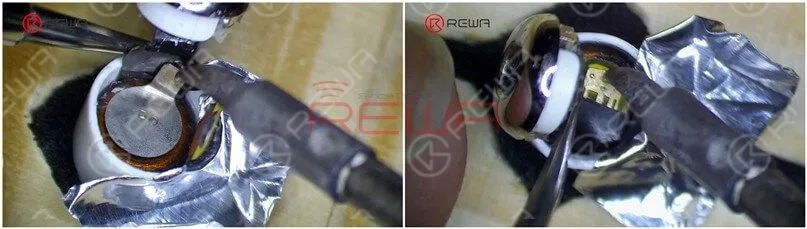
    AirPods BatteriewechselDann legen wir die AirPods zum Testen in die Ladehülle. Die AirPods können geladen werden.
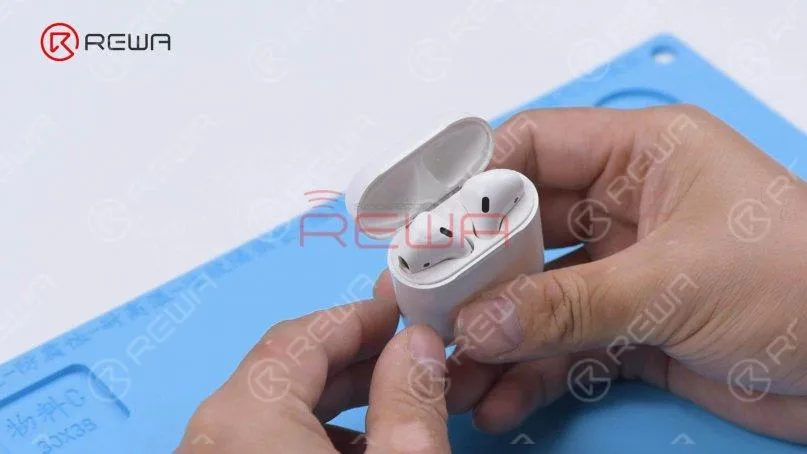
    AirPods BatteriewechselBewerbung B7000 Klebstoff an der Unterseite der AirPods. Schließen Sie die Metallkappe und befestigen Sie sie mit Klebeband. Nach etwa 1 Stunde ist der Kleber ausgehärtet und wir ziehen das Klebeband ab.
    AirPods Batteriewechsel

    Legen Sie die AirPods zum Testen in die Ladehülle. Die AirPods können mit dem Telefon gekoppelt werden und Musik kann abgespielt werden. Nehmen Sie die AirPods ab und die Musikwiedergabe stoppt. Der Akku wurde erfolgreich ausgetauscht.

    AirPods Batteriewechsel

    Schlussfolgerung:

    Um die Batterie der AirPods zu ersetzen, verwenden Sie eine Heißluftpistole mit spiralförmiger Windung, um die Metallkappe zu erhitzen. Heben Sie die Metallkappe von der Seite mit einem L-Buchstaben nach dem Erhitzen für etwa drei Minuten. Entfernen Sie dann den Klebstoff und achten Sie darauf, das flexible Kabel nicht zu beschädigen. Nach dem Entfernen des Klebers schützen Sie das Kunststoffgehäuse mit Aluminiumfolie und trennen Sie die Kathode und Anode der Batterie vom Flexkabel. Um die Batterie zu entfernen, erwärmen Sie die Unterseite der AirPods weiter und nehmen Sie die Batterie mit einer umfunktionierten Pinzette heraus. Schließlich setzen wir die neue Batterie ein, löten die Kathode und die Anode der Batterie und fixieren sie mit Klebstoff.Sehen Sie sich das Video unten an, um zu sehen, wie wir die Batterie der AirPods ersetzen.

  • The Signs That Your Phone Needs A New Battery

    The Signs That Your Phone Needs A New Battery

    signs that your phone needs new battery the

    The likelihood of your cell phone’s performance will not stay at one hundred percent forever. Your cell phone is likely to give a little more trouble, slow down or lose charge quickly as time goes by. The problems you may be experiencing with your phone may be caused by various things, including the need for a new battery for your phone.

    signs that your phone needs new battery

    There are various signs that can tell you if your phone needs to get a new battery. You can tell that your battery needs changing if…

    1. Your phone is dead: We mean completely and permanently dead. We mean that it just isn’t charging or able to come on. When there are no signs of power or life in the phone, even after it has been charged with a good charger, you may just need to get a new battery.

    2. Your phone only shows power when it’s on the charger or it doesn’t power on after it has been given ample time to charge up: This means that your battery does not hold the energy that it gets from the power source. If this is the case with your battery, you need a new one.

    3. Your phone dies quickly: If you’re not playing games, listening to music surfing the web, using Bluetooth or doing something else that may be causing your battery to die. However, a battery that dies very quickly after it has been fully charged, may also be a classic sign that you need a new battery.

    4. Your battery or phone starts getting very hot: It is actually quite normal for batteries to generate heat when charging, but their heat is internalized. Batteries that need to be changed, are those that generate or cause the phone to generate external heat.

    5. Your battery bulges: The bulge in a battery means that the internal cells have ruptured and that simply means that the battery needs to be changed.